

Page 1
Carbon Monoxide Alarm
User’s Guide
Models: KN-COB-IC and KN-COP-IC
KN-COB-IC
KN-COP-IC
with Digital Display
• 120V AC Wire-In
• 9V Battery Backup
• Interconnectable with other Kidde alarms
ATTENTION: Please take a few minutes to thoroughly read this
user’s guide which should be saved for future reference and
passed on to any subsequent owner.
Manual P/N 820-1270 Rev. A 02/07
Page 2
What to do When the Alarm Sounds!
Welcome
Carbon Monoxide Alarm Procedure
WARNING:
Activation of the CO
Alarm indicates the presence of Carbon
Monoxide (CO) which can kill you.
1) Operate the Test/Reset button;
2) Call your emergency services (Fire Department or 911);
PHONE NUMBER:
3) Immediately move to fresh air - outdoors or by an open
door/window
accounted for.Do not reenter the premises nor move away
from the open door/window until the emergency services
responders have arrived, the premises have been aired out, and
your alarm remains in its normal condition.
4) After following steps 1-3, if the alarm reactivates within a 24
hour period, r
technician to investigate sources of CO from fuel burning
equipment and appliances, and to inspect for proper operation
of equipment.
PHONE NUMBER:
If problems are identified during this inspection, have the equipment serviced immediately. Note any combustion equipment not
inspected by the technician and consult the manufacturer’s instructions, or contact the manufacturer’s directly for more information
about CO safety and the equipment. Make sure that motor vehicles
are not, or have not been, operating in a garage attached or adjacent to the residence.
Never restart the source of a CO problem until it has been
ected. Never ignore the sound of the alarm!
corr
If the alarm is sounding, pressing the test/reset button will
terminate the alarm. If the CO condition that caused the alert
in the first place continues, the alarm will reactivate. If the
unit alarms again within six minutes, it is sensing high levels
of CO which can quickly become a dangerous situation.
. Do a head count to check that all persons are
epeat steps 1-3 and call a qualified appliance
Note: Many times throughout this User’s Guide, we will refer to
Carbon Monoxide as “CO”.
This Kidde carbon monoxide (CO) alarm is an important part of your
s home safety plan. This alarm has been designed and tested to
family’
detect CO buildup in a residential environment. Your alarm is for use
specifically in the home. As an owner of a CO alarm, there are some
basic facts you should know about for your protection.
Many people think that CO alarms operate like smoke alarms. Like
smoke alarms, CO alarms monitor the air in your home and sound a
loud alarm to warn you of trouble. The way you respond to a CO alarm
is quite different than a smoke alarm. That’s because a house fire and a
CO problem are two distinctly different situations. If your smoke alarm
were to alarm, you would quickly be able to judge the level of danger
you were in with your senses. You can see and smell the smoke, feel the
heat, see, and possibly hear the fire burning. You can also readily see if
your smoke alarm is alarming in a non-emergency situation. Because
your sense of sight, smell, hearing and touch give you information, you
can almost instantly judge what action to take if you hear your smoke
alarm.
CO is an invisible, odorless, tasteless and non-irritating gas – completely
undetectable to your senses. That’s why it is important to your safety
that you have a CO alarm.
Important Warning Statements
IMPORTANT: This carbon monoxide alarm is designed to detect
carbon monoxide from ANY source of combustion. It is NOT
designed to detect smoke, fire, or any other gas.
WARNING: Carbon monoxide alarms are not smoke alarms. This
carbon monoxide alarm is not a substitute for installing and
maintaining an appropriate number of smoke alarms in your
home.
This carbon monoxide alarm will not sense smoke, fire, or any
poisonous gas other than carbon monoxide even though carbon
monoxide can be generated by fire. For this reason you must
install smoke alarms to provide early warning of fire and to protect you and your family from fire and its related hazards.
CAUTION: This alarm will only indicate the presence of carbon
monoxide at the sensor. Carbon monoxide may be present in
other areas.
Page 3

Important Warning Statements
1. Information About Carbon Monoxide
WARNING: This product is intended for use in ordinary indoor
locations of family living units. It is not designed to measure compliance with Occupational Safety and Health Administration
(OSHA), commercial or industrial standards. It is not suitable for
installation in hazardous locations as defined in the National
Electric Code.
The installation of this device should not be used as a substitute
for proper installation, use and maintenance of fuel burning
appliances, including appropriate ventilation and exhaust systems. It does not prevent CO from occurring, nor can it solve and
existing CO problem.
WARNING: This device is designed to protect individuals from
acute effects of carbon monoxide exposure. It may not fully safeguard individuals with specific medical conditions. If in doubt,
consult a medical practitioner.
Individuals with medical problems may consider using warning
devices which provide audible and visual signals for carbon
monoxide concentrations under 30 PPM.
This carbon monoxide alarm requires a continuous supply of electrical power – it will not work without power. Models without
battery backup will not operate during power failure.
This alarm has not been investigated for carbon monoxide detection below 70 PPM.
Contents of This User’s Guide
1. Information About Carbon Monoxide
2. Product Features and Specifications
3. Installation Locations
4. Installation Instructions
5. Alarm Characteristics
6. KN-COB-IC Operating Characteristics
7. KN-COP-IC (with digital display) Operating Characteristics
8. Maintenance
9. Limited Warranty
General Carbon Monoxide Information
Carbon monoxide is a colorless, odorless and tasteless poison gas that
can be fatal when inhaled. CO inhibits the blood’s capacity to carry oxygen.
Periodically review this alarm manual and discuss your CO alarm emergency procedure with all the members of your family. Never ignore a CO
alarm. A true alarm is an indication of potentially dangerous levels of
CO. CO alarms are designed to alert you to the presence of CO before
an emergency – before most people would experience symptoms of CO
poisoning, giving you time to resolve the problem calmly.
Determine if anyone in the household is experiencing symptoms of CO
poisoning. Many cases of reported CO poisoning indicate that while
victims are aware they are not well, they become so disoriented they are
unable to save themselves by either exiting the building or calling for
assistance. Also, young children and household pets may be the first
affected. You should take extra precautions to protect high-risk persons
from CO exposure because they may experience ill effects from CO at
levels that would not ordinarily affect a healthy adult.
Symptoms of CO Poisoning
The following common symptoms are related to CO poisoning and
should be discussed with ALL members of the household.
Mild Exposure:
Slight headache, nausea, vomiting, fatigue (often described as
“flu-like” symptoms).
Medium Exposure:
Severe throbbing headache, drowsiness, confusion, fast heart rate.
Extreme Exposure:
Unconsciousness, convulsions, cardio-respiratory failure, death.
If you experience even mild symptoms of CO poisoning, consult your
doctor immediately!
Page 4

1. Information About Carbon Monoxide
1. Information About Carbon Monoxide
Carbon Monoxide PPM Levels
(model KN-COP-IC with digital display only)
Model KN-COP-IC is equipped with a digital display that shows levels of
CO (displayed in PPM – parts per million). Lear
dangerous, high, mid and low levels.
Dangerous Levels:
When someone is experiencing symptoms of CO poisoning and CO
eadings are generally above 100 PPM. Anytime someone is experiencing
r
the symptoms of CO poisoning this should be treated as an emergency.
See “What to do When the Alarm Sounds” (inside front cover).
High Levels:
Generally above 100 PPM, with no one experiencing symptoms. This
should be tr
Alarm Sounds” (inside front cover).
Mid Levels:
Generally between 50 PPM to 100 PPM. This should be cause for
concer
When the Alarm Sounds” (inside front cover).
Low Levels:
Generally below 50 PPM. Kidde recommends you take action to
eliminate the sour
(inside front cover).
IMPORTANT: Model KN-COB-IC does not have a digital display and
does not display carbon monoxide levels in PPM. If the alarm
sounds, it should be tr
“What to do When the Alarm Sounds” (inside fr
Possible Sources of Carbon Monoxide
Inside your home, appliances used for heating and cooking are the most
likely sources of CO. Vehicles running in attached garages can also
oduce dangerous levels of CO.
pr
CO can be produced when burning any fossil fuel, such as gasoline,
propane, natural gas, oil and wood. It can be produced by any fuelburning appliance that is malfunctioning, improperly installed, or not
ventilated correctly, such as:
• Automobiles, furnaces, gas ranges/stoves, gas clothes dryers, water
eated as an urgent situation. See “What to do When the
n and should not be ignored or dismissed. See “What to do
ce of CO. See “What to do When the Alarm Sounds”
eated as a potentially serious condition. See
heaters, portable fuel burning space heaters and generators,
fireplaces, wood-burning stoves and certain swimming pool heaters.
n the difference between
ont cover).
• Blocked chimneys or flues, back drafts and changes in air pressure,
corroded or disconnected vent pipes, loose or cracked furnace
exchangers.
• Vehicles and other combustion engines running in an open or closed
garage, attached or near a home.
• Burning charcoal or fuel in grills and hibachis in an enclosed area.
Conditions That Can Produce Carbon Monoxide
The following conditions can result in transient CO situations:
• Excessive spillage or r
by outdoor ambient conditions, such as, wind direction and/or velocity, including high gusts of wind, heavy air in the vent pipes
(cold/humid air with extended periods between cycles).
• Negative pressure resulting from the use of exhaust fans.
• Simultaneous operation of several fuel-burning appliances competing
for limited internal air.
• Vent pipe connections vibrating loose from clothes dryers, furnaces, or
water heaters.
• Obstructions in, or unconventional, vent pipe designs which can
amplify the above situations.
• Extended operation of unvented fuel-burning devices (range, oven,
fireplace, etc.).
• Temperature inversions which can trap exhaust gases near the ground.
• Vehicle idling in an open or closed garage, or near a home.
To be safe, know the possible sources of CO in your home. Keep fuelburning appliances and their chimneys and vents in good working condition. Learn the early symptoms of exposure, and if you suspect CO poisoning, move outside to fresh air and get emergency help. Your first line
of defense is an annual inspection and regular maintenance of your
appliances. Contact a licensed contractor or call your local utility company for assistance.
Information About Carbon Monoxide Alarms –
What They Can and Cannot Do:
CO alarms provide early warning of the presence of CO, usually before a
healthy adult would experience symptoms. This early warning is possible,
, only if your CO alarm is located, installed and maintained as
however
described in this guide.
everse venting of fuel-burning appliances caused
Page 5
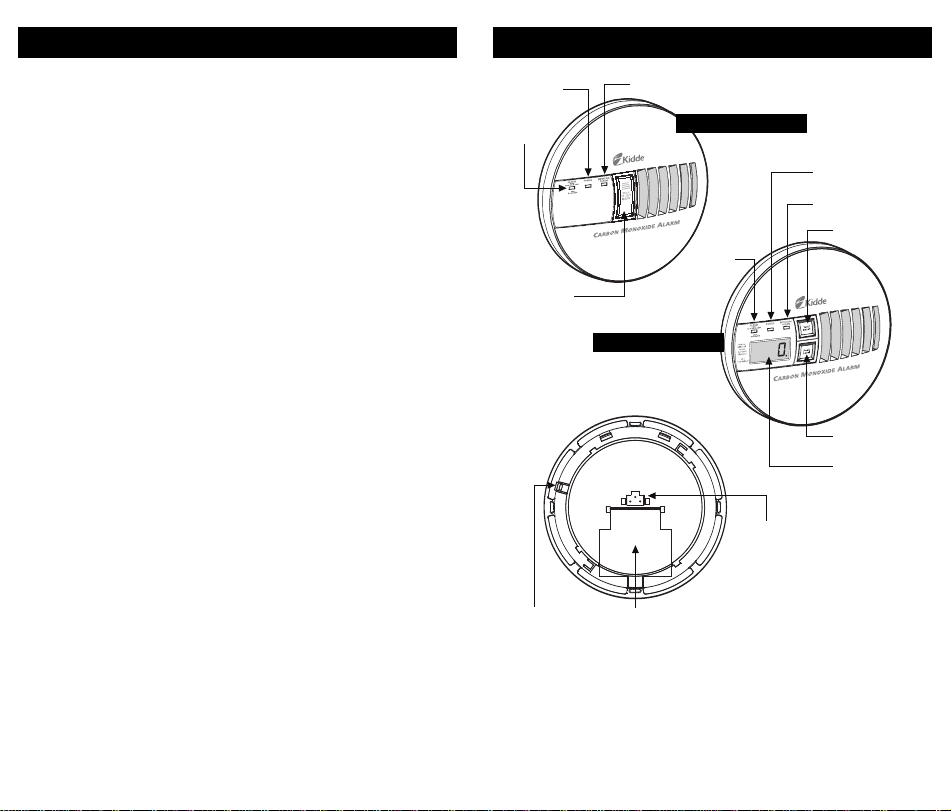
Red,
Alarm LED
Green,
Power LED
Amber, Initiating
Alarm LED
AC Connector
Pins
Tamper Resist
Feature
Battery
Compartment
Test/Reset
Button
Red,
Alarm
LED
Green,
Power LED
Amber, Initiating
Alarm LED
Peak Level
Button
Test/Reset Button
Digital
Display
1. Information About Carbon Monoxide
Because carbon monoxide is a cumulative poison, long-term exposures
to low levels may cause symptoms, as well as short-term exposures to
high levels. This Kidde unit has a time-weighted alarm – the higher the
level of CO present, the sooner the alarm will be triggered.
This CO alarm can only warn you of the presence of CO. It does not
prevent CO from occurring, nor can it solve an existing CO problem. If
your unit has alarmed and you’ve provided ventilation by leaving your
windows and doors open, the CO buildup may have dissipated by the
time help responds. Although your problem may appear to be
temporarily solved, it’s crucial that the source of the CO is determined
and that the appropriate repairs are made.
This CO alarm is designed to act as a monitor; it is not designed for use
as a short-term testing device to perform a quick check for the presence
of CO.
CO alarms have limitations. Like any other electronic device, CO alarms
are not fool-proof. CO alarms have a limited operational life. You must
test your CO alarm weekly, because it could fail to operate at any time.
If your CO alarm fails to test properly, or if its self-diagnostic test reveals
a malfunction, immediately have the unit replaced. This alarm will not
monitor CO levels while in an error condition.
CO alarms can only sense CO that reaches the unit’s sensor. It’s possible
that CO may be present in other areas without reaching the alarm. The
rate and ability that which CO reaches the alarm may be affected by:
• Doors or other obstructions.
• Fresh air from a vent, an open window or other source.
• CO being present on one level of the home and not reach a CO alarm
installed on a different level. (For example, CO in the basement may
not reach an alarm on the second level, near the bedrooms).
For these reasons, we recommend you provide complete coverage by
placing a CO alarm on every level of the home. Please carefully read all
information in sections 2 and 3 on properly installing this CO alarm.
CO alarms should not be used to detect the presence of natural gas
(methane), propane, butane, or other combustible fuels.
Instruct children never to touch, unplug or otherwise interfere with the
alarm. Warn children of the dangers of CO poisoning.
2. Product Features and Specifications
Model KN-COB-IC
Model KN-COP-IC
with digital display
IMPORTANT: Seven (7) years after the initial power up, this alarm
will “beep” every 30 seconds to indicate that it is time to replace
the alarm. Replace the alarm immediately! It will not detect CO in
this condition.
To help identify the date to replace the alarm, a label has been affixed to
the side of the alarm. W
power up) in a permanent marker on this label.
rite the “replace by” date (seven years from
Page 6
2. Product Features and Specifications
3. Installation Locations
Temperature:
Operating Range: 40°F (4.4°C) to 100°F (37.8°C)
Humidity:
Operating range: 10-95% non-condensing
Audible Alarm:
85+ dB at 10’ @ 3.4±0.5 KHz pulsing alarm
Sensor:
Electrochemical
Power:
120 volts AC, 60 Hz, 60 mA max, 9 volt battery back-up
Accuracy of Digital Display (Model KN-COP-IC only):
30-999 PPM +/-30% when measured in conditions of 80° F (+/- 10° F),
atmospheric pr
Display readings may vary slightly depending on changes in the ambient
condition (temperature, humidity) and the condition of the sensor.
Alarm Response Times:
70 PPM = 60-240 min., 150 PPM = 10-50 min., 400 PPM = 4-15 min.
Interconnection with Other Alarms:
This Kidde CO alarm can be used as a single-station alarm or interconnected with other Kidde alarms. This alarm can be interconnected directly with these Kidde models:
Ion smoke alarm models:
1235, 1235CA, 1275, 1275CA, 1276,1276CA, 1285, 1285CA,
i12020, i12040, i12060, i12080, i12020CA, i12040CA, i12060CA
Photo smoke alarm models:
PE120, PE120CA, PI2000, PI2000CA
Heat alarm models:
HD135F, HD135FCA
Carbon monoxide/Ion smoke alarm models:
KN-COSM-IB, KN-COSM-IBCA
Carbon monoxide alarm models:
KN-COB-IC, KN-COP-IC, KN-COB-ICB, KN-COP-ICB
Relay models:
CO120X, SM120X
Strobe Light models:
SL177I
essure +/- 10% and 40% +/- 3% relative humidity.
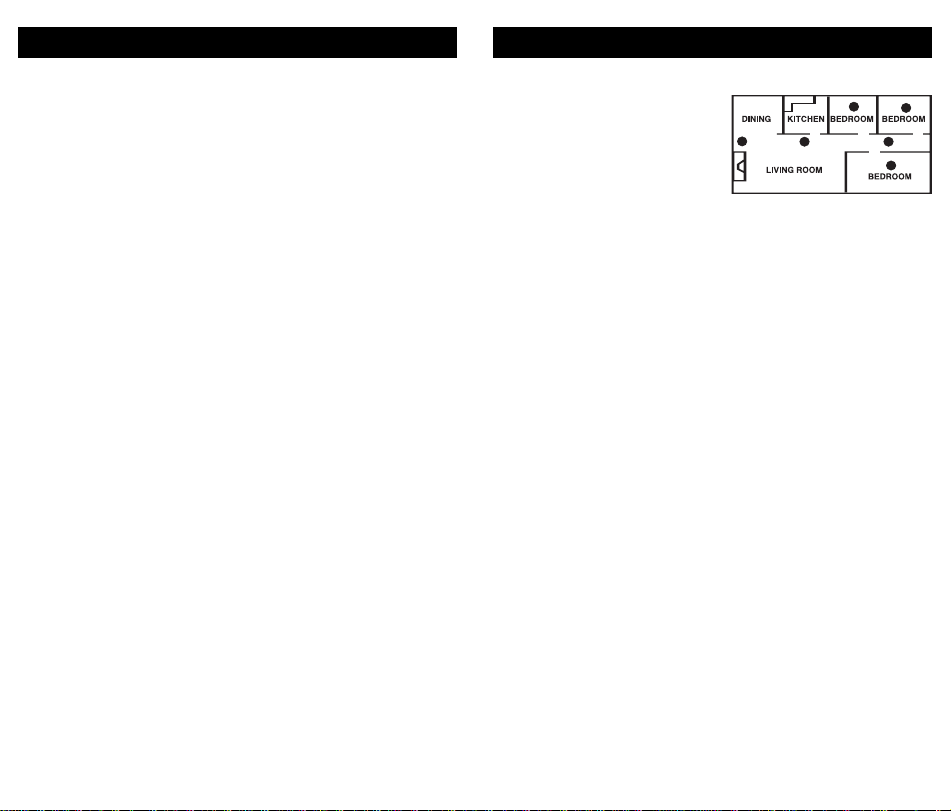
Recommended Installation Locations
CO alarms should be mounted in or
near bedrooms and living areas. It is
recommended that you install a Kidde
CO alarm on each level of your home.
When choosing your installation locations, make sure you can hear the
alarm from all sleeping areas. If you
install only one CO alarm in your
home, install it near bedrooms, not in the basement or furnace room.
• When wall mounting, place out of reach of children. Under no circumstances should children be allowed to handle the CO alarm.
• Placing the alarm at eye level allows for optimum monitoring of the
digital display.
Locations To Avoid
IMPORTANT: Improper location can affect the sensitive electronic components in this alarm. T
optimum performance, and to prevent unnecessary nuisance alarms:
• Do not install in kitchens, garages or furnace rooms that may expose
the sensor to substances that could damage or contaminate it.
• Do not install in areas where the temperature is colder than 40°F
(4.4°C) or hotter than 100°F (37.8°C) such as crawl spaces, attics,
porches and garages.
• Do not install within 5 ft. of heating or cooking appliances. (Kidde
recommends 15 ft. to prevent nuisance alarms).
• Do not install near vents, flues, chimneys or any forced/unforced air
ventilation openings.
• Do not install near ceiling fans, doors, windows or areas directly
exposed to the weather.
• Do not install in dead air spaces, such as peaks of vaulted ceilings or
gabled roofs, where CO may not reach the sensor in time to provide
early warning.
• Do not install on a switched or dimmer-controlled outlet.
• Do not install this unit near deep-cell large batteries. Large batteries
have emissions that can cause the alarm to perform at less than optimum performance.
o avoid causing damage to the unit, to provide
Recommended Locations
Page 7
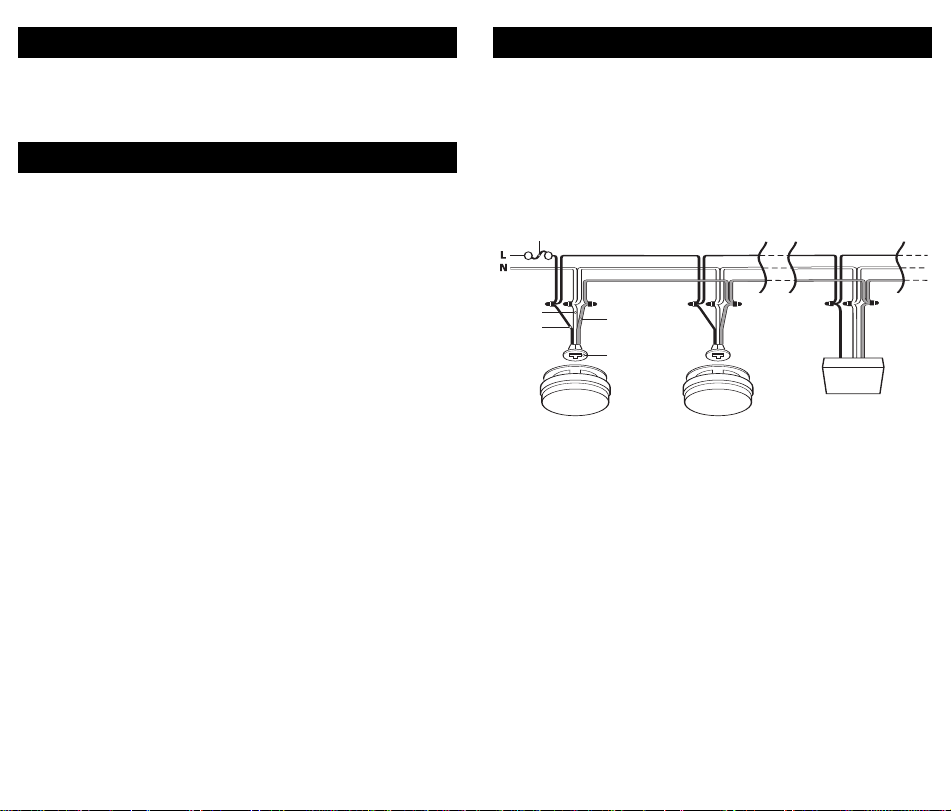
F
USE OR CIRCUIT BREAKER
RED
BLACK
WHITE
CONNECTOR
First CO Alarm Additional
CO Alarm
Optional
Accessory
(See list of compatible
Kidde devices)
3. Installation Locations
4. Installation Instructions
• Do not obstruct the vents located on the alarm. Do not place the
alarm where drapes, furniture or other objects block the flow of air to
the vents.
4. Installation Instructions
Interconnecting
CAUTION: Kidde (Fyrnetics/Lifesaver/Kidde/Nighthawk/Pyrene)
alarms and accessories can only be inter
Kidde alarms and accessories. Connection of these devices to
another manufactures interconnect system, or connection with
equipment from another manufacturer into an existing Kidde
interconnect system could result in nuisance alarming, failure to
alarm, or damage to one or all of the devices in the interconnect
system.
• When compatible Kidde smoke alarms and heat alarms ar
interconnected to your CO alarm, they will only respond to a smoke
or heat related event.
• When mixing Kidde alarms which have battery back-up with models
without battery back-up, be advised that the models without battery
back-up will not function during an AC power failure.
• For alarms that are being used as single station alarms, do not
connect the red wire to anything. Leave the red wire insulating cap in
place to make certain that the red wire cannot contact any metal
parts or the electrical box.
• The appropriate power source is 120 Volt AC Single-Phase supplied
from a non-switchable circuit, which is not protected by a ground
fault interrupter.
• All interconnectable alarms should be installed on a UL Listed or
recognized junction box. All connections should be made by a
qualified electrician and must conform to article 760 of the U.S.
National Electrical Code, NFPA 72 and/or any other codes having
jurisdiction in your area.
• When alarms are interconnected, all interconnected units must be
powered from a single circuit.
• A maximum of 24 Kidde devices may be interconnected in a multiplestation arrangement. The interconnect system should not exceed the
NFPA interconnect limit of 12 smoke alarms and/or 18 alarms total
(smoke, CO, smoke/CO combination, heat, etc.).
connected with other
e
• With 18 alarms interconnected, it is still possible to interconnect up to
a total of six remote signaling devices and/or relay modules.
• The maximum wire run distance between the first and last unit in an
interconnected system is 1000’ (305 m).
• Make certain alarms are wired to a continuous, (non-switched) power
line. NOTE: Use standard UL Listed household wire (as required by
local codes) available at all electrical supply stores and most hardware
stores.
Interconnect Wiring Diagram
Wiring
The diagram above illustrates interconnection wiring. Improper connec-
esult in damage to the alarm, failure to operate, or a shock
tion will r
hazard.
CAUTION: Turn off the main power to the circuit before wiring
the alarm.
es on the AC Quick-Connector Alarm Harness:
Wir
Black Connected to live (L) side of AC line
White Connected to neutral (N) side of AC line
Connected to interconnect lines (red wires) of other units
Red
in a multiple-station set-up
Page 8
4. Installation Instructions
4. Installation Instructions
Mounting
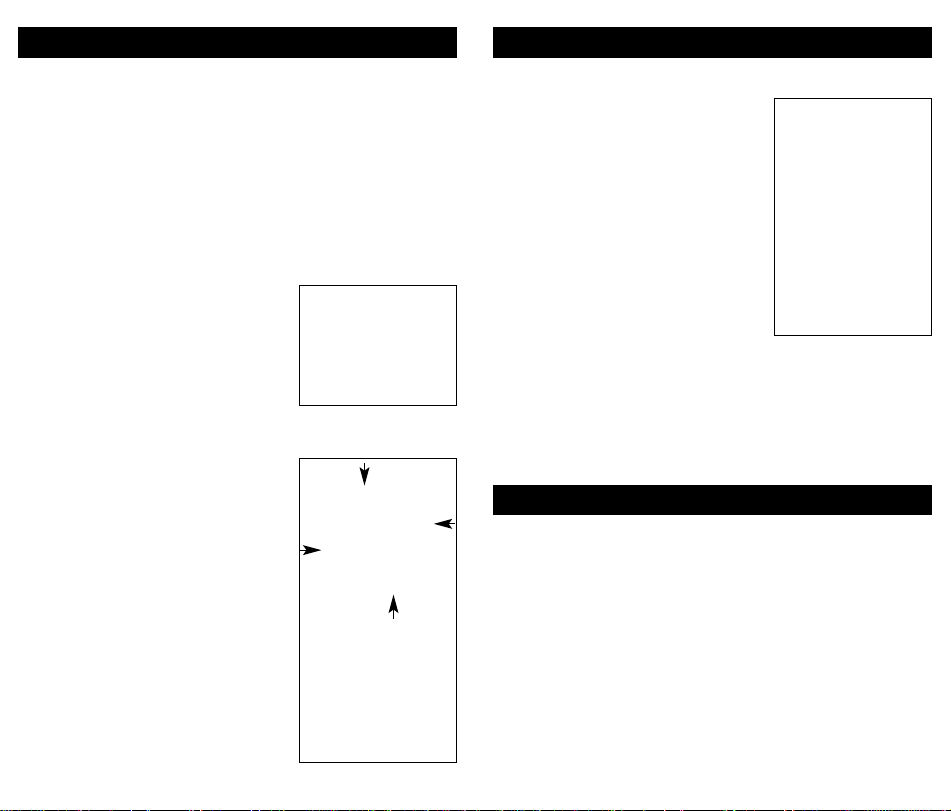
• Remove the mounting plate from the back of the alarm by holding
the mounting plate and twisting the alarm in the direction indicated
by the “OFF” arrow on the alarm cover.
• After selecting the proper location for your CO Alarm and wiring the
AC Quick-Connector harness, attach the mounting plate to the electrical box. To ensure aesthetic alignment of the alarm with the hallway, or wall, the “A” line on the mounting plate must be parallel with
the hallway when ceiling mounted or horizontal when wall mounted.
• Pull the AC Quick-Connector through the center hole in the mounting
plate and secure the bracket, making sure that the mounting screws
are positioned in the small ends of the
keyholes before tightening.
• Plug the AC Quick-Connector into the
back of the alarm, making sure that the
locks on the connector snap into the
unit. Push the excess wire back into the
electrical box through the hole in the
center of the mounting plate.
• Install the alarm on the mounting plate
and twist the alarm in the direction of
the “ON” arrow on the cover until the
alarm ratchets into place (this ratcheting
function allows for aesthetic alignment).
Note: The alarm will mount to the
bracket in 4 positions (every 90 degrees).
• Turn on the AC power. The green AC
Power On Indicator should be lit when
the alarm is operating from AC power.
• For alarms equipped with 9V battery
backup: Pull the Battery Pull Tab (yellow
tab protruding fr
of unit. This will automatically connect
the battery.
om unit) completely out
AC Quick Connector
Post Locations
Tamper Resist Feature
To make this CO alarm somewhat tamper
resistant, a tamper resist feature has been
provided. Activate the feature by breaking
off the four posts in the square holes in
the mounting plate. When the posts are
broken off, the tamper resist tab on the
base is allowed to engage the mounting
plate. Rotate the alarm onto the mounting
plate until you hear the tamper resist tab
snap into place, locking the alarm.
Using the tamper resist feature will deter
children and others from removing the
alarm. To remove the alarm, press on the
tamper resist tab, and rotate the alarm off
of the mounting plate.
Important Labels Provided
Two labels have been provided that have important information on what
to do in case of an alarm. Add the phone number of your emergency
service provider in the space pr
after it is mounted, and one label near a fresh air source such as a door
or window.
ovided. Place one label next to the alarm
Tamper Resist Tab
5. Alarm Characteristics
Carbon Monoxide Alarm Indicator
When the alarm senses a dangerous level of CO, the unit will emit a
loud alarm pattern. The alarm pattern is 4 quick beeps followed by 5
seconds of silence. This cycle repeats as long as a dangerous CO conditions exist. The red Alarm LED will flash the same patter n (and the PPM
will be displayed on alarms with digital displays).
WARNING: For alarms equipped with 9V battery backup, when pow-
ed by battery backup only; after four minutes, the alarm will sound
er
and flash only once every minute, until the alarm is reset or the CO is
eliminated.
If this unit is interconnected with other Kidde CO alarms, the amber LED
(Initiating Alarm) of the unit which first detected the CO, will light and
remain on until reset. The other interconnected CO alarms will also
alarm to warn you that CO was detected.
Page 9

5. Alarm Characteristics
If interconnected to other Kidde alarms and the backup battery (if
equipped) is low or missing, or if the unit malfunctions, it will display
other readings (and alarm differently) to alert you of specific conditions.
Please familiarize yourself, and other family members, to the difference
between a CO reading and and indication signifying a problem with the
unit itself.
WARNING: If at any time you test the alarm and it does not perform as
described, have it r
eplaced immediately.
NOTE: Reference to battery backup operation is only applicable to units
e equipped with battery backup option.
that ar
Smoke Alarm Indicator (inter
connected with CO Alarms)
When an interconnected Kidde smoke alarm detects smoke, the Kidde
CO alarm will sound a smoke/fire alarm pattern of 3 long beeps, followed by 1 second of silence. This cycle repeats as long as smoke signal
persists to alert you of the condition. (For model KN-COP-IC with digi-
tal display: The word “Fir
happens, leave the premises immediately by your escape plan and call
e” will scroll across the digital display). If this
your local fire department.
WARNING: This unit is not a smoke alarm and will not detect smoke or
e. It will only alarm for smoke/fire if it receives a signal from an inter-
fir
connected Kidde smoke alarm.
NOTE: A smoke/fire alarm will override a CO alarm condition.
6. Model KN-COB-IC Operating Characteristics
Whenever the alarm is operating, the green Power LED is illuminated to
indicate the unit is monitoring for CO. If the alarm senses dangerous levels of CO, the red Alarm LED will flash and the alarm will emit an audible alarm pattern.
Operating and Alarm Characteristics
Function LED Display Alarm Sound Unit Status Recommendation
Normal
Operation
Normal
Operation
Green LED
constantly on
Green LED flashes
every 7 seconds
None Normal AC
None Normal DC
operation (sensing
no CO) and with a
good battery
operation on 9V
battery backup
None
Verify AC power is
restored as soon as
possible to conserve
battery. Replace
battery.
6. Model KN-COB-IC Operating Characteristics
Function LED Display Alarm Sound Unit Status Recommendation
Carbon
Red LED flashes
monoxide
with beeps.
alarm
Amber LED shows
initiating alarm
Smoke /
Red LED flashes
fire alarm
with beeps
Low
Red LED flashes
battery
every 15 seconds
Error /
Red LED flashes
service
every 30 seconds
alarm
Error Red LED
constantly on
Normal
Red LED flashes
Test/Reset
with beeps.
function
Green and amber
LED’son
4 quick beeps,
5 seconds
silence,
repeating
3 long beeps,
1 second
silence,
repeating
One quick
beep every 15
seconds
One quick
beep every 30
seconds
Constant
alarm
4 quick beeps,
5 seconds
silence,
repeated once
Alarm condition.
Dangerous
concentrations of
CO detected
Receiving signal
from an interconnected smoke alarm
detecting smoke
AC powered and
low or missing
battery
Unit is in error
condition
Very low battery or
unit malfunction
Normal operation
when Test/Reset
button is pressed
Refer to “What to do
When the Alarm
Sounds” (inside front
cover)
Evacuate by your
escape plan
Install or replace 9V
battery.
Replace battery.
If “Err” continues,
unit has malfunctioned. Replace
immediately. Unit will
not respond CO
CO not detected.
Alarm for test
purposes only
7. Model KN-COP-IC (with digital display)
Operating Characteristics
Whenever the alarm is operating, the green Power LED is illuminated
and the digital display will display “0” to indicate the unit is monitoring
for CO. If the alarm senses dangerous levels of CO, the red Alarm LED
will flash, the digital display will indicate the CO concentration in parts
per million (PPM), and the alarm will emit an audible alarm pattern.
This alarm will display a “0” if CO concentrations between 0 and 30
PPM have been detected within the last 15 seconds.
When the unit is first powered up, the digital display will show three
“eights” – indicating the alarm is in the start-up mode. The three
“eights” will remain for approximately 20 seconds. After 20 seconds,
the alarm should display “0” and begin monitoring the air for CO and
will continue to do so as long as it receives power.
Page 10

7. Model KN-COP-IC (with digital display)
Operating Characteristics
7. Model KN-COP-IC (with digital display)
Operating Characteristics
The following table illustrates the possible digital displays, describes the
audible alarm patterns, and the recommended actions to take.
Operating and Alarm Characteristics
LED Display Shows Alarm Sound Unit Status Recommendation
Brief “888” along
with any number
between 100 and 300.
Red LED flashes with beeps.
Green and amber LED’s on.
Steady “0”
Green LED
constantly on.
“Lb” flashes
alternately with
any number.
Red LED flashes
every 15 seconds.
A steady display of
CO concentration
from 30-999. Red
LED flashes with beeps. Amber
LED shows initiating alarm.
Steady “CO”
Red LED flashes with
beeps. Amber LED
shows initiating alarm
“FirE”
Red LED flashes
with beeps
Steady “Err”
Red LED flashes every
30 seconds
No display alternating
with display of CO
concentration every 60
seconds. Red LED
flashes with beeps
No display alternating
with “0” every 60
seconds.
Green LED flashes
every 7 seconds
4 quick beeps,
5 seconds
silence,
repeated once
None Normal AC
One quick
beep every
15 seconds
4 quick beeps,
5 seconds
silence,
repeating
4 quick beeps,
5 seconds
silence,
repeating
3 long beeps,
1 second
silence,
repeating
One quick
beep every
30 seconds
4 quick beeps,
5 seconds
silence,
repeating
every 60 secs
None Normal operation
Self checking when
AC powered (Test
button was pressed
or unit was first
powered)
operation (sensing
no CO) and with a
good battery
AC powered and
low or missing
battery
Alarm condition.
Dangerous
concentrations of
CO detected
Interconnected CO
alarm warning of a
CO condition
Interconnected
smoke alarm
warning of a
smoke/fire condition
Unit malfunction Replace battery.
Alarm condition
powered on battery
backup. Dangerous
concentrations of
CO detected
after first 4 minutes
of 9 V battery
operation. Unit
monitoring for CO
None – CO has not
been detected.
Numbers shown for
test purposes only
None
Install or replace 9V
battery.
Refer to “What to do
When the Alarm
Sounds” (inside front
cover)
Refer to “What to do
When the Alarm
Sounds” (inside front
cover)
Evacuate by your
escape plan
If “Err” continues,
unit has malfunctioned. Replace
immediately. Unit will
not respond CO
Refer to “What to do
When the Alarm
Sounds” (inside front
cover).
Replace battery
Verify AC power is
restored as soon as
possible to conserve
battery.
Replace battery
Peak Level Memory (model KN-COP-IC only)
When the Peak Level button is pressed and held, the display shows the
highest CO reading taken by the CO alarm since its last reset or power
up. The Peak Level display feature will display levels between 11-999
PPM. Although the Peak Level feature will display levels below 30 PPM,
these levels will not result in an alarm no matter how long the device is
exposed to these levels. The Peak Level feature is helpful in identifying if
you have had a CO reading since resetting the alarm.
Concentrations of CO between 1 and 30 PPM can often occur in normal, everyday conditions. Concentrations of CO below 30 PPM may be
an indication of a transient condition that may appear today and never
reappear. Some CO conditions may start out as low level leaks but could
develop into CO concentrations that may become harmful.
Peak Level Memory Reset
Press the Peak Level button; with the button still pressed, press the
Test/Reset button for two seconds and release. The number on the display will tur
begin monitoring for CO. The Peak Level memory is also reset when the
n to “0”, the memory will be cleared and the alarm will
unit loses power.
8. Maintenance
NOTE: This unit is sealed. The cover is not removable.
Due to the loudness of the alarm, we suggest that you place your
fingers over the sounder opening while testing your alarm.
CAUTION: Continuous exposure to the high sound level of this
alarm over an extended period of time may cause hearing loss.
Testing
To test the alarm, press the T
properly, you should hear 4 quick beeps – followed by 5 seconds of
silence – followed by 4 quick beeps. (For model KN-COP-IC with digi-
tal display: The display will show three “eights” and then show a number – usually ar
and the amber LED will illuminate. Within several seconds the unit will
ound 200). The red LED will flash along with the beeps
return to monitor for CO.
If interconnected to Kidde smoke alarms, pressing the Test/Reset button
on the CO alarm will have no effect on the smoke alarms. The smoke
est/Reset button. If the unit is operating
Page 11
8. Maintenance
8. Maintenance
alarms will not be tested and will not alarm. However, when pressing
the Test button on an interconnected smoke alarm, the CO alarm will
emit a Smoke/Fire audible and visual alarm pattern of 3 long beeps, 1
second of silence, repeated. NOTE: You do not need to press the Test
button to take a CO r
Battery Replacement (for alarms with battery backup)
These CO alarms are not battery operated. However, these alarms are
equipped with 9 volt battery backup – the 9 volt battery is to supply
short term back-up during a power outage.
eplacing the battery, use one of the following approved brands:
When r
• Duracell
• Energizer 522
These batteries can be purchased wher
local hardware store. Use of a different battery may have a detrimental
effect on the alarm operation.
The 9 volt battery is not rechargeable. If the 9 volt battery is missing,
disconnected, or if the battery’s power is low, a red LED flash will occur
once every 15 seconds, accompanied by an audible beep. If this
happens, the battery must be replaced. (For model KN-COP-IC with
digital display: “Lb” will be displayed alternately with the current CO
eading once every second).
r
IMPORTANT: Constant exposures to high or low humidity may reduce
battery life. A good safety measur
a year, or at the same time as you change your clocks for daylight saving
time.
Alarm Removal
If the tamper resist feature has been activated, refer to tamper resist
e description in section 4 for removal instructions.
featur
Remove the alarm from the mounting plate by rotating the alarm in the
direction of the “OFF” arrow on the cover. To disconnect the AC QuickConnector harness, squeeze the locking arms on the sides while pulling
the connector away from the bottom of the alarm (see section 4).
After the alarm has been removed, you can open the battery door and
replace the battery. Battery installation instructions are provided on the
inside of the battery door.
When installing the battery, orient the battery as shown on unit label.
Press the battery tab down into the battery compartment and install the
battery.
eading.
MN1604 or MX1604
e you bought the alarm or at a
e is to replace the battery at least once
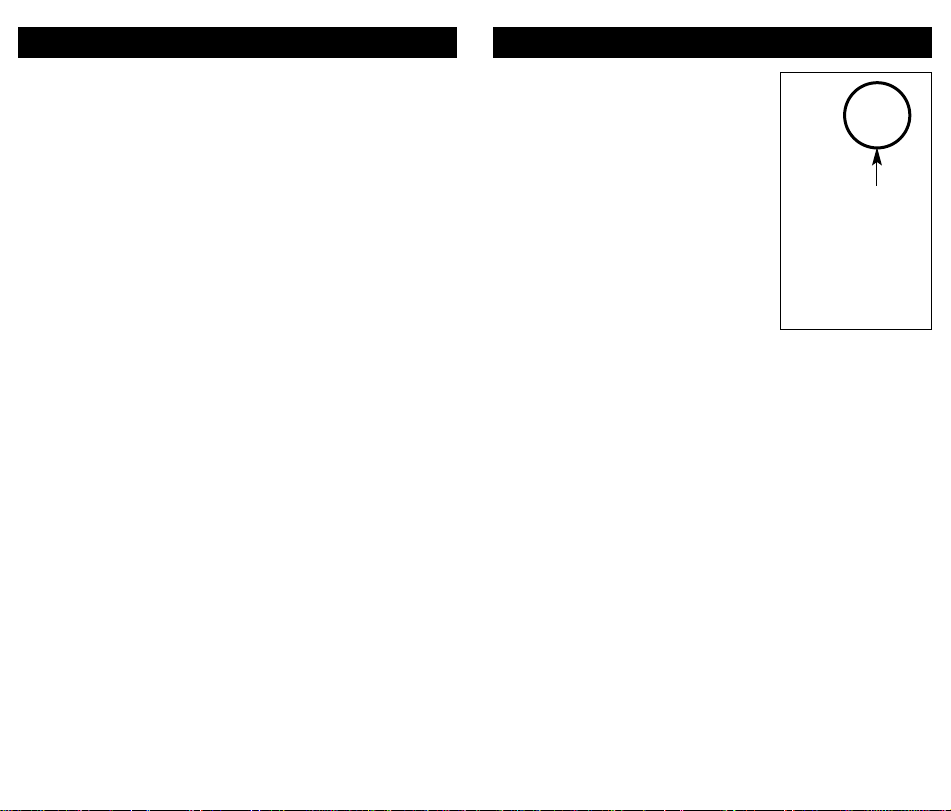
CAUTION!: If the battery tab is not held
down in the battery compartment by the
battery, the battery door will not close, the
AC Quick-Connector will not attach to the
alarm, and the alarm will not attach to the
mounting plate.
After installing or changing the battery,
reinstall your alarm. Test your alarm by
using the Test/Reset button and check that
the green “Power” LED is on.
Maintenance Tips
To keep your alarm in good working order,
you must follow these simple steps:
est the alarm once a week by pressing
• T
the Test/Reset button.
• Vacuum the alarm cover once a month to
remove accumulated dust.
• Never use detergents or solvents to clean the alarm. Chemicals can
permanently damage or temporarily contaminate the sensor.
• Avoid spraying air fresheners, hair spray, paint or other aerosols near
the alarm.
• Do not paint the unit. Paint will seal the vents and interfere with
proper sensor operation.
Move the CO Alarm to a remote location, to prevent possible damage or
contamination of the sensor, prior to performing any of the following:
• Staining or stripping floors or furniture, painting or wall-papering
• Using aerosols or adhesives
WARNING: Reinstall the CO Alarm as soon as possible to assure continuous protection.
The following is a list of substances that at high levels can damage the
sensor or cause temporary r
• Ethylene, ethanol, alcohol, iso-propanol, benzene, toluene, ethyl
acetate, hydrogen, hydrogen sulfide and sulfur dioxide.
• Also most aerosol sprays, alcohol based products, paint, thinner, solvent, adhesive, hair spray, after shave, perfume, auto exhaust (cold
start) and some cleaning agents.
eadings that are not CO readings:
Battery Tab
Battery Replacement
Page 12

FIVE YEAR LIMITED WARRANTY
Warranty Coverage: The manufacturer warrants to the original consumer purchaser, that
this product (except battery) will be free of defects in material and workmanship for a period
of five (5) years from date of purchase. The manufacturer’s liability hereunder is limited to
replacement of the product, repair of the product or replacement of the product with
repaired product at the discretion of the manufacturer. This warranty is void if the product has
been damaged by accident, unreasonable use, neglect, tampering or other causes not arising
from defects in material or workmanship. This warranty extends to the original consumer
purchaser of the product only.
Warranty Disclaimers: Any implied warranties arising out of this sale, including but not
limited to the implied warranties of description, mer
purpose, are limited in duration to the above warranty period. In no event shall the
Manufacturer be liable for loss of use of this product or for any indirect, special, incidental or
consequential damages, or costs, or expenses incurred by the consumer or any other user of
this product, whether due to a breach of contract, negligence, strict liability in tort or
otherwise. The Manufacturer shall have no liability for any personal injury, property damage
or any special, incidental, contingent or consequential damage of any kind resulting from gas
leakage, fire or explosion. Some states do not allow limitations on how long an implied
warranty lasts, so the above limitation may not apply to you. Some states do not allow the
exclusion or limitation of consequential or incidental damages, so the above limitations or
exclusions may not apply to you.
Legal Remedies: This warranty gives you specific legal rights and you may also have other
rights that vary fr
Warranty Performance: During the above warranty period, your product will be replaced
with a comparable product if the defective product is r
the following address: Kidde, Customer Service Department, 1016 Corporate Park Drive,
Mebane, NC 27302 USA, together with proof of purchase date. Please include a note
describing the problem when you return the unit. The replacement product will be in
warranty for the remainder of the original warranty period or for six months, whichever is
longer. Other than the cost of postage, no charge will be made for replacement of the
defective product. In many cases the quickest way to exchange your alarm is to return it to
the original place of purchase. If you have questions, call Kidde customer service department.
IMPORTANT: Do not remove unit back cover. Back cover removal will void warranty.
Your Kidde Carbon Monoxide Alarm is not a substitute for property, disability, life or other
insurance of any kind. Appropriate insurance coverage is your responsibility. Consult your
insurance agent.
Also, Kidde makes no warranty,expr
merchantability or fitness for any particular purpose, with respect to the battery.
The above warranty may not be altered except in writing signed by both parties hereto.
om state to state.
ess or implied, written or oral, including that of
chantability and fitness for a particular
eturned in a postage paid package to
QUESTIONS OR FOR MORE INFORMATION
Call our Consumer Hotline at 1-800-880-6788 or contact
us at our website at www.kidde.com
Kidde, 1016 Corporate Park Drive, Mebane, NC 27302
U.S. Patent 6,976,883
 Loading...