

Page 1
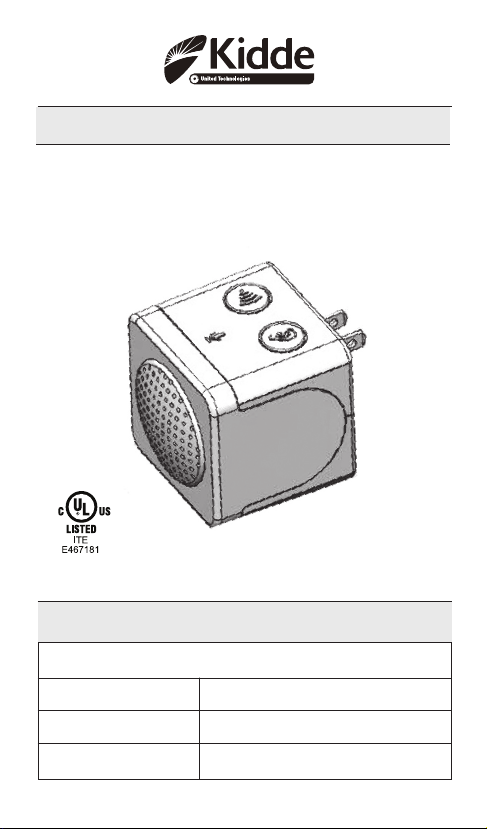
User Guide for the Kidde RemoteLync
Acoustic Monitor
• 120V AC
• 3 Color LED Indicator
• Voice Message System
For questions concerning your monitor, please call our Product Support
For your convenience, write down the following information. If you call our
Product Support Line, these are the first questions you will be asked:
Date of Manufacture
(on back of the monitor):
Date of Purchase:
Where Purchased:
Line at 1-800-880-6788.
Manual P/N 4001-7201-00
Page 2

Table of Contents
Introduction ..................................................................Page 3
Front, Top & Bottom views ........................................Page 3
Operating Instructions
Section 1: Location Guide .........................................Page 4
Section 2: Setup Guide ...............................................Page 5
Section 3:Testing the Monitor After Enrollment ..........Page 6
RemoteLync LED Indicator Operation ........................Page 7
Operation table for app ............................................Page 8
Maintenance Information ......................................Page 9
Troubleshooting: ............................................................Page 10
FCC compliance statement.........................................Page 11
Limited Warranty and Service Information ..............Page 12
2
Page 3

Introduction
Setup button
Test button
3 Color LED
Indicator
Microphone
Speaker
!
Thank you for purchasing the Kidde RemoteLync Acoustic
Monitor. This monitor has a ten-year limited warranty. Please
take a few minutes to thoroughly read this user guide, and
save for future reference. See www.kidde.com/RemoteLync
for further information, including updates to the user guide.
Teach children that they should never play with the monitor.
Your monitor was designed to detect alarm signals from most
UL-approved Smoke, Carbon Monoxide (CO), or Heat alarms
in a residential environment. It is not designed for use in a
recreational vehicle (RV) or boat. If you have any questions
about the operation or installation of your monitor, please call
our toll free Product Support Line at 1-800-880-6788.
NOTE: This monitor is designed to operate in partnership with UL-listed Smoke, CO, and Heat alarms. Some alarms
listed by other agencies may not work in conjunction with this
monitor. Please review your alarm user guides for smoke and
CO safety information, and follow the applicable location and
installation recommendations for maximum home monitoring:
!
Warning: This is a remote notification device. It is not a life
safety device, and should not be relied upon for notification to
present occupants. This device is only as reliable as your home’s
Wi-Fi network, and is not a substitute for a third party monitoring service.
FRONT, TOP & BOTTOM VIEWS
Page 4

Operating Instructions
Features:
• The RemoteLync monitor listens for smoke and carbon monoxide alarm events, and can notify you via your mobile app
on your smart device while you are outside of your home.
• Voice prompts will guide you through the set up and testing
process of your monitor.
• Hush feature allows you to stop notifications while you deal
with a known alarm situation.
• Green, Red, and Amber LEDs indicate status of the monitor.
• Powered by 120V AC (60 Hz, 20mA max)
!
Warning: The RemoteLync monitor is not an alarm. Your
RemoteLync monitor will recognize alarm signals from most
UL-approved smoke and CO alarms manufactured after 1999.
Section 1: Location Guide
IMPORTANT: THIS MONITOR MUST BE PLUGGED INTO A
STANDARD 120VAC, 60Hz OUTLET, LOCATED IN A CENTRAL LOCATION WITH CLEARANCE AROUND IT TO ALLOW
ALARM SOUNDS TO REACH THE MONITOR.
Avoid these locations:
--Dirty, dusty places, such as garages, furnace rooms, near win-
dows or external doors
--Insect infested areas
--Areas of direct sunlight
--Humid areas such as bathrooms, or any area above 95% rela-
tive humidity (RH).
--Kitchens
--Any areas colder than 40F (4.4C) or hotter than 100F (37.8C).
Extreme temperatures may affect the performance of the
RemoteLync.
--Near fluorescent lights as electronic noise may cause nuisance
alarms (Install at least one (1) foot away).
--Avoid locations where sound waves might be blocked from
reaching the monitor, such as behind drapes or other objects.
4
Page 5
Operating Instructions
<
Settings
Wi-Fi
CHOOSE A NEWTWORK…
YOUR NETWORK…
on
i
4:18 PM
Section 2: Setup Guide
NOTE: For this monitor to work properly, you must use it in
conjunction with modern UL-approved smoke, CO, combination, or heat alarms, and you must have an active residential wi-fi system.
• Download and install the appropriate app for your mobile
device by visiting www.kidde.com/RemoteLync, and clicking on the appropriate link.
- Additional links and instructions can be found on the
website.
• Open app and create account.
• Sign into account
• Select “Connect monitor to Wi-Fi network”
• Plug monitor into an outlet that is not controlled by a
switch (see location selection from above).
- All three color LEDs will flash and monitor will announce
“setup starting”.
- For iOS devices, exit app and go to settings>Wi-Fi.
• Select monitor from list of networks, It will start with
Kidde- followed by several letters and numbers
-For iOS devices, You will then be returned to the app to
select your home network, select continue.
• Enter the passcode for your network and press connect.
• Tap “OK” on the app
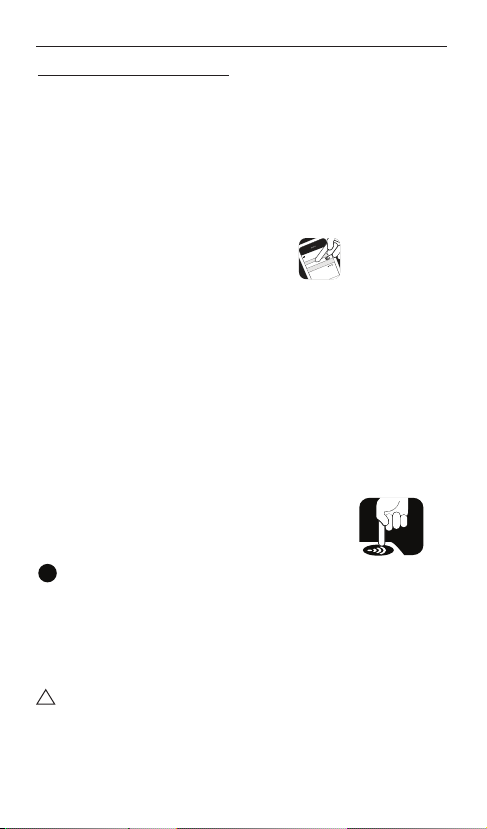
• Press the setup button on the monitor after
instruction plays on monitor.
• Select “Enroll my monitor” on app
• Note: If an error occurs at this point, verify device is
!
on same network.
• Once registration is complete, test the alarm furthest from
your RemoteLync as instructed by the monitor. Please note
that when you put your alarm into test mode that it will
sound, this is normal – do not remove batteries or cover
unit during this test.
!
CAUTION: Due to the loudness (85 decibels) of smoke,
CO, and heat alarms, always stand an arm’s length away
from alarms when testing.
• Monitor will announce when a smoke or carbon monoxide
alarm is detected.
Page 6

Operating Instructions
•
Your RemoteLync will announce “Now Monitoring” once both
smoke and carbon monoxide alarm patterns are recognized or the
setup button is pressed to skip one or the other type.
• To add a person to notify in case of an alarm select “edit”
then “add” to view a list of all contacts available on your
device. Choose the desired contact, verify their information, and finalize using “add”.
• As desired, enable SMS or email notification from the
monitor page by pressing the icon next to each contact.
• Once all contacts are added select “done”.
Congratulations, your Kidde RemoteLync is now actively monitoring for smoke and/or carbon monoxide alarm signals, and ready
to notify you on your mobile device.
Section 3:Testing the Monitor After Enrollment
!
CAUTION: Due to the loudness (85 decibels) of smoke,
CO, and heat alarms, always stand an arm’s length away
from alarms when testing.
• Initiate monitor test through the app, or pressing
test button on the monitor. Wait while the
system conducts a self-test.
• Once self-test is complete, you will hear a voice message to
“test the alarm farthest from this device”.
- If the self-test is unsuccessful, your monitor will enter fault
mode and you will receive a notification on your device.
Validate your network connection, attempt test again, and
then contact customer service if necessary.
• Test the alarm farthest from the monitor. To test a smoke, CO,
Combination, or Heat alarm, push the test button and confirm that at least two T-3 patterns (3 long beeps followed by
a pause) are produced for smoke and heat alarms, or two T-4
patterns (4 quick beeps followed by a pause) are produced
for CO alarms. For combination alarms you should hear two
of each type of pattern.
• If the monitor detects a CO or smoke alarm pattern, you
will hear the voice message “CO alarm detected” or
“Smoke alarm detected,” followed by the message “Test
successful.”and app will show alarm detected.
• If the monitor does not detect an alarm pattern within 2
minutes, you will hear the message “Alarm not heard , now
monitoring”. Attempt to test the alarm again, and if the
error persists, redo setup for your alarms by activating the
Alarm Monitoring Setup your app menu. If this does not
resolve your issue, consider relocating the monitor, and
activate “Alarm Monitoring Setup” again. See previous
section for setting up alarms.
6
Page 7

Operating Instructions
RemoteLync LED Indicator Operation
Mode
Startup – Wait for
Link status active
Enroll – Waiting
for setup button
press
Enroll - Registration
window open
Link lost after
enrollment
Smoke Learning Off 1 sec on/
CO Learning Off 100 ms on/
Standby On Off Off Test monitor and
Test Mode – Step
1: Acoustic
Self-Test
Test Mode- Step
2: Alarm Test
Alarm Detected Off Off Flashes rapidly
Snooze mode Once
Ignore Mode Once
Fault Notification Off On Once per second Unplug monitor and
Green
Amber Red Comment
Off Off Blink twice per
Off Off On for 1 second,
Off Off Flashes rapidly
Off Off Once per second Check status of
1 sec off
1 sec off
On/Off On/Off On/Off Wait for Self-test to
Once per
Off Off Test alarm furthest
second
Off Off Monitor detected patevery
two
seconds
Off Off
every 5
seconds
second
off for 1 second
(4 times a second)
Off Test Smoke alarm
Off Test CO alarm
with a one second
pause.
System will wait for
link status active
before going into
standby
Wait for monitor to
direct user to press
button on monitor
tap “enroll my
monitor” on app
wireless router
alarms weekly
complete, app will
show status.
from monitor, multiple
alarms can be test.
Test mode will exit
2 minutes after last
alarm is detect.
Follow instructions
supplied with your
alarm.
tern but notifications
have been disabled
for 10 minutes.
Monitor detected
pattern but owner has
dismissed alert. Monitor
will provide alert next
time alarm is heard.
plug back in, run test
to verify operation.
Page 8

Operating Instructions
Operation table for app
Mode What to do What to expect
Create Account Download and install app RemoteLync App should be on your mobile device
Connect to
Wireless Router
Enrol Monitor to
account
Learn Alarms in
home
Test monitor Test your monitor (self-test) and that it is
Alarm Detected Through the app, notify your contacts to
Add new Monitor Open your app and using the “add”
Change Monitor
Location
Change/Reset
Router
Un-Enroll Monitor Remove monitor from your account Go into monitor menu and remove monitor from account if you
Following instructions in app, connect to
monitor
Once monitor is connected to wireless
router, press button on monitor then tap
"enroll my monitor" in app
With monitor connected to wireless router
and monitor enrolled to you account, setup
monitor with the alarms in your home
furthest from the monitor
functioning properly with the alarms in
your home.
check on the situation if you are not able.
function, setup the monitor as was done on
previous monitor(s). Name monitor to be
sure you can identify the differnet locations.
Using the “setup alarms with moniotr from
the menu in the app, follow the instruction
and test alarm furthest from monitor when
instructed.
Go into app and follow instructions to
connect moniotr to wi-fi.
8
Page 9

You should connect to the Kidde… monitor through Wi-FI.
The monitor will report back what routers are with in range for
you to select and provide passcode to inorder for monitor to
connect.
Once monitor is connected to your router, you will add it to your
account. Besure you are connected to the same Wi-Fi router as
the monitor for enrollment to work.
With the monitor in setup mode you will test the smoke and/or
CO alarms furthest from the monitor so it can judge the volume
it will hear alarms at. This helps reduce false detections from
your neighbours house or appartment.
App will show testing progress. It will indicate if self-test
completed successfully and whether or not it detected an alarm
pattern from your alarms if they were tested.
When an alarm pattern is detected, monitor will send out
notifications to you and your contacts you have added for this
monitor.
Follow the same processes as above for connecting to wireless
router, enrolling into account and learning alarm furthest from
monitor.
App will walk you through the process to re-establish detection
of your alarms.
You will go through the same process of “connecting to wireless
router” as was done at setup.
no longer have the monitor.
Page 10

Weekly testing is recommended. If at any time the monitor does not
perform as described, please verify that it is correctly inserted into the
wall outlet, and is connected to your home network. If the monitor still
does not appear to be operating properly, call Product Support as shown
at the end of the user guide.
Reset Function
The reset function can be used to return the monitor to its factory
settings and re-start the setup and enrollment processes. Using a small
pin or paper clip, press and hold the reset button on the side of the
monitor for 5 seconds (until LEDs start flashing). Then unplug and reinsert the monitor into the power outlet to re-start the setup process.
Reset Button Access
Maintenance Information
To keep your RemoteLync Monitor in good working order, please
follow these simple steps:
• Verify the operation of the monitor’s voices and LED lights
by conducting a test once a week.
• Once a month, clean the monitor by using a soft brush attachment, vacuum the front vents to remove dust and dirt.
After cleaning conduct a test to verify operation.
• Never use detergents or other solvents to clean the unit.
• Avoid spraying air fresheners, hair spray, or other aerosols
near the monitor.
Do not paint the monitor. Paint will seal the vents and interfere
with the sensor’s ability to detect alarm signals. Never attempt
to disassemble the unit or clean inside. This action will void
your warranty.
!
CAUTION: YOUR ACOUSTIC MONITOR IS SEALED AND THE
COVER IS NOT REMOVABLE!
10
Page 11

Maintenance Information
Troubleshooting:
Description Possible Cause Action
Voice “Test alarm
furthest from device”
continues to repeat.
Green LED is not on
after setup
Green LED not on, red
or yellow colors visible
No voice “Test successful” after pushing
test button on
monitor
Voice “alarm not
heard”
Green LED is on, but
no voices heard
Voice “self-test failed” Monitor failure Try resetting the
Monitor was not setup
with your alarms
Poor connection in AC
outlet, no AC power
present.
Setup process not
complete or fault
mode
Improper location of
monitor, missed two
minute window
Improper location of
monitor, missed two
minute window
Speaker/monitor
failure
Test alarm furthest
from the monitor and
consider relocating
monitor if not detecting your alarms.
Check AC
power connection, try
another outlet, push
test button.
Redo setup process
from app menu
Test alarms within
two minutes, or move
monitor to better
location.
Test alarms within
two minutes, or move
monitor to better
location.
Return monitor and
replace with new one.
monitor. If no help,
return and replace.
Page 12

FCC COMPLIANCE STATEMENT
This equipment has been tested and found to comply with the
limits for a Class B digital device, pursuant to part 15 of the
FCC Rules. These limits are designed to provide reasonable
protection against harmful interference in a residential installation. This equipment generates, uses and can radiate radio
frequency energy and, if not installed and used in accordance
with the instructions, may cause harmful interference to radio
communications. However, there is no guarantee that interference will not occur in a particular installation. If this equipment
does cause harmful interference to radio or television reception,
which can be determined by turning the equipment off and on,
the user is encouraged to try to correct the interference by one
or more of the following measures:
—Reorient or relocate the receiving antenna.
—Increase the separation between the equipment and
receiver.
—Connect the equipment into an outlet on a circuit
different from that to which the receiver is connected.
—Consult the dealer or an experienced radio/TV technician
for help
This device has been designed, constructed, and tested for
compliance with FCC Rules that regulate intentional and unintentional radiators. The user is not permitted to make any modifications to this equipment or use it in any manner inconsistent
with the methods described in this User’s Guide, without express
approval from Kidde. Doing so will void the user’s authority
to operate this equipment. This device complies with Part 15
of the FCC Rules. Operation is subject to the following two
conditions: (1) this device may not cause harmful interference, and (2) this device must accept any interference received,
including interference that may cause undesired operation. The
term “IC:” before the radio certification number only signifies
that Industry of Canada technical specifications were met.
12
Page 13

Limited Warranty and Service Information
TEN YEAR LIMITED WARRANTY
Kidde warrants that the RemoteLync will be free from defects
in material and workmanship or design under normal use and
service for a period of ten years from the date of purchase. The
obligation of Kidde under this warranty is limited to repairing or
replacing the RemoteLync or any part which we find to be defective in material, workmanship or design, free of charge, upon
receiving the alarm with proof of date of purchase, postage and
return postage prepaid, to Warranty Service Department, Kidde,
1016 Corporate Park Drive, Mebane, NC 27302.
This warranty shall not apply to the RemoteLync if it has
been damaged, modified, abused or altered after the date of
purchase or if it fails to operate due to improper maintenance
or inadequate power. Any implied warranties arising out of
this sale, including but not limited to the implied warranties of
description, merchantability and fitness for a particular purpose,
are limited in duration to the above warranty period. In no event
shall the Manufacturer be liable for loss of use of this product or
for any indirect, special, incidental or consequential damages, or
costs, or expenses incurred by the consumer or any other user of
this product, whether due to a breach of contract, negligence,
strict liability in tort or otherwise.
The Manufacturer shall have no liability for any personal
injury, property damage or any special, incidental, contingent or
consequential damage of any kind resulting from gas leakage,
smoke, fire or explosion.
Since some states do not allow limitations of the duration of an
implied warranty or do not allow the exclusion or limitation of
incidental or consequential damages, the above limitations or
exclusions may not apply to you. While this warranty gives you
specific legal rights, you may also have other rights which vary
from state to state.
The above warranty may not be altered except in writing signed
by both parties hereto.
Your Kidde RemoteLync is not a substitute for property, fire,
disability, life or other insurance of any kind.
Appropriate insurance coverage is your responsibility. Consult
your insurance agent.
Opening the unit will void the warranty.
Page 14

QUESTIONS OR FOR MORE INFORMATION
Call our Product Support Line at 1-800-880-6788 or
contact us at our website at www.kidde.com
Kidde 1016 Corporate Park Drive, Mebane, NC 27302
Custom Assembled in China with U.S. and Foreign
Components
14
 Loading...