

Kidco G1101 User Manual [en, es, fr]
Extension Placement Guide
G4100 Extension Kit for Auto Close Gateway Model G1100
G4101 Extension Kit for Auto Close Gateway Model G1101
Note: Each kit contains two extensions
USER GUIDE
GUIDE D'UTILISATION
Width Opening Extensions What You Need Placement
29”– 31 ½” Basic Gate No extensions
31 ½” – 34 ½” Included with Gate Gate + 1 extension -1 on one end
34 ½” – 37” Gate + 2 extensions -1 on each end
37” – 40” 1 – 4100/4101 Gate + 3 extensions -2 on one end; 1 on other end
40” – 42 ½” Gate + 4 extensions -2 on each end
42 ½” – 45” 2 – 4100/4101 Gate + 5 extensions -3 on one end; 2 on other end
45” – 47 ½” Gate + 6 extensions -3 on each end
Guide de positionnement des rallonges
Ensemble de rallonges G4100 pour la barrière Gateway à fermeture automatique modèle G1100
Ensemble de rallonges G4101 pour la barrière Gateway à fermeture automatique modèle G1101
Remarque : Chaque ensemble contient deux rallonges
Largeur d'ouverture Rallonges Matériel requis Positionnement
73,6 à 80 cm Barrière de base Sans rallonges
80 à 87,6 cm Inclus avec la barrière Barrière + 1 rallonge -1 à une extrémité
87,6 à 93,9 cm Barrière + 2 rallonges -1 à chaque extrémité
93,9 à 101,6 cm 1 – 4100/4101 Barrière + 3 rallonges -2 à une extrémité; 1 à l'autre extrémité
101,6 à 107,9 cm Barrière + 4 rallonges -2 à chaque extrémité
107,9 à 114,3 cm 2 – 4100/4101 Barrière + 5 rallonges -3 à une extrémité; 2 à l'autre extrémité
114,3 à 120,6 cm Barrière + 6 rallonges -3 à chaque extrémité
Guía de colocación de las extensiones
Juego de extensión G4100 para la reja Gateway de cierre automático modelo G1100
Juego de extensión G4101 para la reja Gateway de cierre automático modelo G1101
Nota: cada juego contiene dos extensiones
GUÍA DEL USUARIO
G1101G1100
Ancho de la abertura Extensiones Lo que usted necesita Colocación
29”– 31 ½” Reja básica Sin extensiones
31 ½” – 34 ½” Se incluye con la reja Reja + 1 extensión -1 en un extremo
34 ½” – 37” Reja + 2 extensiones -1 en cada extremo
37” – 40” 1 – 4100/4101 Reja + 3 extensiones -2 en un extremo; 1 en el otro extremo
40” – 42 ½” Reja + 4 extensiones -2 en cada extremo
42 ½” – 45” 2 – 4100/4101 Reja + 5 extensiones -3 en un extremo; 2 en el otro extremo
45” – 47 ½” Reja + 6 extensiones -3 en cada extremo
®
1013 Technology Way, Libertyville, IL 60048
800.553.5529
www.kidco.com
®
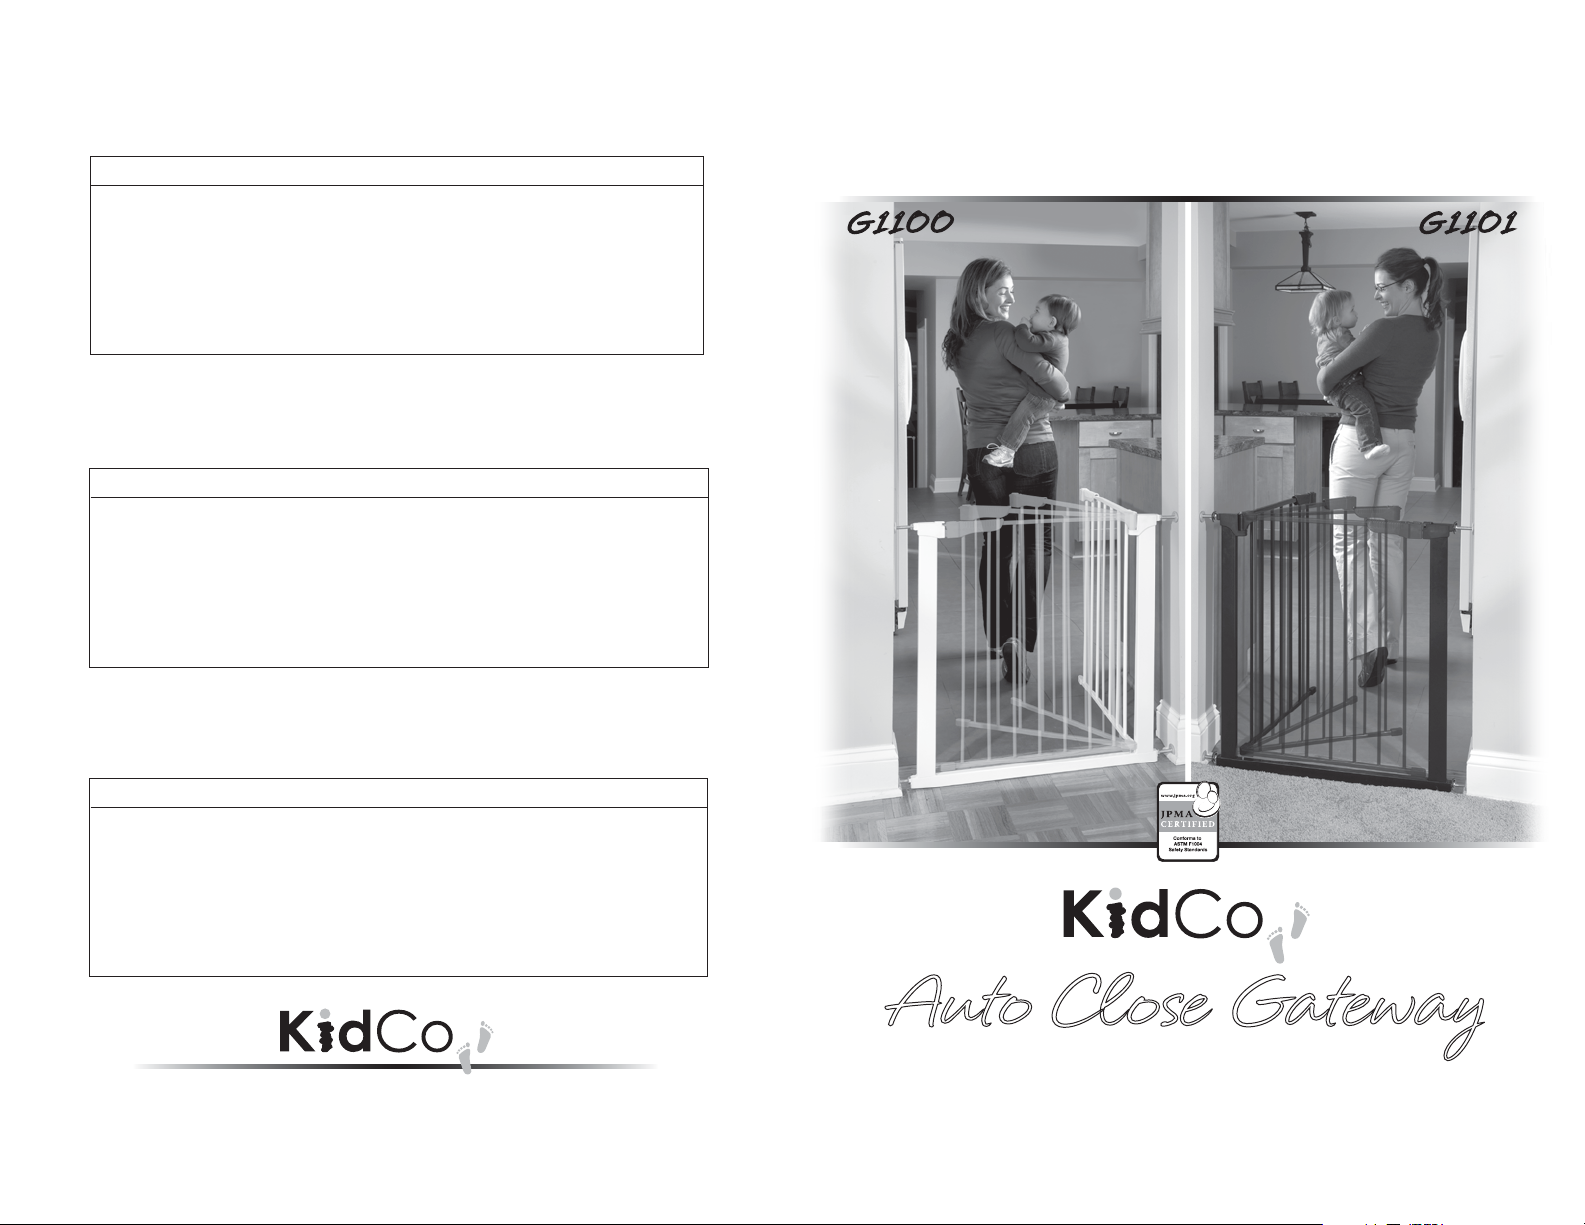
Auto Close Gateway
PRESSURE MOUNT INSTALLATION
Fits openings 29” – 37” • Optional extension kits available
Pour des ouvertures de 73 à 94 cm • Rallonges disponibles en option
Para aberturas de 29” a 37" • Hay disponibles extensiones opcionales
®
USER GUIDE
G1100/G1101
Auto Close Gateway
®
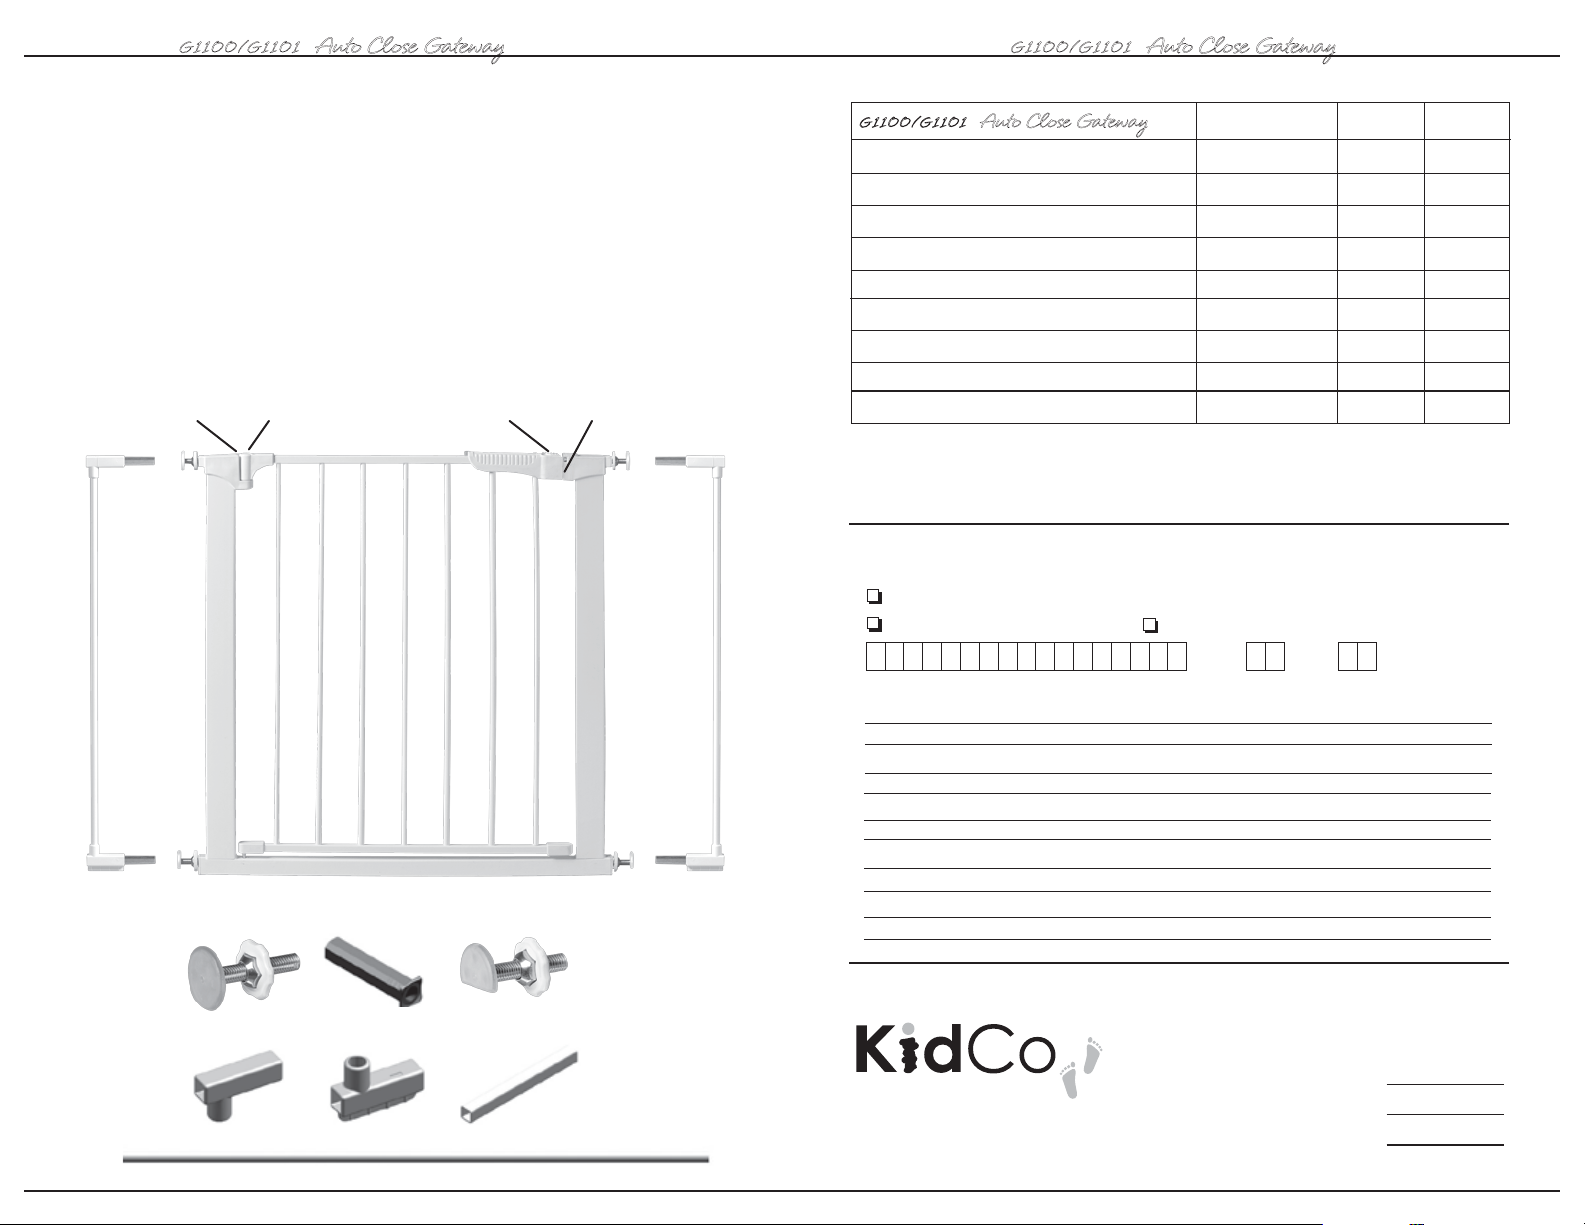
Parts list
A Top Spindle (2)
B Spindle Housing (4)
C Bottom Spindle (2)
D Upper Extension Housing (2)
E Lower Extension Housing (2)
F Extension Tube (4)
G Extension Bar (2)
H Hinge
I Hold Open Button
J Release Button
K Magnets
H J K
I
G1100/G1101
G1100/G1101
Auto Close Gateway
A Eje superior
B Cubierta para pivotes (4)
C Eje inferior
D Cubierta de extensión superior
E Cubierta de extensión inferior
1
F Tubo de extensión 5
F Tubo de extensión 7
F Tubo de extensión 10
/8” (2)*
7
/8” (2)**
1
/2” (2)***
G Barra de extensión
* para usarse con 1 extensión por lado
** para usarse con 2 extensiones por lado
*** para usarse con 3 extensiones por lado
Auto Close Gateway
®
Precio G1100 G1101
$2.00
$2.00
$2.00
$2.00
$2.00
$2.00
$2.00
$2.00
$7.00
®
MÉTODO DE PAGO
MÉTODO DE PAGO Por favor no envíe dinero en efectivo
Cheque/Giro postal adjunto (pagadero a: KidCo, Inc.)
VISA (13 ó 16 dígitos) Mastercard (16 dígitos)
Mes Año
Número de la tarjeta de crédito Fecha de vencimiento (requerida)
Firma del portador de la tarjeta
Por favor escriba en letras de molde el nombre del portador de la tarjeta
Nombre
Domicilio residencial
A
B
E
C
FD
Ciudad
1013 Technology Way
Libertyville, IL 60048-5349
Estado
®
Fecha
N.º telefónico diurno
Unidad
Código postal
CARGOS POR ENVÍO Y MANEJO
Si el pedido incluye tubos de extensión,
barras o pivotes, añada $8.00.
Para todos los demás pedidos, añada $5.00.
Cantidad del pedido
Envío y manejo
Total
$
$
$
G
2
23
USER GUIDE
G1100/G1101
Auto Close Gateway
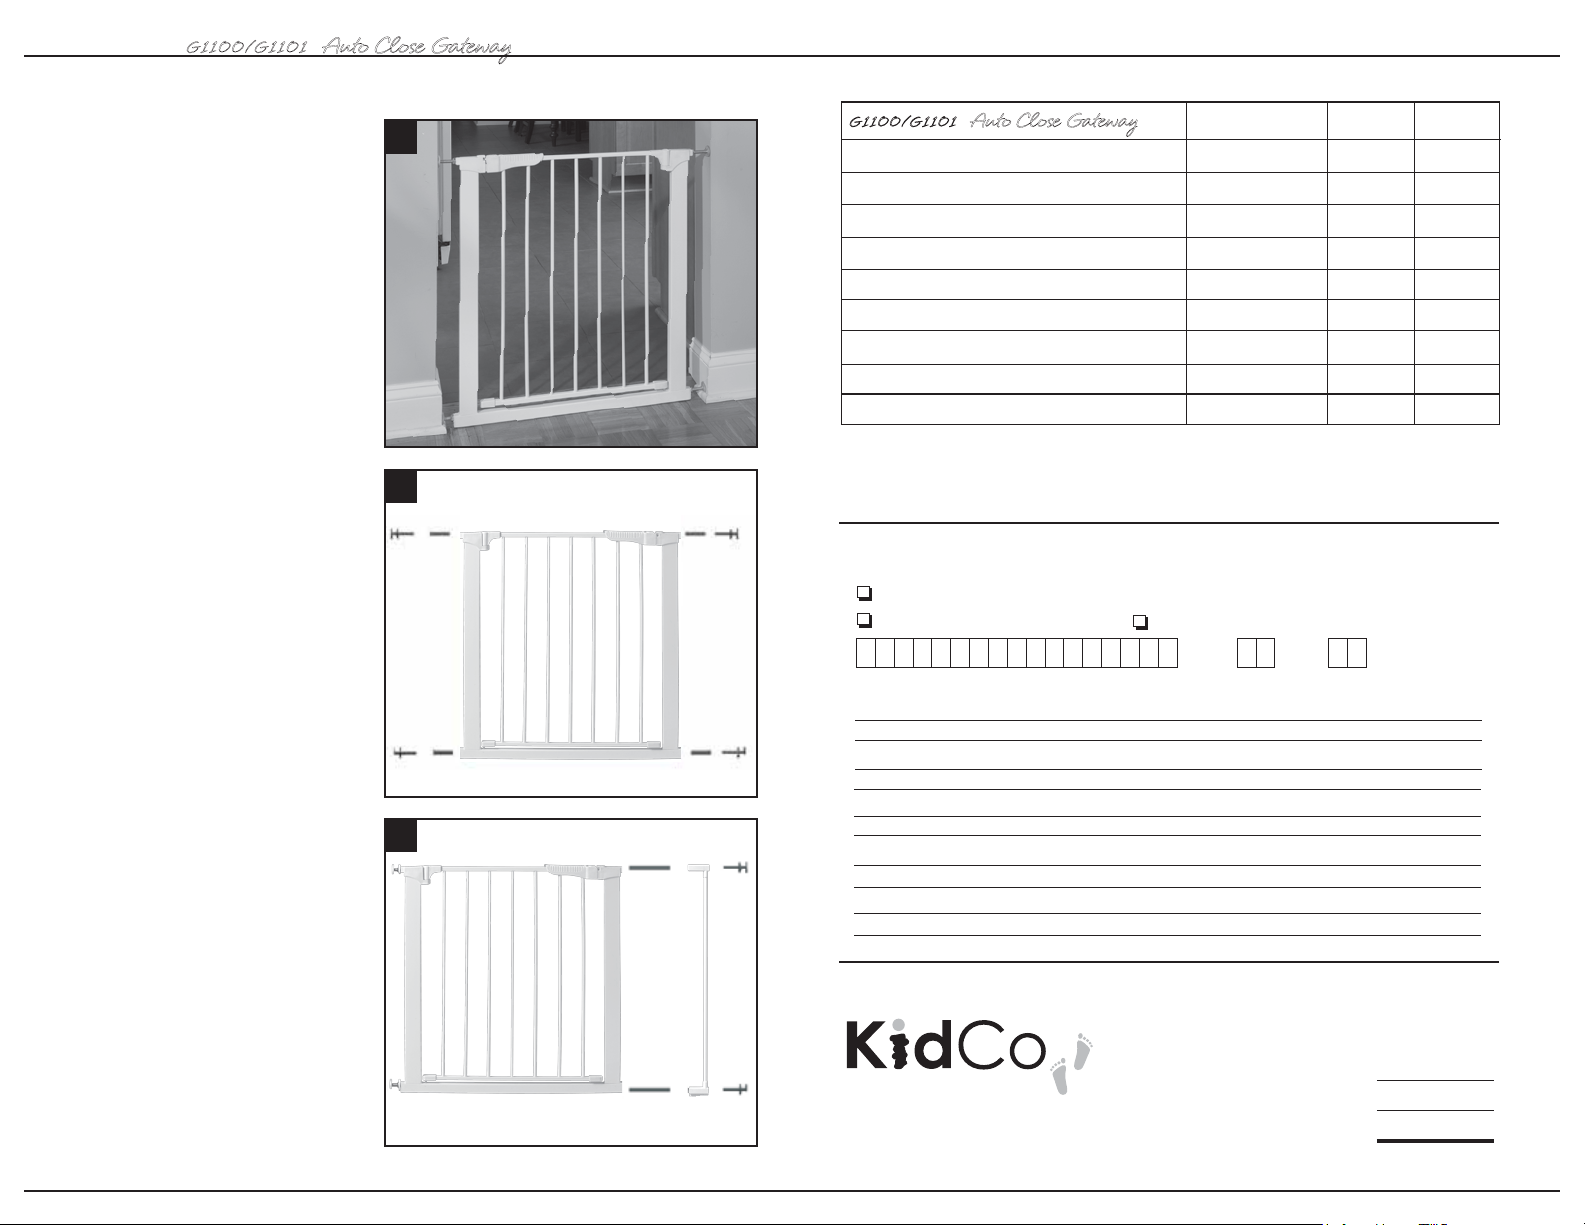
Installation
1 The gate must be installed in a
structurally sound opening. Never install
between two railings or two stair posts.
Ensure mounting surface (wall, doorframe,
etc.) is strong, rigid and is smooth, clean
and grease free. If mounting onto brick,
drywall or other surfaces, an optional gate
installation kit, wooden board mounted to
the surface or additional hardware may be
necessary to provide a solid, smooth
surface. Measure opening to determine if
extensions are needed. Correct width will
be reached by adjusting all 4 corner
spindles. Each spindle adjusts individually
and may be extended to varying lengths
(up to 1 ¾” each) to allow for molding,
uneven walls, etc. This gate can be used
in a closed doorway. Never use gate at top
of stairs.
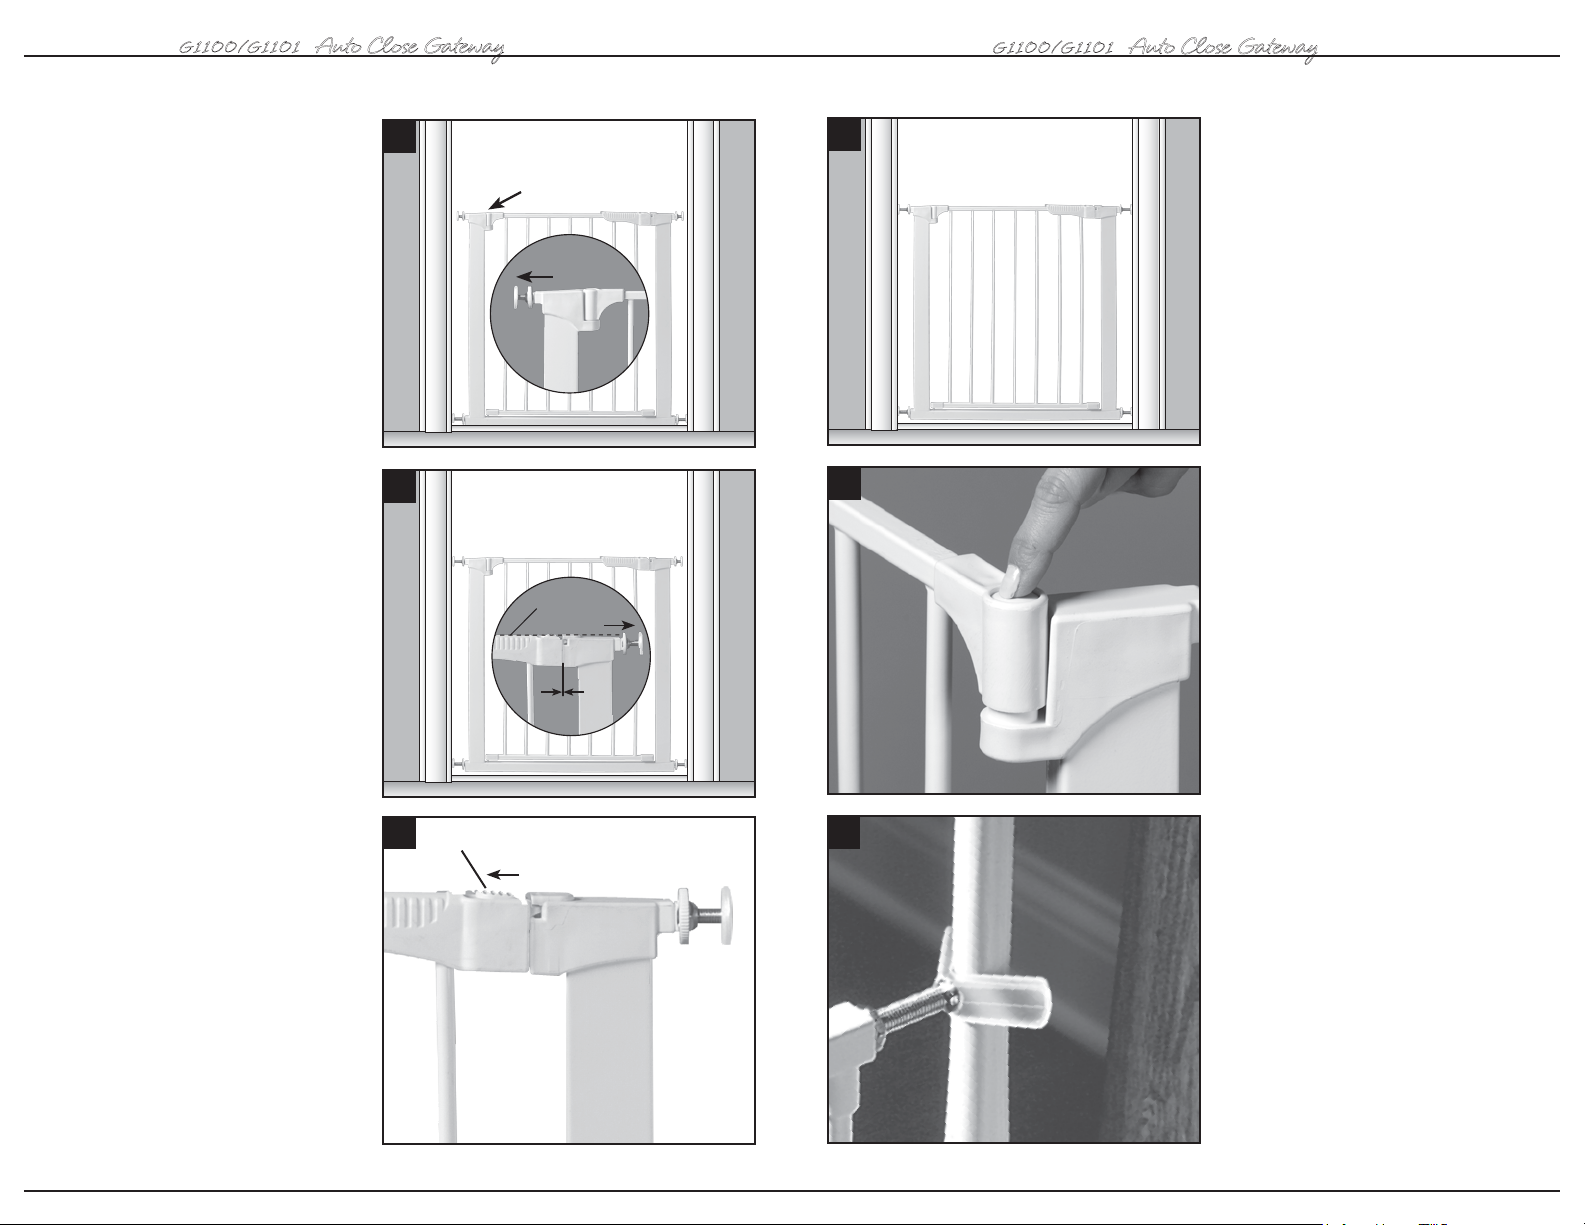
2 Spindle attachment is different
when using extensions and when not
using extensions. If no extension/s are
used, slide top spindles (a) and bottom
spindles (c) into spindle housing end (b).
Push assembly into gate corners.
®
1
1
2
2
(a) (b) (b) (a)
(a) (b) (b) (a)
(c) (b) (b) (c)
(c) (b) (b) (c)
PARTS PRICE LIST AND METHOD OF PAYMENT
G1100/G1101
Auto Close Gateway
A Top Spindle
B Spindle Housing (4)
C Bottom Spindle
D Upper Extension Housing
E Lower Extension Housing
F Square Extension Tube 5
F Square Extension Tube 7
F Square Extension Tube 10
G Extension Bar
* for use with 1 extension per side
** for use with 2 extensions per side
*** for use with 3 extensions per side
1
/8” (2)*
7
/8” (2)**
1
/2” (2)***
®
Price G1100 G1101
$2.00
$2.00
$2.00
$2.00
$2.00
$2.00
$2.00
$2.00
$7.00
METHOD OF PAYMENT Please do not send cash
Check/Money Order enclosed (payable to: KidCo, Inc.)
VISA (13 or 16 digits) Mastercard (16 digits)
Mo Yr
Credit card account number Expiration date (required)
Signature of cardholder
Please print name of cardholder
Date
3 If using extension/s (see Extension
Placement Guide) insert square extension
tubes (f) into gate ends. Connect extension
bar (g) to one upper extension housing (d)
and one lower extension housing (e).
Push assembly over extension tubes.
There should be no metal showing from
extension tubes. It may be necessary to
apply pressure to tubes to ensure they are
fully inserted into gate ends. Slide top
spindles (a) and bottom spindles (c) into
extension tubes.
4
3
3
(f) (d) (a)
(f) (d) (a)
(g)
(g)
(f) (e) (c)
(f) (e) (c)
Name
Street address
City
1013 Technology Way
State
®
Libertyville, IL 60048-5349
Daytime phone number
Unit
Zip
SHIPPING AND HANDLING CHARGES
If order includes extension tubes,
bars or spindles add $8.00
All others add $5.00
Order amount
Shipping & handling
Total
$
$
$
21
USER GUIDE
G1100/G1101
Auto Close Gateway
®
G1100/G1101
Auto Close Gateway
®
GUÍA DEL USUARIO
7 Close walk through door so it is aligned
directly above bottom gate rail. Pull out
top spindle (a) on the hinge side (h) until it
touches mounting surface. Tighten
handwheel TOWARD GATE FRAME.
8 Pull out top spindle (a) on handle side
until it touches mounting surface and
tighten handwheel TOWARD GATE FRAME.
Take turns tightening both top spindles
until tension is reached and the distance
between the handle and frame is
1
/32”.
7
(h)
10
10 Para cerrar la reja: La puerta de acceso
se cerrará automáticamente y se reactivará
la traba. Pruebe la puerta de la reja desde
ambas direcciones. Si la reja está alineada
apropiadamente la puerta se cerrará de
manera automática, lo cual se confirma
(a)
cuando se escucha un “clic”. Si cierra de un
lado pero no del otro, significa que la reja
está inclinada hacia el lado por donde NO
cierra. Cuando éste sea el caso, afloje los
ejes superiores y enderezca la reja al nivel
de la puerta, apriete los ejes y vuelva a
probar. Continúe probando hasta que la
puerta de la reja se cierre automáticamente
desde ambos lados. Ahora la puerta está
8
11
funcionando adecuadamente.
11 Pulsador para mantener la reja abierta
(l): Este pulsador se encuentra a la mitad de
Flush
1
/32”
(a)
la parte superior de la bisagra. Al presionarlo
mientras la puerta se encuentra en posición
totalmente abierta, la puerta se mantendrá
abierta hasta que se presione para cerrarla.
9 To Open Gate: Pull back release
button (j) on handle. Lift gate door
and swing open.
6
9
(j)
12
12 Instalación: KidCo tiene disponibles
pivotes Y OPCIONALES (Modelo GY-1) para
asistir en la instalación cuando la superficie
de montaje tiene un balaustre redondo.
Estos ejes se usan en lugar de los que se
incluyen con la reja básica. Se pueden pedir
en una concesionaria KidCo de su localidad
o directamente de KidCo. Retire la ruedecilla
de la tuerca del pivote de la reja, e instálela
en la tuerca del pivote en Y antes de instalar
el pivote en Y en el extremo de la reja.
19
 Loading...