


PS5250

PS COAXIALS
PS5250
English Version
Versión Español
PS5250 Altavoces Coaxiales
LIVIN’ LOUD
Deutsche Version
PS5250 Koaxial-Lautsprecher
Version Francaise
PS5250 Haut-parleurs Coaxiale
2010 PS5250 RevC.indd 12010 PS5250 RevC.indd 1 12/8/2009 2:53:50 PM12/8/2009 2:53:50 PM
Authorized KICKER Dealer:
Purchase Date:
PERFORMANCE
PS5250 COAXIAL SPEAKERS
Owner’s Manual
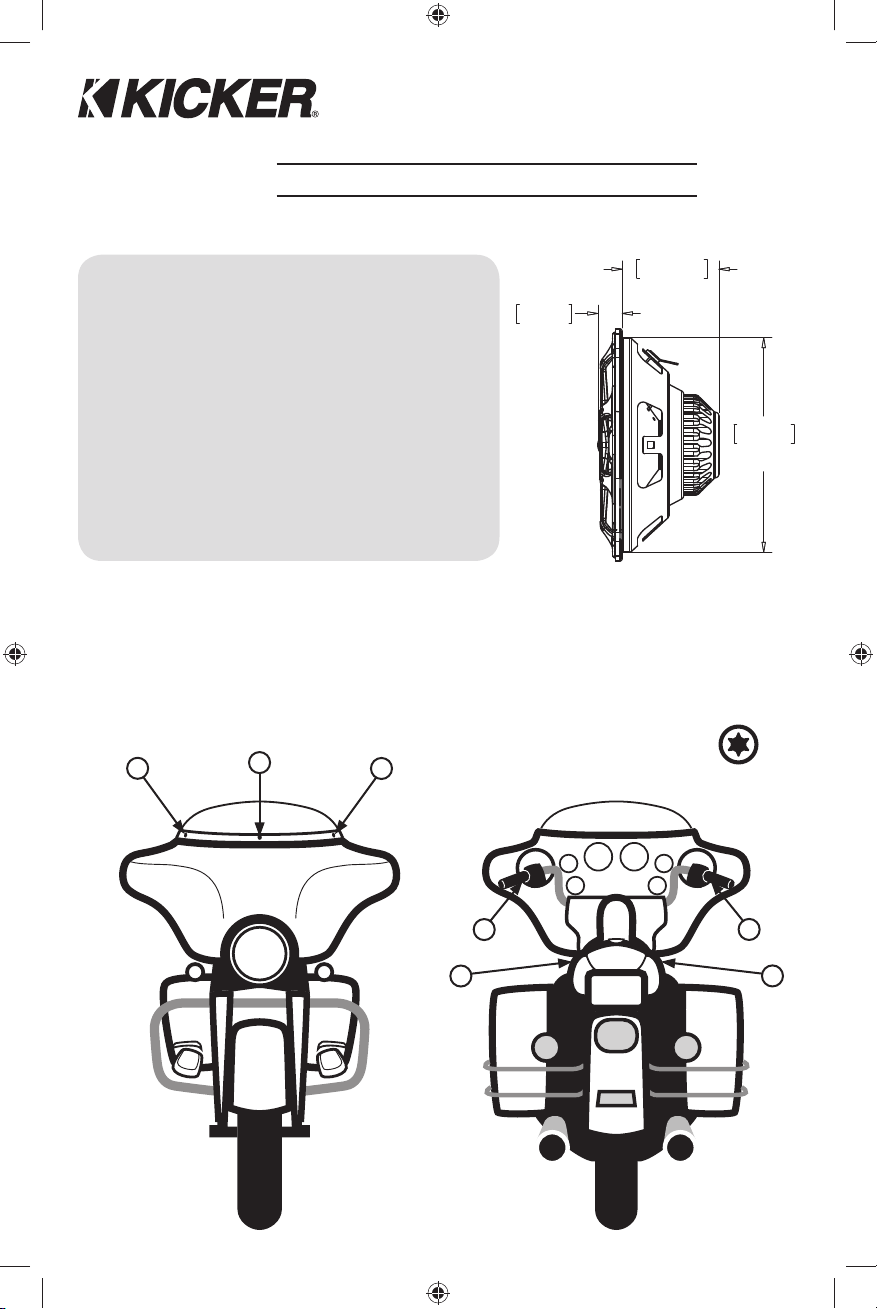
Woofer Size 5-1/4” [133mm]
Tweeter Size 3/4” [20mm]
Frequency Response 60Hz–20kHz
Max Amplifi er Power 100W PEAK | 50W RMS
Sensitivity [1W/1m] 88.3dB
Nominal Impedance 2 Ω
Weight 12.6oz [358g]
Mounting Hole Diameter 4-7/8” [124mm]
Mounting Depth 2-3/16” [56mm]
The PS5250 Coaxial Speakers are KICKER’s upgrade for Harley-Davidson® premium audio systems (2006
and later) and similar touring bikes. Please refer to your bike’s factory service manual for dissassembly/
installation information. Typically, you should retain all factory screws, hardware, and grilles when upgrading your
bike to a KICKER system. The following diagrams show how to install the PS5250 speakers in a Harley-Davidson
bike with “batwing” style fairing (2006 and later). Note: The PS5250 is a 2-ohm speaker. Do not
install in systems that are not 2-ohm stable!
9/16"
14mm
56mm
4 7/8"
124mm
1. Remove front side of fairing.
2 3/16"
1
2
3
7 x Torx T25
4
5
2
2010 PS5250 RevC.indd 22010 PS5250 RevC.indd 2 12/8/2009 2:53:54 PM12/8/2009 2:53:54 PM
PS COAXIALS
6
7
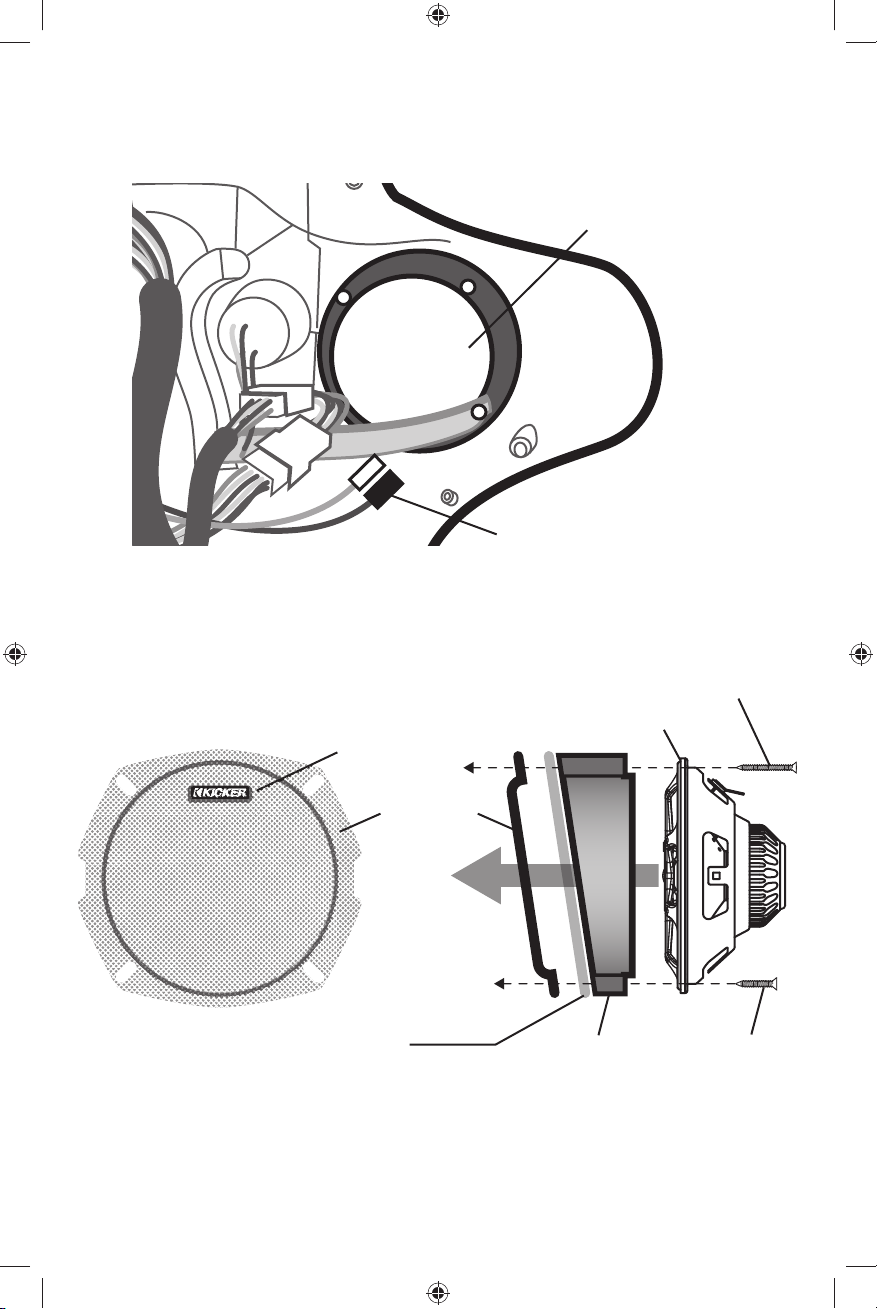
2. Remove factory speakers.
Remove the factory speaker connectors.
Retain the 3 factory screws.
Remove the factory speakers from the factory angle mount (be careful not to damage the angle mount).
[ viewed from front of bike ]
factory speaker location
factory speaker connectors
3. Prepare PS5250 for installation.
Install the KICKER badges onto the grilles; bend the rear posts to secure them in place.
For Harley “batwing” installations, replace the factory grilles with KICKER grilles.
For all other Harley applications, use the factory grilles only.
recommended
badge location
factory screws x 3
KICKER PS5250
KICKER grille
factory grille
(remove for “batwing” only)
factory angle
mount
install short screw at
bottom
4. Install PS5250 in factory location.
Use the 3 factory screws.
Connect the factory speaker connectors to the PS5250 terminals.
Re-install your bike’s front fairing in the reverse order you disassembled it.
3
2010 PS5250 RevC.indd 32010 PS5250 RevC.indd 3 12/8/2009 2:53:55 PM12/8/2009 2:53:55 PM
Distribuidor autorizado de KICKER:
Fecha de compra:
RENDIMIENTO
ALTAVOCES COAXIALES PS5250
Manual del propietario
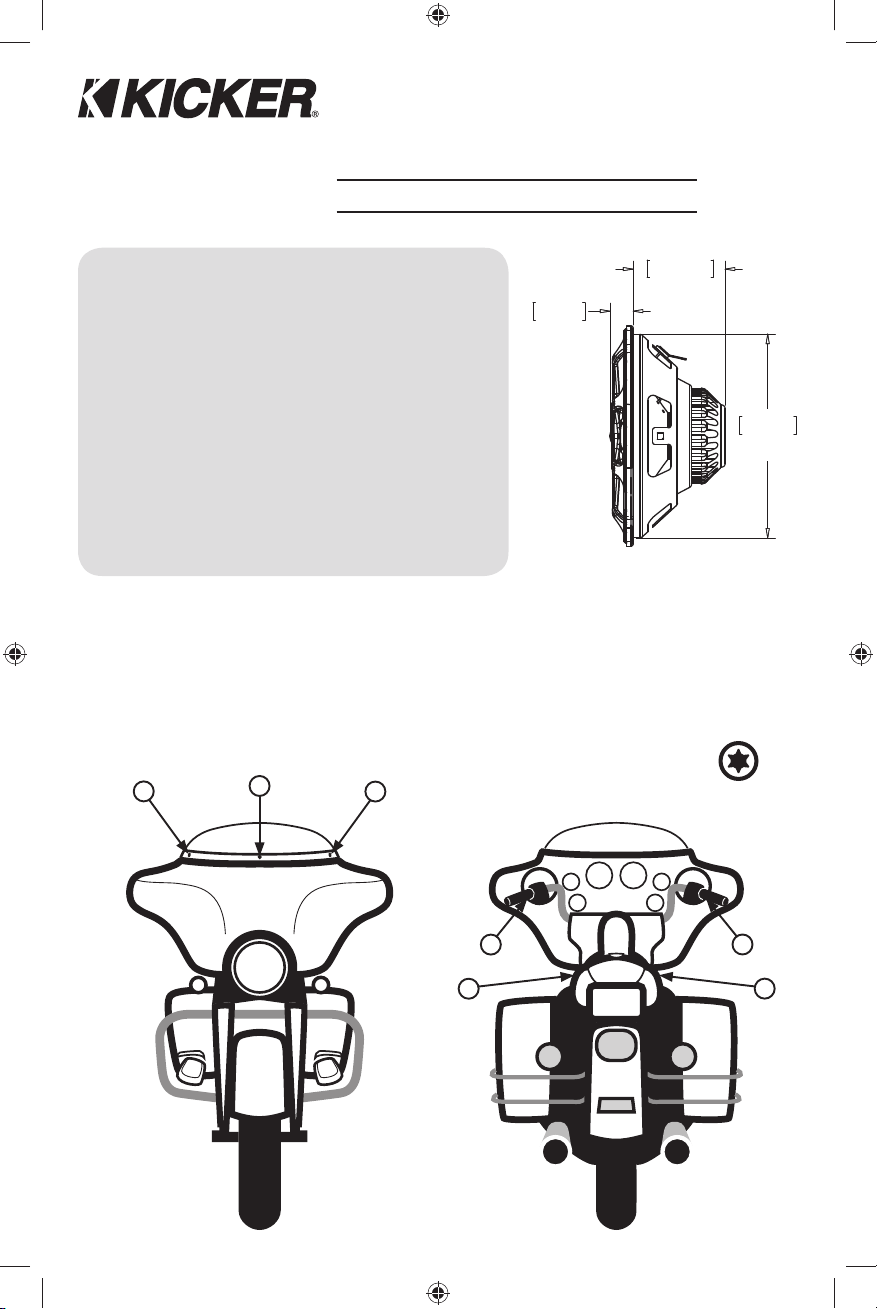
Woofer 5-1/4” [133mm]
Tweeter 3/4” [20mm]
Respuesta de Frecuencias 60Hz–20kHz
Procesamiento de Potencia
Máxima
Sensibilidad [1W/1m] 88.3dB
Impedancia Nominal 2 Ω
Peso 12.6oz [358g]
Diámetro del Orifi cio de Montaje 4-7/8” [124mm]
Profundidad de Montaje 2-3/16” [56mm]
KICKER PS5250...nuestra actualización estándar para Harley-Davidson ® Premium sistemas de audio (2006
y posteriores) motocicletas de turismo y similares. Por favor, consulte al servicio de la fábrica de desmontaje
manual de tu moto / Información de la instalación. Normalmente, se deben conservar todos los tornillos de
fábrica, de hardware, y rejas al actualizar su motocicleta a un sistema de Kicker. Los siguientes diagramas
muestran cómo instalar los altavoces PS5250 en una motocicleta Harley-Davidson con “alas de murciélago”
estilo carenado (2006 y posteriores). Nota: El PS5250 es un altavoz de 2 ohmios. No instalar en
sistemas que no son estables a 2 ohmios!
100W PICO | 50W RMS
9/16"
14mm
1. Eliminar parte frontal de carenado.
1
2
3
2 3/16"
56mm
4 7/8"
124mm
7 x Torx T25
4
5
4
2010 PS5250 RevC.indd 42010 PS5250 RevC.indd 4 12/8/2009 2:53:58 PM12/8/2009 2:53:58 PM
ALTAVOCES COAXIALES PS
6
7
 Loading...