

Kettler Indoor 6 Assembly Instructions Manual
Assembly instructions Table Tennis Table
„Indoor 6”
Art.-Nr.
07138-960
13
10
8
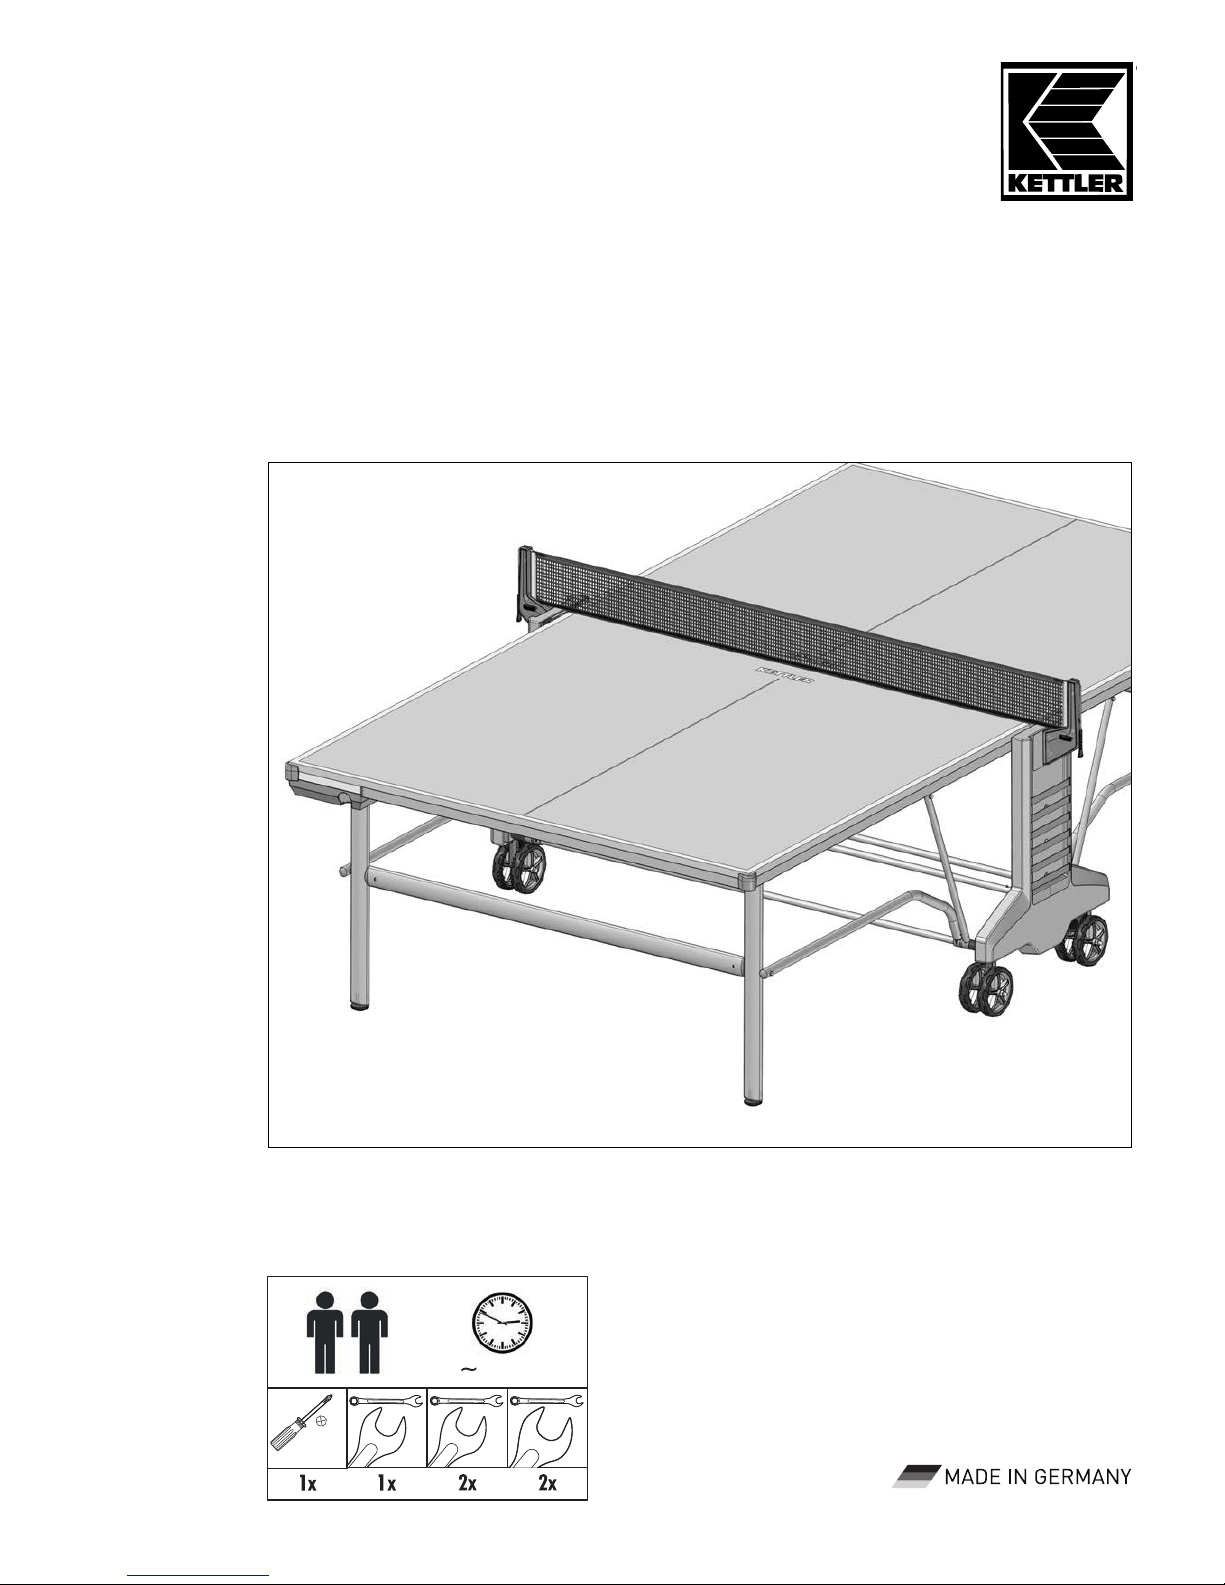
90 min.
– US –
Adult Assembly Required
Please do not return this product to the store. Contact KETTLER®for parts and service: call toll free
866.804.0440 or send email to parts@kettlerusa.com. Please visit our web site www.kettlerusa.com to
view a video demonstration of product assembly.

2
Note on Safety
■ The table-tennis table should be used only for its intended pur-
pose, i.e. for playing with suitable table-tennis bats and balls.
■ All other uses are prohibited and may be dangerous. The ma-
nufacturer cannot be held liable for damage or injury caused
by improper use of the table.
■ Damaged or worn components may endanger your safety or
shorten the lifespan of the table-tennis table. Replace worn or
damaged components immediately and remove the table from
use until this has been done. Use only spare parts manufactured by KETTLER.
■ The table-tennis table complies with all safety regulations. In-
correct repairs, alterations to the design (removal of original
parts, addition of other components etc.) may endanger the safety of the user.
■ Instruct other persons (in particular children) using the table in
its correct use, and draw their attention to any potential source
of danger, especially when setting up or dismantling the table.
■ When setting up or dismantling the table, stay clear of its fol-
ding radius.
■ When folded up, the table-tennis table presents a large surface
to the wind. For this reason, ensure that it is stored in a sheltered position.
■ The table-tennis table may be pushed only into the transport po-
sition because there is otherwise a danger of injury.
■ The unit complies with the standard EN 14468–1:2004.
■ Depending on frequency of use, check all screws, bolts etc. re-
gularly to ensure that they are in good condition.
■ Caution: While assembly of the product keep off children’s
reach (Choking hazard - contains small parts).
■ In case of enquiry, please contact your KETTLER dealer.
Handling the equipment
■ Do not use the table-tennis table until it has been fully and cor-
rectly assembled and checked.
■ Ensure that table-tennis tables which are not weatherproof are
not exposed to dampness or rain. Keep them well away from
direct sources of heat. Should the surface become warped, lay
the table on a level surface for a few days.
■ Set the table up on a level surface.
■ Do not cover it with plastic foil, under which condensation may
form. We recommend the weatherproof KETTLER tarpaulin, art.
no. 7032-300.
■ For practising without a partner, the table halves can be folded
up singly.
■ For more information on the sport of table-tennis, you are re-
ferred to the specialist literature on the subject.
■ Do not use corrosive or abrasive materials to clean the equip-
ment. Ensure that such materials are not allowed to pollute the
environment. In most cases, a slightly dampened cloth is sufficient.
■ Waste Disposal: KETTLER products are recyclable. At the end of
its useful life please dispose of this article correctly and safely
(local refuse sites).
Please read these instructions carefully prior to carrying out assembly and using for the first time. They contain information which is important for your safety as well as for the use and maintenance of the appliance. Keep these
instructions in a safe place for reference purposes, maintenance work and to assist you when ordering spare parts.
– US – Important Instructions
Instructions for Assembly
■ The equipment must be assembled with due care by two adult
persons.
■ Ensure that you have received all the parts required (see check
list) and that they are undamaged. Should you have any cause
for complaint, please contact your KETTLER dealer.
■ Before assembling the equipment, study the drawings carefully
and carry out the operations in the order shown by the diagrams. The correct sequence is given in capital letters.
■ Please note that there is always a danger of injury when wor-
king with tools or doing manual work. Therefore please be careful when assembling this machine.
■ Ensure that your working area is free of possible sources of dan-
ger, for example don’t leave any tools lying around. Always
dispose packaging material in such a way that it may not cause any danger. There is always a risk of suffocation if children
play with plastic bags!
■ The fastening material required for each assembly step is sho-
wn in the diagram inset. Use the fastening material exactly as
instructed.
■ Bolt all the parts together loosely at first, and check that they
have been assembled correctly. Tighten the locknuts by hand
until resistance is felt, then use spanner to finally tighten nuts
completely against resistance (locking device). Then check that
all screw connections have been tightened firmly. Attention:
once locknuts have been unscrewed they no longer function correctly (the locking device is destroyed), and must be replaced.
■ For technical reasons, we reserve the right to carry out prelimi-
nary assembly work (e.g. addition of tubing plugs).
■ Please keep original packaging of this article, so that it may be used
for transport at a later date, if necessary. Goods may only be returned after prior arrangement and in (internal) packaging, which is
safe for transportation, in the original box if possible. It is important
to provide a detailed defect description / damage report!
List of spare parts
When ordering spare parts, always state the full article number,
spare-partnumber, the quantity required and the S/N of the product (see spare parts drawing).
Example order: Art. no. 07138-970 / spare-part no. 10100016
/ 2 pieces / S/N......
Important: spare part prices do not include fastening material; if
fastening material (bolts, nuts, washers etc.) is required, this
should be clearly stated on the order by adding the words „with
fastening material“.
KETTLER GB Ltd.
Kettler House, Merse Road
North Moons Moat
Redditch, Worcestershire B98 9HL
www.kettler.co.uk
GB
+44 1527 591901
+44 1527 62423
sales@kettler.co.uke-mail:
KETTLER International Inc.
1355 London Bridge Road
Virginia Beach, VA 23453
www.kettlerusa.com
USA
+1 888 253 8853
+1 888 222 9333
sales@kettler.co.uke-mail:

3
2
5
1
4x M8x110
4x M8
2
2x M8x65
2x
ø25x8,4
2x 66 mm
3
4x
4x
4x
8x 3,9x16
4
4
4x M6x90
4x
4x
12x6,4x12
12x6,4
8x 3,9x16
4x 26x19x6
6
4x M8x65
4x
ø25x8,4
4x
4x
ø12x5,3
4x M5
4x 3,9x16
4x M5x16
7
4x
ø12,5x6,4
4x M6
1
Pay attention to the numbering of the bag of screws!
Checklist (contents of packaging)
– US – Please use the cardboard packaging during mounting as underlay in order to avoid
scratching and damaging the product.

4
– US – You also need the following tools (Not included):
1
2
3
1
2
3
1x
2x
2x
2x
4x
4x
2x
2x
2x
2x
8x
2x
1x/4x
3x
13
10
8
90 min.
Checklist (contents of packaging)
/

5
Exemple
Exemplos
Příklady
Példák Exempel
Beispiele
Measuring help for screw connections
1 a
2x
M8x110
1x
1x
M8
13
1
2x

1 b
2x
6
1
2x
M8x110
1x
1x
M8
13
!
2
M8x65
2x
ø25
2x
13
66mm
2x
2
 Loading...