

Page 1
Keri i
2
Box Appliance User Guide
Reference Document
The Keri i
Doors.NET. It comes with the Windows 10TM operating system and with Doors.NET software
installed. The first time the Appliance is powered on a special licensing program runs allowing you to
select one controller license type to use. When selected, this license is automatically activated. This
means all you need to do is connect your controller network to the Appliance, configure the hardware
and user information, and your system is fully operational.
There are three types of Keri Appliances:
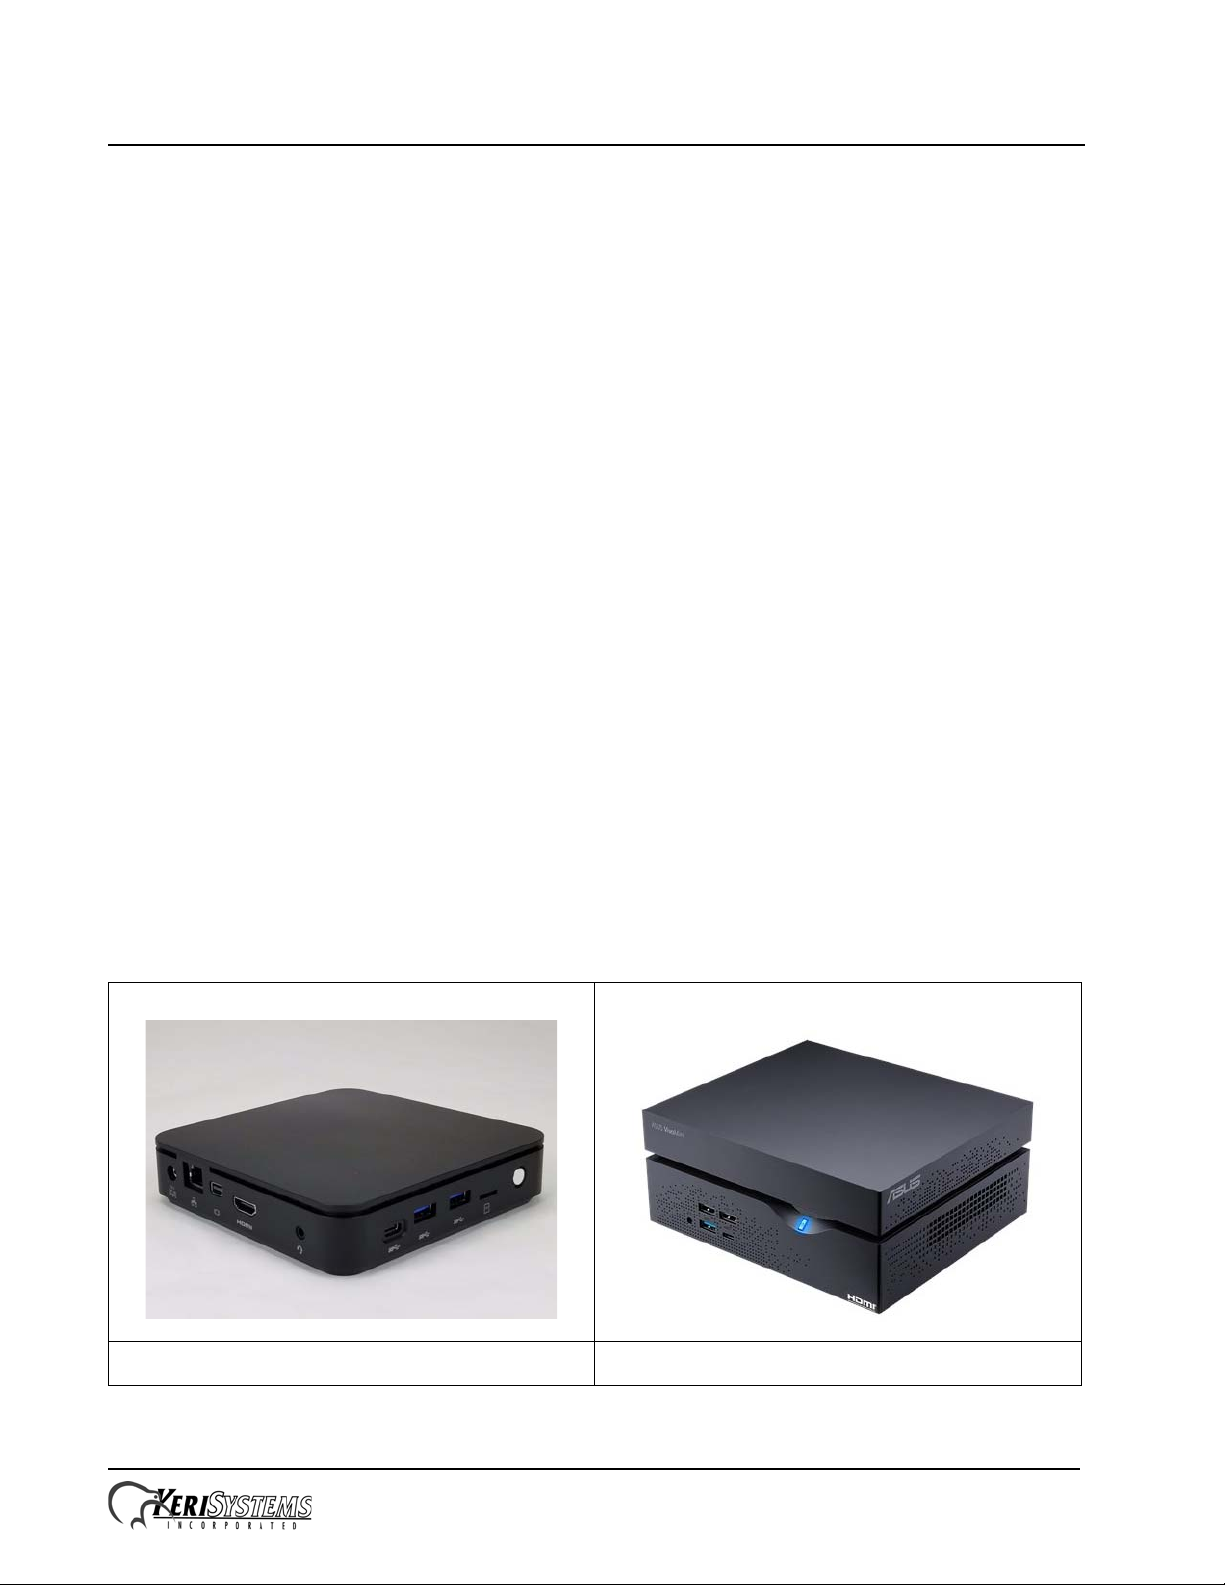
Box Appliance – comes licensed for 64 readers, 384 inputs, 320 outputs, 3,000 cardholders,
1 client, and 1 user-selected hardware gateway. Additional clients and gateways can be purchased.
The Box Appliance does NOT support any items that require a Doors.NET professional license, it
does NOT support Badging, it does NOT support video/cameras and the Reflections client, and it
does not support Doors.WEB.
Plus Appliance – comes licensed for 256 readers, 384 inputs, 320 outputs, 10,000 cardholders,
1 client, and 1 user-selected hardware gateway. Additional clients and gateways can be purchased.
The Plus Appliance is capable of system growth and expansion with the addition of any of Keri’s
optional software modules and hardware packages. It can support Doors.WEB.
2
Appliance is a small form factor computer specifically configured for use with
The Keri Appliance is meant for Doors.NET use only. Installing any software, with the
exception of anti-virus software and data backup software will VOID your warranty.
Pro Appliance – comes licensed for 512 readers, 2,048 inputs/outputs, 1,000,000 cardholders,
1 client, and 1 user-selected hardware gateway. Additional clients and gateways can be purchased.
The Pro Appliance comes with a full Doors.NET Pro software license. It also is capable of system
growth and expansion with the addition of any of Keri’s optional software modules and hardware
packages. It can support Doors.WEB.
Box Appliance Plus and Pro Appliance
Page 1 of 9 P/N: 01676-001 Rev. G
Page 2

Keri i
2
Box Appliance User Guide
Reference Document
The Appliance has Microsoft’s Defender software active. Should you install some other anti-virus or
network security software, please keep in mind that it may interfere with Doors.NET communications
if Doors.NET is not added as a trusted software application to that security software program.
To improve your Appliance security you may decide to locate the Appliance in a secure location and
access it via a remote access program. This is done by installing remote access software on both the
Appliance and a local computer. This allows the local computer to access the Doors.NET program
without a physical connection. TeamViewer is Keri’s preferred remote access program, and a support
version is already installed on the Appliance.
You can use an Appliance to replace an existing Doors.NET installation, but the existing installation
must have the same software revision as is installed on the Appliance so that the databases match.
Detach the Doors.NET database from the existing PC, save it to a portable device, move it to the
Appliance, and attach it to the database in the Appliance. Instructions for this process are provided in
the Detach/Attach Doors.NET SQL Databases document (p/n 01224-001).
1.0 Password Information
Windows 10
- user name - admin
- NO password
Keri recommends creating a new password for your security.
2.0 Appliance Setup
1. Remove the Appliance and supporting peripherals from the box.
2. Unit mounting options:
- horizontal on the table-top using the unit’s mounting feet
- vertical using the provided mounting foot
- VESA mount allowing the unit to be attached to the back of a VESA compliant monitor
3. Connect the keyboard and mouse.
4. Connect the monitor cable – either VGA or HDMI (monitor and cable NOT provided).
5. Connect the Wi-Fi antenna IF you are communicating via a Wi-Fi network. You will encounter
communication issues if you connect using both Wi-Fi and Ethernet. Keri does not recommend
using Wi-Fi if a hard-wired Ethernet connection is available.
6. Connect an Ethernet cable if connecting the Appliance to the router/switch via a hardwired
connection or directly to a LAN-520 on a PXL or EG master controller.
7. Connect the serial cable (if using a serial/modem connection to a PXL-500 or EG master
controller).
8. Connect the power cable.
Page 2 of 9 P/N: 01676-001 Rev. G
Page 3
Keri i
2
Box Appliance User Guide
Reference Document
3.0 Initial Startup
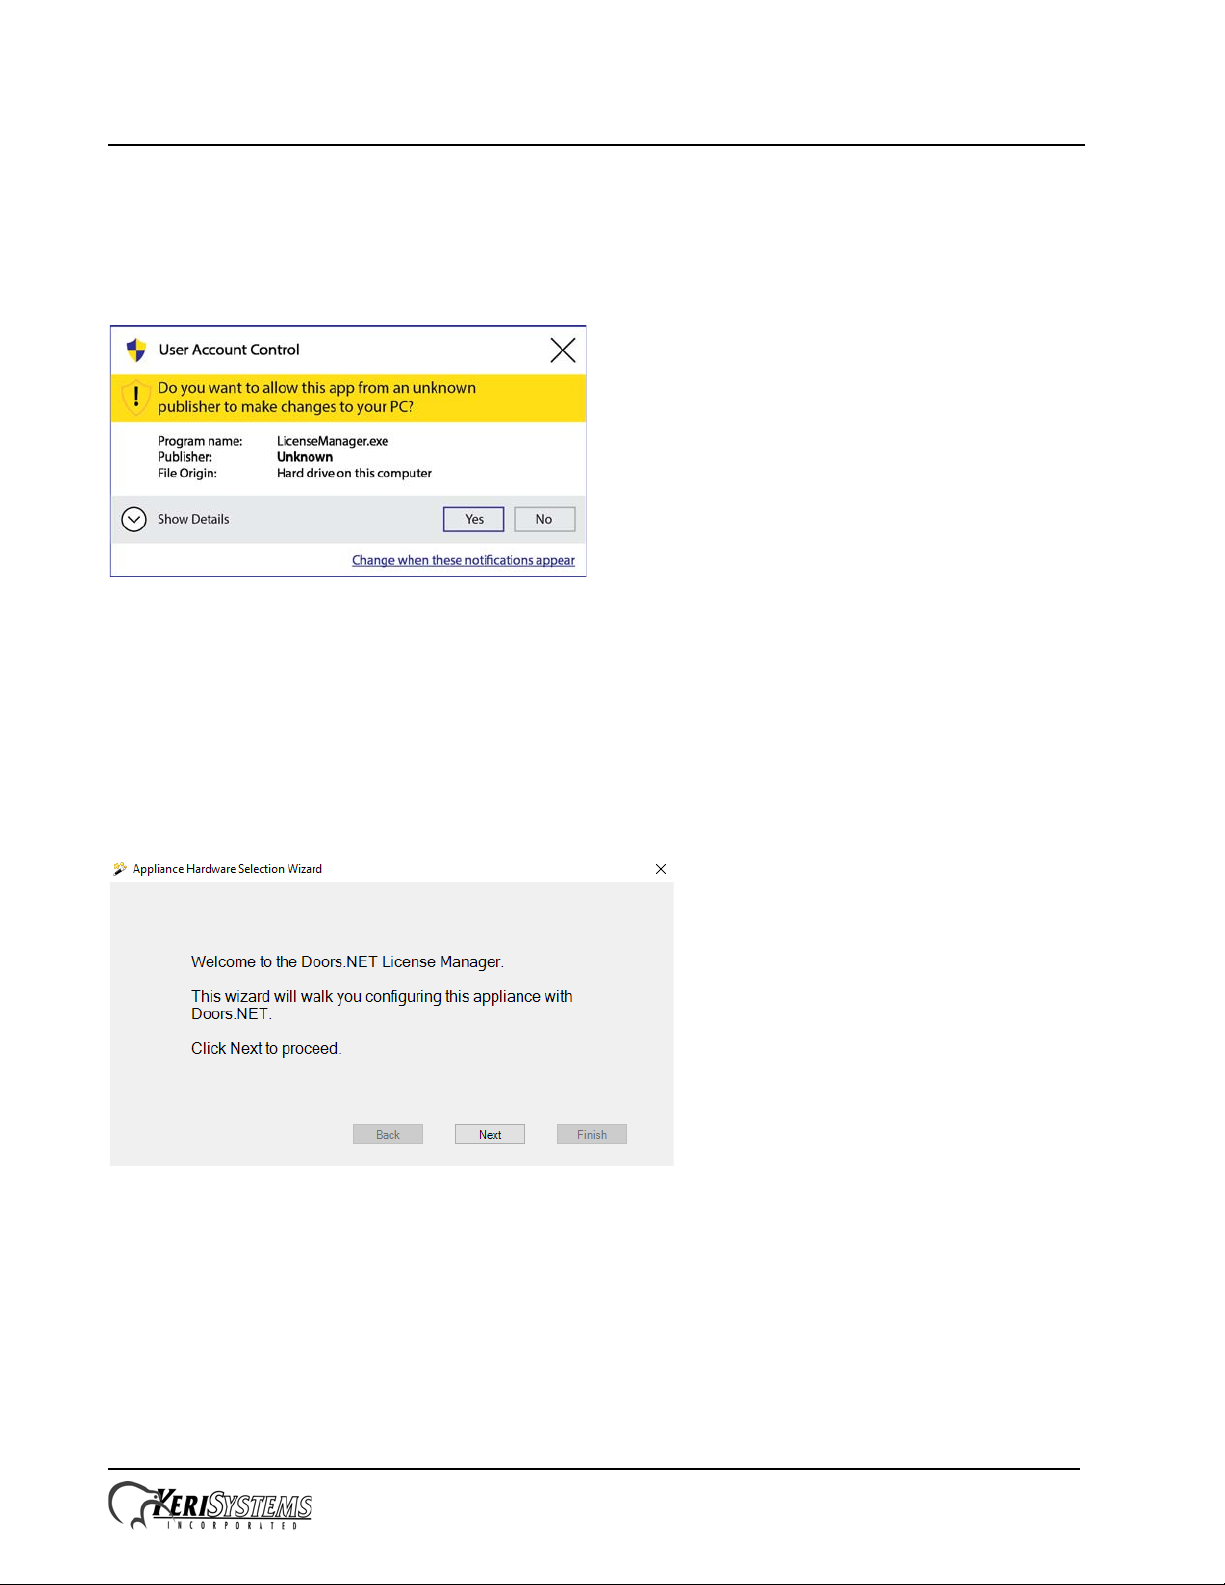
The Appliance has been programmed so that the first time it is powered up the License Manager runs
in a special license selection mode. As this is included as a part of the Appliance’s start up routine,
running this program requires approval.
It may take up to three minutes before this approval window appears.
If the License Manager does not automatically start on first power up, use Windows Explorer to
navigate to C:/Keri/DoorsNET and start the LicenseManager.exe program.
3.1 License Selection and Installation
1. The following window appears when the License Manager opens:
Page 3 of 9 P/N: 01676-001 Rev. G
Page 4

Keri i
2
Box Appliance User Guide
Reference Document
2. Click Next and the controller selection window appears.
3. Select the controller type you are using.
It is critical that you select the correct controller type. Click Next.
4. A summary window appears. Verify you have selected the correct controller type.
Click Back if you have selected the wrong controller type and repeat Step 3.
Click Finish to continue.
Page 4 of 9 P/N: 01676-001 Rev. G
Page 5
Keri i
2
Box Appliance User Guide
Reference Document
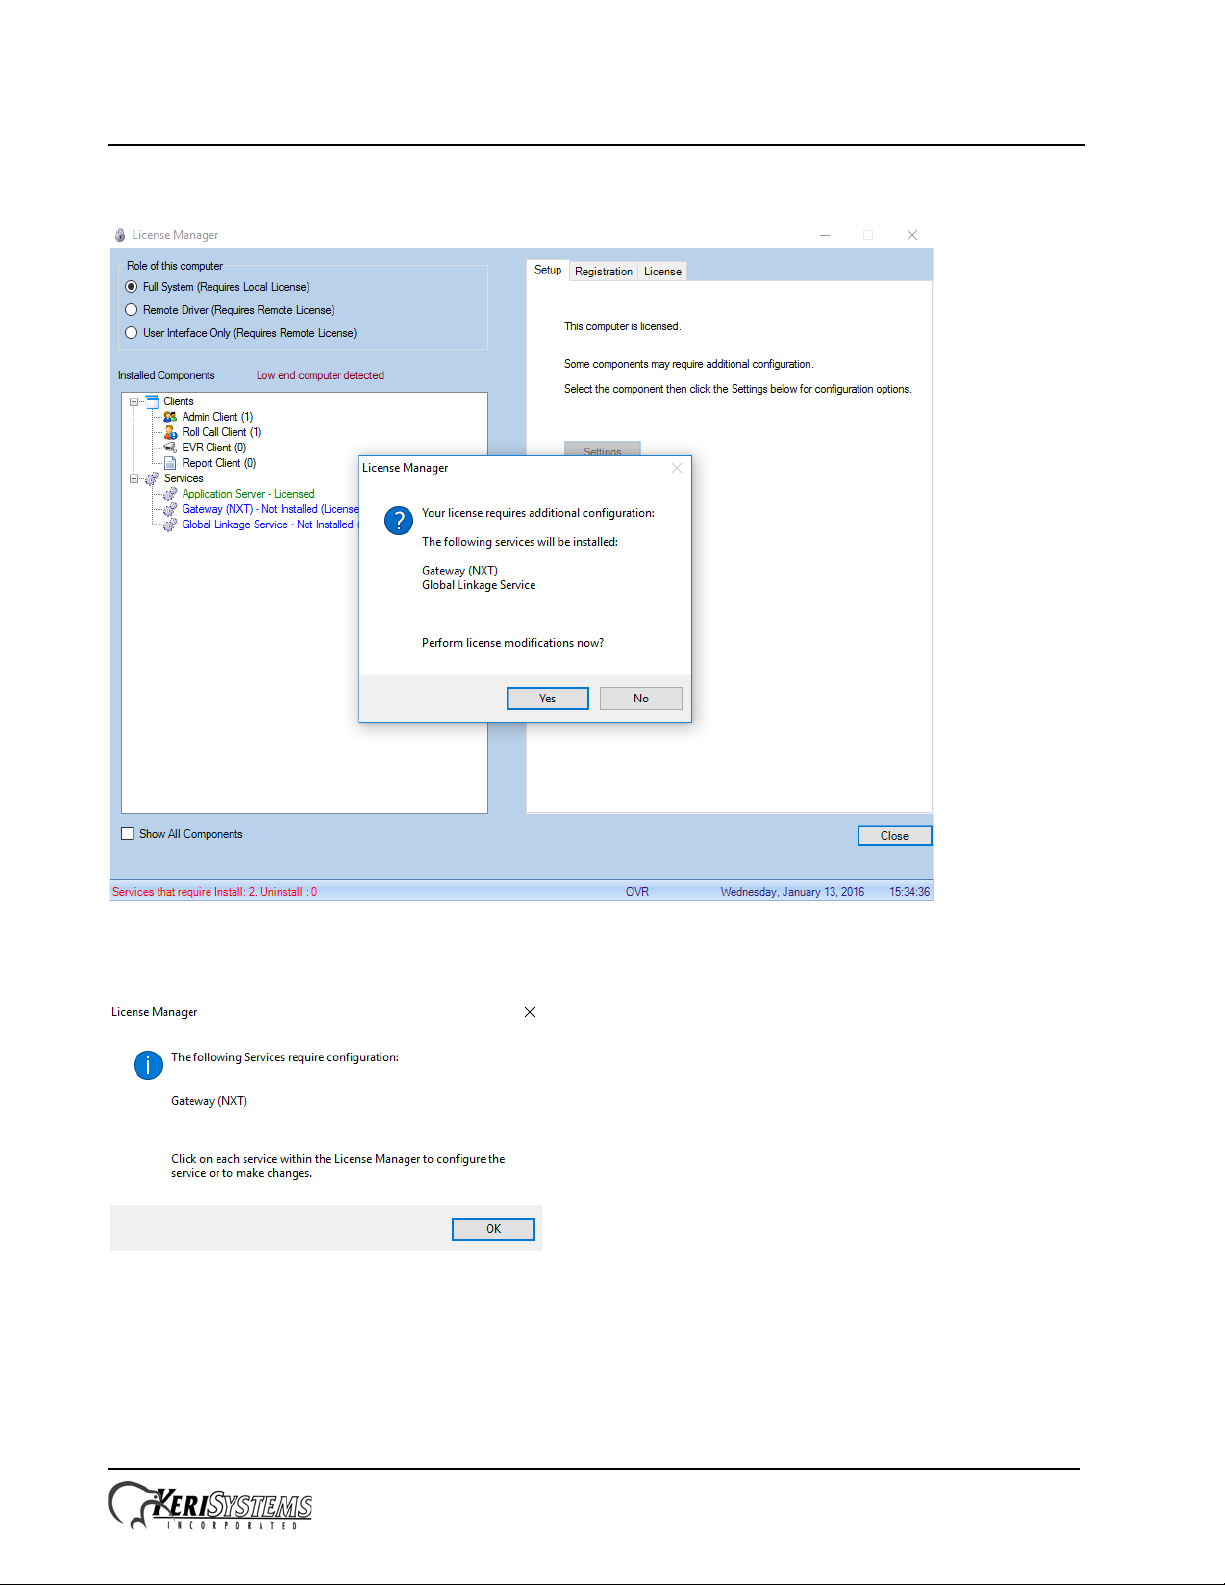
5. Click Yes to install the Gateway for your controllers.
6. Click OK to begin configuring the selected Gateway.
Page 5 of 9 P/N: 01676-001 Rev. G
Page 6

Keri i
2
Box Appliance User Guide
Reference Document
7. Click on the installed Gateway (highlighted in blue). Then click on the Setup tab.
8. Click Settings. Enter a descriptive name for the Gateway and click OK.
9. Click Yes to start the Gateway.
Page 6 of 9 P/N: 01676-001 Rev. G
Page 7
Keri i
2
Box Appliance User Guide
Reference Document
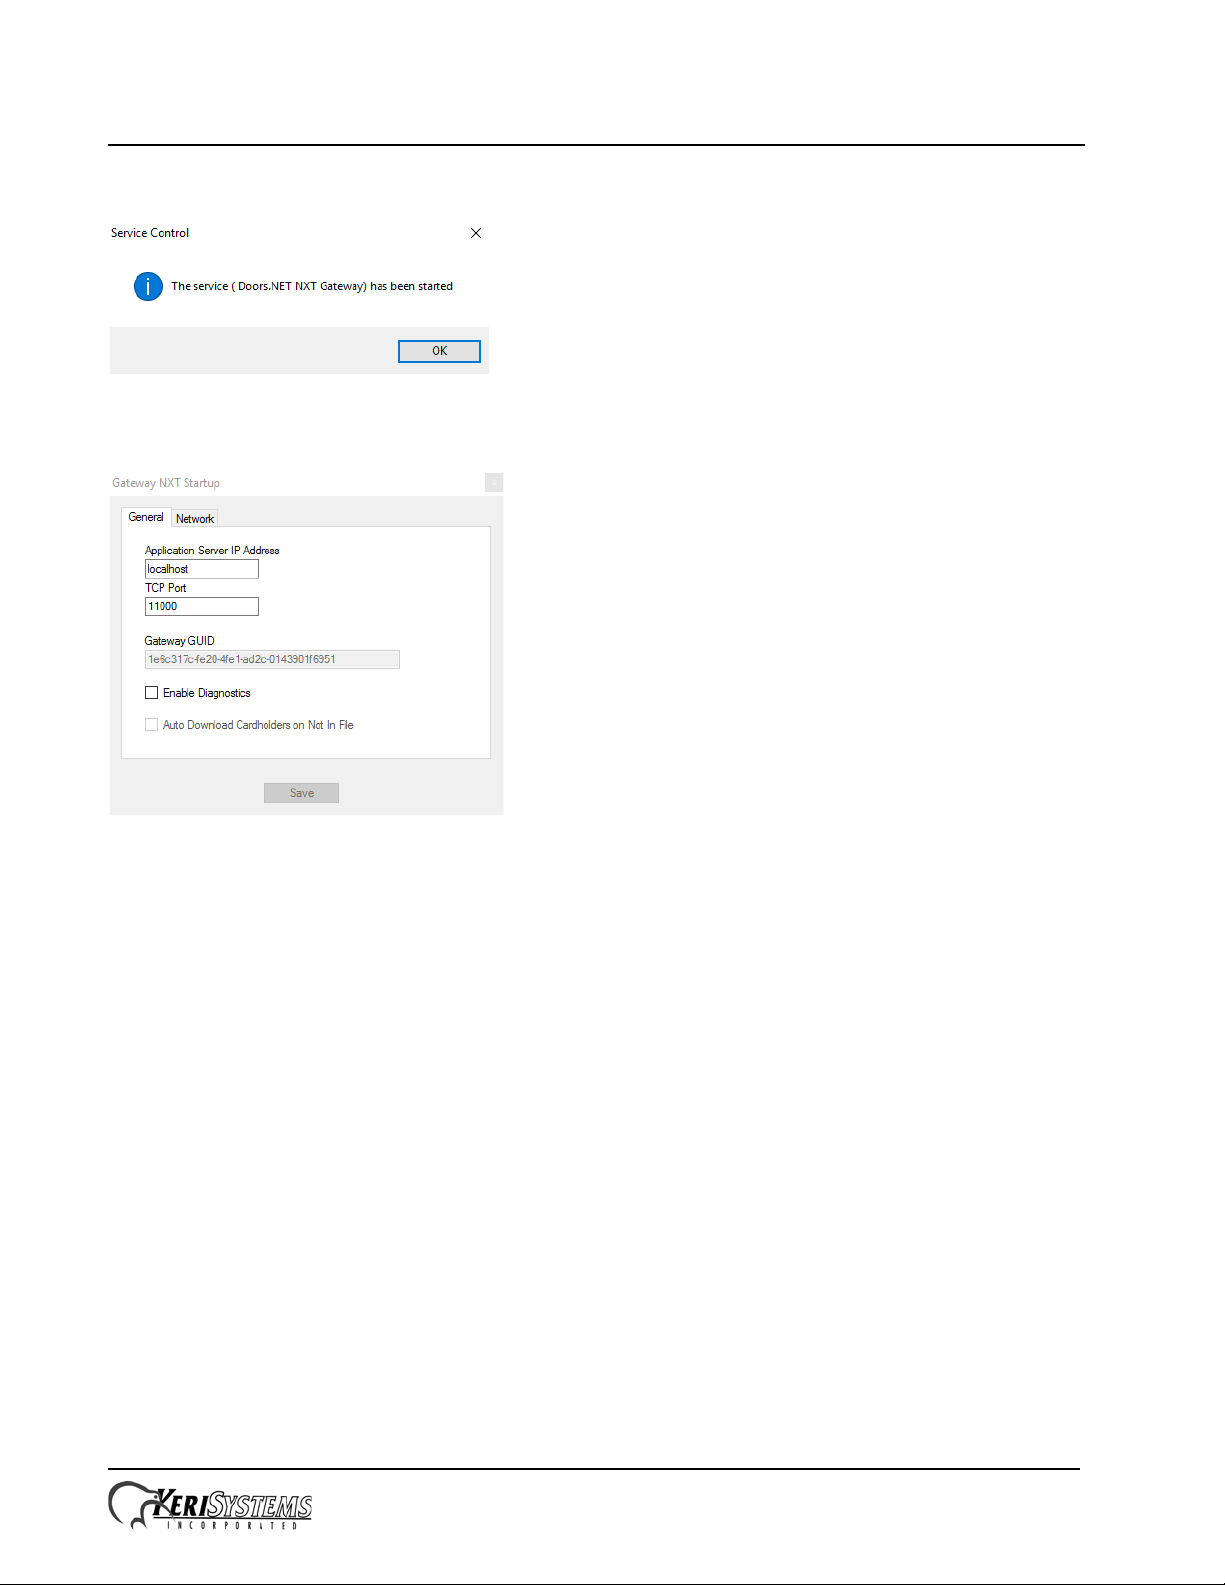
10. The Gateway service is now started.
11. Click OK to finish Gateway configuration.
12. Click the X box and close the window if you are using the default Gateway values. Otherwise
enter your changes and click Save.
Page 7 of 9 P/N: 01676-001 Rev. G
Page 8
Keri i
2
Box Appliance User Guide
Reference Document
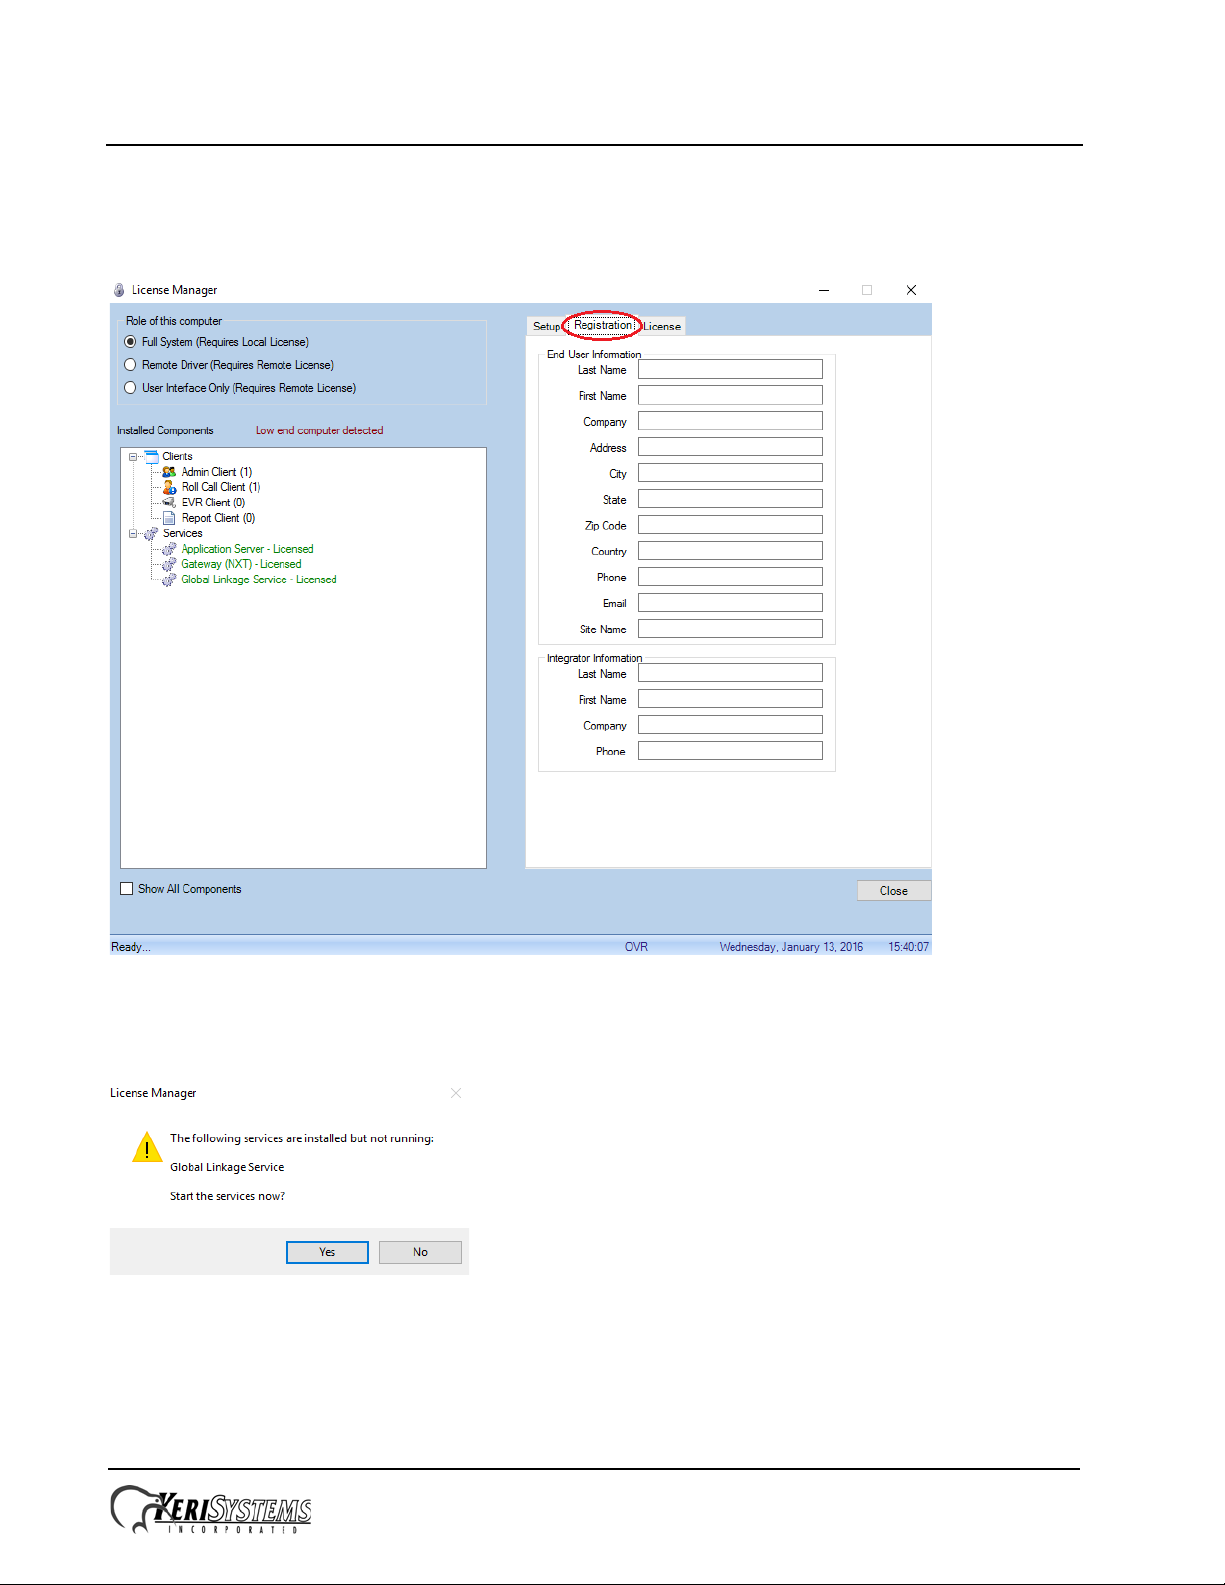
13. Keri strongly recommends you click the Registration tab and register your software installation.
This information will assist Keri in providing both Technical and Customer Support. Registration
requires an Internet connection to relay the registration information.
14. Click Close to exit the License Manager.
15. If the Global Linkage service has not yet been started, click Yes to start it now.
16. The License Manager now closes.
Page 8 of 9 P/N: 01676-001 Rev. G
Page 9

Keri i
2
Box Appliance User Guide
Reference Document
3.2 Controller Hardware Configuration
You can now start Doors.NET and begin your controller hardware configuration. Use the standard
controller configuration document provided with your controllers.
4.0 Remote Client Access
The Doors.NET Client can be installed on any computer to perform most Access Control functions.
The Remote Client can be installed using the installation program on the Doors.NET DVD or by
downloading and running the DoorsNET software installation program. Login credentials are
required to acces the Software Downloads area of the Keri website. Access to Doors.NET on the
Appliance is then done via the remote Admin Client. For remote access to the Appliance,
TeamViewer is Keri’s preferred remote access software. The Appliance has a support version of
TeamViewer installed.
NOTE: Firmware upgrades and softwar e installation cannot be done via a Doors.NET client running
on a remote computer. It must be done directly from the Doors.NET client on the Appliance.
5.0 Contact Keri Systems:
Keri USA Keri UK, Ireland, Europe
2305 Bering Drive
San Jose, CA 95131
Telephone: (800) 260-5265
(408) 435-8400
Fax: (408) 577-1792 Fax: + 44 (0) 1763 274 106
Web: www.kerisys.com Web: www.kerisystems.co.uk
E-mail: sales@kerisys.com
techsupport@kerisys.com
end of document
Unit 17
Park Farm Industrial Estate
Ermine Street
Buntingford
Herts SG9 9AZ UK
Telephone: + 44 (0) 1763 273 243
E-mail: sales@kerisystems.co.uk
tech-support@kerisystems.co.uk
Page 9 of 9 P/N: 01676-001 Rev. G
 Loading...