

Page 1

Doors.NET Quick Start
This document covers the basic installation and configuration of Doors.NET and assumes that
the computer being used for the Doors.NET installation has a connection to the Internet and
Doors.NET has not yet been installed on the computer. This document also assumes that all
software components are being installed on the same computer, except where noted.
Definitions
Application Server – Main Background server application for Doors.NET
NXT Gateway – Doors.NET service that allows communication between the Application Server
and NXT Controllers.
NXT Proxy – Doors.NET communication service used for autoconfig.
NXT Controller – A 2-door or 4-door Access Control panel.
IP Address – A numerical identification for an Ethernet enabled device usually represented in
“dot” notation, i.e. 192.168.100.1.
MAC Address – A globally unique hardware number factory assigned to a networking device
usually represented as 12 hexadecimal numbers grouped in pairs, i.e. 00-14-34-00-00-01.
Global Linkage Service – Application service that provides the ability for email and SMS Text
messaging alerts. Requires a connection to an email server.
Time Schedule – A combination of Time Intervals, Days of the Week and Holiday Lists.
Access Group – A combination of Time Schedules and Doors assigned to a cardholder to
provide or access.
Cardholder – A collection of user information and one or more credentials.
• Before Installation
o Record the MAC address for all NXT controllers that will be installed. The MAC
address is located on the white label of the NXT controller.
o Obtain an IP address for each NXT controller. Consult with an IT Professional to
obtain the IP addresses if none are available.
NOTE: The controller’s IP address(es) should be within the same subnet as the
computer running the NXT Gateway. If controller are on a different subnet,
then a NXT Gateway and License is required for each subnet. The basic
Doors.NET license includes access to one NXT Gateway.
• Install Doors.NET
NOTE: Doors.NET utilizes the latest Microsoft .NET framework and service patches.
Depending on the computer, Windows Update may need to be run multiple times before
installing Doors.NET. The installer will install the required .NET patches if needed.
Computers that are not up to date will require additional time for the install.
o Close all running applications.
Part no. 01565-001 1 Version 1.0
Page 2
o Select a Typical Installation to install the Doors.NET Application Server, NXT
Gateway, Administrative Client and the Global Linkage Service.
o Use the Custom installation Option if different components need to be installed.
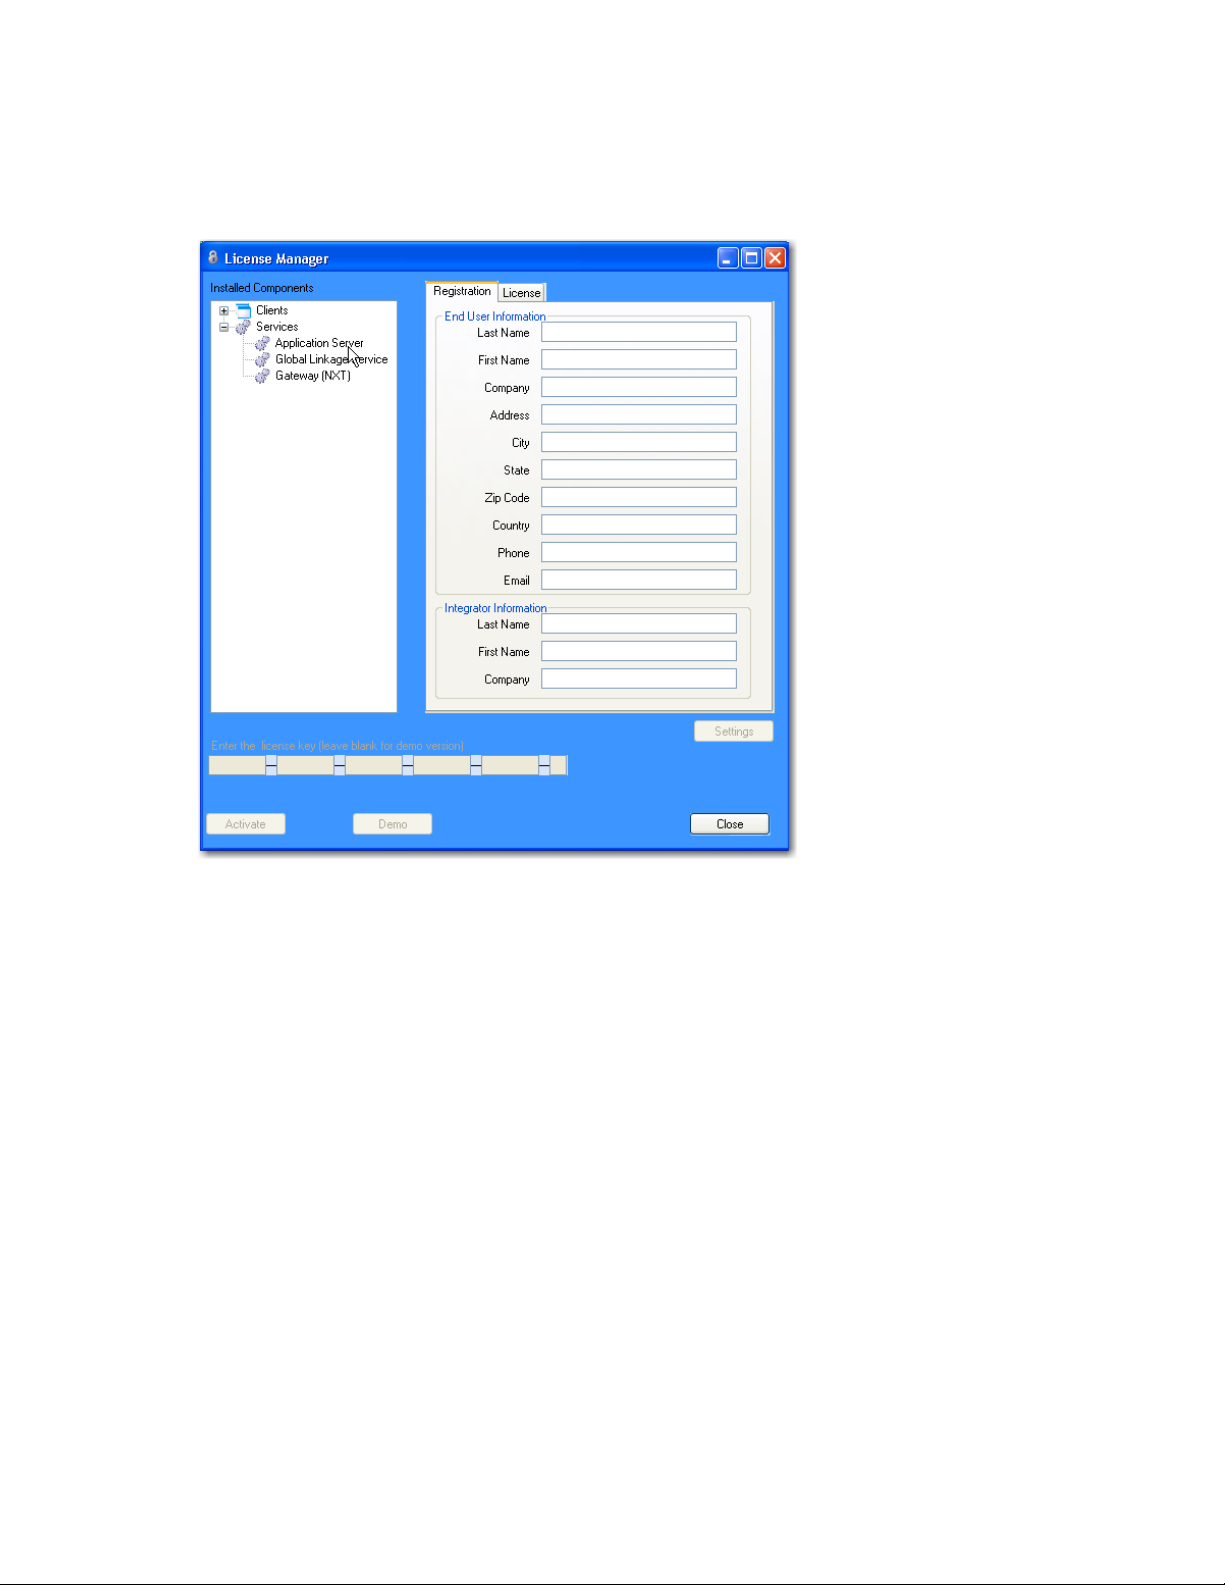
• After installation, run the Eclipse License Manger. (
o In the Installed Components section, select Application Server under Services
Start Programs Door. NET License Manager
)
o Enter the License Keys for the Application Server if one has been provided and click
on Activate.
o If a License Key was not provided, click on the Demo button to run Doors.NET in a
fully functional demo mode.
o If the computer is not connected to the Internet, the license file must be activated off
line. The license manager will display instructions to copy the license file and provide
an email address where the license file should be sent. Once the license file is
received via email, it will be digitally signed and emailed back with instructions on how
to install the file and restart the services. This process will also activate the software
in demo mode that will last for 30 days.
o The Application Server Service will restart after Activation is successful.
Part no. 01565-001 2 Version 1.0
Page 3
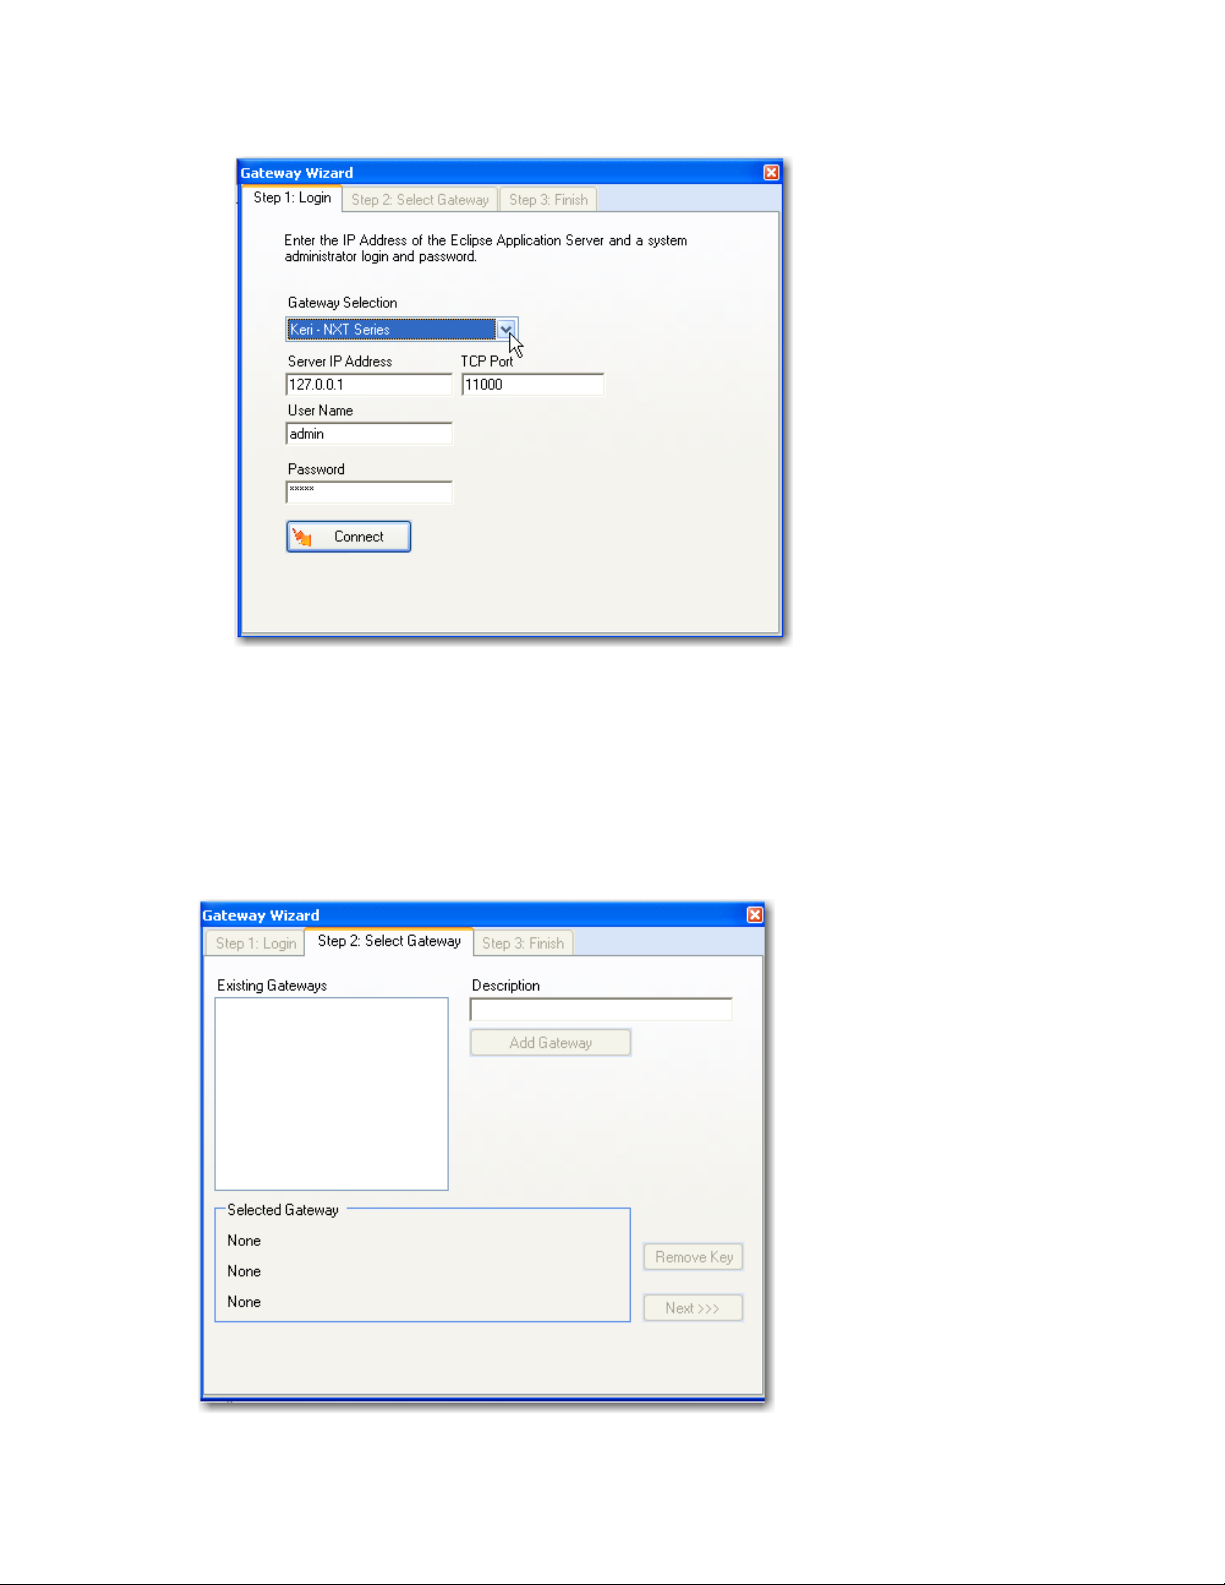
• Run the Gateway Wizard (
o Under Gateway Selection, select Keri- NXT Series
o Connect to the server,
• Select Keri – NXT Series as the Gateway Selection.
• Enter the IP Address of the Application Server (or localhost if the Server and
Gateway reside on the same computer)
• Enter the User Name and Password (the default username is “admin” and the
default password is “admin”.
o Enter a name for the gateway in the Description box and select Add Gateway.
Start Programs Door. NET Gateway Wizard
)
Part no. 01565-001 3 Version 1.0
Page 4
o Select the Gateway and then click on the Next button and then the Finish button. The
NXT Gateway service will be restarted.
• Launch the Administrative Client.
o The default username is: admin, the default password is: admin.
• Perform an Autoconfig
Autoconfig queries the local subnets for each NXT Gateway and returns a list of NXT Controllers
found on the network. Note: The DoorsNXTProxy.exe service must be allowed to communicate
through any firewall installed on the computer running the NXT Gateway service. The
DoorsNXTProxy Service is added to the list of exceptions in the Windows Firewall during
installation, however if another firewall is being used, it may prevent Autoconfig from finding the
controllers on the Local LAN. The following Port numbers are used for Doors.NET
communication and should be allowed to pass through a firewall – UDP 11434&11435, TCP
10020, 10030, 11000-11015 &11435.
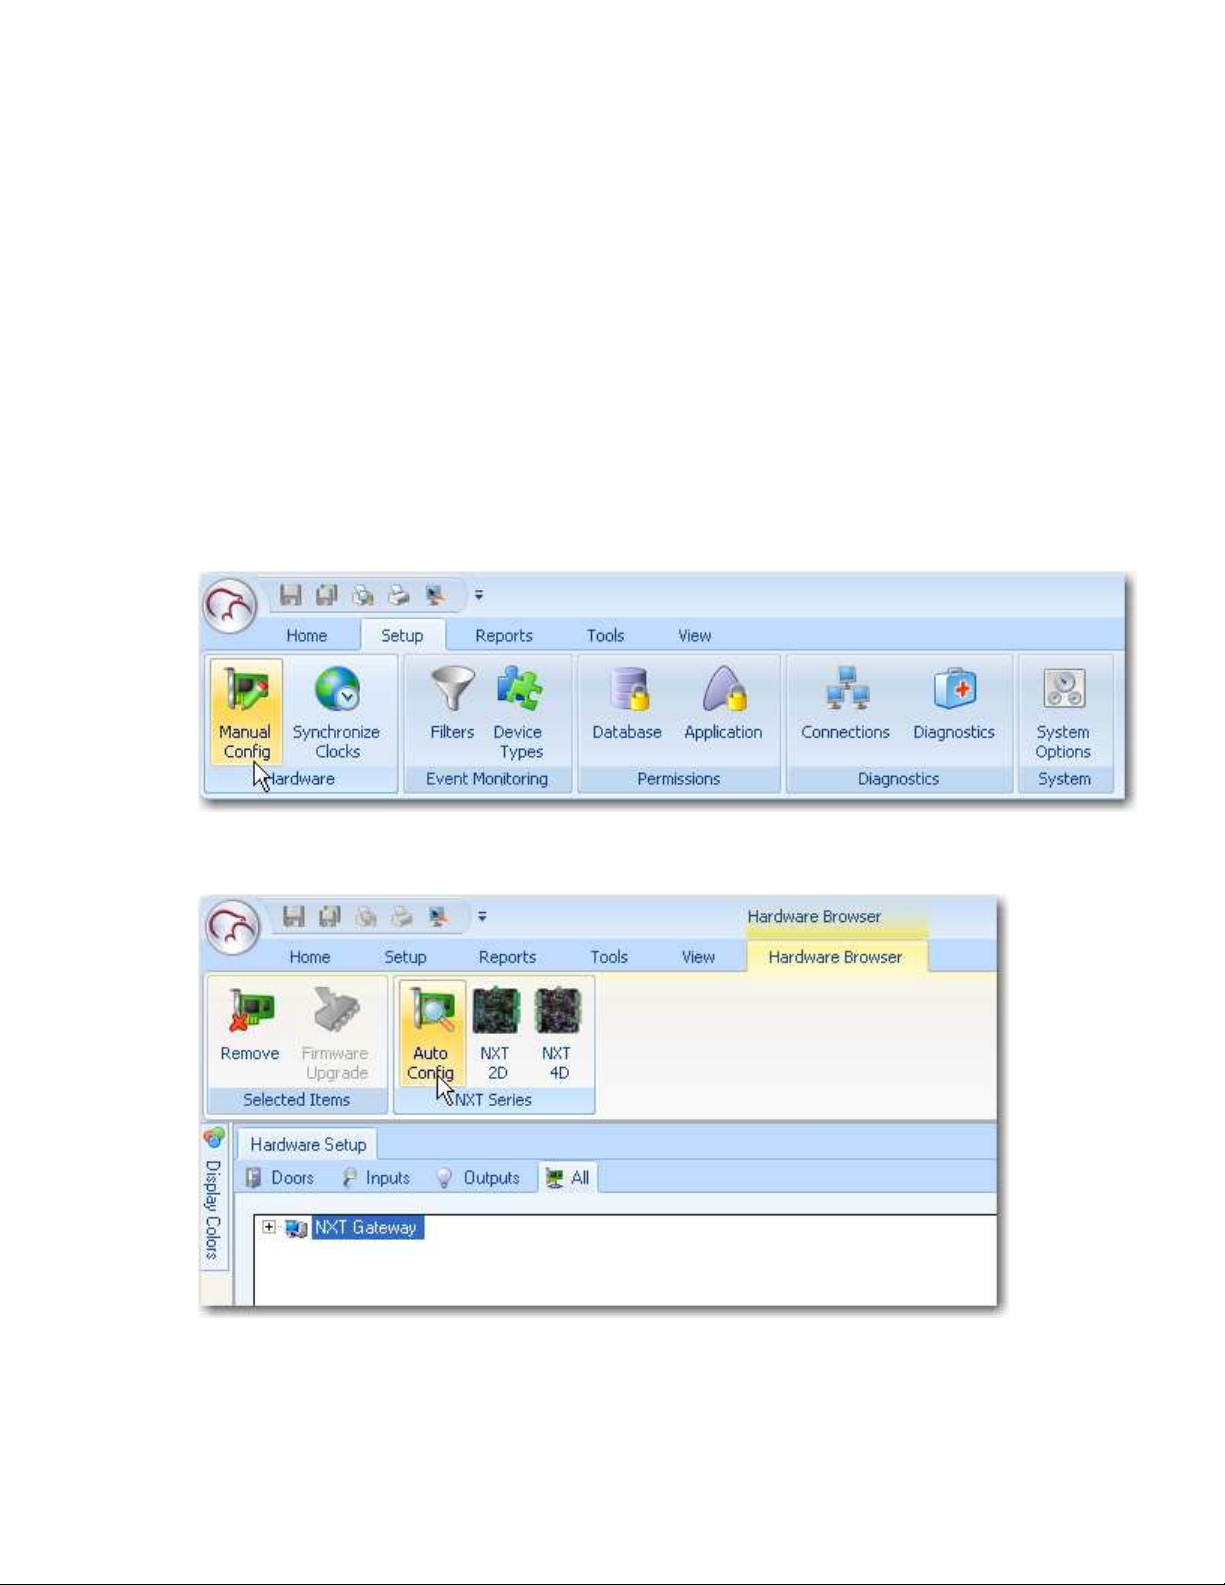
o Click on the Setup tab and then on the Manual Config button in the Hardware Toolbar.
o In the Hardware Setup tab, click on the All tab and then select the NXT Gateway. The
Auto Config icon will appear in the tool bar. Click on the Auto Config button.
Part no. 01565-001 4 Version 1.0
Page 5

o The Autoconfiguration Results tab will appear and all detected controllers will appear
in the Available Controllers section.
o By default, all controllers will be selected. An IP address must be assigned to each
controller. That can be done manually in the IP Address column or by entering a
range of IP Addresses in the area at the top of the section.
o Click Apply after entering the IP Address(es).
o The controller(s) will be assigned the given addresses and added to the NXT Gateway
o An “incorrect firmware” error message will appear in the Status Messages if the
controller firmware is below the required version. A firmware upgrade must be
completed before continuing.
Part no. 01565-001 5 Version 1.0
Page 6
• Upgrade Firmware (if appropriate)
NOTE: When upgrading firmware, the Administrative Client must run on the computer that is
running the NXT Gateway service.
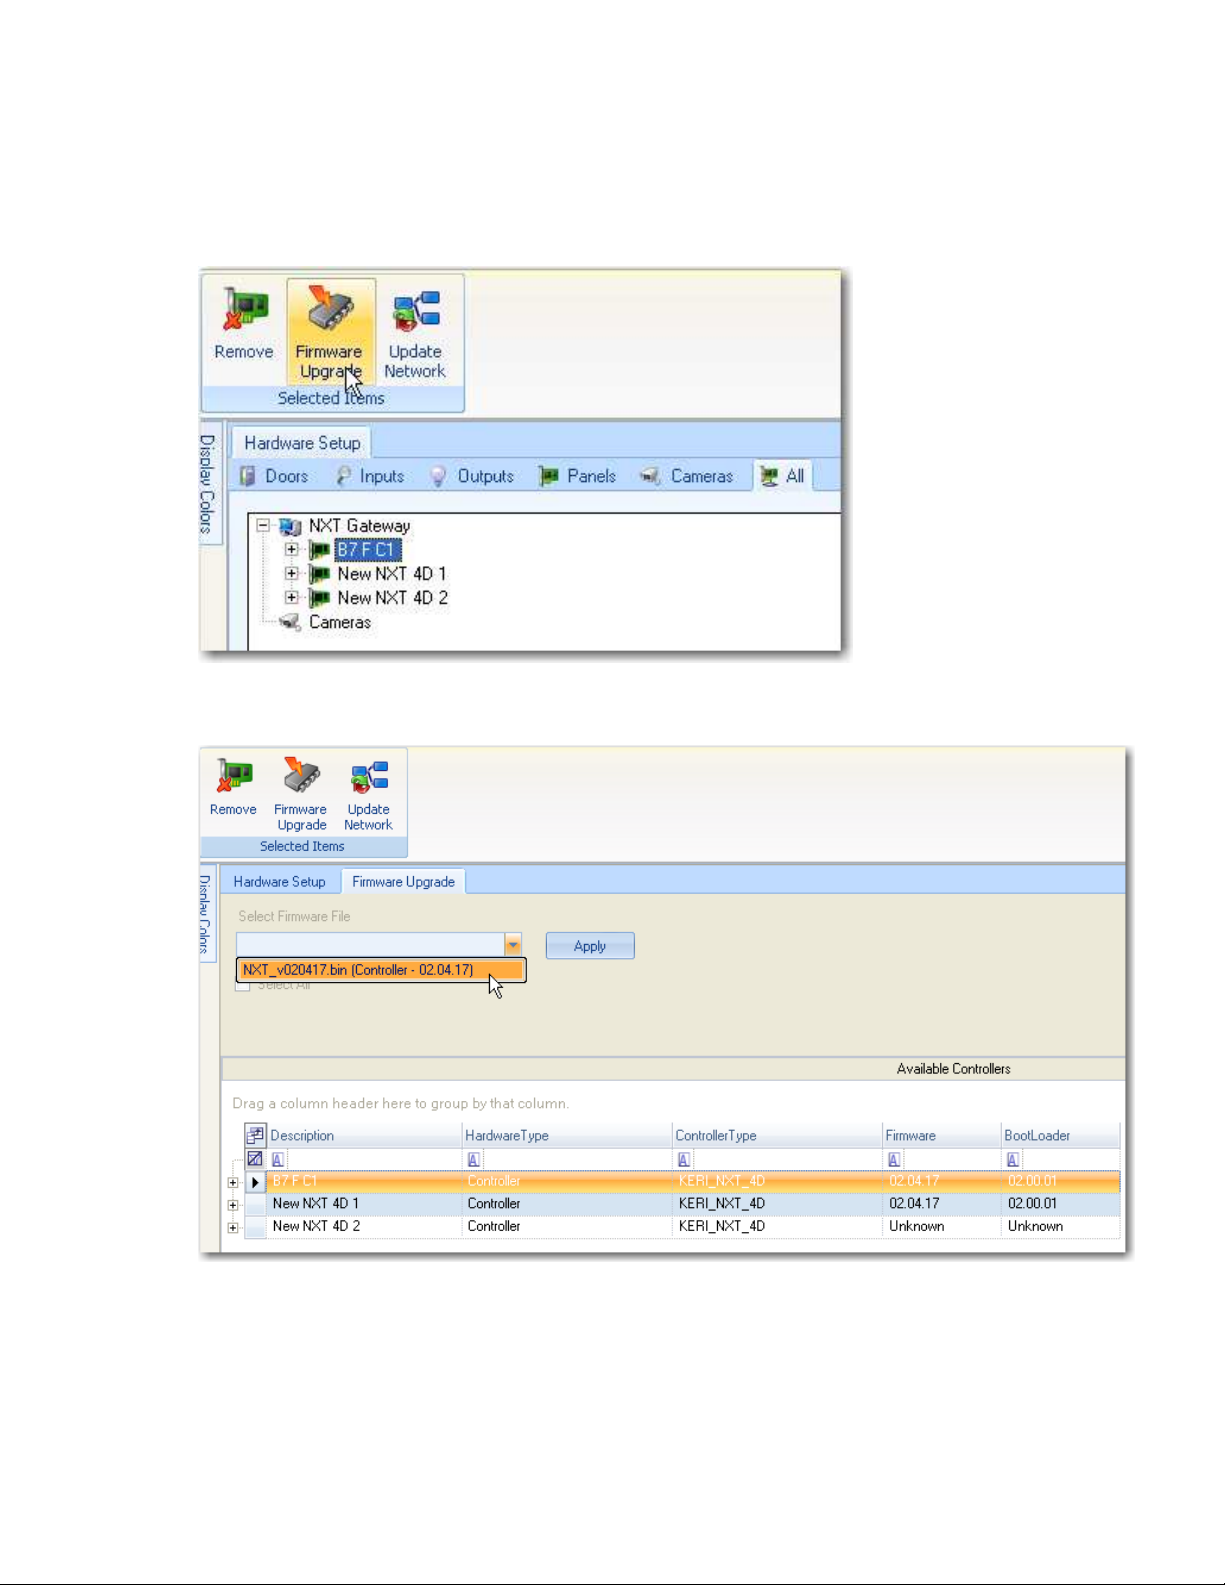
o In the Hardware Setup tab, select the All tab and then select a controller on the tree.
o Click on the Firmware Upgrade button, which will be present in the Selected Items
Toolbar ribbon.
o Select the controller or controllers that need to be updated in the Available Controllers
list and then select a firmware file and click apply.
o A progress bar will appear on the right side of the selected controller tracking the
progress of the firmware upgrade.
o The Firmware Upgrade is complete once the progress bar for all selected controllers
reaches 100%.
• Configure Controller Properties
Part no. 01565-001 6 Version 1.0
Page 7

o Configuring controller properties is done in Hardware Setup. From the Setup tab, click
on the Manual Config button in the Hardware ribbon.
o Hardware Setup has six tabs, Doors, Inputs, Outputs, Panels, Cameras and All where
properties can be set and configured.
o A properties frame is available for each selected item. Changes made to the
properties are automatically updated to the controller after the changes are saved.
• Create Time Schedules
Doors.NET has three default Time Schedules preinstalled – Always Active, Never Active and
Work Week (M-F, 08:00-17:00). Additional Time Schedules can be created
o A time schedule is a combination of time intervals, days of the week and holidays.
o Click on the Home tab
o Click on the Time Schedules
o Add a Time Schedule
• Click the Add button within the Schedules Ribbon
Part no. 01565-001 7 Version 1.0
Page 8

• Rename the Time Schedule by changing the Description in the Properties area
• Save Changes
o Add Intervals to Time Schedule
• With the newly created Time Schedule selected, click on the Add button in the
Intervals ribbon
• Configure the Interval as desired selecting a “Start” and “End Time”, “Days Of
Week” and if “Active On Holiday” for each of the eight holiday types. Note:
Holiday dates are added in the Holidays tab accessed from the User Manager
toolbar ribbon.
• Save Changes.
Part no. 01565-001 8 Version 1.0
Page 9

• Assign Access Groups
o Access groups are combinations of Readers and a Schedule.
o Click on the Home tab
o Click on Access Groups
o Select a Reader or Readers
o Select an Access Group
o Select a Schedule
o Click on the Assign Button
Part no. 01565-001 9 Version 1.0
Page 10

• Add Cardholders
o Click on Home
o Click on Cardholders
o Click on Add
o Enter the Cardholder Name and click the Save Icon at the top of the page
o Add a Credential to the Cardholder
• For Keri NXT credentials, uncheck Calculate Internal Number and enter the
Cardnumber in the Cardnumber field.
Part no. 01565-001 10 Version 1.0
Page 11
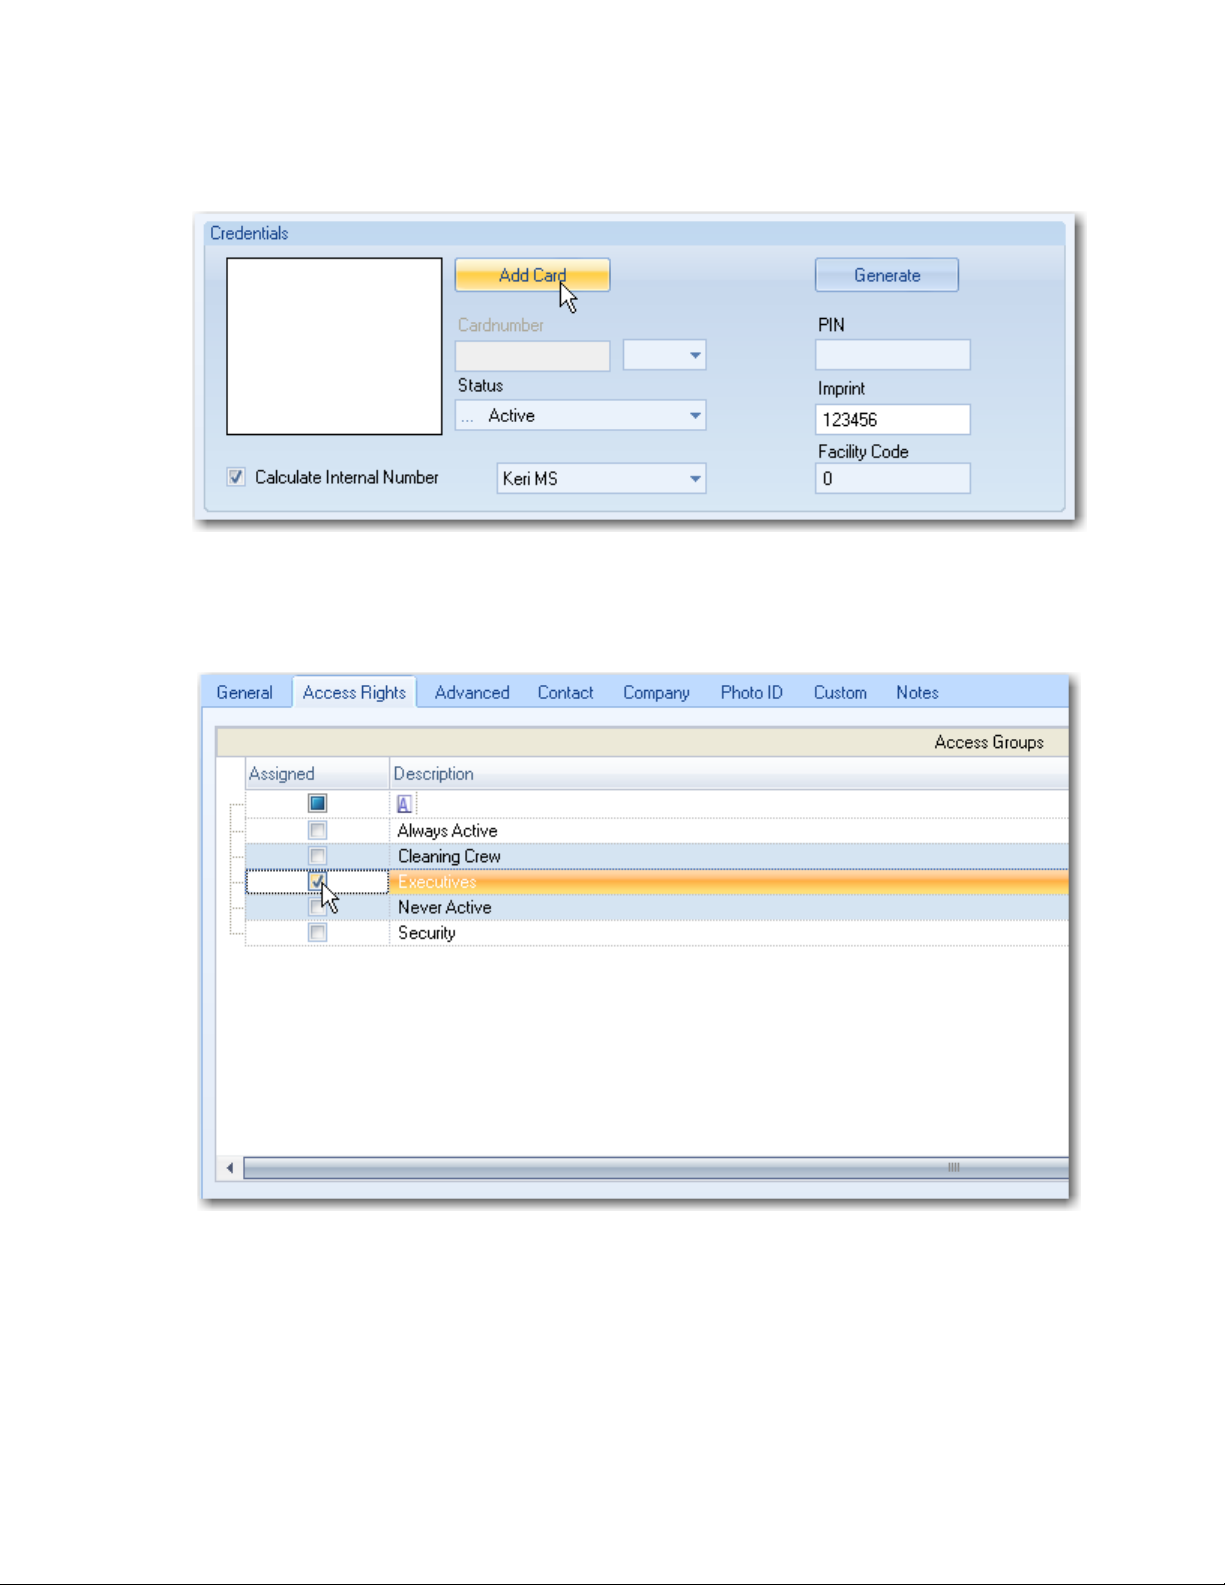
• For Keri MS Cards or 26-bit Wiegand with a non-zero facility codes, Make sure
that Calculate Internal Number is checked and select the appropriate Card type
in the dropdown field then enter the imprinted card number in the Imprint field
and the facility code in the Facility Code Field.
• Set the status as Active
• Click on Add Card
o Click on the Access Rights tab and select the desired Access Group(s).
o Card presentations should grant access now on any enrolled credential that was given
appropriate access.
Part no. 01565-001 11 Version 1.0
 Loading...