

Page 1
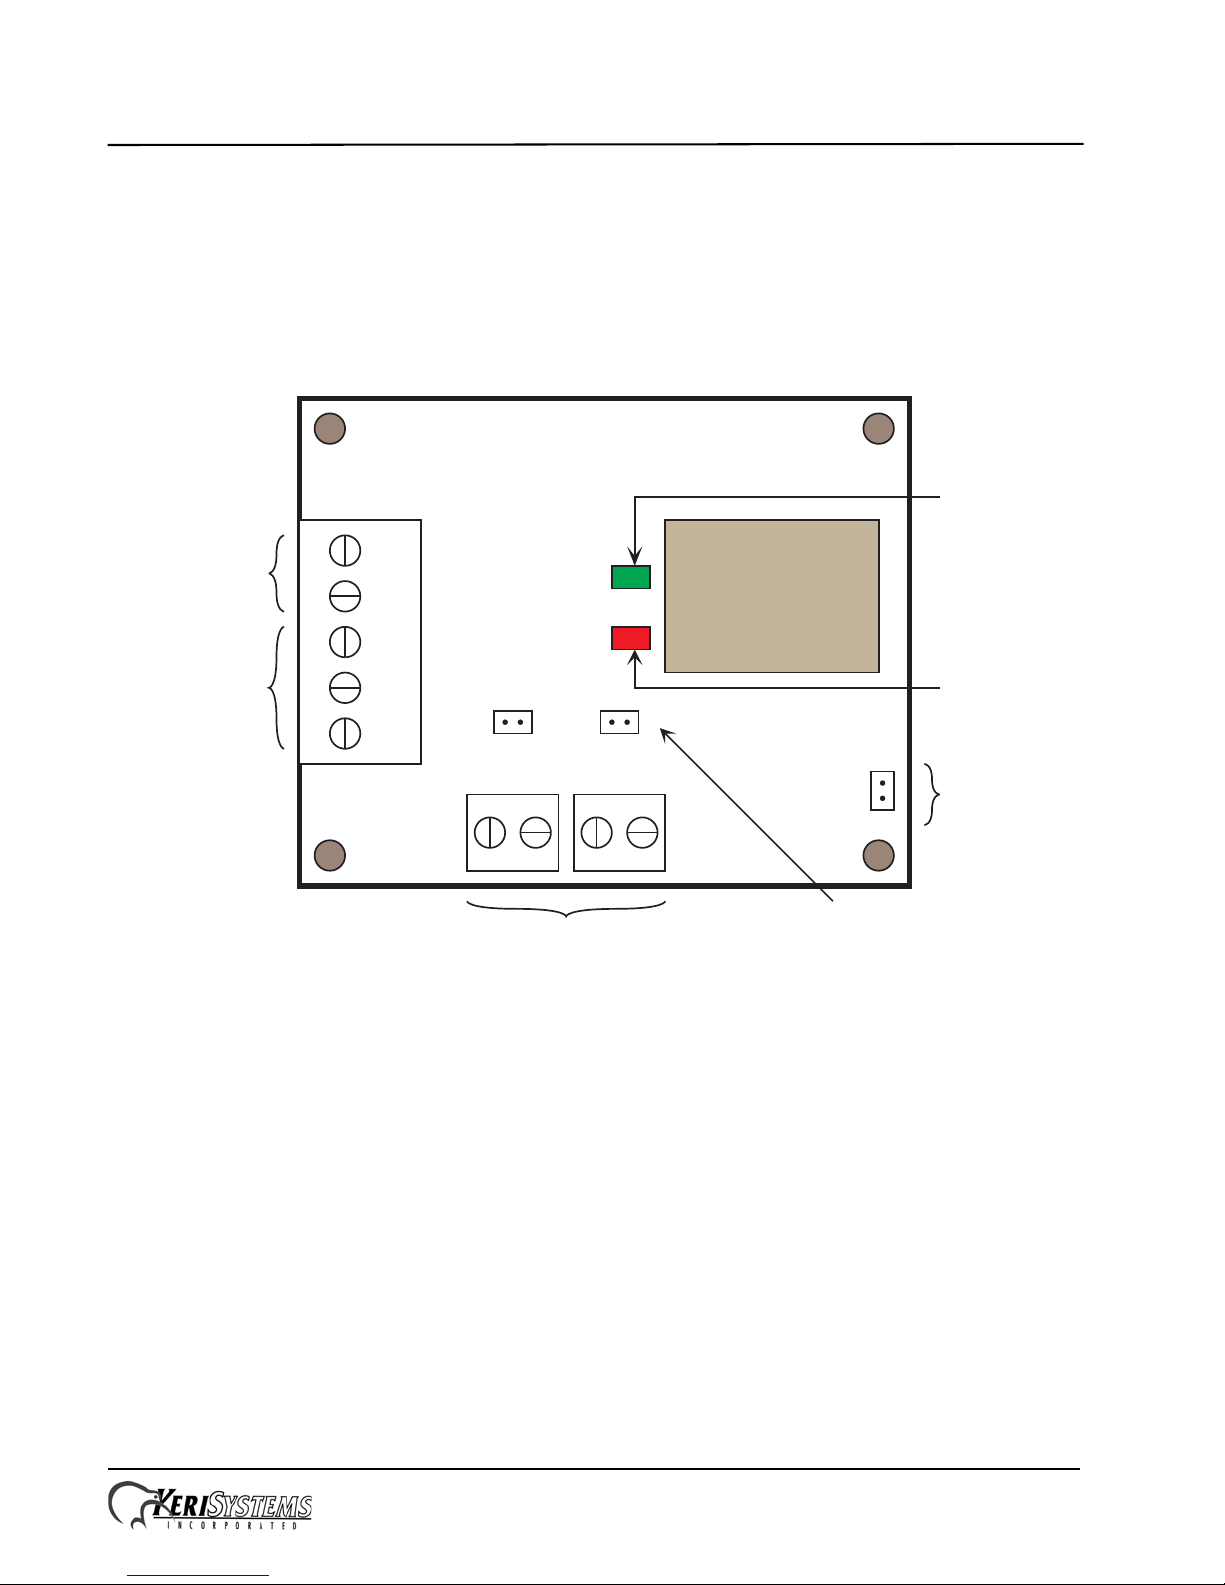
Alarm Relay Board
TAMPER SWITCH
12
BYPASS
12
12 VDC
GND
N/C
COM
N/O
J1
J2
J3
J4
J5
J6
RELAY
Red LED
Green LED
1
2
3
4
5
Relay Contacts
Unit Power
Tamper Switch
Connections
NXT Tamper
Connection
Tamper Bypass
Jumpers
Green LED
unit in
non-alarm
state
Red LED
unit in
alarm state
Installation Guide
The Alarm Relay Board (ARB) is used to provide external annunciation of controller enclosure and
peripheral enclosure tamper events; either an opened enclosure cover or for an enclosure that has
been removed from its mounting location (requiring additional installation steps by the Installer). The
ARB enables NXT -family and PXL-family controllers to meet UL-294/CSA Class 4812 requirements
for annunciation of controller tamper incidents. It is designed to accept standard types of tamper
switches. The Installer must supply the external annunciation device (alarm, signal light, etc.).
Figure 1: Alarm Relay Board Diagram
1.0 ARB PCB Installation
The NXT/PXL standard enclosure has a set of four PEMs in the upper-right corner of the enclosure to
which the ARB is mounted.
The NXT-4x4 and KPS power supply enclosure has four holes in the upper-right corner of the
enclosure. The ARB is mounted in this location using four stand-offs.
2.0 Tamper Switch Installation
Keri provides one enclosure tamper switch with each ARB. The switch is typically installed along the
edge of the enclosure opposite the enclosure hinge and clear of the enclosure lock (see Figure 2 on
page 2).
Page 1 of 3 P/N: 01513-001 Rev. A
Page 2
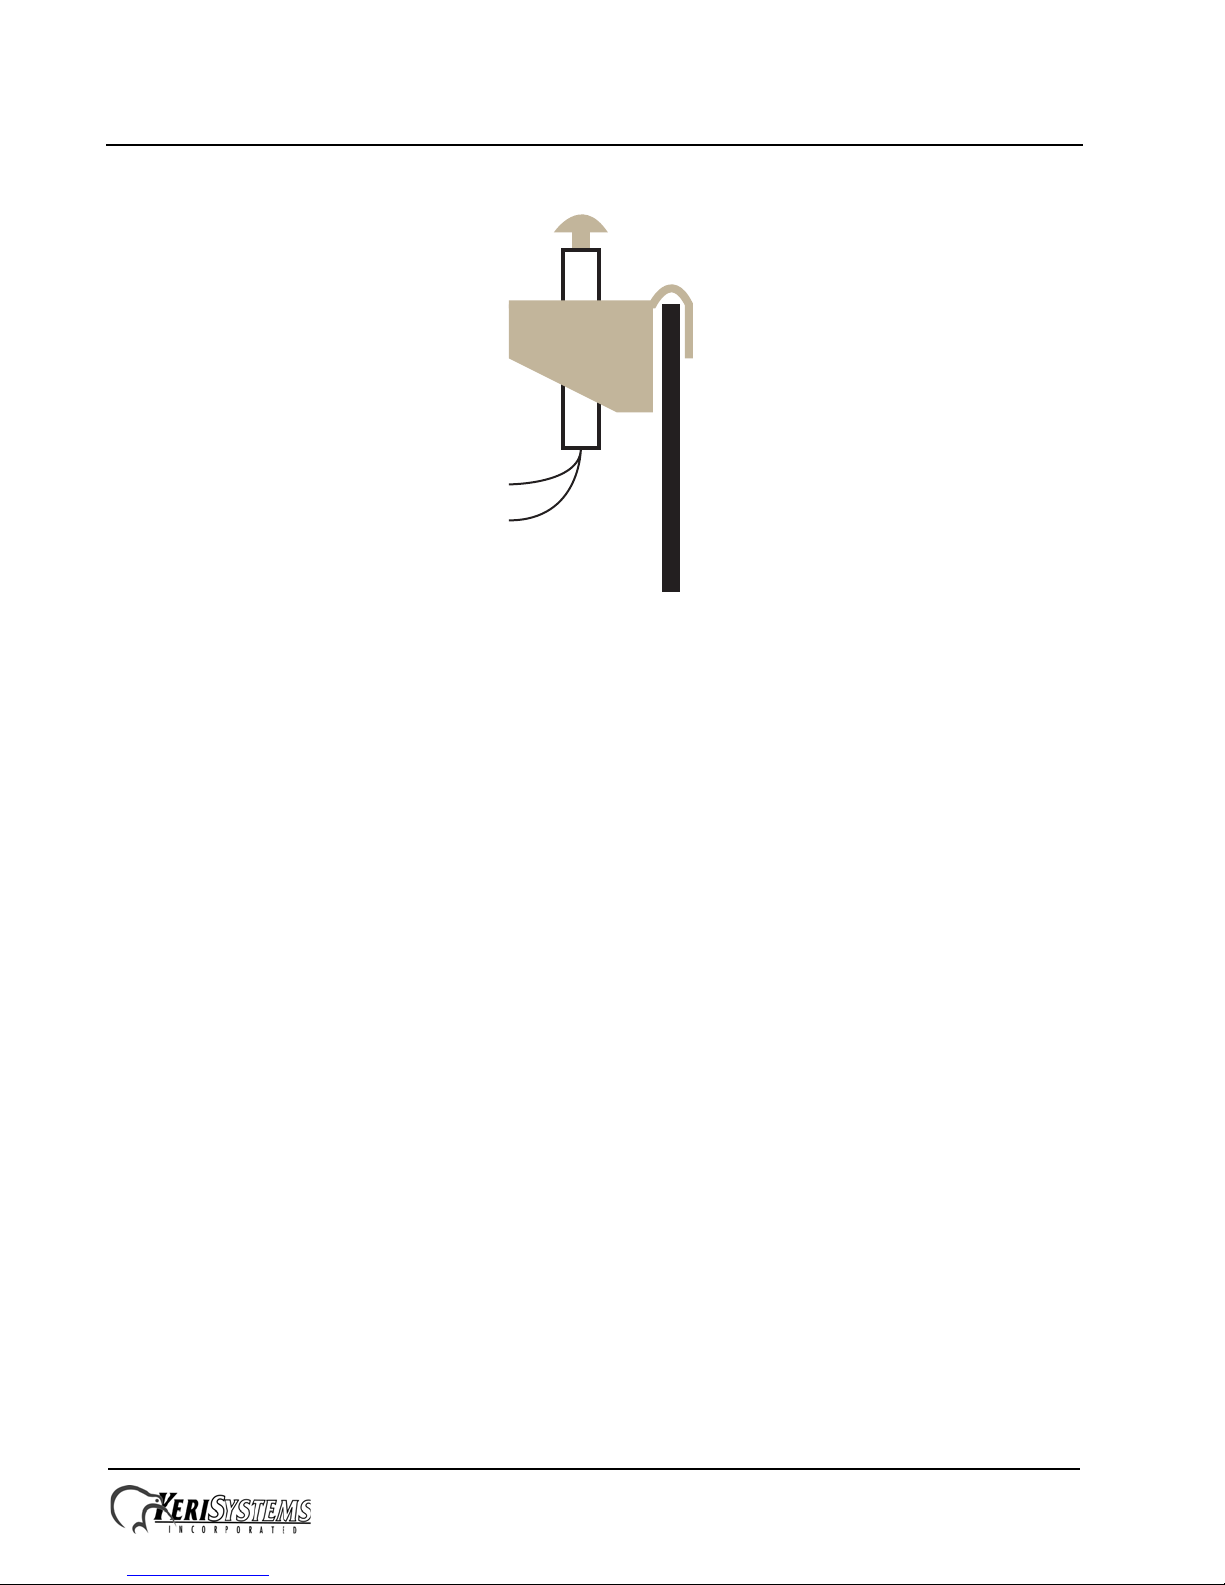
Alarm Relay Board
Enclosure
Wall
Tamper
Switch
Switch
Plunger
Switch
Connection
Wires
Installation Guide
Figure 2: Tamper Switch Installation
3.0 ARB Wiring Instructions
Refer to Figure 1 on page 1 for all instructions in this Section.
Tamper Switches
• provides the input signal for enclosure tamper events – enclosure cover forced open and/or
enclosure removed from its mounting location
• uses normally-open switches
• connection is made to either or both J3 and J5 (the switch connections are designed in parallel)
• requires two-conductor, AWG 22 wire
Bypass Jumpers
• used if a tamper switch is NOT used in one of the two switch positions (single-switch application)
• factory default is jumpers ON (bypasses both Tamper Switches)
• remove the corresponding jumper when a tamper switch is installed
- remove Bypass Jumper 1 (J4) for switch position 1 (J3)
- remove Bypass Jumper 2 (J6) for switch position 2 (J5)
Relay Contacts
• completes the circuit for alarm annunciation
• relay changes state as a tamper switch changes state
• Keri does NOT provide the alarm annunciation device
• requires two- or three-conductor, AWG 22 wire depending upon your alarm annunciation device
Unit Power
• requires 12 VDC, can be tapped off of the controller’s power
• requires two-conductor, AWG 22 wire
Page 2 of 3 P/N: 01513-001 Rev. A
Page 3

Alarm Relay Board
Installation Guide
NXT Tamper Connection
• allows the NXT controller to record an Enclosure Tamper event
• requires two-conductor, AWG 22 wire
4.0 Unit Operation
The ARB is operational as long as power is supplied to the unit. Tw o LEDs on the ARB provide unit
status.
• Red LED – indicates alarm condition
• Green LED – indicates non-alarm condition
Verify tamper switch operation by toggling the tamper switch(es) and observing the red and green
LEDs follow tamper switch state.
Contact Keri Systems:
Keri USA Keri UK, Ireland, Europe
2305 Bering Drive
San Jose, CA 95131
Telephone: (800) 260-5265
(408) 435-8400
Fax: (408) 435-7163 Fax: + 44 (0) 1763 274 106
Web: www.kerisys.com Web: www.kerisystems.co.uk
E-mail: sales@kerisys.com
techsupport@kerisys.com
End of document.
Unit 17
Park Farm Industrial Estate
Ermine Street
Buntingford
Herts SG9 9AZ UK
Telephone: +44 (0) 1763 273 243
E-mail: sales@kerisystems.co.uk
tech-support@kerisystems.co.uk
Page 3 of 3 P/N: 01513-001 Rev. A
 Loading...