

Page 1
INSTRUCTION MANUAL
KEPCO
An ISO 9001 Company.
NON-VOLATILE MEMORY
SAVE, CLEAR AND RESTORE PROCEDURES
I — INTRODUCTION
This manual documents the procedures required to save,
clear and restore data stored in EEPROM (Electrically
Erasable Programmable Read-Only Memory), the non-volatile memory (referred to as NV RAM) of Kepco’s EL Series
Electronic Loads.
The EL Series uses two (2) types of memory to store customer data within the processor chip. The processor chip
contains a volatile Random Access Memory (RAM) and a
Flash (EEPROM) Memory. The Flash memory is divided
into regions, Program Memory, and Variable and Settings
memory. Power cycling the EL will erase all data stored in
RAM memory during the power up self test. However, Flash
memory must be erased or reset to the original manufacturing state by using the procedure in section IV of this document.
The EL Series uses EEPROM to store the unit’s identity,
calibration constants, front panel settings and certain other
operating parameters. Though the command sequences
for storing this information are not published, clearing NV
RAM guards against the possibility that this data can be
changed in the field by a sophisticated or properly trained
individual.
The EL Calibration Save and Restore program must first be
downloaded and installed (see Section II). Each time the
NV RAM
(EEPROM)
SAVE, CLEAR
AND RESTORE
NV RAM is to be cleared, the calibration data must first be
saved (see Section III), then the NV RAM can be cleared
(see Section IV).
Once the Clear function is executed, the unit will no longer
function and will not accept any front panel inputs until the
Restore function is executed (see Section V). The Restore
function restores the previously saved calibration settings.
Upon request from Kepco, the original factory calibration
constants can be accessed and the unit can be restored to
the original factory calibration condition.
Kepco can provide a Certificate of Volatility which insures
that the factory calibration constants of the specific unit are
saved by Kepco for a minimum of 10 years and can be forwarded to the customer after contacting Kepco application
support. If the Certificate Of Volatility is not ordered, the
factory calibration constants are only available for two
years after the unit was manuafactured.
The NV RAM Clear feature will not function until it is
enabled. It is enabled at time of order by requesting a Certificate of Volatility. If not requested at time of order, contact
Kepco application support to order a Certiifcate of Volatility
and receive the instructions to enable the feature.
II — INSTALLING CALIBRATION DATA SAVE AND RESTORE PROGRAM
NOTE: The EL Calibration Save and Restore Program
only needs to be downloaded and installed once.
1. Download the EL Calibration Save and Restore program from www.kepcopower.com/utility/ to a Windowscompatible computer, running Windows XP or later.
2. Extract zipped files into a temporary directory.
KEPCO, INC. " 131-38 SANFORD AVENUE " FLUSHING, NY. 11355 U.S.A. " TEL (718) 461-7000 " FAX (718) 767-1102
http://www.kepcopower.com " email: hq@kepcopower.com
©2013, KEPCO, INC 1
Data subject to change without notice 243-1353
3. Click on setup to install the program by following the onscreen prompts. An icon will be saved on the desktop,
and the program will stored in
c:\Program files\kepco\el_restore.
4. When data is saved it will be stored where the program
was installed. When restoring data, the EL must be connected to the same computer used to save the data.
Page 2
III — SAVING CALIBRATION DATA
Once the Calibration Data Save and Restore Program has
been installed (see Section II), the calibration data can be
saved.
Performing this procedure generates a copy of the current
values of the non-volatilie memory. This copy, if used to
restore the unit, does not meet the requirements of the
Certificate Of Volatility of the US government. By providing the model and serial number of the unit, the factory
non-volatile ram contents file can be obtained from Kepco
Application Engineering support for the first two years
after manuafacture. If a Certificate Of Volatility is ordered
for the unit, the file will be available for 10 years mininum.
of the Kepco EL load with the message:
saving caldata, please wait ...
If there is a connection problem, an Error window (Figure 3) will appear, which will display: Kepco not
found. Click OK to continue.
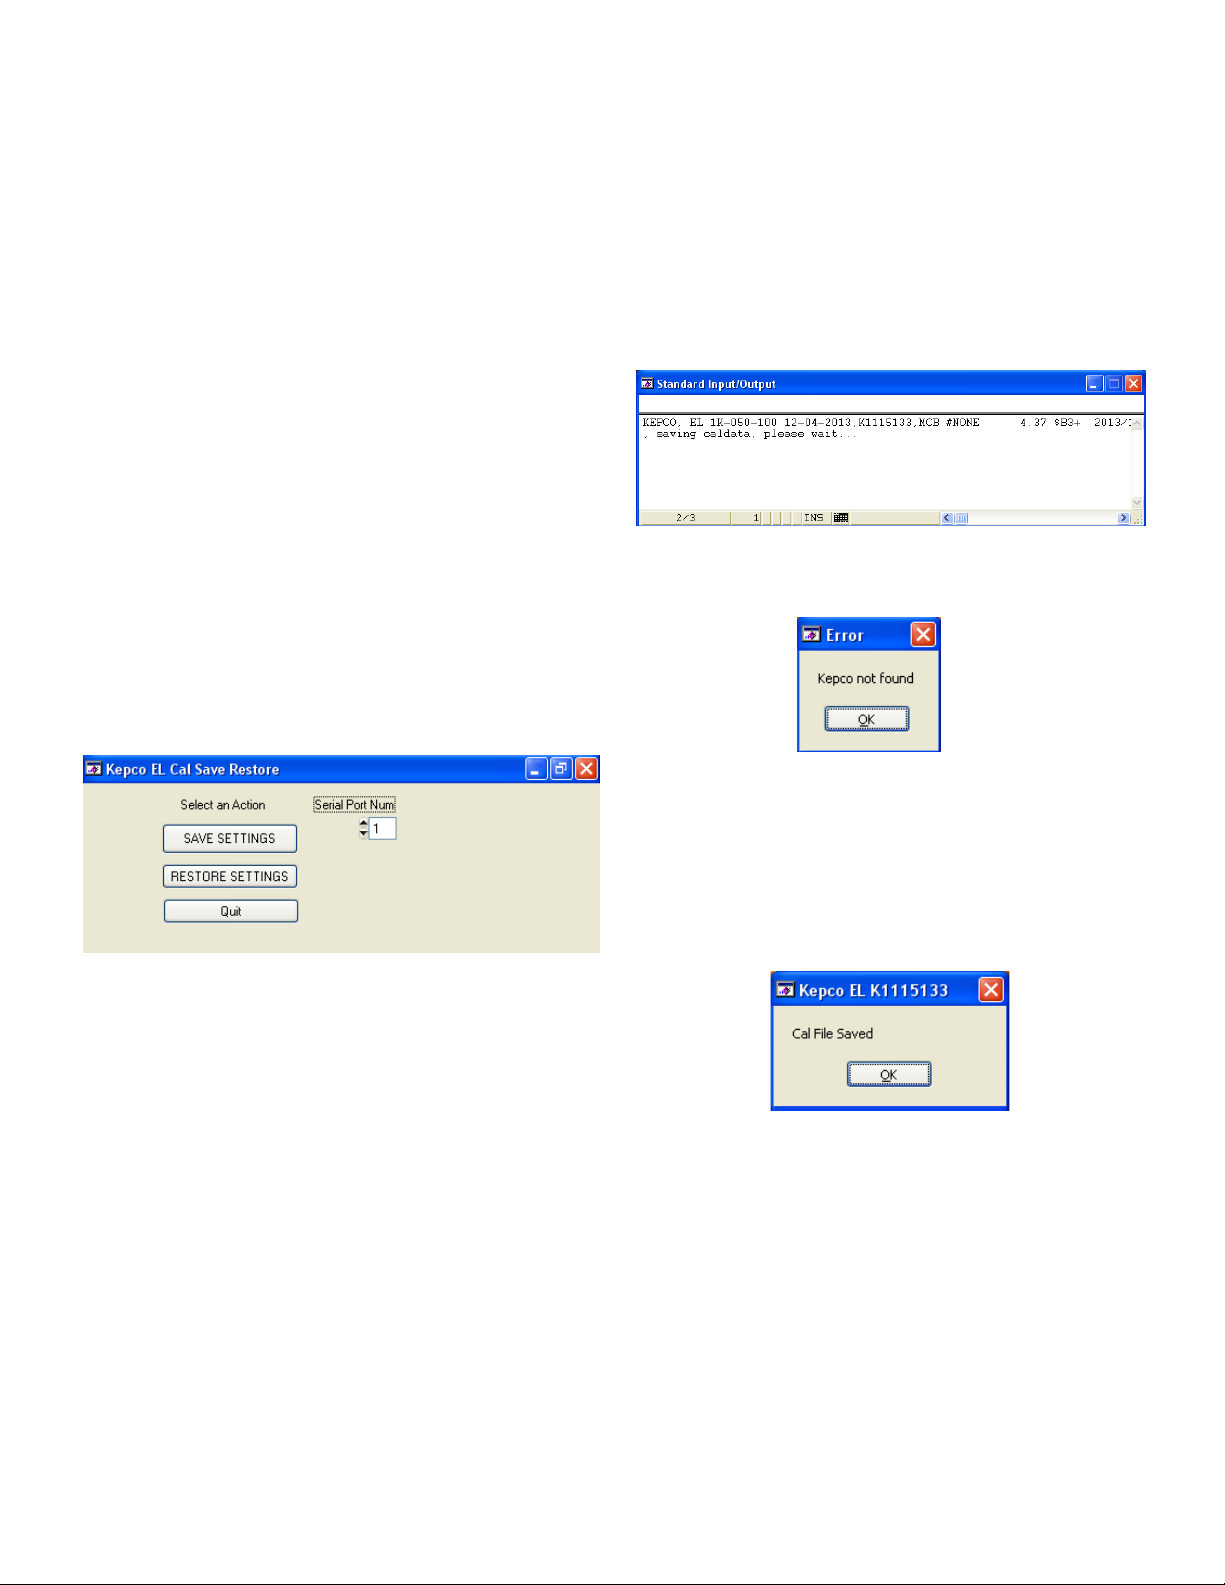
1. Launch the Program from the Windows Start menu, by
selecting All programs - Kepco - calsave.
2. When the Kepco EL Cal Save Restore window (Figure 1) appears, select the serial port to which the EL
load is connected.
FIGURE 1. KEPCO EL CAL SAVE RESTORE WINDOW
3. Select SAVE SETTINGS to save the EL calibration
data.
4. If the connection is made, the Standard Input/Output
window opens (Figure 2), showing the Identifier string
FIGURE 2. STANDARD INPUT/OUTPUT WINDOW,
SAVING CALDATA
FIGURE 3. ERROR WINDOW
5. When the data has been saved, the Cal File Saved
window opens (see Figure 4), entitled Kepco EL
xxxxxxxx where xxxxxxxx is the serial number of the
EL Load, and the message Cal File Saved is displayed. Click OK to end the program.
FIGURE 4. CAL FILE SAVED WINDOW
KEPCO, INC. " 131-38 SANFORD AVENUE " FLUSHING, NY. 11355 U.S.A. " TEL (718) 461-7000 " FAX (718) 767-1102
http://www.kepcopower.com " email: hq@kepcopower.com
2 243-1353 010914
Page 3

IV — CLEARING NV RAM
CAUTION:
Clearing NV RAM will render the unit inoperative
until the restore procedure is executed. Calibration
data must be saved prior to clearing NV RAM!
CAUTION:
Step 7 offers a final opportunity
to abort the NV RAM clear.
To execute NV RAM clear proceed to step 8.
The Clear function is executed from the EL front panel.
Safeguards are in place to avoid accidental or inadvertent
clearing of NV RAM. Executing the Clear function initiates
a series of erasures to NV RAM, including erasing unused
program space, followed by rewriting the program space
with multiple data patterns,
If execution of the Clear function is interrupted by a power
cycle, the clear operation is completed without notifying the
user.
1. Power unit off.
2. While depressing and holding the CONTROL knob,
power up the unit.
3. Once unit is powered up:
VOLTS display shows (NV).
AMPS display shows (CLER).
4. Release the CONTROL knob.
5. Press and hold LOAD pushbutton for approximately one
second, then release it.
VOLTS display shows (ARE).
AMPS display shows (YOU).
KW display shows (SUR).
7. To exit without clearing, rotate CONTROL knob. The
unit reverts to the normal power-up sequence without
clearing NV RAM.
CAUTION:
Executing step 8 will clear NV RAM
and render the unit inoperative until
the Restore procedure is executed.
8. To clear NV RAM, press LOAD pushbutton, hold for
approximately one second, then release LOAD pushbutton.:
VOLTS display shows (CLRG).
AMPS display shows (NVRM).
Unit performs NV RAM clear, including writing multiple
patterns to prevent recovery of data, then restarts automatically.
During power on tests, the erased state of NV memory
causes a rewrite of original firmware defaults, including
the backup copy.
The Restore function (see Section V) must be executed
before the unit can be used.
6. Proceed to step 7 to cancel the clear of NV RAM.
Proceed to step 8 to continue.
KEPCO, INC. " 131-38 SANFORD AVENUE " FLUSHING, NY. 11355 U.S.A. " TEL (718) 461-7000 " FAX (718) 767-1102
010914 243-1353 3
http://www.kepcopower.com " email: hq@kepcopower.com
Page 4

V — RESTORING NV RAM CALIBRATION DATA
The following procedure restores calibration data that has
been previously saved, but can also be used to restore
factory calibration. To restore factory calibration, a calibration data file specific to that particular serial no. must first
be obtained from Kepco, and saved at c:\Program
files\kepco\el_restore. Factory calibration data is available
for two (2) years from date of purchase (10 years if a Certificate of Volatility has been ordered).
1. To restore NV RAM calibration data, launch the Program from the Windows Start menu, by selecting All
programs - Kepco - calsave.
When the Kepco EL Cal Save Restore window (Figure 5)
appears, select the serial port to which the EL
load is connected.
NOTE: The EL must be connected to the same computer
used to save the data.
3. The Standard Input/Output window opens (see Fig-
ure 7) showing that the restore process is started, listing the new settings.
4. When done, the Cal File Restored window opens (see
Figure 8), entitled Kepco EL xxxxxxxx where xxxxxxxx
is the serial number of the EL Load, and the message
Cal File Restored is displayed. Click OK to end
the program.
FIGURE 5. KEPCO EL CAL SAVE RESTORE WINDOW
2. Click the RESTORE SETTINGS button (see Figure 5).
The Restore Cal Data window opens (Figure 6. Enter
the serial number of the unit to be restored and click
OK.
FIGURE 6. RESTORE CAL DATA WINDOW
FIGURE 7. STANDARD INPUT/OUTPUT WINDOW,
RESTORING CALDATA
FIGURE 8. CAL FILE RESTORED WINDOW
KEPCO, INC. " 131-38 SANFORD AVENUE " FLUSHING, NY. 11355 U.S.A. " TEL (718) 461-7000 " FAX (718) 767-1102
http://www.kepcopower.com " email: hq@kepcopower.com
4 243-1353 010914
 Loading...