

Kenwood Sirius KTC-SR901 Quick Start Manuals

KTC-SR901 Sirius®Satellite Radio Tuner
Quick-Start Guides for use
with Kenwood head units
and in-dash televisions
©2002 Kenwood USA Corp. All Rights Reserved

KTC-SR901 Sirius® Satellite Radio Tuner
Quick-Start Guide for: KDC-X959/
KDC-X659/KDC-X559/KDC-MP819/KDC-719
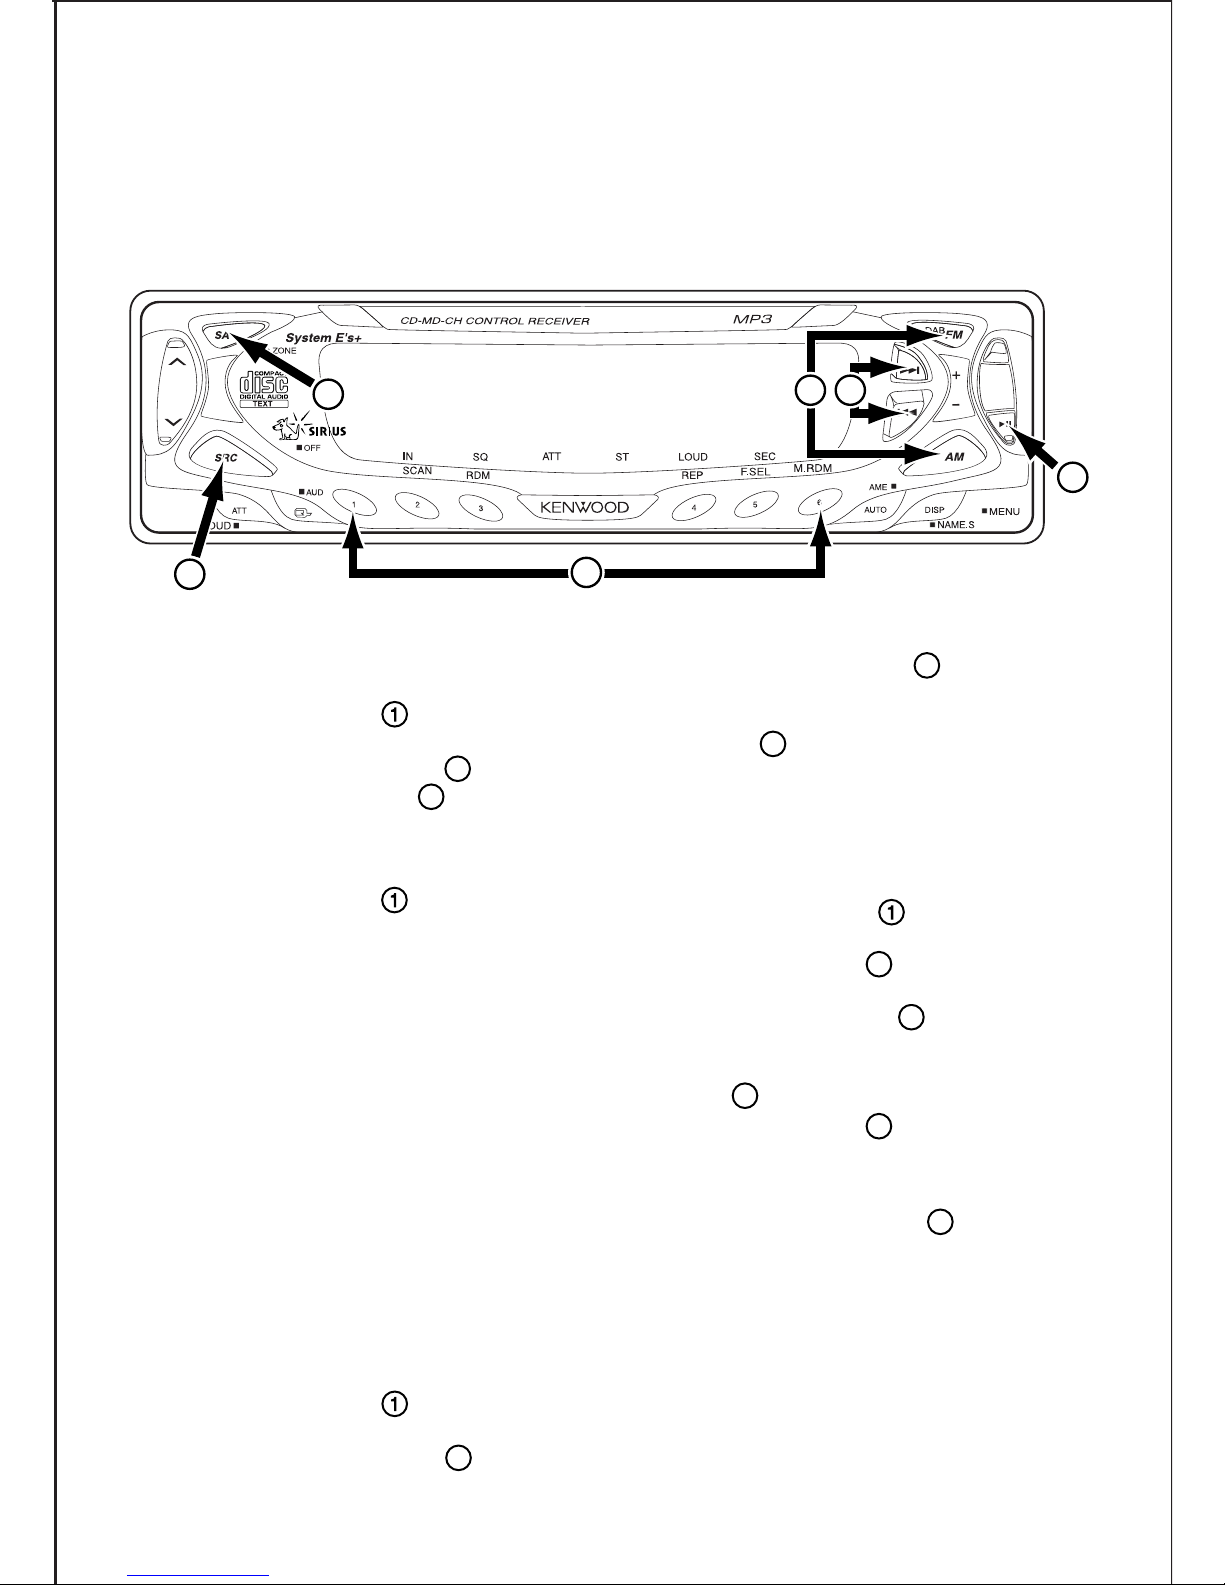
Step 1: Get your unit’s individual Electronic
Serial Number (ESN):
a) Press the SRC button ( ) repeatedly until
“SIR” (Sirius) appears on the display
b) Press the Play/Pause button ( )
c) Press the AM/FM buttons ( ) to scroll through
the options until “ESN XXXXXXXX” appears on
the display
d) Write the number down
e) Press the SRC button ( ) to exit
Step 2: Subscribe to the Sirius Satellite
Radio service
a) Make sure your vehicle has the radio "ON" and
the antenna has a clear view of the sky with no
obstructions (buildings, garage, etc.)
b) Have your Vehicle Identification Number (VIN)
from the vehicle that the radio is installed in.
c) Have your unit’s ESN and your credit card num-
ber handy
d) Contact SIRIUS on the web at siriusradio.com or
call toll-free: 1-888-539-SIRIUS (7474)
e) The operator will instruct you further
• Your tuner should be able to receive Sirius
Satellite Radio signals almost immediately after
you subscribe
Step 3: Searching for program categories
and channels:
a) Press the SRC button ( ) until “SIR” appears
on the display
b) Press the Play/Pause button ( )
c) Press the AM/FM buttons ( )to search
through the available program categories
d) Press the Scan Forward and Scan Backward
buttons ( ) to change channels within the
selected category
• If there are no channels available in a category,
the tuner will automatically switch to the next
category
Step 4: Display settings setup:
a) Press the SRC button ( )until “SIR” appears
on the display
b) Press the SA button ( ) to get into the display
setup mode.
c) Use the AM/FM buttons ( ) to control the dis-
play’s top line.
d) Use the Scan Forward and Scan Backward but-
tons ( ) to control the display’s bottom line.
e) Press the SA button ( )again to exit the dis-
play mode
Step 5: Setting channel presets:
a) Press and hold buttons 1-6 ( ) after tuning to
desired program and channel
6
5
4
3
5
4
3
2
3
2
3
5
R E A D Y
4
2
1
6
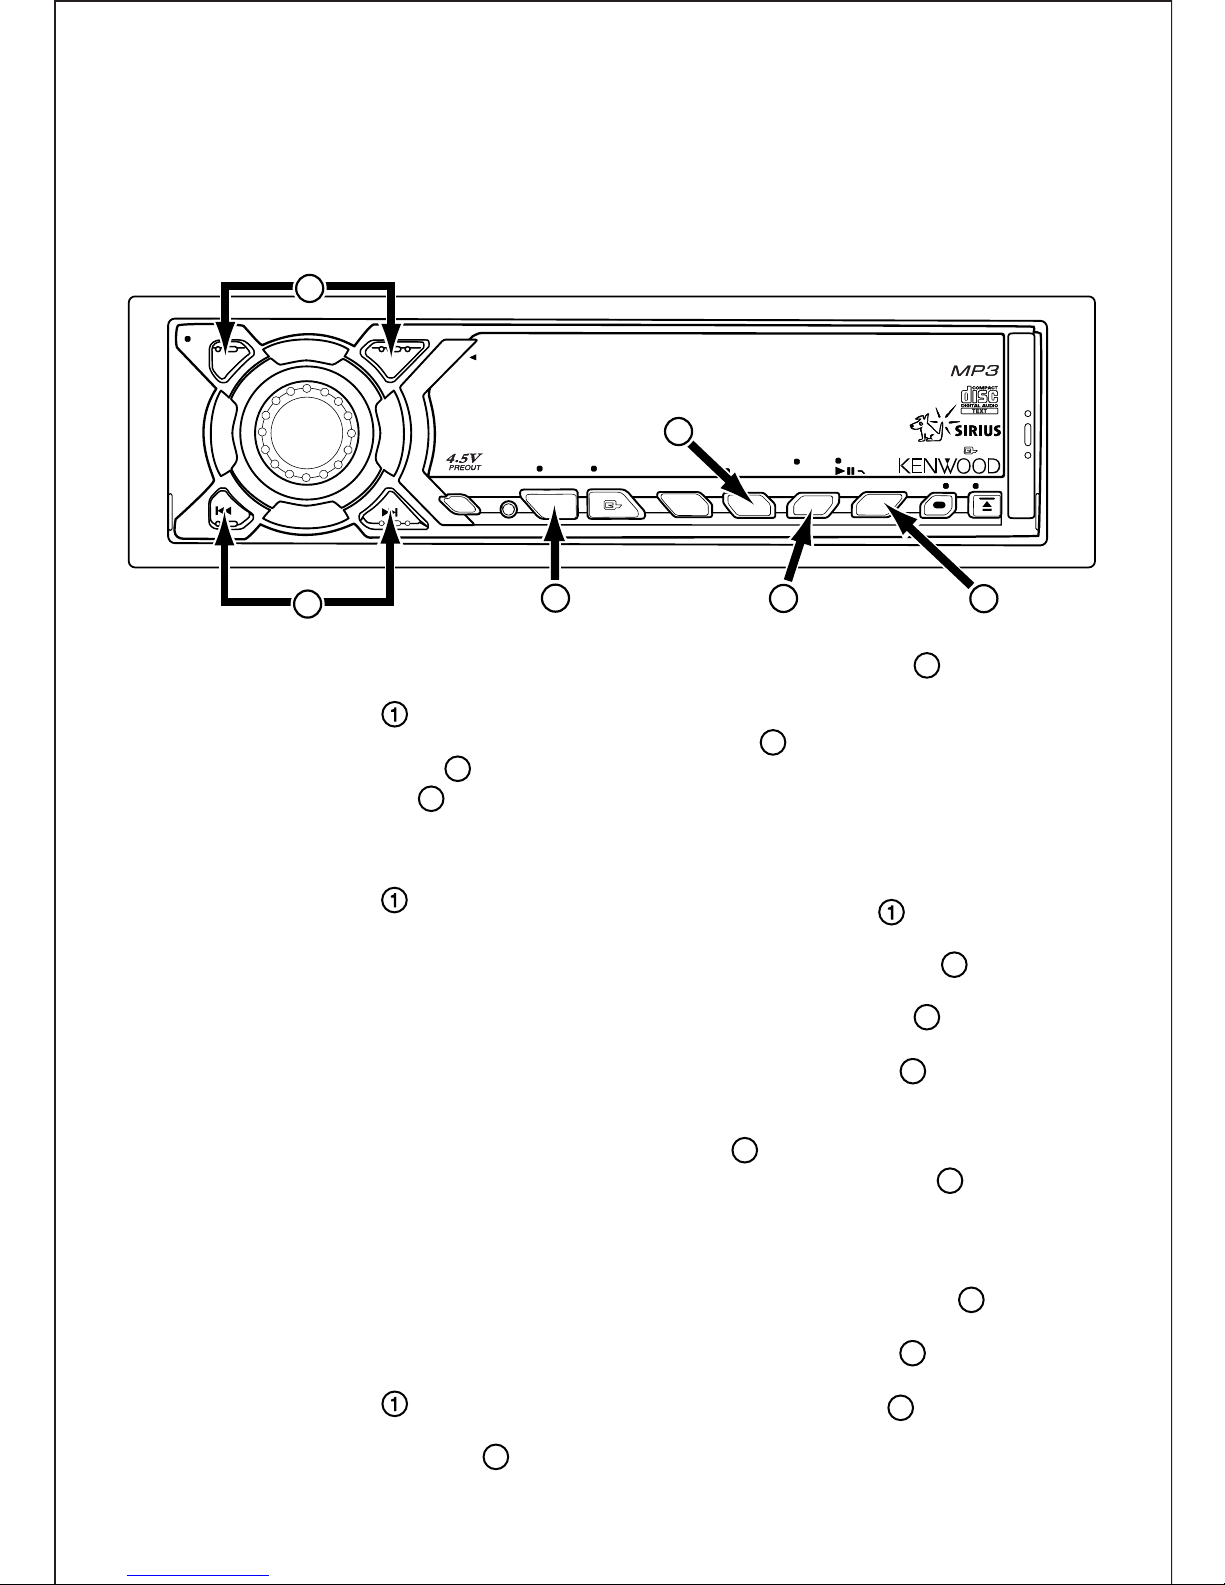
KTC-SR901 Sirius® Satellite Radio Tuner
Quick-Start Guide for:
KDC-X859/KDC-X759/KDC-MP919
Step 1: Get your unit’s individual Electronic
Serial Number (ESN):
a) Press the SRC button ( ) repeatedly until
“SIR” (Sirius) appears on the display
b) Press the Play/Pause button ( )
c) Press the AM/FM buttons ( ) to scroll through
the options until “ESN XXXXXXXX” appears on
the display
d) Write the number down
e) Press the SRC button ( ) to exit
Step 2: Subscribe to the Sirius Satellite
Radio service
a) Make sure your vehicle has the radio "ON" and
the antenna has a clear view of the sky with no
obstructions (buildings, garage, etc.)
b) Have your Vehicle Identification Number (VIN)
from the vehicle that the radio is installed in.
c) Have your unit’s ESN and your credit card num-
ber handy
d) Contact SIRIUS on the web at siriusradio.com or
call toll-free: 1-888-539-SIRIUS (7474)
e) The operator will instruct you further
• Your tuner should be able to receive Sirius
Satellite Radio signals almost immediately after
you subscribe
Step 3: Searching for program categories
and channels:
a) Press the SRC button ( ) until “SIR” appears
on the display
b) Hold-down the Preset 2/6 button ( ) until
“Category Name” appears on the display
c) Press the AM/FM buttons ( )to search
through the available program categories
d) Press the Scan Forward and Scan Backward
buttons ( ) to change channels within the
selected category
• If there are no channels available in a category,
the tuner will automatically switch to the next
category
Step 4: Display settings setup:
a) Press the SRC button ( )until “SIR” appears
on the display
b) Press the Play/Pause button ( ) to get into
the display setup mode.
c) Press the AM/FM buttons ( ) until “Display
Control Mode appears on the display.
d) Use the AM/FM buttons ( ) to control the dis-
play’s top line.
e) Use the Scan Forward and Scan Backward but-
tons ( ) to control the display’s bottom line.
f) Press the Play/Pause button ( )again to exit
the display mode
Step 5: Setting channel presets:
a) After tuning to the desired program and chan-
nel, press and hold button 3/7 ( ) until
“Preset Memory” appears on the display
b) Use the AM/FM buttons ( ) to access the
desired preset number
c) Hold Preset button 3/7 ( )until the unit
“beeps”.
6
3
6
2
5
3
3
2
5
343
2
3
NF
NF
AM
AM
FM
FM
3
3
-
-
D
D
D
D
I
I
S
S
P
P
L
L
A
A
Y
Y
50Wx4
50Wx4
DAB
DAB
OFF AUD
OFF AUD
SRC
SRC
4
REP RDM
SCN D.REP
SCN D.REP
REP RDM
2/6 3/71/5 4/8
2/6 3/71/5 4/8
F.SEL MENU
F.SEL MENU
P.M/M.RDM
P.M/M.RDM
KDC-MP919
KDC-MP919
R E A D Y
R E A D Y
System
System
AUTO SCRL ANG
AUTO SCRL ANG
EX
EX
5
1
6
2
 Loading...