How it Works
Log In / Sign Up
Buy Points
How it Works
FAQ
Contact Us
Questions and Suggestions
Users
KENWOOD
Loading...
K
KDC-5024
9
KDC-5024V
9
KDC-5024-Y
KDC-5024-YV
KDC-5026
4
KDC-5026G
8
KDC-5027
13
KDC-5027Y
5
KDC-5041U
KDC-5047U
15
KDC-5051U
15
KDC-5057SD
17
KDC-506
8
KDC-5060-R
2
KDC-5060-RY
KDC-507
13
KDC-5070R
7
KDC-5070RY
KDC-508
13
KDC-5080R
3
KDC-5080-RY
KDC-5090B
2
KDC-5090BY
KDC-5090R
4
KDC-5094R
7
KDC-5094-RY
KDC-5141U
KDC-515-S
3
KDC-516-S
3
KDC-519
2
KDC-550U
KDC-5751SD
15
KDC-57MR
2
KDC-6001
KDC-6003
KDC-6005
KDC-6007
2
KDC-6009
2
KDC-6010
KDC-6011
KDC-6015
4
KDC-6016-R
KDC-6020
KDC-6021
7
KDC-6022
KDC-6023
7
KDC-6024
8
KDC-6024Y
5
KDC-6046-U
KDC-6047U
18
KDC-6051U
17
KDC-6060-R
2
KDC-6060-RY
KDC-6070-R
6
KDC-6070-RY
KDC-6080R
4
KDC-6080RV
3
KDC-6080RY
KDC-6090R
3
KDC-6090RY
KDC-610U
2
KDC-6527
KDC-655U
3
KDC-67R
KDC-7000
KDC-7001
KDC-7003
KDC-7005
KDC-7007
2
KDC-7008
KDC-7009
3
KDC-7011
2
KDC-7012
KDC-7016
KDC-7018
2
KDC-7021
7
KDC-7021SE
5
KDC-7021Y
KDC-7024
15
KDC-7024Y
5
KDC-7027
20
KDC-7040-R
KDC-7050
KDC-7050-R
KDC-7060R
3
KDC-7060RY
KDC-7070R
3
KDC-7070RY
KDC-7070W
KDC-7071-RY
KDC-7080
KDC-7080R
3
KDC-7080RRYV
KDC-7080-RV
4
KDC-7080-RY
3
KDC-7080-RYV
KDC-7090-R
5
KDC-7090-Y
KDC-715-S
2
KDC-716-S
3
Loading...
Loading...
Nothing found
KDC-6051U
User Manual [ru]
81 pgs
5.43 Mb
0
User Manual
68 pgs
1.83 Mb
0
User Manual [fr]
77 pgs
5.41 Mb
0
User Manual
72 pgs
5.45 Mb
0
User Manual [uk]
79 pgs
5.47 Mb
0
User Manual [de]
79 pgs
5.2 Mb
0
User Manual [cs]
77 pgs
5.4 Mb
0
User Manual [sv]
73 pgs
5.34 Mb
0
User Manual [pt]
77 pgs
5.38 Mb
0
User Manual [pl]
77 pgs
5.42 Mb
0
User Manual [it]
79 pgs
5.4 Mb
0
User Manual [it]
68 pgs
1.85 Mb
0
User Manual [hr]
73 pgs
5.29 Mb
0
User Manual [hu]
77 pgs
5.4 Mb
0
User Manual [de]
81 pgs
5.38 Mb
0
User Manual [es]
79 pgs
5.38 Mb
0
User Manual
75 pgs
5.35 Mb
0
Table of contents
Loading...
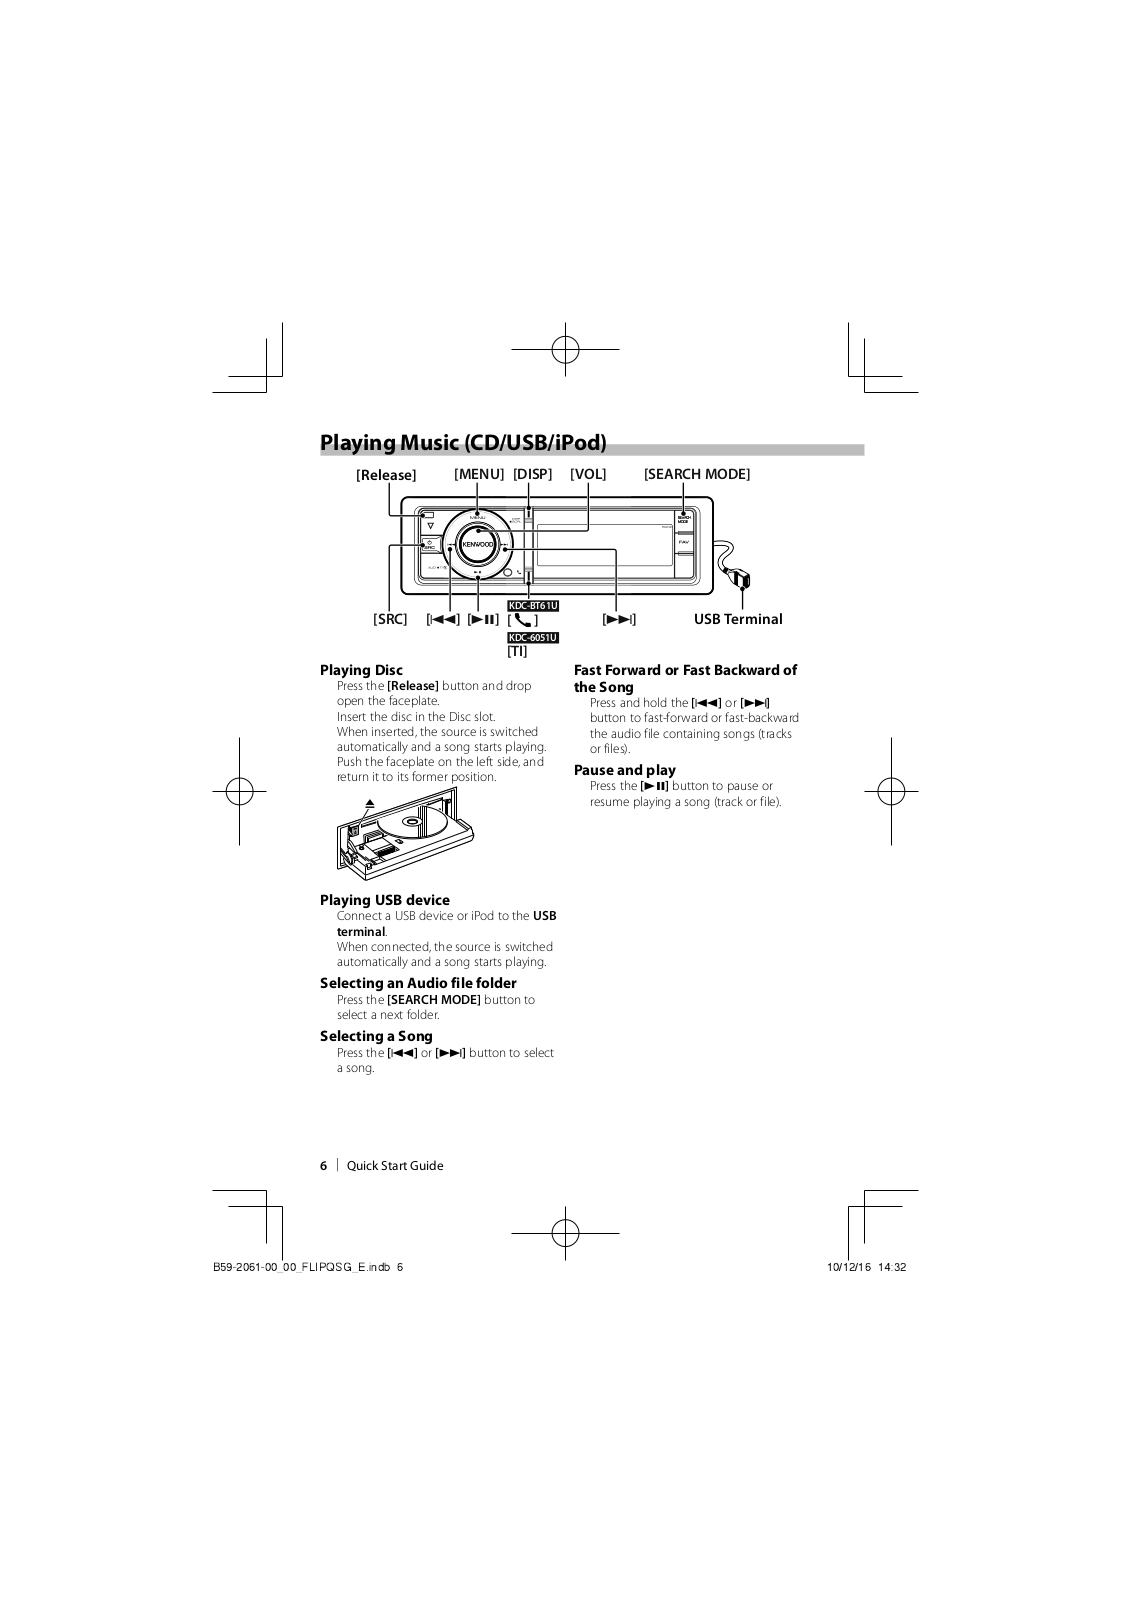
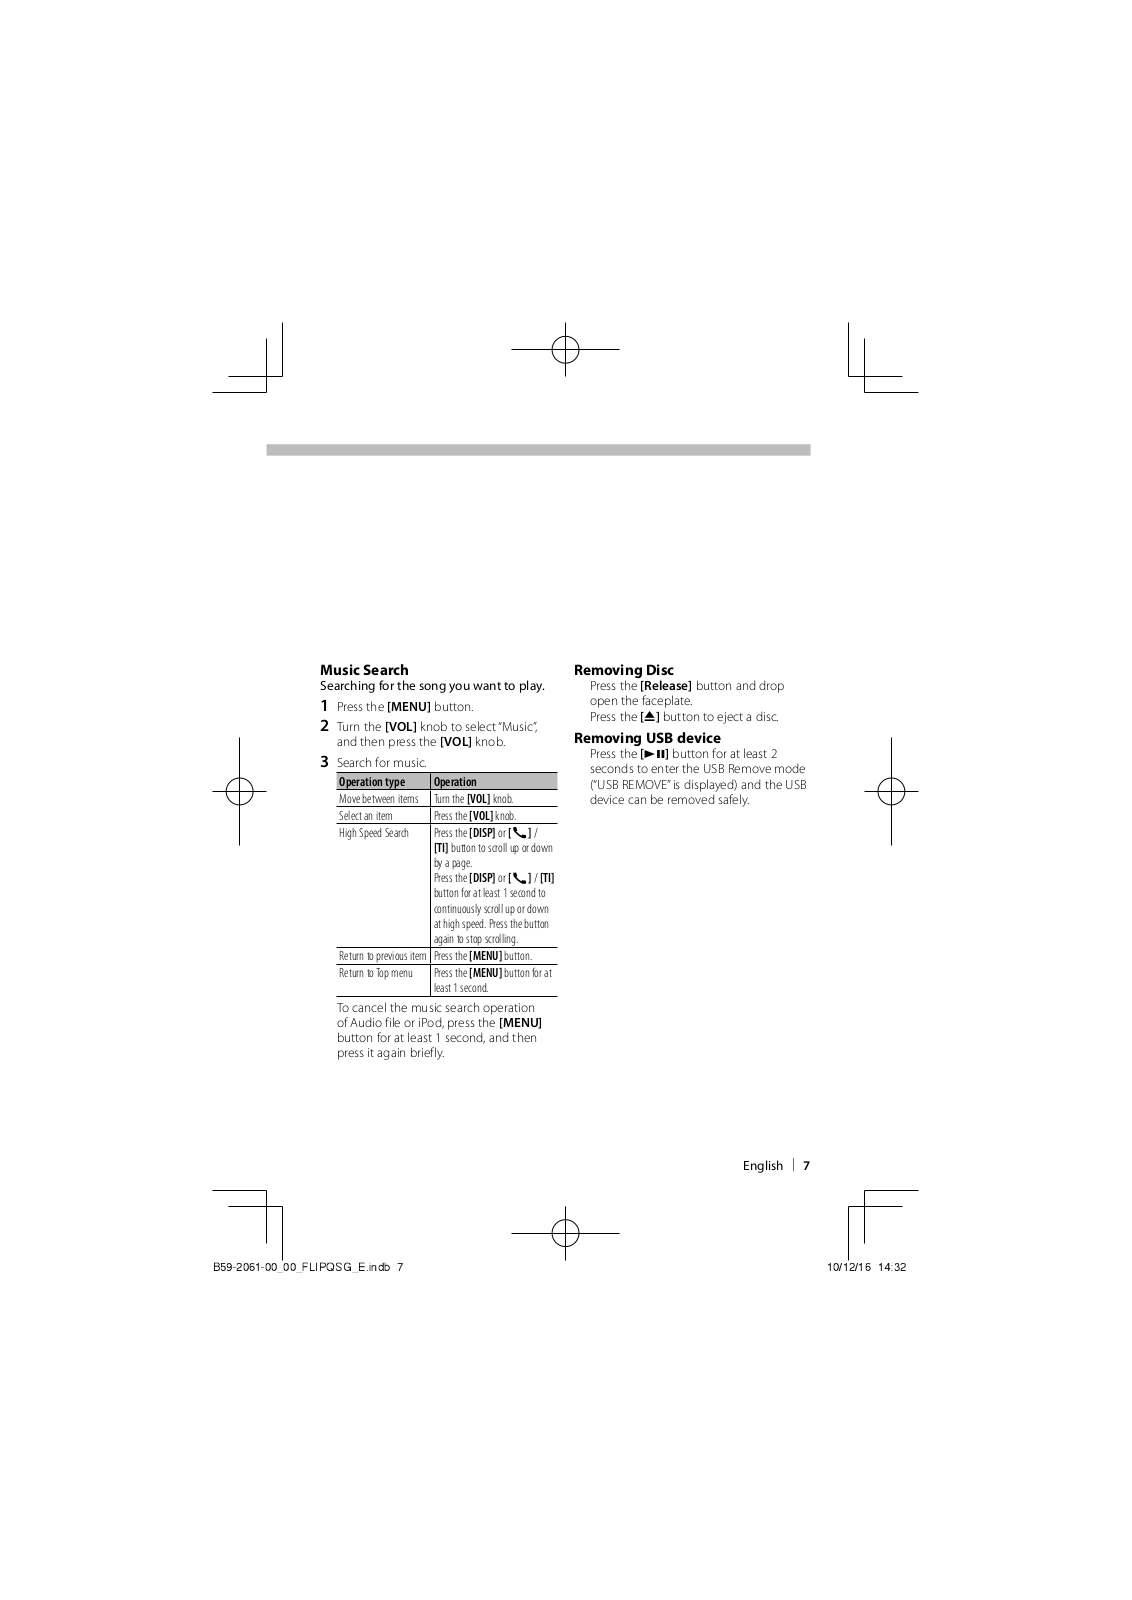
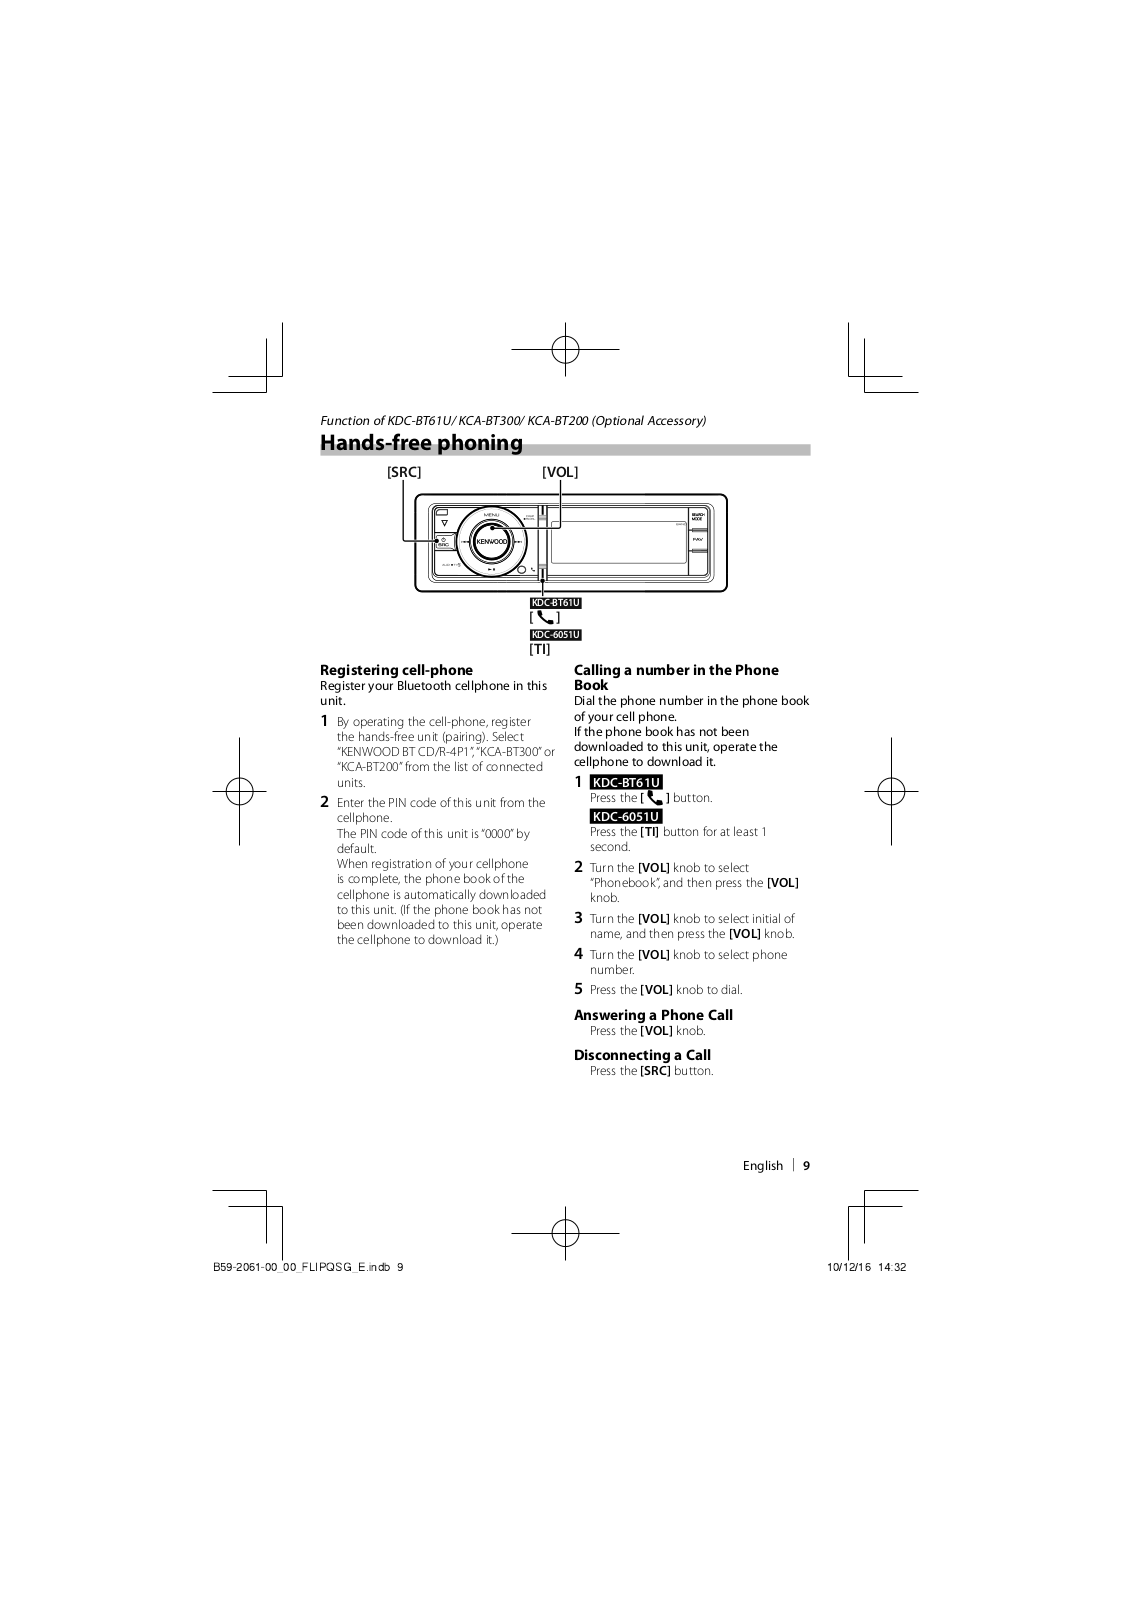
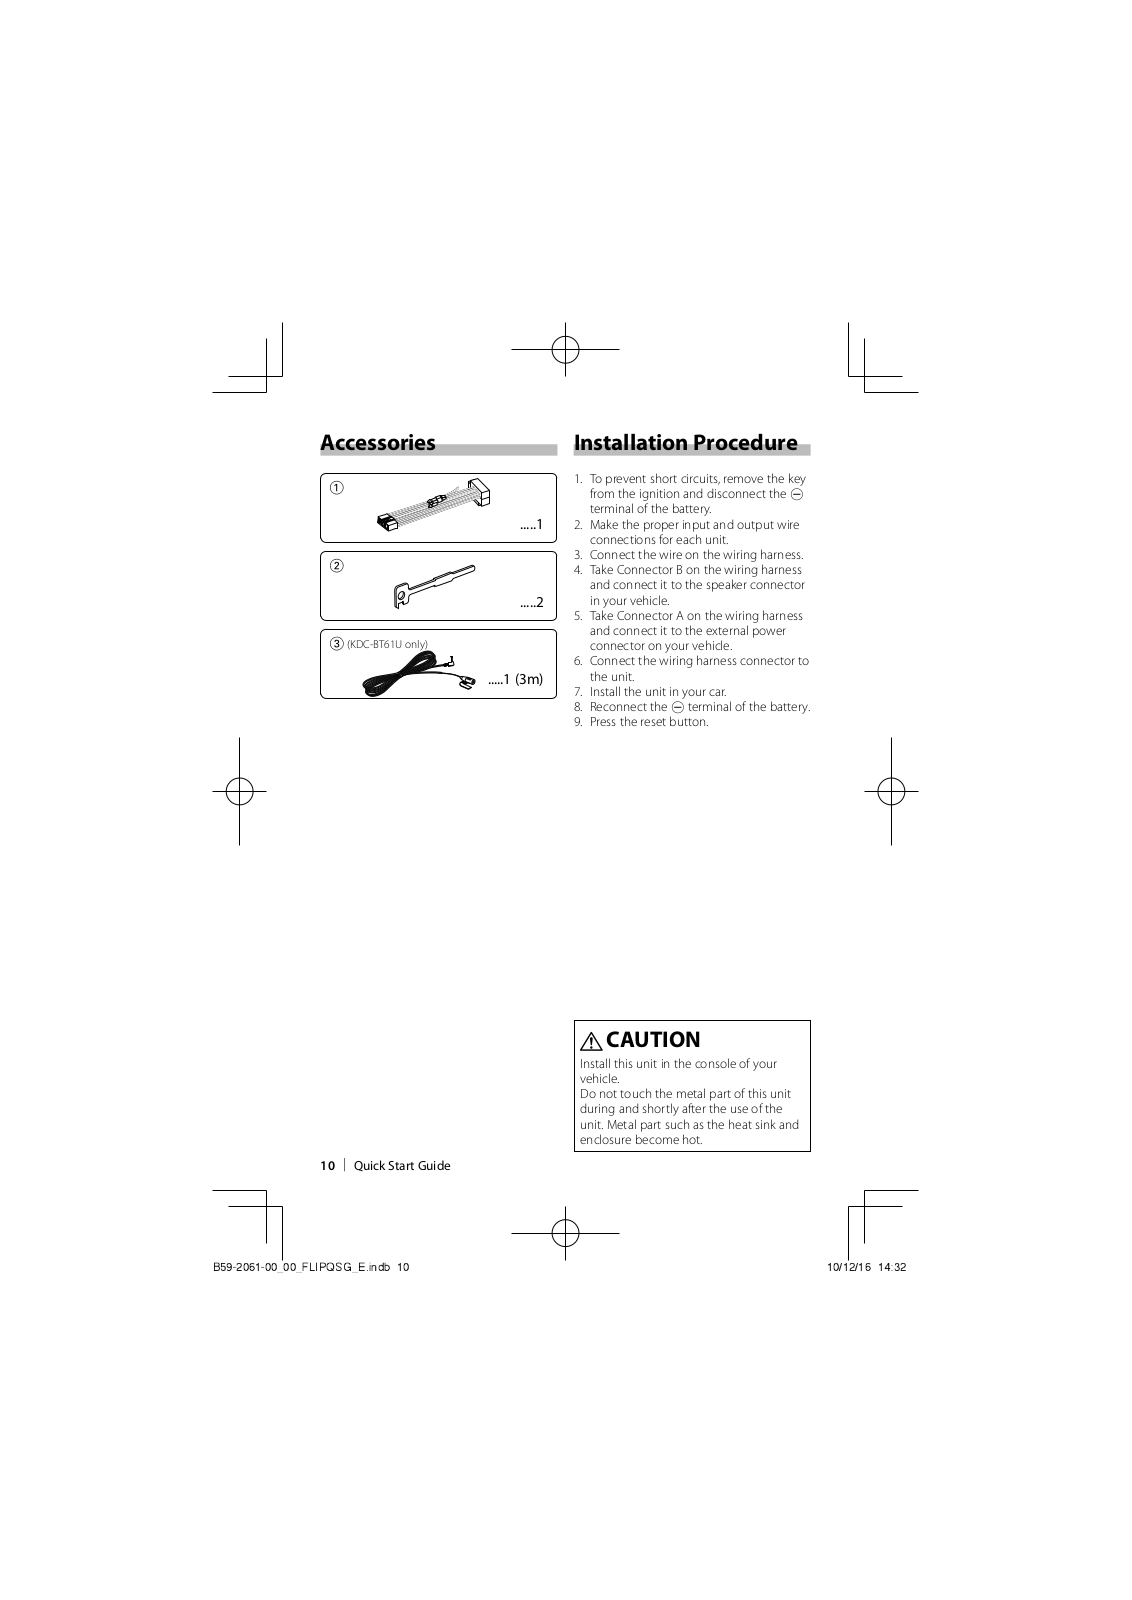
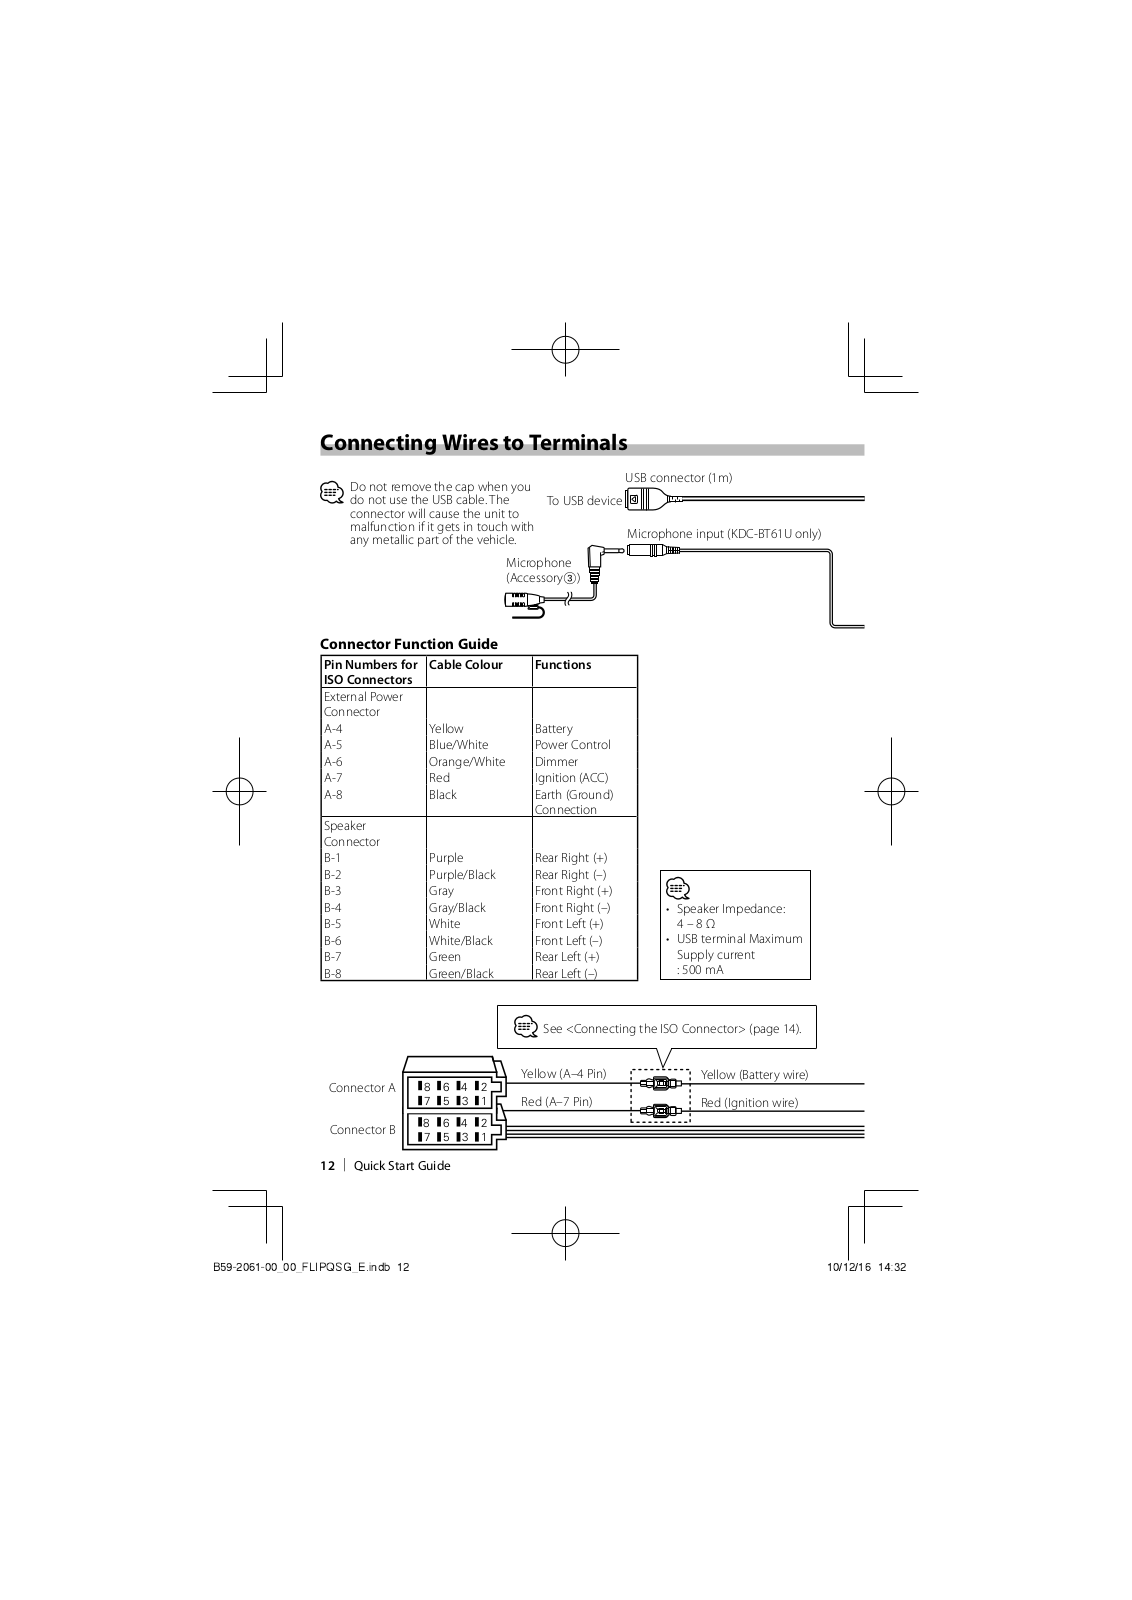
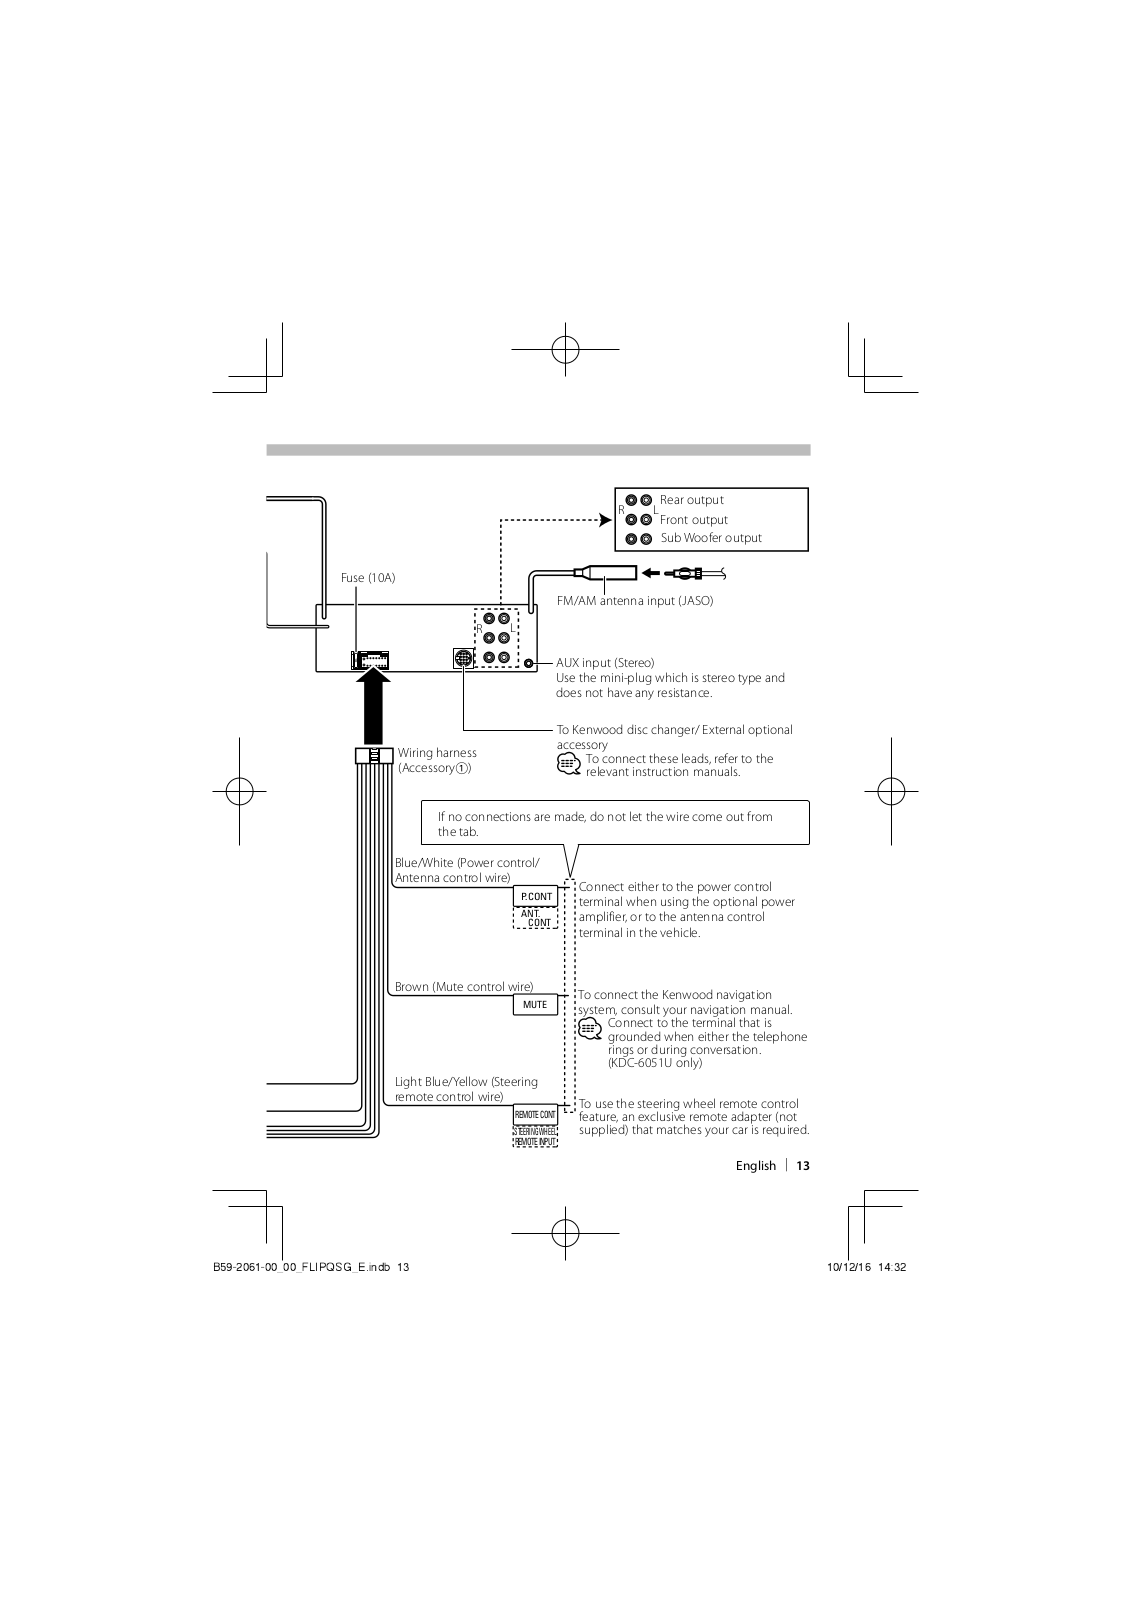
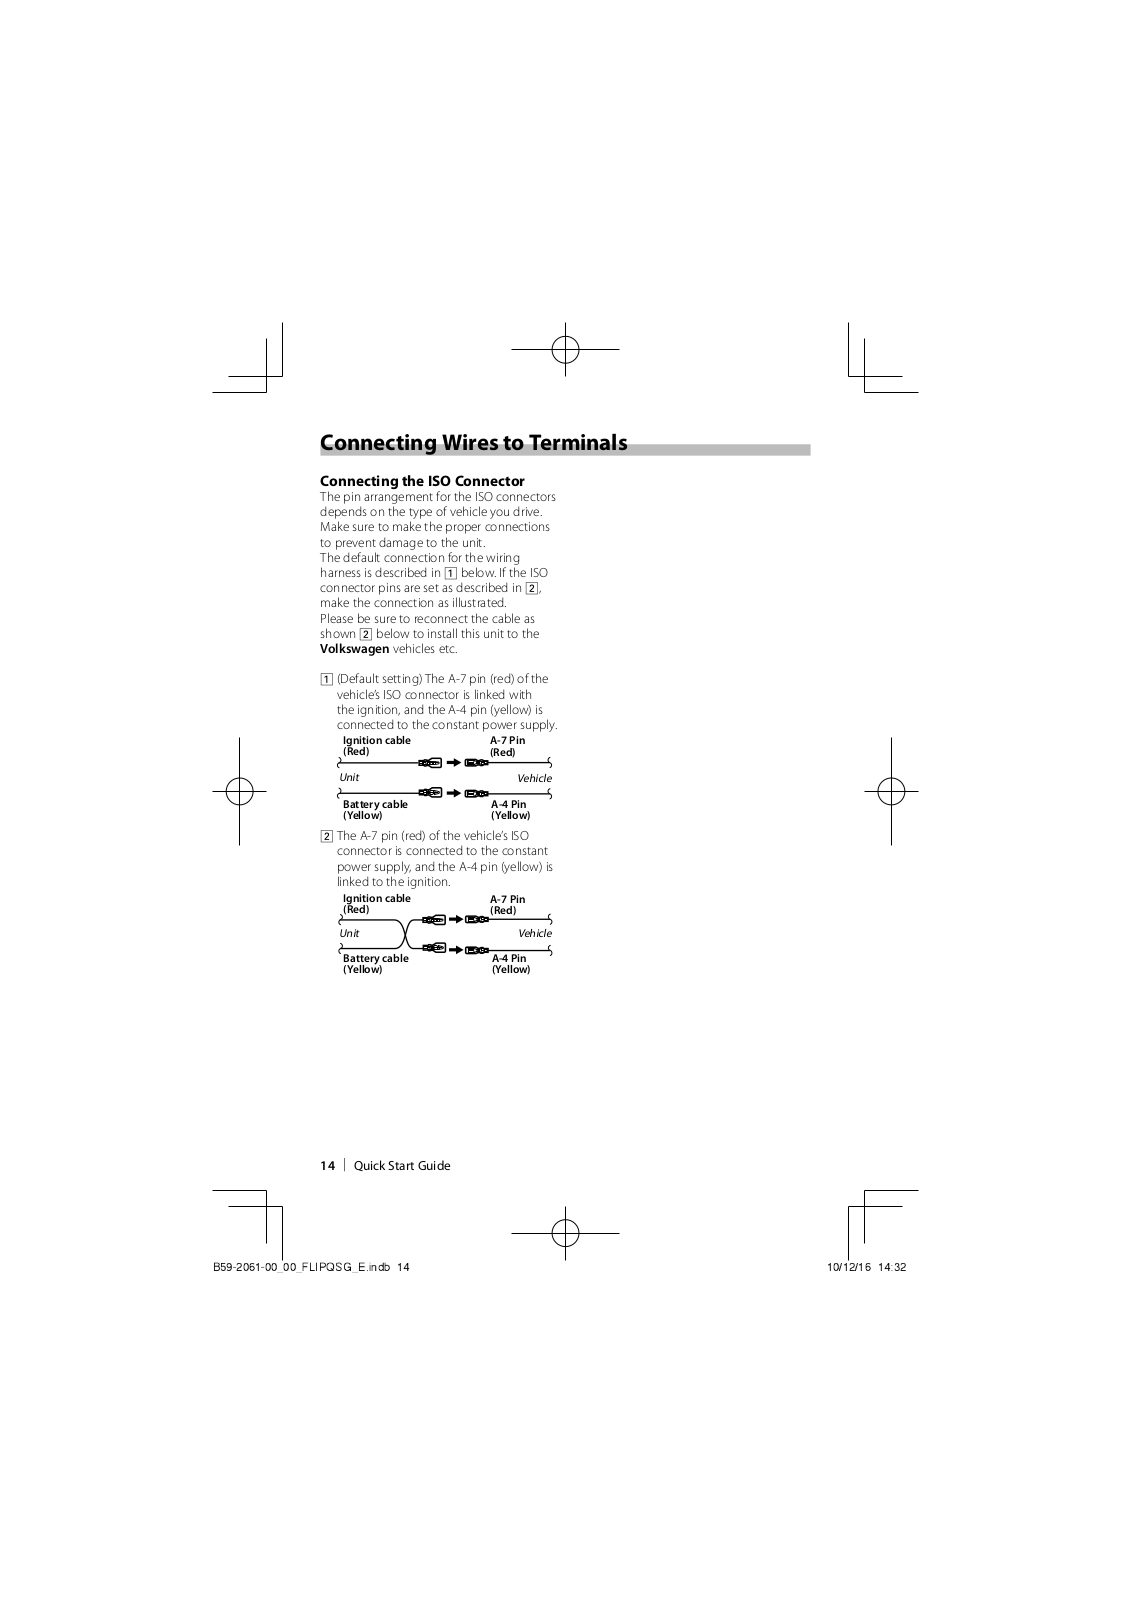
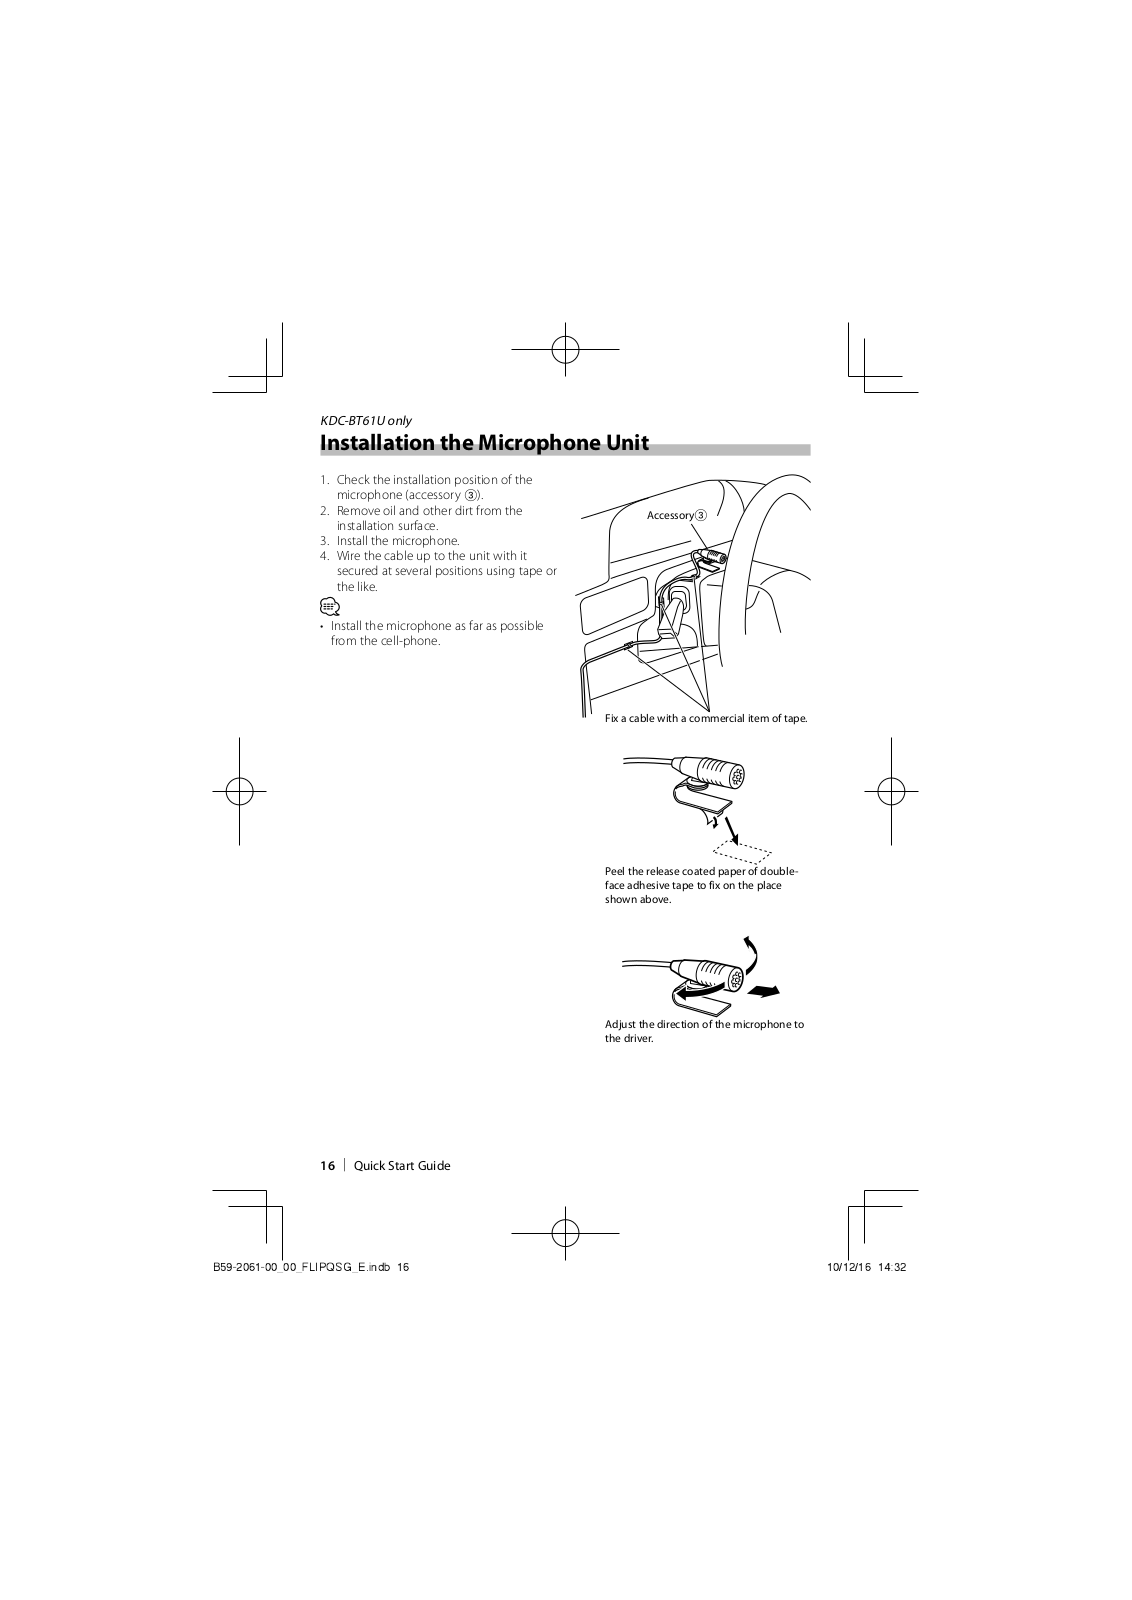
KENWOOD KDC-6051U, KDC-BT61U User Manual
...
KENWOOD User Manual
Download
Specifications and Main Features
Frequently Asked Questions
User Manual
Download
Loading...
+
47
hidden pages
Unhide
You need points to download manuals.
1 point = 1 manual.
You can buy points or you can get point for every manual you upload.
Buy points
Upload your manuals
 Loading...