

Kenwood KDC-4057UR, KDC-3057UR, KDC-3057URY, KDC-4557U, KDC-3057UG User Manual
...
KDC-4557U
KDC-3357UY
KDC-3057URY
KDC-4057UB
KDC-4057UR
KDC-3457UQ
CD-RECEIVER
INSTRUCTION MANUAL
CD-RECEIVER
BEDIENUNGSANLEITUNG
KDC-3257URY
KDC-3057UG
KDC-3057UR
KDC-317UR
GET0848-003A (EW/E0)© 2012 JVC KENWOOD Corporation
Information on Disposal of Old Electrical and Electronic Equipment and
Batteries (applicable for EU countries that have adopted separate waste
collection systems)
Products and batteries with the symbol (crossed-out wheeled bin) cannot be
disposed as household waste.
Old electrical and electronic equipment and batteries should be recycled at a facility
capable of handling these items and their waste byproducts.
Contact your local authority for details in locating a recycle facility nearest to you.
Proper recycling and waste disposal will help conserve resources whilst preventing
detrimental effects on our health and the environment.
Notice: The sign “Pb” below the symbol for batteries indicates that this battery
contains lead.
Entsorgung von gebrauchten elektrischen und elektronischen Geräten und
Batterien (anzuwenden in den Ländern der Europäischen Union und anderen
europäischen Ländern mit einem separaten Sammelsystem für solche Geräte)
Das Symbol (durchgestrichene Mülltonne) auf dem Produkt oder seiner Verpackung
weist darauf hin, dass dieses Produkt nicht als normaler Haushaltsabfall behandelt
werden darf, sondern an einer Annahmestelle für das Recycling von elektrischen und
elektronischen Geräten und batterien abgegeben werden muss.
Durch Ihren Beitrag zur korrekten Entsorgung dieses Produktes schützen Sie die
Umwelt und die Gesundheit Ihrer Mitmenschen.
Unsachgemässe oder falsche Entsorgung gefährden Umwelt und Gesundheit.
Weitere Informationen über das Recycling dieses Produktes erhalten Sie von Ihrer
Gemeinde oder den kommunalen Entsorgungsbetrieben.
Achtung: Das Zeichen „Pb“ unter dem Symbol fur Batterien zeigt an, dass diese
Batterie Blei enthalt.
Declaration of Conformity with regard to the EMC Directive 2004/108/EC
Manufacturer:
JVC KENWOOD Corporation
3-12, Moriya-cho, Kanagawa-ku, Yokohama-shi, Kanagawa, 221-0022, Japan
EU Representative’s:
Kenwood Electronics Europe BV
Amsterdamseweg 37, 1422 AC UITHOORN, The Netherlands
Konformitätserklärung in Bezug auf die EMC-Vorschrift 2004/108/EC
Hersteller:
JVC KENWOOD Corporation
3-12, Moriya-cho, Kanagawa-ku, Yokohama-shi, Kanagawa, 221-0022, Japan
EU-Vertreter:
Kenwood Electronics Europe BV
Amsterdamseweg 37, 1422 AC UITHOORN, Niederlande
This Product is not installed by the manufacturer of a vehicle on the production line,
nor by the professional importer of a vehicle into an EU Member State.
Dieses Produkt wird weder vom Hersteller eines Fahrzeugs während der Produktion
noch von einem professionellen Importeur eines Fahrzeugs in einen EUMitgliedsstaat eingebaut.
i

The marking of products using lasers
The label is attached to the chassis/case and says that the component uses laser
beams that have been classified as Class 1. It means that the unit is utilizing laser
beams that are of a weaker class. There is no danger of hazardous radiation outside
the unit.
Kennzeichnung von Geräten mit Laser-Abtastern
Das Etikett ist am Chassis/Gehäuse angebracht und besagt, dass sich die
Komponente Laserstrahlen bedient, die als Laserstrahlen der Klasse 1 klassifiziert
wurden. Dies weist darauf hin, dass sich das Gerät Laserstrahlen bedient, die einer
schwächeren Klasse angehören. Das bedeutet, dass durch den sehr schwachen
Laserstrahl keine Gefahr durch gefährliche Strahlungen außerhalb des Geräts
besteht.
For Turkey
Bu ürün 28300 sayılı Resmi Gazete’de yayımlanan Atik Elektrikli ve Elektronik Eşyalarin
Kontrolü Yönetmeliğe uygun olarak üretilmiştir.
Eski Elektrik ve Elektronik Ekipmanların İmha Edilmesi Hakkında Bilgi (ayrı atık
toplama sistemlerini kullanan ülkeleri için uygulanabilir)
Sembollü (üzerinde çarpı işareti olan çöp kutusu) ürünler ev atıkları
olarak atılamaz.
Eski elektrik ve elektronik ekipmanlar, bu ürünleri ve ürün atıklarını
geri dönüştürebilecek bir tesiste değerlendirilmelidir. Yaşadığınız
bölgeye en yakın geri dönüşüm tesisinin yerini öğrenmek için
yerel makamlara müracaat edin. Uygun geri dönüşüm ve atık imha
yöntemi sağlığımız ve çevremiz üzerindeki zararlı etkileri önlerken
kaynakların korunmasına da yardımcı olacaktır.
ii

CONTENTS BEFORE USE
BEFORE USE 2
BASICS 3
GETTING STARTED 4
RADIO 5
CD / USB / iPod 6
AUX 7
AUDIO SETTINGS 8
DISPLAY SETTINGS 9
MORE INFORMATION 9
TROUBLESHOOTING 10
SPECIFICATIONS 11
INSTALLATION / CONNECTION 12
How to read this manual
• Operations explained mainly using buttons
on the faceplate.
•
[XX]
indicates the selected items.
• (➜
XX)
indicates references are available on
the stated page number.
Warning
Do not operate any function that takes your attention away from safe driving.
Caution
Volume setting:
• Adjust the volume so that you can hear sounds outside the car to prevent accident.
• Lower the volume before playing digital sources to avoid damaging the speakers by the sudden increase of the
output level.
General:
• Avoid using the USB device or iPod/iPhone if it might hinder driving safety.
• Make sure all important data has been backed up. We shall bear no responsibility for any loss of recorded data.
• Never put or leave any metallic objects (such as coins or metal tools) inside the unit, to prevent a short circuit.
•
If a disc error occurs due to condensation on the laser lens, eject the disc and wait for the moisture to evaporate.
Remote control (RC-406):
• Do not leave the remote control in hot places such as on the dashboard.
• The Lithium battery is in danger of explosion if replaced incorrectly. Replace it only with the same or equivalent
type.
• The battery pack or batteries shall not be exposed to excessive heat such as sunshine, fire or the like.
• Keep battery out of reach of children and in original package until ready to use. Dispose of used batteries
promptly. If swallowed, contact a physician immediately.
Maintenance
Cleaning the unit: Wipe off dirt on the faceplate with a dry silicon or soft cloth.
Cleaning the connector: Detach the faceplate and clean the connector with a
cotton swab gently, being careful not to damage the connector.
Handling discs:
• Do not touch the recording surface of the disc.
• Do not stick tape etc. on the disc, or use a disc with tape stuck on it.
• Do not use any accessories for the disc.
• Clean from the center of the disc and move outward.
• Clean the disc with a dry silicon or soft cloth. Do not use any solvents.
• When removing discs from this unit, pull them out horizontally.
• Remove burrs from the center hole and disc edge before inserting a disc.
Connector (on the reverse
side of the faceplate)
2
BASICS
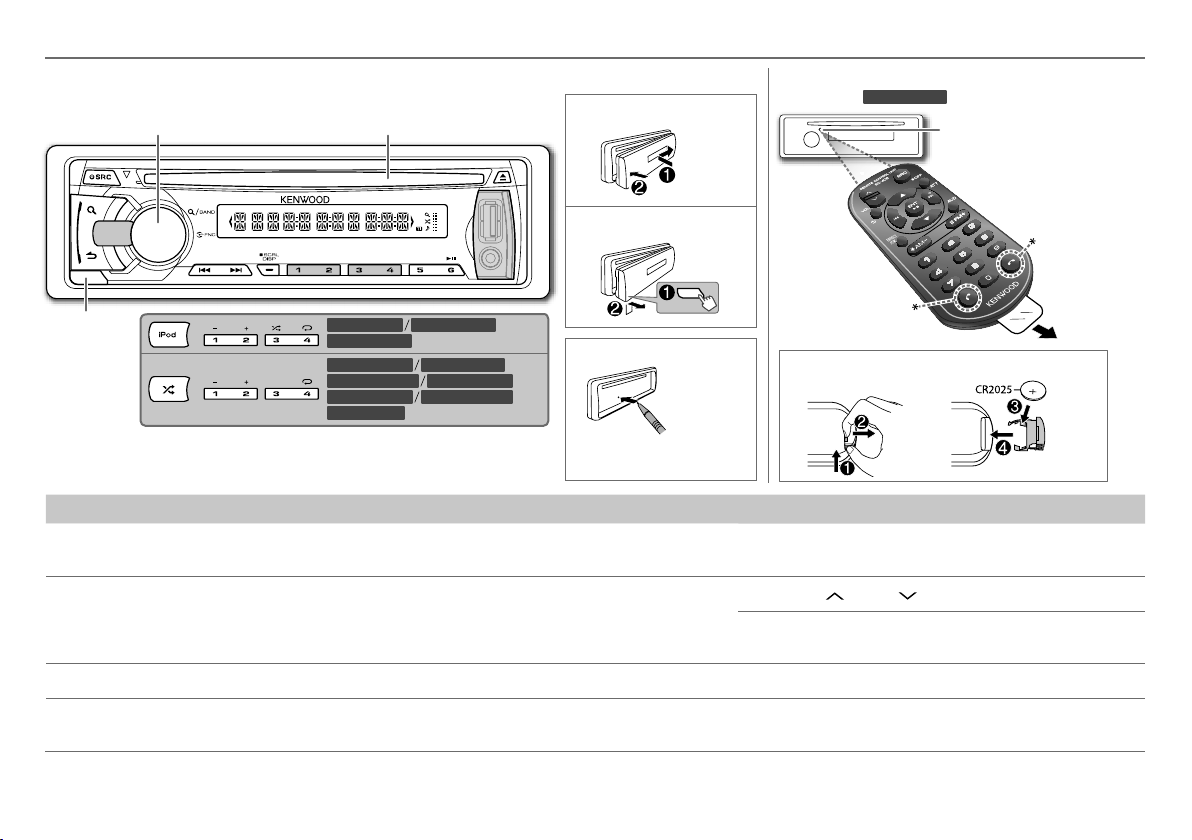
Faceplate
Volume knob
(turn/press) Loading slot
Attach
Detach
Detach
button
To Do this (on the faceplate) Do this (on the remote control)
Turn on the power Press L SRC.
• Press and hold to turn off the power.
KDC-4557U KDC-4057UB
KDC-4057UR
KDC-3457UQ KDC-3357UY
KDC-3257URY KDC-3057UG
KDC-3057UR
KDC-317UR
KDC-3057URY
How to reset
Your preset adjustments
will also be erased.
Remote control (RC-406)
(supplied for
* Not used.
How to replace the battery
Press and hold SRC to turn off the power.
( Pressing SRC does not turn on the power. )
KDC-3357UY
)
Remote sensor (Do not expose
to bright sunlight.)
Pull out the
insulation sheet
when using for
the first time.
Adjust the volume Turn the volume knob. Press VOL
Press ATT during playback to attenuate the sound.
• Press again to cancel.
Select a source Press L SRC repeatedly. Press SRC repeatedly.
Change the display
information
Press SCRL DISP repeatedly.
• Press and hold to scroll the current display information.
( not available )
or VOL .
ENGLISH |
3
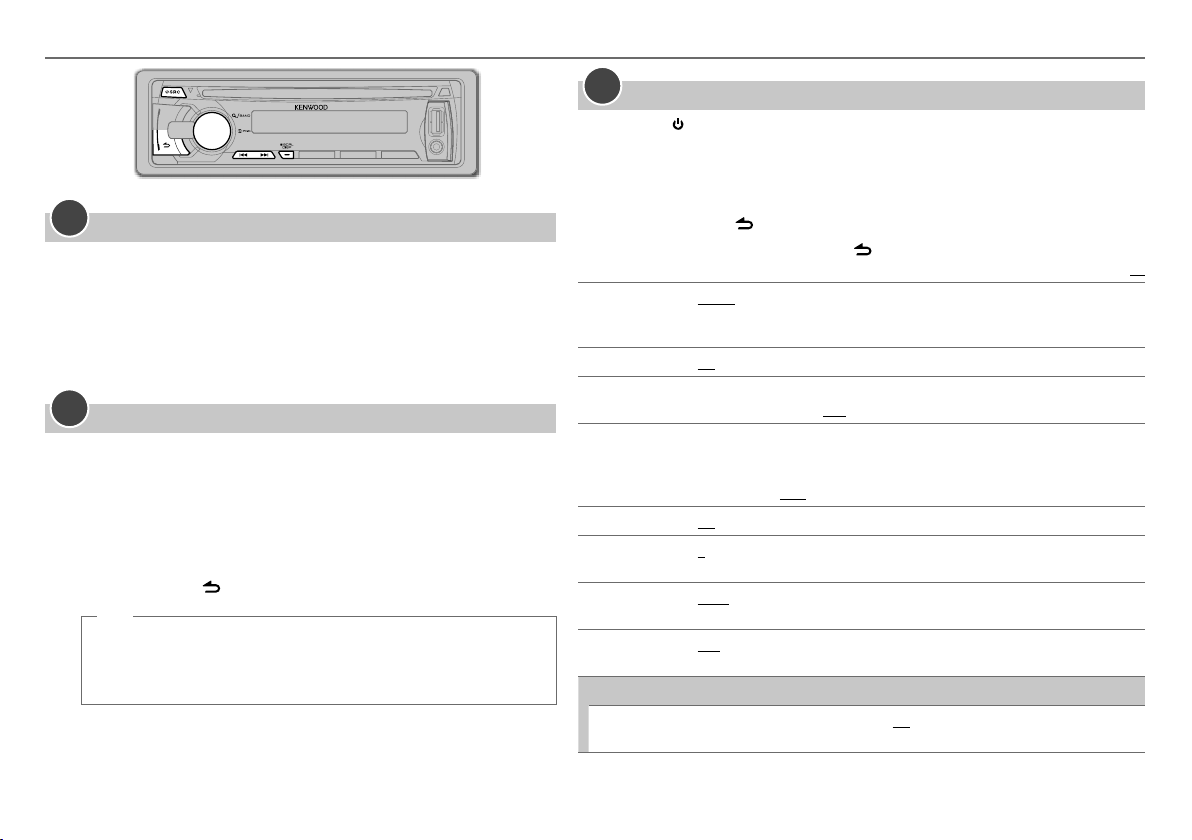
GETTING STARTED
1
Cancel the demonstration
When you turn on the power (or after you reset the unit), the display
shows: “CANCEL DEMO” \ “PRESS” \ “VOLUME KNOB”
1 Press the volume knob.
[YES]
is selected for the initial setup.
2 Press the volume knob again.
“DEMO OFF” appears.
2
Set the clock
1 Press the volume knob to enter
2 Turn the volume knob to select
3 Turn the volume knob to select
4 Press the volume knob to select
5 Turn the volume knob to adjust the hour, then press the knob.
6 Turn the volume knob to adjust the minute, then press the knob.
Press 4
/
¢ to move between the hour and minute adjustment.
7 Press and hold to exit.
(or)
Press and hold SCRL DISP to enter clock adjustment mode directly
while in clock display screen.
Then, perform steps 5 and 6 above to set the clock.
[FUNCTION]
[SETTINGS]
[CLOCK]
[CLOCK ADJ]
.
, then press the knob.
, then press the knob.
.
3
Set the initial settings
1 Press SRC to enter
2 Press the volume knob to enter
3 Turn the volume knob to select
[STANDBY]
.
[FUNCTION]
[INITIAL SET]
.
, then press the knob.
4 Turn the volume knob to make a selection (see the table below), then press
the knob.
5 Press and hold to exit.
• To return to the previous hierarchy, press .
PRESET TYPE NORM: Memorizes one station for each preset button in each band (FM1/ FM2/ FM3/
KEY BEEP ON: Activates the keypress tone. ; OFF: Deactivates.
RUSSIAN SET
P-OFF WAIT Applicable only when the demonstration mode is turned off.
BUILTIN AUX
CD READ 1: Automatically distinguishes between audio file disc and music CD. ; 2: Forces to play
SWITCH PRE REAR/ SUB-W: Selects whether rear speakers or a subwoofer are connected to the
SP SELECT OFF/ 5/4/ 6 × 9/6/ OEM: Selects according to the speaker size (5 inches or
F/W UPDATE
F/W UP xx.xx YES: Starts upgrading the firmware. ; NO: Cancels (upgrading is not activated).
MW/ LW). ; MIX: Memorizes one station for each preset button regardless of the
selected band.
ON: Folder name, file name, song title, artist name, album name are displayed in
Russian (if applicable). ; OFF: Cancels.
Sets the duration when the unit will automatically turns off (while in standby mode)
to save the battery.
––– : Cancels ; 20M: 20 minutes ; 40M: 40 minutes ; 60M: 60 minutes
ON: Enables AUX in source selection. ; OFF: Disables. (➜ 7)
as a music CD. No sound can be heard if an audio file disc is played.
line out terminals on the rear (through an external amplifier).
4 inches, 6×9 inches or 6 inches) or OEM speakers for optimum performance.
For details on how to update the firmware, see: www.kenwood.com/cs/ce/
Default:
XX
4
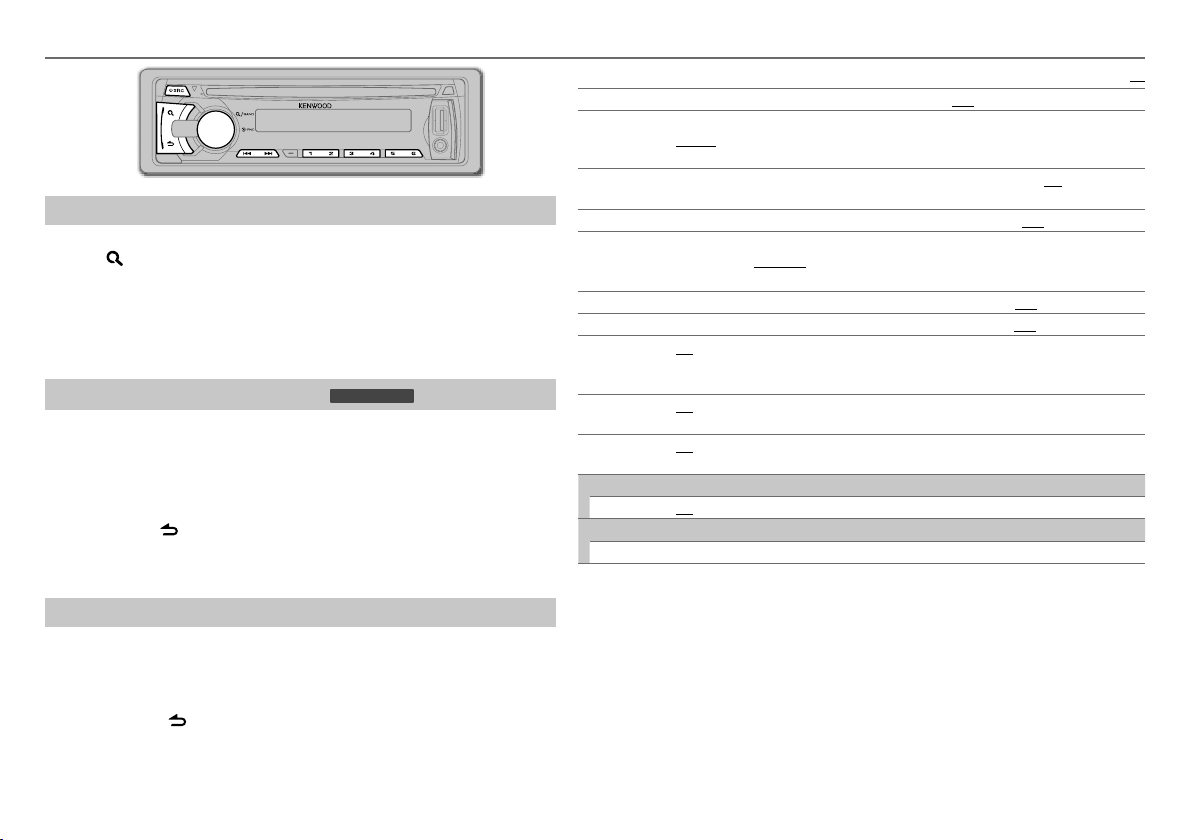
RADIO
Search for a station
1 Press L SRC to select TUNER.
2 Press repeatedly (or press
FM2/ FM3/ MW/ LW.
3 Press 4 / ¢ to search for a station.
• To store a station: Press and hold one of the number buttons (1 to 6).
• To select a stored station: Press one of the number buttons (1 to 6)
Direct Access Tuning (using RC-406) (for
1 Press
AM– / #FM+ to select a band.
*
2 Press DIRECT to enter Direct Access Tuning.
“– – – • –” (for FM) or “– – – –” (for MW/ LW) appears on the display.
3 Press the number buttons to enter a frequency.
4 Press 4 / ¢ (+) to search for a frequency.
• To cancel, press .
• If no operation is done for 10 seconds after step 3, Direct Access Tuning is
automatically canceled.
Other settings
1 Press the volume knob to enter
2 Turn the volume knob to select
3 Turn the volume knob to make a selection (see the table on the right),
then press the knob.
4 Press and hold to exit.
AM– / #FM+ on RC-406) to select FM1/
*
)
[FUNCTION]
[SETTINGS]
KDC-3357UY
.
, then press the knob.
Default:
LOCAL SEEK ON: Searches only FM stations with good reception. ; OFF: Cancels.
SEEK MODE
AUTO
MEMORY
MONO SET
PTY SEARCH
TI
NEWS SET
AF SET
REGIONAL
ATP SEEK
CLOCK
TIME SYNC
TUNER SET: Selectable only when the source is not TUNER.
TI/ NEWS SET/ AF SET/ REGIONAL/ ATP SEEK: (For details, refer to the table above.)
•
[LOCAL SEEK]/ [MONO SET]/ [PTY SEARCH]/ [TI]/ [NEWS SET]/ [AF SET]/ [REGIONAL]/ [ATP
SEEK]
• Available Program Type:
SPEECH: NEWS, AFFAIRS, INFO
MUSIC: POP M
The unit will search for the Program Type categorized under
selected.
• If the volume is adjusted during reception of traffic information, alarm or news bulletin,
the adjusted volume is memorized automatically. It will be applied the next time traffic
information, alarm or news bulletin function is turned on.
Selects the tuning method for the
AUTO1: Automatically searches for a station. ; AUTO2: Searches for a preset station. ;
MANUAL: Manually search for a station.
YES: Automatically starts memorizing 6 stations with good reception. ; NO: Cancels.
(Selectable only if [NORM] is selected for [PRESET TYPE].) (
ON: Improves the FM reception, but the stereo effect may be lost. ; OFF: Cancels.
Press the volume knob to enter PTY language selection. Turn the volume knob to select the
PTY language (ENGLISH/ FRENCH/ GERMAN), then press the knob.
Selects the available Program Type (see below), then, press
ON: Allows the unit to temporarily switch to Traffic Information. ; OFF: Cancels.
00M – 90M: Sets the time for receiving the next news bulletin. ; OFF: Cancels.
ON: Automatically searches for another station broadcasting the same program in the
same Radio Data System network with better reception when the current reception is
poor. ; OFF: Cancels.
ON: Switches to another station only in the specific region using the “AF” control. ;
OFF: Cancels.
ON: Automatically searches for a station with better reception when the traffic
information’s reception is poor. ; OFF: Cancels.
ON: Synchronizes the unit’s time to the Radio Data System station time. ; OFF: Cancels.
is selectable only when the source is FM.
ROCK M
(information),
(music),
VARIED, WEATHER, FINANCE, CHILDREN, SOCIAL, RELIGION, PHONE IN, TRAVEL,
LEISURE, DOCUMENT
(music),
M
(music),
JAZZ, COUNTRY, NATION M
4
/ ¢ buttons.
➜
4)
4 / ¢
SPORT, EDUCATE, DRAMA, CULTURE, SCIENCE,
EASY M
(music),
(music),
LIGHT M
OLDIES, FOLK M
[SPEECH]
(music),
(music)
to start.
CLASSICS, OTHER
or
[MUSIC]
ENGLISH |
if
XX
5
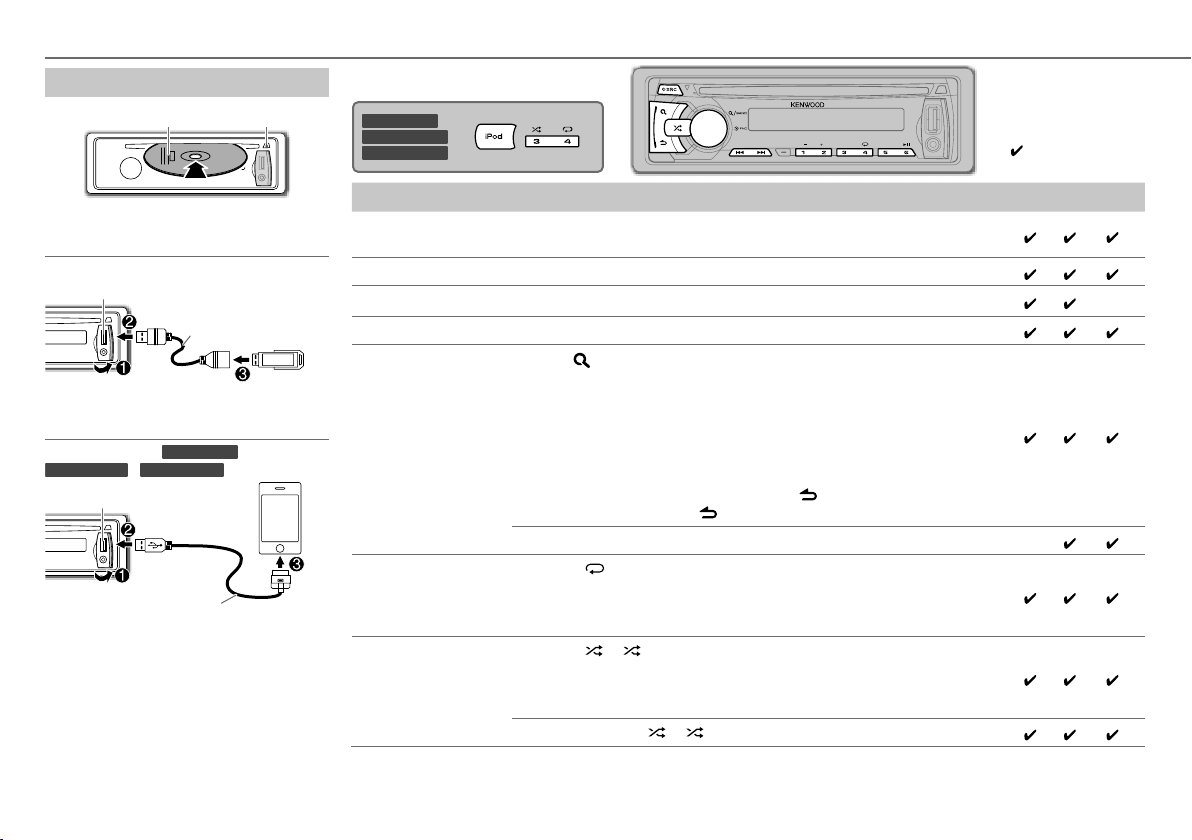
CD / USB / iPod
Start playback
CD
The source changes to CD and playback
starts.
USB
USB input terminal
The source changes to USB and playback
starts.
iPod/iPhone (for
KDC-4057UB
USB input terminal
The source changes to iPod and playback
starts.
Press and hold iPod to select the control
mode while in iPod source.
MODE ON:
MODE OFF:
*1 You can still control play/pause, file
selection, fast-forward or reverse files
from the unit.
6
Label side
CA-U1EX (max.: 500 mA)
(optional accessory)
KDC-4557U
/
KDC-4057UR
KCA-iP102 (optional accessory)
1
From the iPod
*
From the unit.
0
: Eject disc
/
)
.
KDC-4557U
KDC-4057UB
KDC-4057UR
: Applicable
— : Not applicable
To Do this CD USB iPod
Pause or resume
Press 6 38 (or ENT 38 on RC-406).
playback
Select a track/file Press 4 / ¢ (or 4 / ¢ (+) on RC-406).
Select a folder
Press 1 – / 2 + (or
AM– / #FM+ on RC-406).
*
2
*
—
Reverse/Fast-forward Press and hold 4 / ¢ (or 4 / ¢ (+) on RC-406).
Select a track/file
from a list
1 Press .
2 Turn the volume knob to make a selection, then press the knob.
• AAC/MP3/WMA file: Select the desired folder, then a file.
• iPod or KENWOOD Music Editor Light (KME Light)/ KENWOOD Music
Control (KMC) file
ARTISTS, ALBUMS, SONGS, PODCASTS
4
*
: Select the desired file from the list (PLAYLISTS,
5
*
, GENRES, COMPOSERS
5
*
).
• To return to the root folder (or first file), press number button 5.
• To return to the previous hierarchy, press .
• To cancel, press and hold .
*4*
• To skip songs at a specific ratio, press 4 / ¢. (➜
Repeat play Press 4
repeatedly.
7)
—
• Audio CD: TRAC REPEAT, REPEAT OFF
• AAC/MP3/WMA file: FILE REPEAT, FOLD REPEAT, REPEAT OFF
• iPod or KME Light/ KMC file: FILE REPEAT, REPEAT OFF
or
Random play Press 3
repeatedly.
• Audio CD: DISC RANDOM, RANDOM OFF
• AAC/MP3/WMA/iPod or KME Light/ KMC file: FOLD RANDOM,
RANDOM OFF
2
*
2
*
Only for AAC/MP3/WMA files.
3
*
Applicable only when
[MODE OFF]
Press and hold 3
is selected.
or
to select “ALL RANDOM.”
4
*
Only for files registered in the database created with KME Light/
KMC. (➜
5
*
Only for iPod.
9)
3
*
3
3
*
3
*
3
*
Direct Music Search (using RC-406)
(for
KDC-3357UY
)
1 Press DIRECT.
2 Press the number buttons to enter a track/file
number.
3 Press 4 / ¢ (+) to search for music.
• To cancel, press
• Not available if Random Play is selected.
• Not applicable for iPod, KME Light/ KMC file. (➜
Select a song by name
(for
KDC-4557U/ KDC-4057UB
While listening to iPod...
.
9)
/
KDC-4057UR
)
1 Press .
2 Turn the volume knob to select a category, then
press the knob.
3 Press again.
4 Turn the volume knob to select the character to
be searched for.
5 Press 4 / ¢ to move to the entry position.
You can enter up to three characters.
6 Press the volume knob to start searching.
7 Turn the volume knob to make a selection, then
press the knob.
Repeat step 7 until the desired item is selected.
• To search for a character other than A to Z and 0 to 9,
enter only “ * ”.
• To return to the previous hierarchy, press .
• To return to the top menu, press number button 5.
• To cancel, press and hold .
CD / USB / iPod
Set the skip ratio
While listening to iPod (for
KDC-4057UB
file...
/
KDC-4057UR
KDC-4557U
) or KME Light/ KMC
1 Press the volume knob to enter
2 Turn the volume knob to select
press the knob.
3 Turn the volume knob to select
then press the knob.
4 Turn the volume knob to make a selection, then
press the knob.
0.5%
(default)/ 1%/ 5%/
when searching for a song.
10%
: Sets the skip ratio
(Holding 4 / ¢ skips songs at 10% regardless
of the setting made.)
5 Press and hold to exit.
Muting upon the reception of a phone call
Connect the MUTE wire to your telephone using a
commercial telephone accessory. (➜
When a call comes in, “CALL” appears.
• The audio system pauses.
• To continue listening to the audio system during a
call, press
system resumes.
When the call ends, “CALL” disappears.
• The audio system resumes.
SRC. “CALL” disappears and the audio
/
[FUNCTION]
[SETTINGS]
[SKIP SEARCH]
13)
.
, then
,
AUX
Preparation:
Select
[ON]
for
[BUILTIN AUX]
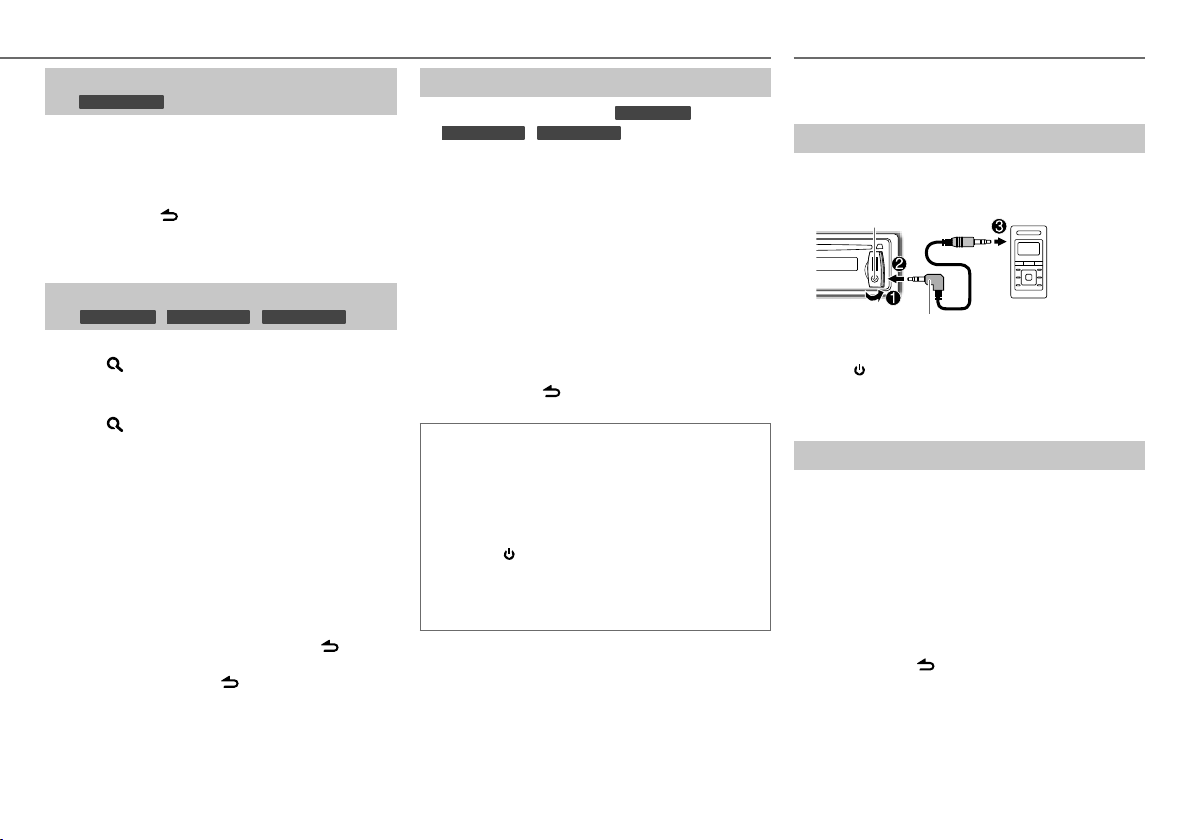
Start listening
1 Connect a portable audio player (commercially
available).
Auxiliary input jack
3.5 mm stereo mini plug with “L” shaped
connector (commercially available)
2 Press SRC to select AUX.
3 Turn on the portable audio player and start
playback.
Set the AUX name
While listening to AUX...
1 Press the volume knob to enter
2 Turn the volume knob to select
press the knob.
3 Turn the volume knob to select
press the knob.
4 Turn the volume knob to make a selection, then
press the knob.
AUX
(default)/
DVD/ PORTABLE/ GAME/ VIDEO/ TV
5 Press and hold to exit.
. (➜ 4)
Portable audio
player
[FUNCTION]
[SETTINGS]
[AUX NAME]
.
, then
, then
ENGLISH |
7
 Loading...