

Page 1

DIGITAL AUDIO
COMPACT
MICRO HI-FI COMPONENT SYSTEM
HM-DV6MD
INSTRUCTION MANUAL
KENWOOD CORPORATION
COMPACT
DIGITAL AUDIO
TEXT
B60-5060-00 00 CS (M)
AP
0105
Page 2
Before applying power
2
Caution : Read this page carefully to ensure safe operation.
Units are designed for operation as follows.
-
..................................................... AC 110
240 V
Before applying power
Preparation section
Safety precautions
WARNING : TO PREVENT FIRE OR ELECTRIC SHOCK, DO NOT
EXPOSE THIS APPLIANCE TO RAIN OR MOISTURE.
CAUTION: TO REDUCE THE RISK OF ELECTRIC SHOCK, DO NOT
REMOVE COVER (OR BACK). NO USER-SERVICEABLE PARTS INSIDE. REFER SERVICING TO QUALIFIED SERVICE PERSONNEL.
Basic section
Application section
CAUTION
RISK OF ELECTRIC SHOCK
DO NOT OPEN
THE LIGHTNING FLASH WITH ARROWHEAD SYMBOL, WITHIN AN EQUILATERAL TRIANGLE, IS INTENDED TO ALERT THE USER TO THE PRESENCE OF UNINSULATED
“DANGEROUS VOLTAGE” WITHIN THE PRODUCT’S ENCLOSURE THAT MAY BE OF
SUFFICIENT MAGNITUDE TO CONSTITUTE A RISK OF ELECTRIC SHOCK TO PERSONS.
THE EXCLAMATION POINT WITHIN AN EQUILATERAL TRIANGLE IS INTENDED TO
ALERT THE USER TO THE PRESENCE OF IMPORTANT OPERATING AND MAINTENANCE (SERVICING) INSTRUCTIONS IN THE LITERATURE ACCOMPANYING THE
APPLIANCE.
The marking of products using lasers
CLASS 1
LASER PRODUCT
The marking this product has been
classified as Class 1. It means that
there is no danger of hazardous radiation outside the product.
Knowledge sections
Location: Back panel
(For countries other than U.S.A., U.S.-Military and Canada)
VISIBLE LASER RADIATION
WHEN OPEN. DO NOT
STARE INTO BEAM.
Inside this laser product, a laser diode classified as Class 2 laser radiation is contained as alerted by
the internal caution label shown
above. Do not stare into beam.
Location: DVD laser pick-up unit
cover inside this product
CAUTION
VISIBLE LASER
RADIATION WHEN OPEN.
AVOID EXPOSURE TO BEAM.
Inside this laser product, a laser diode classified as Class 3B laser radiation is contained as alerted by
the internal caution label shown
above. Avoid exposure to laser
beams.
Location: MD laser pick-up unit
cover inside this product
CAUTION
Page 3

Before applying power
Special features
Micro-component system featuring DVD VIDEO and MD
A DVD VIDEO player and MD recorder are provided as standard. This combination can be used for example
for playing DVD music software and record its audio output on an MD. (Note that it is only the analog audio
that can be recorded when recording DVD Video, VCD or MP3 file playback on MD.)
MP3 playback
Music files recorded in the MP3 audio compression format can be played back.
3
MD Long Play modes
With the long-hour recording/playback modes (LP2, LP4) based on ATRAC3 (MDLP), digital long-hour recording/playback for twice (about 160 minutes*) or 4 times (about 320 minutes*) the normal recording/
playback time is now available. (* Data using a 80-minute disc.)
CD = MD high-speed dubbing
This convenient feature enables simple, quick dubbing from a CD to an MD.
(Note that recording of discs other than CD on MD is possible only in the normal speed because it is only
their analog audio output that can be recorded on MD.)
Convenient recording features
Versatile recording features are provided, allowing the user to select desired one for each purpose.
÷
One-touch recording :
Pressing a single key starts recording of all tracks or a single track in a disc.
÷ Program recording :
Your favorite tracks can be recorded in any desired order. (Program recording is not available with DVD-VIDEO and
MP3 files.)
Versatile timer features
Preparation section Basic section
Application section Knowledge sections
÷ Sleep timer :
The unit is turned OFF automatically after the specified period has elapsed. It is convenient for example for
falling asleep while listening to music in the night time, etc.
÷ O.T.T. :
This timer setting is executed only for an hour (and for once) when the set start time comes.
÷ Timer playback, timer recording :
Two timer programs (PROG.1, PROG.2) are available for timer playback (AI timer playback) or timer recording.
(With the AI timer playback, the playback volume increases gradually after the start of timer playback.)
This document classifies the applications of each feature using the following icons.
DVD
: Description of a feature that can be used with
DVD VIDEO.
VCD
: Description of a feature that can be used with
VIDEO CD.
CD
: Description of a feature that can be used with
CD (CD-R/RW).
MP3
: Description of a feature that can be used with
MP3.
Page 4

4
Before applying power
Unpacking
Unpack the unit carefully and make sure that all the accessories are present.
If any accessories are missing, or if the unit is damaged or fails to operate, notify your dealer immediately. If the unit was
shipped to you directly, notify your shipper immediately. Kenwood recommends that you retain the original carton and
packing materials in case you need to move or ship the unit in the future.
Keep this manual handy for future reference.
Accessories
Please confirm that the following accessories are present.
AM loop antenna (1)
Preparation section
Video cord (1)
Basic section
FM indoor antenna (1)
Remote control unit (1)
AC plug adaptor (1)
Use to adapt the plug on the power cord
to the shape of the wall outlet.
(Accessory only for regions where use is
necessary.)
Speaker cord (2)
Batteries (R6/AA) (2)
In regard to demonstration
Application section
This unit is equipped with a demonstration function (only display). The demonstration consists
of sequential change of display and indicators
showing the operations, but the audio itself does
not change. The demonstration function can be
cancelled as follows.
÷ This operates automatically when a power failure has
occurred or the plug of the power cable has been
pulled while the power was ON.
Knowledge sections
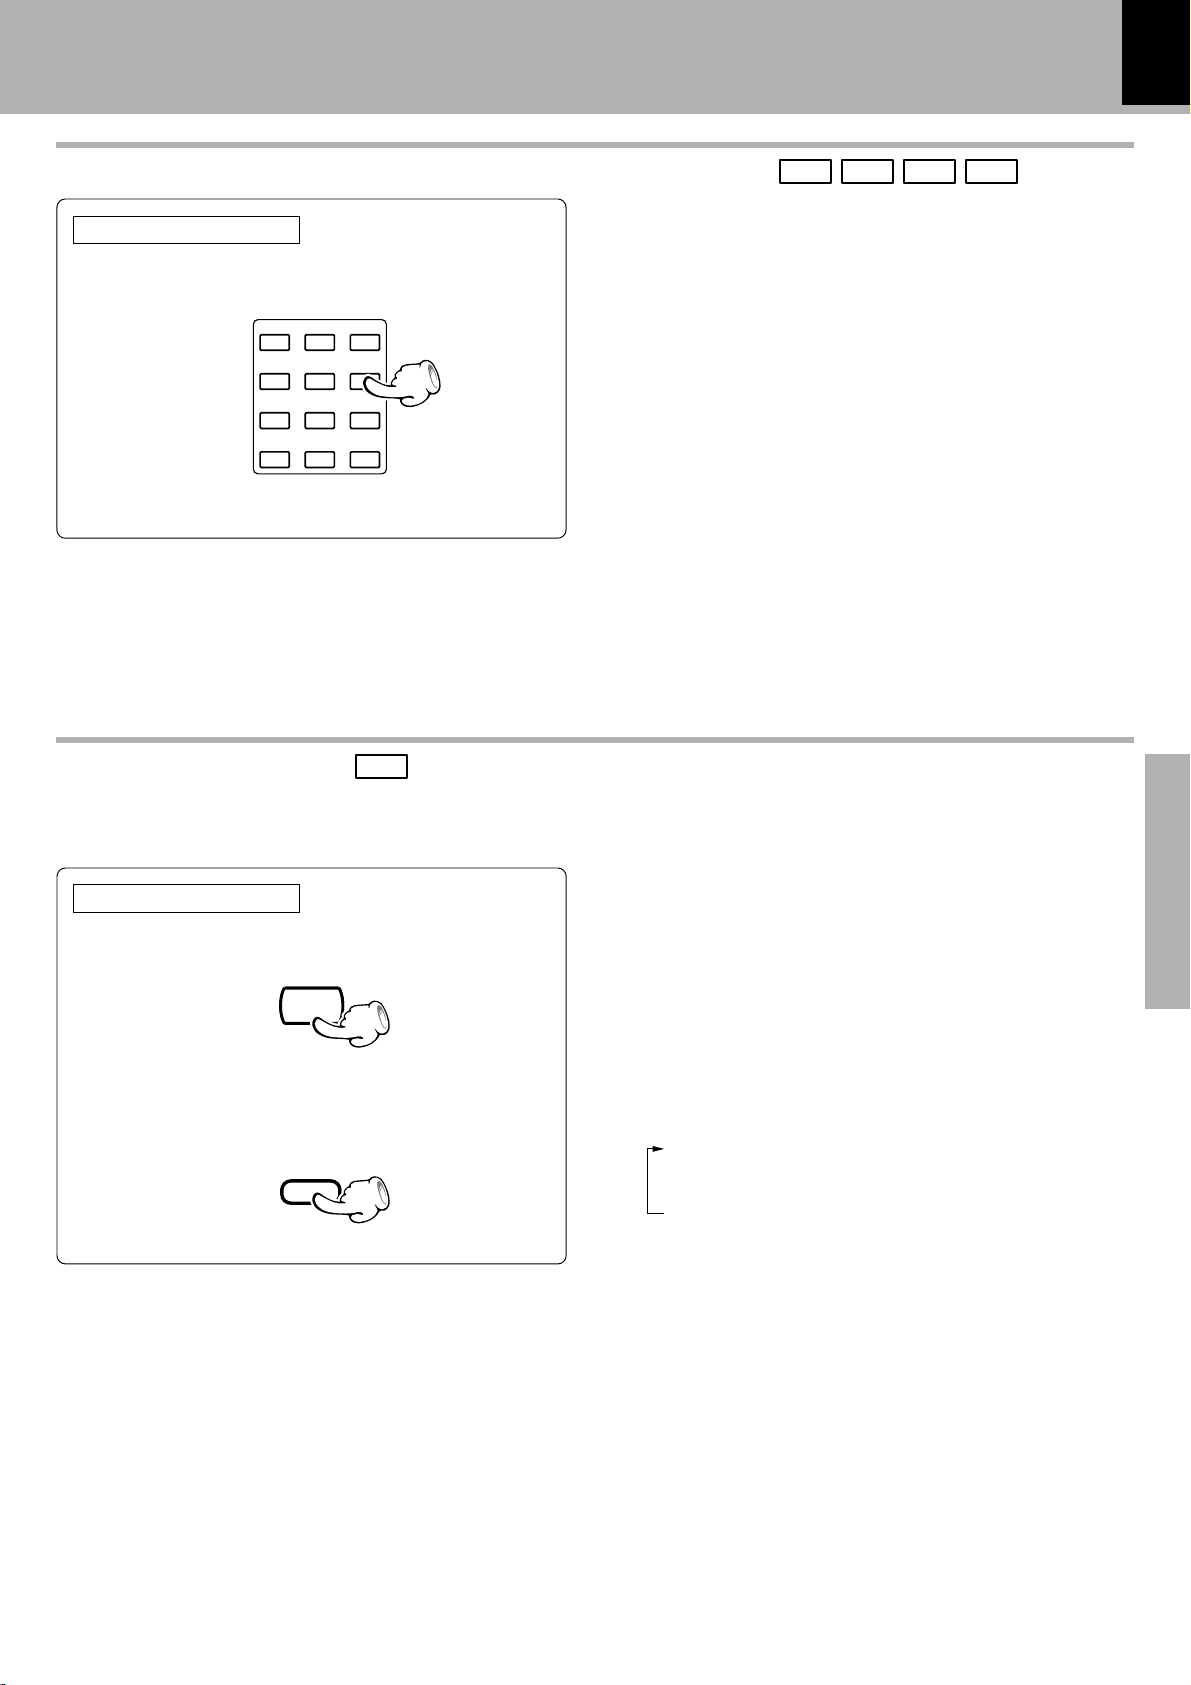
"DEMO OFF" (To cancel demonstration):
Press the SET/DEMO key during demonstration.
SET/DEMO
"DEMO ON" (To execute demonstration):
After turning power ON, press and hold the SET/
DEMO key (for more than 2 seconds).
Page 5

Contents
Caution : Read the pages marked carefully to ensure safe operation.
Before applying power
5
Preparation section
Before applying power ............................................ 2
Safety precautions .............................................................. 2
Special features .............................................................. 3
System connection ......................................................... 6
Connection of the System Accessories .................................. 6
Connection of Other Accessories
(Commercially Available Parts) ........................................... 8
Channel space setting .............................................................. 10
Controls and indicators................................................ 12
Main unit ..................................................................................... 12
Operation of remote control unit ............................................ 14
Display ......................................................................................... 16
Clock adjustment .......................................................... 17
Video Formats ................................................................ 18
Playable Disc ................................................................. 19
Basic section
Basic use method.......................................................... 22
Playback ......................................................................... 24
Basic OSD Operation ................................................................ 28
Icons on the TV screen ............................................................. 29
Playback of MD ............................................................. 31
Receiving broadcast station ....................................... 34
Collective presetting of stations ............................................ 35
Tuning a non-preset radio station
(Auto tuning, Manual tuning) ............................................. 36
One-by-one presetting (Manual preset) ............................... 36
Recording on MD .......................................................... 38
Various playback features .......................................... 58
Listening to the desired sequence (program playback) ... 58
Repeated playback ................................................................... 60
A-B repeat playback ................................................................. 61
Playing tracks in a random order (random playback) ....... 62
Convenient recording methods .................................. 63
One-touch edit high-speed recording................................... 64
One-touch edit normal-speed recording .............................. 66
Program recording .................................................................... 68
MD Edit Functions ......................................................... 71
Moving a single track (MOVE)................................................ 72
Dividing a track (DIVIDE) ......................................................... 74
Combining two tracks (COMBINE) ........................................ 76
Erasing a single track (ERASE) .............................................. 78
Erasing all tracks in disc (ALL ERASE) .................................. 79
Assigning a title to a disc or track ........................................ 80
Copying titles in title memos for use as titles of other MDs or tracks
(TITLE COPY) (TITLE MEMO) ............................................................
84
Listening to an AUX input source............................... 87
Timer operation ............................................................. 88
Sleep timer (SLEEP) .................................................................. 88
Setting the O.T.T. timer............................................................. 89
Setting an everyday timer program ....................................... 90
Knowledge sections
Important Items.............................................................. 93
Maintenance .............................................................................. 93
Reference .................................................................................... 93
Glossary ...................................................................................... 96
In case of difficulty ....................................................... 99
Specifications.............................................................. 104
Preparation section Basic section
Application section Knowledge sections
Application section
Menu playback .............................................................. 44
Menu playback of DVD ............................................................. 44
Menu playback of P.B.C.-compatible VCD ........................... 45
MP3 that can be played back with this equipment ....
Searching a desired folder/file by its title ...................... 47
Changing the initial setup (DVD) ................................ 48
"MAIN" Setting ........................................................................... 48
"SOUND" Setting ........................................................................ 51
"VISUAL"Setting ......................................................................... 54
46
Page 6
6
123 4
GND
FM75 Ω
AM
ANTENNA
1
23
System connection
System connection
Malfunction of microcomputer
If operation is not possible or erroneous display appears even though all connections have been made
properly, reset the microcomputer referring to "In case of difficulty". ¬
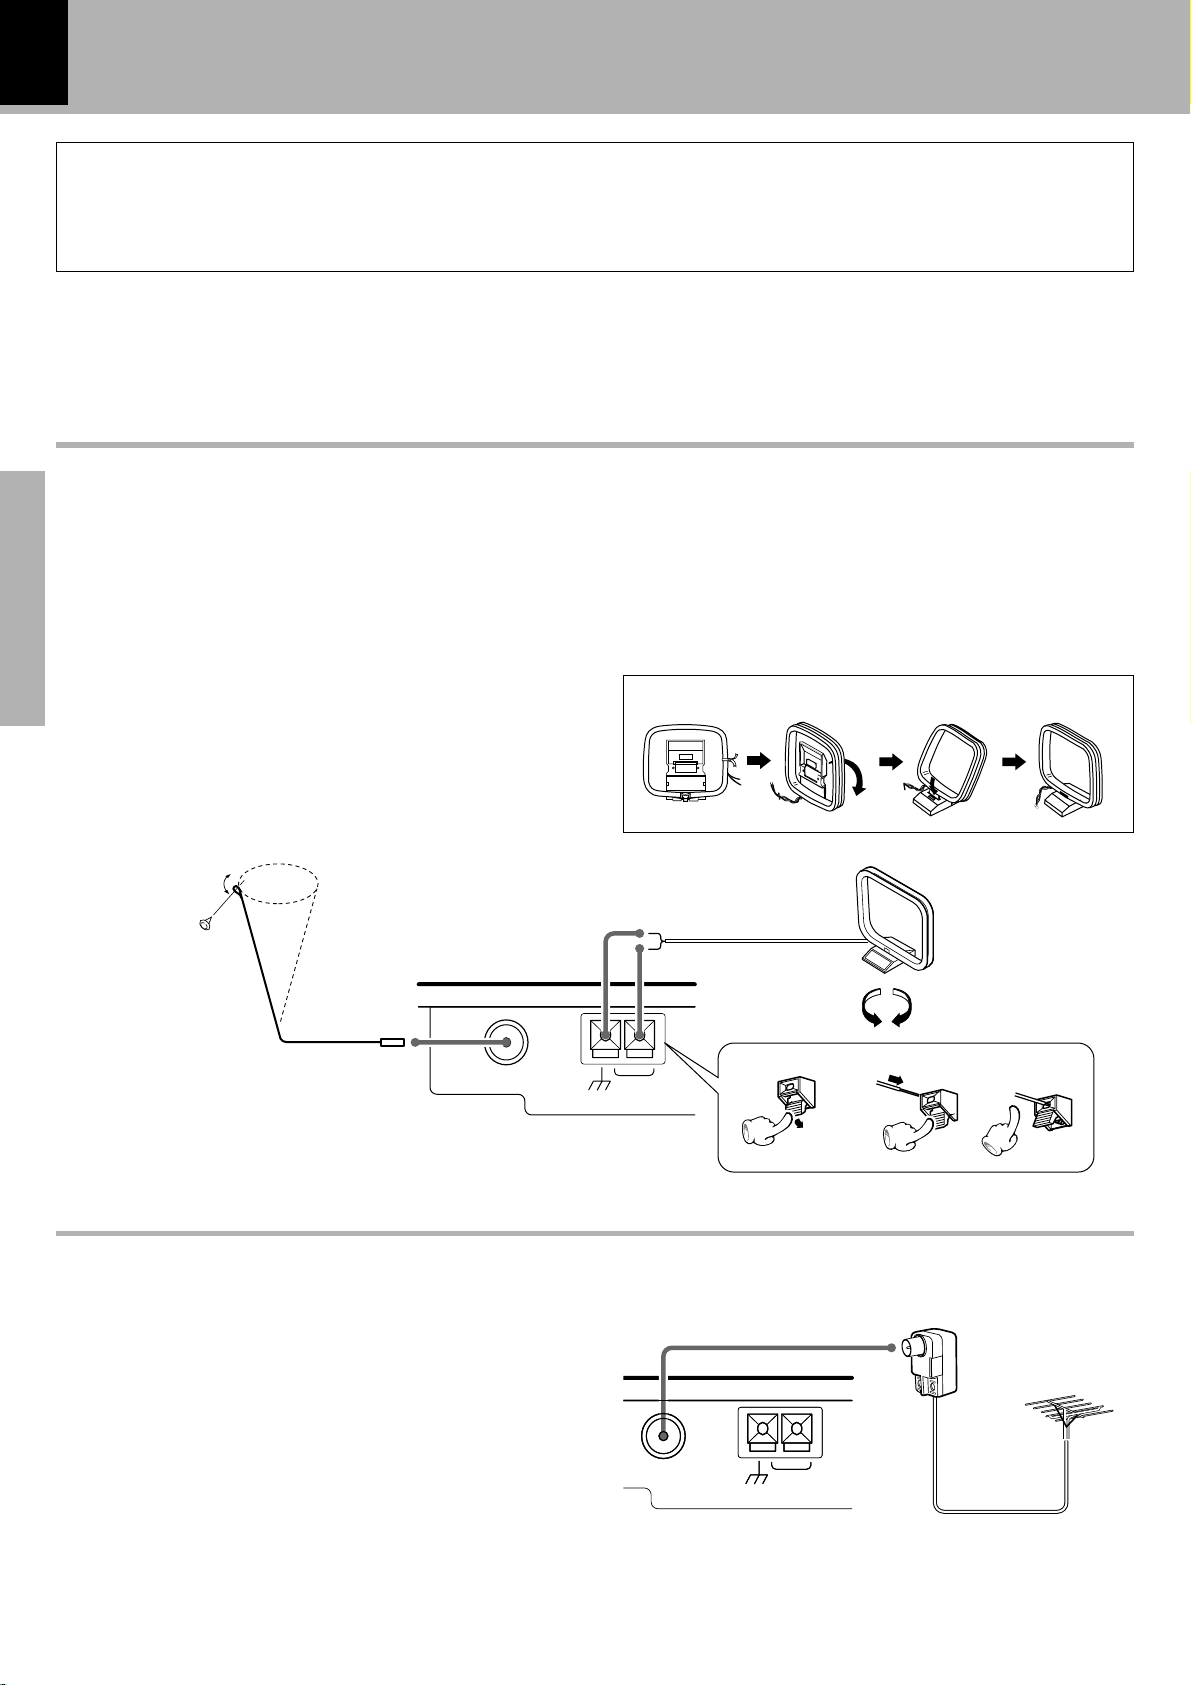
Connection of the System Accessories
Connect the antenna as shown in the figure.
Do not plug the power cord into a wall AC outlet until the connection has been completed.
Connection of the Accessory Antenna
FM indoor antenna
The accessory antenna is for temporary indoor use only.
For stable signal reception we recommend using an outdoor antenna.
Remove the indoor antenna if you connect one outdoors.
Preparation section
1Connect the antenna to the antenna termi-
nal.
2 Locate the position providing good recep-
tion condition.
3 Fix the antenna.
FM indoor antenna
AM loop antenna
The supplied antenna is for indoor use. Place it as far
as possible from the main system, TV set, speaker
cords and power cord, and set it to a direction which
provides the best reception.
Assembling the antenna
AM loop
antenna
FM outdoor antenna (Commercially available)
Lead the 75Ω coaxial cable connected to the FM out-
door antenna into the room and connect it to the FM
75Ω terminal. Please remove the indoor antenna after
an outdoor antenna has been installed.
Antenna adaptor
(Commercially available)
FM75 Ω
GND
ANTENNA
AMGND AM
75Ω coaxial cable
(Commercially available)
FM outdoor
antenna (Commercially available)
Page 7
System connection
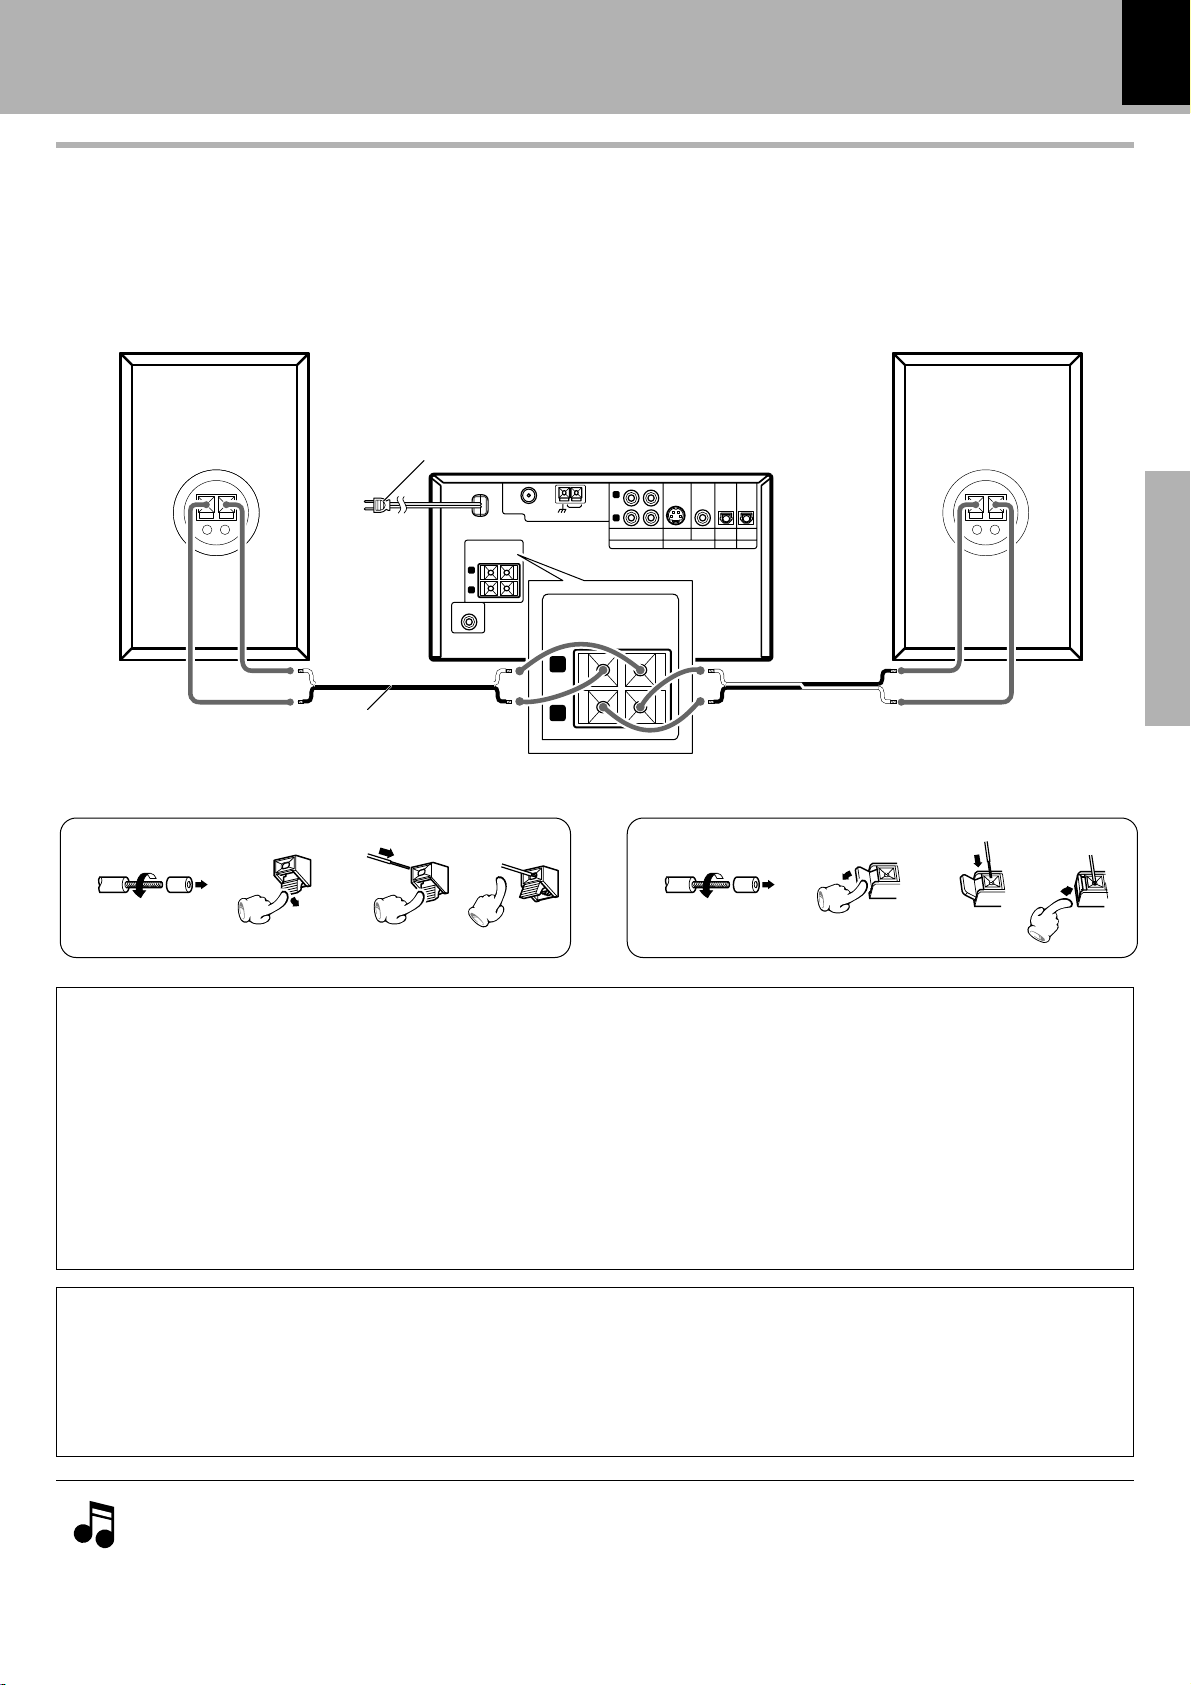
Connection of speakers
÷ Never short-circuit the "+" and "-" speaker cords.
The protection circuit will operate and no sound will be put out.
÷ The "+" and "-" polarity are inverted, the sound will be unnatural with unclear localization of musical instru-
ments.
Speaker (Right) Speaker (Left)
To wall AC outlet
PCM/BIT
S-VIDEO VIDEO
VIDEO OUT
PCM
OPTICAL
DIGITAL IN
STREAM
OPTICAL
DIGITAL OUT
−+−+−++
−
AM
SPEAKERS
-
L
R
AUX
AUX
OUT
IN
AUDIO
( 6
)
-16 Ω
+
FM75 Ω
GND
−+−+−+−
+
-
R
L
SUB WOOFER
PRE OUT
SPEAKERS
( 6
-16 Ω
ANTENNA
)
+
R
7
Preparation section
Speaker cord (accessories)
L
Speaker rear panel
4
Main unit
1 2 3 41 23
twist twist
Installation of speakers and positioning of TV
1. Color irregularities on the TV screen may also be produced depending on the method how the speakers are installed.
When color irregularities are observed after the speaker installation, first turn the TV off, wait for 15 to 30 minutes and turn
it on again: The interference may be improved by the self-demagnetizing function of the TV. If the color irregularities still
remain, install the speakers more apart from the TV.
2. If a source of magnetism such as a magnet is located near the speakers, its interaction with the speakers may cause
color irregularities on the TV screen. Also take care of this point when installing the speakers.
3. Due to induction by the electromagnetic waves produced by a TV, the speakers may produce sound even when the stereo
unit is turned off. In this case also, install the speakers more apart from the TV.
CAUTION
Be sure to adhere to the following, or proper ventilation will be blocked causing damage or fire hazard.
÷ Leave some space around the unit (from the largest outside dimension including projection) equal to or greater than,
shown below.
Back panel : 10 cm
1. Be sure to insert all connection cords securely. If their connections are imperfect, the sound may not be
produced or noise may interfere.
2. Before plugging or unplugging a connection cord, be sure to unplug the power cord from the wall AC outlet.
If connection cords are plugged or unplugged with the power cord left plugged in, malfunction or damage may
result.
Page 8
8
KENWOOD
System connection
Connection of Other Accessories
(Commercially Available Parts)
When connections are to be made, make sure that the power plug is not plugged into a wall AC outlet.
Connect the equipment as shown in the figures.
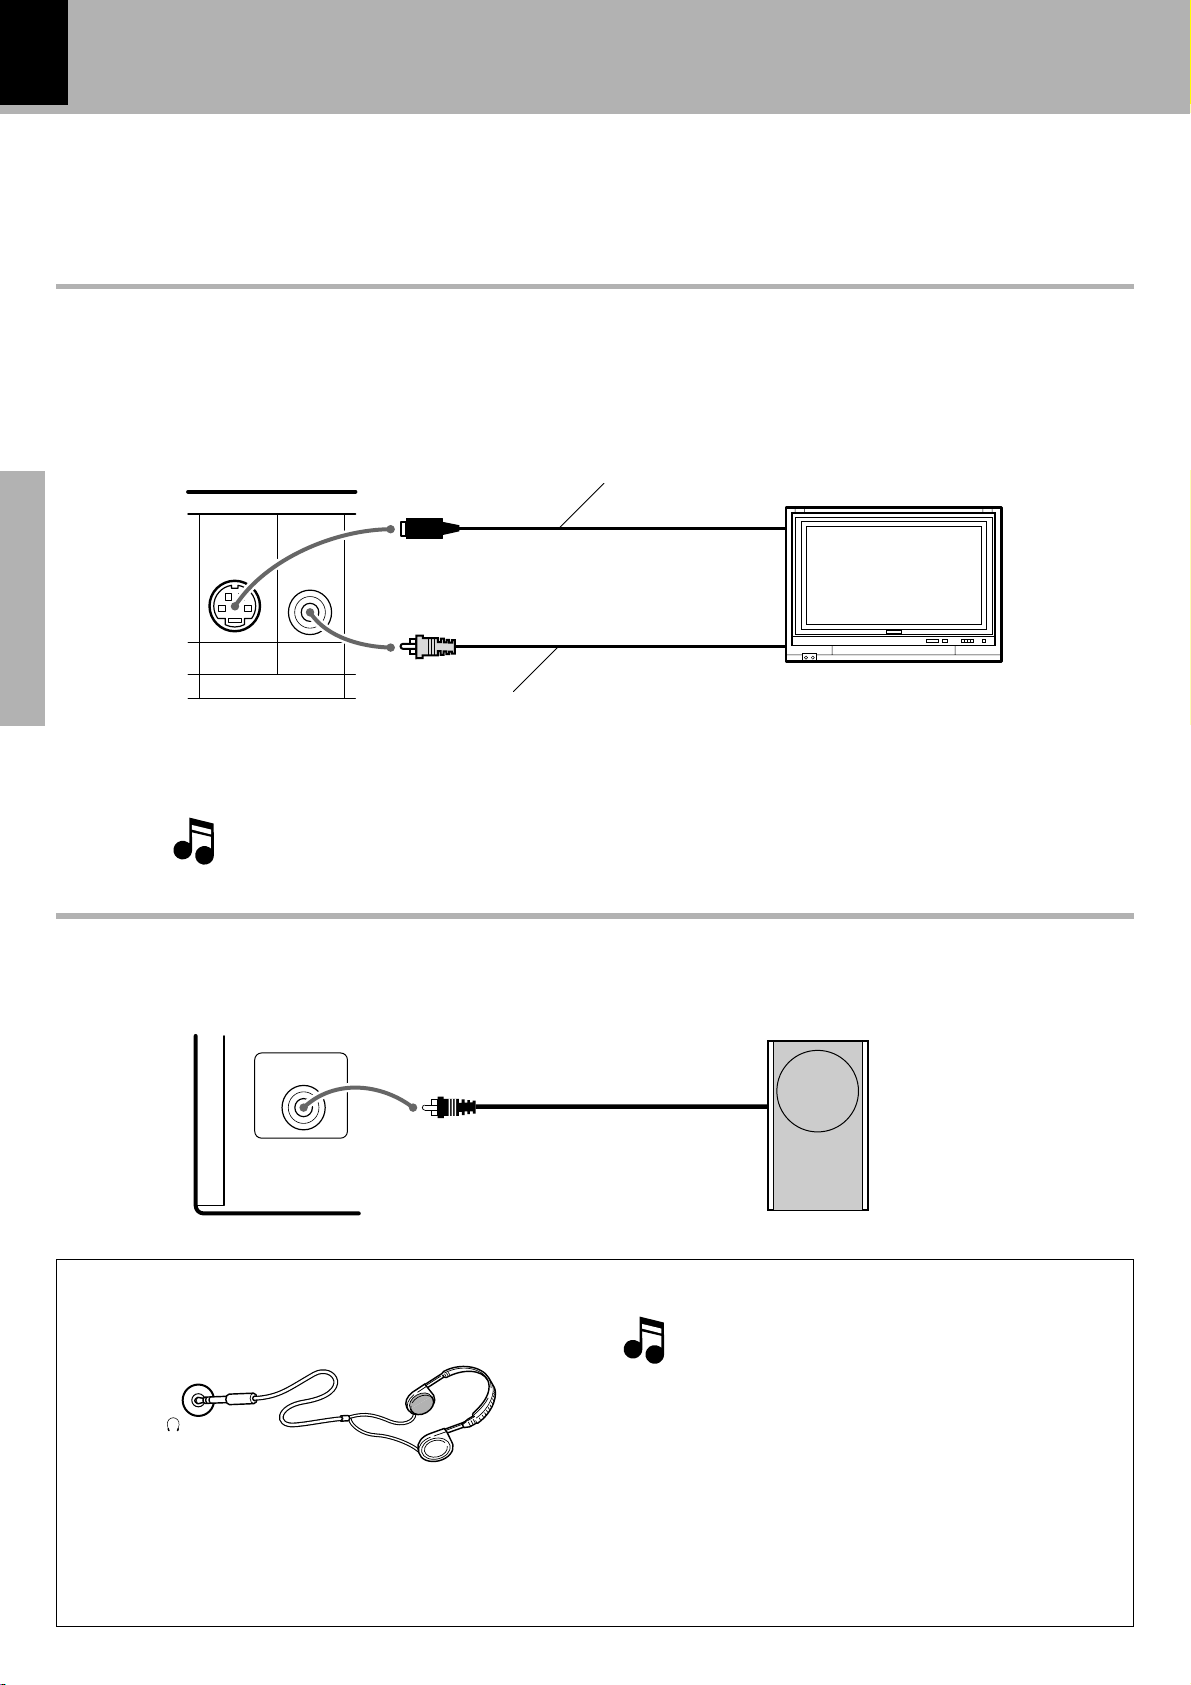
To Connect a TV
Set initial setup "TV Aspect" according to the aspect ratio (4:3 or 16:9) of your TV. i
If the TV has an S Video input connector, connect the VIDEO OUT S-VIDEO connector of the player to it using
the provided S Video cord.
S-Video cord (Commercially available)
Monitor TV
S-Video input
Preparation section
S-VIDEO VIDEO
VIDEO OUT
Video cord (accessories)
Video input
Select the video connection method according to the TV in use. (When S-Video
cable is connected, the ordinary video connection is not necessary.)
The video output from the player should be connected directly to the TV. If the video output is
connected through a VCR, the picture displayed on the TV may be disturbed due to the copy protect function.
Conection of Subwoofer (optional)
Extremely low frequency sound is played back powerfully.
SUB WOOFER
PRE OUT
Using Headphones
1 Insert the headphone plug into the PHONES
jack.
PHONES
÷ Headphones with a stereo mini plug can be con-
nected.
÷ The sounds from all speakers are cut off.
Subwoofer
KENWOOD
When a DTS-encoded disc (CDs, LDs, DVDs) is
played, noise may interfere with the headphone
output. To enjoy DTS digital surround playback
through headphones, connect an external 5.1channel DTS digital surround decoder system to
the digital output of the DVD player and use the
headphones jack of your amplifier or receiver.
2 Adjust the volume with the VOLUME/
MULTI CONTROL knob.
Page 9
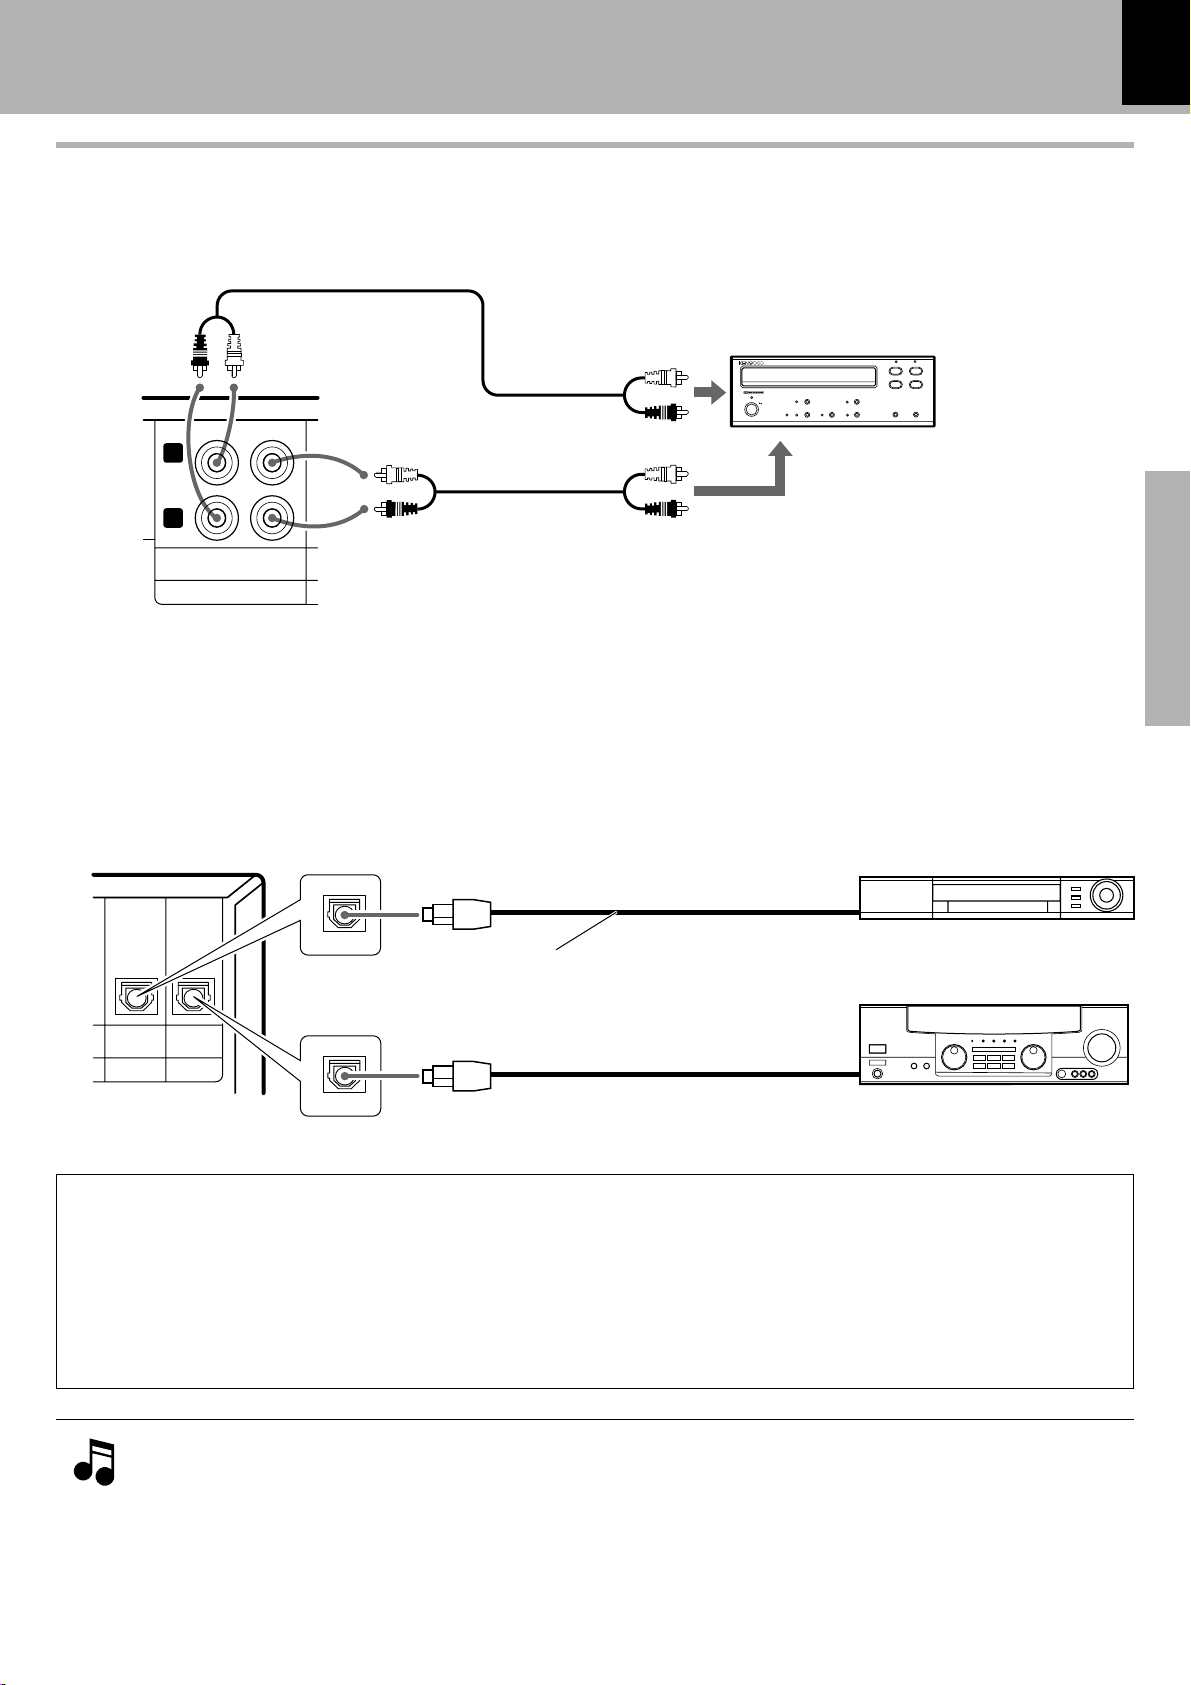
System connection
Connection of external source component
Analog signal connection
The AUDIO AUX IN (AUDIO AUX OUT) input jacks on the rear panel can be used to connect a cassette
deck, etc.
9
audio input
L
R
AUX
AUX
OUT
IN
AUDIO
Cassette deck etc.
audio output
3
027
8
¡
1
¶
Digital signal connection
The OPTICAL digital input jack on the rear panel can be used to connect a digital component.
The recommended setup for "Digital Audio" is variable depending on the equipment connected to the digital
audio output. T
Digital component
Preparation section
PCM/BIT
PCM
STREAM
Optical digital audio output
Optical fiber cable
AV Amplifier
OPTICAL
OPTICAL
DIGITAL IN
DIGITAL OUT
*
Digital outputs are available only from DVD, VCD and CD.
*
Optical digital audio input
DTS disclaimer clause
When playing DTS-encoded (CDs, LDs, DVDs), excessive noise will be exhibited from the analog stereo
outputs. To avoid possible damage to the audio system, the consumer should take proper precautions
when the analog stereo outputs of the DVD player is connected to an amplification system. To enjoy
DTS Digital Surround™ playback, an external 5.1 channel DTS Digital Surround™ decoder system must
be connected to the digital output (S/P DIF, AES/EBU, or TosLink) of the DVD player.
1. This unit always down-mixes multi-channel surround audio into 2-channel audio and outputs it from the
AUDIO AUX OUT, DIGITAL OUT OPTICAL and PHONES jacks. However, with certain discs, this unit
outputs only the Front (L/R) channel signals in place of the down-mixed 2-channel signals.
2. In case an associated system component is connected, also read the instruction manual of the component.
3. Insert the optical-fiber cable straight into the connector until it clicks.
4. Never bend or bundle the optical-fiber cable.
Page 10
10
System connection
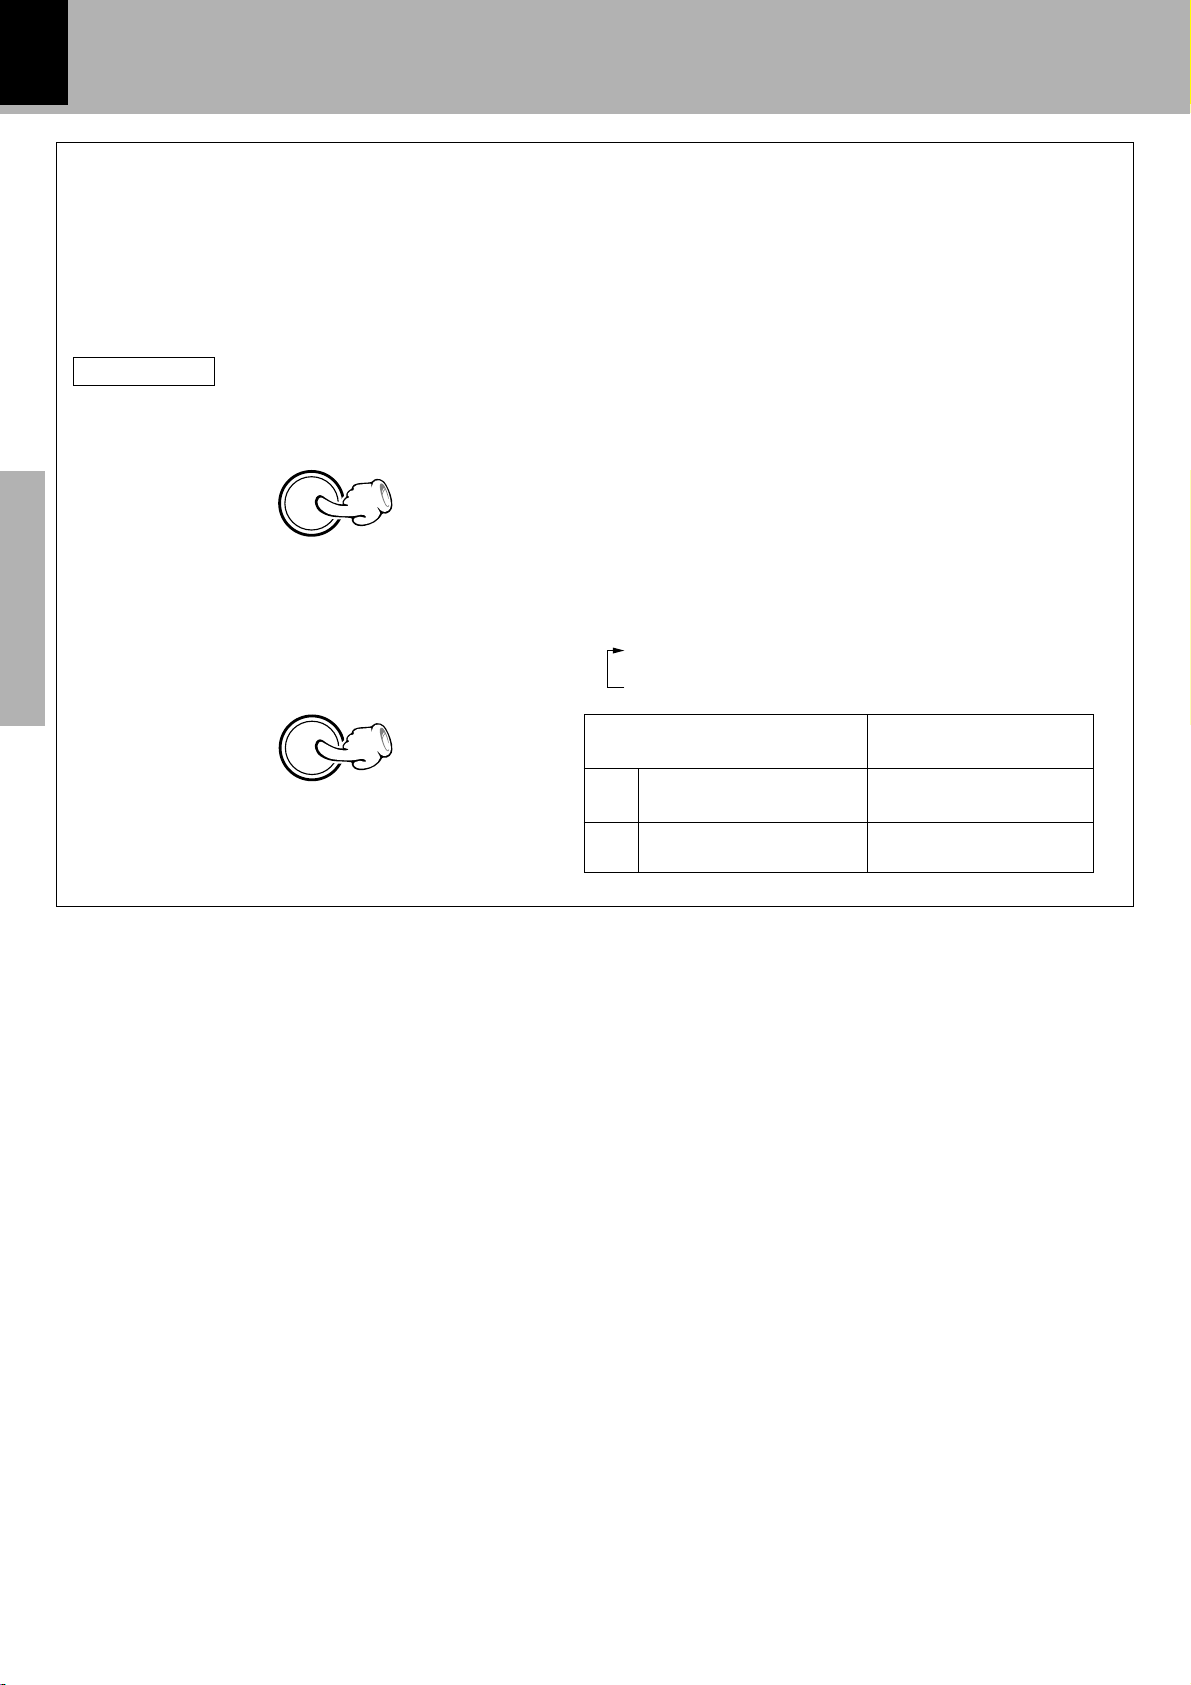
Channel space setting
The space between radio channels has been set to the one that prevails in the area to which the system is shipped.
However, if the current channel space setting does not match the setting in the area where the system is to be
used, for instance when you move from area 1 or area 2 shown in the following table or vice versa, proper reception of AM/FM broadcasts cannot be expected. In this case, change the channel space setting in accordance with
your area by referring to the following table.
Main unit only
1 Select the "TUNER" input.
TUNER/
BAND
2 Press the STOP7/TUNING MODE key.
(for more than 5 seconds)
Preparation section
STOP 7
TUNING MODE
Each press switches the space frequency alternately.
1 FM 50 kHz, AM 9 kHz
2 FM 100 kHz, AM 10 kHz
Area
USA, Canada and South
1
American countries
2
Other countries
CHANNEL
Space Frequency
FM: 100 kHz
AM: 10 kHz
FM: 50 kHz
AM: 9 kHz
Page 11

System connection
11
Preparation section
Page 12

12
Controls and indicators
Main unit
Controls and indicators
Preparation section
1
STANDBY
/TIMER
PHONES
2
AUX
SOUND MODE SET/DEMO REC MODE MD REC
789
3
MULTI CONTROL
VOLUME/
5
LAVEL SIDE
6
4
DVD/CD
6MD
STOP
7
TUNER/BAND
TUNING MODE
P.CALL
4¢
DVD/CD
0MD
6
5
0
1 key
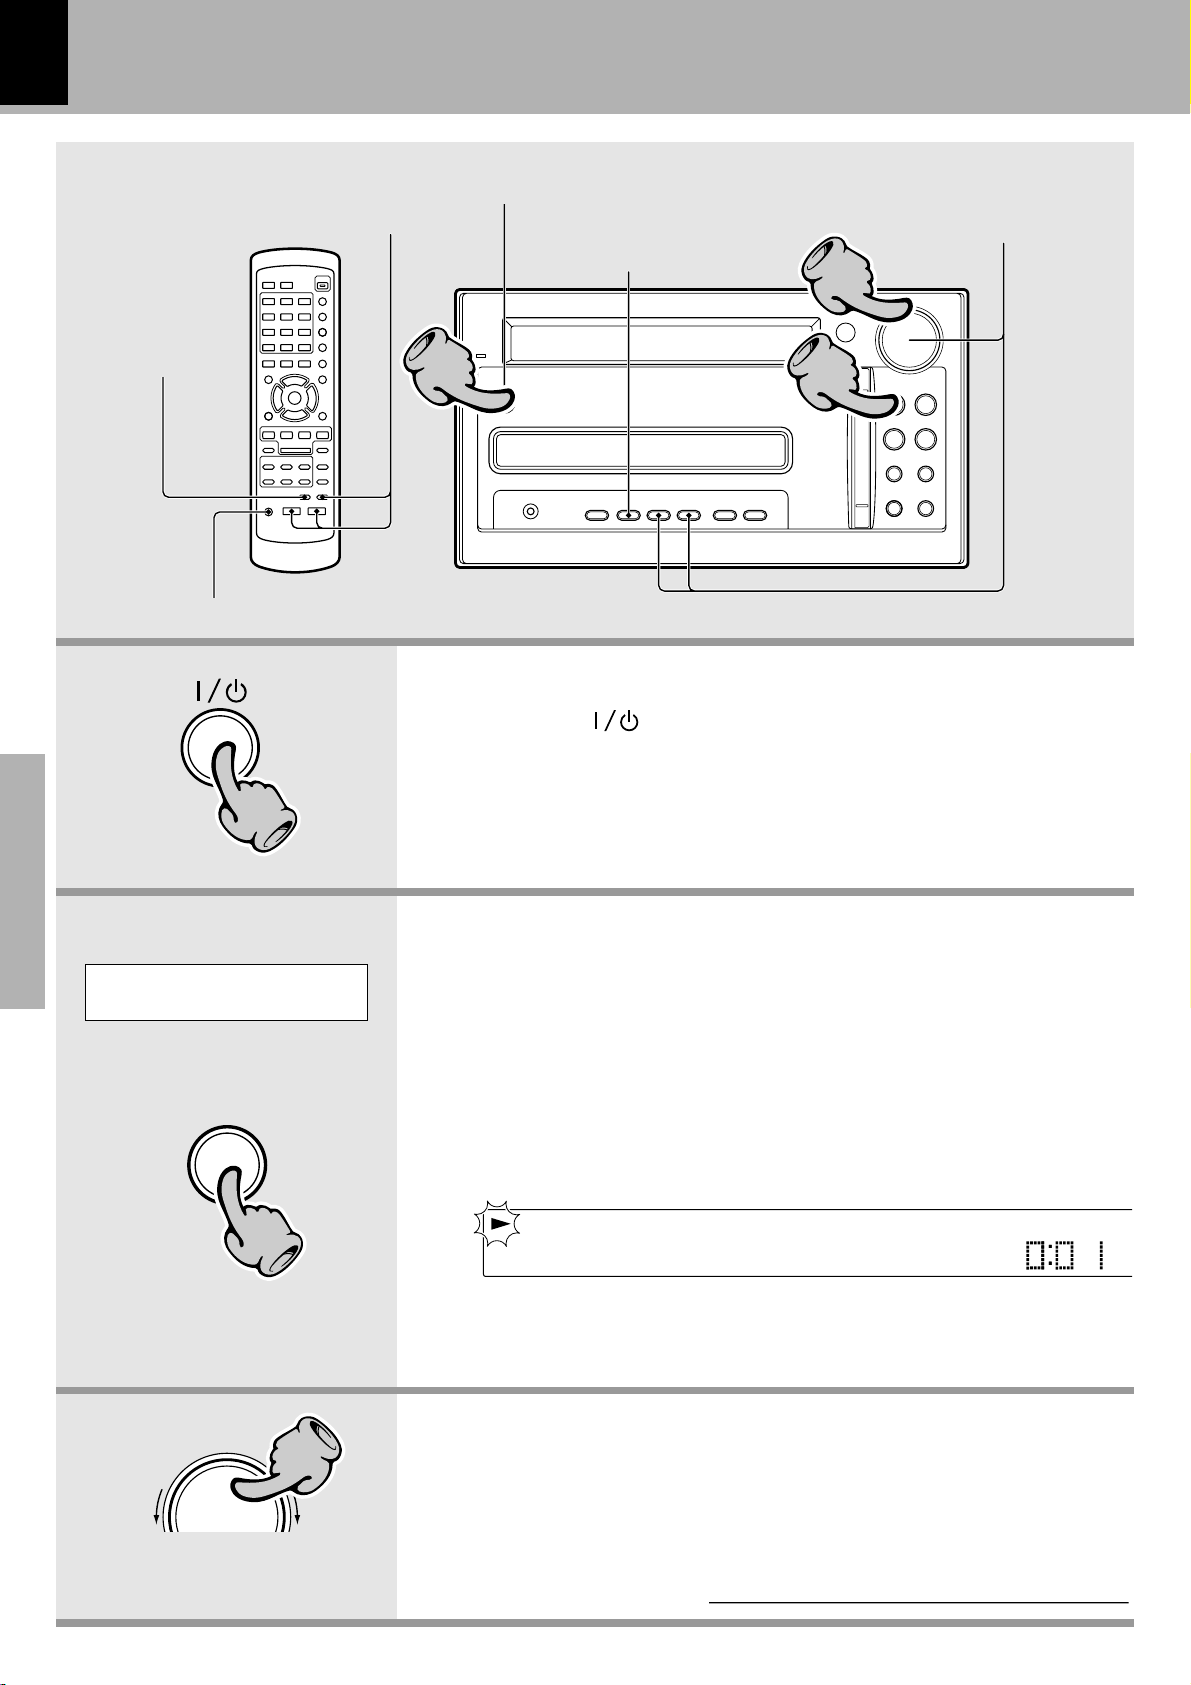
Press to set the unit to ON or STANDBY.
™Lß
STANDBY/TIMER indicator
When power is ON : Goes off.
When power is OFF (standby) : Lights in red #
During timer standby : Lights in amber.Lß
2 Display
3 Remote sensor (remote)
4 VOLUME/MULTI CONTROL knob
This knob is usually used to adjust the listening volume
but can also be used in setting selection, timer
reservation and clock adjustment operations.
#&™
5 DVD/CD 6 key
When power is ON:
Press to select the "DVD/CD" input. ¢
When power is OFF (standby):
Press to turn the system power ON and start DVD
(VCD, CD, MP3) playback. ™
When "DVD/CD" input is selected:
Press to start playback or let it pause. ¢
MD 6 key
When power is ON:
Press to select the "MD" input. ⁄
When power is OFF (standby):
Press to turn the system power ON and start MD
playback. ™
When "MD" input is selected:
Press to start playback or let it pause. ⁄
TUNER/BAND key
When power is ON:
Press to select the tuner input. ›
When power is OFF (standby):
Press to turn the system power ON and start radio
reception on the tuner. ™
During tuner reception:
Press to switch the radio band. ›
STOP7/TUNING MODE key
When power is OFF (standby):
Press to display the time of the day for 5 seconds.&
During DVD (VCD, CD, MP3), MD playback :
Press to stop playback.
During MD recording :
Press to stop recording.
During tuner reception:
Press to switch the tuning mode of the tuner.
Page 13
Controls and indicators
13
4 P.CALL ¢ keys
During DVD (VCD, CD, MP3), MD playback :
Press to skip in the forward or backward direction.
§¤
During tuner reception:
Press to receive a preset station. ›
DVD/CD 0 key
This key is pressed to remove DVD (VCD, CD, MP3).
MD 0 key
This key is pressed to remove MD.
6 MD insertion slot
7 AUX key
Press when playing or recording the input source
connected to the AUDIO AUX IN (analog) input jacks.
°J
Press when playing or recording the input source
connected to the DIGITAL IN OPTICAL jacks.
°J
SOUND key
Press to adjust the tone. £
MODE key
Press to switch the function of the VOLUME/MULTI
CONTROL knob to the menu select mode. #
This key is also used when setting the time of the day.
&
SET/DEMO key
Press to set or enter an item selected with the
VOLUME/MULTI CONTROL knob. &q
This key is also used for switching demonstration
on/off. 4
REC MODE key
Press to switch the MD recording mode.
MD REC key
Press to start MD recording. ·
8 DVD/CD tray
9 PHONES jack
Plug headphones with a stereo mini-plug (optional).
÷ Open the door to use 7 and 9.
Lower this part to open the door.
8
Preparation section
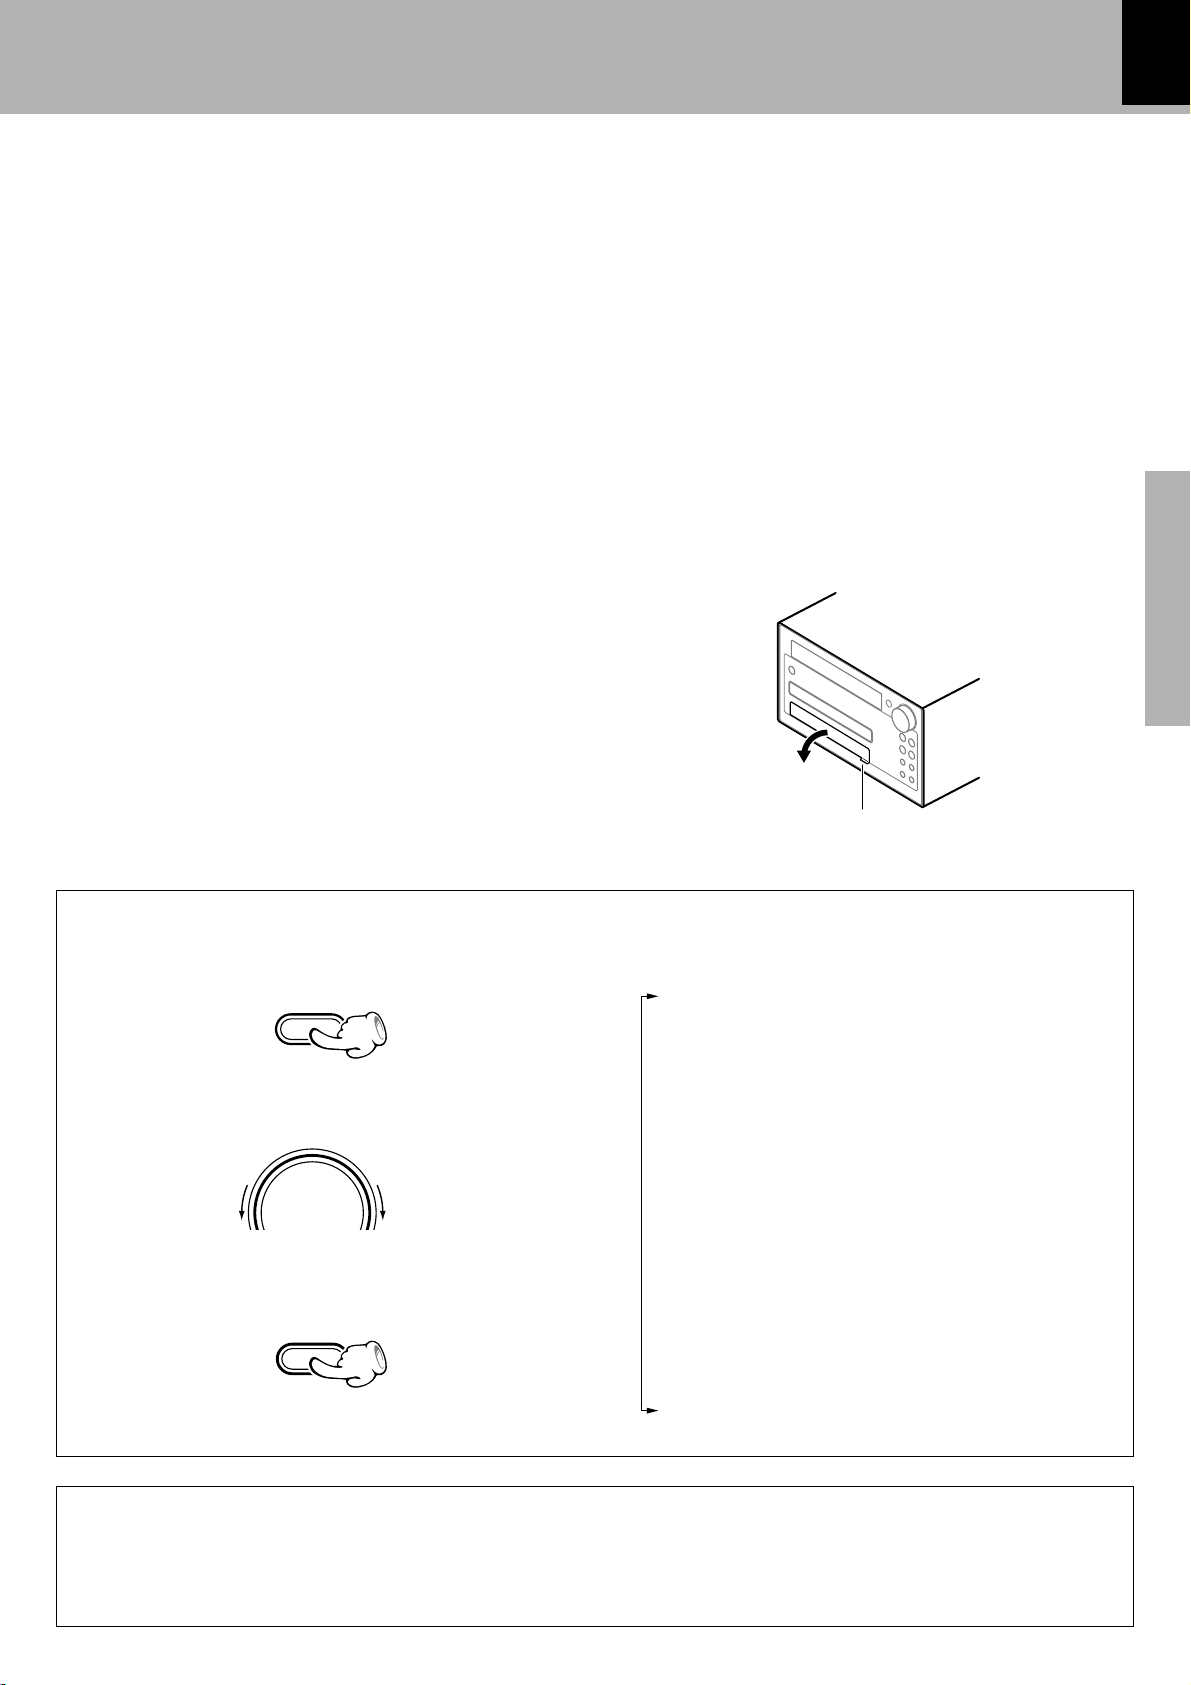
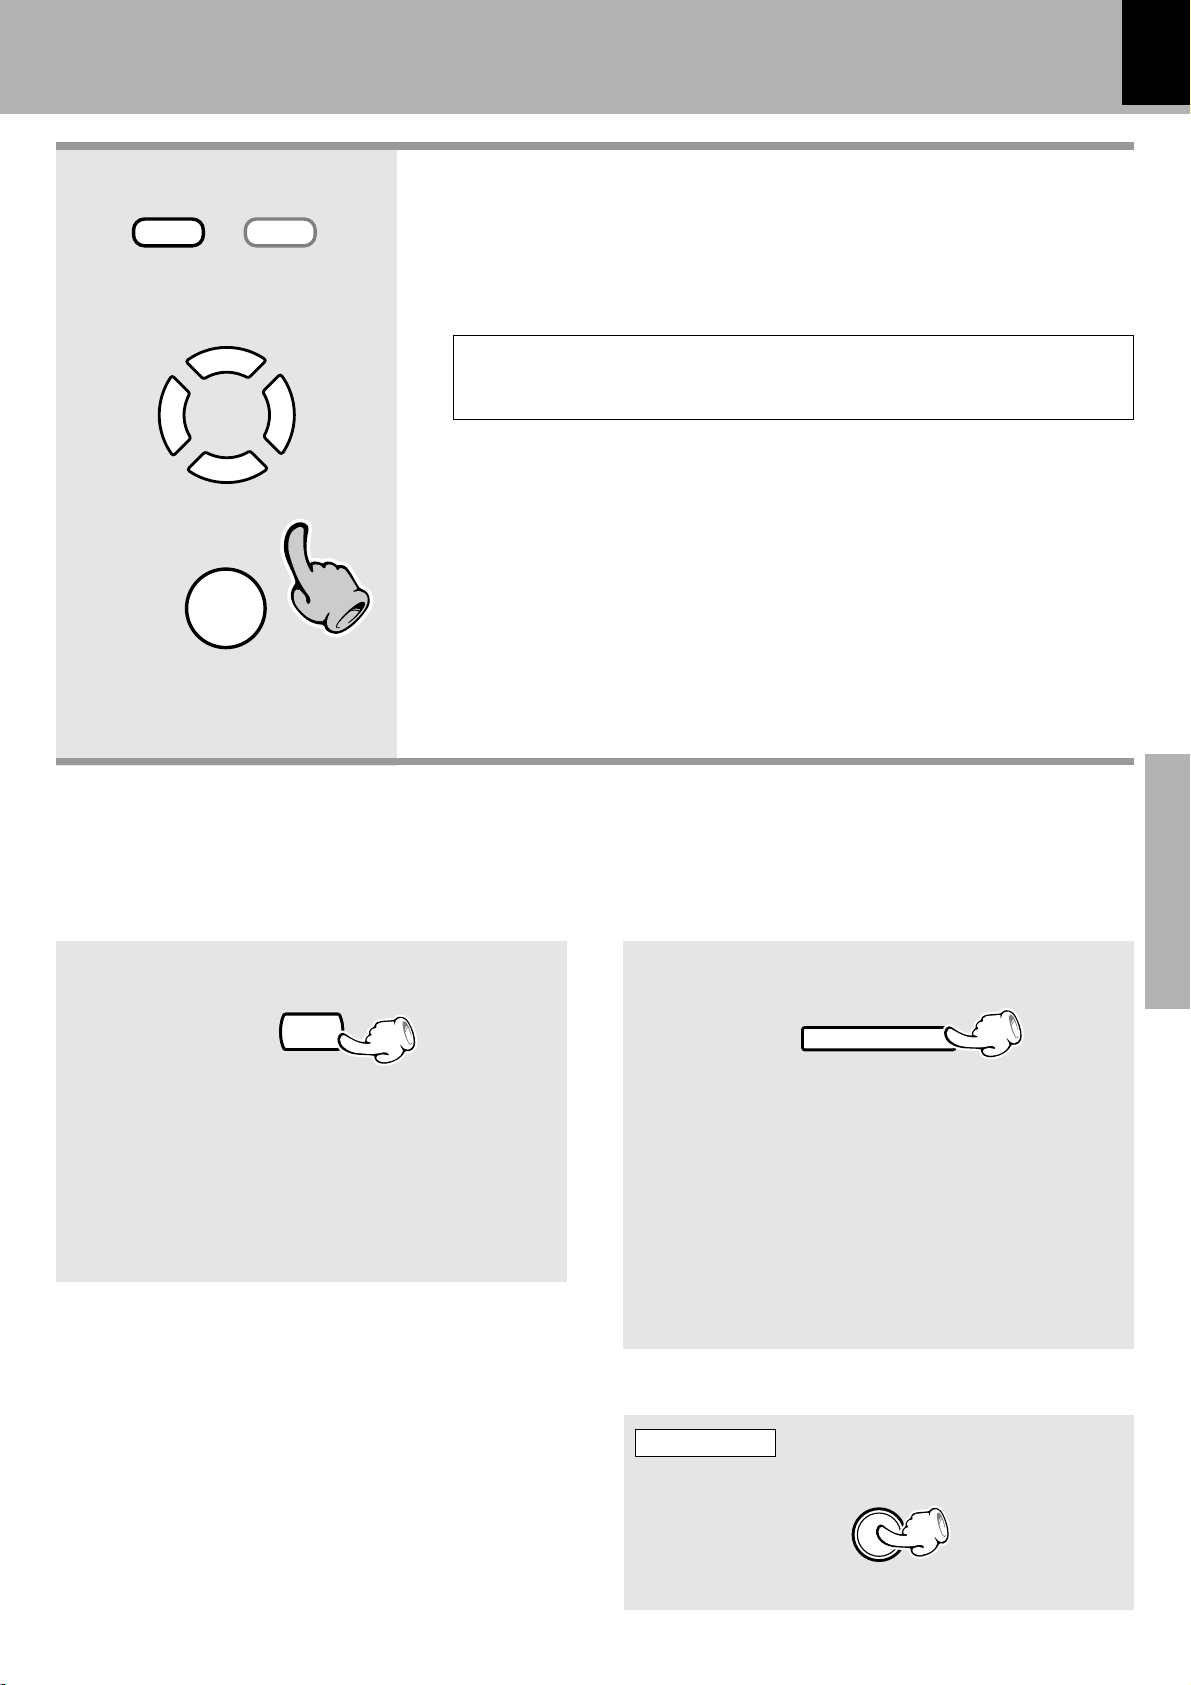
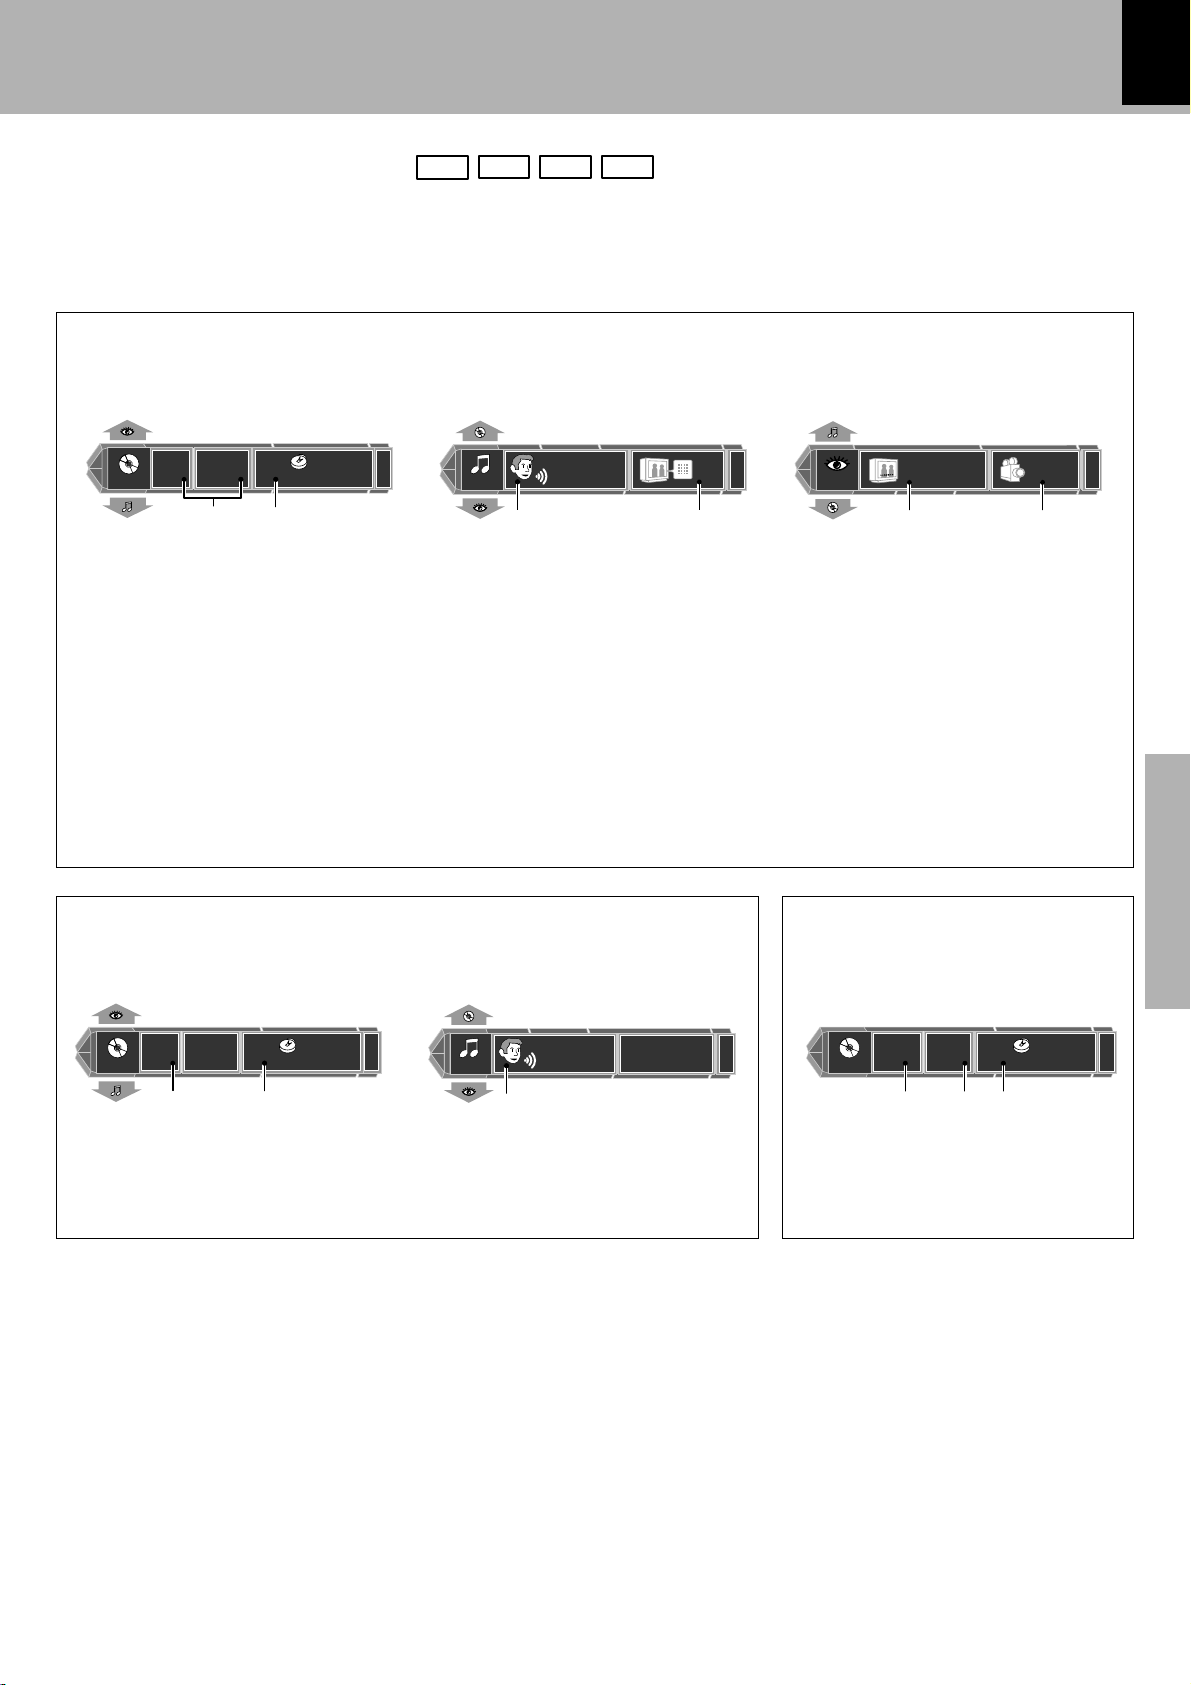
Operation in menu mode
1 Press the MODE key.
MODE
2 Select the item to be set.
VOLUME/
MULTI CONTROL
3 Press the SET/ DEMO key.
SET/DEMO
Each turn changes the displayed item.
"O.T.E. MODE" ˇ¨Ø
"TRACK MARK" w
(Only when REC INPUT is set to "ANALOG")
"REC INPUT" ‚
(Only when the DVD/CD input is selected)
"REC LEVEL" ‚
"TIMER SET" L:
"A.P.S." ^
"INPUT LEVEL" J
(Only when the AUX input is selected)
"BALANCE" £
"TIME ADJUST " &
"AUTO PRESET " fi
(Only when the TUNER input is selected)
"DIMMER" ^
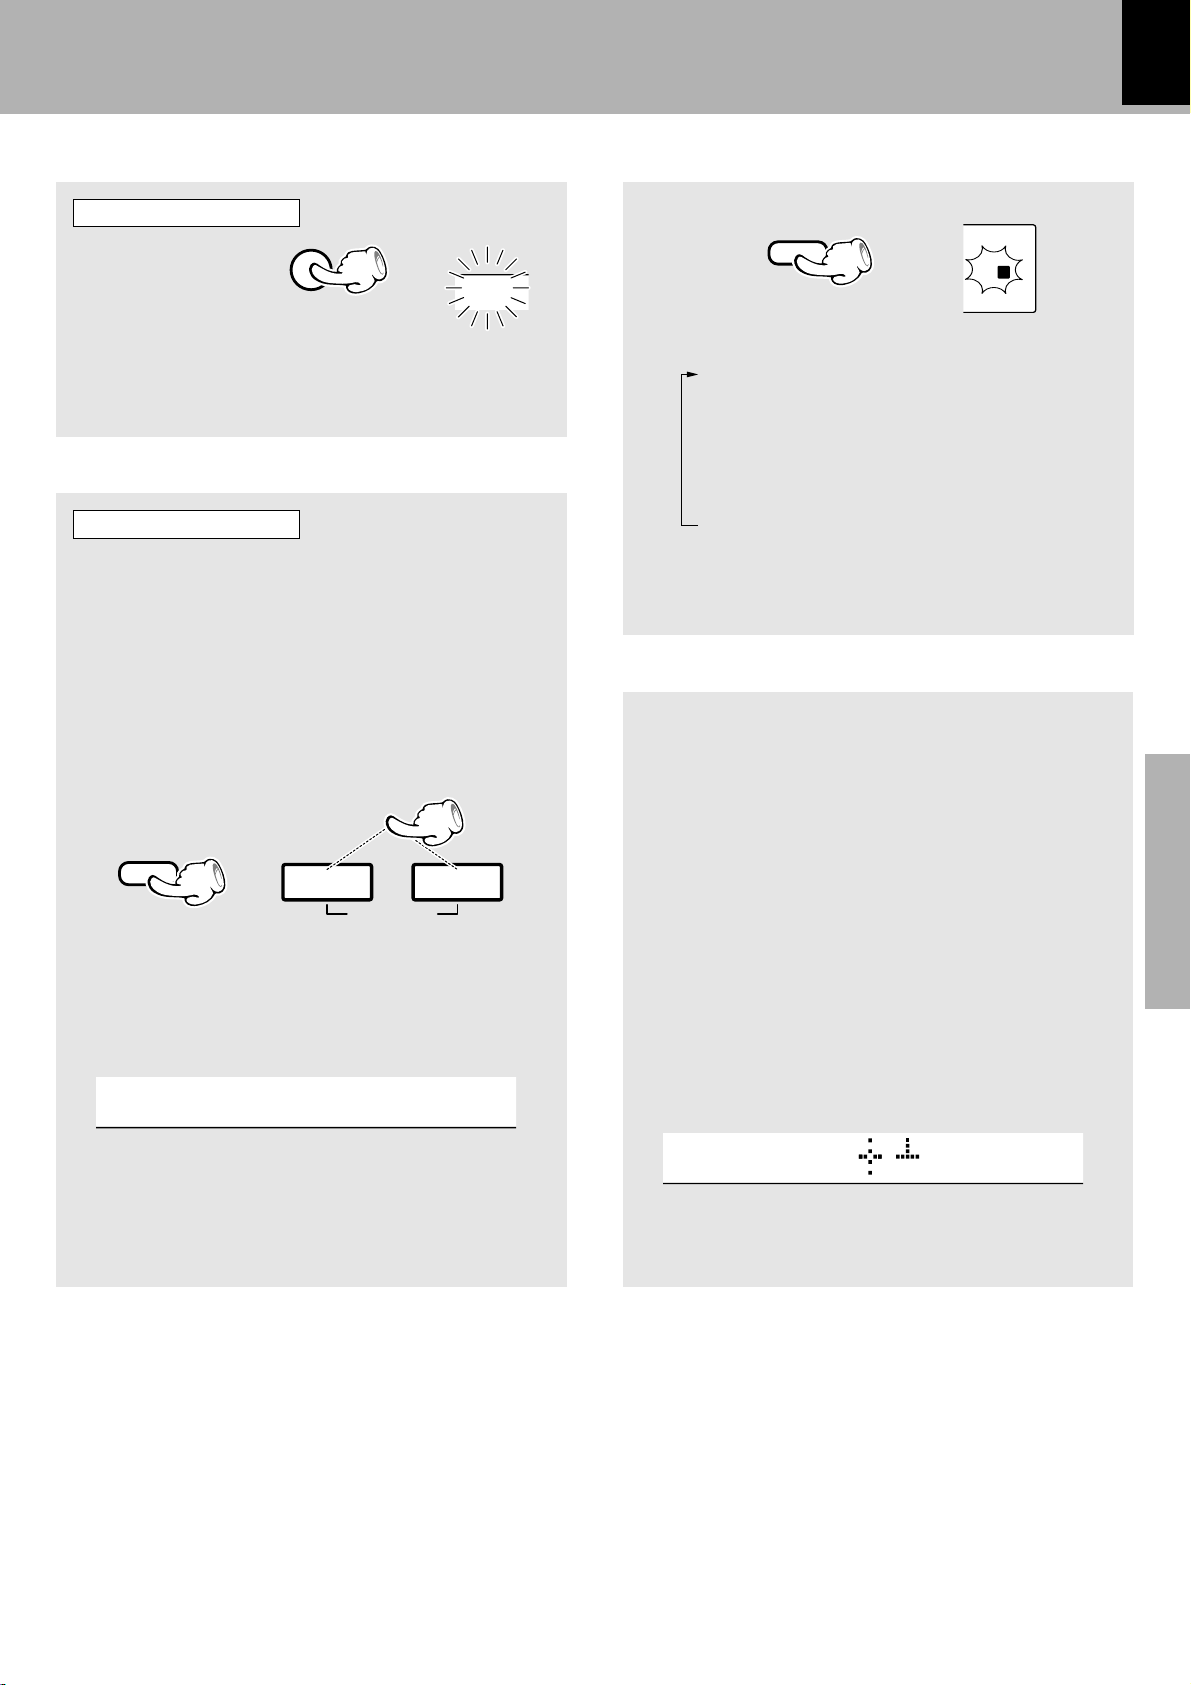
Standby mode
While the standby indicator is lit, a small amount of power is supplied to the system to back up the memory.
This is called standby mode. Under the condition, the system can be turned ON by the remote control
unit.
Page 14

14
Operation of remote control unit
TIMER SLEEP
1
ABC DEF
1123
GHI JKL MNO
456
2
3
PQRS TUV WXYZ
789
& ( )
-
+
100 0
TIME
/SPACE
RETURN
22 33
5
Preparation section
4
5
6
7
4¢
DVD/CD MD TUNER AUX
6
REC STOP
FOLDER
TOP MENU
SET UP
MUTE
ENTER
5
P.CALL
6
AUTO/MONO
7
--
FILE
SEARCH
MENU/P.B.C.
ON SCREEN
5
Infrared ray system
Model : RC-M0513
1 TIMER key
Press to execute or cancel a timer program. ß
SLEEP key
Press to set the sleep timer. K
2 Character/numeric keys
When "DVD/CD" or "MD" input is selected:
Press to enter numbers. ¶¤
During tuner reception :
Press when recalling a preset radio station. ›fl
When MD title input operation :
Used to enter alphanumeric and symbol characters.
3 RETURN key
When a setting menu is displayed, press to return
to the previous display page. ti
POWER
TITLE INPUT
TRACK EDIT
CLEAR/DEL.
' , : ? !
+
10
DISPLAY
/CHARAC.
TUNING
5
5
BAND
REPEAT
REPEAT
AB
VIRTUAL
SURROUND
RANDOM
SOUND TONE
∞
VOLUME
PGM
SET
O. T. E.
8
9
0
!
@
#
$
A
Controls and indicators
TIME/SPACE key
When "DVD/CD" or "MD" input is selected:
Press to switch the time information displayed during
DVD (VCD, CD) or MD playback. º‹
Press to enter a space during MD title entry. A
DISPLAY/CHARAC. key
When "DVD/CD" or "MD" input is selected:
Press to switch the display mode of the display
panel. º‹
Press to switch the character types in MD title input
operation. A
4 SET key
Press to set or enter a program. Is
1 TUNING ¡ keys
During DVD (VCD, CD, MP3) or MD playback :
Press to search in the forward or backward direction. §¤
During tuner reception:
Press to select radio stations. fl
Cursor keys (2 3 5 ∞)
Press one of these keys to select an item in the initial
setup or other menu.
ENTER key
When "MD" input is selected:
This is used to execute an MD editing operation or
to enter an input title. ∞rd
During tuner reception:
Press to enter a manual preset station. fl
4 P.CALL ¢ keys
During DVD (VCD, CD, MP3) or MD playback :
Press to skip in the forward or backward direction.
§¤
During tuner reception:
Press to receive a preset station. ›
5 REC key
6 TOP MENU/FOLDER SEARCH key
With a DVD VIDEO disc, press to display the top
menu. ∞r
With an MP3 disc, press to select a folder containing the file to be played. u
MENU/P.B.C./FILE SEARCH key
With a DVD VIDEO disc, press to display a
menu. ∞r
With P.B.C.-compatible VCD disc, press to
switch the P.B.C. on and off. t
With an MP3 disc, press to select the MP3 file
to be played. u
REPEAT A B key
Press to repeat playback of the designated section
on a disc. Œ
SET UP key
Press to change the initial setup of the DVD
player. iQR
Page 15
Controls and indicators
15
ON SCREEN key
Press to display the OSD information on the connected TV screen. •
VIRTUAL SURROUND key
Press to switch Virtual Surround on and off. ¶
7 MUTE key
Press to mute sound temporarily. £
8 POWER ( ) key
9 TITLE INPUT key
This is used in MD title input operation. ;
TRACK EDIT key
This is used in MD editing for reordering tracks,
deleting tracks, etc. s
PGM key
Used in programming CD (VCD) or MD tracks in the
desired sequence. I
CLEAR/DEL. key
This key is used to clear the program. During title input, it is used to delete a character.
OAS
0 DVD/CD 6 key ™¢
MD 6 key ⁄
TUNER/BAND key ›
AUX key °J
STOP7/AUTO/MONO key
! O.T.E. key ˇ¨Ø
@ REPEAT key
Press for repeat playback of a DVD (VCD, CD, MP3)
or MD. P
RANDOM key
Press to play the tracks in a CD (VCD) or MD in a
random order. „
# SOUND key
TONE key
Press to adjust the highest and lowest frequencies.
£
$ VOLUME key
Press to adjust the listening volume or tone.
™£
Preparation section
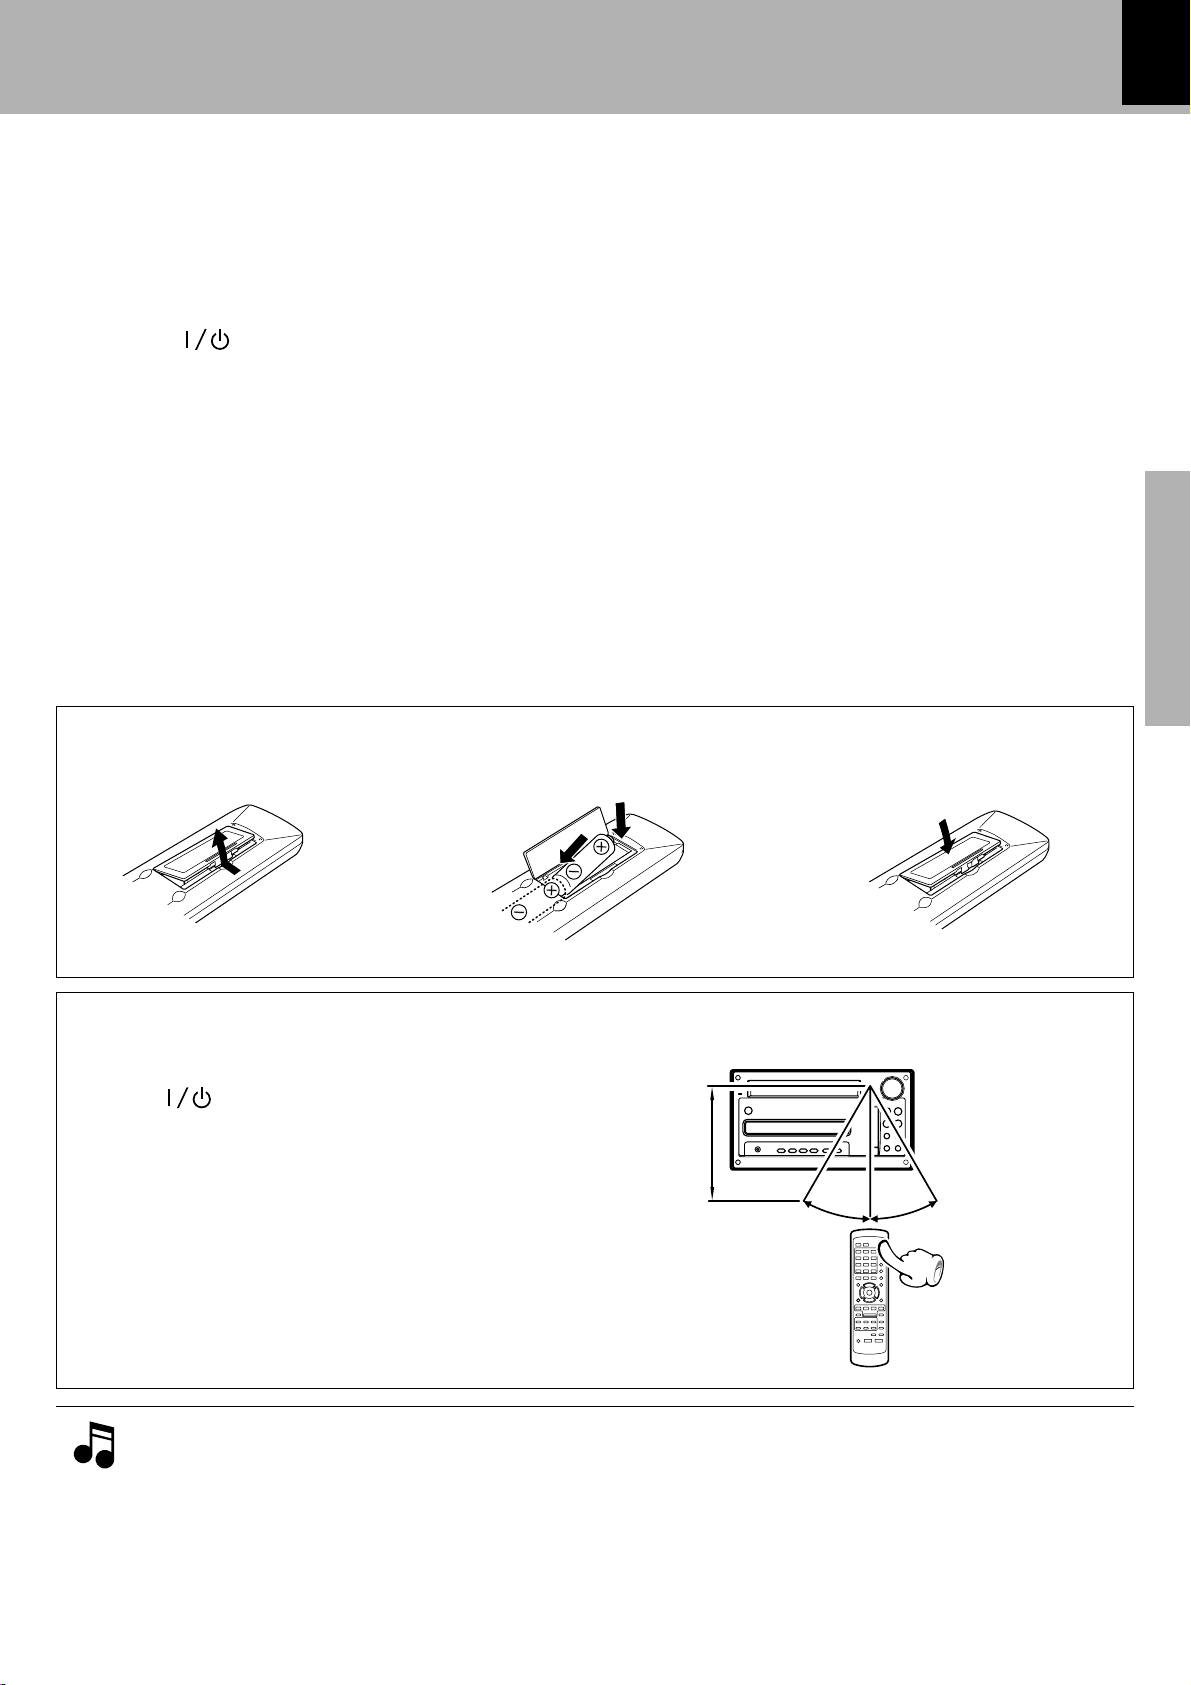
Loading batteries
1 Remove the cover. 2 Insert batteries.
1
÷ Insert two R6 (“AA”-size) batteries following the polarity indications.
Operation
Plug the power cord into a power outlet and press the
POWER (
switch the power ON. Then press the key of the function you want to control.
÷ When pressing more than one remote control keys
successively, press the keys securely by leaving an interval of 1 second or more between keys.
) key on the remote control unit to
3 Close the cover.
2
Operating range (approx.)
6m
30˚
Remote sensor
30˚
1. The provided batteries are intended for use in operation checking, and their service life may be short.
2. When the remote controllable distance becomes short, replace both of the batteries with new ones.
3. If direct sunlight or the light of a high- frequency fluorescent lamp (inverter type, etc.) is incident to the remote
sensor, malfunction may occur. In such a case, change the installation position to avoid malfunction.
Page 16
16
.PA .S. OFF>
DIMMER
Display
RANDOM
Controls and indicators
1 2 3 4 5 6 77 88 89
O.T.E.
AB
1
3
PGM
F
O.T.T.
1 2
HIGH
LP 2 4
MONO SURROUNDMUTE P.B.C. TOTAL REMAINREMAIN AUTOAUTO TUNED RDS
DIGITAL ST.
A.TNOA.TNO
FM
PM
AM
P.S.A.
NB
MHz
kHz
1 2
!@
1 Play(3)/Pause(8 ) indicator
MD rec(¶)/Pause(8 ) indicator
2 REC MODE indicator
(O.T.E., HIGH, LP2, LP4, MONO)
3 MP3 indicator
.... Folder
F
Preparation section
.... File
4 DIGITAL indicator
5 A. TNO indicator
Switching the Display Brightness
1 Press the MODE key.
2 Turn the VOLUME/MULTI CONTROL knob to
select "DIMMER", then press the SET/DEMO
key.
0
6 MUTE indicator
7 P.B.C. indicator
8 Playback/Clock display/Tuning indicators
(Play time, Clock display, Frequency
display, etc.)
9 Tone related indicators
(SURROUND, NB1, NB2)
0 Character information display
! TIMER-related display
@ Special playback related indicators
3 Turn the VOLUME/MULTI CONTROL knob
to select "LOW" or "HIGH", then press the
SET/DEMO key.
LOW
Auto Power Save (A.P.S.)
When the power has been left ON for more than 30 minutes while the unit has been doing neither recording or playback in this period, the A.P.S. function switches the power OFF (standby) automatically.
Whether the A.P.S. function is to be used or not can be set with the following steps.
1 Press the MODE key.
2 Turn the VOLUME/MULTI CONTROL knob to
select "A.P.S.", then press the SET/DEMO key.
3 Turn the VOLUME/MULTI CONTROL knob
to select "ON" or "OFF", then press the
SET/DEMO key.
÷ With the TUNER and AUX input, A.P.S. functions only
when the volume is set to zero.
A.P.S.
Page 17

Clock adjustment
12> HOUR
P.S
H
P.S
H
Controls and indicators
This unit incorporates a clock function. Be sure to adjust the correct time before using the timer function.
If there is a power failure or the power cord is unplugged then plugged in again while the power set to off (STANDBY
mode) after a timer is activated, the STANDBY/TIMER indicator blinks in amber. In this case, adjust the clock again.
Switching the power ON
Activate the clock adjustment mode.
1
1 Press the MODE key.
MODE
2 Turn the VOLUME/MULTI CONTROL knob
to select "TIME ADJUST", then press the
SET/ DEMO key.
IMT E ADJUST
17
Preparation section
3 Turn the VOLUME/MULTI CONTROL knob
to select "12 HOUR" or "24 HOUR", then
press the SET/DEMO key.
Enter the figure of hour.
2
1 Adjust the figure of hour by turning the
VOLUME/MULTI CONTROL knob.
VOLUME/
MULTI CONTROL
To decrease
hour
2 Set it.
Enter the figure of minute.
3
SET/DEMO
To increase
hour
Select the time display mode.Blinks
÷ The time of the day is represented in 12-hour or 24-
hour method.
Example for adjusting at 1:30PM
PM
÷ The time display starts to blink.
÷ Press the SET/DEMO key. The hour is entered and the
minute display starts to blink.
0
Blinks
k
1 Adjust the figure of minute by turning the
VOLUME/MULTI CONTROL knob.
VOLUME/
MULTI CONTROL
To decrease
minute
2 Set it.
SET/DEMO
To increase
minute
Example for adjusting at 1:30PM
PM
÷ If you pressed the SET/DEMO key by mistake, press
the MODE key and restart from the beginning.
÷ To adjust correct time, press the SET/DEMO key at
the same moment as a time announcement.
÷ When the STOP7 /TUNING MODE key is pressed
while the power is in the standby mode, the time of the
day will be displayed for 5 seconds.
0
Blinks
k
Page 18
18
Video Formats
Playable Disc
DVD VCD
The TV picture display and disc signal systems can be divided roughly into two TV formats (NTSC and PAL).
They are variable depending on countries and areas.
This unit reproduces NTSC discs in NTSC format and PAL discs in PAL format. If the video formats of the
disc and TV do not match, the disc cannot be reproduced correctly. It is therefore required to select the disc
according to the TV set in use (country and area).
TV formats in major countries :
TV Format Major Countries & Areas
NTSC
PAL
Japan, Taiwan, Korea, USA, Canada, Mexico, Philippines, Chile, etc.
China, U.K., Germany, Australia, New Zealand, Kuwait, Singapore, etc.
Checking the Video Format
Check the video format of the VCD and DVD discs to be played on the player as described below.
1 Check if the video formats of the TV to
Preparation section
be used and disc to be played match
each other.
¶ For details, refer to the instructions provided with
the TV and disc.
2 When the TV is switchable between NTSC
and PAL, set the TV format according to the
disc format.
TV Format Playable Disc Format
NTSC only
PAL only
NTSC/PAL
switchable
NTSC
PAL
NTSC/PAL
When the video formats are different :
Try playing the disc. If the video formats of the disc and
TV do not match, the played video may be black and
white or become as shown below.
Top and bottom edges are
not displayed.
Top and bottom areas are
dark.
¶ Correct video cannot be reproduced if the video
formats of the TV and disc do not match.
Picture turbulence due to
sync unmatching.
Page 19

Playable Disc
TEXT
Playable Disc
19
Operation restriction according to the disc or player status
DVD VCD
Operations of some DVDs and VCDs are restricted by the intention of the software producers. Operations may also be restricted due to the status of the player.
As this player plays discs in accordance with the intentions of software producers, some functions may
not work as intended by the user. Be sure to read the manual provided with the disc to be played.
When an inhibition icon is displayed on the connected
TV screen during operation, it indicates that the player
is in the operation restricted status.
Inhibition icon
Systems and Types of Playable Discs
Playable Disc DVD VIDEO
Logo mark
VCD
COMPACT
DIGITAL VIDEO
CD, CD-R/RW
COMPACT
DIGITAL AUDIO
TEXT
COMPACT
DIGITAL AUDIO
Preparation section
Unplayable Discs
Never attempt to play a Photo CD disc on this unit.
Other discs which cannot be played on this unit :
¶ SACD, DVD AUDIO, DVD-ROM, DVD-R/RAM, DVD-RW, CD-R/RW which has not been processed by session closing or finaliza-
tion, CD-ROM, DTS-CD, SVCD, VSD, CDV*, CD-G*, CD-EG*, CD-EXTRA* , etc.
* Only the audio part can be reproduced.
¶ A DVD VIDEO disc with a region code which does not match this unit or without a region code. For details, see
"Region Codes of This Player". )
¶ When the video format of a disc differs from that of the TV in use, the disc cannot be played normally. For details,
see "Video Formats". *
¶ This unit may also be incapable of playing certain CD-R/RW discs depending on their properties, recording condi-
tions, etc.
Icons Inscribed on DVD Discs
ALL
8
Indicates the playable region code.
Indicates the number of languages in the audio. The figure in the icon shows the number (max.
8 languages).
DVD
32
9
16:9 LB
Indicates the number of available subtitle languages. The figure in the icon shows the number
(max. 32 subtitle languages).
Indicates the number of viewing angles which can be viewed with the angle function. The
figure in the icon shows the number (max. 9 angles).
Indicates the number of available aspect ratios. LB stands for Letter Box and PS stands for Pan
& Scan. (The example shown means that the 16:9 video can be converted into letterbox.)
Page 20
20
Playable Disc
Region Codes of This Player
DVD
A region code defined for each country or area is assigned for each DVD VIDEO player, so it cannot play a
DVD VIDEO disc if its region code do not match that of this unit. Also, a disc which does not contain any
region code may sometimes be unable to be played on the player. When purchasing a DVD VIDEO disc,
make sure that it has a region code which can be played on your player.
Region Code of
Player
1
2
Preparation section
3
Canada, United States, American Samoa, Bermuda, Johnston Island, Midway Islands, Puerto Rico,
St. Pierre and Miquelon, United States Virgin, Wake Island
Albania, Andorra, Austria, Bahrain, Belgium, Bosnia and Herzegovina, Bulgaria, Croatia, Cyprus,
Czech, Denmark, Egypt, Finland, France, Germany, Greece, Hungary, Iceland, Iran, Iraq, Ireland,
Israel, Italy, Japan, Jordan, Kuwait, Lebanon, Lesotho, Liechtenstein, Luxembourg, Macedonia,
Malta, Monaco, Netherlands, Norway, Oman, Poland, Portugal, Qatar, Romania, San Marino, Saudi
Arabia, Slovakia, Slovenia, South Africa, Spain, Swaziland, Sweden, Switzerland, Syrian Arab Republic, Turkey, United Arab Emirates, United Kingdom, Vatican City State, Yemen, Yugoslavia, Channel
Islands, Faeroe Islands, Gibraltar, Greenland, Isle of Man, Svalbard and Jan Mayen Islands
Brunei Darussalam, Cambodia, Indonesia, Korea, Laos, Malaysia, Myanmar, Philippines, Singapore,
Thailand, Viet Nam, East Timor, Hong Kong, Macau, Taiwan
Usable Country or Area
Antigua and Barbuda, Argentina, Australia, Bahamas, Barbados, Belize, Bolivia, Brazil, Chile, Colom-
4
5
6
bia, Costa Rica, Cuba, Dominica, Dominican Republic, Ecuador, El Salvador, Fiji, Grenada, Guatemala, Guyana, Haiti, Honduras, Jamaica, Kiribati, Marshall Islands, Mexico, Micronesia, Nauru, New
Zealand, Nicaragua, Palau, Panama, Papua New Guinea, Paraguay, Peru, Saint Christopher and
Nevis, Saint Lucia, Saint Vincent and the Grenadines, Samoa, Solomon Islands, Suriname, Tonga,
Trinidad and Tobago, Tuvalu, Uruguay, Vanuatu, Venezuela, Anguilla, British Virgin Islands, Cayman
Islands, Christmas Island, Cocos Islands, Cook Islands, Falkland Islands, French Guiana, French
Polynesia, Guadeloupe, Guam, Martinique, Montserrat, Netherlands Antilles, New Caledonia, Niue,
Norfolk Island, Northern Mariana Islands, Pitcairn, Tokelau, Turks and Caicos Islands, Wallis and
Futuna Islands
Afghanistan, Algeria, Angola, Armenia, Azerbaijan, Bangladesh, Belarus, Benin, Bhutan, Botswana,
Burkina Faso, Burundi, Cameroon, CapeVerde, Central Africa, Chad, Comoros, Congo, Cote d'Ivoire,
Djibouti, Equatorial Guinea, Eritrea, Estonia, Ethiopia, Gabon, Gambia, Georgia, Ghana, Guinea,
Guinea-Bissau, India, Kazakhstan, Kenya, Kyrgyz Republic, Latvia, Liberia, Libya, Lithuania, Madagascar, Malawi, Maldives, Mali, Mauritania, Mauritius, Moldova, Mongolia, Morocco, Mozambique,
Namibia, Nepal, Niger, Nigeria, North Korea, Pakistan, Russia, Rwanda, Sao Tome and Principe,
Senegal, Seychelles, Sierra Leone, Somalia, Sri Lanka, Sudan, Tadzhikistan, Tanzania, Togo, Tunisia,
Turkmenistan, Uganda, Ukraine, Uzbekistan, Zaire, Zambia, Zimbabwe, British Indian Territory,
Jammu and Kashmir, Mayotte, Reunion, St. Helena ex. dep., Western Sahara
China
8
Professional use (Air Line cabin
service)
Region codes of the DVD VIDEO discs that can be played with this player
DVD
This player can play back a DVD VIDEO disc which carries the corresponding code to the region code of the
player shown in the table above, a marking containing the region code of the player or the “ALL” marking
shown below. Even when a DVD VIDEO disc does not carry any indication of the region code, it may sometimes unable to be played on this player due to certain restrictions.
ALL
Page 21
Playable Disc
21
Configuration of Discs
DVD VIDEO disc configuration
Chapter 1 Chapter 1
The title is the largest unit composing the music and/or pictures in an DVD VIDEO disc. Each title is
composed of multiple chapters.
MP3 disc configuration
The folder is the storage unit at the highest level in the disc. Sometimes a single folder contains
more than one file, or sometimes files are recorded directly in the disc in place of being included in
a folder. Some discs also have a hierarchical structure in which a folder includes sub-folders. Note
that the file numbers are not assigned on a per-folder basis but they are assigned consecutively for
all the files in the whole disc.
DVD VCD CD MP3 MD
DVD VIDEO disc
Title 1
22 3 4 5 22
MP 3 disc
Folder 1 Folder 2
File 1 File 6
22 3 4 5 27
Title 2
Preparation section
MD, CD, CD-R/RW and VCD disc configuration
MD, CD, CD-R/
RW and VCD
Track 1
22 3 4 5
Page 22
O
A
Basic use method
22
Tone adjustment
Bass and treble
compensation
Muting the sound temporarily
Switching the power ON (OFF)
Bass and treble
compensation
STANDBY
/TIMER
11
AUX SOUND MODE SET/DEMO REC MODE MD REC
33
22
VOLUME/
MULTI CONTROL
Basic use method
Balance adjustment
DVD/CD
6MD
6
STOP
7
TUNER/
BAND
TUNING MODE
P.CALL
4¢
DVD/CD
0MD
0
Basic section
Example:
To select the DVD/CD input
DVD/CD
11
6
22
1. Switching the power ON (OFF).
Pressing the key when the unit is ON turns it off (Standby
mode of power).
÷ Pressing the DVD/CD 6, MD 6, TUNER/BAND or AUX key also
turns power on and starts playback (reception) of the corresponding input.
(One-touch operation)
2. Selecting the desired output.
DVD/CD (DVD, MP3, VCD, CD)
MD ⁄
TUNER (Broadcasts) ›
AUX (Analog)
Press the AUX key repeatedly until "AUX" is displayed.
[Adjusting the AUX Input Level J]
DIGITAL AUX (Digital) J
Press the AUX key repeatedly until "DIGITAL AUX" is displayed.
RANDOM
F
12
VDD T01 C01
¢
DIGITAL
ST.
SURR
P.S .
kHz
VOLUME/
MULTI CONTROL
The volume
decreases
33
The volume
increases
When DVD has been selected.
÷ When DVD/CD 6 or MD 6 is selected, playback will start when a
disc already has been inserted.
3. Volume adjustment.
÷ The same function is also available using the VOLUME keys on the remote
control unit.
Volume display
OLV UME 35
Page 23
Basic use method
23
Muting the sound temporarily
Remote control unit only
MUTE
÷ Press again to resume the original volume.
÷ This is also cancelled when the volume is changed.
Blinks
MUTE
Tone adjustment
Remote control unit only
The responses of the lowest frequencies (BASS)
and highest frequencies (TREBLE) can be adjusted as desired.After this adjustment, the N.B.
effect will be disabled.
1 Press the TONE key to select "BASS".
Adjust the level of lowest frequencies as desired using the VOLUME keys.
Bass and treble compensation
SOUND
(NB : Natural Bass circuit)
URROUND
P.S.A.
1 2
NB
MHz
kHz
Each press switch the modes as follows.
1 "NB 1" (Only the lowest frequencies
are enhanced.)
2 "NB 2" (The lowest and highest
frequencies are enhanced according
to the current volume level.)
3 "NB OFF" (The source signal is pro-
cessed by the tone control circuitry before being output from the main unit.)
Balance adjustment
The balance of volumes from the left and right
speakers can be adjusted as follows.
TONE
\
∞
VOLUME
5
2 Press the TONE key again while "BASS" is
displayed to select "TREBLE".
Adjust the level of the highest frequencies
using the VOLUME keys.
EBTLER+4
3 Press the TONE key.
÷ The "BASS" and "TREBLE" can be adjusted inde-
pendently in the range from "- 8" to "+ 8".
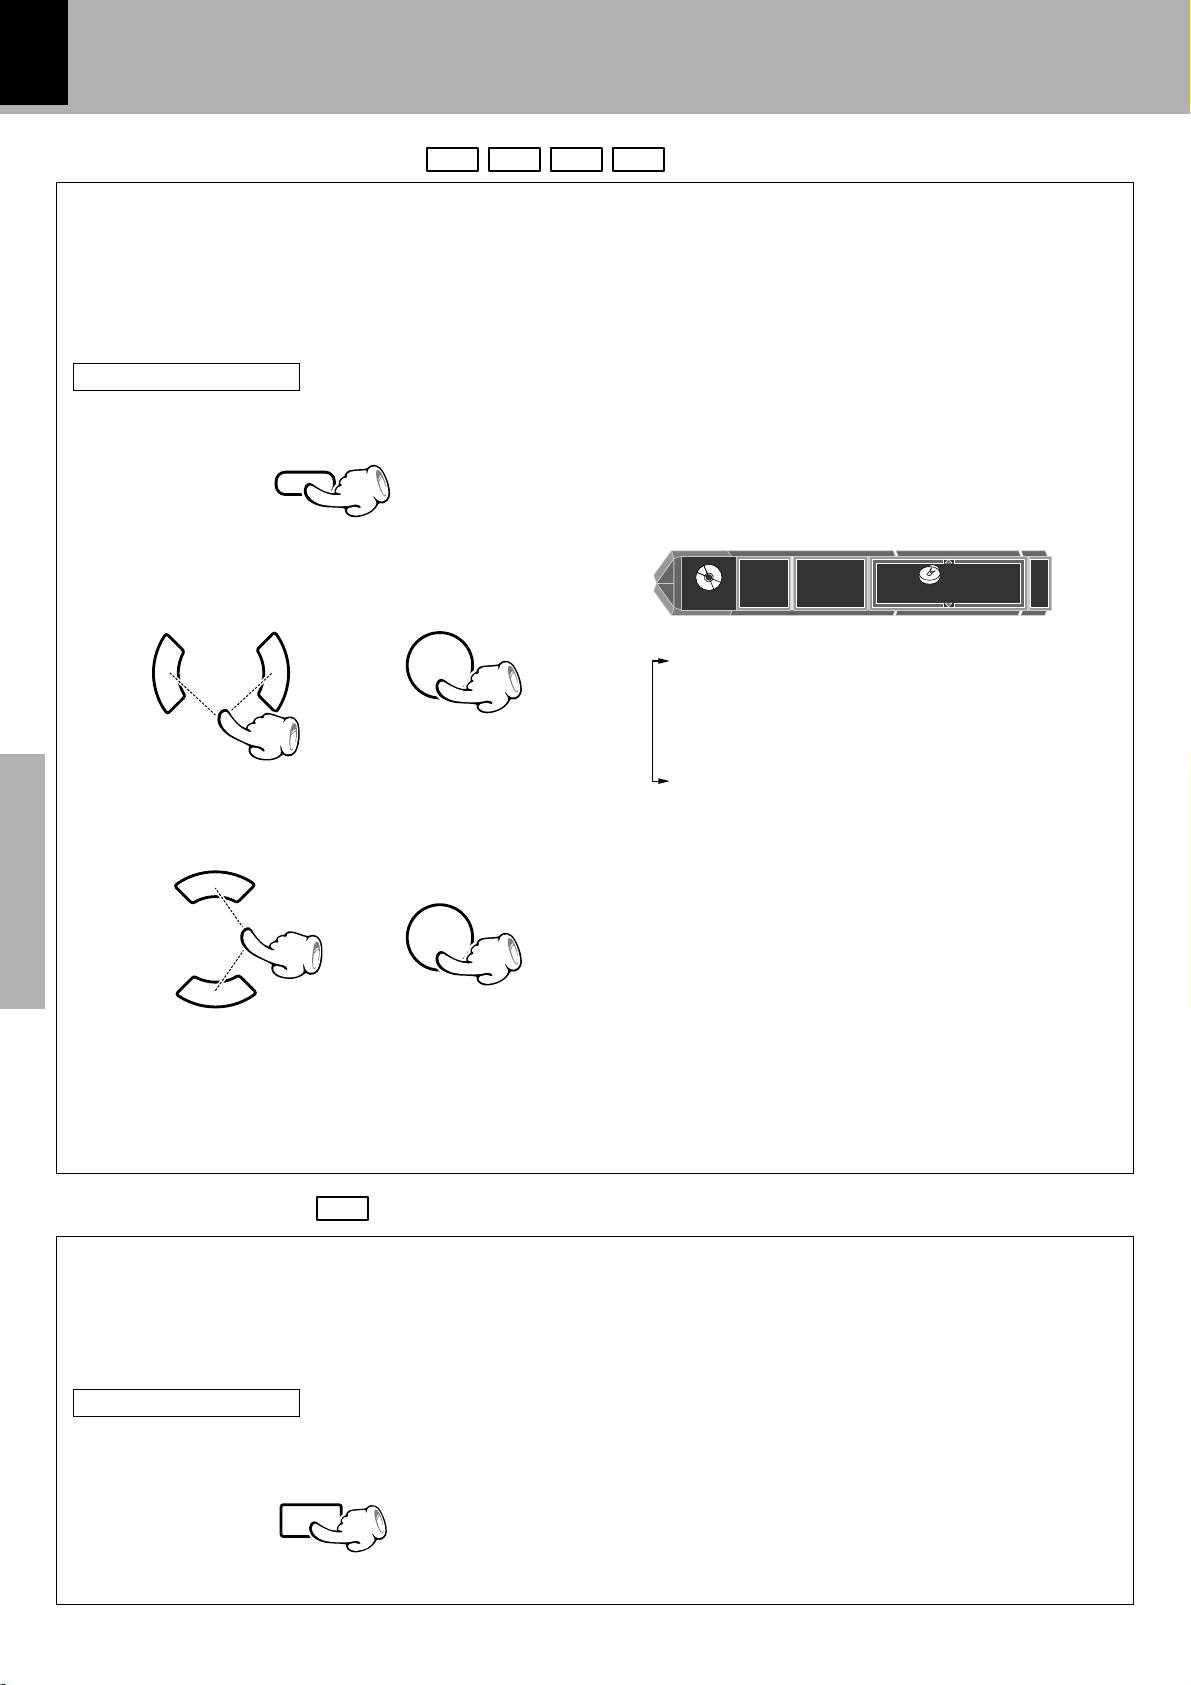
1 Press the MODE key.
2 Turn the VOLUME/MULTI CONTROL knob
to select "BALANCE", then press the SET/
DEMO key.
3 Adjust the left and right speaker balance by
turning the VOLUME/MULTI CONTROL
knob.
--- -L-R
4 Press the SET/DEMO key.
Basic section
Page 24
Playback
O
A
24
Basic use method
The following procedure shows how to play a disc, such as a CD, VCD or DVD, from the beginning.
When playing a VCD with P.B.C. (Play-Back Control) capability, please read "Menu playback of P.B.C.compatible VCD". t
For details on the MP3 discs containing MP3 files, see "MP3 that can be played back with this equipment". y
Select the desired items from the menu screen
Stopping playback
Start playback /
Still picture display and
playback pause
STANDBY
/TIMER
Start playback /
Still picture display and
playback pause
VOLUME/
MULTI CONTROL
DVD/CD
Basic section
0
11
With certain discs, playback starts
now.
If a menu screen appears on the TV
screen, select the desired items as
described in steps 3.-2 and 3 before playing the disc.
Stopping playback
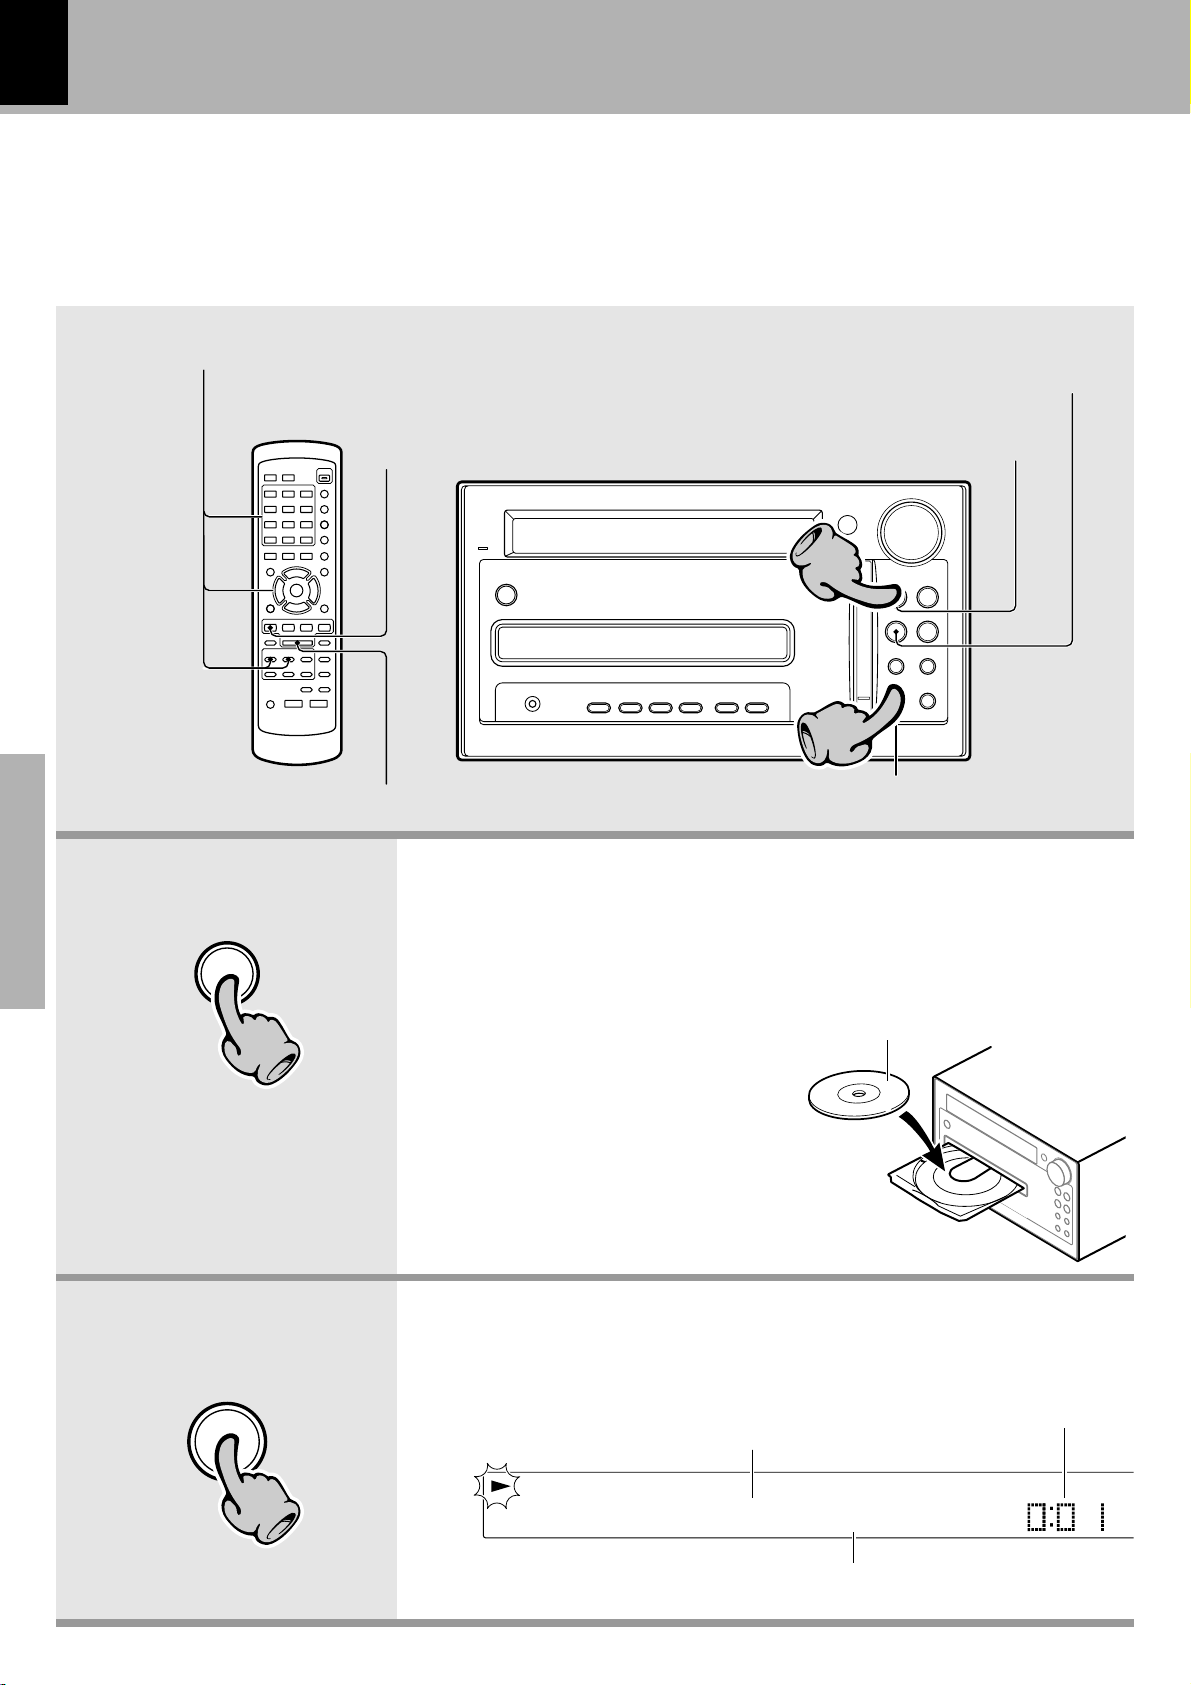
1. Load a disc.
1 Press the DVD/CD 0 key.
2 Place a disc.
3 Press the DVD/CD 0 key.
÷ Do not touch the played side of
÷ Be sure to place a disc horizon-
AUX SOUND MODE SET/DEMO REC MODE MD REC
disc.
tally. Placing it with an inclination
will result in malfunction.
22
DVD/CD
6MD
STOP
7
TUNER/
TUNING MODE
P.CALL
4¢
DVD/CD
0MD
6
BAND
0
11
To eject a disc
The label side must be on top.
DVD/CD
6
22
2. Start playback.
During DVD playback :
RANDOM
F
12
VDD T01 C01
Title No.
DIGITAL
Chapter No.
Elapsed time
ST.
SURR
P.S .
kHz
Page 25
Basic use method
STOP
AUTO/MONO
7
Playback
25
FOLDER
TOP MENU
- -
SEARCH
MENU/P.B.C.
\
5
5
5
\
ENTER
FILE
5
33
3. Select the desired items from the menu screen.
When a DVD VIDEO containing the recording of the top menu or
menu is played, the top menu or menu is displayed.
These menus allow you to select the position you want to play easily based on an interactive method.
The following operation procedure is the basic procedure. As the operation procedure may vary depending on the played software, be sure
to read the manual provided with the software.
1 Press the TOP MENU/FOLDER SEARCH key
2 Press a cursor key (2 3 5 ∞) or numeric keys to select the
scene to be played.
3 Press the ENTER key to start playback
¶ When the TOP MENU/FOLDER SEARCH key is pressed again while
the top menu is displayed during playback, the played position returns
to the position where the key was pressed for the first time and playback restarts from there.
¶ When the MENU/P.B.C./ FILE SEARCH key is pressed, the menu is
displayed. The operation is the same as that of the top menu.
Start playback /
Still picture display and playback pause
DVD/CD
6
÷ The TV screen shows "Pause" or "Still".
÷ When the "IPB Display" is set to On, the TV screen
shows "Still (I)", "Still (P)" or "Still (B)" with every
still picture of DVD VIDEO. i
¶ Press the DVD/CD 6 key to resume normal play-
back.
Basic section
Stopping playback
¶ Pressing the STOP 7 /AUTO/MONO key in the
middle of playback activates the resume function.
¶ When the resume function is activated, the playback
stop position is stored in memory before stopping,
so the playback can be resumed from the stop position when the DVD/CD 6 key is pressed later.
(This function cannot be activated in playback of CD
or random playback.)
To eject a disc
Main unit only
DVD/CD
0
Page 26

26
MP3
Basic use method
Playback
Slow playback and reverse slow playback
Press the 1 key or ¡ key in still mode to select
one of 5 available speeds.
Remote control unit only
Reverse slow
playback
1
Forward search and reverse search
Press once during playback to initiate forward or reverse search at a low speed.
Slow playback
TUNING
1
DVD VCD CD MP3
DVD VCD
¶ When OSD is displayed, pressing the ON SCREEN but-
ton turns it off and shows the speed in place.
¶ Audio is not output during slow playback or reverse slow
playback.
¶ Reverse slow playback is not available with VCD.
¶ Press the DVD/CD 6 key to resume normal play-
back.
Remote control unit only
Backward
search
1
TUNING
Basic section
Skipping a track, chapter, or file
P.CALL
4¢
To skip
backward
Forward
search
1
DVD VCD CD
To skip
forward
¶ The search speed can be selected from 5 speed steps.
(With a MP3 disc, forward search and reverse search
are possible only in a single speed.)
¶ When OSD is displayed, pressing the ON SCREEN key
turns it off and shows the speed in place.
¶ Video may be disturbed during forward search or re-
verse search.
¶ Press the DVD/CD 6 key to resume normal play-
back.
÷ A track is skipped and playback starts from the begin-
ning of the skip destination track,chapter or file. (With
DVD VIDEO, this operation is available only in the
middle of play mode.)
÷ When the 4 key is pressed once during playback,
playback restarts from the beginning of the current
track, chapter or file.
÷ With a VCD and P.B.C. is on, these buttons function as
the 4 (Previous) and ¢ (Next) key. t
Page 27
Basic use method
Playback
27
Playing discs by selecting the title, chapter, track, folder or file
Remote control unit only
Select the desired track No.
1123
GHI JKL MNO
456
PQRS TUV WXYZ
789
& ( )
+
100 0+10
-
ABC DEF
' , : ? !
Press the numeric keys as shown below....
To select track 23
........................... +10, +10, 3
To select track 40
........................... +10, +10, +10, +10, 0
To select track 311 (MP3 disc only)
......... +100, +100, +100, +10, 1
¶ With a DVD VIDEO, when a number is input during
playback, playback of the chapter having the same
number as the input number in the same title starts.
When a number is input in stop mode, playback the
first chapter in the title having the same number as
the input number starts.
¶ With a MP3 disc, playback starts with the beginning of
the file having the same number as the input number.
¶ With a CD or VCD (when P.B.C. is off), playback starts
with the beginning of the track having the same number as the input number.
DVD VCD CD MP3
Virtual Surround function
DVD
When playing a DVD VIDEO recorded with Dolby Digital Surround audio (with 2 or more channels), powerful
sound can be reproduced even when you use only two speakers.
Remote control unit only
1 Start playback.
DVD/CD
6
2 Press the VIRTUAL SURROUND key.
VIRTUAL
SURROUND
Each press switch the modes as follows.
1 "VIRTUAL SURR. OFF" (Cancel)
2 "VIRTUAL SURR. 1"
3 "VIRTUAL SURR. 2"
Basic section
Page 28
28
Basic use method
Playback
Basic OSD Operation
DVD VCD CD MP3
Various operations can be performed by selecting the OSD icons on the TV screen using the cursor
key (2 3 5 ∞) on the remote.
The OSD cannot be displayed when DVD VIDEO, VCD is played by menu playback. It may also be unavailable with
certain discs.
Select the "DVD/CD" input.
Press the ON SCREEN key.
1
¢
"MAIN" OSD :
ON SCREEN
The OSD screen appears.
If the on-screen message or OSD is displayed
outside the TV screen when using a
widescreen TV or similar monitoring device,
set the "OSD Position" setting to
"Cinema". i
Chapter
Title
MAIN
¶ Only the "MAIN" OSD can be displayed when the but-
ton is pressed in stop mode. (The up and down arrows
shown in the above figure are not displayed.)
¶ The "SOUND" OSD and "VISUAL" OSD can be dis-
played only in a play mode.
¶ When the key is pressed in a play mode, the OSD can
be changed by pressing the cursor up/down (5 ∞) key.
5
3
TOTAL
28-:40
EXIT
Select the item to be changed.
2
Basic section
Press either cursor key (2 3) to select an
icon, then press the ENTER key.
Change the content of the selected item.
3
Press either cursor key (5 ∞) to select a content, then press the ENTER key.
¶ Press the cursor (2 3) key to move the cursor. (But the
cursor cannot be moved to the icons of currently unavailable functions.)
¶ The OSD includes icons with a variety of functions. The
displayed icons are variable depending on the player
5
5
5
5
\
\
ENTER
ENTER
status and played disc.
¶ When the cursor is located on the left or right end, if
you attempt to move the cursor toward the outside,
the cursor will move to the opposite end.
¶ To clear the OSD display, move the cursor to the EXIT
icon and press the ENTER key. (The same effect can also
be obtained by pressing the ON SCREEN key.)
EXIT
MAIN
Title
5
Chapter
1
TOTAL
28-:40
Page 29
Basic use method
Playback
29
Icons on the TV screen
DVD VCD CD MP3
Information related to the disc (title, chapter, time, voice language, subtitle language, angle, etc.) or the
player (repeat mode, video quality, etc.) can be displayed and changed as required. The icons displayed on
the TV screen are as shown below.
During DVD VIDEO playback
"MAIN" OSD : "SOUND" OSD : "VISUAL" OSD :
Chapter
Title
MAIN
3
5
21
1 Title icon
Shows the title number in
DVD VIDEO disc.
Chapter icon
Shows the chapter number
in DVD VIDEO disc.
2 Time display icon
Shows the disc time.
Select to perform time
search or change the time
display. º
TOTAL
28-:40
EXIT
1 Dolby
SOUND
ENG 2 ch
3 4
3 Audio icon
Shows the stream number,
audio signal, audio language
and number of audio channels.
Select to switch the audio
language.
4 Cinema voice icon
Shows the on/off status of
Cinema Voice. Select to switch
Cinema Voice on or off.
Off
EXIT
VISUAL
1 ENG
5 6
5 Subtitle icon
Shows the language used in
subtitles. Select to change
the subtitle language.
6 Angle icon
Shows the angle number.
Select to change the
viewing angle.
EXIT
1
Basic section
During CD, VCD (when P.B.C. is off) playback
"MAIN" OSD : "SOUND" OSD :
Track
6
MAIN
1 2
1 Track icon
2 Time display icon
SINGLE
2-:14
EXIT
SOUND
L + R
3
3 Audio icon
EXIT
During MP3 playback
"MAIN" OSD :
File
Folder
MAIN
1 Folder icon
2 File icon
3 Time display icon
32
1
1 2 3
SINGLE
2: 1 4
EXIT
Page 30
30
Basic use method
Playback
Time display for DVD/CD player
DVD VCD CD MP3
Use the following procedure to switch the type of information shown by the time display shown in the
OSD or player display. Time search is also available for specifying the position to start playback by inputting the time information.
The time display information type can also be changed using the TIME/SPACE key.
However, time search is not possible.
Remote control unit only
1 Press the ON SCREEN key during playback
ON SCREEN
2 Press either cursor key (2 3) to select the
time display icon, then press the ENTER
key.
5
5
\
ENTER
3 Press either cursor key (5 ∞) to select the
time display content, then press the ENTER
key.
5
Chapter
MAIN
Title
5
3
SINGLE
2: 1 4
1 Elapsed play time of track or chapter.
2 Remaining play time of track or chapter.
3 Elapsed play time of disc or title.
4 Remaining play time of disc or title.
5 "
- -
: - - : - -" : The time search target time
can be input. ("- - : - -" is displayed with a CD
or VCD.)
EXIT
Basic section
To perform time search, place the cursor
in the time search time input field, enter
the playing time with numeric keys and
press the ENTER key.
In regard to CD-TEXT
\
5
CD
ENTER
÷ Only information 1 can be displayed with MP3 files.
÷ Only information 1 or 2 can be displayed in the pro-
gram and random modes.
÷ Time search is not available in stop mode, during menu
playback of a DVD VIDEO,VCD or with a DVD VIDEO
which does not provide the time display. Time search is
not available in the program and random modes.
÷ If P.B.C. is On, be sure to set it to Off. t
When a CD-TEXT compatible disc is played on this unit, the disc and track titles recorded in the disc are
displayed automatically provided that they use alphanumeric characters.
When a title is too long to be accommodated in the display, press the DISPLAY key to scroll the displayed
title so that the previously hidden characters be viewed.
Remote control unit only
(Press twice)
DISPLAY
/CHARAC.
(When pressed during stop)
Scrolled disc title display
(When pressed during play)
Scrolled track title display
Page 31

Playback of MD
ACB H:Virine
Basic use method
When a disc is placed into the MD recorder in advance, the unit will be switched on automatically by pressing
the MD 6 key, and playback will start. Tracks in MD are played according to the record mode used in recording
(MDLP2 recording, etc.)
Playback from desired track ¤
To fast forward
and backward ¤
Start playback/
To pause playback ¤
STANDBY
/TIMER
Start playback/
To pause playback ¤
VOLUME/
MULTI CONTROL
To stop playback ¤
31
To stop playback ¤
Skipping tracks ¤
Insert with the shutter
facing upward
VOLUME/
STANDBY
/TIMER
AUX SOUND MODE SET/DEMO REC MODE MD REC
MULTI CONTROL
DVD/CD
6MD
STOP
7
TUNING MODE
4¢
DVD/CD
0MD
TUNER/
22
6
BAND
0
AUX SOUND MODE SET/DEMO REC MODE MD REC
11
DVD/CD
6MD
STOP
7
TUNING MODE
P.CALL
4¢
DVD/CD
0MD
Eject the MD ¤
Skipping tracks ¤
Basic section
1. Load a MD.
Insert the MD correctly into the slot of this unit.
÷ When a title has been recorded for the disc, the title is displayed.
The display changes.
6
TUNER/
BAND
P.CALL
0
EAR DING
In the direction of the arrow
MD 6
22
Disc title
The MD cannot be loaded or ejected while the unit is in standby mode.
Do not force load a MD in standby mode, otherwise malfunction will
result.
2. Start playback.
÷ If the MD being played contains recording of track titles, the track title is
displayed at the beginning of each track during playback.
RANDOM
F
12
Play mode
LP 2
DM00
DIGITAL ST.
T1
Track No.
Elapsed time
SURROUND
P.S.A.
1 2
kHz
Page 32

32
Basic use method
Playback of MD
Start playback/ To pause playback
MD
6
÷ Each press pauses and plays the MD alternately.
To stop playback
STOP
AUTO/MONO
7
Playback from desired track
Remote control unit only
Select the desired track No.
ABC DEF
1123
GHI JKL MNO
456
Basic section
Press the numeric keys as shown below....
To select track No. 23
.................. +10, +10, 3
To select track No. 40
.................. +10, +10, +10, +10, 0
To select track No. 213
.................. +100, +100, +10, 3
÷ When a track number which does not exist in the
disc is selected while "READING" is blinking, the
last track in the disc will be played back.
PQRS TUV WXYZ
789
& ( )
-
+
100 0+10
' , : ? !
To fast forward and backward
Remote control unit only
Backward
search
1
TUNING
Forward
search
1
÷ Press and hold one of the keys during playback.
Normal playback resumes at the point where the
key is released.
Skipping tracks
P.CALL
4¢
To skip
backward
To skip
forward
÷ The track in the direction of the key pressed is
skipped, and the selected track will be played from
the beginning.
÷ When the 4 key is pressed once during playback,
the track being played will be played from the beginning. To skip further to a track located before the
current track, press the 4 key quickly.
÷ Tracks can be skipped by pressing the 4 or ¢ key
even when the MD is in stop mode. In this case, playback
starts automatically from the point reached by skipping.
Eject the MD
Main unit only
MD 0
MDLP modes
MD media recorded with an MD recorder incorporating the stereo 2x-length (or 4x-length) recording/playback func-
tion based on ATRAC3, which is a new audio compression method in compliance with the MD standard, or MD
media recorded using ATRAC3 (playback-only MD) carry the MDLP logo on them.
Page 33

Time display for MD recorder
RN
RN
ACBH
Viri
DC T01
R
RN
Basic use method
Playback of MD
33
Each press of the TIME/SPACE key changes the
displayed contents.
Remote control unit only
TIME
/SPACE
÷ Only time information 1,2 and 5 can be displayed dur-
ing single-track repeated playback or random playback.
÷ In the program mode, display 3 shows the elapsed
time of the entire program and display 4 shows the
remaining time of the entire program.
÷ When the displayed time is 324 minutes or more,
the display shows "- - : - -".
1 Elapsed time of track being played
0T01
2 Remaining time of track being played
0T01
3 Elapsed time of entire disc
("TOTAL" lights up)
MUTE P.B.C. TOTAL REMAIN SU
O
O
ST.
0T01
4 Remaining time on entire disc
("TOTAL" lights up)
MUTE P.B.C. TOTAL REMAIN SU
O
O
ST.
0T01
5 Remaining recording time of MD.
("REMAIN" lights up)
MUTE P.B.C. REMAINREMAIN SU
O
O
ST.
0T01
Title display of MD recorder
When a title is too long to be accommodated in the display, press the DISPLAY/CHARAC. key to scroll
the displayed title so that the previously hidden characters be viewed.
Remote control unit only
(Press twice)
DISPLAY
/CHARAC.
(When pressed during stop or play)
1 Title display
:
2 Track No. display
DM T007
ne
(When pressed during recording onto MD)
1 Display of input source being recorded.
2 Remaining recording time of MD.
("REMAIN" lights up)
DIGITAL ST.
REMAIN SU
DM REC T001
3 Remaining recording time of MD and
elapsed time of track being played of CD
MD< >180:15R
The remaining recording time display is variable depending on the MD recording mode
setting.
Basic section
÷ When no track name (track title) and no disc name (disc title) has been recorded, "NO TITLE" is displayed.
÷ "BLANK DISC" is displayed when not even one track has been recorded.
Page 34

N
Receiving broadcast station
34
Receiving broadcast station
Tuning a non-preset
radio station
(2) fl
Tuning a non-preset radio station (1) fl
TUNER/
BAND
One-by-one presetting (3) fl
One-by-one presetting (2,4) fl
STANDBY
/TIMER
1. Select the tuner input.
11
Each press of the TUNER/BAND key switches the band as follows.
FM
AM
Collective presetting of stations fi
AUX SOUND MODE SET/DEMO REC MODE MD REC
VOLUME/
MULTI CONTROL
DVD/CD
6MD
STOP
7
TUNER/
TUNING MODE
P.CALL
4¢
DVD/CD
0MD
6
BAND
0
33
11
Basic section
4¢
P.CALL
33
2. Preset a radio station in memory.
Collective presetting of stations fi
Follow the procedure in "Collective presetting of stations" to preset automatically the tunable radio stations in your area.
÷ Once stations are stored by auto presetting, the present procedure is
not required from the next time, unless you move of house or re-execute presetting of all tunable stations.
One-by-one presetting (Manual preset) fl
A station can also be tuned even when it is not preset. For details, read
"Tuning a non-preset radio station (Auto tuning, Manual tuning)".
3. Tuning (Preset Call)
÷ If radio stations have already
been stored with auto presetting or manual presetting, select a station using the 4,
¢ key. Each press of the
same key switches the preset
stations in sequence.
When ¢ is pressed :
1 = 2 = 3 ..... 38 = 39 = 40 = 1 .....
When 4 is pressed :
40 =39 = 38 ..... 3 = 2 = 1 =40 .....
The "TUNED" indicator lights
when a station is received
FM
Lights during
stereo reception
AUTOAUTO TUNED SURROU
ST.
P.S.A.
MHz
kHz
Frequency display
1
÷ To select a preset station from the remote, use the 4, ¢ key or nu-
meric keys.
Page 35

Collective presetting of stations
Main unit only
Receiving broadcast station
35
1 Receive a broadcast.
TUNER/
BAND
2 Press of the MODE key.
MODE
3 Turn the VOLUME/MULTI CONTROL knob
to select "AUTO PRESET", then press the
SET/DEMO key.
VOLUME/
MULTI CONTROL
SET/DEMO
\
Up to 40 stations can be memorized.
÷ The previously preset frequencies are overwritten.
÷ When there are many stations and the intended station
has not been preset, please also use "One-by-one presetting (Manual preset)". fl
UTA O PRESET
Basic section
Page 36

36
MEMORY
P--
MEMORY P12
Receiving broadcast station
Tuning a non-preset radio station
(Auto tuning, Manual tuning)
Select the tuning mode according to the radio
wave receiving condition.
When the receiving condition is good: AUTO
mode
When it is poor due to weak radio waves:
MANUAL mode
Remote control unit only
1 Select the AUTO or MANUAL mode.
STOP
AUTO/MONO
7
2 Tune a station.
To decrease
frequency
1
TUNING
To increase frequency
1
÷ In MANUAL mode, FM stations are received in
monaural.
Each press alternates the mode.
1 "AUTO" : "AUTO" lit
2 "MANUAL" : "AUTO" not lit
÷ Normally, use the AUTO (Auto tuning, stereo reception)
mode.
Auto tuning mode :
Each press receives a new station.
One-by-one presetting
Remote control unit only
(Manual preset)
Basic section
1 Perform the procedure in "Tuning a non-
preset radio station (Auto tuning, Manual
tuning)" to receive the station to be preset.
2 Press the ENTER key during reception.
ENTER
3 Select the desired preset number between
1 and 40 using the numeric keys on the remote control unit.
ABC DEF
1123
GHI JKL MNO
456
PQRS TUV WXYZ
789
& ( )
-
+
100 0+10
' , : ? !
Manual tuning mode :
Press repeatedly until the desired station is received.
Press the numeric keys as shown below....
12........................... +10, 2
20........................... +10, +10, 0
4 Press the ENTER key again.
ENTER
÷ Repeat steps 1~4 to preset other stations.
÷ If several stations are preset under the same number,
the previous memory is replaced with the latest
memory contents.
Page 37

Receiving broadcast station
37
Basic section
Page 38

Recording on MD
44
38
STANDBY
/TIMER
AUX SOUND MODE SET/DEMO REC MODE MD REC
Pause the recording
Stop the recording
VOLUME/
MULTI CONTROL
DVD/CD 6MD
STOP
7
TUNER/
TUNING MODE
P.CALL
4¢
DVD/CD 0MD
6
22
11
Recording on MD
BAND
0
Insert with the shutter
facing upward
STANDBY
/TIMER
AUX SOUND MODE SET/DEMO REC MODE MD REC
In the direction of the arrow
Select an input source other
than "MD"
Basic section
Example:
To select the DVD/CD input
DVD/CD
6
MULTI CONTROL
1. Make the preparations for recording.
1 Open the write protect tab of the MD to make it recordable.
VOLUME/
DVD/CD
6MD
6
STOP
7
TUNER/
BAND
TUNING MODE
P.CALL
4¢
DVD/CD
0MD
0
©
2 Load the MD.
The MD cannot be loaded or ejected while the unit is in standby mode.
Do not force load a MD in standby mode, otherwise malfunction will
result.
2. Select the source to be recorded.
DVD (MP3, VCD, CD) : Press the DVD/CD 6 key.
TUNER (Broadcasts) : Press the TUNER/BAND key.
AUX (Analog) :
Press the AUX key repeatedly until "AUX" is displayed.
DIGITAL AUX (Digital) :
Press the AUX key repeatedly until "DIGITAL AUX" is displayed.
22
DC T01
The character information display shows
the recording input source.
÷ When DVD/CD 6 or MD 6 is selected, playback will start when a disc
already has been inserted. Press the STOP7/TUNING MODE key to stop it.
÷ Recording of digital audio is possible only when the "CD" or "DIGITAL AUX"
source is selected. Also, even with these sources, the digital audio output
may be unable to be recorded due to the restriction by SCMS. (It is only the
analog audio that can be recorded when recording DVD Video, VCD or MP3
file playback on MD.) c
Even when the CD contains the recording of CD-TEXT data, the data is
not copied onto the MD.
Page 39

Recording on MD
STOP
AUTO/MONO
7
3. Prepare the recording source.
DVD (MP3, VCD, CD) : Put the CD player in record-pause mode at the begin-
ning of the track to be recorded.
TUNER (Broadcasts) : Receive a station.
AUX (Analog) : Make the source component ready for reception or playback.
DIGITAL AUX (Digital) : Make the source component ready for reception or
playback.
÷ The LP recording modes enable long-hour recording for up to 4 times the
standard recording time of each MD. Select the recording mode as required. (REC MODE) q
÷ The recording format can be selected according to the input source as
required. (REC INPUT) ‚
÷ The input level of an external input source can be selected as required.
(REC LEVEL) (AUX INPUT) ‚J
÷ When recording an MD, the track number assignment can be selected as
required. (TRACK MARK) w
39
4. Start recording.
1 Press the MD REC key (the unit enters record-pause mode).
2 When the preparation is complete, press the MD REC key
MD REC
again.
÷ When the input source is a DVD VIDEO, MP 3, VCD or CD, the MD
recording starts at the same time as the DVD/CD 6 key is pressed.
(Synchronized recording)
44
3 Start playback of the source.
÷ When recording from a CD or MD, digital recording of certain discs may
be inhibited by the SCMS. With such a disc, record the ANALOG input
signal. ‚c
Pause the recording Stop the recording
MD 6
Basic section
÷ Press the key again to resume recording. At this
time, the track number is incremented by “1”.
÷ Recording can also be started by pressing the MD
REC key.
÷ When the key is pressed during recording of CD, the
CD player is also stopped. When the key is pressed
during recording of tape, the tape deck is also
stopped. (Sync function)
Do not turn power off or apply shock or impact while
"WRITING" is displayed. If the power cord is unplugged before "WRITING" disappears, the recorded
or edited data will be lost.
Page 40

40
Recording on MD
Selecting the recording input signal (REC INPUT)
With recording of CD playback, either the digital output or analog output can be recorded as required.
(In recording of a disc source other than CD on MD, the recording source is set automatically to the
"ANALOG" audio.)
1 Press the DVD/CD 6 key
2 Press the MODE key
3 Turn the VOLUME/MULTI CONTROL knob to select
"REC INPUT", then press the SET/DEMO key.
ECR INPUT
4 Turn the VOLUME/MULTI CONTROL knob to select
"DIGITAL" or "ANALOG", then press the SET/
DEMO key.
REC INPUTindicator
DIGITAL
DIGITAL
Adjust the recording level (REC LEVEL)
The level for recording the digital input signal from an auxiliary source component such as a satellite
tuner or MD recorder can be adjusted.
(The recording level of the audio selected in "Selecting the recording input signal (REC INPUT)" can be
adjusted.)
1 Press the MODE key
Basic section
2 Turn the VOLUME/MULTI CONTROL knob to
select "REC LEVEL", then press the SET/
DEMO key.
3 Adjust the recording level (-
ing the VOLUME/MULTI CONTROL knob.
oo ~ +12) by rotat-
ECR LEVEL
Input level
Level value
+1
4 Press the SET/DEMO key to set the selection.
Adjust so that these segments
light at times.
Page 41

Recording on MD
Long-hour recording modes (REC MODE)
MD can be recorded in the desired recording modes (REC MODE) as required. (In stop mode only)
1 Select the "MD" input.
2 If the "PGM" indicator is lit, turn it off by
pressing the PGM key in stop mode to cancel the program mode.
41
3 Press the REC MODE key.
REC MODE
4 When "LP2" or "LP4" is selected in step 3,
press the SET/DEMO key.
5 Turn the VOLUME/MULTI CONTROL knob to
select "LP : STAMP on" or "LP : STAMPoff",
then press the SET/ DEMO key.
VOLUME/
MULTI CONTROL
SET/DEMO
\
REC MODE
(Recording mode)
STEREO (Stereo
recording mode)
Each press switch the modes as follows.
1 "STEREO" : Stereo recording mode
2 "LP2" : Stereo LP2 recording mode
3 "LP4" : Stereo LP4 recording mode
4 "MONO" : Monaural recording mode
LP 2
REC MODE indicator
Turning the knob switches the display contents.
1 "LP: STAMP on" :
at the beginning of each track title.
Characters "LP:" are input
2 "LP: STAMPoff" : Characters "LP:" are not in-
put at the beginning of each track title.
MONO (Monaural
recording mode)
LP2 (Stereo LP2
recording mode)
LP4 (Stereo LP4
recording mode)
Basic section
REC MODE indicator
* In stop and record modes, one of the REC MODE indicators lights to show the set recording mode. In
play mode, the indicator showing the recording mode of the track being played lights.
Stereo LP modes (LP2, LP4) : The stereo LP modes enables long hours of recording by adopting higher
digital audio compression rates than the stereo and monaural recording modes. The LP4 mode features
even longer recording time by adopting even higher compression rate than the LP2 mode.
If an MD recorded in the LP2 or LP4 mode is played back on a recorder/player incompatible with LP2/LP4 :
When a track recorded in stereo LP2 or LP4 mode is played back on an MDLP-incompatible recorder/
player, the disc can be played but no audio will be reproduced. When an MD containing tracks recorded in
stereo LP2 and LP4 modes and those recorded in the STEREO and MONO modes is played back, audio will
be reproduced only with the tracks recorded in STEREO and MONO modes. When playing such an MD, be
careful not to increase the volume setting during playback with no audio reproduction. Otherwise, a very
high volume will be reproduced when playback of a track recorded in the STEREO or MONO mode starts.
Stamping (STAMP) : This unit has the stamping function, which attaches stamp characters "LP:" at the
beginning of each track title to facilitate identification of tracks recorded in the LP2 or LP4 mode. "LP:"
can be displayed as a part of each track title only when the stamping function is set to on.
Note that "LP:" is displayed as a part of track title only when a track is recorded in stereo LP2 or LP4 mode
is played on an MDLP-incompatible recorder/player.
This unit allows you to select the STAMP function on ("LP:" attached to the title) or off ("LP:" not attached
to the title).audio reproduction. Otherwise, a very high volume will be reproduced when playback of a
track recorded in the STEREO or MONO mode starts.
Goes off
MONO LP2 LP4
Page 42

42
Recording on MD
Track number marking in MD recording (TRACK MARK)
When you press the set key while "TRACK MARK" is displayed, a menu for selecting whether the track numbers are to be marked automatically during recording (AUTO) or marked manually by yourself during or after
recording (MANUAL). Select either option with the volume/multi-control knob and press the set key.
The initial setting is "AUTO". The track numbers are used when playing back the recording, searching for a
track or programming tracks.
1 Press the MODE key.
2 Turn the VOLUME/MULTI CONTROL knob
to select "TRACK MARK", then press the
SET/DEMO key.
RATCKMARK
3 Turn the VOLUME/MULTI CONTROL knob
to select "AUTO" or "MANUAL", then press
the SET/DEMO key.
AUTO :
Usually, use this position for recording.
When recording audio from a DVD (MP3 or VCD) or recording analog audio from a CD, the MD track number increments as the CD track changes. When an external input is recorded, the MD track also increments
by "1" at the moment the input signal which has been below a certain level for more than 2 seconds increases above the level. (When tuner reception is recorded, the track number may sometimes fail to increment due to signal noise, etc.). When recording music containing a continuous section with a very low
level, for example when recording classic music, the track number may be incremented by "1" after such a
Basic section
section. In this case, cancel the track number later. It is recommended to use the MANUAL mode when
recording such a kind of music. (by executing the COMBINE operation h).
During digital recording of CD, the track number is incremented automatically by “1” according to the
data contained in the digital information. The no-sound blank is not detected.
When the CD track number is increased during manual search of a CD, the track number recorded on
the MD may sometimes fail to be incremented.
A no sound track may sometimes created at the moment the played disc stops.
LP 2 A.TNO
TRACK MARK indicator
DIGITAL
AUTO
MANUAL:
With this setting, the MD track number is not incremented automatically during recording. Track numbers can be marked either during editing (by pressing the TRACK
EDIT key) or after recording (by executing the DIVIDE operation f).
This setting is convenient when recording a CD which has been recorded in live or
which contains very low-level sound such as a classical music CD.
TRACK EDIT
Page 43

Recording on MD
Sampling frequency
Three types of digital signals are usually used according to the sampling frequencies. The sampling frequencies vary depending on the types of digital equipment as shown below.
32 kHz : A mode broadcasting of BS tuner, etc.
44.1 kHz : CD, MD, etc.
48 kHz : CS tuner, B mode broadcasting of BS tuner, etc.
In general, high-quality recording based on digital signal transmission is not possible unless the source
and recorder components use the same sampling frequency. As this unit has a built-in sampling rate
converter, digital signals with 32 kHz and 48 kHz can be recorded by conversion to the MD sampling
frequency (44.1 kHz).
43
Basic section
Page 44

Menu playback
44
Menu playback
Menu playback of DVD
When a DVD containing the recording of the top menu or menu is played, the top menu or menu is displayed.
These menus allow you to select the position you want to play easily based on an interactive method.
The following operation procedure is the basic procedure. The functions vary depending on certain
softwares.
Select the "DVD/CD" input.
Press the TOP MENU/ FOLDER SEARCH key.
1
FOLDER
- -
TOP MENU
SEARCH
MENU/P.B.C.
¢
FILE
DVD
¶ When the TOP MENU/FOLDER SEARCH key is
pressed again while the top menu is displayed during
playback, the played position returns to the position
where the key was pressed for the first time and playback restarts from there.
¶ When the MENU/P.B.C./FILE SEARCH key is
pressed, the menu is displayed. The operation is the
same as that of the top menu.
Select the desired item from the menu screen.
2
1 Press a cursor key (2 3 5 ∞) or numeric
keys to select the scene to be played.
5
5
5
5
2 Press the ENTER key to start playback.
Application section
ENTER
CHAPTERLIST
¶ Step 2 - 2 is not required if numeric keys are used to
select the item.
1
Dogs
2
Castles
3
lovers
4
Birds
NEXTCHAPTERRETURN
To display other menus, perform steps 1 and
2 above.
¶ When the menu has a hierarchical structure, the menu
at the lower level appears.
Page 45

Menu playback
45
Menu playback of P.B.C.-compatible VCD
VCD
When a P.B.C. (PlayBack Control) capable VCD is played with P.B.C. on, the menu is displayed. Perform
operation according to the procedure indicated by the menu. (For details on the operation method and
control keys, refer to the manual provided with the played software.)
Main control keys used in VCD playback, and examples of indications
Indication on
software jacket
Control key on the player
¶ The indication on the jacket is variable depending on the software.
Hierarchical structure of VCD menus :
When a P.B.C.-compatible VCD containing menus is played and an item is selected in the displayed menu, a menu
with more detailed items may sometimes be displayed. Such a structure in which multiple menus are distributed in
different levels and interconnected is referred to as the hierarchical structure. In this structure, the target scene can
be reached by repeatedly selecting items in multiple menus.
Example of hierarchical structure
RETURN
ENTER RETURN 4 ¢
3 (Select
)
PLAY
(Return
)
4 (Previous
)
¢ (Next
Hierarchy level 1 (Menu)
)
Hierarchy level 2
(Submenus)
SELECT
NEXT NEXT
PREVIOUS
To advance in the hierarchy :
When an item is selected in the menu using the
ENTER (Select) key or numeric keys, you can
NEXT
PREVIOUS
PREVIOUS
To return in the hierarchy :
You can return to the level immediately above the
current level every time you press the RETURN key.
Hierarchy level 3 (Scenes)
advance to the menu at the level immediately below the current level. When the selected item is
a [scene], the scene will be played back.
¶ When there are multiple menus (scenes) in a hierarchy level, they can be switched over by pressing the 4 (Previous)
key or ¢ (Next) key.
Switching P.B.C. On and Off
1 Insert the desired VCD in the DVD/CD player.
2 Select the "DVD/CD" input.
3 If the DVD/CD player is playing a disc,
stop it.
4 Press the MENU/P.B.C./FILE SEARCH key.
FOLDER
- -
TOP MENU
SEARCH
FILE
MENU/P.B.C.
Each press switch the modes as follows.
P.B.C. on :
P.B.C.-compatible VCD is played according to
P.B.C.
The TV screen shows "P.B.C. On" and the
P.B.C. off: The TV screen shows "P.B.C. Off" and the
P.B.C.-compatible VCD is played in normal playback without P.B.C.
Application section
Page 46

MP3 that can be played back with this equipment
46
Menu playback
This unit is capable of playing back the music files recorded in the MP3 audio compression format
on CD-R/RW discs. This unit may also be incapable of playing certain CD-R/RW discs depending on their
properties, recording conditions, etc.
¶ Please set up the transfer bit rate setting for the compression software when compressing MP3 files as follows:
¶ Please set up the transfer bit rate setting for the compression software when compressing MP3 files as follows:
¶ Please set up the transfer bit rate setting for the compression software when compressing MP3 files as follows:
MP3 file: 128kbps recommended (32 kbps-320 kbps)
MP3 file: 128kbps recommended (32 kbps-320 kbps)
MP3 file: 128kbps recommended (32 kbps-320 kbps)
¶ This unit is compatible with 32kHz, 44.1kHz (recommended) and 48 kHz samplimg frequencies.
¶ This unit is compatible with 32kHz, 44.1kHz (recommended) and 48 kHz samplimg frequencies.
¶ This unit is compatible with 32kHz, 44.1kHz (recommended) and 48 kHz samplimg frequencies.
¶ A maximum of 999 folders or a maximum of 999 files can be stored on a single media.
¶ A maximum of 999 folders or a maximum of 999 files can be stored on a single media.
¶ A maximum of 999 folders or a maximum of 999 files can be stored on a single media.
¶ There are cases where it is not possible to save folders in the desired sequence depending on the software being
¶ There are cases where it is not possible to save folders in the desired sequence depending on the software being
¶ There are cases where it is not possible to save folders in the desired sequence depending on the software being
used.
used.
used.
¶ Usable formats : ISO 9660 level 1 (excluding expanded formats)
¶ Usable formats : ISO 9660 level 1 (excluding expanded formats)
¶ Usable formats : ISO 9660 level 1 (excluding expanded formats)
¶ This unit can play back only the closed sessions.
¶ This unit can play back only the closed sessions.
¶ This unit can play back only the closed sessions.
¶ This unit is compatible with multi-session discs.
¶ This unit is compatible with multi-session discs.
¶ This unit is compatible with multi-session discs.
Application section
Page 47

MP3 that can be played back with this equipment
Menu playback
47
Searching a desired folder/file by its title
MP3
MP3 files can be searched based on the title of the file or the folder containing the file.
Select the “DVD/CD” input
Press the TOP MENU/FOLDER SEARCH key.
1
FOLDER
- -
TOP MENU
Press the cursor up/down key (5 ∞) to select the title of the desired folder or file.
2
To abort operation, press the TOP MENU/FOLDER
SEARCH key again.
SEARCH
MENU/P.B.C.
5
5
¢
FILE
F
GM
÷ If file search is required, press the MENU/P.B.C./FILE
SEARCH key instead.
O.T.T.
Blinks
ITB TERPI
Folder
MAIN
1 BITTERPI
2 STAINOFF
3 OVERTEND
4 PREVERSI
5 LOVETOYO
1
File
31
SINGLE
2: 1 4
EXIT
Start playback.
3
ENTER
Application section
÷ In folder search, playback begins with the file with the
minimum file number in the searched folder.
÷ In file search, playback begins with the searched file.
Page 48

Changing the initial setup
48
(DVD)
Changing the initial setup (DVD)
äeéÌê›íË
"MAIN" Setting
The setups according to the connected TV, viewing restriction, OSD position, on-screen messages and
IPB display can be set.
When "MAIN" is selected in "SET UP MENU" :
"Rating" Setting
Sets the viewing restriction of DVD VIDEO.
(This functions only with DVD VIDEO discs
compatible with viewing restriction.)
"TV Aspect" Setting
Sets the picture aspect ratio according to that
of the connected TV.
"TV Mode" Setting
This setting is required when the aspect ratio
of the connected TV is 4:3.
"OSD Position" Setting
Sets the position of the OSD (On-Screen Display).
"On Screen Message" Setting
Switches the on-screen message on/off.
"IPB Display" Setting
Switches the IPB display on/off.
Select the "DVD/CD" input.
Select "SET UP MENU MAIN".
1
Press in stop mode
1 Press the SET UP key.
2 Press the ENTER key.
Application section
Select the item to be set.
2
Press either cursor (5 ∞) key to select the
item to be set, then press the ENTER key.
5
SET UP
ENTER
¢
SET UP MENU
MAIN
EXIT
÷ Press the RETURN key or cursor (3) key while the
"SET UP MENU" menu is displayed to exit from the
setup mode.
÷ If the resume function is active, pressing the SET UP
key cancels it.
MAIN
7
Level 8
7
4:3
7
Letterbox
7
Normal
7
On
7
Off
EXIT
MENU
Rating
TV Aspect
TV Mode
OSD Position
On Screen Message
IPB Display
\
5
ENTER
÷ Press the cursor (3 ) key while a setting menu is
displayed to exit from the setup mode. (Pressing
the RETURN key or cursor (2 ) key returns to the
"SET UP MENU".
Page 49

Change the content of the selected item.
3
Changing the initial setup (DVD)
49
Press either cursor key (5 ∞) to change the
setting, then press the ENTER key.
5
\
5
ENTER
÷ Select " " and press the ENTER key to return to the set-
ting menu. (Pressing the RETURN key or cursor (2) key
also returns to the previous setting menu.)
Function items Setting items
"Rating"
(When you attempt to
change the rating level, the
password input screen will
be displayed. p)
"TV Aspect"
"8 No Limit" : Select to enable playback of any DVD discs whether their targets are
adults, general public or children.
"7" to "1" : When DVD software containing the recording of restriction level (an adult-
oriented disc or a disc including violence), playback is restricted in accordance
with the restriction level.
"0 Lock All": Select to inhibit any DVD. Use this setting for example when you want
to inhibit playback of an adult-oriented DVD which does not contain the restriction
information.
"Change Password": Select to change the viewing restriction password which has
been registered before. (This item cannot be selected unless a password has already been registered.)
"Temporary Unlocked": Select to disable temporarily the viewing restriction which
has been set previously. (This item cannot be selected unless a password has
been set previously.)
"4 : 3" : Select when the connected TV uses the conventional aspect ratio of 4:3.
"16 : 9" : Select when the connected TV uses the wide-screen aspect ratio of 16:9.
Widescreen video will be reproduced in full screen. (Set the screen mode of the
TV to the full mode.)
MAIN
Rating
TV Aspect
TV Mode
OSD Position
On Screen Message
IPB Display
7
7
7
4:3
16:9
Application section
"TV Mode"
"OSD Position"
"Pan & Scan" : Select to play widescreen software with pan & scan specification on
a pan & scan screen (screen with the left and/or right edges cut off). When
widescreen software without pan & scan specification is played with this setting,
it will be reproduced in the Letterbox screen mode.
"Letterbox" : Widescreen software without pan & scan specification is reproduced
in the Letterbox screen (screen with black bands on the top and bottom).
"Normal" : Select to display the OSD and messages on the top of the TV screen.
Usually select this setting.
"Cinema" : Select to display the OSD and messages on the lower part of the TV
screen. Select this setting when the OSD or messages are deviated outside the
TV screen.
Continued on next page
Page 50

50
Changing the initial setup (DVD)
Function items Setting items
"On Screen Message"
"On" : Select to display on-screen messages.
"Off" : Select to not to display on-screen messages.
"IPB Display"
"On" : Select to view the IPB display.
"Off" : Select to not to view the IPB display.
If the power is turned off while the setup screen remains displayed after setting changes, the changes will be
invalid. Be sure to close the setup screen before turning power off.
Input of Password
When no password has been set previously :
1 Input the desired password with numeric
keys, then press the ENTER key.
ABC DEF
1123
GHI JKL MNO
456
PQRS TUV WXYZ
789
& ( )
-
+
100 0+10
' , : ? !
\
ENTER
MAIN
Rating
The player is locked.
Please remember the password.
Press ENTER to continue.
0214
2 Note the password in a memo and retain it
in a safe place before pressing the ENTER
key.
When a password has already been set :
Input the desired password with numeric
keys, then press the ENTER key.
ABC DEF
1123
Application section
GHI JKL MNO
456
PQRS TUV WXYZ
789
& ( )
-
+
100 0+10
' , : ? !
\
ENTER
If you select "Change Password", the screen
for input of the new password will open. Input
the new password using the numeric keys
and press the ENTER key. When the password
confirmation screen appears, note the password in a memo and retain it in a safe place
then pressing the ENTER key.
÷ The password input screen changes to the
confirmation screen, and the input password
is shown on the TV screen.
÷ The password is required when setting the
viewing restriction.
MAIN
Rating
7 Cange Level
Input a 4-digit password.
Then press ENTER.
7
----
Page 51

Changing the initial setup (DVD)
"SOUND" Setting
"SOUND" is to be selected when you want to set the audio output method when system components are
connected using the digital audio output connector of the player. Also select "SOUND" to set audio output
during DVD or VCD search and dynamic range control function.
When "SOUND" is selected in "SET UP MENU":
"Digital Audio PCM Down Conversion" Setting
Switches on/off the down-sampling conversion for the
digital signal output with a high sampling rate.
"Digital Audio Dolby Digital" Setting
Sets the Dolby Digital output.
"Digital Audio DTS" Setting
Sets the DTS output.
"Digital Audio MPEG" Setting
Sets the MPEG output.
"Audio During Search" Setting
Switches on/off the audio during search.
"Dynamic Range Control" Setting
Switches the dynamic range control function.
51
Select the "DVD/CD" input.
Select "SET UP MENU SOUND".
1
¢
Press in stop mode
1 Press the SET UP key.
SET UP
2 Press either cursor (5 ∞) key to select
"SET UP MENU SOUND", then press the
ENTER key.
5
\
5
ENTER
SET UP MENU
EXIT
SOUND
Application section
÷ Press the RETURN key or cursor (3) key while the
"SET UP MENU" menu is displayed to exit from the
setup mode.
Select the item to be set.
2
Press either cursor (5 ∞) key to select the
item to be set, then press the ENTER key.
5
ENTER
\
5
ENTER
SOUND
Digital Audio
PCM Down Conversion
Dolby Digital
DTS
MPEG
MENU
Audio During Search
Dynamic Range Control
7
On
7
Bitstream
7
Bitstream
7
Bitstream
7
On
7
Wide
EXIT
÷ Press the cursor (3 ) key while a setting menu is
displayed to exit from the setup mode. (Pressing
the RETURN key or cursor (2 ) key returns to the
"SET UP MENU".
Continued on next page
Page 52

52
Change the content of the selected item.
3
Changing the initial setup (DVD)
Press either cursor key (5 ∞) to change the
setting, then press the ENTER key.
5
\
5
ENTER
÷ Select " " and press the ENTER key to return to the set-
ting menu. (Pressing the RETURN key or cursor (2) key
also returns to the previous setting menu.)
Function items Setting items
"Digital Audio PCM
Down Conversion"
"On" : Select to down-convert the signal to 44.1 kHz/16-bit PCM signal. Select
this setting when the connected AV amplifier is incompatible with 96 kHz
digital input.
÷ The analog output signals are also converted accordingly.
"Off" : Select to skip down conversion. Select this setting when the connected
AV amplifier is compatible with 96 kHz digital input. However, if the disc in-
hibits the 96 kHz digital output, the signal is down-converted even when this
setting is selected.
SOUND
Digital Audio
PCM Down Conversion
Dolby Digital
DTS
MPEG
Audio During Search
Dynamic Range Control
7
7
On
7
Off
"Digital Audio Dolby
Digital"
*1
"Bitstream" : The signal is output as a bitstream. Select when connecting a
component containing Dolby Digital decoder.
"PCM" : The signal is converted onto 48 kHz (2ch.) PCM signal before being
output. Select when connecting a component without Dolby Digital decoder.
"Digital Audio DTS" *2
"Bitstream" : The signal is output as a bitstream. Select when connecting a
component containing DTS decoder.
"Off" : No digital signal is output.
"Digital Audio MPEG"
Application section
"Bitstream" : The signal is output as a bitstream. Select when connecting a
component containing MPEG decoder.
"PCM" : The signal is converted onto 48 kHz (2ch.) PCM signal before being
output. Select when connecting a component without MPEG decoder.
No digital signal is output when an MP3 file is played back.
*1 Set to "PCM" when connecting the equipment other than a Dolby Digital decoder. If this item is set to
"Bitstream", loud noise may be produced and speakers may be damaged.
*2 Noise may interfere with the speaker output if the player is connected to a piece of equipment which does not
incorporate an DTS decoder. Never connect the player to equipment without a built-in DTS decoder.
Page 53

Function items Setting items
Changing the initial setup (DVD)
53
"Audio During
Search"
"Dynamic Range
Control"
If the power is turned off while the setup screen remains displayed after setting changes, the changes will be
invalid. Be sure to close the setup screen before turning power off.
"On" : Select to output audio during search.
"Off" : Select to mute audio during search.
"Wide" : Select to reproduced the audio at the level recorded in the disc.
"Normal" : Select to reduce the difference between the maximum and minimum
volume levels.
"Midnight" : Select to further reduce the difference between the maximum and
minimum volume levels. This setting is suitable for low-level listening in late at
night, etc.
Application section
Page 54

54
Changing the initial setup (DVD)
"VISUAL"Setting
Select "VISUAL" when you want to change the language used to display the menu screens, language use
in menus on the disc, audio language, subtitle language, etc. (If the selected language is not used in a specific disc, the language specified as the priority language for the disc will be used.) Also select "VISUAL" to
set the still mode and video format conversion system.
When "VISUAL" is selected in "SET UP MENU":
"Player Menu Language" Setting
Sets the language used to display the menu screens
of the player.
"Disc Menu Language" Setting
Sets the language used to display the menu screens
of the disc.
"Audio Language" Setting
Sets the language of the disc audio.
Select the "DVD/CD" input.
Select "SET UP MENU VISUAL".
1
¢
Press in stop mode
1 Press the SET UP key.
SET UP
2 Press either cursor (5 ∞) key to select
"SET UP MENU VISUAL", then press the
ENTER key.
"Subtitle Language" Setting
Sets the language of the disc subtitles.
"Still Mode" Setting
Reduces blur in still images.
"NTSC = PAL" Setting
Switches if the signal from an NTSC format disc is to
be converted into PAL or not.
SET UP MENU
EXIT
VISUAL
5
5
Select the item to be set.
2
Application section
Press either cursor (5 ∞) key to select the
item to be set, then press the ENTER key.
5
5
\
\
ENTER
ENTER
÷ Press the RETURN key or cursor (3) key while the
"SET UP MENU" menu is displayed to exit from the
setup mode.
Player Menu Language
Disc Menu Language
Audio Language
Subtitle Language
Still Mode
MENU
NTSC = PAL
VISUAL
7
English
7
English
7
English
7
English
7
Auto
7
On
EXIT
÷ Press the cursor (3 ) key while a setting menu is
displayed to exit from the setup mode. (Pressing
the RETURN key or cursor (2 ) key returns to the
"SET UP MENU".
Page 55

Change the content of the selected item.
3
Changing the initial setup (DVD)
55
Press either cursor key (5 ∞) to change the
setting, then press the ENTER key.
5
\
5
ENTER
÷ Select " " and press the ENTER key to return to the set-
ting menu. (Pressing the RETURN key or cursor (2) key
also returns to the previous setting menu.)
÷ When "Other - - - -" is selected, enter the code num-
ber with the numeric keys then press the ENTER key.
Function items Setting items
"Player Menu
Language"
"English" : Select to display menus in English.
"French" : Select to display menus in French.
"Spanish" : Select to display menus in Spanish.
"German" : Select to display menus in German.
"Italian" : Select to display menus in Italian.
"Japanese" : Select to display menus in Japanese.
"Chinese" : Select to display menus in Chinese.
"Taiwanese" : Select to display menus in traditional Chinese letters.
VISUAL
Player Menu Language
Disc Menu Language
Audio Language
Subtitle Language
Still Mode
NTSC = PAL
7
7
7
Auto
7
Frame
7
Field
"Disc Menu Language"
(The languages displayed
with this setting item are
variable depending on country and area.)
"Audio Language"
(The languages displayed
with this setting item are
variable depending on country and area.)
"English" : Select to display menus in English.
"French" : Select to display menus in French.
"Spanish" : Select to display menus in Spanish.
"German" : Select to display menus in German.
"Italian" : Select to display menus in Italian.
"Chinese" : Select to display menus in Chinese.
"Other - - - -" : Select to specify the language using a code No. listed in the "Disc
Language Code Table". U
"Original" : Select to reproduce audio in the language specified as the priority language
by the disc.
"English" : Select to reproduce audio in English.
"French" : Select to reproduce audio in French.
"Spanish" : Select to reproduce audio in Spanish.
"German" : Select to reproduce audio in German.
"Italian" : Select to reproduce audio in Italian.
"Chinese" : Select to reproduce audio in Chinese.
"Other - - - -" : Select to specify the language using a code No. listed in the "Disc
Language Code Table". U
Application section
Continued on next page
Page 56

56
Changing the initial setup (DVD)
Function items Setting items
"Subtitle Language"
(The languages displayed
with this setting item are
variable depending on country and area.)
"Still Mode"
"Auto" : The subtitle language is selected automatically according to the "Audio
language" setting.
Case in which subtitles are not displayed:
When the voices are reproduced in the language selected with "Audio lan-
guage", the subtitles are not displayed.
Case in which subtitles are displayed:
When the voices cannot be reproduced in the language selected with "Audio
language", subtitles are displayed in the language selected with "Audio lan-
guage".
"English" : Select to display menus in English.
"French" : Select to display menus in French.
"Spanish" : Select to display menus in Spanish.
"German" : Select to display menus in German.
"Italian" : Select to display menus in Italian.
"Chinese" : Select to display menus in Chinese.
"Other - - - -" : Select to specify the language using a code No. listed in the "Disc
Language Code Table". U
"Auto" : Frame still and field still pictures are switched automatically. Usually se-
lect this setting.
"Frame" : Select to display still pictures in a higher picture quality. (As the field and
still pictures are displayed alternately, the picture may blur accordingly.)
"Field" : Select to display still pictures without blur. (As the video information is
halved compared to the frame pictures, the picture quality deteriorates accord-
ingly.)
"NTSC = PAL"
If the power is turned off while the setup screen remains displayed after setting changes, the changes will be
invalid. Be sure to close the setup screen before turning power off.
"On" : Select to enable conversion from NTSC to PAL.
"Off" : Select to disable conversion from NTSC to PAL.
Application section
Page 57

Disc Language Code Table
Changing the initial setup (DVD)
57
Cord No. Language
6565
6566
6570
6577
6582
6583
6588
6590
6665
6669
6671
6672
6678
6679
6682
6765
6779
6783
6789
6865
6869
6890
6976
6978
6979
6983
6984
6985
7065
7073
7074
7079
7082
7089
7165
7168
7176
7178
7185
7265
7273
7282
7285
7289
7365
7378
7383
7384
7387
Afar
Abkhazian
Afrikaans
Amharic
Arabic
Assamese
Aymara
Azerbaijani
Bashkir
Byelorussian
Bulgarian
Bihari
Bengali; Bangla
Tibetan
Breton
Catalan
Corsican
Czech
Welsh
Danish
German
Bhutani
Greek
English
Esperanto
Spanish
Estonian
Basque
Persian
Finnish
Fiji
Faroese
French
Frisian
Irish
Scots Gaelic
Galician
Guarani
Gujarati
Hausa
Hindi
Croatian
Hungarian
Armenian
Interlingua
Indonesian
Icelandic
Italian
Hebrew
Cord No. Language
7465
7473
7487
7565
7575
7576
7577
7578
7579
7583
7585
7589
7665
7678
7679
7684
7686
7771
7773
7775
7776
7778
7779
7782
7783
7784
7789
7865
7869
7876
7879
7982
8065
8076
8083
8084
8185
8277
8279
8285
8365
8368
8372
8373
8375
8376
8377
8378
8379
Japanese
Yiddish
Javanese
Geogian
Kazakh
Greenlandic
Cambodian
Kannada
Korean
Kashmiri
Kurdish
Kirghiz
Latin
Lingala
Laothian
Lithuanian
Latvian; Lettish
Malagasy
Maori
Macedonian
Malayalam
Mongolian
Moldavian
Marathi
Malay
Maltese
Burmese
Nauru
Nepali
Dutch
Nowegian
Oriya
Punjabi
Polish
Pashto; Pushto
Portuguese
Quechua
Rhaeto-Romance
Romanian
Russian
Sanskrit
Sindhi
Serbo-Croatian
Singhalese
Slovak
Slovenian
Samoan
Shona
Somali
Cord No.
8381
8382
8385
8386
8387
8465
8469
8471
8472
8473
8475
8476
8479
8482
8484
8487
8575
8582
8590
8673
8679
8779
8872
8979
9072
9085
Language
Albanian
Serbian
Sundanese
Swedish
Swahili
Tamil
Telugu
Tajik
Thai
Tigrinya
Turkmen
Tagalog
Tonga
Turkish
Tatar
Twi
Ukrainian
Urdu
Uzbek
Vietnamese
Volapük
Wolof
Xhosa
Yoruda
Chinese
Zulu
Application section
Page 58

Various playback features
58
Various playback features
Listening to the desired sequence
(program playback)
VCD CD MD
Desired tracks in a disc can be programmed in the desired order and played back.
(Program playback is not available with DVD VIDEO.)
Select the "DVD/CD" or "MD" input.
Check that the unit is in the stop mode.
1
If is in play mode
¢⁄
Press the STOP 7/AUTO/MONO key.
STOP
AUTO/MONO
7
÷ If P.B.C. is On, be sure to set it to Off. t
Light the "PGM" indicator.
2
PGM
OM
PGM
F
12
HIGH
DC P01 T--
Blinks
Enter track Nos. in the order you want to play them.
3
1 Select a track number using numeric keys.
ABC DEF
1123
GHI JKL MNO
456
PQRS TUV WXYZ
789
& ( )
-
+
100 0
' , : ? !
+
10
2 Press the SET key.
SET
Application section
3 Repeat steps 1 and 2.
Start playback.
4
DVD/CD
6
or
MD
6
Blinks
DC P01 T09
Program position of the track
to be selected next.
Press the numeric keys as shown below....
To enter track No. 12 ... +10, 2
To enter track No. 20 ... +10, +10, 0
÷ Up to 32 tracks can be programmed. When "PGM FULL"
is displayed, no more tracks can be programmed.
÷ If you do not press the SET key before the track num-
ber display stops blinking, the track number entry is
canceled.
÷ Tracks will be played in the order they were pro-
grammed (following the program numbers).
÷ When the 4/ ¢ key is pressed during play, the pro-
gram will jump to the preceding or the following track
respectively.
÷ When the 4 key is pressed once during playback, the
play position returns to the beginning of the current
track being played.
Selection of
tracks
Page 59

To add a track to an existing program
DC P07 T03
1 Select the track number to be added with
the numeric keys.
Press in stop mode
ABC DEF
1123
GHI JKL MNO
456
PQRS TUV WXYZ
789
& ( )
-
+
100 0
2 Press the SET key.
' , : ? !
+
10
Various playback features
Press the numeric keys as shown below....
To enter track No. 12 ... +10, 2
To enter track No. 40 ... +10, +10, +10, +10, 0
59
SET
To clear a programmed track
Press in stop mode
CLEAR/DEL.
To clear the entire program
Press in stop mode
÷ Up to 32 tracks can be programmed. When "PGM FULL"
is displayed, no more tracks can be programmed.
÷ When a track No. is entered, the track will be added to
the end of the existing program.
÷ Each time the key is pressed, the last track in the pro-
gram is cleared.
Goes off
Application section
PGM
÷ It is not permitted to program CD and MD tracks together.
÷ The program mode is cancelled when the unit is turned off or the programmed disc is ejected. The set pro-
gram is cleared entirely at this time.
AB1
3
RANDOM
PGM
O.T.E.
F
O.T. T.
1
Page 60

60
Various playback features
Repeated playback
Repeat playback allows you to play the desired audio or video repeatedly.
With some DVDs and VCDs, the partitions in the recording are not related with the track number assignment. As a result, repeat playback may not be available with such software. (Repeat playback may also be
unavailable during playback of DVD or P.B.C. playback of VCD.)
Select the "DVD/CD" or "MD" input.
To repeat a disc
DVD VCD CD MP3 MD
¢⁄
1 If the "PGM" indicator is lit, turn it off by
pressing the PGM key in stop mode to cancel the program mode.
2 Start playback.
DVD/CD
6
or
MD
6
3 Press the REPEAT key repeatedly until "
is displayed.
REPEAT
To repeat a single track
DVD VCD CD MP3 MD
"
HIGH
RANDOM
F
12
DC T01
÷ Title repeat occurs with a DVD disc.
To stop repeated playback
Press the REPEAT key repeatedly until any repeat-related indicator disappears or press the
STOP7/TUNING MODE key. (Except for MD)
1 If the "PGM" indicator is lit, turn it off by
pressing the PGM key in stop mode to cancel the program mode.
2 Select the track number to be repeated us-
ing the numeric keys or the 4 or ¢ key.
The CD or MD playback of the selected track
will start.
ABC DEF
Application section
1123
GHI JKL MNO
456
PQRS TUV WXYZ
789
-
100 0+10
' , : ? !
& ( )
+
or
P.CALL
4¢
3 During playback, press the REPEAT key
repeatedly until "
" is displayed.
1
REPEAT
PGM
F
O.T. T.
12
DC T18
1
RANDOM
HIGH
÷ Chapter repeat occurs with a DVD disc.
To stop repeated playback
Press the REPEAT key repeatedly until any repeat-related indicator disappears or press the
STOP7/TUNING MODE key. (Except for MD)
Page 61

Various playback features
R
P
P
k
61
To repeat selected tracks
VCD CD MD
1 Program the desired tracks by perform-
ing the procedure in "Listening to the
desired sequence (program playback) "
until step 3. I
2 Start playback.
DVD/CD
6
or
3 Press the REPEAT key to select "
REPEAT
A-B repeat playback
MD
6
".
DVD VCD CD
HIGH
F
PGM
RANDOM
O. T.T.
12
DC P01 T18
To stop repeated playback
Press the REPEAT key repeatedly until any repeat-related indicator disappears or press the
STOP7/TUNING MODE key. (Except for MD)
A-B repeat playback allows you to play a specified section repeatedly. (A-B repeat playback may
sometimes be unavailable during P.B.C. playback of DVD or VCD.)
If the "PGM" indicator is lit, turn it off by pressing the PGM key in stop mode to cancel the program mode.
1Start playback.
DVD/CD
6
2 Press the key at the point you want to
start repeating.
Point A
REPEAT
AB
A1
RANDOM
HIGH
F
3
PGM
O.T. T.
12
VDD T01 C03
ST.
Start point A is specified.
3 Press the key again at the point you want to
end repeating.
Point B
REPEAT
AB
AB1
RANDOM
3
PGM
HIGH
F
O.T. T.
12
VDD T01 C01
ST.
Application section
SUR
k
SUR
End point B is specified and repeated playback of the section between A and B starts.
To stop repeat playback
Press the REPEAT A B key again.
Page 62

62
O
O
Various playback features
Playing tracks in a random order
(random playback)
VCD CD MD
As the titles each time are selected randomly, the music can be enjoyed without getting tired of it.
Select the "DVD/CD" or "MD" input.
¢⁄
1 If the "PGM" indicator is lit, turn it off by
pressing the PGM key in stop mode to cancel the program mode.
PGM
÷ If P.B.C. is On, be sure to set it to Off. t
2 Start random playback.
AB
3
RANDOM
RANDOM
÷ Playback stops after each title has been played once.
÷ The random playback can also be repeated by pressing
the REPEAT key.
PGM
To select another track in the middle of playing one
Press the ¢ key.
P.CALL
4 ¢
÷ Pressing the 4 key returns the playback position
to the beginning of the track being played.
Application section
To cancel random playback
Press the RANDOM or STOP 7/AUTO/MONO
key during random playback.
RANDOM
÷ Pressing the RANDOM key continues playback of
tracks in the order they are recorded, while pressing
the STOP 7/AUTO/MONO key stops playback.
Page 63

Convenient recording methods
Convenient recording methods
This unit provides the following recording features in addition to normal recording. Select the appropriate method
according to the purpose of recording.
Long play recording based on ATRAC3 (MDLP) is available with any of the following MD recording functions.
One-touch edit high-speed recording
Records a CD onto an MD in a short period.All tracks in a CD can be recorded onto an MD in half the normal
playback period. Note that recording of discs other than CD on MD is possible only in the normal speed
because it is only their analog audio output that can be recorded on MD. ‰
63
All-track high-speed recording
All-track recording
One-touch edit normal-speed recordin
Records a CD onto an MD in a short period. Records only one CD track being played onto an MD in half
the normal playback period. Note that recording of discs other than CD on MD is possible only in the normal speed because it is only their analog audio output that can be recorded on MD. Á
Single-track high-speed recording
\
\
\
Single-track recording
Program recording
\
\
CD
CD VCD MP3
CD
CD DVD VCD MP3
\
MD
\
MD
MD
\
MD
Records the programmed CD tracks in the programmed order onto an MD at twice the normal
playback speed. Note that recording of discs other than CD on MD is possible only in the normal speed
because it is only their analog audio output that can be recorded on MD. ˆ
Program high-speed recording
\
Program recording
Synchronized recording
Convenient for recording all chapters in a title in a DVD VIDEO disc. °·
Synchronized recording
\
\
\
CD
CD VCD
\
DVD
MD
\
MD
MD
Application section
Page 64

64
Convenient recording methods
One-touch edit high-speed recording
Records a CD onto an MD in a short period.All tracks in a CD can be recorded onto an MD in half the normal
playback period.
Note that recording of discs other than CD on MD is possible only in the normal speed because it is only
their analog audio output that can be recorded on MD.
CD VCD MP3
\
MD
Be sure to put the MD recorder in stop mode
With recording of CD playback, either the
digital output or analog output can be recorded as required. ‚
MD can be recorded in the desired recording
modes (REC MODE) as required. q
Make preparation for recording.
1
÷ For high-speed recording, set the CD record-
ing signal format to "DIGITAL".
÷ When recording from a CD or MD, digital re-
cording of certain discs may be inhibited by
the SCMS. c
1 Insert a recordable MD in the MD recorder.
2 Ensure that the "RANDOM" indicators are
not lit.
3 Insert the desired CD (MP3, VCD) in the
DVD/CD player.
If the DVD/CD player is playing a disc, stop it.
2
STOP 7
TUNING MODE
Application section
÷ If the "RANDOM" indicator is lit, turn it off by pressing
the RANDOM key to cancel the random play mode.
÷ If P.B.C. is On, be sure to set it to Off. t
When recording of an MP3 disc onto MD is started
in stop mode (i.e. when the 3 indicator is not lit),
all MP3 files in the disc will be recorded. When the
recording is started during folder search (i.e. when
F
the
folder will be recorded.
indicator is blinking), all MP3 files in the
Page 65

Start recording.
3
1 Press the MODE key.
MODE
2 Turn the VOLUME/MULTI CONTROL knob
to select "O.T.E. MODE", then press the
SET/DEMO key.
Convenient recording methods
65
3 Turn the VOLUME/MULTI CONTROL knob
to select "NORMAL SP" or "HIGH SP", then
press the SET/DEMO key.
If you are operating the remote, press the O.T.E.
key. (Only "NORMAL SP" recording is available
from the remote control unit.)
The recorded audio may skip, noise may be recorded
on the MD or unnecessary tracks may be created depending on the condition of the CD. In such a case,
restart recording at the normal speed.
To interrupt a recording
STOP 7
TUNING MODE
(Recording and playback will be stopped)
Turning the knob switches the display contents.
1 "NORMAL SP" : Normal-speed recording
2 "HIGH SP" : High-speed recording
÷ After the track has been recorded, the MD recorder
stops and the DVD/CD player enters pause mode.
÷ When either the playback of CD (MP3, VCD) or record-
ing of MD is stopped, the other operation is stopped
automatically.
With certain tracks, when a track has been recorded
in high-speed recording, the recording mechanism
prohibits to start high-speed recording of the same
track or high-speed recording of the disc containing
the track in less than 74 minutes after the start of previous recording. In this case, the unit displays the time
required till the high-speed recording can be restarted.
Application section
itW 74mian.
If you want to record the same track immediately
after its high-speed recording, record it in normal-speed recording.
Do not turn power off or apply shock or impact
while "WRITING" is displayed. If the power cord is
unplugged before "WRITING" disappears, the recorded or edited data will be lost.
Page 66

66
Convenient recording methods
One-touch edit normal-speed recording
CD DVD VCD MP3
\
MD
Records a CD onto an MD in a short period. Records only one CD track being played onto an MD in half the
normal playback period.
Note that recording of discs other than CD on MD is possible only in the normal speed because it is only
their analog audio output that can be recorded on MD.
Be sure to put the MD recorder in stop mode
With recording of CD playback, either the
digital output or analog output can be recorded as required. ‚
MD can be recorded in the desired recording
modes (REC MODE) as required. q
Make preparation for recording.
1
÷ For high-speed recording, set the CD record-
ing signal format to "DIGITAL".
÷ When recording from a CD or MD, digital re-
cording of certain discs may be inhibited by
the SCMS. c
1 Insert a recordable MD in the MD recorder.
2 Ensure that the "RANDOM" indicators are
not lit.
3 Insert the desired DVD (MP3, VCD, CD) in
the DVD/CD player.
Select the desired track number.
2
1 Press the DVD/CD 6 key.
DVD/CD
6
2 Select the desired track number.
ABC DEF
1123
GHI JKL MNO
Application section
456
PQRS TUV WXYZ
789
& ( )
-
+
100 0+10
' , : ? !
÷ If the "RANDOM" indicator is lit, turn it off by pressing
the RANDOM key to cancel the random play mode.
÷ If P.B.C. is On, be sure to set it to Off. t
Page 67

Start recording.
3
1 Press the MODE key.
MODE
2 Turn the VOLUME/MULTI CONTROL knob
to select "O.T.E. MODE", then press the
SET/DEMO key.
3 Turn the VOLUME/MULTI CONTROL knob
to select "NORMAL SP" or "HIGH SP", then
press the SET/DEMO key.
Convenient recording methods
Turning the knob switches the display contents.
1 "NORMAL SP" : Normal-speed recording
2 "HIGH SP" : High-speed recording
67
If you are operating the remote, press the O.T.E.
key. (Only "NORMAL SP" recording is available
from the remote control unit.)
The recorded audio may skip, noise may be recorded
on the MD or unnecessary tracks may be created depending on the condition of the CD. In such a case,
restart recording at the normal speed.
To interrupt a recording
STOP 7
TUNING MODE
(Recording and playback will be stopped)
÷ When step 3 is performed in the middle of DVD(MP3,
VCD,CD) playback, the current track will be recorded from
the beginning.
÷ After the track has been recorded, the MD recorder stops
and the DVD/CD player enters pause mode.(Except for
DVD VIDEO disc)
÷ When either DVD(MP3, VCD,CD) playback or MD record-
ing stops, the other operation also stops.
With certain tracks, when a track has been recorded
in high-speed recording, the recording mechanism
prohibits to start high-speed recording of the same
track or high-speed recording of the disc containing
the track in less than 74 minutes after the start of previous recording. In this case, the unit displays the time
required till the high-speed recording can be restarted.
itW 74mian.
Application section
If you want to record the same track immediately
after its high-speed recording, record it in normal-speed recording.
Do not turn power off or apply shock or impact
while "WRITING" is displayed. If the power cord is
unplugged before "WRITING" disappears, the recorded or edited data will be lost.
Page 68

68
Convenient recording methods
Program recording
Records the programmed CD tracks in the programmed order onto an MD at twice the normal
playback speed.
Note that recording of discs other than CD on MD is possible only in the normal speed because it is only
their analog audio output that can be recorded on MD.
Be sure to put the MD recorder in stop mode
With recording of CD playback, either the
digital output or analog output can be recorded as required. ‚
MD can be recorded in the desired recording
modes (REC MODE) as required. q
Make preparation for recording.
1
1 Insert a recordable MD in the MD recorder.
CD VCD
\
MD
÷ For high-speed recording, set the CD record-
ing signal format to "DIGITAL".
÷ When recording from a CD or MD, digital re-
cording of certain discs may be inhibited by
the SCMS. c
2 Ensure that the "RANDOM" indicators are
not lit.
3 Insert the desired CD (VCD) in the DVD/CD
player.
If the DVD/CD player is playing a disc, stop it.
2
STOP 7
TUNING MODE
Application section
Program the desired sequence of CD tracks.
3
Perform steps 2 and 3 of the procedure in
"Listening to the desired sequence (Program playback)". I
÷ If the "RANDOM" indicator is lit, turn it off by pressing
the RANDOM key to cancel the random play mode.
÷ If P.B.C. is On, be sure to set it to Off. t
÷ If the same track is programmed twice or more,
"HIGH SP" cannot be selected in step 4 - 3.
Page 69

Start recording.
4
1 Press the MODE key.
MODE
2 Turn the VOLUME/MULTI CONTROL knob
to select "O.T.E. MODE", then press the
SET/DEMO key.
Convenient recording methods
69
3 Turn the VOLUME/MULTI CONTROL knob
to select "NORMAL SP" or "HIGH SP", then
press the SET/DEMO key.
If you are operating the remote, press the O.T.E.
key. (Only "NORMAL SP" recording is available
from the remote control unit.)
The recorded audio may skip, noise may be recorded
on the MD or unnecessary tracks may be created depending on the condition of the CD. In such a case,
restart recording at the normal speed.
To interrupt a recording
STOP 7
TUNING MODE
(Recording and playback will be stopped)
Turning the knob switches the display contents.
1 "NORMAL SP" : Normal-speed recording
2 "HIGH SP" : High-speed recording
÷ Recording begins from the first track in the program and
completes when the entire program has been recorded.
÷ When either the playback of CD (VCD) or recording of
MD is stopped, the other operation is stopped automatically.
With certain tracks, when a track has been recorded
in high-speed recording, the recording mechanism
prohibits to start high-speed recording of the same
track or high-speed recording of the disc containing
the track in less than 74 minutes after the start of previous recording. In this case, the unit displays the time
required till the high-speed recording can be restarted.
Application section
itW 74mian.
If you want to record the same track immediately
after its high-speed recording, record it in normal-speed recording.
Do not turn power off or apply shock or impact
while "WRITING" is displayed. If the power cord is
unplugged before "WRITING" disappears, the recorded or edited data will be lost.
Page 70

70
Convenient recording methods
Application section
Page 71

MD Edit Functions
DCBA DBCA
DCBA DCBA
+++
DCBA
MD Edit Functions
When a commercially available MD fabricated for user recording is used, various editing operations can be
applied after recording.
Note that editing is not possible with commercially available prerecorded MD software designed for playback
only.
÷ For editing, set the write protect tab of the MD to "Write enable" side. ©
Function Limitations because of the MD Standard
Some of the functions are limited because of the MD standard. Please check this before assuming a
malfunction. z
Reordering tracks by moving them
Moving a single track (MOVE) s
71
Dividing a track, combining two tracks
Combining two tracks (COMBINE) hDividing a track (DIVIDE) f
CBA DB'BA
Erasing track(s)
Erasing all tracks in disc (ALL ERASE) lErasing a single track (ERASE) k
CADCBA B
Assigning a title to a disc or track ;
Copying titles in title memos for use as titles of other MDs or tracks (TITLE COPY) (TITLE MEMO) F
Title input is possible simply by selecting one character after another from the characters shown on the display. As the
entered title is compatible between models, it will be displayed also when the disc is set into a different MD recorder
(player).
(The title compatibility is limited partly according to the character types which can be displayed, the number of characters, etc.)
Application section
Page 72

72
MOVE
MD Edit Functions
Moving a single track
The following procedure shows you how to select a single tracks (track number) and move (insert) it at the
desired destination position in the series of track numbers. After the tracks have been moved, the track
numbers before and after them will be adjusted automatically. By repeating this operation, you can reorder the tracks in the desired order.
Before starting MD editing, be sure to cancel the program mode by pressing the PGM key in stop mode.
Select the "MD" input
Select "MOVE".
1
1 Press the TRACK EDIT key.
2 Select "MOVE".
⁄
TRACK EDIT
(MOVE)
÷ Pressing the key in the middle of playback initiates
pause.
÷ To cancel the operation in the middle, press the
TRACK EDIT key any time before step 4.
Each press of the 4 or ¢ keys switches the operation.
P.CALL
4¢
3 Set it.
(To initiate TRACK MOVE during playback,
go to step 3.)
Select the track to be moved.
2
Application section
1 Select a track number.
P.CALL
4¢
SET
When pressed in
stop mode
1 "MOVE"
2 "COMBINE"
3 "ERASE"
010 MOVE?
050 MOVE?
When pressed in play
mode
1 "DIVIDE"
2 "COMBINE"
3 "ERASE"
4 "MOVE"
To decrease
track No.
2 Set it.
SET
To increase
track No.
Track to be moved
Page 73

Select the moving destination track.
3
1 Select a track number.
P.CALL
4¢
To decrease
track No.
To increase
track No.
2 Set it.
SET
Execute track move.
4
ENTER
MD Edit Functions
Example for moving between tracks No. 6 and No. 7
060/1
Display after execution
"EDIT NOW" = "COMPLETE"
(When editing is completed successfully)
"EDIT NOW" = "CAN' T EDIT"
(When editing is impossible)
/007
Destination track No.
73
After editing, eject and remove the MD.
5
MD 0
Image of track reordering by Move
1 72 3 4 5
RIW TING
Information is
being written.
÷ The MD editing is established finally at the moment the
MD disc is ejected.
Do not turn power off or apply shock or impact while
"WRITING" is displayed. If the power cord is unplugged before "WRITING" disappears, the recorded
or edited data will be lost.
Select the track to be moved.
22
MD has been ejected.
JEECT
Application section
3 4 566
21
3 4 5 6
2
1
21
7
22
22
ENDTOP
The track has been moved.
(The track numbers are readjusted.)
Select the move destination.
Page 74

74
DIVIDE
1<0 >0020ok
MD Edit Functions
Dividing a track
The following procedure shows how to divide a track by assigning a track number in the desired position
in the track. For example, by inserting an additional track number before the passage you are specially
fond of, it is easy to skip to there when you play the disc later. After the track number has been divided, the
track numbers after it will be adjusted automatically.
Before starting MD editing, be sure to cancel the program mode by pressing the PGM key in stop mode.
Select the "MD" input
Play the track to be divided.
1
Press the TRACK EDIT key at the desired position.
2
1 Press the TRACK EDIT key.
(DIVIDE)
⁄
TRACK EDIT
÷ When dividing a track, set the dividing point at more
than 2 seconds after the beginning of the track. A track
may not be able to be divided if one of the divide tracks
would become shorter than about 2 seconds.
÷ Pressing the key in the middle of playback initiates
pause.
÷ To cancel the operation in the middle, press the
TRACK EDIT key any time before step 3.
2 Select "DIVIDE".
4¢
3 Set it
Application section
After editing, eject and remove the MD.
3
P.CALL
SET
ENTER
Each press of the 4 or ¢ keys switches the op-
eration.
1 "DIVIDE"
2 "COMBINE"
3 "ERASE"
4 "MOVE"
Display after execution
"EDIT NOW" = "COMPLETE"
(When editing is completed successfully)
"EDIT NOW" = "CAN' T EDIT"
(When editing is impossible)
÷ There is no blank space left between the two tracks.
÷ Track division may sometimes be impossible due to
the limitations of the MD standard.
Up to 255 track numbers can be inserted additionally by repeating 1 to 3 for each of them.
÷ The MD recorder enters pause mode at the beginning
of the track newly created by division.
Page 75

After editing, eject and remove the MD.
RIW TING
4
MD Edit Functions
JEECT
75
Image of divide
MD 0
Should be approx. 2 sec. or longer.
12 3
A B C
12 43
Information is
being written.
÷ The MD editing is established finally at the moment the
MD disc is ejected.
Do not turn power off or apply shock or impact while
"WRITING" is displayed. If the power cord is unplugged before "WRITING" disappears, the recorded
or edited data will be lost.
Track No. is adjusted
MD has been ejected.
A B C
Divided track (second half)
Divided track (first half)
Application section
Page 76

76
COMBINE
01+0020?
06+0070?
MD Edit Functions
Combining two tracks
Combines two adjacent tracks into a single track. After this operation, the track numbers of tracks located
after the combined tracks are decreased automatically.
Before starting MD editing, be sure to cancel the program mode by pressing the PGM key in stop mode.
Select the "MD" input
Select “ COMBINE”.
1
1 Press the TRACK EDIT key.
2 Select "COMBINE".
⁄
TRACK EDIT
(COMBINE)
It is not permitted to combine two tracks which are
recorded in different recording modes.
÷ To combine two tracks during playback, press the TRACK
EDIT key while the second track is being played.
÷ To cancel the operation in the middle, press the TRACK
EDIT key any time before step 3.
Each press of the 4 or ¢ keys switches the operation.
When pressed in
stop mode
When pressed in play
mode
P.CALL
4¢
3 Set it.
SET
(If you combine tracks during playback,
go to step 3.)
Application section
Select the track to be combined.
2
1 Select a track number.
1 "MOVE"
2 "COMBINE"
3 "ERASE"
÷ "COMBINE" cannot be selected if the track being
played is the first track on the disc.
Connecting tracks 6 and 7.
1 "DIVIDE"
2 "COMBINE"
3 "ERASE"
4 "MOVE"
P.CALL
4¢
To decrease
track No.
2 Set it.
SET
To increase
track No.
Page 77

Execute the track combine operation.
3
ENTER
After editing, eject and remove the MD.
4
MD Edit Functions
Display after execution
"EDIT NOW" = "COMPLETE"
(When editing is completed successfully)
"EDIT NOW" = "CAN' T EDIT"
(When editing is impossible)
÷ Track combining may sometimes be impossible due to
the limitations of the MD standard.
÷ The MD recorder enters pause mode at the beginning
of the track newly created by combination.
77
MD 0
Image of track combination
÷ The MD editing is established finally at the moment the
MD disc is ejected.
Do not turn power off or apply shock or impact while
"WRITING" is displayed. If the power cord is unplugged before "WRITING" disappears, the recorded
or edited data will be lost.
1 2 43
A B D
1 2
A
B C
C
3
RIW TING
Information is
being written.
JEECT
MD has been ejected.
Application section
Track No. and title of the
first track are left.
Track No. and title of the
second track are cleared.
Page 78

78
ERASE
1E0 RASE0ok
MD Edit Functions
Erasing a single track
During playback, it is possible to erase only the track being played. The track numbers of the tracks after
the erased track will be adjusted.
Before starting MD editing, be sure to cancel the program mode by pressing the PGM key in stop mode.
Select the "MD" input
Play the track to be erased.
1
Select "ERASE".
2
1 Press the TRACK EDIT key.
2 Select "ERASE".
P.CALL
4¢
⁄
TRACK EDIT
(ERASE)
÷ To cancel the operation in the middle, press the
TRACK EDIT key any time before step 3.
Each press of the 4 or ¢ keys switches the op-
eration.
1 "DIVIDE"
2 "COMBINE"
3 "ERASE"
4 "MOVE"
3 Set it.
Execute the track erasure operation.
3
Application section
After editing, eject and remove the MD.
4
SET
ENTER
MD 0
Display after execution
"EDIT NOW" = "COMPLETE"
(When editing is completed successfully)
"EDIT NOW" = "CAN' T EDIT"
(When editing is impossible)
RIW TING
Information is
being written.
MD has been ejected.
JEECT
÷ The MD editing is established finally at the moment the
MD disc is ejected.
Do not turn power off or apply shock or impact while
"WRITING" is displayed. If the power cord is unplugged before "WRITING" disappears, the recorded
or edited data will be lost.
Page 79

MD Edit Functions
ERASE
lEa RASEl?
lEa RASElok
79
Erasing all tracks in disc
During stop, all tracks can be erased. Be careful in using this operation because the tracks cannot be recovered once the entire minidisc has been erased.
Before starting MD editing, be sure to cancel the program mode by pressing the PGM key in stop mode.
Select the "MD" input
Select "all ERASE".
1
Press in stop mode
1 Press the TRACK EDIT key.
2 Select "ERASE".
P.CALL
4¢
⁄
TRACK EDIT
(ALL ERASE)
÷ To cancel the operation in the middle, press the
TRACK EDIT key any time before step 2.
Each press of the 4 or ¢ keys switches the operation.
1 "MOVE"
2 "COMBINE"
3 "ERASE"
3 Set it.
SET
4 Set it.
SET
Execute the track erasure operation.
2
ENTER
After editing, eject and remove the MD.
3
Application section
Display after execution
"EDIT NOW" = "COMPLETE"
(When editing is completed successfully)
"EDIT NOW" = "CAN' T EDIT"
(When editing is impossible)
RIW TING
Information is
MD 0
being written.
÷ The MD editing is established finally at the moment the
MD disc is ejected.
Do not turn power off or apply shock or impact while
"WRITING" is displayed. If the power cord is unplugged before "WRITING" disappears, the recorded
or edited data will be lost.
JEECT
MD has been ejected.
Page 80

80
ISDC
чччччч
010
÷ чччччч
MD Edit Functions
Assigning a title to a disc or track
When titles are input in discs and tracks, the titles can be displayed when they are played back. The following procedure can also be used to modify or erase input titles.
Before starting MD editing, be sure to cancel the program mode by pressing the PGM key in stop mode.
Select the "MD" input
Activate the title input mode.
1
Press in stop mode
⁄
1 Press the TITLE INPUT key.
TITLE INPUT
2 Select the title to be edited.
P.CALL
4¢
To return To advance
3 Set the title to be edited.
SET
To abort operation, press the TITLE INPUT key
again.
With an MD track recorded in the "LP2" or
"LP4" recording mode using the stamping
function, "LP:" will be input at the beginning
of the track title. q
Disc titles can be assigned in stop mode. When the
MD6 key pressed before step 1-3 while assigning
a title to a track, the title can be entered while listening to that track.
Each press of the 4 or ¢ keys switches the operation.
1 "DISC" : Disc title *1
2 "001", "002"..... : Track title *2
3 "ALL ERASE" : Complete erasure of disc
and track titles
4 "[1]", "[2]", "[3]": Title Memo *3
*1 When step 1
play starts with the disc title.
*2 Each press of the 4 or ¢ key displays a track title
in sequence from “001”, “002”.... When all track titles
have been displayed, 3 then 4 will be displayed.
*3 Each press of the 4 or ¢ key causes the selected
title memo number to blink, after which 1 then 2 will
be displayed.
In case of disc title :
Select "DISC"
-
1 is performed in stop mode, the dis-
Application section
List of registered symbols (ASCII codes):
! “ # $ % & ’( ) * + , - . / : ; < = > ` ? @ _ ˆ
Total number of title characters
Up to 1792 characters can be input per disc and up
to 80 characters can be input per track. (In case of
alphanumeric and symbol characters)
A space (blank character) also required the same
amount of data as alphanumeric characters. When
deleting a title, it is not recommended to overwrite
spaces on previous characters but use the (CLEAR/
DELETE) function. A
In case of track title :
Select the desired track No. (The track can also be
selected using the numeric keys.)
÷ With a track without a title, the display shows "
......
".
Page 81

Input the title.
≤AaA
2
To enter a title :
MD Edit Functions
81
1 Select a character group.
DISPLAY
/CHARAC.
2 Select a character.
ABC DEF
1123
GHI JKL MNO
456
PQRS TUV WXYZ
789
& ( )
-
+
100 0
When the same key is pressed repeatedly, the
characters will change.
ABC
(Example : When
will change in the order of A=B=C=a=b=c.)
' , : ? !
+
10
2
is pressed, the characters
Press the DISPLAY/CHARAC. key for the required
number of times to select one of the character
groups below.
"Aa" group :
A~Z, symbols, Title Memo ( [ 1 ], [ 2 ], [ 3 ])
"12" group :
0 to 9 and symbols
≤Aa
Input place
÷ If you made a mistake, press the CLEAR/DEL. key.
÷ Use the 1 or ¡ key to move the input position cur-
sor to the left or right.
÷ To enter a space character, press the TIME/SPACE key.
3 Set the selected character.
SET
4 Repeat steps 1 to 3 above.
To change or clear a title :
1 Move the character to the desired character
(to be changed).
To return To advance
1
TUNING
1
2 Delete the character.
CLEAR/DEL.
The cursor moves and waits for input of the
next character.
÷ The character can be set also by pressing another nu-
meric key, ¡ key or the DISPLAY/CHARAC. key.
÷ If you want to insert a character without deleting any
(step 2), place the cursor on the character immediately
after the position you want to insert a character.
Application section
3 Perform steps 1 to 4 of "To enter a title".
Continued on next page
Page 82

82
0 KENWO02
RIW TING
Execute title change or deletion.
3
MD Edit Functions
1 Enter the title in memory.
ENTER
2 Complete the operation.
TITLE INPUT
After editing, eject and remove the MD.
4
MD 0
Do not turn power off or apply shock or impact while
"WRITING" is displayed. If the power cord is unplugged before "WRITING" disappears, the recorded
or edited data will be lost.
ORE..ST
The title is scrolled automatically.
÷ To continue editing of another title, repeat the above
procedure from step 1-2.
JEECT
Information is
being written.
÷ The MD editing is established finally at the moment the
MD disc is ejected.
MD has been ejected.
Erasing all titles
Press in stop mode
1 Press the TITLE INPUT key.
TITLE INPUT
2 Select "ALL ERASE".
P.CALL
Application section
3 Set it.
4 Press the ENTER key.
5 Complete the operation.
4¢
To return
TITLE INPUT
SET
ENTER
To advance
Each press of the 4 or ¢ keys switches the operation.
1 "DISC" : Disc title
2 "001", "002"..... : Track title
3 "ALL ERASE" : Complete erasure of disc
and track titles
4 "[1]", "[2]", "[3]": Title Memo
In regard to key function
1 or ¡ key
Moves the cursor position.
CLEAR /DEL. key
Deletes the character on the cursor position and
shifts the subsequent characters leftward by one
column. An entire title can be deleted easily by
pressing the key repeatedly (or holding it depressed).
Page 83

Title editing character list
MD Edit Functions
83
Group
Key
1
2 ABC
3 DEF
4 GHI
5 JKL
6 MNO
7 PQRS
8 TUV
9 WXYZ
0
+10
' , :
+100
÷ The first alphabet which appears when a character input key is pressed
may sometimes be an uppercase or sometimes a lowercase letter depending on each occasion.
& ( )
-
"Aa"
space [1] [2] [3]
ABCabc
DEFdef
GHIghi
JKLjkl
MNOmno
PQRSpqrs
TUVtuv
WXYZwxyz
' , : ? ! ; . " _ ` $
-
& ( )
/ + * = < > # % @
space
"12"
1
2
3
4
5
6
7
8
9
0
Application section
Page 84

84
≤Aa
:
[1]
ччччччч
MD Edit Functions
Copying titles in title memos for use as titles of other MDs or tracks
(TITLE COPY) (TITLE MEMO)
To make character entry simpler, disc titles, track titles and/or performer names can be saved in
title memos ([1] to [3]) and copied them with another disc or track. The title memos can save up
to three sets of titles and/or input character sets.
Before starting MD editing, be sure to cancel the program mode by pressing the PGM key in stop mode.
Select the "MD" input
Copying a disc or track title in a title memo
Example: To save track title “A. Songs” recorded and registered in track NO. 7 of an MD in memory No. [1].
Select the save destination title memo number
1
Press in stop mode
1 Press the TITLE INPUT key.
2 From the save destination memory num-
bers ([1] to [3]), select No. [1] and set the
selection.
P.CALL
4¢
To return To advance
⁄
TITLE INPUT
\
SET
(TITLE COPY)
To abort operation, press the TITLE INPUT key
again.
Each press of the 4 or ¢ keys switches the operation.
1 "DISC" : Disc title
2 "001", "002"..... : Track title
3 "ALL ERASE" : Complete erasure of disc
and track titles
4 "[1]", "[2]", "[3]": Title Memo
Select the title group([123]) containing the copy source title.
2
Application section
1 Select "Aa".
2 Press the 1 key.
(Press twice)
DISPLAY
/CHARAC.
1
1][
ччччччч
Page 85

ORE..ST
Select the track title to be copied.
3
SET
\
P.CALL
4¢
To return To advance
Save it in the save destination title memo.
4
MD Edit Functions
Select track No. 7 “A. Songs”.
.
SAon
Son
It is also possible to copy additional titles to the same
title memo by repeating steps 1-2 to 3.
gs_ Aa
gs:007
≤
85
ENTER
1
][A
÷ “A. Songs” is memorized in title memo No. [1] which
was selected in step 1.
Press the TITLE INPUT key to complete editing.
5
TITLE INPUT
Copying title memo contents as the title of another disc or track
This editing operation is available by exchanging the parties (copy destination and copy source) in the
procedure of "Copying a disc or track title in a title memo (TITLE COPY)".
After performing steps 1 to 5 in the procedure on page 84, change steps 1-2 and 3 as shown below.
The input can be repeated by simply performing these two steps.
.Songs
Application section
Step 1 - 2 : Select a disc or track title as the destination in place of the title memo.
Step 3 : Select a title memo ([1] to [3]) as the copy source.
Page 86

86
MD Edit Functions
Entering characters in title memo
Example: To save characters “TREASURE” in title memo No. [2]
(TITLE MEMO)
Select the save destination title memo number
Press in stop mode
1 Press the TITLE INPUT key.
TITLE INPUT
2 From the save destination memory num-
bers ([ 1 ] to [ 3 ]), select No. [ 2 ] and set the
selection.
SET
\
P.CALL
4¢
To return To advance
To abort operation, press the TITLE INPUT key
again.
Each press of the 4 or ¢ keys switches the operation.
1 "DISC" : Disc title
2 "001", "002"..... : Track title
3 "ALL ERASE" : Complete erasure of disc
4 "[1]", "[2]", "[3]": Title Memo
and track titles
3 Input characters "TREASURE" by perform-
ing steps 2-
a disc or track". A
1 to 2-3 in "Assigning a title to
4 Press the ENTER key to copy the characters
Application section
in the title memo.
ENTER
5 Press the TITLE INPUT key to complete edit-
ing.
TITLE INPUT
T
REA
÷ “TREASURE” is memorized in title memo No. [2]
which was selected in step 2.
÷ If required, character input to other title memo can be
continued by repeating steps 1 to 4.
S_ ≤Aa
Page 87

Listening to an AUX input source
Timer operation
87
Connect the related equipment under reference to "Connection of external source component"
9
1 Press the AUX key.
AUX
Each press switch the modes as follows.
1 "AUX" (Analog)
2 "DIGITAL AUX" (Digital)
2 Play the connected equipment.
3 Adjust the volume.
VOLUME/
MULTI CONTROL
Adjusting the AUX Input Level
This adjusts the input level for the external equipment (video deck etc.) connected to the AUDIO AUX IN
terminal. Adjust so that the volume of the AUX input source sounds at an equivalent level to the CD or MD.
(Main unit operation only)
1 Press the AUX key.(Select the "AUX" input)
AUX
2 Press the MODE key.
MODE
3 Turn the VOLUME/MULTI CONTROL knob
to select "INPUT LEVEL", then press the
SET/ DEMO key.
VOLUME/
MULTI CONTROL
SET/DEMO
\
4 Adjust the input level.
VOLUME/
MULTI CONTROL
The level
decreases
5 Set it.
SET/DEMO
The level
increases
Each press switch the modes as follows.
1 "AUX" (Analog)
2 "DIGITAL AUX" (Digital)
Application section
PUNI T LEVEL
UXA INPUT+1
Input level
÷ Adjustment is possible over the range from - 4 to + 3.
÷ Adjusting the input level control also varies the record-
ing level from the input source connected to the AUX
input jacks.
Page 88

LESEP 10
F
Timer operation
88
The timer makes it possible to play a CD or MD, receive radio or record CD or radio automatically in the
specified time zone. The O.T.T. timer works only once when it is activated, the SLEEP timer switches power
off (Standby mode) automatically even after you fall asleep, and the PROG. timer provides two timer programs which work every day once they are activated.
Timer operation
Sleep timer (SLEEP)
The unit is turned OFF automatically after the specified period has elapsed.
Setting the O.T.T. timer
Playback of the selected input source starts at the specified time, and the unit is switched off after one hour. This timer
operates only once directly after setting.
Timer playback, timer recording (PROG.1, PROG.2)
Playback of the selected input source or recording of the TUNER or AUX input starts at the specified time.
AI timer playback (PROG.1, PROG.2)
When timer playback starts, the volume level increases gradually until a certain level is reached.
Sleep timer
Set the number of minutes after which the unit is to be turned OFF.
(SLEEP)
L
:
:
Connect the related equipment under reference to “System connection”
÷ Each press increases the set time by 10 minutes. The
Press the SLEEP key during CD or MD playback
or during radio reception.
SLEEP
Application section
÷ The unit is turned OFF automatically after the set
time has elapsed.
÷ Press the SLEEP key while the sleep timer is acti-
vated to check the remaining time.
sleep timer can be set up to about 90 minutes.
10 = 20 = 30 ..... 70 = 80 = 90 =
To cancel
The system has been set up so that the display is
dimmed automatically while the sleep timer is activated.
Turn the unit OFF or press the SLEEP key until the
sleep time is cancelled.
Lights
6
~
0
Cancel
Duration for sleep timer
Page 89

Timer operation
P
A
Setting the O.T.T. timer
Timer playback which occurs only once and only for an hour can be programmed by simply setting the start
time. The timer playback reproduces the source selected at the last time the unit is turned off at the last set
volume.
It is not recommended to play a DVD VIDEO or VCD disc using the timer function, for expected playback may
sometimes unavailable with these discs.
89
Adjust the clock before setting the timer
&
1 Select the desired source.
2 Press the MODE key.
MODE
3 Turn the VOLUME/MULTI CONTROL knob
to select "TIMER SET", then press the SET/
DEMO key.
VOLUME/
MULTI CONTROL
SET/DEMO
\
4 Turn the VOLUME/MULTI CONTROL knob
to select "O.T.T. SET ?", then press the SET/
DEMO key.
5 Set the timer ON time by turning the VOL-
UME/MULTI CONTROL knob.
VOLUME/
MULTI CONTROL
The program timer does not operate during playback
by the O.T.T. timer.
TIMRSEET
÷ When a timer setting has already been made in the se-
lected timer, the setting will be overwritten by the new
setting.
÷ If you make a mistake, press the MODE key and restart
from step 2.
The time is
returned
The time is
advanced
6 Press the SET/ DEMO key.
7 Turn the VOLUME/MULTI CONTROL knob
to select "ON", then press the SET/ DEMO
key.
8 Adjust the volume.
9 Press the key to switch the power OFF
(standby).
(When the unit enters the Standby mode, the
STANDBY/TIMER indicator lights in amber.)
After setting the timer, make sure that the power is
set to OFF (Standby).
07: a0m
÷ The ON time can be set in steps of 5 minutes.
.TO.T O.N>
÷ If there is a power failure or the power cord is un-
plugged after the timer reservation has been activated,
the STANDBY/TIMER indicator blinks in amber. In this
case, the clock setting should be restarted from the
beginning.
To check or modify the reservation contents,
restart the timer reservation from the beginning.
Application section
Page 90

90
Timer operation
Setting an everyday timer program
Two timer programs (PROG.1, PROG.2) are available. Both of them are 24-hour timer programs which can
be executed every day. In each of PROG.1 and PROG.2, the timer data including the operating period and
played contents can be set and selected to be activated or not as required.
÷ It is possible to execute both timer reservation programs PROG.1 and PROG.2 simultaneously.
÷ The time zones of PROG.1 and PROG.2 should be set by reserving an interval of 1 minute or more so that they are
not overlapped.
It is not recommended to play a DVD VIDEO or VCD disc using the timer function, for expected playback may
sometimes unavailable with these discs.
Adjust the clock before setting the timer
Make preparations for the play (recording).
1
To listen to CD, MP3
Insert a disc. (Program playback is
not possible.) ¢
Recording or playing the AUX source component
For timer playback or timer recording of a source component connected
to the AUDIO AUX IN jacks, connect it properly by referring to "Connection of Other Accessories". 9J
Select the timer number.
2
1 Press the MODE key.
MODE
&
To listen to MD
Load a disc.(Program playback is
not possible.) ⁄
Example for playing radio broadcast from 10:30am
to 11:30am using PROG.1
2 Turn the VOLUME/MULTI CONTROL knob
to select "TIMER SET", then press the SET/
DEMO key.
To listen to radio
The station should be preset
prior. ›
For recording
Make preparations for recording.
°
TIMRSEET
3 Turn the VOLUME/MULTI CONTROL knob
to select "PROG.1 SET ?", then press the
SET/ DEMO key.
Application section
Set the ON time then the OFF time.
3
1 Adjust the time.
VOLUME/
MULTI CONTROL
The time is
returned
The time is
advanced
2 Set it.
SET/DEMO
÷ If you make a mistake, press the MODE key and restart
from step 2.
÷ When a timer setting has already been made in the se-
lected timer, the setting will be overwritten by the new
setting.
NO310: 0am
FFO311: 0am
÷ For each of the ON time and OFF time, enter the figure
of “hour” by performing steps 1 and 2 then enter the
figure of “minute” in the same manner.
÷ If you make a mistake, press the MODE key and restart
from step 2.
Page 91

Make the desired reservation.
SET/DEMO
SET/DEMO
SET/DEMO
SET/DEMO
4
Timer operation
91
For timer playback or AI timer playback
1 Select the mode.
(1) Select "PLAY" or "AI PLAY".
ME/
ROL
\
1 "PLAY"
(Timer play)
2 "REC"
SET/DEMO
3 "AI PLAY"
(Timer play with gradually
increasing volume)
(2) Set it.
2 Select the input source.
(1) Select the source to be played.
ME/
ROL
SET/DEMO
\
1 "TUNER"
2 "DVD/CD"
3 "MD"
4 "AUX"
5 "DIGITAL AUX" (Digital)
(Broadcasts)
(Analog)
For timer recording
1 Select the mode.
(1) Select "REC".
ME/
ROL
\
1 "PLAY"
2 "REC"
3 "AI PLAY"
(2) Set it.
2 Select the input source.
(1) Select the source to be re-
corded.
ME/
ROL
\
1 "TUNER"
2 "AUX" (Analog)
3 "DIGITAL AUX" (Digital)
(Broadcasts)
(2) Set it.
3 Select the broadcast station (only when
TUNER is selected above).
ME/
ROL
(1) Select the preset station No.
\
(2) Set it.
SET/DEMO
Continued on next page
÷ When "PLAY" is selected, the timer playback will start
at the volume setting used at the moment the unit is
set to the Standby mode.
÷ The sound is muted during timer recording. If you want
to monitor the recorded sound, turn the VOLUME/
MULTI CONTROL knob (or press the VOLUME key on
the remote) to adjust the volume.
(2) Set it.
3 Select the broadcast station (only when
TUNER is selected above).
ME/
ROL
(1) Select the preset station No.
\
(2) Set it.
4 Set the recording mode.
ME/
ROL
\
(1)
1 "STEREO"
2 "LP2" (Stereo LP2 re-
3 "LP4"(Stereo LP4 re-
4 "MONO" (Monaural re-
(2)Set it.
(Stereo re-
cording mode
cording mode
cording mode
)
)
)
cording mode)
Continued on next page
Application section
Page 92

92
Reserve the timer operation.
5
Turn the VOLUME/MULTI CONTROL knob to
select "ON", then press the SET/ DEMO key.
Timer operation
VOLUME/
MULTI CONTROL
SET/DEMO
\
Adjust the volume.
6
Put the unit in standby mode.
7
(When the unit enters the Standby mode, the
STANDBY/TIMER indicator lights in amber.)
ROPG. O1N>
÷ When the timer setting is completed by pressing the
SET/DEMO key, "COMPLETE" is displayed.
÷ Use the same procedure as above when you want to
reserve a program timer operation in PROG.2.
÷ If there is a power failure or the power cord is un-
plugged after the timer reservation has been activated,
the STANDBY/TIMER indicator blinks in amber. In this
case, the clock setting should be restarted from the
beginning.
After setting the timer, make sure that the power is
set to OFF (Standby).
When timer operation is not required
When power is ON, press the TIMER key to turn off
the timer-related indicators completely.
Each press switches the timer as
follows.
TIMER
÷ The reservation contents are held in memory.
Application section
To check or modify the reservation contents, restart the timer reservation from the beginning.
1 O.T.T.
1
2
1 2
3
1 2
4
5 Extinguished
To set the same timer program again
When power is ON, press the TIMER key to turn on
the timer-related indicators completely.
Each press switches the timer as
follows.
TIMER
÷ Be sure to load a disc and adjust the listening vol-
ume.
1 O.T.T.
1
2
1 2
3
1 2
4
5 Extinguished
Page 93

Important Items
Maintenance
In case of difficulty
93
Maintenance of the unit
When the front panel or case becomes dirty, wipe with a
soft, dry cloth. Do not use thinner, benzine, alcohol, etc.
for these agents may cause discoloration.
In regard to contact cleaner
Do not use contact cleaners because it could cause
a malfunction. Be specially careful not to use contact cleaners containing oil, for they may deform the
plastic component.
Reference
Caution on condensation Memory backup function
Condensation (of dew) may occur inside the unit when
there is a great difference in temperature between this
unit and the outside.
This unit may not function properly if condensation occurs. In this case, leave the unit for a few hours and restart the operation after the condensation has dried up.
Be specially cautious against condensation in the following circumstances:
When this unit is carried from one place to another
across a large difference in temperature, when the humidity in the room where this unit is installed increases, etc.
Note related to transportation and movement
Before transporting or moving this unit, carry out the
following operations.
Stored contents which are cleared immediately when
power plug is unplugged from power outlet
Clock display
Stored contents which are cleared in at least a day after
power plug is unplugged from power outlet :
Amplifiersection
"on/standby" status (ON or STANDBY), Input selection, Volume control value, Tone control levels, AUX
input level, Setting auto power save, Setting dimmer
Tunersection
Receiving band, Frequency, Preset stations, Auto/
mono setting, Timer setting contents
1 Remove the DVD (MP3, VCD, CD) or MD
from the unit.
2 Press the MD 6 key.
DMNO CD IS
3 Press the DVD/CD 6 key.
4 Wait for some time and verify that the dis-
play becomes as shown in the figure.
NO DISC
5 Wait a few seconds and turn the unit OFF.
Knowledge sections
Page 94

94
Important Items
In case of difficulty
Disc handling precautions
Handling
Hold the disc so that you do not
touch the playing surface.
Label side
Playing side
Sticker
Do not attach paper or tape to
either the playing side or the label side of the disc.
Sticky paste
Cleaning
If there are fingerprint marks or
foreign matter found on the disc,
lightly wipe the disc with a soft
cotton cloth (or similar) from the
center of the disc outwards in a
radial manner.
Never play a cracked or warped disc
During playback, the disc rotates at high speed in the
player. Therefore, to avoid danger, never use a cracked or
deformed disc or a disc repaired with tape or adhesive
agent. Please do not use discs which are not round because they may cause malfunction.
Disc accessories
The disc accessories (stabilizer, protection sheet, protection ring, etc.) which are marketed for improving the sound
quality or protecting discs as well as the disc cleaner
should not be used with this system because they may
cause malfunction.
Storage
When a disc is not to be played for a
long period of time, remove it from
the player and store it in its case.
Apparatus Claims of U.S. Patent Nos. 4,631,603,
4,577,216, 4,819,098, and 4,907,093 licensed for limited
viewing uses only.
This product incorporates copyright protection technology that is protected by method claims of certain
U.S. patents and other intellectual property rights
owned by Macrovision Corporation and other rights
owners. Use of this copyright protection technology
must be authorized by Macrovision Corporation, and
is intended for home and other limited viewing uses
only unless otherwise authorized by Macrovision Corporation. Reverse engineering or disassembly is prohibited.
"DTS" and "DTS Digital Out" are
trademarks of Digital Theater Systems, Inc.
Manufactured under license from Dolby Laboratories. "DOLBY" and the double-D symbol are
trademarks of Dolby Laboratories.
Knowledge sections
Page 95

Important Items
In case of difficulty
Handling of MD
As the MD is accommodated inside a cartridge, it can be handled without caring about dust or fingerprint. However, stained or soiled cartridge may cause malfunction. To enjoy beautiful sound for extended period of time,
take care on the following points.
95
Do not touch the disc directly.
Do not touch the disc by opening the shutter with
your hand. The cartridge will be damaged if it is
forced open.
Storage position
Do not leave MDs in places where the temperature
and/or humidity are extremely high (for example, in
places subjected to direct sunlight).
Dust countermeasure
The shutter of the disc cartridge is permanently open
while the disc is loaded in the set. Therefore, to prevent dust from penetrating inside the disc, take the
disc out of the unit immediately after completion of
recording or playback.
Care
Periodically wipe off dust and dirt on the cartridge
with a dry cloth.
Note on disc accessories
Do not use lens cleaner for this may lead to malfunction of the unit.
Write protect tab
To protect recorded contents against accidental erasure, set the write protect tab of the disc open. Return the tab to the original position when you want to
record signals on the disc.
Back side of
the disc
Write protect tab
Slide open.
(Recording disabled)
Note on the cartridge labels
Apply each label firmly to every corner so that it will
not peel off.
Slide close.
(Recording enabled)
Caution on MD-Clip data
Do not attempt to record or edit a disc in which MD-Clip data (still images, etc.) have been recorded. Otherwise, the Clip
data may be lost.
US and foreign patents licensed from Dolby Laboratories.
Knowledge sections
Page 96

96
Glossary
In case of difficulty
Important Items
DVD (Digital Versatile Disc) : DVD VIDEO is a disc fea-
turing high video/audio quality, made possible by large
recording capacity of video and audio signals of movie
software, etc. and by digital signal processing.
VIDEO CD (VCD) : This is a CD containing moving
picture. By compressing video data to about 1/120
and audio data to about 1/6, a 12 cm disc with the
same size as ordinary music CD can store mov-
ing pictures and audio for up to about 74 minutes.
The VCD includes the P.B.C.-incompatible discs
with only the playback capability (Version 1.1) and
P.B.C.-compatible discs with the menu playback
and special playback capabilities (Version 2.0)
MPEG (Moving Picture Expert Group) (DVD, VCD) :
A digital video and audio compression and decom-
Quantization bit : The quantization bit count refers
to the number used in digitizing the sliced parts
obtained by slicing the analog signal as described
above. The quantization bit count is the number
of bits used in digitization per second. The origi-
nal sound can be reproduced more faithfully when
the quantization bit count is larger.
Linear PCM (Pulse Code Modulation): Audio signal
format without using compression. In the DVD
which has a very large disc capacity, the linear
PCM signal using high sampling rate can be re-
corded.
Bitstream (DVD):This is the generic name given for
the flow of data based on a standard such as Dolby
Digital, DTS, MPEG, etc.
pression system which is standardized as an in-
ternational standard.
Decoder: A device for restoring standard audio sig-
nal from audio data recorded based on coding into
DVD data, etc. This processing is referred to as
decoding.
Downmixing : Conversion of multichannel audio signals
of DVD into 2-channel stereo signals.
Sampling rate : Sampling refers to converting an
analog signal into digital signal by slicing the ana-
log signal into fine parts at a certain time interval
and digitizing every sliced part. The sampling rate
is the count of slicing per second. The original
sound can be reproduced more faithfully when the
Dolby Digital : A digital audio compression technol-
ogy developed by Dolby Laboratories, Inc.
DTS : Digital surround system developed by Digital
Theater Systems, Inc.
Title/ Title No. (DVD VIDEO): The title is the larg-
est unit of video or audio recorded in DVD VIDEO.
Usually, a title corresponding to a movie product
with video software or an album (or a piece of
music) with music software. The numbers as-
signed to the titles are referred to as title numbers.
Chapter/Chapter No. (DVD VIDEO): The chapter
is a partition of video or audio that is smaller than
the title. A title is composed of multiple chapters.
The numbers assigned to the chapters are re-
sampling rate is higher.
Knowledge sections
ferred to as chapter numbers.
Page 97

In case of difficulty
Important Items
97
Track/Track No. ( VCD, CD): A track is also a sec-
tion of video and audio recorded in a disc. The
numbers assigned to individual tracks are referred
to as the track numbers. With most of music CDs,
a track is assigned to a piece of music. However,
with a VCD, the sections of the contents do not
always correspond to the assigned tracks. As
(special) playback functions such as skipping and
programming of ordinary CDs are based on track
number data, such playback functions are some-
times impossible with some VCDs.
Cinema Voice function (DVD) : This function to be
used when words are hard to be distinguished dur-
ing playback of DVD recorded with Dolby Digital
Surround.
Letterbox (DVD): Method of displaying a horizon-
tally-long picture recorded in 16:9 aspect ratio on
a 4:3 TV screen by attaching bands at the top and
bottom of the screen and displaying the horizon-
tally-long picture at the center of screen.
Frame (DVD, VCD): Each frame of a moving pic-
ture, that is displayed 30 times a second with
NTSC and 25 times a second with PAL. These
TV formats reproduce moving pictures by dis-
playing still pictures sequentially.
Field (DVD, VCD): Part of a frame obtained by di-
viding the video data of each frame by two. Each
frame of ordinary TV is constituted by displaying
the fields alternately.
Subtitle language (DVD): Some DVDs contain the
recording of multiple subtitle languages.
Angle (DVD) : Some DVDs contain the recording of
multiple viewing angles.
Audio language (DVD) : Some DVDs contain the
recording of multiple audio languages.
Aspect ratio: The ratio between the horizontal and
vertical sizes of picture displayed on a TV screen.
The aspect ratio of ordinary TV is 4:3, and that of
widescreen TV is 16:9.
Pan & scan (DVD): Method of displaying a horizon-
tally-long picture recorded in 16:9 aspect ratio on
a 4:3 TV screen by trimming part of picture.
Frame still/Field still (DVD, VCD): Types of still pic-
tures obtained by temporarily stopping a moving
picture. The frame still picture may produce blur in
the picture because it displays two specific fields
alternately, but the picture quality is higher. The
field still picture has lower picture quality because
it uses half the picture information of frame still,
but is not accompanies with picture blur.
IPB display (DVD): With the MPEG2 which is one
of the video display methods of DVD, each pic-
ture is divided into the following three picture
types before being coded in digital signal.
I-picture (Intra coded) : This is the standard
video and can constitute a picture by itself. As
the highest picture quality can be obtained, the
still image of I-picture is most suitable for use
Knowledge sections
In general, the trimming positions for pan & scan
are determined uniformly by the reproducing de-
vice. However, the pan & scan of DVD allows the
software producer to specify the trimming posi-
tions to be used in playback.
when adjusting the picture quality.
P-picture (Predictire coded): Picture calculated
based on past pictures (I-picture or P-picture).
Page 98

98
B-picture (Bidirectionally predictire coded):
Picture calculated by comparing the previous and
next pictures (I-pictures or P-pictures). This pic-
ture type contains least amount of video informa-
tion.
P.B.C. (PlayBack Control) (VCD): VIDEO CDs car-
rying messages such as "Playback Control Ca-
pable" can be played interactively by selecting the
desired play position or information in hierarchi-
cal structures while watching the menus dis-
played on the TV screen.
OSD (On-Screen Display): OSD is a method of in-
teractive operations using the menus and icons
In case of difficulty
Important Items
displayed on the TV screen.
On-Screen Message : Message displayed on the TV
screen when an operation is performed.
Knowledge sections
Page 99

In case of difficulty
In case of difficulty
What seems to be a malfunction is not always so. Before calling for service, check the following table
according to the symptom of your trouble.
99
Operation to reset
The microcomputer may fall into malfunction (impossibility
to operate, erroneous display, etc.) when the power cord is
unplugged while unit is ON or due to an external factor. In
this case, execute the following procedure to reset the microcomputer and return it to normal condition.
Amplifier section/Speakers
Sound is not produced.
The STANDBY/TIMER indicator blinks in red and
no sound is put out.
÷ The input selection of the TV and/or AV amplifier is incorrect or
÷ Connect properly referring to "System connection".
÷ Adjust to an required volume.
÷ Switch MUTE OFF. £
÷ Unplug the headphone plug.
÷ When a DTS-compatible disc is played on this unit, the speakers
÷ A speaker cord is short-circuited. Turn power off and re-connect
Unplug the power cord from the power outlet
then, while holding the STOP 7 /TUNING MODE
key depressed, plug the power cord again.
÷ Please note that resetting the microcomputer clears
the contents stored in and it returns to condition
when it left the factory.
RemedySymptom
these devices are not turned on.
68
do not output sound. In this case, set the audio by referring to the
instruction manual of the software.
the speaker cord.
The STANDBY/TIMER indicator blinks in amber.
No sound from the headphones.
Sound is not produced from the left or right
speakers.
The clock display blinks without changing the figures.
Timer operation is not possible.
Tuner section
Radio stations cannot be received.
Noise interferes.
÷ Adjust the present time again. &
÷ Insert correctly. 8
÷ Adjust to an required volume. ™
÷ Connect properly referring to "System connection". 6
÷ Adjust the present time again. &
÷ Adjust the present time referring to "Clock adjustment". &
÷ Set the timer ON time and OFF time. ß
÷ Press the TIMER key to set up the execution. Lß
RemedySymptom
÷ Connect antennas. 6
÷ Select a band. ›
÷ Tune to the frequency of the desired station. ›
÷ Install the outdoor antenna in an apart position from the road.
÷ Switch the suspected electric appliance OFF.
÷ Install the TV or the system at an increased distance between
them.
Knowledge sections
A station has been preset but it cannot be received by pressing the P.CALL key.
÷ Preset stations with tunable frequencies. fl
÷ Preset stations again. fifl
Page 100

100
DVD/CD player section
In case of difficulty
Symptom
Playback starts but the video is not output.
The picture is disturbed during forward search
or reverse search.
The picture is not neat or the video or audio
quality is poor.
It takes long time before playback starts.
A warning is displayed on the TV screen and
playback is not possible.
Remedy
¶ The input selection of the TV and/or AV amplifier is incorrect or
these devices are not turned on.
¶ Connection cords are connected improperly. 8
¶ The picture disturbance during forward search or reverse is normal.
This is not a malfunction.
¶ Connection cords are connected improperly. 8
¶ A device generating noise is installed near the signal path.
¶ The disc is dirty or damaged. To prevent this, remove dirt and
handle discs carefully so as not to damage them. ƒ
¶ There may be condensation of dew on the optical lenses. In this
case, leave the player with power ON for a few hours to dry up
the condensation, then retry operation. ∂
¶ The disc type should be detected and motor rotation stabilized
before starting playback. This is normal and not a malfunction.
¶ The reproduced video may be disturbed or audio may be skipped
when the disc surface is stained with fingerprints or dirt. Clean
the disc surface by wiping it in the radial directions using a soft
cloth. ƒ
¶ If the disc is placed obliquely or on another disc, place the disc
correctly. ¢
¶ Playback may be unavailable due to viewing restriction or region
code problem. )
The top and bottom edges of the picture are cut
off.
VCD cannot be played with menu playback.
Subtitles are not displayed.
Audio (or subtitle) language cannot be
changed.
Viewing angle cannot be changed.
The viewing restriction (Rating) cannot be
changed.
Knowledge sections
The selected audio or subtitle languages is not
played.
¶ The video format of the played disc does not match that of the
connected TV. *
¶ Menu playback is not available when P.B.C. is Off. t
¶ Menu playback is possible only with P.B.C.-compatible VCDs.
¶ Subtitles are not displayed when the played DVD does not con-
tain the recording of subtitles.
¶ The subtitle language is set to "Off". ª
¶ The language cannot be switched when the played DVD does not
contain the recording of multiple audio (or subtitle) languages.
¶ The viewing angle cannot be switched when the played DVD
does not contain the recording of multiple angles. The viewing
angle can neither be switched in part where no angle is recorded.
¶ If you have forgotten the password, reset the initial settings you
made till now to the factory setting. ¬
¶ If the played DVD does not contain the default language set by
the user, the priority language specified for the disc will be selected.
 Loading...