

Kenwood CK 409 Instructions For Use - Installation Advice
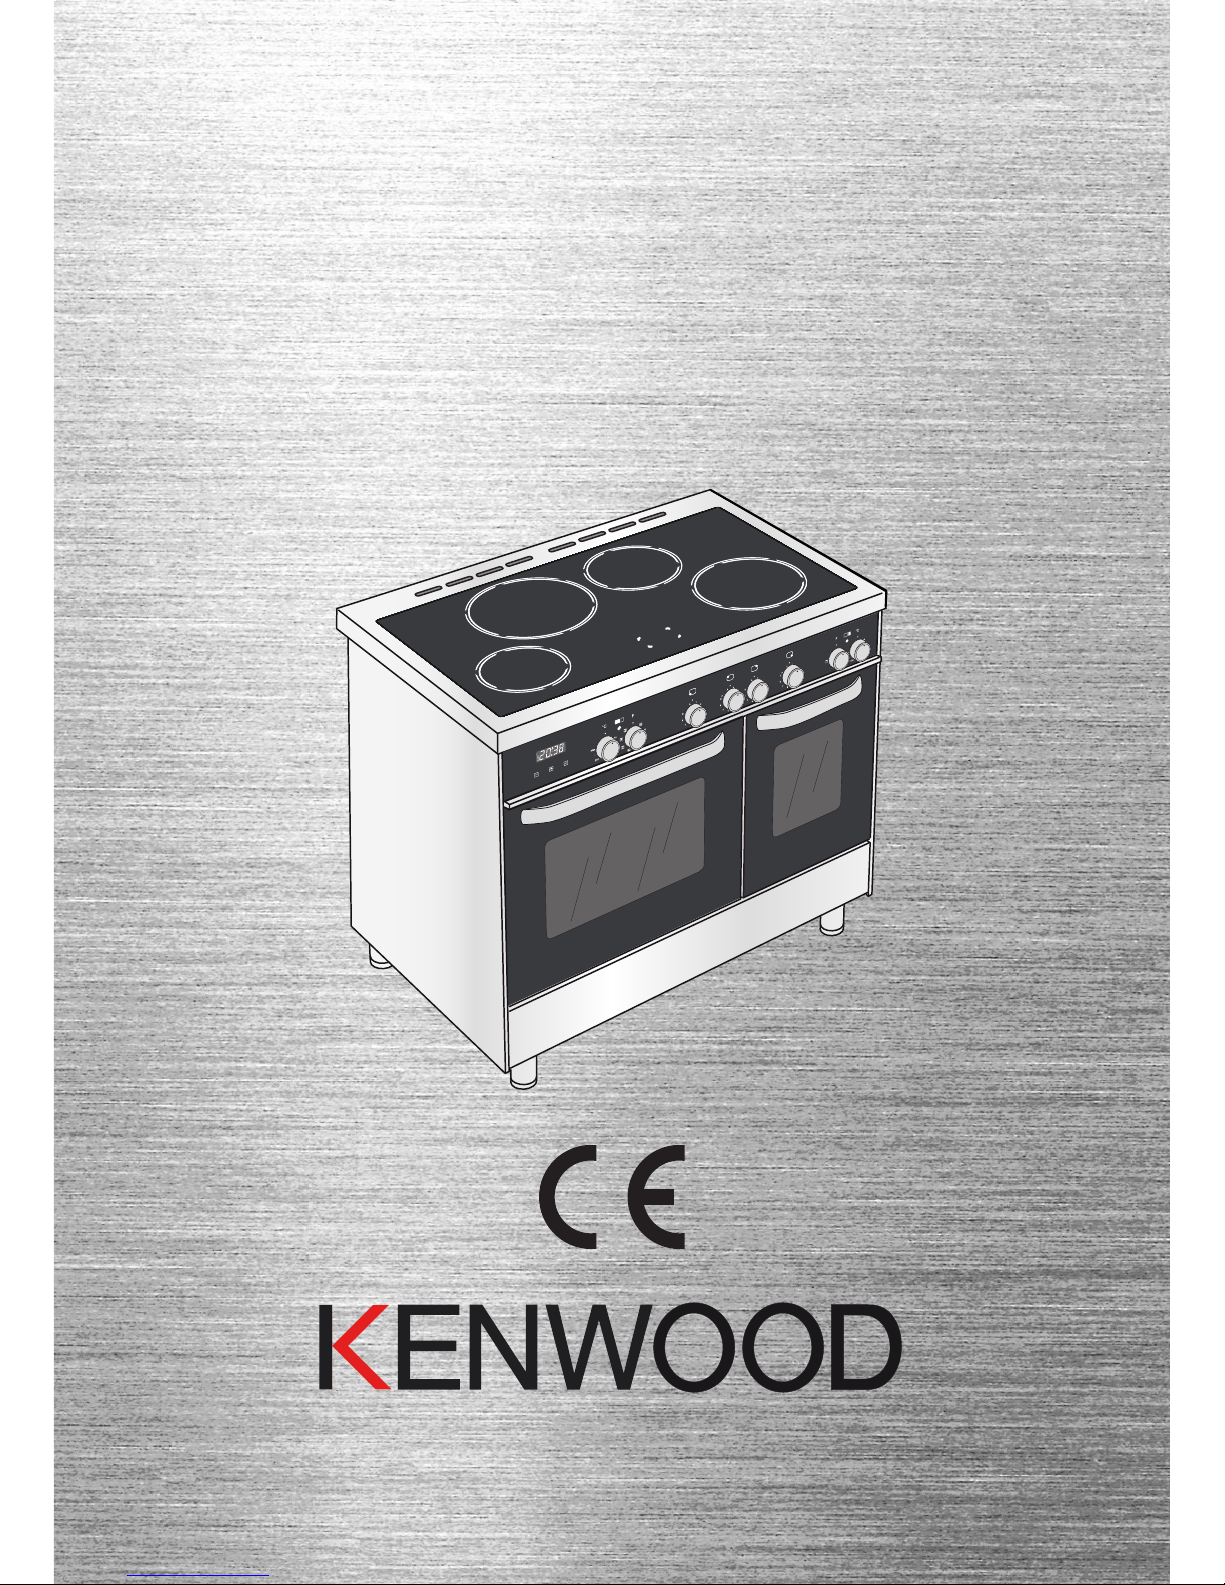
FREESTANDING ELECTRIC
DOUBLE OVEN WITH
INDUCTION HOTPLATE
model CK 409 ..
Instructions for use - Installation advice
Before operating this cooker,
please read these instructions carefully

2

3
CONTENTS Page Number
Introduction ..........................................................................................
Important Safeguards & Recommendations ........................................
Cooking Hob ........................................................................................
Control Panel .......................................................................................
Use of induction hob ............................................................................
Multifunction main oven (left oven) ......................................................
Conventional oven (right oven) ............................................................
Cooking guide ......................................................................................
Clock and timer with “Touch-control” keys ...........................................
Cleaning & maintenance ......................................................................
Advice for the installer ..........................................................................
Installation ............................................................................................
Electrical installation ............................................................................
Guarantee ............................................................................................
4
6 - 7
8
9
10 - 18
19 - 22
23 - 24
25
26 - 28
29 - 35
36
37 - 40
41 - 43
44

4
Read the instructions carefully before installing and using the appliance.
CAUTION: This apparatus must only be installed in a permanently ventilated room in
compliance with the applicable regulations.
Dear Customer,
Thank you for having purchased and given your preference to
our product. The safety precautions and recommendations within
this booklet are for your own safety and that of others. They will also
provide a means by which to make full use of the features offered
by your appliance.
Please preserve this booklet carefully. It may be useful in future,
either to yourself or to others in the event that doubts should arise
relating to its operation.
This appliance must be used only for the task it has explicitly been designed for, that is for cooking foodstuffs. Any
other form of usage is to be considered as inappropriate and
therefore dangerous.
The manufacturer declines all responsibility in the event
of damage caused by improper, incorrect or illogical use of the
appliance.
Important:
This appliance is designed and manufactured solely for the cooking of domestic (household) food and is not suitable for any non domestic application and therefore should
not be used in a commercial environment.
This appliance guarantee will be void if the appliance is used within a non domestic
environment i.e. a semi commercial, commercial or communal environment.
5
IMPORTANT INFORMATION FOR CORRECT DISPOSAL OF THE PRODUCT IN ACCORDANCE WITH EC DIRECTIVE 2002/96/EC.
At the end of its working life, the product must not be disposed of as
urban waste. It must be taken to a special local authority differentiated
waste collection centre or to a dealer providing this service.
Disposing of a household appliance separately avoids possible negative
consequences for the environment and health deriving from inappropriate disposal and enables the constituent materials to be recovered
to obtain signicant savings in energy and resources. As a reminder of
the need to dispose of household appliances separately, the product is
marked with a crossed-out wheeled dustbin.
DECLARATION OF CE CONFORMITY
This cooker has been designed, constructed, and marketed in compliance with:
• Safety requirements of the EU Directive “Low voltage” 2006/95/EC;
• Safety requirements of the EU Directive “EMC” 2004/108/EC;
• Requirements of the EU Directive 93/68/EEC.
FIRST USE OF THE OVENS
It is advised to follow these instructions:
• Furnish the interior of the ovens as described at chapter “Cleaning and maintenance”.
• Switch on the empty ovens on max to eliminate grease from the heating elements.
• Let the ovens cool down and clean the interior of the ovens with a cloth soaked in
water and neutral detergent, then dry carefully.
6
IMPORTANT SAFEGUARDS & RECOMMENDATIONS
After having unpacked the appliance, check to ensure that it is not damaged and that the
oven doors close correctly. In case of doubt, do not use it and consult your supplier or a
professionally qualied technician.
Packing elements (i.e. plastic bags, polystyrene foam, nails, packing straps, etc.) should
not be left around within easy reach of children, as these may cause serious injuries.
• Do not attempt to modify the technical characteristics of the appliance as this may
cause danger to users.
• Do not carry out any cleaning or maintenance without rst disconnecting the appliance
from the electrical supply.
• Do not touch the appliance with wet or damp hands (or feet).
• Do not use the appliance whilst in bare feet.
• During and after use of the appliance, certain parts will become very hot. Do not touch
hot parts. Care should be taken to avoid touching heating elements inside the ovens.
• After use always ensure that the controls are in the “
” or “ ” OFF position.
• Household appliances are not intended to be played with by children.
• Keep children away from the cooker during use.
• Children, or persons with a disability which limits their ability to use the appliance,
should have a responsible person to instruct them in its use. The instructor should
be satised that they can use the appliance without danger to themselves or their
surroundings.
• Some appliances are supplied with a protective lm on steel and aluminium parts.
This lm must be removed before using the appliance.
• WARNING: When correctly installed, your product meets all safety requirements laid
down for this type of product category. However special care should be taken around
the rear or the underneath of the appliance as these areas are not designed or intended to be touched and may contain sharp or rough edges, that may cause injury.
• Fire Risk! Do not store inammable materials inside the ovens, above the glass ceramic hob or in the storage compartment.
• Do not allow heavy or sharp objects to drop on the glass ceramic hob. If the hob
is cracked or otherwise damaged by falling objects etc., disconnect the electrical power cord and call Customer Service.
• Do not scratch the hob with sharp objects. Do not use the hob as a work surface.
• Always use oven gloves when removing the shelves and food trays from the oven/s
whilst hot.
• Clean the ovens regularly and do not allow fat or oils to build up in the oven base or
trays. Remove spillages as soon as they occur.
• Do not line the oven walls with aluminium foil. Do not place baking trays or the drip tray
on the base of the oven chamber.
• Always stand back from the oven/s when opening the oven door/s to allow steam and
hot air to escape before removing the food.
• Do not hang towels, dishcloths or other items on the cooker or its handles – as this
could be a re hazard.
• Do not stand on the open oven door/s.

7
• Make sure that electrical cords connecting other appliances in the proximity cannot
become entrapped in the oven doors.
• If you should decide not to use this appliance any longer (or decide to substitute another model), before disposing of it, it is recommended that it be made inoperative in an
appropriate manner in accordance to health and environmental protection regulations,
ensuring in particular that all potentially hazardous parts be made harmless, especially
in relation to children who could play with unused appliances.
• The various components of the appliance are recyclable. Dispose of them in accordance with the regulations in force in your country. If the appliance is to be scrapped,
remove the power cord.
• Important: This appliance has been designed for domestic use only. The appliance is
NOT suitable for use within a semi-commercial, commercial or communal environment.
• Safe food handling: leave food in the oven for as short a time as possible before
and after cooking. This is to avoid contamination by organisms which may cause food
poisoning. Take particular care during warmer weather.
• Do not operate your appliance by means of an external timer or separate remotecontrol system.
• The manufacturer declines all liability for injury to persons or damage to property caused by incorrect or improper use of the appliance.
OTHER IMPORTANT PRECAUTIONS AND RECOMMENDATIONS
• Do not place or leave empty pans on the glass ceramic hob.
• Metallic objects such as knives, forks, spoons and lids should not be placed on the hob
surface since they can get hot.
• Do not use metallic kitchen utensils (e.g. ladles). It is preferable to use plastic or wood
kitchen utensils.
• Please use pans of recommended size (see minimum pan diameter recommended).
It is not advisable to use pans smaller than the cooking zone. The pans have to be
placed in the centre of the cooking zone.
• Do not use defective pans or pans with a curved bottom.
• Please use suitable pans marked for induction cooking.
• Please keep your distance from the electromagnetic elds by standing 5-10 cm from
the cooking zones. When possible use the rear cooking zones.
• Magnetic objects (e.g. credit cards, oppy disks, memory cards) and electronic instru-
ments (e.g. computers) should not be placed near the induction hob.
• The heating of magnetic tins is forbidden! Close tins may explode by exceeding pressure while heating. There is a burning risk with open tins as well, because the integrated temperature protection can’t work well.
• IMPORTANT WARNING: The induction hob complies with European Standards
for domestic cooking appliances. Therefore it should not interfere with other
electronic units. Persons with cardiac pacemakers or any other electrical implants must check with their doctor if they can use an induction cooking system
(and check any possible interferences with the implants).

8
1 - COOKING HOB
Fig. 1.1
2
1
2
1
3
INDUCTION
Attention:
Detach the appliance from the mains if the ceramic glass is cracked and contact the AfterSales Service.
Metallic objects such as knives, forks, spoons and lids should not be placed on the hob
surface since they can get hot.
INDUCTION COOKING HOB
1. Induction cooking zone Ø 200 mm Normal Power: 2300 W
Booster Power: 3000 W
2. Induction cooking zone Ø 160 mm Normal Power: 1400 W
3. Cooking zones display
Note:
The Nominal and Booster Power may change depending on the size and material of the
pan set on the cooking zone.
9
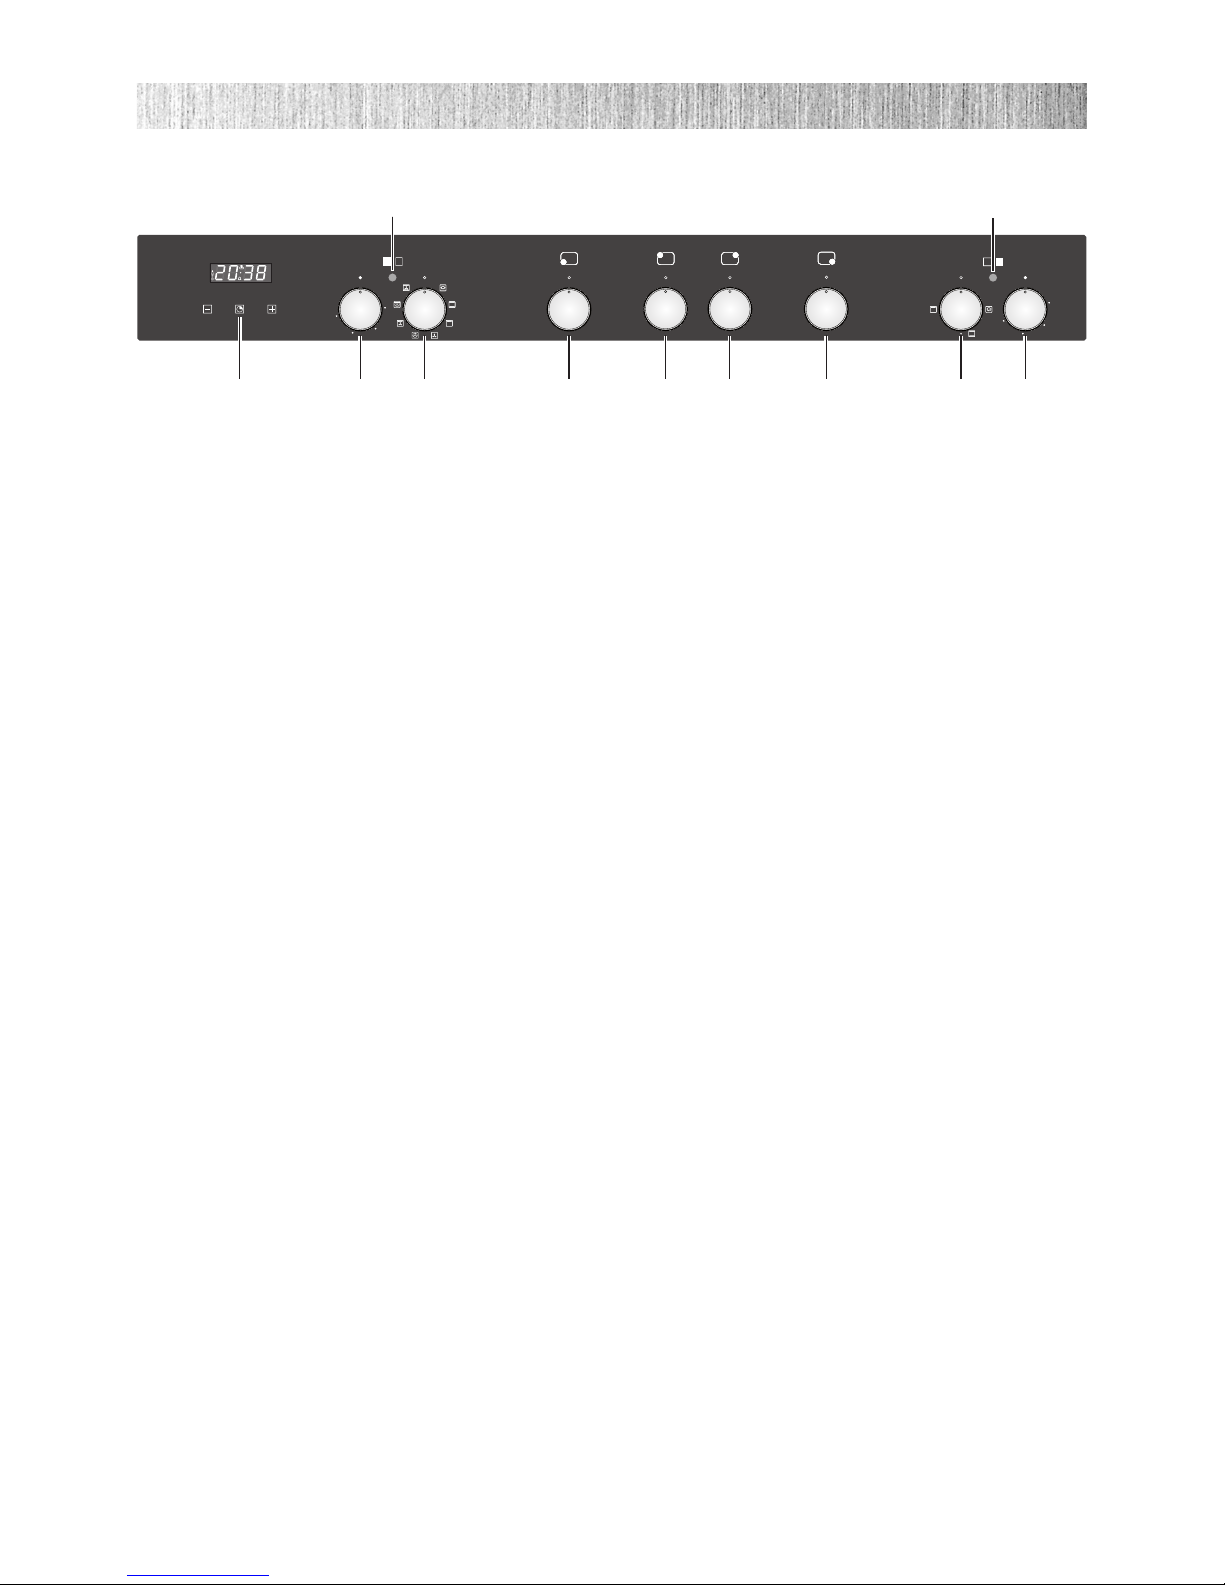
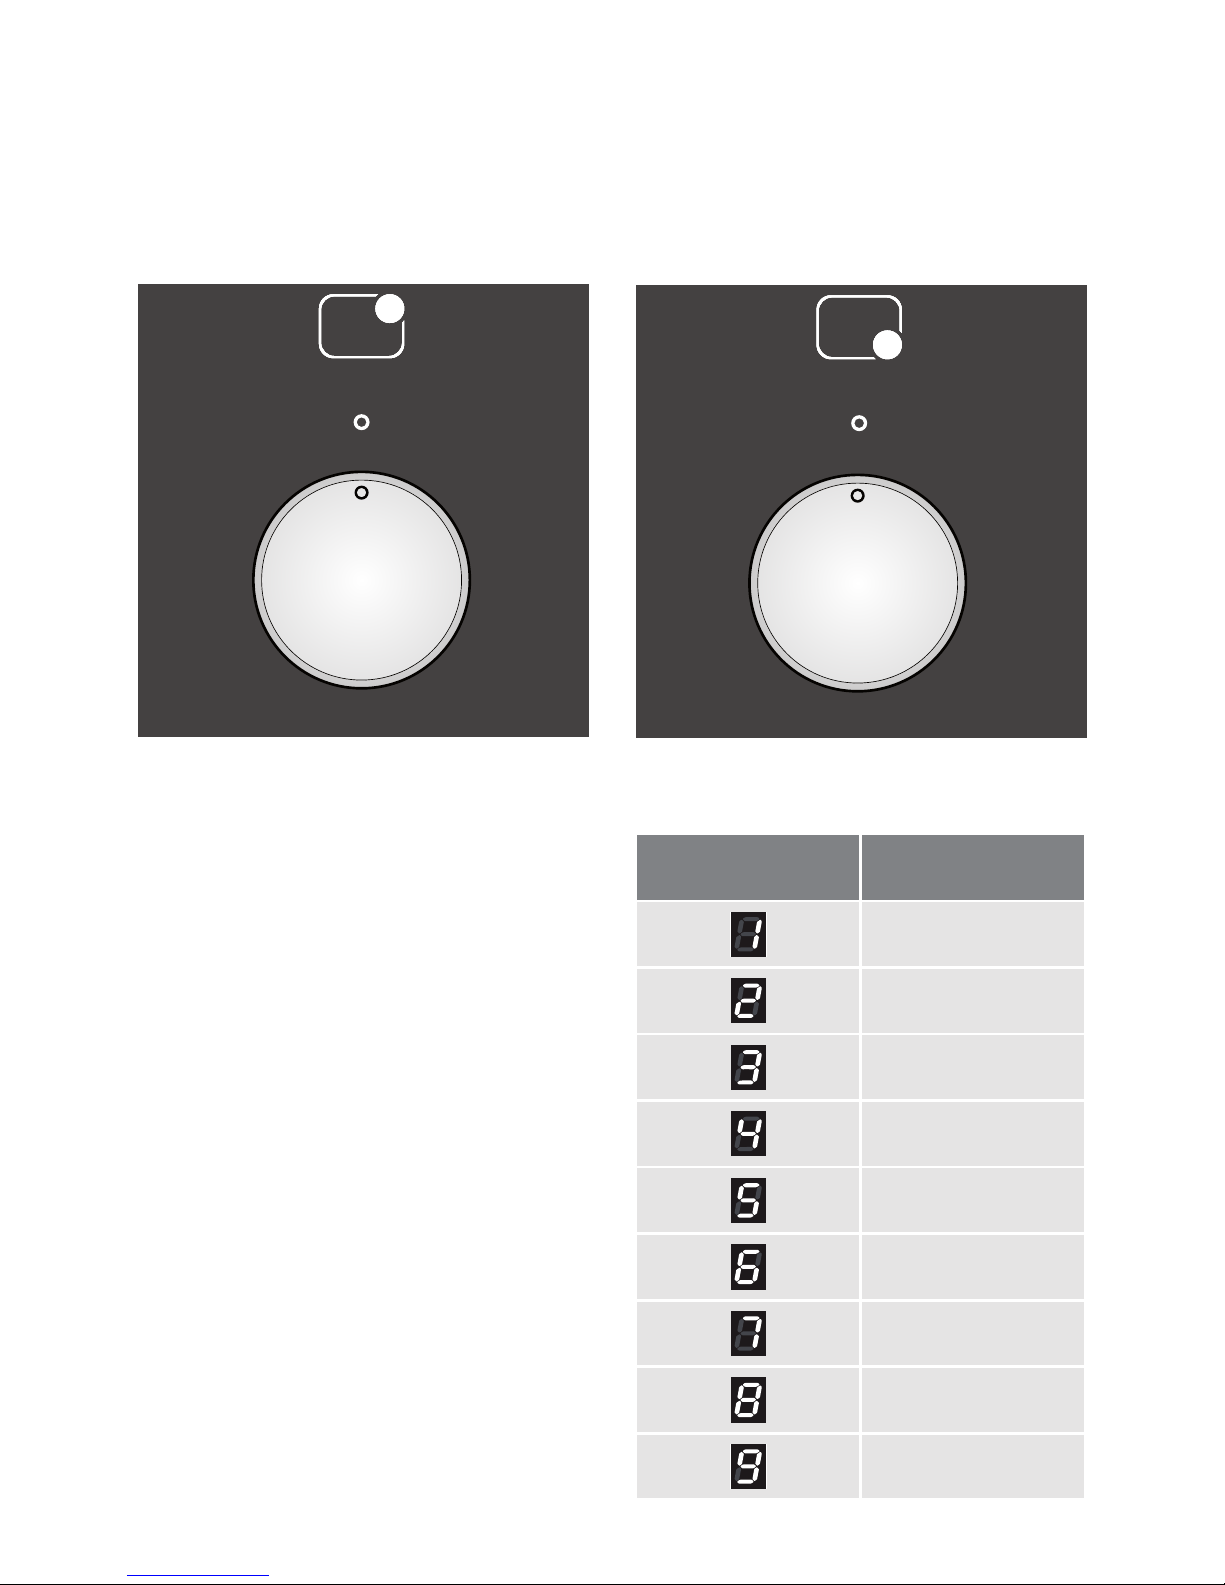
CONTROLS DESCRIPTION
1. Clock and timer with “Touch-Control” keys (main oven only)
2. Multifunction main oven temperature control knob (left oven)
3. Multifunction main oven function selector control knob (left oven)
4. Front left cooking zone control knob
5. Rear left cooking zone control knob
6. Rear right cooking zone control knob
7. Front right cooking zone control knob
8. Conventional oven function selector control knob (right oven)
9. Conventional oven temperature control knob (right oven)
Pilot lamps:
10. Conventional oven temperature indicator light (right oven)
11. Multifunction main oven temperature indicator light (left oven)
Fig. 2.1
°°CC FF °°CC
220000
115500
110000
5500
225500
FF
11
99
AA
22
33
44
55
66
77
88
11
99
AA
22
33
44
55
66
77
88
11
99
AA
22
33
44
55
66
77
88
11
99
AA
22
33
44
55
66
77
88
PP
PP
220000
115500
110000
5500
MMaaxx
987654321
10
11
2 - CONTROL PANEL
Please note:
This appliance incorporates safety cooling fans which you will hear operating whenever the
oven/grill or cooking hob are in use.
The cooling fan motors switch ON/OFF depending on temperature.
Depending on cooking temperatures and times, the cooling fans may run on even after
appliance oven has been switched off.
The duration of this time is dependent on previous cooking temperature and
duration.
These fans are to reduce the external temperature of the appliance and cool the internal
components.
10
3 - USE OF INDUCTION HOB
The ceramic hob is tted with induction cooking zones.
These zones, shown by painted disks on the ceramic surface, are controlled by separate
knobs positioned on the control panel.
INDUCTION COOKING SYSTEM
When your induction hob is switched on and a cooking zone has been selected, the electronic circuits produce induced currents that instantaneously heat the bottom of the pan
which then transfers this heat to the food. Cooking takes place with hardly any energy loss
between the induction hob and the food.
Your induction hob operates only if a correct pan with the right features is placed on a coo-
king zone. Please refer to COOKWARE FOR INDUCTION COOKING.
If the pan detection symbol
appears on the display, your pan is not suitable and your
induction hob will not operate After 10 minutes without detecting any pan, the cooking zone
switches Off automatically and can only be switched On after the control knob has been
returned into “ ” (Off) setting.
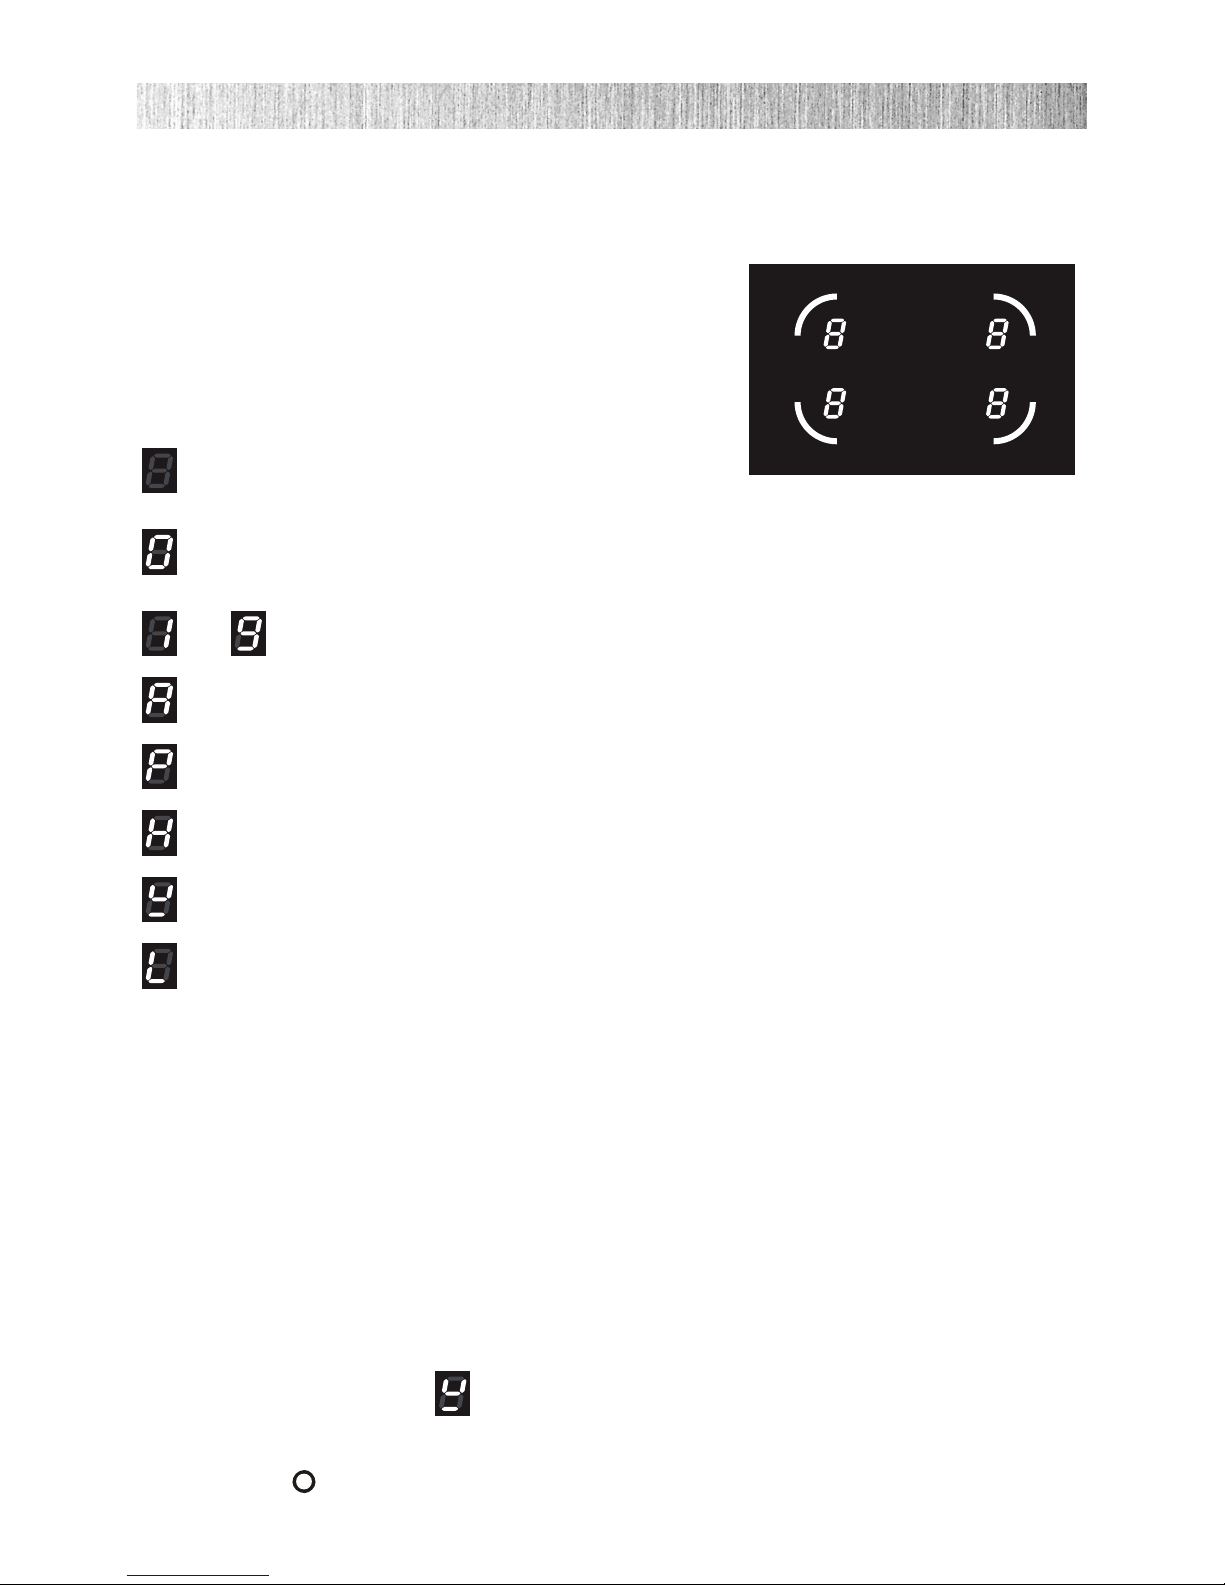
In the front central area of the hob, the cooking zones display (composed by no. 4 luminous gures one for each zone) indicates:
= Cooking zone Off (not activated)
= Cooking zone On (activated but not operating).
If all the zones are in zero setting, the display switches off automatically
(cooking zones Off) after about 10 seconds.
÷
= Power levels
= “Fast heating” function
= “Booster” function
= Remaining heat indicator
= Pan detection indicator
= Childlock safety
Note: each lit gure refers to the relevant cooking zone
Fig. 3.1
11
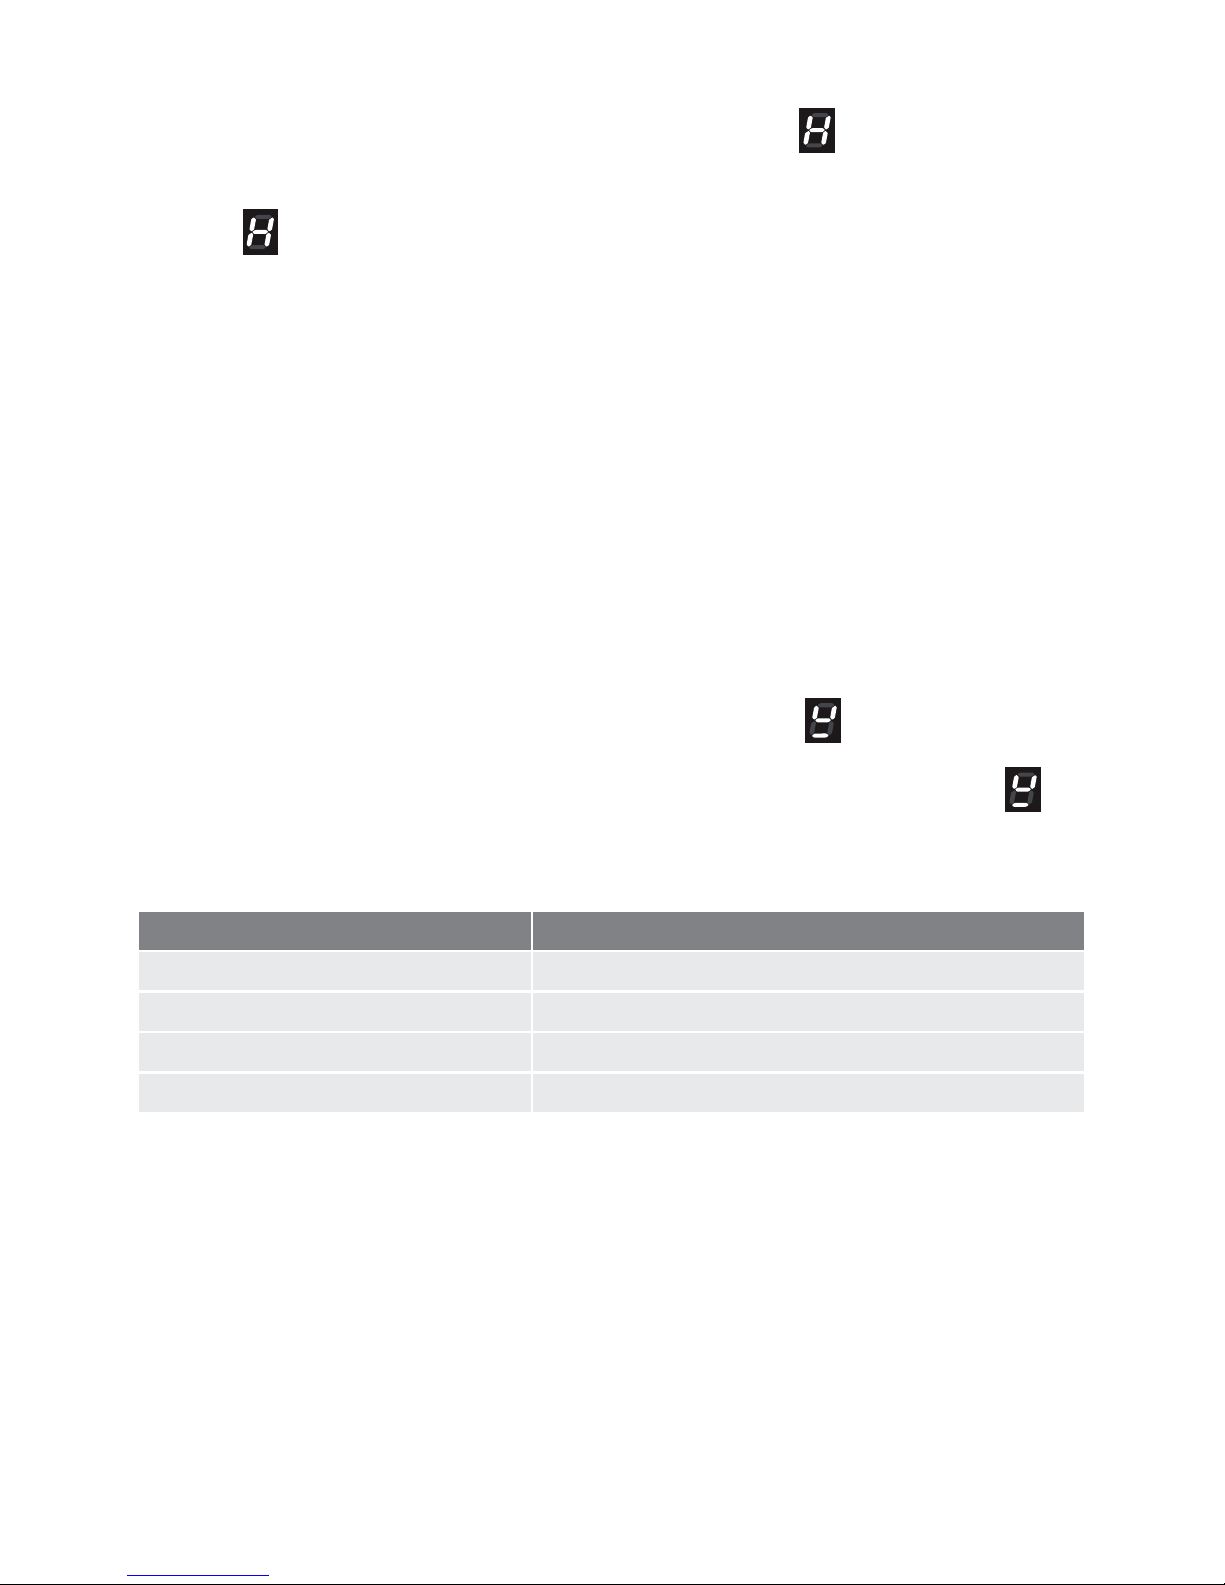
REMAINING HEAT INDICATORS
When the temperature of a cooking zone is still hot, the relevant remaining heat indicator
lights up on the display to alert you of the hot surface.
Avoid touching the hob surface over the cooking area. Please pay special attention to children.
When the
is lit on the display, it is still possible to start cooking again; just turn the control
knob to the required power level.
COOKWARE FOR INDUCTION COOKING
The induction cooking system OPERATES ONLY if using correct cookware suitable for induction
cooking.
The bottom of the pan has to be ferromagnetic to generate the electromagnetic eld necessary
for the heating process (meaning a magnet has to stick to the bottom of the pan).
Pans made from the following materials are not suitable:
• glass, wood, porcelain, ceramic, stoneware;
• pure stainless steel, aluminium or copper without magnetic bottom.
To check if a pan is suitable or not:
• test the bottom of the pan with a magnet: if the magnet sticks, the pan is suitable.
• if a magnet is not available pour a small amount of water inside the pan and place the pan
on a cooking zone. Switch on the cooking zone: if the symbol
(pan detection) appears
on the cooking zone display (instead of the power level), the pan is not suitable.
Important note: the cooking zones will not operate if the pan diameter is too small (
pan
detection symbol will appear on the cooking zone display). To correctly use the cooking zones
follow the indications given in the following table.
Induction cooking zone Minimum pan diameter recommended
Front right Ø 160 mm 110 mm
Rear right Ø 200 mm 145 mm
Rear left Ø 160 mm 110 mm
Front left Ø 200 mm 145 mm
Pay attention: The pan shall always be centred over the middle of the cooking zone. It
is possible to use oversized pans but the bottom of the pan cannot touch other cooking
zones.
Always use pans with thick, completely at bottom.
Do not use pans with concave or convex bottom; these could cause overheating of the
cooking zone.
Note: Some types of pans could cause noise when used on an induction cooking zone.
The noise does not mean any failure on the appliance and does not inuence the cooking
operation.
12
11
99
AA
22
33
44
55
66
77
88
PP
Fig. 3.2b
OPERATION TIME LIMIT OF
COOKING ZONES
Each cooking zone is automatically
switched Off after a maximum preset time
if no operation is performed.
The maximum preset time limit depends
on the set power level, as illustrated in this
schedule.
Each operation on the cooking hob by
using the knob will reset the maximum operation time at its initial value.
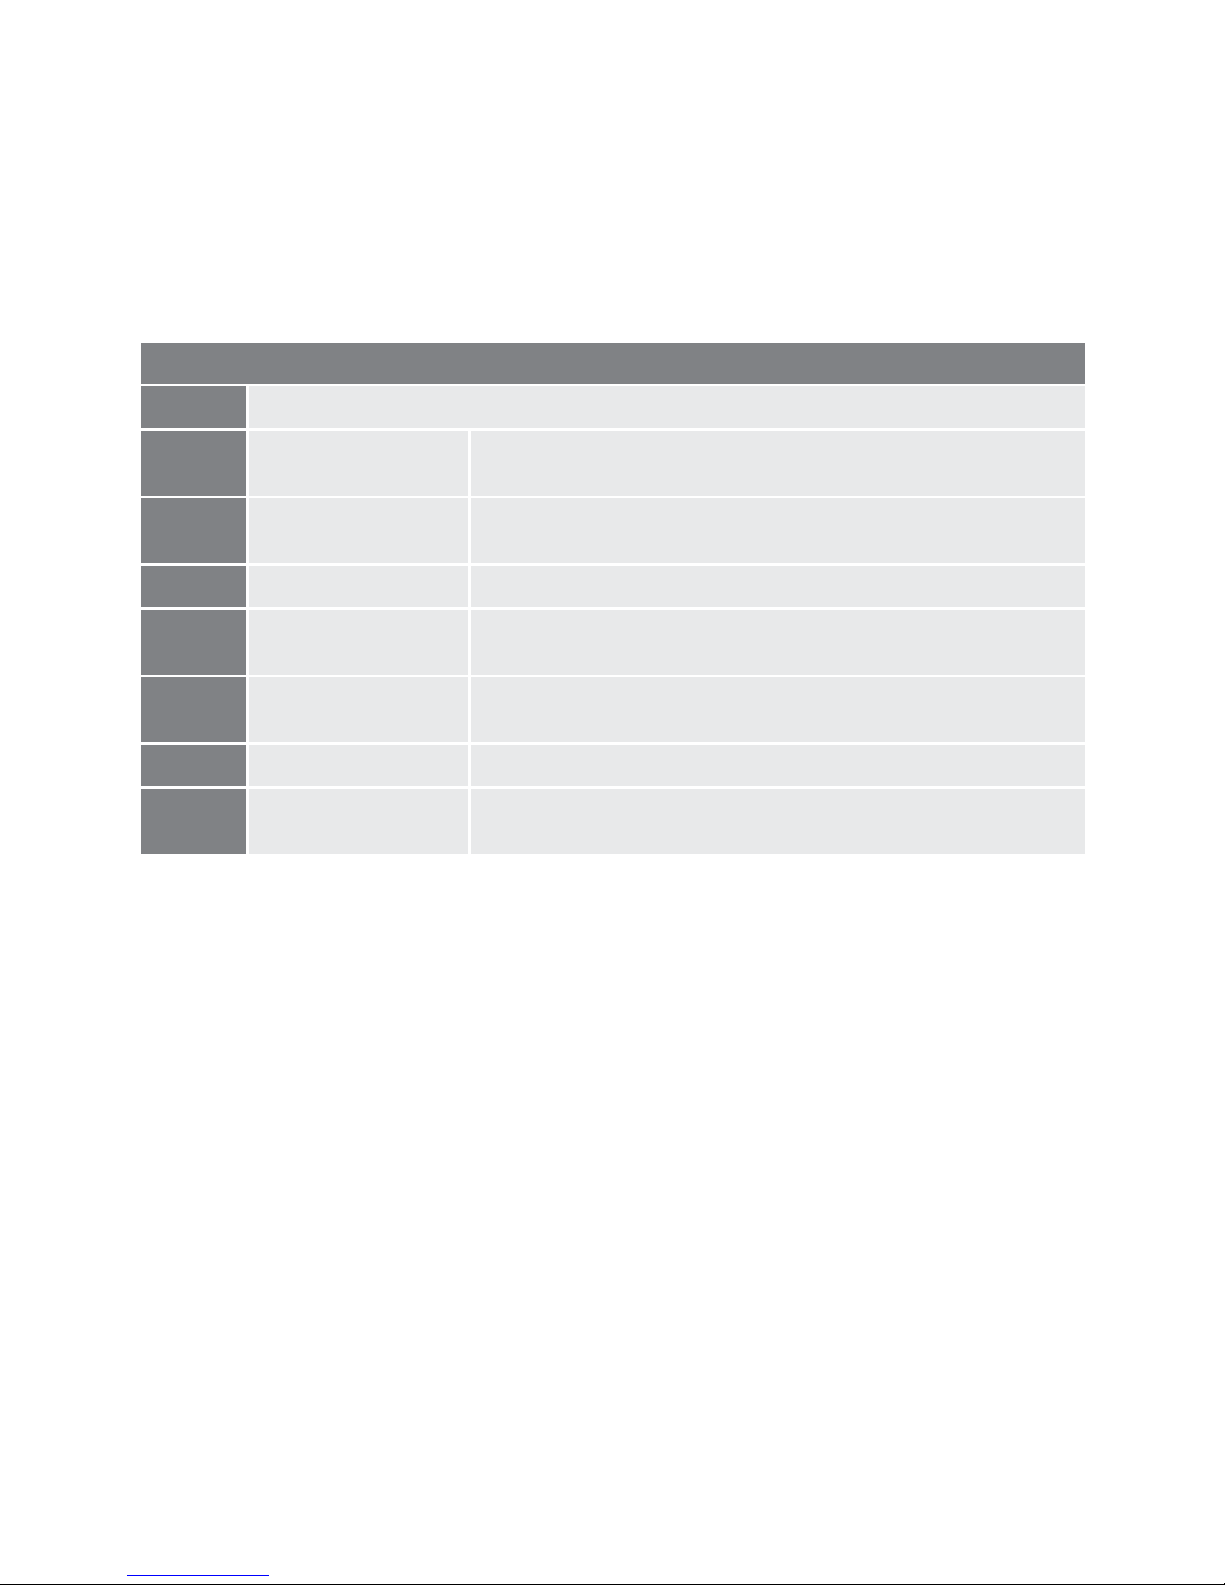
Power level of
Cooking zones
Operation
time limit
360 minutes
360 minutes
300 minutes
300 minutes
240 minutes
90 minutes
90 minutes
90 minutes
90 minutes
11
99
AA
22
33
44
55
66
77
88
CONTROL KNOBS
Each cooking zone is adjusted by a separate control knob positioned on the control panel
and the operation is controlled by the electronic system.
If a cooking zone is not turned Off the electronic system automatically switches it Off after
a pre-set time which depends on the power setting.
Fig. 3.2a
13
EXAMPLES OF COOKING POWER SETTING
O Cooking zone not operating
1 to 2
Melting
Reheating
Sauces, butter, chocolate, gelatine
Dishes prepared beforehand
2 to 3
Simmering
Defrosting
Rice, pudding, sugar syrup
Dried vegetables, sh, frozen products
3 to 4 Steam Vegetables, sh, meat
4 to 5 Water
Steamed potatoes, soups, pasta,
fresh vegetables
6 to 7
Medium cooking
Simmering
Meat, lever, eggs, sausages
Goulash, roulade, tripe
7 to 8 Cooking Potatoes, fritters, wafers
9
Frying, roasting
Boiling water
Steaks, omelettes, fried dishes
Water
1 ÷ 9 POWER LEVEL
Turn the knob clockwise to set the desired power level between 1 (minimum) and 9 (maximum).
The power level can be modied at any time by turning the knob clockwise or anti-clockwise to a different setting.
The cooking zone display shows the selected level.

14
“FAST HEATING” FUNCTION
Turn the control knob anti-clockwise to the setting and then release the knob (after the
“beep”); the relative
symbol lights up on the cooking zone display. Within 5 seconds
turn the knob to the desired power level (between 1 and 9); once a setting has been selected,
and the chosen power level will ash in alternation on the control panel display.
This function allows the cooking zone to operate at the maximum power (100%) for a time
proportional to the selected power level; after this time the cooking zone will operate at the
selected level.
This function is available on all the cooking zones.
While this function is operating it is possible, at any time, to increase the selected power
level but it is not possible to decrease the power; by turning the knob anti-clockwise to a
lower level the function will be disabled.
The function will be disabled also by turning the knob to the “ ” (Off) position or by selecting the “Booster” function.
Note: If removing the pan from the cooking zone before the programme has been completed, the “Fast heating” function will be completed with the remaining time if the pan is put
back on the cooking zone within 10 minutes.
“BOOSTER” FUNCTION
Turn the control knob clockwise to set the maximum power level (9), then turn clockwise
again to the
setting and release the knob (after the “beep”); the control knob returns to
the maximum setting (9) automatically and the relative
symbol lights up on the cooking
zone display.
The “Booster” program is now operative.
This function allows the cooking zone to operate at the Booster maximum power (above
the nominal power) for maximum 5 minutes; it could be used, for example, to rapidly heat
up large amount of water.
This function is available only on the Ø 200 mm induction cooking zones.
To disable this function turn the knob anti-clockwise to a lower power level or to the “
”
(Off).
The “Booster” is also disabled by turning the knob again to the
setting; in this case the
cooking zone operates at the power level 9.
Note: if a cooking zone is still hot, it is not possible to use the “Booster” function and
will ash if you try to activate. The cooking zone is automatically set to the maximum power
level (9).
The “Booster” function is always limited to a maximum of 5 minutes. You can activate the
“Booster” function again after 5 minutes.
IMPORTANT NOTES: The “BOOSTER” function is not suitable for use with non water
based cooking.
Do not use this function for heating oil (e.g. deep fat frying)

15
MAXIMUM USABLE POWER FOR THE COOKING ZONES
The right and left cooking zones are controlled by two
separate power boards and the maximum total power
per each power board is 3700 W.
Should the cooking zones of one power board require
more than 3700 W, the last selected power level has
priority and the power of the other cooking zone is automatically reduced to the remaining power available.
If this occurs, the cooking zone will display a ashing
gure for about 3 seconds before automatically display-
ing the new power level.
This means for example that:
• When setting a “Booster” programme for the second zone, the setting for the other
zone could be reduced to the remaining power available.
• When setting a “Booster” programme for a zone and then another setting on the se-
cond zone, if the total power exceed 3700 W the “Booster” programme is deleted and
the power reduced to the maximum power available.
THERMAL PROTECTIONS
The induction hob is tted with safety devices to protect the electronic system and to protect each cooking zone from overheating.
In case of overheating, one of the following automatic functions could be started by the
electronic system:
• “Booster” program deleted and power reduced;
• one or more cooking zone switched Off;
• cooling fan motor of the induction unit switched on.
CHILDLOCK SAFETY
When not using the induction hob, set the childlock safety to prevent children from acciden-
tally switching on the cooking zones.
Ensure all cooking zones are switched Off, then turn the control knobs of the left cooking
zones simultaneously to the left (
setting) and hold the knobs in this position until lights
up on the cooking zones display; then release the knobs.
To deactivate the childlock repeat the same procedure until
lights up on the cooking
zones display; then release the knobs.
Controlled by
2nd power board
Controlled by
1st power board
 Loading...