

INSTRUCTIONS FOR REPAIRING THE KENWOOD CHEF KM010 & KM020 SERIES
THESE INSTRUCTIONS ARE FOR THE KM10 & 020 SERIES MIXERS
ONLY - NOT THE A901, A901E or KM200 Series
PRESS THE BUTTON ON THE SIDE AND RAISE THE MIXING HEAD.
LAY MIXER ON ITS ‘BACK’.
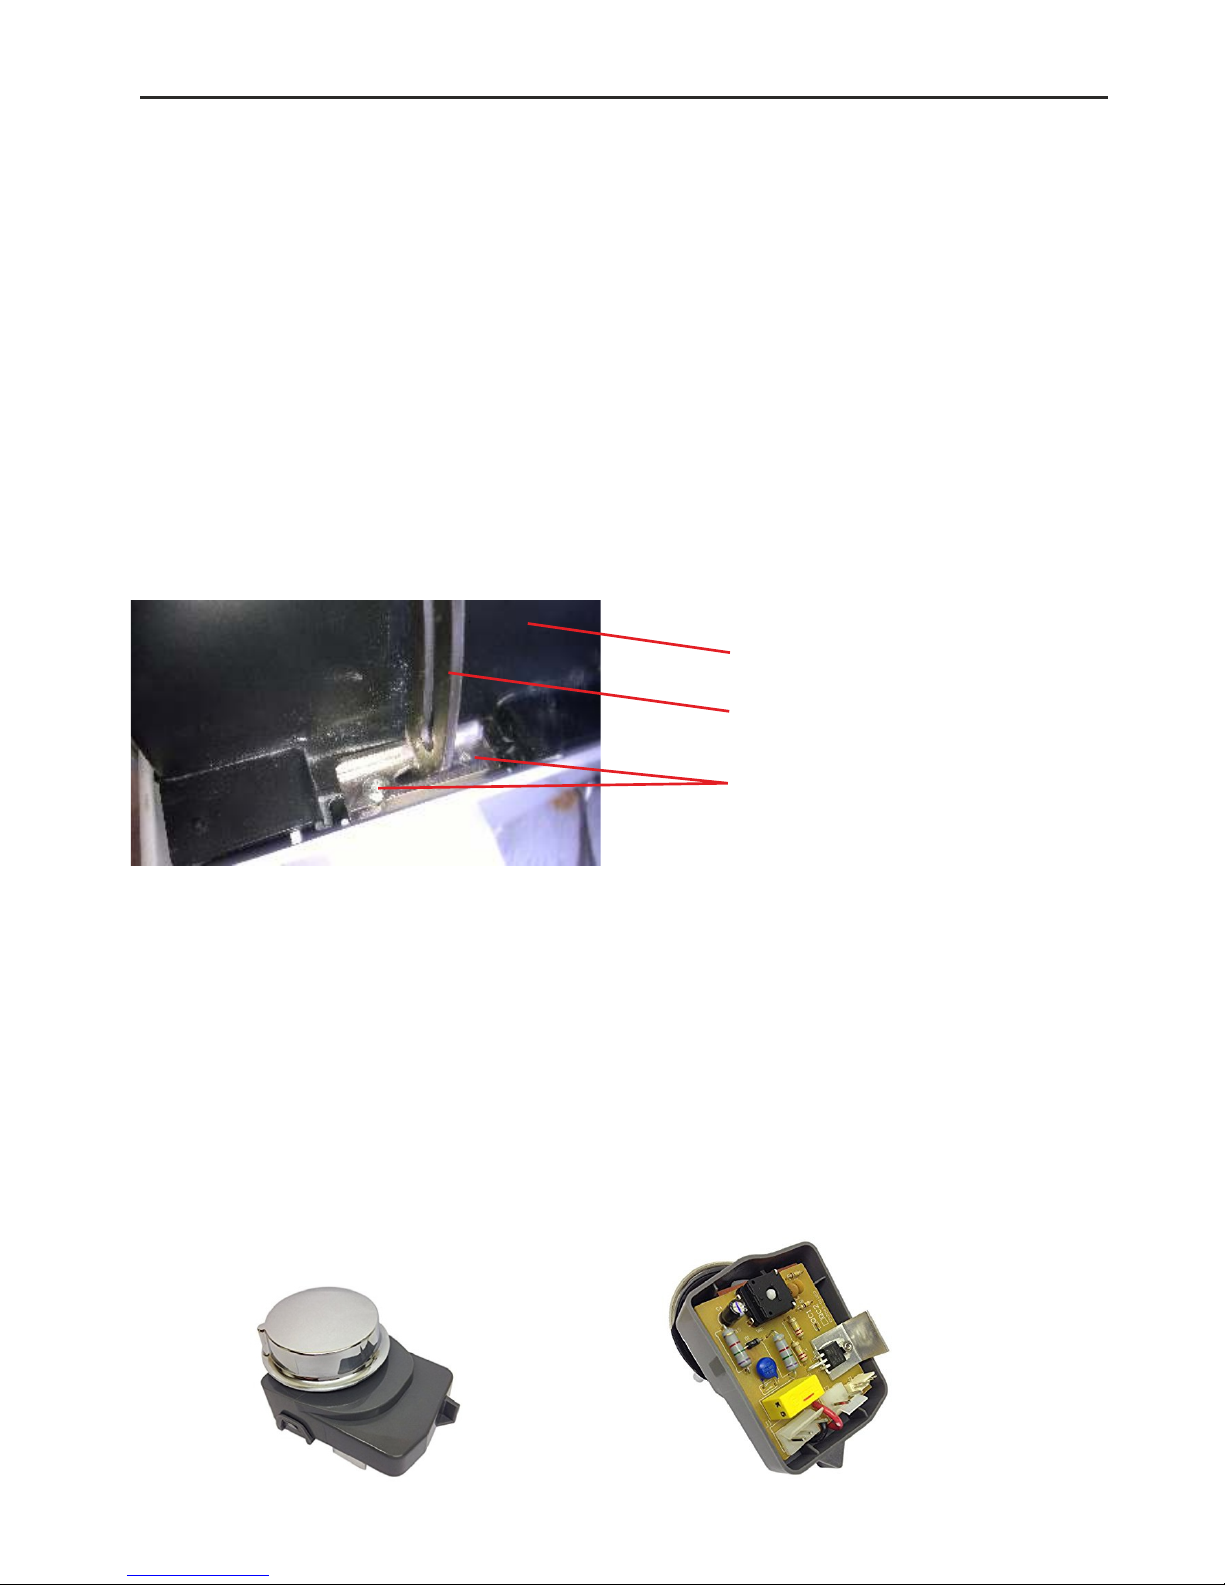
REMOVE THE 2 TORX SCREWS IN PHOTO ABOVE.
PRESS THE BUTTON ON THE SIDE AND PUSH THE SILVER ARM AND
ITS BRACKET DOWN INTO THE BASE.
PULL COVER DOWN FROM THE FRONT (BACK IS HOOKED UNDER THE HINGE)
PUSH COVER INTO THE BASE, EXPOSING THE CONTROLLER AND THE MOTOR.
UNPLUG THE CONNECTORS FROM THE SPEED CONTROLLER UNIT (NOTING
WHERE THEY CAME FROM AND WHICH WAY ROUND THEY ARE FITTED).
PULL THE SPEED CONTROLLER UNIT FROM ITS SLOT IN THE MIXER BODY
UNCLIP THE COVER FROM THE BACK OF THE CONTROLLER UNIT,
THE CIRCUIT BOARD AND ITS COMPONENTS WILL NOW BE EXPOSED.
2 T20 TORX FIXING SCREWS
SILVER ARM
COVER
YOU WILL NEED SOLDERING IRON AND SOLDER
DE-SOLDERING PUMP OR DESOLDERING WICK.
CUTTERS
T20 TORX DRIVER
PLIERS
VIEW OF THE CIRCUIT BOARD
BEFORE YOU DO ANYTHING -
TURN OFF THE POWER AND UNPLUG THE MIXER
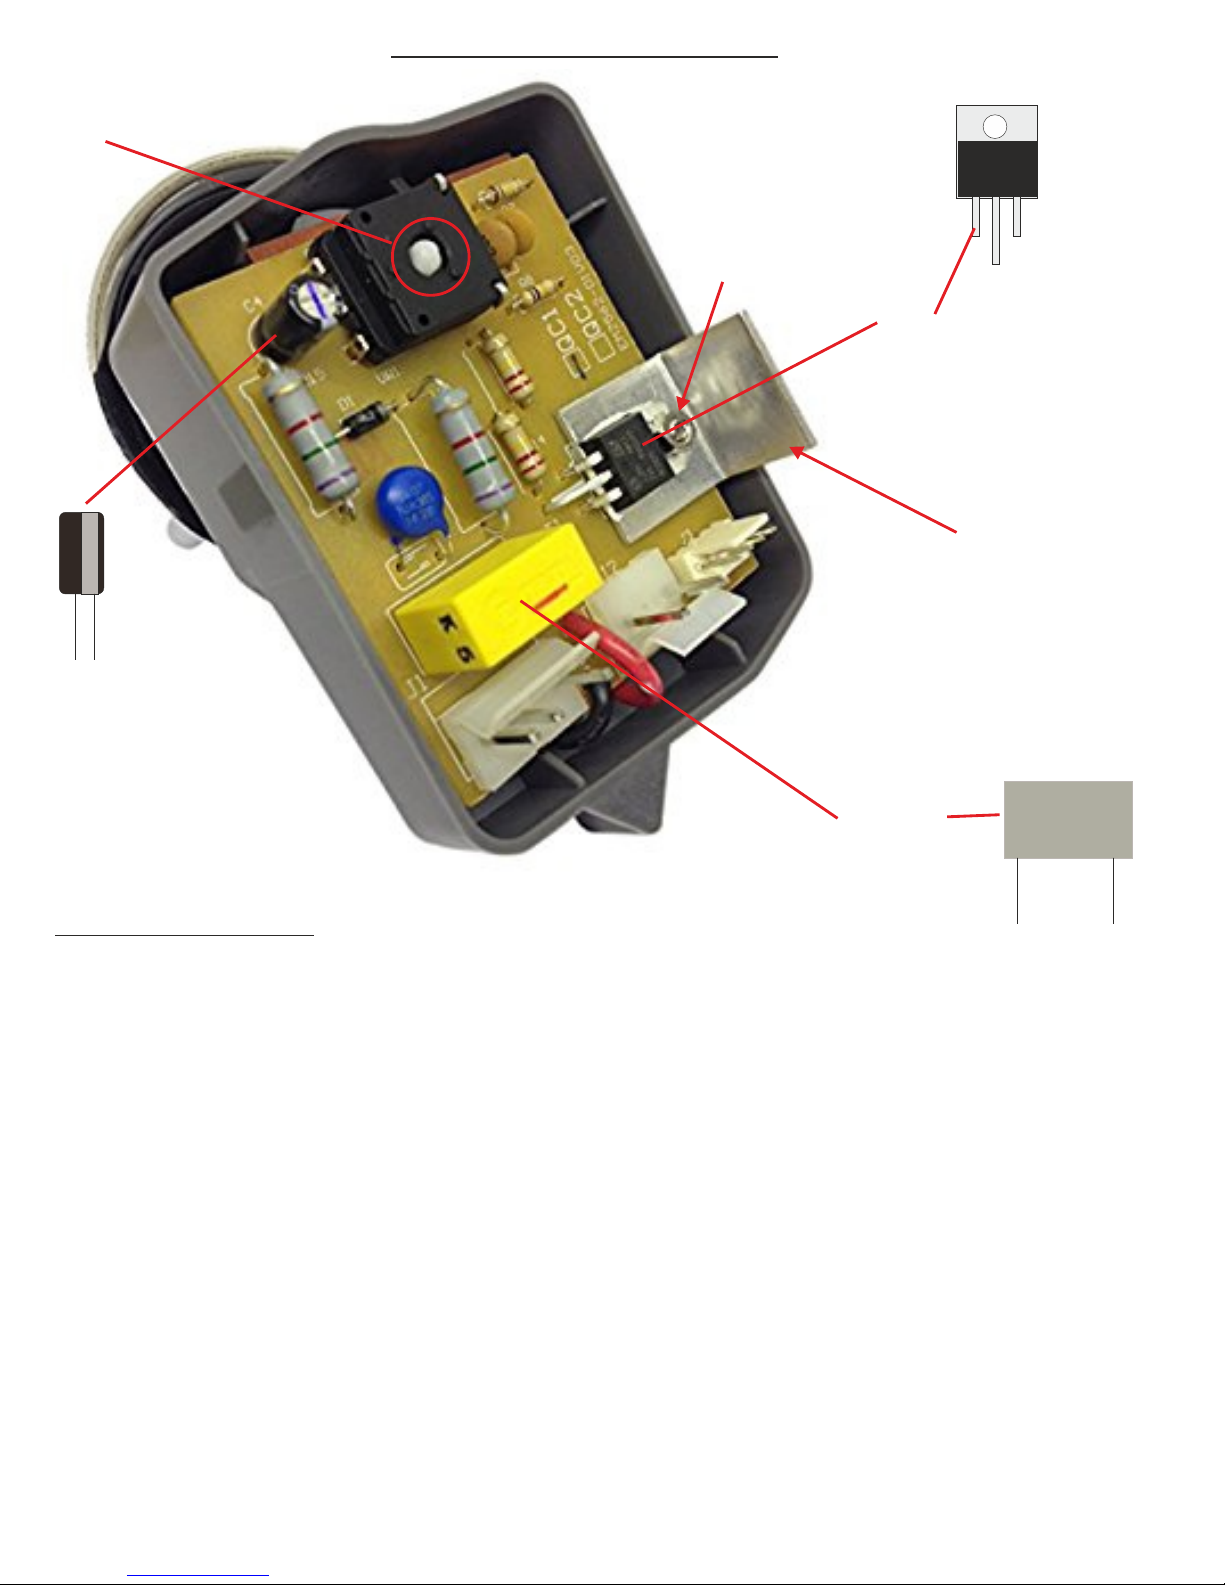
SPEED CONTROLLER PCB ASSEMBLY
SPINDLE PASSES THROUGH HOLE
IN SPEED CONTROL
NUT AND BOLT
+
_
220uF 16V
_ _ _
220uF
Capacitor
Working on the Rear of the board,
desolder and remove the old
components.
Triac
HEATSINK
150nF
Capacitor
150nF 275V X2
FITTING THE NEW PARTS
Fit the 220uF capacitor so that the ‘-’ stripe is facing
away from the edge of the board as shown
Fit the new triac as shown, forming the legs to fit the holes
in the board and refitting the heatsink and nut and bolt.
Tighten the nut and bolt before soldering the legs.
Working on the rear of the board, with the legs uncut,
solder the components to the PCB then cut the legs
where they emerge from the solder joints.
Refit board into plastic case, ensuring the control splidle passes through the hole in the speed control as
shown on previous page. Snap on plastic lid.
Refit contolller to mixer and reconnect plugs to connectors on controller
Refit motor cover and screw silver arm back into place.
Test your mixer
 Loading...