


Using your
Kenwood
AudioAddeo
System
Spectrum 850 AV
KENWOOD


Contents
.
.........
Contents
......
Welcome.
Using the integrated amplifier 6
The front panel controls and display...............6
Using the remote
A few tips.
Loading and replacing the batteries. 9
The basic audio functions
Selecting the input source
Adjusting the volume..............................
Adjusting the bass and treble
Muting the sound _____________________
Making the sound fuller at low volumes. ..13
Bypassing tone controls and surround
circuitry ............
Activating the speakers
Adjusting the speaker balance
Using headphones
About the audio modes
Dolby Pro Logic..................................
Dolby 3 Stereo................................................16
Bypass.........................................................
Selecting an audio mode.
Using the tuner
The front panel controls and display.............18
Tuning stations automatically
Tuning stations manually
Storing preset stations
................................................... 8
.........................................................
_________
____ . . .......................13
........
.....................................
............
..................
.............................
................................
............. _21
... ......^10
____
............ j 0
.....
____
......... 12
....................
.......................... 16
...... 16
..........................
...
................
------------
---------... 20
14
15
.16
17
20
^ i I
12
3
Tuning preset stations
Scrolling through preset stations
Using the CD player — . ..
The front panel controls and display..... 24
Before using your CD player.
Displaying CD time information
Loading CDs...................................................
8
Changing CDs ...............................................
During play.................................7
When the player is stopped
Playing CDs. ................................
From the beginning.
From a specific track .................... 29
Playing a combination of tracks.
Progrannming tracks...
To check a program 3.1
To resume normal play
To cancel a program and stop play
14
18
Adding a track to.a program
Changing a track in a. program..
Clearing a track in a program.
Clearing a whofe program
Playing CDs over (repeat play) .......... 32
Repeating a single CD.
Repeating all loaded CDs,
Repeating programmed tracks
To stop repeat play
Playing tracks in random order (random
play)
.............
To select another track during random play ..... 33.
To cancel random play
Using a timer to play CDs
.........................................
...
............................................... 33
_____
.............. 22
..................
....
................ 26
.....................
...................
......... 27
......
............... 28
.......................
........
......................
..................................
........;.,. — .... 31
........
...............
...
...........................
........
...................;
...............................
— 28.
...
...............
.....
r31
.......................
................... 34
.......................31
.V
..............
----------
----------
____
30_
___
22
24
27
27
27
27
30
31
31
32
.32
32 .
32
33
33

Using the cassette deck ...............
34
The front panel controls and display
Before using your cassette deck................... 36
Maintaining your cassette deck
Listening to tapes
Playing a single tape..................................... 37
Fast«winding tapes...........
Playing tapes in both cassette wells
(relay play)
Finding and playing a specific track
(DPSS)
.............................................................39
Repeating tracks
Recording tapes
Setting the recording level and balance... 40
Recording a tape ...........
Recording fronn a CD (with automatic
recording-level set)
Recording from a CD (with automatic
start and stop)....
Creating custom tapes from CDs
Using a timer to record from the tuner.., 46
Recording from records .........-------------- 46
Copying (dubbing) a tape
.........
----------------
...
.................................. ^.
......................................
.....
..............
-------------------
...........
^42
_____
___________.... .. 43
......... 47
.............
.....................
.
................. „. 37
.............. 44
34
36
... 38.
38
39l
^. ...40
..41
Troubleshooting....... —
Integrated amplifier . . 49
Tuner .......... 50-
CD player ...
Cassette deck ................................... ^..... 5J
_______________________
Specifications— -----------
Integrated amplifier (KA-996)
Tuner (KT-596)............................................... 53
CD player (DP-R896)
Cassette deck (KX-W896)
Speakers
4.
--------- - ------------
...
........
-----
.......................
_____________
.....
.......................
-------
. 49
.^50,
.. 52.
52
.... . .53
53
........54
UÉ

Welcome
Now that you've set up. your Spectrum system, the real
fun begins! Operating'your system is easy, if you follow
the step-by-step instructions in this manual Spend a little
time with the manual before you jump in, so you'
become famiiiar with the many 3pabilities of your system.
Then put up your feet, sit back an.d enjoy the fabulous. ...
sound of your Spectrum system!
5.
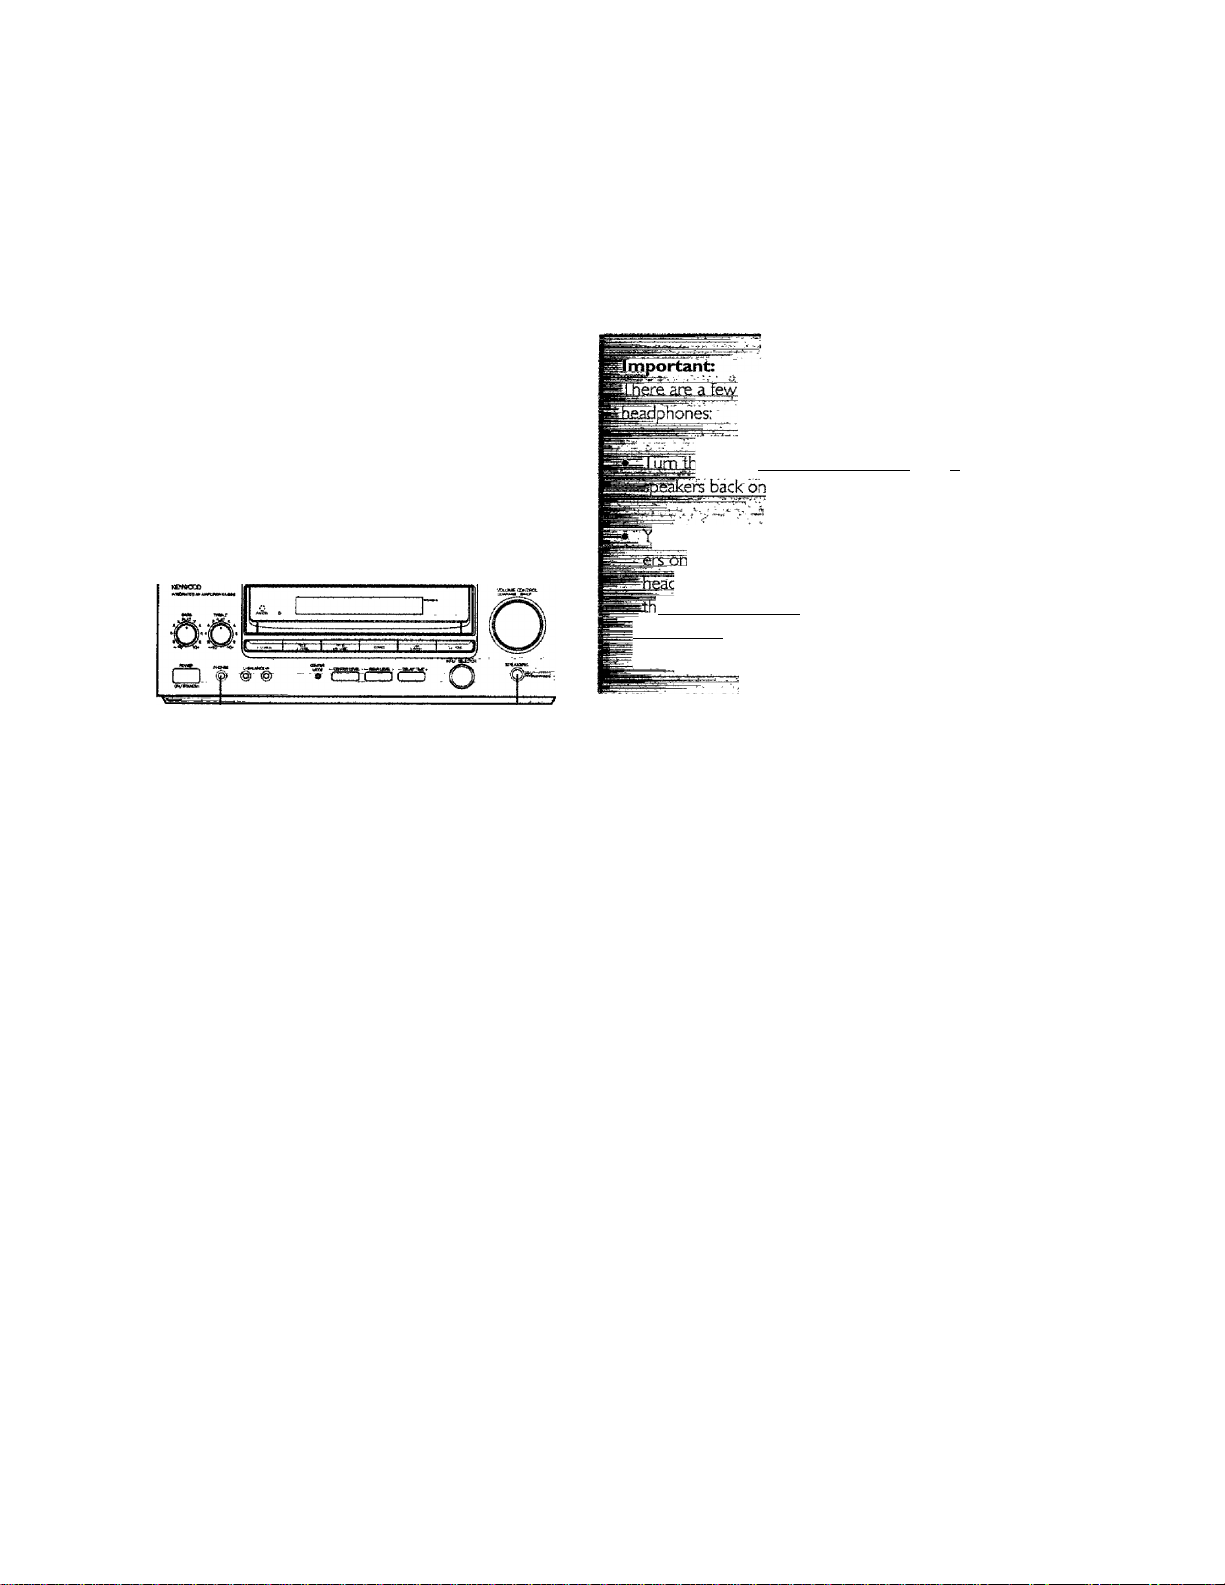
Using the integrated
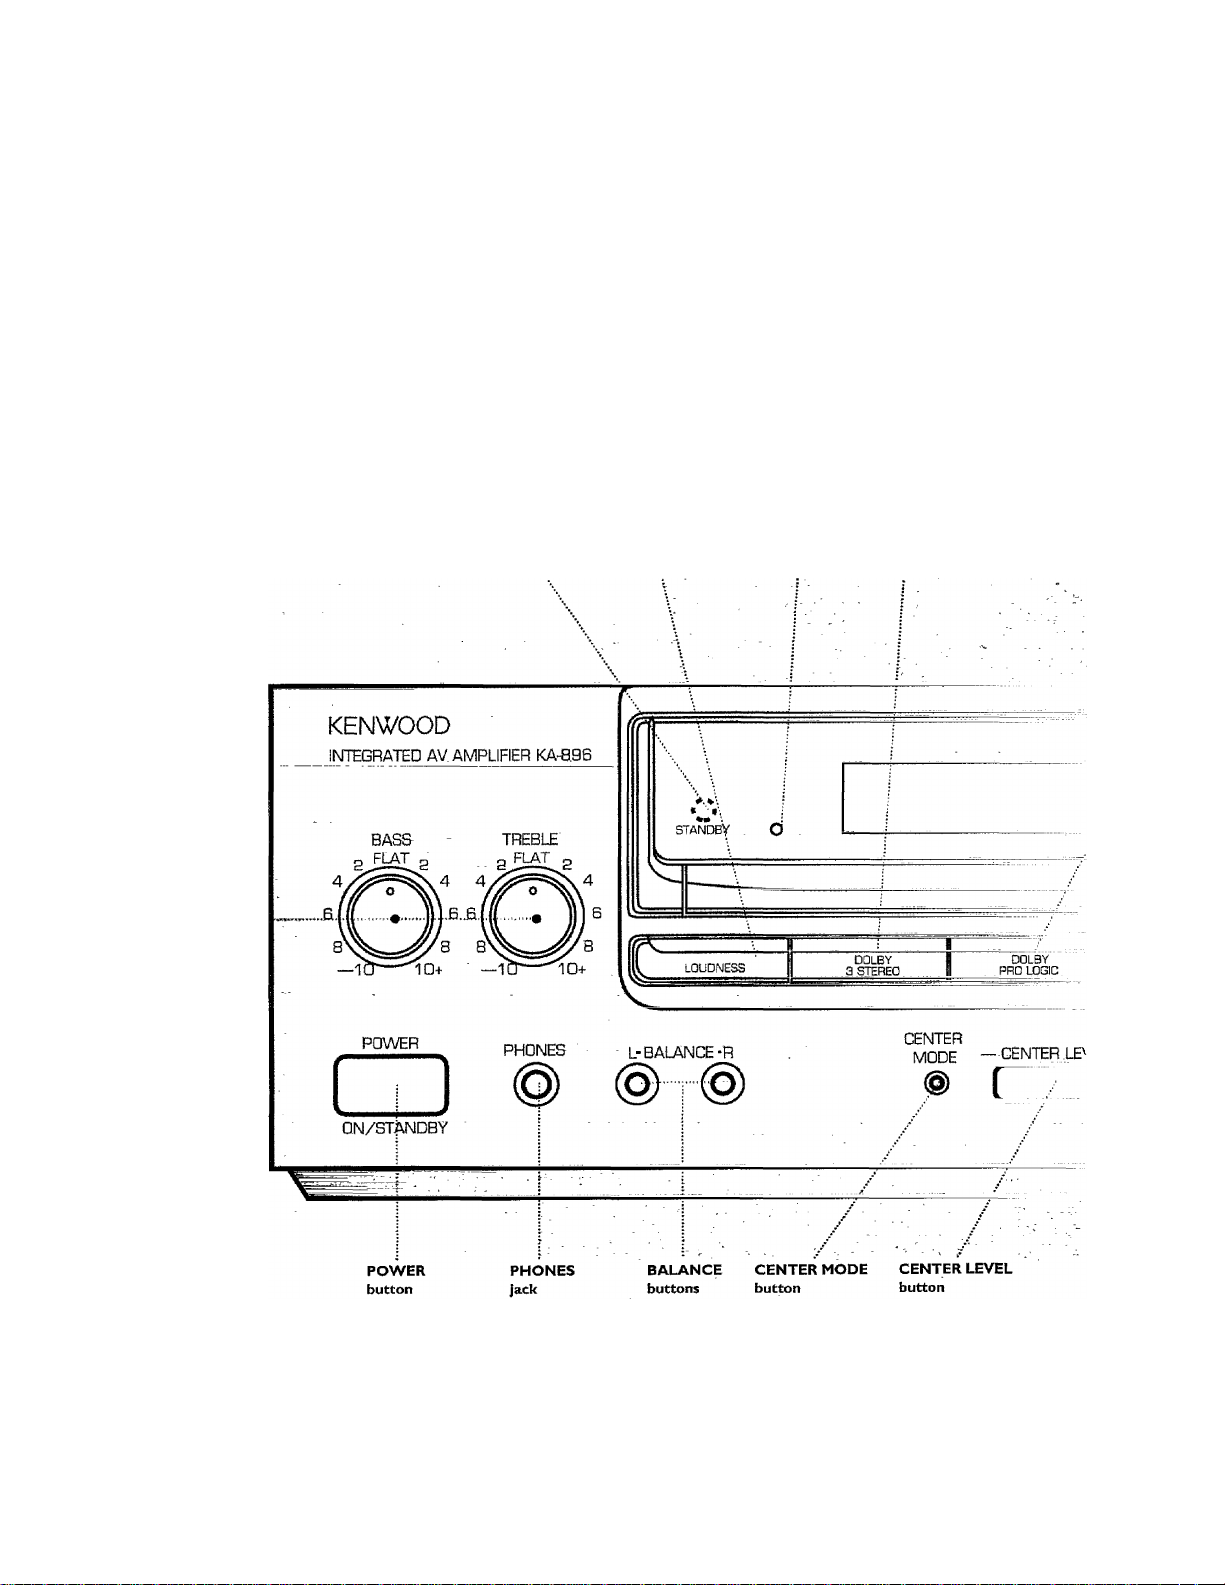
iDufierampnner
Tlie front panel controls and display
TONE
controls
.......
REMOTE
sensor
LOUDNESS STANDBY DOLBY 3 STEREO
button indicator button
6.
DOLBY PRO LOGIC
indicator
DOLBY 3 STEREO
indicator
I SURROLIMÙ 1 ...-‘‘‘ijDÜDNësS
I 3 etëReq.-"' '
inillllli
••••••••••
STRAiqHT
(vîirÿâi -'ij
INFORMATION display
/Volume level
MUTING LOUDNESS
indicator indicator
/ Input selector indicator. .
/ L/R balance indicator
J - DOLBY PRO LOGIC information'-
/ ^pdtBY3‘stereo information-
W WÌ0 W W ^
mm mm mm mm ^ ii
VOLUME
indicator
DOLBY PRO LOGIC
button
VIDEO 1/2
indicator
LINE STRAIGHT
indicator
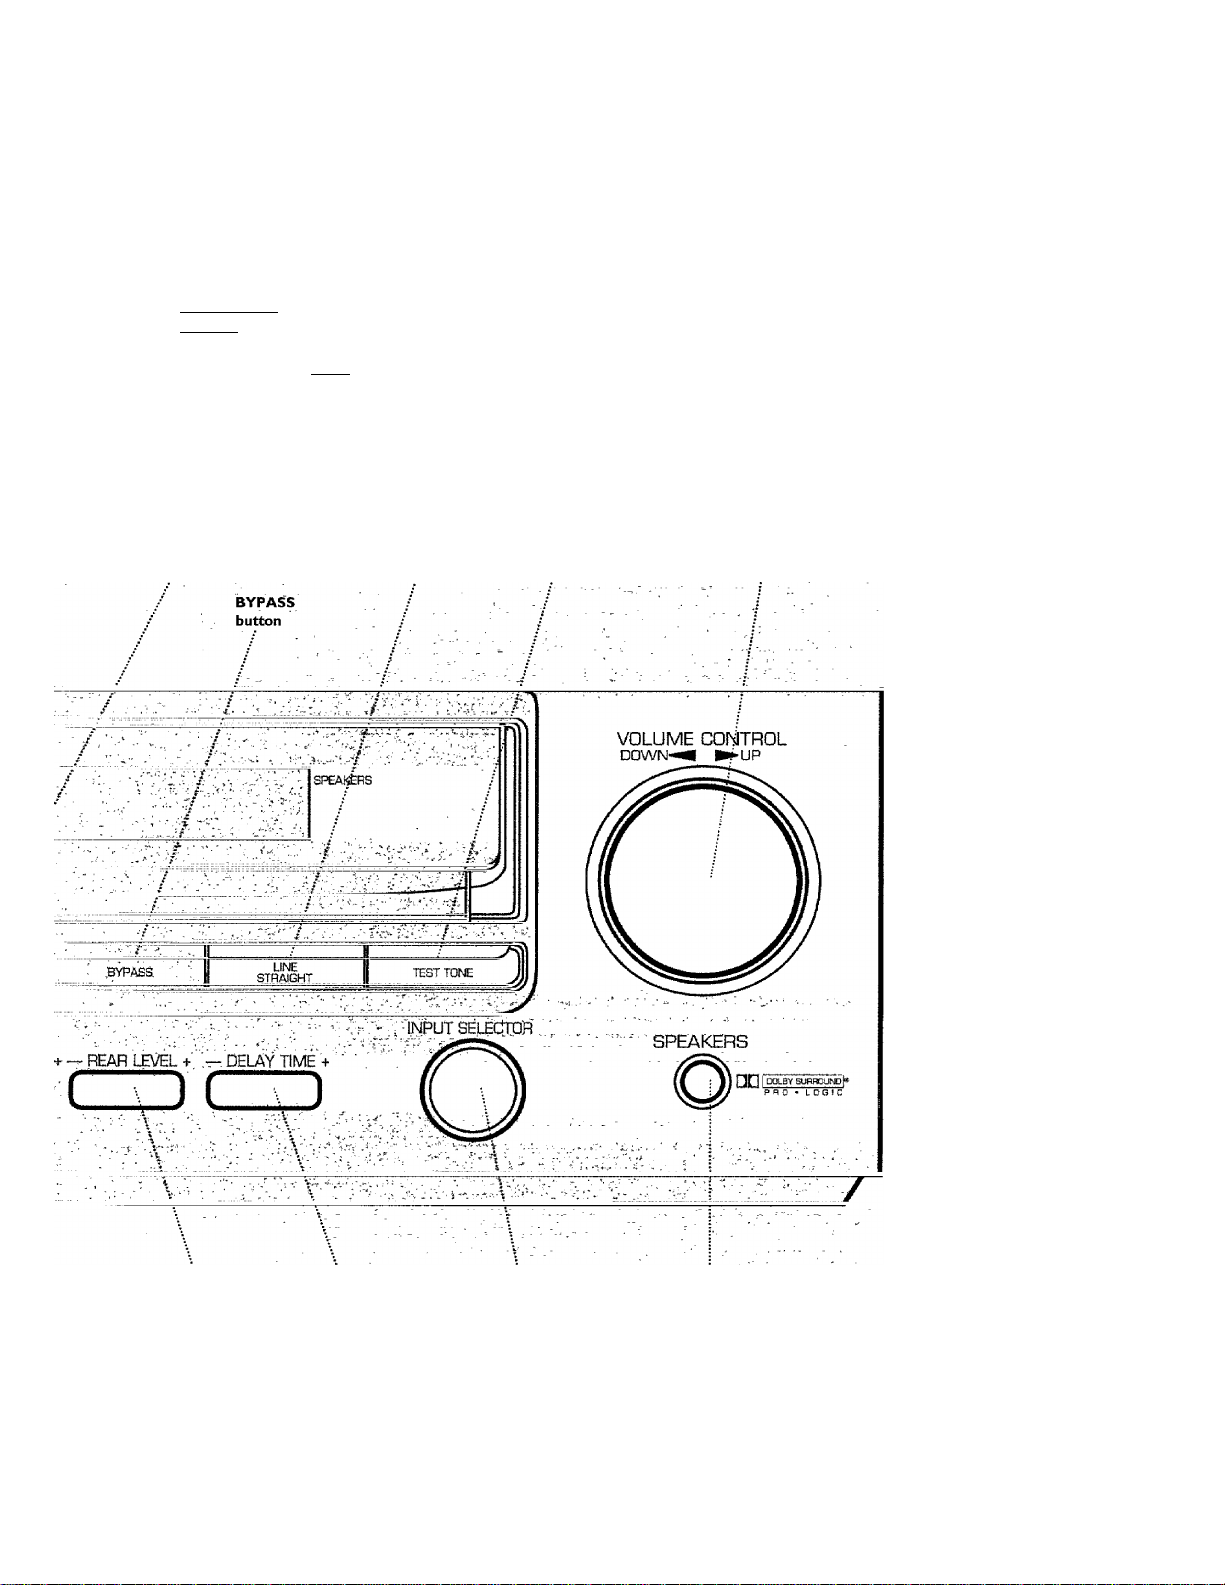
LINE SRAIGHT TEST TONE
button button
SPEAKERS
Indicator
VOLUME CONTROL
knob
REAR LEVEL DELAY TIME
button button
INPUT SELECTOR
knob
SPEAKERS
button
7.
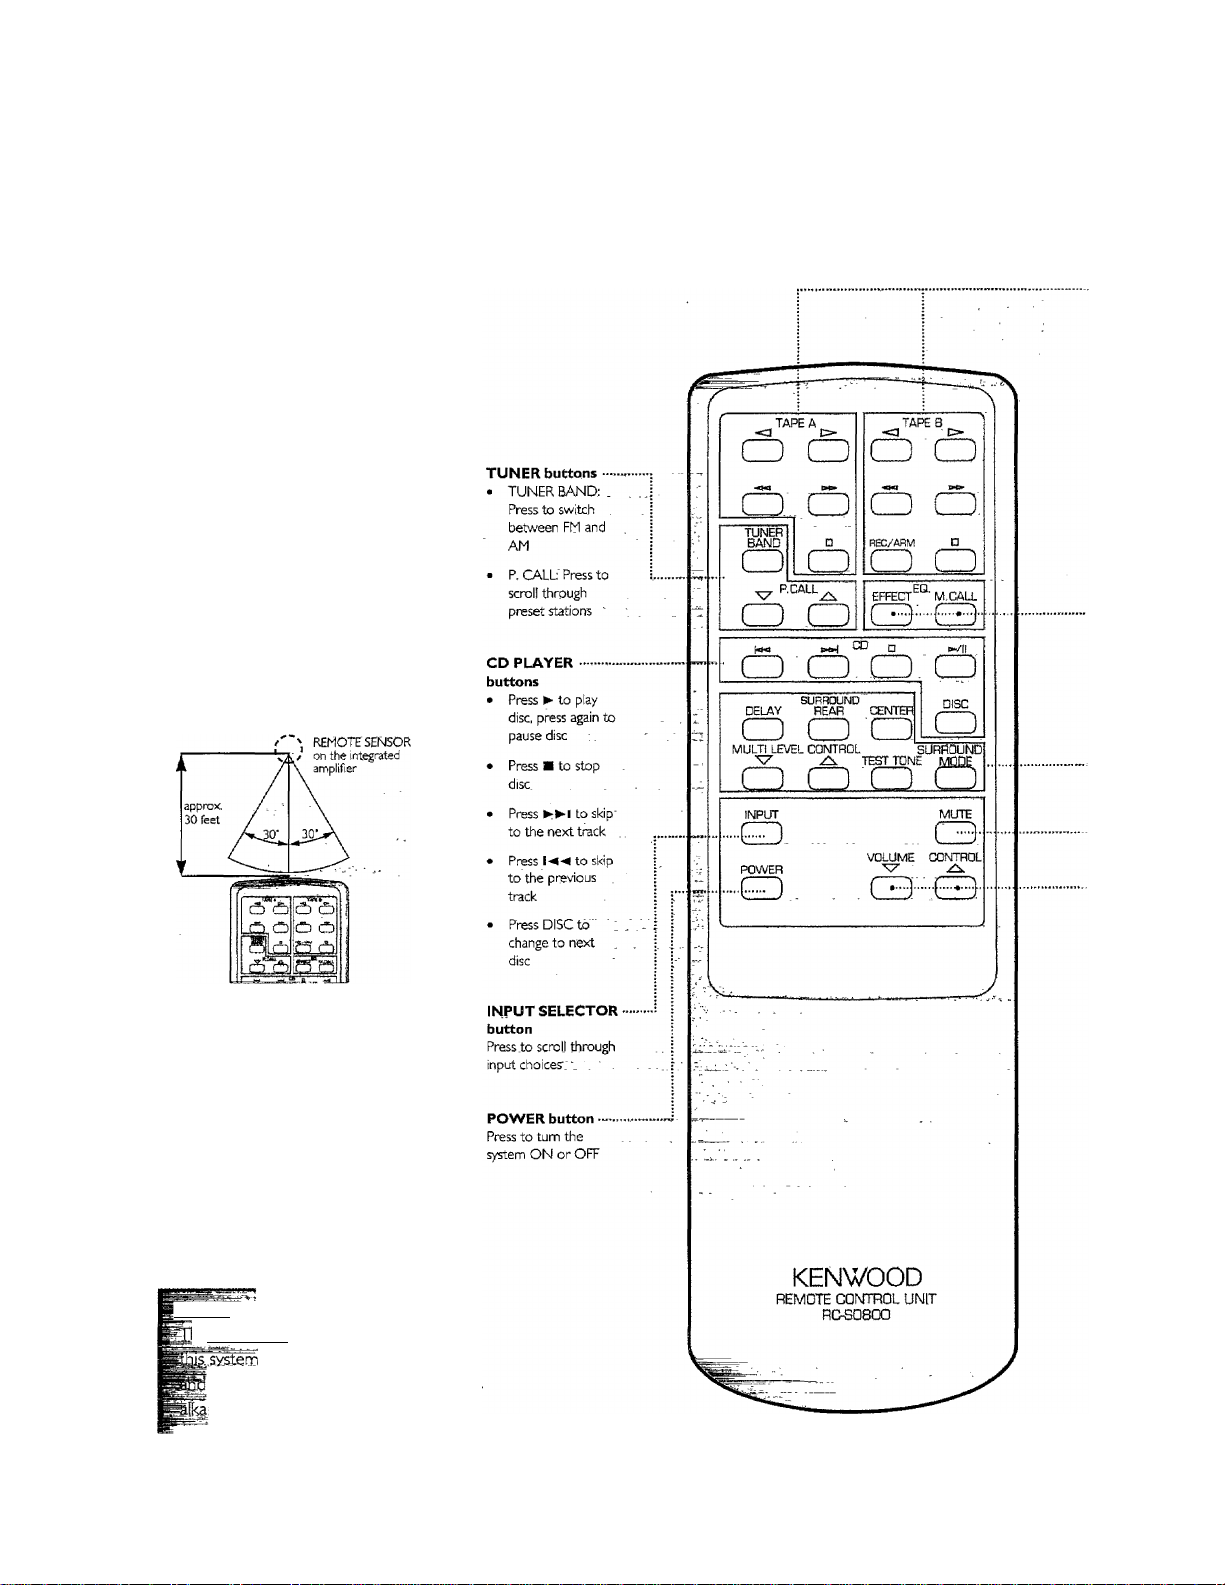
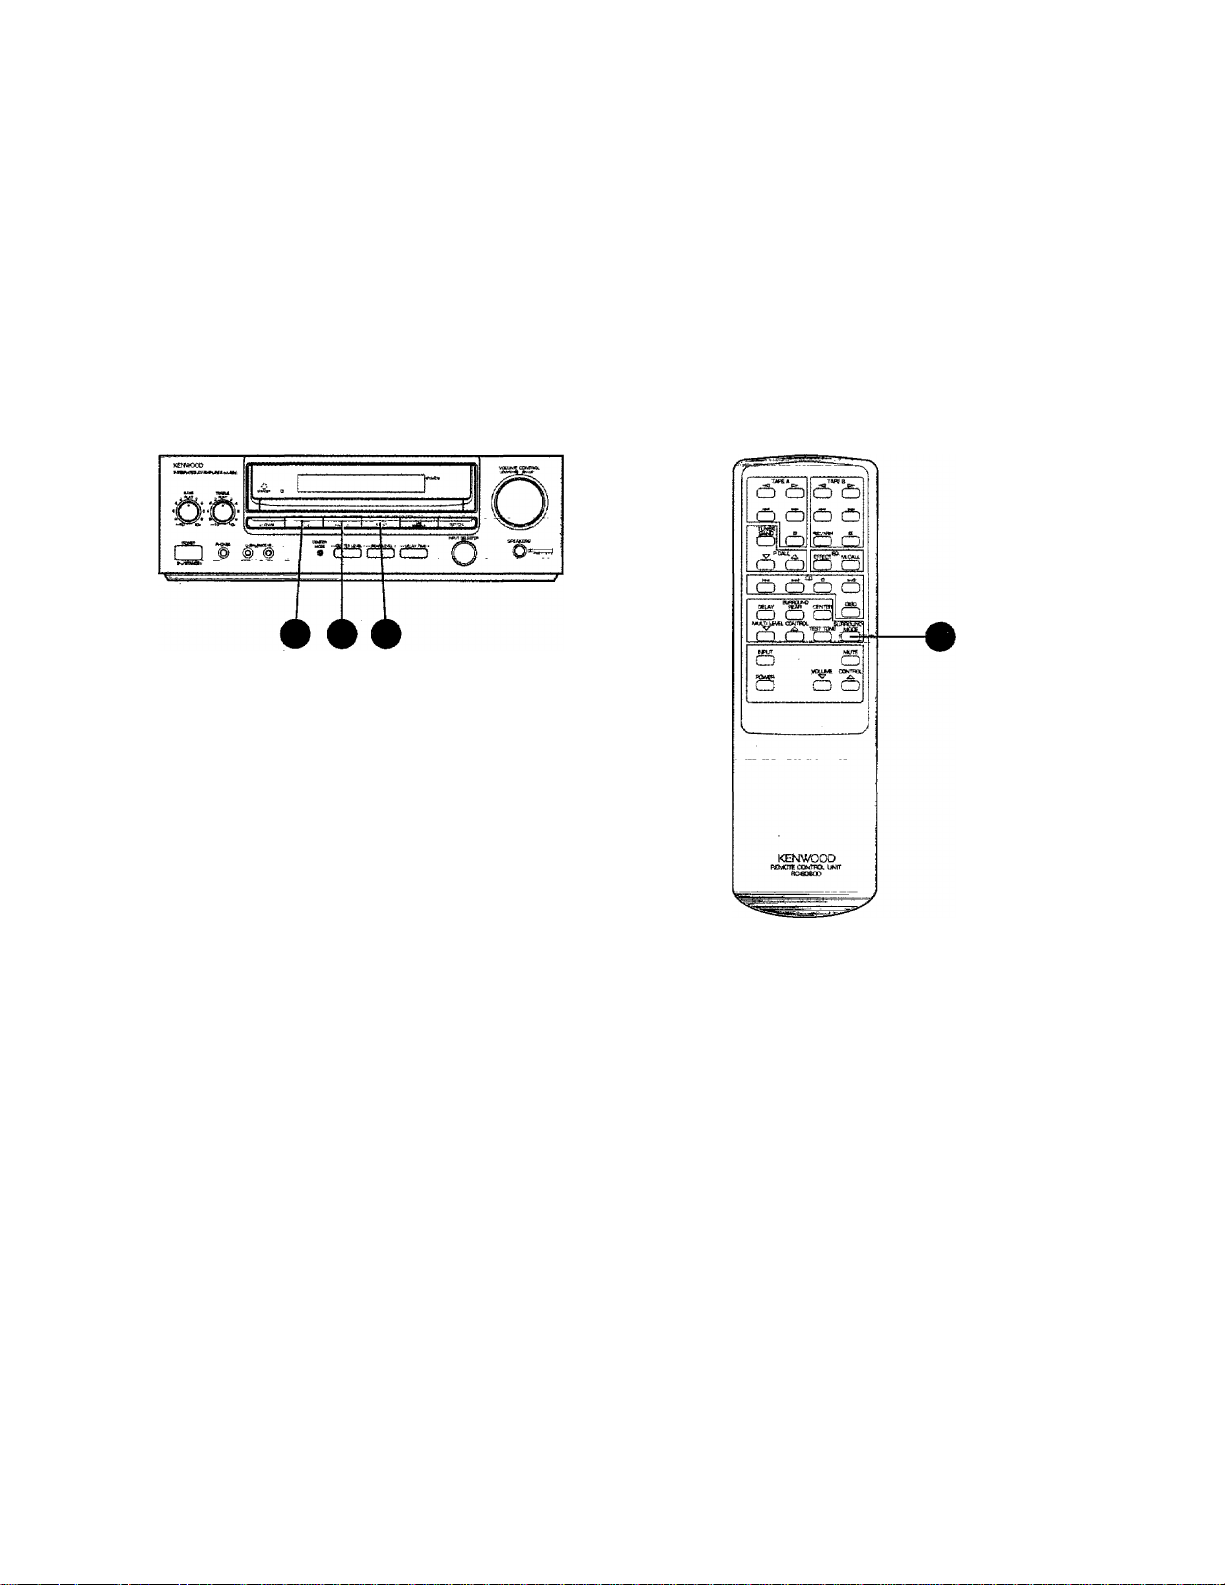
Using the remote
You can use your SPECTRUM
system remote for many functions.,
Д few tips
• Depending on temperature,
humidity, and other envirorimen-
tal conditions, the operating '
range of your remote is approxi
mately 30' and up to 30"" on
either side of the integrated .....
amplifìer's remote light sensor.. .
* When the operating distance.,of
■ your remote begins to get
shorter, replace, both alkaline
batteries with new ones. .
When you press Z.buttons one .
after the .other, press,each
button securely .for more:than i.
second each,
The remote maymalfunctibn if
direct sunlight or high-frequency ’
fluorescent light enters the light
sensor. In this case, either move ,
the audio system, or remove the
light source,
Urnportant:
.....................
he batteDes.%at ca.me.ШК. h
aTe^ti„^‘bakède^
may not last as ions as_,, ;
8.
I
1
■ CASSETTE DECK
buttons
* Press ^.or ► to play or
reverse tape
* Pressto
fast-forward or rewind'
tape
* Press ■ to stop tape
* Press RE'OARM. to. put
the player into ... '
RECORD/PAUSemode'
^ EQUALIZER buttons
For use with an optional
equalizer
• Press EFFECT to arttvate' .
and deactivate EQT . . ...
circuits
• Press M, CALL to acti
vate EQ curves stored'^ ’
memory
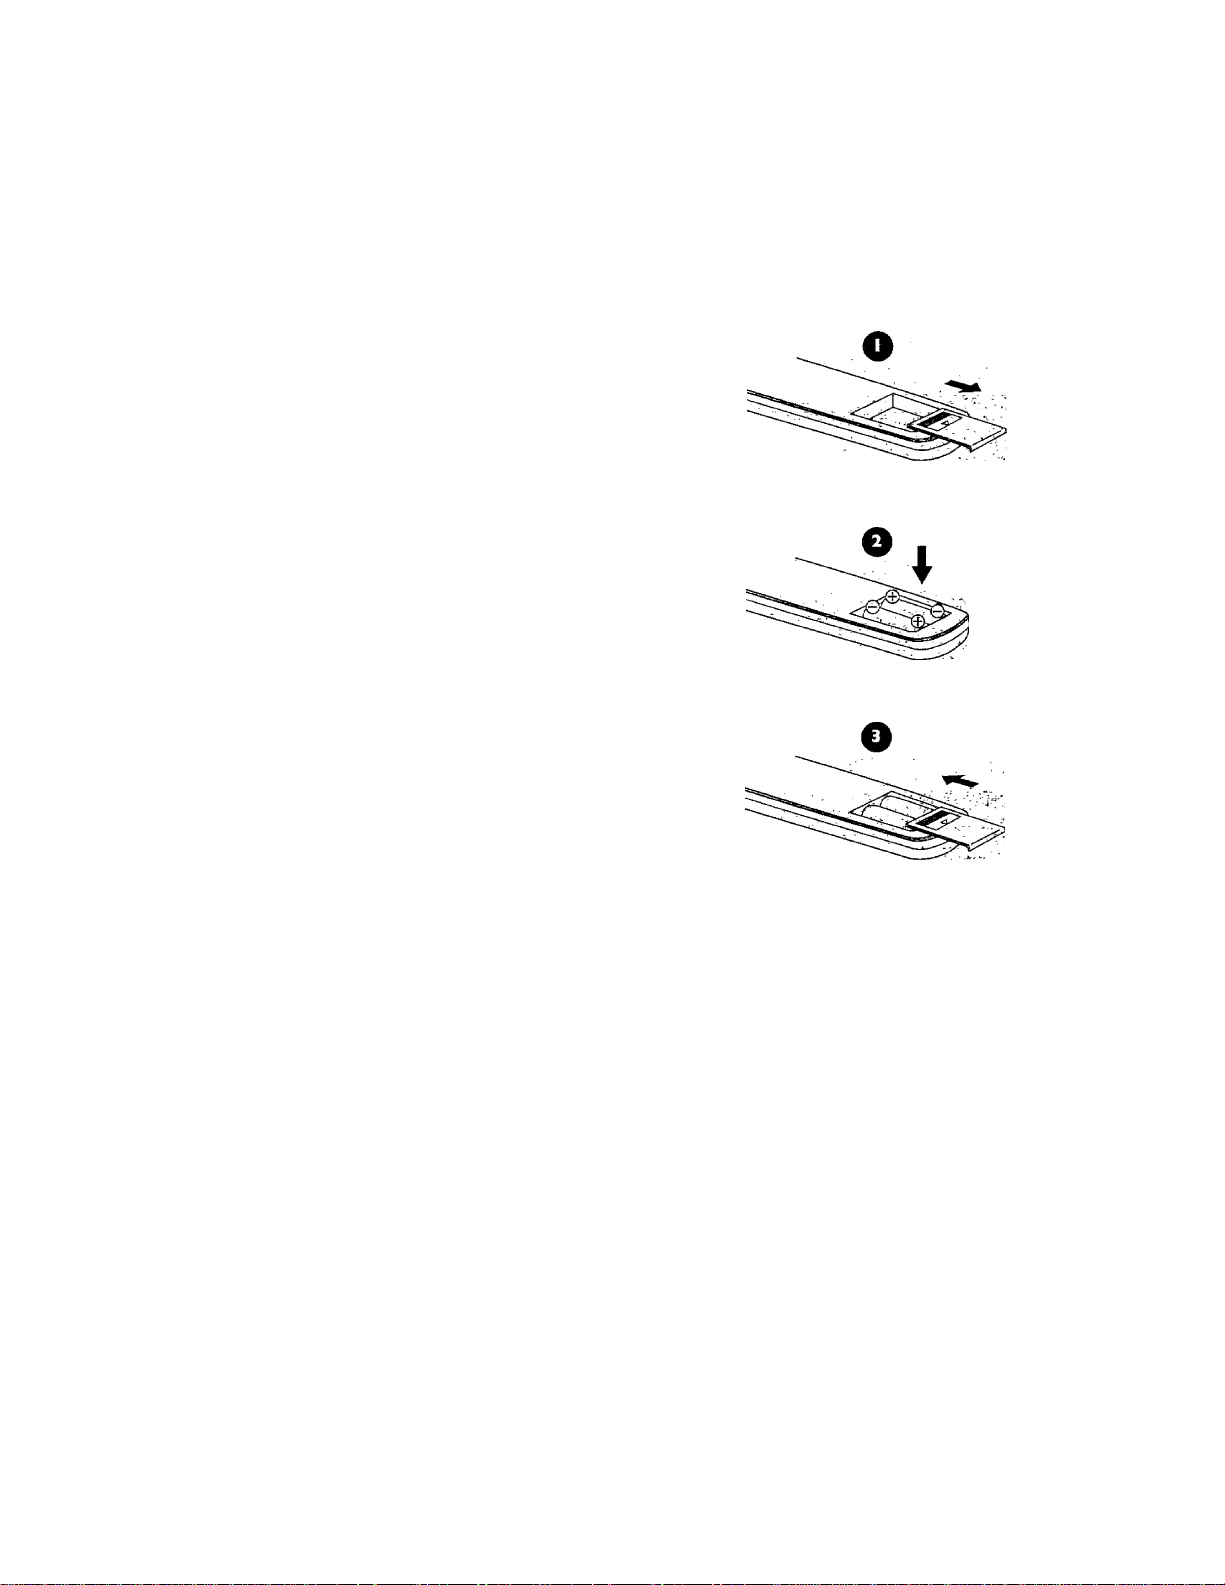
Loading and replacing the batteries
If the receiver doesn’t respond .
when you press a button on the
remote, you need new batteries; ■
We recommend replacing both
batteries at the. same time for longer
battery life.
1 Remove the cover by pressing
down on the ridged area and
sliding it off in the direction of
thearrowc "■
2 insert 2 AA^size alkaline batteries.,
(be sure to pay attention to the
(T) and (-) signs when you’re
inserting the batteries).
3 Close the coven .
SURROUND SOUND
buttons
\ *
MODE: .Pressato, cycle.
\ through Dolby Pro Logic,
f “ Dòlby'3'Stereo and-
j j Bypass
|i • TEST TONE Press to
I \ turn the test noise DN'
i j and OFF “ .L
\ \ • .
\
I the center speaker level
* MUTE button
- VOLUME buttons
__________
CENTER: Pr^ss.to adjust
REAR: Press _to adjust .
the rear speaker levels
DELAY: Press to adjust
the delay time . . .
• MULTI-LEVEL
■ CONTROL; Press to
make center, rear and
. delay adjustments .
Press to MUTE the sound, ,
presi again to turn ON
sound
Press A or V'to increase or'
decrease volume
The basic audio ftinctions
SelecUng the input source
You can play audio from as^many as' 6 ^different sources,
including: , y
• TUNER , •
• TAPE 1 •.viDTo u V* viD£Q.2 -■ ■.
Selecting from the front panel
Rotate the INPUT'SELECTOR-knob.until .you seetbe ,
input source you'.want-on the. display, .
C D
■ ^ PHONO u;;
Selecting from the remote
Press the INPUT button until you see.thejnput source '
you want on the .display.
ifTfei
o o
_ClQ
o o
n o
a 6
10.
Adjusting the volume
You can incnease;oT decrease the volume level in I deci
bel (dB) increments. '
The amplifier's display shows the .decibel. ieveLohange.. .
Adjusting from the front panel
Turn the VOLUME knob to the right to increase the
volume. T um the knob .to. the left to. decrease .it.....
Adjusting from the remote
Press the VOLUME buttons to increase or decrease the
volume level , ,
o a
Lclo
i5ia
6 a'*[±) c5 i
CD CD CDiOi .
..
^
s
KENWOOD
fleitOTCoiwrFiotUKiT
?! t C ^ O B O D
* (f) ;
o cS j
eiWCrT®* MOLL
Q CC ^
MUFE
O ■
¥i^ cflNm ;
11.
Adjusting the bass and treble
Muting the sound
You can increase or decreas.e.the bass or i.reble.to _ ..
personalize the sound
Turn the BASS and TREBLE controls to the ri^ht to . ..
increase thexri. Turn the controls to the left to decease .
them. .
You can quickly turn OFF the sound (whenThe phone'
rings, for exa-mple), and turn it ON again'without stop'ping play.
Press the MUTF buttoj^ to, turn the sound OFF._.Press it,
again to'turn the sound ON. _
The. MUTE light on the display flashes .while MUTE .
is OH . ,
(i) o
CD iD
(f3 a
o o
nr:
,,,0 ,ct3.
a c5“‘o o
O'S’S o
! S
_____
CCWTiKLi
o (±j!
-J
]b
\
12.
KENWOOD
pawTE ctKTW» UMT

Making the sound fuller at low volumes
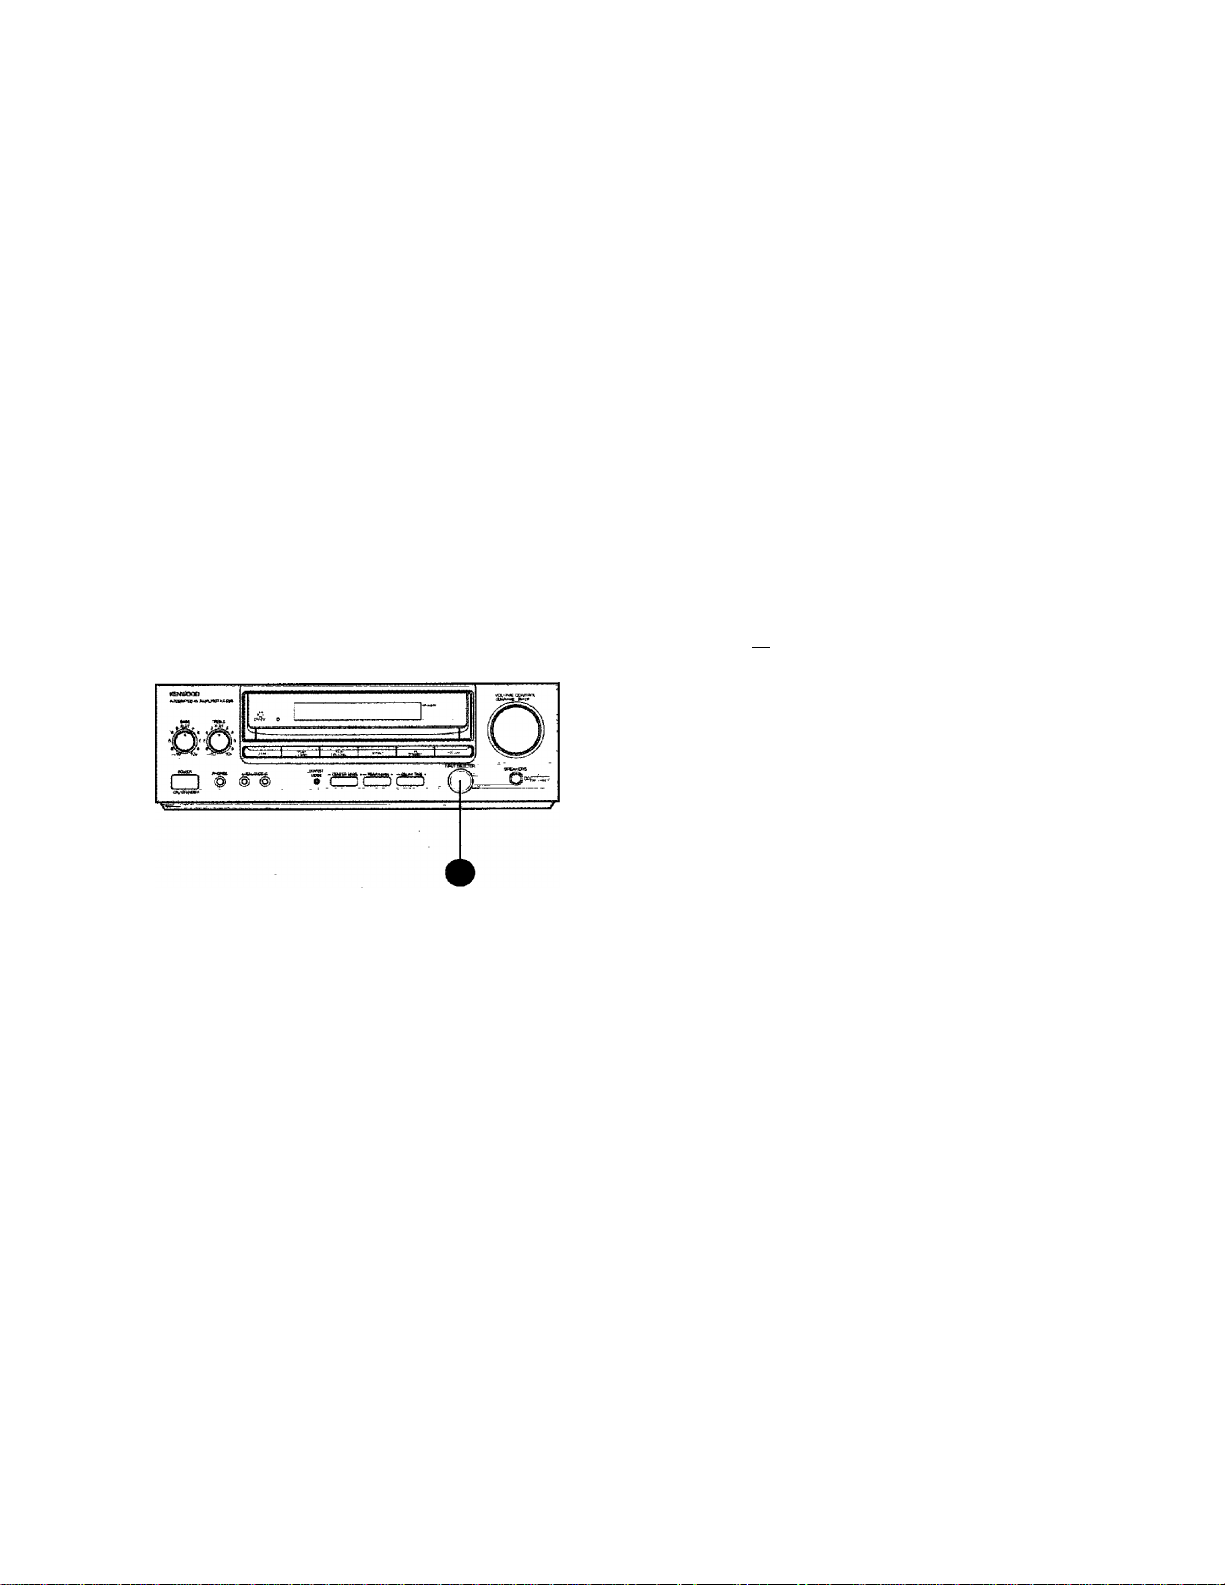
Bypassing tone controls and surround circuitry
You can adjust the bass when you're listening'at low
volunnes. This compensates for the.fact that your hearing
is less sensitive to. bass at these volumes. . . _v '.: _
Press the LOUDNESS button to increase the bass. Press
it again to restore normal .tonal balance." \
The’ LOUDNESS light 6n_the display tunas'ON when '
LOUDNESS is ON and goes OFF. when LOUDNESS is
OFF. ^ - t- -
You can . bypass the tone controls and .the surround
sound circuitry to enjoy your music with purer sound
quality. ... . ., . - .. .
Press the LIND STRAIGHT button_to bypass the tone
controls and.sumound circuitry, Press it again to‘cancel. .
The LIND STRAIGHT light on the display illuminates..
when LINE STRAIGHT is ON and goes .OFF when LINE '
STRAIGHT is OFF
13.
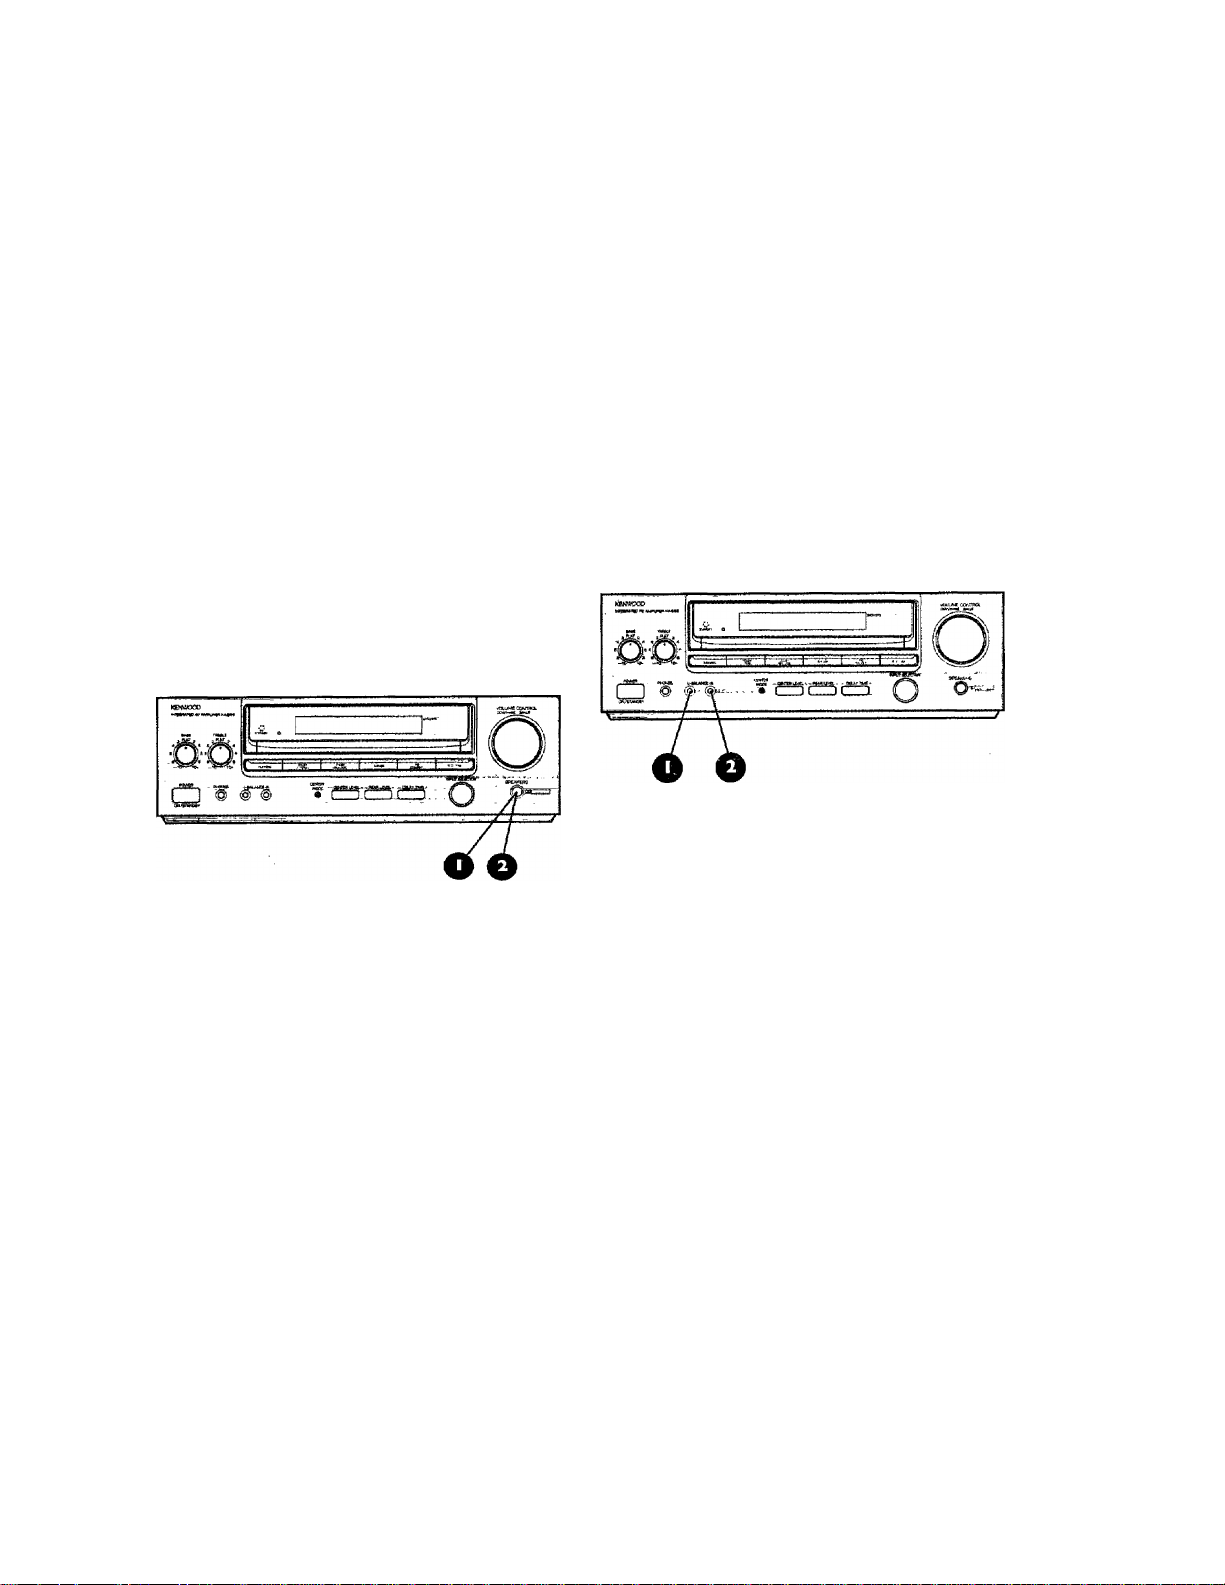
Activating the speakers
Adjusting the speaker balance
You can turn alLof.tbe speal^r^ ON or OFF (for ^caonY
pie, to.,U5.e headphone^) with.the SPEAKERS bgttpn,. ..
1 Press the SPEAKERS button" (while^hey are off) to
turn the speakers ON, ...
2 Press the SPEAKERS button again tqturn the speak-
ei^OFF.; \ ^ : :r YY: - .A .
The SPEAKERS light onjthe display turns ON when the
speakers are .ON, and it goes OFF when then speakers.
are.OFR .. i . .
You ca.n_adjust.tbe volume, balance between the left.and
right speakers, _ ■
1 Press the. L BALANCE button to decrease the right
speaker volume.and. maintain the left.
2 Press the R BALANCE button to. decrease, the left,
speaker volume and maintain the right
While you’re adjusting the balance, the display shows the
relative voluirre between the left and right speakers. .
14.
■Г?
Using headphones
You can use headphones to listen to music,or the. .
sounrdtrack of a film or TV in private,
1 Turn the.speakers OFF. . ’ ■ ". "■
2 Insert the headphone plug into .the HEADPHONE
jack, and then put them on. ■.. . , .
^Ogs to keep in mind \A/hen using
dpwn' before svyitching the
gu pan Щё ypLU^ headphones wfth the speak-
be careful The volume, through the J
leones is usually lower than the volume
rough speakers. When you turn up the
illume for the headphones, be careful not to
^STrrlrbp so'loud you damage your speakers,
‘Я
i
1
15.

About the audio modes
Using one of tKe system’s audip, modes, you’ll get optimum sound fix)m70ur system, whether you’re playing music or
watching a movie, . .
__ _ _
. ,
Dolby Pro Logic
Use it for movres, music videos,
stereo TV bro,adcasts, and. audio. _
CDs recorded in Dolby .Surround,,
and some .older fiimsr with the
Dolby Stereo logo, Dolby Pro Logic
is designed to recreate the surnpund
sound from: films, music Vdepsi and
stereo TV broadcasts^encpded jn'.
Dolby Surround It’ll dnng put the.,
full effect of Dolby Surround- ' . .
encoded audio..CD,s and even ..do a..
great job with standard CDs, -
Dolby 3 Stereo
Use. it for.movi.es, music videos,
stereo TV broadcasts^ and audio
CDs recorded .in Dolby .Surround, ;
and some older.films with’the.
Dolby. Stereo logo. Dolby, 3 Stereo. .
takes Dolby Sumoundj-enco.ded . ^
movies and decodes the sound Tor a
system, without surround speakers.
Bypass
Use it for audio CDs not recorded
in Dolby Surround, and tapes, = ;
records, and TV broadcasts not , _
encoded in Do.lby Surrpund.. Bypass ,
mode uses the left and right front
speakers for. standard music play. It's
called 'bypass' because it bypasses c
the surrouad processing. : - ■
16.
Selecting an audio mode
Selecting from the front panel
Select Ihe appropriate b.utton for DOLBY PRO LOGIC/
DOLBY 3.STEREO, or BYPASS. /
Selecting from the remote
Press the-SURROUND MODE'button'to scroll through
DOLBY PRO LOGIC DOLBY 3 STEREO, and BYPASS.
17.
 Loading...