

Kenmore 91147485890, 91147485991, 91147489991 Owner’s Manual
OWNER'S MANUAL
27" SELF-CLEANING
BUILT-IN WALL OVEN
MODEL NO.
911.47485
911.47486
911.47489
CAUTION:
Before using this oven,
read this manual and
follow all its Safety Rules
and Operating
Instructions.
Sears, Roebuck and Co., Hoffman Estates, IL 60179 U.S.A.
• Safety Instructions
• Operation
• Care and Cleaning
• Problem Solving
229C4020P195-1 (SR-10404)
Table of contents
27" SELF-CLEANINGOVEN
Oven Safety ........................... 3-4
Features of Your Oven .............. 5
Removal of Packaging Tape .... 5
Oven Control, Clock, Timer ...... 6
Control Display ......................... 7
Clock ........................................ 8
Kitchen Timer ........................... 8
Tones ........................................ 9
F Code ...................................... 9
Oven Cooking Tips ............ 10-11
Baking .................................... 12
Broiling ................................... 13
Setting Special Features ... 14-15
Self-Cleaning Cycle ........... 16-17
Control Panel .......................... 18
Broiler Pan and Grid ............... 18
Self-Cleaning Oven Interior .... 18
Oven Light Bulb ...................... 18
Oven Racks ............................ 19
Oven Door .............................. 19
Before Calling for
Service ............................... 20-21
Temperature Adjustment ....... 22
Warranty ................................. 23
Consumer Service Numbers ... 24
For your convenience and future reference, please write down
your model and serial numbers in the space provided. They are
located on the front frame behind the oven door.
MODEL NUMBER: SERIAL NUMBER:
2
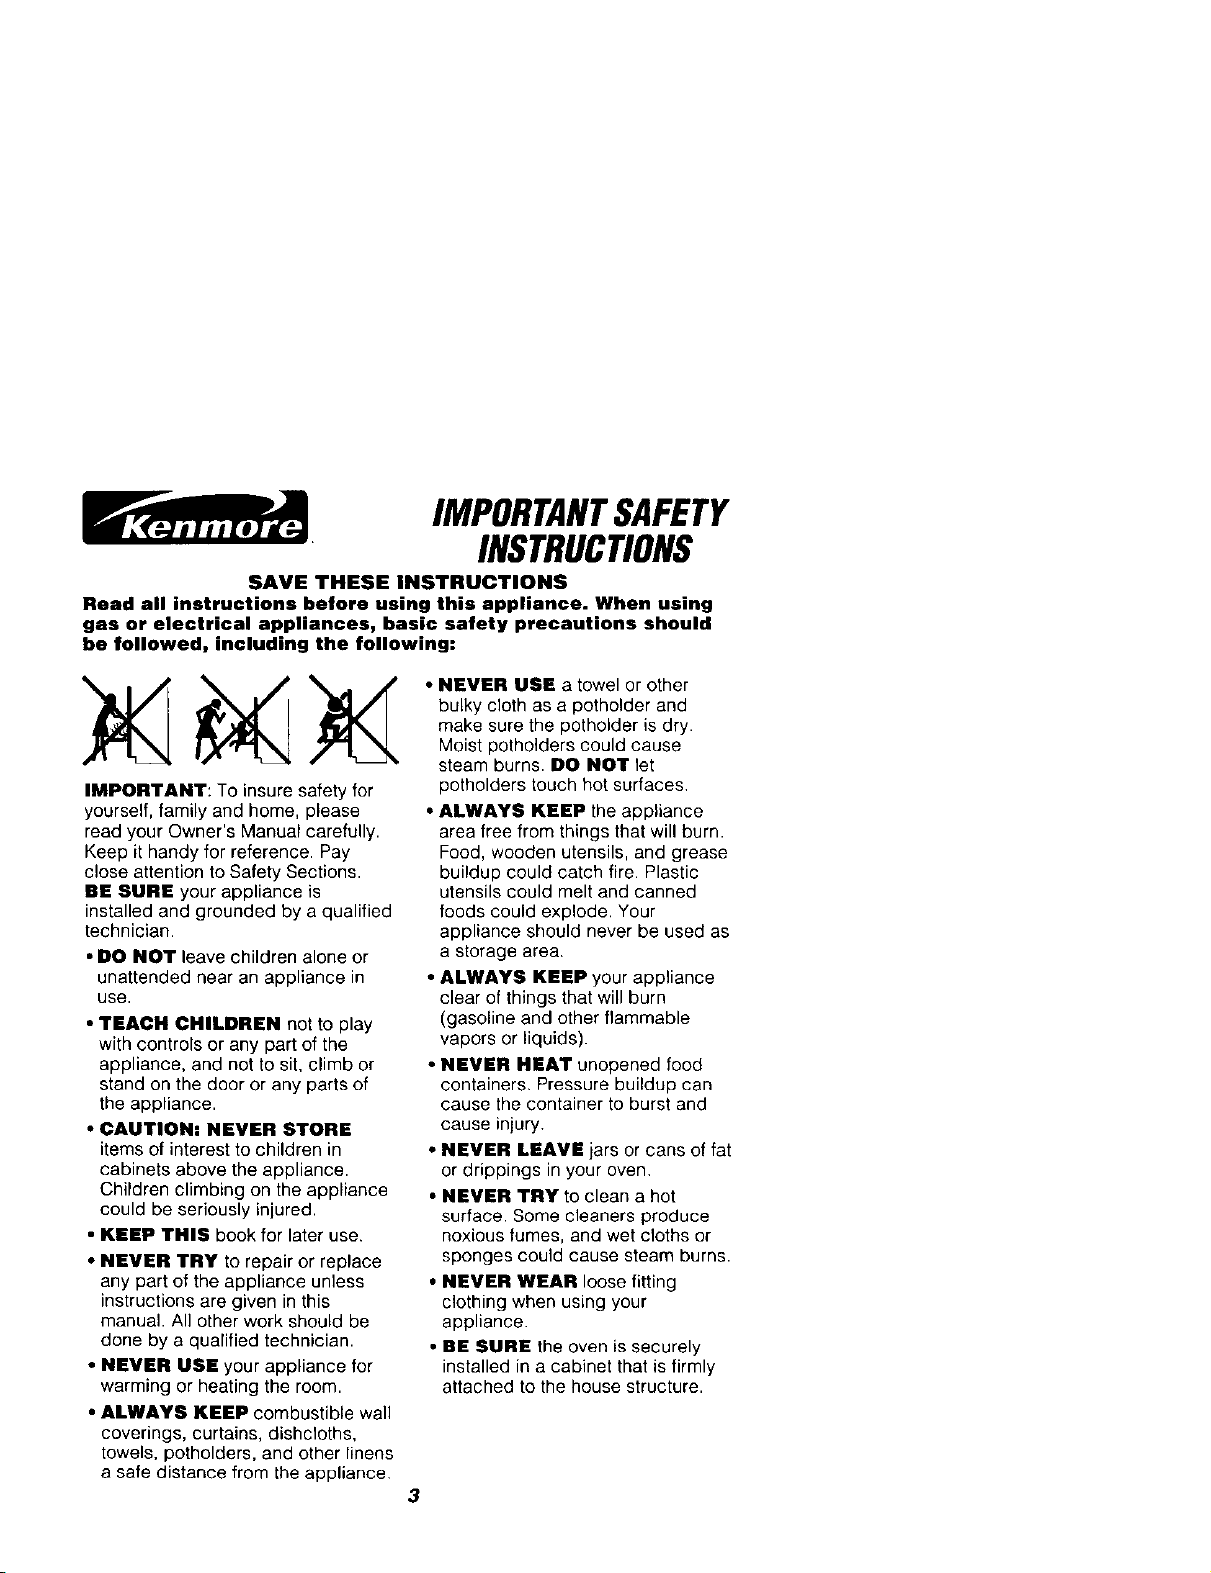
IMPORTANTSAFETY
INSTRUCTIONS
SAVE THESE INSTRUCTIONS
Read all instructions before using this appliance. When using
gas or electrical appliances, basic safety precautions should
be followed, including the following:
• NEVER USE a towel or other
bulky cloth as a potholder and
make sure the potholder is dry.
Moist potholders could cause
steam burns. DO NOT let
IMPORTANT: To insure safety for
yourself, family and home, please
read your Owner's Manual carefully.
Keep it handy for reference. Pay
close attention to Safety Sections.
BE SURE your appliance is
installed and grounded by a qualified
technician.
• DO NOT leave children alone or
unattended near an appliance in
use.
• TEACH CHILDREN not to play
with controls or any part of the
appliance, and not to sit, climb or
stand on the door or any parts of
the appliance.
• CAUTION: NEVER STORE
items of interest to children in
cabinets above the appliance.
Children climbing on the appliance
could be seriously injured.
• KEEP THIS book for later use.
• NEVER TRY to repair or replace
any part of the appliance unless
instructions are given in this
manual. All other work should be
done by a qualified technician.
• NEVER USE your appliance for
warming or heating the room.
• ALWAYS KEEP combustible wall
coverings, curtains, dishcloths,
towels, potholders, and other linens
a safe distance from the appliance,
potholders touch hot surfaces,
• ALWAYS KEEP the appliance
area free from things that will burn.
Food, wooden utensils, and grease
buildup could catch fire. Plastic
utensils could melt and canned
foods could explode. Your
appliance should never be used as
a storage area.
• ALWAYS KEEP your appliance
clear of things that will burn
(gasoline and other flammable
vapors or liquids).
• NEVER HEAT unopened food
containers. Pressure buildup can
cause the container to burst and
cause injury.
• NEVER LEAVE jars or cans of fat
or drippings in your oven.
• NEVER TRY to clean a hot
surface. Some cleaners produce
noxious fumes, and wet cloths or
sponges could cause steam burns.
• NEVER WEAR loose fitting
clothing when using your
appliance.
• BE SURE the oven is securely
installed in a cabinet that is firmly
attached to the house structure.
3

IMPORTANTSAFETY
INSTRUCTIONS
• DO NOT touch heating elements,
surfaces near them, or interior oven
surfaces. These may be hot enough to
cause burns even though they are
dark in color, During and after use, do
not touch or let clothing or flammable
material contact the elements or hot
surfaces until they have had time to
cool. Other surfaces near the oven
vent openings, oven door, and
window may also be hot enough to
cause burns.
• J,,,, : _m
• PLACE OVEN RACKS in the
desired position while the oven is
cool. If racks must be moved while
oven is hot, do not _etpotholder
contact the hot oven element.
• AFTER BROILING always take the
broiler pan and grid out of the oven
and clean them. Leftover grease in the
broiler pan could catch fire the next
time you use your oven,
• ALWAYS USE care when opening
the oven door. Let hot air and steam
escape before moving foods.
• NEVER USE aluminum foil to _inethe
oven bottom. Improper use of foil
could start a fire, or electrical shock
could result.
• NEVER BLOCK the oven vent
opening.
• CLEAN ONLY the parts listed in this
manual. Follow all cleaning
instructions.
• NEVER RUB, move or damage the
door gasket on self-cleaning ranges.
• NEVER TRY to clean utensils,
cookware, removable parts or broiler
pan and grid in the self-clean cycle.
• DO NOT USE oven cleaners - No
commercial oven cleaner or protective
coating of any kind, should be used in
or around any part of the oven.
IMPORTANT SAFETY
NOTICE!
The California Safe Drinking
Water and Toxic Enforcement
Act requires the governor of
California to publish a list of
substances known to the state
to cause birth defects or other
reproductive harm and requires
businesses to warn their
customers of potential
exposure to such substances.
The fiberglass insulation in a
self-cleaning oven will give off
a very small amount of carbon
monoxide during the cleaning
cycle. Exposure can be
minimized by venting with an
open door or window or using a
ventilation fan or hood.
IMPORTANT: The health of
some birds is extremely
sensitive to the fumes given off
during the self-cleaning cycle
of any range. Move birds to
another well.ventilated room.
READ AND UNDERSTAND
THIS INFORMATION
NOW!
Be sure everyone in your home
knows what to do in case of
fire. Never use water on a
grease fire; it will only spread
the flames.
OVEN FIRE:
Do not try to move the pan!
f. Close the oven door and turn
controls off.
2. If fire continues carefully open the
door, throw baking soda on the
fire, or use a dry chemical, foam,
or halon type extinguisher.
4

Self-Clean
Automatic
Oven L
Broiler Pan
And Grid
Model & Serial
Number
Self-Cleaning
Door Gasket
OPERATION
FEATURESOF YOUROVEN
Oven Control
;et Pad
Oven Light
:witch
Automatic Oven
Self-Cleaning
Oven Interior
Removable Oven
-Racks
Removable
Oven Door
To remove the adhesive left from packaging tape, use household dishwashing
liquid, mineral oil or cooking oil. With a soft cloth rub into the area and allow to
soak. Rinse and dry well. Repeat procedure using an appliance polish to insure
no damage is done. This should he done before the oven is turned on
for the first time. The tape cannot be removed once the oven has
heated. Packaging tape may be found in the following areas: door handle,
control panel area, door trim and oven area,
5
OPERATION
OvenControl,Clockand Timer
G3
@ @@
TEMP HOUR MIN
@ QQ
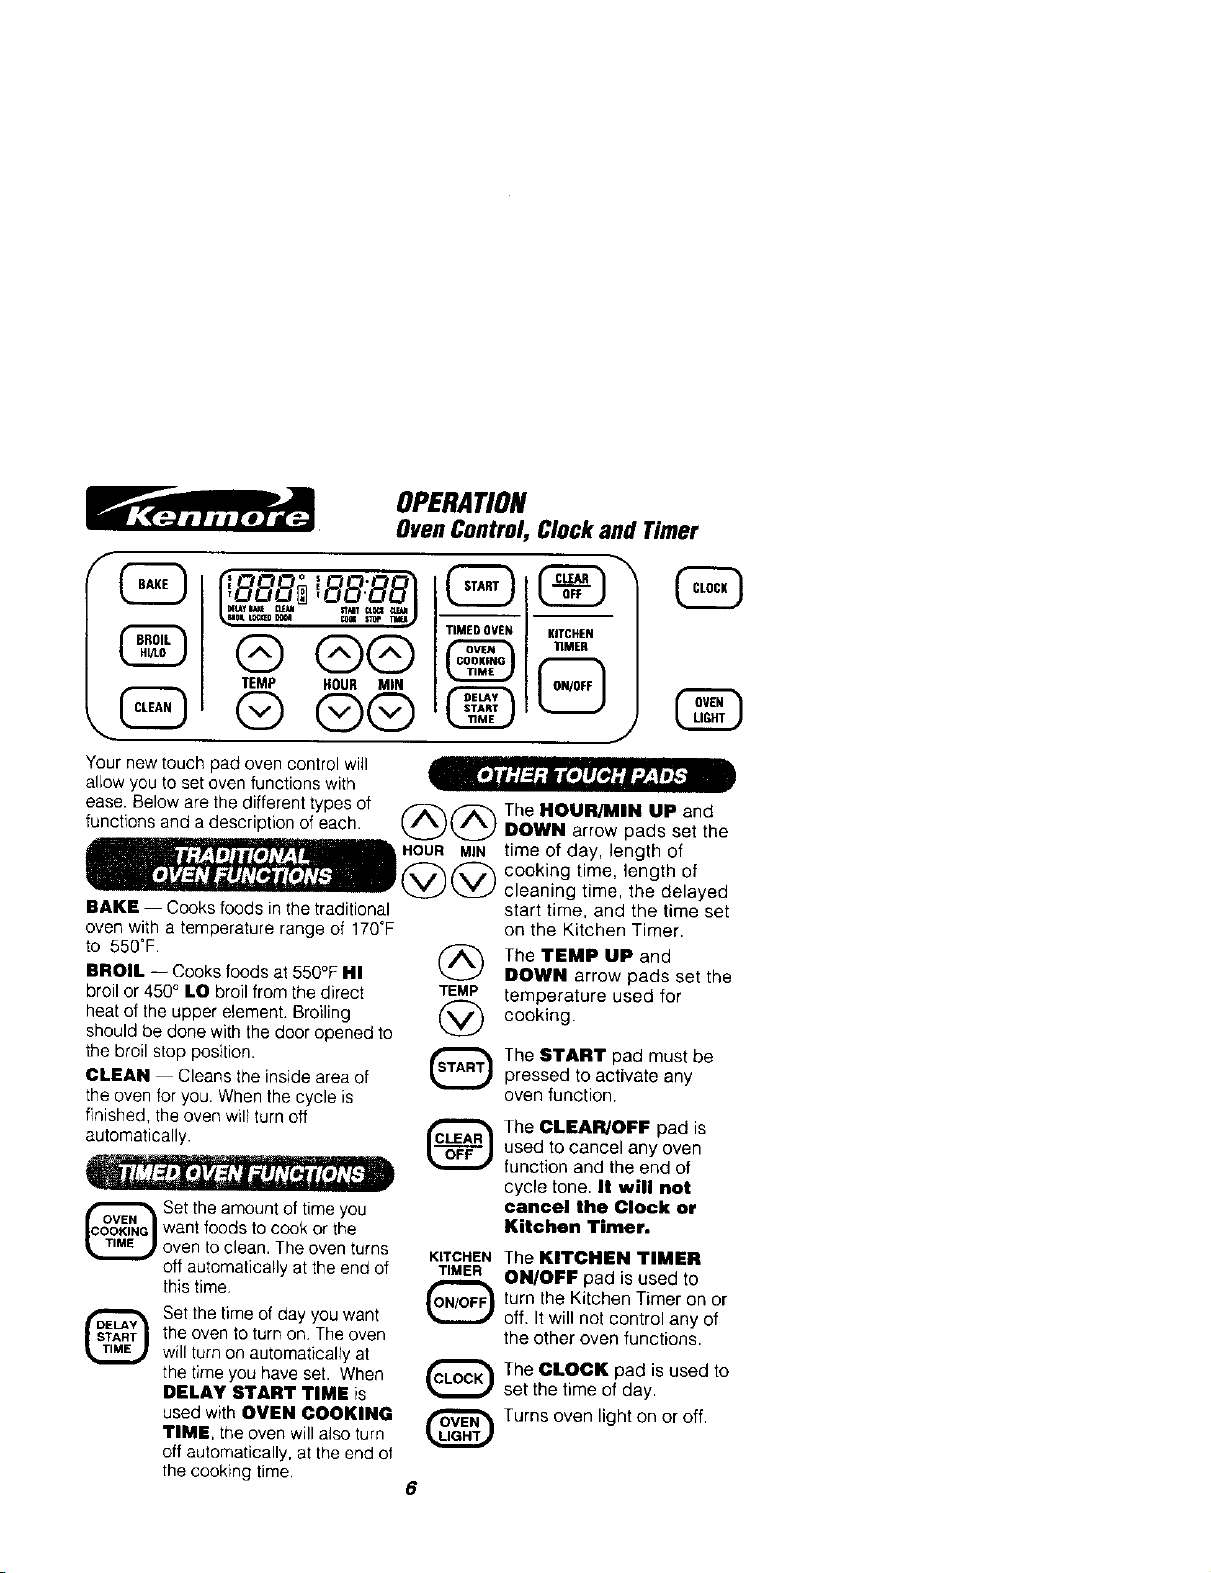
Your new touch pad oven control will
allow you to set oven functions with
ease. Below are the different types of _/"Z_, The HOUR/MIN UP and
functions and a description of each. /(_,)/(,._ DOWN arrow pads set the
_-, i f j, , HOUR MIN time of day, length of
_ t'_"_ _ cooking time, length of
BAKE -- Cooks foods inthe traditional
oven with a temperature range of 170°F
to 550_F.
BROIL -- Cooks foods at 550°F HI
broil or 450° LO broil from the direct TEMP
heat of the upper element. Broiling ('V_
ehould be done with the door opened to
the broil stop position.
CLEAR -- Cleans the inside area of
the oven for you. When the cycle is
finished, the oven will turn off
automatically.
want foods to cook or the
Set the amount of time you
oven to clean. The oven turns
off automatically at the end of
this time,
Set the time of day you want
®
the oven to turn on The oven
will turn on automatically at
the time you have set. When _CLOCK_
DELAY START TIME is
used with OVEN COOKING
TIME, the oven will also turn
off automatically, at the end ot
the cooking time,
_ cleaning time, the delayed
start time, and the time set
on the Kitchen Timer.
The TEMP UP and
DOWN arrow pads set the
temperature used for
cooking.
The START pad must be
pressed to activate any
oven function.
The CLEAR/OFF pad is
used to cancel any oven
function and the end of
cycle tone. It will not
cancel the Clock or
Kitchen Timer.
The KITCHEN TIMER
ON/OFF pad is used to
turn the Kitchen Timer on or
off. It will not control any of
the other oven functions.
The CLOCK pad is used to
set the time of day.
Turns oven light on or off.
6
®
KITCHEN
TIMER
@
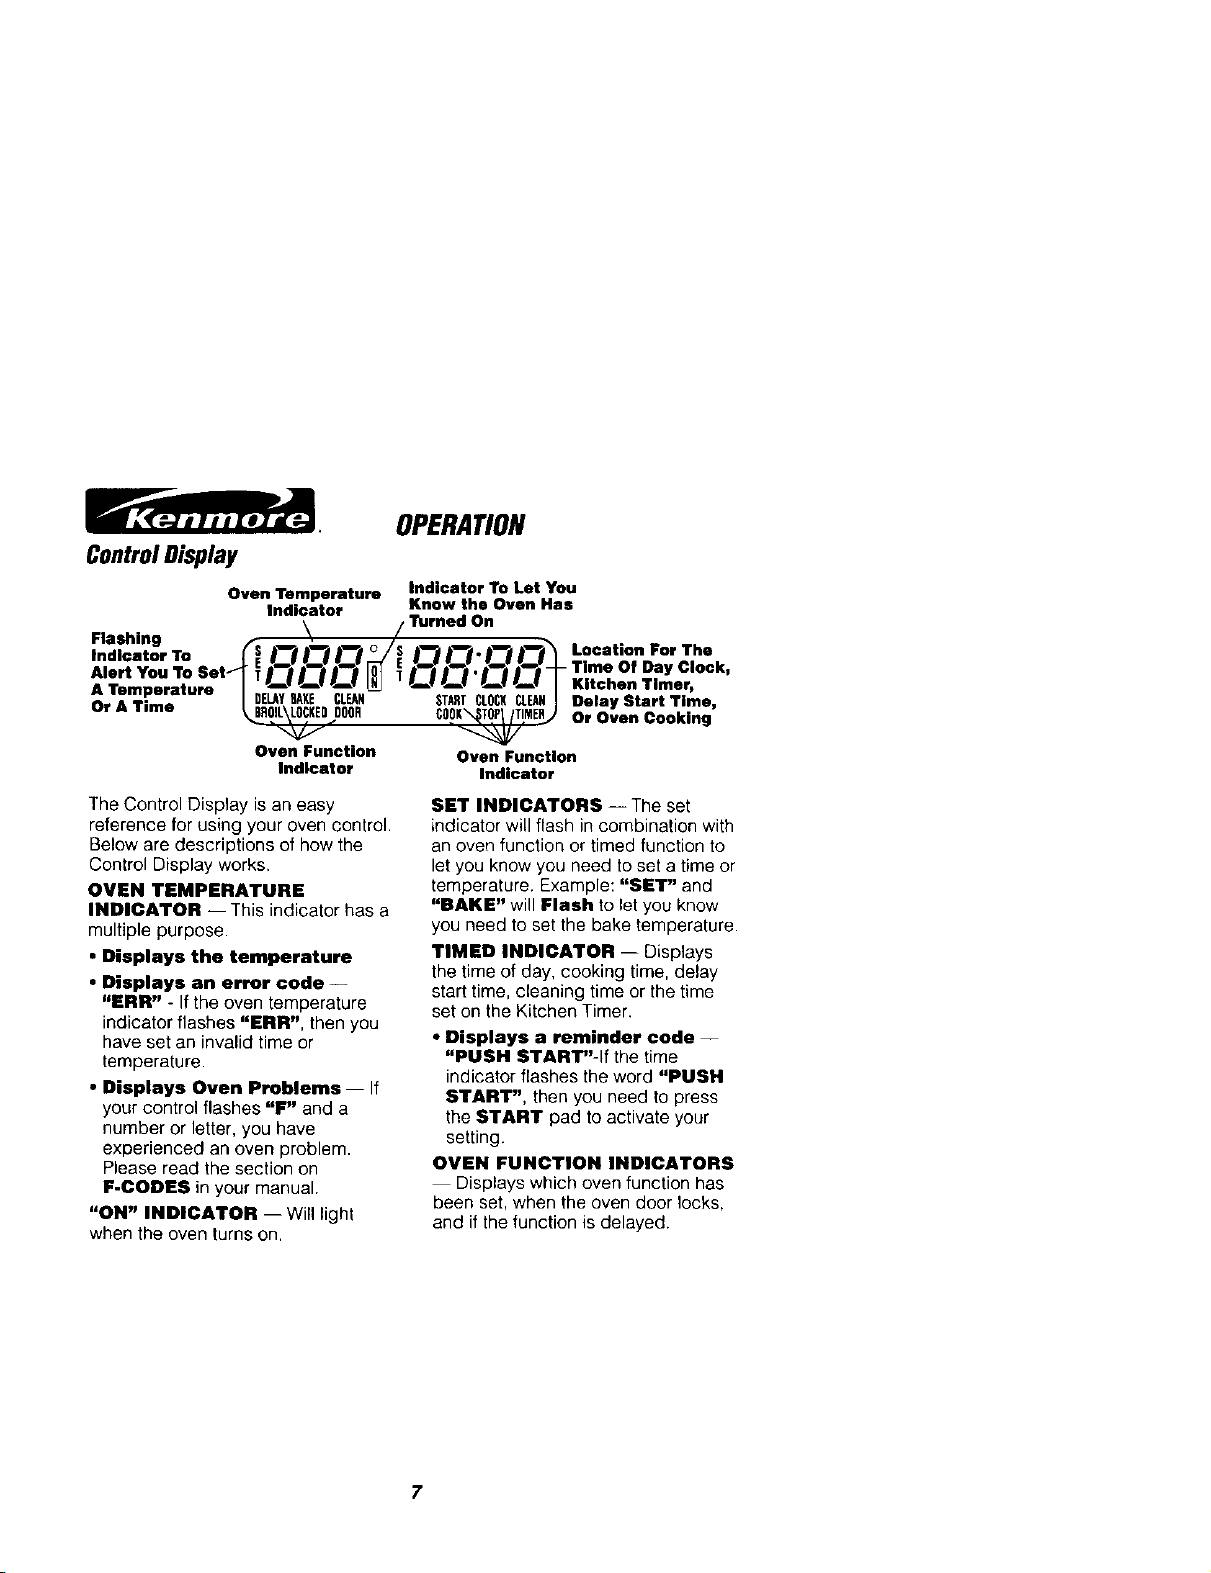
ControlDisplay
Oven Temperature
Indicator
Flashing
Indicator To
Alert You
A Temperature
Or A Time
Oven Function
Indicator
The Control Display is an easy
reference for using your oven control.
Below are descriptions of how the
Control Display works.
OVEN TEMPERATURE
INDICATOR -- This indicator has a
multiple purpose.
• Displays the temperature
• Displays an error code --
"ERR" - Ifthe oven temperature
indicator flashes "ERR", then you
have set an invalid time or
temperature.
• Displays Oven Problems -- If
your control flashes "F" and a
number or letter, you have
experienced an oven problem.
Please read the section on
F-CODES in your manual.
"ON" INDICATOR -- Will light
when the oven turns on.
OPERATION
indicetor To Let You
Know the Oven Has
Turned On
Location For The
- Time Of Day Clock,
Kitchen Timer,
Delay Start Time,
Or Oven Cooking
Oven Function
Indicator
SET INDICATORS -- The set
indicator will flash in combination with
an oven function or timed function to
let you know you need to set a time or
temperature. Example: "SET" and
"RAKE" will Flash to let you know
you need to set the bake temperature.
TIMED INDICATOR -- Displays
the time of day, cooking time, delay
start time, cleaning time or the time
set on the Kitchen Timer,
• Displays a reminder code --
"PUSH START"-If the time
indicator flashes the word "PUSH
START", then you need to press
the START pad to activate your
setting.
OVEN FUNCTION INDICATORS
Displays which oven function has
been set, when the oven door locks,
and if the function is delayed.
7
OPERATION
ClockandTimer
The clock must be set for the correct
time of day before a delayed oven
function can work properly. The time
of day cannot be changed during a
timed oven function, but can be
changed during a bake or broil
function.
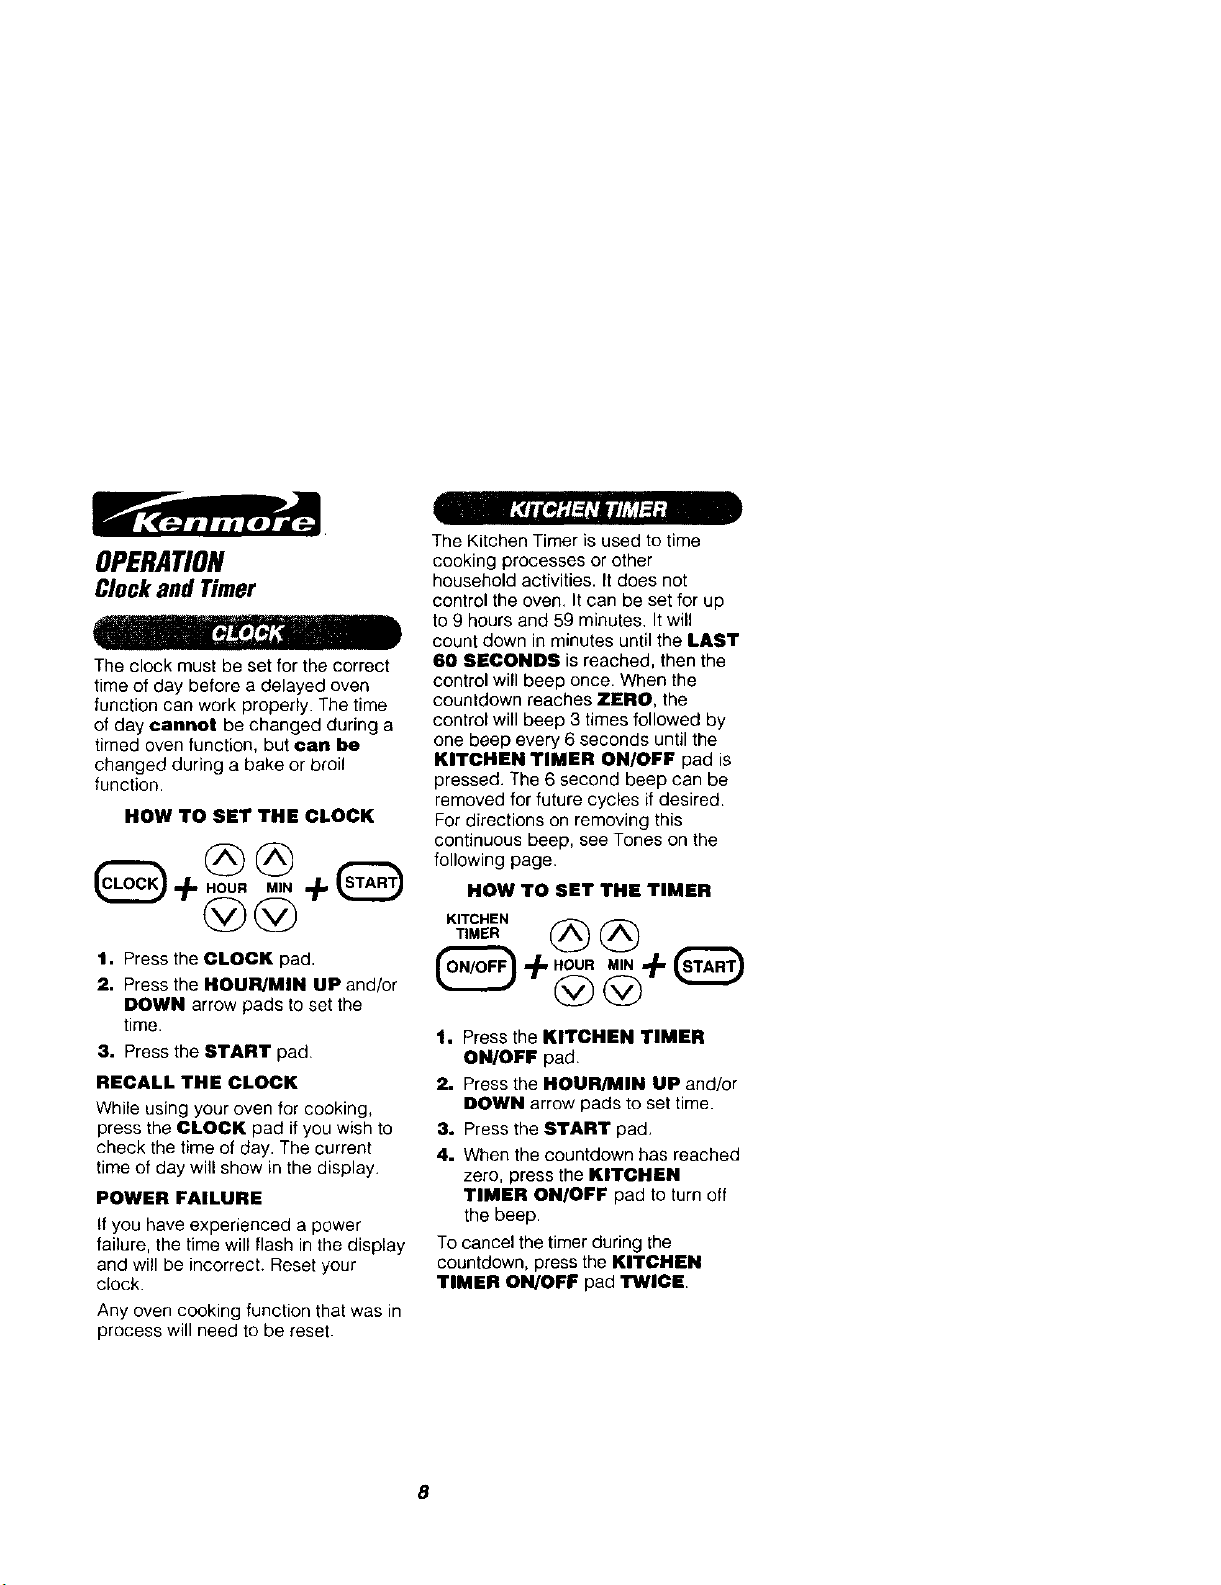
HOW TO SET THE CLOCK
1. Press the CLOCK pad.
2. Press the HOUR/MIH UP and/or
DOWN arrow pads to set the
time.
3. Press the START pad.
RECALL THE CLOCK
While using your oven for cooking,
press the CLOCK pad if you wish to
check the time of day. The current
time of day will show in the display.
POWER FAILURE
tf you have experienced a power
failure, the time will flash in the display
and will be incorrect. Reset your
clock.
Any oven cooking function that was in
process will need to be reset.
The Kitchen Timer is used to time
cooking processes or other
household activities. It does not
control the oven. It can be set for up
to 9 hours and 59 minutes. It will
count down in minutes until the LAST
68 SECONDS is reached, then the
control will beep once. When the
countdown reaches ZERO, the
control will beep 3 times followed by
one beep every 6 seconds until the
KITCHEN TIMER ON/OFF pad is
pressed. The 6 second beep can be
removed for future cycles if desired.
For directions on removing this
continuous beep, see Tones on the
following page.
HOW TO SET THE TIMER
1. Press the KITCHEN TIMER
ON/OFF pad.
2. Press the HOUR/MIN UP and/or
DOWN arrow pads to set time.
3. Press the START pad.
4. When the countdown has reached
zero, press the KITCHEN
TIMER ON/OFF pad to turn off
the beep.
To cancel the timer during the
countdown, press the KITCHEN
TIMER ON/OFF pad TWICE.
8
 Loading...