


CONTENTS
SAFETY
USE AHD CARE
Your Range and Its Features ................................................6
Cooktop Cooking .............................................................7, 8
Range Control ......................................................................9
Clock & Timer ............................................................................t0
Oven Cooking ......................................................... 1t, 12, t3
Broltin g ...................................................................................14
Self-Clean Cycle ..........................................................15, 15
Cleaning Tips .............................................................17, 18
Removabte Parts ........................................................19, 20
Removal of Peckag|ng Tape .............................................20
What to Do Before Calling for Service ............... 21, 22
Temperature Adjustments ...............................................23
__ODELS 46745, 46749
46756, 46755
46759
Recyc;e_Paper
@
AL
229C402OP0t 9-3 SR10222

STABILITY DEVICi
pulled as tight as possible and that there is no excess
slack In the chain after chain is attached to the
bracket.
• ALL RP,tGES
CAN TIP
° iNJURY TO PERSOI'_S
COULD RESULT
• INSTALL ANTI-TIP
DEVICES PACKED
WITH RANGE
• SEE INSTALLATION
iNSTRUCTiONS
REMOVE ALL PARTS FR@_ THE PLASTIC BAG
ATTACHED TO THE BACK @F THE RAHGE A_D
SAVE PACKAGING TAPE,
1) Before placing range in the counter, notice the loca-
tion of the stability bracket which is already attached
to the back of the range. This location shouid work
for most Installations. However, it may be more
convenient to hook the stability chain to the unit
when the stability bracket isattached to the upper set
of holes in the back of the range (See Fig. 1). The
upper set of holes are intended for use with a
backsplash kit. Ira backsplash kit is being used, the
stability bracket can be relocated and put on at the
same time as the backsplash kit. if the backsplash is
not being used, make sure that there are no struco
tural supports for the countertop which will interfere
with the stability bracket when located in the upper
set of holes.
2) Fasten one end ofthe stabiltychain to the floor or the
wall with the long screw and washer supplied (See
Fig, 2), Make certain the screw is going into the wall
plate at the base of the wall or one of the studs in the
base of the wall (See Fig. 3). Whether you attach the
chain to the wall or floor, be certain that the screw is
in at least 3/4" thickness of wooc{ other than base-
board and that there are no electrical wires or plumb-
ing in the area in which the screw could penetrate.
Attach the stability chain in a location which will
allow the chain to be in line with the bracket side to
side as much as posstbie when attached to the unit.
Test to see if the chain is securely fastened by
tugging on the chain.
3) Temporarily attach the loose end of the chain to the
rear of the countertop with the tape from the packag-
ing (See Fig. 4).
4) Place the range in the counter cutout leaving just
enough room between the back of the range and the
wall to reach the stability bracket.
5) Hook the loose end of the chain onto the bracket by
slipping the nearest link of the chain into the slot in
the bracket (See Fig. t), making sure the chain Is
_'_r_te 1o lip over,
6) Side the range all the way back Into the counter.
Once the range is pushed back In place, there wtl! be
a small amount of slack in the chain. This IsnormaL
t1<' SACKGUARD
BRACKET
OPTIONAL,
LOCATION
CHAIN --
BRACKE]
FACTORY
LOCATION
Opposite side used for Gasmodels)
LONG
SCREW _'_
CHAIN
:ii
l_1._.',. (some models)
MAiNBACK
(Electric model shown;
CHAIN
WASHER
AND
SCREW-
CHAINq
TAPE
WALL
PLATE
J
Fig. 1
Fig° 2
Fig. 3
Fig, 4
NEINS28-1

!
Y@@
Teach children notto playwith range
knobs or any other part of the range.
Never leave children alone or unat-
tended where a range is in use.
¢IITtOt!:
t_er_s of interest _o children
should not be stored in cabine_,s
above the range or on _he
backsplash of the range. Chi!.
dren climbing on _he range _o
reach items could _e seriously
_njured,
Never let anyone climb, sit or stand
on the open door or any other part of
the range, Their weight may make
the range tip over,
Never leavethe oven door open when
you are not watching the range,
2 NESAFO8-5

Always keep the range area clear
and tree from things that will burro
CAUTBOH:
Never store things in an
oven or near cooktop elements/
burners. These things may catch
fire and plastic items could melt,
Never use your range for warming
or heating a room. You could be
burned or seriously injured, Such
misuse could also cause damage to
the range.
Never wear loose clothing when
using your range. Such clothing
could catch fire,
Never let pot handles stick out
over the front of the range. Turn
handles in so that they cannot be
bumped Into. Keep the handles
away from other hot surlace ele-
n_ents/burners.
Never use a towel or other bulky cloth
as a potholder, Such cloths could
catch fire on a hot element/burner.
Never leave cooktop elements/
burners unwatched at high heat
settings. Bollovers cause smok-
ing and greasy splllovers could
catch fire.
3 NESAF09_2

BASIC SAFETY PRECAUTIONS
ENSTRUCTIONS
Keep this book for later use.
Be sure your range is installed and grounded properly
by a qualified technician.
Always use dry potholders when removing pans from
the oven or cooktop. Moist or damp potholders can
cause steam burns.
Altways follow cleaning instructions In this book_
ARways keep the range and oven clean. Food and
grease are easy to ignite. Clean the range, oven and
vents regularly.
Clean Only Parts Listed In Manual.
CAUTnON: Do not store items of interest to
chindren in cabinets above a range or on the
backguard of a range. Children cmirnbing on a
range to reach items could be seriously injured.
Always keep combustible wall coverings, curtains, or
drapes a safe distance away from your range and oven.
Always keep dish towels, dish cloths, potholders and
other linens a safe distance away from your range.
Never store such items on your range.
Always keep the appliance area clear and free from
things that will burn (gasoline and other flammable
vapors and ,quids).
Never try to repair or replace any part of the range
unless instructions are given in this book. All other
work should be done by a skilled technician.
Never heat unopened food containers. Pressure
buildup may make container burst and cause Injury°
Never leave jars or cans of fat or drippings on or near
the range. Never let grease build up on your range. You
can keep grease fires from starting If you clean up
grease and spills after each range use.
Never try to move a pan of hot fat, especially a deep fat
fryer. Wait until the fat has cooled.
Never touch surface units, heating elements, or interior
surfaces of the oven. They may be hot even though they
appear dark In color°
Always keep wooden or plastic utensils and canned
food a safe distance away from your range.
Some cleaners produce nox-
ious fumes and wet cloths or
sponges could cause steam
burns If used on a hot surface.
COOKTOP SAFETY
Always use care when touching the cooktop_ Heating
elements could be hot enough to burn you even if they
are dark in color. The glass surface of the cooktop will
retain heat after the controls are turned off.
OnBy some kinds of glass or ceramic pans can be used
for cooktop cooking. Be sure that the pan you use will
not break when heated on the cooktop elements.
Never block free airflow through the oven vent. -
Do not ceok on brol_en cooktop, If cooktop Should
break, cleaning solutions and sptllovers may penetrate
the broken cooktop and create a risk of electrical shock.
Contact a qualified technician lmmedlately.
For rnejo_ sp_Dls -- Turn unit to LO; use dry paper
towels to wipe up major spills, and then use a razor
scraper (held ina potholder) to scrape major spills from
a hot cooking zone. DO NOT attempt further cleaning
until cooktop surface has cooled.
Choose pots and pans
...........................enough to cover the en-
tire cooktop element° This will cut down the risk of
setting potholders or clothing on fire with an uncovered
element and waste less energy.
_" with flat bottoms, large
OVEN SAFETY
]Place oven racks indesired position while oven iscool.
If rack must be moved while oven Is hot, do not let
potholder contact hot heating element in oven.
After broiling, always take the broiler pan out of the
range and clean it. Leftover grease in the broiler pan
can catch on fire next time you use the pan.
Always use care when opening oven door. t.et hot air
and steam out before moving food.
Never use aluminum foil to line drip bowls or oven
bottoms. Improper use of foil could start a fire.
Se=LF.CLe:AN SAFe:TY
H the self-cleaning mode enaifunctions, turn off
and disconnect the power supply. Have serviced by a
qualified technician.
Always remove broiler pan and other utensils from the
oven before a self-clean cycle.
Never rub, move, or damage the door gasket on self-
cleaning ranges° The gasket is essential for agood seal.
Never try to clean utensils, cookware or removable
parts of your range during a self-clean cycle.
Do Not Use Oven Cleaners-- No commercial oven
cleaner or oven liner protective coating of any kind
should be used in or around any part of the oven.
NESAF61

SAFETY UNSTRUCTIONS (continued)
READ AND UNDERSTAND
THIS JHFORMAT_ON NOW v,
Shoumd you ever need it, you will
=tot have time for reading.
COOKTOP GREASE FiRE
pan.v! Instead:
_ ever pick Up a fl_rrting
tightly fitting pan lid, baking soda or an
extinguisher.
1. Turn off the element.
2. Smother the fire with a
5e sure everyone in your home
knows what to do in case of fire.
OVEN FIRE--
DO NOT TRY TO MOVE THE PAN!
Never use water on a grease fire =
it will only spread the flames.
1. Close oven door and turn controls
off.
2. If fire continues, throw baking soda
on the fire, or use a dry chemical,
foam, or halon type extinguisher.
U_PORTANT SAFETY 1ROTtIC_:
The California Safe Drinking Water and Toxic Enforcement Act requires the governor of California to publish a list
of substances known to the state to cause birth defects or other reproductive harm and requires businesses to warn
customers of potential exposure to such substances. The fiberg lass insulation in self-cleaning ovens gives off avery
small amount of carbon monoxide during the cleaning cycle. E,.:posure can be minimized by venting with an open
window or using a ventilation fan or hood,
5 NESAF60-2

VARIABLESIZE COOKING ZONE
(Choose 6" or 9" diameter cooking zone)
(See page 7)
HOT SURFACE
INDICATOR LIGHT
(See page 8)
RANGE CONTROL
(See page 19)
OVEN VENT
(May get hot
during oven use;
DO NOT block vent)
COOKING ZONE
(See page 7, 8)
COOKTOP INDICATOR LIGHT
(Glows when any
cooking zone is on)
(See page 7)
COOKTOP CONTROl
(See pages 7, 8)
SWITCH
(For variable size
left rear cooking zone I
(See page 7)
REMOVABLE OVEN RACKS
(See page 19)
NAME AND NUMBER
PLATE LOCATION
REMOVABLE
STORAGE DRAWER
(See page 19)
OVEN LIGHT SWITCH
SELF-CLEANING
OVEN INTERIOR
(See pages 15-17)
,OVEN BAKE ELEMENT
OVEN DOOR GASKET
(See page 17)
REMOVABLE
OVEN DOOR
(With Window)
(See page 19)
BROILER PAN and GRID
(See pages 14 & 17)
6 NESIF08-1

TO START THING COOKING
COOKTOP COOKBNG
Before you usethecooktop for the first time, clean itwith
cooktop cleaner. This wilt leave a protective coating of
silicone. The cooking zones are shown by the outlines
on the glass surface of the cooktop.
COOKING ZONES
The sign near each cooktop control knob shows which
element Is turned on by that knob.
I i I I
COOKTOP GUEDE TO BASIC SETTINGS
• To use the large 9" cooking area, push to turn the
control knob to desired setting and push In the top
portion of the rocker switch next to the control knob.
. To use the small 6" cooking area, push to turn the
control knob to desired setting and push In the
bottom portion of the rocker switch°
9"ZONE -- (_)
6" ZONE -- o
"Hi"
Used for quick starts, such as
bringing water to a bollo
"MED=HI"
Used for frying and rapid boiling.
O0 ®0 Oe O0
@0 O0 O0 O@
Left Left Right Right
Front Rear Rear Front
_'o operate cooktop contro=s:
2. Set on or between
marks for desired
heat.
The indicator light
will glow when any
heating element is
turned on.
The left rear element has two cooking zones =
DUEL COOKING ZONE
(LEFT REAR ELEMENT ONLY)
9" COOKING ZONES
='MED"
Used for slow boil and saut(£ing,
Used for cooking foods in small
amounts of water.
"LO"
Used for steaming foods or keep-
ing foods at serving temperature.
When acooking zone surface is activated, coils beneath
the zone radiate heat through the glass to the utensil.
The red glow of the coils will be visible through the
glass, It will take the cooking zone surface a few
moments to heat up, The cell cycles on and off to
maintain your selected control setting,
See the Cleaning Tips for important information
about maintaining your cooktop,
@
COOKING ZONES
NEMTC69

TO START THINGS COOKING (conto)
For best cooking results and energy efficient operation,
you should use metal pans that are flat on the bottom.
Match the size of the pan to the size of the cooking zone.
The pan should not extend over the edge of the cooking
zone more than 1".
HeM5 CANNING TIPS
in surface cooking of foods other than canning, the use
of large-diameter pots (extending more than 1" beyond
edge of cooking zone) is not recommended. However,
when canning with water-bath or pressure canner,
large-diameter pots may be used. This is beck.use
bolltng water temperatures (even under pressure) are
not.harmful to cooktop surfaces surrounding cooking
zones.
HO_._EVER_ DO _OT USE L_GE DIA_,_ETER C_I_
_I_F_S OR O'_'I;'_ER _RG_ D_TER PO'1r_; FOR
FRYRI_G OR E_O_L_G FOODS OTHER THAH WATER.
_vlost syrup or sauce rni×tures -- and all types of _rying
_cook at temperatures much htgher than boiling w_ter.
Such temperatures could eventually harm cool,top sup
faces surrounding cooking zones.
OBSERVe- FOLLO , NG POINTS
CANNING
1. Bring water to boil on HIGH heat, then after boiling
has begun, adjust heat to the lowest setting which
maintains the boil (saves energy and best uses
cooking zone).
2. Be sure canner fits over center of cooking zone. If
your range does not allow canner to be centered on
cooking zone, use smaller diameter pots for good
canning results.
3. Flat-bottomed canners give best canning results. Be
sure bottom of canner is flat or slight indentation fits
snugly over cooking zone. Canners with flanged or
rippled bottoms (often found In enamelware) are not
recommended.
Note: A slight odor is norn'_l when a new
cooktop is used for _he first time. it is caused by
tLheheating of new parts and insula_ting materials
_nd wiii disappeaw in a short time.
COOkiNG
We recommend that you use only a flat-bottom wok_
They are available at your local retail store.
4. When canning, use recipes from reputable sources.
Reliable recipes are available from the manufacturer
of your canner; manufacturers of glass jars for can-
ning, such as Bail and Kerr; and the United States
Department of Agriculture Extension Service.
5. Remember, In following the recipes, that canning Is a
process that generates large amounts of steam. Be
carefulwhilecanning to preventburns from steam or hesL
NOTE" If your range is being operated on low power
(voltage), canning may take longer than expected, even
though directions have been carefully followed. The
process may be improved by:
(1) using a pressure canner, and
(2) beginning with hot tap water when heating
larger quantifies of water.
NEMTC61-1

RANGECONTROL
CANCELS BAKE, STATUS TIMER
BROIL OR DISPLAY DISPLAY
CLEAN OPERATION _ 1
PRESSTO TURN
_MER ON AND OFF
PROGRAM CLOCK /
SET AUTOMA_C
OVEN OPERA_ONS
Your range Is controlled with atouch, You now have the
ease of setting the following operations:
CLOCK TIMER
BAKE DELAY BAKE
BROHL CLEAN
DELAY CLEAN
The UP or DOWN arrow is used to set an amount of time
or change the temperature you want to use. By pressing
and holding down either pad the numbering will change
quickly. By pressing and releasing either pad the
numbering will change slowly.
TEMPERATURE
DISPLAY
FUNCTION
DISPI.AY
UP ARROW PAD
(INCREASESTIME
OR TEMPERATURE)
DOWN ARROW PAD
(DECREASES TIME
OR TEMPERATURE)
TOHE$:
The end-of-cycle tone will sound at the end of timer use
and automatic oven functions. The end-of-cycletone is
3 short beeps followed by 1 beep every 6 seconds that
repeat until you press any pad except the UP or DOW'N
arrow key. If you would like to eliminate the repeating
beeps, push and hold CLEAR/OFF for ten seconds. To
return the 1 beep every 6 seconds, push and hold
CILEAFJGFF for 10 seconds.
FoCODE:
D;$PLAY:
Once you have programmed your control for any
operation, you can display the setting by pressing the
appropriate pad. For example, if you _re using the
TI_'_ER and want to see the time of day, press CLOCt_..
'The display will show the time of day.
NOTE: You cannot set BAIZE, BROHL or COOK
TiME while the oven door is in the locked
position, _f you _ry, the word"DOOR" will
appear in the display, The oven door
lock is to be used for Self-Cleaning only,
tf the time display beeps continuously and flashes an
"F" followed by a number, you have a function error
code. Note the number after the "F". Press CLEAR!
OFF. Allow oven to cool for I hour. if problem repeats,
disconnect all power to the range and call for service.
Advise your service technician of the number following
the "F" in the display.
PRESS
9 NCERC18-3

T@ ©LO©K:
I° Press the CLOCK pad, _$1_T" and
2. Press either the IUtPor DOWN arrow pad,
until the display shows the correct time of
day.
The UP arrow will change numbering forward, such as
1, 2, 3. The DOWN arrow will change numbering
backwards, such as 3, 2, I.
The clock win autemat_ca_lly start within one
m_nu_e; or you may press _he cl_ock pad for
_ntrnediate s_art,
TO SET THE TiMeR:
The timer does not control oven operations, such as
bake, broil, clean or any delay function. It allows you to
set an amount of time and alerts you when that time is up.
An example would be timing a three minute egg° The
maximum amount of time you may set is 9 hours and 55
minutes.
TO BESET TI ER= =
When you are setting the timer, if ym_ pause more than
4 seconds while pressing either the UP or DO,iN arrow
pad, _'TE_" wiiist_p _ashing _nthedlspiayand the
_irne_ '_,_,tli_L_tomaticaliy e_artto count down, If this
sheu_d happen just press the T_ER O_IOFF p_d and
you will be abte to continue setting your time.
TO CANC tL THe- TB Fh
While the timer is counting down, press and hold down
theTl;M_R ONIOFF pad for 4seconds, or untit_t'l_R"
quits flashing and the current time of day returns to the
display.
1. Press the TIMER ON/OFF pad. "SET"
and "TIMER" will flash and "HR" wil!
show in the display.
2. Press either the UP or DOWN arrow pad
to set the amount of time you want.
The timer will automatically start to count down within 4
seconds.
3. When the timer counts down to zero a
tone will sound. Press the CLOCK pad to
return to the current time of day°
10 NCCTL44-1

OVEN COOKING
GENERAL RULES
When cooklng a food for the first tlme In your new
oven, use time given on recipes as a guide.
After you have used your oven for awhile, if you feel
your oven should be hotter or cooler, you can adjust
ityourself. SeeTEMPERATURE ADJUSTMENTS
In this manual.
• NO PEEKING-- Opening the door too often to check
food during baking will allow heat loss and may
cauS_poor baking results.
• Theremaybesomeodorwhentheovenisfirstusedo
This is caused by the heating of new parts and
Insulation.
Do not cover an entire oven rack with foil. The foli
can block normal heat flow and cause poor baking
results° Do not place any foil directly above the bake
element. Foil used on the oven bottom under the
element may damage the oven surface, therefore, it
should not be used.
PREHEATING
When recipes require preheating, have food nearby
before you open the oven door. tf the oven door is
allowed to remain open for more than a brief time,
the preheat temperature will be lost.
Let the oven preheat thoroughly before cooking
baked productso WatchforthePreheatindicator
Light to go off or listen for a preheat notification
tone. If your oven is not equipped with either of
these, preheat for 10 minutes before youput food tn
the oven.
BAKEWARE
• Cookies should be baked on flat cookie sheets
without sides to allow the air to circulate properly.
o i!
,--
YV "-
Cakes, muffins, and quick breads should be baked
in shiny pans --to reflect the heat -- because they
should have a light golden crust. Yeast breads and
pie crusts should be baked in glass or dull (non-
shiny) pans -- to absorb the heat -- because they
should have a brown, crisp crust.
Be sure the underside of the pan Is shiny, too,
Darkened undersides will absorb the heat and may
cause over-browning on the bottom of your food.
Oven temperatures should be reduced 25 degrees
betow recommended temperatures ifexterior of pan
has a dark non-stick finish, darkened by age or when
baking in oven-proof glass.
11 NEOVC58-2

BAKIHG:
• Always follow recipe carefully°
. Measure Ingredients properly°
. Use proper pan and rack placement to obtain the
best cooking results°
NOTE:
The top position is only a guide, it cannot be used
as a rack position,
RACK POSITIONS
NOTE: YOUR OVEN HAS FOUR (4)
RACK POSITIONS.
Place pans on the oven racks with 1"to I 1/2" of air
space on all sides of each pan. Avoid overcrowding
the oven,
....... TmMED BAKING:
iw
-4
-3
-2
-1
The oven will start to heat automatically. You will see
100 degrees showing tn the upper right corner of the
display. As the oven heats this temperature wilt change
until it reaches your selected temperature, then a tone
will sound.
3_ When baking is complete, press the
CLEAR/OFF pad_
TO SET YOUR OVEN TO BAKE FOR
A SET AMOUNT OF T_ME AND TURN
OFF AUTOMATICALLY,
1. Press the BAKE pad.
2. Presseitherthe UPorDOWNarrowpad,
to set the temperature you want to use_
3. Press the COOK TaME pad.
40 Press either the UP or DOWN arrow pad,
to setthe amount of time you want foods
tocook, Besure you includeyour preheat
time when setting this amount of time.
If you pause between steps when you are setting this
function, the control will beep. This is normal. The
control is letting you know you need to continue,
o
When baking several items, stagger pans so that no
pan is directly above another,
m
Pans too close to each other, to oven walls or to the
ovenbottom blockthe free movement of air. Improper
air movement causes uneven browning and cooking.
TO S_T BAKe::
I, Press the BAKE pad.
2. Press either the UP or DOWN arrow pad.
The last temperature used will show in the
display. Use the UP arrow pad to increase this
temperature or the DOWN arrow pad to decrease this
temperature until you reach the temperature you prefer
tO use.
You should consider that food will continue to cook
after control turns OFF unless you remove the food
immediately.
You will hear a fan. This is normal. The fan may
Fan:
continue to work even after the oven has been
turned off.
12
NEOVC59-2
TO SET YOUR OVEN FOR A DELAYED
START AND AUTOMATIC STOP
While setting this operation you will not need to
calculate when the oven wilt turn on; the control will
do this for you. You will need to set the following:
1. Temperature 2. Cooking Time 3, Stop Time
1, Press the BAKE pad.
2. Press the UP or DOWN arrow pad to
select the temperature you want_...............
3. Press the COOK TiME pad,
4. Press the UP arrow to select how long
you want food to cook. Be sure to
include your preheat time,
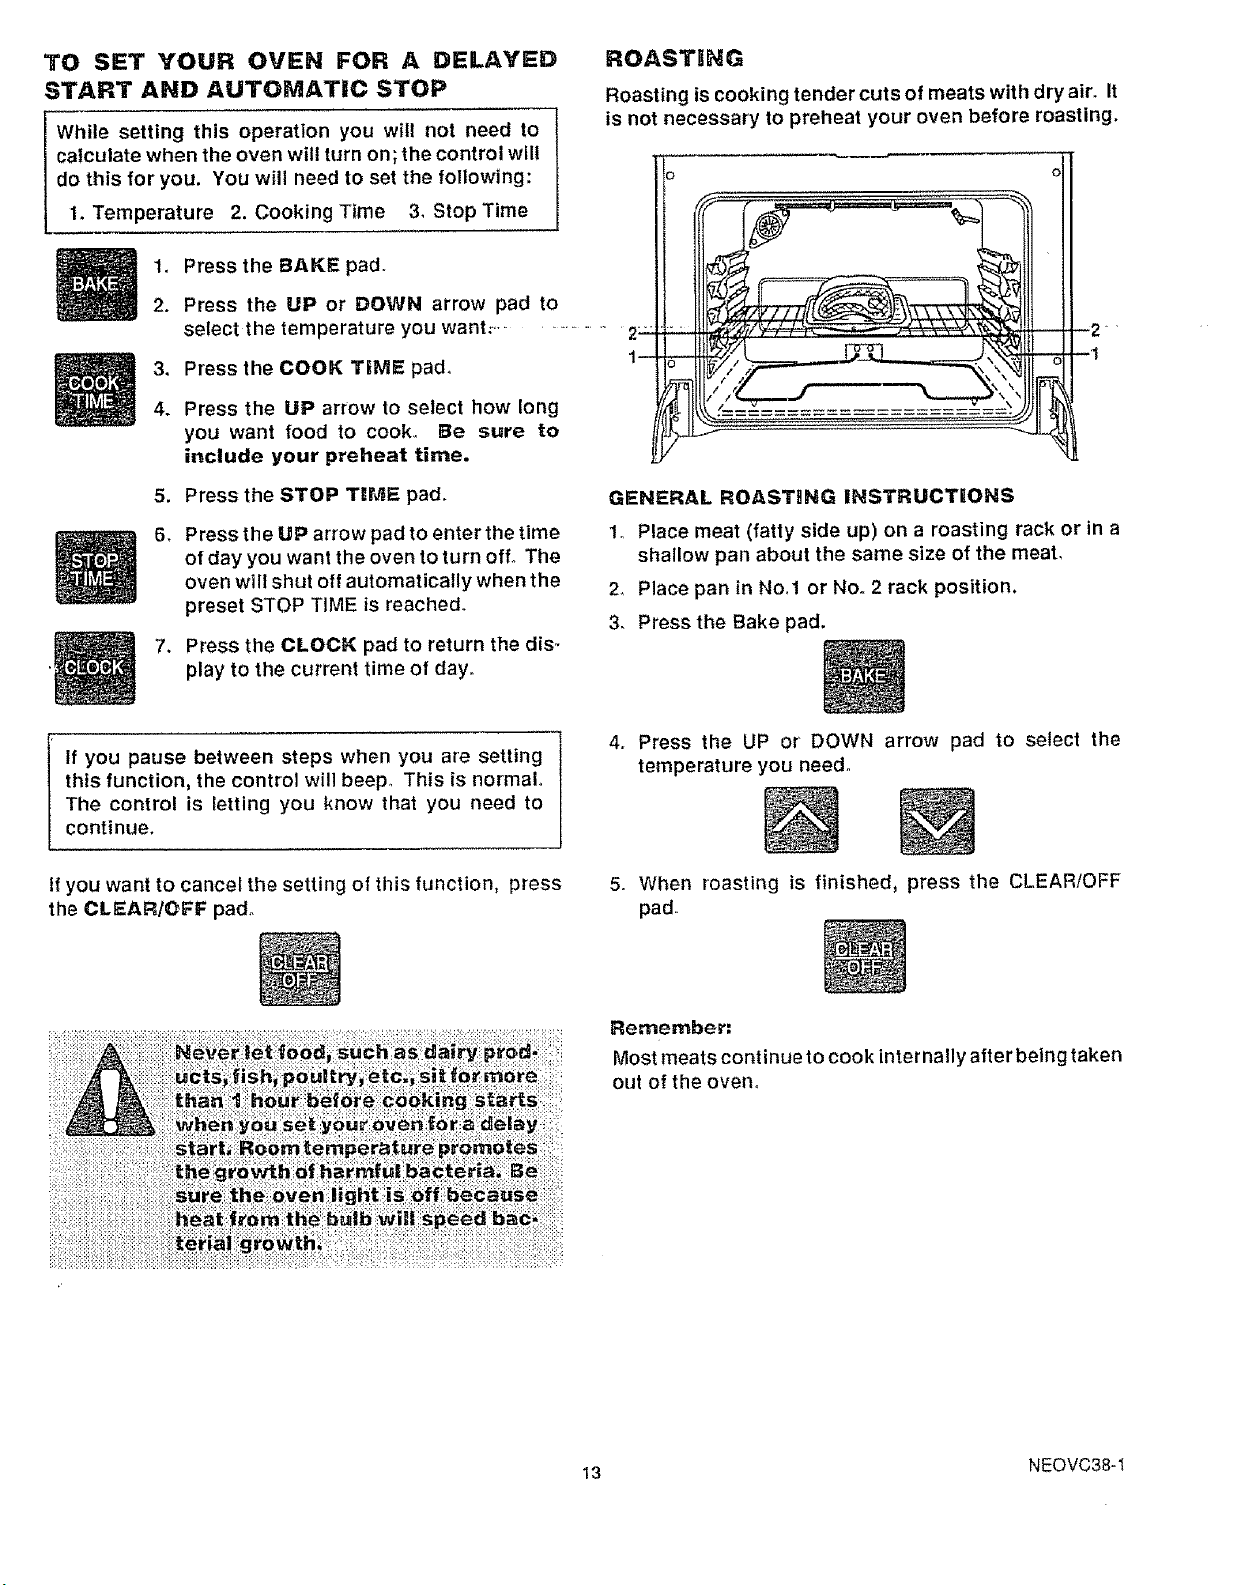
ROASTING
Roasting is cooking tender cuts of meats with dry air, It
is not necessary to preheat your oven before roasting.
5. Press the STOP TIME pad,
6, Press the UP arrow pad to enter the time
of day you want the oven to turn off, The
oven will shut off automatically when the
preset STOP TIME is reached.
7. Press the CLOCK pad to return the dis_
play to the current time of day,
If you pause between steps when you are setting
this function, the control will beep,, This is normal,
The control is letting you know that you need to
continue.
If you want to cancel the setting of this function, press
the CLEAR/OFF pad°
GENERAL ROASTING INSTRUCTIONS
1o Place meat (fatty side up) on a roasting rack or in a
shallow pan about the same size of the meat,
2_ Place pan in No.t or Nor 2 rack position.
3_ Press the Bake pad.
4. Press the UP or DOWN arrow pad to select the
temperature you need.
5. When roasting is finished, press the CLEAR/OFF
pad.
Remember:
Most meats continue to cook internally after being taken
out of the oven°
13 NEOVC38-I
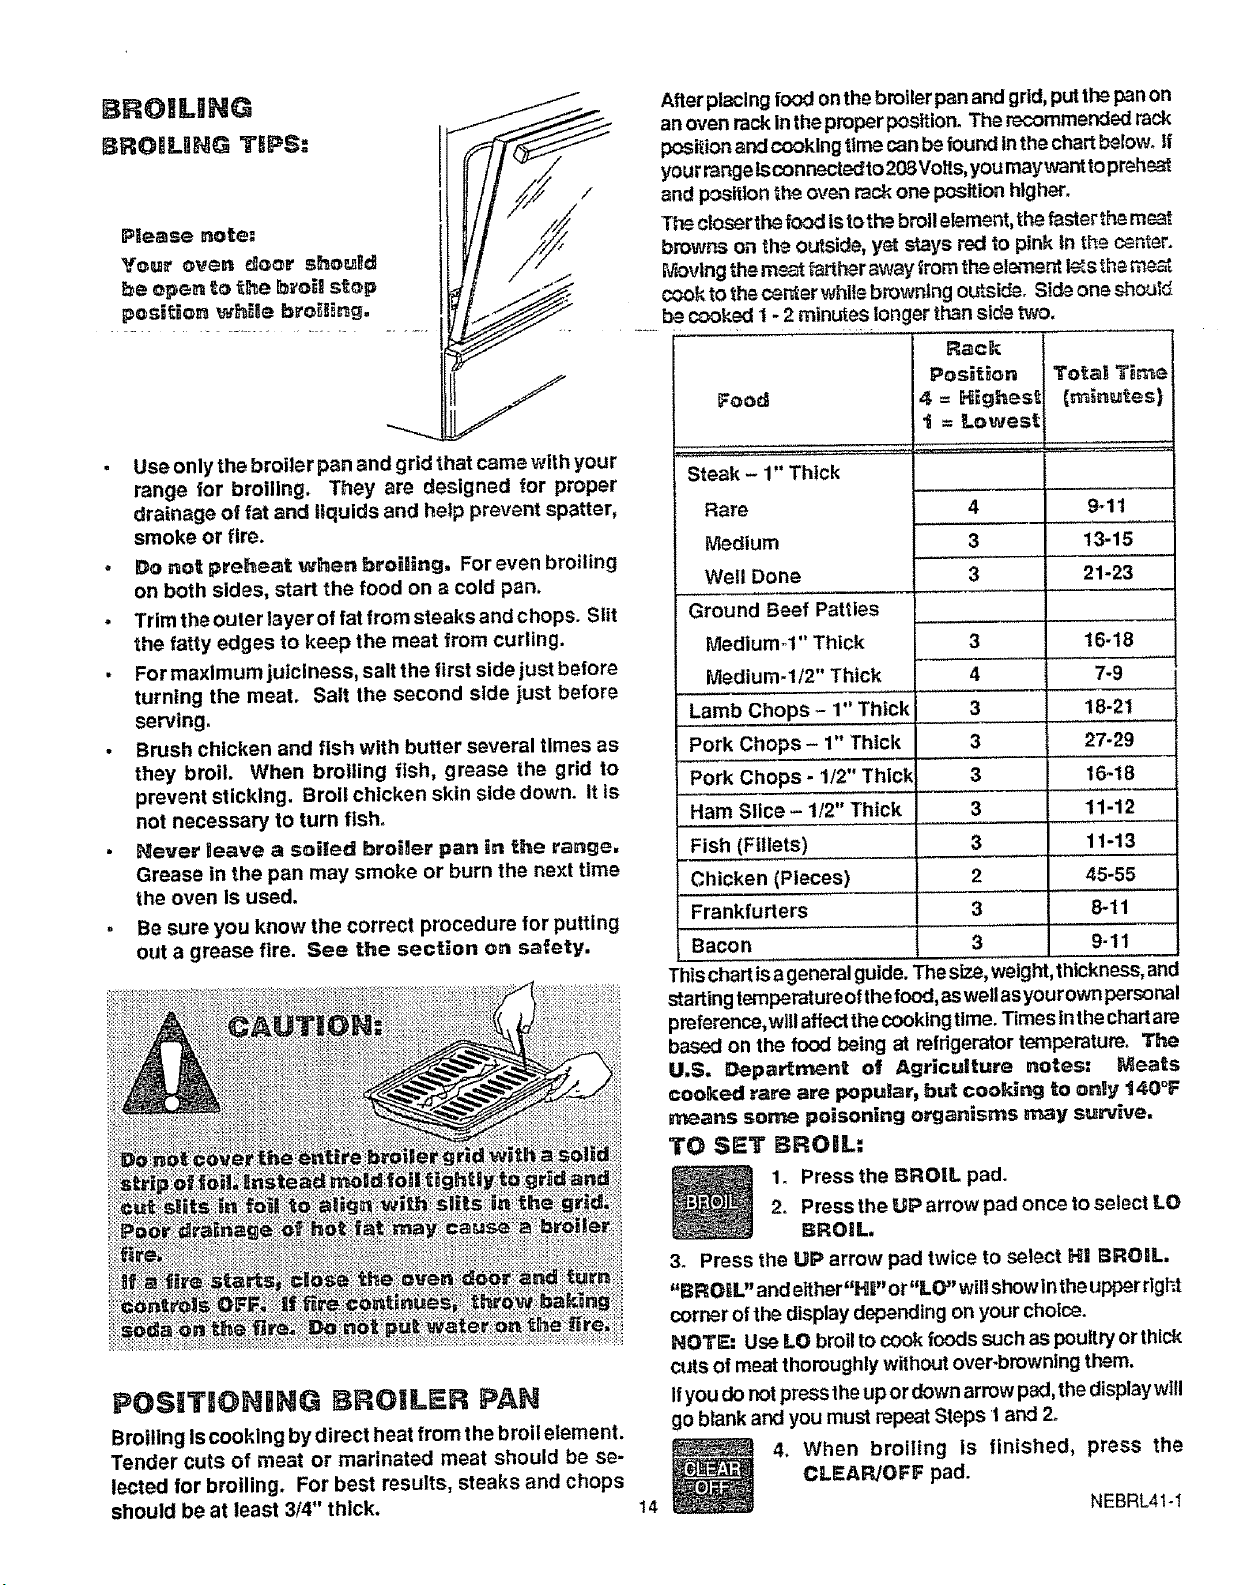
BRO|LBNG
BROHL_NG TBPS:
Your oven door should
posi_ioe_ whEle brogl_ng,
After placing food onthe broiler pan and grid, put tl_ pan on
anoven rack Inthe proper position. The recommended rack
position and cooking ttrnecan be found in the chart below° if
your range Isconnected to 208Volts, you rnaywant topreh_='_
and p_sitfon _heoven rack,one pc_ition higher.
The closerth_food is tothe broil element, the faster _h_me_
browns on the outside, yst stays red to pink in the center.
_oving _hem_"t Partheraway _romthe element I_sthe me.='-;
cookto the centerwhll_ browning outside. Sfdeone shoul_
.... b_ c_kad I - 2 minutes longer than side t'v'_.
R_zck
Position Tote| Ti_e
Food 4 = H_ghes_ (_nu_es)
t = Lowest
Use only the broiler pan and grid that came with your
range for broiling. They are designed for proper
drainage of fat and liquids and help prevent spatter,
smoke or fire.
o Do not preheat when broiling. For even broiling
on both sides, start the food on a cold pan.
• Trim the outer layer of fat from steaks and chops. Slit
the fatty edges to keep the meat from curling.
• For maximum juiciness, salt the first side just before
turning the meat. Salt the second side just before
serving°
• Brush chicken and fish with butter several times as
they broil. When broiling fish, grease the grid to
prevent sticking. Broil chicken skin side down. it is
not necessary to turn fish.
Never _eave a soiled broiler pan in the range.
Grease in the pan may smoke or burn the next time
the oven IS used.
° Be sure you know the correct procedure for putting
out a grease fire. See the section on safety.
POSiTiONiNG BROILER PAN
Broiling Iscooking by direct heat from the broil element.
Tender cuts of meat or marinated meat should be so-
lected for broiling. For best results, steaks and chops
should be at least 3/4" thick.
Steak - 1" Thick
Rare 4 9-11
Medium 3 13-15
Well Done 3 21-23
Ground Beef Patties
Medium -1" Thick 3 t 6-18
Medium-I/2" Thick 4 7-9
Lamb Chops 1"Thick 3 18-21
Pork Chops- 1" Thick 3 27-29
Pork Chops - 1/2" Thick 3 16-18
Ham Slice - 1/2" Thick 3 11-12
Fish (Fillets) 3 11-13
Chicken (Pieces) 2 45-55
Frankfurters 3 8-11
Bacon 3 9-11
Thischart is a general guide. Thesize, weight,thickness, and
startingtemperature ofthefood,as wellas yourown personal
preference,willaffect the cooking time. Timesinthe chartare
based on the food being at refrigerator temperature. The
U,S. Depa_ment of Agriculture notes; Meats
cooked rare are popular, but cooing to only "i40°F
wv_ans some poisoning organisms _y survive.
TO SET BROIL:
1o Press the BROIL pad.
2o Press the UP arrow pad once to select LO
BROIL.
3_ Press the UP arrow pad twice to select H! BROIL.
BROIL andetther HR or LO' wlllshowintheupperrlght
corner of the displaydepending on your choice.
NOTE: Use LO broil to cook foods such as poultry or thick
cuts of meat thoroughly without over-browning them.
Ifyou donot press the up or down arrow pad, the display will
go blank and you must repeat Steps I and 2o
4. When broiling is finished, press the
CLEAR/OFF pad.
14 NEBRL41-1

EFORI A CL - H ©YCL
1. Remove the broiler pan and grid, oven racks, all
utensils and any foil that may be in the oven. Do not
try to clean utensils or any other objects in the oven
during a self-clean cycle. Jf oven rac_:s are left _n
_he range durlng a c_ean cycBe, _;hey wiGl_rke_
Eose theiD' luster and become hard to slide, n_
yeu choose to Heave the racks _rt the ouen_ you
can polish _ghe edges of _he raC_S _,_ith s_eel
wool and apply a small _rnount of vegetablle o_R
to the rack edges after _he seUf.cle;_n cycle,
This w_ll make _he r_c_s _s_er _o sli_e.
2. Soil on the oven front frame, under the front edge of
the cooktop, the door liner outside the door gasket
and the front edge of the oven cavity (about 1" into the
oven) will not be cleaned during a clean cycle (see
t_lustration below). Clean these areas by hand before
starting a clean cycle.
Use hot water with a soap-filled steel woo! pad° We
recommend a cleanser such as 'Soft ScrubS0' brand
or a similar cleaning product to keep white surfaces
looking clean and new. After cleaning, rins_ wetl to
help prevent a brown residue *tom forming when the
oven Is heated. Buff these areas dry with a dry cloth.
Please _oLe:
The €_oor _aske_ _s designed _o have a 5"oS" _p
_ _he _e_ _ the _v_n _e_r. This is _o _zi_ow
for proper a_r c_rcu_a_o_.
DOOR PANEL GASKET
DOOR LINER J_
1oPushtheCIL_;_pad. Thedisplaywillshow"CL5AN",
"T_5", and (....).
OVEN LIGHT
To wolong the life of the bulb, be sure
the oven light is OFF during Seff-Clean. FRONT
DOOR
DOOR LINER
3. Wipe up heavy spillovers on the oven bottom, Too
much soil may cause smoking during the clean cycle,,
4o Do not rub the door gasket. The fiberglass materia! of
the gasket has an extremely low resistance to abrasion.
An intact and well fitting oven door gasket is essential
for energy efficient oven operation and good baking
results. If you notice the gasket becoming worn,
frayed or damaged in any way or if it has become
displaced on the door, you should replace the gasket.
FRAME
2_ Press the UP or DOWN arrow pad to select the
amount of time you want the oven to clean. The
normal cycle is 3 hours, but you can choose between
2 and 4 hours.
You Can press the STOP T_._ pad to see the time of
day the clean cycle win be finished. Push the CLEAN
pad to return to the countdown°
15
(Self-Clean continued on next page l )
NESCL64-1

(Self-Clean continued, __)
WHEN A CLEAN CYCLE I$
FINISHED:
1, Wait until the LOCK display goes out, The oven
temperature must drop below locking temperature
before the door can be unlocked.
WAIT UNTIL LO GOES OUT
AFTER A CLEAN CYCLE
After a clean cycle, you may
notice some white ash in the
oven. Just wipe it up with a
damp cloth or sponge.
If white spots remain, remove
them with a soap-filled steel
woo! pad° Be sure to rinse thoroughly with a vinegar
and water mixture, These deposits are usu_!ly a satt
re_tdde_h_tCannOt be removed by the clean cycle.
!_the oven is not ctean after one cle_.n cycle, the cycle
may be repeated.
TO IMTERRUPT ¢LI, .H CYCLi:
14 Push CLSAtPJOFF,
Follow instructions under "WHEN A CLEAN
CYCLE lie FINISHED."
TO SET A DELAYED
SELF=CLEAN CYCLE:
You will not need to determine when the oven will
turn on, when setting this function, The control will
do this for you. You will need to set the amount of
time you want your oven to clean (between 2 and 4
hours), and the time of day when you want the oven
to turn off,
1. Press the CLEAN pad, The display will
show "CLEAN", "TIME" and (---),
2. Press either the UP or DOWN arrow pad
to select the amount of time you want the
oven to clean, 'The normal cycle is 3
hours but you may choose between 2
and 4 hours.
3. Press the STOP TIME pad.
4. Press either the UP or DOWN arrow pad
tO select the time of day you want the
cycle to end and the oven to turn off,
Make sure your oven light is off during a self-clean cycle
to prolong the llfe of the bulb.
Q. If my range control is not working, can ! still self-
clean my oven?
A. No. Your RANGE CONTROL is used to program the
oven to start and stop the self-cleaning cycle,
Q. Can I use commercial oven cleaners on any part of
my self-cleaning oven?
A. No cleaners or coatings should be used on oraround
any part of thls oven.
Q. Can I clean the woven gasket around the oven door?
A, You cannot clean the woven gasket.
Q, Is it normal to hear "crackling sound" during clean-
Ing?
A, Yes. This is the metal heating and cooling.
Q° Why do I have ash left in my oven after cleaning?
A, Some types of soil will leave a deposit. It can be
removed with a damp sponge or cloth.
What should I do ifexcessive smoking occurs dud ng
a_
cleaning?
A.
This Is caused by excessive sol and you should
press CLEAR/OFF. Open windows to rid room of
smoke. Allow the oven to cool for at least one hour
before opening the door. Wipe up excess soi! and
reset the clean cycle.
O_
Should there be any odor during the cleaning?
A.
Yes, there may be an odor during the first few
cleanings. Failure to wipe out excessive soil might
also cause an odor when cleaning.
16 NESCL61-1
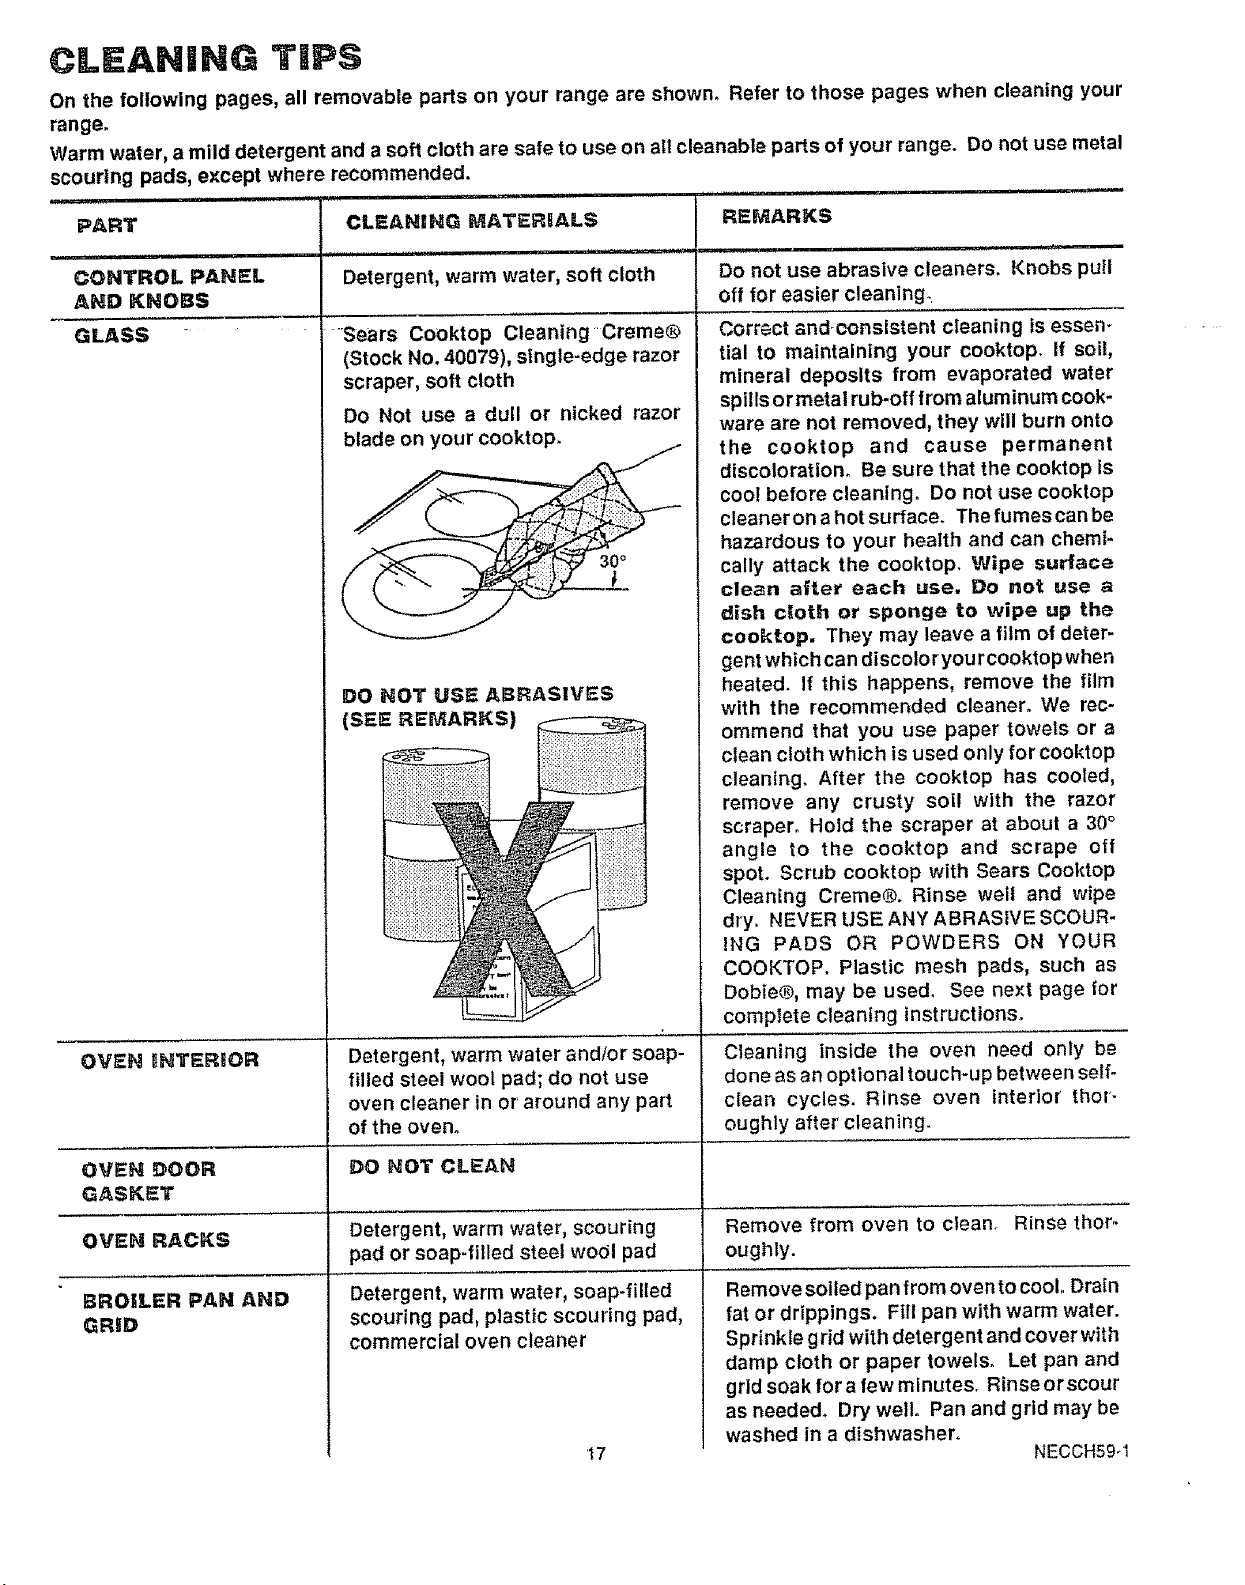
CLEANING TiPS
On the following pages, all removable parts on your range are shown° Refer to those pages when cleaning your
range°
Warm water, a mild detergent and a soft cloth are safe to use on all cleanable parts of your range. Do not use metal
scouring pads, except where recommended.
I,I,IN, I J i ,i,ii1.,.
PART CLEANINIG i_,_ATERIALS
..... i i ,1111,11111i
CONTROL PANEL
................................. ill ii ill ii
Detergent, warm water, soft cloth
AND KNOBS
GLASS
Sears Cooktop CleaningCreme®
(Stock No. 40079), single-edge razor
scraper, soft cloth
Do Not use a dull or nicked razor
blade on your cooktop.
DO HOT USE ABRASIVES
(SEE REMARKS)
REMARKS
Do not use abrasive cleaners. Knobs putl
off for easier cleaning_
Correct andconsistent cleaning is essen-
tial to maintaining your cooktop, if soil,
mineral deposits from evaporated water
spills or metal rub-off from aluminum cook-
ware are not removed, they will burn onto
the cooktop and cause permanent
discoloration. Be sure that the cooktop is
coo! before cleaning. Do not use cooktop
cleaneron a hot surface. The fumes can be
hazardous to your health and can chemi-
cally attack the cooktop. Wipe surface
clean after each use, Do not use a
dish cloth or sponge to wipe up the
cooktop, They may leave a film of deter-
gent which can discoloryourcooktopwhen
heated. If this happens, remove the film
with the recommended cleaner. We rec-
ommend that you use paper towels or a
clean cloth which is used only for cooktop
cleaning. After the cooktop has cooled,
remove any crusty soil with the razor
scraper° Hold the scraper at about a 30°
angle to the cooktop and scrape off
spot. Scrub cooktop with Sears Cooktop
Cleaning Creme®. Rinse welt and wipe
dry. NEVER USE ANY ABRASIVE SCOUR-
ING PADS OR POWDERS ON YOUR
COOKTOP. Plastic mesh pads, such as
Dobie®, may be used. See next page for
complete cleaning instructions.
OVEN_NTERIOR
OVEN DOOR
Detergent, warm water and/or soap-
filled steel wool pad; do not use
oven cleaner in or around any part
of the oven°
DO NOT CLEAN
Cleaning inside the oven need only be
done as an optional touch-up between self-
clean cycles. Rinse oven Interior thor.
oughly after cleaning.
GASKBT
OVEN RACKS Remove from oven to clean. Rinse thor-
BROILER PAN AND
GRiD
Detergent, warm water, scouring
pad or soap-filled steel wool pad
Detergent, warm water, soap-filled
scouring pad, plastic scouring pad,
commercial oven cleaner
oughly.
Remove soiled pan from oven to cool. Drain
fat or drippings. F|II pan with warm water.
Sprinkle grid with detergent and cover with
damp cloth or paper towels. Let pan and
grid soak for afew minutes. Rinse or scour
as needed. Dry well. Pan and grid may be
washed in a dishwasher.
'17
NECCH59_1

GLASS-CERAMIC COOKTOP CLEANING
Cleaning of glass.ceramic ceoktop is different
front cleaning a standard porcelain _inish,
To rrminf_in and protect the surface of your new
glass-cerantic cooktop follow these basic steps.
D_LY CLEAHiNG: ........
Use only Cook Top Cleaning Creme® on Glass-Ceramic.
For norntal_ light soil:
1. Rub a small amount of Cook Top Cleaning Creme®
onto soiled area using a damp paper towel. Wipe
until all soil and creme are removed. Frequent
cleaning leaves a protective coating which Is essen-
tial in preventing scratches and abrasions.
2_ Clean surface wtth Cook Top Cleaning Creme® after
each use.
For heavy, burned-on soil:
1. Apply a few drops of Cook Top Cleaning Creme® to
the cool, soiled area.
2_ Using a damp paper towel, rub creme Into theburned-
on area.
3. With the spill fn a cool area, use a dry paper towel to
remove any excess. Any spill remaining should be
left until the surface of the cooktop has cooled. Do
not continue to use the soiled cooking zone until all
of the spill has been removed_ Follow the steps
under Heavy Soil to continue the cleaning process.
GENERAL iNFORMATION:
As the Cook Top Cleaning Creme® cleans, it leaves a
protective coating on the cooktop surface. This coating
helps prevent buildup of mineral deposits (water spots)
and will make future cleaning easier. Dishwasher deter-
gents remove this protective coating andtherefore make
the cooktop more susceptible to staining_
3. Carefully scrape remaining sell with razor scraper.
Hold scraper at a 30 ° angle against the ceramic
surfacer
4. If any soil remains, repeat the steps listed above. For
additional protection after all soil has been removed,
polish the entire surface with the Cook Top Cleaning
Creme®.
NOTE: Using a razor scraper will not damage the sur-
face if the 30 ° angle is maintained. DO NOT
use a dull or nicked razor blade on your
cooktop. Store the razor scraper out of
reach of children.
SPECIAL CARE:
Sugar spills (such as jellies, fudge, candy syrups) or
melted plastic can cause pitting of the surface of your
cooktop unless the spill Is removed while still hot.
Special care should be taken when removing hot
substances. Follow these Instructions carefully and
remove soil while spill ts still hot.
1. Turn off all cooking zones affected by the spill.
Remove hot utensils.
2. Wearing an oven mitt, holdthe razor scraper at a 30°
angle to the cooklop and scrape hot spill to a cool
area outside the cooking zone.
PRECAUTIONS:
Most cleaners contain ammonia, chemicals and abra-
sives which can damage the surface of your Cooktop.
Use only the Cook Top Cleaning Creme® for
proper cleaning and protection oh your glass-
ceramic surface.
Ifyou slide aluminum or copper cookware across the
surface of your cooktop, they may leave metal mark-
ings which appear as scratches, if this should
happen, use the razor scraper and Cook Top Clean-
ing Creme® to remove these markings. Failure to
remove this residue immediately may leave perma-
nent marks.
If pots with a thin overlay of aluminum, copper, or
enamel are allowed to boil dry, the overlay may bond
with the glass-ceramic and leave a black discolora-
tion. This should be removed immediately before
heating again or the discoloration may be permanent.
Use of window cleaner may leave an iridescent film
on the cooktop° Cook Top Cleaning Creme® will
remove this discoloration.
Water stains (mineral deposits) are removable using
Cook Top Cleaning Creme® or full strength white
vinegar.
18 NECCH60-1

REMOVABLE OV N RACKS
BUMPED-IN
RACK GUIDES
Be careful not to scratch the oven finish when
installing or removing oven racks,
To install:
1. Set the raised back edge of the rack on a pair of rack
guides,
2. Push the rack in until you reach the bump in the rack
guide, then lift the front of the rack and push the rack
all the way in.
TO remove:
To remove=
1, Open the door to the stop position (see illustration),
2. Grasp the door at each side and lift up and off the
hinges, DO NOT lift the door by the handle.
NOTE: When the door is ='emoved and hinge arms
are at stop position, do not bump or try to move
_he hinge arms. The hinges could snap. back
causing an injure/to the hands or damage to the
porcelain on the front of the range. Cover the
hinges with toweling or empty towei roils while
wbrking in the oven area.
To replace:
1. Hold the door over the hinges with the slots at the
bottom edge of the door lined up with the hinges.
The hinge arms must still be in the stop
position,
2, Slide the door down onto the hinges as far as it will
go and close the door_
1. Pull the oven rack out, then up,
NOTE:
The racks are designed with stop locks, When
_he racks are pnaced correctly on the rack sup-
port and extended from the even, the stop !eck
prevents the racks from tilting when you are
removing food from the racks or pltaclng food on
_hem.
REMOVABLE OV H POOR
STOP BROIL POSITION
This drawer gives you space for keeping
cookware and bakeware. Plastics and f|ammable
mat'eria! shouRd not be kept in _his drawer.
Do not overload the storage drawer, if the drawer is too
heavy, it may slip off the track when opened. To open the
drawer, grasp the center of the handle and pull straight
out.
To remove: Pull drawer straight out and lift over the
guide stops,
To replace: Lift over the guide stops and slide drawer
into place.
HINGE
19 NEMNT94

REMOVABLE KNOBS
MOLDED
RIB
CLEAR GROOVE
IN STEM
Never touch the electricallly live collar on the
bulb when replacing it,
Electrical power must be shut off if you have to
replace a broken bulb.
1 Unscrew glass cover and remove.
2 Replace the bulb with a 40 watt appliance bulb.
3 Replace the cover.
Note: We recommend you use a 40 watt appliance butb
...... that ts no longer than 3 1/2"o
All control knobs may be removed for easy cleaning by
pulling the knob straight off the stem. Be sure that the
knob is in the OFF position before removal,
Hint: Slip a thin cloth (Suchas a handkerchlef) or a piece
of string under and around the knob edge and pull up.
Caution: Read these instructions carefully be-
fore replacing f_he knobs, Repiaclng the knobs
improperly w_ii damage the knobs and the spring
cilp on the stems, if this happens, the knobs will
fit loosely.
To replace the knob:
1. The knob stem has a groove in each side. The
groove on one side has a spring clip, The other
groove is clear (see illustration).
2. Check the inside of the knob and find the molded rib.
3. Replace the knob by fitting the molded rib inside the
knob into the clear groove on the stem.
Note: Be sure to replace knobs on correct stems from
which they came.
REPLACING THE OVEN LIGHT
REMOVAL OF PACKAGI G
TAPE:
When packaging tape is removed from your appliance,
you may find some adhesive still on the product. To
remove the adhesive and assure you do not damage the
finish, use an application of household liquid
dishwashing detergent, mineral oil, orcooking oil. Apply
withasoft ctoth. DO NOTuseaplastlcpadorequivalent.
Wipe dry and then apply an appliance polish to thoroughly
clean and protect the surface. This procedure is also
safe for the face of microwave doors and other plastics
and Lexan parts.
NOTE: The plastic tape that is not removed from
chrome trim on range parts CANHOT be removed if
baked on.
S GLASS
/ RETAINER
GLASS_
COVER
Be sure that the llght switch is in the off position.
Do not touch hot oven bulb. Do not touch oven
bulb with wet hands. Do net wipe overt light area
with wet cloth.
20 NEMNTI 17

BEFORE CALLIHG FOR SERVICE
PROBLEM
RANGE DISPLAY iS
FLASHING "F" AND
A NUMBER; OVEN
STOPS WORKING -
SURFACE WORKS
TiNY SCRATCHES
OR ABRASIONS ON
COOKTOP (MAY
APPEAR AS TINY
SCRATCHES)
° METAL MARKING
ON COOKTOP (MAY
APPEAR AS TINY
SCRATCHES)
° DARK STREAKS AND
SPECKS ON COOKTOP
AREAS OF
DISCOLORATION
ON COOKTOP
POSSIBLE CAUSE
L llll, i,,, i H, i,r, J i
• Possible range malfunction
• Use of incorrect cleaning ma-
terials
• Coarse particles (salt, etco)
between cookware b0ttoms
and cooktopo Be sure cook-
ware bottoms and cooktop are
clean before use°
• Cookwarewithroughbottoms
• Slidingorscrapingmetaluten-
sils and cookware across
cooktop
•Encrusted boiloversorgrease
spatters
• Incorrect cleaning materials
• Mineraldepositsfromwateror
food
DON'T CALL FOR SERVICE
UNTIL YOU CHECK
HH I'1 . II'lH, ....
• Press CLEAR/OFF. Let range cool down for
one hour. Place range back into cooking or
cleaning cycle. If problem repeats, call for
service.
Tiny scratches are not removable and do
not affect cooking. In time, the scratches
will become smoother and less visible.
• Use recommended cooktop cleaners.
, Use razor scraper and follow directions in
cleaning chart.
• Use recommended cleaners in cleaning
chart.
, use recommended cleaners,
RANGE DOES NOT
WORK; TOTALLY
iNOPERATIVE
OVEH DOES NOT
HEAT; COOKTOP
ZONES OK
COOKTOP ZONE
DOES NOT WORK;
OVEN OK
FOODS COOK
SLOWLY ON THE
COOKTOP
FOODS DO NOT
BAKE PROPERLY
• No power to range
• Clock set incorrectly
• Oven controls set incorrectly
• Improper operation of control
Improper cookware
• Oven not preheated long
enough
• Improper rack or pan place-
ment
• Oven vent blocked or covered
• Improper use of foil
• Improper temperature setting
for utensil used
• Recipe not followed
• Improper thermostat calibra-
tion
• Range and oven rack not level
Using improper cookware
• Check household circuit breaker
or fuse.
• Check power cord to be sure it is
plugged in.
• Check clock instructions.
• Check oven control instructions°
Be sure knob is pushed in while turning.
Use pans that have flat bottoms and a tight
fitting lid (it applicable). Pansshould match
cooking zone size, Read thecooktop cook-
ing section tot complete information°
• Be sure to preheat°
• Maintain uniform air space around pans
and utensils; see oven cooking section.
• Keep vent area clear.
Use of toil not recommended°
• Reduce temperature 25 degrees tot glass
or dull/darkened pans.
• Is recipe tested and reliable?
, Check oven temperature adjustment pro-
cedures.
• Check the installation instructions for lev-
eling.
, See cooking hints section.
21 NESER107-I

BEFORE CALUHG FOR SERVICE
i ii rl .i,i m:! •
PROBLEM
POSSIBLE CAUSE
"-' • oVEN DOES NOT • NO power to range . Check household circuit breakeror fuse.
WORK; TOTALLY
INOPERATIVE
. OVEN DOES NOT , Oven controls set incor- • Check oven control instructions.
HEAT rectly ....
• OVENTEMPERATURE • Oven calibration • See adjustments described after this sec-
SEEMS INACCURATE • Isrecipetestedandreliable? tion.
....... i iilll ill,i ,,,,,,
DON'T CALL FOR SERVICE
UNTIL YOU CHECK
° FOODS DO NOT BROaL
PROPERLY
. OVEN SMOKES
° OVEN LIGHT DOES
NOT WORK
• Improper rack position
• Oven preheated
Improper utensil used
- Oven door closed during
broil
• Improper broiling time
208 Voltage
Dirty oven
Broiler pan full o! grease
left in oven
Light switch in OFF posi-
tion
Light bulb burned out
Check broiler pan placement. See broiling
sectlon,,
• Do not preheat when broiling,
• Usebroilerpanand grid supplied with range,
• Open door to broil stop position; see re-
movable oven door section,
• Check broiling chart in broiling section,
• Use higher rack position.
Check for heavy spiltover°
• Check pan and grid after each use.
• Check switch setting.
• Check or replace light bulb; see cleaning
and care instructions.
22 NESER175
You may feel that your new oven cooks differently than
the oven it replaced. We recommend that you use your
new oven a few weeks to become more familiar with it,
following the times given In your recipes as a guide.
Your oven has been preset to maximize cooking
efficiency. If you think your new oven is too hot
(burning foods), or not hot enough (foods are under-
cooked) you can adjust the temperature yourself. The
appearance and texture of foods Is a better Indicator of
oven accuracy than an Inexpensive oven thermometer.
We do not recommend the use of inexpensive
thermonteters, such as those found in the grocery
store, to readjust the temperature setting of your
new oven. "fhese thermometers can vary by 20°-,40°F.
Also, you must open the oven door to read the
thermometer and this changes the temperature of the
OVER.
To decide how much to change the temperature, set the
oven temperature 25°F higher (if foods are under-
cooked) or 25°F lower (if foods are burning) than the
temperature In your recipe, then bake. The results of
this "test" should give you an Idea of how much the
temperature should be changed°
To adjust temperature follow these instructions:
3. Press the UP arrow to Increase your
oven's temperature up to +35 °Ho'FrERo
Press the DOWN arrow pad to decrease
your oven's temperature down to -35 °
COOLER.
4. When your selection Iscomplete press
the CLOCK pad to return to the time of
day.
Your oven's thermostat will retain this temperature
adjustment until each of the four steps above are
repeated. This adjustment will remain in memory even
after a power failure.
You will not need to do anything else. Bake as you
normally wouldo This adjustment will not affect broil or
clean temperature.
1. Press the BAKE pad.
2. Press the UP arrow pad to set 550 ° and
DMMEDIATELY press and HOLD the
BAKE pad for 10 seconds until the
clock disappears andthe display shows
a two digit figure.
(This two digit number may vary
according to the original factory
settJngo)
23 NESER116

NOTES
24

NOTES
i i
25
tf --_
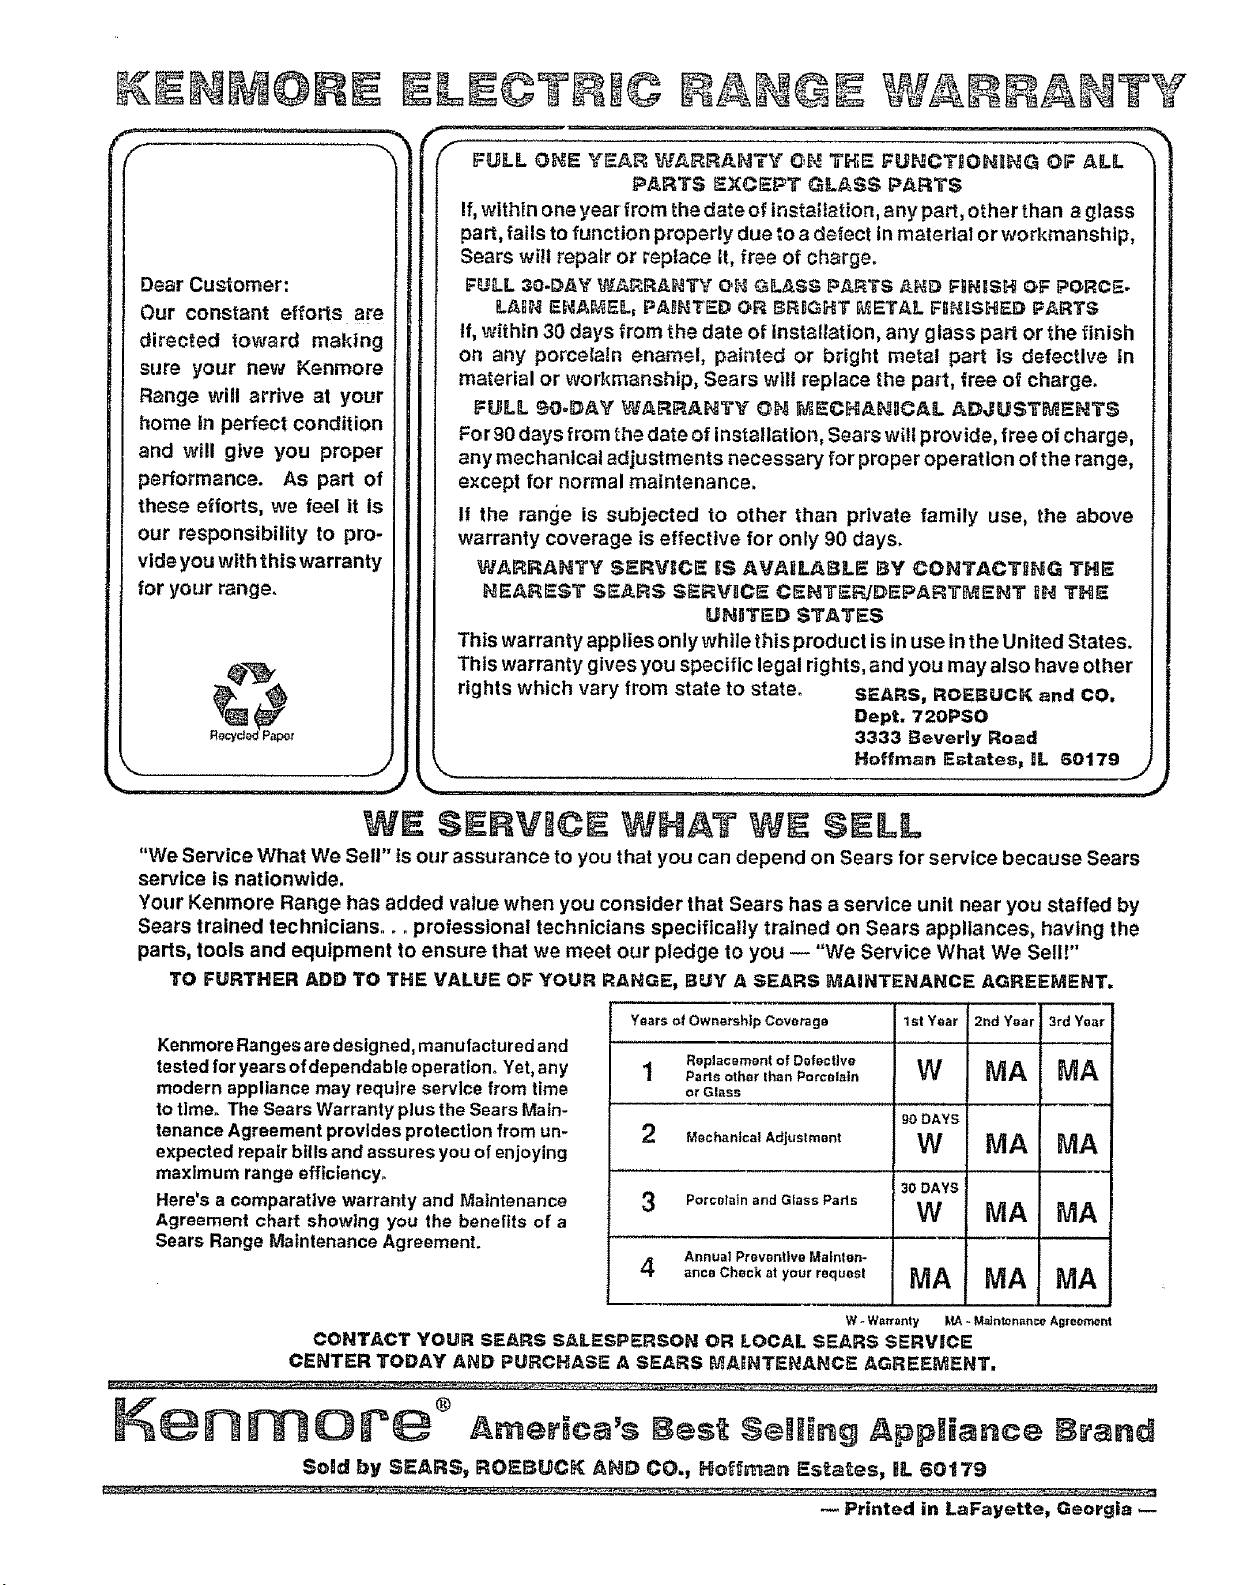
Dear Customer:
Our constant efforts are
directed toward making
sure your new Kenmore
Range tril arrive at your
home in perfect condition
and will give you proper
performance. As part of
these efforts, we feel it is
our responsibility to pro-
vide you with this warranty
for your range.
Rocyd_d P,'_por
J
FULL OH_ Y_ _RR_NT'_" GI_ T[_5 FUNCTDGHIHG OF #_LL
P._.RTS 5XCIEPT GL_,$S PARTS
If, within one year from the date of tnstaftafon, any part, other than a grass
part, fails to function properly due to a delect In material or workmanship,
Sears will repair or replace It, free of charge.
FULL 30-DAY W_RANT_ _ O1_GLASS PA_TS _._D FIiNISH OF PORCE-
LAIN F._A_EL= PAtNT_'D OR BRIGHT F_ETAL FI]_ISHED P,_'RTS
If, within 30 days from the date of Instaltation, any glass part or the finish
on any porcelain enamel, painted or bright metal part is defective in
material or workmanship, Sears wilt replace the pa_t, free of charge.
FULL _O-DAY WARRANTV OH _CHAHICAL _DJIUST_NTS
For 90 days from the date of installation, Sears wll provide, free of charge,
any mechanical adjustments necessary for proper operation of the range,
except for normal maintenance.
It the range is subjected to other than private family use, the above
warranty coverage is effective for only 90 days.
WARRANTY S_RVtC_ IS AVAILAI_L_ BY CONTACTIHG TH_
HFL'-AR_$T $_ARS S_RVIC_- CEHT_F.JDEPART_£_EHT IN THE
UNITED STATES
This warranty applies only while this prodt, ct is in use inthe United States.
This warranty gives you specific legal rights, and you may also have other
rights which vary from state to state, gEARS, ROEBUCK and CO,
Dept, 720PSO
3333 Beverly Ro_d
Hoffman Estates, 1L 60179,
J
J
"We Service What We Sell" is our assurance to you that you can depend on Sears for service because Sears
service is nationwide.
Your Kenmore Range has added value when you consider that Sears has a service unit near you staffed by
Sears trained technicians, o. professional technicians specifically trained on Sears appliances, having the
parts, tools and equipment to ensure that we meet our pledge to you _ "We Service What We Sell!"
TO FURTHER ADD TO THE VALUE OF YOUR RANGE, BUY A SEARS MAINTENANCE AGREEMENT,
Years of Ownership Coverage 1st Year ! 2nd Year 3rd Year i
Kenmore Ranges are designed, manufactured and
tested for yearsof dependable operation. Yet, any
modern appliance may require service from time
to time. The Sears Warranty plus the Sears Main-
tenance Agreement provides protection from um
expected repair bills and assures you of enjoying
maximum range efficiency.
Here's a comparative warranty and Maintenance
Agreement chart showing you the benefits of a
Sears Range Maintenance Agreement.
1 Rep 1cement of Defeet]ve
other than Porcelain W MA NA
or Glass
90 DAYS
2 ,an,c=,A,_|,,st_°°,W iViA MA
30DAYS
3 ,)elnandGIassPa_ls W MA MA
at Preventive Mafnten-
ance Check at your request
W _ W_trranty MA~M_dnten_nceAgreement
MA MA MA
CONTACT YOUR gEARS SALESPERSON OR LOCAL SEARS SERVICE
CENTER TODAY AND PURCHASE A gEARS _AINTENANCE AGREEMENT.
SOld by $fARS_ ROfIgCl AND CO., t_ffmt. _-st_les, II 61t 79
Printed in LaFayette, Georgia
 Loading...