

Kenmore 640-775957-111 Owner’s Manual
Useand CareGuide
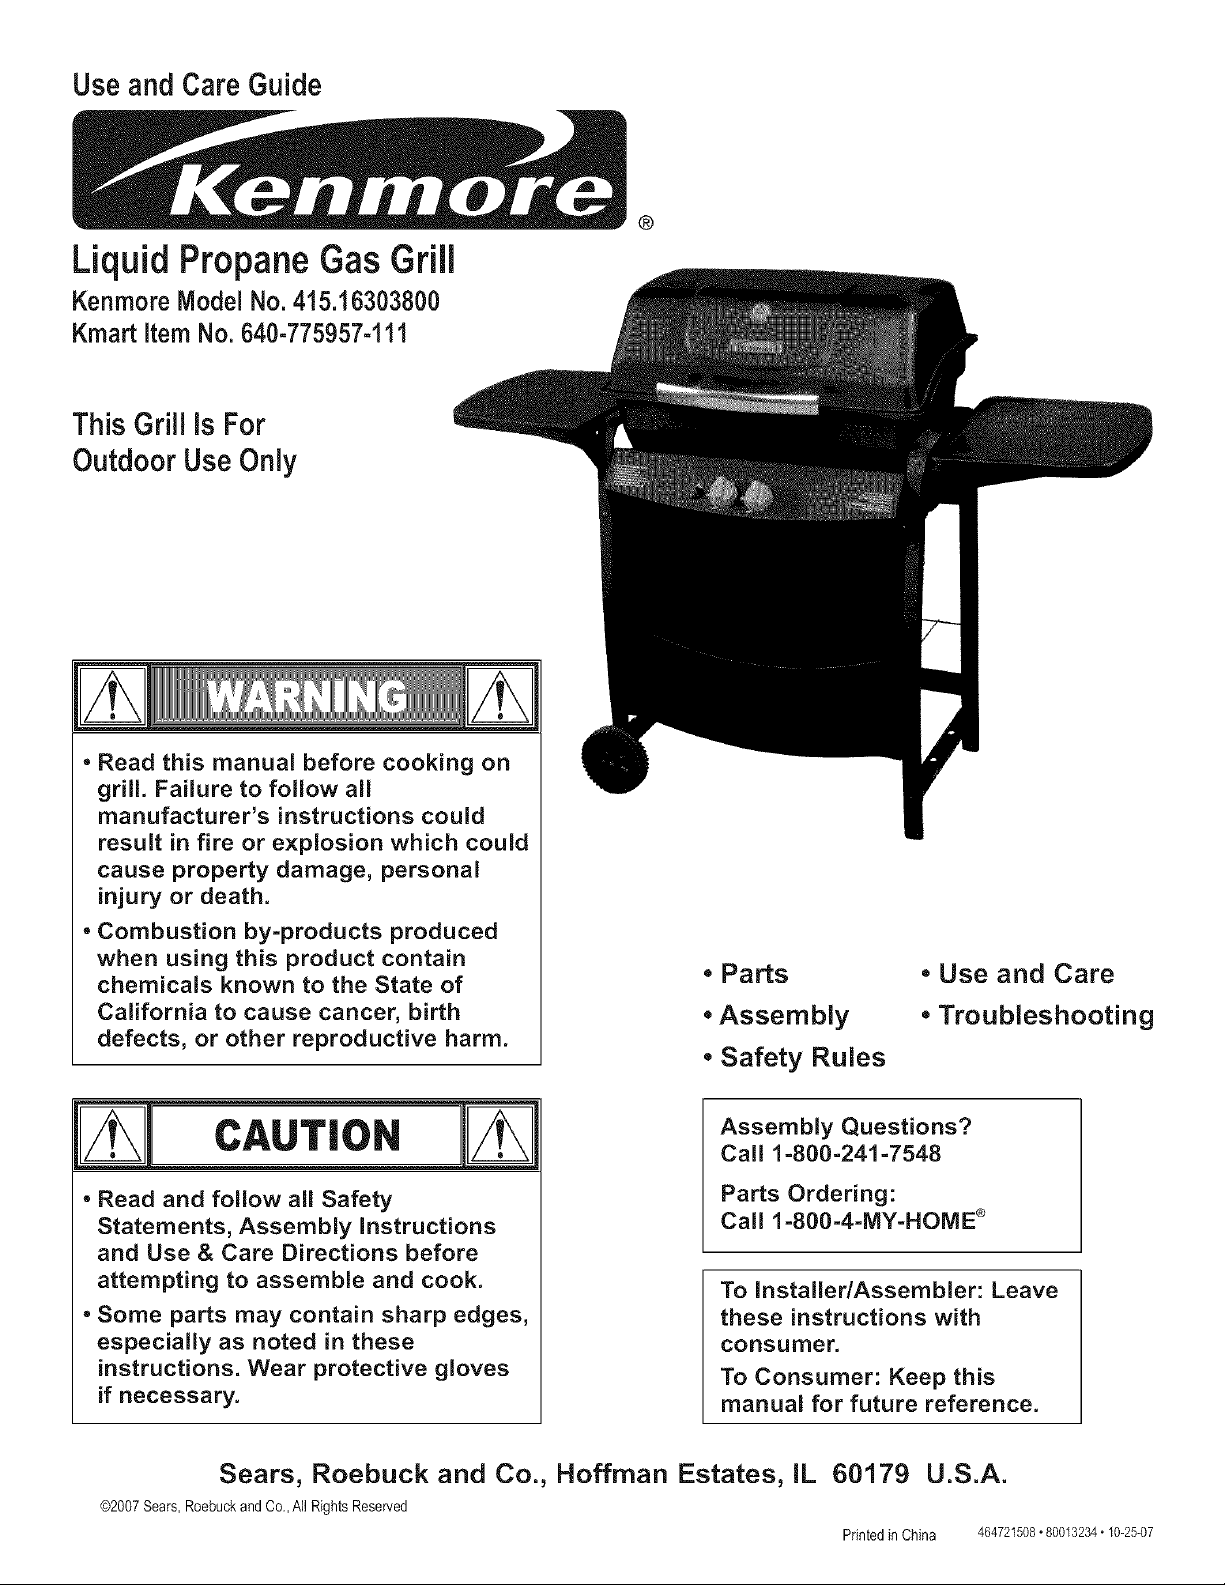
LiquidPropaneGasGrill
Kenm0re ModelNo.415.16303800
Kmart Item No. 640-775957-111
This Grill is For
Outdoor UseOnly
®
• Read this manual before cooking on
grill. Failure to follow all
manufacturer's instructions could
result in fire or e×plosion which could
cause property damage, personal
injury or death.
• Combustion by=products produced
when using this product contain
chemicals known to the State of
California to cause cancer, birth
defects, or other reproductive harm.
CAUTION
• Read and follow all Safety
Statements, Assembly Instructions
and Use & Care Directions before
attempting to assemble and cook.
• Some parts may contain sharp edges,
especially as noted in these
instructions. Wear protective gloves
if necessary.
• Parts
• Assembly
• Use and Care
• Troubleshooting
• Safety Rules
Assembly Questions?
Call 1=800=241 =7548
Parts Ordering:
Call 1=800=4=MY=HOME ®
To InstalledAssembler: Leave
these instructions with
consumer.
To Consumer: Keep this
manual for future reference.
Sears, Roebuck and Co., Hoffman Estates, IL 60179 U.S.A.
©2007Sears,RoebuckandCo.,AllRightsReserved
Printed in China 464721508•80013234• 10-25-07
if you smell gas:
1. Shut off gas to the appliance.
2. Extinguish any open flame.
3. Open lid.
4. ifodor continues, keep away from the
appliance and immediately call your gas
supplier or your fire department.
1. Do not store or use gasoline or other
flammable liquids or vapors inthe vicinity of
this orany other appliance.
2. An LP cylinder not connected for use shall not
be stored in the vicinity of this or any other
appliance.
Call Grill Service Center For Help And Parts
If you havequestions orneed assistance during assembly,
please call 1-800-241-7548.Youwill be speaking toa
representative of the grill manufacturer and not a Sears
employee. Toorder newparts call Searsat 1-800-4-MY-HOME®.
Product Record
CALIFORNIA PROPOSITION65
1. Combustion by-products producedwhen using
this productcontain chemicals known to the State of
California to cause cancer, birth defects, and other
reproductiveharm.
2. This product contains chemicals, including lead
and lead compounds, known to the State of
California to cause cancer, birth defects or other
reproductive harm.
Wash your hands after handfinq this product.
Installation Safety Precautions
Use grill, as purchased,only with LP(propane) gasand the
regulator/valve assembly supplied. A conversion kit mustbe
purchased for use with natural gas.
• Grill installation must conform with localcodes, or intheir
absence of local codes, with either the National Fuel Gas
Code,ANSI Z223.1/NFPA 54, Natural Gasand Propane
Installation Code, CSAB149.1, orPropane Storage and
Handling Code,B149.2, orthe Standardfor Recreational
Vehicles,ANSI A 119.2/NFPA1192,and CSA Z240 RV Series,
Recreational VehicleCode, as appficable.
. All electrical accessories(such as rotisserie) must be
electrically grounded in accordance with local codes, or
National Electrical Code,ANSI / NFPA70 or Canadian
Electrical Code,CSA C22.1. Keep any electrical cords and/or
fuel supply hosesaway fromany hot surfaces.
. This grill issafety certifiedfor use in the United States and/or
Canada only. Do notmodify for use in any other location.
Modification will result ina safety hazard.
Safety Symbols
The symbols and boxesshown below explain what each heading
means. Read and follow all of the messages found throughout
the manual.
iMPORTANT:Fill out the product record informationbelow.
Model Number
Serial Number
See ratinglabelongrillforserialnumber.
Date Purchased
CAUTION
Forresidentialuseonly. Donot use for commercial
cooking.
2" 464721508
DANGER: Indicatesan imminentlyhazardous situation
which, if notavoided,will result in death orserious injury.
WARNING: Indicates an potentiallyhazardoussituation
which, if notavoided, couldresult indeath orserious injury.
r
T,o.
CAUTION: Indicatesa potentiallyhazardous situationor
unsafe practicewhich, if not avoided, may resultin minor
or moderateinjury.
For Your Safety ...................................... 2
Grill ServiceCenter................................... 2
KENMORE GRILL WARRANTY
Product Record Information ............................ 2
Safety Symbols...................................... 2
Installation Safety Precautions .......................... 2
Kenmore Grill Warranty ............................... 3
Use and Care .................................... 4-10
Parts List.......................................... 11
Parts Diagram...................................... 12
Assembly ....................................... 13-23
Troubleshooting.................................. 24-26
Repair Protection Agreements
Congratulations on making asmart purchase. Your new
Kenmore®product is designed and manufacturedfor years of
dependable operation. But like all products, it may require repair
from time to time. That's when having a Repair Protection
Agreement can save you money andaggravation.
Purchase a Repair Protection Agreement now and protect
yourself from unexpectedhassle and expense.
Here's what the Repair ProtectionAgreement* includes:
[] Expert service by our 10,000 professional repair specialists
[] Unlimited service and no charge for partsand labor on all
covered repairs
[] Product replacement up to $1500 ifyour covered product
can't befixed
[] Discount of 10%from regular price of service and related
installed parts not covered by the agreement; also, 10%off
regular priceof preventive maintenance check
[] Fast help by phone- we call it Rapid Resolution -
phone support from aSears representative.Think of us
as a "talkingowner's manual."
Once you purchase the Repair ProtectionAgreement, a simple
phone call isall that ittakes for you to schedule service. You can
call anytime day or night,or schedulea service appointment
online.
The Repair ProtectionAgreement isa risk-free purchase. Ifyou
cancel for any reasonduring the product warranty period, we will
provide a full refund. Or, a prorated refundanytime after the
product warranty period expires. Purchase your Repair
ProtectionAgreement today!
Some limitations and exclusions apply.
For prices and additional information call 1-800-827-6655.
Sears Installation Service
One Year Full Warranty on Kenmore Grill
If this grillfails dueto a defect in materialor workmanship
within one yearfrom the date of purchase,call 1-800-4-MY
HOME®to arrangefor free repair (or replacementif repair
proves impossible).
Any burnerthat rusts through during thewarranty period will
be replaced free of charge.
This warrantyexcludes ignitor batteries and grill partpaint
loss, discoloration or rusting,which areeither expendable
parts that canwear out from normal usewithin the warranty
period, or are conditions that can be the resultof normal use,
accident orimproper maintenance.
This warranty is void if thisgrill is usedfor commercial or
rental purposes.
This warrantyapplies only if this grill isused in the United
States.
This warrantygives you specific legalrights, and you may
have other rights which varyfrom state to state.
Sears, Roebuck and Co., Hoffman Estates, IL 60179
For Sears professional installation of home appliances, garage
door openers, water heaters, and other major home items, in the
U.S.A. call 1-800-4-MY-HOME®
464721508• 3
• NEVER store a spare LP tank under or near grill or in
enclosed areas
• Never fill the cylinder beyond 80% full.
• An overfilled or improperly stored tank is a hazard due
to possible gas release from the safety relief valve.
• if you see, smell or hear escaping gas, immediately get
away from the LP tank/grill and call your fire
department.
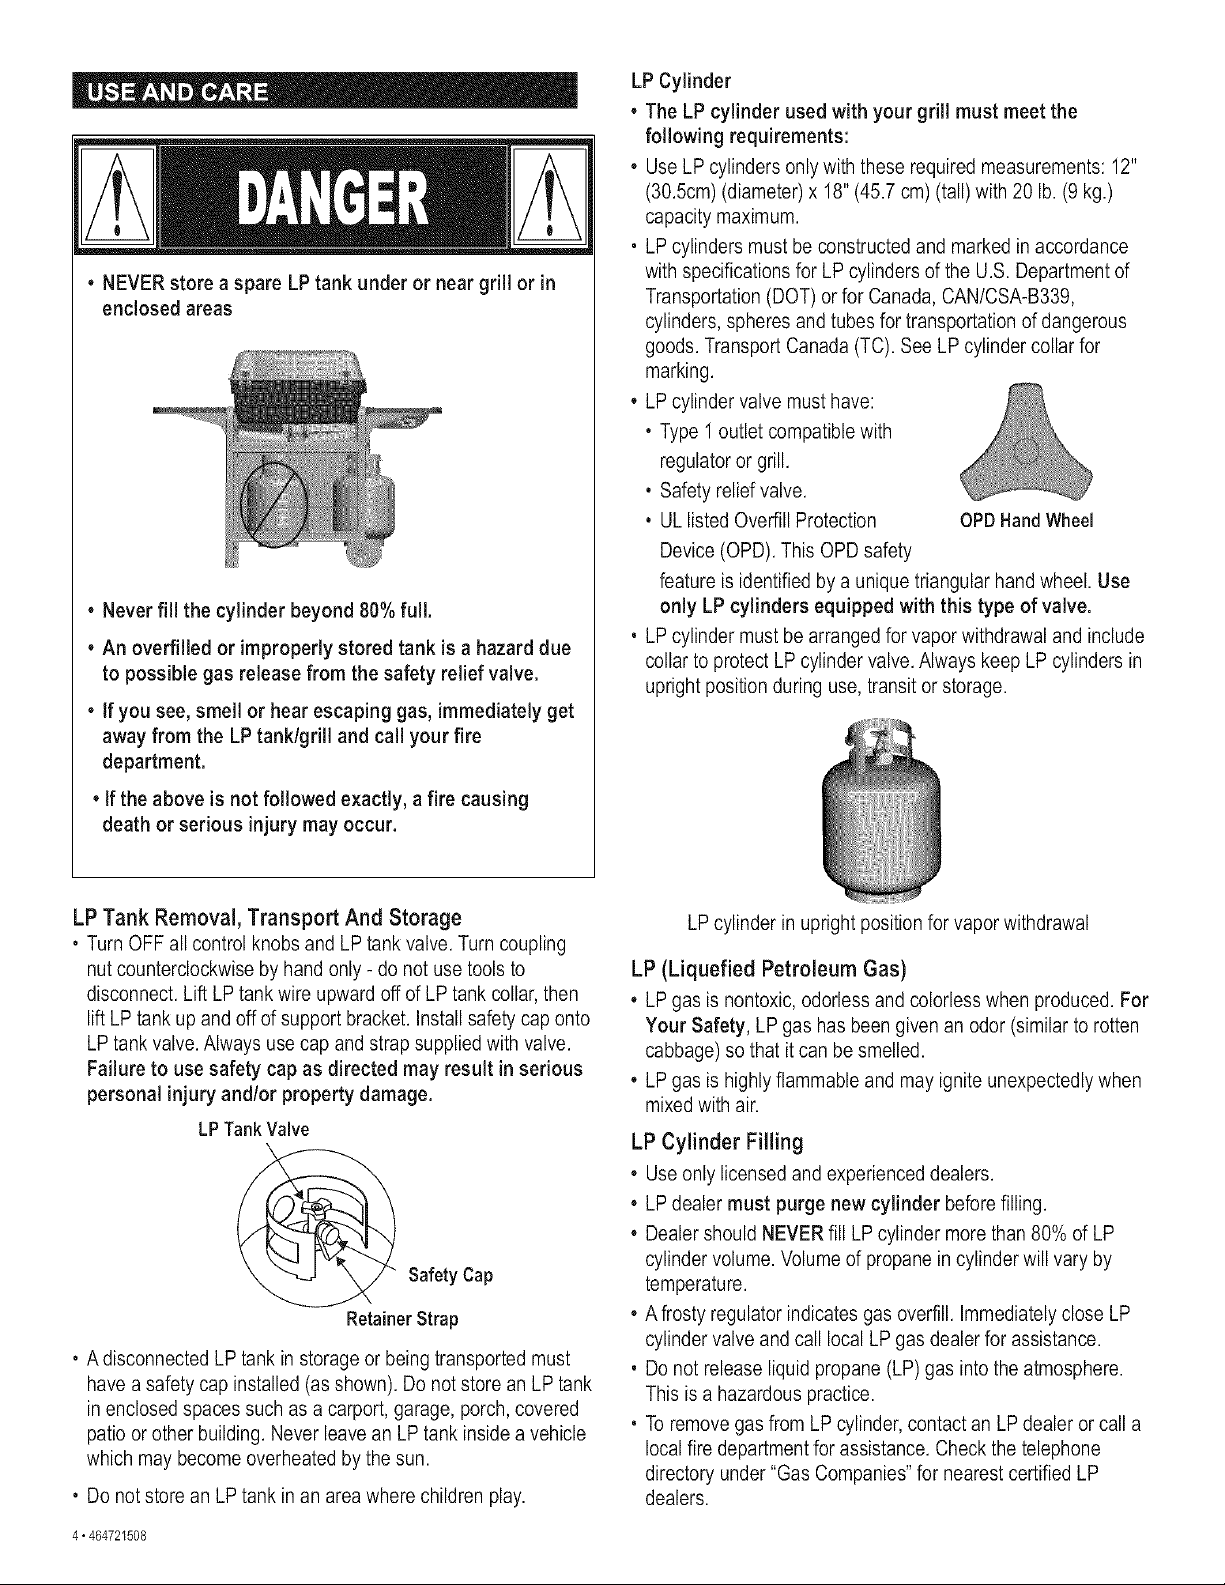
LP Cylinder
• The LP cylinder used with your grill must meet the
following requirements:
• Use LP cylinders only with these required measurements: 12"
(30.5cm) (diameter) x 18" (45.7 cm) (tall) with 20lb. (9 kg.)
capacity maximum.
, LP cylinders must be constructed and marked inaccordance
with specifications for LP cylinders of the U.S. Department of
Transportation (DOT) or for Canada,CAN/CSA-B339,
cylinders, spheresand tubesfor transportation of dangerous
goods. Transport Canada (TC). See LP cylinder collar for
marking.
• LP cylinder valve must have:
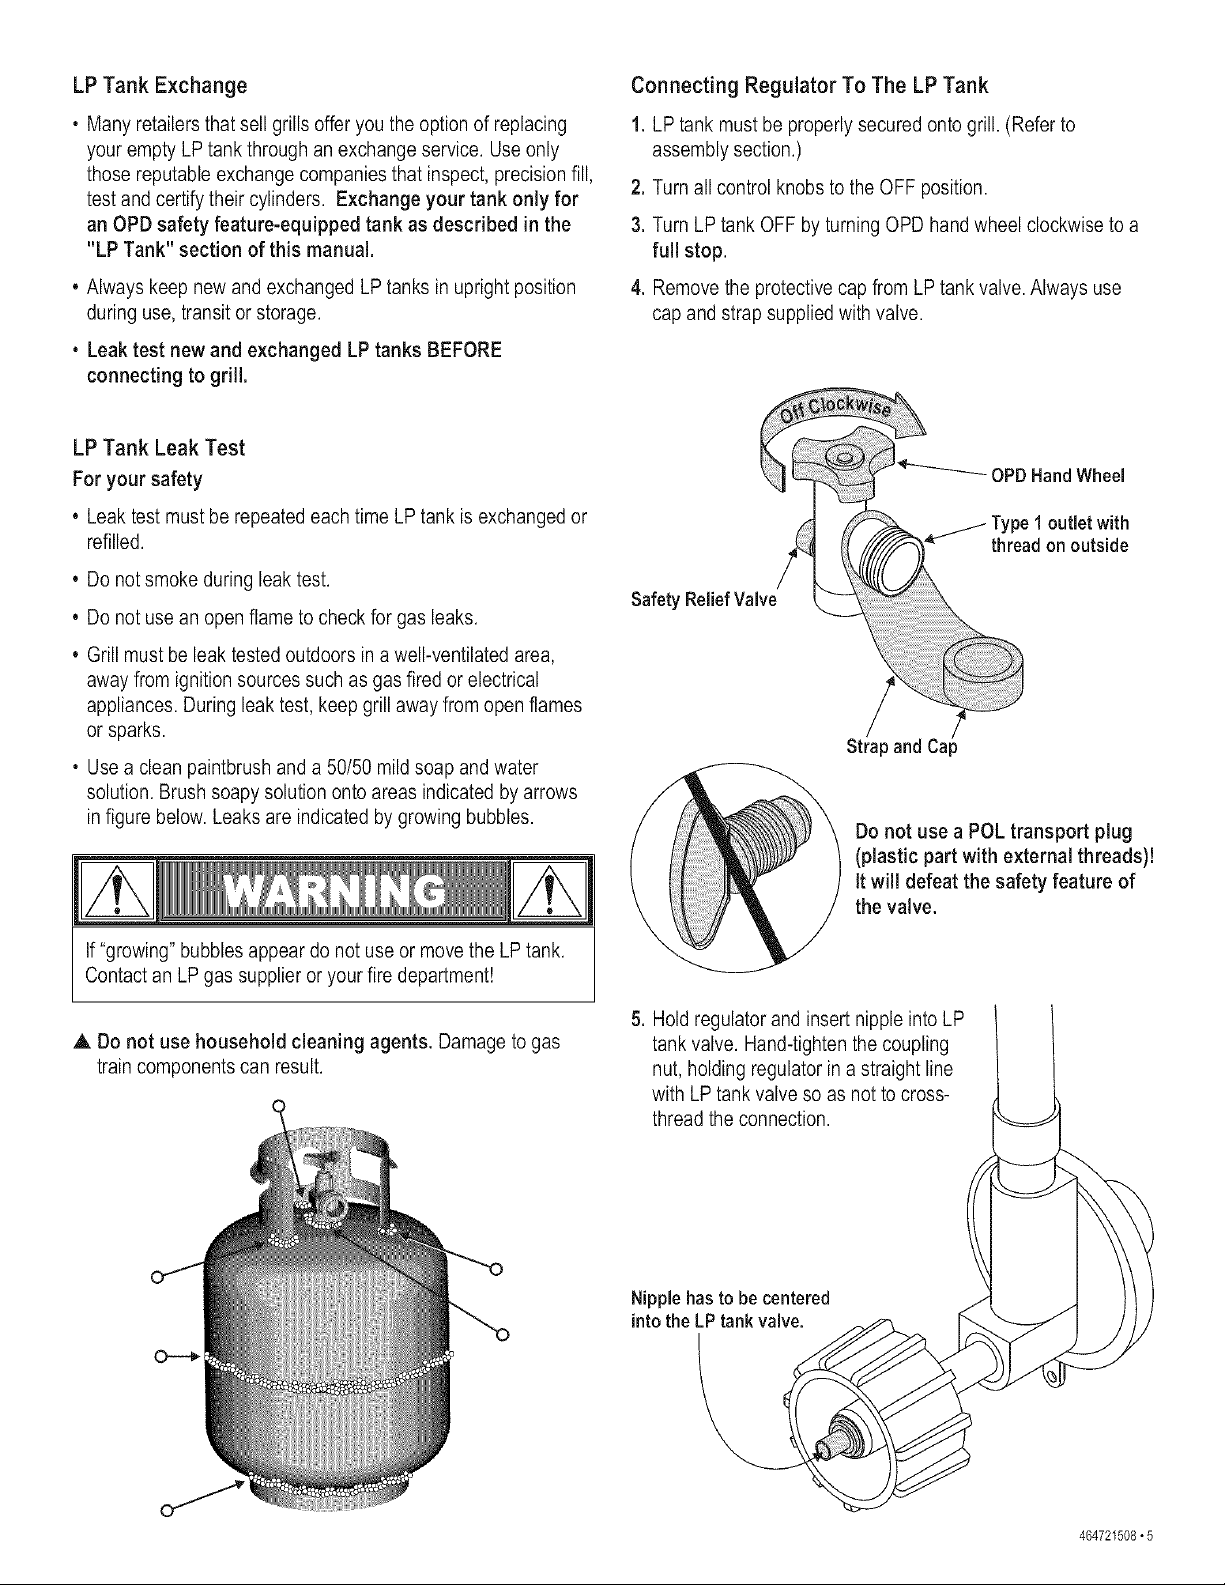
, Type 1 outlet compatible with
regulatoror grill.
, Safetyrelief valve.
, ULlisted Overfill Protection OPDHand Wheel
Device (OPD). This OPDsafety
feature is identified bya unique triangular hand wheel. Use
only LP cylinders equipped with this type of valve.
, LP cylinder must be arrangedfor vapor withdrawal and include
collar to protect LP cylinder valve. Always keep LPcylinders in
upright position during use, transit orstorage.
• if the above is not followed exactly, afire causing
death or serious injury may occur.
LP Tank Removal, Transport And Storage
, Turn OFF all control knobs and LPtank valve.Turn coupling
nut counterclockwise by hand only - do not use tools to
disconnect. Lift LPtank wire upward off of LP tank collar, then
lift LPtank upand offof support bracket, install safety cap onto
LP tank valve.Always use cap and strap suppliedwith valve.
Failure to use safety cap as directed may result in serious
personal injury and/or property damage.
LP TankValve
SafetyCap
RetainerStrap
, A disconnected LPtank in storage orbeing transported must
have a safetycap installed (as shown). Do not store an LP tank
in enclosed spaces such as a carport, garage, porch, covered
patio or other building. Never leavean LPtank insidea vehicle
which maybecome overheated bythe sun.
, Do not store anLP tank in an area where children play.
LP cylinder in upright position for vapor withdrawal
LP (Liquefied Petroleum Gas)
• LP gas is nontoxic, odorless andcolorless when produced. For
Your Safety, LP gas has beengiven an odor (similar to rotten
cabbage) so that it can besmelled.
• LP gas is highly flammable and may ignite unexpectedlywhen
mixed with air.
LP Cylinder Filling
• Useonly licensed and experienceddealers.
• LP dealer must purge new cylinder beforefilling.
• Dealer should NEVERfill LP cylinder more than 80%of LP
cylinder volume. Volume of propane in cylinder will vary by
temperature.
• A frosty regulator indicates gas overfill, immediately close LP
cylinder valve and call local LPgas dealer for assistance.
, Do not release liquid propane (LP) gas into the atmosphere.
This isa hazardous practice.
, Toremove gasfrom LP cylinder,contact an LP dealer or call a
local fire department for assistance. Check the telephone
directory under"Gas Companies"for nearest certified LP
dealers.
4• 464721508
LP Tank Exchange
Connecting Regulator To The LP Tank
o Many retailersthat sellgrills offer you the option of replacing
your empty LPtank throughan exchangeservice. Useonly
those reputable exchangecompanies that inspect, precision fill,
test and certifytheir cylinders. Exchange your tank only for
an OPB safety feature-equipped tank as described in the
"LP Tank" section of this manual.
Always keep newand exchanged LP tanks in upright position
during use, transit or storage.
, Leak test new and exchanged LP tanks BEFORE
connecting to grill,
LP Tank Leak Test
For your safety
• Leak test must be repeated each time LPtank isexchanged or
refilled.
Do not smoke during leak test.
• Do not use an open flame to check for gas leaks.
Grill mustbe leak testedoutdoors ina well-ventilated area,
away from ignition sources such as gas fired or electrical
appliances. During leak test, keep grill away fromopen flames
or sparks.
1. LPtank must be properly secured onto grill. (Refer to
assembly section.)
2. Turnall control knobs to the OFF position.
3. Turn LP tank OFFby turning OPD hand wheel clockwise to a
full stop.
4. Remove the protective cap from LP tank valve.Always use
cap and strap supplied with valve.
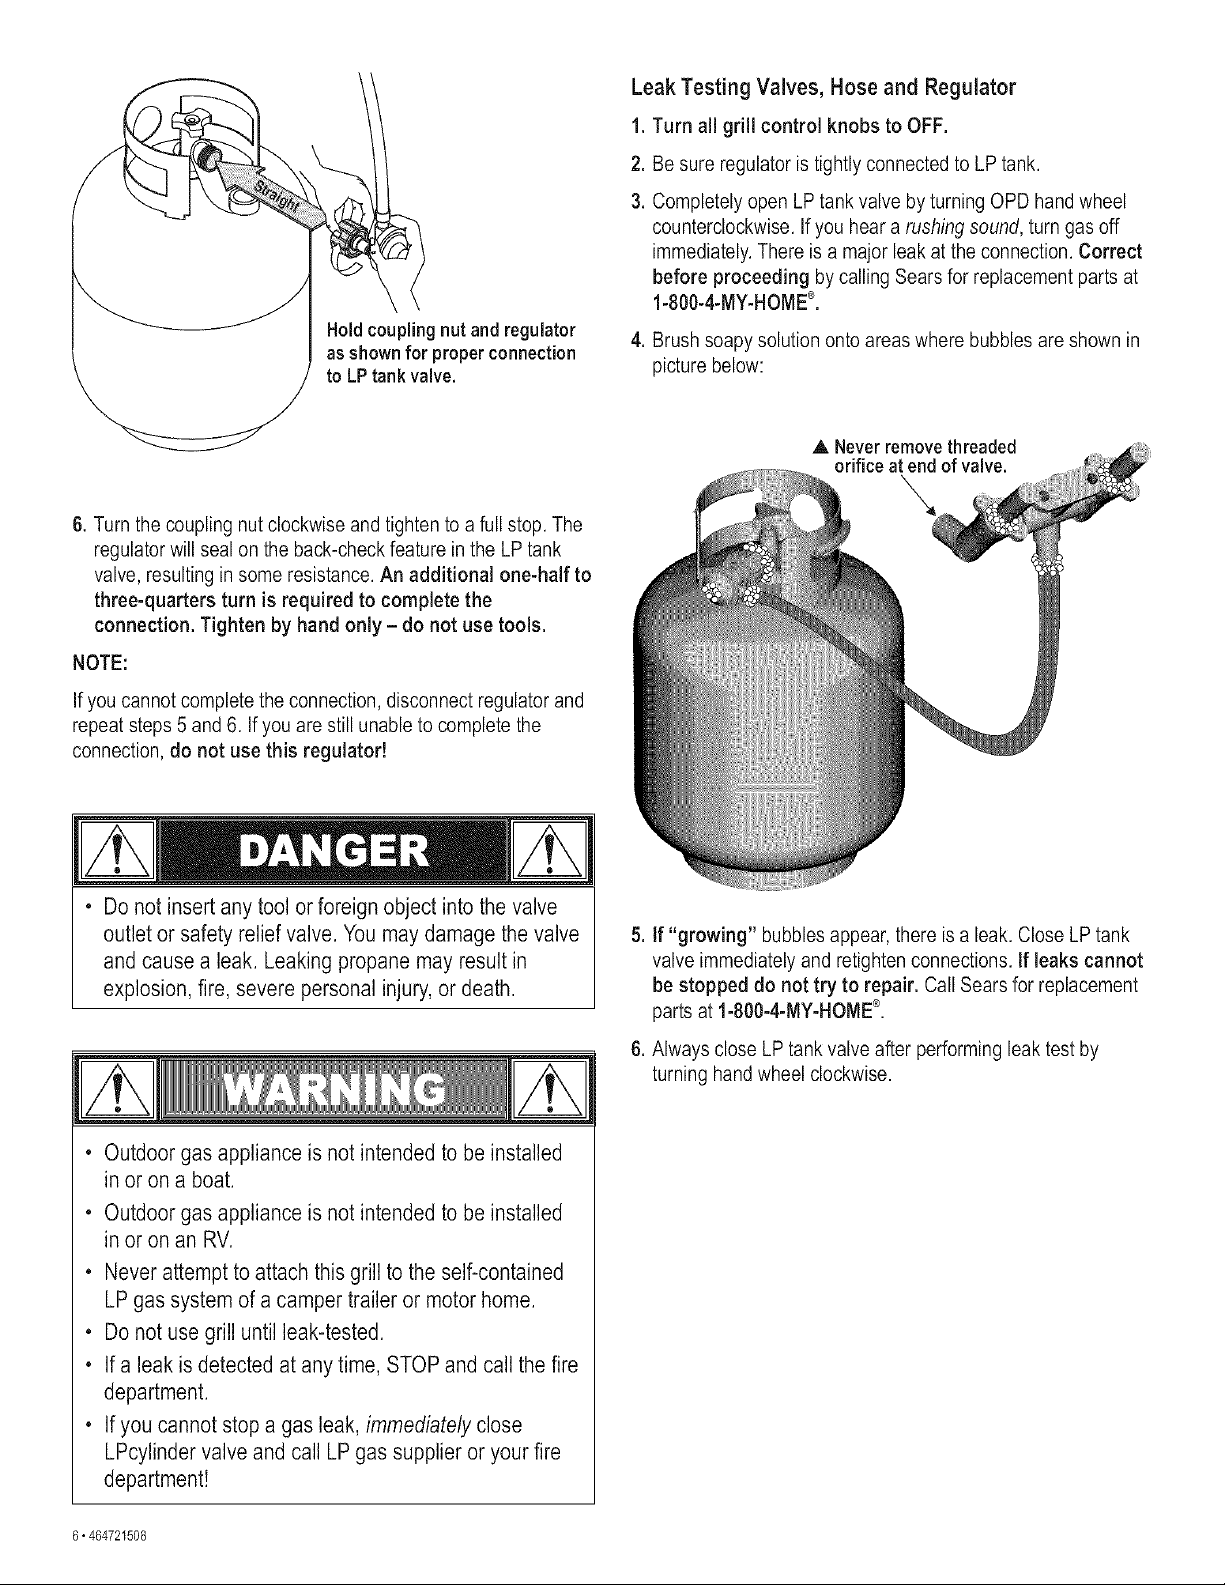
, Usea clean paintbrush anda 50/50 mild soap and water
solution. Brush soapy solutiononto areas indicated by arrows
in figure below. Leaks are indicated by growing bubbles.
If "growing" bubbles appear do not use or movethe LPtank.
Contact an LP gas supplier or your fire department!
A Do not use household cleaning agents. Damage to gas
train components can result.
Do not use a POL transport plug
(plastic part with external threads)!
itwill defeat the safety feature of
the valve.
5. Hold regulator and insertnipple into LP
tank valve. Hand-tightenthe coupling
nut, holding regulator in a straight line
with LPtank valve so as notto cross-
thread the connection.
Nipple hasto be centered
intothe LPtankvalve.
O---*
464721508" 5
Holdcouplingnutand regulator
asshown for properconnection
to LP tank valve.
6. Turn the coupling nutclockwise and tighten to a full stop. The
regulatorwill seal on the back-checkfeature in the LPtank
valve, resulting insome resistance.An additional one-half to
three-quarters turn is required to complete the
connection. Tighten by hand only - do not use tools.
NOTE:
Leak Testing Valves, Hose and Regulator
1. Turnall grill controlknobsto OFF.
,
Be sure regulator istightly connected to LP tank.
3.
Completely open LPtank valve byturning OPD hand wheel
counterclockwise. If you hear a rushing sound, turn gas off
immediately.There isa major leak at theconnection. Correct
before proceeding by calling Sears for replacement parts at
1-800-4-MY-HOME®.
4. Brush soapy solution onto areas wherebubbles are shown in
picture below:
A Neverremovethreaded
orifice atendof valve.
If you cannot complete the connection, disconnect regulator and
repeat steps 5 and 6. If you are still unableto complete the
connection, do not use this regulator!
• Donot insert any toolor foreign object intothe valve
outlet or safetyrelief valve. You may damagethe valve
and causea leak. Leaking propane mayresult in
explosion, fire, severe personal injury,or death.
• Outdoorgasappliance isnot intendedto be installed
in or ona boat.
• Outdoorgasappliance isnot intendedto be installed
in or onan RV.
• Never attempt to attach this grillto the self-contained
LPgas systemof a camper trailer or motorhome.
• Donot usegrill until leak-tested.
• If a leakis detectedat any time,STOP and call thefire
department.
• If you cannot stopa gas leak, immediately close
LPcylindervalve andcall LPgas supplieror yourfire
department!
5. ff "growing" bubblesappear, there is a leak.Close LPtank
valve immediately and retighten connections. If leaks cannot
be stopped do not try to repair. Call Searsfor replacement
parts at 1-800-4-MY-HOME®.
6. Always close LPtank valve after performingleak test by
turning hand wheel clockwise.
6• 464721508
For Safe Use Of Your Grill And To Avoid Serious
injury:
• Donot letchildren operate or play near grill.
• Keep grill area clear and free from materials that burn.
• Donot block holes in bottom or back of grill.
• Check burnerflames regularly.
• Use grill only in well-ventilated space. NEVER use in
enclosed space such as carport, garage,porch, covered
patio, or underan overhead structure of any kind.
• Donot usecharcoal orceramic briquets in agas grill.
(Unlessbriquets are supplied withyour grill.)
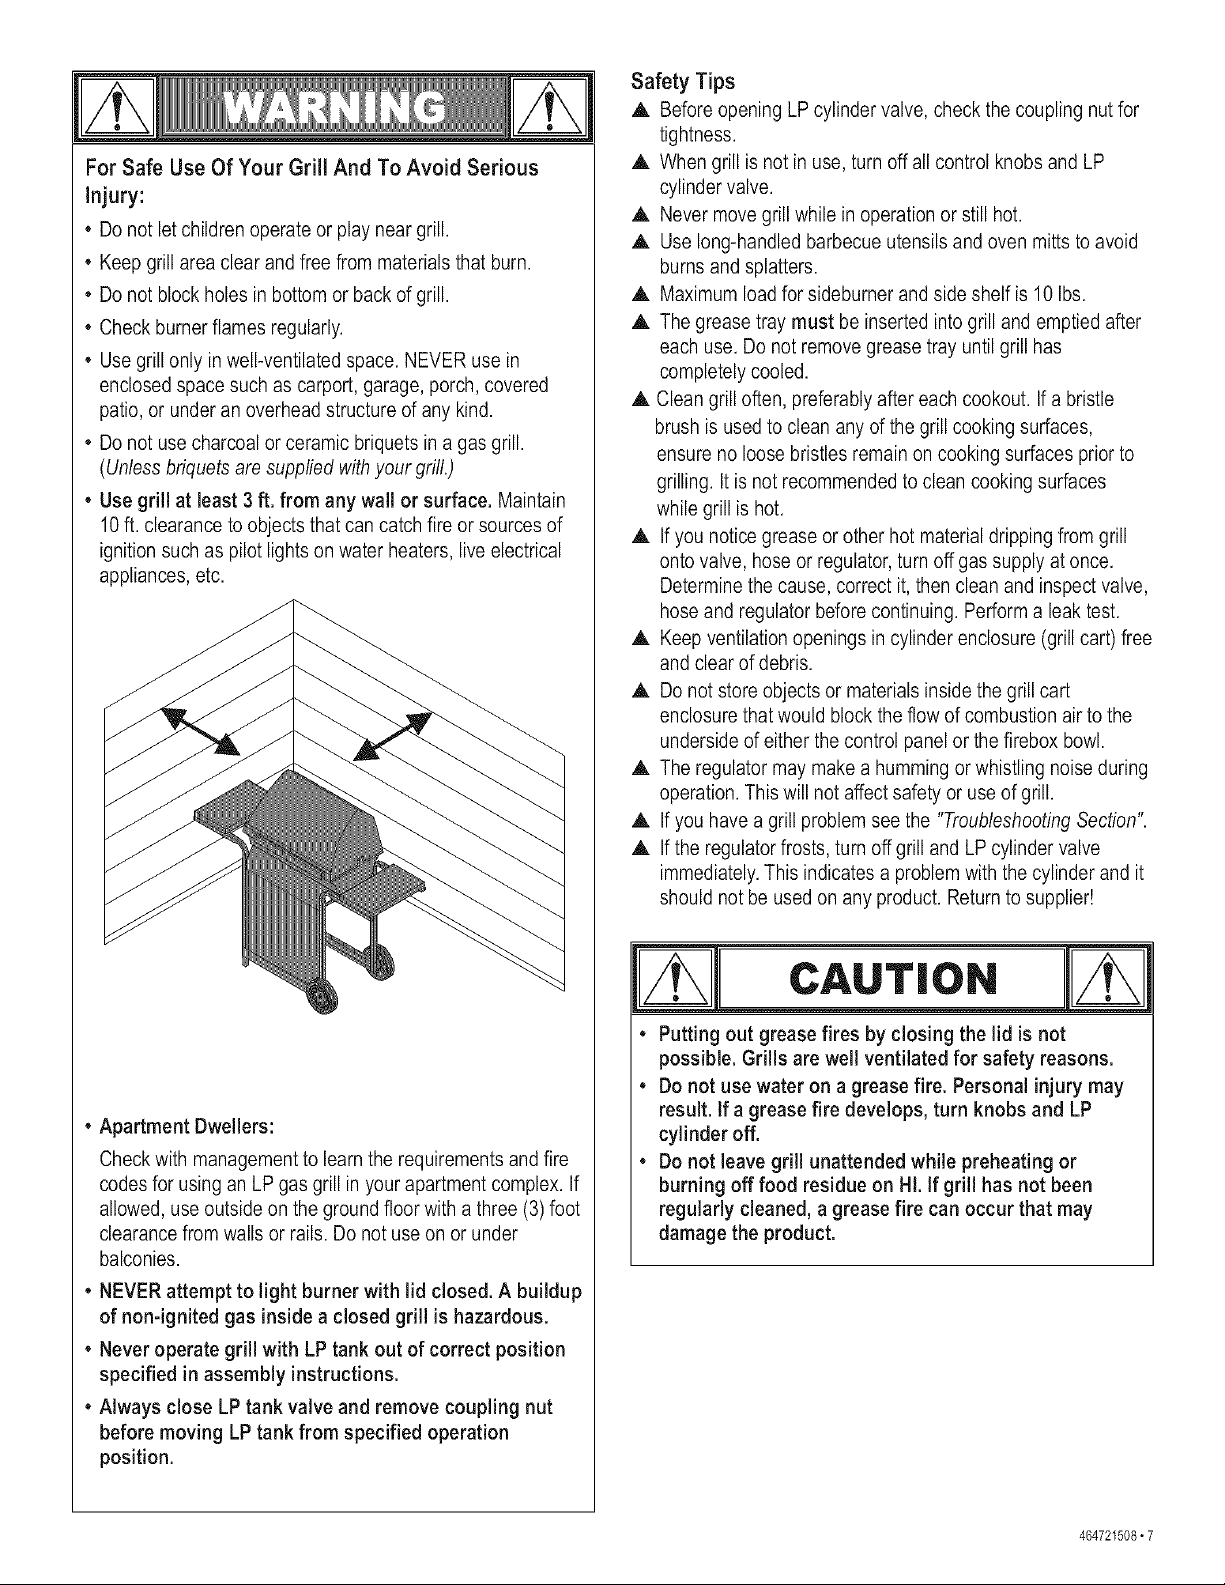
• Use grill at least 3 ft. from any wall or surface. Maintain
10ft. clearance to objects that can catch fire or sources of
ignitionsuch as pilot lights on water heaters, liveelectrical
appliances, etc.
Safety Tips
,A. Beforeopening LPcylinder valve, check the coupling nutfor
tightness.
A When grill is not in use,turn offall control knobs and LP
cylinder valve.
A Nevermove grill while in operation or still hot.
A Uselong-handled barbecue utensils and oven mitts to avoid
burnsand splatters.
A Maximumload for sideburner and side shelf is 10 Ibs.
A The grease tray must be insertedinto grill andemptied after
each use. Do not remove grease tray until grill has
completely cooled.
,A. Clean grill often, preferably after eachcookout. If a bristle
brush is used to cleanany of the grill cooking surfaces,
ensure no loose bristles remain oncooking surfaces prior to
grilling. Itis not recommended toclean cooking surfaces
while grill is hot.
,A. If you notice grease or other hot material drippingfrom grill
onto valve, hose or regulator, turn off gas supply at once.
Determinethe cause,correct it, then clean and inspect valve,
hoseand regulator before continuing. Perform a leaktest.
A Keepventilation openingsin cylinder enclosure (grill cart) free
and clear of debris.
,A. Donot store objects or materials inside the grill cart
enclosure that would block the flow of combustion air to the
undersideof eitherthe control panel or the firebox bowl.
,A. Theregulator may make a humming or whistling noiseduring
operation. This will not affect safety or use of grill.
A Ifyou havea grill problem see the "TroubleshootingSection".
,A. If the regulatorfrosts, turn off grill and LP cylinder valve
immediately.This indicates a problemwith the cylinder and it
should not be used on any product. Return to supplier!
Apartment Dwellers:
Checkwith management to learn the requirements and fire
codes for using an LPgas grill inyour apartmentcomplex. If
allowed, use outsideon the ground floor with a three (3)foot
clearance from walls or rails. Do not use on orunder
balconies.
• NEVER attempt to light burner with lid closed. A buildup
of non-ignited gas insidea closed grill is hazardous.
• Never operate grill with LP tank out of correct position
specified in assembly instructions,
• Always close LPtank valve and remove coupling nut
before moving LP tank from specified operation
position.
CAUTION
• Putting out grease fires by closing the lid is not
possible, Grills are well ventilated for safety reasons,
• Do not use water on a grease fire. Personal injury may
result, if a grease fire develops, turn knobs and LP
cylinder off,
• Do not leave grill unattended while preheating or
burning off food residue on Hi. if grill has not been
regularly cleaned, a grease fire can occur that may
damage the product,
464721508• 7
ignitor Lighting
A Donot lean over grill while lighting.
1. Open lid during lighting.
2. TurnON valve fromsource or tank.
3. Push and turn Ignition Burner controlknob to_ HI and
immediately press and hold Electronic Ignitionbutton.
4. If ignition does NOT occur in 5 seconds, turn Left Burner
control knob OFF, wait 5 minutes for gas to clear and repeat
the lighting procedure.
5. ToLight Other Burners turn control knob to HI.
If ignitordoes notwork, follow match lighting instructions.
After Lighting:Turn knobs to HI position for 15minutes to pre-
heat grill. Then turn knobto desired setting forcooking.
Before Your First Cookout
, Light burners, check to make sure they are lit, close the lid and
warm upgrill on HIGHfor 15 minutes. This curing of paint and
parts will produce an odor onlyon first lighting.
Burner Flame Check
, Light burner, rotate knobs from HIGH to LOW.You should see
a smallerflame inLOW positionthan seen on HIGH.Always
check flame priorto eachuse. Ifonly low flame is seen refer to
"Sudden drop or low flame" inthe TroubleshootingSection.
CAUTION
if burner does not light, turn knobs to OFF, wait 5
minutes, and try again. Always close valve during the 5
minute waiting period, ifthe burner does not ignite with
the valve open, gas will continue to flow out of the burner
and could accidentally ignite with risk of injury.
Match-Lighting
,A.Do not lean over grill while lighting,
1. Open lid during lighting,
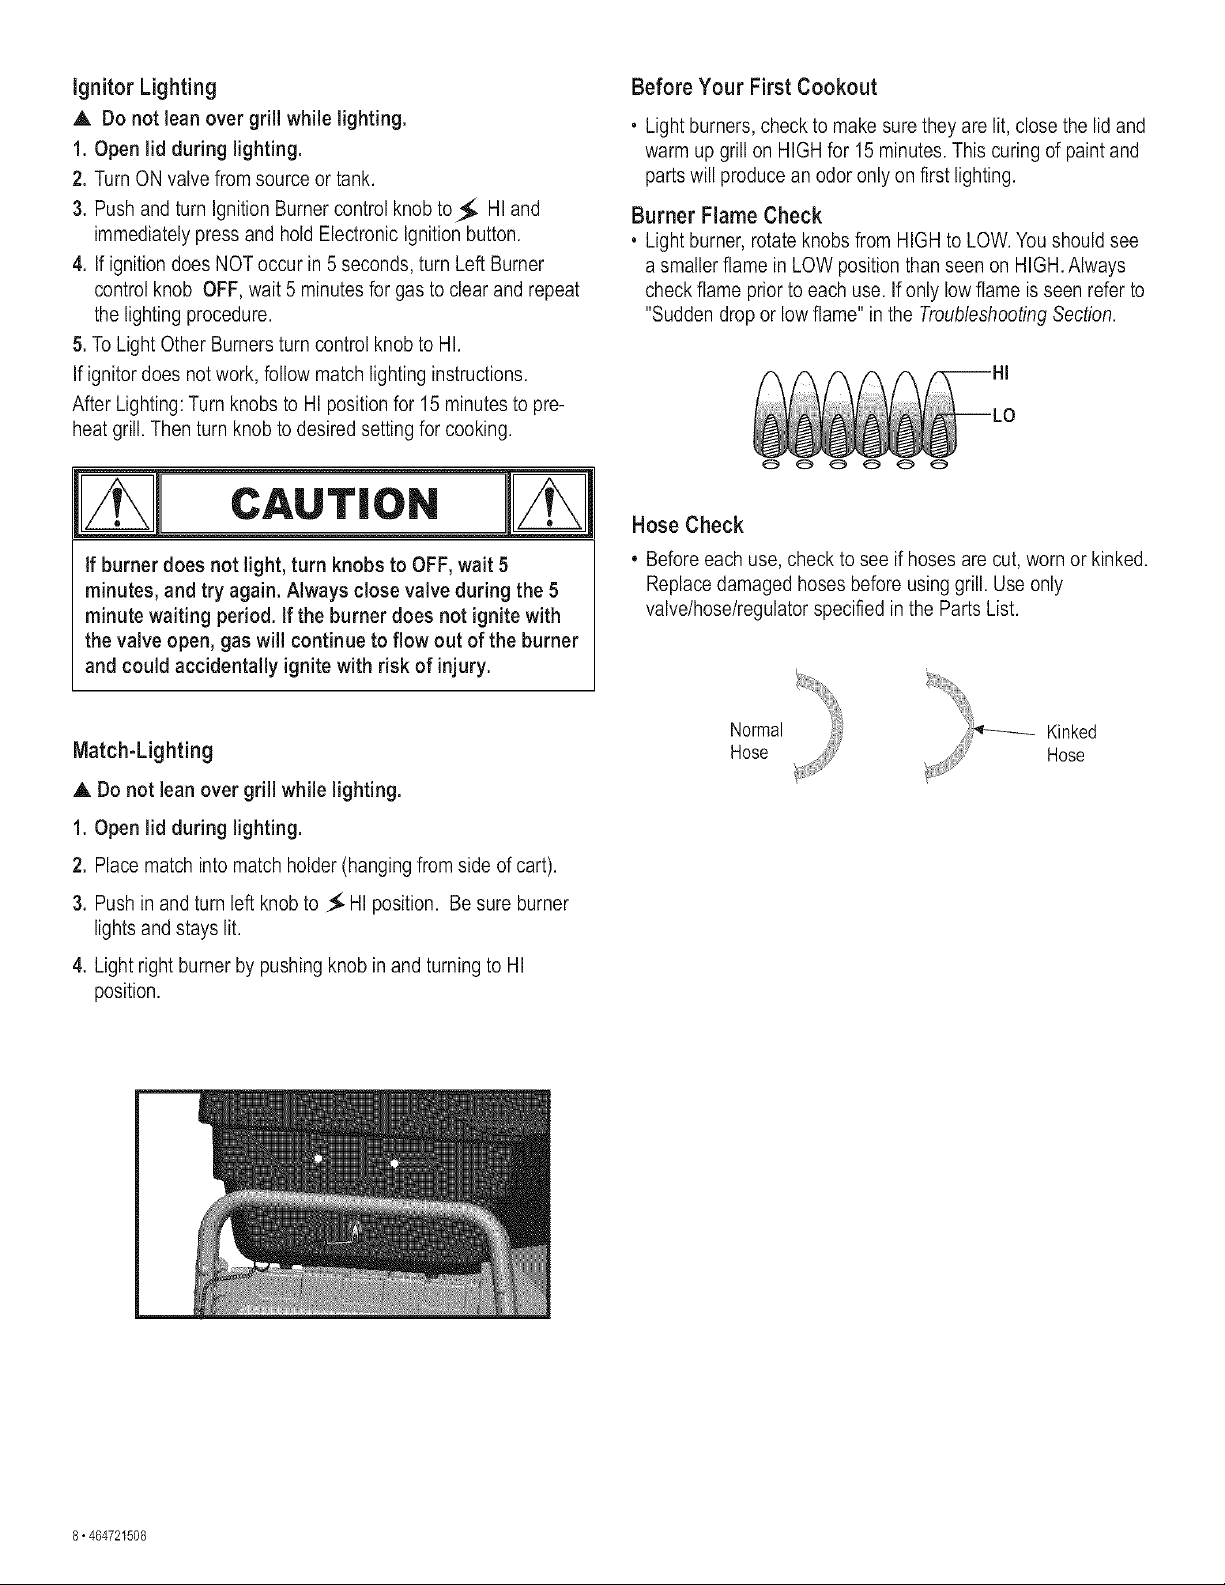
2. Place match into match holder (hangingfrom side of cart).
3. Push in and turn left knobto $ HI position. Be sure burner
lights and stays lit.
4. Light right burner by pushing knob inand turning to HI
position.
Hose Check
Beforeeach use, check to see if hoses are cut, worn or kinked.
Replace damaged hoses before using grill. Use only
valve/hose/regulator specified in the Parts List.
Normal Kinked
Hose Hose
8• 464721508
Turning Grill Off
. Turn all knobsto OFF position.Turn LP tank off byturning
OPD hand wheel clockwise to afull stop.
Ignitor Check
• Turn gas off at LP tank, Pressand hold ignitor button. "Click"
should be heardand sparkseen each time between collector
box or burnerand electrodes. See "Troubleshooting"if no click
or spark.
Valve Check
• Important: Make sure gas is off at LP tank before checking
valves. Knobs lock in OFF position. Tocheck valves,first
push in knobsand release, knobs should spring back. If knobs
do notspring back, replace valveassembly before using grill.
Turn knobs to LO position then turn back to OFF position.
Valves should turn smoothly.
General Grill Cleaning
, Keep the outsideof your grill looking new by cleaning it once a
month with warm soap and water ora non-abrasive cleaner. If
you don't have a grill cover, wipe off dust andgrime before
starting your grill.
, Coatingthe cooking grids with spray-on cookingoil will keep the
food from stickingand makeclean up easier.After cooking,
scrape thegrates with along handled, brass wire bristlebrush.
, Check inside the grill bottomfor grease build upand clean
often, especially after cookingfatty meat.
, Do not mistake brown or blackaccumulation of grease and
smoke for paint. Apply a strong solutionof detergent andwater
or usea grill cleaner with scrub brush on insides of grill lidand
bottom. Rinse and allow to completelyair dry.Do not apply a
caustic grillloven cleaner to painted surfaces.
• Plated wire grates: Wash grates with concentrated grill
cleaner or use soap and water solution. Dry thoroughlyand
store indoorsbetween cookouts.
, Plastic parts: Wash with warm soapy water andwipe dry.
A Do not usecitrisol, abrasive cleaners, degreasers or a
concentrated grill cleaner on plastic parts. Damage to and
failure of parts can result.
• Porcelain surfaces: Because of glass-like composition, most
residue can bewiped awaywith baking soda/water solutionor
specially formulated cleaner. Usenonabrasive scouring powder
for stubborn stains.
CAUTION l ll
f
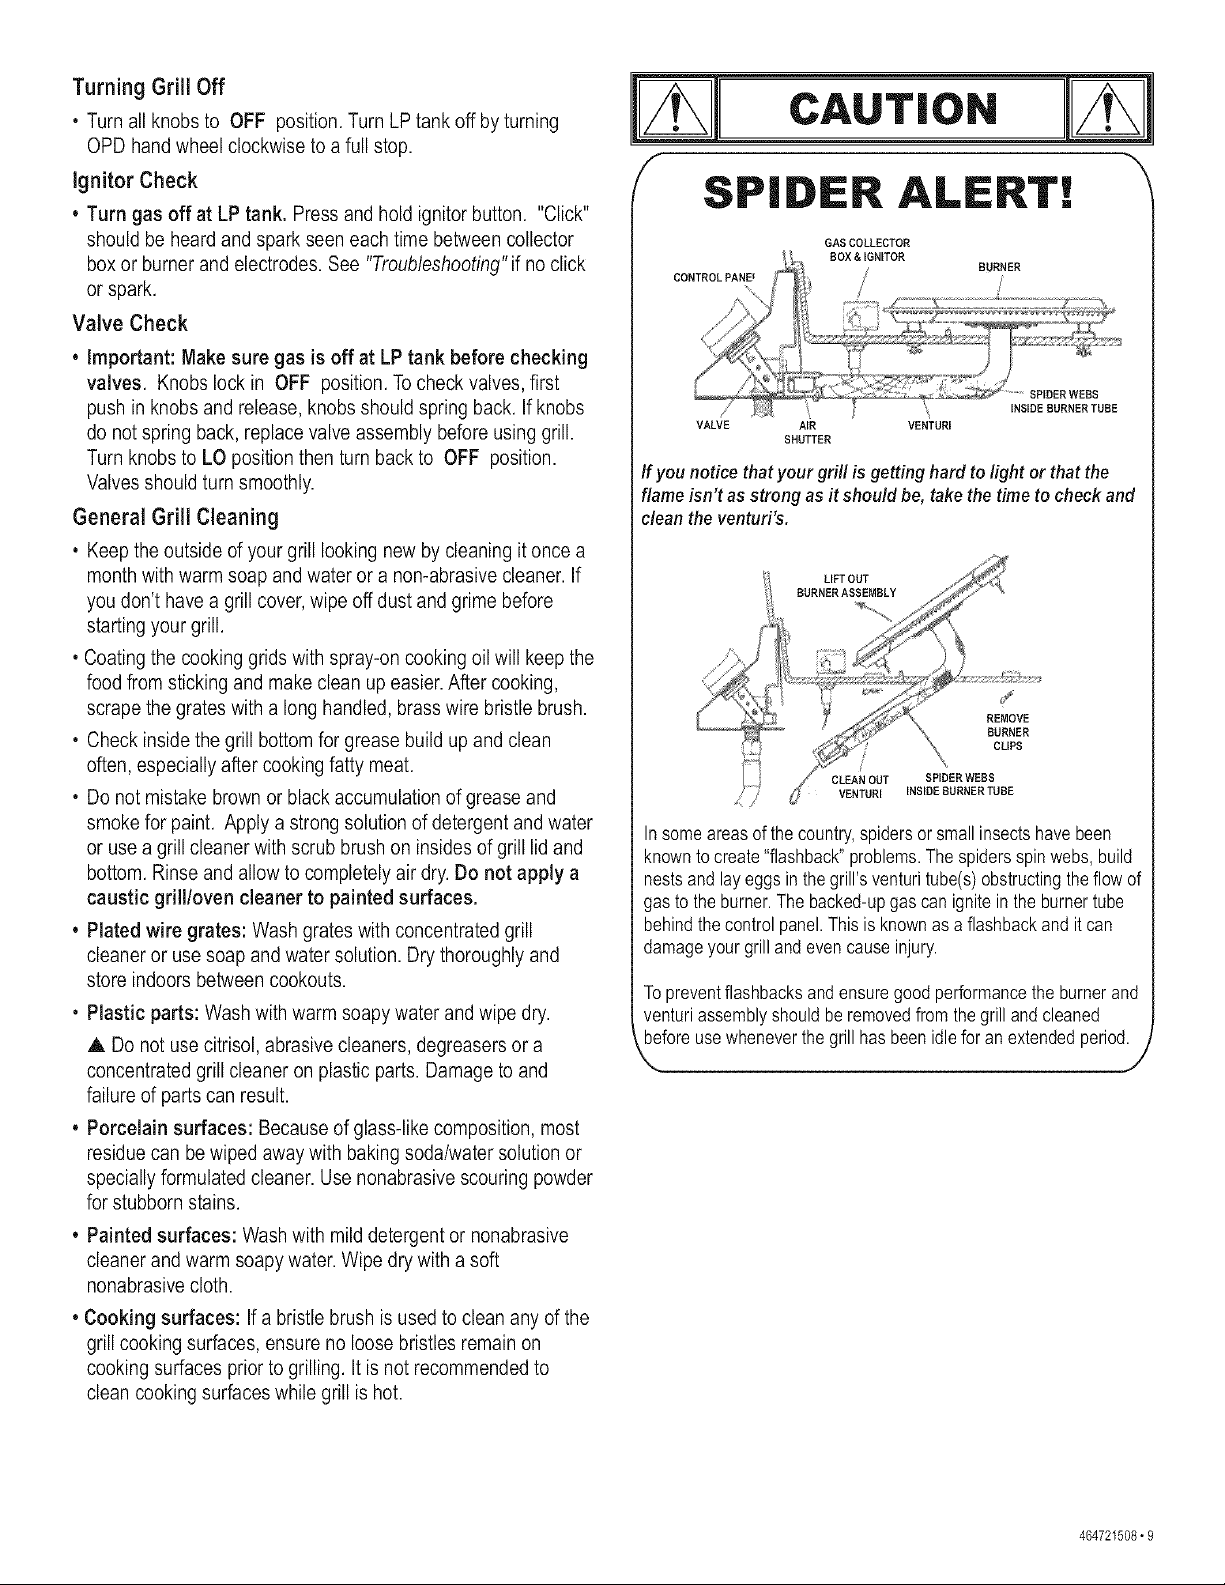
SPIDER ALERT!
GASCOLLBCTOR
VALVE AIR VBNTURI
If you notice thatyour grill is getting hardto light or that the
flame isn't asstrong asit should be,take the time to checkand
cleanthe venturi's.
Insomeareasofthecountry,spidersorsmallinsectshavebeen
knowntocreate"flashback"problems.Thespidersspinwebs,build
nestsand layeggsin thegrill'sventuritube(s)obstructingtheflowof
gasto theburner.Thebacked-upgascanigniteinthe burnertube
behindthecontrolpanel.Thisis knownasa flashbackandit can
damageyourgrillandevencauseinjury.
Topreventflashbacksandensuregoodperformancetheburnerand
venturiassemblyshouldberemovedfromthegrill andcleaned
beforeusewheneverthegrillhas beenidlefor anextendedperiod.
\ J
SHUTTER
LIFT OUT
BURNBRASSEMBLY
VBNTURI INSIDEBURNERTUBE
6/ CLEAN OUT SPIDERWBBS
J
REMOVE
BURNER
CLIPS
• Painted surfaces: Wash with mild detergent or nonabrasive
cleaner and warm soapy water. Wipe dry with a soft
nonabrasive cloth.
• Cooking surfaces: If a bristle brush is used to clean any of the
grill cooking surfaces, ensure no loose bristles remain on
cooking surfaces prior to grilling. It is not recommendedto
clean cooking surfaceswhile grill is hot.
464721508• 9
 Loading...