

Page 1
Owner’s Manual
Dehumidifier
Models 5751
5840
5830
CAUTION:
Before using this dehumidifier,
read this manual and follow all
its Safety Rules and Operating
Instructions.
Sears, Roebuck and Co., Hoffman Estates, IL 60179 USA
P/N 327000007(9905)
Safety
Operation
Care and Cleaning
Troubleshooting
Español
Français
Page 2
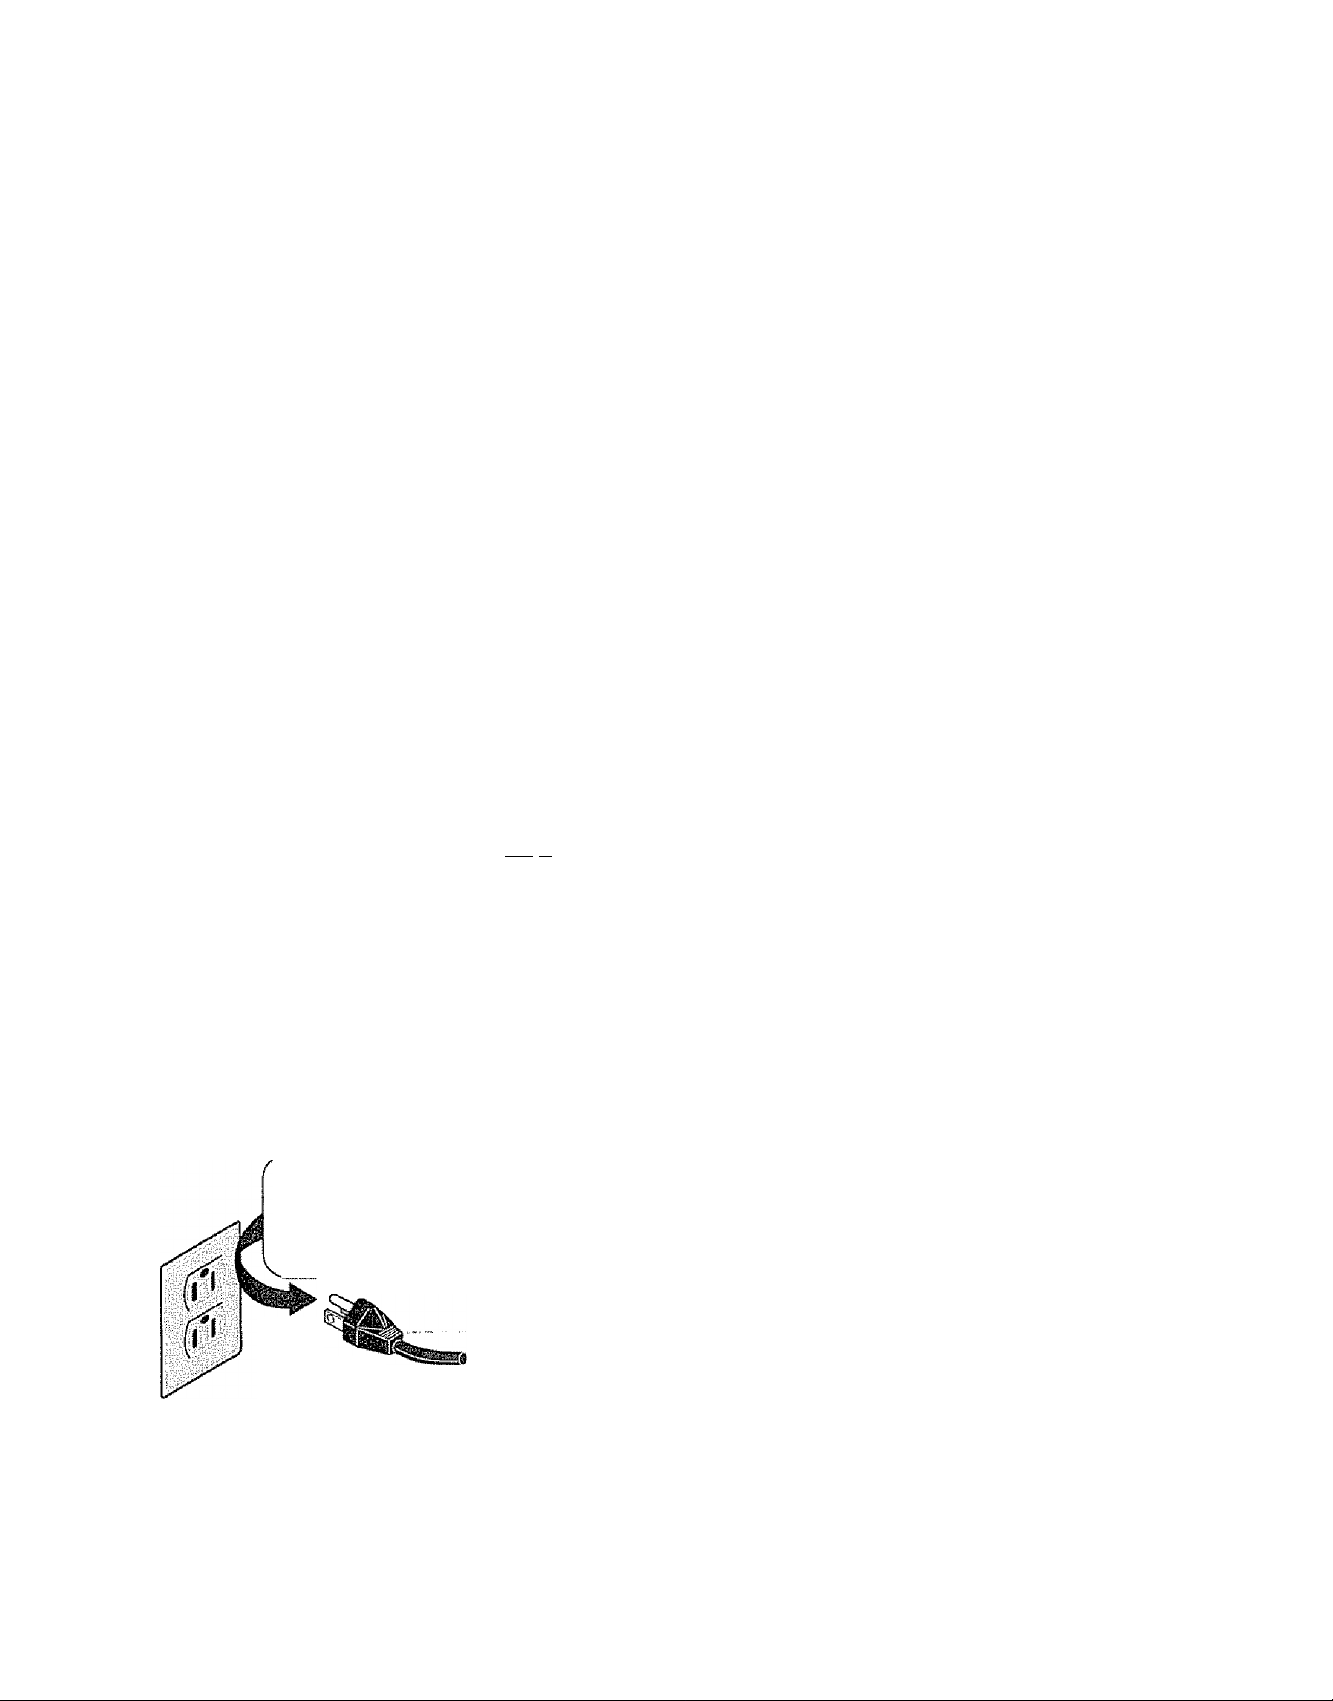
Table of Contents
Product Registration
Important Safety Instructions
Location
How it Works...................
Operating Steps..............
Dehumtdifier Features
Removing Collected Water
Care and Cleaning
Troubleshooting ...............
Warranty ..
Sears Service
Español ...............- .
Français
...........................
........................
.................
.............................
............
..........
.............
.
.......
2
2
3
3
3
3-4
. 4
.
.
5
6
7
7-8
9
17
Product Registration
Important Safety
Instructions
Avoid fire hazard or
electric shock, Do not use an extension
cord or adapter plug. Do not remove
grounding prong from power cord
Record Your Model and Serial Number
in the space provided below record the model and serial number of your
dehumidifier. You will find them on the nameplate located in the center of the
rear panel
Model Number;
Serial Number:
Purchase Date;
Read all instructions before using this dehumidifier. To reduce the risk of
fire, electric shock, or injury to persons when using your dehumidifier, follow
basic precautions, including the following:
gMlii For Your Safety
Do not store or use gasoline or other flammable vapors and liquids in the vicinity
of this or any other appliance Read product labels for flammability and other
warnings-
Child Safety Precautions
0 Destroy the carton, plastic bags, and any packing materials immediately after
the dehumidifier is unpacked. Children should never use these items for play
• Do not leave children unattended in an area where the appliance is operating
Do not allow them to sit or stand on the appliance
.........................
Grounding type
wall receptacle
Do not under
any circumstances
cut, remove,
or bypass
the grounding prong
from this plug.
Power supply
cord with 3-prong
grounding plug
Read and Save These
Instructions
Electrical Information
• For your safety and protection, this dehumidifier is equipped with a three-
prong grounding plug on the power cord Do not, under any
circumstances, cut or remove the round grounding prong from the
plug.
• Your dehumidifier must be plugged directly into a properly grounded and
polarized three-prong receptacle, If the wali receptacle you intend to use will
not accept a three-prong plug, or if you are not sure the outlet is adequately
grounded or protected by a time delay fuse or circuit breaker, have a qualified
• electrician install the proper outlet according to the National Electrical Code
and applicable local codes and ordinances Do not use an extension cord or
an adapter plug,
• Never unplug the dehumidifier by pulling on the power cord. Always grip the
plug firmly and pull straight out from the receptacle,
• Do not pinch, bend, or knot the power cord
Operate dehumidifier only as instructed in this Owneris Guide These instructions
are not meant to cover every possible condition and situation that may occur
Common sense and caution must be used when installing, operating, and
maintaining any appliance.
Printed in U S A
Page 3
Location
Selecting a Location
IMPORTAi^T:
1- Dehumidifier must be operated in an enclosed area to be most effective
Close all doors, windows, and other outside openings to the room>
2- Rear of dehumidifier must be placed at least 8" from a wall or other
obstruction so as not to restrict airfiow to the coils or out of the front grili
3 A dehumidifier operating in a basement will have little or no effect in drying
an adjacent enclosed storage area, such as a closet, unless there is adequate
circulation of air in and out of the area It may be necessary to install a second
dehumidifler in the enclosed area for satisfactory drying
How it Works
Operating Steps
Dehumidifier Features
Fan Control Humidistat Control
\ I /
1 AUTOMATIC
. SHUTOFF
/ T\
When the unit is started, the fan begins to pull moisture-laden air across the
dehumidifying coils. The coiis condense or draw moisture from the air, and air
flows through the front grili into the room as dry, warm air Moisture removed
from air is collected In a bucket on the back of the dehumidifier.
To begin operating the dehumidifier, follow these stepsi
1. Plug the power cord into a property grounded 110/120 volt outlet.
Note: Before operating this unit, see the "Removing Collected Water" section
for proper placement of the bucket Models will not operate if the bucket is
not properly positioned on the support posts.
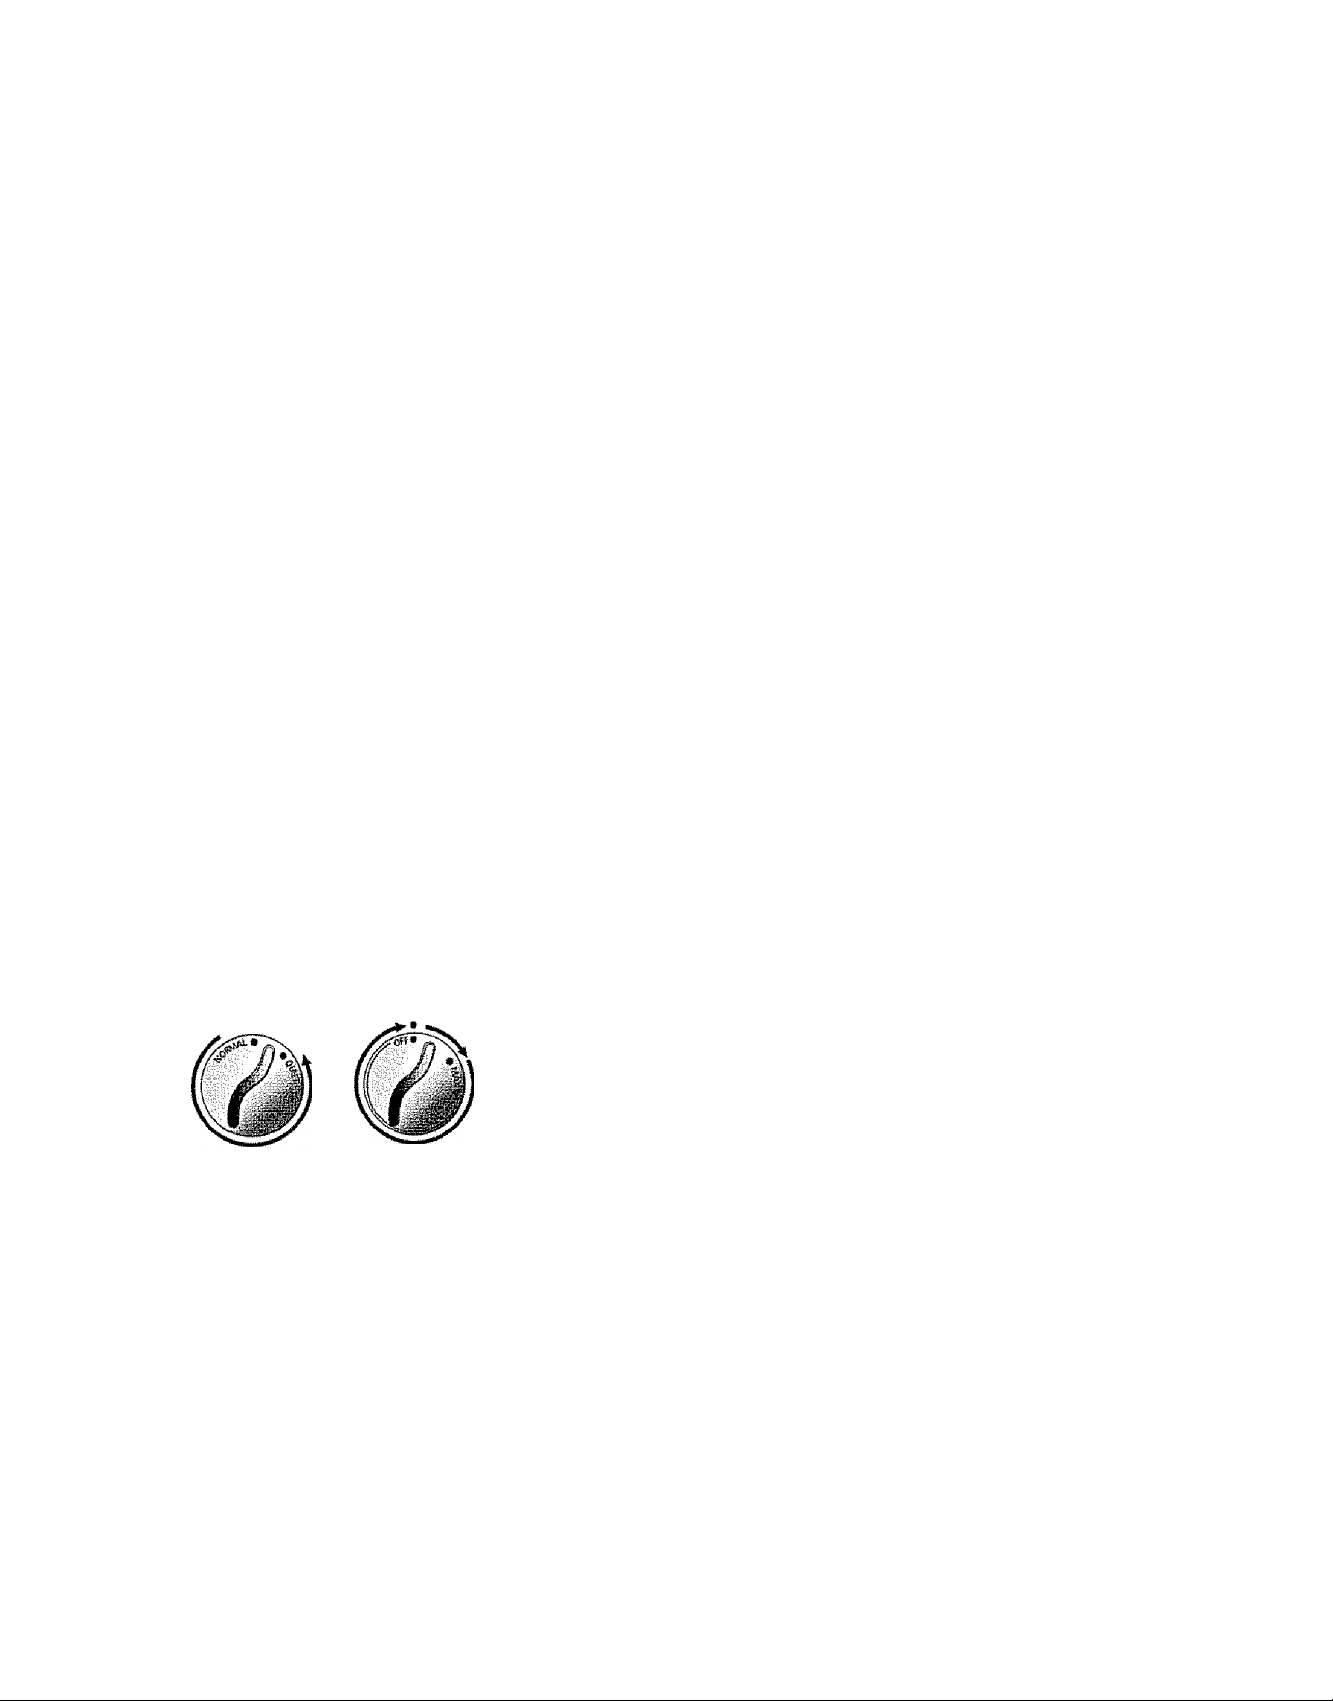
2- When first using the dehumidifier, turn Humidistat Control clockwise
to the MAX. DRY position. The unit wili run continuously at this setting
Note: The dehumidifier should be kept in operation as long as excess moisture
is present in the room air
3 Turn the Fan Control to NORMAL. The NORMAL setting is recommended for
faster moisture removal.
4, Allow the dehumidifier to operate at the above settings for three to four days
After this time, adjust the controls as needed See below
Humidistat Control
The Humidistat Control automaticaily starts dehumidifier when humidity is
excessive. When humidity has been reduced to the comfort level set on the
control, the unit turns off
When first using dehumidifier, turn Humidistat Control ciockwise to MAX,. DRY,
and the Fan Control to NORMAL. Unit will run continuously at this setting
Operate dehumidifier at the MAX, DRY setting for three to four days. During this
time, observe the dampness conditions in the area being dried. When the
dampness and dampness odors are gone, adjust Humidistat Control to the
position between OFF and MAX, DRY that provides a "dryness" condition suitable
to your comfort needs
Fan Control (some models)
The Fan Control adjusts fan speed Turn Fan Control to NORMAL for maximum
moisture removal When humidity has been reduced to the desired levei and
quiet operation is preferred, set Fan Control to QUIET,
Wloisture Removal
At first, the dehumidifier will remove large amounts of moisture It will continue
to do so until the relative humidity is reduced to a point where moisture damage
will not occur- Then, the amount of moisture removed from the air will be a lot
less. This indicates the dehumidifier is operating effectively and Is maintaining the
relative humidity at the desired level Judge the performance of the dehumidifier
by the elimination of dampness and dampness odors, not by the amount of water
being deposited in the bucket When bucket has filled with water, unit will turn
off This model features an Automatic Shut-Off light that will glow until bucket is
emptied and returned to the proper position
Page 4
Dehumidifier Features
(continued)
Operating Conditions
A dehumidifier will not operate satisfactorily if room temperature is 65"F (IS^C)
or lower, or if the humidity in the room is low Under these conditions, the
dehumidifier should be turned off See “Frost Control “
A dehumidifier will not eliminate frost on windows during winter The
dehumidifying coil normally operates above freezing temperatures and cannot
prevent moisture from condensing on the inside of a window pane that is
below freezing-
TIP: St may be helpful to use a dehumidifier in the kitchen or laundry area
where the humidity is high Reducing humidity in these areas may reduce frost
on windows in other parts of the home
Frost Formation on Coils
A light coating of frost on the coils is normal when dehumidifier begins to
operate. Under normal conditions, it will disappear within 60 minutes. Frost also
forms on the coil when room temperature or humidity level is low
Frost Control
The Frost Control feature prevents frost or ice from remaining on the
dehumidifying coil for an extended period of time, When frost formation
occurs, this control turns off the compressor The fan continues to run, causing
any frost or ice to melt The dehumidifier wilt then resume norma! operation ,
Removing Collected
Ik mt f M
Water
Frost Control is also designed to prevent excessive on-off cycling. Under certain
conditions this may allow frost to remain on coil for some time before the
compressor turns off and the frost is cleared.
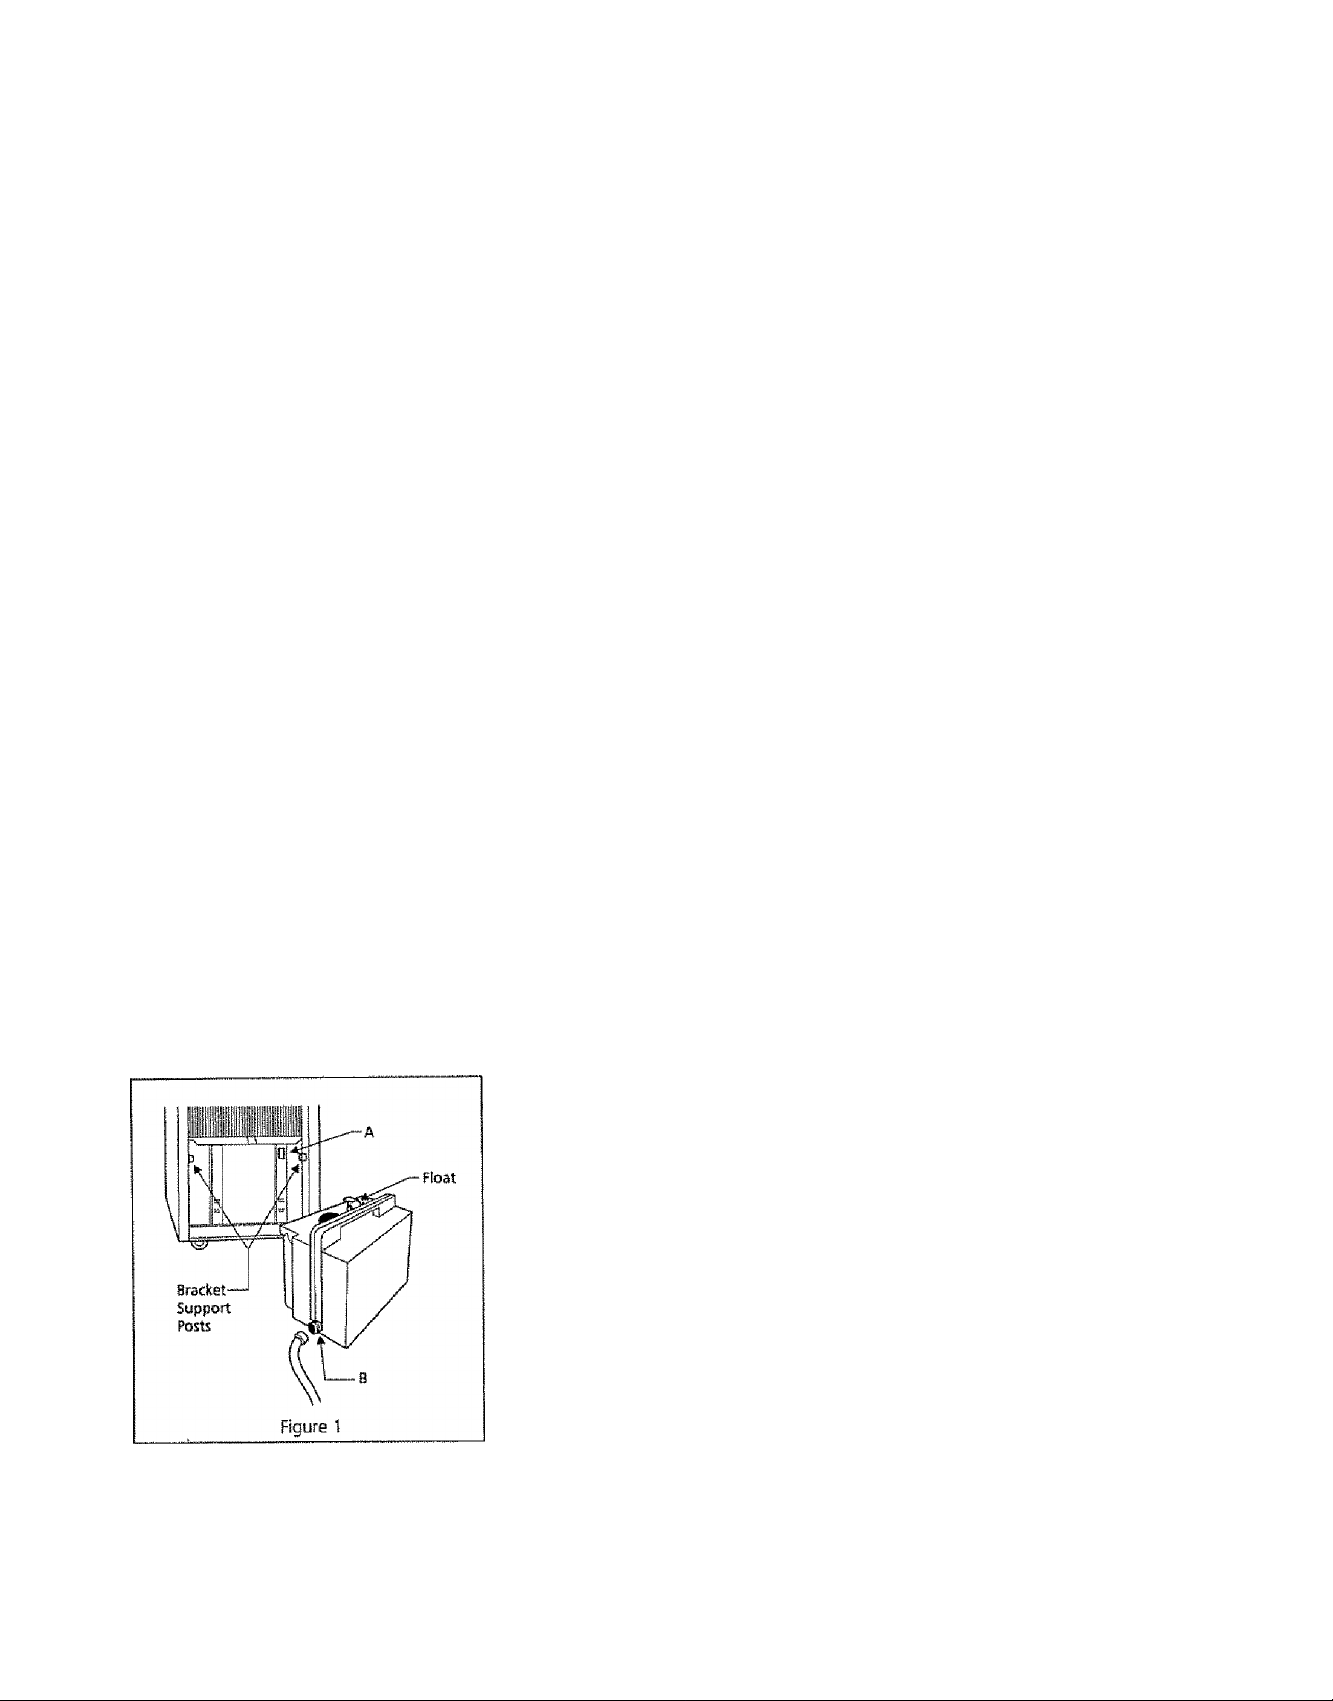
Bucket Installation
Your unit is supplied with a dosed bucket, which hangs conveniently on the
back of the unit to accumulate water removed from the air, The bucket also has
a built-in hose connection to carry water directly to a drain, if desired.
Your dehumidifier is equipped with an Automatic Shut-Off switch (A in Figure 1)
which is activated by a float, The Auto Shut Off switch stops the unit before the
bucket overflows, and turns the unit on again after the bucket is emptied and
replaced.
Direct Draining
if you want the water to flow directly to a drain, conned any standard garden
hose to the bucket connection (B in Figure 1), or place the dehumidifier over the
drain. A standard garden hose has a 3/4” (19 mm) diameter connection with 11
1/2 threads per inch.
Note: When using either of the above direct draining methods, you must first
drill a 3/16" (5 mm) to 3/8" (10 mm) hole in the center of the bucket
connection. This will allow water to flow freely through the connection. Hose
should not be longer than 6 to 8 feet for proper drainage. To reseal the
hose connection on the bucket, use any standard hose end cap
IMPORTANT: Do not drink the water collected in the bucket.
Page 5
Care and Cleaning
Proper Care
Before cleaning, be sure to turn off and unplug unit-
1 Dust outer cabinet with an oil-free cloth, or wash with warm water
2 Use a vacuum cleaner and brush attachment to clean grill.
Note: Fan motor has been permanently lubricated at the factory
Air passing though dehumidifier may carry quantities of dust, lint and fungus
spores. Much of this matter will be deposited on the coil and then flushed away
by natura! drainage, if a buildup develops on coil;
1 Remove buildup when soft and wet Brush away with a soft brush {a
small paintbrush or old clothes brush),
2 Do not allow buildup to dry and harden. It must then be soaked and
softened, and is difficult to remove,
3 If you feel you must flush coil, use a spray bottle with water. Do not let
water enter electrical-machine compartment through the coil Do not
spray coil with a hose.
Filter Cleaning
Check filter on back of unit at least once a month to see if cleaning is needed
Trapped particles in filter can build up and cause a buildup of frost on cooling
coils These conditions can reduce the efficiency of the unit,.
To dean filter, wash with a miid detergent and warm water. Rinse filter well
Gently shake excess water from filter. Dry filter well before reinstalling
Removing Filter:
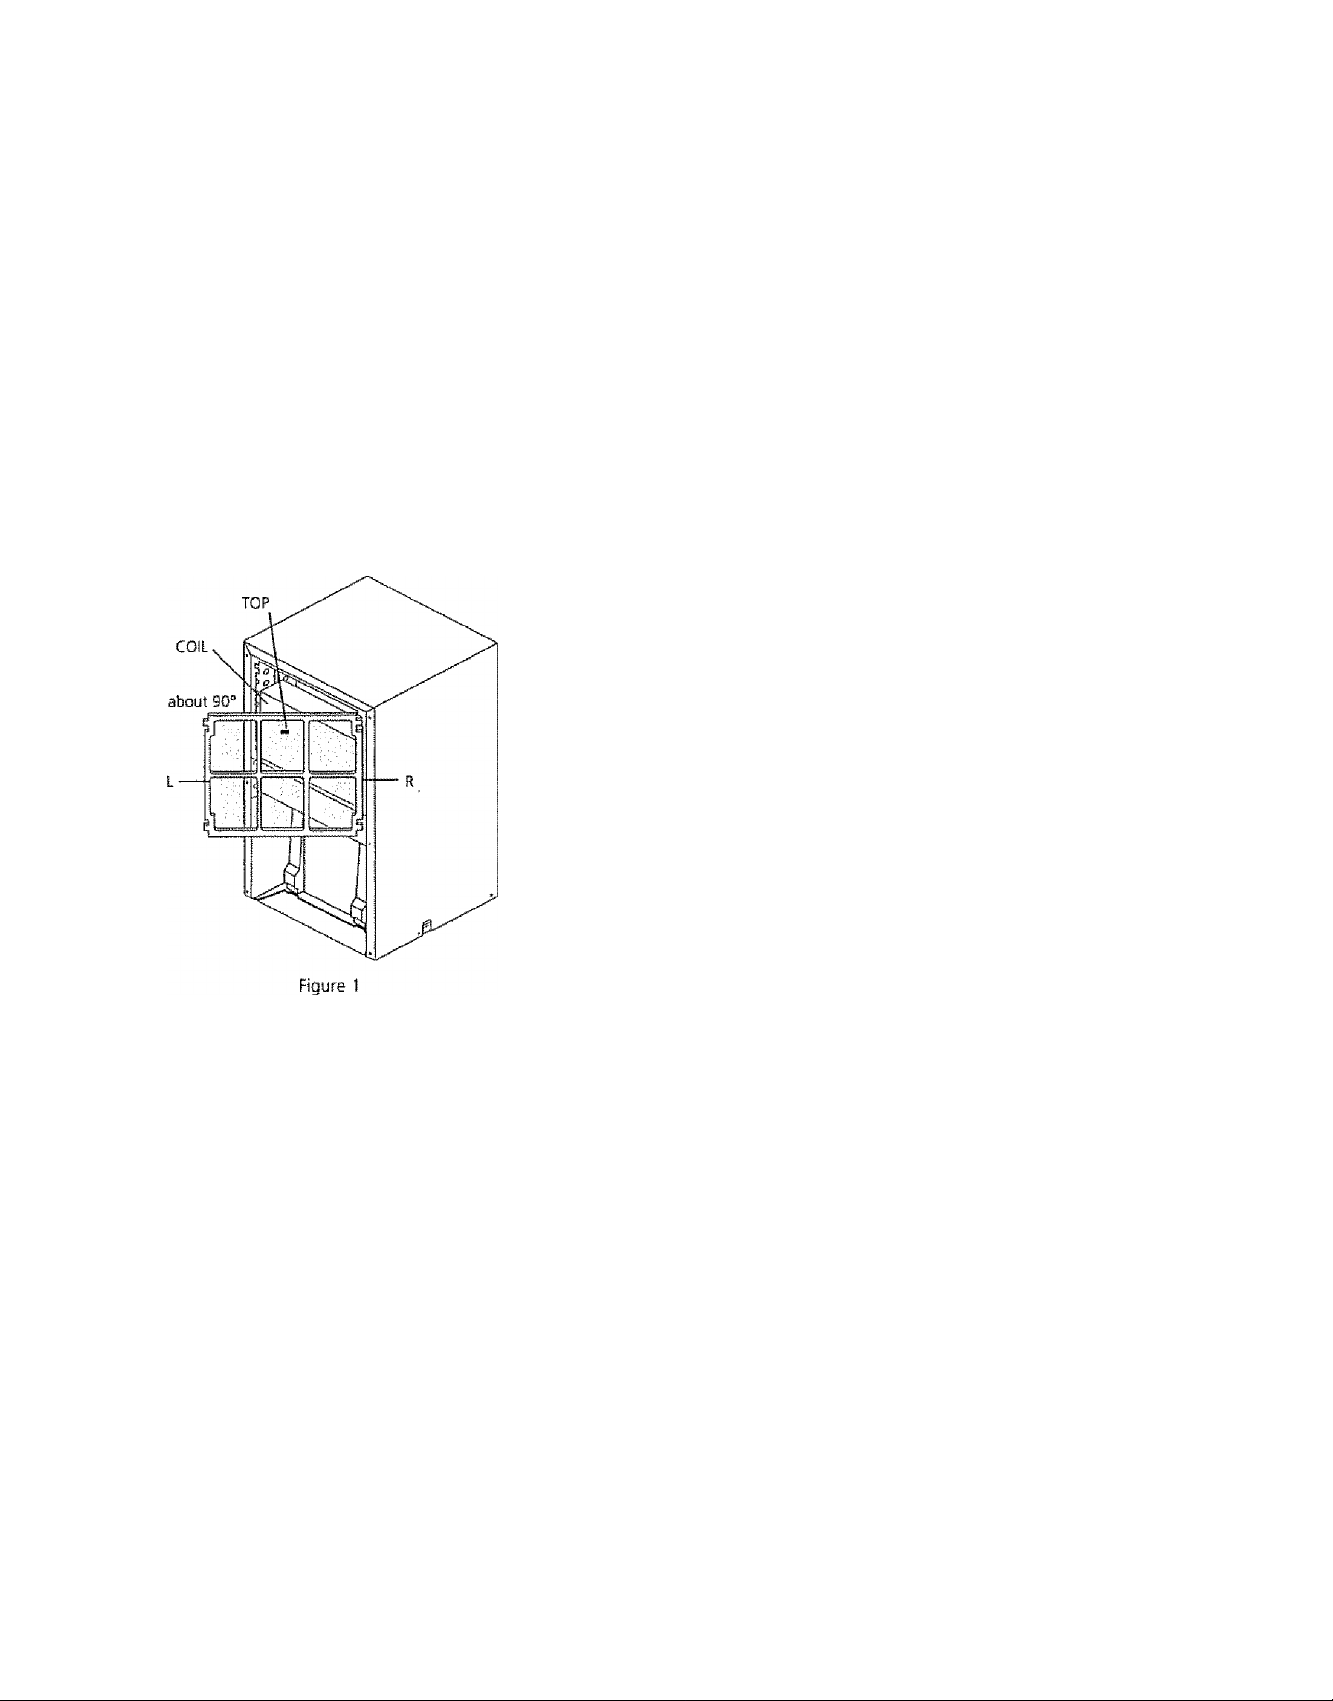
Grasp filter from top and bottom, and gently pull toward you, bowing filter
slightly Undo left side filter tabs from unit Swing filter out toward the right.
When filter is at about 90°, pull to remove, {Figure 1 )
Reinstalling Filter:
Hold filter from top and bottom The word TOP and the letters R (right) and L
(left) should be facing you Slip right side tabs into slots on the right side first.
Swing filter to the left. Bowing filter slightly, insert left side tabs into slots on
the left side
Bucket Cleaning Instructions:
Periodic cleaning of bucket with a mild detergent and water will prevent the
growth of mold, mildew and bacteria
Page 6

Dehumidifier Troubleshooting Guide
Bsforc csiling for S6fvicfi, rGvisw this probism occurrGticG list It may savs you time and expense, because some of the
occurrences are not the result of defects in materials or workmanship, and would not be covered by the warranty
SOLUTION
DEHUMiDIRER DOES NOT OPERATE.
Plug is disconnected from outlet Push plug firmly into wall outlet
House fuse blown or circuit breaker tripped Replace fuse with time delay type or
reset circuit breaker
The dryness level you selected has been reached Dehumidifier automatically shuts off
when selected amount of moisture has been removed from the air If you want to
remove more moisture, turn the Humidistat Control to MAX DRY After the
dehumidifier starts, reset the control to the desired setting.
Bucket not installed properly Hang bucket on support posts See “Removing
Collected Water."
Water in the bucket has reached its preset level. Dehumidifter automatically turns off
when this occurs. Empty bucket and return bucket to position
Dehumidifier is not turned on Turn the Humidistat Control to MAX. DRY
DEHUWIIDIFIER RUNS TOO MUCH.
DEHUM1DIFIIR EMITS AN UNPLEASANT
ODOR.
DEHUMIDIFIER 15 OPERATING BUT
ROOM !S NOT DRY ENOUGH.
Windows or doors near dehumidifier are open to outdoors Close all windows or
doors to outside
Area to be dehumidified is too large Check with your dealer to see if capacity is
adequate
Air movement through dehumidifier is blocked. Grill may be dirty. Use brush
attachment of vacuum cleaner to dean grill Dehumidifying coil on back of unit may
be dirty. See "Care and Cleaning “ Dehumidifier must be piaced in a space that does
not restrict air flowing into the rear coil or out of the front grill (See page 2 )
Dehumidifter has been installed or restarted recently The higher the moisture ir> the
room, the longer the dehumidifier will operate
Humidistat Control is set at MAX DRY Dehumidifier will not turn off if Humidistat
Control is at MAX DRY,
The bucket is dirty. Clean per instructions on page 5,
Coils are dirty Clean per instructions on page S
Filter is dirty. Clean per instructions on page 5
Humidistat Control is set too low Turn the Humidistat Control to a higher setting
Dehumidifier has been installed or restarted recently. The higher the moisture in the
room air, the longer it takes for the room air to become dry
Dehumidifier does not have sufficient clearance to operate Air flow to front and rear
grills is blocked. See "Selecting a Location," page 3
FROST APPEARS ON COILS ABOVE
BUCKET OR DRIP TRAY.
FAN-LIKE NOISE.
Room temperature is too low Unit will not operate satisfactorily if the room
temperature is below 65®F (18°C) See "Operating Conditions," page 3,
Refer to causes under DEHUMiDiFlER RUNS TOO MUCH
Dehumidifier has been turned on recently This is normal due to refrigerant rushing
through the coil Frost will usually disappear within 60 minutes
Room temperature is too low Unit will not operate satisfactorily if room temperature
is below 65°F (IS^C) See "Operating Conditions "
Air is moving through the dehumidifier This is a normal sound
Page 7

MM
Sears Dehumidifier
Warranty
Fuïï One Year Warranty on De humidifier
For one year from date of purchase, if this Oehumidifier is operated and
maintained according to the owner's instructions attached to, or furnished
with, the product. Sears wll! repair this Dehumidifier free of charge, if
defective in material or workmanship.
Full Five Year Warranty on Sealed Refrigeration
System
For five years from date of purchase, when this Dehumidifter Is operated
and maintained according to owner’s instructions attached to, or
furnished with the product, Sears will repair the sealed refrigeration
system (consisting of refrigerant, connecting tubing, and compressor
motor) free of charge, if defective in materia! or workmanship.
Warranty (Exciusions)
1, Damage to product caused by misuse, fire, flood, acts of nature.
2, Damages due to commercial use or from product being used in multi
user dwellings
3, Damage to Sealed System’*' caused by salt corrosion or chemica!
reaction to copper/stee!.
* Sealed System (compressor, condenser, evaporator, drier and tubing.)
S©9rs S©rvic©
Warranty Service
Warranty Service is available by returning this Dehumldtfier to the nearest
Sears Service Center in the United States.
This warranty applies only while this Dehumidifier is used in the United States
This warranty gives you specific legal rights, and you may also have other
rights which vary from state to state.
Sears Roebuck and Co.
DEPT„ 817WA
Hoffman Estates, !L 60179
“We Service What We Sell“ is our assurance that you can depend
on Sears for service. Your Kenmore Dehumidifier has added value when
you consider that Sears has service units nationwide, staffed with
professional technicians trained on all appliances Sears selis, They have
the knowledge and skills, tools, parts and equipment to ensure our
pledge to you that "We Service What We Sell."
Sears Maintenance Agreement
Maintain the value of your Dehumidifier with a Sears Maintenance
Agreement, Kenmore Dehumidifters are designed, manufactured, and
tested for years of dependable operation. Yet any appliance may require
service from time to time, The Sears Maintenance Agreement offers you
an outstanding service program for your Kenmore Dehumidifier,
The Sears Maintenance Agreement:
• is your way to buy tomorrow's service at today's prices-
• Eliminates repair bills resulting from normal use,
• Allows for as many service calls as you need.
• Provides an annua! Preventive Maintenance Check at your request to
keep your Dehumidifier in proper running condition.
For more Information, call 1-800-827-6655
Page 8

D^qPií 11*1^1 i 1*1 II*
ww^ ■ R R ■ C K \mm R II II vRIlfR \«4 R
Sears Garantie
Garantie complète de un an sur le déshumidificateur
Pendant un an, à compter de la date d’achat, et à condition que ce déshumidificateur soit
utilisé et entretenu conformément au manuel de Tutilisateur joint au produit ou fourni avec
ce dernier. Sears réparera ce déshumidificateur sans aucuns frais, en cas de défaut de
matériau ou de fabrication.
Garantie complète de cinq ans sur les systèmes de réfrigération scellés
Pendant cinq ans, à compter de la date d'achat, et à condition que ce déshumidificateur
soit utilisé et entretenu conformément au manuel de l'utilisateur joint au produit ou fourni
avec ce dernier, Sears réparera le système de réfrigéraliort scellé (comprenant le
réfrigérant, le tube de raccordement et ie moteur du compresseur) sans aucuns frais, en
cas de défaut de matériau ou de fabrication
Garantie (exclusions)
1, Les dommages infligés au produit par une mauvaise utilisation, un incendie, une
inondation ou un cas de force naturelie,
2. Les dommages infligés par une utiiisation commerciale ou par une utilisation en
collectivité du produit.
3 Les dommages infligés au système scellé* par la corrosion saline ou par une réaction
chimique au cuivre/i l'acier.
‘Système scellé (compresseur, condensateur, évaporateur, sécheur et tube)
Service de
réparation Sears
Service de réparation sous garantie
Le service de réparation sous garantie est disponible en renvoyant le déshumidificateur au
centre de service Sears le plus proche aux États-Unis.
Cette garantie est valable uniquement lorsque ce déshumidificateur est utilisé aux États-Unis
Cette garantie vous accorde des droits Juridiques spécifiques, et vous pouvez également
bénéficier d’autres droits en fonction de TÉtat dans lequel vous habitez.
Sears Roebuck and Co.
DEPT. 8Î7WA
Hoffman Estates, IL 60179 E.U.
« Nous réparons tout ce que nous vendons » est notre assurance que vous
pouvez toujours compter sur nous pour ie service technique. Voire déshumidificateur
Kenmore prend donc plus de valeur si vous considérez le nombre de centres de réparation
Sears à travers íes États-Unis et le professionnalisme de nos techniciens capables de
réparer tous les appareils électroménagers vendus dans nos magasins. Ils possèdent
l'expertise, les outils, les pièces et ¡’équipement nécessaires pour réparer tout ce que nous
vendons.
Contrat d’entretien Sears
Préservez la valeur de voire déshumldiflcafeur avec un contrat d'entretien Sears. Les
déshumidificateurs Kenmore sont conçus, fabriqués et testés pour fonctionner de manière
fiable pendant de nombreuses années, Cependant, tous les électroménagers doivent être
vérifiés de temps à autre. Le contrat d'entretien Sears vous offre un programme d'erjfretien
unique pour votre déshumidificateur Kenmore
Le contrat d’entretien Sears :
• Vous permet de payer les futurs frais d'entretieri à leur coût actuel.
• Élimine les factures de réparations résultant d’une utilisation normale,
• Vous permet de faire autant d’appels que vous vouiez au service de réparation
• Offre une vérification annuelle préventive à votre demande pour que votre
déshumidificateurcontlnue à fonctionner de façon optimale.
Pour plus d'informatlorrs, composez le 1-800-627-6655
23
Page 9

For the repair or replacement parts you need
Call 7am - 7 pm, 7days a week
1-800-366-PART
(1^800-366-7278)
For in-home major brand repair service
Call 24 hours a day, 7days a week
1-800-4-MY-HOME™
(1-800-366-7278)
For the location of a
Sears Parts and Service Center
in your area
Call 24 hours a day, 7days a week
1-800-488-1222
^«•••0000
For more information on purchasing a
Sears Maintenance Agreement
or to inquire about an existing Agreement
Call 9 am - 5 pm, Monday-Saturday
1-800-827-6655
SEAtm
Hom eC en tr ar
The Service Side of Sears*'
Sears, Roebuck and Co., Hoffman Estates, IL 60179, U.S.A.
24
 Loading...