

Kenmore 14812201, 14812200, 14812181, 14812180 Owner’s Manual

I N
ZIG- ZAG SEWING MACHINE
52880
R U C T I 0 N S

@ ©
FRONT VIEW
@
1. Bobbin Winder
2. Special Stitch Control and Width Control
3. Stitch Length Control
4. Light Switch
5. Feed Dog Control
6. Nomenclature Plate
!
7. Needle Plate
8. Feed Dog
9. Needle Clamp Screw
10. Hand Hole Cover Plate
11. Presser Foot
12, Presser Foot Screw
I
®
®
-®
13. Thread Guides
14. Upper Thread Tension Control
15. Thread Take-up Lever
16. Bobbin Winder Thread Guide
17. Upper Thread Guide
2

@
BACK VIEW
@
@
18. Presser Foot Pressure Regulator
19. Face Plate
20. Presser Foot Lever
21, Thread Cutter
22. Hand Wheel
23. Clutch Knob
24, Thread Spool Pins
3
e
o
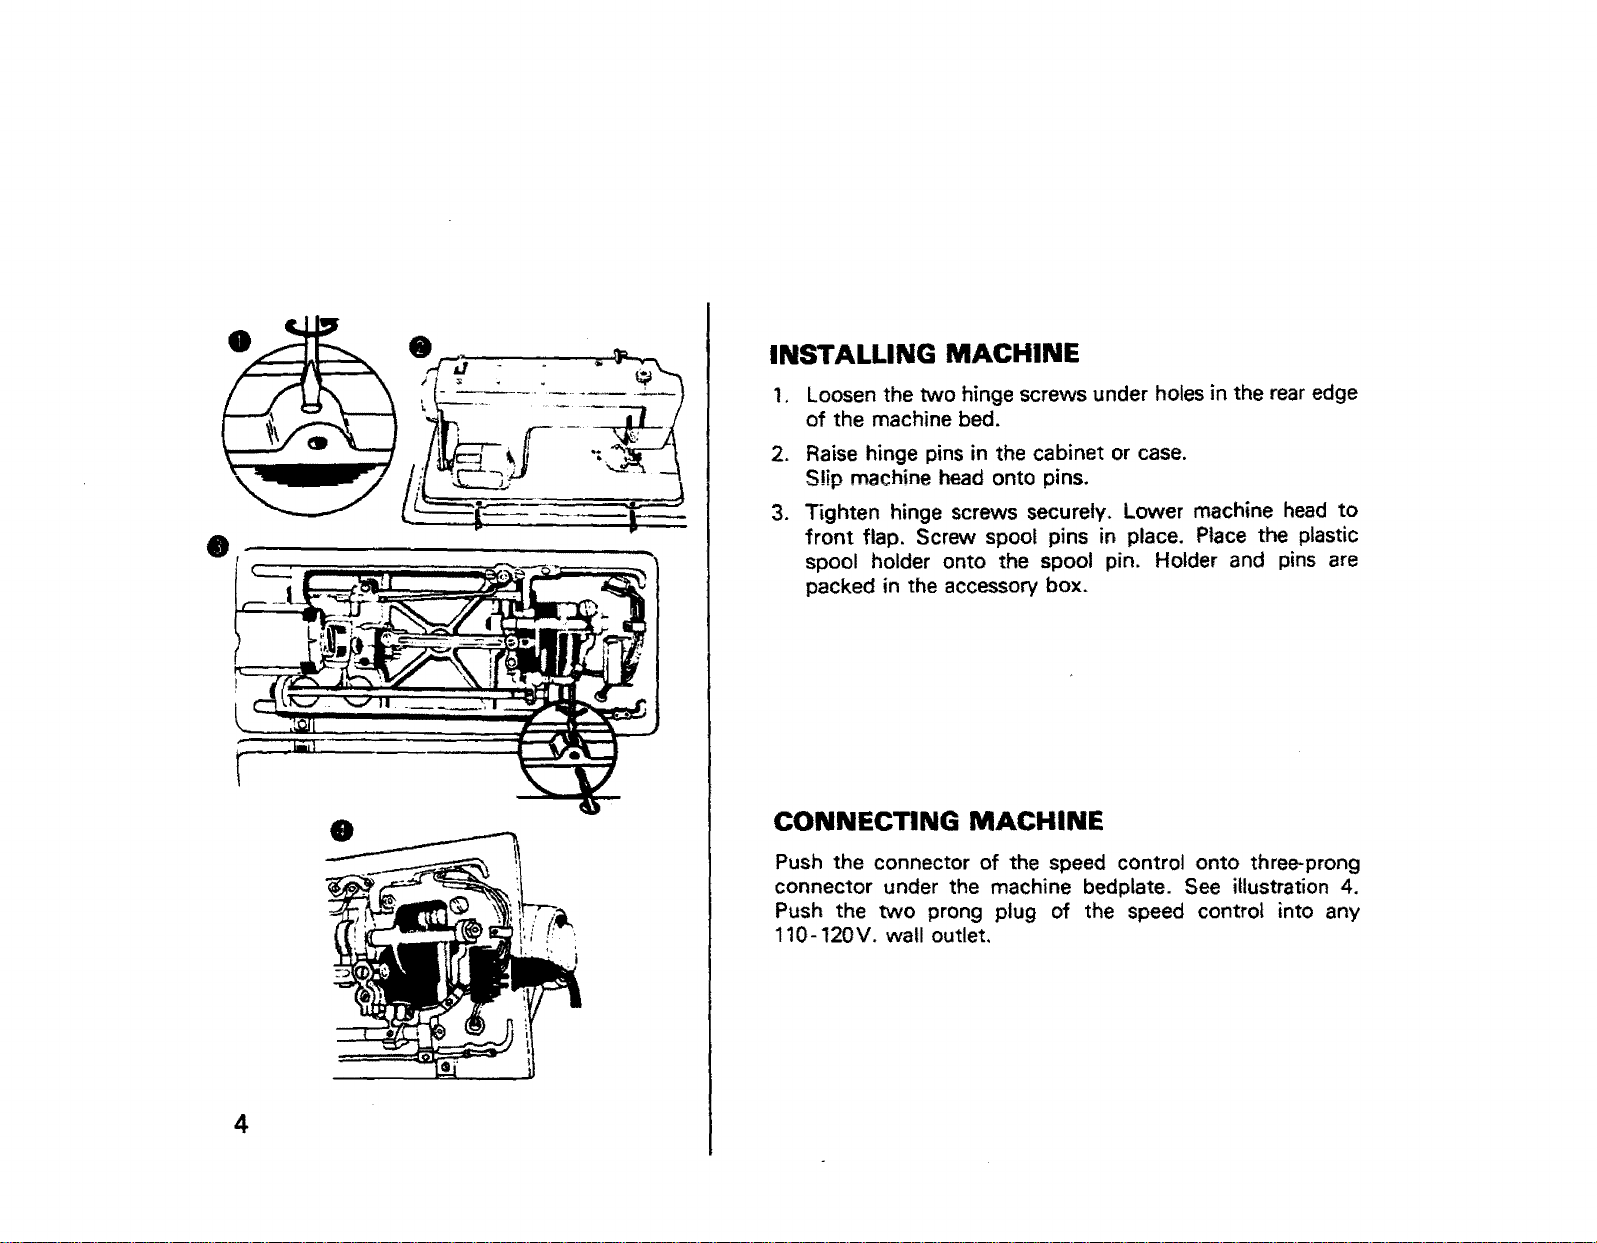
INSTALLING MACHINE
1, Loosen the two hinge screws under holes in the rear edge
of the machine bed.
2, Raise hinge pins in the cabinet or case.
S!ip machine head onto pins.
3. Tighten hinge screws securely. Lower machine head to
front flap. Screw spool pins in place. Place the plastic
spool holder onto the spool pin. Holder and pins are
packed in the accessory box.
CONNECTING MACHINE
Push the connector of the speed control onto three-prong
connector under the machine bedplate. See illustration 4.
Push the two prong plug of the speed control into any
110-120V. wall outlet,
4
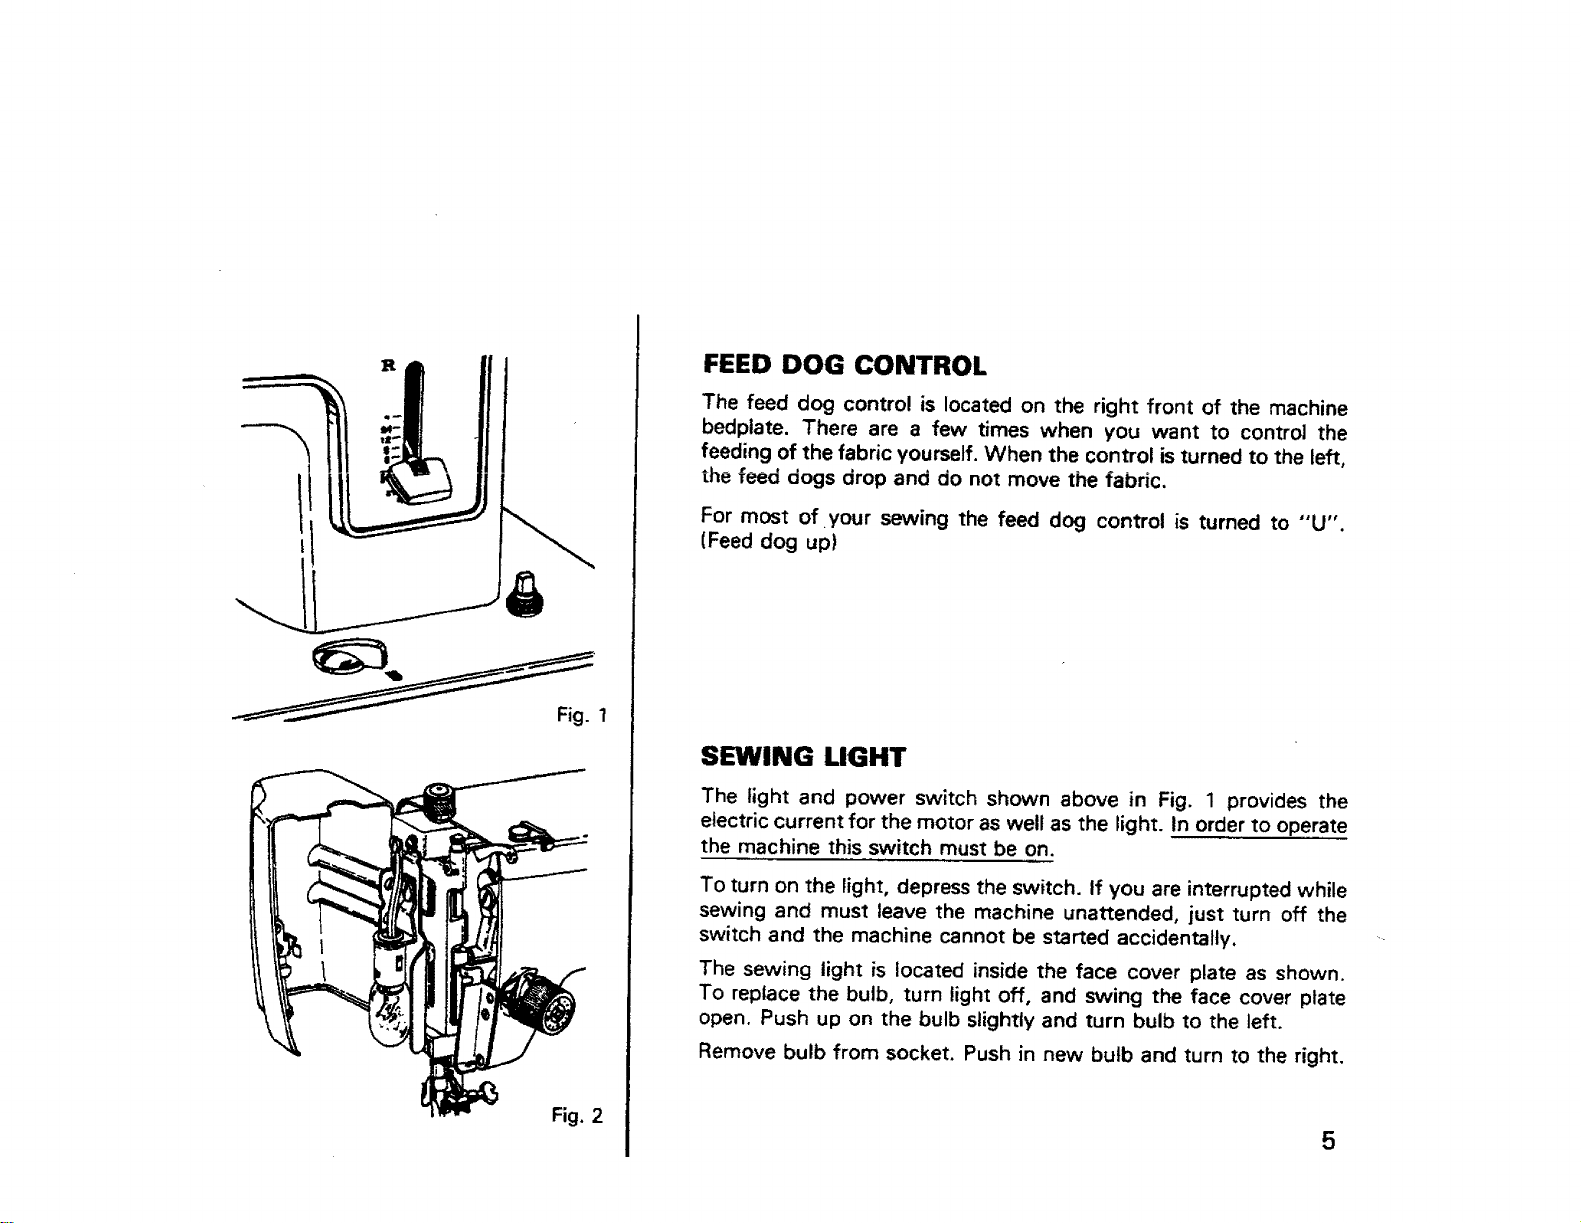
Fig.1
FEED DOG CONTROL
The feed dog control is located on the right front of the machine
bedplate. There are a few times when you want to control the
feeding of the fabric yourself. When the control is turned to the left,
the feed dogs drop and do not move the fabric.
For most of your sewing the feed dog control is turned to "'U".
(Feed dog up)
SEWING LIGHT
The light and power switch shown above in Fig. 1 provides the
electric current for the motor as well as the light. In order to operate
the machine this switch must be on.
To turn on the light, depress the switch. If you are interrupted while
sewing and must leave the machine unattended, just turn off the
switch and the machine cannot be started accidentally.
Fig. 2
The sewing light is located inside the face cover plate as shown.
To replace the bulb, turn light off, and swing the face cover plate
open. Push up on the bulb slightly and turn bulb to the left.
Remove bulb from socket. Push in new bulb and turn to the right.
5
NEEDLES
Use KENMORE needles. The size of the needle should conform with
the size of the thread and both should be suitable to the fabric (See
next page). Never use a bent needle or one with a blunt point. Fig. 1
shows you the exact length of your needle. Be sure you never use in
your machine one that is not this exact length.
You will find among your accessories "'Q NEEDLE ''_ with blue shank. This special needle is to be used when
sewing certain knits and certain difficult synthetic fabrics. If you experience skipped stitches in any of your
sewing, use "'Q NEEDLE ''T".
PLACEMENT OF NEEDLE
Raise needle bar to its highest position by turning the hand wheel
toward you.
Loosen the needle clamp screw. Holding the needle with the flat side
away from you, slip the needle into the needle bar. When it is in as
Flat
side
faces
to
right
far as it will go, tighten the needle clamp screw with a screwdriver.
t | It |
I l It I
Fig. 1
6

NEEDLE, THREAD, FABRIC CHART
THREAD SIZE
POLYESTER CORE/COTTON WRAP
FINE MERCERIZED COTTON
POLYESTER SYNTHETIC
SILK A
NEEDLE SIZE
,, ,,,,, ,,,,,,
9or 1!
FABRIC
Lightweight: Batiste, Dimity,
Chiffon, Silks, Synthetic
Jerseys, Fine Lace, Organza,
Crepe. Taffetta, Voile,
Organdy
Medium Weight: Cotton, Cotton
50 MERCERIZED COTTON
POLYESTER SYNTHETIC
SILK A
t4
Blends, Percale, Gingham,
Shantung, Pique, Seersucker,
Satin, Knits. Vinyl, Suitings,
Linen, Wool Crepe, Leather
50 MERCERIZED COTTON
MERCERIZED HEAVY DUTY
POLYESTER sYhrTHETIC
SILK A
14 or 16
Medium Heavy Weight: Corduroy,
Denim, Wool, Sailcloth, Wool
Flannel, Gabardine, Velvets,
Leather
HF_AVY DUTY MERCERIZED COTTON Heavy Weight: Coatings,
POLYESTER SYNTHETIC 18 Upholstery, Cotton Duck.
SILK A Heavy Twills, Canvas
16, 18 or
SILK BUTTONHOLE TWIST "Q NEEDLE"TM Decorative Top-stitching on all
"Q SET"TM
POLYESTER SYNTHETIC
50 MERCERIZED COTTON
("Q NEEDLE'TM
and
"Q FOOT"TM)
ilUll lUUllllll i
Synthetic Knits and Stretch
Fabrics: Polyester Double
Knits, Nylon Tricot, Jersey,
Stretch Terry, Sl_ndex,
Cire Tricot
7
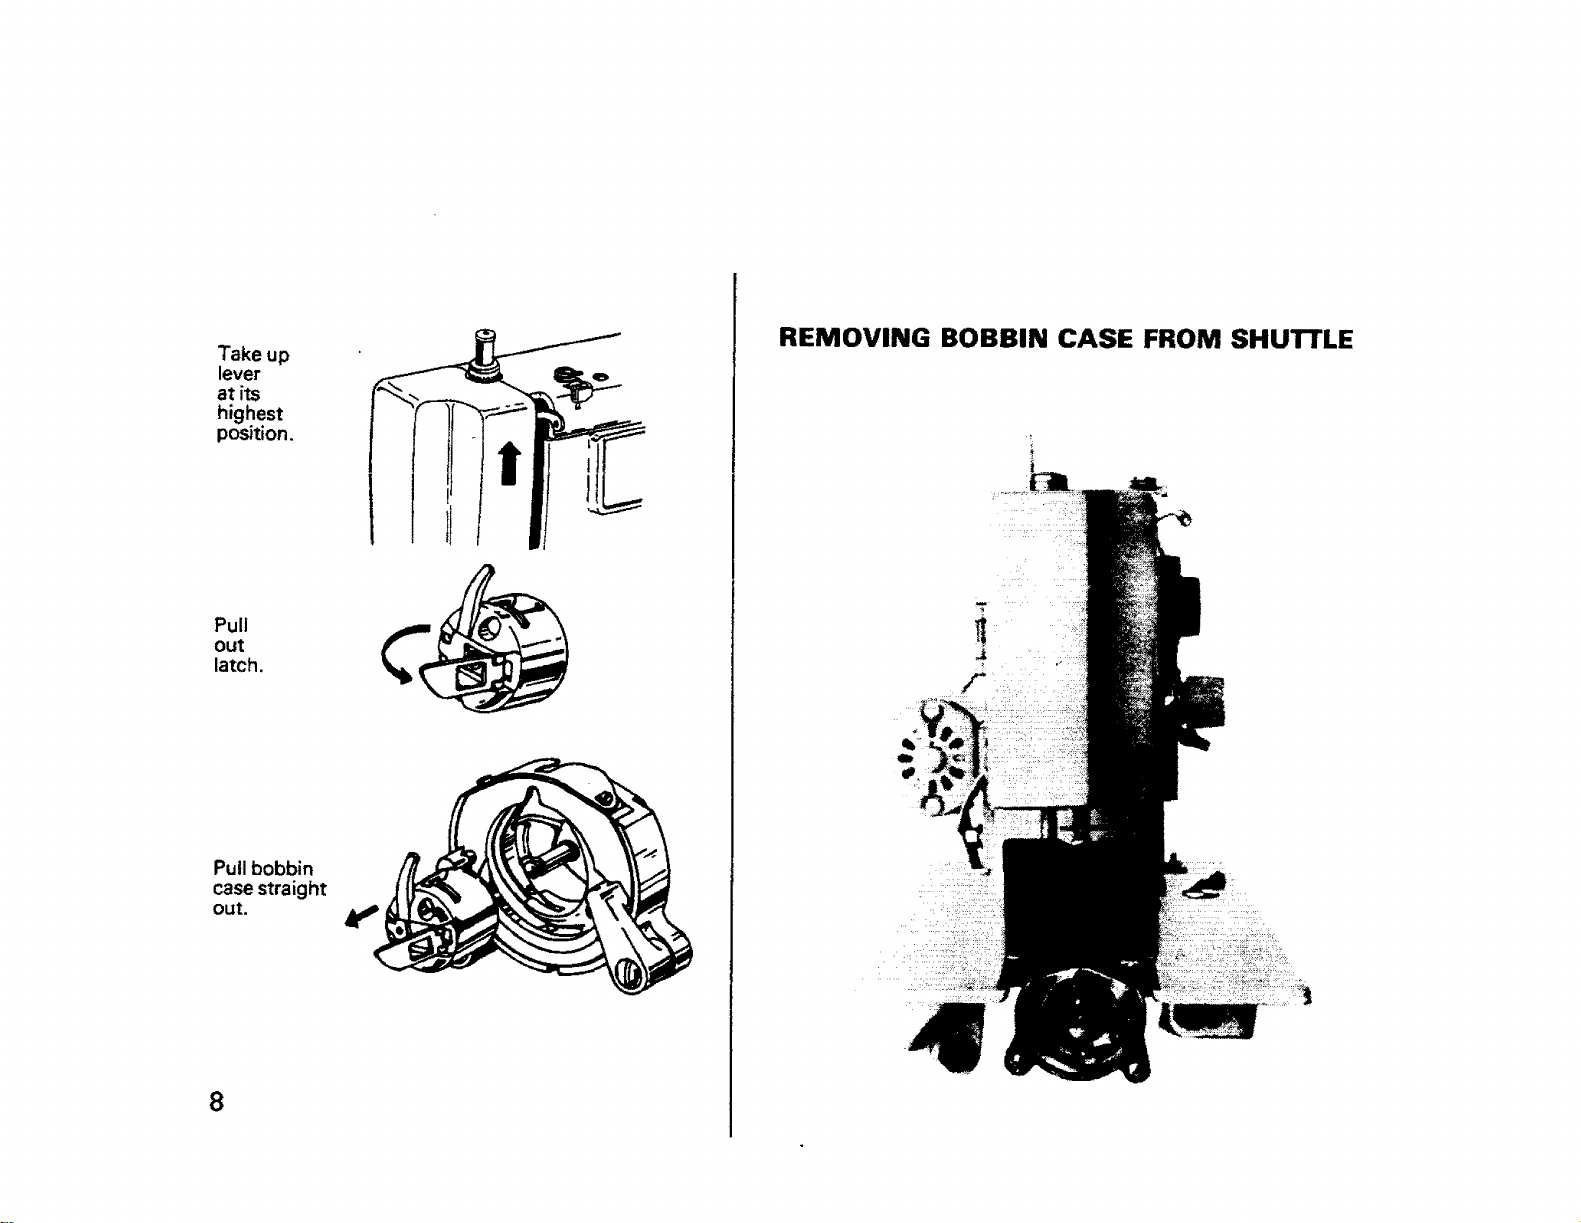
Take up
lever
at its
highest
position.
Pull
out
latch.
Pullbobbin
case straight
out.
REMOVING BOBBIN CASE FROM SHUTTLE
_J
I I l! tt'_r _
I l't
8

O
O
@
@
@
O
WINDING THE BOBBIN
1. Release clutch by turning clutch
knob toward you.
2. Draw thread from spool through
bobbin winder tension discs as
shown.
3. Pull end of thread through hole in
bobbin as shown.
4. Place bobbin onto bobbin winder
shaft with end of thread coming
from-the top of the bobbin.
Push bobbin winder latch against
bobbin until it clicks. Holding onto
end of thread, start machine.
When bobbin is slightly filled, snip
off end of thread.
5. Start machine. Wind thread until
bobbin winder latch releases.
6. Tighten clutch knob and remove
bobbin.
Two spool pins have been included
with this machine to aid in bobbin
winding, By placing a spool of thread
on the second spool pin, you may
wind your bobbin without unthreading
the machine.
9

THREADING THE BOBBIN CASE
INSERTING BOBBIN INTO BOBBIN CASE ........ CASE INTO SHUI"rLE
L
O
@
O @
i
@
t.
Insert bobbin into bobbin case
making sure thread is coming from
bobbin as shown.
.
Pull thread through slot of case as
shown.
.
Pull thread under tension spring.
4.
Turn hand wheel to raise needle to
its highest position. Holding latch
open, position case into shuttle,
and release latch. Case should lock
into place when latch is released.
,
Hold needle thread loosely in ieft
hand and rotate hand wheel toward
you one complete turn. Bring
bobbin thread up by pulling upper
thread.
10
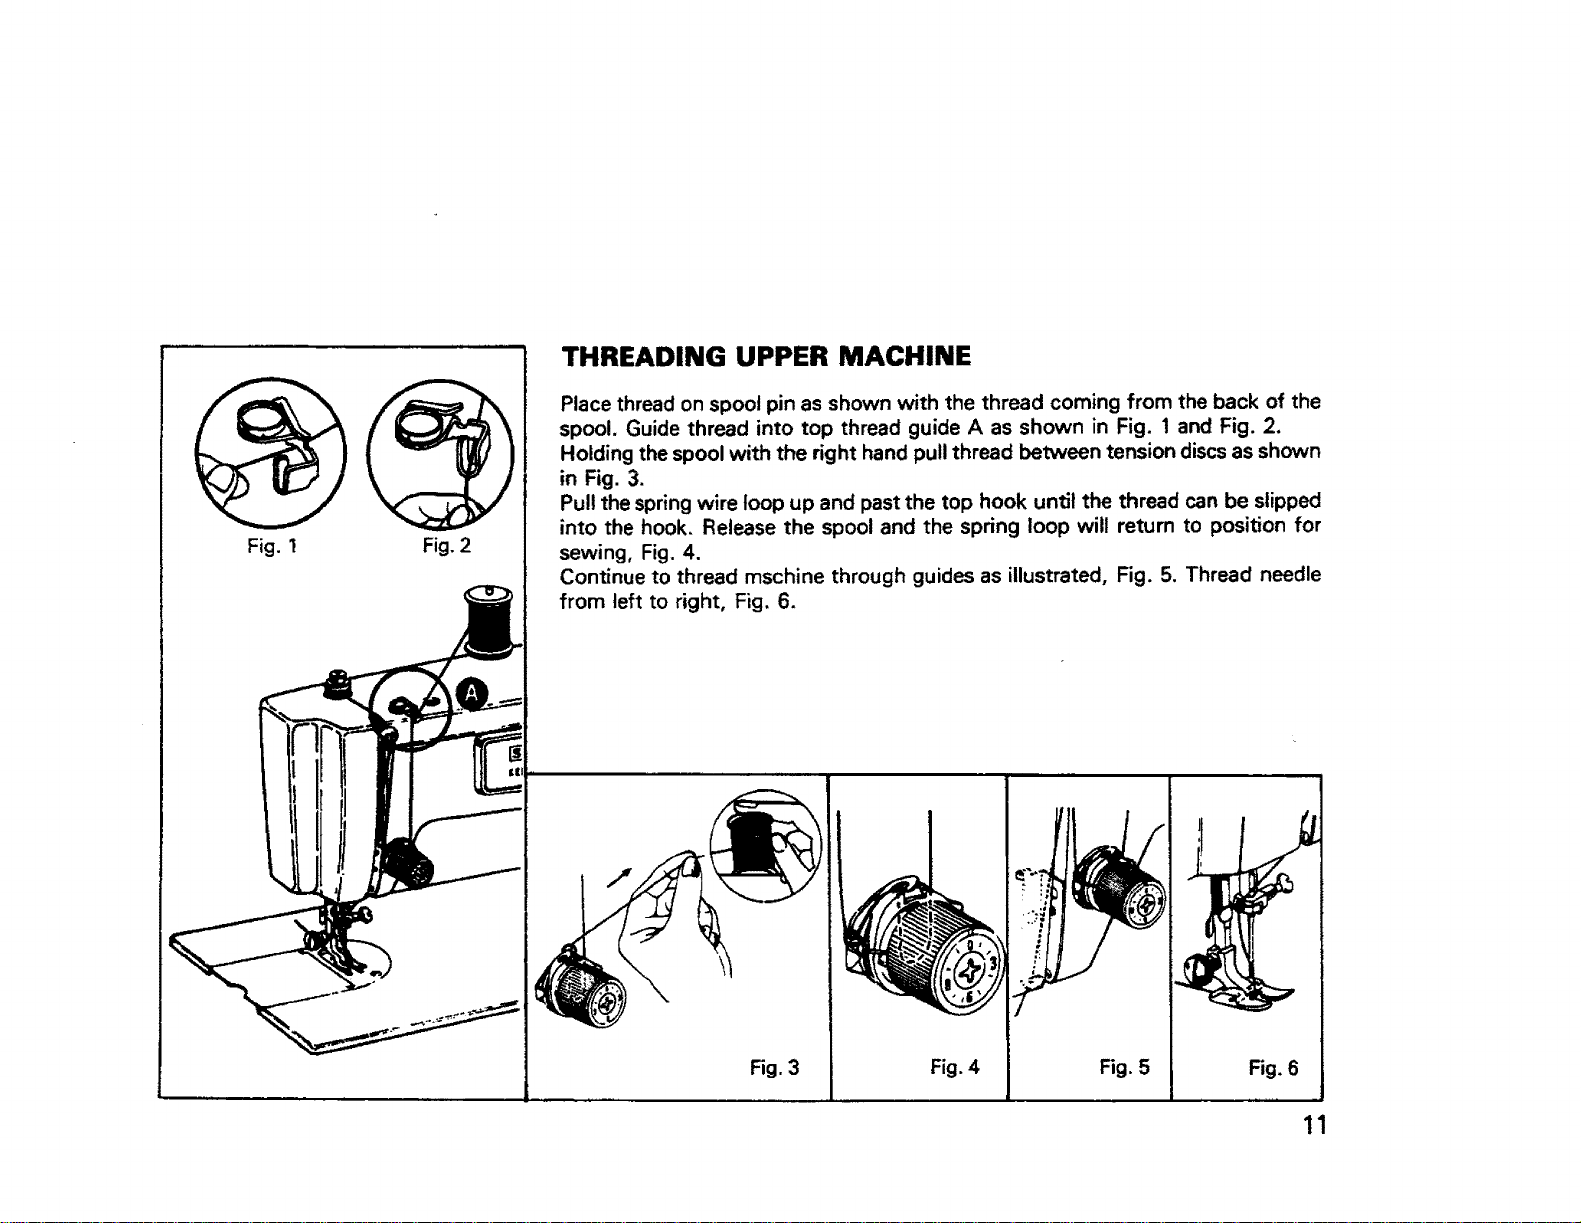
Fig.I Fig. 2
THREADING UPPER MACHINE
Place thread on spool pin as shown with the thread coming from the back of the
spool. Guide thread into top thread guide A as shown in Fig. 1 and Fig. 2.
Holding the spool with the right hand pull thread between tension discs as shc_wn
in Fig. 3.
Pull the spring wire loop up and past the top hook until the thread can be slipped
into the hook. Release the spool and the spring loop will return to position for
sewing, Fig. 4.
Continue to thread mschine through guides as illustrated, Fig. 5. Thread needle
from left to right, Fig. 6.
Fig. 3 Fig. 4 Fig. 5 Fig. 6
11
 Loading...