

Page 1

I E-488
Keithley MetraByte Corporation
Page 2

*****
Page 3

IE-488 Manual
Part Number: 24820
Revision A
Last Edit: June, 1984
Copyright @ 1984
KEITHLEY METAASYTEIASYSTIDAC
440 Myles Standish Boulevard
Taunton. Massachusetts 02780
Telephone 508/880-3000
FAX 508/880-0179
Page 4
WARRANTY INFORMATION
All products manufactured by Keithley MetraByte are warranted against defective materials
and worksmanship for a period of one year from the date of delivery to the original
purchaser. Any product that is found to be defective wlthin the warranty period will. at the
option of Keithley MetraByte, be repaired or replaced. This warranty does not apply to
products damaged by improper use.
Page 5
WARNING
Keithley MetraByte assumes no liability for damages consequent to the
u8e of this product. This product is not designed with components of a
level
of
reliability suitable for use in life support or crltical applications.
Information furnished by Keithley MetraEiyte is believed to be accurate and reliable.
However, the Keithley MetraByte Corporation assumes no responsibility for the use of such
information nor for any infringements of patents or other rights of third parties that may
result from its use.
No license is granted by implication or otherwise under any patent
rights of Keithley MetraByte Corporation.
Keithley MetraByte/Asyst/DAC
is also referred to here-in as Keith&
MetmByte.
BasicTM
is a trademark of Dartmouth College.
IBM@ is a registered trademark of International Business Machines Corporation.
PC, XT. AT, PS/2.
and
Micro Channel Architecture@
(MCA) are trademarks of
International Business Machines Corporation.
Microsoft@
is a registered trademark of Microsoft Corporation.
Turbo C@ is a registered trademark of Borland International.
Page 6

Page 7
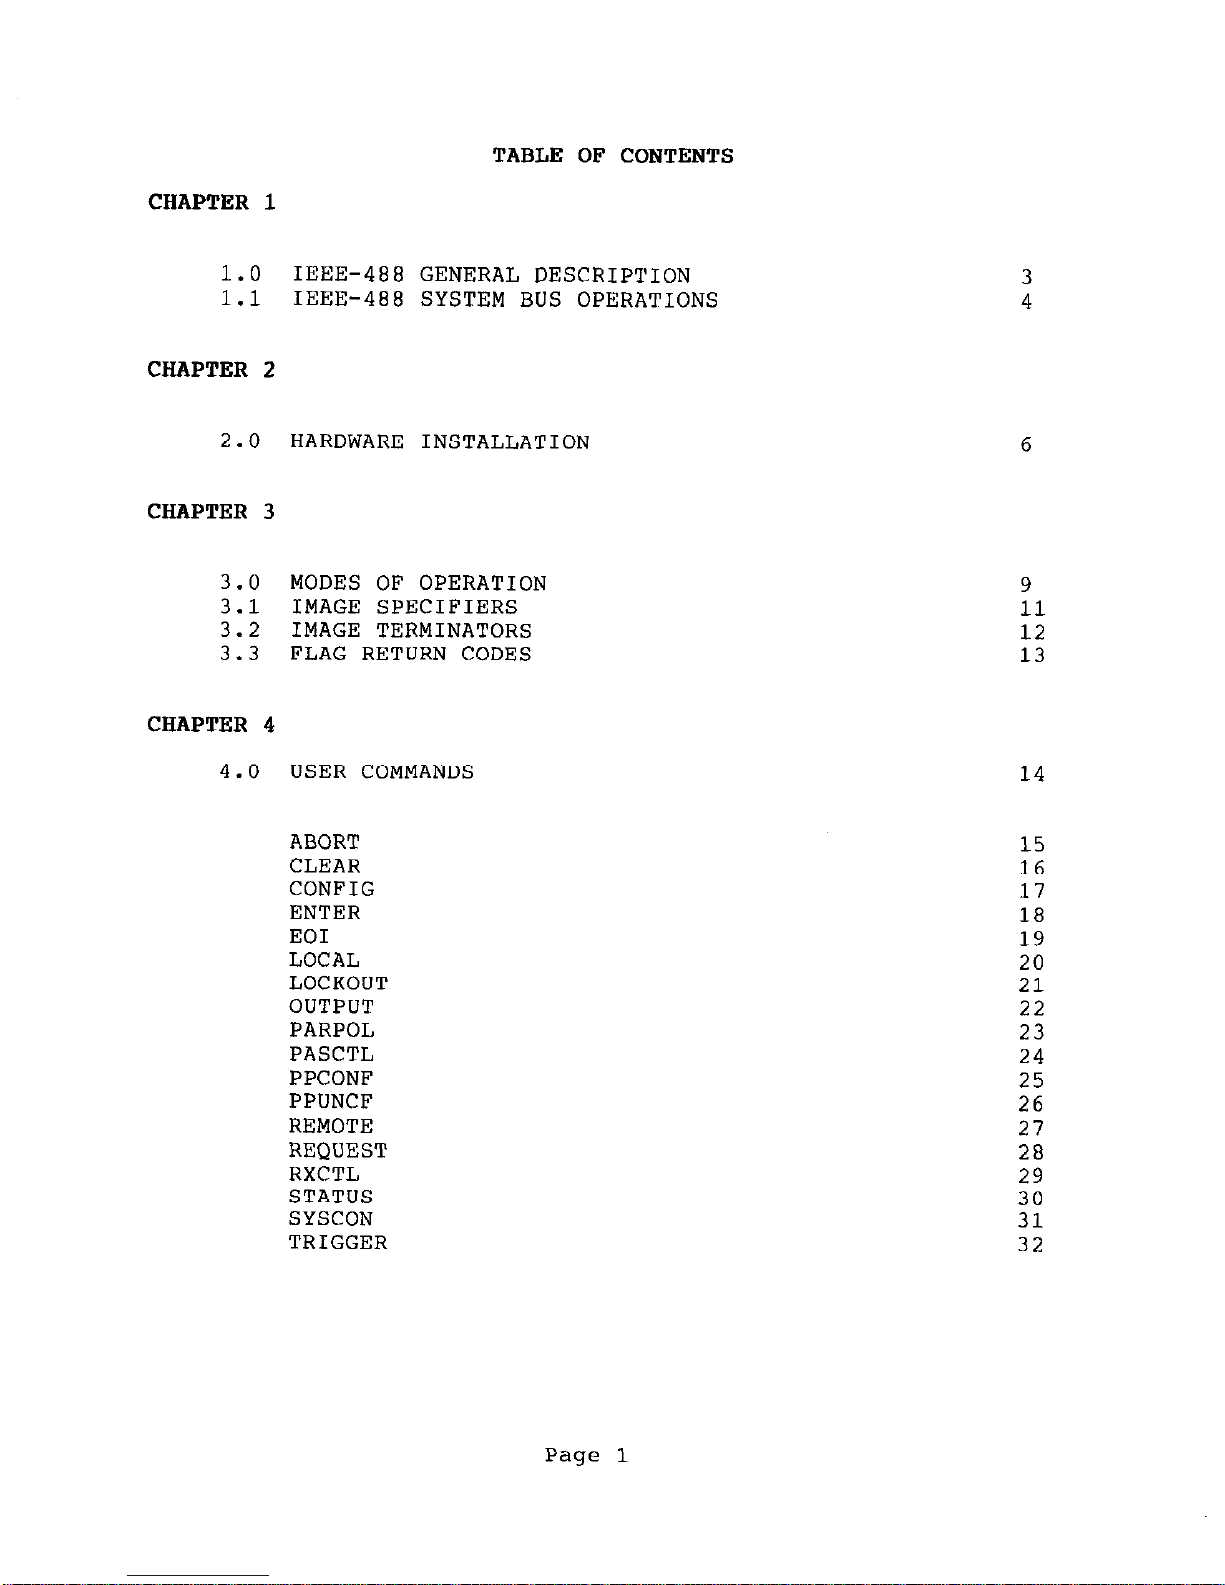
TABLE OF CONTENTS
CHAPTER 1
1.0 IEEE-488 GENERAL DESCRIPTION
1.1 IEEE-488 SYSTEM BUS OPERATIONS
CHAPTER 2
2.0 HARDWARE INSTALLATION
CHAPTER 3
3.0 MODES OF OPERATION
3.1 IMAGE SPECIFIERS
3.2 IMAGE TERMINATORS
3.3 FLAG RETURN CODES
CHAPTER 4
4.0 USER COMMANDS
ABORT
15
CLEAR
16
CONFIG
17
ENTER
18
EOI
19
LOCAL
20
LOCKOUT
21
OUTPUT
22
PARPOL
23
PASCTL
24
PPCONF
25
PPUNCF
26
REMOTE
27
REQUEST
28
RXCTL
29
STATUS
30
SYSCON
31
TRIGGER
32
3
4
9
11
12
13
14
Page 1
Page 8
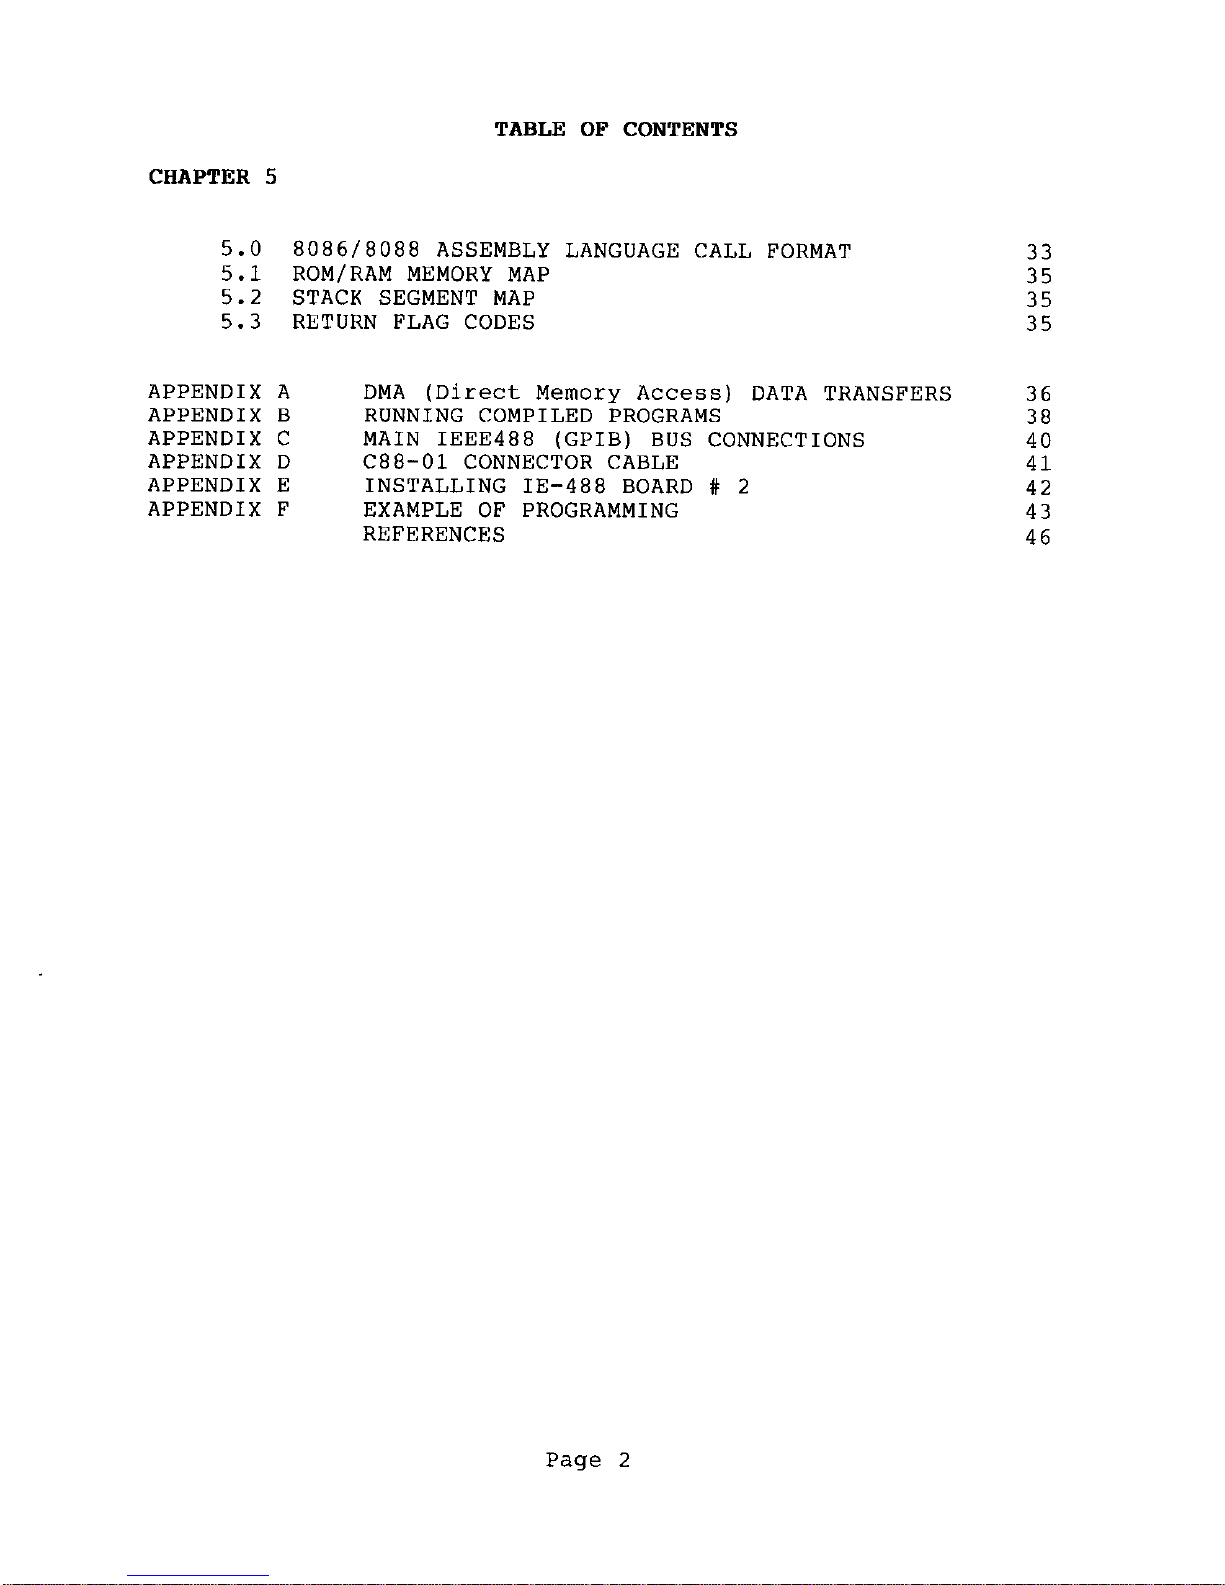
TABLE OF CONTENTS
CHAPTER 5
5.0 8086/8088 ASSEMBLY LANGUAGE CALL FORMAT
5.1 ROM/RAM MEMORY MAP
5.2 STACK SEGMENT MAP
5.3 RETURN FLAG CODES
APPENDIX A
DMA (Direct Memory Access) DATA TRANSFERS 36
APPENDIX B
RUNNING COMPILED PROGRAMS 38
APPENDIX C
MAIN IEEE488 (GPIB) BUS CONNECTIONS
40
APPENDIX D
C88-01 CONNECTOR CABLE 41
APPENDIX E
INSTALLING IE-488 BOARD # 2
42
APPENDIX F
EXAMPLE OF PROGRAMMING 43
REFERENCES
46
33
35
35
35
Page 2
Page 9
GPIB IEEE488 MANUAL
1.0 GPIB IEEE488 INTERFACE CARD GENERAL DESCRIPTION
MetraByte's IE-488 General
Interface (GPIB) I/O expansion board
for the IBM-PC computer is designed to plug directly into one I/O
slot inside the IBM-PC.The IE-488 has a built in 12 KbyteROM
interpreter which handles all the required initialization and
protocol functions required to use the IEEE488 Interface. No disk
files with driver routines are needed and the interpreter allows
all commands to be programmed in conventional high level IEEE488
command syntax e.g. REMOTE, ENTER etc.
The IE-488 complies with
the IEEE November 1978 standard. The Interpreter is a relocatable
16 Kbyte block of code which may be entered via a BASIC CALL
statement or via DOS interrupt commands using assembly language
programming. All commands are string coded for ease of use. The
GPIB will handle up to 14 other talker/listener devices. The
controller maybe the IBM or any other of the 14 devices, any one
of which control may also be transferred to or from. The IE488
interpreter includes a group of subroutines which may be used to
to condition the data before data transfer when using assembly
language programs.
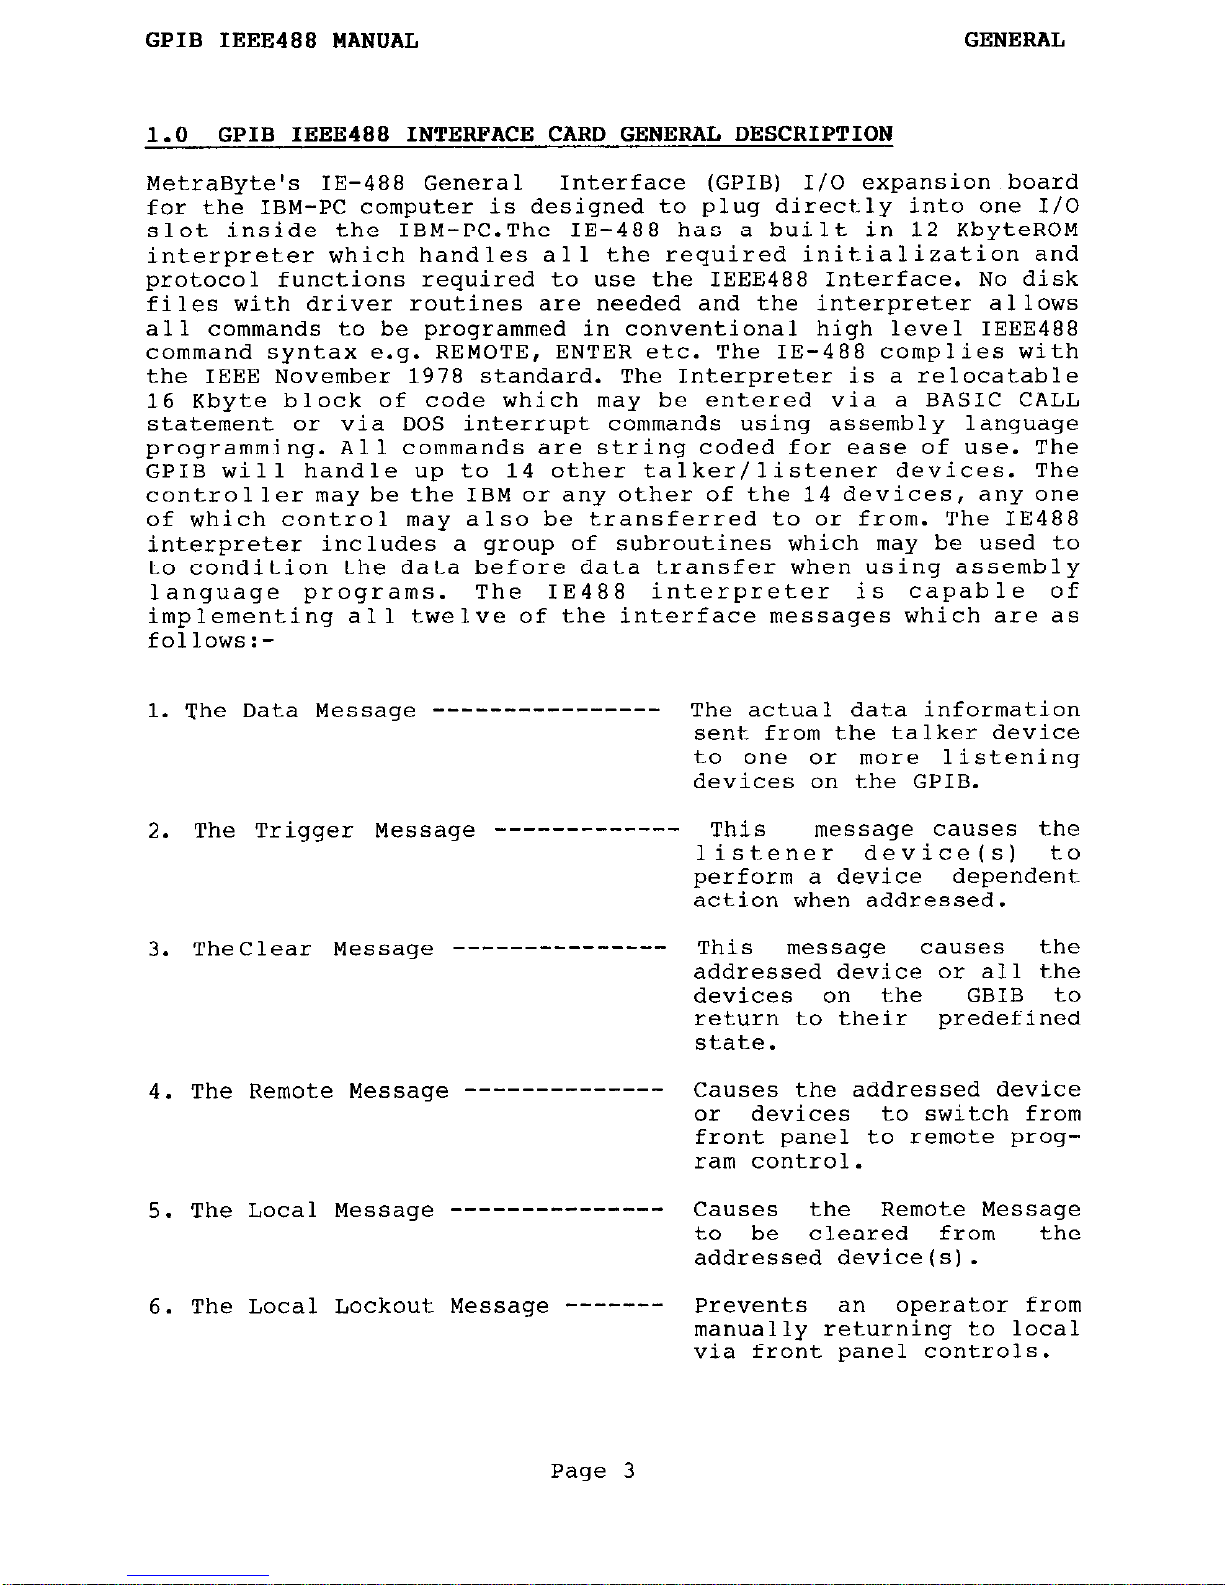
The IE488 interpreter is capable of
implementing all twelve of the interface messages which are as
follows:-
1. The Data Message
----------------
The actual data information
sent from the talker device
to one or more listening
devices on the GPIB.
2.
The Trigger Message
-------------
This messaoe causes the
listener
device(s) to
perform a device dependent
action when addressed.
3.
TheClear Message
---------------
4. The Remote Message --------------
5. The Local Message ---------------
6. The Local Lockout Message -------
This
message
causes the
addressed device or all the
devices on the GBIB to
return to their
predefined
state.
Causes the addressed device
or devices to switch from
front panel to remote program control.
Causes
the Remote Message
to be cleared
from the
addressed device(s).
Prevents an
operator from
manually returning to local
via front panel controls.
Page 3
Page 10
GPIB IEEE488 MANUAL
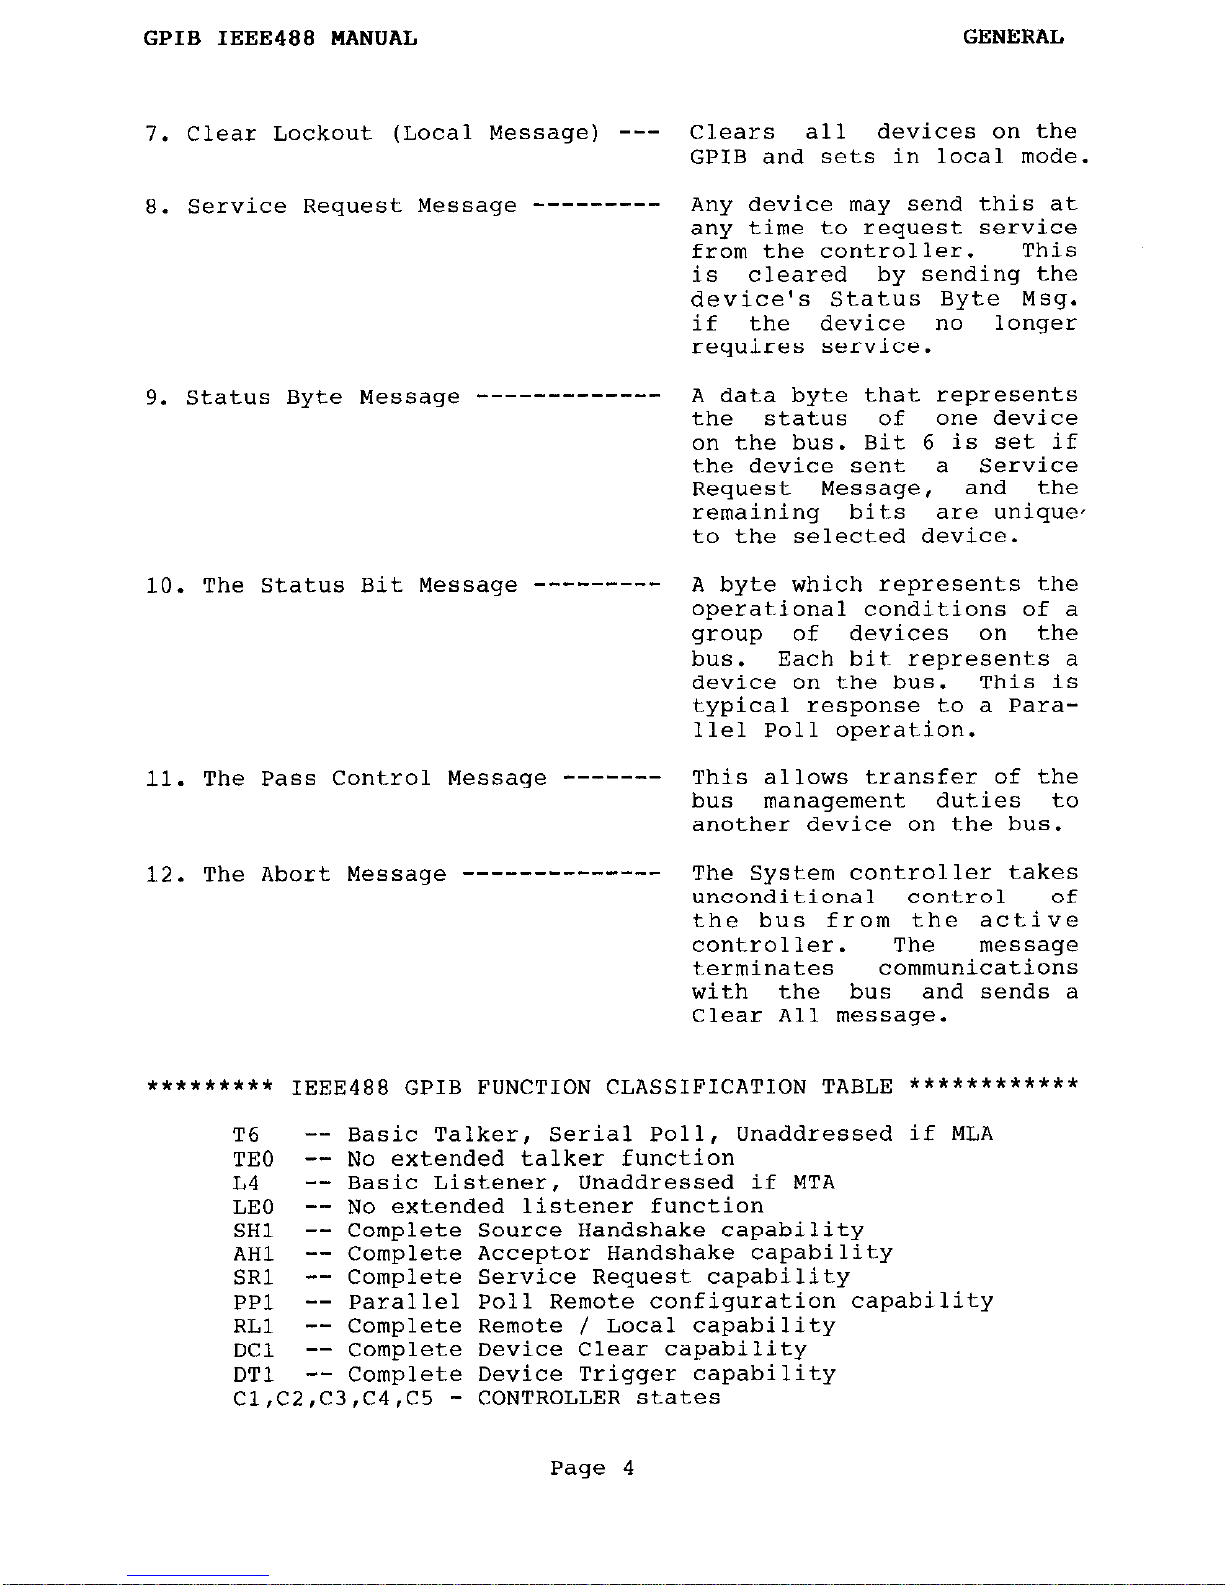
7. Clear Lockout (Local Message) ---
8. Service Request Message
- - - - - - - - -
9. Status Byte Message
-------------
10. The Status Bit Message ---------
11. The Pass Control Message
-------
12. The Abort Message --------------
GENERAL
Clears
all
devices on the
GPIB and sets in local mode.
Any device
may
send this at
any
time
to request service
from the controller. This
is
cleared
by sending the
device's Status Byte Msg.
if
the device no
longer
requires service.
A data byte that represents
the
status of
one device
on the bus.
Bit 6 is set if
the device sent a Service
Request Message,
and the
remaining
bits are unique,
to the selected device.
A byte which represents the
operational conditions of a
group
of devices on the
bus.
Each bit represents a
device on the bus. This is
typical response to a Para-
llel Poll operation.
This allows transfer of the
bus
management
duties to
another device on the bus.
The
System
controller takes
unconditional
control of
the bus from the active
controller.
The
message
terminates communications
with
the bus
and sends a
Clear All
message.
********* IEEE488 GPIB FUNCTION CLASSIFICATION TABLE ************
T6
-- Basic Talker, Serial Poll, Unaddressed if MLA
TEO
-- No extended talker function
II4
-- Basic Listener, Unaddressed if MTA
LEO
-- No extended listener function
SHl
-- Complete Source Handshake capability
AH1
-- Complete Acceptor Handshake capability
SRl
-- Complete Service Request capability
PPl
-- Parallel Poll Remote configuration capability
RLl
-- Complete Remote / Local capability
DC1
-- Complete
Device
Clear capability
DTl
-- Complete Device Trigger capability
Cl,C2,C3,C4,CS - CONTROLLER states
Page 4
Page 11
GPIB IEEE488 MANUAL
1.1
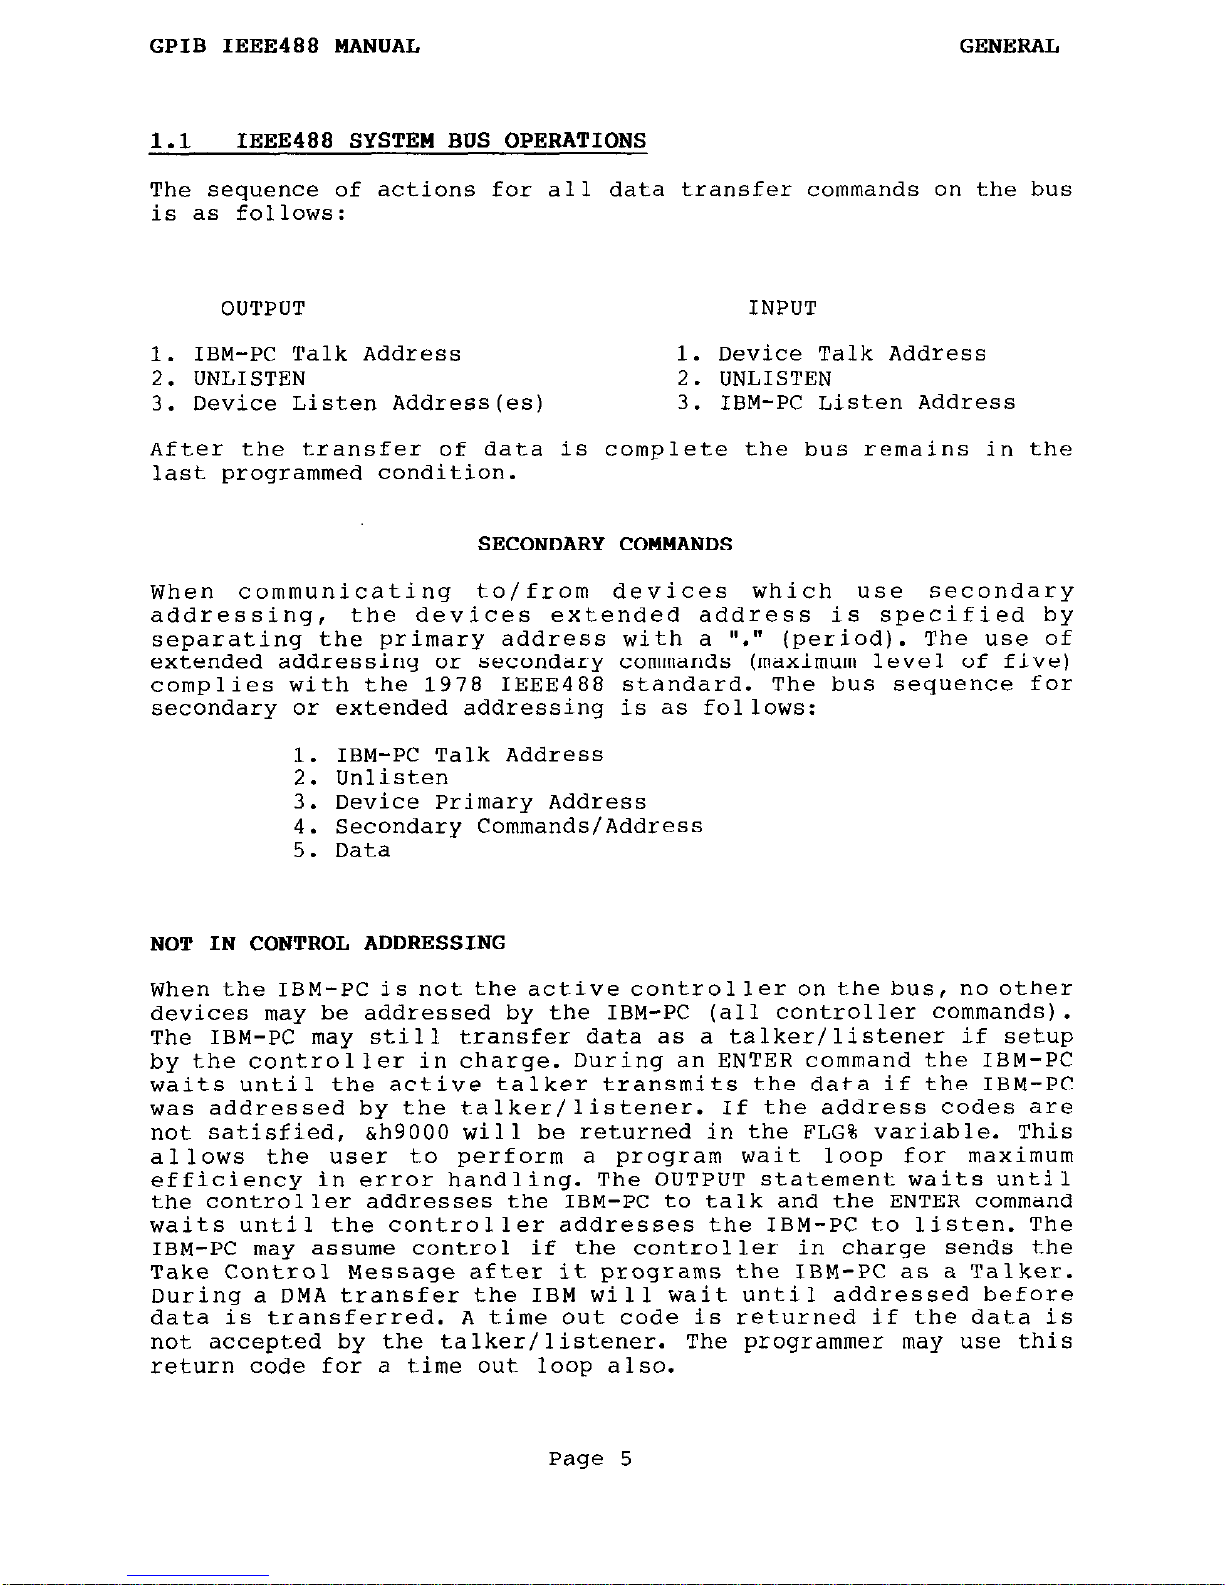
IEEE488 SYSTEM BUS OPERATIONS
The sequence of actions for all data transfer commands on the bus
is as follows:
OUTPUT
INPUT
1. IBM-PC Talk Address
1. Device Talk Address
2. UNLISTEN 2. UNLISTEN
3. Device Listen Address
3.
IBM-PC Listen Address
After the transfer of data is complete the bus remains in the
last programmed condition.
SECONDARY COHMANDS
When communicating to/from devices which use secondary
addressing,
the devices extended address is specified by
separating the primary address with a ".11 (period). The use of
extended addressing or secondary commands (maximum level of five)
complies with the 1978 IEEE488 standard. The bus sequence for
secondary or extended addressing is as follows:
1.
IBM-PC Talk Address
2. Unlisten
3. Device Primary Address
4. Secondary Commands/Address
5. Data
NOT IN CONTROL ADDRESSING
When the IBM-PC is not the active controller on the bus, no other
devices may be addressed by the IBM-PC (all controller commands).
The IBM-PC may still transfer data as a talker/listener if setup
by the controller in charge.
During an ENTER command the IBM-PC
waits until the active talker transmits the data if the IBM-PC
was addressed by the talker/listener. If the address codes are
not satisfied,
ah9000 will be returned in the FLG% variable. This
allows the user to perform a program wait loop for maximum
efficiency in error handling. The OUTPUT statement waits until
the controller addresses the IBM-PC to talk and the ENTER command
waits until the controller addresses the IBM-PC to listen. The
IBM-PC may assume control if the controller in charge sends the
Take Control Message after it programs the IBM-PC as a Talker.
During a DMA transfer the IBM will wait until addressed before
data is transferred. A time out code is returned if the data is
not accepted by the talker/listener.
The programmer may use this
return code for a time out loop also.
Page 5
Page 12

GPIB IEEE488 MANUAL
GENERAL
2.0 HARDWARE INSTALLATION
TheIE488 board requires one slot in the IBM-PC and 16
consecutive address locations in I/O space.
The board also
requires a free 16 K-byte block of memory for the on board 12Kbyte ROM interpreter and 4K-byte Static Ram. Some I/O address
locations will be occupied by internal I/O and your other
peripheral cards,
so to provide flexibility in avoiding conflict
with thesedevices the IE488 I/O address can be set by the Base
Address D.I.P.
switch to be on any 16 bit boundary in the IBM PC decoded I/O space. This also makes possible the use of a
second IE488 interface board in the same computer. The I/O map
for IBM's standard Internal/External peripherals is listed on
page 2-23 of the
"IBM Technical Reference Manual".
Usually, a good choice is to put the IE488 at base address
&H300 or &H310 (Decimal 768,784). (Note if you are using the IBM
prototype interface board,
it uses the hex 300 -3lF address space
and would be in conflict).
There are three groups of switches on the IE488 interface card.
The Base Address switch is located on the top left corner and
marked BASE ADDRESS. The switch settings are listed as follows:
DEVICE I/O ADDRESS BITS
(msb)
(lsb)
A9 AS A7 A6 A5 A4
Example shows
address bits 11 0 0 0 0
ADDRESS = &H300
switch pos.
dn dn up up up up
A switch in the up (on) position corresponds to a ZERO (0) in the
address bit. Similarly,
a ONE (1) is set in the address bit when
the switch is in the down (off) position. The example switch
setting above shows the address switch selecting &H300 (768
decimal) for the Base I/O Address.
NO CRECK IS MADE ON THE BASE ADDRESS WHEN INITIALIZED, BE SURE
THAT THE BASE ADDRESS SELECTED DOES NOT CONFLICT WITH ANY OTHER
PERIPHERALS.
The next switch is the MEMORY ADDRESS switch. This switch selects
the 16 Kbyte block of memory on an even 16 Kbyte boundary. The
addressing of the switches corresponds to the absolute20bit
address location in 16 Kbyte increments. The MEMORY ADDRESS
switch is located above the gold edge connector.
MEMORY ADDRESS BIT
(msb)
A19 A18 Al7 Al6 Al5
address
bits 1 1
0 0 0
s
(lsb)
Al4
Example for
0
MEMORY ADDRESS
Page 6
Page 13
GPIB IEEE488 MANUAL INSTALLATION
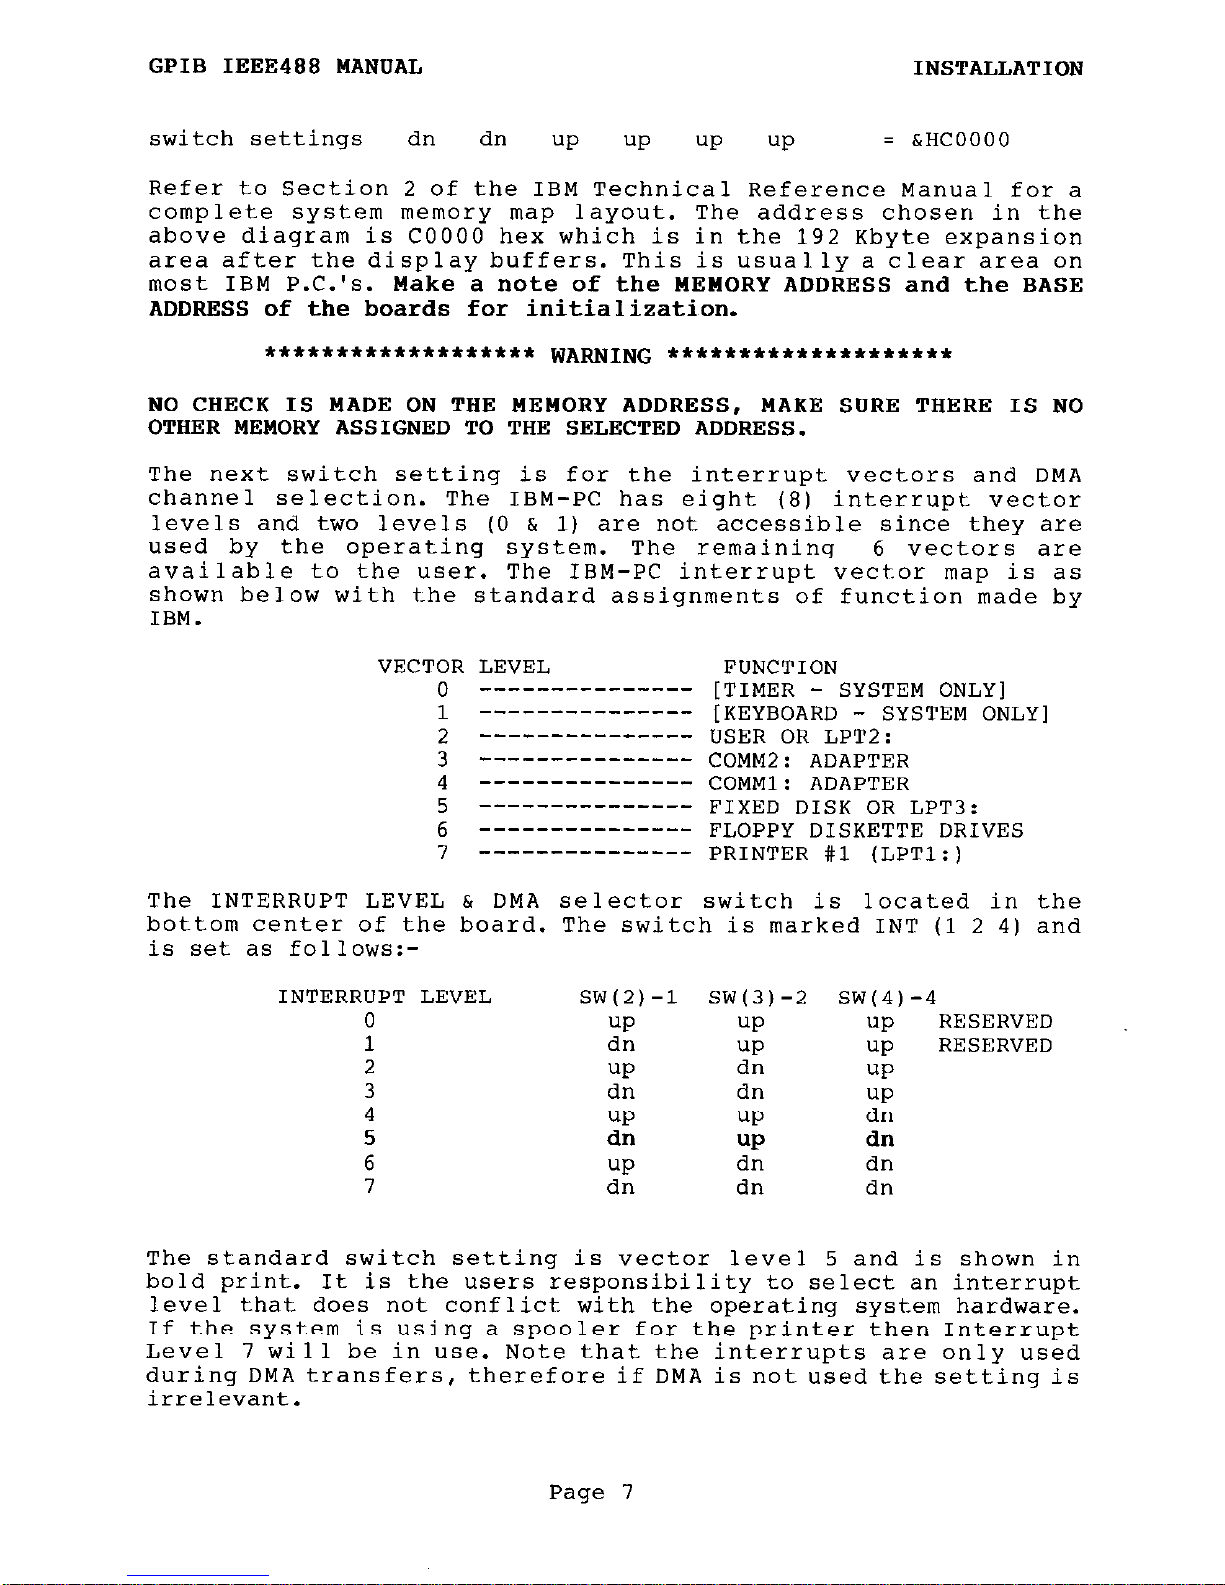
switch settings dn dn up up up up
= &HCOOOO
Refer to Section 2 of the IBM Technical Reference Manual for a
complete
system memory
map layout. The address chosen in the
above diagram is COO00 hex which is in the 192 Kbyte expansion
area after the display buffers.
This is usually a clear area on
most
IBM P.C.'s.
Make a note of the MEMORY ADDRESS and the BASE
ADDRESS of the boards for initialization.
*****************et WARNING *******t*t****ttt*tt
NO CHECK IS MADE ON THE MEMORY ADDRESS, MAKE SURE THERE IS NO
OTHER MEMORY ASSIGNED TO THE SELECTED ADDRESS.
The next switch setting is for the interrupt vectors and DMA
channel selection.
The IBM-PC has eight (8) interrupt vector
levels and two levels (0 & 1) are not accessible since they are
used by the operating
system.
The remaining 6
vectors are
available to the user.
The IBM-PC interrupt vector map is as
shown below with the standard assignments of function made by
IBM.
LEVEL
VECTOR
0
1
---------------
---------------
3”
-----------____
---------------
4
---------------
5
---------------
6
---------------
7
---------------
FUNCTION
[TIMER - SYSTEM ONLY)
[KEYBOARD - SYSTEM ONLY)
USER OR LPT2:
COMM2: ADAPTER
COMMl: ADAPTER
FIXED DISK OR LPT3:
FLOPPY DISKETTE DRIVES
PRINTER #l (LPTl:)
The INTERRUPT LEVEL & DMA selector switch is located in the
bottom center of the board. The switch is marked INT (1 2 4) and
is set as follows:-
INTERRUPT
0
1
2
3
4
5
6
7
LEVEL
SW(2)-1
2
2
::
d":
SW(3)-2
UP
::
dn
up
a":
dn
SW(4)-4
up
RESERVED
UP
RESERVED
UP
UP
dn
dn
dn
dn
The standard switch setting is vector level 5 and is shown in
bold print. It is the users responsibility to select an interrupt
level that does not conflict with the operating
system
hardware.
If the
system
is using a spooler for the printer then Interrupt
Level 7 will be in use. Note that the interrupts are only used
during DMAtransfers, therefore if DMA is notusedthe setting is
irrelevant.
Page 7
Page 14
GPIB IEEE488 MANUAL
INSTALLATION
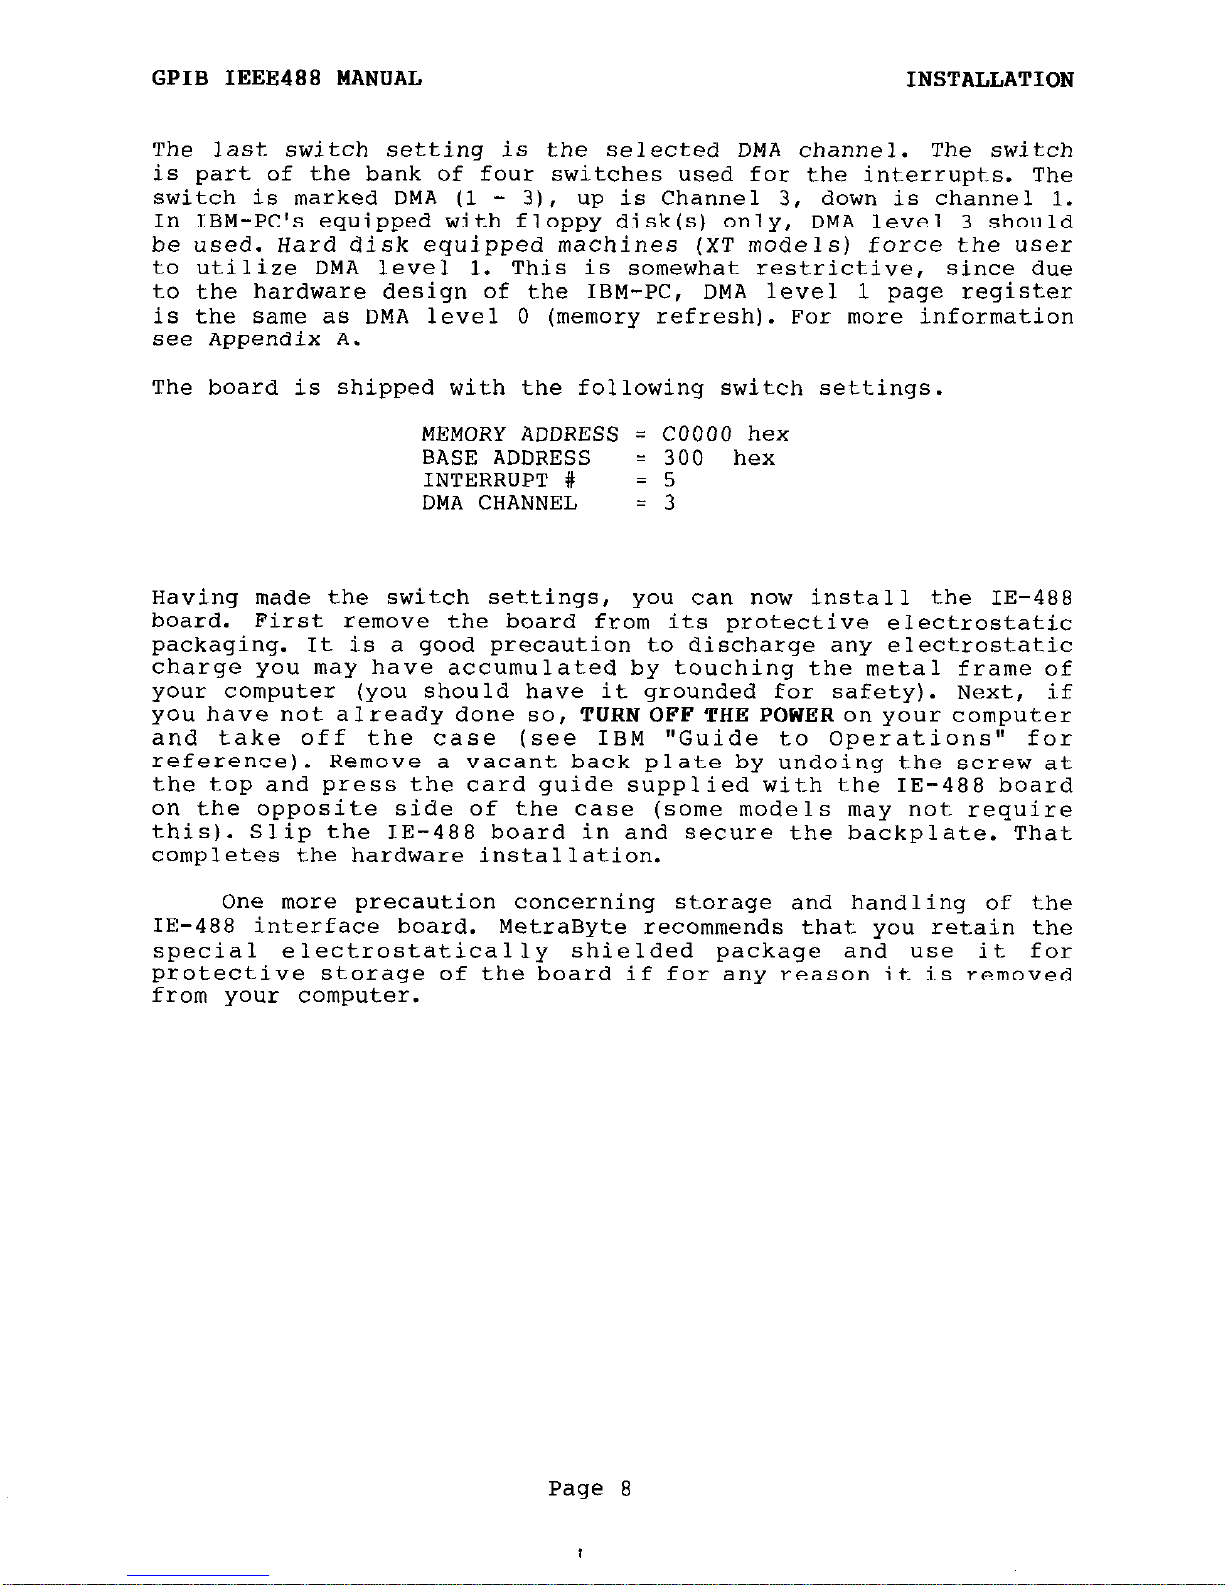
The last switch setting is the selected DMA channel. The switch
is part of the bank of four switches used for the interrupts. The
switch is marked DMA (1 - 3), up is Channel 3, down is channel 1.
In IBM-PC's equipped with floppy disk(s) only, DMA level 3 should
be used. Hard disk equipped machines (XT models) force the user
to utilize DMA level 1.
This is somewhat restrictive, since due
to the hardware design of the IBM-PC,
DMA level 1 page register
is the
same as
DMA
level 0 (memory
refresh). For
more
information
see Appendix A.
The board is shipped with the following switch settings.
MEMORY ADDRESS = COO00 hex
BASE ADDRESS
= 300 hex
INTERRUPT # = 5
DMA CHANNEL = 3
Having made the switch settings, you can now install the IE-488
board.
First
remove
the board from its protective eIectrostatic
packaging.
It is a good precaution to discharge any electrostatic
charge you
may
have accumulated by touching the
metal
frame of
your computer (you should have it grounded for safety). Next, if
you have not already done so, TURNOPPTHEPOWERonyour computer
and take off the case (see IBM
"Guide to Operations" for
reference).
Remove a vacant back plate by undoing the screw at
the top and press the card guide supplied with the IE-488 board
on the opposite side of the case
(some
models
may not
require
this). Slip the IE-488 board in and secure the backplate. That
completes
the hardware installation.
One
more
precaution concerning storage and handling of the
IE-488 interface board.
MetraByte recommends that you retain the
special
electrostatically shielded package and use it for
protective storage of the board if for any reason it is removed
from your computer.
Page 8
Page 15

GPIB IEEE488 MANUAL COMMAND FORMAT
3.0 MODES OF OPERATION
In the interests of conciseness for the more experienced
programmer and user, this section has been written as a reference
and initially may be difficult to understand. If this is the
case, refer to Appendix F where a step by step real programming
example read together with this
section provides an easier
introduction.
All modes of operation are determined by an
ASCII
STRING
in a command (COMMANDS or CMD$) referenced within a CALL
statement. The CALL statement format is:
XXX CALL IE488 ( COMMAND$, varf$I(%), FLAG%, BASADR% 1
where:
COWHANDS
- is the COMMAND
including
device addresses or
secondary commands and
[ image terminators 1. This
is always a STRINGandisdecodedbythe CommandLine
Interpreter in the IE-488 firmware (ROM). The
COMMAND is separated from the operands (devices etc.)
by one or more SPACES,
any other delimiters will
cause a SYNTAX error in command line. The separator
for devices is always the comma "," andsecondary
address is always a period ".". The IMAGE string is
identified by brackets "[I". The Command
Line
Interpreter is relatively tolerant of syntax error
identification and will send back the appropriate
error code to isolate the error. The format is:-
CMD$ =
"COMMAND devl, dev2, . . . ..devn [image]"
The
[image]
specifier allows the user to specify the
variable field operations for the beginning and end
of the data transfer variable. The variable may be a
variable name,
array identifier, numeric data value
or a string. The user must match the image to the
data type or an error will be generated in the
data
transfer. No check is made in the match of the image
to the variable type,
this is the responsibility of
the user.
The [image] codings are explained in
section 3.1 (IMAGE SPECIFIERS).
varC$l(%) - isthe data variable OUTPUT/INPUT to be transferred
from/to. Datais transferred
as specified by the
image terminator/specifier. If the image specifier
is not used the data is treated as an integer. The
data may be of String or Integer type.
FLAG% ---
is the transfer status of the CALL statement. If an
error occurs FLAG%
will
contain a
HEX
number
representing the error condition.
A set of error and
Page 9
Page 16
GPIB IEEE488 MANUAL
COMMAND FORMAT
transfer message codes are generated at the
completion of each CALL.
BASADR% -- is the address of the interface board being used.
BASADR% may be 0 or 1, or actual base address e.g. 768.
Page 10
Page 17

GPIB IEEE488 MANUAL
COMMAND FORMAT
3.1
IMAGE SPECIFIER
[S(p) (xl .m.zl -
Input/Output the number of Bytes to/from the
variable string starting at position m and
ending at position z,
with parity p (E=even,
O=odd, none). If m, z and p are omitted the
entire string will be output as in the string
variable$ as specified by the image terminator
(x) without parity. If no terminator is used
then the string will end with EOI.
[B(H/L) (x),m,zl-
Input/Output the specified H/L number of Bytes
to or from the the specified integer variable
array starting at (m) array location and ending
at the (z) position. The data transferred will
not change the the other half of the 16 bit
integer,
only the byte specified is changed on
an ENTER command. There is no change to the data
with the OUTPUT command. [BL#,2,101 will
transfer the low byte of position 2 thru
position 10 of the integer variable array. Note,
the number of bytes transferred is nine,
position two and ten are included. Transfer
termination is specified by
the image
terminator.
It is the user's responsibility to
insure that the array size and the type of array
are correct. No check is made on data types. The
values of m and z may be reversed which will
transfer data in the reverse order. If m and z
arethe same then only one word is transferred.
If mand z are omittedthenthe integer variable
is not considered an array and the variable is
transferred with or without an EOI depending on
the image terminator (x).
[M(x).m,sl -
Input / Output the specified number of 16 bit
words to / from the specified integer variable
(array) starting with position (m) and ending
with position (2). The number of words
transferred is defined as [z - m + 13.
Termination is specified by the
image
terminator.
It is the user's responsibility to
insure that the array size and type of array are
correct.
No check is made on data types. The
values of m and z may be reversed which will
transfer data in the reverse order. If m and z
are the same then only one word istransferred.
Ifm and s are omitted then the integer variable
is not considered an array and the variable is
transferredwith or without an EOI depending on
the image terminator (x).
Page 11
Page 18

GPIB IEEE488 MANUAL
COMMAND FORMAT
3.2
IMAGE TERMINATORS
% (t-1
The % image terminator cancels both the line
feed and EOI terminators during an OUTPUT command
execution. During an INPUT command the entry will
terminate when the array size or the input count
is reached (m + count = z) or EOI. The line feed
is entered as part of the array.
t(t)
+(t1
(t)
The # image terminator cancels the line feed
only. The data is terminated by an EOI during the
INPUT or OUTPUT command.
The ENTER
also
terminates if the last item in data list is
entered which sets the FLAG% variable with an
error code of &H0020.
The + image terminator cancels the line feedand
EOI during an OUTPUT command only.
The INPUT
command is in the default mode (INPUT terminates
with EOI or last entry).
If carriage return
and line feed are part of the data being
transferred they will be sent as normal data.
The transfer terminator t determines the type
of transfer the GPIB is to perform. The following
transfer codes are available. If this specifier
is not used the data transfer is under program
control.
D
= Direct Memory Access (DMA) to the specified
array. The m and z specifiers must be used
with this
type of transfer. Structure
programming must be used when this mode is
active. All variables must be assigned before
theCALLis executed and no new variables are
allowed to be introduced after the execution
of the CALL statement.See APPENDIX A for
details on DMA transfers.
Page 12
Page 19

GPIB IEEE488 MANUAL COMMAND FORMAT
3.3
FLAG RETURN CODES
The following codes are returned in the FLAG% variable
upon completion of the CALL statement.
The flag return codes are
grouped into 3 categories.
&HO000 =
TRANSFERRED OK
&HO020 =
NO INPUT EOI or LINE FEED
&HO030 = DEVICE TIME OUT
&HO040 =
RESERVED
&HO050 =
DMA CHANNEL BUSY
&HO060 = GPIB BUSY
&HO100 = HARDWARE FAILURE
&HO200 =
TIME OUT ON DATA TRANSFER
&HO300 = DEVICE NOT ACTIVE CONTROLLER
&HO400 =
IBM-PC ACTIVE CONTROLLER
&HO500 = SYSTEM NOT INITIALIZED
&HO600 = CONFIGURATION ERROR
&HlOOO
&HllOO
&H2000
&H3000
&H3100
&H3200
&H4000
&HSOOO
&H6000
&H7000
&H9000
UNDEFINED COMMAND
SYNTAX ERROR IN COMMAND LINE
UNDEFINED IMAGE
DEVICE RANGE ERROR
TOO MANY DEVICES
TALKER/LISTENER CONFLICT
COMMAND/DATA OUT OF RANGE
COMMAND REQUIRES DEVICE
UNDEFINED DEVICE CODE
INPUT ARRAY NOT INITIALIZED
IBM MUST BE TALKER or LISTENER
Page 13
Page 20

GPIB IEEE488 MANUAL
USER COMMANDS
4.0 USER COMMANDS
The following user commands are available. The string
variable
COHHAND$
is the same string format as described in the
IBM-PC BASIC manual. A typical command string would be as
follows. Please note that all commands must be assigned in string
form before using the CALL statement.
COMMAND$=
"OUTPUT 03.13.20,05[WD#,2,201"
This command string would output integer words (16 bit) two thru
and including word 20 to device primary address 03 with secondary
addresses 13 and 20 and also to device primary address 05. The
data transfer uses the DMA (SEE APPENDIX A) mode for fast
access. The device codes must be in decimal within the range of
00 to 30. This allows the user a maximum of 31 device addresses
to choose from. However the maximum number of devices which may
physically be connected to the bus is 15.
The transfer of String data is
limited to single element arrays
and must be initialized. The Maximum string size is 255 bytes as
defined in the IBM-PC Basic manual.
The user may transfer a
string inside of an array such as VAR$(2,3), which would transfer
the string data contents of array element (2,3). An error code of
&H7000 will be returned in the FLAG% variable if the stringarray
element is not initialized.
EXAMPLES OF LEGAL STRING DATA TRANSFER:
xxx10 COMMANDS = "OUTPUT ll.Ol[$E+,9,22]"
xxx20 VAR$(2,8) ="THIS IS ARRAY ELEMENT 2,8"
xxx30 CALL IE488 (COMMANDS, VAR$(~,~), FLG%, BRD%)
This command will output the bytes "ARRAY ELEMENT" then return to
the user program.
xx100 VAR$(l) = "This is a single array element"
xx110 CALL IE488 (COMMANDS, VAR$(l), FLG%, BRD%)
This command will output the bytes ' single ar" then return to
the user program.
xx200 COMMANDS = "OUTPUT ll.Ol[$E,22,9]"
xx210 VAR$ = "THIS IS ALSO A SINGLE ARRAY TEST"
xx220 CALL IE488 (COMMANDS, VAR$, FLG%, BRD%)
This example will output the bytes "NIS A OSLA" i.e backwards,
then return to the user program.
Page 14
Page 21

GPIB IEEE488 MANUAL
USER COMMANDS
ABORT
- Terminate the current command issued by the
IBM. The
command executes an IFC and resets the IBM board
addressed.
DMA and Interrupts are disabled. The
IBM-PC is assumed to be the main system controller
and unconditionally takes control of the bus and
remains the controller in charge until PASCTL
command is executedNo device is necessary.
COMMANDS FORMAT:
"ABORT"
EXAMPLE:
xxx10 CMD$ ="ABORT" 'command format
xxx20 DEF SEG = &HCOOO
'driver subroutine
xxx30
CALL 1~488 (CMD$, VAR%, FLG%, BRD%) 'execute command
xxx40 IF NOT FLG% THEN 100
'test for errors ?
xxx50
PRINT "ERROR *';HEx$(FLG%);" IN LINE
70”
xxx60
END
xx100 . . . . . . user program continues . . . . . . . . .
Note: The VAR% is used as a dummy variable and no change occurs
to the contents of VAR%. This variable may be first declared
inside the CALL statement at execution for convenience.
Page 15
Page 22

GPIB IEEE488 MANUAL USER COMMANDS
CLEAR
- Clear or Reset the selected devices or all devices. If
no device is given the GPIB is cleared. The IBM PC
must be the active controller or an error message will
be generated.
COMMANDS FORMAT:
"CLEAR devl,dev2 , . . . . . .
devN"
EXAMPLE:
xx200 CMDS =
"CLEAR 10,12,14"
'command format
xx210 BRD% = 0
'board #
xx220 CALL IE488 (CMDS, VAR%, FLG%, BRD%)
'execute command
xx230 IF NOT FLG% THEN 300
'test for errors ?
xx240 PRINT "ERROR ";HEX$(FLG%);" IN LINE 220"
xx250 END
xx300 . . . . . . users program continues . . . . . . .
Page 16
Page 23

GPIB IEEE488 MANUAL
USER COMMANDS
CONFIG
- Configure the GPIB to the devices specified in the
command string. The
GPIB will remain in this state
until reconfigured by issuing an ENTER or OUTPUT
command.
The VAR% variable is not changed in this
command. If the TALK = devl is omitted the IBM-PC is
assumed to be the controller only. The user may enter
MTA to make the IBM-PC the talker or enter the actual
device number using the TALK variable name. The IBM-PC
may be addressed as a listener by using the name MLA
as the last device in the COMMAND string. The FLAG%
variable will contain the error code if any conflicts
occur.
COMMANDS FORMAT:
"CONPIG (TALK=devl /MTA,)LISTEN=devZ,dev3,...,(MLA)"
EXAMPLE:
Xx10 BRD% = 0
xx20 CMD$ =
"CONFIG MTA,LISTEN = 10,12.34,5,7"
xx30 CALL IE488 (CMDS, VAR%, FLAG%, BRDB)
xx40 IF NOT FLAG% THEN 100
xx50 PRINT "ERROR ";HEX$(FLAG%);" IN LINE 30"
xx60 END
Xl00
. . . . . . . . program continues here if no errors
. . . . . . . . . .
The above program sets the IBM-PC as a talker and devices
10, 12.34, 5 and 7 as listeners.
The MTA variable is internally
interpreted as the MAD set in the initialization of the GPIB
using the SYSCON command.
xx20 CMD$ =
"CONFIG TALK=6,LISTEN=12,14,5,MLA"
This CONFIG command sets device address 6 as a talker and devices
12, 14, 5 and IBM-PC as listeners. The string MTA is internally
interpreted as MAD set in the initialization of the GPIB using
the SYSCON command.
Page 17
Page 24

GPIB IEEE488 MANUAL
USER COHHANDS
ENTER
- Input GPIB data from selected talker to specified
string
array.
The string array must have been
previously dimensioned. The FLAG%
will contain error
codes if an error occurs.
The IBM - PC
must
have
been previously programmed as a listener.If the IBM PC is not the controller then the ENTER command will
return error code 9000H to inform the caller that the
IBM is not in the listen mode. The command
may
be
re-entered until the controller in charge programs
the IBM to listen.
Only one device is allowed with
this command.
COMMANDS FORMAT:
"ENTER dev.secad [image]"
EXAMPLE:
xxx10 DVM$ = SPACES(25)
'Dimension array
xxx20 CMD$ =
"ENTER 12[$,0,181"
'Command String
xxx30 CALL IE488 (CMD$, DVM$, FLG%, BRD%)
xxx40 IF NOT FLG% THEN 140
'test for errors ?
xxx50 PRINT "ERROR ";HEX$(FLG%);" IN LINE 30"
xxx60 END
xx140 . . . . . . . .
user program continues . . . . . . . .
The above program will fill DVM$ array elements 0 to 18, If all
is successful the FLG%
variable will contain 0. If an error
should occur the FLG% would be coded according to the error. The
data in DVM$ will be incomplete with error codes > = 100 hex.
DMA is ONLY allowed for WORD integer arrays less than 32767, (64
k bytes). See APPENDIX A for DMA DATA TRANSFERS.
Page 18
Page 25

GPIB IEEE488 MANUAL
USER COMMANDS
EOI
- Sends a data byte on the selected device with EOI
asserted.
The bus
must
have been programmed to talk
before the
command is executed. The variable contains
the data to be transferred.
It is the users
responsibility to insure the data and type match. If a
string
variable is
used
the entire
string is
transferred ending with an EOI. If Integer mode is
used
only one transfer (byte) or two (word) will be
executed. The limit parameters are ignored. Only one
device is allowed. No device is generally required if
the Talker (IBM-PC) has been previously programmed to
talk bythecontroller incharge. If the IBM-PCis not
the controller in charge and not programmed as a
talker then an error code &h9000 will be returned
until the controller in charge programs the IBM-PC as
a talker before data is transferred.
COMMANDS FORMAT:
"EOI dev [image] n
EXAMPLE:
xx100 VAR$ = "THIS IS A STRING"
'define last byte to transfer
xx110 CMD$ = "EOI 12[$1"
'define command
xx120 CALL IE488 (CMDS, VAR$, FLG%, BRD%)
xx130 IF NOT FLG% THEN 200
xx140
PRINT "ERROR ";HEx$(FLG%);" IN LINE
120”
xx150 END
xx200 . . . . . . . . .
continue users program
. . . . . . . . . . .
This routine will transfer the STRING in the VAR$ variable and
issue an EOI command with the last byte of the STRING to signal
the receiver on the bus that the data transfer will end.
The image specifiers for the removal of the line feeds and
carriage returns are ignored during the command, no parity is
used.
Page 19
Page 26

GPIB,IEEE488 MANUAL USER COMMANDS
LOCAL - Set selected device(s) to the local state. If no device
is
specified then all devices on the bus are set to
local. The IBM-PC must be the active controller or an
error message will be generated.
COMMANDS FORMAT:
"LOCAL devl,dev2 ,......devN"
EXAMPLE:
xx100 CMD$ = "LOCAL 10,11,12,14"
'define command
xx120 CALL IE488 (CMD$, VAR%, FLG%, BRD%)
'execute command
xx130 IF NOT FLG% THEN 200
'test for errors
xx140 PRINT "ERROR ";HEX$(FLG%);" IN LINE 120"
xx150 END
xx200 . . . . . . . continue users program . . . . . . . .
The above program sets devices 10,11,12,14 to the local state and
returns to the user's program.
The LOCKOUT command is very
similar in structure to the LOCAL command except the LOCKOUT does
not allow the user to manually select the device to local.
Page 20
Page 27

GPIB IEEE488 MANUAL
USER
COMMANDS
LOCKOUT - Local Lockout the specified device. If no device is
given all devices on the bus will be set to local
lockout.
The IBM-PC must be the active controller or
an error message will be generated. The devices cannot
be set to local except by the GPIB controller. The
FLG% variable contain the error code.
COMMANDS FORMAT:
"LOCKOUT
devl,dev2
,.....devN"
This command is the same as the LOCAL command except the user is
NOT allowed to manually select the device to local.
Page 21
Page 28

GPIB IEEE488 MANUAL
USER COMMANDS
OUTPUT
- Output selected string to selected listener(s) on
GPIB. The variable will contain the data to be
transferred. The image specifier will contain the data
type and terminators. The FLAG% will contain the error
codes if an error occurs. Up to 14 devices may be
accessed in the list.
If the IBM-PC is not the
controller in charge,
the IBM-PC
must
be programmed by
the controller in charge before data is transferred.
COMMANDS FORMAT:
"OUTPUT devl.secad,dev2...[image]"
EXAMPLE:
xx100 VAR$ = "THIS IS A TEST" 'define bytes to transfer
xx110 CMD$ = "OUTPUT 12,11[$El"
'define command
xx120 CALL IE488 (CMD$, VAR$, FLG%, BRD%)
xx130 IF NOT FLG% THEN 200
Xx140 PRINT "ERROR '.
,HEX$(FLG%);" IN LINE 120" : END
'This command line will output the entire string "THIS IS A TEST"
'using even parity and ending with a EOI code to show the end of
'the string.
The FLG% variable will have any error transfer codes
'if an error was detected during transfer.
xx200 . . . . . . . . . continue users program . . . . . . . . . . .
xx400 DIM MYDATA%(2,400)
'my integer data array
xx410 CMD$ = "OUTPUT 12,11[BL,0,1001" 'setup
image
' output data in 2,0 from element 0 to 100 low byte only
xx420 CALL IE488 (CMD$, MYDATA%(2,0), FLG%, BRD%)
xx430IFNOT FLG% THEN 500
xx440
PRINT~~ERROR ";HEx$(FLG%);" IN 420" : END
. . . . . . continue users program.......
xx500
'setup for DMA transfer
xx510 CMD$ =
"OUTPUT 12,10,15[WD,0,81921" 'DECIMAL ONLY
xx520 DIM DMAPTR%(2)
xx530 DMAPTR%(O) = DATASEGMENT% 'setup data segment
xx540 MDAPTR%(l) = DATAOFFSET% 'setup data offset
' transfer data in DMA mode
xx550 CALL IE488 (CMD$, DMAPTR%(O), FLG%, BRD% )
xx560 IF NOT FLG% THEN 600
xx570 PRINT "ERROR ";HEX$(FLG%) ;" IN LINE 550 ' : END
'If error code in DMA is not &H50 or 0 then issue an ABORT
command to clear interface device.
600 . . . . . . . . user program continues
. . . . . .
Page 22
Page 29

GPIB IEEE488 MANUAL
USER COMMANDS
PARPOL -
Reads the 8 Status Bit messages for the devices on the
GPIB which
have been set for parallel poll
configuration.
The VAR$ (string) will contain the 8
bit message. The IBM-PC must be the active controller
or an error will occur.
COMMANDS FORMAT:
"PARPOL"
PROGRAMMING EXAMPLE:
100 VAR$ = CHR$(&HO) 'Parallel Poll return byte initialized
110 CMD$ = "PARPOL"
120 CALL IE488 (CMD$, VAR$, FLG%, BRD%)
130 IF NOT FLG% THEN 200
'if error,
the flag is printed out.
140 PRINT "ERROR ";HEX$(FLG%);" IN LINE 120" : END
200 'process parallel poll return byte code in VAR$
. . . . . . . . . .
. . . . . . . . . .
This command responds as programmed in the parallel configuration
command. The VAR$ will contain the eight bit poll response. See
the Parallel Poll Configure command (PPCONF) for the details of
the bit pattern.
Page 23
Page 30

GPIB IEEE488 MANUAL
USER COHHANDS
PASCTL
- The Active control of the GPIB is transferred to the
specified device address and the IBM-PC becomes the
standard listener/talker but not controller. The IBM PC must be the active controller or an error will
occur. The IBM-PC is not allowed to Talk until
programmed by the controller in charge.
COMMANDS FORMAT:
"PASCTL dev"
EXAMPLE:
100 CMD$ = "PASCTL 6"
110 CALL IEE488 (CMD$, X%, FLG%, BRD%)
120 IF NOT FLG% THEN 200
130 PRINT "ERROR ";HEX$(FLG%);" IN LINE 110" : END
xx200
. . . . . . . . . . . . . . .
continue users program . . . . . . . . . . . . . . . . . .
The IBM-PC is inactive at this point and no
controller commands are allowed. To receive control
back the command RXCTL must be used as follows.
xx300 CMD$ = "RXCTL" 'define command
xx310VAR%= 0
'set VAR$ to false
xx320 WHILE NOT VAR% 'control test loop
xx330 CALL IE488 (CMD$, VAR%, FLG%, BRD%) 'test for control
xx340 IF NOT FLG% THEN 360
~~350
PRINT "ERROR ";HEx$(FLG%);" IN LINE 330" : END
xx360 .....
user continues program
......
......
......
xx500 WEND 'Last test
xx510 . . . . . WHEN IBM IS IN CONTROL PROGRAM CONTINUES HERE . . . .
xxxx . . . . . .
Note: It is the responsibility of the controller in charge to
program the IBM-PC to the talk mode before the transfer of
control is executed.
Page 24
Page 31

GPIB IEEE488 MANUAL
USER COMMANDS
PPCONF
- Sets up the desired parallel poll bus configuration
for the user. The VAR$ (string) contains the poll
sequence (00-FF).
IBM-PC must be the active controller
or an error will occur.
COMMANDS FORMAT:
"PPCONP dev"
The PARALLEL POLL function provides a means of sending
one bit of status information if the controller is
requesting the response. Unlike SERIAL POLL, which is
initiated by the device, the parallel poll is
initiated by the controller in charge. There are two
methods to configure
a
device for parallel poll,
remote
and local configurations. In remote
configuration (PPI),
he controller uses the following
bit codes to configure the device addressed.
Were Pn = the device bit code 0 to 7 for PPRl to PPR8
and S is the Send of the Parallel Poll Response, S =
response. Adevice
may
be configured so that it never
responds to a parallel poll. PPD (&H70) is the
parallel poll disable command, which places the device
in the parallel poll idle state (PPIS). The value of
the individual status (IST) can be set by bit B4 in
the VAR$
byte.
EXAMPLE:
B4 = 0 IST = Parallel Poll Flag
B4 = 1 IST = SRQS
110 BRD% = 0
120 A$ = CHR$(&HA) 'parallel configure bit code for dev 14
130 CMD$ =
"PPCONF 14"
140 CALL IE488 (CMD$, A$, FLG%, BRD%)
150 IF NOT FLG% THEN 170
160
PRINT "ERROR ";HEX$ (FLG~);~' IN LINE 140" : END
170 . . . . . .
continue program . . . . . . . . . .
In the local configuration (PP2), the specifications
are made from the device. Writing 0 11 U S P3 P2 Pl to
the VAR$ configures the controller for a Parallel Poll
Response-When U = 0, this command is the LPE (local
poll enable) local message. When U = 1, the TLC does
not respond to the poll.
The TLC is configured in the
S bit. The PPRn will be sent true onlyifthe Parallel
Poll Flag (IST individual
status local
message)
matches this bit. During normal operation, The value
of VAR$ on entrywill set or clear PPF (IST if B4 = 0)
according to the device's need for service.
Page 25
Page 32

GPIB IEEE488 MANUAL
USER COMMANDS
PPUNCF
- Resets the parallel poll type configuration of the
selected device.
The IBM-PC must be the active
controller or an error will occur. The specified
device will not respond to a parallel poll command.
COMMANDS FORMAT:
"PPUNCF dev"
PROGRAMMING EXAMPLE:
100 BRD% = 0
110 A$ = CHR$(LHA)
120 CMD$ = "PPUNCF 14"
130 CALL IE488 ( CMD$, A$, FLG%, BRD% )
140 IF NOT FLG% THEN 300
' error is processed here
150 PRINT "ERROR ";HEX$(FLG%);" IN LINE 130"
160 END
300 'program continues here if ok
310 . . . . . . . . . . . . . . . . . . . . .
. . . . . . . . . . . . . . . . . . .
This routine will only disable device 14 to respond to a Parallel
Poll command. If no device code is used the entire bus is
disabled.
Page 26
Page 33

GPIB IEEE488 MANUAL USER COMMANDS
REMOTE -
Sets the selected devices or device on the GPIB to go
into the remote position. The IBM must be theactive
controller or an error will occur. If an erroroccurs
the FLAG% will contain the error code.
COMMANDS FORMAT:
"REMOTE devl,dev2,.......devN"
EXAMPLE:
xx100 VAR% = 0
'dummy variable not used
xx120 BRD% = 0
'define board number
xx130 CMD$ = "REMOTE 10,12,14" 'define command
xx140 CALL IE488 (CMD$, VARS, FLG%, BRD%)
xx150 IF NOT FLG% THEN 200
xx160 PRINT “ERROR “;HEX$(FLG%) i" IN LINE 140"
xx170 END
xx200
. . . . . . . . . continue users program . . . . . . . . . . .
This command is the counterpart to the
LOCAL command. Devices
10,12,14
are set
in the
remote state
and ready for a command
sequence.
The error flag FLG% will contain any error codes if an
error was detected.
Page 27
Page 34

GPIB IEEE488 UANUAL
USER COMMANDS
REQUEST
- The GPIB
may
request service from the active
controller on the bus by executing the "REQUEST n"
command.
This command has two modes. the first when
'In" is omitted which may be executed any
time
to
monitor the status of the IBM interface board. The
VAR% (INTEGER) contains the status bits for the GPIB
board addressed, [Hi Byte I = on board hardware
registers, [Lo Byte] contains the IBM GPIB serial poll
register status byte.
The second mode when n is any
number (O-31).
This allows the user to set a serial
poll status word to the controller in charge. The Low
byte of the variable will contain the STATUS byte to
be transferred to the controller.
msb
GPIB ON BOARD SERIAL POLL REGISTER lsb
__-_______------____-----------
________-__--_-__-__-----------
15
14 13 12 11 10 09 08 07 06 05
04 03 02 01 00
____------------__-------------
_________-____-________________
BIT 08 = INTERRUPT ENABLED 1 = on
BIT 09 = DMA ENABLED 1 = on
BIT 10 = DMA CHANNEL
l=chan #l, O=chan #3
BIT 11 = INTERRUPT vector level (1)
BIT 12 = INTERRUPT vector
level (2)
BIT 13 = INTERRUPT vector level (4)
BIT 14 = srq (CIC=l) PEND bit (CIC=O)
BIT 15 = Controller In Charge (CIC)
1 = yes,
0 = not in charge
BIT 00 = SO BIT
BIT 01 = Sl BIT
BIT 02 = S2 BIT
BIT 03 = 53 BIT
BIT 04 = 54 BIT
BIT 05 = S5 BIT
BIT 06 = rsv on send
PEND on receive
BIT 07 = 57 BIT
EXAMPLE 1: ------- IBM NOT IN CONTROL --------
110 BRD%=O :
X% = (SERIAL POLL BIT PATTERN)
120 CMD$ = "REQUEST 1"
130 CALL IE488 (CMD$, X%, FLG%, BRD%)
140 IF NOT FLG% THEN 200
150 PRINT "ERROR ";HEX$(FLG%);" IN LINE 130" : END
200 PRINT "REQUEST 1 FLAG CODE = HEX ";HEX$ (X%)
EXAMPLE 2:
-------- IBM IS CONTROLLER IN CHARGE ---------
110 BRD%=O
120 CMD$ = "REQUEST"
130 CALL IE488 (CMD$, X%, FLG%, BRD%)
140 IF NOT FLG% THEN 300
150 PRINT "ERROR ";HEX$(FLG%)'" IN LINE 130" : END
300 PRINT "REQUEST STATUS COD; = HEX" ;HEX$(X%)
Bit 09 would be used to determine if the DMA data transfer is
complete (0 = off, 1 = on).
The user
may use
the instruction at
any time
to monitor the state of the IBM-PC GPIB.
140 IF X% AND &HO200 THEN 130 ' this will loop until the DMA is
' done.
Page 28
Page 35

GPIB IEEE488 MANUAL
USER COMMANDS
RXCTL -
Receive control of the bus.The VAR% (integer) is set
true if the IBM regains control of the bus else VAR%
is false.
COMMANDS FORMAT:
"RXCTL"
EXAMPLE:
xx120 BRD% = 0
xx140 CMD$ = "RXCTL"
'define board number
'define command
xx145 WHILE NOT VAR%
xx150 CALL IE488 (CMD$, VAR$, FLG%, BRD%)
xx160 IF NOT FLG% THEN 200
xx170 PRINT "ERROR ";HEX$(FLG%);" IN LINE 150" : END
xx200 . . . continue users program until IBM is controller . . .
xx210
. . . . . .
xx220 WEND
' the last instruction before control
xx300 . . . . . THIS IS WHERE THE PROGRAM WILL CONTINUE . . . . .
. . . . . WHEN THE IBM RECEIVES CONTROL
. . . . .
xx310 . . . . . . . . user program continues . . . . . . .
xxxxx
. . . . . .
When control is received the IBM may issue all commands as
outlined. The RXCTL command may be issued at any time to
determine the state of the IEEE488 BUS.
Page 29
Page 36

GPIB IEEE488 HANUAL USER COMMANDS
STATUS -
A serial polled devices status byte is read into the
selectedvariable. The variable% will contain the
Statusbyte of the device specified as a serial poll.
TheIBM-PC must be the active controller or an error
will occur. Only one device is allowed with one
secondary address.
If no device is specified an error
will occur.
COMMANDS FORMAT:
"STATUS dev.secad"
EXAMPLE:
' three command sequence for Keithly Model 175 DVM
110 BRD% = 0
120 A$ = "M33X"
130
CMD$ = "REMOTE 12"
140 DVMEOI$ = "EOI 12[$]"
150 DVMSTATLlS$ = "STATUS 12"
160 CALL IE488 (CMD$, A$, FLG%, BRD% )
170 IF NOT FLG% THEN 190
180 PRINT "ERROR ";HEX$(FLG%);" IN LINE 160" : END
190 CALL IE488 (DVMEOIS, A$, FLG%, BRD% )
200 IF NOT FLG% THEN 220
210
PRINT "ERROR ";HEX$ (FLG%);" IN LINE
190~~
: END
' Status command issued here
220 CALL IE488 (DVMSTATUSS, X%, FLG%, BRD% 1
230 IF NOT FLG% THEN 250
240 PRINT "ERROR "iHEX$ (FLG%);" IN LINE 220" : END
220 PRINT "STATUS BYTE CODE RETURNED IS
=
HEX ";HEX$(X%)
The above routine
selects the DVM, sends out Set status info
"M33X" then the status (serial poll) is executed on the device.
Page 30
Page 37

GPIB IEEE488 MANUAL
USER COtWANDS
SYSCON
- SYStem CONfiguration and initialization of the GPIB.
The user must run this command once before using the
GPIB. IF this is not run first an error will be
generated. Base address data BAx is in HEX(&H) or
DECIMAL. The SYSCON command checks for the conflict of
all parameters if two boards are used. These are the
BASO, BASl, interrupt vector and DMA channel settings
which must be different.
The BRD% and data variable
are notusedinthis CALL since they have been defined
in the COMMAND string.
COMMANDS FORMAT:
"SYSCON MAD=dev,CIC=(0/1/2/3),NOB=(1/2),BAO=&Hdddd(,BAl=&Hdddd)"
where:
dev = the address of the IBM 00 to 30 decimal
MAD =
My
(IBM) device address
NOB = number of IE488 boards (1 or 2)
BAO = base address for board 1
BAl = base address for board 2
CIC = controller in charge,
O=none, l=brd#l,
2=brd#2,
3=(brd#l and brd#2) (separate GPIB busses).
EXAMPLE:
100 DEF SEG = &HCOOO
'starting segment of ROM CALL routine
110 CMD$ = "SYSCON MAD=3, CIC=l, NOB=l, BAO=&H300"
120 IE488 = 0
130 CALL IE488 (CMD$, A%, FLG%, BRD% )
140 IF NOT FLG% THEN 200
150 PRINT "ERROR ";HEX$ (FLG%);" IN LINE 130" : END
'The above lines of initialization code should always be placed
'at the beginning of your programs and precede any use of the IE'488.
Note the DEF SEG = &HCOOO before initiating the CALL and
'the CALL OFFSET variable IE488 is zero.
200 . . . . . . . . . .
continue users program . . . . . . . . . . . . . .
210 . . . . . . . . . . . . .
220 . . . . . . . . . . . . .
Page 31
Page 38

GPIB IEEE488 MANUAL
USER COMMANDS
TRIGGER
- Sends a trigger message to the selected device or a
group of devices.
The IBM-PC must be the active
controller or an error will occur.
COMMANDS FORMAT:
"TRIGGER devl, dev2
,......... devN"
EXAMPLE:
xx120 BRD% = 0
'define board number
xx140 CMD$ =
"TRIGGER 11,12,15"
'define command
xx150 CALL IE488 (CMDS, VAR%, FLG%, BRDB)
. . . . .
devices 11,12,13 are triggered at the same time
. . . . .
xx160 IF NOT FLG% THEN 200
xx170 PRINT "ERROR ";HEX$(FLG%);"
IN LINE 160" : END
xx200 . . . . . . . . .
continue users program
. . . . . . . . . . .
Page 32
Page 39

GPIB IEEE488 MANUAL
ASSEHBLY LANGUAGE LINK
5.0 8086/8088 ASSEMBLY LANGUAGE CALL FORMAT
TheIE488 interface card also allows the user to use all the user
commands as described in section 4.0 (USER COMMANDS) using the
same parameter passing conventions as the BASIC Interpreter. The
user should be familiar with the 8086/8088 assembly language
format before attempting to utilize this function. The user will
initiate a FAR CALL to the ROM (the address
of the switch
settings selected for the ROM segment on the IE488). The Stack is
used to transfer all variable pointers and data. The DS register
is the data segment pointer for the variable. Interrupt vector
OFEH is set to point to OBBBH (utility vector).
The segment will
be the same value as the switch setting on the IE488 interface
board. The user should save any register contents which he does
not want destroyed.
EXAMPLE:
;------------------------ BOARD CONTROL DATA -_________________-
IE488 ROM SEG: DD OCOOOOOOOH ; COOO:OOOO pointer to ROMS
- -
RTN FLAG: DW
0000
BASE ADDRESS: DW
ireturn flag code variable
0000 iboard number 0 (first board)
-
.____-___________________
COMMAND STRING -_____________________
CMD STRING: DB 'OUTPUT 11,12,14[$,2,15]'
CMD DESCRP: DB $ - CMD STRING
;Byte count
DW
CMD
STRING
-
.--------------- STRING ,,ESCRIPTER , DATA ARRAY ___-____________
,
DATA ARRAY: DB 'THIS ISTHEDATATOTRANSFER',CR,LF
-
DATA DESCRP:
DB $ - DATA ARRAY
DW DATA ARRAY
;byte count
;pointer to data
-
.------------------- VARIABLE POINTERS FOR COMMAND
,
-------------
VARIABLE 1: DW OFFSET CMD DESCRPT 'command
VARIABLE-2: DW OFFSET STRiNG DATA
VARIABLE-3: OFFSET RTN FLTiG
'data string
DW
VARIABLEr4:
'return flags
DW OFFSET BASE ADDRESS 'board number
-
Page 33
Page 40

GPIB IEEE488 MANUAL
ASSEMBLY LANGUAGE LINK
;------------------ SET"P STACK AND EXECUTE COMMAND ------------
IE488: MOV SI,OFFSET VARIABLE 1
-
PUSH [SII
PUSH [SI+21
PUSH [SI+41
PUSH [SI+6]
CALL DWORD IE488-ROM-SEG
i
get pointers
i
put on stack
i’
var'#2
i
ready to exec
call device driver
RETURN:
CMP RTN FLAG,00
;any errors on return ?
JNE ERRSR HANDLER
;exit to error handler
. . . .
continue iisers program . . . . . .
There is also available an assembly language macro library for
the IEEE488 interface board which allows the use of MACRO's
similar to the Basic CALL statement for all the commands. This
IEEE488 MACRO library allows the user to link to fortran and
assembly language with simple easy
to understand english
language.
Page 34
Page 41

GPIB IEEE488 MANUAL ASSEMBLY LANGUAGE LINK
5.1 ROW/RAM MEMORY MAP
The following is a
memory
layout of the 16 K byte IE488
interpreter. The GPIB Interpreter contains 12 K byte of ROM and 4
K bytes of static
ram.
GPIB IEEE488 16 K BYTE INTERPRETER MAP
0000
OBB8
3000
3800
3FFF
Cl2 K ROM interpreter]
ASSEMBLY LANGUAGE UTILITY ROUTINES
_______-- RAM BUFFER BEGINS -----------------
INTERNAL RAM BUFFERS FOR INTERPRETER
2 Kbytes
USER RAM AREA FOR SCRATCH PAD
2048
bytes
NOT USED BY INTERPRETER
--__---___ END OF RAM BUFFERS ---------------
5.2 STACK SEGMENT MAP
The stack is used to transfer the variable pointers to and from
the IE488 interpreter and must be of sufficient size to handle
the interrupt and DMA vectors used in the interpreter.
The
interpreter uses 20H words (32 decimal) of stack for the
subroutine link. The stack
memory
map upon entry to the IE488
interpreter is shown below.
This is the stack layout at entry and upon exittoffromthe IE488
interpreter:-
SP+6 =
VARIABLE 1
[ COMMAND STRING POINTER 1
sp+4 = VARIABLE-2
[ DATA VARIABLE POINTER 1
sp+2 = VARIABLE-3
[ RETURN FLAG POINTER 1
SP = VARIABLE14
[ BOARD BASE ADDRESS POINTER 1
5.3 RETURN FLAG CODES
The return flag codes are the same as the codes used in the BASIC
CALL statement (see section 3.3).
Page 35
Page 42

DMA DATA TRANSFERS
APPENDIX A
TheIE488 DMA data transfer hardware allows the user to transfer
data anywhere within the 20 bit address range with a word count
of 32767 (64 Kbyte). The DMA transfer parameters are passed to
the interpreter via the VAR% array variable. The VAR% is setup as
follows. All simple variables
must
be declared before the CALL to
setup the DMA transfer is executed and NO simple variables may be
declared after the CALL has been executed. Failure to comply with
this outline will generate unpredictable errors. The reason for
this is that BASIC stores array variables above simple variables
in memory,
and on declaring a new simple variable, BASIC
relocates all array variables and string descriptors. If the DMA
is in process to a variable that suddenly relocates, disaster
ensues!
NOTE: DMA channel 1 shares the same page register as DMA channel
0 (memory refresh) and is limited to the first 64K of
memory. DMA channel 3 is used by and cannot be shared with
the hard disk in XT computers,
in floppy only machines it
is free. These are system limitations of the IBM-PC. In
floppy based machines,
DMA is no problem but DMA transfers
modes are more restricted in hard disk machines. It is the
user's responsibility to insure that disk transfers and
IE488 DMA transfers do not conflict.
VAR%(O) = DMA DATA SEGMENT TO BE TRANSFERRED.
IF THE SEGMENT IS SET TO &HFFFF THEN THE BASIC DATA
SEGMENT IS USED. This allows the user to transfer
string data internal to BASIC.
VAR%(l) = DMA OFFSET
INTO DATA SEGMENT THE TRANSFER IS TO BE
REFERENCED. This is the value the limits use as a
reference starting point.
IMAGE SPECIFIERS
The Image specifier for a DMA transfer is the [WD,m,z) only. If
no limits are used the DMA transfer is ignored and the normal
transfer is executed. If the limits difference is less than 1
word then the DMA is ignored and error code
&H4000 is returned.
The limits (m,z) must be in the increment mode (m > z), else an
error &H2000 (image error) will be returned in the FLG% variable.
If BASIC's data segment is to be used then
NO SIMPLE VARIABLES
ARE ALLOWED TO BE INSERTED AFTER THE VAR% ARRAY HAS BEEN
INITIALIZECeLSE UNPREDICTABLE SYSTEM FAULTS WILL OCCUR.
String
variables may be transferred by the use of the VARPTR(var)
command in the BASIC reference manual.
No EOI is generated with
the last byte transferred in DMA. It is the responsibility of the
user to generate an EOI using the EOI command.
To transfer a string to a device the maximum length is 255
Page 36
Page 43

DNA DATA TRANSFERS
APPENDIX A
(&HFF) r
the user would use the VARPTR command as shown.
10 DIM X%(2)
20 IE488 = 0 : BRD% = 0 : FLG% = 0
30 CMD$ = "OUTPUT dev#[WD,0,151"
'word = 2 bytes
40 A$ = "THIS IS THE STRING TO TRANSFER IN DMA"+CHR$(13)+CHR$(lO)
50
x%(l) = (vARPTR(A$) + 1)
60 X%(O) = &HFFFF 'use basic's data segment
70 CALL 13488 (CMD$, X%(O), FLG%,BRD%)
Page 37
Page 44

RUNNING COMPILED PROGRAMS
APPENDIX B
Linking the IE488 interface with compiled programs generally
requires an .OBJ file of the assembled driver. Since the main
program is in ROM the user must write a small program to jump to
the ROM segment to execute the command line interpreter. Some
compilers allow a direct jump (call) to a segment and offset
defined by the programmer,
however the variable pointers must be
positioned the same as BASIC(A) CALL requires. To allow all types
of compilers to use the IE488 ROM command line interpreter, an
assembly language link facility is available (see assembly
language call chapter 5) to reposition the stack. Do to the
string descriptor differences in the IBM Basic interpreter and
the IBM Basic compiler a straight foward approach is not
possible.However the following patch may be used when linking
the compiled programs and the labels need not be changed.
To compile a Basic program using the IE488 is a straightforward
procedure using CALL IE488
(CMD$, VAR$(%), FLG%, BRD%). Refer
to the BASIC Compiler manual for the CALL command. The IE488
variable is not passed and is always = 0. The DEF SEG = (ROM
Command Line Interpreter segment),
may be removed from the
compiled program since the linker will determine the starting
segment of the program.
This requires very little modification to
the main program. The following program may be used to call the
IEEE488 card.
Step 1. Using any word processor or editor generate the
following assembly language program.
IE488SEG SEGMENT BYTE 'IEEE488 DVR'
ASSUME CS:IE488SEG, Ds:IE488SEG
PUBLIC IE488
IE488
PROC FAR
.--------------__-_----------------------------------------------
,
: CHANGE THIS ROM SEGMENT IF THE ROM SWITCHES ON THE BOARD HAVE
; BEEN CHANGED
ROM-SEG = OCOOOH ;IEEE 488 ROM SEGMENT
;---------------------------------------------------------------
IE BUSY = 309AH
;INTERNAL POINTERS
BASADR
= 300AH iINTERNAL POINTERS
ERRFLG = 300CH iINTERNAL POINTERS
VARPTR = 300EH iINTERNAL POINTERS
DATSEG = 3010H ;INTERNAL POINTERS
PUSH BP
MOV SP,BP
PUSH ES
PUSH SS
PUSH DS
MOV AX,ROM SEG
-
;pointers
;get IEEE rom segment
Page 38
Page 45

MOV DS,AX
MOV SI,IE BUSY
CMP DS:[ST],OOOlH
JE IEEE RTN
MOV WORE PTR DS:[SI],OOOlH
POP DS
PUSH DS
MOV BX,[BP]+12
MOV AX,[BP]+lO
MOV CX,[BPl+B
MOV SI,[BP]+6
MOV DX,[SI]
MOV AX,ROM SEG
MOV DS,AX MOV SI,BASADR
MOV DS:[SI],DX
MOV SI,ERRFLG
MOV DS:[SI],CX
MOV SI,VARPTR
MOV DS:[SI],AX
POP AX
PUSH AX
MOV SI,DATSEG
MOV DS:[SI],AX
MOV DX,ROM SEG
MOV ES,DX MOV DS,AX
SUB CX,CX
MOV CX,[BX]
MOV SI,2[BXl
JMP DWORD PTR IEE488 PROG
-
IEEE RTN:
MOV AX,0060H
JMP DWORD PTR IOERTN
IEE488 PROG: DD OC0000048H
IOERTNf DD OCOOOOB90H
IE488 ENDP
IE488SEG ENDS
END
;DS points to ROM SEG
;internal pointer
;BUSY ?
ireturn to caller
;now were busy
;basic data seg
;restore stack
;string descpt ptr
;ARG #2
;ARG #3
;address of interface
;base address, device
;get rom seg address
inew data seg
iinternal pointer
;save base address
;save flag ptr
ivariable pointer
;BASIC data seg
-save data seg.
,
:BASIC DATA SEG
;cx = 0
;BYTE COUNT WORD
;cmd string pointer
;START PROGRAM
;BUSY RTN CODE
-long error return
,
;point to ROM START
;error return handler
Step 2.
Assemble the above module and name the file IE488
then use the linker to combine the Basic compiled
program.OBJ and IE488.OBJ
The Assembly language link using basic is outlined in the BASIC
Reference manual and also in the IBM BASIC COMPILER reference
manual.
Page 39
Page 46

MAIN IEEE488 BUS CONNECTIONS
APPENDIX c
The slots on the rear of the IBM P.C. are slightly too narrow to
accommodate a standard IEEE-488 connector directly. To make
connections a standard 25 pin D type female is used on the
backplate (similar to RS232 type connector) and a special adapter
cable,
MetraByte part # C88-01, is used between the D connector
and the standard IEEE-488 male/female.
For details of this
adapter cable see Appendix D.
A rear view of the D connector pin assignments is shown below:-
GND
SHIELD
ATN
SRQ
IFC
NDAC
NRFD
DAV
EOI
DIO-4
DIO-3
DIO-2
DIO-1
A.
14
2
15
3
16
4
17
5
18
6
19
7
20
8
21
9
22
10
23
11
24
GND
GND
GND
GND
GND
GND
GND
REN
DIO-8
DIO-7
DIO-6
DIO-5
Note that although the above connector is of the same type as
specified by IEC-625, the pinout is different. An adapter cable
is required for IEC-625 instruments.
Page 40
Page 47

I
39
(1 meter)
C88-01 GPIB CONNECTOR CABLE
APPENDIX D
A drawing of Metrabyte's C88-01 adapter cable is shown below. The
cable is of flat shielded type and has a standard length of 1
meter
(approx. 3 feet).
Different lengths are available to
special order, specify C88-xx where xx = length in meters.
I+---
2.43
in.
-I
F
+.- 1.65
IEEE-488
Male/female
-1.82
-4
P .
a-- 0.1
1.84
Ii
All dimensions
in inches.
25
pi~n D ma1.e
Page 41
Page 48

INSTALLING IE-488 BOARD # 2
APPENDIX E
The IE488 ROM Command Line Interpreter is designed to handle 2
IE488 boards, therefore the ROM Interpreter on the second board
must be disabled. This is done by the removal of U19 (74LS245).
This will disable the second ROM. The user is also free to use
this ROM location for any programs which are to remain permanent.
The address decoding may be set to select a different 16 k byte
block of memory.
There is 12 Kbytes of ROM and 4 Kbytes of
static RAM which the Control-Alt-Del reset will have no effect
on. The user may also use the last 2 Kbytes of static RAM on the
first board for similar programs or a scratch pad. This allows
maximum flexibility for a turn key system involving up to 30 GPIB
selectable devices.
When two boards are used the DMA and
interrupt vectors must be different or else the boards will not
initialize using the SYSCON command. The user may perform a DMA
out on board 1 and a DMA in on board 2 (or vice-versa) at the
same time without conflict.
Page 42
Page 49

EXAMPLE PROGRAMS
APPENDIX P
The terms IEEE-488 buss and GPIB (General purpose interface buss)
are used synonymously in this manual.
The IEEE-488 buss was
developed by the Hewlett Packard Company and was initially known
as the HP-IB (Hewlett Packard Interface Buss). As its use spread
to other instrument companies,
the buss structure earned itself
the name GPIB (General Purpose Interface Buss) and finally the
Institute of Electrical and Electronic Engineers (IEEE) generated
standard number 488 covering all aspects of buss configuration
and operation,
hence IEEE-488. In Europe, the International
Electrotechnical Commission developed an equivalent standard,
IEC 625-2 which defines an interconnect buss that is electrically
similar to IEEE-488 but uses a different connector system.
As an example, we shall examine a program to read data from a
Keithley Model 175 digital multimeter setup on the buss as device
#12. The first step is to initialize the IE-488 board, this
applies whatever you intend to do later and would usually be
performed at the beginning of a program. It is not necessary to
repeat this operation unless your computer is turned off. To
initialize, we make use of the SYSCON (system configuration)
command.
100 DEF SEG = &HCOOO
'This first line tells the CALL statement that follows
where to find the IE-488 ROM firmware routine.
The
address Hex COO0 corresponds to the setting of the
MEMORY ADDRESS switch on the board. See the IBM BASIC
manual for the action of DEF SEG.
110 CMD$ =
"SYSCON MAD=3, CIC=l, NOB=l, BAO=LH300"
'The command string does the following:-
SYSCON = command
MAD = 3 sets the IBM talk/listen address to 3.
The device address for the IBM is set
in software instead of by switch.
CIC =1 specifies that the board will be the
buss controller. Only one device can
be controller at a time.
NOB = 1 We only have 1 IE-488 board
installed
in our computer.
BAO
= &H300 The base I/O address through which
all data will be transferred must be
known by the
firmware. This
corresponds to the setting of the BASE
ADDRESS switch on the board.
Page 43
Page 50

120 IE488 = 0
130 A% = 0 : FLG% = 0 : BRD% = 0
'Line 120 sets the CALL offset variable to zero. It is
always zerothroughoutthe use of the CALL with the IE-
488. Line 130 declares A% as a dummy data variable and
clears the error flag variable FLAG%.
No data will be
passed during SYSCON but the presence of a data
variable is required as a "filler"
in the CALL
parameter list. Strictly neither line 120 or 130 are
absolutely necessary as they may be declared by default
in the CALL and BASIC will automatically initialize
them to zero, being explicit is just good programming
practice.
150 CALL IE488 (CMD$, A%, FLG%, BRD%)
'Line 150 performs the initialization.
The CALL
parameters CMD$, A%, FLG%,
BRD% must always appear in
the CALL in the same order - think of it as COMMAND,
DATA,
ERRORS, ADDRESS. The pointers to the location of
these variables will be passed on BASIC's stack in the
order they appear,
hence the importance of keeping the
order and number fixed (see CALL in the IBM BASIC
Manual).
160 IF FLG%<>O THEN PRINT "INSTALLATION ERROR" : END
'This line is optional and just confirms that the
initialization proceeded O.K.
If the FLG% error
variable returned anything other than zero,
a mistake
has been made.
Lines 100-150 will be required
initialization in all your
programs. From hereon, the programming depends on your
application. For our example,
we will first set the Keithley 175
into remote. This is a good way to check the buss is "alive"
since most devices have some sort of remote indicator that will
be activated on execution of the next CALL.
170 CMD$ = "REMOTE 12"
'Our command is to put device #12 into remote mode.
180 BRD% = 0
'Once initialized, the board address variable may be set
to 0 or 1 depending on which board in a 2 board system
that was being addressed or alternatively if we prefer
the actual base address of the board (&H300 in this
case). You may choose either option.
190
CALL 1~488 (CMD$, A%, FLAG%, BRD%)
'Remote indicator will now activate.
Page 44
Page 51

200 IFFLG%<>O THEN PRINT "ERROR # ";HEX$(FLG%) :END
'Again, optional check for errors.
Nowwewill read dat
.a from the DVM. The DVM outputs a data string
of ASCII characters . .
NDCV+O.l234E+O meaning normal DC volts,
+0.1234 exponent 10
-"O 'i.e.
1. This is typical of many IEEE-488
instrument responses.
To fetch this data we use the ENTER
command. Conversely,
if we wanted to write data to the instrument
we would use the OUTPUT command.
The first step is to setup a data variable to receive this data.
Since we are expecting an ASCII string,
we choose a string
variable with enough elements to contain the expected data.
210 DVMDT$ = SPACES(25)
'An empty (spaces) 25 character string.
220 CMD$ = "ENTER 12[$,0,181"
'Enter data from device 12. The image specifiers tell
the IE-488 firmwarethatthe data transfer will be to a
string variable ($) and that 19 characters are to be
transferred to elements 0 thru 18 of the string.
230 CALL IE488 (CMDS, DVMDT$, FLG%, BRD%)
'Note that although we have used the mnemonic CMD$ as a
name for our command string variable throughout our
examples,
you are free to choose any other string name
e.g. MYOWNNM$ for command data as long as it is
correctly referenced in the CALL parameter list.
240 IF FLG%<>O THEN PRINT "ENTRY ERROR" : END
'Checks for transfer errors - optional.
The data is now in DVMDT$. The numeric and range information can
be sorted out using BASIC's string functions e.g. MID$, VAL
etc.
Alternatively, in a fixed format response application, the image
specifier can select out the data of interest in the response
string.
This exampleshows how in 15 lines of code, many lines of which
are optional,
the IE-488 board can be initialized and data
returned. It also shows how the firmware interpreter minimizes
user programming and keeps communication with the IEEE-488 buss
down to memorizing a few "English like" commands, a feature that
is unique to the MetraByte IE-488 interface.
Another helpful hint on using the IEEE488 bus with different
instruments is to insure that each instruction has sufficient
time to complete its requested command before issuing another.
Page 45
Page 52

REFERENCES ON THE IEEE-488 BUSS
--
The following literature on the IEEE-488 buss may be of
interest:-
1.
2.
3.
4.
5.
"IEEE Standard Digital
Interface for Programmable
Instrumentation". ANSI/IEEE Std. 488-1978. Published by the
IEEE Inc., 345 East 47th. St.,New York, N.Y. 10017
"Hewlett-Packard
Interface Bus User's Guide". Publication
9830A, 1974.
"HP-1B. Improving
Measurements in Engineering and
Manufacturing -
A Collection of Useful Technical
Information". Hewlett-Packard Publication #5952-0058.
"IEEE Standard 488 and Microprocessor Synergism".
Loughry,
D.C. and Allen,
M.S. in Proceedings of the IEEE, Vo1.66,
No.2, February 1978, ~~162-172.
"Standard Instrument Interface Simplifies System Design"
Ricci, D.W. and Nelson, G.E.. Electronics, Nov. 14, 1974
pp95-106.
Page 46
 Loading...