

Page 1
Instructions for use
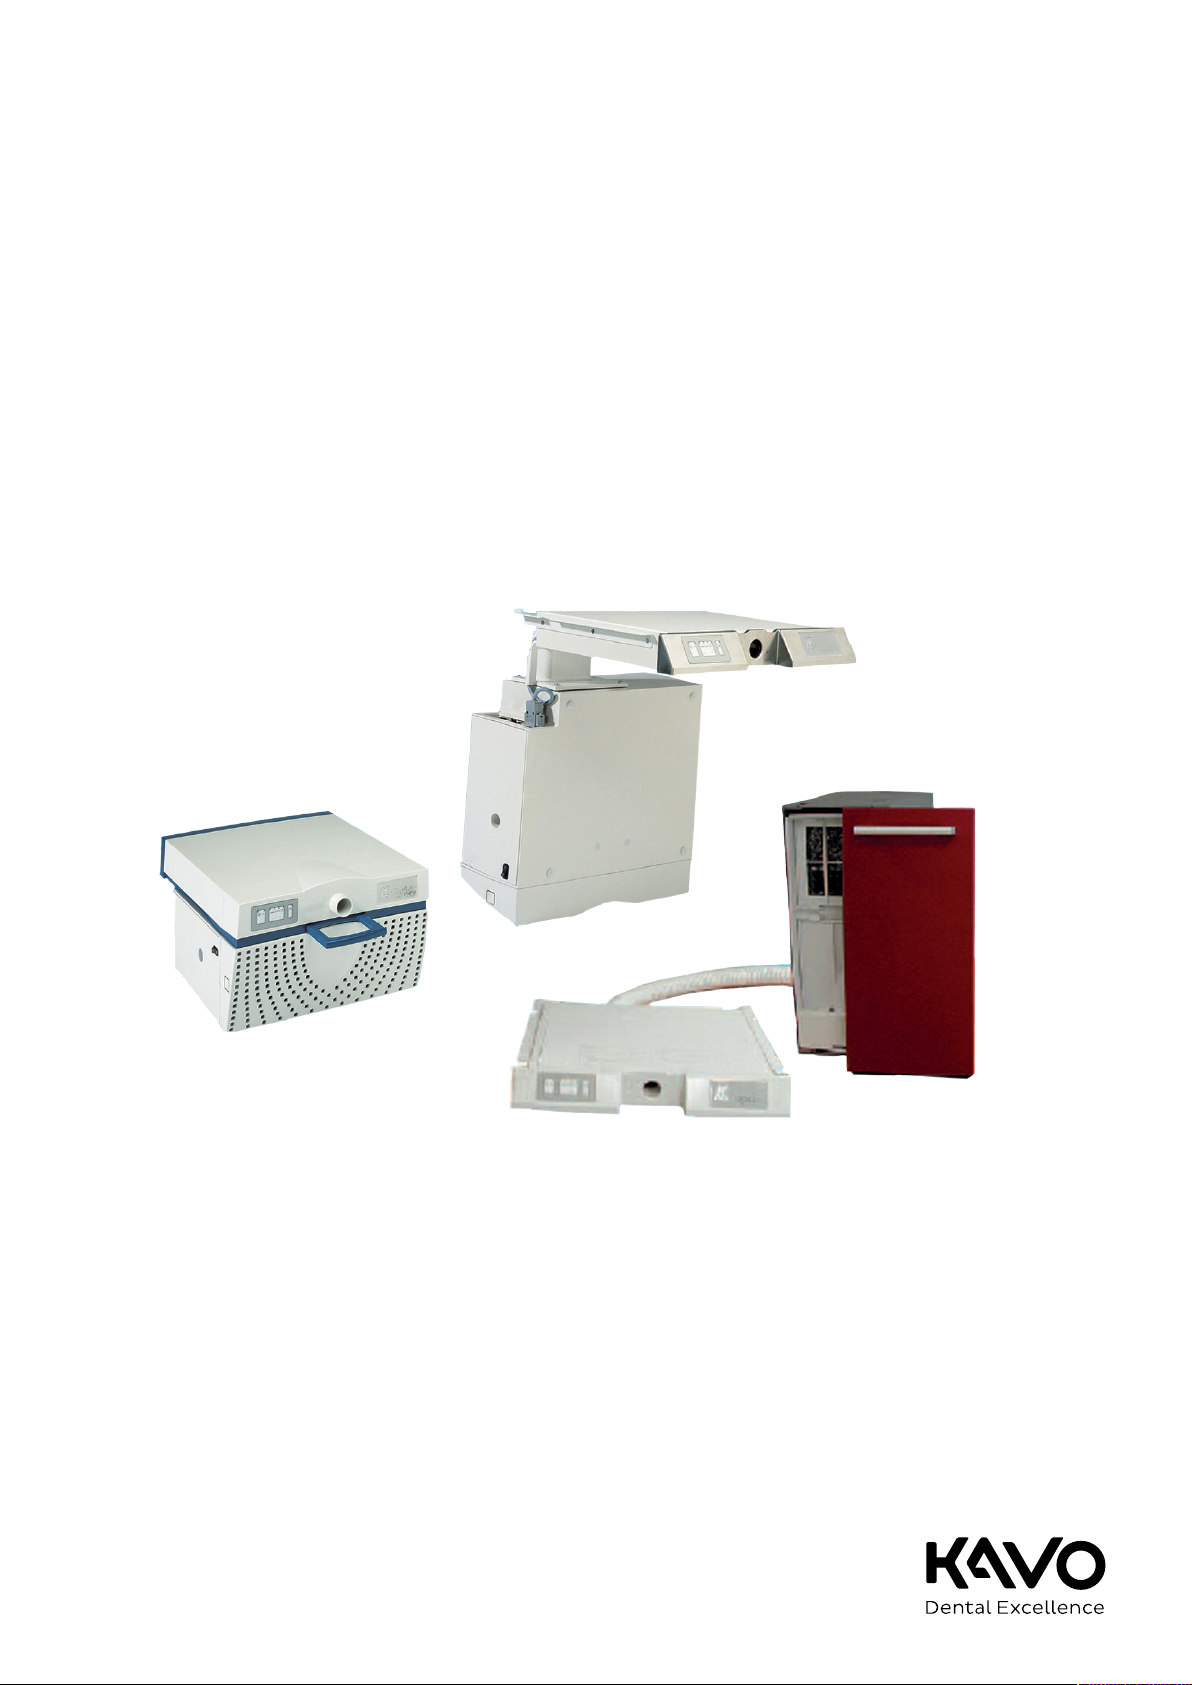
SMARTair Evo, SMARTair Evo mobile, SMARTair
Evo FLEXspace
Page 2

Distributed by:
KaVo Dental GmbH
Bismarckring 39
D-88400 Biberach
Phone +49 (0) 7351 56-0
Fax +49 (0) 7351 56-1488
Manufacturer:
Kaltenbach & Voigt GmbH
Bismarckring 39
D-88400 Biberach
www.kavo.com
Page 3

Instructions for use SMARTair Evo, SMARTair Evo mobile, SMARTair Evo FLEXspace
Contents
Contents
1 User instructions ................................................................................................................ 5
1.1 User guide .................................................................................................................... 5
1.1.1 Symbols ............................................................................................................ 5
1.1.2 Target group...................................................................................................... 5
1.2 Service ......................................................................................................................... 5
1.3 Terms and conditions of warranty.................................................................................... 5
1.4 Transport and storage.................................................................................................... 6
1.4.1 Currently valid packaging regulations.................................................................... 6
1.4.2 Damage in transit............................................................................................... 6
1.4.3 Information on the packaging: Storage and transportation...................................... 7
2 Safety.................................................................................................................................. 8
2.1 Description of safety instructions ..................................................................................... 8
2.1.1 Warning symbol ................................................................................................. 8
2.1.2 Structure ........................................................................................................... 8
2.1.3 Description of hazard levels ................................................................................. 8
2.2 Safety Instructions......................................................................................................... 8
2.2.1 General ............................................................................................................. 8
2.2.2 Product-specific .................................................................................................. 9
2.3 Protective equipment ..................................................................................................... 10
2.4 Disposal of electronic and electrical devices ...................................................................... 10
3 Product Description ............................................................................................................12
3.1 Intended use................................................................................................................. 12
3.1.1 General ............................................................................................................. 12
3.1.2 Indications for use .............................................................................................. 12
3.2 Delivery Content............................................................................................................ 13
3.3 Device parts.................................................................................................................. 14
3.4 Filter box ...................................................................................................................... 15
3.5 Connectors.................................................................................................................... 16
3.6 Control panel................................................................................................................. 16
3.7 Technical Specifications.................................................................................................. 17
3.7.1 Dimensions of SMARTair Evo................................................................................ 17
3.7.2 Dimensions of SMARTair Evo mobile..................................................................... 17
3.7.3 Dimensions of SMARTair Evo FLEXspace ............................................................... 18
3.7.4 Technical Specifications....................................................................................... 18
3.8 Rating plates................................................................................................................. 20
3.9 Dust filtration test.......................................................................................................... 21
4 Installation .........................................................................................................................22
4.1 Location........................................................................................................................ 22
4.2 Installation of the SMARTair Evo...................................................................................... 23
4.3 Installation of the SMARTair Evo mobile ........................................................................... 24
4.4 Installation of the SMARTair Evo FLEXspace...................................................................... 25
4.5 Installing the power cable............................................................................................... 27
4.6 Connecting the SMARTair to the equipment...................................................................... 28
4.7 Installing the extraction hood (optional)........................................................................... 29
5 Startup................................................................................................................................31
3 / 46
Page 4

Instructions for use SMARTair Evo, SMARTair Evo mobile, SMARTair Evo FLEXspace
Contents
5.1 Checking the filter bag ................................................................................................... 31
6 Operation............................................................................................................................ 32
6.1 Automatic mode ............................................................................................................ 32
6.2 Manual mode ................................................................................................................ 32
6.3 Operation via foot switch ................................................................................................ 34
6.4 Adjust the suction levels................................................................................................. 34
6.4.1 Recognition of software version and device properties ............................................ 35
6.5 Setting the response sensitivity....................................................................................... 35
7 Cleaning and servicing .......................................................................................................37
7.1 Cleaning ....................................................................................................................... 37
7.2 Servicing ...................................................................................................................... 38
7.2.1 Getting the device ready for use........................................................................... 38
7.2.2 Changing the filter bag........................................................................................ 38
7.2.3 Changing the adsorption filter (optional accessory)................................................. 39
7.2.4 Changing the ultra-fine filter ................................................................................ 39
8 Safety checks in accordance with IEC 62638 (VDE 0701 / 0702).....................................41
9 Troubleshooting .................................................................................................................42
10Accessories.........................................................................................................................43
11Statement of conformance.................................................................................................44
4 / 46
Page 5
Instructions for use SMARTair Evo, SMARTair Evo mobile, SMARTair Evo FLEXspace
1 User instructions | 1.1 User guide
1 User instructions
1.1 User guide
Requirement
Read these instructions prior to first use to avoid misuse and prevent damage.
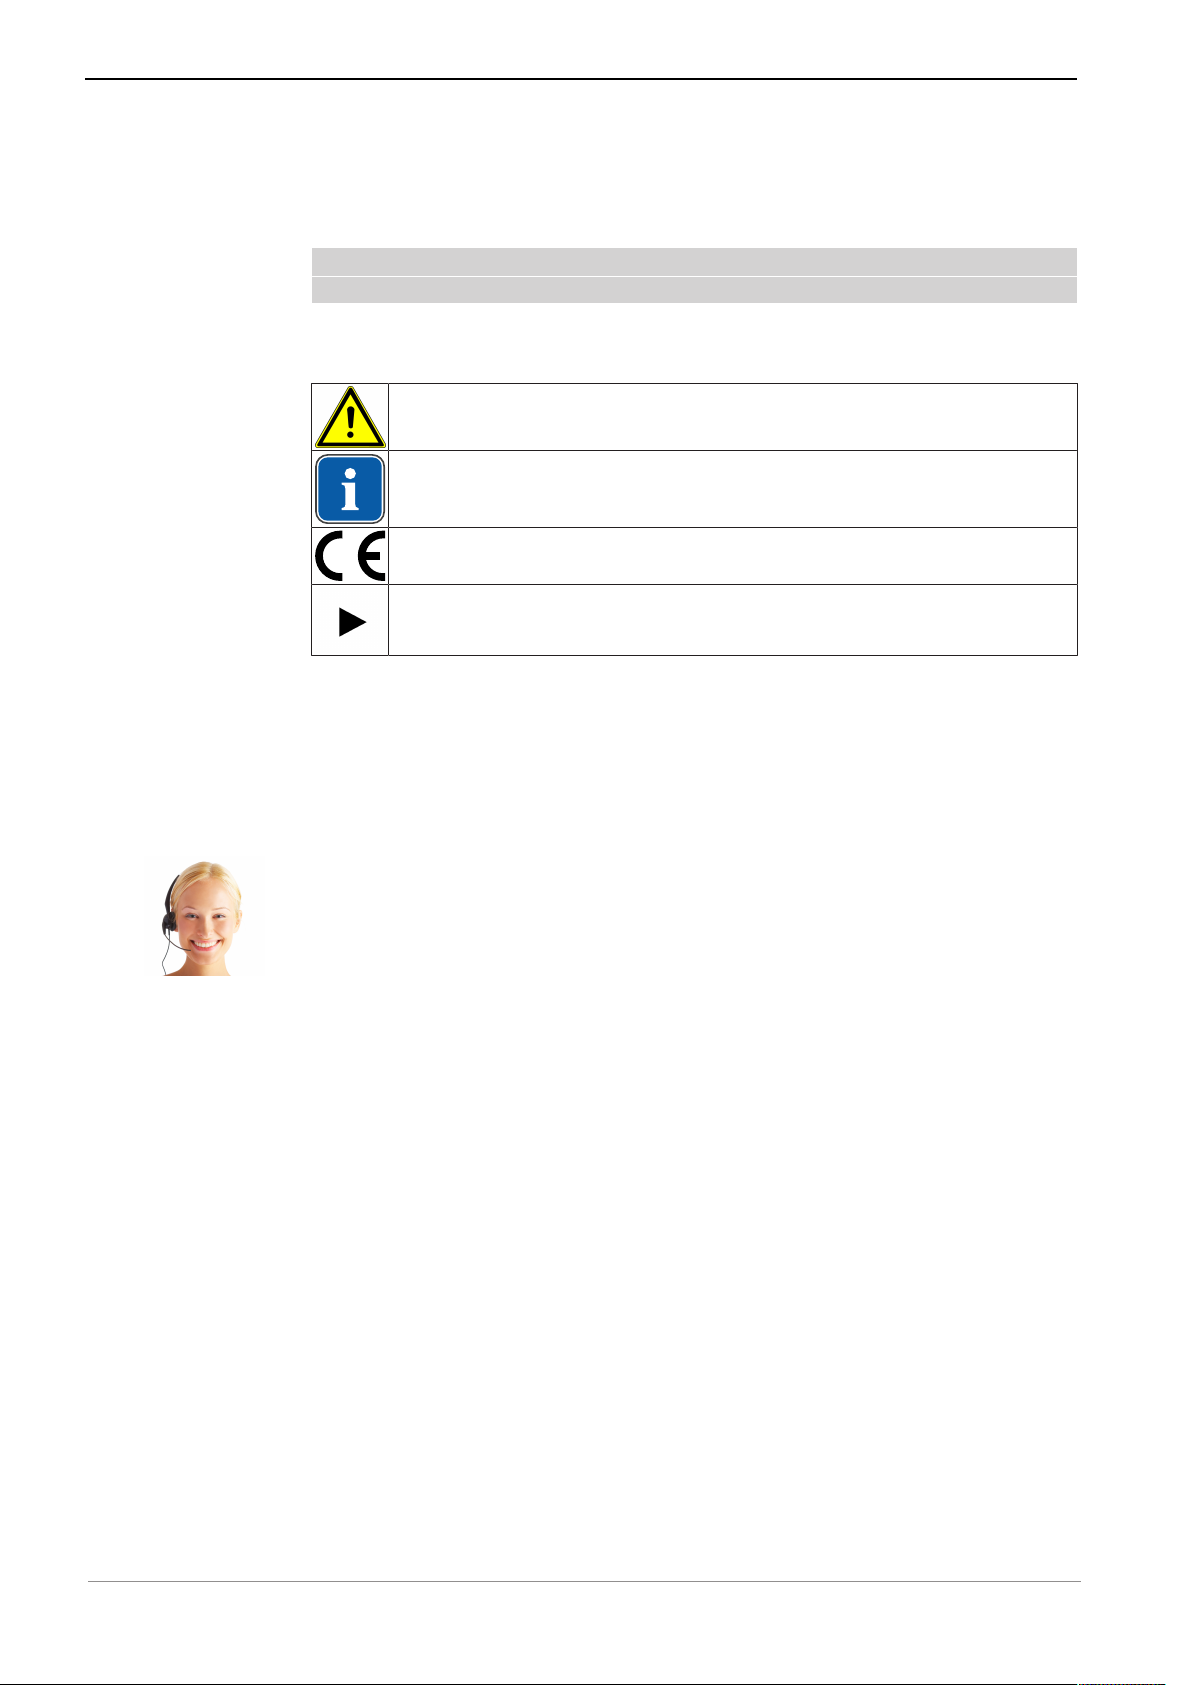
1.1.1 Symbols
See the Safety/Warning Symbols section
Important information for users and technicians
CE mark (European Community). A product bearing this mark meets
the requirements of the applicable EU directive.
Action required
1.1.2 Target group
This document is for dental technicians and laboratory personnel.
1.2 Service
Service-Hotline:
+49 7351 56-1000
Service.Zahntechnik@kavo.com
Please indicate the product serial number in all requests!
For further information, please visit: www.kavo.com
1.3 Terms and conditions of warranty
Within the scope of the applicable KaVo delivery and payment conditions, KaVo
guarantees proper function, absence of defects in material and workmanship
for a period of 12 months from the date of purchase as confirmed by the salesperson.
In case of justified complaints, KaVo will honour its warranty with a free replacement or repair.
The warranty does not cover defects and their consequences that arose or may
have arisen due to natural wear, improper handling, cleaning or maintenance,
non-compliance with operating, maintenance or connection instructions, corrosion, contaminated media supply or chemical or electrical influences deemed
abnormal or impermissible in accordance with factory specifications.
The warranty does not usually cover lamps, light conductors made of glass and
glass fibres, glassware, rubber parts and the colourfastness of plastic parts.
The warranty expires if defects or their consequences could possibly have
arisen because the product has been modified or changed. Warranty claims can
only be asserted when they are immediately reported to KaVo in writing.
5 / 46
Page 6

Instructions for use SMARTair Evo, SMARTair Evo mobile, SMARTair Evo FLEXspace
1 User instructions | 1.4 Transport and storage
This notification must be accompanied by a copy of the invoice or delivery note
on which the manufacturing number is clearly visible. In addition to the guaranty, the statutory warranty claims of the purchaser also apply with a warranty
period of 12 months.
1.4 Transport and storage
1.4.1 Currently valid packaging regulations
Note
Only valid for the Federal Republic of Germany.
Dispose of and recycle the sales packaging appropriately in accordance with
current packaging regulations, employing waste management or recycling companies. Comply with the comprehensive return system. KaVo has had its sales
packaging licensed for this purpose. Please comply with the regional public
waste-disposal system.
1.4.2 Damage in transit
In Germany
If the packaging is visibly damaged on delivery, please proceed as follows:
1. The recipient of the package must record the loss or damage on the delivery
receipt. The recipient and the representative of the shipping company must
sign this delivery receipt.
2. Leave the product and packaging in the condition in which you received it.
3. Do not use the product.
4. Report the damage to the shipping company.
5. Report the damage to KaVo.
6. Consult with KaVo first, before returning a damaged product.
7. Send the signed delivery receipt to KaVo.
If the product is damaged but there was no discernable damage to the packaging on delivery, proceed as follows:
1. Report the damage to the shipping company immediately and no later than
7 days after delivery.
2. Report the damage to KaVo.
3. Leave the product and packaging in the condition in which you received it.
4. Do not use a damaged product.
Note
Failure on the part of the recipient to comply with any of the above-mentioned obligations will mean that the damage will be considered to have
arisen following delivery (in accordance with the General German Freight Forwarders´ Terms and Conditions, Art. 28).
Outside Germany
Note
KaVo shall not be held liable for damage arising from transportation.
The shipment must be checked on arrival.
6 / 46
Page 7
Instructions for use SMARTair Evo, SMARTair Evo mobile, SMARTair Evo FLEXspace
1 User instructions | 1.4 Transport and storage
If the packaging is visibly damaged on delivery, please proceed as follows:
1. The recipient of the package must record the loss or damage on the delivery
receipt. The recipient and the representative of the shipping company must
sign this delivery receipt.
Without this evidence, the recipient will not be able to assert a claim for
damages against the shipping company.
2. Leave the product and packaging in the condition in which you received it.
3. Do not use the product.
If the product is damaged but there was no discernable damage to the packaging on delivery, proceed as follows:
1. Report any damage to the shipping company immediately and no later than
7 days after delivery.
2. Leave the product and packaging in the condition in which you received it.
3. Do not use a damaged product.
Note
If the recipient fails to comply with any of the above-mentioned obligations,
the damage will be considered to have arisen following delivery
(in accordance with CMR law, Chapter 5, Art. 30).
1.4.3 Information on the packaging: Storage and
transportation
Note
Please keep the packaging in case you need to return the product for servicing or repair.
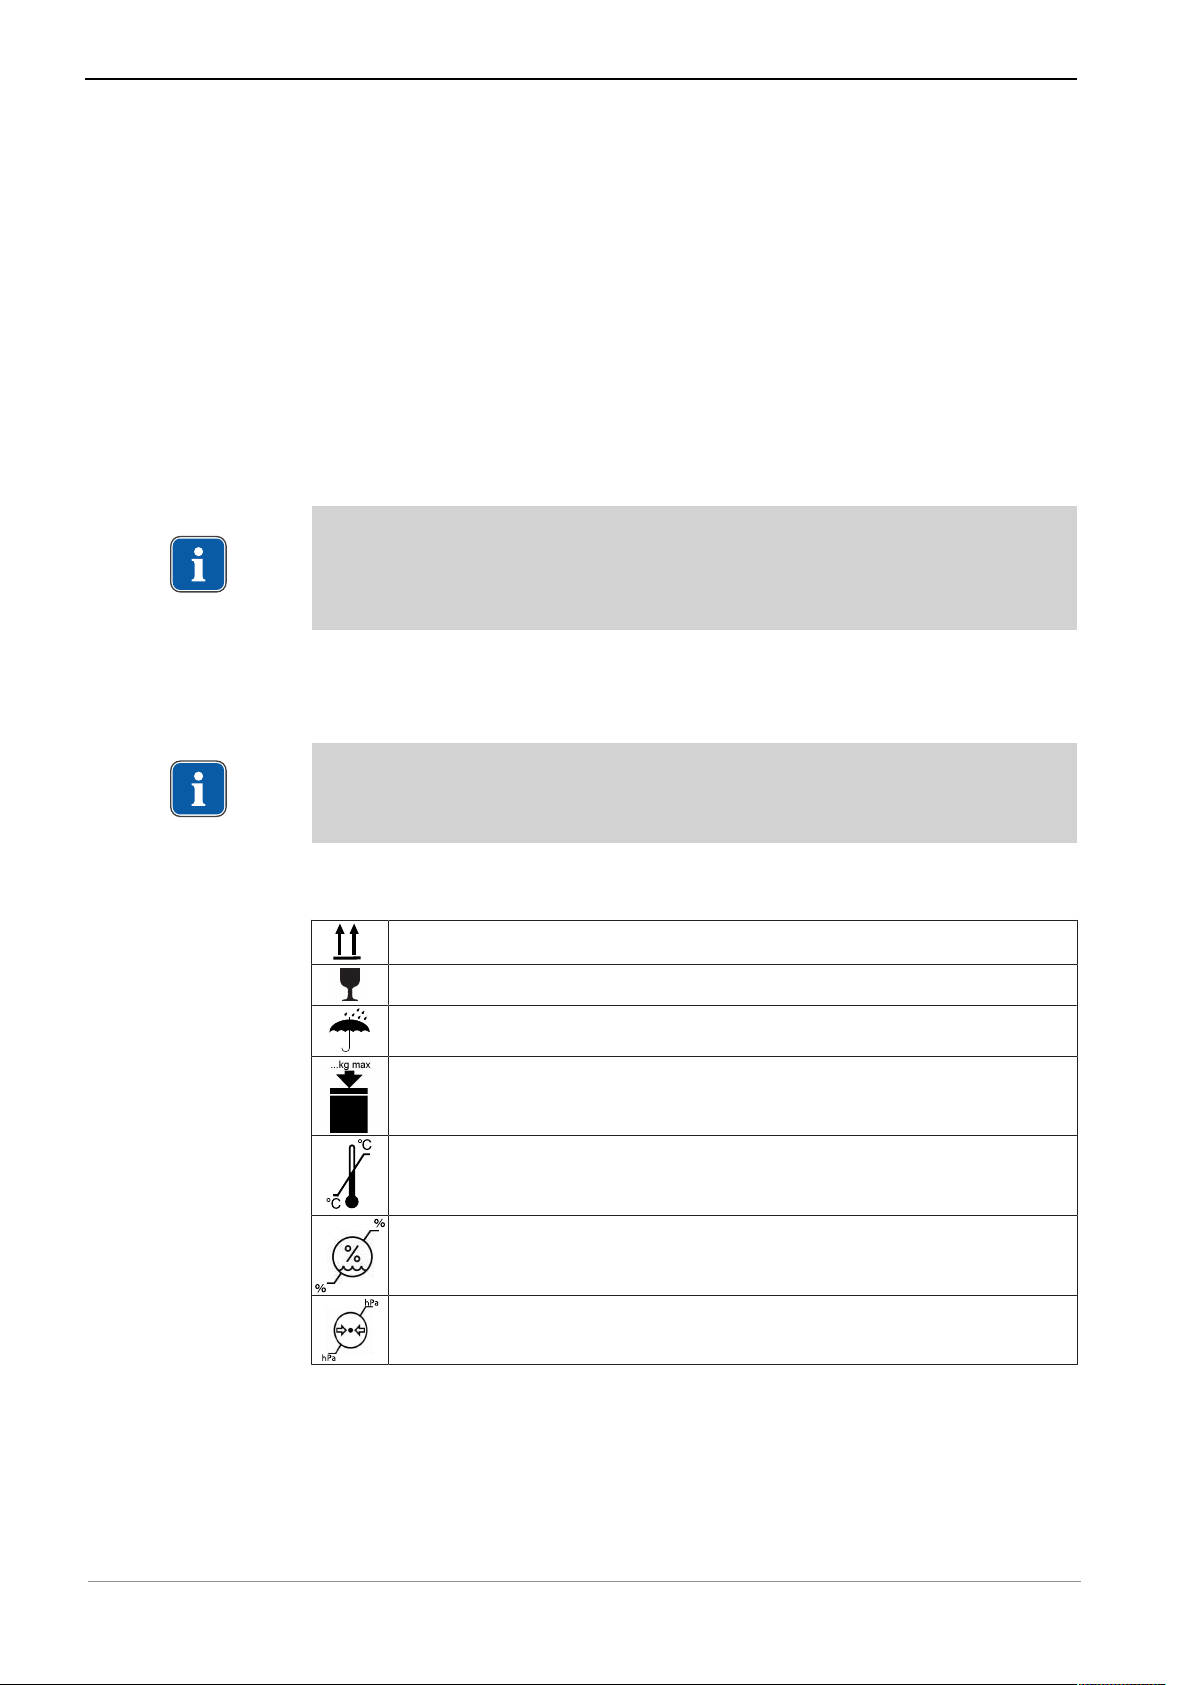
The symbols printed on the outside are for transportation and storage, and
have the following meaning:
Transport upright with the arrows pointing upwards!
Fragile - protect against impact!
Protect from moisture!
Permissible stacking load
Temperature range
Humidity
Air pressure
7 / 46
Page 8
Instructions for use SMARTair Evo, SMARTair Evo mobile, SMARTair Evo FLEXspace
2 Safety | 2.1 Description of safety instructions
2 Safety
2.1 Description of safety instructions
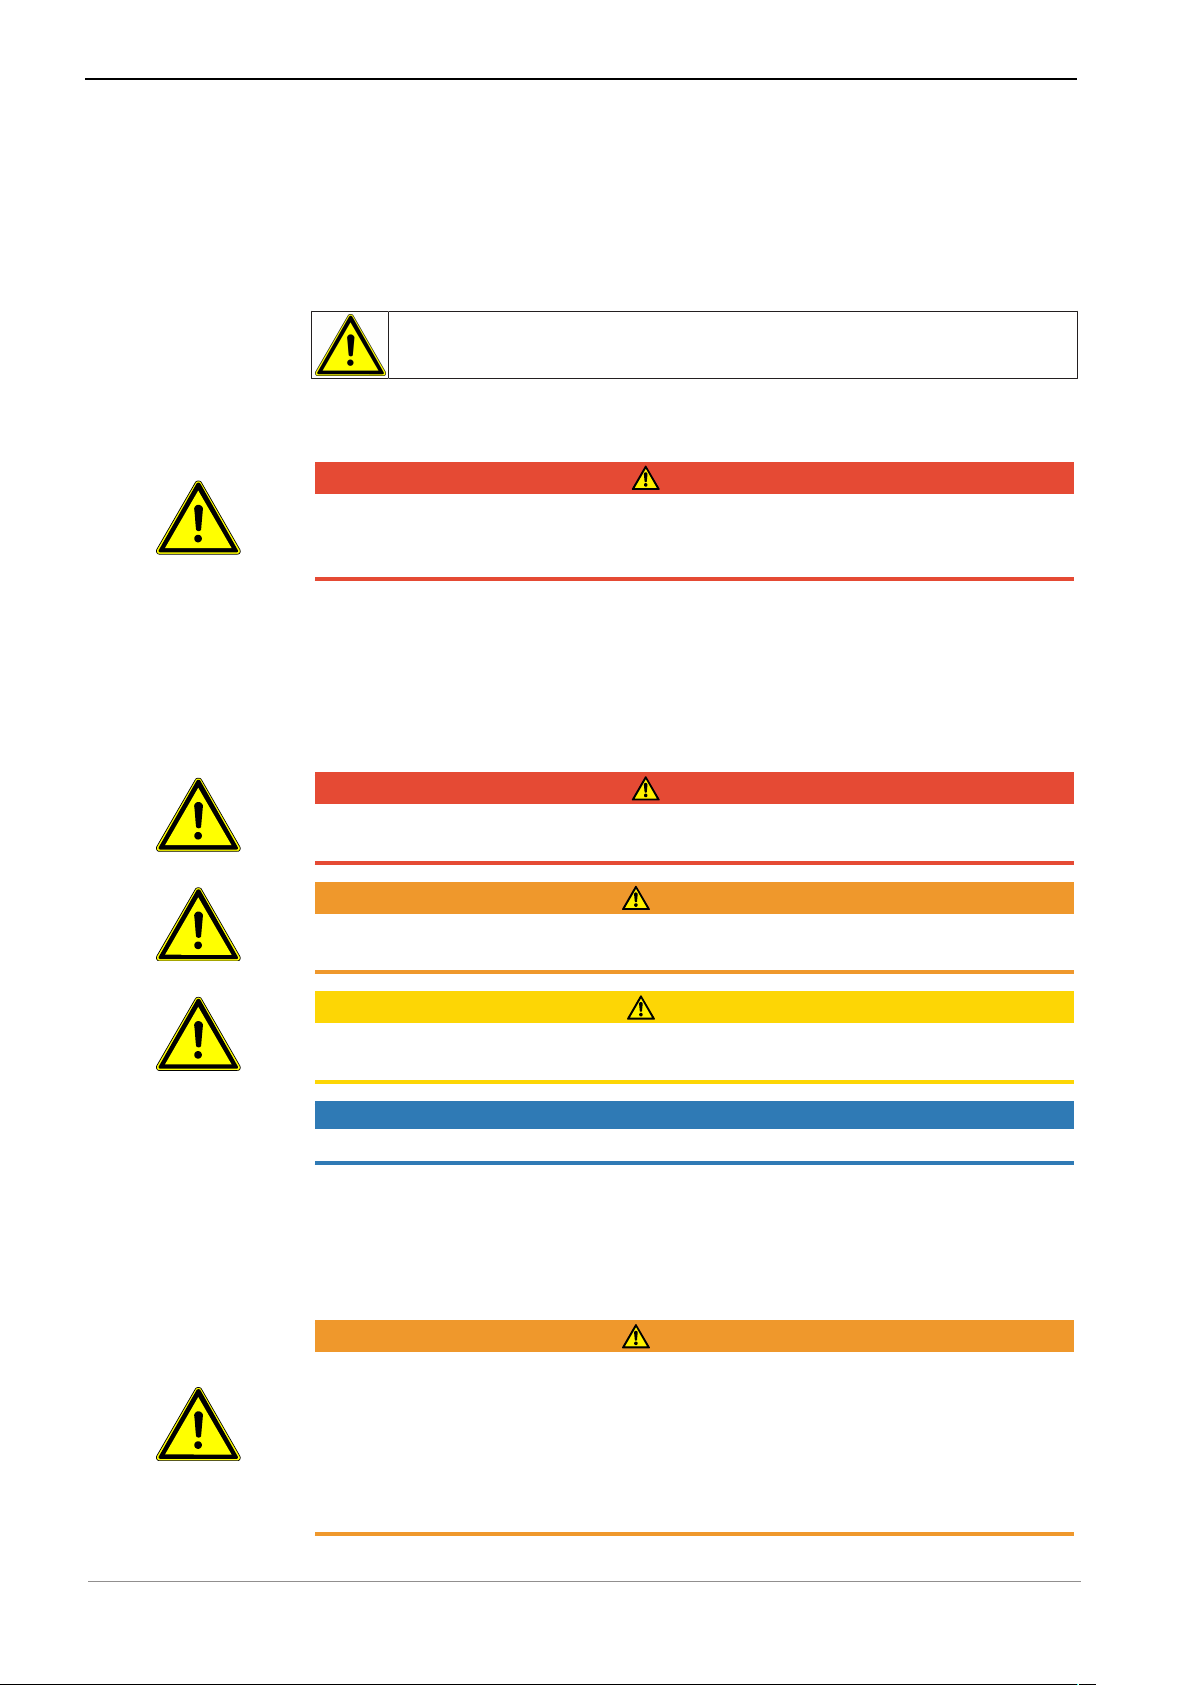
2.1.1 Warning symbol
Warning symbol
2.1.2 Structure
DANGER
The introduction describes the type and source of the hazard.
This section describes potential consequences of non-compliance.
▶ The optional step includes necessary measures for hazard prevention.
2.1.3 Description of hazard levels
The warning and safety notes in this document must be observed to prevent
personal injury and material damage. The warning notes are designated as
shown below:
DANGER
In cases which – if not prevented – directly lead to death or severe injury.
WARNING
In cases which – if not prevented – could lead to death or severe injury.
CAUTION
In cases which – if not prevented – could lead to minor or moderate
injury.
NOTICE
In cases which – if not prevented – could lead to material damage.
2.2 Safety Instructions
2.2.1 General
WARNING
Injury or damage from damaged functional parts.
If functional parts are damaged, it can cause additional damage or personal injury.
▶ Check the device, electrical cables and any accessories regularly for pos-
sible damage to the insulation and replace them according to need.
▶ If functional parts are damaged: discontinue your work and
repair the damage or notify a service technician!
8 / 46
Page 9

Instructions for use SMARTair Evo, SMARTair Evo mobile, SMARTair Evo FLEXspace
2 Safety | 2.2 Safety Instructions
CAUTION
Damage by liquids.
Faults on electrical components.
▶ Protect openings of the product from any ingress of liquids.
▶ Do not continue using the device and contact Customer Service, if there is
any ingress of liquid into the device.
CAUTION
Product damage from incorrectly adjusting the tension.
Destruction of electrical components.
▶ Adjust the voltage input for the product to the existing mains voltage.
CAUTION
Damage from overvoltage.
This damages the product.
▶ The nominal voltage and frequency must be the same as that on the rating
plate.
CAUTION
Premature wear and malfunctions from improper servicing and care.
Reduced product life.
▶ Perform regular proper care and servicing!
2.2.2 Product-specific
CAUTION
Hazard from connection of wrong capture elements.
User may be exposed to elevated amounts of dust in the workplace.
▶ Fur aspiration, exclusively use capture elements (suction hoods) designed
for a volume flow of 15 l/s or less.
CAUTION
Damage from pointed or sharp-edged objects being aspirated.
User may be exposed to elevated amounts of dust in the workplace.
▶ Do not aspirate pointed or sharp-edged objects.
CAUTION
Damage from pointed or sharp-edged objects being aspirated.
This damages the product.
▶ Do not aspirate pointed or sharp-edged objects.
WARNING
Hazardous dusts
Injury hazard
▶ Comply with national regulations and permissible dust loads for workplaces.
▶ Comply with the safety data sheets during any aspiration of hazardous ma-
terials.
▶ Wear personal protective clothing during any aspiration of hazardous ma-
terials.
▶ Discharge exhaust air appropriately during any aspiration of hazardous ma-
terials.
9 / 46
Page 10
Instructions for use SMARTair Evo, SMARTair Evo mobile, SMARTair Evo FLEXspace
2 Safety | 2.3 Protective equipment
CAUTION
Hazardous dusts
Injury hazard
▶ Wear personal protective clothing whenever you empty or clean the dust
drawer.
▶ Comply with local regulations and accident prevention regulations
whenever you dispose of the suctioned material or spent filters.
▶ The disposal of suctioned material must be in compliance with legal regula-
tions.
▶ Always keep the dust drawer closed during suctioning.
▶ Never use the equipment without a suction hose.
▶ Never used the equipment without an appropriate filter.
▶ Do not aspirate combustible or explosive gases, vapours, dusts.
▶ Do not aspirate hot materials.
▶ Do not aspirate liquids.
▶ Check the filling level of the filters regularly.
2.3 Protective equipment
The following protective equipment is recommended when emptying or servicing the suction system:
▪ Facemask
▪ Gloves
▪ Protective glasses
2.4 Disposal of electronic and electrical devices
Note
According to EC directive 2012/19 concerning waste electrical and electronic
equipment, this product is subject to the cited directive and must be disposed
of accordingly within Europe.
For more information, please visit www.kavo.com or contact your specialised
dental supplier.
For final disposal:
In Germany
To return an electrical device, you need to proceed as follows:
1. On the homepage www.enretec.de of enretec GmbH, you can download a
form for a disposal order under the menu item eom. Download the disposal
order or complete it as an online order.
2. Enter the corresponding information to complete the order, and submit it as
an online order or by fax +49 (0)3304 3919 590 to enretec GmbH.
The following contact options are also available for questions and for initiating a disposal order:
Phone: +49 (0) 3304 3919-500
Email: eom@enretec.de and
Postal address: enretec GmbH, Geschäftsbereich eomRECYCLING®
Kanalstraße 17
D-16727 Velten
3. A unit that is not permanently installed will be picked up at the office.
A permanently installed unit will be picked up at the curb at your address on
the agreed date.
10 / 46
Page 11

Instructions for use SMARTair Evo, SMARTair Evo mobile, SMARTair Evo FLEXspace
2 Safety | 2.4 Disposal of electronic and electrical devices
The owner or user of the device will have to bear the cost of disassembly,
transportation and packaging.
International
For country-specific information on disposal, contact your dental supplier.
11 / 46
Page 12

Instructions for use SMARTair Evo, SMARTair Evo mobile, SMARTair Evo FLEXspace
3 Product Description | 3.1 Intended use
3 Product Description
3.1 Intended use
3.1.1 General
The overarching guidelines and/or national laws, national regulations and the
rules of technology applicable to machines for the startup and use of the KaVo
product for the intended purpose are to be applied and complied with.
In combination with KaVo control units, this KaVo product is suitable for the
processing of materials in dentistry, industry and trade applications by means
of rotating tools.
Any other type of use is not permitted.
"Proper use" includes following all instructions for use and ensuring that all inspections and service tasks are performed.
The user must ensure that the unit works properly and is in satisfactory condition before each use.
The following persons are authorised to repair and service the KaVo product:
▪ Technicians of KaVo branch offices after appropriate product training.
▪ Specifically KaVo-trained technicians of KaVo franchised dealers.
Note
The product must be cleaned and serviced according to instructions if it is not
to be used for an extended period of time.
KaVo shall not be responsible for damage caused by:
▪ external influences, poor media quality or faulty installation.
▪ The use of incorrect information.
▪ repair work carried out incorrectly.
Note
Any waste which is generated must be recycled or disposed of in strict compliance with all applicable national regulations in a manner which is safe both
for people and the environment.
If you have any questions regarding proper disposal of the KaVo product,
please contact the KaVo branch.
3.1.2 Indications for use
The KaVo product is for vacuuming and separating hazardous dust (with MAK
values) and inert dusts and vapours (primarily methyl methacrylate).
The use of this KaVo product is not permitted in areas subject to an explosion
hazard.
Note
The KaVo product is not suitable for vacuuming collected dust (such as on
the floor).
12 / 46
Page 13
Instructions for use SMARTair Evo, SMARTair Evo mobile, SMARTair Evo FLEXspace
1
5
2
5
1
M
S
A
R
T
r
i
a
2
3
4
5
6
7
1
3 Product Description | 3.2 Delivery Content
Note
The KaVo product is not suitable for vacuuming hazardous mineral dusts as
per VBG 119 and carcinogenic materials as per VBG 113.
The materials are vacuumed with the aid of various collecting elements in accordance with ergonomic regulations.
Connectors on suction opening:
▪ SMARTair Evo: suction hoods
▪ SMARTair Evo mobile: suction hoods or direct connection to small devices
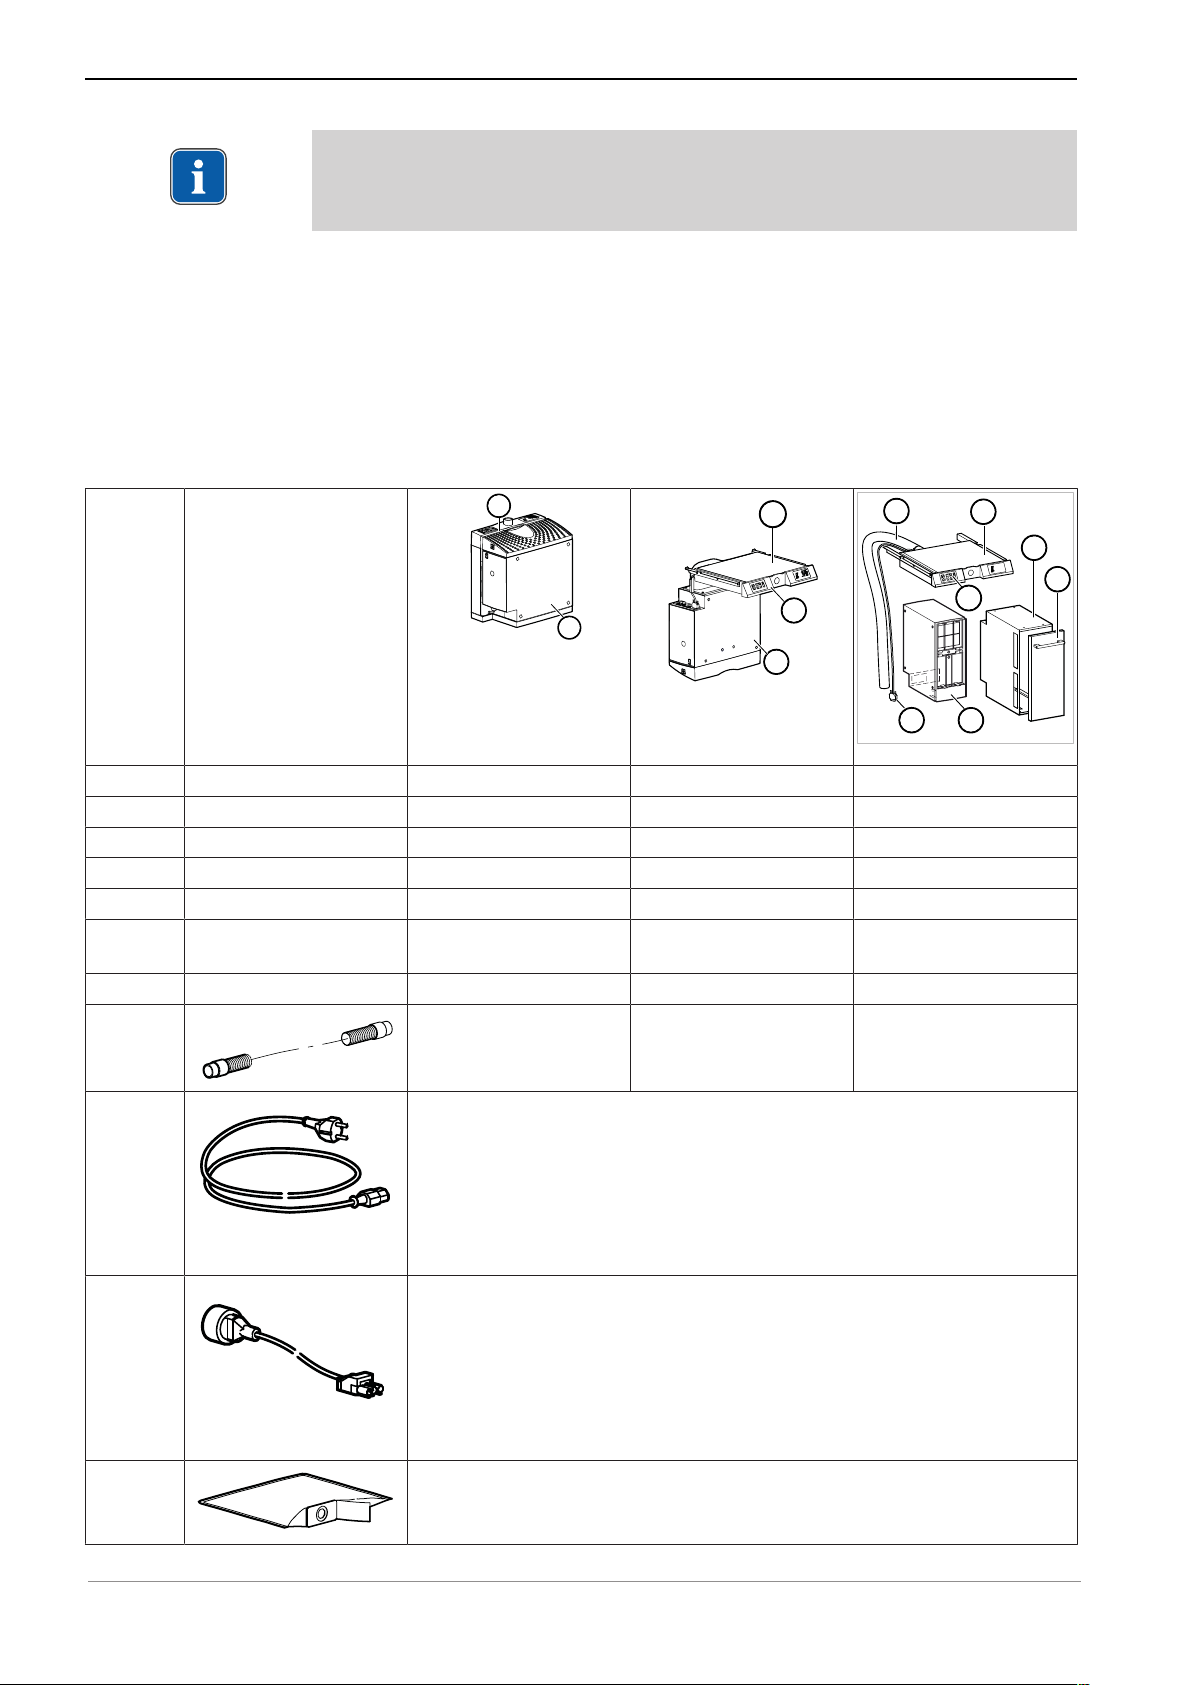
3.2 Delivery Content
SMARTair Evo mobile
SMARTair Evo
SMARTair Evo FLEXspace
① Front panel Front panel Front panel
② Motor filter drawer Motor filter drawer
③ Blower box receptacle
④ Front door with handle
⑤ Blower box Blower box Blower box
⑥ Connection cable for
membrane keypad
⑦ Suction hose
Suction hose
Ø 42 mm with coupling bushes
Power cable
▪ DE Mat. no. 1.001.8593
▪ GB Mat. no. 0.692.6901
▪ CH Mat. no. 1.001.8594
▪ US Mat. no. 1.001.8595
▪ AUS Mat. no. 1.001.8598
Connection cable
▪ DE Mat. no. 1.002.2525
▪ GB Mat. no. 1.002.2529
▪ CH Mat. no. 1.002.2527
▪ US Mat. no. 1.002.2528
▪ AUS Mat. no. 1.002.2530
Replacement filter bag
Mat. no. 0.658.2160
13 / 46
Page 14
Instructions for use SMARTair Evo, SMARTair Evo mobile, SMARTair Evo FLEXspace
M
S
R
A
r
i
a
T
r
i
a
T
R
A
M
S
e
l
i
b
o
m
3 Product Description | 3.3 Device parts
Ultra-fine filter
Mat. no. 0.658.9802
User Guide
Mat. no. 1.001.9704
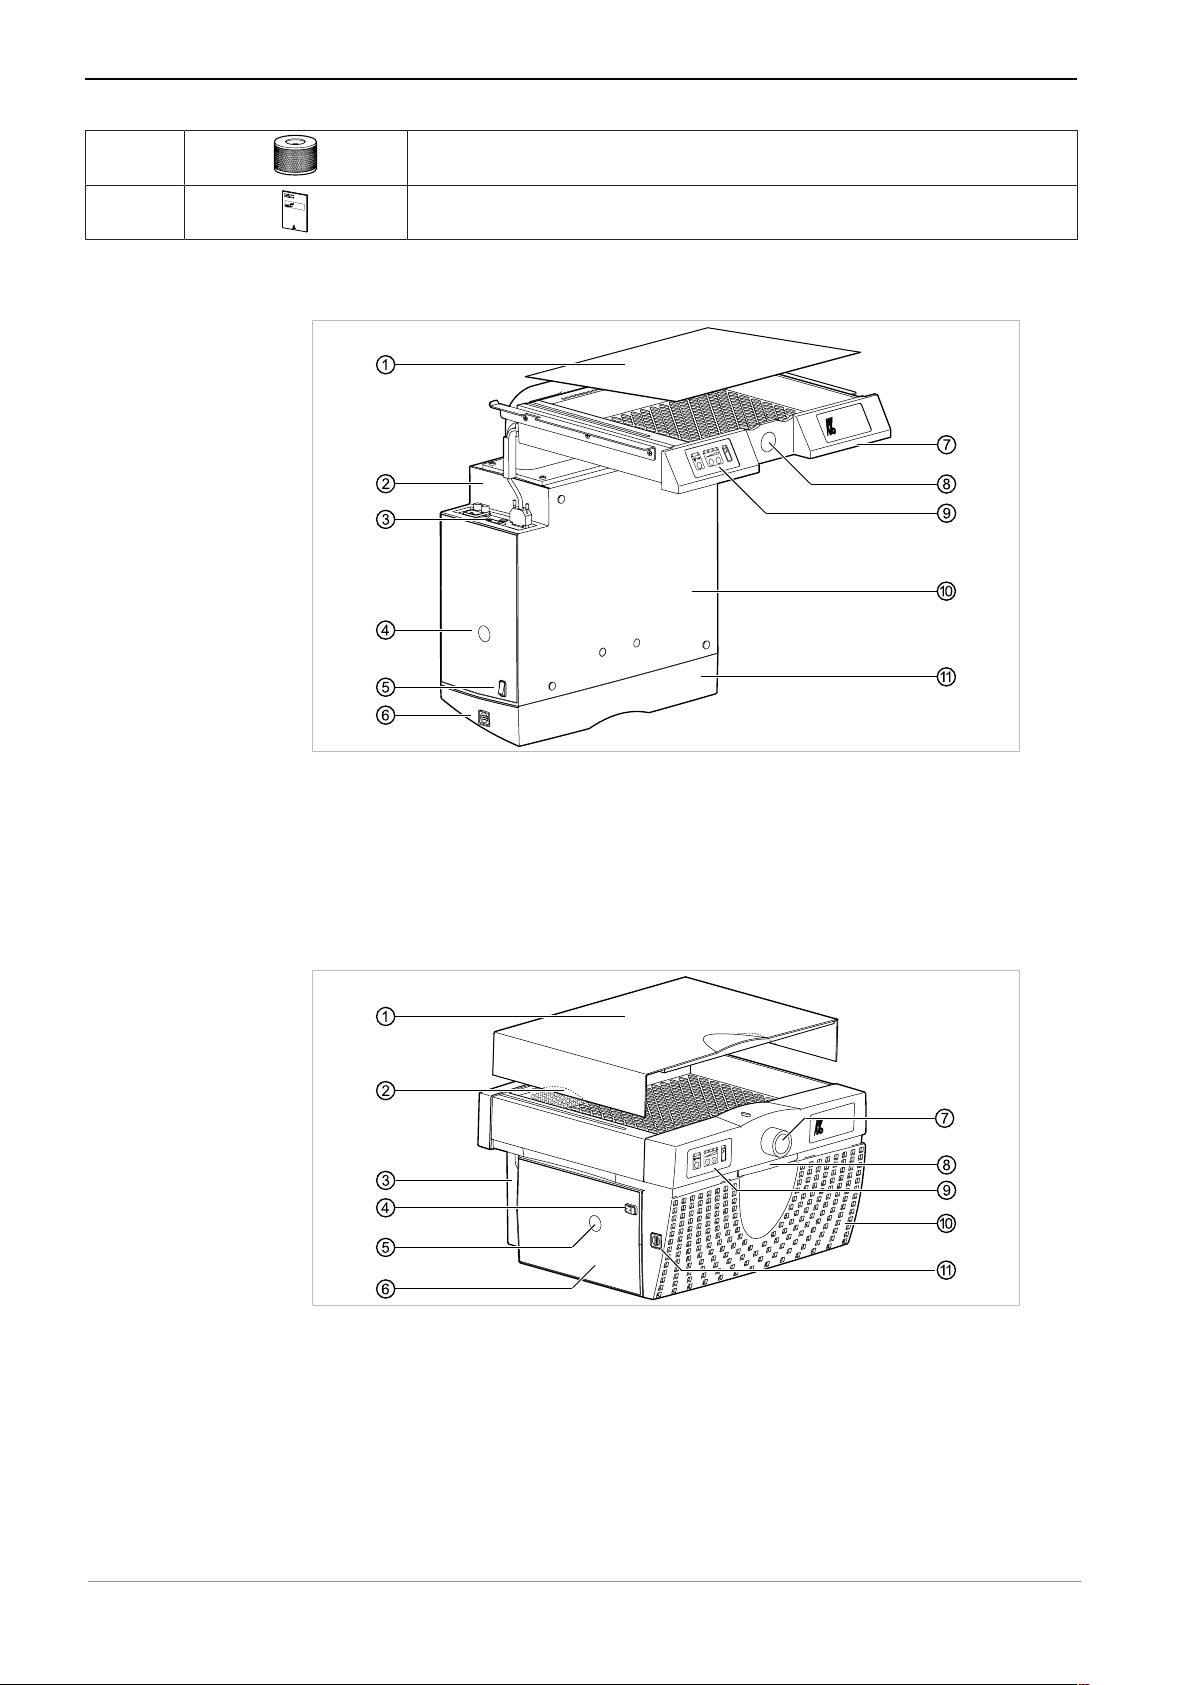
3.3 Device parts
SMARTair Evo components
① Cover ② Rating plate
③ Connectors ④ Voltage selection switch
⑤ Power switch ⑥ Closure of housing cover
⑦ Handle bar ⑧ Suction opening
⑨ Control panel ⑩ Filter box
⑪ Housing cover for filter box
SMARTair Evo mobile components
① Cover ② Handle bar
③ Connectors ④ Power switch
⑤ Voltage selection switch ⑥ Filter box
⑦ Suction opening ⑧ Handle bar
⑨ Control panel ⑩ Housing cover for filter box
⑪ Closure of housing cover
14 / 46
Page 15

Instructions for use SMARTair Evo, SMARTair Evo mobile, SMARTair Evo FLEXspace
1
3
2
4
7
5
6
8
3 Product Description | 3.4 Filter box
SMARTair Evo FLEXspace components
① Cover ② Filter muff
③ Power switch ④ Voltage selection switch
⑤ Snap locks of filter flap ⑥ Filter flap
⑦ Handle bar ⑧ Control panel
⑨ Suction opening
3.4 Filter box
① Filter bags ② Flap of blower box
③ Filter flap ④ Snap locks of filter box
⑤ Adsorption filter (optional) ⑥ Silencer element
⑦ Ultra-fine filter ⑧ Blower box
15 / 46
Page 16

Instructions for use SMARTair Evo, SMARTair Evo mobile, SMARTair Evo FLEXspace
3 Product Description | 3.5 Connectors
3.5 Connectors
① Socket for power cable connector ② Fuse for line input (10 A)
③ Socket for connection to equipment ④ Fuse for fan stage 2 (3.15 A)
⑤ Fuse for fan stages 1 through 4
(4 A)
⑦ Sub-D socket for connection to
membrane keyboard
⑨ Connecting cable to equipment
(country-specific)
⑪ Foot-operated button (optional) ⑫ Suction hose (for
⑥ Socket for control cable to equip-
ment (for ⑩)
⑧ Power cable (country-specific)
⑩ Control cable for K-Control / K-Con-
trol TLC (optional)
SMARTair Evo mobile only)
3.6 Control panel
① LED Automatic mode (green) ② LED automatic mode (green)
③ LEDs suction level display (green) ④ LED display "Filter full" (red)
⑤ "Automatic" key ⑥ "Minus" key (reduction of the ex-
traction level)
⑦ "Plus" key (increase of the extrac-
tion level)
16 / 46
Page 17

Instructions for use SMARTair Evo, SMARTair Evo mobile, SMARTair Evo FLEXspace
3 Product Description | 3.7 Technical Specifications
3.7 Technical Specifications
3.7.1 Dimensions of SMARTair Evo
Weight approx. 18 kg
Package SMARTair Evo
Length approx. 668 mm
Width approx. 409 mm
Height approx. 510 mm
Weight with packaging 20 kg
3.7.2 Dimensions of SMARTair Evo mobile
Weight approx. 18 kg
17 / 46
Page 18

Instructions for use SMARTair Evo, SMARTair Evo mobile, SMARTair Evo FLEXspace
180
0
3
4
380
SM
AR
T
air
450
375
60
19
0
0
6
4
430
465
3 Product Description | 3.7 Technical Specifications
Package SMARTair Evo mobile
Length approx. 668 mm
Width approx. 409 mm
Height approx. 510 mm
Weight with packaging 20.4 kg
3.7.3 Dimensions of SMARTair Evo FLEXspace
Weight approx. 25 kg
Package SMARTair Evo FLEXspace
Length approx. 659 mm
Width approx. 545 mm
Height approx. 580 mm
Weight with packaging 27 kg
3.7.4 Technical Specifications
Housing
Degree of soiling 2
Class of protection I
18 / 46
Page 19

Instructions for use SMARTair Evo, SMARTair Evo mobile, SMARTair Evo FLEXspace
3 Product Description | 3.7 Technical Specifications
Electrical system
Rated voltage 100 / 115 / 230 V
Nominal frequency 50 / 60 Hz
Admissible leakage current max 0.5 mA
Fuse for mains input 100 to 230 V T 10 A (H) / 250 V
Fuse for fan stage 1,3,4 T 4 A (L) / 250 V
Fuse for fan stage 2 T 3.15 A (L) / 250 V
Unit power consumption max. 1000 W
Connection value for the device max. 500 W
Operating mode Continuous operation
Overvoltage category II
Output
Suction power 15 to 30 l/s
Filter surface 0.58 m
Vacuum max. 147 mbar
Ultra-fine filter, filter quality Class M according to EN 60335-2-69
2
Noise emission
Level Noise level
with suction hood AT without suction hood
0.3 m vertical 1.0 m horizontal
[dB(A)] [dB(A)] [dB(A)] [dB(A)]
I 63 56 64 57
II 67 59 67 58
III 70 63 69 60
IV 74 66 72 63
0.3 m vertical 1.0 m horizontal
Operating environment
WARNING
Inappropriate operating conditions.
Impairment of the electrical safety of the device.
▶ It is essential to comply with the operating conditions specified in the
"Technical Specifications" chapter.
Ambient temperature +5 to +40 oC
Relative Humidity max. 80 %
Max. elevation for operation max. 2000 m above sea level
Permissible mains voltage fluctuation max. ± 10 % of the nominal voltage
Permissible in enclosed rooms
19 / 46
Page 20

Instructions for use SMARTair Evo, SMARTair Evo mobile, SMARTair Evo FLEXspace
M
S
R
A
r
i
a
T
r
i
a
T
R
A
M
S
e
l
i
b
o
m
3 Product Description | 3.8 Rating plates
Transportation and storage conditions
Ambient temperature -20 to +55 oC
Relative Humidity 5% to 95% non-condensing
Air pressure 700 to 1600 hPa
3.8 Rating plates
Attachment locations for rating plate
SMARTair Evo
SMARTair Evo mobile
SMARTair Evo FLEXspace
Type Device type
SN Year of manufacture - month - serial number
REF Material number
CE mark
VDE mark
CSA mark
20 / 46
Page 21

Instructions for use SMARTair Evo, SMARTair Evo mobile, SMARTair Evo FLEXspace
3 Product Description | 3.9 Dust filtration test
GOST R mark
Disposal note Proper use
GS mark
HIBC Code
Follow the instructions for use
3.9 Dust filtration test
DGUV Test mark:
Demonstrates compliance with the requirements of "Basic principles for the
testing and certification of suction systems for dental laboratories - GS-IFAM20". This test mark was granted by the Testing and Certification Board (Prüfund Zertifizierungsstelle IFA), the Institut for Occupational Safety of Statutory
German Accident Insurance (Deutsche Gesetzliche Unfallversicherung, DGUV).
21 / 46
Page 22

Instructions for use SMARTair Evo, SMARTair Evo mobile, SMARTair Evo FLEXspace
4 Installation | 4.1 Location
4 Installation
Note
Repairs and service tasks may only be performed by qualified professionals
except for the activities described in these instructions for use.
4.1 Location
CAUTION
Exceeding the permissible thresholds.
▶ Make sure that the maximum return airflow is 50% of the fresh air flow.
Note
For transport purposes, cover the suction opening with adhesive tape. Select
the installation site properly such as to not block the extracted air openings.
Ensure sufficient ventilation if the unit is operated for extended periods of
time!
The SMARTair Evo suction system ② is designed to be installed in support
frame ① or system base 5.
Set-up site of the SMARTair Evo
The SMARTair Evo mobile suction system can be set up upright or on its side.
Set-up site of the SMARTair Evo mobile
22 / 46
Page 23

Instructions for use SMARTair Evo, SMARTair Evo mobile, SMARTair Evo FLEXspace
G
A
S
D
I
N
D
V
G
W
SMAR
T
air
4 Installation | 4.2 Installation of the SMARTair Evo
The SMARTair Evo FLEXspace suction system is designed to be incorporated
into the FLEXspace workstation.
Set-up site of the SMARTair Evo FLEXspace
4.2 Installation of the SMARTair Evo
Connect the motor housing to the flange
▶ Screw the motor housing ③ and flange ① together with four screws ②.
▶ Insert the Sub-D connector ⑤ into the provided socket in the housing, and
affix it with two screws ④.
23 / 46
Page 24

Instructions for use SMARTair Evo, SMARTair Evo mobile, SMARTair Evo FLEXspace
4 Installation | 4.3 Installation of the SMARTair Evo mobile
Insert the SMARTair Evo into the support frame
▶ Take off the cover ② of the SMARTair Evo.
▶ Insert the SMARTair Evo into the support frame ①.
4.3 Installation of the SMARTair Evo mobile
▶ Place the SMARTair Evo mobile at the intended set-up site.
▶ Switch the power switch ① to "OFF".
▶ Plug the enclosed power cable ② into the designated connector ③ of the
SMARTair Evo mobile and insert the plug into an easily accessible, properly
installed (grounded) mains socket. Use an extension cable if needed.
24 / 46
Page 25

Instructions for use SMARTair Evo, SMARTair Evo mobile, SMARTair Evo FLEXspace
G
A
S
D
I
N
D
VG
W
M5x20
4x
G
A
S
D
I
N
D
V
G
W
S
M
A
R
T
a
ir
4 Installation | 4.4 Installation of the SMARTair Evo FLEXspace
4.4 Installation of the SMARTair Evo FLEXspace
Screw down the housing
▶ Remove the cover ②.
▶ Screw the housing ① tight with 4 screws M5 x 20.
Insert the filter drawer
▶ Guide the connection cable ② and the suction hose ① through the housing
and towards the back.
▶ Insert the filter drawer of the SMARTair Evo FLEXspace into the guide ele-
ment and slide it in.
▶ Route the cables properly such that the SMARTair Evo FLEXspace can be
pulled out to the limit stop without unplugging any cables.
25 / 46
Page 26

Instructions for use SMARTair Evo, SMARTair Evo mobile, SMARTair Evo FLEXspace
4 Installation | 4.4 Installation of the SMARTair Evo FLEXspace
Install the suction hose
▶ Place the blower box ② on the floor.
▶ Attach the suction hose ①.
Left installation
Note
To allow the filter drawer to be removed and inserted when changing the filter, the installation instructions must be precisely followed.
▶ Insert the ② suction hose ② curved.
▶ Attach the suction hose with a clip ⑥ and strap ⑤ at the provided position
(see dimensions ①).
▶ Insert the fan box ③. To keep the power switch free, make sure that the
fan box ③ lies on the rails ④.
26 / 46
Page 27

Instructions for use SMARTair Evo, SMARTair Evo mobile, SMARTair Evo FLEXspace
4 Installation | 4.5 Installing the power cable
Right installation
▶ Remove the rails ④.
▶ Rotate the fan box 180o.
▶ Reinstall the rails ④.
▶ Fasten the suction hose at the provided position with a strap ② through the
opening ① in the bottom of the function function line ③.
4.5 Installing the power cable
CAUTION
Product damage from incorrect power cable.
Destruction of electrical components.
▶ Before connecting, check if the provided power cable is the right one for the
mains connection
CAUTION
Product damage from incorrectly adjusting the tension.
Destruction of electrical components.
▶ Adjust the voltage input for the product to the existing mains voltage.
CAUTION
Damage from overvoltage.
This damages the product.
▶ The nominal voltage and frequency must be the same as that on the rating
plate.
27 / 46
Page 28

Instructions for use SMARTair Evo, SMARTair Evo mobile, SMARTair Evo FLEXspace
4 Installation | 4.6 Connecting the SMARTair to the equipment
▶ Switch the power switch to "OFF".
▶ Plug the enclosed power cable ② into the designated connector ① of the
SMARTair and insert the plug into an easily accessible, properly installed
(grounded) mains socket. Use an extension cable if needed.
▶ Route the power cable ② properly such that the SMARTair can be pulled out
to the limit stop without unplugging the power cable.
▶ Place the cover on the SMARTair.
▶ SMARTair Evo: slide the suction device into the support frame all the way to
the limit stop.
▶ SMARTair Evo FLEXspace; Sub-D plug ③ may need to be plugged in and
and voltage selection switch may need to be set to country-specific mains
voltage.
4.6 Connecting the SMARTair to the equipment
CAUTION
Unsuitable electrical equipment.
Material damage and injury.
▶ Connect equipment with max. 500 watt power exclusively.
Note
When using the control cable (Mat. no. 1.000.7198), do not run a connect-
ing line. In addition, the response sensitivity must not be adjusted.
▶ Connect the equipment without control output ① via connection cable ③ to
the SMARTair.
28 / 46
Page 29

Instructions for use SMARTair Evo, SMARTair Evo mobile, SMARTair Evo FLEXspace
4 Installation | 4.7 Installing the extraction hood (optional)
or
▶ Connect the equipment (e.g. K-Control) with control output (3.5 mm
socket) via control cable (Mat. no. 1.000.7198) ② to the SMARTair.
4.7 Installing the extraction hood (optional)
SMARTair Evo
▶ Insert the extraction hood ② into the intake opening ① so that the intake
opening is completely covered by the rubber lip.
▶ To adjust it, loosen the screws ⑤ in the connector ④.
▶ Move the connector ④ to the side, and re-tighten the screws ⑤.
▶ Set the voltage selector switch ③ to the country-specific mains voltage.
29 / 46
Page 30

Instructions for use SMARTair Evo, SMARTair Evo mobile, SMARTair Evo FLEXspace
4 Installation | 4.7 Installing the extraction hood (optional)
SMARTair Evo mobile
▶ Plug the suction hose ① onto the suction socket ② of the SMARTair Evo
mobile.
▶ Establish the tube connection to the extraction hood.
▶ Set the voltage selector switch ③ to the country-specific mains voltage.
SMARTair Evo FLEXspace
▶ When using an extraction hood ②, make sure that the intake opening ① is
completely covered by the rubber lip.
30 / 46
Page 31

Instructions for use SMARTair Evo, SMARTair Evo mobile, SMARTair Evo FLEXspace
SMARTair Evo / SMARTair Evo FLEXspace SMARTair Evo mobile
5 Startup | 5.1 Checking the filter bag
5 Startup
▶ Check if the rated voltage and rated frequency match the specifications on
the rating plate.
▶ Check if the voltage selection switch is set to the country-specific value.
▶ Use the power plug as mains disconnecting device.
5.1 Checking the filter bag
Note
The unit may be only used when the filter bag is inserted. Only original filter
bags may be used.
▶ Check if the filter bag ① is properly affixed.
The filter bag needs to be pushed with plastic frame ② onto the filter con-
nector ③. SMARTair Evo mobile: secure it with bracket ④.
31 / 46
Page 32

Instructions for use SMARTair Evo, SMARTair Evo mobile, SMARTair Evo FLEXspace
I
3
2
1
5
4
6 Operation | 6.1 Automatic mode
6 Operation
Note
The distance between the item generating the dust (such as a cutter) and the
intake opening may not exceed 50 mm.
6.1 Automatic mode
Note
Automatic mode is recommended for units that have an electrical connection.
Set automatic mode
▶ Set the power switch ①, ② or ③ to "ON".
▶ Press the "Automatic" button ④ until the "Automatic" LED ⑤ is on.
ð In "Automatic" position, the suction device is automatically switched on and
off together with the equipment connected to it.
Switch on and switch off
▶ Switch the equipment on.
ð Suction device starts-up automatically.
▶ Switch the equipment off.
ð Suction device continues to run for a few seconds and then switches off
automatically.
See also:
2 Set the sensitivity, Page 000
6.2 Manual mode
Note
Units without an electrical connection (such as turbine systems) must be operated manually.
32 / 46
Page 33

Instructions for use SMARTair Evo, SMARTair Evo mobile, SMARTair Evo FLEXspace
I
3
2
1
5
4
6
6 Operation | 6.2 Manual mode
Setting-up manual mode
▶ Set the power switch ①, ② or ③ to "ON".
▶ Press button ④ until the "Continuous mode" LED ⑤ is on.
ð The device is switched on.
▶ Press the button ④ until the "Automatic mode" LED ⑥ is on.
ð The unit is switched off.
Display of suction
Note
When the suction decreases from soiling or a full filter, the suction automatically switches to the set suction. Only when the suction limit is reached does
the "Filter full" ⑤ LED shine.
Display Suction power Malfunction Action
The "Suction level
display" LEDs ① to
③ shine.
The extraction
level is sufficient.
No malfunction Reduce the extrac-
tion level by pressing the "Minus"
key ⑥.
Increase the extraction level by
pressing the "Plus"
key ⑦.
33 / 46
Page 34

Instructions for use SMARTair Evo, SMARTair Evo mobile, SMARTair Evo FLEXspace
3
2
1
4
5
6
6 Operation | 6.3 Operation via foot switch
Display Suction power Malfunction Action
The "Suction level
display" LEDs ① to
④ shine.
The LED "Filter
full" ⑤ flashes.
The maximum extraction level has
been reached.
The suction
threshold is almost
reached.
No malfunction Reduce the extrac-
The filter bag or ultra-fine filter is almost full.
The suction hose
or suction site is
dirty.
The LED "Filter
full" ⑤ shines.
The suction
threshold has been
reached.
The filter bag or ultra-fine filter is almost full.
The suction hose
or suction site is
dirty.
6.3 Operation via foot switch
tion level by pressing the "Minus"
key ⑥.
Replace filter bag
and/or ultra-fine
filter.
Clean the suction
hose or suction
site.
Replace filter bag
and/or ultra-fine
filter.
Clean the suction
hose or suction
site.
▶ Insert the cable of the foot switch ③ into the socket for the control line ②.
▶ Press the "Automatic" button ④ until the "Automatic" LED ① is on.
▶ Switch the suction device on and off using the foot switch ③.
6.4 Adjust the suction levels
▶ Press the buttons ⑤ and ⑥ to set suction levels ① to ④.
Activate the suction level default
Note
The suction level thus set can be saved and stays saved after the device is
switched off.
▶ Press and hold the "Plus" ⑥ button and switch the power switch on.
34 / 46
Page 35

Instructions for use SMARTair Evo, SMARTair Evo mobile, SMARTair Evo FLEXspace
3
2
1
4
5
6
6 Operation | 6.5 Setting the response sensitivity
ð LEDs ① to ④ flash.
▶ Release the "Plus" ⑥ button.
ð Saving of the suction levels is now selected.
▶ Switch the power switch off and then on again after 2 seconds.
ð The selected suction level is saved.
Deactivate the default suction level
▶ Press and hold the "Minus" ⑤ button and switch the power switch on.
ð LEDs ① to ④ flash.
▶ Release the "Minus" ⑤ button.
ð Saving of the suction levels is now deactivated.
▶ Switch the power switch off and then on again after 2 seconds.
ð No suction level is pre-selected.
6.4.1 Recognition of software version and device properties
▶ Press the power switch to switch the suction device on.
ð After two seconds, LEDs ① to ③ indicate the software version and device
properties.
Number of
flashes
Twice Software version 2 Device is connec-
None Device is connec-
6.5 Setting the response sensitivity
Getting the device ready for use
The response sensitivity is set in the "Automatic" position.
LED 1 LED 2 LED 3
Flow sensor is re-
ted to 50 Hz
ted to 60 Hz
cognised
(SMARTair Evo)
No flow sensor is
recognised
(SMARTair Standard)
35 / 46
Page 36

Instructions for use SMARTair Evo, SMARTair Evo mobile, SMARTair Evo FLEXspace
3
2
1
6 Operation | 6.5 Setting the response sensitivity
▶ Press the power switch to switch the suction device on.
▶ Press the "Automatic" button ③ (for approx. 3 seconds), until LEDs ① and
② flash.
ð The suction device is in "Setting mode".
Setting and saving the response sensitivity
▶ Turn on the power switch on the control unit.
▶ Start the working device at a speed of 5000 to 7000 min-1 and keep it run-
ning while performing the setting.
Case 1: LEDs do not light up
▶ Briefly press the "Plus" ⑤ button several times until all LEDs ② light up.
▶ Press the "Automatic" ③ button to save the setting.
Case 2: All LEDs light up
▶ Briefly press the "Minus" ④ button several times until all LEDs ② go off.
▶ Briefly press the "Plus" ⑤ button several times until all LEDs ② light up.
▶ Press the "Automatic" ③ button.
ð The values are saved.
ð The unit is in "normal mode" again.
36 / 46
Page 37

Instructions for use SMARTair Evo, SMARTair Evo mobile, SMARTair Evo FLEXspace
7 Cleaning and servicing | 7.1 Cleaning
7 Cleaning and servicing
Note
Any change of filter bag, adsorption filter, ultra-fine filter and the cleaning of
the filter chamber must be done in compliance with the chapter on protective
equipment.
See also:
2 2.3 Protective equipment, Page 10
To guarantee constant readiness for use and maintenance of value of the KaVo
product, the recommended servicing must be done.
This device contains harmful dust. Only professionals and wearing the appropriate protective equipment may empty and service the device including emptying
the dust collector. Only original KaVo filters may be used.
Precautionary measures while servicing:
▪ Before removing the dust extraction system from the contaminated area, it
should be aspirated or wiped clean, and the openings on the untreated air
side must be sealed.
Before removing the dust extraction system from the contaminated area, it
should be aspirated or wiped clean, and the openings on the untreated air
side must be sealed.
- Accessory parts (hoses, etc.) are to be considered contaminated and
treated correspondingly.
▪ Use suitable personal protective equipment.
▪ If possible, use a room with filtered automatic ventilation.
▪ Cleaning the servicing area.
- All contaminated parts that are not sufficiently cleaned during repairs
must be disposed of in sealable bags.
▪ They must be disposed of in accordance with valid regulations.
7.1 Cleaning
Note
Liquids inside the device can cause malfunctions.
When cleaning, make sure that no liquid enters the device.
Cleansers:
▪ New surfaces: water and non-abrasive mild cleanser.
▪ Surfaces with very sticky soiling: KaVo plastics cleanser (Mat. no.
0.611.0030)
37 / 46
Page 38

Instructions for use SMARTair Evo, SMARTair Evo mobile, SMARTair Evo FLEXspace
SMAR
T
a
i
r
0
SMARTair Evo SMARTair Evo mobile SMARTair Evo FLEXspace
7 Cleaning and servicing | 7.2 Servicing
7.2 Servicing
7.2.1 Getting the device ready for use
▶ Switch the power switch ③ to "OFF".
▶ Unplug the power plug and disconnect the connecting cable to the equip-
ment.
▶ Move the SMARTair into an accessible position.
▶ Pull the filter drawer ② or system base ② out and take off the lid, if applic-
able.
▶ SMARTair Evo mobile: pull the handle bars ② apart to unlock the snap locks
and take off the cover ①.
7.2.2 Changing the filter bag
Note
To keep the fan motor from being damaged, the filter chamber must be
checked for dust and cleaned if necessary before inserting a new filter bag.
▶ Carefully take the filter bag ① off the filter socket ⑤ and take out the filter.
▶ Close the full filter bag with the adhesive strip ② and dispose it ③.
▶ Check if the filter space contains dust and clean it according to need.
38 / 46
Page 39

Instructions for use SMARTair Evo, SMARTair Evo mobile, SMARTair Evo FLEXspace
3
1
2
7 Cleaning and servicing | 7.2 Servicing
▶ Carefully slide a new filter bag with plastic frame ⑥ onto the filter socket ⑦,
in case of the SMARTair Evo mobile affix it with bracket ④ and check if it is
properly affixed.
▶ Re-attach the cover and snap it into place and/or slide the filter drawer into
the support arm or system base up to the limit stop.
▶ Move the SMARTair back to its functional location.
7.2.3 Changing the adsorption filter (optional accessory)
The adsorption filter is designed to adsorb various gaseous impurities in the air.
Note
The service life of the activated carbon filter is determined mainly by the
number of prostheses fabricated at a workstation. Based on 10 to 15 prostheses per workday and workstation, the filter service life is 30 to 50 workdays.
Note
When the activated carbon filter is loaded with methylmethacrylate and other
chemical substances, it needs to be disposed of as "hazardous waste".
▶ Release the snap locks ② and open the filter flap ①.
▶ Take out the spent adsorption filter ③.
▶ Insert new adsorption filter ③.
▶ Close and lock filter flap ① into place.
7.2.4 Changing the ultra-fine filter
Note
SMARTair Evo suction equipment may be operated only if an ultra-fine filter
is inserted.
Note
The ultra-fine filter must be changed every 2 years.
39 / 46
Page 40

Instructions for use SMARTair Evo, SMARTair Evo mobile, SMARTair Evo FLEXspace
1
2
3
4
5
6
1
3
4
2
7 Cleaning and servicing | 7.2 Servicing
Note
The ultra-fine filter also needs to be exchanged when the LED "Filter full" indicates a malfunction after the filter bag has been changed.
Remove the old ultra-fine filter
▶ Release the snap locks ② and open the flap of the blower box ①.
▶ Carefully remove the blower box ③ from the housing. Make sure that no ul-
tra-fine dust penetrates the inside of the housing.
▶ From the back of the blower box ④ remove the soiled micro filter ⑤.
▶ Pack the soiled micro filter ⑤ in a dustproof plastic bag ⑥ and dispose of it
in the appropriate manner.
▶ Vacuum up any residual dust in the filter compartment with a BIA-compli-
ant vacuum cleaner.
Install a new ultra-fine filter
▶ Insert the new micro filter ① with the opening pointing outwards into the
blower box ②.
▶ Insert the blower box ③ into the housing. Note the positioning marks.
▶ Close the flap of the blower box ④ and snap into place.
▶ Move the SMARTair suction unit back to its functional location.
40 / 46
Page 41

Instructions for use SMARTair Evo, SMARTair Evo mobile, SMARTair Evo FLEXspace
8 Safety checks in accordance with IEC 62638 (VDE 0701 / 0702)
8 Safety checks in accordance with IEC 62638
(VDE 0701 / 0702)
The applicable national legal regulations must be observed during the use of the
device, in particular:
▪ the applicable occupational health and safety regulations.
▪ the applicable accident prevention regulations.
The overarching guidelines and/or national laws, national regulations and the
rules of technology applicable to this product for start-up and use of the KaVo
product for the intended purpose are to be applied and complied with.
Compliance with the requirements of VDE 0701-0702 concerning product safety
upon start-up, after changes and repair as well as in recurrent tests is required.
Caution: Electrical safety checks have to be carried out by electrical engineering
professionals or by individuals trained in electrical engineering and supervised
by an electrical engineering professional.
An electrical engineering professional is defined to be anyone whose training,
knowledge and experience as well as knowledge of the pertinent regulations allow him or her to assess the imminent work and recognise possible hazards. It
is at the discretion of the electrical engineering professional in charge to decide
whether nor not further individual tests are required in order to attain the
safety target.
If safety deficiencies or damage is/are detected during the recurrent test, the
testing process must be discontinued and the equipment must be labelled accordingly and banned from further use or submitted for repair of the defect.
Annual tests
Note
According to § 53 Para. 2 of the Workplace Ordinance, vacuum devices must
be checked every 2 years for function by an expert. After consulting with the
Trade Supervisory Office in Celle, the test can be performed by a dental technician who has been trained how to use equipment in his journeyman training.
Note
KaVo recommends checking function annually and observing the sections
"Cleaning and servicing" and "Troubleshooting" in these instructions for use.
See also:
2 7 Cleaning and servicing, Page 37
See also:
2 9 Troubleshooting, Page 42
▶ Check the filter for damage.
▶ Check the housing and hose lines for leaks and cracks.
▶ Check the function of the control device and the amount of filtration.
▶ Make sure that dust extraction system has original filters and all the neces-
sary filter.
▶ Mount the cover loosely, and check if it is sucked tight from the vacuum
when the unit is turned on. A flow of air must be detectable at the intake.
▶ The person performing the check must provide the date and signature.
41 / 46
Page 42

Instructions for use SMARTair Evo, SMARTair Evo mobile, SMARTair Evo FLEXspace
9 Troubleshooting
9 Troubleshooting
DANGER
Electrical power.
Risk of fatal injury.
▶ Have the electrical part of the device repaired and serviced only by profes-
sionals or persons trained at the factory who have been advised of the
safety instructions.
▶ Before opening any housing parts, pull the power plug to turn off the
power.
Malfunction Cause Remedy
The extraction level is
not sufficient.
The suction does not
start when the unit
starts.
The filter bag is full.
The default extraction
level is set at the lowest level.
Suction hose and/or
suction site is leaky
and soiled.
The current switching
threshold is not properly set.
The unit is not connected to the dust extraction system.
The fuse for the unit is
defective.
▶ Change the filter bag.
See also:
2 7 Cleaning and servicing, Page 37
▶ Press the "Plus" key to set a higher level.
▶ Clean the suction hose or suction site.
▶ Set the current switching threshold correctly.
See also:
2 6.5 Set the sensitivity, Page 35
▶ Connect the unit to the dust extraction system.
▶ Change the fuse for the unit and check if the
unit is defective.
The dust extraction
system does not start.
The "Filter full" LED
shines red.
The fuse for the dust
extraction system is
defective.
The filter bag or ultrafine filter is full.
The filter bag or ultrafine filter is full.
The suction hose or
suction site is dirty.
▶ Exchange the fuse.
▶ Check if the mains voltage and frequency
match the rating plate.
▶ Check if the voltage selection switch is set to
the national voltage.
▶ Replace filter bag and/or ultra-fine filter.
See also:
2 7 Cleaning and servicing, Page 37
▶ Replace filter bag and/or ultra-fine filter.
See also:
2 7.2 Servicing, Page 38
▶ Clean the suction hose or suction hose site.
42 / 46
Page 43

Instructions for use SMARTair Evo, SMARTair Evo mobile, SMARTair Evo FLEXspace
10 Accessories
10 Accessories
Presentation Brief description Mat. No.
Foot switch (Mat. no. 1.000.3147)
Connection cable K-Control (Mat. no. 1.000.7198)
Adsorption filter (Mat. no. 0.658.1861)
Ultra-fine filter (Mat. no. 0.658.9802)
Filter bag, pack of 5 for all dust suction facilities
(Mat. no. 0.658.2160)
Plastic bag, pack of 50 (Mat. no. 0.228.3076)
Cable tie (Mat. no. 0.222.6090)
Extracted air set SMARTair for SMARTair mobile and
SMARTair Evo mobile (Mat. no. 1.003.9276)
Extracted air set SMARTair for SMARTair and
SMARTair Evo (Mat. no. 1.003.9366)
43 / 46
Page 44

Instructions for use SMARTair Evo, SMARTair Evo mobile, SMARTair Evo FLEXspace
11 Statement of conformance | 7.2 Servicing
11 Statement of conformance
44 / 46
Page 45

Page 46

1.001.9704 · Fk · 20180305 - 7 · en
 Loading...