

Karl Storz Endomat select UP-210 Endomat

GEBRAUCHSANWEISUNG
®
UP 210 ENDOMAT
SELECT
INSTRUCTION MANUAL
®
UP 210 ENDOMAT
SELECT
MANUAL DE INSTRUCCIONES
UP 210 ENDOMAT® SELECT

Wichtiger Hinweis für die
Benutzer von KARLSTORZ
Geräten und Instrumenten
Important information
for users of KARLSTORZ
instruments
Indicaciones importantes
para los usuarios de equipos
e instrumentos KARLSTORZ
1. Wichtiger Hinweis für die
Benutzer von KARLSTORZ
Geräten und Instrumenten
Es wird empfohlen, vor der Verwendung die
Eignung der Produkte für den geplanten
Eingriff zu überprüfen.
Vielen Dank für Ihr Vertrauen in den Namen
KARL STORZ. Auch in diesem Produkt steckt
unsere ganze Erfahrung und Sorgfalt. Sie und
Ihr Haus haben sich damit für ein modernes
und hochwertiges Gerät der Firma
entschieden.
Die vorliegende Gebrauchsanweisung soll helfen,
den ENDOMAT
anzuschließen und zu bedienen. Alle notwendigen
Einzelheiten und Handgriffe werden an schaulich
erklärt. Bitte lesen Sie deshalb diese Anleitung
sorgfältig durch; bewahren Sie sie zum etwaigen
Nachlesen in der mitgelieferten Schutzhülle an gut
sichtbarer Stelle beim Gerät auf.
®
SELECT richtig aufzustellen,
KARL STORZ
1. Important information
for users of KARLSTORZ
instruments
It is recommended to check the suitability of
the product for the intended procedure prior
to use.
Thank you for your expression of confidence in
the KARL STORZ brand name. Like all of our
other products, this product is the result of years of
experience and great care in manu facture. You and
your organization have decided in favor of a modern,
high-quality item of equipment from KARL STORZ.
This instruction manual is intended to serve as an
aid in the proper setup, installation, and ope r a tion of
the ENDOMAT
equipment and all actions required on your part are
clearly presented and explained. We thus ask that
you read this manual carefully before proceeding
to work with the equipment. Insert this manual in
its protective wallet and keep it available for ready
reference in a convenient and conspicuous location
near the equipment.
®
SELECT. All essential details of the
1. Indicaciones importantes
para los usuarios de
equipos e instrumentos
KARLSTORZ
Antes de su utilización, se recomienda
comprobar la idoneidad de los productos en
cuanto a la intervención planeada.
Agradecemos la confianza que ha depositado
en la marca KARL STORZ. Este producto, como
todos los demás, es el resultado de nuestra amplia
experiencia y esmero. Con esta adquisición, tanto
usted como su institución se han decidido por
un producto
calidad y tecnología vanguardista.
El presente Manual de instrucciones contiene todas
las indicaciones necesarias para la instalación,
puesta en funcionamiento y manipulación de la
ENDOMAT
explicaciones necesarias sobre las particularidades
y los detalles de su manejo. Recomendamos la
lectura detenida de esta Instrucción y su colocación
cerca del aparato, en un lugar visible para facilitar
la consulta y debidamente protegido en la funda de
plástico que se adjunta.
KARL STORZ de gran precisión, alta
®
SELECT. Con tal fin, contiene todas las
CAUTION: Federal (USA) law restricts this device
Version 1.1 – 08/2017 96116049 D
II
to sale by or on the order of a physician.
Images of the device Imágenes del equipoGeräteabbildungen
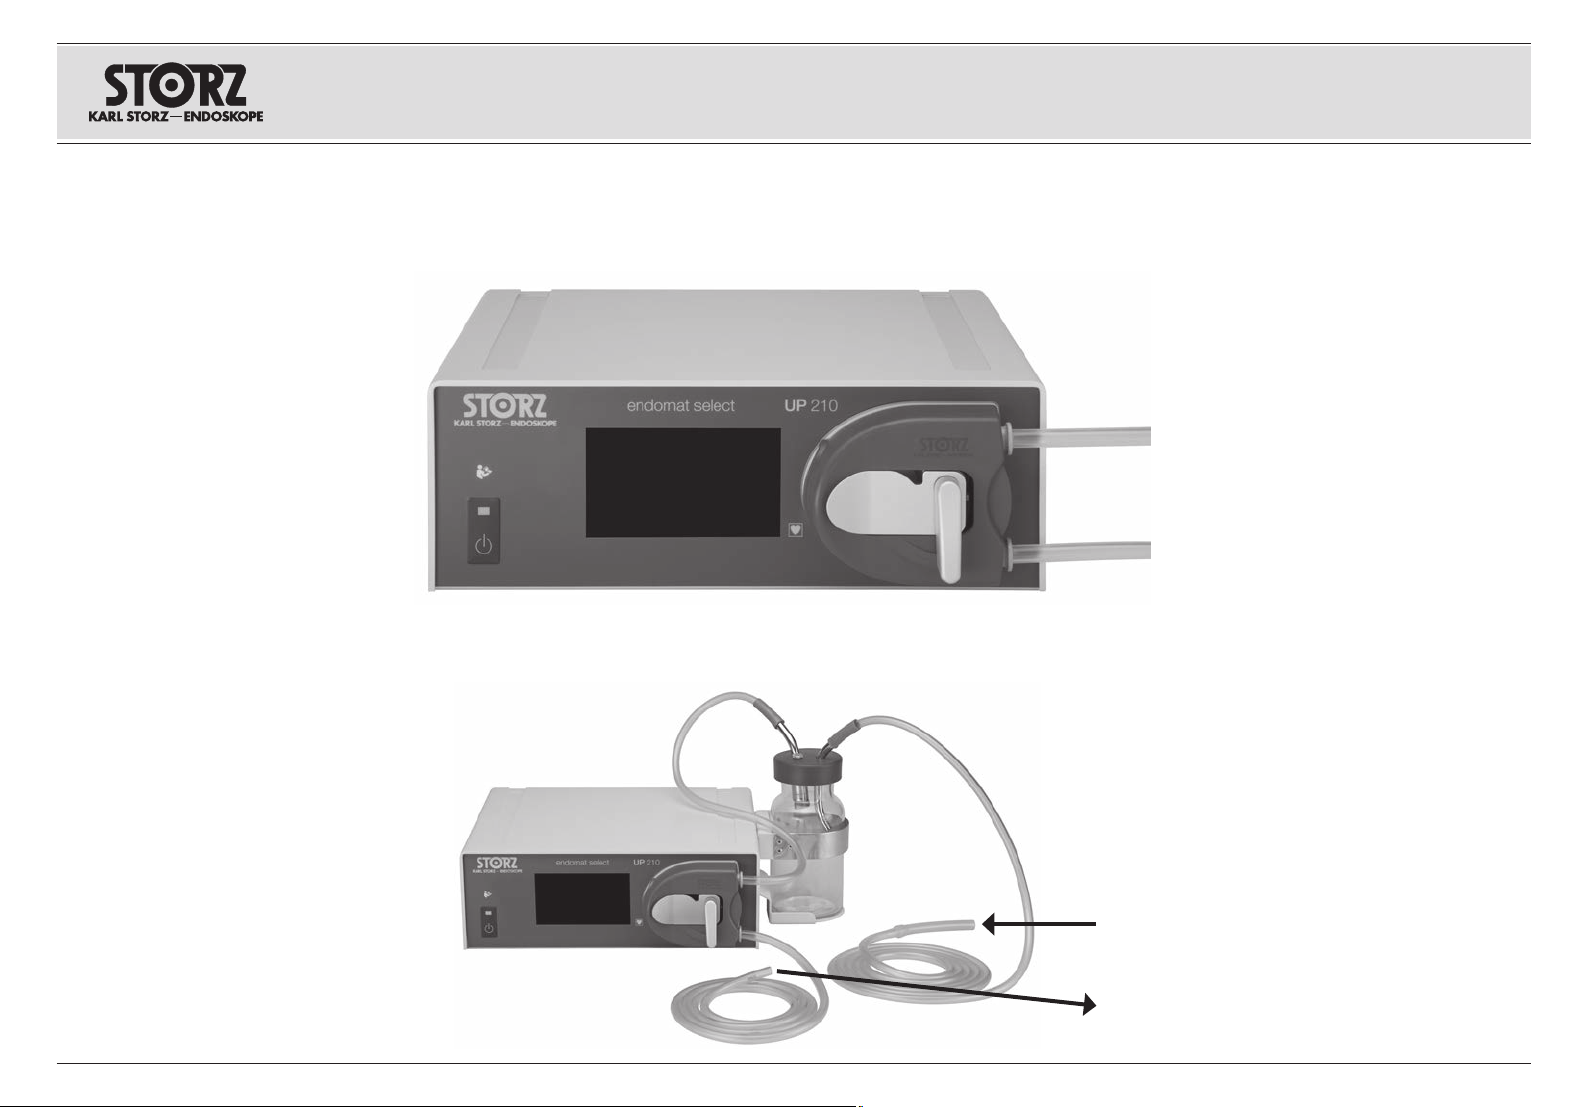
2. Geräteabbildungen 2. Images of the device
2. 1 Betrieb als Spülpumpe 2. 1 Operation as irrigation pump
2. 2 Betrieb als Saugpumpe 2. 2 Operation as suction pump
2. Imágenes del equipo
2. 1 Funcionamiento como bomba
de irrigación
➞
vom Spülflüssigkeitsbeutel
from the irrigation-liquid bag
de la bolsa de líquido de irrigación
zum Instrument
to the instrument
➞
al instrumento
2. 2 Funcionamiento como bomba
de succión
vom Instrument/Patient
from instrument/patient
del instrumento/paciente
zum Auffangbehälter
to the collecting container
al recipiente colector
III

W ER
Images of the device Imágenes del equipoGeräteabbildungen
Q T YU I P
O {
}
IV

Bedienungselemente,
Anzeigen, Anschlüsse
und ihre Funktion
Controls, displays,
connectors, and
their uses
Elementos de control,
indicadores, conexiones
y sus funciones
3. Bedienungselemente,
Anzeigen, Anschlüsse
undihre Funktion
1 Netzschalter
2 TFT Touch-Bildschirm
3 Pumpenrollen
4 Lichtschranke
5 Pumpenhebel (Verriegelungshebel Kassette)
6 Anschlussbuchse (beispielsweise) für
Fußschalter
7 SCB-Anschlüsse*
8 Service-Schnittstelle (Ethernet)**
9 Service-Schnittstelle (USB)**
0 Netzanschlussbuchse
q Potentialausgleichsanschluss
w Schlauchkassette für Einmalgebrauch
* Die KARL STORZ-SCB Schnittstelle
®
(KARL STORZ Communication Bus), die auf
dem CAN Feldbus basiert, ermöglicht eine
Fernsteuerung von Gerätefunktionen, sowie eine
Fernanzeige von Geräteparametern.
**WARNUNG: Der ENDOMAT® SELECT
ist nicht dafür vorgesehen mit anderen
3
Geräten über die USB- oder EthernetSchnittstelle verbunden zu werden.
Diese Schnittstellen sind nur dem
KARLSTORZ Service vorbehalten.
Eine Verbindung des ENDOMAT® SELECT
mit einem IT-Netzwerk, das weitere Geräte
enthält, kann bisher unbekannte Risiken für
Patienten, Bediener oder Dritte hervorrufen.
Da die Rahmenbedingung, Installation
und der Betrieb eines IT-Netzwerkes in
der Verantwortung des Betreibers liegen,
kann KARLSTORZ keine Garantie für
einen fehlerfreien Betrieb übernehmen. Der
Betreiber muss den Schutz, die Sicherheit
und Zuverlässigkeit des IT-Netzwerks durch
Risikomanagement gemäß IEC80001
sicherstellen.
3. Controls, displays,
connectors, and
their uses
1 Power switch
2 TFT touch screen
3 Pump rollers
4 Light barrier
5 Pump lever (cartridge locking lever)
6 Connection socket (example) for footswitch
7 SCB connectors*
8 Service interface (Ethernet)**
9 Service interface (USB)**
0 Power cord receptacle
q Potential equalization connector
w Disposable tubing cartridge
* The KARL STORZ-SCB interface (KARL STORZ
Communication Bus), based on the CAN field bus,
permits remote control of equipment functions, as
well as remote display of equipment parameters.
**WARNING: The ENDOMAT® SELECT
is not intended to be connected to other
3
equipment via the USB or Ethernet
interface. These interfaces are exclusively
reserved for KARL STORZ service.
Connecting the ENDOMAT® SELECT to an
IT network that includes other equipment
could result in previously unidentified risks
to patients, operators or third parties.
Since the framework condition, installation,
and operation of an IT network are the
responsibility of the operator, KARL STORZ
cannot guarantee failure-free operation.
The operator must ensure the protection,
safety, and reliability of the IT network
through risk management in accordance
with IEC 80001.
3. Elementos de control,
indicadores, conexiones
ysus funciones
1 Interruptor de red
2 Pantalla táctil TFT
3 Rodillos de la bomba
4 Barrera de luz
5 Palanca de bomba (palanca de enclavamiento
del cartucho)
6 Conector (por ejemplo) para interruptor de
pedal
7 Puertos SCB*
8 Interfaz para servicio técnico (Ethernet)**
9 Interfaz para servicio técnico (USB)
0 Conector de red
q Conexión equipotencial
w Cartucho de tubos flexibles, desechable
* La interfaz KARL STORZ-SCB (KARL STORZ
Communication Bus), basada en el bus de campo
CAN, permite el control remoto de las funciones del
aparato, así como la indicación a distancia de los
parámetros del aparato.
**CUIDADO: La ENDOMAT® SELECT
no está prevista para ser conectada
3
con otros aparatos mediante la interfaz
USB o Ethernet. Estas interfaces están
reservadas exclusivamente para el
Servicio Técnico de KARL STORZ.
Unaconexión de la ENDOMAT® SELECT
a una red informática que incluye otros
aparatos puede comportar riesgos
desconocidos hasta el momento para los
pacientes, usuarios o terceros. Dado que
las condiciones generales, la instalación
y el uso de una red informática son
responsabilidad del usuario, KARL STORZ
no puede asumir ninguna garantía por un
servicio correcto. El usuario debe asegurar
la protección, seguridad y fiabilidad de
la red informática mediante la gestión
de riesgos de acuerdo con la norma
CEI80001.
V
Symbols employed Explicación de los símbolosSymbolerläuterungen
4. Symbolerläuterungen
4. 1 Symbole auf Gerät
Gebrauchsanweisung befolgen
EIN/AUS (Standby)
Anwendungsteil des Typs CF
Anschlussbuchse (beispielsweise)
für Fußschalter
Potentialausgleichsanschluss
Ethernet
USB
Wechselstrom
Vermeidung von
Umweltverschmutzung durch
elektronische Geräte (China RoHS)
Dieses Gerät ist entsprechend der
europäischen Richtlinie über Elektro- und Elektronik-Alt geräte (waste
electrical and electronic equipment
– WEEE) gekennzeichnet.
4. Symbols employed
4. 1 Symbols on the device
Follow instructions for use
ON/OFF (Standby)
Applied part of type CF
Connection socket (example) for
footswitch
Potential equalization connector
Ethernet
USB
Alternating current
Electronic information product
pollution control (China RoHS)
This device has been labelled in
accordance with the European
Directive on waste electrical and
electronic equipment (WEEE).
4. Explicación de los símbolos
4. 1 Símbolos utilizados en el aparato
Observe el Manual de instrucciones
CON./DESC. (standby)
Equipo del tipo CF
Conector (por ejemplo) para
interruptor de pedal
Conexión equipotencial
Ethernet
USB
Corriente alterna
Certificación de control de la
contaminación ambiental debida
a aparatos electrónicos (directiva
RoHS china)
Este equipo está identificado conforme a la directiva europea sobre
residuos de aparatos eléctricos y
electrónicos (Waste Electrical and
Electronic Equipment – WEEE).
Hersteller
4. 2 Symbole auf Label und
4. 2 Symbols on label and
Verpackung des Geräts
Die Bedeutung der auf Label oder Verpackung
aufgedruckten Symbole können Sie dem
Beipackzettel »Verpackungssymbole«,
Mat.-Nr. 96216316 DF entnehmen. Diesen können
Sie unter www. karlstorz.com herunterladen.
VI
For the meanings of the symbols printed on the
label or packaging, please refer to the ‘Packaging
symbols’ accompanying instruction leaflet, mat.
no. 96216316 DF. This can be downloaded from
www. karlstorz.com.
Manufacturer
packaging of the device
Fabricante
4. 2 Símbolos utilizados en el etiquetado yelembalajedel aparato
Consulte el significado de los símbolos impresos
en el etiquetado o el embalaje en el pliego adjunto
“Símbolos del embalaje”, nº. de art. 96216316 DF.
Puede descargarlo en www.karlstorz.com.
Symbols employed Explicación de los símbolosSymbolerläuterungen
❶
❷
❸ ❸
❼
❹
❽ ❺
❹
❻
❺
❾
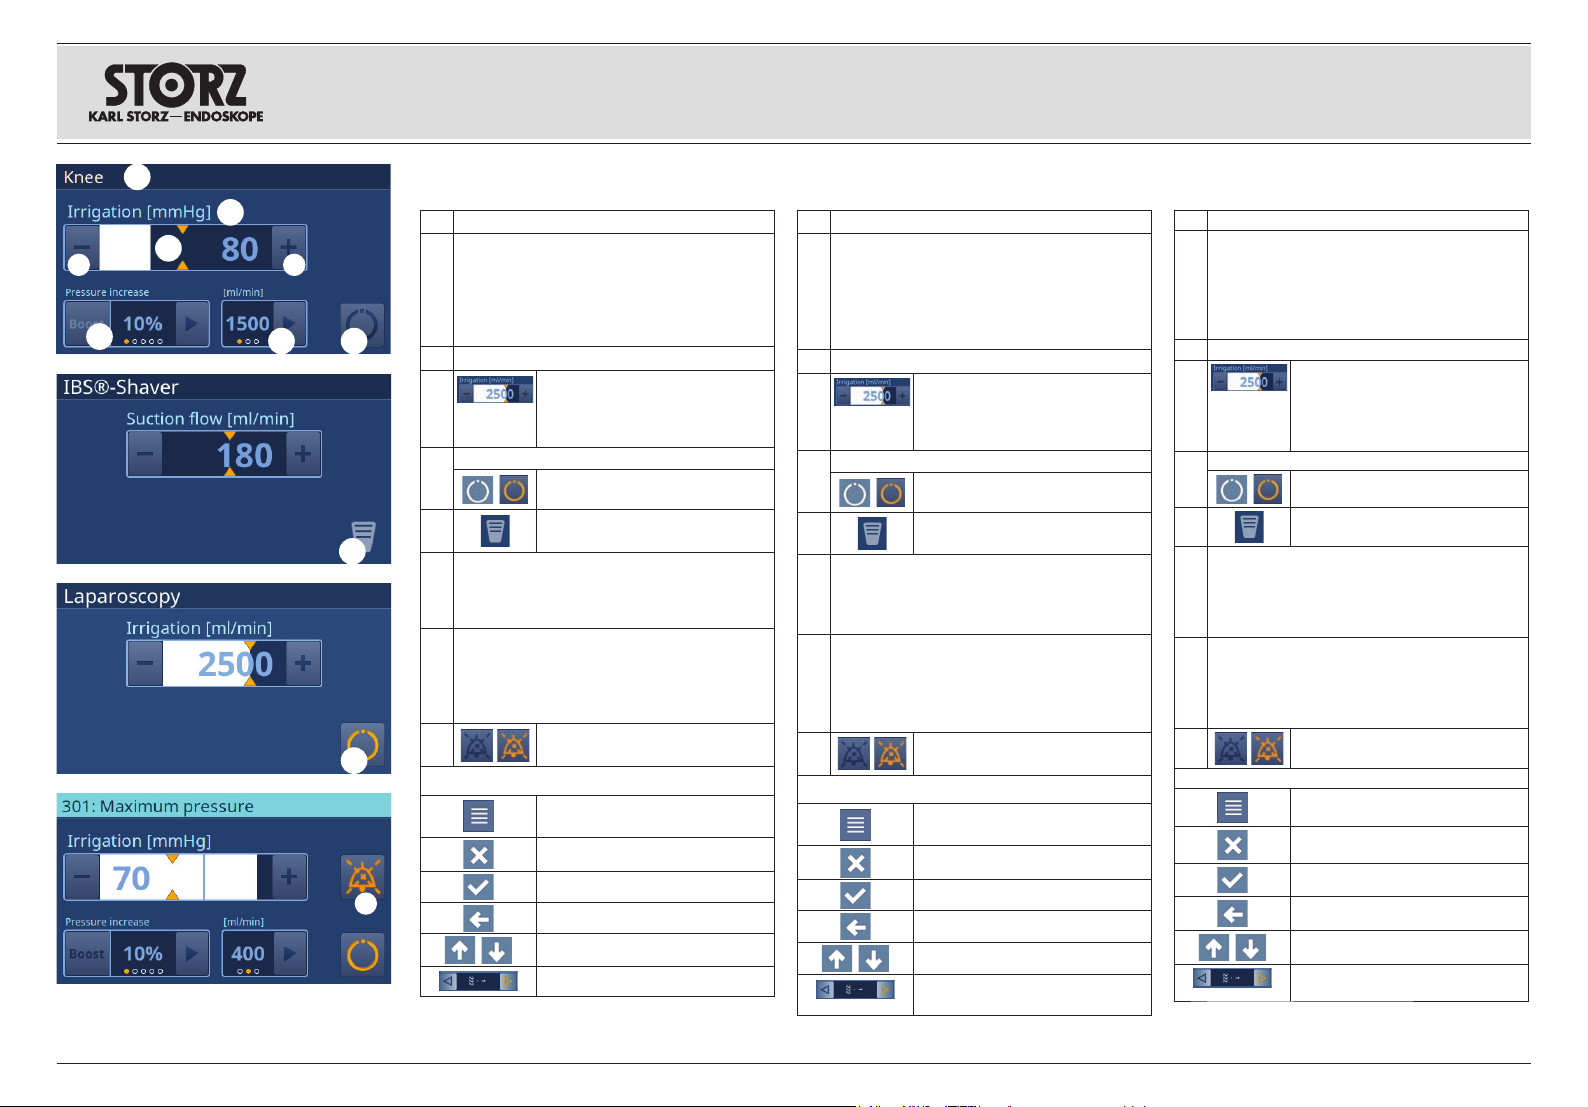
4. 3 Symbole Benutzeroberfläche 4. 3 User interface symbols
❶
Name der Disziplin bzw. des Einsatzgebiets
Einstellbare Parameter (abhängig
von eingelegter Schlauchkassette –
Voraussetzung: installierte Softwarepakete)
• Spülung (ml/min) – LAP
• Spülung (mmHg) – ART
• Saugfluss (ml/min) – IBS® Shaver
❸
Sollwert verringern / erhöhen
Start/Stopp Spülung (Fluss bzw. Druck)
❻
nur verfügbar in den Disziplinen ART/URO
❼
Boost Druckerhöhung (über Button oder
Fußschalter – im Beispiel »Fußschalter«).
(in 10 %-Stufen – von 10% bis 50%)
Begrenzung Fluss oder Druck (abhängig vom
❽
Fachgebiet und installiertem Zusatzpaket
(Advanced))
• Fluss-Begrenzung in ml/min
•
Druck-Begrenzung in mmHg
쐎
Anzeige Spülen/Saugen aktiviert
Istwert – weiße Balkenanzeige
Sollwert – orangefarbene
Markierung und »Zahl«
Standby / Pumpe aktiviert
Start/Stopp Absaugung mittels
Fußschalter
Alarm Audio pausierend (30 s)
»ohne Abbildung«
Aufrufen Menü
Abbrechen (Änderungen verwerfen)
Bestätigen (Änderungen akzeptieren)
Menü zurück
= Blättern im Menü
Seiten blättern (Symbol 90° gedreht)
❶
Name of discipline or field of application
Parameters which can be set (depending on
the tubing cartridge inserted – prerequisite:
installed software packages)
• Irrigation (ml/min) – LAP
• Irrigation (mmHg) – ART
• Suction (ml/min) – IBS
❸
Increase/decrease the setpoint
Start/stop irrigation (flow or pressure)
❻
only available in the disciplines ART/URO
❼
Boost pressure increase (via button or
footswitch – in the example ‘footswitch’).
(in 10% increments – from 10% to 50%)
Flow or pressure limitation (depending on
❽
the specialization and installed additional
package (Advanced))
• Flow limitation in ml/min
•
Pressure limitation in mmHg
쐎
Irrigation/suction display activated
Actual value – white bar display
Setpoint – orange marks and
‘number’
Standby/pump activated
Start/stop suction using the
footswitch
Alarm audio paused (30 s)
‘no image’
Open the menu
Cancel (reject changes)
Confirm (accept changes)
Menu back
= scrolling in the menu
Scroll through pages
(symbol rotated through 90°)
®
Shaver
4. 3 Símbolos utilizados en la
interfaz del usuario
❶
Nombre de la disciplina/del campo de aplicación
Parámetros ajustables (en función del cartu-
cho de tubos flexibles insertado – Requisito
previo: paquete de software instalado)
• Irrigación (ml/min) – LAP
• Irrigación (mmHg) – ART
• Flujo de succión (ml/min) – Shaver IBS®
❸
Reducción/aumento del valor nominal
Inicio/parada de la succión (flujo/presión)
❻
Solo disponible en las disciplinas de ART/URO
❼
Aumento de refuerzo de la presión
(con el botón o el interruptor de pedal;
en el ejemplo, “interruptor de pedal”).
(en incrementos del 10% – del 10% al 50%)
Límite de flujo o presión (en función de
❽
la especialidad y del paquete adicional
instalado (Advanced))
• Límite de flujo en ml/min
•
Límite de presión en mmHg
쐎
Indicador de irrigación/succión
activado
Valor real – Indicador de barra
blanco Valor nominal – Marcas y
“número” de color naranja
Standby/bomba activada
Inicio/parada de la succión
mediante interruptor de pedal
Señal de audio pausada (30 s)
“sin ilustración”
Abrir el menú
Cancelar (desechar cambios)
Confirmar (aceptar cambios)
Volver al menú
= Desplazamiento en el menú
Desplazamiento por las páginas
(símbolo girado 90°)
VII

Symbols employed Explicación de los símbolosSymbolerläuterungen
4. 4 Verwendete Abkürzungen
ART Arthroskopie
BS Absaugung via Flasche
CV CLEARVISION
CYST Zystoskopie
DS Absaugung direkt
ENT HNO
FC Flussgeregelt
FESS Functional Endoscopic Sinus
Surgery (Funktionelle endoskopische
Nasennebenhöhlen-Chirurgie)
GI Gastrointestinal
GYN Gynäkologie
HYS Hysteroskopie
®
IBS
Intrauteriner BIGATTI Shaver
LAP Laparoskopie
NEURO Neurochirurgie
PC Druckgeregelt
PCN Perkutane Nephroskopie
PRO Proktologie
RES Resektion
SPINE Wirbelsäule
SURG Chirurgie
THOR Thorakoskopie
URO Urologie
URS Uretero-Renoskopie
VET Veterinärmedizin
®
4. 4 Abbreviation used
ART Arthroscopy
BS Bottle suction
CV CLEARVISION
CYST Cystoscopy
DS Direct suction
ENT Ear Nose Throat
FC Flow-controlled
FESS Functional
Endoscopic
Sinus Surgery
GI Gastrointestinal
Gyn Gynecology
HYS Hysteroscopy
®
IBS
Intrauterine BIGATTI Shaver
LAP Laparoscopy
NEURO Neurosurgery
PC Pressure-controlled
PCN Percutaneous Nephroscopy
PRO Proctology
RES Resection
SPINE Vertebral column
SURG Surgery
THOR Thoracoscopy
URO Urology
URS Ureterorenoscopy
VET Veterinary Medicine
®
4. 4 Abreviaturas utilizadas
ART Artroscopia
BS Succión a través de la botella
CV CLEARVISION
CYST Cistoscopia
DS Succión directa
ENT ORL
FC Regulada por flujo
FESS Functional Endoscopic Sinus Surgery
(cirugía funcional endoscópica de los
senos paranasales)
GI Gastrointestinal
GYN Ginecología
HYS Histeroscopia
®
IBS
Shaver intrauterino BIGATTI
LAP Laparoscopia
NEURO Neurocirugía
PC Regulada por presión
PCN Nefroscopia percutánea
PRO Proctología
RES Resección
SPINE Columna vertebral
SURG Cirugía
THOR Toracoscopia
URO Urología
URS Ureterorrenoscopia
VET Medicina veterinaria
®
VIII

Inhalt Contents Contenido del manual
1. Wichtiger Hinweis für die
Benutzer von KARL STORZ
Geräten und Instrumenten ..........................II
2. Geräteabbildungen .....................................III
2. 1 Betrieb als Spülpumpe ............................... III
2. 2 Betrieb als Saugpumpe .............................. III
3. Bedienungselemente, Anzeigen,
Anschlüsse und ihre Funktion ....................V
4. Symbolerläuterungen .................................VI
4. 1 Symbole auf Gerät .....................................VI
4. 2 Symbole auf Label und
Verpackung des Geräts ..............................VI
4. 3 Symbole Benutzeroberfläche .....................VII
4. 4 Verwendete Abkürzungen ........................ VIII
5. Allgemeines ..................................................4
5. 1 Gerätebeschreibung .................................... 4
5. 2 Schutzrechte ............................................... 5
6. Sicherheitshinweise .....................................6
6. 1 Erklärung zu Warn- und
Vorsichtshinweisen ......................................6
6. 2 Zweckbestimmung ....................................10
6. 3 Qualifikation des Anwenders .....................13
6. 4 Einweisung in die
Gerätefunktion und Bedienung ..................13
6. 5 Patientenpopulation ...................................13
6. 5. 1 SURG, URO, ART, SPINE,
ENT/NEURO, GI, VET .............................13
6. 5. 2 GYN .......................................................13
6. 6 Vorgesehene Einsatzgebiete
am Patienten ............................................. 14
6. 7 Anwenderprofil Arzt und
Assistenzpersonen ....................................15
6. 8 Vorgesehene Einsatzbedingungen ............. 15
6. 8. 1 Gebrauch ............................................... 15
6. 8. 2 Weitere vorgesehene Bedingungen .........15
6. 9 Position des Anwenders ............................16
6. 10 Sicherheitsmaßnahmen
am Aufstellort ............................................ 16
6. 11 Sicherheitsmaßnahmen beim
Einsatz des Geräts ....................................17
6. 12 Sicherheitseinrichtungen ............................17
6. 12. 1 Selbstprüfung ......................................... 17
6. 12. 2 Test des Touch-Displays ......................... 17
6. 12. 3 Kontrolle des Spüldrucks ........................17
1. Important information
for users of KARL STORZ
instruments ...................................................II
2. Images of the device ..................................III
2. 1 Operation as irrigation pump ...................... III
2. 2 Operation as suction pump ........................ III
3. Controls, displays, connectors, and
their uses ......................................................V
4. Symbols employed ......................................VI
4. 1 Symbols on the device ............................... VI
4. 2 Symbols on label and
packaging of the device .............................VI
4. 3 User interface symbols .............................. VII
4. 4 Abbreviation used .................................... VIII
5. General information .....................................4
5. 1 Device description .......................................4
5. 2 Property rights .............................................5
6. Safety instructions .......................................6
6. 1 Explanation of warnings and
cautions ......................................................6
6. 2 Intended use .............................................10
6. 3 User qualification ....................................... 13
6. 4 Training in the operation and
function of the device ................................ 13
6. 5 Patient profile ............................................ 13
6. 5. 1 SURG, URO, ART, SPINE,
ENT/NEURO, GI, VET .............................13
6. 5. 2 GYN .......................................................13
6. 6 Intended region of treatment
on the patient ............................................ 14
6. 7 User profile of physician and
assistants ..................................................15
6. 8 Intended conditions of use ........................15
6. 8. 1 Use .........................................................15
6. 8. 2 Other intended conditions .......................15
6. 9 User position .............................................16
6. 10 Safety precautions at
the site of installation .................................16
6. 11 Safety precautions when
operating the device ..................................17
6. 12 Safety features ..........................................17
6. 12. 1 Self-test ..................................................17
6. 12. 2 Testing the touch display ........................17
6. 12. 3 Monitoring the irrigation pressure ............17
1. Indicaciones importantes para los
usuarios de equipos e instrumentos
KARL STORZ ................................................II
2. Imágenes del equipo ..................................III
Funcionamiento como bomba de irrigación
2. 1
2. 2 Funcionamiento como bomba de succión.. III
3. Elementos de control, indicadores,
conexiones y sus funciones ........................V
4. Explicación de los símbolos ......................VI
4. 1 Símbolos utilizados en el aparato ...............VI
4. 2 Símbolos utilizados en el etiquetado
y el embalaje del aparato ............................ VI
4. 3 Símbolos utilizados en la
interfaz del usuario ....................................VII
4. 4 Abreviaturas utilizadas .............................. VIII
5. Generalidades .............................................. 4
5. 1 Descripción del aparato ..............................4
5. 2 Derechos de propiedad ...............................5
6. Instrucciones de seguridad ........................6
6. 1 Explicación de las indicaciones
de alarma y advertencia ..............................6
6. 2 Uso previsto ..............................................10
6. 3 Cualificación del usuario ............................13
6. 4 Formación acerca de las funciones
del aparato y su manejo ............................13
6. 5 Población de pacientes .............................13
6. 5. 1 SURG, URO, ART, SPINE,
ENT/NEURO, GI, VET .............................13
6. 5. 2 GYN .......................................................13
6. 6 Zonas previstas de aplicación
en el paciente ............................................14
6. 7 Perfil de usuario del médico y
del personal auxiliar ...................................15
6. 8 Condiciones previstas de aplicación ..........15
6. 8. 1 Empleo ................................................... 15
6. 8. 2 Otras condiciones previstas .................... 15
6. 9 Posición del usuario ..................................16
6. 10 Medidas de seguridad en el
lugar de emplazamiento ............................16
6. 11 Medidas de seguridad durante
el empleo del equipo ................................. 17
6. 12 Dispositivos de seguridad .........................17
6. 12. 1 Test automático de funcionamiento ........17
6. 12. 2 Test de la pantalla táctil ..........................17
6. 12. 3 Control de la presión de irrigación ..........17
. III
1

Inhalt Contents Contenido del manual
7. Aufstellen und
Bedienungshinweise ..................................18
7. 1 Auspacken ................................................ 18
7. 2 Grundausstattung ..................................... 18
7. 3 Aufstellen des Geräts ................................18
7. 4 KARL STORZ-SCB .................................. 20
7. 5 Inbetriebnahme .........................................20
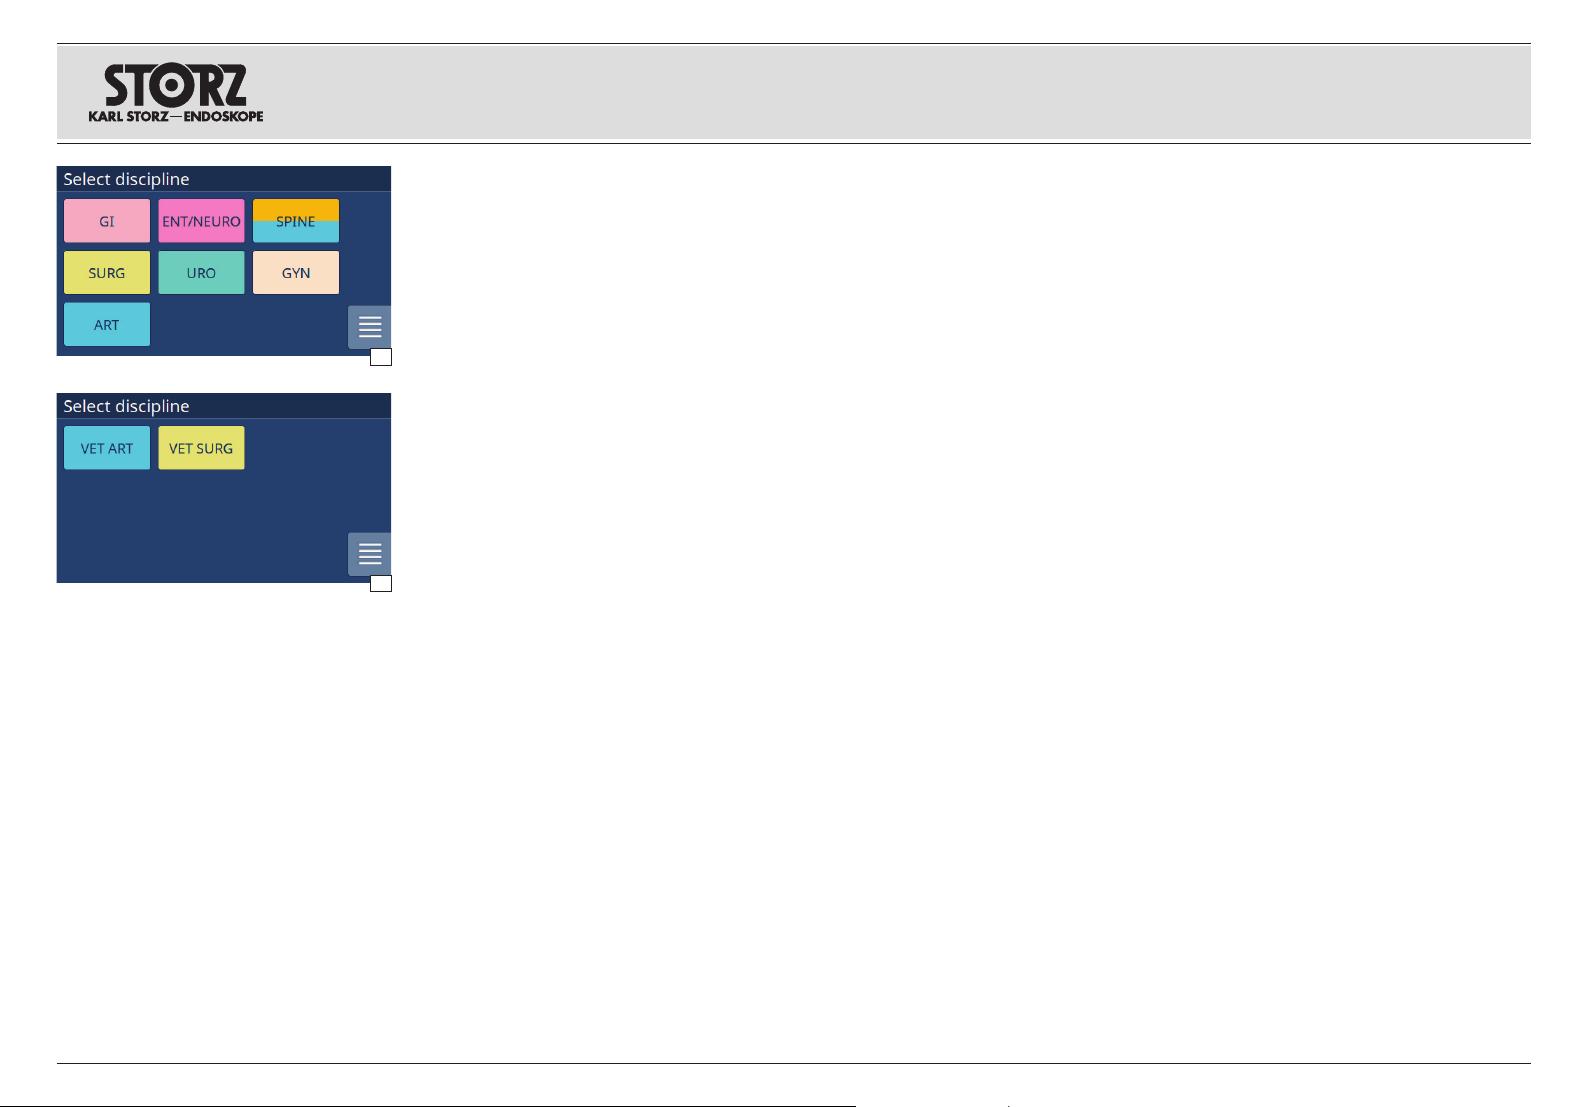
7. 6 Disziplin/Verfahren .....................................21
7. 6. 1 Humanmedizin ........................................ 21
7. 6. 2 Veterinärmedizin ..................................... 21
7. 7 Aufsetzen der Schlauchkassette................22
7. 7. 1 Erstmaliges Aufsetzen der
Schlauchkassette/Aufstarten ................. 22
7. 7. 2 2. und folgende Aufsetzen der
Schlauchkassette .................................. 22
7. 8 Entfernen der
Schlauchkassette ......................................23
7. 9 Schlauchkassette für
Absaugung anschließen ............................24
7. 10 ENDOMAT
®
SELECT als
Spülpumpe einsetzen ................................26
7. 10. 1 Spülfluss vorgeben
(SURG, GI, VET SURG) ..........................26
7. 10. 2 Spülfluss vorgeben (ENT/NEURO) .......... 27
7. 10. 3 Spüldruck vorgeben
(HYS, URO, ART, SPINE, VET ART) ........ 28
7. 10. 4 Spülpumpe starten .................................29
7. 11 ENDOMAT
®
SELECT als
Saugpumpe einsetzen ...............................30
7. 11. 1 Saugfluss vorgeben
®
Shaver, RES, CALCUSON
(IBS
VET SURG) .............................................30
7. 11. 2 »Saugpumpe« starten ............................. 30
7. 12 Funktionsprüfung und Ent-
lüftung des Schlauchsystems ....................31
7. 13 Spülvorgang starten .................................. 32
7. 14 Absaugvorgang starten .............................32
7. 15 Geräte-Menü .............................................33
7. 15. 1 Einstellungen ..........................................33
7. 15. 2 Ereignisprotokoll ..................................... 36
7. 15. 3 Geräteinformation ................................... 36
7. 15. 4 Service ................................................... 36
7. Installation and
operating instructions ...............................18
7. 1 Unpacking the equipment .........................18
7. 2 Basic equipment ....................................... 18
7. 3 Installation ................................................. 18
7. 4 KARL STORZ-SCB .................................. 20
7. 5 Operating the device .................................20
7. 6 Discipline/procedure ..................................21
7. 6. 1 Human medicine..................................... 21
7. 6. 2 Veterinary medicine ................................. 21
7. 7 Inserting the tubing cartridge .....................22
7. 7. 1 Inserting the tubing cartridge for
the first time/startup ................................22
7. 7. 2 Inserting the tubing cartridge for the
second and subsequent times ...............22
7. 8 Removing the tubing
cartridge ....................................................23
7. 9 Connecting the tubing
cartridge for suction ..................................24
7. 10 Using the ENDOMAT
®
SELECT
as an irrigation pump ................................26
7. 10. 1 Specifying the irrigation flow
(SURG, GI,
VET SURG
) .......................... 26
7. 10. 2 Specifying the irrigation flow
(ENT/NEURO) .........................................27
7. 10. 3 Specifying the irrigation pressure
(HYS, URO, ART, SPINE, VET ART) ........ 28
7. 10. 4 Starting the irrigation pump ....................29
7. 11 Using the ENDOMAT
®
SELECT
as a suction pump ....................................30
7. 11. 1 Specifying the suction flow
®
shaver, RES, CALCUSON
(IBS
VET SURG) .............................................30
7. 11. 2 Starting the suction pump ......................30
7. 12 Test for proper operation and
air-relief of the tubing system .....................31
7. 13 Initiating irrigation ...................................... 32
7. 14 Initiating suction ........................................ 32
7. 15 Device menu .............................................33
7. 15. 1 Settings .................................................. 33
7. 15. 2 Event protocol ........................................36
7. 15. 3 Device information ..................................36
7. 15. 4 Service ................................................... 36
7. Montaje e
instrucciones operativas ........................... 18
7. 1 Desembalaje ............................................. 18
7. 2 Equipamiento básico .................................18
7. 3 Montaje del equipo .................................... 18
7. 4 KARL STORZ-SCB ................................... 20
7. 5 Puesta en marcha .....................................20
7. 6 Disciplina/procedimiento ........................... 21
7. 6. 1 Medicina humana ................................... 21
7. 6. 2 Medicina veterinaria ................................ 21
7. 7 Montaje del cartucho de tubos flexibles ....22
7. 7. 1 Montaje del cartucho de tubos flexibles
por primera vez / arranque .....................22
7. 7. 2 Montaje del cartucho de tubos flexibles
por segunda vez y siguientes .................22
7. 8 Extracción del cartucho de
tubos flexibles ...........................................23
7. 9 Conexión del cartucho de
tubos flexibles para succión ......................24
7. 10 Empleo de la ENDOMAT® SELECT
como bomba de irrigación .........................26
7. 10. 1 Especificación del flujo de irrigación
(SURG, GI, VET SURG) ..........................26
7. 10. 2 Especificación del flujo de irrigación
(ENT/NEURO) .........................................27
7. 10. 3 Especificación de la presión de irrigación
(HYS, URO, ART, SPINE, VET ART) ........ 28
7. 10. 4 Inicio de la bomba de irrigación ..............29
7. 11 Empleo de la ENDOMAT
®
SELECT
como bomba de succión ...........................30
7. 11. 1 Especificación del flujo de succión
(shaver IBS
®
, RES, CALCUSON
VET SURG) .............................................30
7. 11. 2 Inicio de la “bomba de succión” .............30
7. 12 Prueba de funcionamiento y purga
de aire del sistema de tubos......................31
7. 13 Inicio de la irrigación ..................................32
7. 14 Inicio de la succión ....................................32
7. 15 Menú del aparato ......................................33
7. 15. 1 Configuración .........................................33
7. 15. 2 Protocolo de eventos ..............................36
7. 15. 3 Información acerca del aparato...............36
7. 15. 4 Servicio ................................................... 36
2

Inhalt Contents Contenido del manual
8. Instandhaltung............................................37
8. 1 Aufbereitung ..............................................37
8. 1. 1 Wischdesinfektion des Geräts .................37
8. 1. 2 Allgemeine Warnhinweise zu
wiederaufbereitbaren Medizinprodukten ..37
8. 1. 3 Saugflasche und Verschlusskappe ..........39
8. 2 Wartung und
Sicherheitsüberprüfung .............................43
8. 2. 1 Wartung .................................................. 43
8. 2. 2 Sicherheitsüberprüfung/
Wiederholungsprüfung nach IEC 62353 .43
8. 3 Instandsetzung .......................................... 44
8. 4 Entsorgung ............................................... 44
8. 5 Reparaturprogramm .................................. 45
8. 6 Verantwortlichkeit ...................................... 46
8. 7 Garantie ....................................................46
9. Technische Beschreibung .........................47
9. 1 Alarmspezifikation .................................... 47
9. 1. 1 Optische Signalisation............................. 47
9. 1. 2 Akustische Signalisation.......................... 47
9. 1. 3 Verifikation der Funktion des
Alarmsystems .........................................48
9. 2 Informationssignale ....................................48
9. 2. 1 Optische Signalisation............................. 48
9. 2. 2 Akustisches Informationssignal ...............49
9. 3 Testbedingungen für die Alarm- und
Informationssignale ..................................50
9. 3. 1 Überdruckalarm ......................................50
9. 3. 2 Informationssignale ................................. 50
9. 4 Informationsmeldungen ............................. 51
9. 5 Fehlersuchliste .......................................... 60
9. 6 Technische Daten ......................................62
9. 7 Technische Unterlagen .............................. 64
10. Ersatzteile,
empfohlenes Zubehör ..............................65
10. 1 Ersatzteilliste ............................................. 65
10. 2 Empfohlenes Zubehör ...............................65
11. Hinweise zur elektromagneti schen
Verträglichkeit (EMV) ................................. 67
12. Niederlassungen ........................................84
8. Maintenance ............................................... 37
8. 1 Reprocessing ............................................ 37
8. 1. 1 Wipe-down disinfection of device ...........37
8. 1. 2 General warnings for reusable
medical devices ......................................37
8. 1. 3 Suction bottle and cap ...........................39
8. 2 Maintenance and
safety check .............................................43
8. 2. 1 Maintenance ...........................................43
8. 2. 2 Safety check/repeat inspection
according to IEC 62353 ..........................43
8. 3 Servicing and repair ...................................44
8. 4 Disposal .................................................... 44
8. 5 Repair program .........................................45
8. 6 Limitation of liability ...................................46
8. 7 Manufacturer’s warranty ............................46
9. Technical description ................................. 47
9. 1 Alarm specification ....................................47
9. 1. 1 Visual signaling ....................................... 47
9. 1. 2 Acoustic signaling ................................... 47
9. 1. 3 Verification of the functioning of the
alarm system ..........................................48
9. 2 Information signals .................................... 48
9. 2. 1 Visual signaling ....................................... 48
9. 2. 2 Acoustic information signal ..................... 49
9. 3 Test conditions for alarm and
information signals .....................................50
9. 3. 1 Excess pressure alarm ............................50
9. 3. 2 Information signals ..................................50
9. 4 Information messages ...............................54
9. 5 Troubleshooting ......................................... 60
9. 6 Technical data ...........................................62
9. 7 Technical documentation ...........................64
10. Spare parts,
recommended accessories ....................... 65
10. 1 List of Spare parts .....................................65
10. 2 Recommended accessories ...................... 65
11. Electromagnetic Compatibility
(EMC) Information ...................................... 67
12. Subsidiaries ................................................ 84
8. Mantenimiento ...........................................37
8. 1 Preparación ...............................................37
8. 1. 1 Desinfección del aparato por frotado ......37
8. 1. 2 Advertencias generales acerca
de productos médicos aptos
para nueva preparación ..........................37
8. 1. 3 Botella de succión y tapa de cierre ......... 39
8. 2 Mantenimiento y
control técnico de seguridad ..................... 43
8. 2. 1 Mantenimiento ........................................43
8. 2. 2 Control técnico de seguridad/
verificación periódica según CEI 62353 ..43
8. 3 Reparaciones ............................................ 44
8. 4 Gestión de residuos ..................................44
8. 5 Programa de reparaciones ........................45
8. 6 Responsabilidad ........................................ 46
8. 7 Garantía ....................................................46
9. Descripciones técnicas .............................47
9. 1 Especificación de las alarmas .................... 47
9. 1. 1 Señalización visual .................................. 47
9. 1. 2 Señalización acústica ..............................47
9. 1. 3 Verificación del funcionamiento
del sistema de alarmas ........................... 48
9. 2 Señales de información .............................48
9. 2. 1 Señalización visual .................................. 48
9. 2. 2 Señal de información acústica ................49
9. 3 Condiciones de prueba para las señales
de alarma e información ............................ 50
9. 3. 1 Alarma de sobrepresión ..........................50
9. 3. 2 Señales de información ..........................50
9. 4 Mensajes de información ........................... 57
9. 5 Localización de errores .............................60
9. 6 Datos técnicos ..........................................62
9. 7 Documentación técnica ............................. 64
10. Piezas de repuesto,
accesorios recomendados........................65
10. 1 Piezas de repuesto ....................................65
10. 2 Accesorios recomendados ........................65
11. Indicaciones sobre compatibilidad
electromagnética (CEM) ............................67
12. Sociedades distribuidoras ........................84
3
Allgemeines GeneralidadesGeneral information
5. Allgemeines
5. 1 Gerätebeschreibung
Der ENDOMAT® SELECT ist eine neue
Rollenpumpe von KARL STORZ. Diese kann je
nach Einsatzgebiet zum Spülen oder Absaugen
von Flüssigkeiten bei Operationen in verschiedenen
Fachgebieten eingesetzt werden.
Die Anpassung an die jeweilige Operationsart
durch Bereitstellung der jeweils optimalen
1
Betriebsparameter erfolgt automatisch mit
dem Aufsetzen einer fachgebietsspezifischen
Schlauchkassette unter der Voraussetzung, dass
das Gerät für das vorgesehene Einsatzgebiet
freigeschaltet ist.
Dieses Konzept hat den Vorteil, dass das Gerät
speziell für die Bedürfnisse des Anwenders
konfigurierbar ist. Es werden z. B. nur
Einsatzgebiete angezeigt, die er nutzen möchte.
Bei Bedarf können nachträglich Fachgebiete aus
dem Bereich Humanmedizin nachgerüstet werden
(siehe Abb. 1). Ebenso besteht die Möglichkeit
ein »Advanced Softwarepaket« mit erweiterten
2
Einstellmöglichkeiten zu erwerben (siehe Seiten 26,
28, 29 und 34).
Zusatzfunktionen:
• BOOST: Bei bestimmten Anwendungen URO/
ARTHRO kann über eine BOOST-Funktion der
Spüldruck kurzzeitig erhöht werden.
• Druck- bzw. Fluss-Begrenzung: Bei bestimmten
Anwendungen kann neben der »frei« wählbaren
Haupt einstellung z. B. dem Spülfluss, der
Spüldruck begrenzt werden und umgekehrt.
5. General information
5. 1 Device description
The ENDOMAT® SELECT is a new roller pump from
KARL STORZ. Depending on the application, it can
be used for irrigation or suctioning away liquids
during interventions in a range of medical fields.
The device automatically adapts to suit the type
of operation being performed by providing optimal
operating parameters when a field-specific tubing
cartridge is inserted, assuming the device is
activated for the field of application in question.
This concept has the advantage that the device
can be configured specifically for the individual
requirements of the user. For example, only
applications which he wishes to use are displayed.
If necessary, disciplines from the field of human
medicine can be added at a later date (see Fig. 1).
An ‘Advanced software package’ with extended
setting options (see pages 26, 28, 29 and 34) can
also be purchased.
Additional functions:
• BOOST: With certain URO/ARTHRO applications,
the irrigation pressure can be increased briefly
using the BOOST function.
• Pressure/flow limitation: With certain applications,
in addition to the freely selectable main setting,
e.g., the irrigation flow rate, the irrigation pressure
can also be limited or vice versa.
5. Generalidades
5. 1 Descripción del aparato
ENDOMAT® SELECT es una nueva bomba de
rodillos de KARL STORZ. En función del campo
de aplicación, esta puede emplearse para irrigar
o succionar líquidos durante operaciones en
diferentes especialidades.
La adaptación al tipo de intervención mediante la
puesta a disposición de los parámetros de servicio
óptimos en cada caso ocurre de forma automática
al montarse un cartucho de tubos flexibles
específico para la especialidad que corresponda,
siempre que el aparato haya sido habilitado para el
campo de aplicación previsto.
Este concepto ofrece la ventaja de poder
configurar el aparato de manera específica para
las necesidades del usuario. Por ejemplo, solo se
muestran los campos de aplicación que el usuario
desea utilizar. Si es necesario, posteriormente
pueden agregarse especialidades del ámbito de la
medicina humana (véase la fig. 1). Asimismo, existe
la posibilidad de adquirir un paquete de software
“Advanced” con opciones avanzadas de ajuste
(véanse las págs. 26, 28, 29 y 34).
Funciones adicionales:
• REFUERZO: En algunas aplicaciones de URO/
ARTRO se puede incrementar la presión de
irrigación brevemente usando la función de
REFUERZO.
• Límite de presión / flujo: En algunas aplicaciones,
además del ajuste principal que puede
seleccionarse libremente como, p. ej., el flujo de
irrigación, también se puede limitar la presión de
irrigación o a la inversa.
Der ENDOMAT
Veterinärmedizin konfigurierbar (Abb. 2).
Es ist aber nicht möglich, Fachgebiete aus dem
Bereich Veterinärmedizin mit Fachgebieten aus dem
Bereich Humanmedizin zu kombinieren.
4
®
SELECT ist auch als Modell für die
The ENDOMAT
the model for veterinary medicine (Fig. 2).
However, it is not possible to combine disciplines
from the field of veterinerary medicine with
disciplines from the field of human medicine.
®
SELECT can also be configured as
El ENDOMAT
configurarse como modelo para medicina
veterinaria (fig. 2).
Sin embargo, no es posible combinar
especialidades de medicina veterinaria con
especialidades de medicina humana.
®
SELECT también puede

Allgemeines GeneralidadesGeneral information
Die Bedienung und Kontrolle des Geräts erfolgen
über ein Touch-Display. Die Anzeige des Soll- und
Istwertes von Spüldruck bzw. Fluss erlaubt eine
Kontrolle des aktuellen Betriebszustandes. Eine
elektronische Sicherheitsschaltung blockiert die
Förderung bzw. Absaugung bei anhaltenden
Abweichungen vom Sollwert und informiert den
Benutzer über akustische Signale. Zum hohen
Sicherheitsstandard des ENDOMAT
auch ein elektronisches Auto-Check-System bei,
das die verschiedenen Systemkomponenten bei
jeder Inbetriebnahme des Geräts prüft und etwaige
Fehlerzustände signalisiert.
®
SELECT trägt
The device is operated and monitored via a touch
display. The display for the setpoint and actual
values of the irrigation pressure/flow enables
monitoring of the current operating status. An
electronic safety circuit interrupts irrigation or
suction if device performance persistently deviates
from the setpoint, and emits an audible signal
to inform the user. The high safety standard of
ENDOMAT® SELECT is further enhanced by
an electronic auto-check system, which tests
the system components each time the device
is switched on, and notifies the operator of any
failures detected.
El aparato se maneja y se monitoriza mediante
una pantalla táctil. La indicación del valor nominal
y real de la presión / del flujo de irrigación permite
monitorizar el estado actual del servicio. Un circuito
electrónico de seguridad bloquea el transporte o
la succión en caso de desviaciones persistentes
respecto del valor nominal e informa al usuario
mediante señales acústicas. Al elevado estándar
de seguridad de la ENDOMAT
asimismo un sistema electrónico de autocontrol,
que revisa los diversos componentes del sistema
cada vez que se pone en marcha el aparato y avisa
mediante señales de eventuales errores.
®
SELECT contribuye
5. 2 Schutzrechte
Dieses Produkt ist in den USA geschützt durch
(mindestens eines der folgenden) US-Patent/e
5,788,688; 6,397,286; 6,484,221; 6,824,539.
5
5. 2 Property rights
This product is protected in the USA by (at least
one of the following) US Patent No(s) 5,788,688;
6,397,286; 6,484,221; 6,824,539.
5. 2 Derechos de propiedad
Este producto está protegido en los EE. UU. por
la(s) (por lo menos una de las siguientes) patente(s)
americana(s) 5,788,688; 6,397,286; 6,484,221;
6,824,539.

Sicherheitshinweise Instrucciones de seguridadSafety instructions
6. Sicherheitshinweise
Sicherheitshinweise sind Maßnahmen zum Schutz
des Anwenders und Patienten vor Gefährdungen,
die durch den Gebrauch des Systems entstehen
können.
6. 1 Erklärung zu Warn- und
Vorsichtshinweisen
Bitte lesen Sie diese Gebrauchsanweisung
sorgfältig durch, und beachten Sie die Anweisungen
genau. Die Bezeichnungen Warnung, Vorsicht
und Hinweis haben spezielle Bedeutungen. Wo
immer sie in der Gebrauchsanweisung verwendet
werden, sollte der nachfolgende Text genau gelesen
werden, um einen sicheren und effizienten Betrieb
des Geräts zu gewährleisten. Zur deutlicheren
Hervorhebung steht diesen Bezeichnungen
zusätzlich ein Piktogramm voran.
WARNUNG: Warnung macht auf eine
Gefährdung des Patienten oder des Arztes
3
aufmerksam. Die Nichtbeachtung einer
Warnung kann Verletzungen desPati en ten
oder des Arztes zur Folge haben.
VORSICHT: Vorsicht macht darauf
aufmerksam, dass bestimmte Wartungs-
2
oder Sicherheitsmaßnahmen zu treffen
sind, um eine Beschädigung des Geräts zu
vermeiden.
HINWEIS: Hinweise enthalten spezielle
1
Informationen zur Bedienung des Geräts, oder
sie erklären wichtige Informationen.
6. Safety instructions
Safety instructions are measures intended to
protect the user and patients from the risks which
could arise through the use of the system.
6. 1 Explanation of warnings and
cautions
Please read this manual and follow its instructions
carefully. The words Warning, Caution, and Note
convey special meanings. Wherever they are used
in this manual, they should be carefully reviewed
to ensure the safe and effective opera tion of this
product. To make the words stand out more clearly,
they are accompanied by a pictogram.
WARNING: A Warning indicates that the
personal safety of the patient or physi cian
3
may be involved. Disregarding a Warning
could result in injury to the patient or
physician.
CAUTION: A Caution indicates that partic-
ular service procedures or precautions
2
must be followed to avoid possible dam age
to the product.
NOTE: A Note indicates special informa-
1
tion about operating the product, or clar ifies
important information.
6. Instrucciones de seguridad
Las instrucciones de seguridad son medidas para
proteger al usuario y al paciente contra riesgos que
podrían originarse al utilizar el sistema.
6. 1 Explicación de las indicaciones
de alarma y advertencia
Le rogamos leer este Manual con atención y
observar estrictamente sus instrucciones. Los
términos Cuidado, Advertencia y Nota tienen
significados especiales. Cuando aparezcan en
alguna parte de este Manual de instrucciones,
revise esa sección cuidadosamente para asegurar
la operación inocua y eficaz de este aparato.
Para destacar más claramente estos términos,
los mismos están precedidos por un pictograma
adicional.
CUIDADO: El término Cuidado llama la
atención sobre una situación de peligro
3
para el paciente o para el médico. La inobservancia de este aviso podría conllevar
lesiones para el paciente o para el médico.
ADVERTENCIA: El término Advertencia
llama la atención sobre determinadas
2
medidas de mantenimiento o de seguridad
que han de llevarse a cabo a fi n de evitar el
deterioro del aparato.
NOTA: Los párrafos denominados con
1
el término Nota contienen informaciones
especiales para el manejo del equipo o
aclaran informaciones importantes.
WARNUNG: Lesen Sie diese
Gebrauchsanweisung genau durch, bevor
3
Sie das Gerät in Betrieb nehmen. Lesen Sie
besonders das Kapitel Sicherheitshinweise
aufmerksam durch, um Gefährdungen
Ihrer Patienten, Ihres Personals sowie Ihrer
eigenen Person zu vermeiden.
HINWEIS: Beschädigungen des Geräts,
1
die aufgrund von Fehlbedienungen
entstehen, fallen nicht unter die
Gewährleistungsansprüche.
6
WARNING: Read this instruction for use
thorough ly before putting the device into
3
operation. Read the section on safety
instructions carefully to avoid putting your
patients, personnel or yourself at risk.
NOTE: Any damage to the device resulting
1
from incorrect operation is not covered by the
manu facturer’s warranty.
CUIDADO: Lea detenidamente este
Manual de instrucciones antes de poner
3
en funcionamiento el aparato. Lea con
especial atención el capítulo referente a las
Instrucciones de seguridad a fi n de evitar
poner en peligro a sus pacientes, a su
personal o a usted mismo.
NOTA: Los deterioros producidos en el
1
aparato a causa de un manejo erróneo
quedan excluidos de la garantía.

Sicherheitshinweise Instrucciones de seguridadSafety instructions
Warn- und Vorsichtshinweise Warnings and cautions Indicaciones de alarma y advertencia
WARNUNG: Die elektrischen Installationen des
Operationssaals, in dem das Gerät angeschlossen
und betrieben wird, müssen die Anforderungen der
geltenden IEC-Normen erfüllen.
3
7
WARNUNG: Gerät außerhalb der Reichweite von
Patienten aufstellen.
WARNUNG: Aus Sicherheitsgründen dürfen die
Ausgangsbuchsen des Geräts und der Patient nicht
gleichzeitig berührt werden.
WARNUNG: Die Gebrauchsanweisungen
und die Schnittstellenspezifikationen der in
Kombination verwendeten Medizinprodukte und/
oder Systemkomponenten sind genauestens zu
beachten.
WARNUNG: Eine sicherheitstechnische
Unbedenklichkeit bei Kombinationen von
Medizinprodukten ist nur dann gegeben, wenn
• diese in den jeweiligen Gebrauchsanweisungen
als solche ausgewiesen sind oder
• die Zweckbestimmung und die Schnittstellenspezifikation der in der Kombination verwendeten
Produkte dies zulässt.
WARNUNG: Das Gerät darf nur an die unten
aufgeführten Geräte angeschlossen werden, die die
Anforderungen der IEC 60601-1 erfüllen:
• CALCUSON
• UNIDRIVE
• UNIDRIVE® S III ARTHRO
WARNUNG: Rollenpumpe. Bei aktivierter Pumpe
(auch wenn diese steht) nicht in die Pumpenrollen
fassen. Eine aktivierte Pumpe kann jederzeit
anlaufen. Quetschgefahr bzw. Einzug von loser
Kleidung (Haaren) möglich.
WARNUNG: Das Gerät regelt auf den am
Ausgang der Spülpumpe gemessenen Druck.
Der intrakavitäre Druck ist aber auch vom
Höhenunterschied zwischen Gerät und Kavität
abhängig. Versuchen Sie den Unterschied so gering
wie möglich zu halten.
WARNUNG: Vermeiden Sie unbedingt ein
Eindringen von Flüssigkeit in das Gehäuse.
Lagern Sie keine Flüssigkeit auf oder direkt über
dem Gerät. Ist trotz aller Vorsichtsmaßnahmen
Flüssigkeit in das Gerät eingedrungen, sehen Sie
ausreichend Zeit zum Verdunsten vor (ebenfalls bei
Bildung von Kondenswasser).
®
S III
WARNING: The electrical installation of the
operating room in which the device is connected
and operated must comply with the applicable IEC
standards.
WARNING: Set up the device out of reach of
patients.
WARNING: For safety reasons, do not
simultaneously touch the device output sockets and
the patient.
WARNING: The instructions for use and interface
specifications for medical devices and/or system
components used in combination must be
observed precisely.
WARNING: Combinations of medical devices are
only assured to be safe if:
• they are identified as such in the particular
instructions for uses or
• the intended use and interface specifications of
the devices used in combination permit this.
WARNING: The device may only be connected to
the devices listed below, which have been shown to
comply with the requirements of IEC 60601-1:
• CALCUSON
• UNIDRIVE
• UNIDRIVE® S III ARTHRO
WARNING: Reel pump. Do not touch the pump
reels when the pump is active (even if it is not
moving). An activated pump may start moving at
any time. Danger of crushing and/or of clothes (or
hair) getting pulled into the device.
WARNING: The device controls the pressure
measured at the outlet of the irrigation pump.
The intracavitary pressure depends, among other
things, on the height difference between the device
and the cavity. Try to keep the difference as low as
possible.
WARNING: Avoid allowing fluids to enter the
housing. Do not store liquids on or directly above
the device. If, despite the precautions, liquid enters
the device, sufficient time should be planned for
evaporation (this also applies for the formation of
condensation).
®
S III
CUIDADO: La instalación eléctrica del quirófano,
donde el aparato está conectado y en servicio,
ha de cumplir con los requisitos exigidos por las
normas CEI vigentes.
CUIDADO: Instale el aparato fuera del alcance de
los pacientes.
CUIDADO: Por razones de seguridad, no se
debe entrar en contacto simultáneamente con los
conectores de salida del aparato y con el paciente.
CUIDADO: Observe con la mayor atención los
Manuales de instrucciones y las especificaciones
de interfaz de los productos médicos y/o
componentes del sistema utilizados en combinación.
CUIDADO: Una aplicación técnicamente segura,
al combinar productos médicos, puede darse
únicamente si
• estas combinaciones están indicadas expresamente como tales en los Manuales de instrucciones respectivos o
• si el uso previsto y la especificación de interfaz
de los productos utilizados en combinación lo
permiten.
CUIDADO: El aparato debe conectarse únicamente a los aparatos relacionados más abajo, los cuales cumplen los requisitos de la CEI 60601-1:
• CALCUSON
• UNIDRIVE
• UNIDRIVE® S III ARTHRO
CUIDADO: Bomba de rodillos. En caso de estar
la bomba activada (aunque esté detenida), no
toque los rodillos de la bomba con las manos.
Una bomba activada puede ponerse en marcha
en cualquier momento. Existe peligro de que las
prendas sueltas (o el cabello) queden aplastadas o
sean arrastradas.
CUIDADO: El equipo se regula a la presión medida
a la salida de la bomba de irrigación. No obstante,
la presión intracavitaria también depende de la
diferencia de altura existente entre el equipo y la
cavidad. Procure mantener la mínima distancia
posible.
CUIDADO: Evite a toda costa la infiltración de
líquido en la carcasa. No coloque líquidos sobre el
aparato o inmediatamente por encima de este. Si,
a pesar de todas las precauciones tomadas, se ha
infiltrado líquido en el aparato, prevea un tiempo
suficiente para su evaporación (también en caso de
formarse agua por condensación).
®
S III

Sicherheitshinweise Instrucciones de seguridadSafety instructions
Warn- und Vorsichtshinweise Warnings and cautions Indicaciones de alarma y advertencia
3
WARNUNG: Vergewissern Sie sich vor dem Start
des Eingriffs, dass das eingesetzte Schlauchset
weder undicht noch abgeknickt ist, und dass die
Schlauchenden sicher befestigt sind.
WARNUNG: Seien Sie vorsichtig beim Einlegen
der Schlauchkassette. Ein gequetschter
Pumpenschlauch führt dazu, dass das
Sicherheitssystem die Pumpe stoppt.
WARNUNG: Der Service darf nur durch eine von
KARL STORZ autorisierte Fachkraft durchgeführt
werden.
WARNUNG:
Anwen dung auf seine Funktionsfähigkeit. Bei
offensichtlichen Schäden darf das Gerät nicht
verwendet werden.
WARNUNG: Beachten Sie bei der Entsorgung
von Zubehör die länderspezifischen Vorschriften/
Gesetze.
WARNUNG: Das Gerät nur innerhalb der
festgelegten Umweltbedingungen betreiben.
WARNUNG: Das Gerät kann plötzlich ausfallen. Sie
sollten daher die Bereitstellung eines Ersatzgeräts
oder alternative Verfahren einplanen, wenn die
Anwendung gesteuerten Flüssigkeitstransport
erfordert.
WARNUNG: Gerät nicht öffnen! Gefahr eines
elektrischen Schlags. Lassen Sie Servicearbeiten
nur durch den Hersteller oder vom Hersteller
autorisiertes Personal durchführen (vgl. §3
Medizinprodukte-Betreiberverordnung). Jedes
Öffnen des Geräts durch unautorisiertes Personal
führt zum Erlöschen der Garantie.
WARNUNG: Um das Risiko eines elektrischen
Schlages zu vermeiden, darf dieses Gerät nur an
ein Versorgungsnetz mit Schutzleiter angeschlossen
werden.
WARNUNG: Das Gerät ist nur vollständig von der
Netzspannung getrennt, wenn der Netzstecker
abgezogen ist.
Prüfen Sie dieses Gerät vor jeder
WARNING: Before you start the intervention,
make sure that the tubing set used is not leaking or
kinked and that the ends of the tubes are properly
secured.
WARNING: Be carefully when inserting the tubing
cartridge. A squeezed pump hose can cause the
safety system to stop the pump.
WARNING: Servicing may only be performed by
specialists authorized by KARL STORZ.
WARNING: Test this device prior to each surgical
procedure to ensure that it is functioning correctly.
It should not be used if any damage is evident.
WARNING: Follow the country-specific regulations/
laws for the disposal of accessories.
WARNING: The device may only be operated
within specified environmental conditions.
WARNING: The device may be subject to sudden
failures. Keep a spare device at hand or alternate
procedures in mind if the intervention requires
controlled fluid transportation.
WARNING: To avoid the risk of electrical shock,
do not open the unit. Refer servicing to the
manufacturer or to personnel authorized by the
manufacturer. Any opening of the device by
unauthorized persons will void warranty claims.
WARNING: To avoid the risk of an electric shock,
this equipment must only be connected to a supply
mains with protective earth.
WARNING: The line voltage to the device is only
definitively disconnected once the power plug has
been unplugged.
CUIDADO: Antes de iniciar la intervención,
cerciórese de que el set de tubos flexibles utilizado
no presente fugas ni esté doblado y los extremos
de los tubos flexibles estén bien fijados.
CUIDADO: Proceda con cuidado al insertar el
cartucho de tubos flexibles. Si un tubo flexible de
la bomba está aplastado, el sistema de seguridad
detiene la bomba.
CUIDADO: Las tareas de servicio técnico deben
ser llevadas a cabo únicamente por personal
autorizado por KARL STORZ.
CUIDADO:
funcionamiento de este aparato antes de cada
aplicación. No debe utilizarse el aparato si presenta
deterioros evidentes.
CUIDADO: Observe la legislación vigente, tanto
local como estatal, en materia de gestión de
residuos.
CUIDADO: El aparato solo puede utilizarse dentro
de las condiciones ambientales especificadas.
CUIDADO: El aparato puede fallar repentinamente.
Por esta razón, usted debe planificar un equipo
de repuesto a disposición o procedimientos
alternativos si la aplicación requiere un transporte
de líquidos controlado.
CUIDADO: No abra el aparato. Peligro de
descarga eléctrica. Los trabajos de servicio técnico
deben encargarse únicamente al fabricante o
a personal autorizado por el fabricante. Si el
equipo es abierto por personas no autorizadas, se
extinguirán los derechos de garantía.
CUIDADO: A fin de evitar el riesgo de una
descarga eléctrica, este aparato solo puede
conectarse a una red de alimentación con
conductor de protección.
CUIDADO: El aparato solo está completamente
desconectado de la corriente eléctrica cuando se
haya extraído el enchufe de la red.
Compruebe la capacidad de
8

Sicherheitshinweise Instrucciones de seguridadSafety instructions
Warn- und Vorsichtshinweise Warnings and cautions Indicaciones de alarma y advertencia
3
WARNUNG: Nicht im Umfeld eines Kernspintomographen (MRT) verwenden. Dieses Gerät ist für die
Kernspintomographie ungeeignet.
WARNUNG: Der ENDOMAT
verwendet werden, wenn Geräte für MRT, CT,
Diathermie, Elektrokauterisation oder RFID elektromagnetische Störungen verursachen könnten.
Ist sich der Benutzer unsicher oder vermutet, dass
Geräte dieser Art technische Probleme verursachen
könnten, sollte der klinische/biomedizinische Techniker der Einrichtung zu Rate gezogen werden.
WARNUNG: Um zu vermeiden, dass unbekannte
Quellen elektromagnetischer Störungen die Funktion elektrischer klinischer Geräte beeinträchtigen,
wird dringend empfohlen, einen Ad-Hoc-Test der
HF-Strahlung von einem klinischen/biomedizinischen Ingenieur oder einem EMV-Fachmann
durchführen zu lassen.
WARNUNG: Zusätzliche Geräte, die mit
elektrischen Medizingeräten verbunden
werden, müssen mit den entsprechenden
IEC oder ISO Standards (z. B. IEC 60950 für
Datenverarbeitungsgeräte) übereinstimmen.
Des Weiteren müssen alle Konfigurationen den
Anforderungen für medizinisch elektrische Systeme
entsprechen (siehe IEC 60601-1-1 bzw. Absatz 16
der 3. Edition der IEC 60601-1). Jeder, der
zusätzliche Geräte an elektrische Medizingeräte
anschließt, konfiguriert ein medizinisches System
und ist daher verantwortlich, dass das System
den Anforderungen für medizinisch elektrische
Systeme entspricht. Es ist zu beachten, dass die
lokale Rechtsvorschrift Vorrang gegenüber den
oben genannten Anforderungen hat. Bei Zweifeln
kontaktieren Sie Ihren Vertreter vor Ort oder den
technischen Kundendienst.
WARNUNG: Die richtige Konfiguration des Geräts
muss nach jedem Software-Update überprüft
werden.
®
SELECT darf nicht
WARNING: Do not use in a magnetic resonance
(MR) environment. This device is MR Unsafe.
WARNING: The ENDOMAT
used where MRI, CT, Diathermy, Electrocautery
or RFID equipment may cause Electromagnetic
interference (EMI). If the user is unsure or suspects
that such equipment may be causing technical
problems, the clinical/biomedical engineer of the
facility should be consulted.
WARNING: To prevent electrical medical device
equipment from being adversely effected by
unknown sources of electromagnetic interference,
it is highly recommended that Ad hoc radiated
RF testing be conducted by a Clinical/Biomedical
engineer or an EMC professional.
WARNING: Additional devices which are
connected to electrical medical devices must
comply with the relevant IEC or ISO standards
(e.g., IEC 60950 for data processing devices).
Furthermore, all configurations must comply with
the requirements for medical electrical systems
(see IEC 60601-1-1 or para 16 of the 3rd edition
of the IEC 60601-1). Anybody connecting
additional devices to electrical medical devices
is configuring a medical system, and is therefore
responsible for ensuring that the system complies
with the standard requirements for medical
electrical systems. It should be noted that the
local legal regulations have priority over the abovementioned requirements. If in doubt, contact your
representative on site or the technical customer
service.
WARNING: The correct configuration of the device
must be checked after each software update.
®
SELECT is not to be
CUIDADO: No utilice el aparato en un entorno
de resonancia magnética (RM). Este aparato está
clasificado como No seguro para RM (MR Unsafe).
CUIDADO: No se debe utilizar el ENDOMAT
SELECT ante la posibilidad de interferencia
electromagnética (EMI) provocada por TRM, TC,
diatermia, electrocauterización o equipos de RFID.
Si el usuario está inseguro o sospecha que dicho
aparato pueda estar causando problemas técnicos,
se debe consultar al ingeniero clínico/biomédico del
centro sanitario.
CUIDADO:
de interferencia electromagnética afecten de manera
adversa al equipo de aparatos médicos eléctricos,
se recomienda firmemente la realización de una
prueba de radiofrecuencia radiada por parte de un
ingeniero clínico/biomédico o un experto de CEM.
CUIDADO: Los aparatos adicionales que se
conectan a equipos electromédicos han de contar
con una certificación que acredite el cumplimiento
de las normas CEI o ISO correspondientes (p. ej.,
CEI 60950 para aparatos procesadores de datos).
Además, todas las configuraciones han de cumplir
los requisitos para sistemas electromédicos (véase
la CEI 60601-1-1 o la sección 16 de la 3ª edición
de la CEI 60601-1). Toda persona que conecte
aparatos adicionales a aparatos electromédicos
está configurando un sistema médico y es, por
lo tanto, responsable de que el sistema cumpla
con los requisitos para equipos electromédicos.
Obsérvese que la legislación nacional o regional
tiene prioridad sobre los requisitos indicados más
arriba. En caso de duda le rogamos dirigirse a
su representante local correspondiente o bien a
nuestro departamento de servicio técnico.
CUIDADO: Se debe comprobar la correcta
configuración del aparato tras cada actualización
de software.
Para evitar que fuentes desconocidas
®
9

Sicherheitshinweise Instrucciones de seguridadSafety instructions
Machen Sie sich vor der ersten Anwendung
des Geräts am Patienten unbedingt mit der
Funktionsweise und Bedienung des Geräts vertraut.
6. 2 Zweckbestimmung
Saug-/Spülpumpen und deren Zubehör dienen
zum Einbringen von Spülflüssigkeiten in Organe,
Gelenke und auf Operationsfelder sowie zum
Absaugen von Spül- und Körperflüssigkeiten,
Sekreten, Gewebe und Gasen bei diagnostischen
oder therapeutischen Eingriffen.
Indikation
Saug-/Spülpumpen mit dem entsprechenden
Zubehör eignen sich für all jene diagnostischen
sowie therapeutischen Eingriffe, welche
die im Kapitel 9.4 »Technische Daten« vom
Gerät bereitgestellten Energien und Stoffe zur
erfolgreichen Durchführung benötigen.
Das Gerät stellt Spül- oder Saugfunktionen für
mehrere Indikationen bereit:
• Urologie
• Gynäkologie
• Chirurgie (Thorakoskopie, Laparoskopie und
Proktologie)
• Arthroskopie
• Gastroenterologie
• Objektivspülung z. B. während FESS (Funktionelle
endoskopische Nasennebenhöhlen-Chirurgie)
• Wirbelsäulenchirurgie
Before using the device on the patient, it is imperative that you be acquainted with how the device
operates and is controlled.
6. 2 Intended use
Suction/irrigation pumps and their accessories
are used for the introduction of irrigation fluids into
organs, joints and operating fields as well as the
suctioning off of irrigation fluids and bodily fluids,
secretions, tissue and gas during diagnostic or
therapeutic interventions.
Indication
Suction and irrigation pumps with the
corresponding accessories are suitable for all
diagnostic or therapeutic interventions which require
the energy and substances provided by the device
as per section 9.4 ‘Technical data’ for successful
implementation.
The device provides irrigation and suction functions
for a range of indications:
• Urology
• Gynecology
• Surgery (Thoracoscopy, Laparoscopy and
Proctology)
• Arthroscopy
• Gastroenterology
• Lense Cleaning e.g. during FESS
• Spine surgery
Familiarícese bien con los modos de
funcionamiento y el manejo del equipo antes de
emplearlo por primera vez con un paciente.
6. 2 Uso previsto
Las bombas de succión e irrigación y sus
accesorios se utilizan para aplicar líquidos de
irrigación en órganos, articulaciones y campos
operatorios, así como para succionar líquidos de
irrigación y corporales, secreciones, tejidos y gases
en intervenciones diagnósticas o terapéuticas.
Indicaciones
Las bombas de succión e irrigación junto con
los accesorios correspondientes son adecuadas
para todas aquellas intervenciones con fines
diagnósticos y terapéuticos que requieran las
energías y sustancias proporcionadas por el
aparato según el capítulo 9.4 “Datos técnicos” para
alcanzar los fines previstos.
El aparato proporciona funciones de irrigación o
succión para varias aplicaciones:
• Urología
• Ginecología
• Cirugía (toracoscopia, laparoscopia y proctología)
• Artroscopia
• Gastroenterología
• Enjuague del objetivo, p. ej., durante FESS
(cirugía funcional endoscópica de los senos
paranasales)
• Cirugía de la columna vertebral
10

Sicherheitshinweise Instrucciones de seguridadSafety instructions
Warn- und Vorsichtshinweise Warnings and cautions Indicaciones de alarma y advertencia
Intended useZweckbestimmung
Uso previsto
Kontraindikation
Der Einsatz ist kontraindiziert, wenn nach
Einschätzung des behandelnden Arztes das Gerät
aufgrund seiner technischen Ausführung nicht
mit dem erfolgreichen Abschluss des geplanten
Eingriffes vereinbar ist.
Das Zubehör darf nur mit den dafür vorgesehenen
Geräten verwendet werden. Allgemein dürfen
Medizinprodukte nicht verwendet werden
bei Patienten, welche nicht dem definierten
Patientenkreis angehören oder wenn die OP selbst
als kontraindiziert gilt.
Der Einsatz von Pumpensystemen ist dann
kontraindiziert, wenn nach Einschätzung
des behandelnden Arztes die OP-Methode
kontraindiziert
Allgemeinzustands des Patienten die OPbzw. Narkosefähigkeit nicht gegeben ist.
Pumpensysteme dürfen nicht für Eingriffe in
direktem Kontakt mit dem ZNS (Zentralen
Nervensystem) und zentralen Herzkreislaufsystem
verwendet werden.
Saug- und/oder Spülpumpen ohne
Drucküberwachung dürfen nicht für die Dilatation
von Hohlorganen und Gelenken verwendet werden.
Das Gerät darf nicht bei der ERCP und
Cholangioskopie (Gastro), Spine lumbar
(interlaminarer Zugang), Spine zervical sowie bei
allen Anwendungen, die einen nicht-pulsatilen Fluss
benötigen, eingesetzt werden.
Ebenfalls darf das Gerät nicht zur Zufuhr von
Medikamenten oder zur Thorax Drainage eingesetzt
werden.
ist oder aufgrund des
Contraindication
Use is contraindicated if, in the opinion of the
attending physician, the device is not compatible
with successful completion of the planned
intervention due to its technical design.
The accessories must only be used with the
intended devices. In general, medical devices must
not be used on patients who are not part of the
defined patient group, or if the operation itself is
contraindicated.
The use of pump systems is contraindicated if, in
the opinion of the attending physician, the surgical
method as such is contraindicated, or if the patient
is not able to undergo surgery or anesthesia due to
his or her general condition.
Pump systems must not be used for interventions
in direct contact with the central nervous system
(CNS) and central cardiovascular system.
Suction and/or irrigation pumps without pressure
monitoring must not be used for dilations of hollow
organs or joints.
The device must not be used for ERCP and cholangioscopy (gastro), the lumbar spine (interlaminar
approach), cervical spine as well as all applications
which require a non-pulsatile fl ow.
Likewise, the device must not be used to administer
medication. Nor may it be used for thoracic
drainage.
Contraindicaciones
La aplicación está contraindicada cuando, según
la opinión del médico encargado del tratamiento, la
ejecución técnica del aparato no contribuiría al éxito
final de la intervención planeada.
Utilice los accesorios únicamente con los aparatos
previstos para ello. Como regla general, no se
deben utilizar productos médicos en pacientes que
no se ajusten a la definición del grupo de pacientes
o cuando la intervención quirúrgica en sí esté
contraindicada.
La utilización de sistemas de bombas está
contraindicada cuando, según la opinión del
médico encargado del tratamiento, el método
quirúrgico en sí esté contraindicado
estado general del paciente, no pueda administrarse
anestesia o practicarse cirugía.
Los sistemas de bombas no deben utilizarse en
intervenciones que requieran contacto directo
con el SNC (sistema nervioso central) y el sistema
circulatorio central.
No deben utilizarse bombas de succión y/o
irrigación sin monitorización de la presión para la
dilatación de órganos huecos y articulaciones.
El aparato no debe utilizarse para la
colangiopancreaticografía retrógrada endoscópica
(CPRE) y la colangioscopia (Gastro), la columna
lumbar (vía de acceso interlaminar), la columna
cervical ni para todas las aplicaciones que requieran
un flujo no pulsátil.
Asimismo, el aparato no debe emplearse para la
administración de medicamentos o para practicar
un drenaje torácico.
o, debido al
11

Sicherheitshinweise Instrucciones de seguridadSafety instructions
Indicaciones de alarma y advertenciaIntended useZweckbestimmung
Uso previsto
Der ENDOMAT® SELECT ist eine Rollenpumpe, die
entweder als Spül- oder als Saugpumpe für den
Einsatz bei diagnostischen und therapeutischen
Eingriffen bestimmt ist. Die Applikation erfolgt über
anwendungsspezifische Saug-/Spülinstrumente.
Die Verwendung des Geräts anders als oben
bestimmt ist aus Sicherheitsgründen nicht zulässig.
Der ENDOMAT
Schlauchkassetten bzw. Schlauchsets und
Zubehörteilen betrieben werden, die von
KARL STORZ für das Gerät als geeignet be zeich net
werden.
Insbesondere folgende schwerwiegende Fehler
können auftreten:
• Unzureichender Halt auf den
Schlauchkonnektoren bedeutet Sterilitätsverlust
und kann Beschädigung des Geräts durch
eingedrungene Flüssigkeit zur Folge haben.
• Frühzeitiger Bruch des Pumpenschlauch-
segments sowie dadurch bedingter Sterilitätsverlust und Beschädigung des Geräts durch
eingedrungene Flüssigkeit.
• Anzeige einer falschen Ist-Förderrate durch
Abweichungen im Schlauchdurchmesser.
®
SELECT darf nur mit
WARNUNG: Bei Verwendung anderer als
der vorgeschriebenen Schlauchsysteme
3
kann keine Gewähr für die sichere Funktion
des Geräts übernommen werden.
WARNUNG: Eine Änderung des
medizinischen elektrischen (ME) Geräts
3
istnicht erlaubt.
®
The ENDOMAT
intended for use either as an irrigation or suction
pump in diagnostic or therapeutic interventions.
Theapplication must be carried out using
appropriate suction/irrigation instruments.
Use of the device in fields other than those
indicated above is not allowed for safety reasons.
The ENDOMAT
with tubing cartridges or tubing sets and
accessories which have been designated as
suitable for the device by KARL STORZ.
3
The following serious defects may arise in particular:
• Inadequate grip on the tube connectors means a
loss of sterility and may lead to the device being
damaged by ingress of liquid.
• Premature breakage of the pump tube segment
and consequent loss of sterility and damage to
the device caused by ingress of liquid.
• Display of an incorrect actual irrigation rate due
to deviations in tube diameter.
3
SELECT is a roller pump which is
®
SELECT may only be operated
WARNING: No responsibility for the safe
operation of the device can be accepted
if any tubing system other than those
specified are used.
WARNING: No modification of this
equipment is allowed.
La ENDOMAT® SELECT es una bomba de rodillos,
la cual está prevista para utilizarse como bomba
de irrigación o de succión en intervenciones
diagnósticas o terapéuticas. La aplicación se
efectúa con instrumentos específicos de succión e
irrigación.
Por motivos de seguridad, no está permitida la
utilización del aparato de forma diferente de la arriba
indicada.
La ENDOMAT
utilizada con los cartuchos / sets de tubos flexibles
y las piezas accesorias que KARL STORZ haya
indicado como idóneos para este equipo.
Pueden producirse los siguientes fallos graves:
• Apoyo insuficiente en los conectores del tubo
flexible, lo que supone la pérdida de esterilidad y
puede ocasionar deterioros en el aparato debido
a la infiltración de líquido.
• Rotura del segmento de tubo flexible de la bomba
en un estadio temprano, así como la consiguiente
pérdida de esterilidad y deterioro del aparato
debido a la infiltración de líquido.
• Indicación de un flujo de bombeo real erróneo
debido a desviaciones en el diámetro del tubo
flexible.
®
SELECT solamente puede ser
CUIDADO: En el caso de utilizarse otros
sistemas de tubos fl exibles diferentes a los
3
prescritos, no se podrá asumir ninguna
garantía en cuanto a la seguridad de
funcionamiento del equipo.
CUIDADO: No está permitido realizar
modifi cación alguna en el aparato
3
electromédico (EM).
12

Sicherheitshinweise Instrucciones de seguridadSafety instructions
6. 3 Qualifikation des Anwenders
Der ENDOMAT® SELECT darf nur von Ärzten und
medizinischem Assistenzpersonal angewendet
werden, die über eine entsprechende fachliche
Qualifikation verfügen und am Gerät eingewiesen
sind.
6. 4 Einweisung in die
Gerätefunktion und Bedienung
Die Einweisung darf nur durch solche Personen
erfolgen, die aufgrund ihrer Kenntnisse dazu
geeignet sind.
Die zuständige Gebietsvertretung oder der
zuständige KARL STORZ Vertreter steht für die
Einweisung bei Ihnen und für Auskunft über weitere
Schulungsalternativen zur Verfügung.
6. 5 Patientenpopulation
6. 5. 1 SURG, URO, ART, SPINE, ENT/NEURO,
GI, VET
Geschlecht: irrelevant
Alter: irrelevant
Gewicht: irrelevant
Nationalität: irrelevant
Gesundheitszustand: entsprechend der
Einschätzung des Arztes geeignet für die
Behandlung
6. 5. 2 GYN
Geschlecht: weiblich
Alter: irrelevant
Gewicht: irrelevant
Nationalität: irrelevant
Gesundheitszustand: entsprechend der
Einschätzung des Arztes geeignet für die
Behandlung
6. 3 User qualification
The ENDOMAT® SELECT may only be used by
physicians and medical assistants who have a
correspond ing specialized qualification and who
have been instructed in use of the device.
6. 4 Training in the operation and
function of the device
Training should only be provided by persons
equipped to do so on the basis of their skills.
Your local representative or responsible
KARL STORZ member of staff is available to
provide training on your premises and to give you
information about further training options.
6. 5 Patient profile
6. 5. 1 SURG, URO, ART, SPINE, ENT/NEURO,
GI, VET
Gender: irrelevant
Age: irrelevant
Weight: irrelevant
Nationality: irrelevant
State of health: suitable for endoscopic
interventions, in the physician's judgment
6. 5. 2 GYN
Gender: female
Age: irrelevant
Weight: irrelevant
Nationality: irrelevant
State of health: suitable for endoscopic
interventions, in the physician's judgment
6. 3 Cualifi cación del usuario
La ENDOMAT® SELECT solo puede ser empleada
por médicos y personal de asistencia médica
que dispongan de una cualificación profesional
adecuada y que hayan recibido instrucciones sobre
la utilización del aparato.
6. 4 Formación acerca de las funciones delaparatoysu manejo
Únicamente las personas que por sus
conocimientos estén capacitadas para ello deben
encargarse de impartir la instrucción en el manejo
del aparato.
Su representante local o el responsable
correspondiente de KARL STORZ están
gustosamente a su disposición para impartir
esta instrucción en las instalaciones que usted
determine y para proporcionarle información
respecto a otras alternativas de formación.
6. 5 Población de pacientes
6. 5. 1 SURG, URO, ART, SPINE, ENT/NEURO,
GI, VET
Sexo: irrelevante
Edad: irrelevante
Peso: irrelevante
Nacionalidad: irrelevante
Estado de salud: adecuado para la aplicación,
según la evaluación del médico
6. 5. 2 GYN
Sexo: femenino
Edad: irrelevante
Peso: irrelevante
Nacionalidad: irrelevante
Estado de salud: adecuado para la aplicación,
según la evaluación del médico
13

Sicherheitshinweise Safety instructions
Instrucciones de seguridad
6. 6 Vorgesehene Einsatzgebiete
am Patienten
SURG: Abdomen, Thorax, Prokto
GYN: Uterus
URO: unterer und oberer Harntrakt
ART: Gelenke in Fuß, Knie, Hüfte,
Schulter, Hand oder Finger
SPINE: Thorakale und lumbale Wirbelsäule
ENT/NEURO: Linsenreinigung bei endoskopisch
assistierter FESS-Chirurgie sowie
bei endoskopisch assistierter Mikro-
Neurochirurgie, und transnasaler
Hypophysen-Chirurgie
GI: oberer und unterer
Gastrointestinaltrakt
6. 6 Intended region of treatment
onthe patient
SURG: Abdomen, thorax, pelvis
GYN: Uterus
URO: Upper and lower urinary tract
ART: Joints in the foot, knee, hips,
shoulder, hand and finger
SPINE: Thoracic and lumbar vertebral
column
ENT/NEURO: Lens cleaning with endoscopically
assisted FESS surgery as well
as with endoscopically assisted
microneurosurgery and transnasal
pituitary gland surgery
GI: Upper and lower gastrointestinal
tract
6. 6 Zonas previstas de aplicación
en el paciente
SURG: abdomen, tórax, proctología
GYN: Útero
URO: Tracto urinario inferior y superior
ART: Articulaciones en el pie, rodilla,
cadera, hombro, mano o dedos de
la mano
SPINE: Columna torácica y lumbar
ENT/NEURO: Limpieza de las lentes en cirugía
FESS asistida endoscópicamente,
así como en microneurocirugía
asistida endoscópicamente y en
cirugía de la hipófisis transnasal
GI: Tracto gastrointestinal superior e
inferior
14

Sicherheitshinweise Instrucciones de seguridadSafety instructions
6. 7 Anwenderprofil Arzt und
Assistenzpersonen
Anerkannte medizinische Grundkenntnisse der
Anwendung (Facharzt, medizinische Fachkraft)
Ausreichende Auffassungsgabe zur rationalen
Beurteilung der aktuellen Situation
Vertrautheit im Umgang mit technischen Apparaten
Ausreichende Kenntnisse einer der vom Gerät und
der Gebrauchsanweisung verwendeten Sprache
Mindestens eine umfassende Einweisung in die
Bedienung des Geräts
Keine körperlichen Behinderungen die eine
Wahrnehmung von akustischen oder optischen
Signalen beeinträchtigen oder verhindern.
6. 8 Vorgesehene
Einsatzbedingungen
6. 8. 1 Gebrauch
Das Gerät ist für den Einsatz in Kliniken und
Praxen vorgesehen. Die technischen Daten
und Umgebungsbedingungen sind in der
Gebrauchsanweisung beschrieben.
6. 8. 2 Weitere vorgesehene Bedingungen
Verwendungshäufigkeit: ein bis mehrmals täglich
Gebrauchsdauer: von mehreren Minuten bis zu
mehreren Stunden täglich
Aufstellungsort: Positionierung auf einer ebenen,
vibrationsfreien Unterlage
Beweglichkeit: kann, wenn auf einem Wagen
positioniert, bewegt werden
Kombination: kann mit anderen für die Operationen
notwendigen Geräten gleichzeitig am Patienten
eingesetzt werden
Steuerung: kann über den KARL STORZ-SCB
angesteuert werden.
6. 7 User profile of physician and
assistants
Training: recognized medical skills in the field of
application (specialist physician, qualified medical staff)
Intelligence: adequate powers of comprehension to
rationally assess the situation in hand
Ability to act: familiarity with the use of technical
apparatus
Language: Suitable command of one of the languages
used by the device and in the instruction manual.
Experience: at least one comprehensive session of
training in the use of the device.
Impairments: no physical impairment which makes
it difficult or impossible to perceive acoustic or visual
signals.
6. 8 Intended conditions of use
6. 8. 1 Use
The device is intended for use in clinics and
practices. The technical data and ambient
conditions are described in the instruction manual.
6. 8. 2 Other intended conditions
Frequency of use: one or more times a day
Length of use: from a few minutes to several hours
a day.
Place of installation: Positioning on a level, vibration-
free surface
Mobility: can be moved if positioned on a cart
Combination: can be used on the patient at the
same time as other equipment required for the
operations
Control: can be controlled via the KARL STORZSCB.
6. 7 Perfi l de usuario del médico y
del personal auxiliar
Conocimientos médicos convalidados de la
aplicación (médico especialista, personal médico
especializado)
Facultad de comprensión suficiente para una
evaluación racional de la situación actual
Familiaridad con el manejo de aparatos técnicos
Conocimientos suficientes de uno de los
idiomas utilizados por el aparato y el Manual de
instrucciones
Como mínimo, una instrucción exhaustiva en el
manejo del aparato
Ausencia de impedimentos físicos que puedan
menoscabar o impedir la percepción de señales
visuales o acústicas.
6. 8 Condiciones previstas de
aplicación
6. 8. 1 Empleo
El aparato está previsto para su aplicación en
clínicas y consultorios médicos. Los datos técnicos
y las condiciones ambientales están descritos en el
Manual de instrucciones.
6. 8. 2 Otras condiciones previstas
Frecuencia de uso: de una a varias veces al día
Duración de la aplicación: desde varios minutos
hasta varias horas al día
Lugar de emplazamiento: posicionamiento sobre
una superficie plana, sin vibraciones
Movilidad: puede ser desplazado si está colocado
sobre una unidad móvil
Combinación: puede utilizarse en el paciente
simultáneamente con otros aparatos necesarios
para la intervención quirúrgica
Control: puede controlarse a través del
KARL STORZ-SCB
15
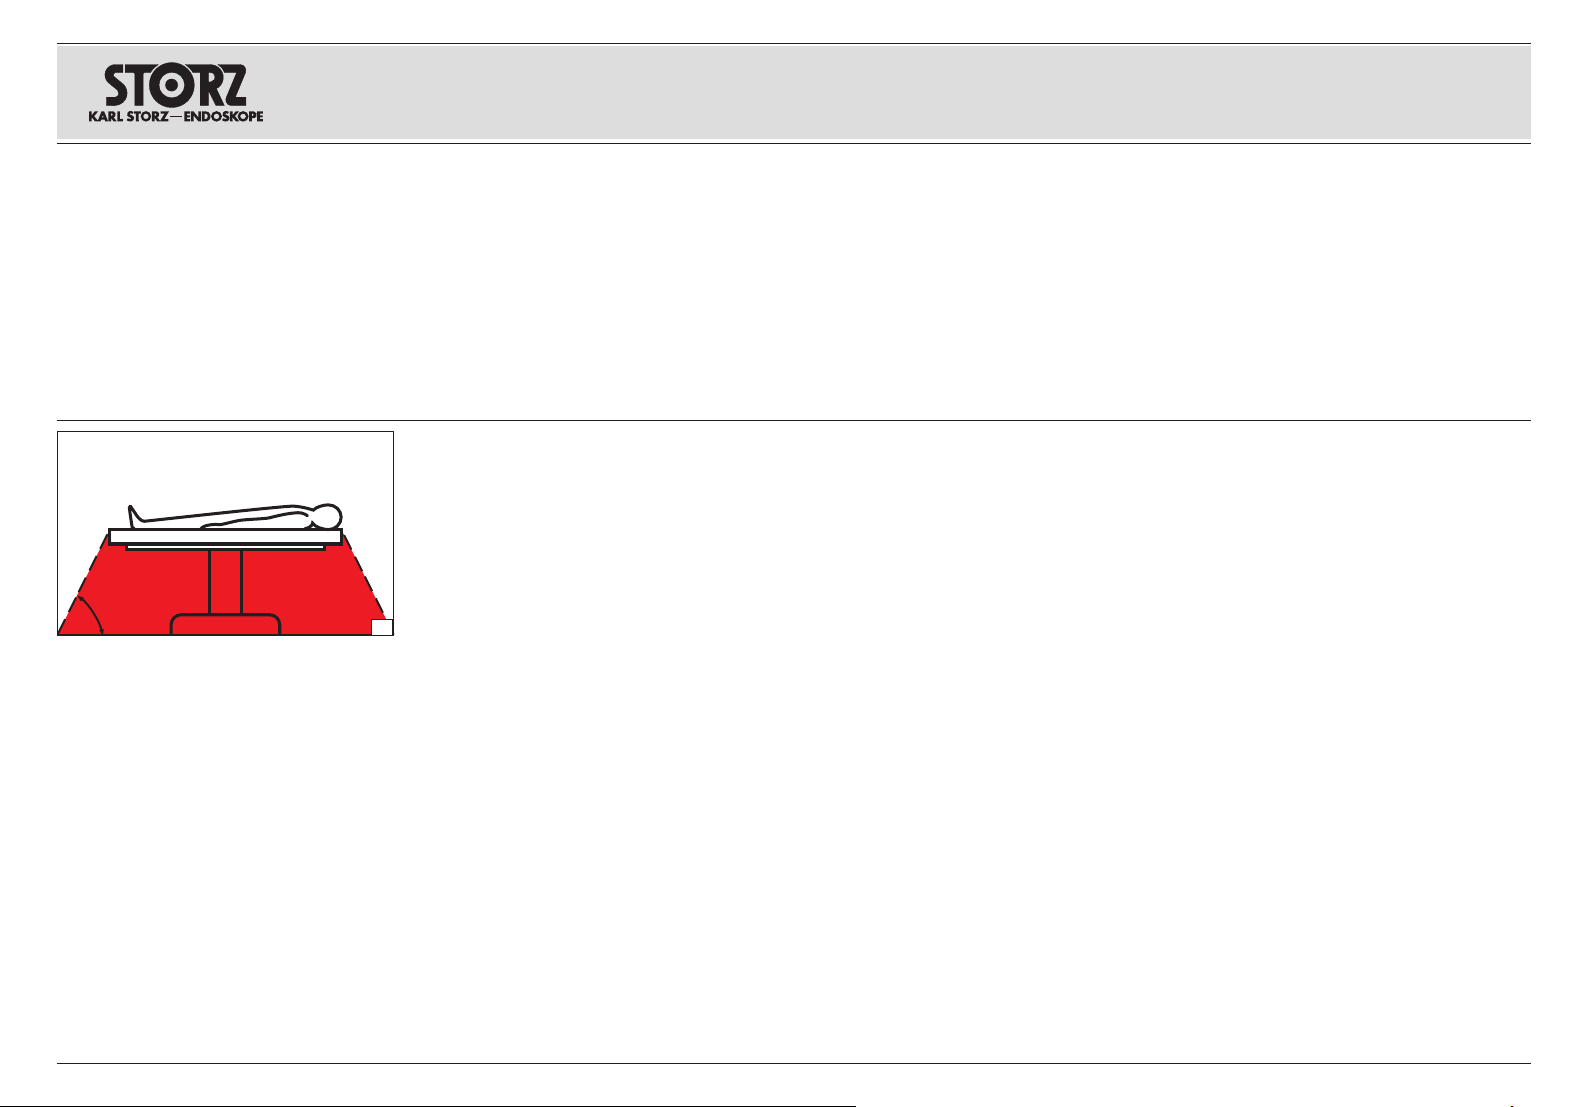
Sicherheitshinweise Instrucciones de seguridadSafety instructions
60°
6. 9 Position des Anwenders
Für die Bedienung des Geräts steht der Anwender
innerhalb eines Sichtkegels mit Öffnungswinkel
von ±45° vor dem Gerät in einer Distanz von ca.
30 – 70 cm zur Frontplatte.
Für die Beobachtung der Ist-Werte während der
Anwendung wird von einer Sichtdistanz zum Gerät
von 2 m ausgegangen (die Schlauchlänge beträgt
2 m).
6. 10 Sicherheitsmaßnahmen
am Aufstellort
Das Gerät darf nur in medizinisch genutzten
Räumen benutzt werden, deren elektrische Anlagen
nach den national gültigen Vorschriften installiert
sind.
WARNUNG: Verwenden Sie das Gerät
NICHT, wenn sich zündfähige Narkosegase
3
in der unmittelbaren Umgebung des Geräts
3
befinden.
WARNUNG: Das Gerät ist nicht für
den Betrieb in explosionsgefährdeten
3
Bereichen bestimmt. Bei Verwendung
von explosionsfähigen Narkosegasen
darf das Gerät nicht in der dargestellten
Gefahrenzone betrieben werden (Abb.3).
WARNUNG: Das Gerät darf nicht in
sauerstoffangereicherter Umgebung
3
eingesetzt werden.
Dieses gilt auch für leicht brennbare und explosionsfähige Chemikalien, z. B. Hautdesinfektions- und
Flächen schnell desinfektions mittel.
Das Gerät ist mit einer Steckvorrichtung für
den Potentialausgleich ausgerüstet. Diese nach
Maßgabe der national gültigen Vorschriften
anschließen.
6. 9 User position
For operation, the user should always be standing
in front of the device within a 'cone of vision' with
an opening angle of ±45° at a distance of approx.
30 – 70 cm to the front panel.
For observation of the actual values during the
application, a visual distance from the device of 2 m
is assumed (the tube length is 2 m).
6. 10 Safety precautions at
the siteofinstallation
The device may only be used in medical rooms in
which the electrical equipment has been installed in
accordance with applicable national regulations.
WARNING: DO NOT use the device in the
presence of flammable anesthetics.
3
WARNING: The device is not intended for
use in potentially explosive zones. Do not
3
operate the device within the demarcated
hazard zone while explosive anesthetic
gases are in use (Fig.3).
WARNING: The device must not be used
in oxygenated environments.
3
This also applies for easily combustible and
explosive chemicals, e.g. skin disinfectants and
fast-acting surface disinfectants.
The device is equipped with a connector for
attaching a ground line. It should be connected
up in accordance with the applicable national
regulations.
6. 9 Posición del usuario
Para el manejo del aparato, el usuario está dentro
de un cono visual con un ángulo de abertura de
±45°, delante del aparato, a una distancia de aprox.
30 a 70 cm con respecto a la placa frontal.
Para la observación de los valores reales durante
la aplicación, se presupone una distancia visual
de 2 m hasta el aparato (la longitud de los tubos
flexibles alcanza 2 m).
6. 10 Medidas de seguridad en el
lugar de emplazamiento
El equipo solo podrá ser utilizado en espacios
médicos cuya instalación eléctrica haya sido
efectuada de acuerdo con las normas nacionales
vigentes.
CUIDADO: NO utilice el aparato si existen
gases anestésicos infl amables en las
3
inmediaciones del aparato.
CUIDADO: El producto no está previsto
para ser utilizado en áreas expuestas a
3
posibles explosiones. Si se emplean gases
anestésicos explosivos, no podrá utilizarse
el aparato en las zonas califi cadas como
peligrosas por este motivo (fi g.3).
CUIDADO: El aparato no debe ser utilizado
en un ambiente enriquecido con oxígeno.
3
Esto es válido también para productos químicos
fácilmente inflamables y explosivos tales como,
p. ej., productos para desinfección de la piel y
desinfectantes rápidos para superficies.
El equipo está provisto de un enchufe para
conexión equipotencial. La conexión ha de
efectuarse de acuerdo con las normativas
nacionales vigentes.
16

Sicherheitshinweise Instrucciones de seguridadSafety instructions
6. 11 Sicherheitsmaßnahmen beim
Einsatz des Geräts
Der Anwender hat sich vor der Anwendung
des Geräts von der Funktionssicherheit und
dem ordnungsgemäßen Zustand des Geräts zu
überzeugen.
Während der Behandlung mit dem ENDOMAT
SELECT muss der Patient mit der üblichen
medizinischen Sorgfalt be handelt und beobachtet
werden. Dies schließt die Verlaufskontrolle des
Be hand lungs vorgangs, die Überwachung der
Vitalwerte und der Narkose mit ein.
Jeder Behandlungsvorgang darf nur durchgeführt
werden, wenn die visuelle Beobachtung der
Gerätewirkung sichergestellt ist.
®
6. 12 Sicherheitseinrichtungen
Der ENDOMAT® SELECT verfügt über folgende
Sicherheitseinrichtungen:
6. 12. 1 Selbstprüfung
Die Selbstprüfung wird bei jedem Einschalten des
Geräts durchgeführt. Fällt einer der Tests negativ
aus, wird eine entsprechende Fehlermeldung
angezeigt.
6. 12. 2 Test des Touch-Displays
Nach dem Einschalten der Versorgungsspannung
wird ein KARL STORZ Logo mit dem Gerätenamen
für ein paar Sekunden, abhängig von der Ladezeit
des Betriebssystems, angezeigt (Abb. 4).
6. 11 Safety precautions when
operating the device
It is the user’s responsibility to make sure the device
is safe and operates properly before using it.
During treatment with the ENDOMAT
patient must be treated and kept under observation
with the usual medical care. This includes keep ing
a check on the progress of treatment, as well as
monitoring the vital levels and the anesthetic effects.
Any treatment may only be performed if visual
observation of the device is ensured.
®
SELECT the
6. 12 Safety features
The ENDOMAT® SELECT is equipped with the
following safety features:
6. 12. 1 Self-test
A self-test is performed each time the device
is switched on. If any of the tests is negative, a
corresponding error message is displayed.
6. 12. 2 Testing the touch display
After switching on the supply voltage, a
KARL STORZ logo with the device name is
displayed for a few seconds, depending on the
loading time of the operating system (Fig. 4).
6. 11 Medidas de seguridad durante
el empleo del equipo
El usuario ha de cerciorarse de la seguridad de
funcionamiento y el buen estado del aparato antes
de cada aplicación.
Durante el tratamiento con la ENDOMAT
el paciente ha de ser tratado y observado con los
cuidados médicos habituales. Esto incluye los
controles de desarrollo del tratamiento, así como la
vigilancia de los valores vitales y anestésicos.
Cada procedimiento de tratamiento solo podrá ser
llevado a cabo si está garantizado el control visual
de los efectos del aparato.
®
SELECT,
6. 12 Dispositivos de seguridad
La ENDOMAT® SELECT dispone de los siguientes
dispositivos de seguridad:
6. 12. 1 Test automático de funcionamiento
El test de funcionamiento se efectúa
automáticamente cada vez que se conecta el
aparato. En caso de que uno de estos tests dé un
resultado negativo, se muestra un mensaje de error
a este respecto.
6. 12. 2 Test de la pantalla táctil
Después de conectar la tensión de alimentación,
aparece un logotipo de KARL STORZ con el
nombre del aparato durante un par de segundos,
independientemente del tiempo de carga del
sistema operativo (fig. 4).
17
4
6. 12. 3 Kontrolle des Spüldrucks
Eine elektronische Sicherheitsschaltung blockiert
die Förderung bei anhaltender Überschreitung des
maximal einstellbaren Sollwerts um 20 mmHg.
6. 12. 3 Monitoring the irrigation pressure
An electronic safety circuit blocks the supply if the
maximum adjustable target value is persistently
exceeded by 20 mmHg.
6. 12. 3 Control de la presión de irrigación
Un circuito electrónico de seguridad bloquea el
transporte en caso de excederse en 20 mmHg
de forma persistente el valor nominal máximo
ajustable.

Aufstellen und
Bedienungshinweise
Installation and
operating instructions
Montaje e
instrucciones operativas
7. Aufstellen und
Bedienungshinweise
7. 1 Auspacken
Entnehmen Sie den ENDOMAT® SELECT und das
Zubehör vorsichtig der Verpackung. Überprüfen Sie
die Lieferung auf Vollständigkeit und auf eventuelle
Beschädigungen. Sollte die Lieferung Anlass zur
Reklamation geben, so wenden Sie sich bitte
umgehend an den Hersteller oder Lieferanten.
Wenn möglich, bewahren Sie die Originalverpackung auf, sie kann bei einem Transport des
Geräts nützlich sein.
7. 2 Grundausstattung
KARL STORZ Set-Nr.: UP 210
1 ENDOMAT
1 Netzkabel 400 A, Länge 300 cm
1 Gebrauchsanweisung
1 Schutzhülle für Gebrauchsanweisung
HINWEIS: Je nach installiertem
1
Softwarepaket kann der Funktionsumfang
des Geräts unterschiedlich sein. Notwendiges
Zubehör für die jeweiligen Softwarepakete ist
im Kapitel 10.2. aufgeführt.
7. 3 Aufstellen des Geräts
HINWEIS: Der ENDOMAT® SELECT sowie
1
angeschlossenes Zubehör darf in medizinisch
genutzten Räumen nur benutzt werden, wenn
deren elektrische Anlagen nach den national
gültigen Vorschriften installiert sind.
®
SELECT UP 210
7. Installation and
operating instructions
7. 1 Unpacking the equipment
Carefully unpack the ENDOMAT® SELECT and
remove the device and its accessories from their
packaging. Check for missing items and evidence
of shipping damage. File any complaints with the
manufacturer or sup plier immediately.
If possible, retain the original packing materials for
later use; these can come in handy if the device has
to be transported.
7. 2 Basic equipment
KARL STORZ Set No.: UP 210
1 ENDOMAT
1 Power cord 400 A, length 300 cm
1 Instruction manual
1 Wallet for instruction manual
NOTE: Depending on the installed software
1
package, the range of functions can vary.
Necessary accessories can be looked up in
chapter 10.2.
7. 3 Installation
NOTE: The ENDOMAT® SELECT including
1
the acces so ries connected may only be
used in medical rooms in which the electrical
equipment has been installed in accordance
with applicable national regulations.
®
SELECT UP 210
7. Montaje e
instruccionesoperativas
7. 1 Desembalaje
Extraiga cuidadosamente la ENDOMAT® SELECT y
los accesorios fuera del embalaje. Revise si el envío
está completo y no ha sufrido ningún deterioro. En
caso de reclamaciones, diríjase inmediatamente al
fabricante o al proveedor.
Es recomendable guardar el embalaje original para
volver a utilizarlo en un posible transporte posterior
del aparato.
7. 2 Equipamiento básico
N.º de set de KARL STORZ: UP 210
1 ENDOMAT
1 Cable de red 400 A, longitud 300 cm
1 Manual de instrucciones
1 Funda de protección para el Manual de
instrucciones
NOTA: Dependiendo del paquete de software
1
instalado, la gama de funciones puede
variar. Los accesorios necesarios los puede
encontrar en el capítulo 10.2.
7. 3 Montaje del equipo
NOTA: La ENDOMAT® SELECT, así como
1
los accesorios conectados, solo podrán
usarse en espacios médicos cuya instalación
eléctrica haya sido efectuada de acuerdo con
las normas nacionales de seguridad vigentes.
®
SELECT UP 210
18
1. Gerät auf eine horizontale, ebene Fläche stellen
(Abb. 5).
WARNUNG: Das Gerät muss so aufgestellt
werden, dass das Netzkabel jederzeit
3
einfach gezogen werden kann.
WARNUNG: Das Gerät ist nur vollständig
von der Netzspannung getrennt, wenn der
3
Netzstecker abgezogen ist.
5
1. Set the device on a horizontal, flat surface
(Fig.5).
WARNING: The device must be set up in
such a way that the power cord can be
3
simply pulled out at any time.
WARNING: The line voltage to the device
is only definitively disconnected once the
3
power plug has been unplugged.
1. Coloque el aparato en posición horizontal sobre
una superficie plana (fig.5).
CUIDADO: El aparato debe instalarse
de modo tal, que pueda desenchufarse
3
tirando del cable de red en todo momento
y sin difi cultad.
CUIDADO: El aparato solo está
completamente desconectado de la
3
corriente eléctrica cuando se haya extraído
el enchufe de la red.
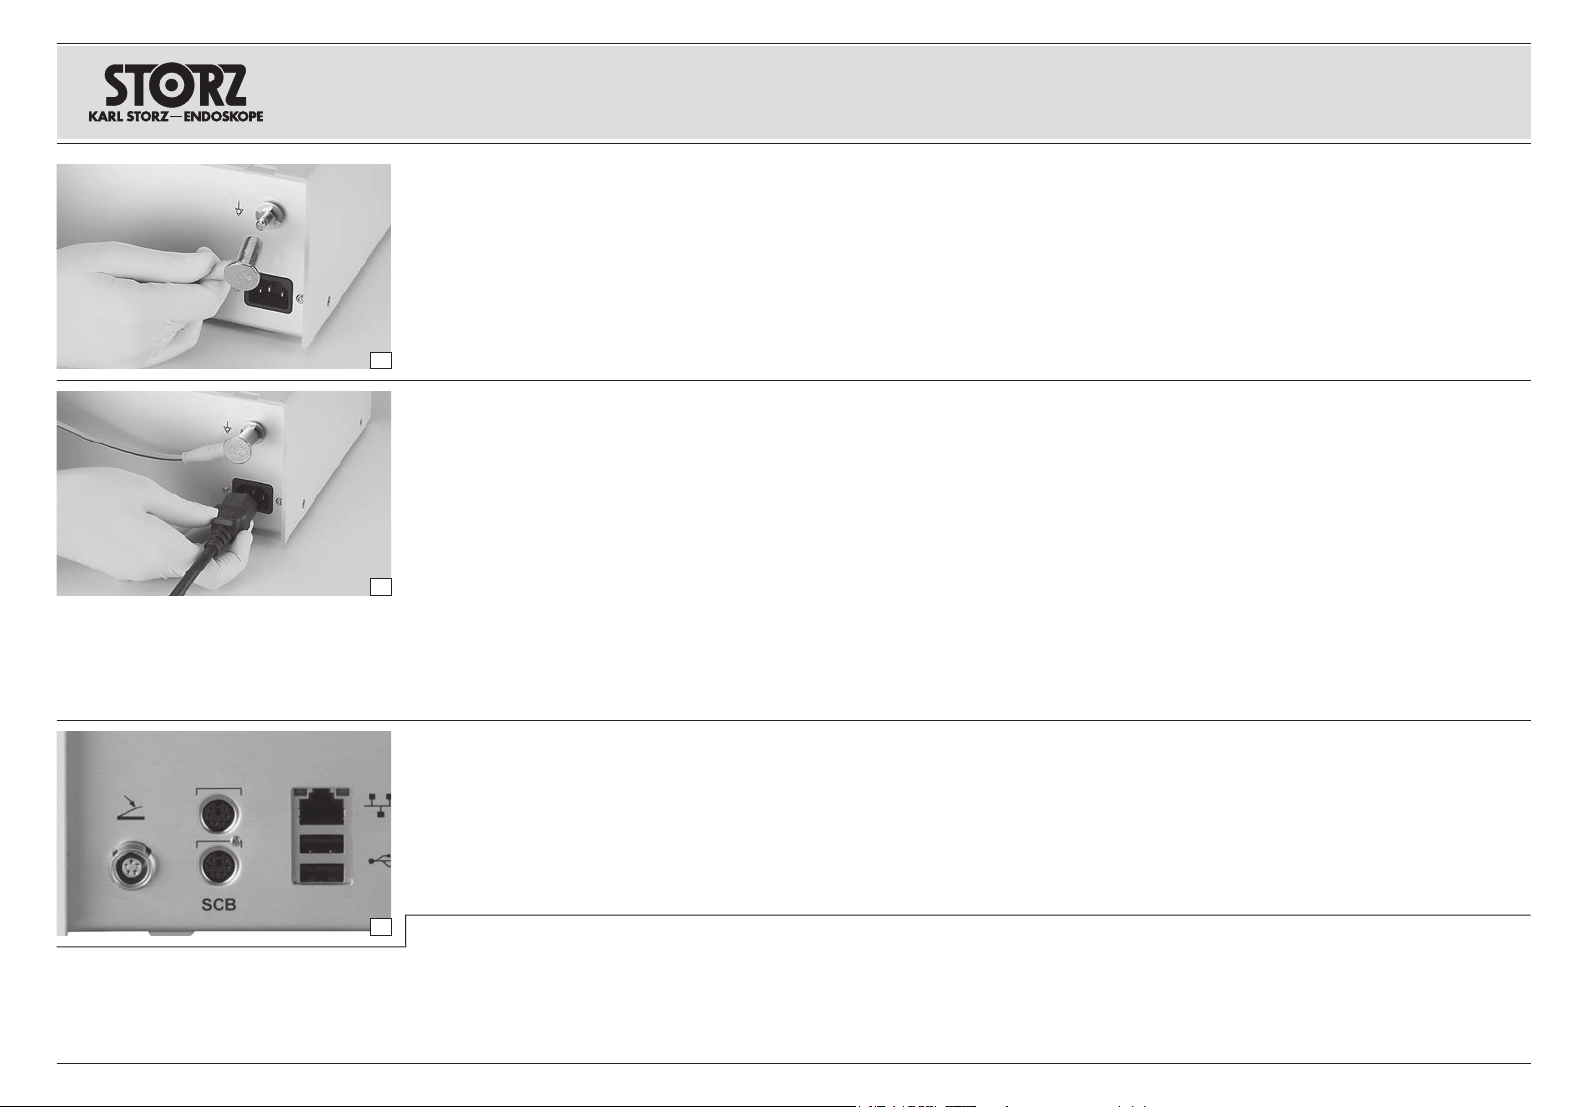
Aufstellen und
Bedienungshinweise
Installation and
operating instructions
Montaje e
instrucciones operativas
WARNUNG: Das Gerät ist mit einer
Steckvorrichtung für den Potentialausgleich
3
ausgerüstet. Führen Sie den
Potentialausgleich nach Maßgabe der
national gültigen Vorschriften durch.
2. Das Potentialausgleichskabel an die
Steckvorrichtung für den Potentialausgleich {
anschließen.
3. Lassen Sie die Erdung ggf. durch sachkundiges
Personal durchführen (Abb. 6).
6
WARNUNG: Nur das von KARLSTORZ
gelieferte Netzkabel oder ein entsprechen-
3
des, mit nationalem Prüfzeichen
ausgestattetes Netzkabel verwenden.
Netzkabel anschließen, Netzstecker bis zum
Anschlag in Netzbuchse P einschieben (Abb. 7).
WARNUNG: Gerät nur mit der auf dem
Typenschild angegebenen Netzspannung
3
betreiben.
WARNUNG: Netzstecker nur außerhalb
7
explosionsgefährdeter Bereiche mit der
3
Stromversorgung verbinden bzw. trennen.
WARNUNG: Das Gerät ist nur dann
zuverlässig geerdet, wenn es an einer
3
einwandfrei installierten SchutzkontaktSteckdose angeschlossen ist.
Gegebenenfalls Fußschalter oder Steuerkabel
UP 006 für Kombination mit UNIDRIVE® S III
ARTHRO oder Steuerkabel 20 7010 70 für
Kombination mit CALCUSON bzw. UNIDRIVE® S III
anschließen (Abb. 8).
WARNING: The device is equipped with
a connector for attaching a ground line.
3
Carry out potential equalization as per the
applicable national regulations.
2. Connect the potential equalization cable to the
potential equalization connector {.
3. Where necessary, have grounding performed by
qualified personnel (Fig.6).
WARNING: The device may only be
operated with the power cable delivered
3
by KARLSTORZ or a similar power cable
which has a national inspection seal.
Connect power cord and insert the pow er plug fully
into the power cord receptacle P (Fig. 7).
WARNING: Only operate the device with
the voltage stated on the manufacturer´s
3
identification plate.
WARNING:
power plug to/from the power supply outside
3
of areas subject to explosion hazards.
WARNING: Grounding reliability can only
be achieved when the device is connected
3
to a properly installed ‘Hospital only’ or
‘Hospital Grade’ receptacle (i.e. approved
for use in an operating room).
If necessary, connect the footswitch or control
cable UP 006 for combination with UNIDRIVE®
S III ARTHRO or control cable 20 7010 70 for
combination with CALCUSON or UNIDRIVE® S III
(Fig. 8).
Only connect/disconnect the
ADVERTENCIA: El equipo está provisto
de un enchufe para conexión equipotencial.
3
Efectúe la conexión equipotencial de
acuerdo con las normativas nacionales
vigentes.
2. Conecte el cable para conexión equipotencial
en el enchufe{ previsto al efecto.
3. Es recomendable que la conexión a tierra sea
efectuada por un técnico experto en la materia
(fig.6).
CUIDADO: Utilice únicamente el cable de
red suministrado por KARLSTORZ o uno
3
de calidad equivalente que lleve la marca
de homologación nacional.
Conecte el cable de red, e introduzca el enchufe de
red hasta el tope en el conector de red P (fig. 7).
CUIDADO: Conecte a la red solo
con la tensión indicada en la placa de
3
especifi caciones.
CUIDADO: Conecte/desconecte el enchufe
de la red de alimentación de corriente
3
únicamente en zonas que no estén
expuestas a riesgo de explosión.
CUIDADO: La conexión a tierra de
este aparato es únicamente fi able si se
3
encuentra conectado a un enchufe con
puesta a tierra debidamente instalado.
Si es necesario, conecte el interruptor de pedal o
el cable de mando UP 006 para la combinación
con la UNIDRIVE
mando 20 7010 70 para la combinación con el
CALCUSON / la UNIDRIVE® S III (fig. 8).
®
S III ARTHRO o el cable de
19
8
WARNUNG: Der ENDOMAT® SELECT
ist nicht dafür vorgesehen mit anderen
3
Geräten über die USB- oder EthernetSchnittstelle verbunden zu werden.
Diese Schnittstellen sind nur dem
KARLSTORZ Service vorbehalten.
WARNING: The ENDOMAT® SELECT is
not intended to be connected to other
3
equipment via the USB or Ethernet
interface. These interfaces are exclusively
reserved for KARL STORZ service.
CUIDADO: La ENDOMAT® SELECT
no está prevista para ser conectada
3
con otros aparatos mediante la interfaz
USB o Ethernet. Estas interfaces están
reservadas exclusivamente para el
Servicio Técnico de KARL STORZ.
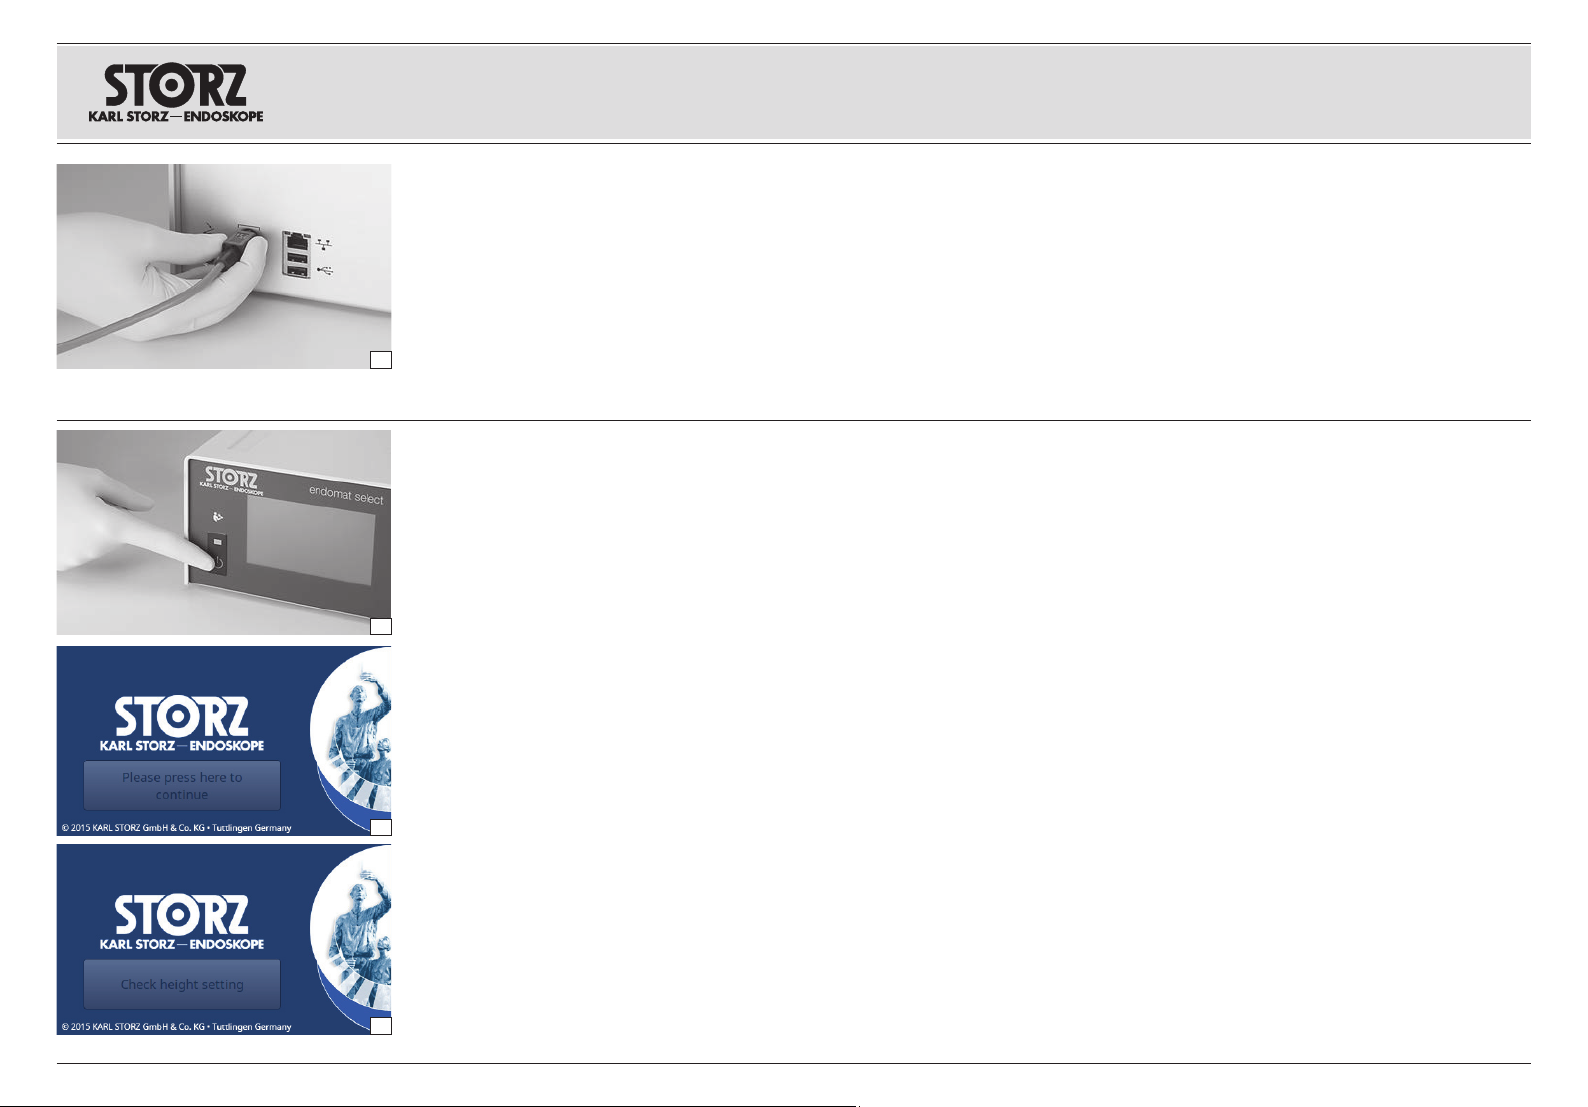
Aufstellen und
Bedienungshinweise
Installation and
operating instructions
Montaje e
instrucciones operativas
7. 4 KARLSTORZ-SCB
HINWEIS:
1
ziehen des SCB-Verbindungskabels zu ver hindern, besitzt der SCB-Stecker eine Schutzvorrichtung. Zum Ausstecken des SCB-Kabels
daher am Stecker ziehen, nicht am Kabel!
Das SCB-Kabel 20 0901 70 an eine der (gleichwertigen) SCB-Buchsen U auf der Rückseite des
Geräts anschließen (Abb. 9). Das andere Ende des
Kabels mit einem KARL STORZ-SCB Steuergerät
9
(KARL STORZ Communication Bus) oder wei teren
SCB-Geräten verbinden (siehe hierzu Gebrauchsanweisung KARL STORZ-SCB control NEO System).
Um ein versehentliches Heraus-
7. 5 Inbetriebnahme
Netzschalter Q einschalten (grüne Kontrollleuchte
leuchtet auf) (Abb. 10).
Das Gerät führt anschließend einen
Selbsttest durch, bei dem die verschiedenen
Systemkomponenten geprüft werden.
Fall a: nach Abschluss des Ladevorgangs erscheint
ein Startscreen mit der Schaltfläche »Please press
here to continue« (Abb. 11).
Fall b: nach Abschluss des Ladevorgangs
10
erscheint ein Startscreen mit der Schaltfläche
»Höheneinstellung überprüfen« (Abb. 12).
Im Fall b bestätigt der Anwender mit Betätigung
der Schaltfläche, dass die Position des Geräts
entsprechend der Einstellung der Höhendifferenz
ist (siehe Kapitel 7.15.1 Einstellungen –
Höhendifferenz).
HINWEIS: Mit der Bestätigung der Schaltflä-
1
che auf dem Startbildschirm (Abb. 11/12) ertönt ein akustisches Bereitschaftssignal, dass
11
12
zur Überprüfung des Alarmsystems dient.
WARNUNG: Aus Sicherheitsgründen darf
das Gerät nur verwendet werden, wenn un-
3
mittelbar nach Betätigung der Schaltfl äche
das Bereitschaftssignal zu hören war!
WARNUNG: Die Verwendung des
Advanced Softwarepakets bietet eine
3
Einstellung für Ausgleich des Höhenunterschieds zwischen dem Gerät und der Kavität. Diese Einstellung korrigiert die Druckmessung und -steuerung. Überprüfen Sie
die Einstellung nach dem Einschalten, um
unbeabsichtigten Überdruck zu vermeiden.
7. 4 KARLSTORZ-SCB
NOTE: To avoid mistakenly pulling out the
1
SCB connecting cable, the SCB connector
possesses a protection device. Therefore, to
unplug the SCB cable, pull out the connector
– do not pull directly on the cable!
Connect the SCB cable 20 0901 70 to an
(equivalent) SCB socket U on the back of the
device (Fig. 9). Connect the other end of the
cable to the KARL STORZ-SCB (KARL STORZ
Communication Bus) control device or other SCB
devices (see KARL STORZ-SCB control NEO
System Instruction Manual).
7. 5 Operating the device
Switch on the device at its power switch
(green indicator light illuminates) (Fig. 10).
The device will then conduct a self-test,
checking all system components for proper
operation.
Case A: Once charging is complete, a start screen
will appear, with the button: ‘Please press here to
continue’ (Fig. 11).
Case B: Once charging is complete, a start screen
will appear, with the button: ‘Check height setting’
(Fig. 12).
In Case B, the user presses the button to confirm
that the position of the device matches the height
difference setting (see Section 7.15.1 ‘Settings –
height difference’).
NOTE: When the button on the start screen is
1
pressed (Fig. 11/12), an acoustic ready signal
will sound in order to check the alarm system.
WARNING: For safety reasons, the device
may only ever be used if, immediately after
3
‘first click’, the acoustic availability signal
sounded!
WARNING: Using advanced software
package provides a setting for height
3
difference between the device and the
cavity. This setting corrects the pressure
measurement and control. Check the
setting after power on to avoid unintended
over pressure.
Q
7. 4 KARLSTORZ-SCB
NOTA: Con el fin de evitar extraer inadvertida-
1
mente el cable de conexión SCB, el enchufe
SCB está provisto de un dispositivo protector.
Para desconectar el cable SCB de la red, tire
por tanto del enchufe y no del cable.
Conecte el cable SCB 20 0901 70 a uno de los
conectores SCB U (equivalentes) de la parte posterior del aparato (fig. 9). Conecte el otro extremo del
cable con la unidad de control KARL STORZ-SCB
(KARL STORZ Communication Bus) o los otros aparatos SCB (véase para esto el Manual de instrucciones del sistema KARL STORZ-SCB control NEO).
7. 5 Puesta en marcha
Conecte el interruptor de red Q (ahora se ilumina la
lámpara piloto verde) (fig. 10).
A continuación, el aparato realiza un test
automático para la comprobación de los
diferentes componentes del sistema.
Caso a: Una vez finalizado el proceso de carga,
aparece una pantalla de inicio con el botón “Please
press here to continue” (Presione aquí para
continuar) (fig. 11).
Caso b: Una vez finalizado el proceso de carga,
aparece una pantalla de inicio con el botón “Check
height setting” (Comprobar ajuste de altura) (fig. 12).
En el caso b, el usuario presiona el botón para
confirmar que la posición del aparato corresponde
al ajuste de la diferencia de altura (véase el capítulo
7.15.1 Configuración – Diferencia de altura).
NOTA: Al presionarse el botón en la pantalla
1
de inicio (figs. 11/12) se emite una señal
acústica de estado dispuesto, que sirve para
comprobar el sistema de alarmas.
CUIDADO: Por razones de seguridad, el
aparato debe utilizarse únicamente si la
3
señal de estado dispuesto se ha emitido
inmediatamente después de presionarse
el botón.
CUIDADO: Al utilizar el paquete de software
“Advanced”, el usuario dispone de un ajuste
3
para compensar la diferencia de altura entre
el aparato y la cavidad. Este ajuste corrige
la medición y el control de la presión. Compruebe el ajuste después de la conexión a
fi n de evitar una sobrepresión involuntaria.
20
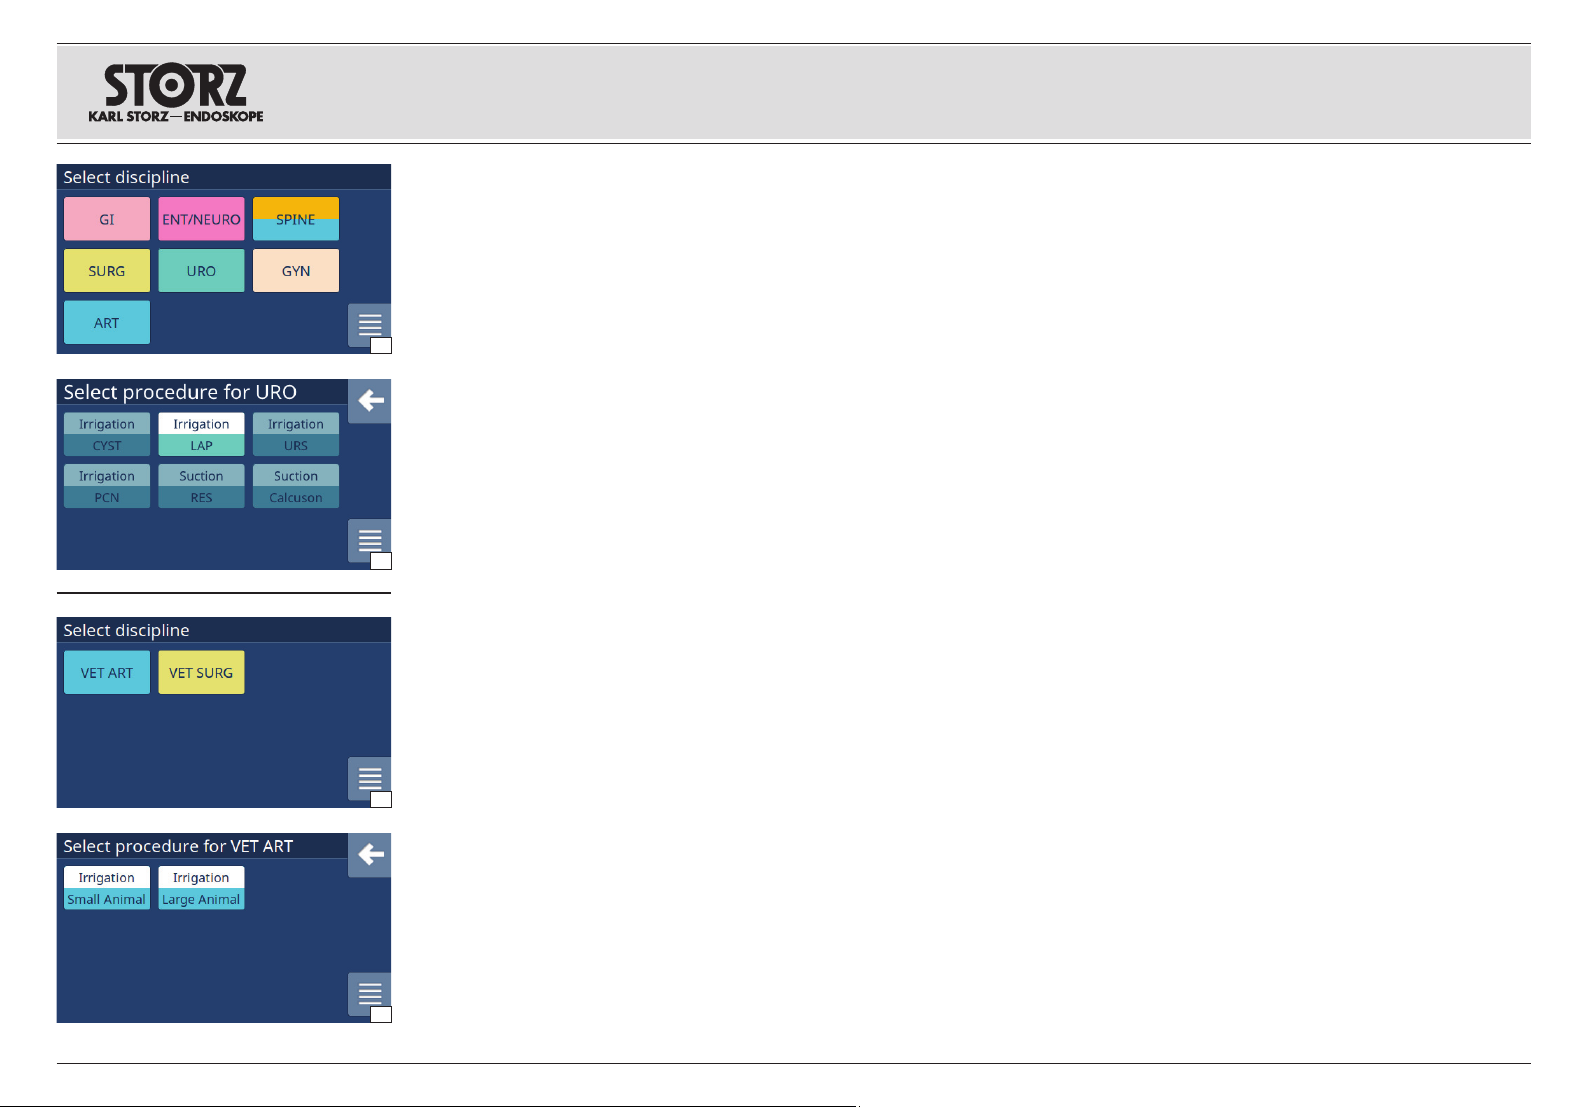
Aufstellen und
Bedienungshinweise
Installation and
operating instructions
Montaje e
instrucciones operativas
7. 6 Disziplin/Verfahren
7. 6. 1 Humanmedizin
Nach dem Aufstarten des Geräts erscheint der
Bildschirm zur Auswahl der Disziplin (Abb. 1).
Nach (beispielhaftem) Auswählen der Disziplin
URO erscheint der Bildschirm »Prozedur für
URO wählen« (Abb. 13).
7. 6. 2 Veterinärmedizin
1
Nach dem Aufstarten des Geräts erscheint der
Bildschirm zur Auswahl der Disziplin (Abb. 2).
Nach (beispielhaftem) Auswählen der Disziplin
VET ART erscheint der Bildschirm »Prozedur für
VET ART wählen« (Abb. 14).
HINWEIS: Wenn ein Schlauchset
1
ausgewählt wurde, welches nur die dann
hellen Prozeduren unterstützt, sind diese
13
»ausgegraut«.
Nach Wahl der gewünschten Prozedur wird
mittels einer Animation das Aufsetzen der
Schlauchkassette erklärt (siehe Abb. 15, Seite 22
oben).
7. 6 Discipline/procedure
7. 6. 1 Human medicine
After starting up the device, a screen is
displayed for the user to select the discipline
(Fig. 1).
After selecting the discipline URO, for example,
the screen ‘Select procedure for URO’ appears
(Fig. 13).
7. 6. 2 Veterinary medicine
After starting up the device, a screen is
displayed for the user to select the discipline
(Fig. 2).
After selecting the discipline VET ART, for
example, the screen ‘Select procedure for VET
ART’ appears (Fig. 14).
NOTE: If a tubing set was selected which then
1
only supports the light procedures, these are
grayed out.
Following selection of the desired procedure,
an animation explains how to insert the tubing
cartridge (see Fig.15, top of page22).
7. 6 Disciplina/procedimiento
7. 6. 1 Medicina humana
Una vez que el aparato haya arrancado, aparece
la pantalla de selección de la disciplina (fig. 1).
Al seleccionarse (por ejemplo) la disciplina URO,
aparece la pantalla “Seleccionar procedimiento
para URO” (fig. 13).
7. 6. 2 Medicina veterinaria
Una vez que el aparato haya arrancado, aparece
la pantalla de selección de la disciplina (fig. 2).
Al seleccionarse (por ejemplo) la disciplina
VET ART, aparece la pantalla “Seleccionar
procedimiento para VET ART” (fig. 14).
NOTA: Si se ha seleccionado un set de
1
tubos flexibles que entonces solo admite los
procedimientos claros, estos aparecerán de
color gris.
Una vez seleccionado el procedimiento que se
desee, se explica el montaje del cartucho de tubos
flexibles mediante una animación (véase la fig. 15,
pág. 22 arriba).
21
2
14
 Loading...