

Page 1
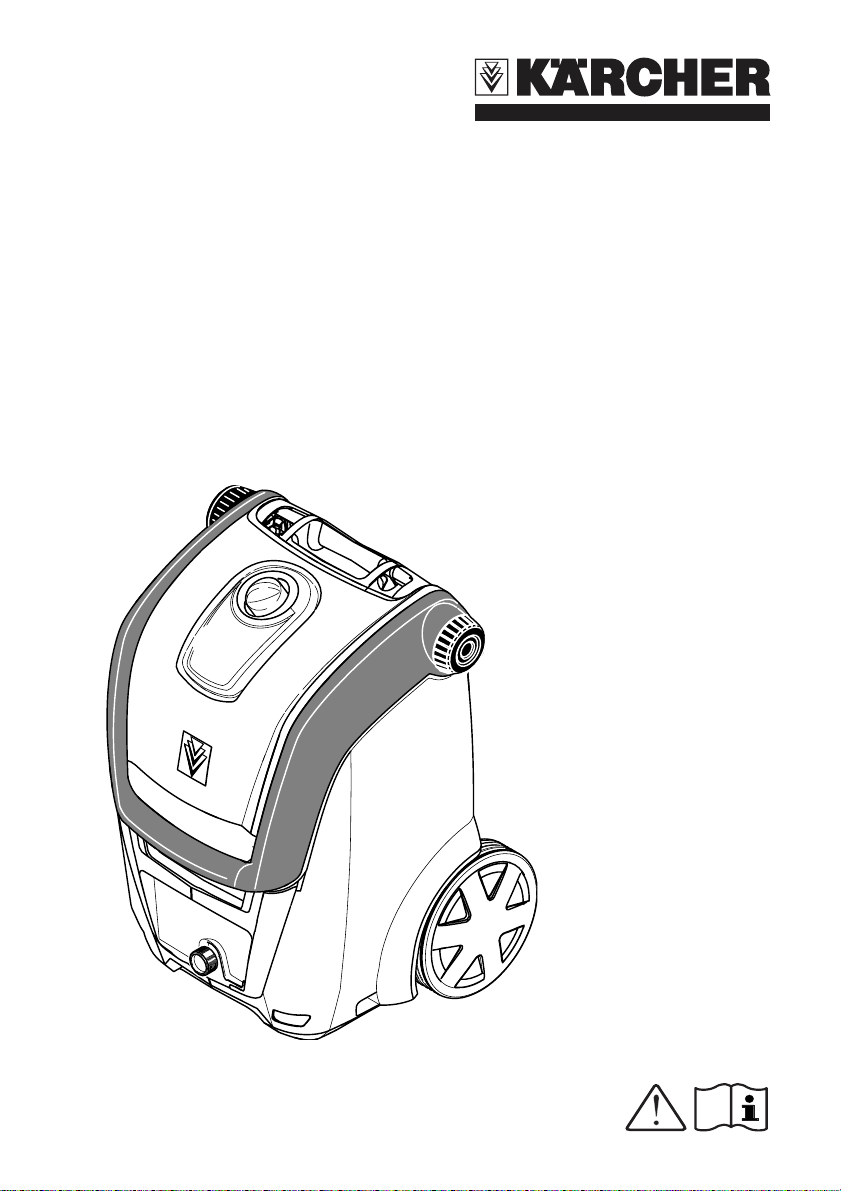
KB 4040
Please see notes on pages 2,3 and 7
regarding changes to be made.
Operating
Instructions
Before first use of the unit
read these operating
instructions and act in
accordance with them
5.961-608_03/05
Page 2
2
Page 3
Dear Customer,
Please read and comply with
these instructions prior to the
initial operation of your appliance. Retain these operating instructions for
future reference or for subsequent possessors.
Proper Use
This high-pressure cleaner is designed for
domestic use only:
– to clean machines, vehicles, buildings,
tools, facades, terraces, garden equipment etc. using a high-pressure water jet
(and detergents if required).
– with accessories, replacement parts and
detergents approved by Kärcher. Observe the instructions provided with
these detergents.
Environmental protection
The packaging material can be recycled. Please do not place the pakkaging into the ordinary refuse for
disposal, but arrange for the proper
recycling.
Old appliances contain valuable
materials that can be recycled.
Please arrange for the proper recycling of old appliances. Batteries,
oil, and similar substances must not
enter the environment. Please dispose of your old appliances using
appropriate collection systems.
Warranty
The terms of the guarantee applicable in
each country have been published by our respective national distributors. We will fix
possible faults on your unit free of charge
within the warranty period, insofar as the
faults are caused by material defects or defective workmanship. Guarantee claims
should be addressed to your dealer or the
nearest authorized customer service centre,
and supported by documentary evidence of
purchase.
Description of the Appliance
Definition of abbreviations used:
HP = High pressure
DT = Detergent
When unpacking the product, make sure
that no accessories are missing and that
none of the pakkage contents have been
damaged. If you detect any transport damages please contact your dealer.
The accessories, high pressure hose and
gun are included in the delivery and stored
within the appliance. The appliance comes
fully mounted, only the bearing wheels, the
handgun and the coupling element for the
water connection need to be assembled.
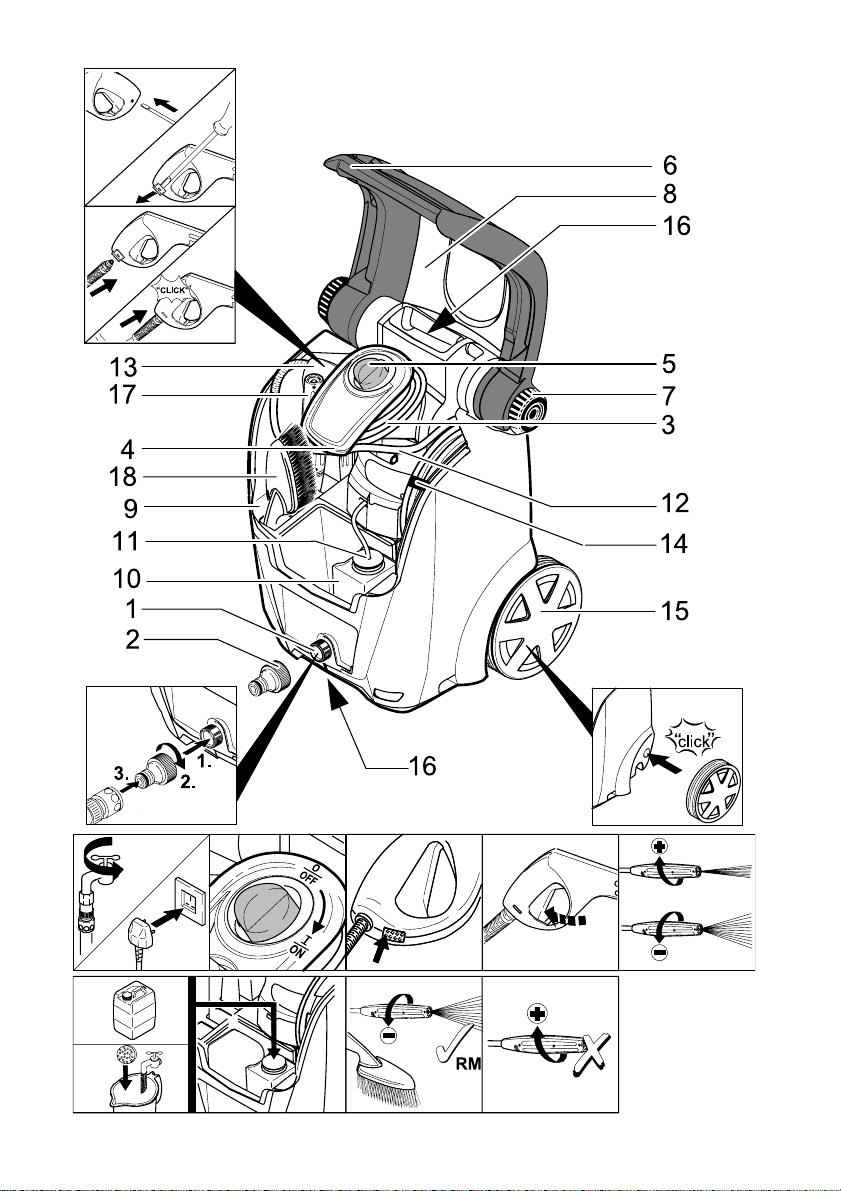
Illustrations on Page 2
1 Connection for water supply with filter
2 Coupling element for water connection
3 Power cord with plug
4 Storage, power cord
5 ON/OFF switch for appliance
6 Transport handle, retractable
7 Transport handle lock
8 Internal cover
9 Accessory mount
10 DT tank
11 DT suction hose with filter
12 DT metering regulator
13 HP hose
14 Handgun with safety catch
15 HP hose clip
16 Bearing wheel
17 Carrying handle
18 Spray lance with Variopower nozzle
19 Washing brush
3 English
Page 4
Safety instructions
Danger
! Never touch the mains plug and the
socket with wet hands.
! The appliance must not be used if the
power cord or important parts of the appliance, e.g. safety devices, high-pressure hoses, spray guns, are damaged.
! The appliance may not be used in areas
where a risk of explosion is present.
! If the appliance is used in hazardous ar-
eas (e.g. filling stations) the corresponding safety provisions must be observed.
! Check the power cord with mains plug
for damage before every use. If the power cord is damaged, please arrange immediately for the exchange by an
authorized customer service or a skilled
electrician.
! High-pressure jets can
be dangerous if improperly used. The jet may
not be directed at persons, animals, live electrical equipment
or at the appliance itself.
! The jet must not be directed at other per-
sons or directed by the user at him/herself to clean clothing or footwear.
! Never use the appliance to clean objects
containing hazardous substances (e.g.
asbestos).
! Vehicle tyres or tyre valves are suscepti-
ble to damage from the high-pressure jet
and may burst. The first indication of this
is a discolouration of the tyre. Damaged
vehicle tyres/tyre valves are highly dangerous. Ensure that a distance of at least
30 cm is observed when cleaning with
the jet!
! Never draw in fluids containing solvents
or undiluted acids and solvents! This includes petrol, paint thinner and heating
oil. The spray mist thus generated is
highly inflammable, explosive and poisonous. Do not use acetone, undiluted
acids and solvents as they are aggressive towards the materials from which
the appliance is made.
몇 Warning
! Unsuitable extension cables can be haz-
ardous. Only use extension cables outdoors which have been approved for this
purpose and labelled with a sufficient cable cross section:
1 - 10 m: 1,5 mm
10 - 30 m: 2,5 mm
! Check the high-pressure hose for dam-
age before every use. Please arrange for
the immediate exchange of a damaged
high-pressure hose.
! High-pressure hoses, fixtures and cou-
plings are important for the safety of the
appliance. Only use high-pressure hoses, fixtures and couplings recommended
by the manufacturer.
! Cleaning operations which produce oily
waste water, e.g. engine washes, underbody washes, may only be carried out
using washing stations equipped with an
oil separator.
Note
! The appliance must not be operated by
children or persons who have not been
instructed accordingly.
! The operator must use the appliance
properly. When working with the appliance, he must consider the local conditions and pay due care and attention to
other persons, in particular children, who
are nearby.
! Observe a distance of at least 30 cm
when using the jet to clean painted surfaces to avoid damaging paintwork.
! Wear protective clothing and safety gog-
gles to protect against back spray containing water or dirt.
! Never leave the appliance unattended
when it is in operation.
! This appliance was designed to be used
with detergents which are supplied or
recommended by the manufacturer. The
2
2
English 4
Page 5

use of other detergents or chemicals
may compromise the safety of the appliance or cause appliance damage.
! Make sure that the power cord or exten-
sion cables are not damaged by running
over, pinching, dragging or similar. Protect the power cords from heat, oil, and
sharp edges.
! The connection between the power cord
and extension cable must not lie in water.
! All current-conducting parts in the work-
ing area must be protected against jet
water.
! The appliance may only be connected to
an electrical supply which has been installed in accordance with IEC 60364.
! The appliance may only be connected to
alternating current. The voltage must
correspond with the type plate on the appliance.
! The minimum fuse rating required at the
sokket outlet is 10 A (slow-blow).
! To avoid accidents due to electrical
faults we recommend the use of sockets
with a line-side current-limiting circuit
breaker (max. 30 mA nominal tripping
current).
! The plug and coupling of the extension
cable used must be watertight.
! Always fully unroll the extension cable
from the cable drum.
Safety Devices
Safety devices prevent injury and may not
be modified or bypassed.
Unit switch
The switch prevents unintented starting of
the appliance. Stop the appliance during
breaks or after operation.
Safety catch
The safety catch on the handgun prevents
the appliance from being switched on unintentionally.
Commissioning and operation
Before Commissioning
" Remove the coupling element from the
lower packaging unit and mount it.
" Remove both bearing wheels from the
lower packaging units.
" Insert the bearing wheels into the axle
box and lock them.
" Mount HP hose clip to HP hose.
" Push out the safety clip in the handgun
using e.g. a small screwdriver.
" Join HP hose and handgun together.
" Push clip in until it engages and check
that it is securely fastened by pulling on
the HP hose.
Water supply
Water supply from mains
For connection values, see type plate/technical data.
Observe regulations of water supplier.
" Use a fibre-reinforced hose (not includ-
ed) with a standard coupling: - Minimum
diameter, 1/2 inches (13 mm). - Minimum length, 7.5 m.
" Screw the coupling unit (supplied) to the
water connection on the appliance.
" Push the water supply hose onto the
coupling unit, then connect it to the tap.
몇 Caution
Never operate the high-pressure cleaner
when the tap is turned off as dry running will
damage the HP pump.
If the water supply is not clean, the Kärcher
water filter must be used (special accessory
- order No. 4.730-059).
Drawing in water from open reservoirs
When fitted with the appropriate accessories, this high-pressure cleaner can draw in
surface water, e.g. from water butts or ponds
(max. suction height 0.5 m).
" As the standard coupling system is not
suitable for use in suction mode, the
Kärcher suction hose with integrated fil-
5 English
Page 6

ter should be used instead (special accessory, order no. 4.440-238) and
suspended inside the water butt.
" Use the Kärcher water filter to protect the
HP pump and accessories (special accessories, order no. 4.730-059). This filter removes dirt from incoming water.
" Appliance ventilation: Switch on the ap-
pliance without connection the HP hose
and run it until the water discharging
from the HP outlet is free of bubbles.
Switch off appliance and reconnect HP
hose.
Start up
" Push the appropriate spray lance on to
the handgun and fasten it by turning it
through 90°.
" Open tap.
" Plug in the main plug.
" Set main switch to “I/ON”.
" Press safety catch on the handgun to re-
lease it and pull lever.
High pressure operation
몇 Warning
The handgun is subjected to a recoil force
when the water jet is discharged. Make sure
that you have a firm footing. Hold the handgun and spray lance firmly.
Spray lance with Variopower nozzle
" Carrying out the most common cleaning
tasks.
Operation with detergents is possible
with low pressure (–)
Operation with detergent
-Note
Detergent can only be added when the appliance is being operated in low pressure
mode.
All washing brushes supplied by Kärcher are
designed for use with detergents.
" Turn Variopower nozzle until lowest
pressure setting has been reached (–).
DT metering regulator
" Turning the regulator to the left: Deter-
gent is added from the left DT tank.
" Turning regulator to the right: Detergent
is added from the right DT tank.
DT suction infeed from DT tank
" During low pressure operation, deter-
gent is automatically sucked in from the
filled detergent tank.
" Dosage happens through the DT dosage
regulator.
Recommended Cleaning Method
1 Spray a small dose of the detergent on
the dry surface, and allow it to react
(make sure the detergent does not dry
up).
2 Wash off the loosened dirt using the
high-pressure jet.
Interrupting operation
" Release the lever on the handgun.
" During breaks, use the safety catch to
secure the handgun lever.
" During longer breaks (more than 5 min-
utes), also turn the appliance off using
the ON/OFF switch.
" Store the handgun and spray lance in the
accessory mount.
English 6
Page 7

Finish operation
" If detergent has been added: Suspend
detergent suction hose in a container
filled with clear water, switch the appliance on for around 1 minute once the
spray lance has been removed and rinse
until water runs clear.
" Release the lever on the handgun.
" Switch the appliance switch to "0/OFF“.
" Turn off tap.
" Press the lever on the handgun to re-
lease any remaining pressure in the system.
" Disconnect the appliance from the water
supply.
" Detach spray lance from the handgun.
" Briefly switch the appliance on ("I/ON“),
press the handgun lever until no further
water is discharged (approx. 1 min).
" Switch the appliance switch to "0/OFF“.
" Use the safety catch to secure the hand-
gun lever.
" Pull out the mains plug.
" Store the power cord, the HP hose and
the accessories on the appliance.
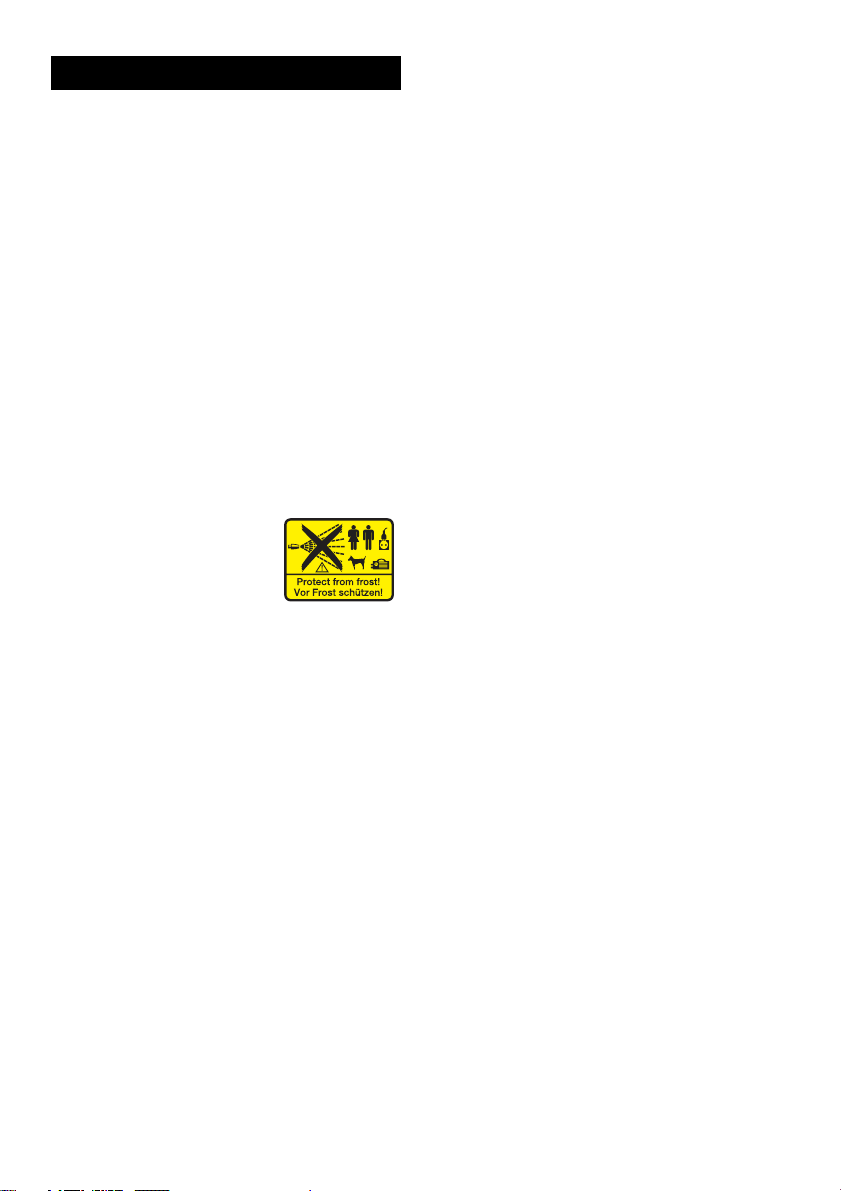
Transport
appliance. Store the appliance in a frost resistant room during winter.
" Store the coiled power cord above the
accessories compartment.
" Roll up HP hose and lock it with HP hose
clip. Store HP hose in storage compartment.
" Insert hand gun and accessories into the
appropriate compartment.
" The washing brush (special accessory)
can be stored in the pocket between both
DT tanks.
Special accessories
Special accessories expand the possibilities
of using your appliance. Please contact your
Kärcher dealer for further information.
Detergents
To ensure a trouble-free operation of the appliance and to match the individual cleaning
task, we recommend our Kärcher detergent
and maintenance agents. Please ask for our
advice, or request information on the products.
몇 Caution
Please remove the detergent from the DT
tank if the application is transported in a reclined position.
Bearing wheel rolling
" Fold up transport handle
" Lock Transport handle
Carry appliance
" Unlock transport handle.
" Retract transport handle.
" Lift application at carrying handle.
Storing the Appliance
몇 Caution
Please remove the detergent from the DT
tank if the application is transported in a reclined position.
Frost can destroy the not completely drained
7 English
Maintenance and Care
Risk of injury
Always switch off the appliance and pull out
the mains plug before care and maintenance
work.
Cleaning
Prior to longer periods of storage, e.g. in the
winter:
" Remove filter from suction hose for de-
tergent and clean with running water.
" Pull out filter in water connection using
flat-nose pliers and clean with running
water.
Maintenance
The appliance is maintenance-free.
Page 8

Spare Parts
Only use original Kärcher spare parts. You
will find a list of spare parts at the end of this
document.
Troubleshooting
You can rectify minor faults yourself with the
help of the following overview.
If in doubt, please consult the authorized
customer service.
Risk of injury
Always switch off the appliance and pull out
the mains plug before care and maintenance
work.
Warning
Repair works may only be performed by the
authorized customer service.
Machine does not start
" Check whether the voltage indicated on
the type plate corresponds to the voltage
of the socket.
" Check the power cord for damage.
Pressure does not build up in the appliance
" Check the setting at the spray lance.
" Appliance ventilation: Switch on the ap-
pliance without connection the HP hose
and run it until the water discharging
from the HP outlet is free of bubbles.
Switch off appliance and reconnect
spray lance.
" Clean the filter in the water supply con-
nection: This can be easily removed using flat-nose pliers.
" Check all supply lines to the HP pump for
leaks or blockages.
Strong pressure fluctuations
" Clean the high-pressure nozzle: Re-
move dirt and debris from the nozzle
bore with a needle and rinse through with
water towards the front.
" Check the volume of incoming water.
HP pump leaking
" Slight leakage from the HP pump is nor-
mal. If the leakage increases contact the
authorized customer service.
No detergent infeed
" Select the low-pressure setting for the
spray lance.
" Clean the filter of the detergent suction
hose.
" Check the DT suction hose for kinks.
Specifications
Power connection
Voltage (1~50 Hz) 240V
Connection output 1,9kW
Mains fuse (slow-blow) 10A
Protective class I
Water connection
Max. feed temperature 40 °C
Min. feed volume 10l/min
Feed pressure, 0,2 - 1,2MPa
Performance data
Working pressure 12MPa
Max. permissible pressure 13MPa
Water flow rate 6,7l/min
Detergent flow rate 0,3l/min
Recoil force of handgun 18N
Hand-arm vibration (ISO
5349)
Sound pressure level Lpa
(EN60704-1)
Sound power level Lwa
(2000/14/EG)
Dimensions
Depth 420mm
Width 445mm
Height 590 - 930 mm
Weight 19,5 kg
2,2m/s
77dB(A)
92dB(A)
2
English 8
Page 9

CE-Declaration
We hereby declare that the machine described below complies with the relevant basic safety and health requirements of the EU
Directives, both in its basic design and construction as well as in the version put into circulation by us. This declaration shall cease
to be valid if the machine is modified without
our prior approval.
PRODUCT: High-pressure cleaner
TYPE: 1.636-xxx
Relevant EU Directives:
98/37/EC
73/23/EEC (+93/68/EEC)
89/336/EEC (+91/263/EEC, 92/31/EEC, 93/
68/EEC)
2000/14/EC
Applied harmonized standards:
DIN EN 60,335 – 1:
DIN EN 60,335 – 2 – 79
DIN EN 55014-1:2000 + A1:2001 + A2:2002
DIN EN 55,014 – 2: 1997 + A1:2001
DIN EN 61 000 – 3 – 2: 2000
DIN EN 61 000 – 3 – 3: 1995 + A1: 2001
Applied conformity evaluation method: Appendix V
Measured sound power level: 91 dB(A)
Guaranteed sound power level: 92 dB(A)
Appropriate internal measures have been
taken to ensure that the series appliances
always comply with the requirements of the
currently valid EU Directives and the applied
standards.
The undersigned act on behalf and under
the power of attorney of the company management.
Section B),
Managing Director: Dr. Bernhard Graf,
Hartmut Jenner, Georg Metz
Alfred Kärcher GmbH & Co. KG
Cleaning Systems
Alfred - Kärcher - Str. 28 - 40
P.O. Box 160
D - 71349 Winnenden
Phone: +49 7195 14-0
Fax: +49 7195 14-2212
Alfred Kärcher Kommanditgesellschaft. Location: Winnenden. Registration Court:
Waiblingen, HRA 169 (Trade Register Section A 169). Partner liable to an unlimited extent: Kärcher Reinigungstechnik GmbH.
Location: Winnenden, 2404 Registration
Court Waiblingen, HRB (Trade Register
9 English
Page 10

Help-Line
Karcher (UK) Limited operate a help-line allowing customers to discuss any problems
experienced with our products.
The help-line operates during normal business hours, if you have difficulty getting
through, please understand that there are
peak periods during the day when our consultants are unable to take all calls coming
in. In these circumstances we would ask that
you try to contact us again later in the day.
The help-line number is 0906 6800632
from 8.30am to 5.00pm Monday - Friday.
(calls to this number are charged at 25p per
minute)
It helps us if you have the model number and
data plate details to hand before making
your call as there are very many different
models of Karcher Pressure Washers in
use.
Alternatively you may write or e-mail to
the address below:
Karcher (UK) Limited
Karcher House
Beaumont Road
Banbury
Oxon, OX16 1TB
E-mail:
retail_inquiries@karcheruk.co.uk
English 10
Page 11

11
Page 12

 Loading...