

Page 1

In Australia, this Kambrook Replacement
Warranty does not affect the mandatory
statutory rights implied under the Trade Practices
Act 1974 and other similar State and Territory
legislation relating to the appliance. It applies in
addition to the conditions and warranties implied
by that legislation.
In New Zealand, this Kambrook Replacement
Warranty does not affect your mandatory statutory
rights implied under the Consumer Guarantees
Act 1993 in relation to the appliance. It applies in
addition to the conditions and guarantees implied
by that legislation.
This Kambrook Replacement Warranty is valid only
in the country of purchase, but other statutory
warranties may still apply.
This Warranty card and the purchase receipt
for this product are to be retained as proof of
purchase and must be presented if making a claim
under the Kambrook Replacement Warranty.
Please note that under any applicable statutory
warranty you are not required to produce these
documents, but may be required to provide a
proof of purchase.
Kambrook warrants the purchaser against defects
in workmanship and material for a period of 12
months domestic use from the date of purchase
(or 3 months commercial use).
The Kambrook Replacement Warranty does not
apply to any defect, deterioration, loss, injury or
damage occasioned by, or as a result of, misuse
or abuse, negligent handling or if the product
has been used other than in accordance with
the instructions. The Kambrook Replacement
Warranty excludes breakables such as glass and
ceramic items, consumable items and normal
wear and tear.
This Kambrook Replacement Warranty is void if
there is evidence of the product being tampered
with by unauthorised persons.
If the product includes one or a number of
accessories only the defective accessory
or product will be replaced. Subject to your
statutory rights, in the event of Kambrook
choosing to replace the appliance, the
Kambrook Replacement Warranty will expire at
the original date, i.e. 12 months from the original
date of purchase.
In the event that you need some assistance
with your Kambrook appliance, please contact
our Customer Service Department on 1300 139
798 (Australia) or 09 271 3980 (New Zealand).
Alternatively, visit us on the website at
www.kambrook.com.au
Kambrook 12 Month Replacement Warranty
Your Purchase Record (Please Complete)
Date Of Purchase ________________________________
Model Number ___________________________________
Serial Number ____________________________________
Purchased From __________________________________
Attach a copy of the purchase receipt here.
(Please don’t return purchase record
until you are making a claim)
Register your warranty at www.kambrook.com.au/service.asp
Kambrook - Australia
Building 2, Port Air Industrial Estate
1A Hale Street
Botany NSW 2019
Australia
Customer Service Line 1300 139 798
Customer Service Fax 1800 621 337
Kambrook - New Zealand
Private Bag 94411
Botany, Manukau
Auckland 2141
New Zealand
Customer Service Line/Spare Parts
0800 273 845 or 09 271 3980
Customer Service Fax 0800 288 513
Due to continual improvement in design or otherwise, the product you
purchase may differ slightly from the illustration in this book. Issue C10
Kambrook 12 Month Replacement Warranty
Page 2
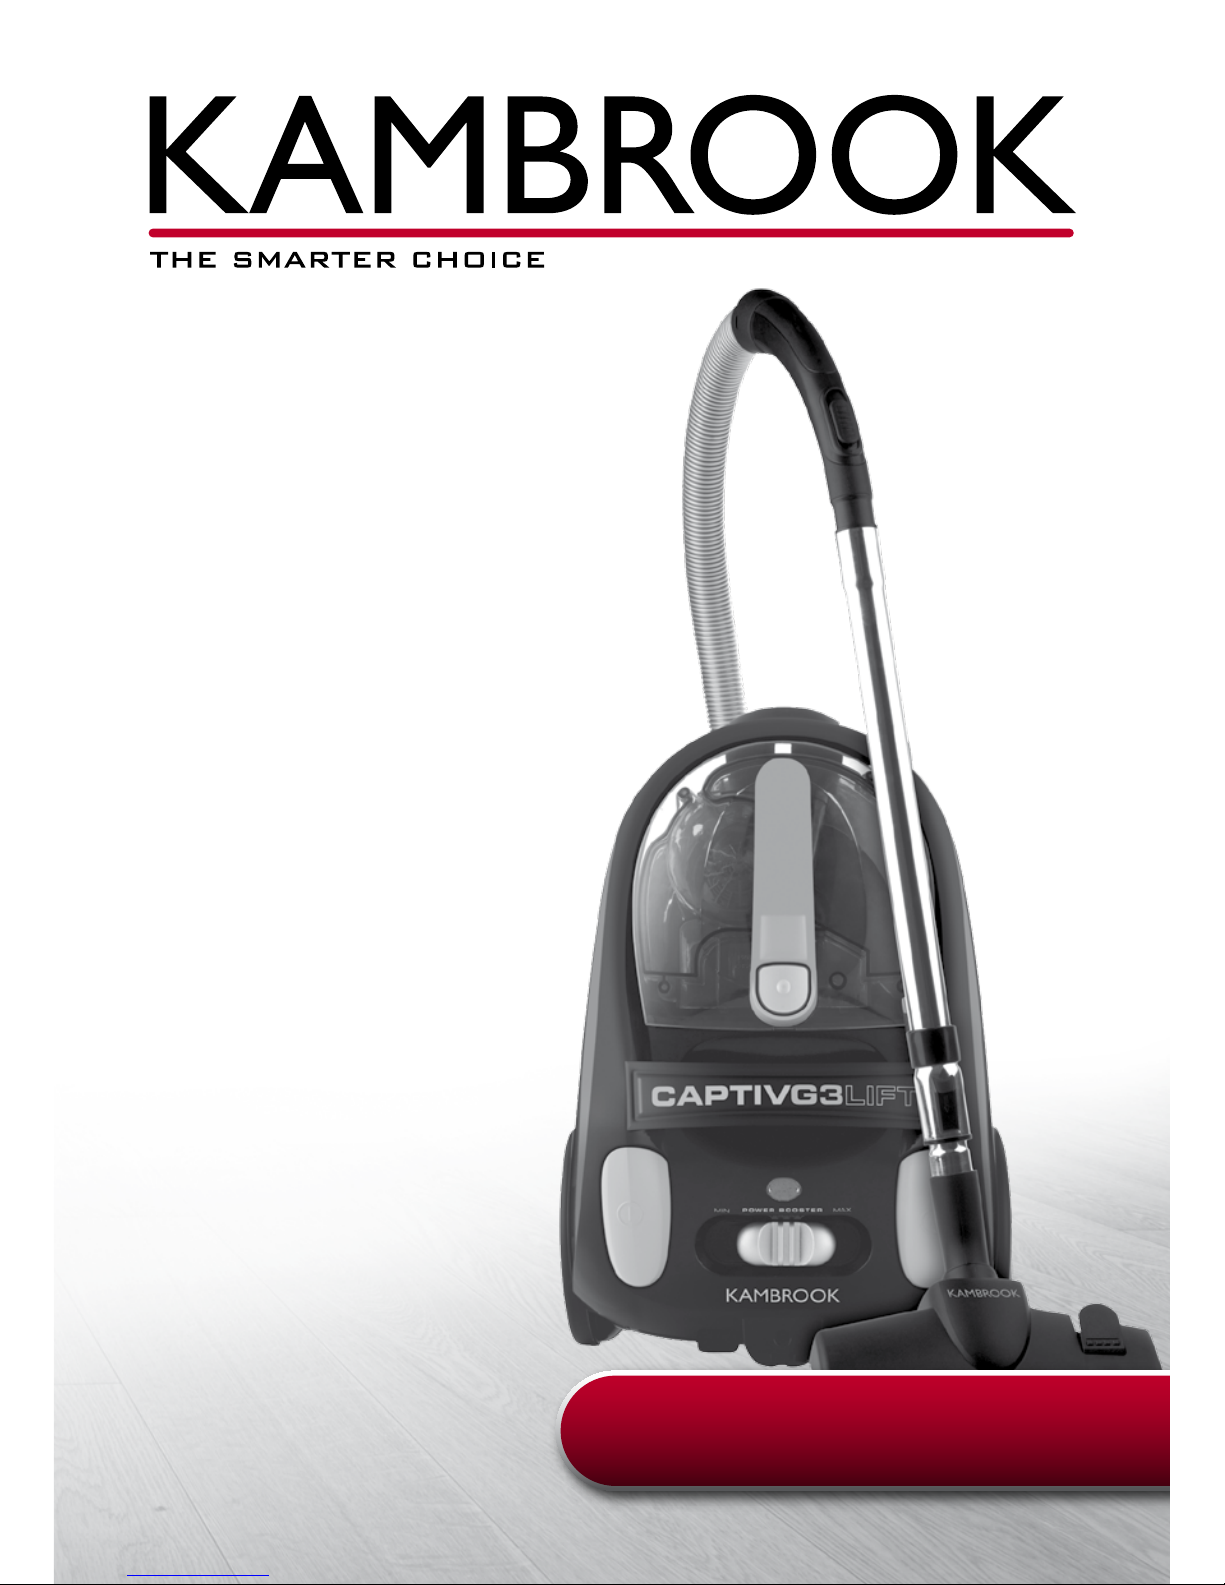
CaptivG3Pet/
Cyclonic
Bagless Vacuum
KBV420/480
Instruction Booklet
Page 3

Important
Please retain your instruction
book for future use.
In the event that you need some assistance with your
Kambrook appliance, please contact our Customer Service
Department on 1300 139 798 (Australia) or 09 271 3980 (New
Zealand). Alternatively, visit us on our website at
www.kambrook.com.au
Page 4

Contents
Kambrook Recommends p4
Safety First
Your CaptivG3Pet/Cyclonic p6
Bagless Vacuum
Operating Instructions p7
Care and Maintenance p10
Troubleshooting p15
Warranty Details p16
Page 5

4
Kambrook Recommends Safety First
IMPORTANT: Please retain your
instruction book for future use.
At Kambrook, we believe that safe performance is the first priority in any
consumer product, so that you, our valued customer can confidently
use and trust our products. We ask that any electrical appliance that
you use be operated in a sensible fashion with due care and attention
placed on the following important operating instructions.
Important Safeguards For Your Kambrook
CaptivG3Pet/Cyclonic Bagless Vacuum
• Carefully read all instructions
before operating the Kambrook
CaptivG3Pet/Cyclonic Bagless
Vacuum for the first time and save
for future reference.
• To protect against electric shock, do
not immerse the vacuum, cord or
plug in water or any other liquid.
• Ensure that the power source to
be used is the same as the voltage
requirements of the product.
• Always switch vacuum cleaner to
off, then switch off at the power
outlet, and then unplug the vacuum
cleaner when not in use and prior to
cleaning the dust container or filters.
• Never use the vacuum cleaner
without a dust container and motor
protection filter in place.
• Never use the vacuum cleaner to
vacuum hot ashes, broken glass,
sharp objects or liquids.
• Never use in the presence of
explosive liquids or vapours.
• Never vacuum up inflammable or
poisonous liquids such as petrol,
copier toner or other volatile
substances. Never vacuum up
acids, asbestos or asbestos dust.
• Do not leave the vacuum cleaner
unattended when in use. Young
children should be supervised to
ensure that they do not play with
the vacuum cleaner.
• Close supervision is required at all
times when operating the vacuum
cleaner near children.
• This vacuum cleaner is suitable for
domestic use only. Do not use this
vacuum cleaner for anything other
than its intended use.
• Do not use or store outdoors.
• Fully extend the cord (to the yellow
tape mark) whenever the vacuum
cleaner is in use. Please ensure that
the cord is not extend past the red
tape mark.
• This appliance is not intended for
use by persons (including children)
with reduced physical, sensory
or mental capabilities or lack of
experience and knowledge unless
they have been given supervision
or instruction concerning use of the
appliance by a person responsible
for their safety.
• Do not leave the appliance
unattended when in use.
Page 6

5
• Children should be supervised to
ensure that they don’t play with
the appliance.
• Regularly inspect the supply cord,
plug and actual appliance for any
damage. If damage is found in
any way, immediately cease use
of the appliance and return the
entire appliance to your nearest
authorised Kambrook service centre
for examination, replacement
or repair.
• The installation of a residual
current device (safety switch)
is recommended to provide
additional safety protection when
using electrical appliances. It is
advisable that a safety switch with
a rated residual operating current
not exceeding 30mA be installed in
the electrical circuit supplying the
appliance. See you electrician for
professional advice.
Important Safeguards For All
Electrical Appliances
• Fully unwind the power cord
before use.
• Do not let the power cord hang over
the edge of a bench or table, touch
hot surfaces or become knotted.
• The appliance is not intended for
use by persons (including children)
with reduced physical, sensory
or mental capabilities, or lack of
experience and knowledge, unless
they have been given supervision
or instruction concerning use of the
appliance by a person responsible
for their safety.
• Children should be supervised to
ensure that they do not play with
the appliance.
• It is recommended to regularly
inspect the appliance. To avoid a
hazard do not use the appliance
if power cord, power plug or
appliance becomes damaged
in any way. Return the entire
appliance to the nearest authorised
Kambrook Service Centre for
examination and/or repair.
• Any maintenance other than
cleaning should be performed
at an authorised Kambrook
Service Centre.
• This appliance is for household use
only. Do not use this appliance for
anything other than its intended
use. Do not use in moving vehicles
or boats. Do not use outdoors.
Misuse may cause injury.
• The installation of a residual
current device (safety switch)
is recommended to provide
additional safety protection when
using electrical appliances. It is
advisable that a safety switch with
a rated residual operating current
not exceeding 30mA be installed in
the electrical circuit supplying the
appliance. See your electrician for
professional advice.
Page 7

6
Your CaptivG3Pet/Cyclonic
Bagless Vacuum
1. Bagless convenience for easy
removal of dirt and dust with no
need for replacement bags
2. Variable power control
3. 2000 watt motor for superior
suction, fast and effective
cleaning
4. Dust level indicator
5. Quality multi-terrain floor tool
ideal for carpet and hard floors
6. CaptivG3 Turbo floor brush, picks
up pet hair from carpet making
it ideal for homes with pets
(KBV480 only)
7. Hard floor tool for improved pick
up on hard floors (KBV480 only)
8. Telescopic chrome steel wand is
easily extendable or retractable
for varying height requirements
9. Cyclonic cone helps separate
particles from the air before
filtering begins
10. Two washable HEPA
filters included
11. Auto cord rewind
12. Convenient carry handle
13. Cord length 5m
14. Small brush
15. Upholstery tool
16. Crevice tool
Page 8

7
Operating Instructions
Before First Use
Remove any promotional material
from the vacuum cleaner.
When unpacking the vacuum cleaner
check to see you have received all
the required components, such as the
hose and other accessories before
discarding the packaging.
To Operate the
Vacuum Cleaner
Locate the crush proof hose and
push the connection point into the
hose inlet connection on the front
side of the vacuum, until a “click”
sound is heard.
Connect the wide end of the metal
wand to the hose end, and push
together firmly.
Fit the floor tool to the narrow end of
the wand and push together firmly.
Fully extend the power cord by pulling
the power plug out from the rear of
the vacuum, until the yellow tape on
the cord is showing.
NOTE: Ensure that you do not
over extend the power cord
– do not extend past the red
warning tape on the cord.
Plug into a 230V or 240V power point
and switch the power on at the
power point.
To commence vacuuming, push
down on the on/off button
up
down
on the
top of the vacuum cleaner.
When vacuuming is complete, push
down on the ‘on/off’ button to
switch off. Turn the power off at the
outlet and then remove the power
cord from the power outlet. When
removing the plug from the power
outlet, grasp the plug not the cord.
To retract the cord push down on the
‘cord rewind’ button
up
down
on top of the
vacuum cleaner.
IMPORTANT: Hold the
plug end and guide the
cord into the vacuum
during retraction to
prevent it from striking
you or the vacuum.
CAUTION: Always
ensure that the dust
container and the
motor protection filter
are correctly fitted.
Never operate without
the dust container or
filters in place.
Fig. 1
Fig. 2
Page 9

8
Variable Power Control
The power booster lever on the
vacuum can be used for variable
power control. Slide the lever toward
the MAX marking for vacuuming hard
floor and carpet surfaces. Slide the
lever toward the MIN marking when
using the crevice, upholstery and
brush tools.
Fig. 3
Crevice and Brush
Tool Accessories
Fig. 4
The crevice tool is ideal for
vacuuming hard to reach places such
as the edges along skirting boards.
The brush and upholstery tools can
be used to vacuum delicate surfaces
and areas such as shelves and
venetian blinds.
Operating Instructions continued
Set the variable speed control
between minimum and medium
power when using the tool
accessories.
Fig. 5
Turn off the vacuum cleaner when
changing any attachments.
CaptivG3 Turbo Floor Brush
(KBV480 Only)
Fig. 6
The CaptivG3 turbo floor brush is ideal
for picking up dirt and hair, brushing
them back into the nozzle. It is ideal
for pet owners.
Page 10

9
Hard Floor Tool
(KBV480 Only)
Fig. 7
The hard floor tool is ideal for
vacuuming hard floors, with improved
pick-up.
Simply fit the hard floor tool to the
narrow end of the wand and push
together firmly.
Page 11

10
Check all filters and replace them
regularly. It is recommended to clean
the filters after every use. For normal
household vacuuming the filters should
be replaced at least twice a year.
If you encounter reduced vacuum
cleaner performance, check:
• Dust capacity in dust container
• All filters, including dust, motor and
exhaust. Any clogging in the filters
will reduce the efficiency of your
vacuum cleaner
To clean the outside of the unit, wipe
the exterior with a soft, damp cloth.
Never use an abrasive cleaner.
Emptying the Dust Container
Always switch the vacuum off, then
switch off at the power outlet and
unplug prior to replacing filters or
emptying the dust container.
For optimum use, the dust container
should be emptied after every use.
When the dust container reaches the
capacity mark ‘MAX’, it is essential
to thoroughly clean both the dust
container and filters.
To remove the dust container, ensure
the vacuum is down on its wheels;
remove the dust container by pressing
down on the button on top of the dust
container. Once released carefully lift
the container upwards.
Fig. 8
Care and Maintenance
Fig. 9
To empty the dust container simply
place it over the rubbish bin, ensuring
the opening of the bin is larger than
the dust container. Press the “PUSH”
button located beneath the hose
inlet connection on the front of the
dust container. The bottom of the
container will release and the dust
and compiled dirt will be dispensed.
Fig. 10
NOTE: Dependant upon
the amount and type of dirt
collected in the dust container, it
may be necessary to agitate the
dirt inside the dust container for
easier dispensing.
IMPORTANT: Do not use
the unit without a dust
container in place.
Page 12

11
Cleaning and
Replacing Filters
To assist you with the regular care of
your vacuum, a second HEPA filter is
supplied for convenient use, ideal for
when a dirty filter is being cleaned.
Dirty and clogged filters may result in
reduced suction performance. It is
recommended that filters are cleaned
after every use and replaced regularly
to ensure maximum efficiency from
your vacuum.
If filters are left uncleaned, it may
result in a reduction of suction power.
Should this occur, the following
procedure should be followed every
couple of months.
Procedure to Replace Filters
Always switch the vacuum off,
then switch off at the power outlet
and unplug prior to cleaning or
replacing the filters. Before replacing
the filters ensure all dirt and dust is
first emptied from the dust container.
Refer to the ‘EMPTYING THE DUST
CONTAINER’ section.
1. Remove the dust container from
the vacuum by pressing down
on the button on top of the
dust container. Once released,
carefully lift the container
upwards.
Your new vacuum cleaner
includes a black foam filter casing
which locks your foam filter to the
front side of the HEPA filter. This is a
reusable, removable part.
Fig. 11
2. To remove the HEPA filter from
the back (flat side) of the dust
container, press the tab and pull
out the HEPA filter, followed by the
foam filter and black casing.
Fig. 12
When conducting your routine
cleaning of the filters, it is
necessary to remove the black
foam casing to separate the
foam and HEPA filters for cleaning.
Page 13

12
Fig. 13
3. Shake and tap the HEPA filter
until all the fine dust particles are
removed. After approximately
6 months the HEPA filter should
be replaced. This period is
dependant upon the frequency
of use and type of dirt being
subjected to the vacuum.
The HEPA filter can also be hand
washed in warm water.
NOTE: Do not use any detergents
or boiling water to wash the
filter, do not wash the filter in a
dishwasher or washing machine.
It is advised to let the filter dry
completely for at least a minimum of
24 hours before use.
NOTE: Do not dry in a tumble
dryer, microwave, oven or near
a naked flame. The filter and
filter case must be completely
dry before replacing into
the vacuum. Failure to allow
the filter to completely dry
may result in damage to the
vacuum motor.
Care and Maintenance continued
NOTE: A second HEPA filter is
supplied for convenience,
ideal for when a used filter is
being cleaned.
Fig. 14
NOTE: When replacing the dust
container HEPA filter, all three
components (HEPA filter, foam
filter and plastic casing) need
to be replaced.
4. To place the filter back in the dust
container, ensure that the filter is
completely dry before use. Close
the bottom of the container.
5. Simply place the foam filter
into the black casing. When
reassembling the filter casing,
it is important to position the
casing in its correct orientation
against the foam filter. As
demonstrated in Fig.12, the larger
square compartments should be
positioned at the same end as the
locking tabs.
Then click the filter assembly into
the back of the dust container.
Page 14

13
NOTE: If the Canister does not
easily fit in position, the filter
casing may be in the wrong
orientation. Do not force the
dust canister back into position.
NOTE: Dirty and clogged
filters may result in reduced
suction performance. It is
recommended that filters are
cleaned after every use and
replaced regularly to ensure
maximum efficiency from
your vacuum. If filters are left
uncleaned, it may result in
reduction of suction power.
6. To remove and clean the
CaptivG3 cone from inside the
dust container, firstly ensure the
dust container has been emptied.
Follow the ‘EMPTYING THE DUST
CONTAINER’ instructions.
Press the ‘PUSH’ button located
beneath the hose inlet connection
on the front of the dust container.
The bottom of the container will
release. Grip the two pockets at
the base of the cone with two
fingers, twist clockwise to ‘OPEN’
and pull to remove the cone.
Fig. 15
Fig. 16
Shake and tap the cone until
all the fine dust particles are
removed. The cone can also
be hand washed. Allow the
cone to completely air dry
before re-assembling.
To replace the cone into the dust
container, grip the two pockets
at the base of the cone with two
fingers, slide the cone into the
allocated bracket inside the dust
container and twist anti-clockwise
to ‘CLOSE’ until resistance is felt.
Page 15

14
Fig. 15
7. Place the dust container back in
the vacuum cleaner for next use.
Exhaust Filter
The exhaust filter should be cleaned
after every use for maximum
vacuuming performance. To clean,
simply unclip the grill at the back
of the vacuum cleaner and shake
and tap the filter to remove any dust
accumulated. Then relocate the filter
and reattach the grill.
Care and Maintenance continued
Page 16

15
Troubleshooting
Problem Possible Causes What To Do
Vacuum cleaner is not
working
Vacuum cleaner is not
picking up dirt
Dust escaping from
vacuum
• The unit may not be
plugged into power
outlet
• Dust container is full
• Filter is clogged
• Dust container is not
fitted correctly
• Dust container is not
fitted correctly
• Hose is not fitted
correctly
• Dust container is full
• Ensure the power plug is
securely plugged
• Empty and clean the
dust container
• Refer to ‘Cleaning and
Replacing Filters’, page 11
• Check dust container
replacement
• Check dust container
installation
• Check hose installation
• Empty and clean the
dust container
Spare Parts
To order spare parts for your
Kambrook CaptivG3Pet/Cyclonic
Bagless Vacuum please contact
Customer Service on:
1300 139 789 (Australia)
and 0800 253 007 (New Zealand)
 Loading...