

Küppersbusch EKDG 6800.1 Instructions For Use And Installation Instructions

Instructions for use
and installation instructions
565990 K31
EKDG 6800.1
Convect-Air Piccolo

Content
Content . . . . . . . . . . . . . . . . . . . . . . . . . . . . . . . . . .2
Safety instructions . . . . . . . . . . . . . . . . . . . . . . . . . .4
Prior to initial operation ................................................................ 4
Appropriate use........................................................................... 4
On operation............................................................................... 5
Your appliance . . . . . . . . . . . . . . . . . . . . . . . . . . . .8
Appliance parts ........................................................................... 8
Control elements and display elements............................................ 9
Initial operation.......................................................................... 10
General information on operation................................................ 11
Settings . . . . . . . . . . . . . . . . . . . . . . . . . . . . . . . . .12
Language selection..................................................................... 12
Switching the childproof lock on and off ....................................... 13
Switching the clock on or off........................................................ 15
Changing the volume of the buzzer.............................................. 16
Changing the switch-on time setting.............................................. 17
Switching the automatic oven cavity light
on and off................................................................................. 18
Water Hardness......................................................................... 19
Cooking and baking . . . . . . . . . . . . . . . . . . . . . . .20
The operating modes and their application.................................... 21
Switching the appliance on and off.............................................. 25
Operation when the childproof lock is activated............................. 30
Roasting thermometer ................................................................ 31
Instructions for optimal use .......................................................... 34
Instructions for use, setting tables . . . . . . . . . . . . .36
Timer . . . . . . . . . . . . . . . . . . . . . . . . . . . . . . . . . . .40
Setting and adjusting the time...................................................... 40
Stop clock (Timer)....................................................................... 41
Using automatic timing ............................................................... 42
Care and maintenance . . . . . . . . . . . . . . . . . . . . . .46

... Content
Cleaning the outside of the oven.................................................. 46
Interior oven care....................................................................... 46
Decalcifying.............................................................................. 48
Replacing a light bulb ................................................................ 50
Carrying out minor repairs yourself . . . . . . . . . . 51
What to do if …......................................................................... 51
After a power cut....................................................................... 53
Tips and tricks . . . . . . . . . . . . . . . . . . . . . . . . . . . . 54
Technical data . . . . . . . . . . . . . . . . . . . . . . . . . . . . 58
Disposal . . . . . . . . . . . . . . . . . . . . . . . . . . . . . . . . 59
Installation instructions for fitter . . . . . . . . . . . . . . 60
Electrics.................................................................................... 60
Installation dimensions ................................................................ 61
Installing in a fitted kitchen unit.................................................... 62
Short list of spare parts . . . . . . . . . . . . . . . . . . . . . 64

4
Safety instructions
Prior to initial operation
• The appliance may only be installed and connected to the mains in
accordance with separate mounting/installation instructions. Please have the
necessary work carried out by a professional electrician.
• Ensure that packaging material is disposed of in accordance with local
regulations.
• The instructions are to be observed prior to initial use of a newly-installed
appliance,see "Initial operation" on page 10.
• Carry out the required settings. See page 12.
Appropriate use
• Store the instruction manual in a safe place so that it can be referred to at any
time. Should you sell the appliance or pass it on to a third party, ensure that
the instructions for assembly and for operation are also passed on, thus
providing the new owner with information on correct operation and with the
respective instructions.
• The appliance is intended to be used for preparing food in the home. In the
case of inappropriate operation or incorrect handling, liability cannot be
assumed for any resulting damage.
• Do not use the appliance for room heating or wetting purposes.
• The appliance should only be installed and operated if the temperature of the
environment is between 5 °C and 35 °C. If there is a risk of frost, residual
water in the pumps may freeze and cause damage to the pumps. In the event
of such a risk please contact our customer service (see X).
This appliance has been designed in accordance with
recognised statutory technical regulations and the respective
safety regulations. Howev er, in order to avoid any damag e or
accidents, it is essential that the appliance be appropriately
handled. Please observe the instructions contained in this
manual.

... Safety instructions
5
On operation
• No alterations, manipulations or attempts at repairs, particularly with the use
of tools (screw drivers, etc.) may be carried out on or in the appliance. Any
repairs, particularly those required on live parts, are only to be carried out by
skilled specialists trained for the respective appliance. Any repairs carried out
improperly may lead to serious accidents, damage to the appliance and to
equipment and also cause breakdowns. In the case of a breakdown of your
appliance or should repairs become necessary, refer to the instructions in
chapter "Carrying out minor repairs yourself" beginning on page 51. Contact
our customer service for assistance.
• Do not operate the appliance if it shows any visible damage. Contact our
customer s er vice.
• The appliance must be disconnected from the mains as soon as a fault is
discovered.
• Ensure that connecting leads from electric appliances do not get caught in the
door of the appliance since the electrical insulation may be damaged.
• Should the connecting lead of this appliance be damaged, it is essential to
have it replaced by an electrician in order to avoid endangering human
beings.
• Prior to closing the door of the appliance, ensure that no foreign bodi es or pets
are in the interior of the oven.
• Do not store any thermo-sensitive or inflammable materials, such as cleaning
agents, oven sprays, etc. in the interior of the oven.
Caution. Risk of burns!
• The appliance becomes extremely hot during operation.
• The appliance remains hot for a certain period subsequent to switch-off and
only gradually cools down to room temperature. Wait until the appliance is
sufficiently cooled down before carrying out any tasks such as cleaning the
appliance.

... Safety instructions
6
• The oven door, in particular the glass pane, may become hot. Danger of burns.
Do not touch. Keep children away!
• On opening the oven door, steam and drops of water may escape from the
appliance. Do not put your hands in the appliance in the case of the occurence
of steam.
• Overheated fats and oils are easily inflammable. Refrain from heating oil in
the oven interior in order to sear meat, as this is dangerous. Never attempt to
extinguish burning oil or fat with water (risk of explosion). Smother the fire with
damp cloths and keep doors and windows closed.
• The roasting grid, baking trays and pans become hot. Please use protective
oven gloves or oven cloths.
Caution! Risk of injury!
• On cleaning or operating the appliance, ensure that nobody puts their fingers
into the door hinges as there is a risk that moving the appliance door may
result in crushing and injuries. This applies particularly when children are
present.
• Leave the door of the appliance open in the resting position only. There is a
risk of stumbling or tripping and crushing when the appliance door is open.
Do not sit on the door or support yourself on it, and do not put anything onto it.
Avoid damage to the appliance as follows:
• On cleaning, ensure that no water gets into the appliance. Do not use cloths
that are excessively damp. Never spray the inside or the outside of the
appliance with water. Do not use a steam cleaning appliance, since water
penetrating the appliance can cause damage.
• Do not use any corrosive obejec ts in the interior of the ov en, since these can
lead to further corrosion in the oven cavity.
• Do not use any silver dishes in the interior of the oven.
• Do not slam the oven door.
• After use, wipe away any fluid which may have remained on the bottom of the
oven with a soft cloth and allow the appliance to cool down with the oven door
open.
Cutting bread, cakes or pastries with extremely hard knives or cutting wheels
(ceramics or hard metal) on the baking tray can damage its surface.

... Safety instructions
7
When children are present in the home
• Packaging materials (such as foil or polystyrene) may put children at risk.
Danger of suffocation! Keep packaging material well away from children.
• The appliance is intended for use by adults who are familiar with the
instructions for use.
• Children are frequently not able to recognise risks involved on handling the
appliance. Please ensure that they are supervised accordingly and never allow
them to play with the appliance.
• Cooking and baking result in the development of heat. The door of the
appliance, in particular the glass pane, may become hot. Danger of burns. Do
not touch. Keep children away!
8
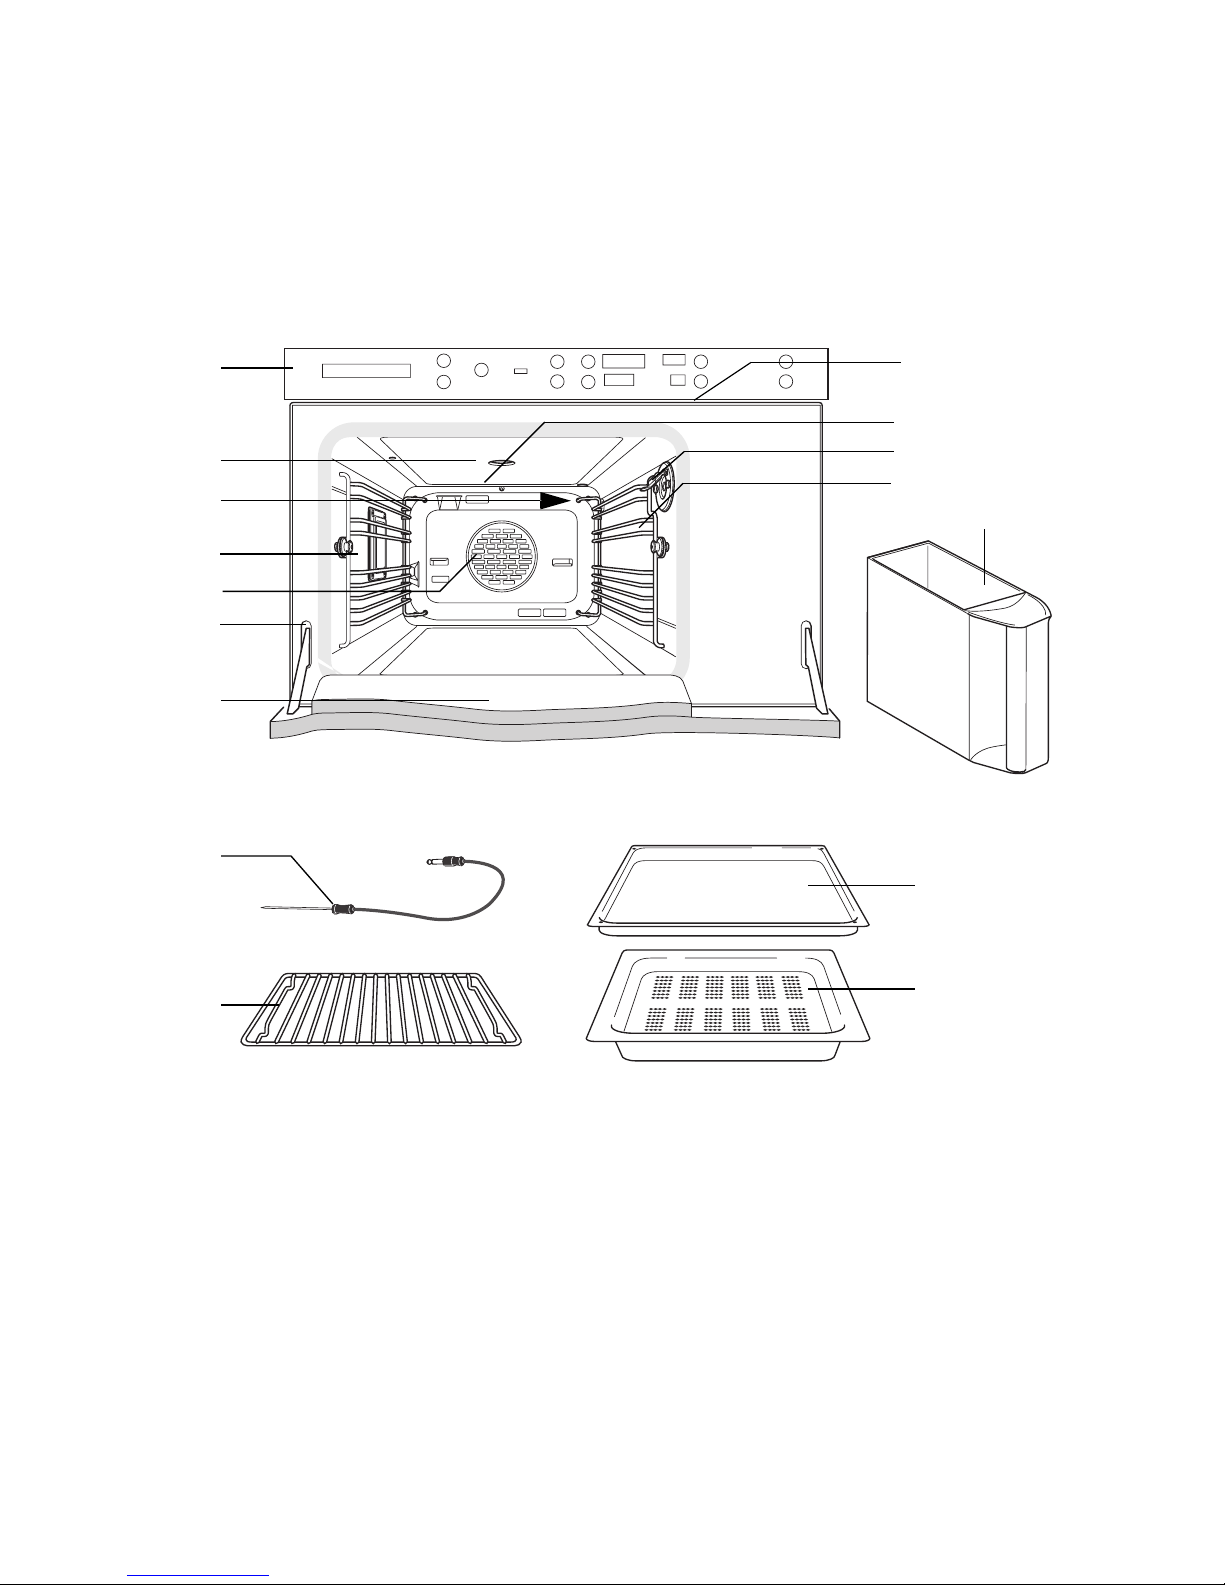
Your appliance
Appliance parts
1 Control elements and display
elements
2 Oven cavity ventilator
3 Steam inlet
4 Oven cavity light
5 Hot air fan
6 Door sealing
7 Oven door
8 Ventilator
9 Oven cavity temperature gauge
10 Socket for roasting thermometer
11 Rack levels
12 Water tank
13 Roasting thermometer
14 Roasting grid (2 units)
15 Original stainless steel baking tray
16 Perforated cooking pan
1
2
3
4
5
6
7
13
14
15
16
12
8
9
10
11
... Your appliance
9
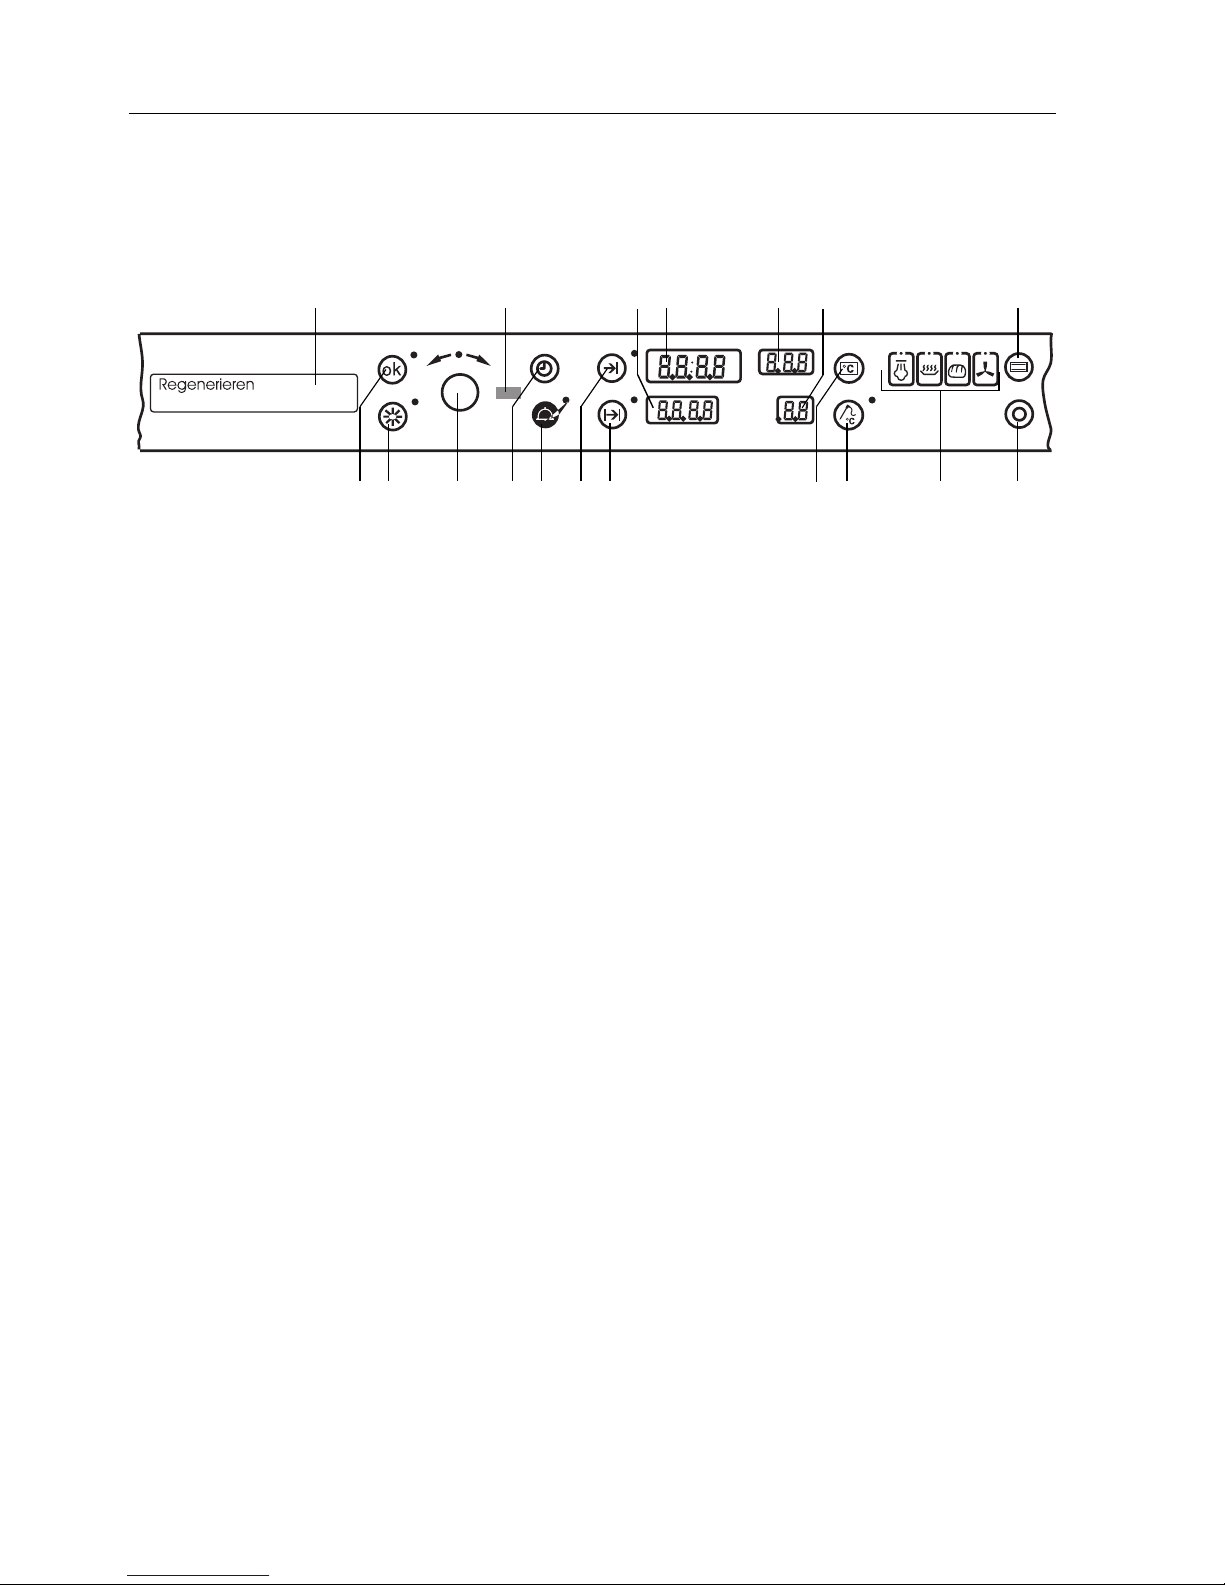
Control elements and display elements
Buttons /setting elements
A ok with an indicator lamp
B Oven lighting with an indicator lamp
C Clock
D Timer with an indicator lamp
E Switch-off time with an indicator lamp
F Operation duration with an indicator lamp
G Oven cavity temperature
H Core temperature with an indicator lamp
J Operating mode
K Appliance off
L Control dial with an indicator lamp
Displays
S Communications interface
M Clear text display
N Operation duration/timer
O Time/switch-off time
P Oven cavity temperature
Q Core temperature
R Operating mode symbol
A
NM O PS Q J
BLCDEF GH R K

... Your appliance
10
Initial operation
Prior to initial use of a newly-installed appliance, the following steps should be
taken:
• Remove packaging and transport materials from the oven interior.
• Set the clock:
Press the button lightly and set the hours with the control dial.
Press the button once again and set the minutes with the control dial.
– Once the time set has been reached, the display stops blinking and the
clock is activated.
Setting the time is described in detail in the chapter "Timer" beginning on page
40 .
• Set as required (see page 12).
• Clean the appliance and the accessories thoroughly (see page 46).
• Then operate the oven with an empty cavity (without the roasting grid, the
trays, etc.) for 30 minutes using the operating mode “Professional baking” and
an oven cavity temperature of 180 °C. See 'Cooking and baking' beginning
on page 20.
The point at which the water boils depends on the air pressure and
therefore also on the altitude level. The appliance adapts automatically to
pressures prevailing at its location.

... Your appliance
11
General information on operation
Select the various operating modes, the oven temperature and the core temperature as well as the duration and various other functions by pressing the respective
button.
.
– The respective lamp (if present) will blink.
– A suggestion will blink in the respective display.
Changing a suggestion
• Turn the knob until the required setting is indicated.
– After a certain response time, these settings will be taken over and the
appliance will start.
It is not necessary to wait until the response time has lapsed.
• Press the button.
– The settings are confirmed and are immediately taken over.
– The appliance starts.

12
Settings
Certain user settings on the appliance can be adapte d to s uit your requirements.
The general procedure is equivalent for all settings.
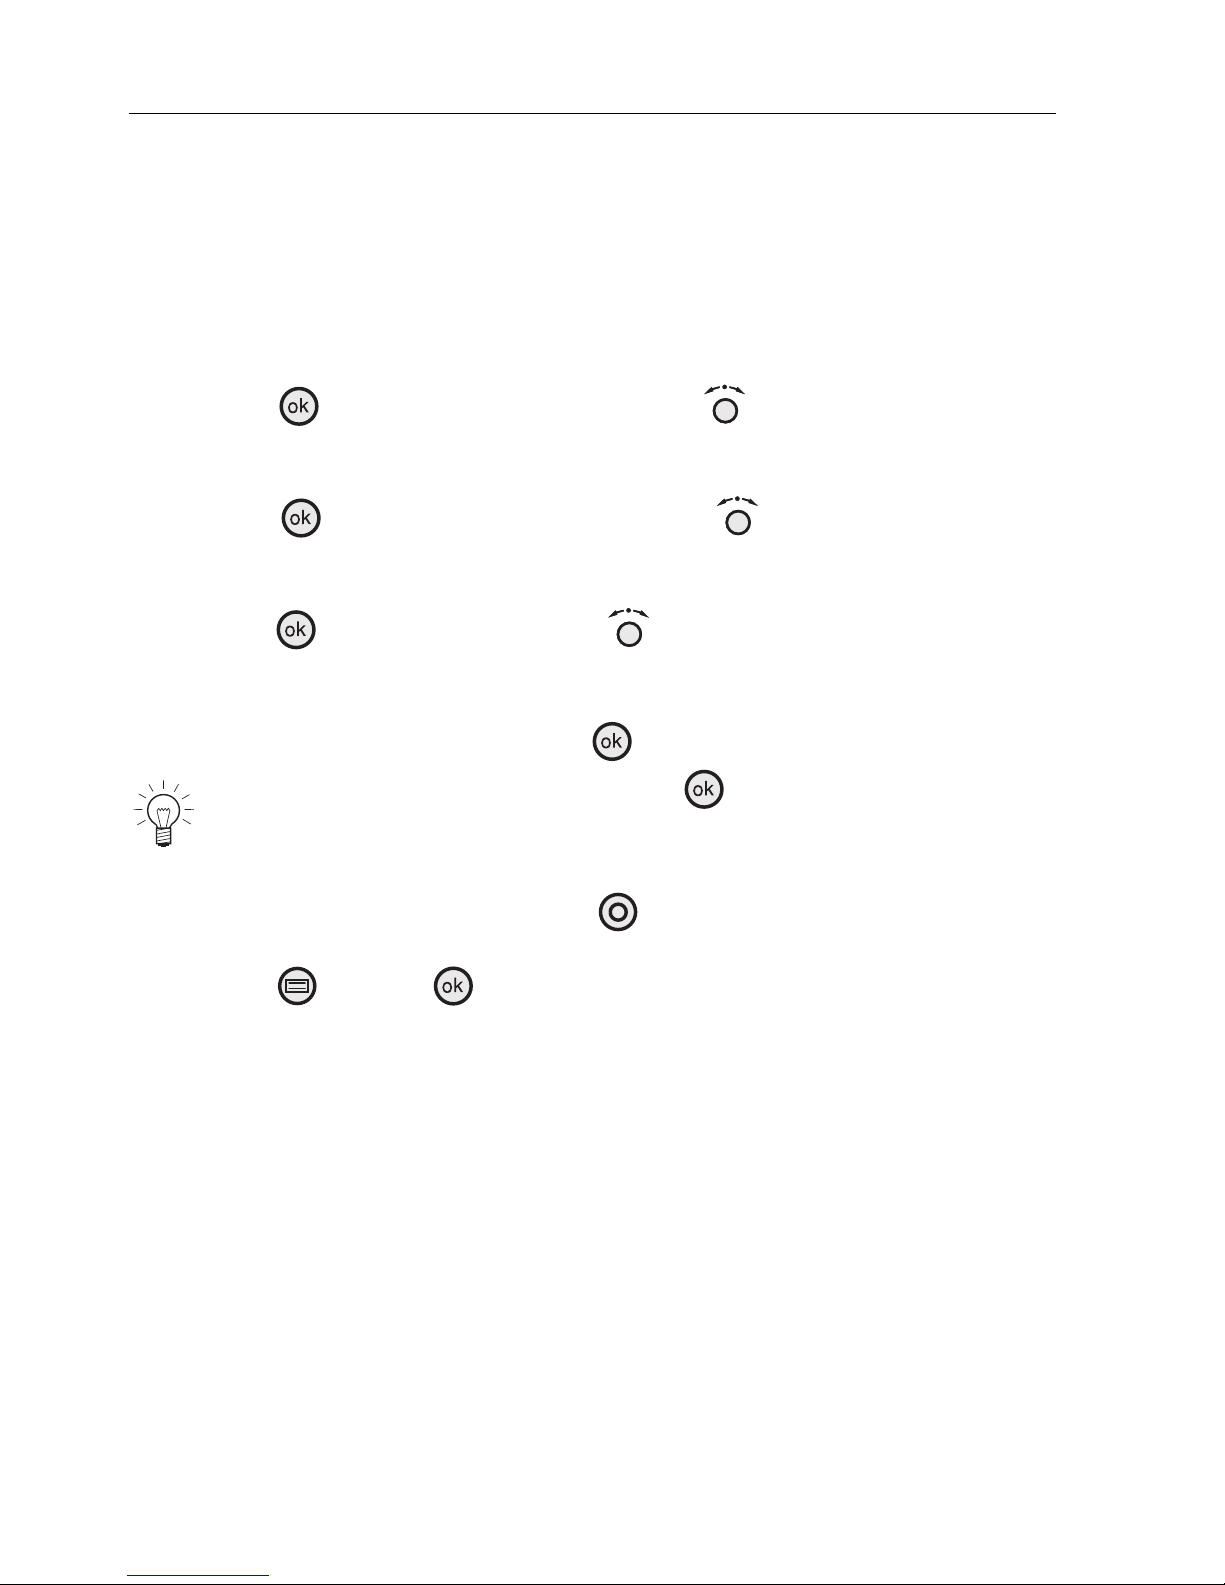
Language selection
• Press the button and turn the control dial until the clear text display
indicates “user settings”.
• Press the button and turn the control dial until the clear text display
indicates “language”.
• Press the button and select the required language with the control
dial.
• Confirm the selected setting by means of the button.
• In order to exit the settings, press the button.
On selecting “reset” and pressing the button, the respective next
operation level can be returned to.
... Settings
13
Switching the childproof lock on and off
The childproof lock is designed to prevent the appliance from being switched on
unintentionally. When the childproof lock is activated the oven lighting can be
switched on and off, the time on the clock can be adju sted, the timer can be used
and the time setting can be programmed.
• Press the button and turn the control dial until the clear text display
indicates “user settings”.
• Press the button and turn the control dial until “childproof lock” is
indicated on the clear text display.
• Press the button and select either “childproof lock on” or “childproof
lock off” with the control dial.
• Confirm the selected setting with the button.
• In order to exit the settings, press the button.
Should the or the buttons be pressed when the childproof lock is
activated,
– the alarm buzzer will buzz twice,
– the clear text display will indicate “childproof lock“ and
there will be no reaction when buttons are pressed.
On selecting “reset” and pressing the button, the respective next
operation level can be returned to.

... Settings
14
Operation when the childproof lock is activated
• Keep the button pressed
• Press the or the button
– The childproof lock has been negotiated and operation may continue as
described in the respective sections.
– The childproof lock has been put out of operation for 10 minutes.
• During this period the appliance can be operated as usual.
– The childproof lock will automatically be re-activated ten minutes after the
appliance has been switched off.
Deactivating
• In order to deactivate the childproof lock press the button and the
button simultaneously.
• Turn the knob until the clear text display indicates “user settings“.
• Press the button and select “childproof lock off“ with the knob.
• The selected user setting must be confirmed with the button.
It is possible to return to the next respective operating level by selecting “back“
and pressing the button.
In order to exit user settings press the button.
... Settings
15
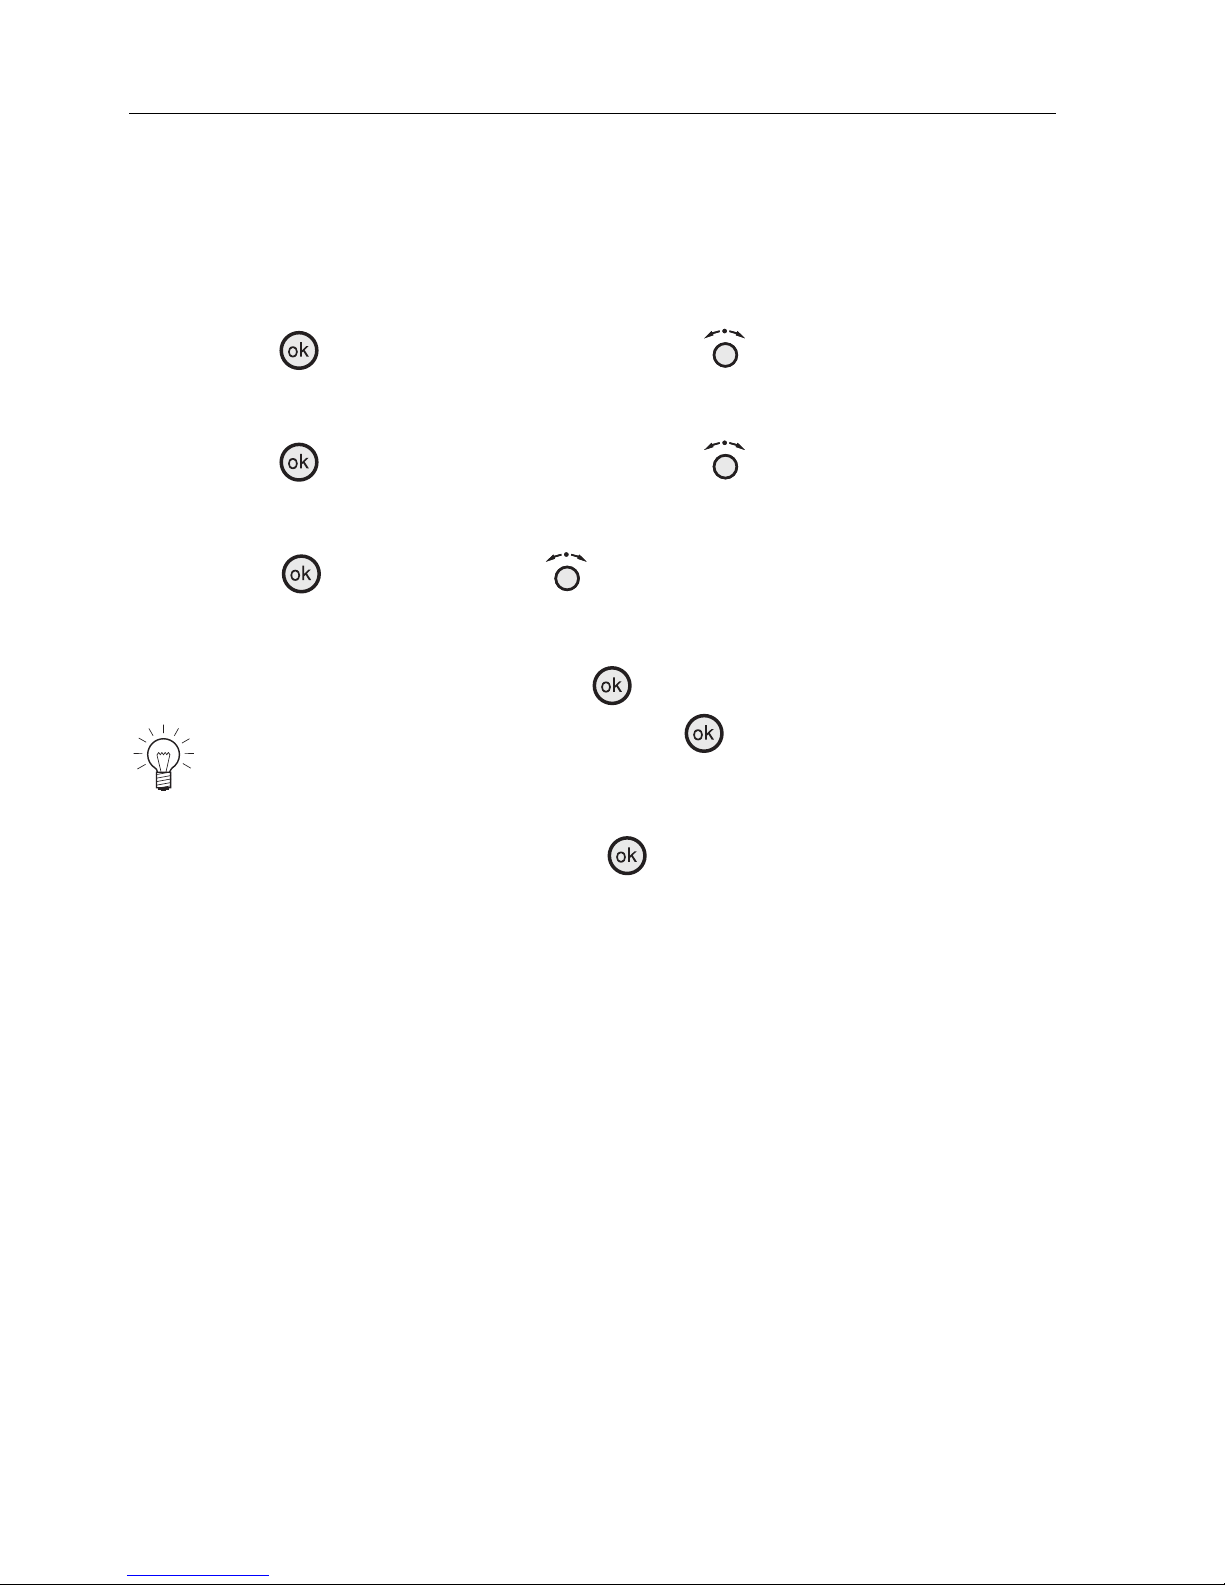
Switching the clock on or off
The clock can be switched off if the appliance is not used for some time, in order
to reduce energy consumption. The clock continues to run invisibly. The appliance
can be put into operation at any given time.
• Press the button and turn the control dial until the clear text display
indicates “user settings”.
• Press the button and turn the control dial until the clear text display
indicates “time”.
• Press the button and select “visible” or “invisible” with the control
dial.
• Confirm the selected setting with the button.
• In order to exit the settings, press the button.
On selecting “reset” and pressing the button, the respective next
operation level can be returned to.

... Settings
16
Changing the volume of the buzzer
The volume of the buzzer can be altered in two stages.
• Press the button and turn the control dial until the clear text display
indicates “user settings”.
• Press the button and turn the control dial until the clear text display
indicates “buzzer”.
• Press the button and select “soft” or “loud” with the control dial.
• Confirm the selected setting with the button.
• In order to exit the settings, press the button.
On selecting “reset” and pressing the button, the respective next
operation level can be returned to.

... Settings
17
Changing the switch-on time setting
The switch-on time (i.e. the stand-by time between the last setting and the
commencement of the selected operation mode by the appliance) can be adjusted
in three stages.
• Press the button and turn the control dial until the clear text display
indicates “user settings”.
• Press the button and turn the control dial until the clear text display
indicates “switch-on time”.
• Press the button and select “short”, “medium” or “long” with the
control dial.
• Confirm the selected setting with the button.
• In order to exit the settings, press the button.
On selecting “reset” and pressing the button, the respective next
operation level can be returned to.

... Settings
18
Switching the automatic oven cavity light
on and off
Should, in the settings, “oven cavity lighting have been selected automatically with
door”, the oven cavity light will always be switched on as soon as the oven door
is opened.
• Press the button and turn the control dial until the clear text display
indicates “user settings”.
• Press the button and turn the control dial until the clear text display
indicates “oven cavity light”.
• Press the button and select “with button only” or “automatically with
the door” with the control dial.
• Confirm the selected setting with the button.
• In order to exit the settings, press the button.
Switching on and off
The lamp can be switched on and off at any time.
• Press the button to switch the lamp on and off.
– When the lamp is switched on the respective control lamp will light up.
If the lamp is not switched off, it will go off automatically 30 minutes after
operation has been stopped.
On selecting “back” and pressing the button, the respective next
operation level can be returned to.
... Settings
19
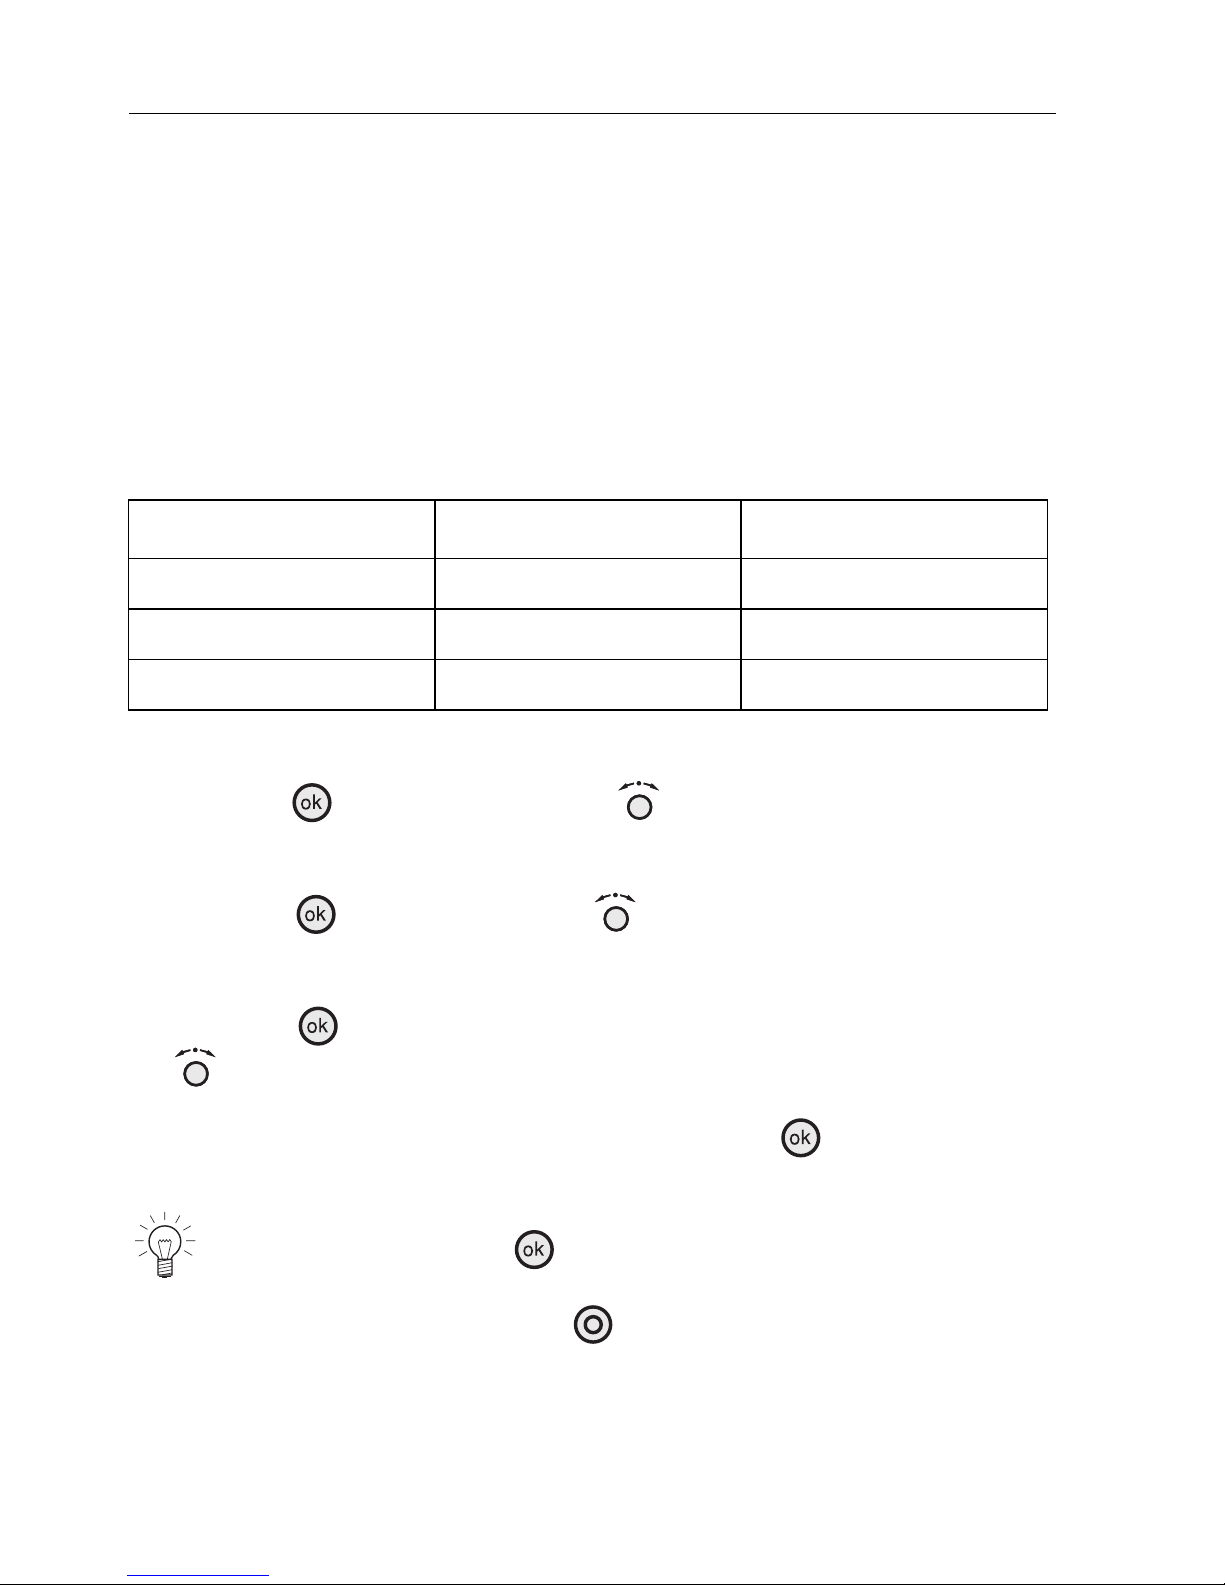
Water Hardness
The appliance has a system which automatically indicates when it should be
decalcified. This system can be optimised by setting the most suitable water hardness level in the user settings when the appliance is connected to an extremely soft
water supply (also one with water softening equipment) or an extremely hard
water supply.
There are three settings for the degree of water hardness:
The medium level of water hardness is set in the factory.
• Press the abutton and turn the knob until the clear text display
indicates “user settings“.
• Press the button and turn the setting knob until the clear tex t display indicates “water hardness“.
• Press the button and select “0 - 15 °fH“ or “36-50 °fH“ with the
button.
• The user setting selected must be confirmed with the button.
It is possible to return to the next respective operating level by selecting
“back“ and pressing the button.
In order to exit user settings press the button.
Level Water hardness [°fH] Water hardness [°dH]
extremely soft waterr 0 - 15 0 - 8
medium level 16 - 35 9 - 20
extremely hard water 36 - 50 21 - 28

20
Cooking and baking
You have acquired a modern appliance which “differs” from older appliances in
its operation. This is why, particularly in old recipe books, the recommended
temperatures for cooking and baking are frequently too high and the rack levels
indicated are not optimal for your appliance.
In the setting tables (see chapter "Instructions for use, setting tables" beginning on
page 36) you will find details for the optimal uti lisation of your appliance. Should
you be in any doubt, use this information as a guideline, taking into consideration
the fact that the information in these tables refers to typical methods of cooking
and can therefore only serve as recommendations.
After being in use for a certain period, the oven interior will take on a golden
colour. This is a normal development in the case of stainless steel and does not
influence cooking or baking properties, nor does it represent an impairment of the
appliance.
Prior to initial use of the appliance, it must be prepared for use in accordance with
section "Initial operation" on page 10 .
Do not forget: Baking and cooking result in the occurence of
heat. Risk of burns!
Please read the safe ty in structions prior to cookin g or ba king
page 4.
 Loading...