

Page 1
VC 6150
AR 177
AR 177
Register and win!
www.kaercher.com
Deutsch 5
English 11
Français 17
Italiano 23
Nederlands 29
Español 35
Português 41
Dansk 47
Norsk 53
Svenska 59
Suomi 65
Ελληνικά 71
Türkçe 78
Русский 84
Magyar 91
Čeština 97
Slovenščina 103
Polski 109
Româneşte 115
Slovenčina 121
Hrvatski 127
Srpski 133
Български 139
Eesti 146
Latviešu 152
Lietuviškai 158
Українська 164
59637070 (08/10)
Page 2
234
Page 3
Page 4
Page 5
Inhaltsverzeichnis
Sicherheitshinweise DE - 1
Bedienung
Betrieb beenden DE - 4
Pflege und Wartung DE - 4
Allgemeine Hinweise DE - 5
Technische Daten DE - 6
Sonderzubehör DE - 6
Sehr geehrter Kunde,
Lesen Sie vor der ersten Benut-
zung Ihres Gerätes diese Originalbetriebsanleitung, handeln Sie danach
und bewahren Sie diese für späteren Gebrauch oder für Nachbesitzer auf.
Bestimmungsgemäße Verwendung
Dieser Staubsauger ist für den privaten Gebrauch im Haushalt und nicht für gewerbliche Zwecke bestimmt.
Der Hersteller haftet nicht für eventuelle
Schäden, die durch nicht bestimmungsgemäßen Gebrauch oder falsche Bedienung
verursacht werden.
Den Staubsauger nur benutzen mit:
Original-Filterbeuteln.
Original-Ersatzteilen, -Zubehör oder
-Sonderzubehör.
Der Staubsauger ist nicht geeignet für:
Das Absaugen von Menschen oder Tie-
ren.
Das Aufsaugen von:
Kleinlebewesen (z. B. Fliegen, Spinnen, usw.).
Gesundheitsschädlichen, scharfkantigen, heißen oder glühenden Substanzen.
Feuchten oder flüssigen Substanzen.
Leicht entflammbaren oder explosiven
Stoffen und Gasen.
DE - 2
Umweltschutz
Die Verpackungsmaterialien sind re-
cyclebar. Bitte werfen Sie die Verpackungen nicht in den Hausmüll, sondern
führen Sie diese einer Wiederverwertung
zu.
Altgeräte enthalten wertvolle recyc-
lingfähige Materialien, die einer Ver-
wertung zugeführt werden sollten.
Bitte entsorgen Sie Altgeräte deshalb über
geeignete Sammelsysteme.
Hinweise zu Inhaltsstoffen (REACH)
Aktuelle Informationen zu Inhaltsstoffen finden Sie unter:
http://www.karcher.de/de/unternehmen/
umweltschutz/REACH.htm
Entsorgung von Filter und Filterbeutel
Filter und Filterbeutel sind aus umweltverträglichen Materialien hergestellt.
Sofern sie keine eingesaugten Substanzen
enthalten, die für den Hausmüll verboten
sind, können sie über den normalen Hausmüll entsorgt werden.
Sicherheitshinweise
– Dieses Gerät ist nicht dafür bestimmt,
durch Personen (einschließlich Kinder)
mit eingeschränkten physischen, sensorischen oder geistigen Fähigkeiten
oder mangels Erfahrung und/oder mangels Wissen benutzt zu werden, es sei
denn, sie werden durch eine für ihre Sicherheit zuständige Person beaufsichtigt oder erhielten von ihr Anweisungen,
wie das Gerät zu benutzen ist. Kinder
sollten beaufsichtigt werden, um sicherzustellen, dass sie nicht mit dem Gerät
spielen.
– Verpackungsfolien von Kindern fernhal-
ten, es besteht Erstickungsgefahr!
– Gerät nach jedem Gebrauch und vor je-
der Reinigung/Wartung ausschalten.
– Brandgefahr. Keine brennenden oder
glimmenden Gegenstände aufsaugen.
– Der Betrieb in explosionsgefährdeten
Bereichen ist untersagt.
- 1
5DE
Page 6

– Bei längeren Betriebspausen Gerät am
Hauptschalter / Geräteschalter ausschalten oder Netzstecker ziehen.
몇 Elektrischer Anschluss
– Das Gerät nur an Wechselstrom an-
schließen. Die Spannung muss mit dem
Typenschild des Gerätes übereinstimmen.
Stromschlaggefahr
– Netzstecker und Steckdose niemals mit
feuchten Händen anfassen.
– Netzstecker nicht durch Ziehen an der
Anschlussleitung aus der Steckdose
ziehen.
– Anschlussleitung mit Netzstecker vor
jedem Betrieb auf Schäden prüfen. Beschädigte Anschlussleitung unverzüglich durch autorisierten Kundendienst/
Elektro-Fachkraft austauschen lassen,
um Gefährdungen zu vermeiden.
– Das Netzanschlusskabel nicht zum Tra-
gen / Transportieren des Gerätes benutzen.
– Das Netzanschlusskabel nicht über
scharfe Kanten ziehen und nicht einquetschen.
– Vor allen Arbeiten am Gerät Netzste-
cker ziehen.
몇 Achtung
Niemals ohne Filterbeutel saugen.
Gerät kann beschädigt werden.
Saugen mit Düse und Saugrohr in Kopf-
nähe vermeiden. Es besteht Verletzungsgefahr!
Bei Saugbetrieb das Netzanschlusska-
bel vollständig ausziehen.
Gerät vor externer Witterung, Feuchtig-
keit und Hitzequellen schützen.
Gerät ausschalten, wenn nicht gesaugt
wird.
Bedienung
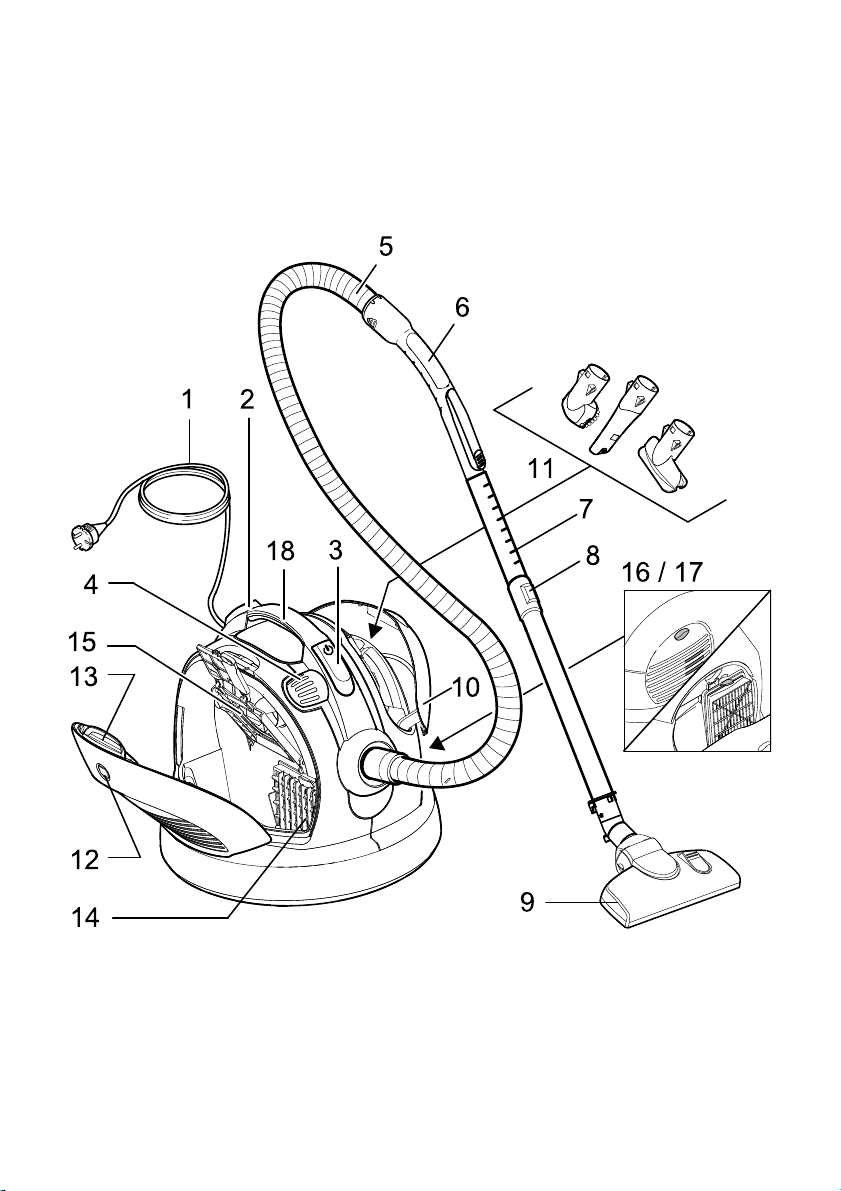
Gerätebeschreibung
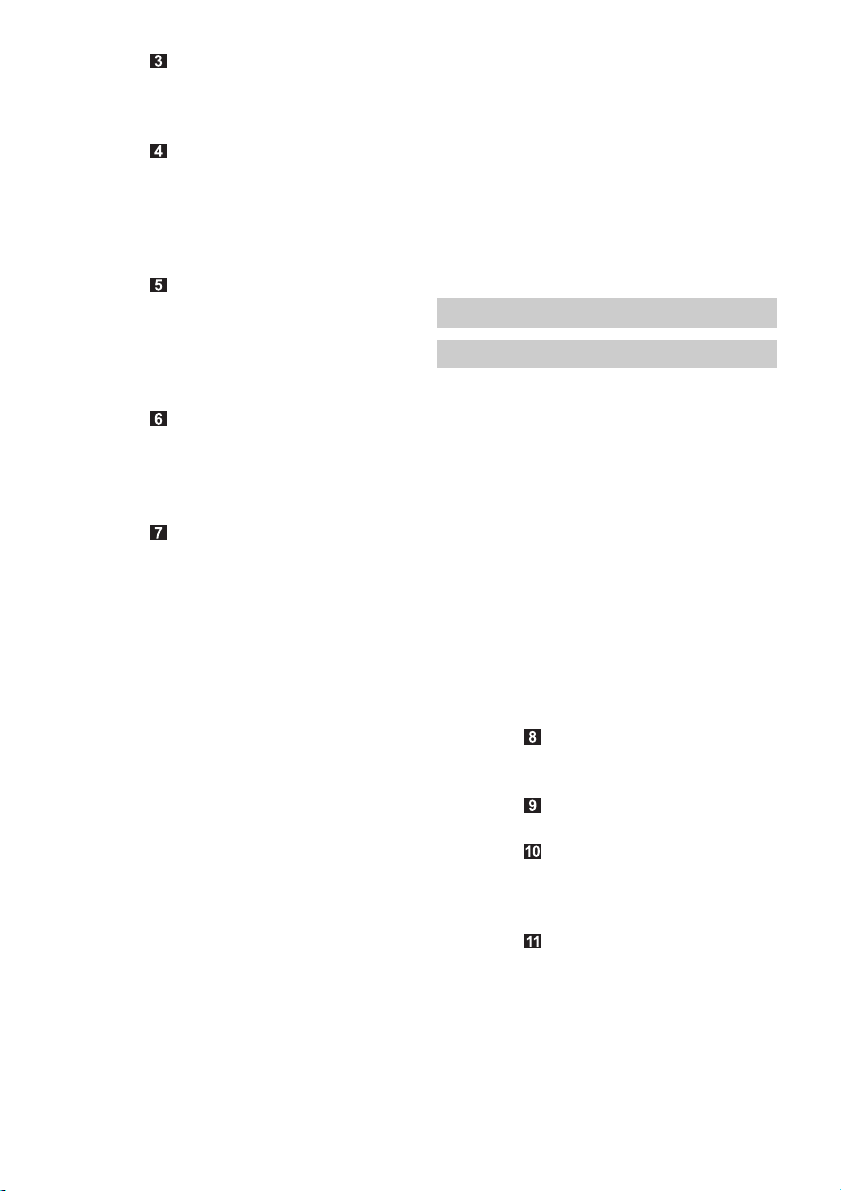
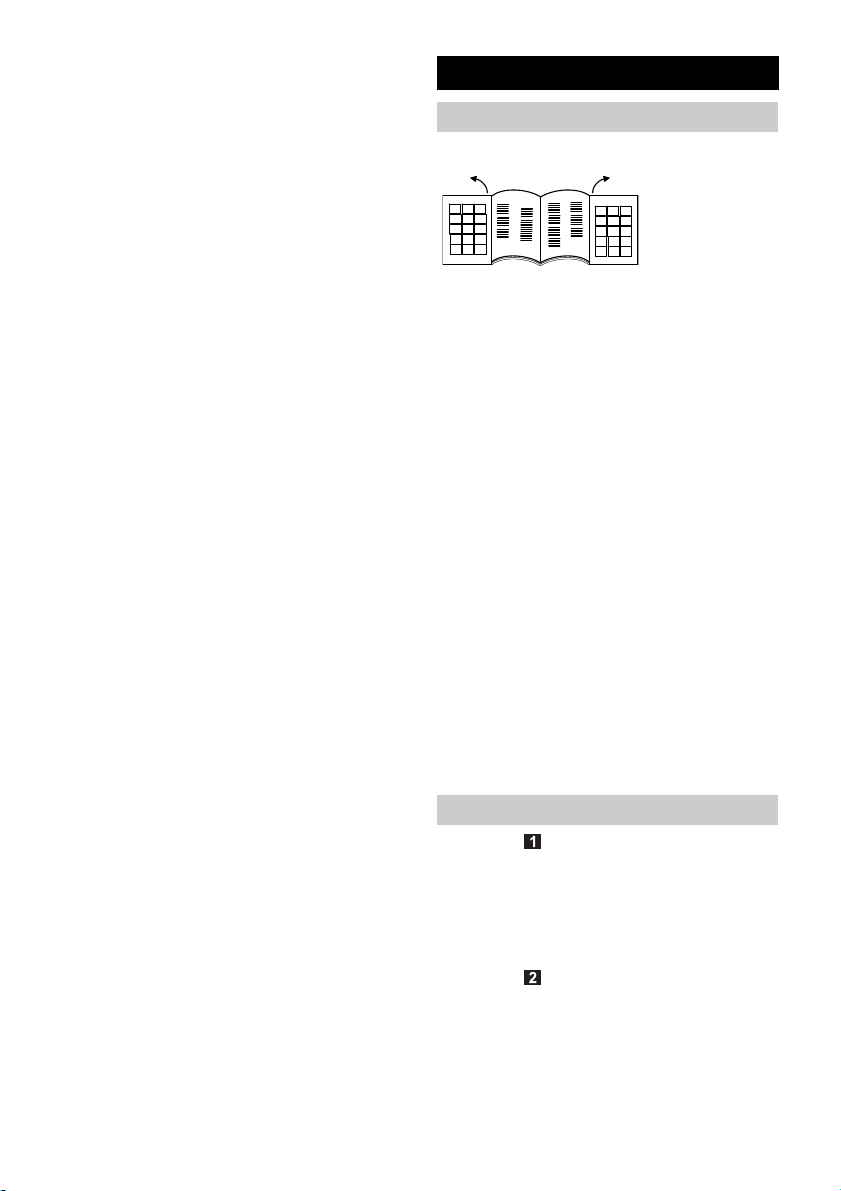
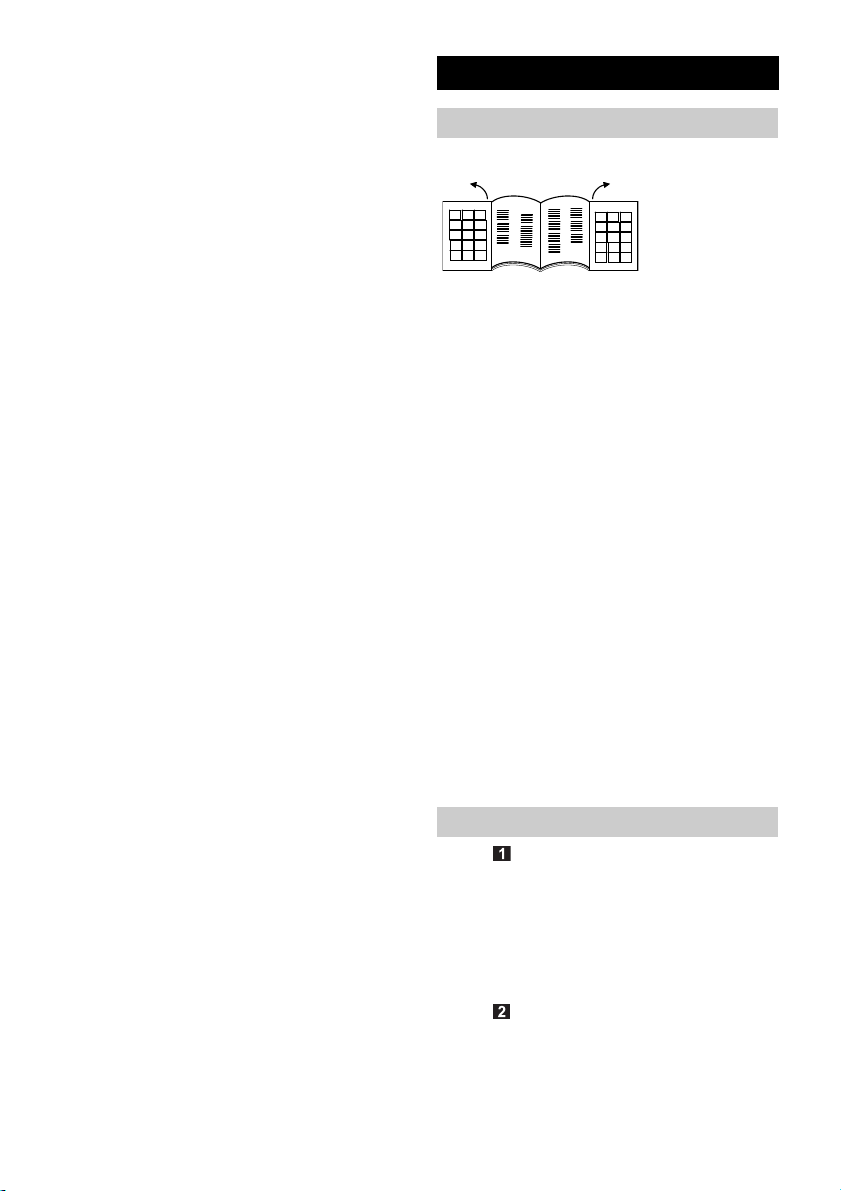
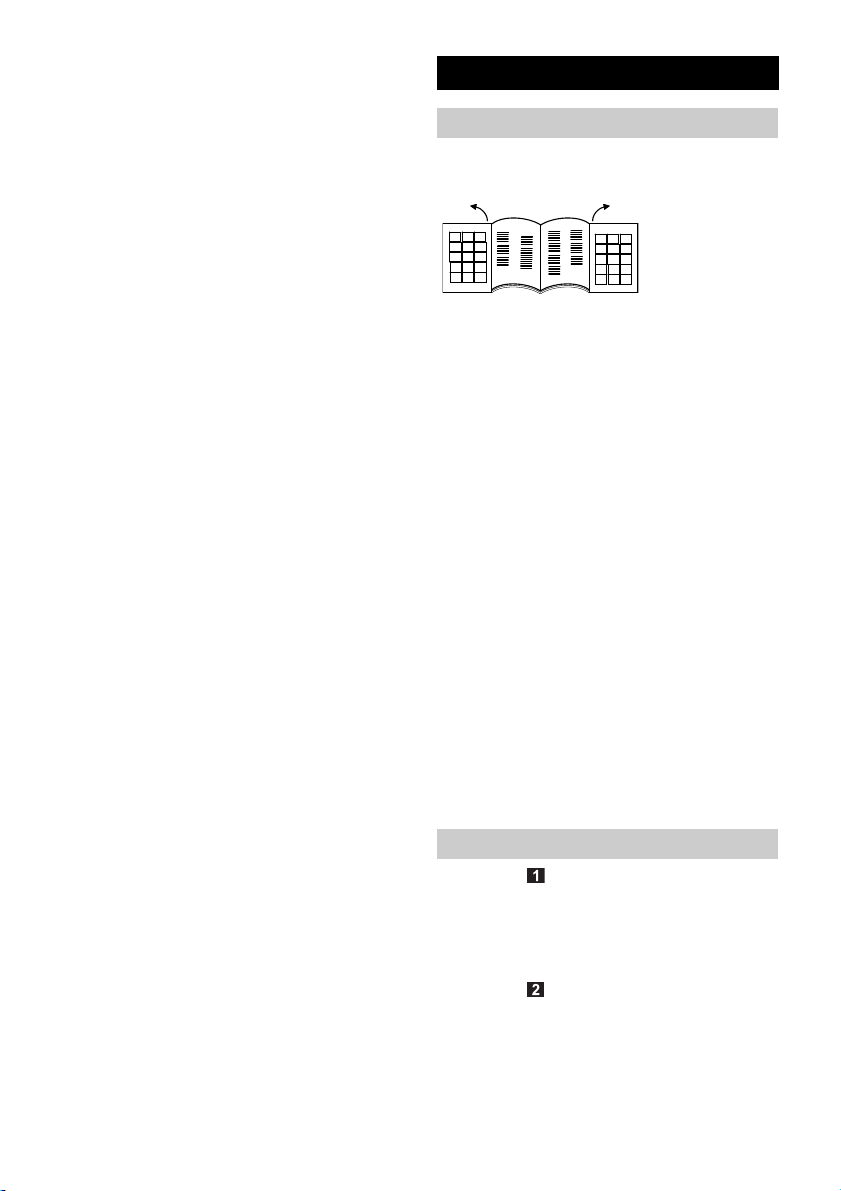
Bitte Abbildungsseiten ausklappen!
1 Netzanschlusskabel mit Stecker
2 Taste Kabelaufwicklung
3 Ein-/Aus Taste
4 Saugkraftregler
5 Saugschlauch
6 Handgriff
7 Teleskopsaugrohr
8 Verstellung Teleskopsaugrohr
9 Bodendüse
10 Abdeckung Zubehöraufnahme
11 Zubehöraufnahme QuickClick:
enthält Polsterdüse, ausziehbare Fu-
gendüse und Möbelpinsel
12 Filterwechselanzeige
13 Verschlusshebel, Deckel Filterbeutel /
Motorschutzfilter
14 Motorschutzfilter
15 Filterbeutelhalterung
16 Abdeckung HEPA-Filter
17 HEPA-Filter
18 Tragegriff
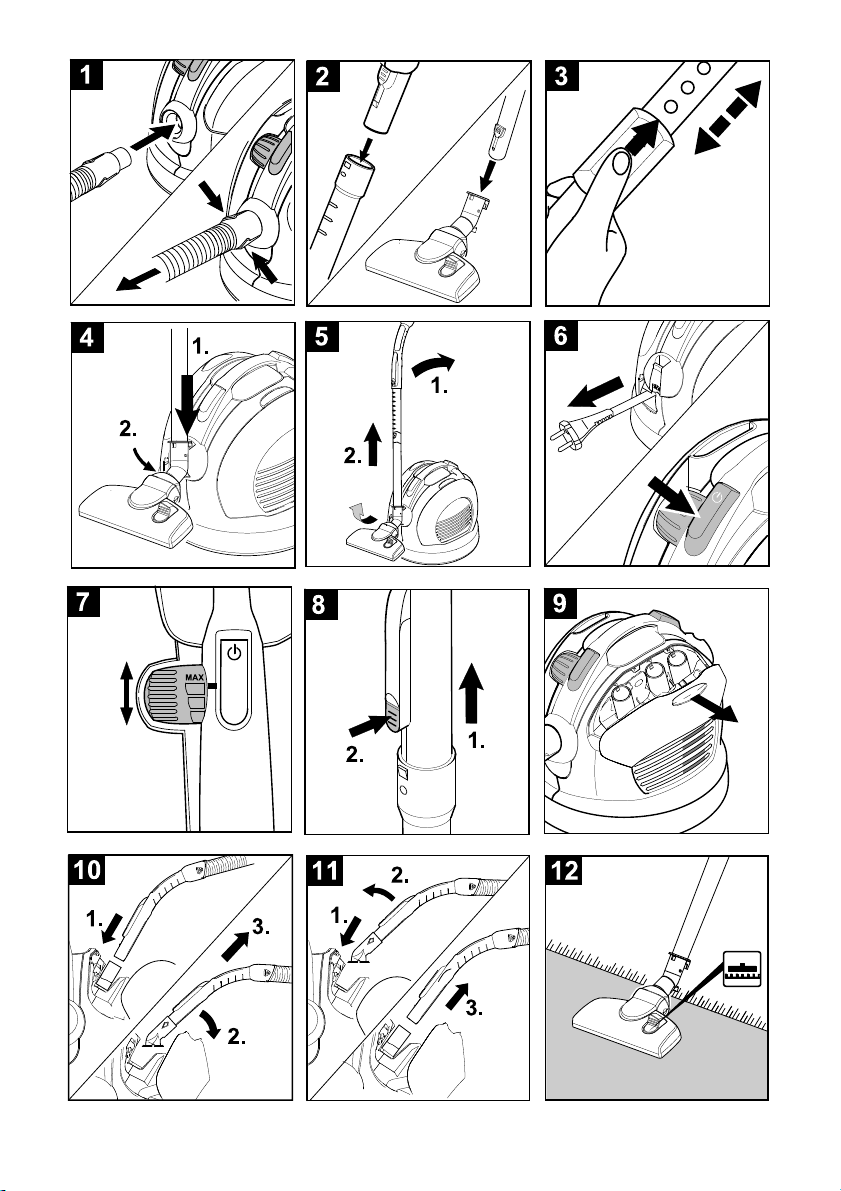
Inbetriebnahme
Abbildung
Saugschlauchstutzen in die Saugöff-
nung einrasten.
Zum Abnehmen beide Rastnasen zu-
sammendrücken und Schlauch abzie-
hen.
Abbildung
Handgriff und Teleskopsaugrohr zu-
sammenstecken und einrasten.
Bodendüse und Teleskopsaugrohr zu-
sammenstecken und einrasten.
6 DE
- 2
Page 7
Abbildung
Verstellung betätigen und Teleskop-
saugrohr auf gewünschte Länge ein-
stellen.
Abbildung
Zum Abstellen oder bei kurzen Arbeits-
unterbrechungen, Bodendüse in die
Parkhalterung an der Geräterückseite
einhängen und in Raststellung drücken.
Abbildung
Zum Entnehmen Handgriff nach hinten
in Richtung Gerät drücken. Damit wird
die Bodendüse aus der Parkhalterung
entriegelt und kann nach oben abge-
nommen werden.
Abbildung
Netzanschlusskabel am Stecker halten
und herausziehen. Netzstecker in
Steckdose einstecken.
Gerät ein- / ausschalten.
Abbildung
Die Saugkrafteinstellung erfolgt am
Saugkraftregler:
- Markierung auf MAX, hohe Saugkraft
- Markierung auf MIN, geringe Saug-
kraft
Hinweis: die Markierung zeigt die aktu-
elle Saugleistung an.
Saugkraft entspechend der Saugsituation anpassen:
Niedrige Saugleistung – für Gardinen,
Textilien, Polstermöbel, Kissen
Mittlere Saugleistung – für leicht ver-
schmutzte Teppiche / Teppichböden,
hochwertige Teppiche, Brücken und
Läufer
Höchste Saugleistung – für Hartbö-
den, stark verschmutzte Teppiche und
Teppichböden
Bitte beachten! Sollte beim Einschalten
des Gerätes die Netzsicherung auslösen,
kann es daran liegen, dass gleichzeitig andere Elektrogeräte am gleichen Stromkreis
angeschlossen und betrieben werden.
Stellen Sie in diesem Fall die niedrigste
Leistungsstufe am Gerät ein, bevor Sie das
Gerät einschalten. Danach können Sie
eine höhere Leistungsstufe wählen. Netz-
absicherung siehe Kapitel „Technische Daten“.
Wichtiger Hinweis! Das Gerät schaltet
sich bei Gefahr einer Überhitzung automatisch ab. Schalten Sie das Gerät aus und
ziehen Sie den Netzstecker. Stellen Sie sicher, dass Düse, Saugrohr oder Schlauch
nicht verstopft sind bzw. der Filter gewechselt werden muss. Nach Beseitigung der
Störung das Gerät mindestens 1 Stunde
abkühlen lassen, dann ist das Gerät wieder
betriebsbereit.
Saugen mit Zubehör
QuickClick Zubehör
QuickClick Zubehör anwenden
Polsterdüse: zum Absaugen von Pols-
termöbeln, Matratzen, Gardinen u. a
Möbelpinsel, drehbar: zur schonen-
den Reinigung von Möbeln und empfindlichen Gegenständen, Abstauben
von Büchern, Lüftungsschlitze im Auto
u.a
Fugendüse, ausziehbar: für Kanten,
Fugen und Heizkörper
Zubehör aus QuickClick Zubehöraufnahme wechseln
Bodendüse in die Parkhalterung an der
Geräterückseite einhängen und in Raststellung drücken (siehe Abbildung 4).
Abbildung
Entriegelungstaste am Handgriff drü-
cken und Handgriff von Teleskopsaugrohr abziehen.
Abbildung
Abdeckung der Zubehöraufnahme auf-
klappen.
Abbildung
Handgriff in gewünschtes Zubehör bis
zum Anschlag einstecken. Damit rastet
es ein. Anschließend nach unten
schwenken und herausziehen.
Abbildung
Zum Aufbewahren, Zubehör mit Handgriff
in Zubehöraufnahme stecken und nach
oben einrasten. Handgriff abziehen.
- 3
7DE
Page 8
Hinweis: Das Zubehör kann auch von
Hand entnommen und auf den Hand-
griff gesteckt werden. Zum Lösen des
Zubehörs Entriegelungstaste vom
Handgriff drücken.
Hinweis: Alle o.g. Schritte können auch
mit aufgestecktem Teleskopsaugrohr
ausgeführt werden. Dazu Bodendüse in
die Parkhalterung an der Geräterück-
seite einhängen und in Raststellung
drücken. Teleskopsaugrohr senkrecht
nach oben abziehen.
ComfoGlide Düse
Abbildung
Teppiche und Teppichböden:
Schalterstellung wie folgt wählen:
Abbildung
Hartflächen:
Schalterstellung wie folgt wählen:
Betrieb beenden
Gerät ausschalten und Netzstecker zie-
hen.
Abbildung
Taster Kabelaufwicklung drücken. Ka-
bel zieht sich automatisch in das Gerät
ein.
Bodendüse in die Parkhalterung an der
Geräterückseite einhängen und in
Raststellung drücken.
Transport, Aufbewahren
Gerät zum Transport am Tragegriff hal-
ten und in trockenen Räumen aufbe-
wahren.
Hinweis: Empfehlenswert ist es das
Teleskopsaugrohr vorher ganz einzu-
schieben.
Pflege und Wartung
Verletzungsgefahr
Vor allen Pflege- und Wartungsarbeiten,
Gerät ausschalten und Netzstecker ziehen.
Gerät reinigen
몇 Achtung
Keine Scheuermittel, Glas oder Allzweckreiniger verwenden! Gerät niemals in Wasser tauchen.
Gerät und Zubehörteile aus Kunststoff
mit einem handelsüblichen Kunststoffreiniger pflegen.
Den Staubraum mit einem trockenen
Staubtuch / Staubpinsel reinigen.
Filterbeutel austauschen
Bestell-Nr. 6.904-329
Inhalt: 5 Filterbeutel mit Verschluss und
1 Motorschutzfilter.
Hinweis: Zum Ablesen der Filterwechselanzeige das Teleskopsaugrohr vom Handgriff trennen.
Abbildung
Zeigt die Filterwechselanzeige im De-
ckel vollständig rot, bitte Filterbeutel
wechseln.
Verschlusshebel betätigen und Deckel
öffnen.
Abbildung
Halterung für Filterbeutel entriegeln und
nach außen klappen.
Abbildung
Mit Verschlusslasche Filterbeutel ver-
schließen, Filterbeutel herausnehmen
und entsorgen.
Abbildung
Neuen Filterbeutel bis zum Anschlag in
die Halterung einschieben. Lasche zu-
erst nach unten drücken, danach Halte-
rung in das Gehäuse schieben und am
Gerätegehäuse einrasten.
몇 Achtung
Deckel schließt nur mit eingelegtem Filterbeutel. Nach dem Aufsaugen feiner Staubpartikel (wie z. B. Gips, Zement, usw.)
8 DE
- 4
Page 9
Motorschutzfilter reinigen bzw. austauschen.
Motorschutzfilter austauschen
Motorschutzfilter: Wechseln mit dem letz-
ten Filterbeutel der Filterbeutelpackung.
Der Motorschutzfilter liegt hinter dem
eingesetzten Filterbeutel. Vor Einsetzen des Filterbeutels Motorschutzfilter
austauschen.
Abbildung
Rahmen entriegeln und herausneh-
men.
Rahmenunterteil abnehmen, alten Mo-
torschutzfilter entnehmen und entsorgen. Neuen Motorschutzfilter in
Rahmen einlegen und Rahmenunterteil
einsetzen.
Abbildung
Rahmen einsetzen und einrasten.
HEPA-Filter austauschen
Bestell-Nr. 6.414-805
Filter für reine Ausblasluft.
HEPA-Filter: 1x jährlich wechseln.
Abbildung
Deckel öffnen.
HEPA-Filter entriegeln und herausneh-
men.
Abbildung
Neuen HEPA-Filter einsetzen und ein-
rasten.
Deckel schließen.
ComfoGlide Düse reinigen
Die ComfoGlide Düse in regelmäßigen Abständen reinigen!
Düse vom Saugrohr abnehmen.
Abbildung
Hintere Lenkrolle reinigen:
Am Besten bei abgenommener Rolle.
Dazu Achse aufschrauben und herausziehen. Staubflusen, Haare usw. können jetzt leicht entfernt werden.
Lenkrolle wieder einbauen.
Zubehör reinigen
Abbildung
Handgriff und Saugschlauch können
zur Reinigung oder bei Verstopfung ge-
trennt werden. Dazu 2 Entriegelungen
drücken und auseinanderziehen.
Zum Verbinden Handgriff und Saug-
schlauch zusammenstecken und ein-
rasten.
Allgemeine Hinweise
Garantie
In jedem Land gelten die von unserer zuständigen Vertriebsgesellschaft herausgegebenen Garantiebedingungen. Etwaige
Störungen an Ihrem Gerät beseitigen wir
innerhalb der Garantiefrist kostenlos, sofern ein Material- oder Herstellungsfehler
die Ursache sein sollte. Im Garantiefall
wenden Sie sich bitte mit Kaufbeleg an Ihren Händler oder die nächste autorisierte
Kundendienststelle.
(Adresse siehe Rückseite)
Kundendienst
Bei Fragen oder Störungen hilft Ihnen unsere KÄRCHER-Niederlassung gern weiter. Adresse siehe Rückseite.
Bestellung von Ersatzteilen und
Sonderzubehör
Eine Auswahl der am häufigsten benötigten Ersatzteile finden Sie am Ende der Betriebsanleitung.
Ersatzteile und Zubehör erhalten Sie bei ihrem Händler oder bei ihrer KÄRCHER-Niederlassung.
(Adresse siehe Rückseite)
- 5
9DE
Page 10
Technische Daten
Sonderzubehör
Spannung
Stromart
Netzabsicherung (trä-
V 220 - 240
Hz 50/60
A16
ge)
Schutzklasse II
Leistung P
Leistung P
nenn
max
Gewicht (ohne Zube-
W 1600
W 1800
kg 7,0
hör)
Aktionsradius
Abmessungen
Nennweite, Zubehör
Schalldruckpegel
m10
mm ø 380 x
380
mm 35
dB(A)
64
(EN 60704-2-1)
Technische Änderungen vorbehalten!
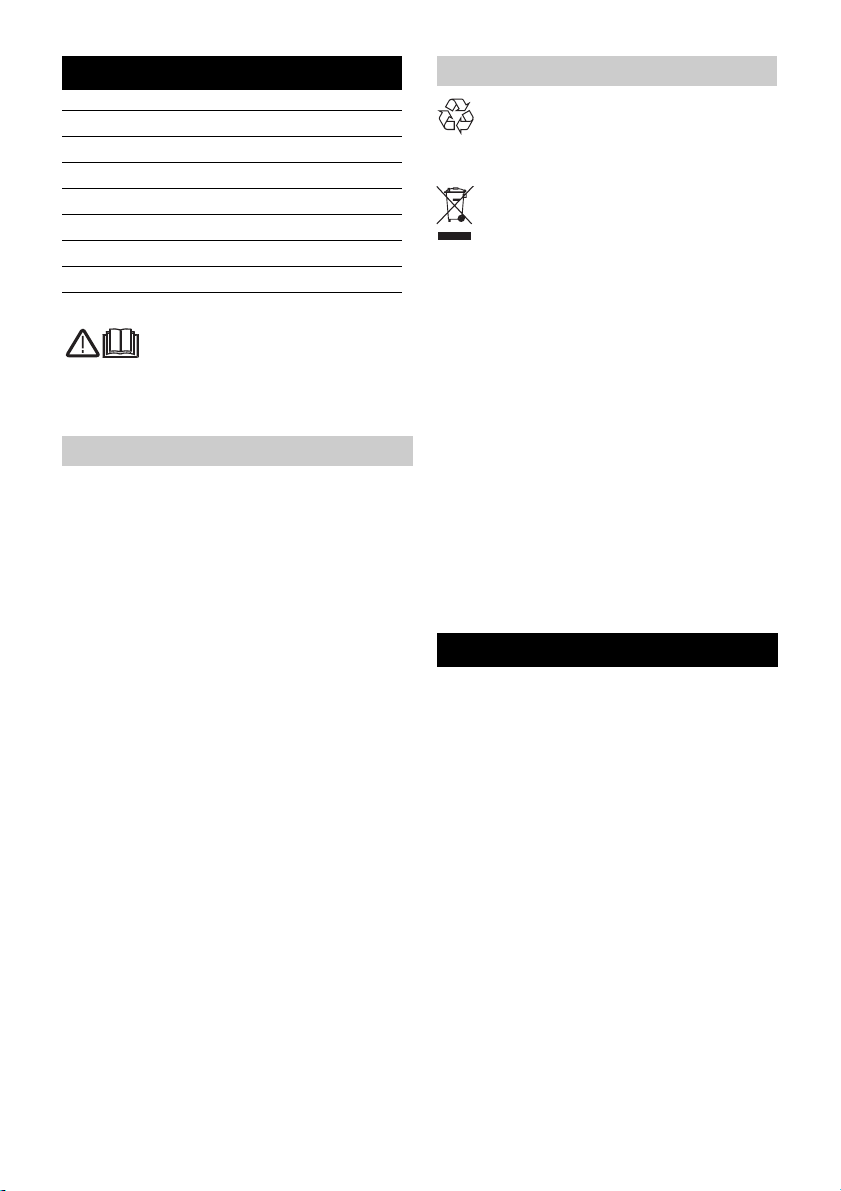
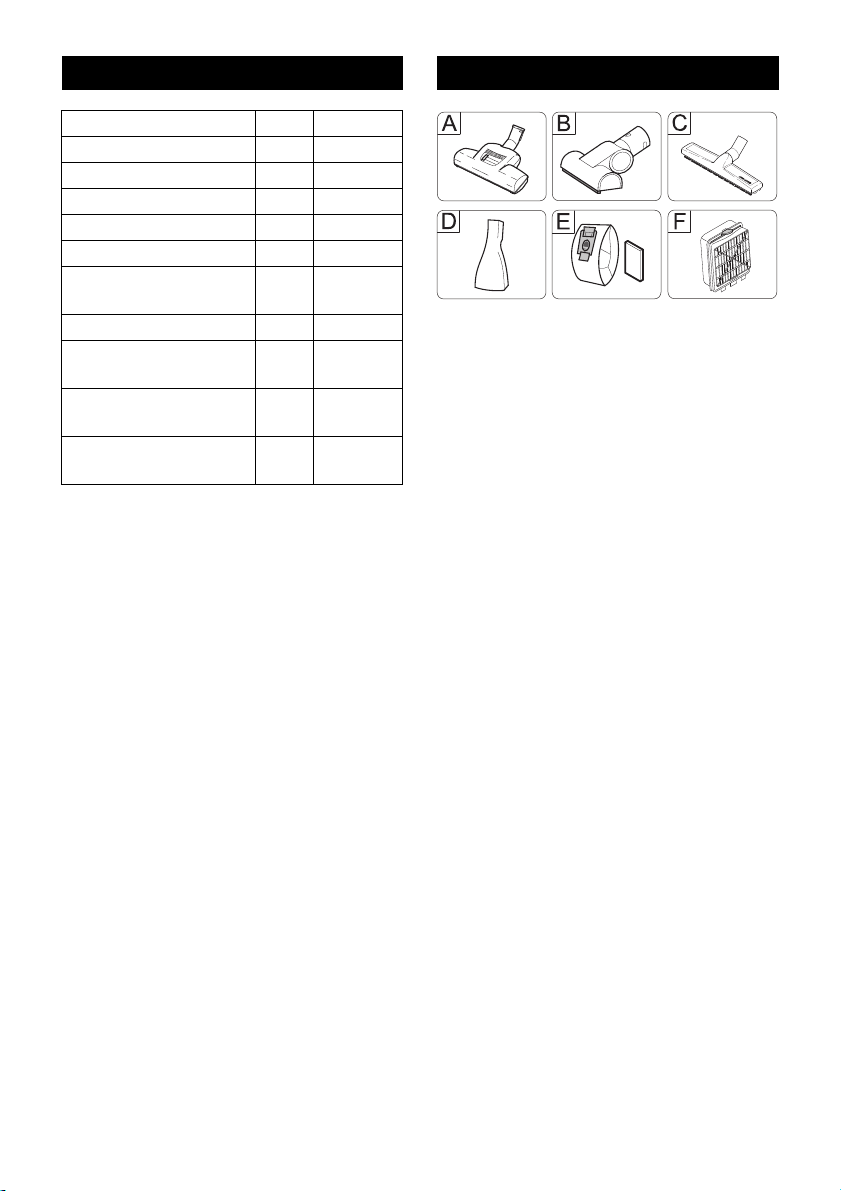
A Turbodüse für Böden
(Bestell-Nr. 4.130-177)
Bürsten und Saugen in einem Arbeits-
gang.
Besonders geeignet zum Aufsaugen
von Tierhaaren und Saugen von hoch-
florigen Teppichen. Antrieb der Bürs-
tenwalze erfolgt über den Luftstrom.
Kein Elektroanschluss erforderlich.
B Turbodüse für Polster
(Bestell-Nr. 2.903-001)
Bürsten und Saugen in einem Arbeits-
gang von Polstermöbeln, Matratzen,
Autositzen, usw.
Besonders geeignet zum Aufsaugen
von Tierhaaren. Antrieb der Bürsten-
walze erfolgt über den Luftstrom.
Kein Elektroanschluss erforderlich.
C Parkettdüse
(Bestell-Nr. 4.130-172)
Zum Saugen empfindlicher glatter Bö-
den (Parkett, Marmor, Terrakotta,
usw.).
D Matratzendüse
(Bestell-Nr. 6.906-755)
Zum Saugen von Matratzen und Pols-
tern.
E Filterbeutel
(Bestell-Nr. 6.904-329)
Inhalt: 5 Filterbeutel mit Verschluss und
1 Motorschutzfilter.
F HEPA-Filter
(Bestell-Nr. 6.414-805)
Zusätzlicher Filter für reine Ausblasluft.
Empfohlen für Allergiker.
10 DE
- 6
Page 11
Contents
Safety instructions EN - 1
Operation EN - 2
Finish operation EN - 4
Maintenance and care EN - 4
General notes EN - 5
Technical specifications EN - 6
Special accessories EN - 6
Dear Customer,
Please read and comply with
these original instructions prior
to the initial operation of your appliance and
store them for later use or subsequent owners.
Proper use
This vacuum cleaner is meant for use in
private households and not for commercial
purposes.
The manufacturer is not responsible for any
damages that may occur on account of improper use or wrong operations.
Use the vacuum cleaner only with:
Original filter bags.
Original spare parts, accessories and
special accessories.
The vacuum cleaner is not suitable for:
Sucking in human beings or animals.
Suction of:
Small living creatures (for e.g. flies, spiders, etc.).
Substances that are harmful for health,
have sharp edges, are hot or burning.
Moist or fluid substances.
Mildly inflammable or explosive materials and gases.
Environmental protection
The packaging material can be recy-
cled. Please do not place the packaging into the ordinary refuse for disposal, but
arrange for the proper recycling.
Old appliances contain valuable ma-
terials that can be recycled. Please
arrange for the proper recycling of old
appliances. Please dispose your old appliances using appropriate collection systems.
Notes about the ingredients (REACH)
You will find current information about the
ingredients at:
http://www.karcher.de/de/unternehmen/
umweltschutz/REACH.htm
Disposing the filters and filter bags
Filters and filter bags are made from environment-friendly materials.
They can therefore be disposed off through
the normal household garbage provided
you have not sucked in substances that are
not permitted to be thrown into household
garbage.
Safety instructions
– This device is not intended for use by
persons (including children) with reduced physical, sensory or mental abilities or lacking experience and/or
knowledge, unless they are supervised
by a person responsible for their safety
or are instructed by these persons on
the use of the device. Children should
be supervised, to ensure that they do
not play with the device.
– Keep packaging film away from children
- risk of suffocation!
– Switch the appliance off after every use
and prior to every cleaning/maintenance procedure.
– Risk of fire. Do not vacuum up any burn-
ing or glowing objects.
– The appliance may not be used in areas
where a risk of explosion is present.
- 1
11EN
Page 12
– In case of extended downtimes, switch
the appliance off at the main switch / appliance switch or remove the mains
plug.
몇 Electrical connection
– The appliance may only be connected
to alternating current. The voltage must
correspond with the type plate on the
appliance.
Risk of electric shock
– Never touch the mains plug and the
socket with wet hands.
– Do not pull the plug from the socket by
pulling on the connecting cable.
– Check the power cord with mains plug
for damage before every use. If the
power cord is damaged, please arrange
immediately for the exchange by an authorized customer service or a skilled
electrician.
– Do not use the power cord to carry/
transport the machine.
– Do not scrape the power cord across
sharp edges and ensure that it does not
get pressed.
– First pull out the plug from the mains be-
fore carrying out any tasks on the machine.
몇 Caution
Never vacuum clean without the filter
bag.
This can cause damage to the appli-
ance.
Avoid vacuum cleaning using nozzle or
suction tubes close to the head. There
is risk of injury!
Always pull out the power cord fully dur-
ing operation.
Protect the appliance against external
weather, humidity and heat sources.
Turn off the appliance while you do not
vacuum.
Operation
Description of the Appliance
Please unfold the pages with the diagrams!
1 Power cord with plug
2 Push button take-up cable
3 On/Off button
4 Suction control
5 Suction hose
6 Handle
7 Telescopic suction pipe
8 Adjustable telescopic suction pipe
9 Floor nozzle
10 Cover attachment housing
11 Attachment housing QuickClick:
includes upholstery nozzle, telescopic
gap nozzle and a furniture brush
12 Change filter indicator
13 Shutter lever, lid filter bag/ motor pro-
tection filter
14 Motor protection filter
15 Filter bag holder
16 Cover HEPA filter
17 HEPA-filter
18 Carrying handle
Start up
Illustration
Lock the suction hose neck in the suc-
tion opening.
To take off, push both lock devices to-
gether and pull the tube.
Illustration
Connect handle and suction tube and
insert.
Connect the floor nozzle and telescopic
suction pipe and insert.
12 EN
- 2
Page 13
Illustration
Use the adjustment in order to adjust
the telescopic suction pipe to the length
you wish.
Illustration
When you stop or you take a short
break, hang the floor nozzle into the
parking position on the back of the ap-
pliance, and push it into the resting po-
sition.
Illustration
To remove, press handle backwards in
the direction of the appliance. The floor
nozzle is thus unlocked from the park-
ing holder and can be removed up-
wards.
Illustration
Hold the power cord at the plug and pull
it out. Insert the mains plug into a sock-
et.
Turn on/off the appliance.
Illustration
The power suction adjustment is at the
power suction control:
- Marking MAX, high power suction
- Marking MIN, low power suction
Note: the marking shows the current
suction power.
Adjust the suction power to suit the suction requirement:
Low suction power – for laced cur-
tains, textiles, upholstered furniture,
cushions
Medium suction power – for slightly
dirty carpets/ carpeted floors, precious
carpets, bridges and runners
Highest suction power – for hard
floors, very dirty carpets and carpeted
floors
Please take notice! Should, while turning
the appliance on, the mains furse tripper
shut off, possibly, other electrical appliances are connected and are operating on the
same electric circuit. Should this be the
case, put the appliance in its lowest power
stage, before turning the appliance on. Afterwards you may select a higher power
stage. Refer to chapter "Technical data" for
power fuse protection.
Important notice! The appliance will shutdown automatically, if there is danger of
overheating. Turn the appliance off and pull
the power plug. Make sure, that the nozzle,
the suction pipe or the tube is not clogged,
failing all the above the filter must be
changed. After the elimination of the interference let the appliance cool down for a
minimum of 1 hour, before using it again.
Suction using accessories
QuickClick attachment
QuickClick Using the attachments
Upholstery nozzle: for cleaning uphol-
stered furniture, mattresses, laced curtains, etc.
Furniture brush, rotating: for cleaning
furniture and delicate objects with care,
dusting books, air vents in the car, etc.
Joint nozzle, detachable: for edges,
joints and heaters
Changing the attachments in the QuickClick attachment housing
Hang in the floor nozzle in the park
holder on the rear side of the machine
and press it into locking position (see illustration 4)
Illustration
Push the dead button at the handle and
remove the telescopic suction pipe.
Illustration
Open the attachment housing cover.
Illustration
Insert the handle in the desired acces-
sory until the stop. It then gets locked.
Then tilt it downwards and pull it out.
Illustration
To store, put the attachment using the
handle into the attachment housing and
click it up into place. Remove the han-
dle.
Notice: You also can remove the at-
tachment manually and put it on top of
the handle. In order to release the at-
- 3
13EN
Page 14
tachment, push the dead button on the
handle.
Notice: All steps stated above can also
be done when the telescopic suction
pipe is connected. Hang the floor nozzle on the backside of the appliance into
the parking holder, and push into the
pause position. Pull the telescopic suction pipe straight up.
ComfoGlide nozzle
Illustration
Carpets and carpeted floors:
Select the following switch setting:
Illustration
Hard surfaces:
Select the following switch setting:
Finish operation
Turn off the appliance and disconnect
the mains plug.
Illustration
Push the take-up cable button. The ca-
ble will pull itself automatically into the
appliance.
Hang the floor nozzle on the backside
of the appliance into the parking holder,
and push into the pause position.
Transport, storage
Hold the appliance at the carrying han-
dle when you want to transport it and
store it in dry rooms.
Note: It is recommended that you first
completely push in the telescopic suction pipe.
Maintenance and care
Risk of injury
Always switch off the appliance and pull out
the mains plug before care and maintenance work.
Cleaning the device
몇 Caution
Do not use abrasives, glass or universal cleaners! Never immerse the appliance in water.
Clean the appliance and accessory
parts made of plastic with a commercial
plastic cleaner.
Clean the dust chamber with a dry wipe
cloth/ dust brush.
Replacing the filter bag
Order no. 6.904-329
Contents: 5 filter bags with cap and 1 engine protection filter.
Note: Separate the telescopic suction pipe
from the handle to see the filter change indicator.
Illustration
If the filter change indicator in the cover
glows red, then please change the filter bag.
Use the closing lever and open the lid.
Illustration
Unlock the holder of the filter bags and
pull towards the outside.
Illustration
Close the filter bag using the closing
flap, remove the filter bag and dispose it
off.
Illustration
Push the new filter bag into the support
until the stop. First press the flap down-
wards; then push the holder into the
casing and lock it at the appliance cas-
ing.
몇 Caution
Close the lid only, if there is a filter bag inserted. After picking up small dust particle
(as for example plaster, cement etc) clean
the motor protection filter, change if necessary.
14 EN
- 4
Page 15
Change the motor protection filter
Motor protection filter: change before the
last filter bag is removed from the filter bag
package.
The motor protection filter is behind the
inserted filter bag. Change the motor
protection filter before you insert the filter bag.
Illustration
Unlock the frame and remove.
Remove the lower part of the frame,
take out old engine protection filter and
dispose it off. Insert the new engine protection filter in the frame and replace
the lower part of the frame.
Illustration
Insert and click the frame into its place.
Change the HEPA-filter
Order no. 6.414-805
Filter for pure blower air.
HEPA filter: Change once a year.
Illustration
Open cover.
Unlock the HEPA filter and remove.
Illustration
Insert the new HEPA filter and click it
into place.
Close the lid.
Cleaning of the ComfoGlide nozzle
The ComfoGlide nozzle must be cleaned
regularly!
Remove the nozzle from the suction
pipe.
Illustration
Clean the back steering roller:
The easiest way to do this, is to remove
the roller. Unscrew the axle and pull
out. Dust fluff, hair etc. can now be removed easily. Fit the steering roller
back into place.
Cleaning the accessories
Illustration
Handle and suction tube can be discon-
nected in order to clean or if clogged.
Push the 2 interlocks and pull apart.
Connect handle and suction tube and
insert.
General notes
Warranty
The terms of the guarantee applicable in
each country have been published by our
respective national distributors. We will repair possible faults on your unit free of
charge within the warranty period, insofar
as the faults are caused by material defects
or defective workmanship. Guarantee
claims should be addressed to your dealer
or the nearest authorized customer service
centre, and supported by documentary evidence of purchase.
(See address on the reverse)
Customer Service
Our KÄRCHER branch will be pleased to
help you further in the case of questions or
faults. See address on the reverse.
Ordering spare parts and special at-
tachments
At the end of the operating instructions you
will find a selected list of spare parts that
are often required.
You can procure the spare parts and the attachments from your dealer or your
KÄRCHER branch office.
(See address on the reverse)
- 5
15EN
Page 16
Technical specifications
Voltage V 220 - 240
Current type Hz 50/60
Mains fuse (slow-blow) A 16
Protective class II
Output P
Output P
nom
max
Weight (without accessories)
Action radius m 10
Dimensions mm ø 380 x
Nominal width, accessories
Sound pressure level
(EN 60704-2-1)
Subject to technical modifications!
W1600
W1800
kg 7,0
380
mm 35
dB(A) 64
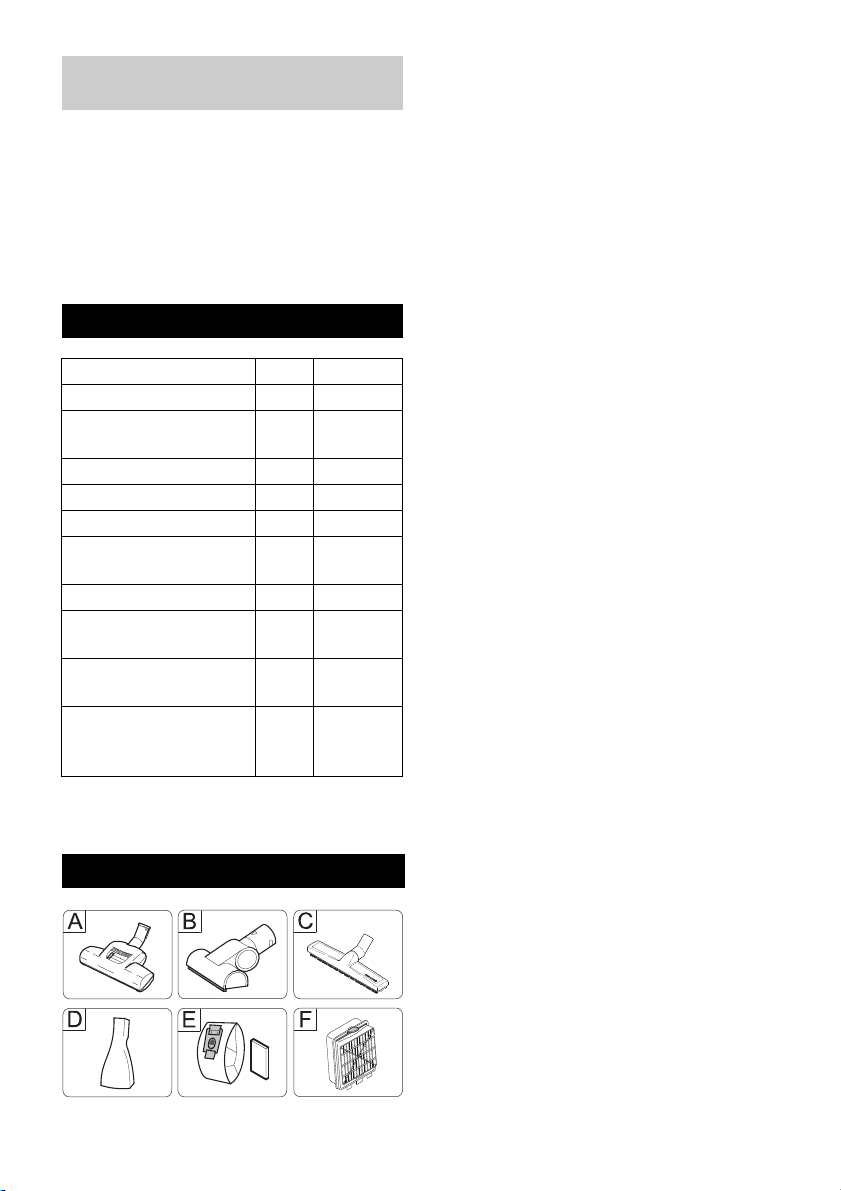
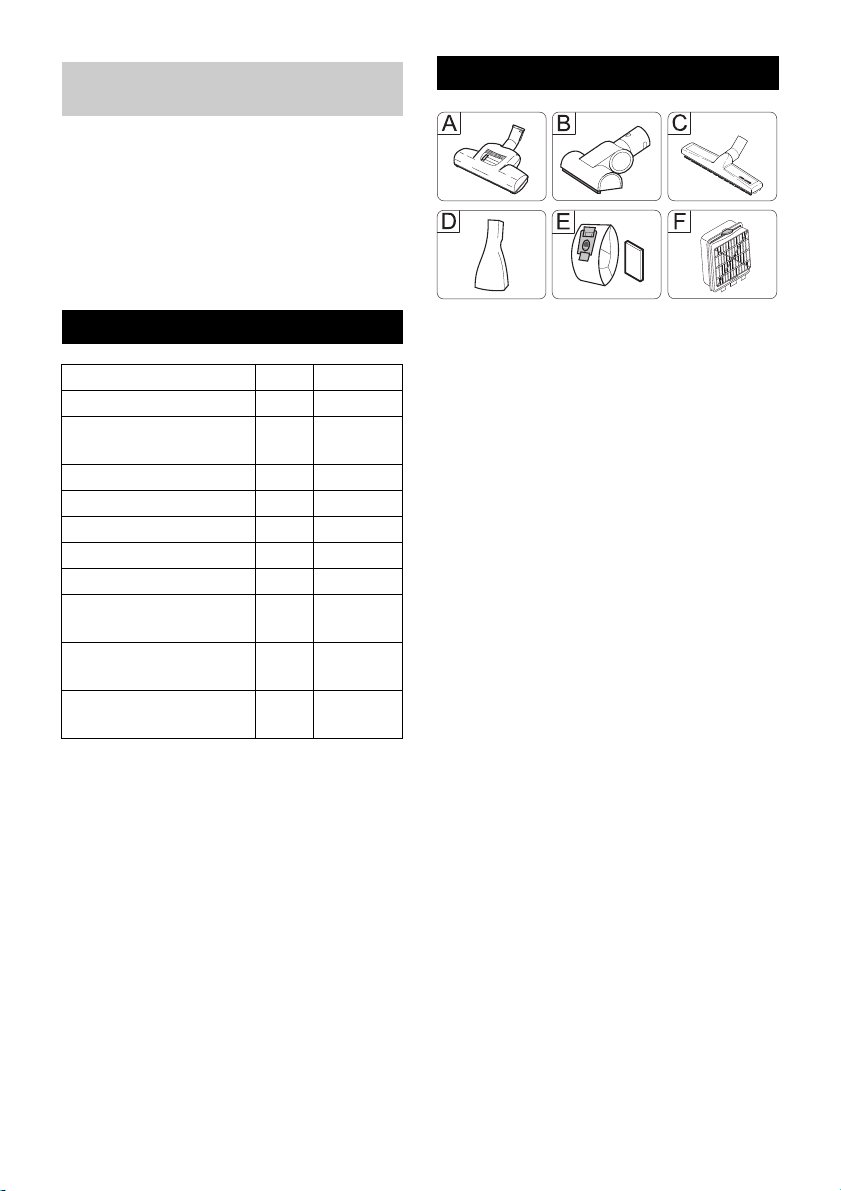
Special accessories
A Turbo nozzle for floors
(Order no. 4.130-177)
brush and vacuum in one work cycle.
Especially suitable in order to pick up
animal hair and to vacuum high floor
carpets. The brush roller is driven by air
steam.
There is not electrical outlet necessary.
B Turbo nozzle for upholstery
(Order no. 2.903-001)
Brushing and vacuum cleaning uphol-
stered furniture, mattresses, car seats,
etc. in one single step.
Especially suitable for absorbing animal
hair. The brush rollers are driven by the
air current.
No electrical connection required.
C Parquet nozzle
(Order no. 4.130-172)
Used to vacuum sensitive and smooth
floors (parquet, marble, terracotta etc.).
D Mattress nozzle
(Order no. 6.906-755)
For absorbing dust from mattresses
and upholstery.
E Filter bag
(Order no. 6.904-329)
Content: 5 filter bags with cover and 1
motor protection filter
F HEPA-filter
(Order no. 6.414-805)
Additional filters for cleaner exhausting
air. Recommended for allergy sufferers
16 EN
- 6
Page 17
Table des matières
Consignes de sécurité FR - 1
Utilisation FR - 2
Fin de l'utilisation FR - 4
Entretien et maintenance FR - 4
Consignes générales FR - 5
Caractéristiques techniques FR - 6
Accessoires en option FR - 6
Cher client,
Lire cette notice originale avant
la première utilisation de votre
appareil, se comporter selon ce qu'elle requièrt et la conserver pour une utilisation ultérieure ou pour le propriétaire futur.
Utilisation conforme
Cet aspirateur a été conçu pour un usage
ménager privé et non pour un emploi industriel.
Le fabricant décline tout responsabilité en
cas de dommages issus d'une utilisation
non conforme ou incorrecte de l'appareil.
N'utiliser l'aspirateur qu'en association
avec :
des sacs filtrants originaux ;
des pièces de rechange, accessoires
ou accessoires spéciaux originaux.
L'aspirateur ne convient pas pour :
aspirer des personnes ou des
animaux ;
l'aspiration de :
petits organismes (par ex. des mouches, des araignées, etc.) ;
substances toxiques, objets à bords
tranchants et matières chaudes ou
incandescentes ;
substances humides ou liquides;
substances ou gaz hautement inflammables ou explosifs.
Protection de l’environnement
Les matériaux constitutifs de l’embal-
lage sont recyclables. Ne pas jeter
les emballages dans les ordures ménagères, mais les remettre à un système de recyclage.
Les appareils usés contiennent des
matériaux précieux recyclables les-
quels doivent être apportés à un système de recyclage. Pour cette raison,
utilisez des systèmes de collecte adéquats
afin d'éliminer les appareils usés.
Instructions relatives aux ingrédients
(REACH)
Les informations actuelles relatives aux ingrédients se trouvent sous :
http://www.karcher.de/de/unternehmen/
umweltschutz/REACH.htm
Elimination du filtre et du sac du filtre
Le filtre et le sac du filtre sont fabriqués en
matériaux recyclables.
S'ils ne contiennent aucune substance aspirée dont l'élimination est interdite dans
les déchets ménagers, vous pouvez les jeter dans les déchets ordinaires.
Consignes de sécurité
– Cet appareil n'est pas conçu pour être
utilisé par des personnes (y compris
des enfants) avec des capacités physiques, sensorielles ou mentales limitées
ou manquant d'expérience et/ou de
connaissances, sauf si elles sont surveillées par une personne responsable
de leur sécurité ou si elles en obtiennent des instructions sur la manière
d'utiliser l'appareil. Les enfants doivent
être surveillés afin de s'assurer qu'ils ne
jouent pas avec l'appareil.
– Tenir les films plastiques d'emballages
hors de portée des enfants, risque
d'étouffement !
– Mettre l'appareil hors service après
chaque utilisation et avant chaque nettoyage/entretien.
– Risque d'incendie. N’aspirer aucun ob-
jet enflammé ou incandescent.
- 1
17FR
Page 18
– Il est interdit d’utiliser l’appareil dans
des zones présentant des risques d’explosion.
– Lors des pauses d'exploitation prolon-
gées, mettre l'appareil hors service au
niveau du sectionneur général / de l'interrupteur d'appareil ou de la fiche secteur.
몇 Raccordement électrique
– L'appareil doit être raccordé unique-
ment au courant alternatif. La tension
doit être identique avec celle indiquée
sur la plaque signalétique de l’appareil.
Risque de choc électrique
– Ne jamais saisir la fiche secteur ni la pri-
se de courant avec des mains humides.
– Ne pas debrancher la fiche secteur en
tirant le câble d'alimentation.
– Vérifier avant chaque utilisation que le
câble et la fiche secteur ne sont pas endommagés. Un câble d’alimentation endommagé doit immédiatement être
remplacé par le service après-vente ou
un électricien agréé.
– Ne pas utiliser le câble d'alimentation
pour soulever / transporter l'appareil.
– Ne pas faire passer le câble d'alimenta-
tion sur des arêtes vives et ne pas le
coincer.
– Avant d'effectuer tout type de travaux
sur l'appareil, débrancher la fiche secteur.
몇 Attention
Ne jamais aspirer en l'absence de sac
filtrant.
L'appareil risquerait d'être endomma-
gé.
Eviter d'approcher le suceur et le tuyau
d'aspiration à proximité du visage. Risque de blessure !
En cas de service, dérouler intégrale-
ment le câble d'alimentation.
Conserver l'appareil à l'abris des intem-
péries, de l'humidité et des sources de
chaleur.
Eteindre l'appareil lorsque l'aspiration
n'est pas active.
18 FR
- 2
Utilisation
Description de l’appareil
Déplier les pages d'illustration !
1 Câble d’alimentation avec fiche secteur
2 Touche Enroulement du câble
3 Touche Marche / Arrêt
4 Régulateur de puissance d'aspiration
5 Flexible d’aspiration
6 Poignée
7 Tuyau télescopique
8 Réglage du tuyau télescopique
9 Buse pour sol
10 Cache du range-accessoires
11 Range-accessoires QuickClick :
contient un suceur pour tissus, un suceur fente amovible et un pinceau pour
meubles
12 Témoin de remplacement du filtre
13 Levier de verrouillage, couvercle du sac
filtrant / filtre protecteur du moteur
14 Filtre protecteur du moteur
15 Support du filtre
16 Cache du filtre HEPA
17 Filtre HEPA
18 Poignée de transport
Mise en service
Illustration
Enclencher les raccords du flexible
d'aspiration dans les orifices d'aspira-
tion.
Pour le démontage, presser les deux
crans d'arrêt et retirer le flexible.
Illustration
Enclencher la poignée et le flexible
d'aspiration télescopique.
Emboîter le suceur pour sols et le flexi-
ble d'aspiration télescopique.
Page 19
Illustration
Actionner le dispositif de réglage et po-
sitionner le flexible télescopique à la
longueur souhaitée.
Illustration
Pour mettre l'appareil hors service ou
lors d'interruptions des travaux de cour-
te durée, accrocher le suceur pour sols
dans le support prévu à cet effet (face
arrière de l'appareil) et appuyer pour
qu'il s'enclenche.
Illustration
Pour retirer pressionner la poignée en
arrière en direction de l'appareil. Avec
cela le bocal du sol est déverrouillé du
support et peut être enlever ver l'haut.
Illustration
Maintenir le câble d'alimentation au ni-
veau de la fiche secteur et tirer. Bran-
cher la fiche secteur dans une prise de
courant.
Activer / désactiver l'appareil.
Illustration
Le régulateur permet d'adapter la puis-
sance d'aspiration de l'appareil :
- Repère sur MAX, puissance d'aspira-
tion élevée
- Repère sur MIN, puissance d'aspira-
tion faible
Remarque: Le marquage montre la
puissance d'aspiration.
Adapter la puissance d'aspiration en
fonction de la situation:
Puissance faible d'aspiration – pour
rideaux, textiles, meubles rembourrés,
coussins
Puissance moyenne d'aspiration –
pour les tapis/revêtements de sols faci-
lement salissants, les tapis de valeur,
les carpettes et les couloirs
Puissance d'aspiration forte – pour
les sols durs, les tapis et les revête-
ments de sols fortement salis
Attention ! Si le fusible réseau se déclen-
che lors de la mise sous tension de l'appareil; il est possible qu'un autre appareil
électrique soit branché sur le même circuit
électrique et qu'il ait été mis en service.
Dans ce cas, régler le niveau de puissance
minimal sur l'aspirateur avant de le mettre
en marche. Par la suite, il est possible de
sélectionner un niveau de puissance plus
élevé. Protection par fusible réseau, voir
chapitre "Caractéristiques techniques".
Remarque importante ! En cas de risque
de surchauffe, l'appareil est automatiquement désactivé. Mettre l'appareil hors tension et débrancher la fiche secteur.
S'assurer que le suceur, le tuyau d'aspiration ou le flexible ne sont pas obstrués ou
que le filtre ne doit pas être remplacé. Une
fois le problème résolu, laisser refroidir l'appareil au moins une heure avant que celuici soit de nouveau opérationnel.
Aspiration avec les accessoires
Acesssoire QuickClick
Utiliser un accessoire QuickClick
Buse pour tissus: pour aspirer des
meubles rembourrés, des matelas, des
rideaux, etc.
Brosse à meubles, rotative: pour le
nettoyage préservateur des meubles et
des appareils sensibles, le dépoussiérage des livres, des fentes d'aération
des véhicules, etc.
Suceur pour joints, amovible: pour
les côtés, joints et radiateurs
Changement d'accessoires à partir du
range-accessoires QuickClick
Accrocher le suceur pour sols dans le
support situé sur la face arrière de l'appareil et appuyer pour qu'il s'enclenche
(voir illustration 4).
Illustration
Appuyer sur la touche de déverrouillage
de la poignée et déboîter cette dernière
du flexible d'aspiration télescopique.
Illustration
Ouvrir le cache du range-accessoires.
Illustration
Introduire la poignée jusqu'en butée
dans l'accessoire voulu. Ce dernier
s'encliquette. Le faire ensuite pivoter
vers le bas et le retirer.
- 3
19FR
Page 20

Illustration
Pour le rangement, accrocher l'acces-
soire et la poignée dans le range-ac-
cessoires et tirer vers le haut. Retirer la
poignée.
Remarque : L'accessoire peut égale-
ment être monté et démonté manuelle-
ment sur la poignée. Pour extraire
l'accessoire, appuyer sur la touche de
déverrouillage de la poignée.
Remarque : Toutes les étapes sus-
mentionnées peuvent également être
effectuées lorsque le flexible d'aspira-
tion télescopique est connecté. Accro-
cher le suceur pour sols dans le support
situé sur la face arrière de l'appareil et
appuyer pour qu'il s'enclenche. Démon-
ter le flexible télescopique en tirant vers
le haut à la verticale.
Suceur ComfoGlide
Illustration
Tapis et moquettes :
Sélectionner la position du commuta-
teur comme suit :
Illustration
Sols durs :
Sélectionner la position du commuta-
teur comme suit :
Fin de l'utilisation
Eteindre l'appareil et retirer la fiche du
secteur.
Illustration
Appuyer sur le bouton Enroulement du
câble. Le câble est immédiatement ré-
tracté dans l'appareil.
Accrocher le suceur pour sols dans le
support situé sur la face arrière de l'ap-
pareil et appuyer pour qu'il s'enclenche.
Transport, conservation
Pour le transport, tenir l'appareil par la
poignée et le conserver dans une pièce
au sec.
Remarque : Il est recommandé de repousser totalement le tuyau téléscopique avant le rangement.
Entretien et maintenance
Risque de blessures
Couper l'appareil et débrancher la fiche
secteur avant d'effectuer des travaux de
maintenance et de réparation.
Nettoyage de l’appareil
몇 Attention
N'utiliser aucun produit moussant, pour vitres ou multi-usage ! Ne jamais plonger
l'appareil dans l'eau.
Entretenir l'appareil et les accessoires
plastique au moyen d'un nettoyant plastique disponible dans le commerce.
Nettoyer le compartiment à poussière à
l'aide d'un chiffon sec / d'un plumeau.
Remplacement du filtre
N° de commande 6 904-329.
Contenu : 5 sac filtrants avec fermeture et
1 filtre protecteur de moteur.
Remarque : Pour pouvoir lire l'affichage du
changement de filtre, séparer le tuyau d'aspiration à télescope de la poignée.
Illustration
Lorsque le témoin de remplacement du
filtre, situé sur le capot, s'allume en permanence en rouge, changer le filtre.
Actionner le levier de verrouillage et
ouvrir le couvercle.
Illustration
Déverrouiller le support du sac filtrant et
le rabattre vers l'extérieur.
Illustration
Fermer le sac filtrant au moyen de la
languette prévue à cet effet, l'extraire et
le mettre au rebut.
20 FR
- 4
Page 21

Illustration
Introduire un nouveau sac filtrant jus-
qu'en butée dans le support. Presser
tout d'abord la languette vers le bas,
puis pousser le support dans le boîtier
et l'encliqueter sur le capot de l'appareil.
몇 Attention
Le capot ne peut être refermé que si un sac
filtrant est installé dans l'appareil. Après aspiration de fines particules de poussière
(ex : plâtre, ciment, etc.), nettoyer le filtre
du moteur et, si nécessaire, le remplacer.
Remplacement du filtre protecteur
du moteur
Filtre protecteur du moteur : à changer
avant d'utiliser le dernier sac filtrant du paquet.
Le filtre protecteur du moteur est placé
derrière le sac filtrant. Avant de mettre
en place le sac filtrant, remplacer le filtre protecteur du moteur.
Illustration
Déverrouiller le cadre et l'extraire.
Retirer la partie inférieure du cadre, en-
lever le filtre protecteur usé du moteur
et l'éliminer. Placer un nouveau filtre
protecteur du moteur dans le cadre et
mettre la partie inférieure du cadre en
place.
Illustration
Positionner le cadre et l'enclencher.
Remplacement du filtre HEPA
N° de commande 6 414-805.
Filtre pour un air d'évacuation pur.
Filtre HEPA : remplacer une fois par an.
Illustration
Ouvrir le capot.
Déverrouiller le filtre HEPA et le démon-
ter.
Illustration
Insérer un nouveau filtre HEPA et l'en-
clencher.
Fermer le couvercle.
Nettoyage du suceur ComfoGlide
Nettoyer le suceur ComfoGlide à inervalles
réguliers !
Démonter le suceur du tuyau d'aspira-
tion.
Illustration
Nettoyer la roulette pivotante
arrière :
Le mieux est de démonter la roulette.
Pour ce faire, dévisser l'axe et le démonter. Ainsi, il est très facile d'éliminer
les peluches, les cheveux et autres saletés. Remonter la roulette pivotante.
Nettoyage d’accessoires
Illustration
Pour procéder au nettoyage, ou en cas
d'obstruction, il est possible de démonter la poignée et le flexible d'aspiration.
Pour ce faire, appuyer sur les deux éléments de verrouillage et tirer pour déboîter la poignée et le flexible.
Enclencher la poignée et le flexible
d'aspiration.
Consignes générales
Garantie
Dans chaque pays, les conditions de garantie en vigueur sont celles publiées par
notre société de distribution responsable.
Nous éliminons gratuitement d’éventuelles
pannes sur l’appareil au cours de la durée
de la garantie, dans la mesure où une erreur de matériau ou de fabrication en sont
la cause. En cas de recours en garantie, il
faut s'adresser avec le bon d’achat au revendeur respectif ou au prochain service
après-vente.
(Adresse au dos)
Service après-vente
®
Notre succursale Kärcher
entière disposition pour d'éventuelles questions ou problèmes. L'adresse figure au
dos.
se tient à votre
- 5
21FR
Page 22
Commande de pièces détachées et
d'accessoires spécifiques
Une sélection des pièces de rechange utilisées le plus se trouve à la fin du mode
d'emploi.
Vous obtiendrez des pièces détachées et
des accessoires chez votre revendeur ou
®
auprès d'une filiale Kärcher
.
(Adresse au dos)
Caractéristiques techniques
Tension V 220 - 240
Type de courant Hz 50/60
Protection du réseau (à
A16
action retardée)
Classe de protection II
Puissance P
Puissance P
nom
max
Poids (sans accessoi-
W1600
W1800
kg 7,0
re)
Rayon d'action m 10
Dimensions mm ø 380 x
380
Largeur nominale, ac-
mm 35
cessoires
Niveau de pression
dB(A) 64
acoustique
(EN 60704-2-1)
Sous réserve de modifications
techniques !
Accessoires en option
A Suceur turbo pour sols
(n° de réf 4.130-177)
Brossage et aspiration en une seule
phase de travail.
Particulièrement adapté pour aspirer
les poils d'animaux et nettoyer les mo-
quettes épaisses. Le rouleau de brosse
est entraîné par de l'air pulsé.
Aucun raccord électrique n'est nécessaire.
B Suceur turbo pour revêtement textile
(n° de réf 2.903-001)
Brossage et aspiration en une seule
phase de travail pour les meubles dotés
de revêtement textile, les matelas, les
sièges auto, etc.
Particulièrement adapté pour l'aspiration
de poils d'animaux. Le rouleau de brosse
est entraîné par de l'air pulsé.
Aucun raccord électrique n'est nécessaire.
C Suceur pour parquet
(n° de réf 4.130-172)
Pour aspirer les surfaces lisses délicates (parquet, carrelages, terre cuite,
etc.)
D Suceur pour matelas
(n° de réf 6.906-755)
Pour aspirer les matelas et revêtements
textiles.
E Sac filtrant
(n° de réf 6.904-329)
Contenu : 5 sac filtrants avec fermeture
et 1 filtre protecteur de moteur
F Filtre HEPA
(n° de réf 6.414-805)
Filtre supplémentaire permettant d'ob-
tenir un air refoulé plus pur. Recommandé pour les personnes souffrant
d'allergies
22 FR
- 6
Page 23
Indice
Norme di sicurezza IT - 1
Uso IT - 2
Terminare il lavoro IT - 4
Cura e manutenzione IT - 4
Avvertenze generali IT - 5
Dati tecnici IT - 6
Accessori optional IT - 6
Gentile cliente,
Prima di utilizzare l'apparecchio
per la prima volta, leggere le
presenti istruzioni originali, seguirle e conservarle per un uso futuro o in caso di rivendita dell'apparecchio.
Uso conforme a destinazione
La presente aspirapolvere è destinata per
l'uso privato e non per usi a scopo commerciale.
Il produttore non è responsabile per eventuali danni causati dall'uso improprio e/o
uso che non corrisponde a quello conforme
a destinazione.
Usare l'aspirapolvere esclusivamente con:
sacchetti filtro originali.
Pezzi di ricambio, accessori e accessori
optional originali.
L'aspirapolvere non si presta:
all'uso diretto su persone o animali.
all'aspirazione di:
piccoli organismi come mosche, ragni
ecc.
sostanze dannose per la salute, taglienti, calde o incandescenti.
sostanze umide o liquide.
materiale o gas facilmente infiammabili
o esplosivi.
Protezione dell’ambiente
Tutti gli imballaggi sono riciclabili. Gli
imballaggi non vanno gettati nei rifiuti
domestici, ma consegnati ai relativi centri di
raccolta.
Gli apparecchi dismessi contengono
materiali riciclabili preziosi e vanno
perciò consegnati ai relativi centri di
raccolta. Si prega quindi di smaltire gli apparecchi dismessi mediante i sistemi di raccolta differenziata.
Avvertenze sui contenuti (REACH)
Informazioni aggiornate sui contenuti sono
disponibili all'indirizzo:
http://www.karcher.de/de/unternehmen/
umweltschutz/REACH.htm
Smaltimento di filtro e sacchetto filtrante
Il filtro e il sacchetto filtrante sono realizzati
in materiale ecologico.
Se non contengono sostanze aspirate vietate per i rifiuti domestici, possono essere
smaltiti con i normali rifiuti domestici.
Norme di sicurezza
– Questo apparecchio non è destinato
all’uso da parte di persone (compresi
bambini) dalle facoltà fisiche, sensoriali
o intellettuali limitate o carenti di esperienza e/o conoscenze, a meno che costoro non vengano sorvegliati da una
persona responsabile della loro sicurezza o ricevano da questa istruzioni
sull’uso dell’apparecchio. Sorvegliare i
bambini per assicurarsi che non giochino con l’apparecchio.
– Tenere le pellicole di imballaggio fuori
dalla portata dei bambini. Rischio di
asfissia!
– Disattivare l'apparecchio dopo ogni im-
piego e prima di ogni pulizia/manutenzione.
– Pericolo d'incendio. Non aspirare og-
getti brucianti o ardenti.
– E' vietato l'utilizzo in ambienti a rischio
di esplosione.
- 1
23IT
Page 24
– In caso di pause di esercizio prolungate
disattivare l'apparecchio dall'interruttore principale / interruttore dell'apparecchio o tirare la spina di rete.
몇 Collegamento elettrico
– Collegare l'apparecchio solo a corrente
alternata. La tensione deve corrispondere a quella indicata sulla targhetta
dell'apparecchio.
Pericolo di scosse elettriche
– Non toccare mai la spina e la presa con
le mani bagnate.
– Non staccare la spina dalla presa tiran-
do il cavo di collegamento.
– Prima di ogni utilizzo controllare che il
cavo di allacciamento e la spina di alimentazione non presentino danni. Far
sostituire immediatamente il cavo di allacciamento danneggiato dal servizio
clienti autorizzato/da un elettricista specializzato.
– Non usare il cavo di allacciamento alla
rete per portare / trasportare l'apparecchio.
– Tenere lontano il cavo di allacciamento
da spigoli vivi ed evitare di schiacciarlo.
– Estrarre la spina di alimentazione prima
di effettuare interventi sull'apparecchio.
몇 Attenzione
Non aspirare mai senza il sacchetto fil-
tro.
L'apparecchio può essere danneggiato.
Non portare né la bocchetta né il tubo ri-
gido di aspirazione in prossimità della
testa durante le operazioni di aspirazione. Pericolo di lesioni!
Estrarre completamente il cavo di allac-
ciamento alla rete durante le operazioni
di aspirazione.
Proteggere l'apparecchio da intempe-
rie, umidità e fonti di calore.
Spegnere l'apparecchio quando non
viene usato per aspirare.
Uso
Descrizione dell’apparecchio
Si prega di aprire le pagine illustrate!
1
Cavo di allacciamento alla rete con spina
2 Tasto avvolgimento cavo
3 Pulsante On/Off
4 Regolatore di potenza aspirazione
5 Tubo flessibile di aspirazione
6 Impugnatura
7 Tubo telescopico
8 Regolazione tubo telescopico
9 Bocchetta pavimenti
10 Coperchio alloggio accessori
11 Alloggio accessori QuickClick:
contiene la bocchetta per mobili imbot-
titi, la bocchetta per fessure ed il pen-
nello per mobili
12 Segnalazione cambio filtro
13 Leva di chiusura, coperchio sacchetto
filtro / filtro protezione motore
14 Filtro protezione motore
15 Supporto sacchetto filtro
16 Coperchio filtro HEPA
17 Filtro HEPA
18 Maniglia di trasporto
Messa in funzione
Figura
Inserire il bocchettone del tubo flessibi-
le di aspirazione nell'apertura di aspira-
zione fino allo scatto in posizione.
Per estrarlo, schiacciare le due estremi-
tà del dispositivo a scatto contempora-
neamente e togliere il tubo flessibile.
Figura
Inserire l'impugnatura nel tubo telesco-
pico fino allo scatto in posizione.
Inserire la bocchetta pavimenti nel tubo
telescopico fino allo scatto in posizione.
24 IT
- 2
Page 25
Figura
Agire sulla regolazione ed impostare il
tubo telescopico alla lunghezza deside-
rata.
Figura
Per spegnere l'apparecchio o durante
pause brevi agganciare la bocchetta
pavimenti al supporto di appoggio posto
sul lato posteriore dell'apparecchio e
premere fino ad ottenere lo scatto in po-
sizione.
Figura
Per toglierlo, tirare indietro l'impugnatu-
ra verso l'apparecchio. Questo sblocca
la bocchetta pavimenti posta nella posi-
zione di appoggio. Adesso può essere
tolta dall'alto.
Figura
Afferrare la spina del cavo di allaccia-
mento alla rete e toglierla. Inserire la
spina nella presa elettrica.
Accendere/Spegnere l’apparecchio.
Figura
L'impostazione della forza aspirante av-
viene tramite il regolatore di potenza
aspirazione:
- Tacca MAX, forza aspirante elevata
- Tacca MIN, forza aspirante ridotta
Avviso: la marcatura indica l'attuale
potenza di aspirazione.
Adeguare la forza di aspirazione in base
alla situazione:
Potenza di aspirazione bassa – per
tende, tessuti, mobili imbottiti, cuscini
Potenza di aspirazione media – per
tappeti/moquette leggermente sporchi,
tappeti di valore, passatoie e guide
Potenza di aspirazione massima –
per pavimenti duri, tappeti e moquette
molto sporchi
Attenzione! L'eventuale scatto della prote-
zione di rete al momento dell'accensione
dell'apparecchio, può essere causato dal
fatto che anche altri elettrodomestici sono
collegati allo stesso circuito elettrico. In
questo caso impostare il livello minimo di
potenza dell'apparecchio prima di accenderlo. I livelli di potenza maggiori potranno
essere impostati in seguito. Protezione rete: vedi capitolo "Dati tecnici".
Avviso importante! L'apparecchio si spegne automaticamente in situazioni di potenziale surriscaldamento. Spegnere
l’apparecchio e togliere la spina di alimentazione. Assicurarsi che la bocchetta, il
tubo rigido di aspirazione ed il tubo flessibile non siano ostruiti e che il filtro non debba
essere cambiato. Dopo l'eliminazione di
eventuali guasti lasciare raffreddare l'apparecchio per almeno un'ora. Dopodiché sarà
di nuovo pronto per l'uso.
Impiego degli accessori
Accessori QuickClick
Utilizzo degli accessori QuickClick
Bocchetta mobili imbottiti: per aspira-
re mobili imbottiti, materassi, tende e simili
Pennello per mobili, girevole: per pu-
lire in modo delicato mobili e oggetti delicati, per togliere la polvere da libri,
feritoie di ventilazione in auto e simili
Bocchetta per giunti, estraibile: per
bordi, giunti e radiatori
Sostituire gli accessori dell'alloggio accessori QuickClick
Agganciare la bocchetta pavimenti al
supporto di appoggio posto sul lato posteriore dell'apparecchio e premerlo
fino ad ottenere lo scatto in posizione
(vedere figura 4).
Figura
Premere il pulsante di sblocco posto
sull'impugnatura ed estrarre quest'ultima dal tubo telescopico.
Figura
Alzare il coperchio dell'alloggio acces-
sori.
Figura
Inserire l'impugnatura nell'accessorio
desiderato fino all'arresto. In questo
modo si innesta. Infine orientarla verso
il basso ed estrarla.
- 3
25IT
Page 26
Figura
Per riporre gli accessori, inserirli nell'al-
loggio accessori (completi di impugna-
tura) e farli scattare in posizione (verso
l'alto). Togliere l'impugnatura.
Avviso: Gli accessori possono essere
tolti anche manualmente ed essere in-
seriti sull'impugnatura. Per togliere gli
accessori, premere il pulsante di sbloc-
co dell'impugnatura.
Avviso: Tutti i procedimenti sopra men-
zionati possono essere svolti a tubo te-
lescopico inserito. Agganciare a tal fine
la bocchetta pavimenti al supporto di
appoggio posto sul lato posteriore
dell'apparecchio e premerlo fino ad ot-
tenere lo scatto in posizione. Estrarre
verticalmente il tubo telescopico (verso
l'alto).
Bocchetta ComfoGlide
Figura
Tappeti e moquettes:
Scegliere le seguenti posizioni dell'in-
terruttore:
Figura
Superfici dure:
Scegliere le seguenti posizioni dell'in-
terruttore:
Terminare il lavoro
Spegnere l'apparecchio e staccare la
spina.
Figura
Premere il tasto avvolgimento cavo. Il
cavo rientra automaticamente nell'ap-
parecchio.
Agganciare la bocchetta pavimenti al
supporto di appoggio posto sul lato po-
steriore dell'apparecchio e premerlo
fino ad ottenere lo scatto in posizione.
Trasporto, conservazione
Per il trasporto fissare l'apparecchio
alla rispettiva maniglia e conservarlo in
luoghi asciutti.
Nota: si consiglia di fare rientrare completamente il tubo telescopico.
Cura e manutenzione
Rischio di lesioni
Prima di effettuare lavori di cura e di manutenzione, spegnere l'apparecchio ed estrarre la spina di alimentazione.
Pulizia dell’apparecchio
몇 Attenzione
Non usare detergenti abrasivi, detergenti
per il vetro o detergenti universali! Non immergere mai l'apparecchio in acqua.
Pulire l'apparecchio e gli accessori in
plastica con un normale detergente per
materiale sintetico.
Pulire il vano polvere con uno strofinac-
cio asciutto / pennello per spolverare.
Sostituire il sacchetto filtro
(Cod. d’ordin. 6.904-329)
Contenuto: 5 Sacchetti filtro con chiusura,
1 filtro protezione motore.
Avviso: per leggere l'indicatore di sostituzione filtro staccare il tubo telescopico
dall'impugnatura.
Figura
Quando la segnalazione cambio filtro è
completamente rossa, bisogna cambiare il sacchetto filtro.
Agire sulla leva di chiusura ed aprire il
coperchio.
Figura
Sbloccare il supporto del sacchetto filtro
e girarlo verso l'esterno.
Figura
Chiudere il sacchetto filtro usando
l'aletta di chiusura, toglierlo e smaltirlo
conformemente alle norme ambientali.
26 IT
- 4
Page 27

Figura
Inserire nel supporto il nuovo sacchetto
filtrante fino all'arresto. Spingere innanzitutto la linguetta verso il basso, successivamente il supporto
nell'alloggiamento e farla innestare
nell'alloggiamento dell'apparecchio.
몇 Attenzione
Il coperchio si chiude solo a sacchetto filtro
inserito. Dopo aver aspirato particelle di
polvere fini (p.es.: gesso, cemento ecc.)
pulire e sostituire eventualmente il filtro protezione motore.
Pulire la bocchetta ComfoGlide
Pulire regolarmente la bocchetta ComfoGlide!
Togliere la bocchetta dal tubo rigido di
aspirazione.
Figura
Pulire la ruota pivottante posteriore:
Pulizia ottimale a ruota smontata. A
questo scopo svitare ed estrarre l'asse.
Sia i fili di polvere che capelli/peli ecc.
possono ora essere tolti facilmente. Ri-
montare la ruota pivottante.
Sostituire il filtro protezione motore
Filtro protezione motore: da sostituire as-
sieme all'ultimo sacchetto filtro contenuto
nella confezione sacchetti filtro.
Il filtro protezione motore si trova dietro
il sacchetto filtro inserito. Prima di inserire il sacchetto filtro, sostituire il filtro
protezione motore.
Figura
Sbloccare il telaio e toglierlo.
Rimuovere la parte inferiore del telaio,
rimuovere il filtro protezione motore e
smaltirlo. Inserire il nuovo filtro protezione motore nel telaio e inserire la parte
inferiore del telaio.
Figura
Inserire il telaio e farlo scattare in posi-
zione.
Sostituire il filtro HEPA
(Cod. d’ordin. 6.414-805)
Filtro per una migliore aria di scarico.
Filtro HEPA: Cambiare una volta l'anno.
Figura
Aprire il coperchio.
Sbloccare il filtro HEPA e toglierlo.
Figura
Inserire il filtro HEPA nuovo e farlo scat-
tare in posizione.
Chiudere il coperchio.
Pulire gli accessori
Figura
L'impugnatura ed il tubo flessibile di
aspirazione possono essere staccati in
presenza di eventuali ostruzioni. A que-
sto scopo premere i 2 dispositivi di
sblocco e staccarli
Per congiungerli, inserire l'impugnatura
nel tubo telescopico fino allo scatto in
posizione.
Avvertenze generali
Garanzia
In tutti i paesi sono valide le condizioni di
garanzia pubblicate dalla nostra società di
vendita competente. Entro il termine di garanzia eliminiamo gratuitamente eventuali
guasti all’apparecchio, se causati da un difetto di materiale o di produzione. Nei casi
previsti dalla garanzia si prega di rivolgersi
al proprio rivenditore, oppure al più vicino
centro di assistenza autorizzato, esibendo
lo scontrino di acquisto.
(Indirizzo vedi retro)
Servizio assistenza
In caso di domande o anomalie la filiale
KÄRCHER è felice di poterla aiutare. Indirizzo vedi retro.
- 5
27IT
Page 28
Ordinare ricambi e accessori
speciali
La lista dei pezzi di ricambio più comuni è
riportata alla fine del presente manuale
d'uso.
I ricambi e gli accessori sono reperibili
presso il rivenditore di fiducia o una filiale
KÄRCHER.
(Indirizzo vedi retro)
Accessori optional
Dati tecnici
Tensione V 220 - 240
Tipo di corrente Hz 50/60
Protezione rete (fusibile
ritardato)
Grado di protezione II
Potenza P
Potenza P
Peso (senza accessori) kg 7,0
Raggio di azione m 10
Dimensioni mm ø 380 x
Diametro nominale, accessori
Pressione acustica
(EN 60704-2-1)
Con riserva di modifiche tecniche!
nom
max
A16
W1600
W1800
380
mm 35
dB(A) 64
A Bocchetta turbo per pavimenti
(Cod. d’ordin. 4.130-177)
Spazzolare ed aspirare contemporane-
amente.
Particolarmente indicato per aspirare
peli di animali e per la pulizia di tappeti
a pelo alto. L'azionamento del rullo
spazzola avviene tramite il flusso d'aria.
Non serve alcun collegamento elettrico.
B Bocchetta turbo per imbottiture
(Cod. d’ordin. 2.903-001)
Spazzolare ed aspirare contemporane-
amente imbottiture, materassi, sedili di
autovetture ecc.
Particolarmente indicato per aspirare
peli di animali. L'azionamento del rullo
spazzola avviene tramite il flusso d'aria.
Non serve alcun collegamento elettrico.
C Bocchetta parquet
(Cod. d’ordin. 4.130-172)
Per pulire pavimenti lisci e delicati (par-
quet, marmo, terracotta ecc.).
D Bocchetta materassi
(Cod. d’ordin. 6.906-755)
Per la pulizia di materassi ed imbottitu-
re.
E Sacchetto filtro
(Cod. d’ordin. 6.904-329)
Indice: 5 Sacchetti filtro con chiusura,
1 filtro protezione motore.
F Filtro HEPA
(Cod. d’ordin. 6.414-805)
Filtro supplementare per l'aria di scari-
co pulita. Particolarmente consigliato
per persone allergiche.
28 IT
- 6
Page 29
Inhoud
Veiligheidsinstructies NL - 1
Bediening NL - 2
Werking stopzetten NL - 4
Onderhoud NL - 4
Algemene instructies NL - 5
Technische gegevens NL - 6
Bijzondere toebehoren NL - 6
Beste klant,
Lees vóór het eerste gebruik
van uw apparaat deze originele
gebruiksaanwijzing, ga navenant te werk
en bewaar deze voor later gebruik of voor
een latere eigenaar.
Reglementair gebruik
Deze stofzuiger is alleen geschikt voor
huishoudelijk en niet voor zakelijk gebruik.
De fabrikant is niet aansprakelijk voor
eventuele schade die ontstaat wanneer het
apparaat niet volgens de voorschriften of
op een verkeerde manier wordt gebruikt.
De stofzuiger alleen gebruiken met:
Originele filterzakken.
Originele onderdelen, -accessoires of
extra toebehoren
De stofzuiger is niet geschikt voor:
Het schoonzuigen van mensen of die-
ren.
Het opzuigen van:
Insecten ( bijv. vliegen, spinnen, enz.).
Substanties die schadelijk voor de gezondheid, heet of gloeiend zijn, of
scherpe randen hebben.
Vochtige of vloeibare stoffen.
Licht ontvlambare of explosieve stoffen
en gassen.
Zorg voor het milieu
Het verpakkingsmateriaal is herbruik-
baar. Deponeer het verpakkingsmateriaal niet bij het huishoudelijk afval, maar
bied het aan voor hergebruik.
Onbruikbaar geworden apparaten
bevatten waardevolle materialen die
geschikt zijn voor hergebruik. Lever
de apparaten daarom in bij een inzamelpunt voor herbruikbare materialen.
Aanwijzingen betreffende de inhoudsstoffen (REACH)
Huidige informatie over de inhoudsstoffen
vindt u onder:
http://www.karcher.de/de/unternehmen/
umweltschutz/REACH.htm
Afvoer van filters en filterzakken
Filters en filterzakken zijn gemaakt van milieuvriendelijk materiaal.
Voor zover ze geen opgezogen substanties
bevatten die niet via het huishoudelijke afval verwijderd mogen worden, mogen ze
via het normale huisafval afgevoerd worden.
Veiligheidsinstructies
– Dit apparaat is niet geschikt om door
personen (inclusief kinderen) met beperkte fysieke, sensorische of geestelijke vaardigheden of met gebrek aan
ervaring en/of kennis gebruikt te worden, tenzij ze door een voor hun veiligheid verantwoordelijke persoon in de
gaten gehouden worden of van hem
aanwijzingen ontvingen hoe het apparaat gebruikt moet worden. Kinderen
dienen in de gaten gehouden te worden
om er zeker van te zijn dat ze niet met
het apparaat spelen.
– Verpakkingsfolie buiten het bereik van
kinderen houden, er bestaat verstikkingsgevaar!
– Apparaat na elk gebruik en voor elke
reiniging / elk onderhoud uitschakelen.
– brandgevaar. Geen brandende of glim-
mende voorwerpen opzuigen.
- 1
29NL
Page 30
– U mag het apparaat niet in gebieden
met explosiegevaar gebruiken.
– Bij langdurige bedrijfsonderbrekingen
moet het apparaat aan de hoofdschakelaar / apparaatschakelaar uitgeschakeld worden of moet de netstekker
uitgetrokken worden.
몇 Elektrische aansluiting
– Gebruik uitsluitend wisselstroom voor
het apparaat. De spanning moet overeenkomen met de vermelding op het
typeplaatje van het apparaat.
Gevaar voor elektrische schokken
– Pak de stekker en wandcontactdoos
nooit met vochtige handen beet.
– Netstekker niet verwijderen door hem
aan de netkabel uit het stopcontact te
trekken.
– Controleer netsnoer en stekker vóór ge-
bruik altijd op beschadigingen. Laat een
beschadigd netsnoer onmiddellijk vervangen door een bevoegde klantendienst-/elektromonteur.
– Het elektriciteitssnoer niet voor het dra-
gen / transporteren van de stofzuiger
gebruiken.
– Het elektriciteitssnoer niet over scherpe
randen trekken en niet bekneld laten raken.
– Bij alle werkzaamheden aan het appa-
raat netstekker eruit trekken.
몇 Let op
Nooit zonder filterzak gebruiken.
Apparaat kan beschadigd worden.
Zuigen met zuigmond en zuigbuis dicht-
bij het hoofd vermijden. Er bestaat gevaar voor verwondingen!
Bij gebruik het elektriciteitssnoer volle-
dig uittrekken.
Apparaat tegen externe weersinvloe-
den, vocht en warmtebronnen beschermen.
Apparaat uitschakelen, wanneer er niet
gezogen wordt.
Bediening
Beschrijving apparaat
Pagina's met afbeeldingen uitklappen
a.u.b.!
1 Netsnoer met stekker
2 Kabeloprol-knop
3 Aan-/Uit-knop
4 Zuigkracht regelaar
5 Zuigslang
6 Handgreep
7 Telescoopzuigbuis
8 Verstellen van telescoopzuigbuis
9 Vloersproeier
10 Afdekking accessoire-opbergvak
11 Accessoire-opbergvak QuickClick:
bevat mondstuk voor gestoffeerde
meubelen, uittrekbare voegenmond-
stuk en meubelborstel
12 Indicatie voor filter omwisselen
13 Vergrendelingshendel, deksel filterzak /
filter voor bescherming van de motor
14 Filter voor bescherming van de motor
15 Filterzak-houder
16 Afdekking HEPA-filter
17 HEPA-filter
18 Handgreep
Ingebruikneming
Afbeelding
Steunen voor de zuigslang in de zuigo-
pening aansluiten.
Om het uit elkaar te halen, beide nokjes
indrukken en de slang eruit trekken.
Afbeelding
Handvat en telescoopzuigslang in el-
kaar steken en aansluiten.
Grondmondstuk en telescoopzuigslang
in elkaar steken en aansluiten.
30 NL
- 2
Page 31

Afbeelding
Verstelling indrukken en telescoop-
zuigslang op de gewenste lengte instel-
len.
Afbeelding
Voor het uitzetten of bij korte werkon-
derbrekingen, grondmondstuk in de
gleuf aan de achterkant van het appa-
raat steken en in pauzestand drukken.
Afbeelding
Om deze eruit te halen, handvat naar
achteren in de richting van het apparaat
drukken. Daardoor wordt het grond-
mondstuk uit de gleuf ontgrendeld en
kan deze met een beweging naar bo-
ven eruit gehaald worden.
Afbeelding
Hou de netkabel bij de stekker vast en
trek deze eruit. Netstekker in het stop-
contact steken.
Apparaat aan- / uitschakelen.
Afbeelding
De zuigkrachtinstelling kan men aan-
passen met de zuigkrachtregelaar:
- Markering op MAX, hoge zuigkracht
- Markering op MIN, geringe zuigkracht
Aanwijzing: de markering geeft de juis-
te zuigkracht aan.
Zuigkracht aanpassen aan de zuigsituatie:
Laag zuigvermogen – voor gordijnen,
textiel, gestoffeerde meubelen, kus-
sens
Gemiddeld zuigvermogen – voor licht
vervuilde tapijten / vloerkleden, hoog-
waardige tapijten, karpetjes en lopers
Hoogste zuigvermogen – voor harde
vloeren, sterk vervuilde tapijten en
vloerkleden
Attentie! Als de stoppen bij het inschake-
len van het apparaat doorslaan, kan het zijn
dat er tegelijkertijd andere elektronische
apparaten op dezelfde stroomkring zijn
aangesloten en gebruikt worden. Stelt u in
dit geval het apparaat op het laagste vermogensniveau in, voordat u het apparaat
aanzet. Daarna kunt u een hoger vermo-
gensniveau kiezen. Beveiliging van het net
zie hoofdstuk "technische gegevens".
Belangrijke aanwijzing! Het apparaat
schakelt zelf automatisch uit bij gevaar voor
oververhitting. Schakel het apparaat uit en
trek de stekker eruit. Controleer of zuigmond, zuigbuis of slang niet verstopt zijn of
dat het filter verwisseld moet worden. Na
het verhelpen van de storing het apparaat
minstens 1 uur laten afkoelen, dan is het
apparaat weer bedrijfsklaar.
Zuigen met accessoires
QuickClick toebehoren
QuickClick toebehoren gebruiken
Mondstuk voor gestoffeerde meube-
len: voor het schoonzuigen van gestof-
feerde meubelen, matrassen, gordijnen
e.a.
Meubelborstel, zwenkbaar: voor het
zacht reinigen van meubelen en gevoelige voorwerpen, het afstoffen van boeken, ventilatie-openingen in de auto
e.a.
Voegenborstel, uittrekbaar: voor ran-
den, voegen en verwarmingslichamen
Accessoires uit QuickClick accessoireopbergvak omwisselen
Grondmondstuk in de gleuf aan de ach-
terkant van het apparaat hangen en in
pauzestand drukken (zie afbeelding 4).
Afbeelding
Ontgrendelingsknop op het handvat in-
drukken en het handvat van de tele-
scoopzuigslang aftrekken.
Afbeelding
Afdekking van accessoire-opbergvak
openklappen.
Afbeelding
Handvat in gewenste accessoires tot de
aanslag steken. Zo sluit het in elkaar.
Daarna naar beneden draaien en eruit
trekken.
- 3
31NL
Page 32

Afbeelding
Om te bewaren, accessoire met hand-
vat in het accessoire-opbergvak steken
en naar boven vastklikken. Handvat
eraf trekken.
Aanwijzing: De accessoire kan ook
met de hand eruit gehaald worden en
op het handvat gestoken worden. Om
de accessoire los te maken, drukt men
de ontgrendelingsknop op het handvat
in.
Aanwijzing: Alle bovengenoemde
stappen kunnen ook met uitgetrokken
telescoopzuigslang uitgevoerd worden.
Daartoe hangt u het grondmondstuk in
de gleuf aan de achterkant van het apparaat en drukt u het in de pauzestand.
Telescoopzuigslang loodrecht naar boven eruit trekken.
ComfoGlide mondstuk
Afbeelding
Tapijten en vloerbedekking :
Schakelinstellingen als volgt kiezen:
Transport, opslag
Apparaat voor het transport aan de
draaghandgreep vasthouden en in dro-
ge ruimten opslaan.
Aanwijzing: Wij raden aan de telesco-
pische zuigbuis vooraf volledig in te
schuiven.
Onderhoud
Letselgevaar
Vóór alle onderhoudswerkzaamheden
schakelt u het apparaat uit en trekt u de
stekker uit het stopcontact.
Reiniging van het apparaat
몇 Let op
Geen schuurmiddelen, glas of reinigingsmiddelen gebruiken! Dompel het apparaat
nooit in water.
Apparaat en kunststofaccessoires met
een in de winkel verkrijgbare kunst-
stofreiniger verzorgen.
De stofkamer met een droge stofdoek /
stofborstel reinigen.
Afbeelding
Harde bodem:
Schakelinstellingen als volgt kiezen:
Werking stopzetten
Apparaat uitschakelen en de stekker uit
de wandcontactdoos trekken.
Afbeelding
Toets kabel oprollen indrukken. Kabel
rolt automatisch op in het apparaat.
Grondmondstuk in de gleuf aan de ach-
terkant van het apparaat hangen en in
pauzestand drukken.
32 NL
- 4
Filterzak vervangen
Bestelnr. 6.904-329
Inhoud: 5 filterzakken met sluiting en 1 filter
om de motor te beschermen.
Aanwijzing: Voor het aflezen van de aanwijzing voor het wisselen van het filter dient
u de telescoopzuigbuis van de handgreep
af te nemen.
Afbeelding
Als de filtervervangindicator op het dek-
sel volledig rood is, vervang dan de fil-
terzak.
Vergrendeling indrukken en deksel
openen.
Afbeelding
Filterzakhouder ontgrendelen en naar
buiten klappen.
Afbeelding
Met afsluitklep de filterzak vergrende-
len, filterzak eruit nemen en weggooien.
Page 33

Afbeelding
Nieuwe filterzak tot de aanslag in de
houder schuiven. Klep eerst naar beneden drukken, daarna houder in de behuizing schuiven en in de
apparaatbehuizing in elkaar sluiten.
몇 Let op
Deksel sluit alleen als er een filterzak inzit.
Na het opzuigen van fijne stofdeeltjes (zoals bijv. gips, cement enz.) het filter om de
motor te beschermen reinigen of indien nodig vervangen.
ComfoGlide mondstuk reinigen
Het ComfoGlide mondstuk regelmatig reinigen!
Mondstuk van zuigslang nemen.
Afbeelding
Achterste stuurrollen reinigen:
Gaat het beste als de rollen eruit ge-
haald zijn. Daartoe de as losschroeven
en eruit trekken. Stofvlokken, haren
enz. kunt u nu gemakkelijk verwijderen.
Stuurrollen weer erin zetten.
Filter om de motor te beschermen
vervangen
Filter voor bescherming van de motor:
verwisselen bij de laatste filterzak in de filterzakverpakking.
Het filter om de motor te beschermen
ligt onder de ingezette filterzak. Voor
het inzetten van een filterzak eerst het
filter voor de bescherming van de motor
vervangen.
Afbeelding
Frame ontgrendelen en eruit halen.
Frame afnemen, oude filter voor be-
scherming van motor wegnemen en
verwijderen. Nieuw filter voor bescherming van motor erin leggen en frame
aanbrengen.
Afbeelding
Frame inzetten en vastklikken.
HEPA-filter vervangen
Bestelnr. 6.414-805
Filter voor schone uitblaaslucht.
HEPA-filter: 1 x per jaar vervangen.
Afbeelding
Open het deksel.
HEPA-filter ontgrendelen en eruit ha-
len.
Afbeelding
Nieuw HEPA-filter inzetten en vastklik-
ken.
Deksel sluiten.
Accessoires reinigen
Afbeelding
Handvat en zuigslang kunnen voor rei-
niging of bij verstopping uit elkaar ge-
haald worden. Daartoe drukt u de 2
ontgrendelingen in en u trekt ze uit el-
kaar
Om ze aan elkaar te maken drukt u het
handvat en de zuigslang in elkaar en u
klikt ze vast.
Algemene instructies
Garantie
In elk land gelden de door onze hiervoor
verantwoordelijke verkoopmaatschappij
uitgegeven garantievoorwaarden. Eventuele storingen aan het apparaat verhelpen
wij zonder kosten binnen de garantietermijn als een materiaal of fabrieksfout hiervan de oorzaak is. Neem bij klachten
binnen de garantietermijn contact op met
uw leverancier of de dichtstbijzijnde klantenservicewerkplaats en neem de accessoires en uw aankoopbewijs mee.
(adres zie achterzijde)
Klantenservice
Bij vragen of storingen helpt onze KÄRCHER-filiaal u graag verder. Adres zie achterzijde.
- 5
33NL
Page 34

Bestelling van reserveonderdelen
en bijzondere toebehoren
Een selectie van de meest frequent benodigde reserveonderdelen vindt u achteraan
in de gebruiksaanwijzing.
Reserveonderdelen en toebehoren zijn
verkrijgbaar bij uw handelaar of uw KÄRCHER-filiaal.
(adres zie achterzijde)
Bijzondere toebehoren
Technische gegevens
Spanning V 220 - 240
Stroomsoort Hz 50/60
Netzekering (traag) A 16
Beschermingsklasse II
Vermogen Pnom. W 1600
Vermogen Pmax. W 1800
Gewicht (excl. acces-
soires)
Actieradius m 10
Afmetingen mm ø 380 x
Nominale afstand, accessoires
Geluidsdrukniveau
(EN 60704-2-1)
Technische veranderingen voorbehouden!
kg 7,0
380
mm 35
dB(A) 64
A Turbozuigmond voor de grond
(Bestelnr. 4.130-177)
Borstelen en zuigen in een keer.
Met name geschikt voor het opzuigen
van dierenharen en het zuigen van
hoogpolige tapijten. De rolborstel wordt
aangedreven door de luchtstroom.
Geen elektrische aansluiting vereist.
B Turbozuigmond voor beklede meu-
belen
(Bestelnr. 2.903-001)
Borstelen en zuigen in een keer van be-
klede meubelen, matrassen, autostoe-
len, enz.
Met name geschikt voor het opzuigen
van dierenharen. De rolborstel wordt
aangedreven door de luchtstroom.
Geen elektrische aansluiting vereist.
C Parketmondstuk
(Bestelnr. 4.130-172)
Voor het zuigen van kwetsbare gladde
vloeren (parket, marmer, terracotta,
enz.)
D Matrassenmondstuk
(Bestelnr. 6.906-755)
Voor het zuigen van matrassen en kussens.
E Filterzak
(Bestelnr. 6.904-329)
Inhoud: 5 Filterzakken met sluiting en 1
filter om de motor te beschermen.
F HEPA-filter
(Bestelnr. 6.414-805)
Extra filter voor schone uitblaaslucht.
Aanbevolen voor mensen die allergisch
zijn.
34 NL
- 6
Page 35

Índice de contenidos
Indicaciones de seguridad ES - 1
Manejo ES - 2
Finalización del funcionamiento ES - 4
Cuidados y mantenimiento ES - 4
Indicaciones generales ES - 5
Datos técnicos ES - 6
Accesorios especiales ES - 6
Estimado cliente:
Antes del primer uso de su apa-
rato, lea este manual original,
actúe de acuerdo a sus indicaciones y
guárdelo para un uso posterior o para otro
propietario posterior.
Uso previsto
Este aspirador está diseñado para el uso
doméstico particular, no para el uso industrial.
El fabricante no asume responsabilidad alguna por los daños que pudieran derivarse
de un uso inadecuado o incorrecto.
Utilizar el aspirador únicamente con:
bolsas filtrantes originales.
Accesorios y piezas de repuesto o ac-
cesorios opcionales originales.
El aspirador no es apropiado para:
utilizarlo en personas o animales
Aspirar:
Insectos ( p. ej. moscas, arañas, ...),
sustancias nocivas para la salud, calientes o incandescentes ni materiales
cortantes,
sustancias húmedas o líquidas,
materiales o gases inflamables o explosivos.
Protección del medio ambiente
Los materiales de embalaje son reci-
clables. Po favor, no tire el embalaje
a la basura doméstica; en vez de ello, entréguelo en los puntos oficiales de recogida
para su reciclaje o recuperación.
Los aparatos viejos contienen mate-
riales valiosos reciclables que debe-
rían ser entregados para su
aprovechamiento posterior. Por este motivo, entregue los aparatos usados en los
puntos de recogida previstos para su reciclaje.
Indicaciones sobre ingredientes (REACH)
Encontrará información actual sobre los ingredientes en:
http://www.karcher.de/de/unternehmen/
umweltschutz/REACH.htm
Eliminación de filtro y bolsa filtrante
El filtro y la bolsa filtrante están fabricados
con materiales biodegradables.
Si no aspira sustancias que no estén permitidas en la basura convencional, los puede eliminar con ella.
Indicaciones de seguridad
– Este aparato no es apto para ser opera-
do por personas (incl. niños) con capacidades físicas, sensoriales o
intelectuales limitadas, o con falta de
experiencia y/o conocimientos, a no ser
que sea supervisado por una persona
para responsable para su seguridad o
haya sido instruida para utilizar el aparato. Mantener fuera del alcance de los
niños.
– Mantener alejado el plástico del emba-
laje de los niños, se pueden ahogar.
– Apagar el aparato después de cada uso
y antes de cada limpieza/mantenimiento.
– Peligro de incendio. No aspire objetos
incandescentes, con o sin llama.
– Está prohibido usar el aparato en zonas
en las que exista riesgo de explosiones.
- 1
35ES
Page 36

– Para pausas de operación prolongadas
desconecte el aparato del interruptor
principal / interruptor del aparato o desenchufe la clavija de red.
몇 Conexión eléctrica
– Conecte el aparato únicamente a co-
rriente alterna. La tensión tiene que corresponder a la indicada en la placa de
características del aparato.
Peligro de descarga eléctrica
– No toque nunca el enchufe de red o la
toma de corriente con las manos mojadas.
– No saque el enchufe de la toma de co-
rriente tirando del cable.
– Antes de cada puesta en servicio, com-
pruebe si el cable de conexión y el enchufe de red presentan daños. Si el
cable de conexión estuviera deteriorado, debe solicitar sin demora a un electricista especializado del servicio de
atención al cliente autorizado que lo
sustituya.
– No utilizar el cable de alimentación de
red para llevas/transportar el aspirador.
– Evitar que el cable quede tirante en las
esquinas o quede aplastado.
– Desenchufar la clavija de red antes de
realizar cualquier trabajo en el aparato.
몇 Atención:
No aspirar nunca sin bolsa filtrante.
Se puede dañar el aparato.
No acercar la cabeza a la boquilla o al
tubo cuando el aparato esté aspirando.
¡Riesgo de lesiones!
Extraer completamente el cable de ali-
mentación durante la aspiración.
Proteja el aparato de la intemperie, la
humedad y las fuentes de calor.
Cuando no esté efectuando ninguna
aspiración, desconecte el aparato.
Manejo
Descripción del aparato
¡Despliegue las páginas!
1 Cable de conexión a red con enchufe
2 Botón de enrollar el cable
3 Interruptor de ON/OFF
4 Regulador de potencia de aspiración
5 Manguera de aspiración
6 Mango
7 Tubo de aspiración telescópico
8
Ajuste del tubo de aspiración telescópico
9 Boquilla barredora de suelos
10 Cubierta de zona de inserción de acce-
sorios
11 Zona de inserción de accesorios Quic-
kClick:
contiene una boquilla para tapicerías,
boquilla extraíble para juntas y cepillo
para muebles
12 Indicador de cambio de filtro
13 Palanca de cierre, tapa de la bolsa fil-
trante / filtro protector del motor
14 Filtro protector del motor
15 Soporte de la bolsa filtrante
16 Cubierta del filtro HEPA
17 Filtro HEPA
18 Asa de transporte
Puesta en marcha
Figura
Encajar el racor del tubo flexible de as-
piración en la abertura de aspiración.
Para quitarlo, presionar ambas lengüe-
tas y extraer el tubo.
Figura
Unir y encajar la empuñadura y el tubo
de aspiración telescópico.
36 ES
- 2
Page 37

Unir y encajar la boquilla barredora de
suelos y el tubo de aspiración telescópico.
Figura
Pulse la regulación y ajuste el tubo de
aspiración telescópico a la longitud deseada.
Figura
Al parar el funcionamiento o al realizar
breves pausas, colocar y encajar la boquilla barredora de suelos en el soporte
para pausas.
Figura
Para extraer, presióne la empuñadura
hacia atrás en dirección al aparato. De
esta forma se desbloquea la boquilla
barredora de suelos del soporte para
pausas y se puede extraer hacia arriba.
Figura
Sujetar el cable de alimentación por la
clavija y tirar. Enchufar la clavija de red
a una toma de corriente.
Desconctar/conectar el aparato
Figura
La potencia de aspiración se ajusta con
el regulador de potencia
- Marca en MAX, alta potencia de aspi-
ración
- Marca en MIN, baja potencia de aspi-
ración
Indicación: la marca muestra la poten-
cia de absorción actual.
Adaptar la potencia de absorción a la situación:
Potencia de absorción baja – para
cortinas, telas, muebles tapizados, coji-
nes
Potencia media de absorción – para
alfombras / moquetas poco sucias, al-
fombras de alta calidad, puentes y al-
fombras de pasillos
Potencia máxima de absorción –
para suelos duros, alfombras y moque-
tas muy sucias
¡Importante! Si salta el fusible al conectar
el aparato, puede deberse a que haya otros
aparatos eléctricos de alto consumo de corriente conectados al mismo circuito. En
este caso, configure el nivel de potencia
más bajo en el aparato, antes de encender
el aspirador. Después podrá seleccionar
un nivel de potencia más alto. Fusible de
red, consulte el capítulo "Datos técnicos".
¡Indicación importante! El aparato se
apaga automáticamente si se corre el riesgo de sobrecalentamiento. Apague el aparato y desenchufe la clavija. Compruebe si
la boquilla, tubo de aspiración o manguera
están atascados o si es necesario cambiar
el filtro. Tras solucionar la avería, deje enfriar el aparato al menos 1 hora, tras esto
se podrá poner el aparato de nuevo en funcionamiento.
Aspirar con accesorios
Accesorios QuickClick
Utilizar accesorios QuickClick
Boquillas para tapicería: para aspirar
muebles tapizados, colchones, cortinas
etc.
Cepillo para muebles, giratorio: para
una limpieza cuidadosa de muebles y
objetos delicados, para quitar el polvo a
libros, rejillas de ventilación del coche
etc.
Boquilla para juntas, desplegable:
para bordes, fugas y radiadores
Cambiar el accesorio de la zona de inserción QuickClick
Colgar la boquilla para suelos del so-
porte de interrupción de funcionamiento
situado en la parte trasera y pulsar la
posición de encaje (véase figura 4).
Figura
Presionar la tecla de desbloqueo de la
empuñadura y extraerla del tubo de absorción telescópico.
Figura
Soltar la cubierta de la zona de inser-
ción de accesorios.
Figura
Introducir la empuñadura en el acceso-
rio deseado hasta el tope. De esta for-
- 3
37ES
Page 38

ma encajará. A continuación girar hacia
abajo y extraer.
Figura
Para guardarlo, inserte el accesorio con
la empuñadura en la zona de inserción
de accesorios y encajar hacia arriba.
Extraer la empuñadura.
Indicación: El accesorio también se
puede coger y encajar en la empuñado-
ra con la mano. Para soltar el acceso-
rio, pulsar el botón de desbloqueo de la
empuñadura.
Indicación: Todos los pasos mencio-
nados arriba también se pueden reali-
zar con el tubo de absorción
telescópico insertado. Para ello colgar
la boquilla barredora de suelos en el so-
porte para pausas del lateral del apara-
to y presionar hasta que encaje. Extraer
el tubo de absorción telescópico hacia
arriba de forma vertical.
Boquilla ComfoGlide
Figura
Alfombras y moquetas:
Seleccionar las posiciones de interrup-
tor de la siguiente manera:
Figura
Superficies duras:
Seleccionar las posiciones de interrup-
tor de la siguiente manera:
Finalización del funcionamiento
Apague el aparato y desenchufe la cla-
vija de red.
Figura
Pulsar la tecla de recogida de cable. El
cable se recogerá automáticamente ha-
cia el interior del aparato.
Colgar la boquilla barredora de suelos
en el soporte para pausas del lateral del
aparato y presionar hasta que encaje.
Transporte, almacenamiento
Sujetar el aparato por el asa para su
transporte y guardar en lugares secos.
Indicación: Se recomienda plegar antes el tubo de aspiración telescópico to-
talmente.
Cuidados y mantenimiento
Peligro de lesiones
Antes de efectuar cualquier tarea de cuidado o mantenimiento en el aparato, hay que
apagarlo y desconectarlo de la red eléctrica.
Limpieza del aparato
몇 Atención:
No utilice detergentes abrasivos, ni detergentes para cristales o multiuso. No sumerja jamás el aparato en agua.
Limpie el aparato y los accesorios de
plástico con un limpiador de materiales
sintéticos de los habituales en el mercado.
Limpiar el compartimento colector de
polvo con un paño / cepollo seco.
Sustitución de la bolsa filtrante
Ref. 6.904-329
Contenido: 5 bolsas filtrantes con cierre y
un filtro protector del motor.
Nota: Para leer el indicador de cambio de
filtro separe el tubo de aspiración telescópica de la empuñadura.
Figura
Si el indicador de cambio de filtro de la
tapa está totalmente rojo, cambiar la
bolsa filtrante.
Pulsar la palanca de cierre y abrir la ta-
pa.
Figura
Desbloquear el soporte de la bolsa fil-
trante y abatir hacia arriba.
38 ES
- 4
Page 39

Figura
Cerrar con lengüeta de cierre, extraer la
bolsa filtrante y eliminarla.
Figura
Introducir la nueva bolsa filtrante hasta
el tope en la sujeción. Presionar primero la cubrejunta hacia abajo, después
deslice la sujeción en la carcasa y encajar en la carcasa del aparato.
몇 Atención:
La tapa se cierra sólo con la bolsa filtrante
colocada. Después de aspirar partículas de
polvo finas (p. ej. escayola, cemento, etc.)
limpiar o cambiar el filtro protector del motor.
Cambiar el filtro protector del motor
Cambiar el filtro protector del motor: con
la última bolsa filtrante del paquete.
El filtro protector del motor está detras
de la bolsa filtrante que ha colocado.
Cambie primero el filtro protector del
motor antes de colocar la bolsa filtrante.
Figura
Desbloquear y extraer el bastidor.
Retirar la parte inferior del bastidor, ex-
traer el filtro protector del motor y eliminar. Colocar un nuevo filtro protector
del motor en el bastidor y colocar la parte inferior del bastidor.
Figura
Introducir e insertar el bastidor.
Sustitución del filtro HEPA
Ref. 6.414-805
Filtro para una mayor depuración del aire
de salida.
Filtro HEPA: Cambiar 1 vez al año.
Figura
Abrir la tapa.
Desbloquear y extraer el filtro HEPA.
Figura
Introducir y encajar un nuevo filtro
HEPA.
Cerrar la tapa.
Limpiar la boquilla ComfoGlide
¡Limpiar regularmente la boquilla ComfoGlide!
Quitar la boquilla del tubo de absorción.
Figura
Limpiar el rodillo guía trasero:
Es mejor hacerlo con el rodillo extraído.
Para ello desenrosque y extraíga el eje.
Ahora se pueden quitar fácilmente las
pelusas, pelos etc. Montar de nuevo el
rodillo guía.
Limpiar los accesorios
Figura
Se puede separar la empuñadura y el
tubo de aspiración para limpiar o en
caso de atasco. Para ello pulsar los dos
botones de desbloqueo y separar
Para unir, insertar la empuñadura en el
tubo de aspiración hasta que encaje.
Indicaciones generales
Garantía
En todos los países rigen las condiciones
de garantía establecidas por nuestra sociedad distribuidora. Las averías del aparato
serán subsanadas gratuitamente dentro
del período de garantía, siempre que las
causas de las mismas se deban a defectos
de material o de fabricación. En un caso de
garantía, le rogamos que se dirija con el
comprobante de compra al distribuidor
donde adquirió el aparato o al Servicio al
cliente autorizado más próximo a su domicilio.
(La dirección figura al dorso)
Servicio de atención al cliente
En caso de dudas o alteraciones, la sucursal de KÄRCHER estará encantada de
ayudarle. La dirección figura al dorso.
- 5
39ES
Page 40

Pedido de piezas de repuesto y ac-
cesorios especiales
Podrá encontrar una selección de las piezas de repuesto usadas con más frecuencia al final de las instrucciones de uso.
En su distribuidor o en la sucursal de KÄRCHER podrá adquirir piezas de repuesto y
accesorios.
(La dirección figura al dorso)
Accesorios especiales
Datos técnicos
Tensión V 220 - 240
Tipo de corriente Hz 50/60
Fusible de red (inerte) A 16
Clase de protección II
Potencia P
Potencia P
Peso sin accesorios kg 7,0
Radio de acción m 10
Dimensiones mm ø 380 x
Diámetro nominal,
accesorios
Nivel de presión acústica (EN 60704-2-1)
Reservado el derecho a realizar modificaciones técnicas.
nom
máx
W1600
W1800
380
mm 35
dB(A) 64
A Boquilla extra-rápida para suelos
(Ref. 4.130-177)
Cepillar y aspirar en una sola pasada
Ideal para aspirar pelos de animales y
moquetas de pelo largo. El rodillo del
cepillo es accionado mediante la co-
rriente del ventilador.
No precisa conexión eléctrica.
B Boquilla extra-rápida para tapicerías
Ref. 2.903-001)
Cepillar y aspirar en una sola pasada
muebles tapizados, colchones, asien-
tos de automóviles, etc.
Especialmente apropiado para aspirar
pelos de animales. El rodillo del cepillo
es accionado mediante la corriente del
ventilador.
No precisa conexión eléctrica.
C Boquilla para parquet
(Ref. 4.130-172)
Para aspirar en suelos lisos delicados
(parqué, mármol, terracota, etc.)
D Boquilla para colchones
(Ref. 6.906-755)
Para aspirar colchones y almohadas.
E Bolsa filtrante
(Ref. 6.904-329)
Contenido: 5 bolsas filtrantes con cie-
rre y 1 filtro protector del motor.
F Filtro HEPA
(Ref. 6.414-805)
Filtro adicional para una mayor depura-
ción del aire de salida. Recomendado
para alérgicos.
40 ES
- 6
Page 41

Índice
Avisos de segurança PT - 1
Manuseamento PT - 2
Desligar o aparelho PT - 4
Conservação e manutenção PT - 4
Instruções gerais PT - 5
Dados técnicos PT - 6
Acessórios especiais PT - 6
Estimado cliente,
Leia o manual de manual origi-
nal antes de utilizar o seu aparelho. Proceda conforme as indicações no
manual e guarde o manual para uma consulta posterior ou para terceiros a quem
possa vir a vender o aparelho.
Utilização conforme o fim a que se
destina a máquina
Este aspirador destina-se exclusivamente
para o uso doméstico privado, não devendo ser utilizado para fins industriais.
O fabricante não se responsabiliza por
eventuais danos causados por uma utilização indevida ou erros de manuseamento.
Utilizar o aspirador somente com:
Sacos de filtro originais.
Peças sobresselentes e acessórios ori-
ginais e especiais.
O aspirador não é indicado para:
Limpar pessoas ou animais.
Para aspirar:
Pequenos animais ( por ex., moscas,
aranhas, etc.).
Substâncias nocivas para a saúde, objectos pontiagudos, substâncias quentes ou incandescentes.
Substâncias húmidas ou líquidas.
Substâncias e gases facilmente inflamáveis ou explosivos.
Protecção do meio-ambiente
Os materiais de embalagem são reci-
cláveis. Não coloque as embalagens
no lixo doméstico, envie-as para uma unidade de reciclagem.
Os aparelhos velhos contêm materi-
ais preciosos e recicláveis e deverão
ser reutilizados. Por isso, elimine os
aparelhos velhos através de sistemas de
recolha de lixo adequados.
Avisos sobre os ingredientes (REACH)
Informações actuais sobre os ingredientes
podem ser encontradas em:
http://www.karcher.de/de/unternehmen/
umweltschutz/REACH.htm
Eliminação do filtro e do saco de filtro
O filtro e o saco de filtro são compostos por
materiais compatíveis com o meio-ambiente.
Desde que estes não contenham substâncias aspiradas que não se destinem ao lixo
doméstico, estes podem ser eliminados
juntamente com o lixo doméstico.
Avisos de segurança
– Este aparelho não foi concebido para
ser utilizado por pessoas (incluindo crianças) com capacidades físicas, sensoriais e psíquicas reduzidas ou por
pessoas com falta de experiência ou
conhecimentos, excepto se estas forem
supervisionadas por uma pessoa responsável pela sua segurança ou receberem as necessárias instruções sobre
como utilizar o aparelho. As crianças
devem ser supervisionadas, de modo a
assegurar que não brinquem com o
aparelho.
– Manter as películas da embalagem fora
do alcance das crianças! Perigo de asfixia!
– Desligar o aparelho após cada utiliza-
ção e antes de cada limpeza/manutenção.
– Perigo de incêndio. Não aspirar materi-
ais em combustão nem em brasa.
- 1
41PT
Page 42

– É proibido pôr o aparelho em funciona-
mento em áreas com perigo de explosão.
– No caso de longas interrupções de fun-
cionamento deve-se desligar o interruptor principal / interruptor do aparelho ou
retirar a ficha da tomada.
몇 Ligação eléctrica
– Ligar o aparelho só à corrente alterna-
da. A tensão deve corresponder à placa
de tipo do aparelho.
Perigo de choque eléctrico
– Nunca tocar na ficha de rede e na toma-
da com as mãos molhadas.
– Não puxar a ficha de rede pelo cabo
para a retirar da tomada.
– Antes de qualquer utilização do apare-
lho, verificar se o cabo de ligação e a ficha de rede não apresentam quaisquer
danos. O cabo de ligação danificado
tem que ser imediatamente substituído
pela assistência técnica ou por um
electricista autorizado.
– Não utilizar o cabo de ligação à rede
para levantar ou transportar o aparelho.
– Não entale o cabo de ligação à rede
nem o passe sobre arestas vivas.
– Retirar a ficha da tomada antes de
efectuar quaisquer trabalhos no aparelho.
몇 Atenção
Nunca aspirar sem saco de filtro.
O aparelho pode ser danificado.
Evitar aspirar com o bocal e o tubo de
aspiração próximo da cabeça. Corre o
perigo de se ferir!
Durante os trabalhos de aspiração, o
cabo de ligação à rede deve estar completamente desenrolado.
Proteger o aparelho do tempo atmosfé-
rico, da humidade e de fontes de calor.
Desligue o aparelho quando não for uti-
lizado.
Manuseamento
Descrição da máquina
Abrir as páginas com as ilustrações!!
1 Cabo de ligação à rede com ficha
2 Botão para o enrolamento do cabo
3 Botão de activação/desactivação
4 Regulador da potência de aspiração
5 Tubo flexível de aspiração
6 Punho
7 Tubo de aspiração telescópico
8 Ajuste do tubo de aspiração telescópico
9 Bico para o chão
10 Cobertura do suporte de acessórios
11 Suporte de acessórios QuickClick:
inclui bocal para estofos (sofás), bocal
extensível para juntas e pincel para mó-
veis
12 Indicação de substituição do filtro
13 Alavanca de fecho, tampa do saco de
filtro / filtro de protecção do motor
14 Filtro de protecção do motor
15 Suporte do saco de filtro
16 Cobertura do filtro HEPA
17 Filtro HEPA
18 Punho de transporte
Colocação em funcionamento
Figura
Encaixar o bocal do tubo de aspiração
na abertura de aspiração.
Para retirar basta premir os dois botões
de encaixe e retirar o tubo.
Figura
Unir e encaixar o punho no tubo de as-
piração telescópico.
Unir e encaixar o bocal de chão no tubo
de aspiração telescópico.
42 PT
- 2
Page 43

Figura
Efectuar o ajuste para regular o tubo de
aspiração telescópico no comprimento
desejado.
Figura
Para arrumar a máquina ou em curtas
interrupções de trabalho, deve-se en-
gatar o bocal do chão no suporte de es-
tacionamento, situado no lado traseiro
do aparelho, e premir a posição de en-
caixe.
Figura
Para retirar novamente o bocal é ne-
cessário premir o punho para trás, isto
é, no sentido do aparelho. Desse modo,
o bocal do chão é destravado do supor-
te de estacionamento e pode ser retira-
do para cima.
Figura
Agarrar o cabo de ligação à rede pela fi-
cha e retirá-lo da tomada. Inserir a ficha
de rede na tomada de corrente.
Ligar/desligar o aparelho.
Figura
A regulação da potência de aspiração é
efectuada no regulador da potência de
aspiração:
- Marcação em MÁX, elevada potência
de aspiração
- Marcação em MÍN, baixa potência de
aspiração
Aviso: a marcação indica a potência de
aspiração actual.
Adaptar a força de aspiração à respectiva situação de aspiração:
Potência de aspiração baixa – para
cortinas, produtos têxteis, móveis esto-
fados, almofadas
Potência de aspiração média – para
tapetes / alcatifas com pouca sujidade,
tapetes de alta qualidade, carpetes e
passadeiras
Potência de aspiração mais alta –
para pavimentos duros, tapetes e alca-
tifas com forte sujidade
Atenção! Se durante a colocação em fun-
cionamento ocorrer um disparo do fusível
de rede, uma possível causa pode ser o
funcionamento simultâneo de outros aparelhos eléctricos no mesmo circuito eléctrico. Nestes casos deve ajustar no aparelho
o nível de potência mais baixa antes de
proceder à activação do aparelho. Posteriormente poderá seleccionar um nível de
potência mais elevado. Protecção por fusível, ver capítulo "Dados técnicos“.
Aviso importante! O aparelho desliga-se
automaticamente quando se encontrar em
perigo de sobreaquecimento. Desligue o
aparelho e retire a ficha da tomada. Certifique-se que o bocal, o tubo de aspiração ou
o tubo flexível não estão entupidos e resp.,
o filtro tem que ser substituído. Após a resolução da avaria o aparelho deve arrefecer durante, pelo menos, uma hora antes
de ser colocado novamente em funcionamento.
Aspirar com acessórios
Acessórios QuickClick
Aplicar os acessórios QuickClick
Bocal para estofos (sofás): para aspi-
rar mobiliário estofado, colchões, cortinas, entre outros
Pincel para móveis, rotativo: para a
limpeza cuidadosa de móveis e de objectos sensíveis, limpeza do pó depositado em livros, ranhuras de ventilação
no carro, entre outros
Bocal para juntas, extensível: para
cantos, juntas e radiadores
Trocar os acessórios do suporte de
acessórios QuickClick
Engatar o bocal de chão no suporte de
estacionamento e premi-lo até encaixar
(ver figura 4).
Figura
Premir o botão de desbloqueio no pu-
nho e retirar o punho do tubo telescópico.
Figura
Abrir a cobertura do suporte de acessó-
rios.
- 3
43PT
Page 44

Figura
Inserir o punho no acessório pretendi-
do, até ao batente. Desse modo o pu-
nho encaixa. De seguida, girar para
baixo e puxar para fora.
Figura
Para o guardar, deve-se posicionar o
acessório com punho no suporte de
acessórios e encaixar para cima. Reti-
rar punho.
Aviso: O acessório pode igualmente
ser retirado manualmente e ser encai-
xado no punho. Premir o botão de des-
bloqueio no punho para soltar o
acessório.
Aviso: Todos os passos supracitados
podem ser efectuados com o tubo te-
lescópico encaixado. Para tal, engatar
o bocal de chão no suporte de estacio-
namento e premi-lo até encaixar. Puxar
o tubo telescópico de aspiração verti-
calmente para cima.
Bocal ComfoGlide
Figura
Tapetes e alcatifas:
Seleccionar a seguinte posição do bo-
tão:
Engatar o bocal de chão no suporte de
estacionamento e premi-lo até ancaixar.
Transporte, armazenamento
Usar o punho de transporte para trans-
portar o aparelho e guardar o mesmo
em locais secos.
Aviso: recomenda-se que o tubo telescópico de aspiração seja primeiro recolhido totalmente.
Conservação e manutenção
Perigo de lesão
Antes de efectuar trabalhos de conservação e manutenção, desligar o aparelho e tirar a ficha de rede.
Limpeza do aparelho
몇 Atenção
Não utilize produtos abrasivos, produtos
para a limpeza de vidros ou universais!
Nunca mergulhe o aparelho em água.
Limpe o aparelho e os acessórios de
plástico com um produto para limpeza
de plásticos corrente.
Limpar o compartimento do saco do pó
com um pano seco / pincel de pó.
Figura
Superfícies duras:
Seleccionar a seguinte posição do bo-
tão:
Desligar o aparelho
Desligue o aparelho e retire a ficha de
rede.
Figura
Premir o botão para o enrolamento do
cabo. O cabo é automaticamente reco-
lhido.
44 PT
- 4
Trocar o saco de filtro
N.º de encomenda: 6.904-329
Contém: 5 sacos de filtro com fecho e 1 filtro protector para motor.
Aviso: Separe o tubo de aspiração telescópico do punho para consultar a indicação
de substituição do filtro.
Figura
Proceder à substituição do saco de fil-
tro assim que a indicação de substituição do filtro, na tampa, estiver
completamente vermelha.
Premir a alavanca de fecho e abrir a
tampa.
Figura
Destravar o suporte do saco de filtro e
abrir.
Page 45

Figura
Fechar o saco de filtro com a lingueta
de fecho, retirar o saco e eliminá-lo.
Figura
Inserir um novo saco no suporte até ao
batente. Premir a lingueta primeiro para
baixo, inserir de seguida o suporte na
carcaça e encaixar na carcaça do aparelho.
몇 Atenção
A tampa só fecha com um saco de filtro.
Limpar ou substituir o filtro de protecção do
motor, após a aspiração de pequenas partículas de pó (p. ex. gesso, cimento, etc.).
Substituir o filtro de protecção do
motor
Filtro de protecção do motor: trocar as-
sim que utilizar o último saco de filtro da
embalagem.
O filtro de protecção do motor situa-se
atrás do saco de filtro. Substituir o filtro
de protecção do motor antes de inserir
o saco de filtro.
Figura
Destravar o quadro e retirá-lo.
Retirar a parte inferior do quadro e pro-
ceder à remoção e consequente eliminação do filtro de protecção do motor.
Posicionar o novo filtro de protecção do
motor no quadro e encaixar a parte in-
ferior do quadro.
Figura
Inserir o quadro e encaixar.
Substituir o filtro HEPA
N.º de encomenda: 6.414-805
Filtro para garantir uma maior limpeza do
ar expelido.
Filtro HEPA: substituir uma vez por ano.
Figura
Abrir a tampa.
Destravar o filtro HEPA e retirá-lo.
Figura
Inserir novo filtro HEPA e encaixar.
Fechar a tampa.
Limpar o bocal ComfoGlide
Limpar o bocal ComfoGlide em intervalos
regulares!
Retirar o bocal do tubo de aspiração.
Figura
Limpar o rolo de guia traseiro:
de preferência com o rolo retirado. Desaparafusar, para isso, o eixo e retirar.
Pó, cotão, cabelos, etc. podem agora
ser facilmente removidos. Montar novamente o rolo de guia.
Limpar os acessórios
Figura
O manípulo bem como o tubo de aspi-
ração podem ser separados para fins
de limpeza e desobstrução de entupimentos. Premir para esse efeito os dois
dispositivos de desbloqueio e separar
as partes.
Para proceder novamente à montagem
das duas peças, basta uni-las até encaixarem.
Instruções gerais
Garantia
Em cada país são válidas as condições de
garantia emitidas pelas nossas Empresas
de Comercialização competentes. Eventuias avarias no aparelho, durante o período
de garantía, serão reparadas sem encargos para o cliente, desde que se trate de
um defeito de material ou de fabricação.
Em caso de garantia, dirija-se ao seu revendedor ou ao Serviço Técnico mais próximo, com o aparelho e documento de
compra.
(Endereços no verso)
Serviço de assistência técnica
Em caso de dúvidas ou avarias, a nossa filial KÄRCHER local está à sua disposição.
Endereços no verso.
- 5
45PT
Page 46

Encomenda de peças sobressalen-
tes e acessórios especiais
No final das Instruções de Serviço encontra uma lista das peças de substituição
mais necessárias.
As peças sobressalentes e acessórios podem ser adquiridos junto do seu revendedor ou em cada filial da KÄRCHER.
(Endereços no verso)
Acessórios especiais
Dados técnicos
Tensão V 220 - 240
Tipo de corrente Hz 50/60
Protecção de rede (de
acção lenta)
Classe de protecção II
Potência P
Potência P
Peso (sem acessórios) kg 7,0
Raio de acção m 10
Dimensões mm ø 380 x
Diâmetro nominal,
acessórios
Nível de pressão acústica (EN 60704-2-1)
Reservados os direitos a alterações técnicas!
nom
máx
A16
W1600
W1800
380
mm 35
dB(A) 64
A Turbobocal para pavimentos
(Nº de encomenda: 4.130-177)
Escovar e aspirar numa só passagem.
Especialmente adequado para aspirar
pêlos de animais e para tapetes felpu-
dos. O accionamento da escova rotativa é efectuado pela corrente de ar.
Não é necessária qualquer ligação
eléctrica.
B Turbobocal para estofos
(Nº de encomenda: 2.903-001)
Escovar e aspirar, numa só passagem,
mobiliário estofado, colchões, assentos
de automóveis, etc.
Especialmente adequado para aspirar pêlos de animais. O accionamento da escova
rotativa é efectuado pela corrente de ar.
Não é necessária qualquer ligação
eléctrica.
C Bocal para parquete
(Nº de encomenda: 4.130-172)
Para aspirar pavimentos lisos e sensíveis
(parquete, mármore, terracota, etc.).
D Bocal para colchões
(Nº de encomenda: 6.906-755)
Para aspirar colchões e estofos.
E Saco de filtro
(Nº de encomenda: 6.904-329)
Contém: 5 sacos de filtro com fecho e 1
filtro protector para motor.
F Filtro HEPA
(Nº de encomenda: 6.414-805)
Filtro adicional para garantir uma maior
limpeza do ar expelido. Recomendado
para pessoas que sofram de alergias.
46 PT
- 6
Page 47

Indholdsfortegnelse
Sikkerhedsanvisninger DA - 1
Betjening DA - 2
Efter brug DA - 4
Pleje og vedligeholdelse DA - 4
Generelle henvisninger DA - 5
Tekniske data DA - 6
Ekstratilbehør DA - 6
Kære kunde
Læs original brugsanvisning in-
den første brug, følg anvisningerne og opbevar vejledningen til senere
efterlæsning eller til den næste ejer.
Bestemmelsesmæssig anvendelse
Denne støvsuger er beregnet til privat brug
i huset og ikke til industrielle formål.
Producenten garanterer ikke for eventuelle
skader som blev forårsaget af ikke bestemmelsesmæssigt brug eller ukorrekt betjening af apparatet.
Brug støvsugeren kun med:
Originale filterposer.
Original reservedele, tilbehør eller eks-
tra tilbehør.
Støvesugeren er ikke egnet til:
Støvsuge mennesker eller dyr.
Suge bort:
Små levende organismer (f.eks. fluer,
edderkopper, osv.).
Sundhedsfarlige, varme eller glødende
stoffer eller stoffer med skarpe kanter.
Våde stoffer eller væsker.
Stoffer eller gas som er let antændelige
eller eksplosivt.
Miljøbeskyttelse
Emballagen kan genbruges. Smid
ikke emballagen ud sammen med det
almindelige husholdningsaffald, men aflever den til genbrug.
Udtjente apparater indeholder værdi-
fulde materialer, der kan og bør afle-
veres til genbrug. Aflever derfor
udtjente apparater på en genbrugsstation
eller lignende.
Henvisninger til indholdsstoffer
(REACH)
Aktuelle oplysninger til indholdsstoffer finder du på:
http://www.karcher.de/de/unternehmen/
umweltschutz/REACH.htm
Bortskaffelse af filter og filterpose
Filter og filterpose er produceret af miljøvenligt materiale.
Såfremt de ikke har indsugede stoffer, som
ikke er forbudt som husholdningsaffald,
kan de bortskaffes med den normale affald.
Sikkerhedsanvisninger
– Dette apparat er ikke beregnet til brug
af personer (inklusive børn) med indskrænkede fysiske, sensoriske eller åndelige evner eller som ikke har
erfaringer med brugen og/eller kendskab til brugen, med mindre de er under
opsyn af en person som er ansvarligt
for deres sikkerhed eller blev anvist i
brugen af apparatet. Børn skal være
under opsyn for at sørge for, at de ikke
leger med apparatet.
– Emballagefolie skal holdes væk fra
børn p.gr.a. kvælningsfare!
– Efter hver brug og før hver rengøring/
vedligeholdelses skal maskinen slukkes.
– Brandfare. Opsug ikke brændende eller
glødende genstande.
– Det er forbudt at bruge højtryksrense-
ren i områder, hvor der er eksplosionsfare.
- 1
47DA
Page 48

– Ved længere arbejdspauser skal maski-
nen afbrydes via hovedafbryderen /
kontakten eller netstikket skal trækkes
ud.
몇 El-tilslutning
– Højtryksrenseren må kun sluttes til vek-
selstrøm. Spændingen skal svare til angivelsen på typeskiltet.
Risiko for elektrisk stød
– Rør aldrig ved netstik og stikkontakt
med fugtige hænder.
– Træk stikkontakten ikke ud af stikdåsen
ved at trække i ledningen.
– Kontroller altid tilslutningsledningen og
netstikket for skader, før højtryksrenseren tages i brug. En beskadiget tilslutningsledning skal udskiftes af en
autoriseret kundeserviceafdeling/elektriker med det samme.
– Tillsutningskablet må ikke bruges til at
bære/transportere apparatet.
– Træk tilslutningskablet ikke over skarpe
kanter og sørg for at kablet ikke klemmes ind.
– Træk netstikket inden der arbejdes på
apparatet.
몇 OBS
Støvsug aldrig uden filterpose.
Apparatet kan blive beskadiget.
Undgå støvsugning med mundstykke
og sugerør nær til hovedet. Der er fare
for personskader!
Træk tilslutningskablet helt ud under
sugedriften.
Beskyt apparatet imod vejr, fugtighed
og varmekilder.
Sluk for apparatet, når der ikke suges.
Betjening
Beskrivelse af apparatet
Fold venligst siderne med figurerne ud!
1 Nettilslutningskabel med stik
2 Tast kabelopspoling
3 Tænd/Sluk tast
4 Sugekraftregulator
5 Sugeslange
6 Håndtag
7 Teleskopsugerør
8 Omstilling teleskopsugerør
9 Gulvmundstykke
10 Dæksel tilbehørsholder
11 Tilbehørsholder QuickClick:
indeholder mundstykke til puder, fugemundstykke som kan trækkes ud og
møbelpensel.
12 Filterskiftindikator
13 Låsehåndtag, dæksel filterpose/motor-
beskyttelsesfilter
14 Motorbeskyttelsesfilter
15 Filterposeholder
16 Dæksel HEPA-filter
17 HEPA-filter
18 Bæregreb
Ibrugtagning
Figur
Sugeslangens studs skal gå i hak i su-
geåbningen.
Tryk begge låsekærve sammen til at
fjerne sugeslangen og træk slangen af.
Figur
Sæt håndtaget og teleskopsugerøret
sammen til det går i hak.
Sæt gulvmundstykket og teleskopsuge-
røret sammen til det går i hak.
48 DA
- 2
Page 49

Figur
Betjen omstilleren og indstil teleskopsu-
gerøret til den ønskede længde.
Figur
Hæng gulvmundstykket i holderen på
apparatets bagside og tryk den i låseposition, hvis du stiller apparatet til side
eller afbryder arbejdet for et kort tidsrum.
Figur
Tryk håndtaget tilbage i apparatets ret-
ning for at tage det ud igen. Derved åbnes/løsnes gulvmundstykket ud af
holderen og kan tages opad ud.
Figur
Hold tilslutningskablet fat i stikken og
træk det ud. Sæt netstikket i en stikdå-
se.
Tænde/slukke for apparatet.
Figur
Indstille sugekraften på sugekraftregu-
latoren:
- Markering på MAX, stor sugekraft
- Markering på MIN, lav sugekraft
Bemærk: markeringen viser den aktu-
elle sugeeffekt.
Tilpas sugekraften tilsvarende til situationen:
Lav sugekapacitet – til gardiner, teks-
tiler, polstrede møbler, puder
Medium sugekapacitet – til let tilsmud-
sede tæpper/ tæppegulv, tæpper af høj
kvalitet, små gulvtæpper
Høj sugekapacitet – til hårde gulve,
stærkt tilsmudsede tæpper og gulvtæp-
per
Bemærk! Hvis netsikrigen udløses ved
tænding af apparatet, kan årsagen herfor
være at andre el-apparater samtidig er tilsluttet til den samme strømkreds og bruges
på samme tidspunkt. Indstil i et sådant tilfælde det laveste præstationsniveau på apparatet inden du tænder for apparatet.
Derefter kan du vælge et højere præstationsniveau. Netsikring se kapitel "Tekniske
data".
Vigtig henvisning! Apparatet afbrydes
automatisk hvis der er fare for en overop-
hedning. Sluk for apparatet og træk netstikket ud. Forvis dig om at mundstykket,
sugerøret eller slangen ikke er tilstoppet eller at filteren skal udskiftes. Efter rettelsen
af fejlen skal apparatet afkøles for mindst 1
time, derefter er apparatet igen klar til brug.
Suge med tilbehør
QuickClick tilbehør
Bruge QuickClick tilbehør
Polstermundstykke: til sugning af pol-
stermøbler, madrasser, gardiner osv.
Møbelpensel, drejeligt: til skånende
rengøring af møbler og sensitive genstande, fjerne støv af bøger, ventilationssprækker i bilen osv.
Fugemundstykke, som kan trækkes
ud: til kanter, fuger og radiatorer
Skifte tilbehør ud af QuickClick tilbehørsholderen
Hæng gulvmundstykket i holderen på
apparatets bagside og tryk den i låseposition (se figur 4).
Figur
Tryk på åbningstasten på håndtaget og
træk håndtaget fra teleskopsugerøret.
Figur
Åbn tilbehørholderens dæksel.
Figur
Stik håndtaget i det ønskede tilbehør til
anslaget. Dermed går det i hak. Sving
derefter nedad og træk det ud.
Figur
Til opbevaring, sæt tilbehør med hånd-
taget i tibehørholderen og lad det gå i
hak. Fjern håndtaget.
Bemærk: Tilbehør kan også tages ud
med hånden og sættes på håndtaget.
Tryk åbningstasten på håndtaget for at
løsne tilbehøret.
Bemærk: Alle ovenfor nævnte trin kan
også gennemføres med påsat teleskop-
sugerør. Hæng hertil gulvmundstykket i
holderen på apparatets bagside og tryk
den i låseposition. Fjern teleskopsuge-
røret ved at trække det lodret opad.
- 3
49DA
Page 50

ComfoGlide mundstykke
Figur
Tæpper og væg til væg-tæpper:
Vælg omstillerens position som følgende:
Figur
Hårde gulve:
Vælg omstillerens position som følgende:
Efter brug
Sluk for apparatet, og træk netstikket
ud.
Figur
Tryk knappen kabelopspoling. Kablet
trækker sig selv automatisk ind i appa-
ratet.
Hæng gulvmundstykket i holderen på
apparatets bagside og tryk den i låse-
position.
Transport, opbevaring
Hold apparatet til transport fast på gre-
bet og opbevar det i et tørt rum.
Bemærk: Det anbefales at skubbe tele-
skoprøret helt ind.
Pleje og vedligeholdelse
Risiko for tilskadekomst!
Sluk for højtryksrenseren og træk altid netstikket ud før pleje- og vedligeholdelsearbejde.
Rengøring af apparatet
몇 OBS
Undlad at bruge skuremidler, glas- eller
universalrengøringsmiddel! Nedsænk aldrig apparatet i vand.
Apparat og tilbehørsdele af plast skal
rengøres med et almindeligt plastrengøringsmiddel.
Rens støvrummet med en tør støvklud/
støvpensel.
Udskifte filterposen
Best-nr. 6.904-329.
Indhold: 5 filterposer med lås og 1 motorbeskyttelsesfilter.
Bemærk: Fjern teleskopsugerøret fra
håndtaget for at aflæse filterskiftindikatoren.
Figur
Hvis filterskiftindikatoren i dækslet er
helt rød, udskift venligst filterposen.
Betjen låsearmen og åbn dækslet.
Figur
Åbn filterposens holder og klap den ud-
ad.
Figur
Lås filterposen med låseflappen, filter-
posen tages ud og bortskaffes.
Figur
Skub en ny filterpose ind i holderen til
anslaget. Tryk låset først nedad, skub
derefter holderen ind i huset og lad den
gå i hak på maskinens hus.
몇 OBS
Dækslet kan kun låses med ilagt filterpose.
Rens, hhv. udskift motorbeskyttelsesfilteret
efter opsugning af fine støvpartikler (som
f.eks. gips, cement, osv.).
50 DA
- 4
Page 51

Udskifte motorbeskyttelsesfilteret
Motorbeskyttelsesfilter: udskift med den
sidste filterpose i filterposens emballage.
Motorbeskyttelsesfilteret sidder bagved
den isatte filterpose. Udskift motorbeskyttelsesfilteret inden du sætter filterposen i.
Figur
Løsn rammen og fjern den.
Fjern rammens nederste del, fjern den
gamle motorbeskyttelsesfilter og skaf
den bort. Læg en ny motorbeskyttelsesfilter ind i rammen og sæt rammens nederste del på plads igen.
Figur
Sæt rammen i og lad den gå i hak.
Udskifte HEPA-filter
Best-nr. 6.414-805.
Filter til ren udblæsningsluft.
HEPA-filter: udskift 1x om året.
Figur
Åbn dækslet.
Løsn HEPA-filteret og tag den ud.
Figur
Isæt ny HEPA-filter og lad den gå i hak.
Luk dækslet.
Rense ComfoGlide dysen
Rens ComfoGlide dysen i regelmæssige
afstande!
Fjern dysen fra sugerøret.
Figur
Rens den bageste styringsrulle:
Helst med fjernet rulle. Skru hertil akslen op og træk den ud. Støvfnug, hår
osv. kan nu nemt fjernes. Monter styringsrullen igen.
Rense tilbehør
Figur
Håndtag og sugeslange kan adskilles til
rensning eller hvis de er tilstoppet. Tryk
hertil 2 låseanåbningordninger og træk
håndtaget og sugeslangen fra hinan-
den.
Til forbindelse, sæt håndtaget og suge-
slangen sammen og lad dem gå i hak.
Generelle henvisninger
Garanti
I de enkelte land gælder de garantibetingelser, som er udgivet af vores respektive ansvarlige forhandlere. Inden for
garantifristen afhjælper vi gratis eventuelle
fejl på Deres maskine, såfremt disse er forårsaget af materiale- eller produktionsfejl.
Hvis De vil gøre Deres garanti gældende,
bedes De henvende Dem til Deres forhandler eller nærmeste autoriserede kundeservice medbringende kvittering.
(Se adressen på bagsiden)
Kundeservice
Vores KÄRCHER-afdeling hjælper gerne,
hvis De har spørgsmål, eller der er fejl på
støvsugeren. Se adressen på bagsiden.
Bestilling af reservedele og ekstra-
tilbehør
Et udvalg over de reservedele som bruges
meget ofte finder De i slutningen af betjeningsvejledningen
Reservedele og tilbehør får du ved din forhandler eller i den KÄRCHER-afdeling.
(Se adressen på bagsiden)
- 5
51DA
Page 52

Tekniske data
Spænding V 220 - 240
Strømtype Hz 50/60
Netsikring (træg) A 16
Beskyttelsesklasse II
Ydelse P
Ydelse P
nom.
maks.
Vægt (uden tilbehør) kg 7,0
Aktionsradius m 10
Mål mm ø 380 x
Nominel bredde, tilbehør
Lydtryksniveau
(EN 60704-2-1)
Forbehold for tekniske ændringer!
W1600
W1800
380
mm 35
dB(A) 64
Ekstratilbehør
A Turbodyse til gulve
(bestillingsnr. 4.130-177)
Børste og suge i en arbejdsgang.
Især velegnet til at opsuge dyrehår og til
at støvsuge tæpper med høj luv. Bør-
stevalsen drives over luftstrømningen.
El-tilslutning er ikke nødvendigt.
B Turbodyse til puder
(bestillingsnr. 2.903-001)
Børste og suge polstrede møbler, ma-
drasser, bilsæder, osv. i en arbejds-
gang.
Især velegnet til opsugning af dyrehår.
Børstevalsen drives over luftstrømnin-
gen.
El-tilslutning er ikke nødvendigt.
C Parketmundstykke
(bestillingsnr. 4.130-172)
Til støvsugning af sensitive jævne gulv-
flader (parket, marmor, terrakotta,
osv.).
D Madrasmundstykke
(bestillingsnr. 6.906-755)
Til sugning af madrasser og puder/hyn-
der.
E Filterpose
(bestillingsnr. 6.904-329)
Indhold: 5 filterposer med lås og 1 mo-
torbeskyttelsesfilter.
F HEPA-filter
(bestillingsnr. 6.414-805)
Supplerende filter til ren udsblæsnings-
luft. Anbefalet til allergiske personer.
52 DA
- 6
Page 53

Innholdsfortegnelse
Sikkerhetsanvisninger NO - 1
Betjening NO - 2
Etter bruk NO - 4
Pleie og vedlikehold NO - 4
Generelle merknader NO - 5
Tekniske data NO - 5
Tilleggsutstyr NO - 6
Kjære kunde,
Før første gangs bruk av appa-
ratet, les denne originale bruksanvisningen , følg den og oppbevar den for
senere bruk eller for overlevering til neste
eier.
Forskriftsmessig bruk
Støvsugeren er kun beregnet for bruk i private husholdninger og ikke til nærings- og
industriformål.
Produsenten er ikke ansvarlig for eventuelle skader forårsaket av ikke-tiltenkt eller feil
bruk.
Støvsugeren skal bare brukes med:
Original-filterposer.
Originale reserverdeler, originalt tilbe-
hør eller originalt ekstrautstyr
Støvsugeren egner seg ikke til:
Støvsuging av mennesker eller dyr
Oppsuging av:
Småkryp (fluer, edderkopper o.l.)
Helseskadelige, varme eller glødende
stoffer eller gjenstander med skarpe
kanter
Fuktige eller flytende stoffer
Lett antennelige eller eksplosive stoffer
og gasser.
Miljøvern
Materialet i emballasjen kan resirku-
leres. Ikke kast emballasjen i husholdningsavfallet, men lever den inn til
resirkulering.
Gamle maskiner inneholder verdifulle
materialer som kan resirkuleres. Dis-
se bør leveres inn til gjenvinning.
Gamle maskiner skal derfor avhendes i egnede innsamlingssystemer.
Anvisninger om innhold (REACH)
Aktuell informasjon om stoffene i innholdet
finner du under:
http://www.karcher.de/de/unternehmen/
umweltschutz/REACH.htm
Deponering av filter og filterpose
Filter og filterpose er produsert av miljøvennlige materialer.
Dersom de ikke inneholder oppsugd materiale som ikke er tillatt i husholdningsavfall,
kan alt kastes som normalt husholdningsavfall.
Sikkerhetsanvisninger
– Dette apparatet er ikke egnet for bruk
av personer (inkludert barn) med reduserte fysiske, sensoriske eller sjelelige
evner. Det skal heller ikke benyttes dersom brukeren mangler erfaring og/eller
kunnskap. Slike personer skal kun bruke apparatet under oppsyn av en ansvarlig person som skal sørge for
sikkerheten, eller som kan gi informasjon om bruken. Barn skal holdes under
oppsyn ved bruk av apparatet, for å sikre at de ikke leker med det.
– Emballasjefolien holdes unna barn, fare
for kvelning!
– Slå av apparatet etter hver bruk og før
hver rengjøring/vedlikehold.
– Brannfare. Brennene eller glødende
gjenstander må ikke suges opp.
– Bruk i eksplosjonsfarlige områder er
forbudt.
- 1
53NO
Page 54

– Ved lengre driftspauser slå av appara-
tet med hovedbryter/apparatbryter eller
trekk ut støpselet.
몇 Elektrisk tilkobling
– Høytrykksvaskeren må kun kobles til
vekselstrøm. Spenningen må stemme
overens med høytrykksvaskerens typeskilt.
Fare for elektrisk støt
– Ta aldri i støpselet eller stikkontakten
med våte hender.
– Strømkabelen skal ikke tas ut av stikk-
kontakten ved at du trekker i kabelen.
– Kontroller strømledningen og støpselet
for skader hver gang høytrykksvaskeren skal brukes. En skadet strømledning må skiftes ut umiddelbart hos
autorisert kundeservice eller autorisert
elektriker.
– Ikke bruk strømkabelen for å bære/
transportere apparatet.
– Ikke trekk nettkabelen over skarpe kan-
ter, og ikke klem den fast.
– Før alt arbeide på apparatet skal strøm-
kabelen trekkes ut.
몇 Forsiktig
Skal aldri brukes uten filterpose.
Maskinen kan skades.
Unngå å suge med dyse og sugeslange
i nærheten av hodet. Fare for skader!
Ved suging skal strømkabelen trekkes
helt ut.
Beskytt maskinen mot vær og vind, fuk-
tighet og varmekilder.
Slå av apparatet når det ikke er i bruk.
Betjening
Beskrivelse av apparatet
Brett ut bildesidene!
1 Nettkabel med plugg
2 Bryter for kabeloppvikling
3 På-/av bryter
4 Sugekraftregulator
5 Sugeslange
6 Håndtak
7 Teleskopsugerør
8 Regulering teleskopsugerør
9 Gulvmunnstykke
10 Deksel tilbehørsholder
11 Tilbehørsholder QuickClick:
Innehoder putedyse, uttrekkbar fugedy-
se og møbelpensel
12 Filterskifteindikator
13 Låsehendel, deksel filterpose/motor-
vernfilter
14 Motorvernfilter
15 Filterposeholder
16 Deksel HEPA filter
17 HEPA filter
18 Bærehåndtak
Igangsetting
Figur
Sugeslangestuss i sugeåpning, press i
lås.
For å ta av trykkes begge låseknappe-
ne sammen og slangen trekkes ut.
Figur
Sett sammen håndtak og teleskopsuge-
rør, og la de gå i lås.
Sett sammen gulvdyse og teleskopsu-
gerør, og la de gå i lås.
54 NO
- 2
Page 55

Figur
Bruk reguleringen og still inn teleskop-
sugerør til ønsket lengde.
Figur
For å sette bort apparatet eller ved kor-
te arbeidspauser settes gulvdysen i
parkeringsholderen på apparatets bak-
side, og trykk i lås.
Figur
For å ta ut håndtaket, trykk det bakover
i retning apparatet. Da går gulvdysen ut
av låsen i parkeringsholderen og kan
trekkes opp.
Figur
Hold strømkabelen i støpselet og trekk
ut. Sett støpselet i stikkontakten.
Slå maskinen på/av.
Figur
Innstilling av sugekraft skjer ved suge-
kraftregulatoren:
- Markering til MAX, høy sugekraft
- Markering til MIN, lav sugekraft
Merk
: Markeringen viser aktuell sugeeffekt.
Sugekraften tilpasses den relevante sugesituasjon:
Lav sugeeffekt – for gardiner, tekstiler,
stoppede møbler, puter
Middels sugeeffekt – for lett tilsmusse-
de tepper/teppegulv, kostbare tepper,
småtepper og løpere
Høy sugeeffekt – for harde gulv, sterkt
tilsmussede tepper og teppegulv
OBS! Dersom nettsikringen går når apparatet slås på, kan det skyldes at det samti-
dig er koblet andre elektriske apparater til
samme strømkrets, og at de samtidig er
slått på. I så fall stilles apparatet på nederste effekt før det slås på. Etterpå kan du
velge et annet effekttrinn. For nettsikringer,
se "Tekniske data".
Viktig anvisning! Apparatet kobler seg automatisk ut ved fare for overoppheting. Slå
av apparatet og trekk ut strømkabelen.
Kontroller at dyse, sugerør eller slange ikke
er tilstoppet, og om filteret eventuelt må
skiftes. Etter løsing av feilen skal apparatet
avkjøles i minst 1 time, da skal apparatet
være klar til bruk igjen.
Støvsuging med tilbehør
QuickClick tilbehør
Bruk av QuickClick tilbehør
Putemunnstykke: for suging av stop-
pede møbler, madrasser, gardiner o.a.
Møbelpensel, dreibar: for skånende
rengjøring av møbler og følsomme
gjenstander, støvtørking av bøker, lufteslisser i bil o.a.
Fugedyse, uttrekkbar: for kanter, fu-
ger og radiatorer
Skifte tilbehør fra QuickClick utstyrsholder
Gulvdysen settes i parkeringsholderen
på apparatets bakside, trykkes i lås (se
figur 4).
Figur
Låsetasten på håndtaket trykkes inn, og
håndtaket trekkes ut av teleskopsuge-
røret.
Figur
Slå opp deksel på tilbehørsholder.
Figur
Sett håndtaket inn i ønsket tilbehør til
anslag. Det går da i lås. Svinges etterpå
ned og trekkes ut .
Figur
For oppbevaring settes tilbehør med
håndtak inn i tilbehørsholderen, trykk
opp for å låse på plass. Ta av håndtak.
Merk: Tilbehøret kan også tas ut for
hånd og settes på håndtaket. For å løs-
ne tilbehøret trykk inn låsetasten på
håndtaket.
Merk: Alle overnevnte trinn kan også
utføres med teleskopsugerør tatt av.
For å gjøre det settes gulvdysen i par-
keringsholderen på apparatets bakside,
trykkes i lås. Teleskopsugerør trekkes
rett opp.
- 3
55NO
Page 56

ComfoGlide dyse
Figur
Tepper og teppegulv:
Velg bryterstilling som følger:
Pleie og vedlikehold
Fare for personskader
Slå alltid av høytrykksvaskeren og trekk ut
støpselet før stell og vedlikehold av enheten.
Rengjøring av apparatet
Figur
Harde flater:
Velg bryterstilling som følger:
Etter bruk
Slå av apparatet og trekk ut støpselet.
Figur
Trykk på tasten for inntrekking av kabel.
Kabel trekkes automatisk inn i apparatet.
Gulvdysen settes i parkeringsholderen
på apparatets bakside, trykkes i lås.
Transport, oppbevaring
Hols maskinen i bærehåndtaket for
transport, oppbevares i tørt rom.
Merk: Det anbefales at teleskopsugerø-
ret først trekkes helt ut.
몇 Forsiktig
Ikke bruk skuremiddel, glass eller universalrengjøringsmiddel! Dypp aldri apparatet
under vann.
Bruk et alminnelig rengjøringsmiddel for
plast på apparatet, og tilbehørsdeler av
plast.
Rengjør støvrommet med en tørr støv-
klut/støvpensel.
Bytte filterpose
Bestill.nr. 6 904-329.
Innhold: 5 filterposer med lukking og 1 motorvernfilter.
Merk: For å lese av filterskifteindikatoren
må teleskopsugerøret tas av håndtaket.
Figur
Dersom filterskifteindikatoren i dekselet
er helt rød skal filterposen skiftes.
Trykk på låsehendelen og åpne dekse-
let.
Figur
Lås opp holderen for filterpose og vipp
det utover.
Figur
Lukk filterposen med låseslasken, ta ut
filterposen og kast den (restavfall).
Figur
Skyv en ny filterpose inn i holderen så
langt det går. Trykk først ned låsen,
skyv så holderen inn i huset til den går i
lås.
몇 Forsiktig
Deksel lukkes nå over den innlagte filterposen. Etter oppsuging av fine støvpartikler
(som f.eks. gips, sement, osv.) skal motorvernfilter rengjøres eller eventuelt skiftes.
56 NO
- 4
Page 57

Skifte motorvernfilter
Motorvernfilter: Skiftes samtidig med siste
filterpose i filterposepakken.
Motorvernfilteret ligger bak den innsatte
filterposen. Motorvernfilteret skiftes før
filterpose settes inn.
Figur
Lås opp ramme og ta den ut.
Ta av rammeunderdelen, ta av brukt
motorvernfilter og kast det. Legg nytt
motorvernfilter og sett på rammeunderdelen igjen.
Figur
Sett inn ramme og lås den på plass.
Bytte HEPA-filter
Bestill.nr. 6 414-805.
Filter for renere utblåsningsluft.
HEPA filter: Skiftes 1 gang pr. år.
Figur
Åpne lokket.
HEPA-filter låses opp og tas ut.
Figur
Sett inn nytt HEPA-Filter og lås det på
plass.
Sett på lokket igjen.
Generelle merknader
Garanti
De garantibestemmelser som er utgitt av
vår distribusjonsavdeling, gjelder i alle
land. Eventuelle feil på maskinen blir reparert gratis i garantitiden, dersom disse kan
føres tilbake til material- eller produksjonsfeil. Ved behov for garantireparasjoner
henvender du deg til din forhandler eller
nærmeste autoriserte serviceforhandler.
(Se adresse på baksiden)
Kundetjeneste
Våre Kärcher-avdelinger hjelper deg gjerne
ved feil eller om du har spørsmål. Se baksiden for adressen.
Bestilling av reservedeler og spesi-
altilbehør
Et utvalg av de vanligste reservedelene finner du bak i denne bruksanvisningen.
Reservedeler og tilbehør får du hos din forhandler eller ved en KÄRCHER-avdeling.
(Se adresse på baksiden)
Rengjøre ComfoGlide dyse
ComfoGlide dysen skal rengjøres regelmessig!
Ta dysen av sugerøret.
Figur
Rengjøre bakre styrehjul:
Gjøres enklest med avtatt hjul. Skru av
akslingen og ta den ut. Støvdotter, hår
etc. kan nå lett fjernes. Montere styrehjul igjen:
Rengjøre tilbehør
Figur
Håndtak og sugeslange kan skilles for
rengjøring eler ved tilstopping. For å
gjøre det trykkes de 2 låsene sammen,
trekk så fra hverandre.
For å sette sammen håndtak og sugeslangen trykkes de sammen og låses.
Tekniske data
Spenning V 220 - 240
Strømtype Hz 50/60
Strømsikring (trege) A 16
Beskyttelsesklasse II
Effekt P
Effekt P
Vekt (uten tilbehør) kg 7,0
Aksjonsradius m 10
Mål mm ø 380 x
Nominell bredde,
tilbehør
Lydtrykksnivå
(EN 60704-2-1)
Det tas forbehold om tekniske endringer!
- 5
nominell
maks
W 1600
W 1800
mm 35
dB(A) 64
380
57NO
Page 58

Tilleggsutstyr
A Turbodyse for gulv
(Bestill.-nr. 4.130-177)
Børste og suge i en arbeidsoperasjon.
Spesielt egnet for oppsuging av dyrehår
og suging av langflossede tepper. Drift
av børsetvalsen skjer ved hjelp av luftstrømmen.
Det er ikke nødvendig med egen strømtilkobling.
B Turbodyse for puter
(Bestill.-nr. 2.903-001)
Børste og suge i en arbeidsoperasjon
av polstrede møbler, madrasser, bilseter etc.
Spesielt egnet til å suge opp dyrehår.
Drift av børsetvalsen skjer ved hjelp av
luftstrømmen.
Det er ikke nødvendig med egen strømtilkobling.
C Parkettdyse
(Bestill.-nr. 4.130-172)
Til støvsuging av ømfintlige glatte gulv
(parkett, gulvfliser, terrakotta osv.)
D Madrassdyse
(Bestill.-nr. 6.906-755)
For suging av madrasser og puter.
E Filterpose
(Bestill.-nr. 6 904-329)
Innhold: 5 filterposer med lukking og 1
motorvernfilter.
F HEPA filter
(Bestill.-nr. 6 414-805)
Ekstra filter for renere utblåsningsluft.
Anbefales til allergikere.
58 NO
- 6
Page 59

Innehållsförteckning
Säkerhetsanvisningar SV - 1
Handhavande SV - 2
Avsluta driften SV - 4
Skötsel och underhåll SV - 4
Allmänna hänvisningar SV - 5
Tekniska data SV - 5
Specialtillbehör SV - 6
Bäste kund,
Läs bruksanvisning i original
innan aggregatet används första
gången, följ anvisningarna och spara
driftsanvisningen för framtida behov, eller
för nästa ägare.
Ändamålsenlig användning
Denna dammsugare är avsedd för privat
bruk i hushållet och inte för industriell användning.
Tillverkaren ansvarar ej för skador som förorsakas av felaktig användning eller felaktig hantering.
Använd dammsugaren endast med:
Original-filterpåsar.
Original-reservdelar, -tillbehör eller ex-
tra tillbehör.
Dammsugaren är inte avsedd för:
Sugning av människor eller djur.
Uppsugning av:
Smådjur (ex. flugor, spindlar etc.).
Hälsovådliga, vassa, heta eller glödande substanser.
Fuktiga eller flytande substanser.
Lättantändliga eller explosiva material
och gaser.
Miljöskydd
Emballagematerialen kan återvinnas.
Kasta inte emballaget i hushållsso-
porna utan för dem till återvinning.
Skrotade aggregat innehåller återvinningsbara material som bör gå till
återvinning. Överlämna skrotade ag-
gregat till ett lämpligt återvinningssystem.
Upplysningar om ingredienser (REACH)
Aktuell information om ingredienser finns
på:
http://www.karcher.de/de/unternehmen/
umweltschutz/REACH.htm
Hantera filter och filterpåse
Filter och filterpåse är tillverkade i miljövänligt material.
Så länge de inte innehåller uppsugna substanser, som inte får kastas i hushållssoporna, så kan de avyttras på detta sätt.
Säkerhetsanvisningar
– Denna apparat är ej avsedd att använ-
das av personer (även barn) med begränsad fysisk, sensorisk eller mental
färdighet eller av personer som saknar
erfarenhet och/eller kunnande, såvida
de inte övervakas av en person ansvarig för deras säkerhet eller har fått instruktioner av en sådan person hur
apparaten ska användas. Barn ska hållas under uppsikt för att garantera att de
inte leker med apparaten.
– Håll förpackningsfolien borta från barn,
risk för kvävning!
– Stäng av maskinen efter varje använd-
ning och före all form av rengöring/underhåll.
– Brandrisk. Sug inte upp brännande eller
glödande föremål.
– Användning av aggregatet i utrymmen
med explosionsrisk är förbjuden.
– Stäng av maskinen med huvudström-
brytaren / Maskinbrytaren under längre
driftsuppehåll, eller dra ur nätkontakten.
- 1
59SV
Page 60

몇
Elanslutning
– Aggregatet får endast anslutas till väx-
elström. Spänningen ska motsvara den
spänning som är angiven på aggregatets typskylt.
Risk för strömstötar!
– Ta aldrig i nätkabeln och nätuttaget
med fuktiga händer.
– Tag inte nätkontakten ur vägguttaget
genom att dra i anslutningssladden.
– Kontrollera före drift att nätkabeln och
nätkontakten inte är skadade. Skadade
nätkablar ska genast bytas ut av auktoriserad kundservice eller en utbildad
elektriker.
– Använd inte nätsladden till att bära/
transportera apparaten.
– Drag inte kabeln över vassa kanter och
kläm inte ihop den.
– Drag ur nätkontakten före alla arbeten
på apparaten.
몇 Observera
Sug aldrig utan filterpåse.
Apparaten kan skadas.
Undvik att suga med munstycke och
sugrör i närheten av huvudet. Risk för
skada!
Drag ut nätkabeln helt vid sugning.
Skydda apparaten mot yttre väderlek,
fukt och värmekällor.
Stäng av apparaten när den inte an-
vänds.
Handhavande
Beskrivning av aggregatet
Vik ut bildsidor!
1 Nätkabel med kontakt
2 Knapp för upprullning av kabel
3 Till/Från knapp
4 Reglering av sugstyrka
5 Sugslang
6 Handtag
7 Teleskoprör
8 Justering av teleskoprör
9 Golvmunstycke
10 Skydd över tillbehörsfack
11 Tillbehörsfack QuickClick:
innehåller möbelmunstycke, utdragbart
fogmunstycke och möbelpensel.
12 Indikering filterbyte
13 Förslutningsspak, lock på filterpåse /
motorskyddsfilter
14 Motorskyddsfilter
15 Hållare för filterpåse
16 Skydd HEPA-filter
17 HEPA-filter
18 Bärhandtag
Idrifttagande
Bild
Haka fast sugslangsfästet i sugöpp-
ningen.
Vid borttagning trycks båda spärrarna
in och slangen dras ur.
Bild
Sätt ihop och haka fast handtag och te-
leskoprör.
Sätt ihop och haka fast handtag och te-
leskoprör.
Bild
Använd justeringsfunktionen och ställ in
teleskopröret på önskad längd.
60 SV
- 2
Page 61

Bild
När apparaten ska ställas undan, eller
vid korta arbetspauser, hängs golvmunstycket i hållaren på apparatens sida
där det hakas fast.
Bild
För att lyfta av detta igen trycks handta-
get bakåt, mot apparaten. Detta gör att
golvmunstycket frigörs från hållaren
och kan lyftas av, med uppåtriktad rö-
relse.
Bild
Håll i kontakten på nätanslutningsslad-
den och drag ur den. Stick in kontakten
i vägguttaget.
Starta / stäng av apparaten.
Bild
Sugkraften ställs in på sugkraftreglaget.
- Markering på MAX, hög sugkraft
- Markering på MIN, låg sugkraft
Hänvisning: Markeringen visar aktuell
sugeffekt.
Anpassa sugkraften till sugsituationen:
Låg sugeffekt – för gardiner, textilier,
stoppade möbler, kuddar
Medelstark sugkraft – för lätt ned-
smutsade mattor / heltäckningsmattor,
mattor av hög kvalitet, småmattor och
hallmattor
Hög sugeffekt – för hårda golv, kraftigt
nedsmutsade mattor och heltäcknings-
mattor
Vänligen beakta! Löser nätsäkringen ut
när apparaten ansluts kan detta bero på att
andra elektriska apparater anslutits, och
drivs, via samma strömkrets. Ställ i detta
fall in lägsta effektnivå på apparaten innan
den startas. Därefter kan en högre nivå väljas. Nätsäkring, se kapitel "Tekniska Data".
Viktig hänvisning! Vid risk för överhettning stänger apparaten automatiskt av sig.
Stäng av apparaten och drag ur nätkontakten. Kontrollera att inte munstycke, rör och
slang är tilltäppta eller att filtret behöver bytas. Låt apparaten kylas av under minst en
timme när störningen åtgärdats; därefter är
apparaten klar att använda igen.
Suga med tillbehör
QuickClick tillbehör
Använda QuickClick tillbehör
Möbelmunstycke: för sugning av stop-
pade möbler, madrasser, gardiner bl.a.
Möbelpensel, vridbar: för skonsam
rengöring av möbler och känsliga föremål, avdamning av böcker, rengöring
av ventilationsöppningar i bilen etc.
Fogmunstycke, utdragbart: för kan-
ter, fogar och element
Byt tillbehör från QuickClick tillbehörsfack
Häng golvmunstycke i hållaren på ap-
paratens sida och spärra det (se bild 4).
Bild
Tryck på spärrknappen som finns på
handtaget och tag bort handtaget från
teleskopröret.
Bild
Öppna skyddet över tillbehörsfacket.
Bild
Skjut in handtaget i önskat tillbehör, till
anslag. Detta gör att det hakar fast.
Sväng i anslutning till detta nedåt och
drag ur.
Bild
Vid förvaring läggs tillbehöret med
handtag i tillbehörsfacket och hakas
fast med uppåtriktad rörelse. Drag bort
handtaget.
Hänvisning: Tillbehöret kan också lyf-
tas ur med handen och placeras på
handtaget. För att lossa tillbehöret
trycks spärrknappen på handtaget in.
Hänvisning: Alla ovan beskrivna ar-
betsförlopp kan även utföras med mon-
terat teleskoprör. För detta hängs
golvmunstycket i hållaren på appara-
tens sida och hakas fast. Drag ut tele-
skopröret lodrätt uppåt.
- 3
61SV
Page 62

ComfoGlide munstycke
Bild
Mattor och heltäckningsmattor:
Välj reglageinställningar på följande
sätt:
Bild
Hårda ytor:
Välj reglageinställningar på följande
sätt:
Avsluta driften
Stäng av apparaten och dra ur nätan-
slutningen.
Bild
Tryck på knappen för upprullning av ka-
bel. Kabeln dras automatiskt in i appa-
raten.
Häng golvmunstycket i hållaren på ap-
paratens sida och haka fast det.
Transport, förvaring
Bär apparaten i handtaget vid förflytt-
ning och förvara den i torra utrymmen.
Anvisning: Det rekommenderas att te-
leskopröret först skjuts in helt.
Skötsel och underhåll
Risk för skada!
Stäng alltid av aggregatet och lossa nätkontakten före alla skötsel- och underhållsarbeten.
Rengöra apparaten
몇 Varning
Använd inte skurmedel, glas- eller allrengöringsmedel! Doppa aldrig ner apparaten i
vatten.
Vårda apparaten och tillbehören med
ett vanligt i handeln förekommande
plastrengöringsmedel.
Rengör dammutrymmet med torr
dammtrasa / pensel.
Byt filterpåse.
Beställnr. 6. 904-329.
Innehåll: Fem filterpåsar med förslutning
och ett motorskyddsfilter.
Hänvisning: Skilj teleskopröret från handtaget för avläsning av display för filterbyte.
Bild
Är filterbytesindikerignen i locket helt
röd måste filterpåsen bytas ut.
Använd spärrspaken och öppna locket.
Bild
Öppna hållaren för filterpåsen och vik ut
den.
Bild
Stäng filterpåsen med förslutningsrem-
san, lyft ur påsen och släng den.
Bild
Sätt i ny filterpåse i hållaren, till anslag.
Tryck först ner plösen, skjut sedan in
hållaren i höljet och haka fast på appa-
raten.
몇 Varning
Locket kan bara stängas när filterpåse
lagts i. Rengör eller byt ut motorskyddsfiltret efter uppsugning av fina dammpartiklar
( som ex. gips, cement etc.).
62 SV
- 4
Page 63

Byt ut motorskyddsfilter
Motorskyddsfilter: ska bytas i samband
med att sista filterpåsen tas i påsförpacknnigen.
Motorskyddsfiltret ligger bakom den
isatta filterpåsen. Byt motorskyddsfiltret
innan filterpåsen sätts i.
Bild
Lossa ramen och lyft ut den.
Tag bort underdelen till ramen, tag ur
det gamla motorskyddsfiltret och kasta
det. Lägg i nytt motorskyddsfilter i ra-
men och sätt in underdelen.
Bild
Sätt tillbaka ramen och haka fast den.
Byt ut HEPA-filter
Beställnr. 6. 414-805.
Filter för ren utblåsluft.
HEPA-filter: Byt en gång per år.
Bild
Öppna locket.
Lossa HEPA-filtret och tag ut det.
Bild
Sätt i nytt HEPA-filter och haka fast.
Stäng locket.
Allmänna hänvisningar
Garanti
I alla länder gäller de av vårt ansvariga försäljningsbolag utformade garantivillkor.
Eventuella fel på apparaten åtgärdas utan
kostnad under garantitiden, om det var ett
material- eller tillverkarfel som var orsaken.
Gäller det garantiärenden, ber vi er vända
er till försäljaren med köpbeviset eller
närmsta auktoriserade kundtjänst.
(Se baksidan för adress)
Kundservice
För frågor eller problem står närmaste
KÄRCHER-filial till förfogande. Se baksidan för adress.
Beställning av reservdelar och spe-
cialtillbehör
I slutet av bruksanvisningen finns ett urval
av de reservdelar som oftast behövs.
Reservdelar och tillbehör finns att få på inköpsstället, eller från närmaste KÄRCHERfilial.
(Se baksidan för adress)
Rengör ComfoGlide munstycke
Rengör ComfoGlide munstycke med regelbundna intervaller!
Tag bort munstycket från sugröret.
Bild
Rengör bakre länkrulle:
Enklast med borttagen rulle. Skruva
upp och drag ut axeln. Dammråttor, hår
och liknande kan nu lätt tas bort. Sätt
tillbaka länkrullen.
Rengör tillbehör
Bild
Handtag och sugslang kan delas för
rengöring men också om det är stopp i
dem. Tryck då in två spärrfästen och
drag isär.
Handtag och sugslang sätts sedan ihop
och hakas fast.
Tekniska data
Spänning V 220 - 240
Strömart Hz 50/60
Nätsäkring (trög) A 16
Skyddsklass II
Effekt P
Effekt P
Vikt (utan tillbehör) kg 7,0
Arbetsradie m 10
Mått mm ø 380 x
Märkvidd, tillbehör mm 35
Ljudtrycksnivå
(EN 60704-2-1)
Med reservation för tekniska ändringar!
- 5
nominell
max
W 1600
W 1800
dB(A) 64
380
63SV
Page 64

Specialtillbehör
A Turbomunstycke för golv
(Beställnr. 4.130-177)
Borsta och sug samtidigt.
Mycket bra vid uppsugning av pälsres-
ter från djur och vid sugning av tjocka
mattor. Borstvalsen drivs via luftström-
men.
Ingen elanslutning behövs.
B Turbomunstycke för möbeltyg
(Beställnr. 2.903-001)
Borsta och sug samtidigt möbeltyg,
madrasser, bilsäten etc.
Mycket bra vid uppsugning av pälsres-
ter från djur . Borstvalsen drivs via luft-
strömmen.
Ingen elanslutning behövs.
C Parkettmunstycke
(Beställnr. 4.130-172)
För sugning av känsliga, halkiga golv
(parkett, marmor, terrakotta, etc.).
D Madrassmunstycke
(Beställnr. 6.906-755)
För sugning av madrasser och stopp-
ning.
E Filterpåse
(Beställnr. 6.904-329)
Innehåll: 5 filterpåsar med förslutning
och 1 motorskyddsfilter.
F HEPA-filter
(Beställnr. 6.414-805)
Tillsatsfilter för ren utblåsluft. Rekom-
menderas för allergiker.
64 SV
- 6
Page 65

Sisällysluettelo
Turvaohjeet FI - 1
Käyttö FI - 2
Käytön lopetus FI - 4
Hoito ja huolto FI - 4
Yleisiä ohjeita FI - 5
Tekniset tiedot FI - 6
Erikoisvarusteet FI - 6
Arvoisa asiakas,
Lue käyttöohje ennen laitteesi
käyttämistä, säilytä käyttöohje
myöhempää käyttöä tai mahdollista myöhempää omistajaa varten.
Tarkoituksenmukainen käyttö
Tämä pölynimuri on tarkoitettu yksityiseen
kotikäyttöön eikä ammattikäyttöön.
Valmistaja ei vastaa mahdollisista vahingoista, jotka johtuvat ohjeidenvastaisesta
käytöstä.
Pölynimuria saa käyttää vain, jos se on varustettu:
alkuperäisillä pölypusseilla.
alkuperäisillä varaosilla, sekä alkupe-
räisillä lisä- tai erikoistarvikkeilla.
Pölynimuri ei sovi:
ihmisten tai eläinten imuroimiseen.
Sillä ei voida imuroida:
Pieneläimiä (esim. kärpäsiä, hämähäkkejä, jne.).
Terveydelle vaarallisia, teräviä esineitä
eikä kuumia tai hehkuvia aineita.
Kosteita tai nestemäisiä aineita.
Helposti syttyviä tai räjähtäviä aineita ja
kaasuja.
Ympäristönsuojelu
Pakkausmateriaalit ovat kierrätettä-
viä. Älä käsittelee pakkauksia kotitalousjätteenä, vaan toimita ne jätteiden
kierrätykseen.
Käytetyt laitteet sisältävät arvokkaita
kierrätettäviä materiaaleja, jotka tulisi
toimittaa kierrätykseen. Tästä syystä
toimita kuluneet laitteet vastaaviin keräilylaitoksiin.
Huomautuksia materiaaleista (REACH)
Ajantasaisia tietoja ainesosista löytyy osoitteesta:
http://www.karcher.de/de/unternehmen/
umweltschutz/REACH.htm
Suodattimen ja suodatinpussin hävittäminen
Suodatin ja suodatinpussi on valmistettu
ympäristöystävällisestä materiaalista.
Mikäli niihin ei ole imuroitu aineita, joita ei
saa laittaa yleisiin jäteastioihin, ne voidaan
hävittää normaalin kotijätteen mukana.
Turvaohjeet
– Tämä laite ei ole tarkoitettu sellaisten
henkilöiden (lapset mukaan lukien) käytettäväksi, joiden fyysiset, sensorisia tai
henkiset ominaisuudet ovat rajoittuneet
tai, joilta puuttuu riittävä kokemus ja/tai
riittävä tietämys, paitsi, jos he ovat heidän turvallisuudestaan vastaavan henkilön valvonnassa tai ovat saaneet
häneltä ohjeistuksen koneen käyttämiseen. Lapsia pitäisi valvoa, jotta he eivät leikkisi koneen kanssa.
– Pidä pakkausfoliot lasten ulottumatto-
missa, tukehtumisvaara!
– Laite kytketään pois päältä jokaisen
käytön jälkeen ja ennen jokaista puhdistusta/huoltoa.
– Palovaara. Älä imuroi mitään palavia tai
hehkuvia kohteita.
– Käyttö räjähdysalttiilla alueilla on kiellet-
ty.
- 1
65FI
Page 66

– Pitempien käyttötaukojen aikana pää-
kytkin/laitekytkin kytketään pois tai
verkkopistoke irrotetaan.
몇 Sähköliitäntä
– Liitä laite vain vaihtovirtaan. Jännitteen
on oltava sama kuin laitteen tyyppikilvessä ilmoitettu jännite.
Sähköiskuvaara
– Älä koskaan tartu märillä käsillä virta-
pistokkeeseen.
– Älä irrota verkkojohtoa pistokkeesta ve-
tämällä johdosta.
– Tarkasta aina ennen käyttöä, että liitos-
johto ja virtapistoke ovat ehjät. Anna
valtuutetun asiakaspalvelun/sähköalan
ammattilaisen välittömästi vaihtaa vaurioitunut liitosjohto.
– Älä käytä verkkojohtoa laitteen kanta-
miseen / kuljetukseen.
– Älä vedä verkkoliitäntäjohtoa terävien
reunojen yli äläkä litistä sitä.
– Virtapistoke on vedettävä irti laitteesta
ennen kaikkia laitteen huoltotöitä.
몇 Huomio
Älä imuroi koskaan ilman pölynpussia.
Laite voi vaurioitua.
Vältä imurointia suuttimella ja putkella
pään lähellä. Loukkaantumisvaara!
Vedä verkkojohto kokonaan ulos imu-
roinnin ajaksi.
Suojaa laite sääolosuhteilta, kosteudel-
ta ja lämmönlähteiltä.
Jos imua ei käytetä, kytke laite pois
päältä.
Käyttö
Laitekuvaus
Avaa kuvasivut!
1 Verkkokaapeli ja pistoke
2 Johdon kelauspainike
3 Päälle/pois päältä -painike
4 Imutehon säädin
5Imuletku
6 Käsikahva
7 Teleskooppi-imuputki
8 Teleskooppi-imuputken säätö
9 Lattiasuutin
10 Lisävarustetelineen kansi
11 QuickClick-lisävarusteteline:
sisältää huonekalusuuttimen, vedettä-
vän rakosuuttimen ja huonekaluharjan
12 Suodattimen vaihdon merkkivalo
13 Lukitsinvipu, pölypussin / moottorin
suojasuodattimen kansi
14 Moottorin suojasuodatin
15 Pölypussin pidike
16 HEPA-suodattimen suojus
17 HEPA-suodatin
18 Kantokahva
Käyttöönotto
Kuva
Kiinnitä imuletkun istukka imuaukkoon.
Irrottaessasi imuletku paina molemmis-
ta lukitusnokista ja vedä letku irti.
Kuva
Liitä käsikahva ja teleskooppi-imuputki
yhteen ja lukitse ne.
Liitä lattiasuulake ja teleskooppi-imu-
putki yhteen ja lukitse ne.
Kuva
Säädä teleskooppi-imuputki haluamaa-
si pituuteen.
66 FI
- 2
Page 67

Kuva
Kun lopetat imuroimisen tai keskeytät
työn hetkeksi, ripusta lattiasuulake pysäköintiasentoon laitteen takaosaan ja
paina lukitsinta.
Kuva
Irrottaaksesi paina takana olevaa käsi-
kahvaa laitteen suuntaan. Tällöin lattiasuulake vapautuu
pysäköintiasennosta ja sen voi nostaa
ylöspäin.
Kuva
Tartu verkkojohtoon sen pistokkeesta ja
vedä se ulos. Työnnä virtapistoke pisto-
rasiaan.
Kytke laite päälle / pois päältä.
Kuva
Imutehon säätö tapahtuu imutehon
säätimellä:
- Merkintä MAX, suuri imuteho
- Merkintä MIN, pieni imuteho
Huomautus: Merkkaus näyttää ajan-
kohtaisen imuvoimakkuuden.
Sovita imuteho imuroitavien kohteiden
mukaan:
Pieni imuteho – verhot, tekstiilit, peh-
mustetut huonekalut, tyynyt
Keskinkertainen imuteho – kevyesti
likaantuneet matot / kokolattiamatot, ar-
vokkaat matot, kynnysylitykset ja pitkät
käytävämatot
Suurin imuteho – matottomat lattiat,
pahasti likaantuneet matot ja kokolattia-
matot
Huomio! Jos sulake palaa kytkiessäsi laitteen päälle, se voi johtua siitä, että samaan
virtapiiriin on liitetty muita sähkölaitteita samanaikaisesti. Voit estää sulakkeen palamisen säätämällä laite pienimmälle teholle
ennen käynnistämistä. Käynnistämisen jälkeen voit valita suuremman tehoalueen.
Katso liitäntäarvot kohdasta "Tekniset tiedot".
Tärkeä ohje!Laite sammuu ylikuumentuessaan automaattisesti. Kytke laite pois
päältä ja vedä virtapistoke irti. Varmista,
että suutin, imuputki tai imuletku ei ole tukkeutunut ja tarkista onko suodatin vaihdet-
tava. Anna laitteen jäähtyä häiriön jälkeen
vähintään 1 tunnin ajan, minkä jälkeen laite
on jälleen käyttövalmis.
Imurointi lisävarusteita käyttäen
QuickClick -varusteet
QuickClick -varusteiden käyttö
Pehmustesuutin: pehmustettujen huo-
nekalujen, patjojen, verhojen ja muiden
sellaisten imurointiin
Huonekaluharja kiertyvä: huonekalu-
jen ja arkojen kohteiden hellävaraiseen
puhdistamiseen, kirjojen ja auton tuuletussäleikköjen pölynpoistoon ja muuhun sellaiseen
Rakosuutin, ulosvedettävä: kulmien,
rakojen ja lämpöpattereiden imurointiin
Lisävarusteen vaihtaminen QuickClicklisävarustetelineestä
Ripusta lattiasuulake säilytyspitimeen-
sä laitteen takaosaan ja paina suulaketta kunnes se napsahtaa lukitukseen
(katso kuva 4).
Kuva
Paina käsikahvan vapautuspainiketta ja
irrota teleskooppi-imuputki käsikahvasta.
Kuva
Avaa lisävarustetelineen kansi.
Kuva
Työnnä käsikahva haluamaasi lisäva-
rusteeseen sisään sen vasteeseen
saakka. Tällöin se lukittuu. Käännä sen
jälkeen alaspäin ja vedä ulos.
Kuva
Työnnä säilytystä varten lisävaruste ka-
sikahvan kera lisävarustetelineeseen ja
lukitse se ylös. Poista käsikahva.
Ohje: Lisävaruste voidaan irrottaa kä-
sin ja asettaa käsikahvaan. Paina käsi-
kahvan vapautuspainiketta
irrottaaksesi lisävarusteen käsikahvas-
ta.
Ohje: Kaikki edellä mainitut vaiheet voi-
daan suorittaa myös teleskooppi-imu-
putki liitettynä. Ripusta sitä varten
- 3
67FI
Page 68

lattiasuulake pysäköintiasentoon laitteen takaosaan ja paina lukitsinta. Vedä
teleskooppi-imuputki pystysuoraan
ylöspäin.
ComfoGlide-suulake
Kuva
Matot ja kokolattiamatot:
Valitse kytkimen asento seuraavasti:
Kuva
Kovat pinnat:
Valitse kytkimen asento seuraavasti:
Käytön lopetus
Kytke laite pois päältä ja vedä virtapis-
toke irti.
Kuva
Paina johdon kelauspainiketta. Johto
kelautuu automaattisesti laitteen sisään.
Ripusta lattiasuulake pysäköintiasen-
toon laitteen takaosaan ja paina lukitsinta.
Kuljetus, säilytys
Kanna laitetta kantokahvasta ja säilytä
kuivissa tiloissa.
Huomautus: On suositeltavaa työntää
teleskooppi-imuputki kokonaan sisään.
Hoito ja huolto
Loukkaantumisvaara
Ennen kaikkia hoito- ja huoltotöitä on kytkettävä laite pois päältä ja vedettävä virtapistoke irti.
Laitteen puhdistus
몇 Huomio
Älä käytä hankausaineita, lasia tai monikäyttöpuhdistusaineita! Älä koskaan upota
laitetta veteen.
Hoida laite ja muoviset lisävarusteen
osat tavallisella muoville tarkoitetulla
puhdistusaineella.
Puhdista pölypussisäiliö kuivalla pölylii-
nalla / pölyharjalla.
Pölypussin vaihto
Tilausnro 6 904-329
Sisältö: 5 pölypussia sulkimilla ja 1 moottorin suojasuodatin.
Huomautus: Suodattimen vaihdon merkkivalon lukemiseen erota teleskooppiputki
käsikahvasta.
Kuva
Kun pölypussin vaihdon merkkivalo on
kokonaan punainen, vaihda pussi.
Avaa kansi lukitsinvivusta.
Kuva
Vapauta pölypussin pidike ja taivuta se
taaksepäin.
Kuva
Sulje pölypussi sen sulkukaistaleella,
vedä pussi ulos ja hävitä se.
Kuva
Työnnä uusi pölypussi kiinnittimeen
vasteeseen asti. Paina hahlo ensin
alas, työnnä kiinnitin koteloon ja lukitse
se laitteen koteloon.
몇 Huomio
Kansi sulkeutuu vain, jos pölypussi on asetettu paikoilleen. Puhdista tai vaihda moottorin suojasuodatin imuroituasi
hienojakoista pölyä (esim. kipsi- tai sementtipöly jne.).
68 FI
- 4
Page 69

Moottorin suojasuodattimen vaihto
Moottorin suojasuodatin: vaihda samas-
sa yhteydessä, kun vaihdat laitteeseen pölypussipakkauksen viimeisen pölypussin.
Moottorin suojasuodatin sijaitsee pai-
koillaan olevan pölypussin takana.
Vaihda moottorin suojasuodatin ennen
pölypussin paikoilleen asettamista.
Kuva
Vapauta kehykset ja poista suodatin.
Irrota kehyksen alaosa, poista ja hävitä
vanha moottorin suojasuodatin. Aseta
uusi moottorin suojasuodatin kehykseen ja aseta kehyksen alaosa takaisin
paikoilleen.
Kuva
Aseta kehys sisään ja lukitse se.
HEPA-suodattimen vaihto
Tilausnro 6 414-805
Suodatin puhdasta ulospuhallusilmaa varten.
HEPA-suodatin Vaihdettava vuosittain.
Kuva
Avaa kansi.
Irrota HEPA-suodatin ja ota pois lait-
teesta.
Kuva
Aseta uusi HEPA-suodatin paikoilleen
ja lukitse.
Sulje kansi.
ComfoGlide-suulakkeen puhdista-
minen
Puhdista ComfoGlide-suulake säännöllisin
väliajoin!
Irrota suulake imuletkusta.
Kuva
Taemman ohjausrullan puhdistami-
nen:
Puhdistus käy parhaiten rulla irrotettuna. Ruuvaa akseli auki ja vedä rulla
pois. Pölynukka, hiukset jne. on helposti poistettavissa. Asenna ohjausrulla takaisin paikoilleen.
Lisävarusteiden puhdistaminen
Kuva
Käsikahva ja imuletku voidaan erottaa
puhdistusta varten tai poistettaessa tu-
kosta. Paina irrottaaksesi kahta lukitus-
nuppia ja vedä osat toisistaan irti.
Käsikahva ja imuletku liitetään toisiinsa
työntämällä ne yhteen ja lukitsemalla
ne.
Yleisiä ohjeita
Takuu
Kussakin maassa ovat voimassa valtuuttamamme myyntiorganisaation julkaisemat
takuuehdot. Materiaali- ja valmistusvirheistä aiheutuvat virheet laitteessa korjaamme
takuuaikana maksutta. Takuutapauksessa
ota yhteys ostostositteineen jälleenmyyjään tai lähimpään valtuutettuun asiakaspalveluun.
(Osoite, katso takasivua)
Asiakaspalvelu
KÄRCHER -edustustomme vastaa mielellään kysymyksiisi ja auttaa häiriön ilmaantuessa. Osoite, katso takasivua.
Varaosien ja erityisvarusteiden
tilaaminen
Tärkeimpien osien varaosaluettelo löytyy
tämän käyttöohjeen lopusta.
Varaosat ja erityisvarusteet saat kauppiaaltasi tai lähimmältä KÄRCHER tytäryhtiöltä.
(Osoite, katso takasivua)
- 5
69FI
Page 70

Tekniset tiedot
Jännite V 220 - 240
Virtatyyppi Hz 50/60
Verkkosulake (hidas) A 16
Kotelointiluokka II
Teho P
nenn
Teho P
max
Paino (ilman varusteita) kg 7,0
Toimintasäde m 10
Mitat mm ø 380 x
Sisähalkaisija, lisävarusteet
Äänen painetaso (standardi EN 60704-2-1)
Oikeus teknisiin muutoksiin pidätetään!
W1600
W1800
380
mm 35
dB(A) 64
Erikoisvarusteet
A Turbosuulake lattioita varten
(tilausnro 4.130-177)
Harjaamiseen ja imuroimiseen samalla
kertaa.
Sopii erityisesti eläinten karvojen imu-
rointiin ja korkeanukkaisille matoille.
Harjatelan pyörintä tapahtuu ilmavirran
avulla.
Sähköliitäntää ei tarvita.
B Turbosuulake pehmusteita varten
(tilausnro 2.903-001)
Pehmustettujen huonekalujen, patjo-
jen, auton istuimien jne. harjaamiseen
ja imurointiin yhdellä kertaa.
Sopii erityisesti eläinten karvojen imu-
rointiin. Harjatelan pyörintä tapahtuu il-
mavirran avulla.
Sähköliitäntää ei tarvita.
C Parkettisuulake
(tilausnro 4.130-172)
Tasaisten lattioiden imurointiin (parket-
ti, marmori, terrakotta jne.)
D Patjasuutin
(tilausnro 6.906-755)
Sopii patjojen ja pehmusteiden imuroin-
tiin.
E Pölypussi
(tilausnro 6.904-329)
Sisältö: 5 pölypussia sulkimilla ja 1
moottorin suojasuodatin.
F HEPA-suodatin
(tilausnro 6.414-805)
Lisäsuodatin puhdasta puhallusilmaa
varten. Suositellaan allergikoille.
70 FI
- 6
Page 71

Πίνακας περιεχομένων
Υποδείξεις ασφαλείας EL - 1
Χειρισμός EL - 2
Τερματισμός λειτουργίας EL - 4
Φροντίδα και συντήρηση EL - 5
Γενικές υποδείξεις EL - 6
Τεχνικά χαρακτηριστικά EL - 7
Πρόσθετα εξαρτήματα EL - 7
Αγαπητέ πελάτη,
Πριν χρησιμοποιήσετε τη
συσκευή σας για πρώτη φορά,
διαβάστε αυτές τις πρωτότυπες οδηγίες
χρήσης, ενεργήστε σύμφωνα με αυτές και
κρατήστε τις για μελλοντική χρήση ή για τον
επόμενο ιδιοκτήτη.
Ενδεδειγμένη χρήση
Αυτή η ηλεκτρική σκούπα προορίζεται για
οικιακή χρήση και όχι για επαγγελματικούς
σκοπούς.
Ο κατασκευαστής δεν ευθύνεται για
ενδεχόμενες ζημιές
ενδεδειγμένη χρήση ή σε λάθος χειρισμό.
Χρησιμοποιήστε την ηλεκτρική σκούπα
αποκλειστικά με:
Αυθεντικές σακούλες φίλτρων.
Αυθεντικά ανταλλακτικά, εξαρτήματα ή
πρόσθετα εξαρτήματα.
Η ηλεκτρική σκούπα δεν είναι κατάλληλη
για:
Καθαρισμό ανθρώπων ή ζώων.
Αναρρόφηση:
Μικρών ζωντανών οργανισμών (π.χ.
μύγες, αράχνες κτλ).
Υλικών επικίνδυνων για
αιχμηρών, καυτών ή πυρακτωμένων.
Υγρών ή ρευστών ουσιών.
Εύφλεκτων ή εκρηκτικών υλικών και
αερίων.
, που οφείλονται σε μη
την υγεία,
Προστασία περιβάλλοντος
Τα υλικά συσκευασίας είναι
ανακυκλώσιμα. Μην πετάτε τη
συσκευασία στα οικιακά απορρίμματα,
αλλά παραδώστε την προς ανακύκλωση.
Οι παλιές συσκευές περιέχουν
ανακυκλώσιμα υλικά, τα οποία θα
πρέπει να παραδίδονται προς
επαναχρησιμοποίηση. Για το λόγο αυτό
αποσύρετε τις παλιές συσκευές με
κατάλληλες διαδικασίες συγκέντρωσης
αποβλήτων.
Υποδείξεις για τα συστατικά (REACH)
Ενημερωμένες πληροφορίες για τα
συστατικά μπορείτε να βρείτε στη
διεύθυνση:
http://www.karcher.de/de/unternehmen/
umweltschutz/REACH.htm
Διάθεση φίλτρου και σακούλας φίλτρου
Το φίλτρο και η σακούλα του
κατασκευάζονται από υλικά φιλικά προς το
περιβάλλον.
Εάν δεν περιέχουν υλικά, τα οποία δεν
επιτρέπεται να καταλήξουν στους κάδους
οικιακών
διαθέσετε στο σύστημα οικιακών
απορριμμάτων.
απορριμμάτων, μπορείτε να τα
Υποδείξεις ασφαλείας
– Η συσκευή αυτή δεν πρέπει να
χρησιμοποιείται από άτομα
(συμπεριλαμβανομένων των παιδιών)
με σωματικές, διανοητικές και
αισθητήριες ανεπάρκειες ή άτομα που
δεν έχουν την κατάλληλη εμπειρία ή
γνώση, εκτός εάν επιτηρούνται από
κατάλληλο για την ασφάλειά τους άτομο
ή έλαβαν προηγουμένως οδηγίες για
την κατάλληλη χρήση της συσκευής.
Τα παιδιά
διασφαλιστεί ότι δεν θα παίζουν με τη
συσκευή.
– Κρατάτε τα παιδιά μακριά από τα
πλαστικά φύλλα συσκευασίας,
υφίσταται κίνδυνος ασφυξίας!
πρέπει να επιτηρούνται για να
- 1
71EL
Page 72

– Απενεργοποιείτε τη συσκευή έπειτα από
κάθε χρήση και πριν από τον
καθαρισμό/τη συντήρηση.
– Κίνδυνος πυρκαγιάς. Μην αναρροφάτε
καιγόμενα ή καυτά αντικείμενα.
– Απαγορεύεται η χρήση σε σημεία, όπου
υφίσταται κίνδυνος έκρηξης.
– Σε περίπτωση μεγάλων διαλειμμάτων
από τις εργασίες, απενεργοποιήστε τη
συσκευή από το γενικό διακόπτη/το
διακόπτη της συσκευής ή βγάλτε το
καλώδιο ρεύματος.
몇 Ηλεκτρική σύνδεση
– Συνδέετε τη συσκευή μόνο σε
εναλλασσόμενο ρεύμα. Η τάση πρέπει
να συμφωνεί με την πινακίδα τύπου της
συσκευής.
Κίνδυνος ηλεκτροπληξίας
– Μην αγγίζετε ποτέ με βρεγμένα χέρια το
ρευματολήπτη και την πρίζα.
– Μην βγάζετε τον ρευματολήπτη από την
πρίζα τραβώντας τον από το καλώδιο
σύνδεσης.
– Πριν από κάθε λειτουργία της συσκευής
ελέγχετε το καλώδιο ρεύματος και το φις
για τυχόν ζημιές. Αναθέτετε αμέσως σε
εξουσιοδοτημένη υπηρεσία τεχνικής
εξυπηρέτησης πελατών/εξειδικευμένο
ηλεκτρολόγο την αλλαγή του
χαλασμένου καλωδίου σύνδεσης στο
δίκτυο.
– Μη χρησιμοποιείτε το καλώδιο
τροφοδοσίας για το κράτημα/την
μεταφορά της συσκευής.
– Μην τραβάτε το καλώδιο τροφοδοσίας
πάνω από κοφτερές ακμές και μην το
συνθλίβετε.
– Πριν από όλες τις εργασίες στην
συσκευή, βγάζετε οπωσδήποτε το φις
από την πρίζα.
몇 Προσοχή
Μην κάνετε ποτέ αναρρόφηση χωρίς
σακούλα φίλτρου.
Η συσκευή μπορεί να υποστεί βλάβη.
Αποφύγετε την αναρρόφηση με
ακροφύσιο και σωλήνα αναρρόφησης
στην περιοχή του κεφαλιού. Υφίσταται
κίνδυνος τραυματισμού!
Κατά την αναρρόφηση, ξετυλίξτε
ολόκληρο το καλώδιο τροφοδοσίας.
Προστατεύετε τη συσκευή από τις
δυσμενείς καιρικές συνθήκες, την
υγρασία και τις
πηγές θερμότητας.
Απενεργοποιείτε τη συσκευή όταν δεν
τη χρησιμοποιείτε.
Χειρισμός
Περιγραφή συσκευής
Παρακαλούμε ανοίξτε τις σελίδες με τις
εικόνες!
1 Καλώδιο σύνδεσης δικτύου με φις
2 Πλήκτρο περιτύλιξης καλωδίου
3 Πλήκτρο On/Off
4 Ελεγκτής αναρροφητικής ισχύος
5 Εύκαμπτος σωλήνας αναρρόφησης
6 Χειρολαβή
7 Τηλεσκοπικός σωλήνας αναρρόφησης
8 Προσαρμογή τηλεσκοπικού σωλήνα
αναρρόφησης
9 Μπεκ δαπέδου
10 Κάλυμμα θήκης εξαρτημάτων
11 Θήκη εξαρτημάτων QuickClick:
περιλαμβάνει ακροφύσιο για
ταπετσαρίες, αφαιρούμενο ακροφύσιο
αρμών και πινέλο επίπλων
12 Ένδειξη αλλαγής φίλτρου
13 Μοχλός κλείδωσης, κάλυμμα σακούλας
φίλτρου / φίλτρου προστασίας κινητήρα
14 Φίλτρο προστασίας κινητήρα
15 Πλαίσιο στήριξης σακούλας φίλτρου
16 Κάλυμμα φίλτρου ΗΕΡΑ
17 Φίλτρο ΗΕΡΑ
18 Λαβή μεταφοράς
72 EL
- 2
Page 73

Θέση σε λειτουργία
Εικόνα
Κλειδώστε το στόμιο ελαστικού σωλήνα
αναρρόφησης στο άνοιγμα
αναρρόφησης.
Για να τον αφαιρέσετε, πιέστε μεταξύ
τους τα δύο δόντια ασφάλισης και
τραβήξτε τον σωλήνα.
Εικόνα
Συνδέστε την χειρολαβή με τον
τηλεσκοπικό σωλήνα αναρρόφησης και
ασφαλίστε τα.
Συνδέστε το ακροφύσιο δαπέδου με τον
τηλεσκοπικό σωλήνα αναρρόφησης και
ασφαλίστε τα
Εικόνα
Πιέστε την προσαρμογή και ρυθμίστε
τον τηλεσκοπικό σωλήνα
αναρρόφησης στο επιθυμητό μήκος.
Εικόνα
Για την φύλαξη της συσκευής ή κατά τα
διαλείμματα από την εργασία, κρεμάστε
το ακροφύσιο δαπέδου στο ειδικό
στήριγμα στάθμευσης στο πίσω μέρος
της συσκευής και πιέστε στην θέση
κλείδωσης.
Εικόνα
Για να το αφαιρέσετε, πιέστε την
χειρολαβή προς τα πίσω, προς την
κατεύθυνση της συσκευής. Έτσι, το
ακροφύσιο δαπέδου θα απασφαλιστεί
από το στήριγμα στάθμευσης και
μπορεί να αφαιρεθεί τραβώντας προς
τα πάνω.
Εικόνα
Κρατήστε το καλώδιο τροφοδοσίας από
το φις και τραβήξτε το. Βάλτε το φις
στην πρίζα.
Ενεργοποίηση/απενεργοποίηση
συσκευής
Εικόνα
Η ρύθμιση της αναρροφητικής ισχύος
γίνεται από τον ελεγκτή αναρροφητικής
ισχύος:
- Σημάδι στο ΜΑΧ, υψηλή
αναρροφητική ισχύς
.
- Σημάδι στο ΜΙΝ, χαμηλή
αναρροφητική ισχύς
Υπόδειξη: το σημάδι υποδεικνύει τη
ρυθμισμένη ισχύ αναρρόφησης.
Προσαρμόστε την αναρροφητική ισχύ
ανάλογα με την περίσταση:
Χαμηλή αναρροφητική ισχύς – για
κουρτίνες, υφάσματα, ταπετσαρισμένα
έπιπλα, μαξιλάρια.
Μέτρια αναρροφητική
ελαφρά λερωμένα χαλιά/μοκέτες, χαλιά
μεγάλης αξίας, πατάκια και
διαδρόμους.
Μέγιστη αναρροφητική ισχύς – για
σκληρά δάπεδα, πολύ λερωμένα χαλιά
και μοκέτες
Προσέξτε! .Εάν κατά την ενεργοποίηση
της συσκευής πέσει η ασφάλεια, αυτό
μπορεί να οφείλεται το ότι στο κύκλωμα
είναι συνδεδεμένες ταυτόχρονα και άλλες
ηλεκτρικές συσκευές, οι οποίες
σε λειτουργία. Στην περίπτωση αυτή,
ρυθμίστε την συσκευή στην χαμηλότερη
βαθμίδα ισχύος, πριν την θέσετε σε
λειτουργία. Έπειτα, μπορείτε να επιλέξετε
μία υψηλότερη βαθμίδα ισχύος. Σχετικά με
την ηλεκτρική ασφάλεια, βλέπε "Τεχνικά
χαρακτηριστικά".
Σημαντική υπόδειξη! Η συσκευή
απενεργοποιείται αυτόματα, όταν
υφίσταται κίνδυνος υπερθέρμανσης.
Απενεργοποιήστε την συσκευή και βγάλτε
φις από την πρίζα. Βεβαιωθείτε ότι το
το
ακροφύσιο, ο σωλήνας αναρρόφησης ή ο
ελαστικός σωλήνας δεν είναι βουλωμένα
και/ή ότι το φίλτρο πρέπει να αλλαχθεί.
Αφού αντιμετωπίσετε την βλάβη, αφήστε
την συσκευή να κρυώσει για τουλάχιστον 1
ώρα. Έπειτα η συσκευή είναι έτοιμη για
λειτουργία.
ισχύς – για
βρίσκονται
- 3
73EL
Page 74

Αναρρόφηση με εξάρτημα
Εξαρτήματα QuickClick
Χρήση εξαρτημάτων QuickClick
Ακροφύσιο για ταπετσαρίες
επίπλων: για την αναρρόφηση ρύπων
σε ταπετσαρισμένα έπιπλα, στρώματα
ύπνου, κουρτίνες κτλ.
Πινέλο επίπλων, περιστρεφόμενο:
για τον ήπιο καθαρισμό επίπλων και
ευαίσθητων αντικειμένων, το
ξεσκόνισμα βιβλίων, θυρίδων
εξαερισμού στο αυτοκίνητο κτλ.
Ακροφύσιο αρμών, αποσπώμενο:
για ακμές, αρμούς, θερμαντικά σώματα
Αντικατάσταση εξαρτημάτων από την
θήκη εξαρτημάτων QuickClick
Κρεμάστε το ακροφύσιο δαπέδου στο
άγκιστρο στάθμευσης
στο πίσω μέρος της συσκευής και
πιέστε το στη θέση ασφάλισης (βλ.
εικόνα 4).
Εικόνα
Πιέστε το πλήκτρο απασφάλισης στην
χειρολαβή και τραβήξτε την χειρολαβή
από τον τηλεσκοπικό σωλήνα
αναρρόφησης.
Εικόνα
Ανοίξτε το κάλυμμα της θήκης
εξαρτημάτων.
Εικόνα
Εισάγετε την χειρολαβή στο επιθυμητό
εξάρτημα ως τον αναστολέα. Το
εξάρτημα κλειδώνει. Τέλος, μετακινήστε
το προς τα κάτω και τραβήξτε.
Εικόνα
Για την φύλαξη, τοποθετήστε το
εξάρτημα με την χειρολαβή στην θήκη
εξαρτημάτων και κλειδώστε το προς τα
πάνω. Αφαιρέστε την λαβή.
Υπόδειξη: Το εξάρτημα μπορεί,επίσης,
να αφαιρεθεί με το χέρι και να εισαχθεί
στην χειρολαβή. Για την αφαίρεση
εξαρτήματος, πιέστε το πλήκτρο
απασφάλισης από την χειρολαβή.
που βρίσκεται
του
Υπόδειξη: Όλα τα παραπάνω βήματα
μπορούν επίσης να εκτελεστούν με
συνδεδεμένο τον τηλεσκοπικό σωλήνα
αναρρόφησης. Για τον σκοπό αυτόν,
κρεμάστε το ακροφύσιο δαπέδου στο
ειδικό στήριγμα στάθμευσης στο πίσω
μέρος της συσκευής και πιέστε στην
θέση κλείδωσης. Τραβήξτε τον
τηλεσκοπικό σωλήνα
κάθετα προς τα επάνω.
Ακροφύσιο ComfoGlide
Εικόνα
Χαλιά και μοκέτες:
Επιλέξτε τις θέσεις του διακόπτη με τον
ακόλουθο τρόπο:
Εικόνα
Σκληρές επιφάνειες:
Επιλέξτε τις θέσεις του διακόπτη με τον
ακόλουθο τρόπο:
αναρρόφησης
Τερματισμός λειτουργίας
Απενεργοποιήστε τη συσκευή και
βγάλτε το καλώδιο από την πρίζα.
Εικόνα
Πιέστε το πλήκτρο περιτύλιξης
καλωδίου. Το καλώδιο
αυτόματα μέσα στην συσκευή.
Κρεμάστε το ακροφύσιο δαπέδου στο
ειδικό στήριγμα στάθμευσης στο πίσω
μέρος της συσκευής και πιέστε στην
θέση κλείδωσης.
τυλίγεται
Μεταφορά, φύλαξη
Κατά τη μεταφορά κρατήστε τη
συσκευή από τη λαβή μεταφοράς και
φυλάξτε την σε ξηρό περιβάλλον.
Υπόδειξη: Συνιστάται προηγουμένως
να εισάγετε μέχρι τέλους τον
τηλεσκοπικό σωλήνα αναρρόφησης
.
74 EL
- 4
Page 75

Φροντίδα και συντήρηση
Κίνδυνος τραυματισμού
Πριν από όλες τις εργασίες φροντίδας και
συντήρησης, απενεργοποιήστε τη συσκευή
και τραβήξτε το φις από την πρίζα.
Καθαρισμός συσκευής
몇 Προσοχή
Μην χρησιμοποιείτε λειαντικά μέσα, γυαλί ή
καθαριστικά γενικής χρήσης! Ποτέ μην
βυθίζετε τη συσκευή μέσα σε νερό.
Φροντίζετε τη συσκευή και τα πλαστικά
εξαρτήματα με ένα κοινό καθαριστικό
πλαστικών.
Καθαρίστε τον χώρο συλλογής σκόνης
με ένα στεγνό ξεσκονόπανο /πινέλο
ξεσκονίσματος.
Αντικατάσταση της σακούλας
φίλτρου
Κωδ. παραγγελίας 6 904-329
Περιεχόμενο: 5 σακούλες φίλτρου με
κλείστρο και 1 φίλτρο
κινητήρα.
Υπόδειξη: Για να διαβάσετε την ένδειξη
αλλαγής φίλτρου αφαιρέστε τον
τηλεσκοπικό σωλήνα αναρρόφησης από
την χειρολαβή.
Εικόνα
Εάν η ένδειξη αλλαγής φίλτρου στο
κάλυμμα γίνει εντελώς κόκκινη,
αντικαταστήστε το φίλτρο.
Πιέστε τον μοχλό κλείδωσης και ανοίξτε
το κάλυμμα.
Εικόνα
Απασφαλίστε το πλαίσιο στήριξης της
σακούλας φίλτρου και
τα έξω.
Εικόνα
Κλειδώστε την σακούλα φίλτρου με την
γλώσσα κλείδωσης, αφαιρέστε την
σακούλα φίλτρου και πετάξτε την.
Εικόνα
Εισάγετε μία νέα σακούλα φίλτρου μέσα
στο πλαίσιο στήριξης ως τον
αναστολέα. Πρώτα πιέστε τον αμφιδέτη
προστασίας
ανοίξτε το προς
προς τα κάτω και έπειτα εισάγετε το
πλαίσιο στήριξης στο περίβλημα,
ώσπου να κλειδώσει εκεί.
몇 Προσοχή
Το κάλυμμα κλείνει μόνο εάν υπάρχει
εγκατεστημένη σακούλα φίλτρου. Μετά την
αναρρόφηση πολύ λεπτών μορίων σκόνης
(π.χ. γύψου, τσιμέντου κτλ.), καθαρίστε και/
ή αντικαταστήστε το φίλτρο προστασίας του
κινητήρα.
Αντικατάσταση του φίλτρου
προστασίας του κινητήρα
Φίλτρο προστασίας του κινητήρα:
αντικαστήστε το με την τελευταία σακούλα
φίλτρου της συσκευασίας σακουλών
φίλτρου.
Το φίλτρο προστασίας του
βρίσκεται πίσω από την ήδη
τοποθετημένη σακούλα φίλτρου. Πριν
την τοποθέτηση της σακούλας φίλτρου,
αντικαταστήστε το φίλτρο προστασίας
του κινητήρα.
Εικόνα
Απασφαλίστε και αφαιρέστε το πλαίσιο.
Αφαιρέστε το κάτω μέρος του πλαισίου,
βγάλτε το χρησιμοποιημένο φίλτρο
προστασίας του κινητήρα και πετάξτε
το. Τοποθετήστε το νέο φίλτρο
προστασίας του κινητήρα
και βάλτε το κάτω μέρος του πλαισίου
ξανά στη θέση του.
Εικόνα
Τοποθετήστε και ασφαλίστε το πλαίσιο.
Αντικατάσταση φίλτρου ΗΕΡΑ
Κωδ. παραγγελίας 6 414-805
Φίλτρο για καθαρό εξερχόμενο αέρα
Φίλτρο ΗΕΡΑ: Αντικαταστήστε 1 Χ έτος.
Εικόνα
Ανοίξτε το κάλυμμα.
Απασφαλίστε και αφαιρέστε το φίλτρο
ΗΕΡΑ.
Εικόνα
Τοποθετήστε και ασφαλίστε το νέο
φίλτρο ΗΕΡΑ.
Κλείστε το κάλυμμα.
κινητήρα
στο πλαίσιο
- 5
75EL
Page 76

Καθαρισμός ακροφυσίου
ComfoGlide
Καθαρίζετε το ακροφύσιο ComfoGlide σε
τακτικά διαστήματα!
Αφαιρέστε το ακροφύσιο από τον
σωλήνα αναρρόφησης.
Εικόνα
Καθαρισμός του οπίσθιου
τροχίσκου οδήγησης:
κατά προτίμηση, αφαιρέστε τον
τροχίσκο. Για τον σκοπό αυτόν,
ξεβιδώστε τον άξονα και τραβήξτε τον.
Τώρα μπορείτε να αφαιρέσετε εύκολα
τις σκόνες, τις τρίχες κτλ.
Συναρμολογήστε ξανά τον τροχίσκο
οδήγησης.
Καθαρισμός εξαρτημάτων
Εικόνα
Η λαβή μπορεί να αποσυνδεθεί από τον
σωλήνα αναρρόφησης για να
καθαριστεί ή σε περίπτωση
απόφραξης. Για τον σκοπό αυτόν,
πιέστε τα 2 σημεία απασφάλισης και
τραβήξτε.
Για την σύνδεση, εισάγετε την
χειρολαβή στον τηλεσκοπικό σωλήνα
αναρρόφησης και ασφαλίστε την.
Γενικές υποδείξεις
Εγγύηση
Σε κάθε χώρα ισχύουν οι όροι εγγύησης
που εκδόθηκαν από
αντιπροσωπεία μας. Εντός της προθεσμίας
της παρεχόμενης εγγύησης
αποκαθιστούμε δωρεάν οποιαδήποτε
βλάβη στη συσκευή σας εφόσον έχει
προκληθεί από σφάλμα υλικού ή
κατασκευής. Σε περίπτωση που επιθυμείτε
να κάνετε χρήση της εγγύησης,
παρακαλούμε απευθυνθείτε με την
απόδειξη αγοράς στο κατάστημα από το
οποίο προμηθευτήκατε τη συσκευή ή στην
πλησιέστερη
τεχνικής εξυπηρέτησης πελατών μας.
(Για τη διεύθυνση βλ. στην πίσω σελίδα)
εξουσιοδοτημένη υπηρεσία
Υπηρεσία εξυπηρέτησης πελατών
Σε περίπτωση αποριών ή βλαβών
μπορείτε να απευθύνεστε στο
υποκατάστημα του Οίκου KARCHER. Για
τη διεύθυνση βλ. στην πίσω σελίδα.
Παραγγελία ανταλλακτικών και
ειδικών εξαρτημάτων
Μία επιλογή των ανταλλακτικών που
χρειάζονται συχνότερα θα βρείτε στο τέλος
των οδηγιών χρήσης.
Μπορείτε να προμηθευθείτε ανταλλακτικά
και εξαρτήματα από τον αρμόδιο έμπορο ή
από το υποκατάστημα της KARCHER της
περιοχής σας.
(Για τη διεύθυνση βλ. στην πίσω σελίδα)
την αρμόδια
76 EL
- 6
Page 77

Τεχνικά χαρακτηριστικά
Τάση V 220 - 240
Ρεύμα Hz 50/60
Ασφάλεια δικτύου
A16
(βραδείας τήξης)
Κατηγορία προστασίας II
Ισχύς P
Ισχύς P
ονομ
μέγ
Βάρος (χωρίς
W1600
W1800
kg 7,0
παρελκόμενα)
Ακτίνα δράσης m10
Διαστάσεις mm ø 380 x
380
Ονομαστικό πλάτος,
mm 35
εξαρτήματα
Στάθμη ακουστικής
dB(A) 64
πίεσης (EN 60704-2-1)
Με την επιφύλαξη τεχνικών αλλαγών!
Πρόσθετα εξαρτήματα
επίπλων, στρωμάτων
, καθισμάτων
αυτοκινήτου κτλ.
Ιδιαίτερα κατάλληλο για αναρρόφηση
των τριχών κατοικίδιων ζώων.
Δεν είναι απαραίτητη καμία ηλεκτρική
σύνδεση.
C Ακροφύσιο για παρκέ
(Κωδ. παραγγελίας 4.130-172)
Για τον καθαρισμό ευαίσθητων λείων
δαπέδων (παρκέ, μάρμαρο, κεραμικά
δάπεδα, κτλ.)
D Ακροφύσιο στρωμάτων
(Κωδ. παραγγελίας 6.906-755)
Για τον καθαρισμό στρωμάτων και
ταπετσαρισμένων επίπλων.
E Σακούλα φίλτρου
(Κωδ. παραγγελίας 6.904-329)
Περιεχόμενο
: 5 σακούλες φίλτρου με
κλείστρο και 1 φίλτρο προστασίας
κινητήρα.
F Φίλτρο ΗΕΡΑ
(Κωδ. παραγγελίας 6.414-805)
Πρόσθετο φίλτρο για καθαρό
εξερχόμενο αέρα. Συνιστάται για τους
αλλεργικούς.
A Ακροφύσιο θυρών για δάπεδα
(Κωδ. παραγγελίας 4.130-177)
Βούρτσισμα και ταυτόχρονη
αναρρόφηση.
Ιδιαίτερα κατάλληλο για αναρρόφηση
των τριχών κατοικίδιων ζώων και τον
καθαρισμό χαλιών με υψηλό πέλος.
Δεν είναι απαραίτητη καμία ηλεκτρική
σύνδεση.
B Ακροφύσιο θυρών για ταπετσαρίες
(Κωδ. παραγγελίας 2.903-001)
Βούρτσισμα και ταυτόχρονη
αναρρόφηση ταπετσαρισμένων
- 7
77EL
Page 78

İçindekiler
Güvenlik uyarıları TR - 1
Kullanımı TR - 2
Çalışmanın tamamlanması TR - 4
Koruma ve BakımTR -4
Genel bilgiler TR - 5
Teknik Bilgiler TR - 6
Özel aksesuar TR - 6
Sayın müşterimiz,
Cihazın ilk kullanımından önce
bu orijinal kullanma kılavuzunu
okuyun, bu kılavuza göre davranın ve daha
sonra kullanım veya cihazın sonraki
sahiplerine vermek için bu kılavuzu
saklayın.
Kurallara uygun kullanım
Bu elektrikli süpürge, ev işlerindeki özel
kullanım için üretilmiş ve ticari amaçlı
kullanım için üretilmemiştir.
Üretici, amacına uygun olmayan ya da
hatalı kullanım sonucu oluşan hasarlar için
sorumluluk üstlenmez.
Elektrikli süpürgeyi sadece aşağıdakilerle
birlikte kullanın:
Orijinal filtre torbaları.
Orijinal yedek parçalar, aksesuarlar ya
da özel aksesuarlar.
Elektrikli süpürge aşağıdakiler için uygun
değildir:
İnsanlar ve hayvanların emme
yöntemiyle temizlenmesi.
Aşağıdakilerin emilmesi:
Küçük canlılar (Örn; böcekler,
örümcekler, vb)
lığa zararlı, keskin kenarlı, sıcak ya
Sağ
da yanmakta olan maddeler.
Nemli ya da sıvı maddeler.
Kolay alev alabilen ya da patlayıcı
maddeler ve gazlar.
78 TR
- 1
Çevre koruma
Ambalaj malzemeleri geri dönüş-
türülebilir. Ambalaj malzemelerini
evinizin çöpüne atmak yerine lütfen tekrar
kullan labilecekleri yerlere gönderin.
Eski cihazlarda, yeniden
değerlendirme işlemine tabi tutulması
gereken değerli geri dönüşüm
malzemeleri bulunmaktadır. Bu nedenle
eski cihazları lütfen öngörülen toplama
sistemleri aracılığıyla imha edin.
İçindekiler hakkında uyarılar (REACH)
İçindekiler hakkında ayrıntılı bilgileri
bulabileceğiniz adres:
http://www.karcher.de/de/unternehmen/
umweltschutz/REACH.htm
Filtre ve filtre torbasının imha edilmesi
Filtre ve filtre torbası çevreye uyumlu
malzemelerden üretilmiştir.
Ev çöpü için yasak olan emilmiş maddeler
içermedikleri sürece, bu parçalar normal ev
çöpünde imha edilebilir.
Güvenlik uyarıları
– Bu cihaz, güvenlikleri için yetkili bir kişi
tarafından gözetim altında
tutulmadıkları ya da cihazın nasıl
kullanılacağına yönelik gerekli
talimatları almadıkları sürece fiziksel,
duyusal ya da ruhsal açıdan kısıtlı
yeteneklere sahip ya da deneyimleri ve/
veya bilgileri yetersiz kişiler (çocuklar
dahil) için üretilmemiştir. Cihazla
oynamadıklarından emin olmak için
çocuklar gözetim altında tutulmalıdır.
– Ambalaj folyolarını çocuklardan uzak
tutun, boğulma tehlikesi bulunmaktadır!
– Her kullanımdan sonra ve her temizlik/
bakımdan önce cihazı kapatın.
– Yangın tehlikesi. Yanan veya kor
halindeki maddeleri temizlemeyin.
– Patlama tehlikesi olan bölgelerde
cihazın çalıştırılması yasaktır.
– Uzun çalışma molalarında cihazı ana
şalterden / cihaz şalterinden kapatın ya
da elektrik fişini çekin.
Page 79

몇
Elektrik bağlantısı
– Cihazı sadece alternatif akıma
bağlayın. Gerilim, cihazın tip plaketiyle
aynı olmalıdır.
Elektrik çarpma tehlikesi
– Fişi ve prizi kesinlikle ıslak veya nemli
elle temas etmeyin.
– Şebeke fişini, bağlantı kablosundan
çekerek prizden çıkartmayın.
– Bağlantı kablosuna, elektrik fişiyle
birlikte her kullanımdan önce hasar
kontrol yapın. Hasar görmüş bağlantı
kablosunu derhal yetkili müşteri
hizmetleri/elektronik teknisteni
tarafından değiştirilmesini sağlayın.
– Şebeke bağlantı kablosunu cihazı
taşımak için kullanmayın.
– Şebeke bağlantı kablosunu keskin
kenarlar üzerinden çekmeyin ve
sıkıştırmayın.
– Tüm çalışmalardan önce cihazı elektrik
fişinden çekin.
몇 Dikkat
Kesinlikle filtre torbası yokken emme
yapmayın.
Cihaz zarar görebilir.
Meme ve emme borusuyla başınızın
yakınında emme yapmaktan kaçının.
Yaralanma tehlikesi bulunmaktadır!
Süpürme işlemi sırasında şebeke
bağlantı kablosunu tümüyle dışarı
çekin.
Cihazı harici hava etkileri, nem ve ısı
kaynaklarına karşı koruyun.
Temizlik yapılmadığı zamanlarda cihazı
kapatınız.
Kullanımı
Cihaz tanımı
Lütfen şekil sayfalarını açın!
1 Soketli elektrik fişi kablosu
2 Kablo sarma tuşu
3 Açma/Kapama tuşu
4 Emme gücü ayarlayıc
5 Emme hortumu
6 Tutamak
7 Teleskop emme borusu
8 Teleskop emme borusunun ayarı
9 Taban memesi
10 Aksesuar donanımının kapağı
11 QuickClick aksesuar donanımı:
Yastık memesi, çıkartılabilen ek
memesi ve mobilya fırçası içerir
12 Filtre değişim göstergesi
13 Kilit kolu, filtre torbası kapağı / motor
koruma filtresi
14 Motor koruma filtresi
15 Filtre torbası tutucusu
16 HEPA filtre kapağı
17 HEPA filtre
18 Taşıma kolu
İlk çalıştırma
Şekil
Emme hortumunun ağzı emme deliğine
bastırın.
Çıkartmak için, her iki kilitleme
mandalını içeri doğru bastırın ve
hortumu dışarı çekin.
Şekil
Tutamak ve teleskop emme borusunu
birbirine geçirin ve kilitleyin.
Taban memesi ve teleskop emme
borusunu birbirine geçirin ve kilitleyin.
ısı
- 2
79TR
Page 80

Şekil
Ayar düğmesine basın ve teleskop
emme borusunu istediğiniz uzunluğa
ayarlayın.
Şekil
Durdurmak için ya da kısa çalışma
aralarında, taban memesini cihazın
arka tarafındaki park tutucusuna asın
ve kilit konumuna bastırın.
Şekil
Çıkartmak için, tutamağı geriye doğru
cihaz yönünde bastırın. Bu şekilde,
taban memesi park tutucusundan açılır
ve yukarı doğru çıkartılabilir.
Şekil
Şebeke bağlantı kablosunu fişinden
tutun ve dışarı çekin. Elektrik fişini prize
takın.
Cihazı açın / kapatı
Şekil
Emme gücü, emme gücü
ayarlayıcısından ayarlanır:
- İşaret MAX üzerinde, yüksek emme
gücü
- İşaret MIN üzerinde, düşük emme
gücü
Not: İşaret, güncel emme gücünü
gösterir.
Emme gücünün emme durumuna uygun
olarak adapte edilmesi:
Düşük emme gücü – Perdeler,
tekstiller, yastıklı mobilyalar, mindeler
Orta emme gücü – Az kirlenmiş halılar
/ halı zeminler, yüksek kaliteli halılar,
köprüler ve rotorlar
Yüksek emme gücü – Sert zeminler,
çok kirlenmiş halılar ve halı zeminler
Lütfen dikkat edin! Cihazın çalışması
sırasında şebeke sigortasının devreye
girmesinin nedeni, aynı elektrik devresine
aynı anda başka elektrikli cihazların
bağlanmış ve çalış
Bu durumda, cihazı çalıştırmadan önce
cihazdaki en düşük güç kademesini
ayarlayın. Daha sonra daha yüksek bir güç
kademesi seçebilirsiniz. Şebeke sigortası
için "Teknik bilgiler" bölümüne bakın.
n.
tırılıyor olması olabilir.
Önemli uyarı! Cihaz, bir aşırı ısınma
tehlikesinde otomatik olarak kapanır.
Cihazı kapatın ve elektrik fişini çekin.
Meme, emme borusu ya da hortumun
tıkanmış olup olmadığı ya da filtrenin
değiştirilmesinin gerekli olup olmadığından
emin olun. Arızanın giderilmesinden sonra
cihazı en az 1 sata soğutun, daha sonra
cihaz tekrar çalışmaya hazırdır.
Aksesuarlarla süpürme
QuickClick; Aksesuar
QuickClick aksesuarın kullanılması
Yastık memesi: Yastıklı mobilyalar,
minderler, perdelerin, vb emilmesi için
Mobilya fırçası, döner: Mobilyalar ve
hassas cisimlerin koruyucu temizliği,
kitaplar, otomobildeki havalandırma
ızgaralarının tozunun alınması, vb için.
Ek memesi, çıkartılabilir: Köşeler, ek
yerleri ve kalorifer radyatörleri için
QuickClick aksesuar donanımındaki
aksesuarın değiştirilmesi
Taban memesini cihazın arka
tarafındaki park tutucusuna asın ve kilit
konumuna bastırın (Bkz. Şekil 4).
Şekil
Tutamaktaki kilit açma tuşuna basın ve
tutamağı teleskop emme borusundan
çekin.
Şekil
Aksesuar donanımının kapağını yukarı
doğru katlayın.
Şekil
Tutamağı, istediğiniz aksesuarda
tahdide kadar içeri sokun. Bu şekilde
kilitlenir. Daha sonra, aşa
çevirin ve dışarı çekin.
Şekil
Saklamak için, aksesuarı tutamakla
birlikte aksesuar donanımına takın ve
yukarı doğru kilitleyin. Tutamağı
çekerek çıkartın.
Uyarı: Aksesuar, elle de çıkartılabilir ve
tutamağa takılabilir. Aksesuarı
ğı doğru
80 TR
- 3
Page 81

gevşetmek için tutamağın kilit açma
düğmesine basın.
Uyarı: Yukarıda belirtilen tüm adımlar,
teleskop emme borusu takılı
durumdayken de uygulanabilir. Bu
amaçla taban memesini cihazın arka
tarafındaki park tutucusuna asın ve kilit
konumuna bastırın. Teleskop emme
borusunu dik konumda yukarı çekin.
ComfoGlide memesi
Şekil
Halılar ve halı döşemeler:
Düğme konumlarını aşağıdaki şekilde
seçin:
Koruma ve Bakım
Yaralanma tehlikesi
Bütün bakım ve temizlik çalışmalarında
cihaz kapatılmalı şebeke kablosu prizden
çıkartılmalıdır.
Cihazın temizlenmesi
몇 Dikkat
Aşındırıcı maddeler, cam veya çok amaçlı
temizleyiciler kullanmayınız! Cihazı asla
suya daldırmayınız.
Cihazı ve plastik aksesuarlarını
piyasadan temin edilen bir plastik
temizleyicisiyle temizleyiniz.
Toz odasını kuru bir toz bezi / toz
fırçasıyla temizleyin.
Şekil
Sert Zeminler:
Düğme konumlarını aşağıdaki şekilde
seçin:
Çalışmanın tamamlanması
Cihazı kapatınız ve fişi çıkartın
Şekil
Kablo sarma tuşuna basın. Kablo
otomatik olarak cihazın içine çekilir.
Taban memesini cihazın arka
tarafındaki park tutucusuna asın ve kilit
konumuna bastırın.
ız.
Taşıma, saklama
Taşımak için cihazı taşıma kolundan
tutun ve kuru odalarda saklayın.
Uyarı: Teleskop emme borusunun
daha önce tümüyle içeri itilmesi önerilir.
Filtre torbasının değiştirilmesi
Sipariş no. 6.904-329
İçindekiler: Kilit ve 1 motor koruma filtresi
ile birlikte 5 filtre torbası.
Uyarı: Filtre değişim göstergesini okumak
için, teleskop emme borusunu tutamaktan
ayırın.
Şekil
Kapaktaki filtre değişim göstergesi tam
olarak kırmızıysa, lütfen filtre torbasını
değiştirin.
Kilit koluna basın ve kapağı
Şekil
Filtre torbası tutucusunun kilidini açın
ve tutucuyu dışarı katlayın.
Şekil
Kilit kulağıyla filtre torbasını kilitleyin,
filtre torbasını çıkartın ve imha edin.
Şekil
Yeni filtre torbasını dayama noktasına
kadar tutucuya doğru itin. Kulağı ilk
önce aşağı doğru bastırın, daha sonra
tutucuyu muhafazanın içine doğru itin
ve cihaz muhafazasına kilitleyin.
açın.
몇 Dikkat
Kapak, sadece filtre torbası yerleştirilmişse
kapanır. İnce tozları (Örn; alçı, çimento, vb
gibi) süpürdükten sonra, motor koruma
filtresini temizleyin ya da değiştirin.
- 4
81TR
Page 82

Motor koruma filtresinin
değiştirilmesi
Motor koruma filtresi: Filtre torbası
ambalajındaki son filtre torbası ile birlikte
değiştirin.
Motor koruma filtresi, yerleştirilmiş olan
filtre torbasının arkasında yer alır. Filtre
torbasını yerleştirmeden önce motor
koruma filtresini değiştirin.
Şekil
Çerçevenin kilidini açın ve çerçeveyi
çıkartın.
Çerçevenin alt parçasını çıkartın, eski
motor koruma filtresini dışarı alın ve
imha edin. Yeni motor koruma filtresini
çerçeveye oturtun ve çerçevenin alt
parçasına yerleştirin.
Şekil
Çerçeveyi yerleştirin ve kilitleyin.
HEPA filtrenin değiştirilmesi
Sipariş no. 6.414-805
Temiz bir üfleme havası için filtre.
HEPA filtre: Yılda 1 kez değiştirin.
Şekil
Kapa
Hepa filtrenin kilidini açın ve filtreyi
Şekil
HEPA filtreyi yerleştirin ve kilitleyin.
Kapağı kapatın.
ğı açın.
çıkartın.
ComfoGlide memenin temizlenmesi
ComfoGlide memeyi düzenli aralıklarla
temizleyin!
Memeyi emme borusundan çıkartın.
Şekil
Arka manevra tekerleklerinin
temizlenmesi:
En iyi şekilde, tekerlek çıkartılmış
durumdayken. Bu amaçla aksı
vidalayın ve dışarı çekin. Toz
kırpıntıları, kıllar ve artık kolayca
temizlenebilir. Manevra tekerleğini
tekrar takın.
Aksesuarın temizlenmesi
Şekil
Tutamak ve emme hortumu, temizleme
amacıyla ya da tıkanma durumunda
ayrılabilir. Bu amaçla 2 kilit açma
mekanizmasını bastırın ve dışarı doğru
çekin
Bağlamak için, tutamak ve emme
hortumunu birbirine geçirin ve kilitleyin.
Genel bilgiler
Garanti
ılgili ülkede, genel distribitörümüzün
belirlemiş ve yayınlamış olduğu garanti
koşulları geçerlidir. Garanti süresi dahilinde
cihazda, malzeme ve üretim hatasından
oluşabilecek arızaların giderilmesi
tarafımızdan ücretsiz olarak yapılır. Garanti
kapsamındaki arızaların oluşması halinde,
lütfen cihazı tüm aksesuarları ve satış
belgesi ile (fiş, fatura) satın aldığınız yere
yada en yakındaki yetkili servise
götürünüz. Cihazın kullanım ömrü 10 yıldır.
(Adres için Bkz. Arka sayfa)
Müşteri hizmeti
Sorularızın veya arızalar söz konusu olursa
KÄRCHER distribütörümüz size seve seve
yardımcı olacaktır. Adres için bkz. Arka
sayfa.
Yedek parça ve özel aksesuar
siparişi
En sık kullanılan yedek parça çeşitlerini
kullanım kılavuzunun sonunda
bulabilirsiniz.
Yedek parçalar ve aksesuarları yetkili
satıcınız ya da KÄRCHER temsilciliğinden
temin edebilirsiniz.
(Adres için Bkz. Arka sayfa)
82 TR
- 5
Page 83

Teknik Bilgiler
Gerilim V 220 - 240
Elektrik türü Hz 50/60
Şebeke sigortası
(gecikmeli)
Koruma sınıfı II
Güç P
NOMİNAL
Güç P
MAKS
Ağırlık (aksesuar hariç) kg 7,0
Hareket alanı m10
Boyutlar mm ø 380 x
Nominal mesafe,
aksesuar
Ses şiddeti seviyesi
(EN 60704-2-1)
Teknik değişiklik yapma hakkı saklıdır!
A16
W1600
W1800
380
mm 35
dB(A) 64
Özel aksesuar
A Zemin için turbo meme
(Sipariş No. 4.130-177)
Bir çalışma aşamasında fırçalama ve
süpürme.
Özellikle hayvan tüyleri ve yüksek
tabanlı halıların süpürülmesi için
uygundur. Fırça silindirinin tahriki, hava
akımı üzerinden gerçekleşir.
Elektrik bağlantısı gerekli değildir.
B Yastıklar için turbo meme
(Sipariş No. 2.903-001)
Yastıklı mobilyalar, minderler, araç
koltuklarının, vb bir çalışma
aşamasında fırçalanması ve
süpürülmesi.
Özellikle hayvan tüylerinin süpürülmesi
için uygundur. Fırça silindirinin tahriki,
hava akımı üzerinden gerçekleşir.
Elektrik bağlantı
C Parke memesi
(Sipariş No. 4.130-172)
Hassas, kaygan zeminlerin (parke,
mermer, fayans, vb) süpürülmesi için.
D Minder memesi
(Sipariş No. 6.906-755)
Minderler ve yastıkların süpürülmesi
için
E Filtre torbası
(Sipariş No. 6.904-329)
İçindekiler: Kilit ve 1 motor koruma
filtresi ile birlikte 5 filtre torbası.
F HEPA filtre
(Sipariş No. 6.414-805)
Temiz bir kaçak hava için ek filtre.
Alerjisi olanlar için önerilir.
sı gerekli değildir.
- 6
83TR
Page 84

Оглавление
легковоспламеняющихся или
взрывчатых веществ и газов.
Указания по технике
безопасности
Управление RU - 2
Окончание работы RU - 4
Уход и техническое
обслуживание
Общие указания RU - 6
Технические данные RU - 7
Специальные
принадлежности
Уважаемый покупатель!
Перед первым применением
вашего прибора прочитайте
эту оригинальную инструкцию по
эксплуатации, после этого действуйте
соответственно и сохраните ее для
дальнейшего пользования или для
следующего владельца.
RU - 1
RU - 5
RU - 7
Использование по назначению
Данный пылесос предназначен для
использования в домашнем хозяйстве,
он не подходит для промышленного
использования.
Изготовитель не несет ответственности
за повреждения, полученные в
результате использования
назначению или неправильного
обращения с прибором.
Использовать пылесос только с:
оригинальными пылесборными
мешками.
оригинальными запчастями,
стандартными или специальными
принадлежностями.
Пылесос не предназначен для:
чистки людей и животных.
всасывания:
насекомых (например, мух, пауков
итд.).
вредных для здоровья веществ,
острых, горячих или раскаленных
предметов.
мокрых предметов или жидкостей.
не по
Охрана окружающей среды
Упаковочные материалы пригодны
для вторичной обработки. Поэтому
не выбрасывайте упаковку вместе с
домашними отходами, а сдайте ее в
один из пунктов приема вторичного
сырья.
Старые приборы содержат ценные
перерабатываемые материалы,
подлежащие передаче в пункты
приемки вторичного сырья. Поэтому
утилизируйте старые приборы через
соответствующие системы приемки
отходов.
Инструкции по применению
компонентов (REACH)
Актуальные сведения о компонентах
приведены на веб-узле по следующему
адресу:
http://www.karcher.de/de/unternehmen/
umweltschutz/REACH.htm
Утилизация фильтра и пылесборного
мешка
Фильтр и пылесборный мешок
изготовлены из экологически
безвредных материалов.
Если они не содержат никаких веществ,
которые запрещены для утилизации
домашнего мусора, они могут быть
утилизированы с обычным домашним
мусором.
Указания по технике
безопасности
– Это устройство не предназначено
для использования людьми (в том
числе и детей) с ограниченными
физическими, сенсорными или
умственными способностями или
лицами с отсутствием опыта и/
или знаний, за исключением случаев,
если за обеспечением безопасности
их работы наблюдают специально
подготовленные лица или они
84 RU
- 1
Page 85

получают от них указания,
касающиеся использования
устройства. Необходимо следит за
детьми, не разрешать им играть с
устройством.
– Упаковочную пленку держите
подальше от детей, существует
опасность удушения!
– Прибор следует отключать после
каждого применения и перед
проведением очистки/технического
обслуживания.
– Опасность пожара. Не допускать
всасывания горящих или тлеющих
предметов.
– Эксплуатация прибора во
взрывоопасных зонах запрещается.
– Во время продолжительных
перерывов в эксплуатации следует
выключить прибор с помощью
главного выключателя /
выключателя прибора или
отсоединить его от электросети.
몇 Подключение к сети питания
– Прибор следует включать только в
сеть переменного тока.
Напряжение должно
соответствовать указаниям в
заводской табличке прибора.
Опасность поражения током
– Не прикасаться к сетевой вилке и
розетке мокрыми руками.
– Не вытаскивать сетевую
штепсельную вилку путем
подтягивания за сетевой шнур.
– Перед началом работы с прибором
проверять сетевой шнур и
штепсельную вилку на
повреждения. Поврежденный
сетевой шнур должен быть
незамадлительно заменен
уполномоченной службой
сервисного обслуживания/
специалистом-электриком.
– Не используйте сетевой кабель
питания для переноски /
транспортировки пылесоса.
– Следите за тем, чтобы сетевой
кабель не защемлялся и не терся об
острые края.
– Перед проведением любых работ по
уходу и техническому обслуживанию
прибора шнур питания необходимо
вынимать из розетки.
몇 Внимание
Никогда не пылесосить без
пылесборного мешка.
Прибор может выйти из строя.
Избегать пылесосить всасывающей
трубой с насадкой в близи головы.
Это может привести к травме!
При работе в режиме пылесоса
полностью вытяните сетевой кабель.
Прибор следует защищать от
сильных погодных влияний,
влажности и источников тепла.
Если прибор не
используется, его
следует выключать.
Управление
Описание прибора
Откройте страницы с
изображениями!
1 Сетевой шнур со штепсельным
разъемом
2 Кнопка смотки кабеля
3 Кнопка Вкл./Выкл.
4 Регулятор мощности всоса
5 Всасывающий шланг
6 рукоятка
7 Телескопическая всасывающая
труба
8 Регулировка телескопической
всасывающей трубы
9 Форсунка для чистки пола
10 Крышка места хранения
принадлежностей
- 2
85RU
Page 86

11 Место хранения принадлежностей
QuickClick:
содержит насадку для мягкой обивки,
вытягиваемую насадку для щелей и
мебельную щетку
12 Индикатор смены фильтра
13 Рычаг блокиратора, крышка
пылесборного мешка / защитный
фильтр мотора
14 Защитный фильтр мотора
15 Крепление пылесборного мешка
16 Крышка HEPA фильтра
17 HEPA фильтр
18 Рукоятка для ношения прибора
Ввод в эксплуатацию
Рисунок
Вставьте патрубок шланга во
всасывающее отверстие и einrasten.
Для снятия
выступа и вынуть шланг.
Рисунок
Рукоятку соединить с
телескопической трубой и
зафиксировать.
Половую насадку соединить с
телескопической трубой и
зафиксировать.
Рисунок
Используя регулировку, установить
желаемую длину телескопической
трубы.
Рисунок
Для хранения или при коротких
перерывах в работе половую
насадку навесить в парковочное
положение на задней стенке прибора
и надавить для фиксации в
положении.
Рисунок
Для снимания нажать рукоятку назад
в сторону прибора. При этом половая
насадка высвобождается из
парковочного положения и может
быть вынута вверх.
нажать оба стопорных
Рисунок
Удерживая за штепсельную вилку,
вытянуть кабель питания. Вставить
штепсельную вилку в ророзетку.
Включите / выключите прибор.
Рисунок
Регулировка мощности всасывания
выполняется регулятором
мощности:
- мaркировка на MAX, максимальная
сила всоса
- мaркировка на MIN, минимальная
сила всоса
Указание: маркировка указывает
текущюю мощность всасывания.
Настроить мощность всасывания в
ависимости от ситуации:
Низкая мощность всасывания –
для гардин, текстильных изделий,
мягкой мебели, подушек
Средняя мощность всасывания –
для легко загрязненных ковров /
ковровых покрытий,
высококачественных ковров,
дорожек и половиков
Самая высокая мощность
всасывания – для твердых
напольных покрытий, сильно
загрязненных ковров и ковровых
покрытий
Внимание! Если при включении
прибора сразу же сработал
предохранитель, это означает, что
одновременно к данной электросети уже
подключены и используются другие
электроприборы. В таком случае перед
включением установите на приборе
наименьщую мощьность. Позднее вы
сможете выбрать более высокий режим
мощности. Параметры зашиты сети
предохранителем указаны в разделе
"Технические данные".
Важное указание! Прибор при
опасности перегрева автоматически
отключается. Выключите прибор и
потяните за штепсельную вилку.
Убедитесь, что насадки, всасывающая
труба или шланг не забились, и не
86 RU
- 3
Page 87

требуется замена фильтра. После
устранения неполадки дать прибору
остынуть как минимум 1 час, затем
прибор снова готов к работе.
Использование
принадлежностей
Принадлежности QuickClick
Использовать принадлежности
QuickClick
Форсунка для мягкой обивки: для
очистки мягкой мебели, матрасов,
гардин и т.д.
Кисточка для мебели,
вращающаяся: для щадящей
очистки мебели и деликатных
предметов, очистки книг,
вентиляционных щелей в авто и т
Насадка для щелей,
вытягивается: для углов, щелей и
радиаторов отопления
Замена принадлежностей из отсека
QuickClick
Навесить половую насадку в
парковочное положение на стенке
прибора и надавить для фиксации в
положении (см. рис. 4).
Рисунок
Нажать кнопку отблокировки на
рукоятке и снять рукоятку
телескопической всасывающей
трубы.
Рисунок
Откинуть крышку отсека хранения
принадлежностей.
Рисунок
Вставить
деталь принадлежностей. При этом
она фиксируется. В завершении
повернуть вниз и вынуть.
Рисунок
Для хранения насадку с рукояткой
вставить в отсек принадлежностей и
зафиксировать вверх. Снять
рукоятку.
до упора ручку в желаемую
.д.
Указание: Насадку можно также
вынуть и установить на рукоятку
вручную. Для разъединения
нажмите кнопку разблокировки на
ручке.
Указание: Все вышеупомянутые
шаги можно выполнить также с
установленной телескопической
всасывающей трубой. Для этого
навесить половую насадку в
парковочное положение на задней
стенке прибора и надавить для
фиксации в положении. Снять
телескопическую трубу вертикально
вверх.
Насадка ComfoGlide
Рисунок
Ковры и ковровые покрытия:
Положения переключателя выбрать
следующим образом:
Рисунок
Жесткие поверхности:
Положения переключателя
следующим образом:
выбрать
Окончание работы
Выключить прибор и вытащить
сетевую вилку,
Рисунок
Нажать кнопку смотки кабеля.
Кабель автоматически втягивается в
прибор.
Навесить половую насадку в
парковочное положение на задней
стенке прибора и надавить для
фиксации в положении.
- 4
87RU
Page 88

Транспортировка, хранение
При транспортировке держите
прибор за ручку и сохраняйте в сухом
помещении.
Указание: Рекомендуется
предварительно полностью убирать
телескопическую всасывающую
трубу
Уход и техническое
обслуживание
Опасность получения травм!
При проведении любых работ по уходу
и техническому обслуживанию прибор
следует отключить, а сетевой шнур вынимуть из розетки.
Чистка прибора
몇 Внимание
Не использовать чистящих паст,
моющих средств для стекла и
универсальных моющих средств!
Запрещается погружать прибор в
воду.
Прибор и принадлежности из
искусственных материалов следует
чистить стандартными моющими
средствами для искусственных
материалов.
Очистить отсек пылесборного мешка
сухой тряпкой / щеткой для пыли.
Замена пылесборного мешка
Номер для заказа 6.904-329
В комплект входит: 5 пылесборных
мешков с
мотора.
Указание: Для считывания показания
индикатора замены фильтра
отделить телескопическую
всасывающую трубу от рукоятки.
Рисунок
Если индикотор смены фильтра в
запором и 1 фильтр защиты
крышке полностью красный,
пожалуйста, замените пылесборный
мешок.
Нажать рычаг разблокировки и
открыть крышку.
Рисунок
Разблокировать крепление
пылесборного мешка и откинуть
вверх.
Рисунок
Закупорить пылесборный
помощью запорного язычка, вынуть
мешок и утилизировать.
Рисунок
Вставить новый мешок до упора в
крепление. Сперва нажать язычок
вниз, затем ввести крепление в
корпус и зафиксировать на корпусе
аппарата.
мешок с
몇 Внимание
Крышка закрывается только со
вставленным пылесборным мешком.
После всасывания мелкой пыли
(например, гипс, цемент итд.)
прочистить или заменить фильтр
защиты мотора.
Замена фильтра защиты патрона
Защитный фильтр мотора: заменять с
каждым последним пылесборным
мешком из упаковки.
Фильтр защиты мотора находится за
установленным пылесборным
мешком. Перед установкой
пылесборного мешка заменить
фильтр защиты мотора.
Рисунок
Разблокировать и вынуть рамку.
Снять нижнюю часть рамки, вынуть
старый фильтр защиты мотора и
утилизировать. Вставить в рамку
новый фильтр защиты мотора и
установить нижнюю часть рамки.
Рисунок
Снова установить и зафиксировать
рамку.
88 RU
- 5
Page 89

Замена НЕРА фильтра
Номер для заказа 6 414-805
Фильтр для очистки выдуваемого
воздуха.
HEPA фильтр: менять ежегодно.
Рисунок
Открыть крышку.
Разблокировать и вынуть НЕРА
фильтр.
Рисунок
Установить и зафиксировать новый
НЕРА фильтр.
Закрыть крышку.
Чистка насадки ComfoGlide
Чистить насадку ComfoGlide через
регулярные промежутки времени!
Снять насадку со всасывающей
трубы.
Рисунок
Чистить задний направляющий
ролик:
лучше всего при снятом ролике. Для
этоко открутить и вынуть ось. Теперь
можно легко удалить комки пыли,
волосы итд. Сново установить
направляющий ролик.
Чистка принадлежностей
Рисунок
Рукоятку и всасывающий шланг для
чистки или в случае засора можно
отделить. Для этого нажать 2
блокиратора и разъединить
Для соединения рукоятку
состыковать со всасывающим
шлангом и зафиксировать.
Общие указания
Гарантия
В каждой
соответственно гарантийные условия,
изданные уполномоченной
организацией сбыта нашей продукции в
данной стране. Возможные
неисправности прибора в течение
гарантийного срока мы устраняем
бесплатно, если причина заключается в
дефектах материалов или ошибках при
изготовлении. В случае возникновения
претензий в течение гарантийного срока
просьба обращаться, имея при себе чек
о покупке,
продавшую вам прибор или в
ближайшую уполномоченную службу
сервисного обслуживания.
(Адрес указан на обороте)
Филиал фирмы Karcher с удовольствием
ответит на ваши вопросы и окажет
содействие при устранении
неисправностей в приборе. Адрес
указан на обороте
специальных принадлежностей
Выбор наиболее часто необходимых
запчастей вы найдете в конце
инструкции по эксплуатации.
Запасные части
можете получить у Вашего дилера или в
филиале фирмы KARCHER.
(Адрес указан на обороте)
стране действуют
в торговую организацию,
Сервисная служба
Заказ запасных частей и
и принадлежности Вы
- 6
89RU
Page 90

Технические данные
Напряжение V 220 - 240
Вид тока Hz 50/60
Сетевой
предохранитель
(инертный)
Класс защиты II
Мощность Р
Мощность Р
Вес без
(принадлежностей)
Радиус действия m10
Габариты mm ø 380 x
Номинальный
внутренний диаметр
насадок
Уровень звукового
давления
(EN 60704-2-1)
Изготовитель оставляет за собой
право внесения технических
изменений!
ном
макс
A16
W1600
W1800
kg 7,0
380
mm 35
dB(A) 64
Специальные
принадлежности
щетки осуществляется потоком
воздуха.
Дополнительный источник
электроэнергии не требуется.
B Турбо насадка для мягкой обивки
(№
для заказа 2.903-001)
Одновременно чистит щеткой и
всасывает пыль из мягкой мебели,
матрасов, автомобильных сидений
итд.
Особенно эффективна для удаления
шерсти животных. Привод валика
щетки осуществляется потоком
воздуха.
Дополнительный источник
электроэнергии не требуется.
C Паркетная насадка
(№ для заказа 4.130-172)
Для чистки гладких полов (паркет,
мрамор, теракот итд.)
D Матрасовая насадка
(№ для
Для чистки матрасов и мягкой
обивки.
E Пылесборный мешок
(№ для заказа 6.904-329)
В комплект входит: 5 пылесборных
мешков с запором и 1 фильтр
защиты мотора.
F HEPA-фильтр
(№ для заказа 6.414-805)
Дополнительный фильтр для
очистки выдуваемого воздуха.
Рекомендуется для аллергиков.
заказа 6.906-755)
A Турбо насадка для пола
(№ для заказа 4.130-177)
Одновременная чистка щеткой и
всасывание.
Особенно эффективна для удаления
шерсти животных и чистки ковров с
высоким ворсом. Привод валика
90 RU
- 7
Page 91

Tartalomjegyzék
Biztonsági tanácsok HU - 1
Használat HU - 2
Használat befejezése HU - 4
Ápolás és karbantartás HU - 4
Általános megjegyzések HU - 5
Műszaki adatok HU - 6
Különleges tartozékok HU - 6
Tisztelt Vásárló,
A készülék első használata előtt
olvassa el ezt az eredeti
használati utasítást, ez alapján járjon el és
tartsa meg a későbbi használatra vagy a
következő tulajdonos számára.
Rendeltetésszerű használat
Ez a porszívó háztartási használatra és
nem ipari célra készült.
A gyártó nem vállal felelősséget esetleges
károkért, amelyek a nem rendeltetésszerű
használatból vagy hibás kezelésből
származnak.
A porszívót csak ezekkel használja:
Eredeti porzsákkal.
Eredeti alkatrészekkel, tartozékokkal
és külön tartozékokkal.
A porszívó nem alkalmas:
Emberek és állatok leporszívózására.
A következők felszívására:
Kis élőlények (pl. legyek, pókok, stb.).
Egészségre ártalmas, éles szélű, forró
vagy izzó anyagok.
Nedves vagy folyékony anyagok.
Gyúlékony vagy robbanékony anyagok
vagy gázok.
Környezetvédelem
A csomagolóanyagok
újrahasznosíthatók. Ne dobja a
csomagolóanyagokat a háztartási
szemétbe, hanem gondoskodjék azok
újrahasznosításról.
A régi készülékek értékes
újrahasznosítható anyagokat
tartalmaznak, amelyeket tanácsos
újra felhasználni. Ezért a régi készülékeket
az arra alkalmas gyűjtőrendszerek
igénybevételével ártalmatlanítsa!
Megjegyzések a tartalmazott
anyagokkal kapcsolatban (REACH)
Aktuális információkat a tartalmazott
anyagokkal kapcsolatosan a következő
címen talál:
http://www.karcher.de/de/unternehmen/
umweltschutz/REACH.htm
Szűrők és porzsákok hulladék kezelése
A szűrők és porzsákok környezetkímélő
anyagokból készlütek.
Amennyiben nem tartalmaznak olyan
felszívott anyagokat, amelyeket tilos a házi
szemétben elhelyezni, akkor a rendes házi
szemétbe lehet elhelyezni.
Biztonsági tanácsok
– Ez a készülék nem alkalmas arra, hogy
olyan korlátozott fizikai, érzékelő vagy
szellemi képességgel rendelkező
személyek (beleértve a gyerekeket)
vagy tapasztalat és/vagy ismeret nélküli
személyek használják, kivéve ha őket
biztonságukért felelős személy
felügyeli vagy ez a személy
megtanította nekik, hogy hogyan kell a
készüléket használni. Gyerekeket
felügyelni kell, annak biztosításáért,
hogy a készülékkel ne játszanak.
– A csomagolófóliát tartsa gyermekektől
távol, fulladás veszélye áll fenn!
– A készüléket minden használat után, és
minden tisztítás/karbantartás előtt
kapcsolja ki.
- 1
91HU
Page 92

– Égésveszély. Ne szívjon fel égő vagy
parázsló tárgyat.
– Tilos a tűzveszélyes helyiségekben
történő üzemeltetés.
– Hosszabb üzemszünetek esetén a
készülék főkapcsolóját /
készülékkapcsolót ki kell kapcsolni
vagy ki kell húzni a hálózati dugót.
몇 Elektromos csatlakozás
– A készüléket csak váltóárammal
szabad üzemeltetni. A feszültségnek
meg kell egyeznie a készülék
típustábláján található
tápfeszültséggel.
Áramütés veszély
– Ne fogja meg nedves kézzel a hálózati
csatlakozót és dugaljat.
– A hálózati dugót ne a csatlakozókábel
húzásával távosítsa el a hálózati
dugaljból.
– A hálózati kábel és a hálózati dugasz
épségét minden használat előtt
ellenőrizze. A sérült hálózati kábelt
haladéktalanul ki kell cseréltetni egy
jogosult ügyfélszolgálattal vagy
elektromos szakemberrel.
– A hálózati csatlakozókábelt ne
használja a készülék hordozásához/
szállításához.
– A hálózati csatlakozókábelt ne húzza át
éles sarkokon és ne csípje be.
– A készüléken történő bármiféle munka
előtt húzza ki a hálózati csatlakozót.
몇 Figyelem
Soha ne porszívózzon porzsák nélkül.
A készülék károsodhat.
Kerülje a porszívózást szívófejjel és
szívócsővel a fej közelében. Sérülés
veszélye áll fenn!
Porszívózási üzemnél húzza ki teljesen
a hálózati csatlakozókábelt.
A készüléket védeni kell a szélsőséges
időjárástól, a nedvességtől és a
hőforrásoktól.
A készüléket ki kell kapcsolni, ha nem
használják.
Használat
Készülék leírása
Kérjük, hajtsa ki az ábrákat tartalmazó
oldalakat!
1 Hálózati kábel csatlakozóval
2 Kábel felcsévélés gomb
3 Be-/Ki kapcsoló
4 Szíváserősség szabályozó
5 Szívótömlő
6 Markolat
7 Teleszkópos szívócső
8 Teleszkópos szívócső beállítása
9 Padló szórófej
10 Tartozék tároló fedele
11 QuickClick tartozék tároló:
tartalmaz kárpitfejet, kihúzható
fugafejet és bútorkefét
12 Szűrőcsere kijelző
13 Zárókar, porzsák / motorvédő szűrő
fedél
14 Motorvédő szűrő
15 Porzsáktartó
16 HEPA-szűrő fedél
17 HEPA-szűrő
18 Fogantyú
Üzembe helyezés
Ábra
Szívócsőtámasztékokat a
szívónyílásba bekattintani.
A kivételhez nyomja össze mindkét
rögzítőpecket és húzza le a csövet.
Ábra
Markolatot és a teleszkópos csövet
rakja össze és kattintsa be.
A padlófejet és a teleszkópos
szívócsövet rakja össze és kattintsa be.
92 HU
- 2
Page 93

Ábra
Mozgassa az állítót és állítsa be a
teleszkópos csövet a kívánt
hosszúságra.
Ábra
Leállításhoz vagy rövid munka
megszakításoknál, a padlófejet a
készülék hátsó részén lévő parkolási
tartóba akassza be és nyomja pihenési
állásba.
Ábra
Kivételhez nyomja hátra, a készülék
felé a markolatot. Ezzel a padlófejet
kioldja a parkolási tartóból és felfelé le
lehet venni.
Ábra
A hálózati kábelt fogja a dugaljnál és
húzza ki. Dugja be a hálózati dugót a
dugaljba.
A készülék be- /kikapcsolása.
Ábra
A szívóerősség beállítása a
szívóerősség szabályozónál történik.
- jelzés MAX-on, magas szívóerősség
- jelzés MIN-on, gyenge szívóerősség
Megjegyzés: a jelzés az aktuális
szívóteljesítményt mutatja.
A szívás erősségét igazítsa a szívási
helyzethez:
Alacsony szívóteljesítmény –
függönyökhöz, textíliákhoz, kárpitozott
bútorhoz, párnákhoz
Közepes szívóteljesítmény – enyhén
szennyezett szőnyegekhez /
szőnyegpadlókhoz, értékes
szőnyegekhez, futószőnyegekhez
Legnagyobb szívóteljesítmény –
kemény padlózathoz, erősen
szennyezett szőnyegekhez és
szőnyegpadlókhoz
Kérem vegye figyelembe! Amennyiben a
készülék bekapcsolásakor a hálózati
biztosíték kioldódna, ennek oka az lehet,
hogy egy időben más elektromos készülék
is ugyanerre az áramkörre van rákapcsolva
és használatban van. Ebben az esetben
állítsa a készüléket a legalacsonyabb
teljesítményi fokozatra, mielőtt a
készüléket bekapcsolná. Ezután választhat
magasabb teljesítményi fokozatot. Hálózati
biztosítás lásd a "Műszaki adatok"
fejezetet.
Fontos megjegyzés! A készülék
túlmelegedés veszélye esetén
automatikusan kikapcsol. Kapcsolja ki a
készüléket és húzza ki a hálózati dugót.
ződjön meg róla, hogy a szívófej vagy
Győ
szívócső nincs eldugulva ill. nem kell-e
cserélni a szűrőt. A zavar elhárítása után a
készüléket legalább 1 órán át hagyni kell
lehűlni, azután a készülék ismét
üzemképes.
Porszívózás tartozékkal
QuickClick tartozék
QuickClick tartozék használata
Kárpit-fej: kárpitozott bútorok,
matracok, függönyök stb.
porszívózására
Bútorkefe, forgatható: bútorok és
érzékeny tárgyak kíméletes
tisztítására, könyvek leporolására, az
autóban található szellőző nyílások
tisztítására stb.
Fugafej, kihúzható: sarkokhoz,
fugákhoz és fűtőtestekhez
Tartozék cseréje a QuickClick tartozék
tárolóból
A padlófejet a készülék hátsó részén
lévő parkoló tartóba akassza be és
nyomja pihenési állásba (lásd a 4.
ábrát).
Ábra
Nyomja meg a kioldási gombot a
markolaton és húzza le a markolatot a
teleszkópos szívócsőről.
Ábra
Nyissa ki a tartozék tároló fedelét.
Ábra
A markolatot tolja rá ütközésig a kívánt
tartozékra. Úgy, hogy az bekattanjon.
Végül forgassa lefelé és húzza ki.
- 3
93HU
Page 94

Ábra
Tároláshoz a tartozékot a markolattal
nyomja a tartozék tárolóba és felfelé
kattintsa be. Markolat lehúzása.
Megjegyzés: A tartozékot kézzel is ki
lehet venni és a markolatra lehet
helyezni. A tartozék kioldásához
nyomja meg a markolaton lévő kioldó
gombot.
Megjegyzés: Minden fent említett
lépést el lehet végezni felhúzott
teleszkópos szívócsővel is. Ehhez
akassza be a padlófejet a készülék
hátsó részén lévő parkolási tartóba és
nyomja pihenési állásba. A teleszkópos
szívócsövet függőlegesen felfelé húzza
le.
ComfoGlide fej
Ábra
Szőnyegek és padlószőnyegek:
A kapcsolóállásokat a
következőképpen válassza ki:
Szállítás, tárolás
A készüléket szállításnál a hordó
fogantyúnál fogja és száraz
helyiségben tárolja.
Megjegyzés: Ajánlott a teleszkópos
szívócsövet előtte teljesen betolni.
Ápolás és karbantartás
Sérülésveszély
Minden ápolási és karbantartási munkálat
megkezdése előtt kapcsolja ki a készüléket
és húzza ki a hálózati csatlakozót.
A készülék tisztítása
몇 Figyelem
Ne használjon súrolószert, üveget vagy
univerzális tisztítószert! A készüléket tilos
vízbe meríteni.
A műanyagból készült készüléket és
tartozékrészeket a kereskedelemben
kapható műanyagtisztítóval kell ápolni.
A porteret száraz porronggyal / -
ecsettel tisztítsa.
Ábra
Keményburkolatok:
A kapcsolóállásokat a
következőképpen válassza ki:
Használat befejezése
Kapcsolja ki a készüléket és húzza ki a
hálózati csatlakozó dugót.
Ábra
Nyomja meg a kábel feltekercselés
gombot. A kábel automatikusan
beszívódik a készülékbe.
A padlófejet a készülék hátsó részén
lévő parkolási tartóba akassza be és
nyomja pihenési állásba.
94 HU
- 4
Porzsák cseréje
Megrendelési szám 6.904-329
Tartalom: 5 porzsák zárással és 1
motorvédő szűrő.
Megjegyzés: A szűrőcsere kijelző
leolvasásához válassza le a teleszkópos
szívócsövet a markolatról.
Ábra
Ha a szűrőcsere kijelző a fedélen
tejesen pirosat mutat, kérem cserélje ki
a porzsákot.
A zárókarral nyissa ki a fedelet.
Ábra
Oldja ki és hajtsa kifelé a porzsák
tartóját.
Ábra
A zárhajtókával zárja be a porzsákot,
vegye ki és dobja ki a porzsákot.
Ábra
Az új porzsákot ütközésig tolja be a
tartóba. A záróhajtókát először nyomja
Page 95

lefelé, azután a tartót tolja befelé a
házba, amíg bekattan a
készülékházban.
몇 Figyelem
A fedél csak behelyezett porzsákkal
záródik. Finom porrészecskék felszívása
után (mint pl. gipsz, cement, stb.) tisztítsa
meg ill. cserélje ki a motorvédő szűrőt.
Motorvédő szűrő cseréje
Motorvédő szűrő: a porzsákcsomag
utolsó porzsákjával együtt cserélje.
A motorvédő szűrő a behelyezett
porzsák mögött helyezkedik el. A
porzsák behelyezése előtt cserélje ki a
motorvédő szűrőt.
Ábra
Oldja ki és vegye ki a keretet.
Vegye le a keret alsó részét, vegye ki a
régi motorvédő szűrőt és távolítsa el.
Rakja be az új motorvédő szűrőt a
keretbe és helyezze be a keret alsó
részét.
Ábra
Helyezze és kattintsa be a keretet.
HEPA-szűrő cseréje
Megrendelési szám 6.414-805
Szűrő a tiszta kiáramló levegőhöz.
HEPA-szűrő: Évente 1x cserélje.
Ábra
Nyissa ki a fedelet.
Oldja ki és vegye ki a HEPA-szűrőt.
Ábra
Helyezze be és kattintsa be az új
HEPA-szűrőt.
Zárja le a fedelet.
ComfoGlide fej tisztítása
Rendszeres időközönként tisztítsa a
ComfoGlide fejet!
Vegye le a fejet a szívócsőről.
Ábra
hátsó kormánygörgő tisztítása:
legjobb levett görgők mellett. Ehhez
csavarozza ki és húzza ki a tengelyt.
Por maradékot, hajat stb. most könnyen
el lehet távolítani. A kormánygörgőt
ismét építse be.
Tartozékok tisztítása
Ábra
A markolatot és a szívócsövet tisztítás
vagy elzáródás esetén szét lehet
választani. Ehhez nyomja meg a 2
kioldást és húzza szét.
Összerakáshoz a markolatot és a
teleszkópos csövet rakja össze és
kattintsa be.
Általános megjegyzések
Garancia
Minden országban az illetékes forgalmazó
vállalat által kiadott szavatossági feltételek
érvényesek. A készülék esetleges hibáit a
garanciaidőn belül költségmentesen
megszüntetjük, ha azok anyag- vagy
gyártási hibára vezethetők vissza.
Garanciális igény esetén kérjük, a
számlával együtt forduljon kereskedőjéhez
vagy a legközelebbi, ilyen esetek
intézésére jogosult vevőszolgálathoz.
(A címet lásd a hátoldalon)
Szerviz
Kérdések vagy üzemzavar esetén Kärchertelephelyünk szívesen segít Önnek. A
címet lásd a hátoldalon.
Alkatrészek és különleges
tartozékok megrendelése
Az üzemeltetési útmutató végén talál egy
válogatást a legtöbbször szükséges
alkatrészekről.
Alkatrészeket és tartozékokat
kereskedőjénél vagy KÄRCHERtelephelyen kaphat.
(A címet lásd a hátoldalon)
- 5
95HU
Page 96

Műszaki adatok
Feszültség V 220 - 240
Áramfajta Hz 50/60
Hálózati biztosító
A16
(lomha)
Védelmi osztály II
Teljesítmény P
Teljesítmény P
névl
max
W1600
W1800
Tartozékok nélküli súly kg 7,0
Működési sugár m 10
Méretek mm ø 380 x
380
Névleges átmérő,
mm 35
tartozék
Hangnyomásszint
dB(A) 64
(EN 60704-2-1)
A műszaki adatok módosításának jogát
fenntartjuk!
Különleges tartozékok
B Turbófej kárpithoz
(Megrendelési szám 2.903-001)
Egy munkamenetben tudja kefélni és
porszívózni a kárpitozott bútorokat,
matracokat, autóüléseket stb.
Különösen alkalmas állatszőrök
felporszívózására. A kefehenger
meghajtása a légáramon keresztül
történik.
Nincs szükség elektromos
csatlakozásra.
C Parkettafej
(Megrendelési szám 4.130-172)
Érzékeny sima padlózat
porszívózására (Parketta, márvány,
terrakotta, stb.).
D Matracfej
(Megrendelési szám 6.906-755)
Matracok és párnák porszívózására.
E Porzsák
(Megrendelési szám 6.904-329)
Tartalom: 5 porzsák zárással und 1
motorvédő szűrő.
F HEPA-szűrő
(Megrendelési szám 6.414-805)
További szűrők a tiszta kiáramló levegő
érdekében. Allergiásoknak ajánlott.
A Turbófej padlóhoz
(Megrendelési szám 4.130-177)
Egy munkamenetben porszívózni és
kefélni.
Különösen alkalmas állatszőrök
felporszívózásához és hosszú szőrű
szőnyegek porszívózásához. A
kefehenger meghajtása a légáramon
keresztül történik.
Nincs szükség elektromos
csatlakozásra.
96 HU
- 6
Page 97

Obsah
Bezpečnostní pokyny CS - 1
Obsluha CS - 2
Ukončení provozu CS - 4
Ošetřování a údržba CS - 4
Obecná upozornění CS - 5
Technické údaje CS - 6
Zvláštní příslušenství CS - 6
Vážený zákazníku,
Před prvním použitím svého
zařízení si přečtěte tento
původní návod k používání, řiďte se jím a
uložte jej pro pozdější použití nebo pro
dalšího majitele.
Správné používání
Tento vysavač je určen k používání v
domácnosti, nikoli k profesionálnímu
používání.
Výrobce neručí za případné škody
způsobené nesprávným používáním nebo
nesprávnou obsluhou.
Vysavač používejte pouze
s originálními filtračními sáčky.
s originálními náhradními díly,
příslušenstvím a speciálním
příslušenstvím.
Vysavač není vhodný:
k čištění osob a zvířat.
vysávání:
malých živočichů (např. much,
pavouků).
zdraví škodlivých, ostrých, horkých
nebo žhavých látek.
vlhkých nebo kapalných látek.
snadno vznětlivých nebo výbušných
látek a plynů.
Ochrana životního prostředí
Obalové materiály jsou
recyklovatelné. Obal nezahazujte do
domácího odpadu, nýbrž jej odevzdejte k
opětovnému zužitkování.
Přístroj je vyroben z hodnotných
recyklovatelných materiál
dají dobře znovu využít. Likvidujte
proto staré přístroje ve sběrnách k tomuto
účelu určených.
Informace o obsažených látkách
(REACH)
Aktuální informace o obsažených látkách
naleznete na adrese:
http://www.karcher.de/de/unternehmen/
umweltschutz/REACH.htm
Likvidace filtru a filtračního sáčku
Filtr i filtrační sáček jsou vyrobeny z
ekologického materiálu.
Pokud neobsahují substance, které nesmí
přijít do domovního odpadu, můžete je
vyhodit do běžného domovního odpadu.
Bezpečnostní pokyny
– Toto zařízení není určeno k tomu, aby
je používaly osoby (včetně dětí) s
omezenými fyzickými, smyslovými
nebo duševními schopnostmi nebo s
nedostatečnými zkušenostmi a/nebo
znalostmi, pokud ne ně nebude dohlížet
osoba odpovědná za jejich bezpečnost
a nepoučí je o tom, jak se má zařízení
používat. Na děti je třeba dohlížet, aby
bylo zajištěno, že si se zařízením
nebudou hrát.
– Balicí fólii udržujte mimo dosah dětí,
hrozí nebezpečí udušení!
– Po každém použití a vždy před čištěním
/ údržbou zařízení vypněte.
– Nebezpečí požáru. Nevysávejte hořící
či doutnající předměty.
– Nikdy nepracujte s vysokotlakým
čističem v prostorách, ve kterých hrozí
nebezpečí exploze!
– Při delších provozních přestávkách
vypněte hlavní vypínač / spínač
- 1
ů, které se
97CS
Page 98

přístroje nebo přístroj odpojte od zdroje
napětí.
몇 Elektrické připojení
– Přístroj zapojujte pouze na střídavý
proud. Napětí musí být shodné s údaji o
napětí na typovém štítku přístroje.
Nebezpečí úrazu elektrickým
proudem
– Nikdy se nedotýkejte síťového kabelu
vlhkýma rukama.
– Síťovou zástrčku neodpojuje ze
zásuvky taháním za síťový kabel.
– Před každým použitím přístroje
zkontrolujte, zda napájecí vedení a
zástrčka nejsou poškozeny. Poškozené
napájecí vedení je nutné nechat
neprodleně vyměnit autorizovanou
servisní službou, resp. odborníkem na
elektrické přístroje.
– Síťový kabel nepoužívejte k nošení ani
přemísťování přístroje.
– Síťový kabel netahejte přes ostré hrany
a zamezte jeho skřípnutí.
– Před prací na přístroji vždy vytáhněte
síťovou zástrčku.
몇 Pozor!
Nikdy nevysávejte bez filtračního
sáčku.
Mohlo by dojít k poškození přístroje.
Hubicí a sací trubkou nevysávejte v
blízkosti hlavy. Hrozí nebezpečí úrazu!
Při vysávání síťový kabel úplně
vytáhněte.
Přístroj chraňte před extrémními vlivy
počasí, vlhkostí a zdroji tepla.
Přístroj vypněte, když se nevysává.
Obsluha
Popis zařízení
Rozložte prosím stránky s obrázky!
1Síťový kabel se zástrčkou
2Tlačítko navíjení kabelu
3Tlačítko vypínače
4 Regulátor sací síly
5 Sací hadice
6 Rukojet'
7 Teleskopická sací trubka
8 Nastavení teleskopické sací trubky
9 Hubice na čištění podlah
10 Kryt schránky na příslušenství
11 Schránka na příslušenství QuickClick:
obsahuje hubice na čalounění,
výsuvnou štěrbinovou hubici a kartáč
na nábytek.
12 Ukazatel naplnění filtru
13 Páka uzávěru, kryt filtračního sáčku /
ochranného filtru motoru
14 Ochranný filtr motoru
15 Držák filtračního sáčku
16 Kryt filtru HEPA
17 Filtr HEPA
18 Držadlo
Uvedení přístroje do provozu
ilustrace
Hrdlo sací hadice zaklapně
sacíhootvoru.
Při odpojování stiskněte obě západky k
sobě a hadici vytáhněte.
ilustrace
Spojte a zaklapněte rukojeť a
teleskopickou sací trubku.
Spojte a zaklapněte podlahovou hubici
a teleskopickou sací trubku.
te do
98 CS
- 2
Page 99

ilustrace
Stiskněte regulátor a nastavte
požadovanou délku teleskopické sací
trubky.
ilustrace
Při stavění nebo krátkém přerušení
práce zavěste podlahovou hubici do
parkovacího držáku na zadní straně
přístroje a zatlačte, aby zaklapla.
ilustrace
Při vyndávání zatlačte rukojeť dozadu
směrem k přístroji. Tím se podlahová
hubice uvolní z parkovacího držáku a
lze ji vyndat.
ilustrace
Síťový kabel uchopte za zástrčku a
vytáhněte. Zapojte síťovou zástrčku do
zásuvky.
Přístroj zapněte nebo vypněte.
ilustrace
Sací síla se nastavuje regulátorem:
- značka MAX, velká sací síla
- značka MIN, malá sací síla
Upozornění: Značka ukazuje aktuální
sací výkon.
Sací sílu přizpůsobte situaci při
vysávání:
Nízký sací výkon – pro záclony,
textilie, polstrovaný nábytek, polštáře
Stř
ední sací výkon – pro mírně
znečištěné koberce / kobercové
podlahy, vysoce kvalitní koberce, malé
koberečky a běhouny
Nejvyšší sací výkon – pro tvrdé
podlahy, silně značištěné koberce a
kobercové podlahy
Pozor! Pokud při zapnutí přístroje vypne
síťová pojistka, mohou být důvodem jiné
elektrické přístroje připojené a zapnuté ve
stejném okruhu. V tom případě nastavte
před zapnutím přístroje nejnižší výkon. Pak
můžete výkon zvýšit. Jištění sítě viz část
„Technické údaje“.
Důležité upozornění! P ři hrozícím přehřátí
se přístroj automaticky vypne. Vypněte ho
a vytáhněte síťovou zástrčku. Zjistěte, zda
není ucpaná hubice nebo sací trubka nebo
zda není nutné vyměnit filtr. Po odstranění
poruchy nechte přístroj minimálně 1 hodinu
vychladnout. Pak je opět p
použití.
řipraven k
Vysávání s příslušenstvím
Příslušenství QuickClick
Použití příslušenství QuickClick
Hubice na polstrování: pro vysávání
polstrovaného nábytku, matrací, záclon
aj.
Štětec na nábytek, otočný: Štětec na
nábytek, otočný: k šetrnému čištění
nábytku a citlivých předmětů,
oprašování knih, větracích otvorů v
autě apod.
Štěrbinová tryska, vytažitelná: pro
hrany, štěrbiny a topná tělesa
Výměna příslušenství ze schránky
QuickClick
Zavěste podlahovou hubici do
parkovacího držáku na zadní straně
přístroje a zatlačte, aby zaklapla (viz.
obrázek 4).
ilustrace
Stiskněte odjišťovací tlačítko na rukojeti
a rukojeť sundejte z teleskopické sací
trubky.
ilustrace
Otevřete kryt schránky na příslušenství.
ilustrace
Držadlo v požadovaném příslušenství
zasuňte až nadoraz. Tím zaklapne.
Poté zasuňte dolů a vytáhněte.
ilustrace
i ukládání zasuňte příslušenství s
Př
rukojetí do schránky a zaklapněte
směrem nahoru. Rukojeť sundejte.
Upozornění: Příslušenství lze
sundávat a nasazovat na rukojeť také
rukou. Příslušenství lze uvolnit
stisknutím uvolňovacího tlačítka na
rukojeti.
Upozornění: Všechny uvedené kroky
lze provádět také s nasazenou
teleskopickou sací trubkou. K tomu
zavěste podlahovou hubici do
- 3
99CS
Page 100

parkovacího držáku na zadní straně
přístroje a zatlačte, aby zaklapla.
Teleskopickou sací trubku vytáhněte
svisle nahoru.
Hubice ComfoGlide
ilustrace
Koberce a celopodlahové koberce:
Nastavte přepínače takto:
ilustrace
Tvrdé podlahy:
Nastavte přepínače takto:
Ukončení provozu
Přístroj vypněte a síťovou zástrčku
vytáhněte ze zásuvky.
ilustrace
Stiskněte tlačítko navíjení kabelu.
Kabel se automaticky zasune do
přístroje.
Zavěste podlahovou hubici do
parkovacího držáku na zadní straně
přístroje a zatlačte, aby zaklapla.
Přeprava, uchovávání
Při přepravě držte přístroj za úchyt a
skladujte jej v suchých místnostech.
Upozornění: Teleskopickou sací trubici
doporučujeme nejprve zcela zasunout.
Ošetřování a údržba
Nebezpečí poranění
Než začnete provádět jakékoli údržbářské
práce na přístroji, vytáhněte zástrčku ze
sítě.
Čištění přístroje
몇 Pozor!
Nepoužívejte abrazivní čisticí prostředky,
čističe na sklo nebo víceúčelové čističe!
Přístroj nikdy nesmíte ponořit do vody.
Přístroj a díly příslušenství z plastu
ošetřujte běžnými čističi na plasty.
Prostor na prach vyčistěte suchou
prachovkou nebo štětcem.
Výměna filtračního sáčku
Objednací č. 6.904-329
Obsah: 5 filtračních sáčků s uzávěrem a 1
ochranný filtr motoru.
Upozornění: Ke zjištění stavu ukazatele
naplnění filtru odpojte teleskopickou sací
trubku od rukojeti.
ilustrace
Pokud je ukazatel naplnění filtru na
krytu úplně červený, vyměňte filtrační
sáček.
Stiskněte páku uzávěru a otevřete kryt.
ilustrace
Uvolněte držák filtračního sáčku a
vyklopte ho ven.
ilustrace
Filtrační sáček uzavřete chlopní,
vyndejte ho a zajistěte jeho likvidaci.
ilustrace
Nový filtrační sáček úplně zasuňte do
držáku. Západku nejdříve stiskněte,
potom zasuňte úchytku do krytu a
zaklapněte na krytu přístroje.
몇 Pozor!
Kryt lze zavřít jen s nasazeným filtračním
sáčkem. Po vysávání prachových částic
(např. sádry a cementu) vyčistěte, resp.
vyměňte ochranný filtr motoru.
100 CS
- 4
 Loading...