

Page 1
JV-DTV23 / JV-DTV27 / JV-DTV30
Please read this manual carefully before operating your set. Retain it
for future reference.
See the label attached on the back cover and quote this information to
your dealer when you require service.
JV -DTV 23 / 2 7 / 30 V 10 M 1 0 / E N / F R / GE/ I T / S P 05 11 2 0 05
Page 2

Installation 3
Remote control handset 4-5
Controls 4
Battery installation 5
Controls of
Front panel 6
Connections of
Back panel 7
Connection to
External equipment 8-11
Basic operation
On and Off 12
Programme selection 12
Volume adjustment 12
On screen language selection (option) 12
On screen menus
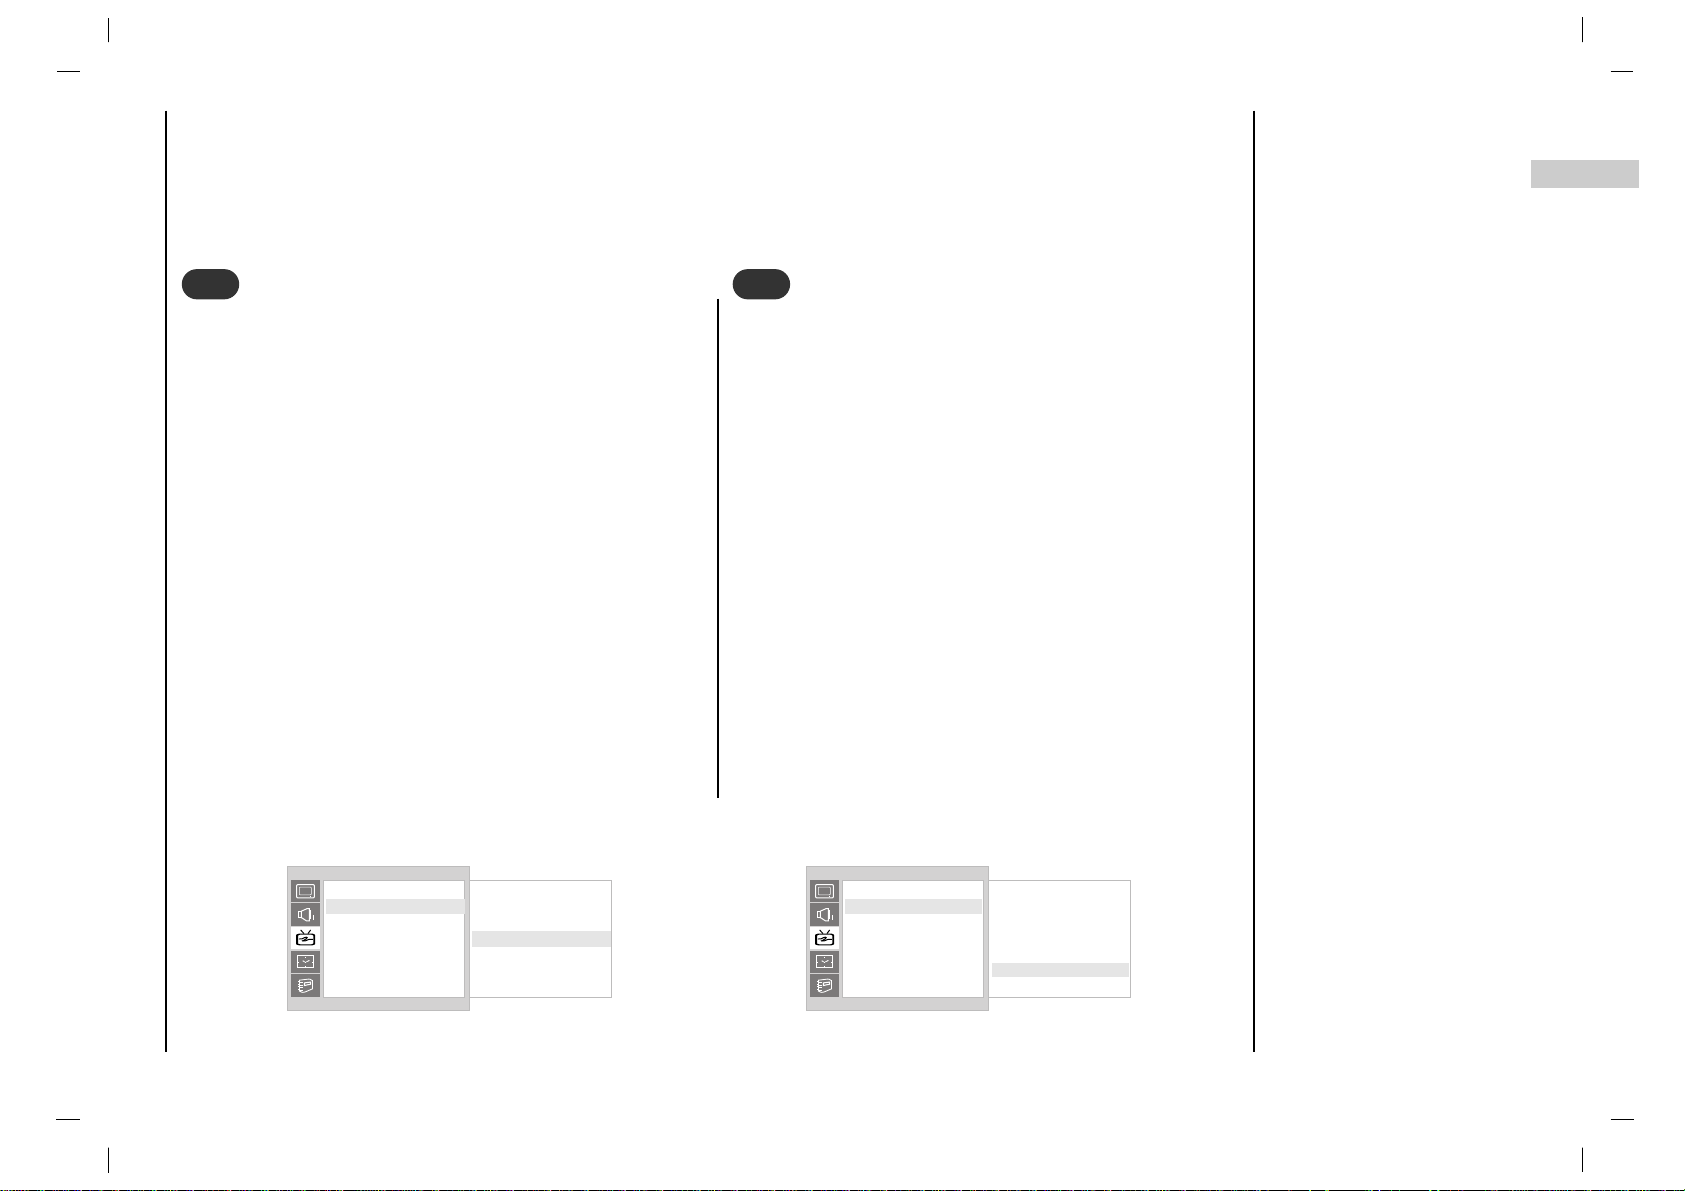
Menu selection 13
Picture adjustment 14-15
PSM (Picture Status Memory) 14
Manual Picture Control 14
Picture Format 15
Sound adjustment 16-18
SSM (Sound Status Memory) 16
Balance 17
AVL (Auto Volume Leveler) 17
Stereo/Dual/NICAM reception 18
Setting up TV stations 19-24
Auto programme tuning 19
Manual programme tuning 20-21
Programme edit 22-23
Calling the programme table 24
Time Menu / Other functions 25-26
Clock 25
On/Off Time 25
Auto sleep / Sleep timer 26
CSM (Colour Status Memory) 26
Connection of PC
PC Setup 27
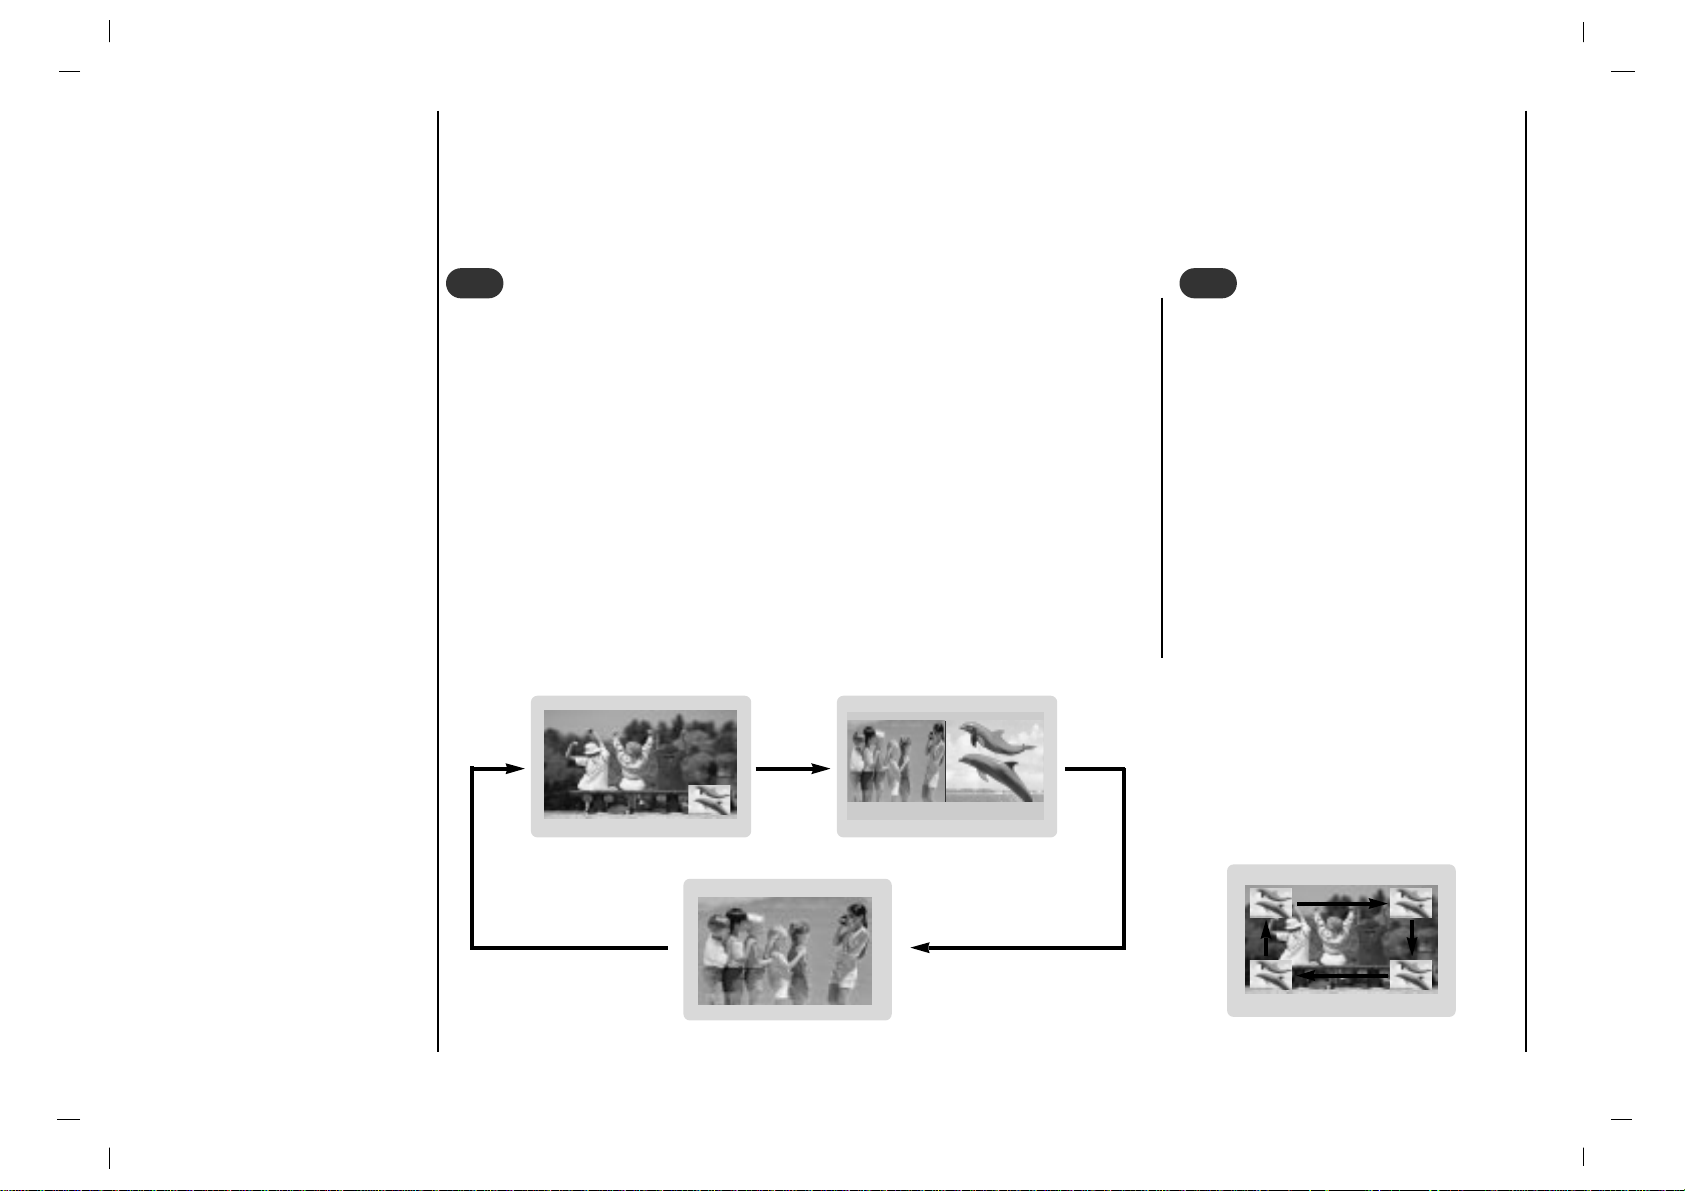
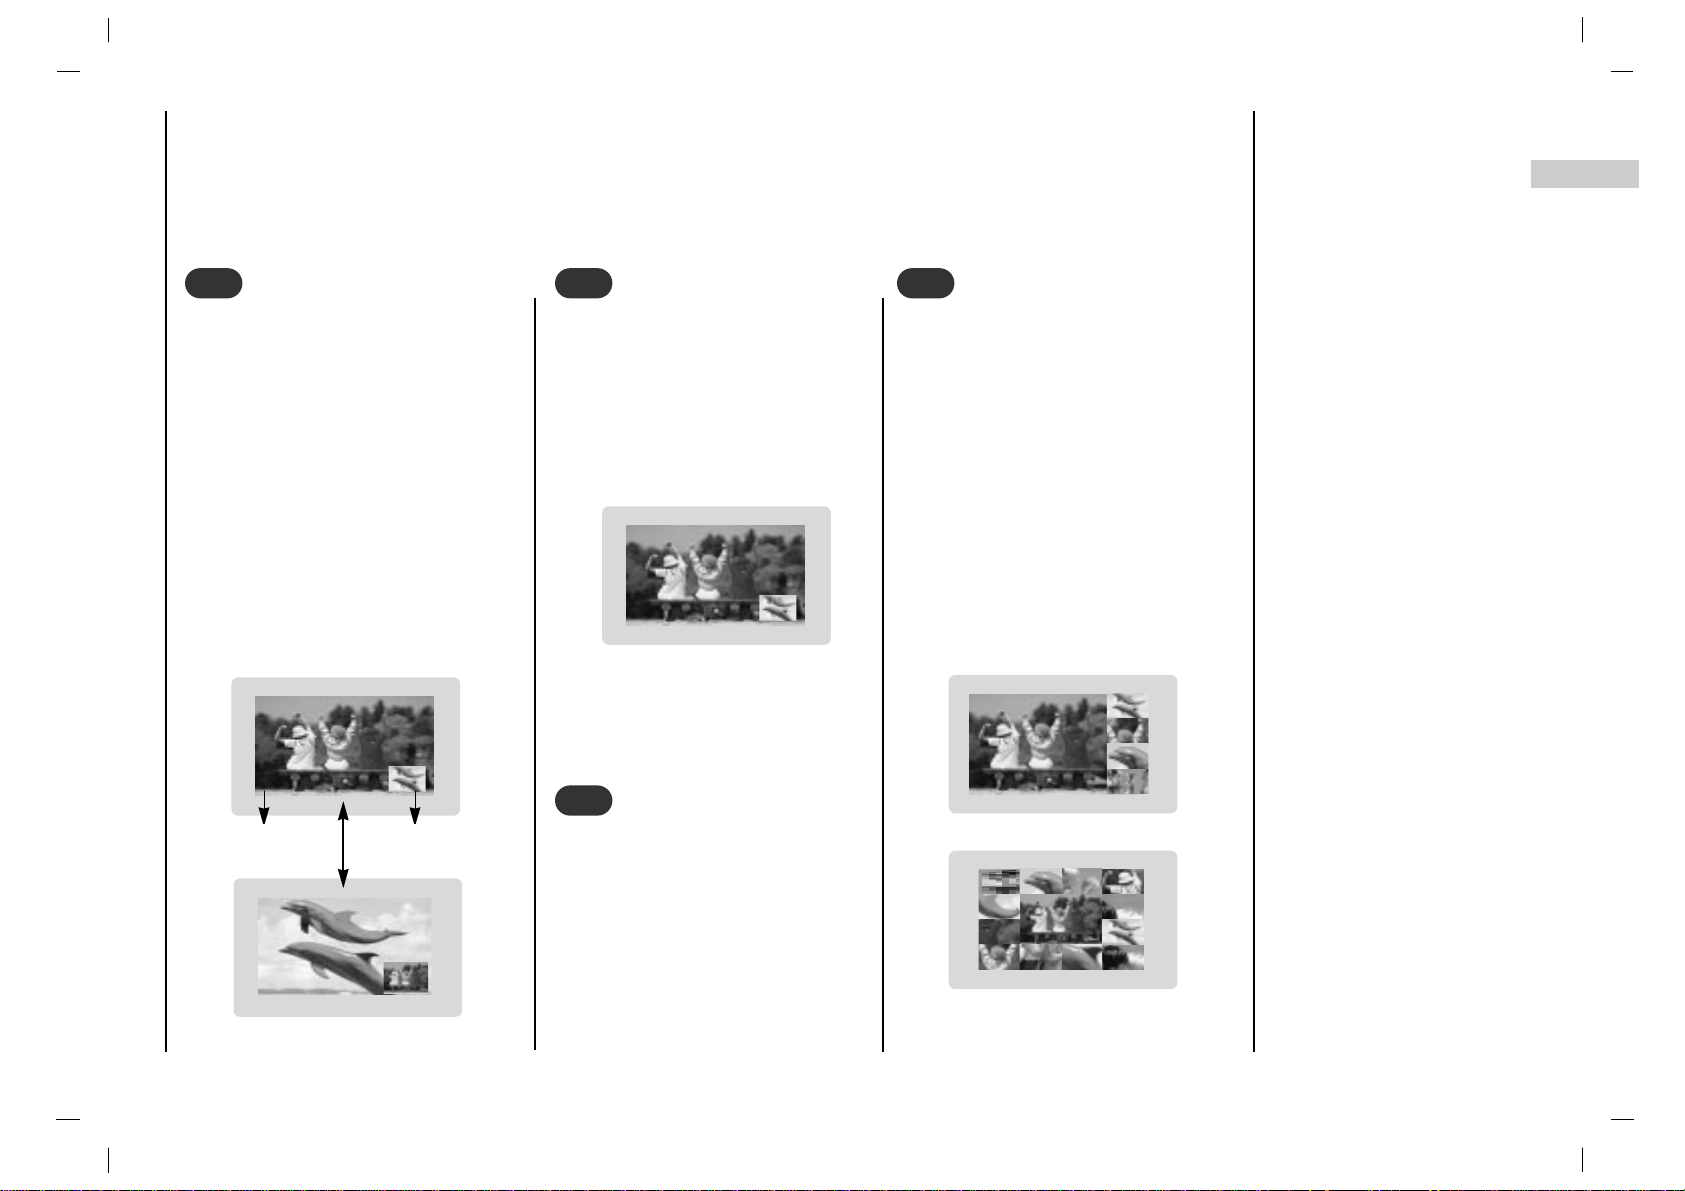
PIP (Picture-In-Picture) Feature 28-29
Watching PIP 28
Moving the PIP 28
Swapping the PIP 29
Selecting a Input Signal Source for the PIP 29
Programme selection for sub picture 29
Programme scan 29
Teletext (option) 30-31
External Control Device Setup 32-39
Displayable Monitor Specification 40
Troubleshooting
Check list 43
Contents
2
Page 3

Power
This set operates on an AC mains supply, the voltage is as
indicated on the label on the back cover. Never apply DC
power to the set. In the event of thunderstorms or powercuts, please pull out the aerial and mains plugs.
Warning
To prevent fire or shock hazard, do not expose the set to
rain or moisture. Do not rub or strike the Active Matrix LCD
with anything hard as this may scratch, mar, or damage the
Active Matrix LCD permanently.
Service
Never remove the back cover of the set as this can expose
you to very high voltage and other hazards. If the set does
not operate properly, unplug it and call your dealer.
Aerial
Connect the aerial cable to the socket marked +75 Ω on
the back cover. For the best reception an outdoor aerial
should be used.
Location
Position your set so that no bright light or sunlight falls
directly onto the screen. Care should be taken not to
expose the set to any unnecessary vibration, moisture,
dust or heat. Also ensure that the set is placed in a position to allow a free flow of air. Do not cover the ventilation
openings on the back cover.
Cleaning
Unplug the set before cleaning the face of the LCD Screen.
Dust the set by wiping the screen and the cabinet with a
soft, clean cloth. If the screen requires additional cleaning,
use a clean, damp cloth. Do not use liquid cleaners or
aerosol cleaners.
Installation
3
EN
Page 4
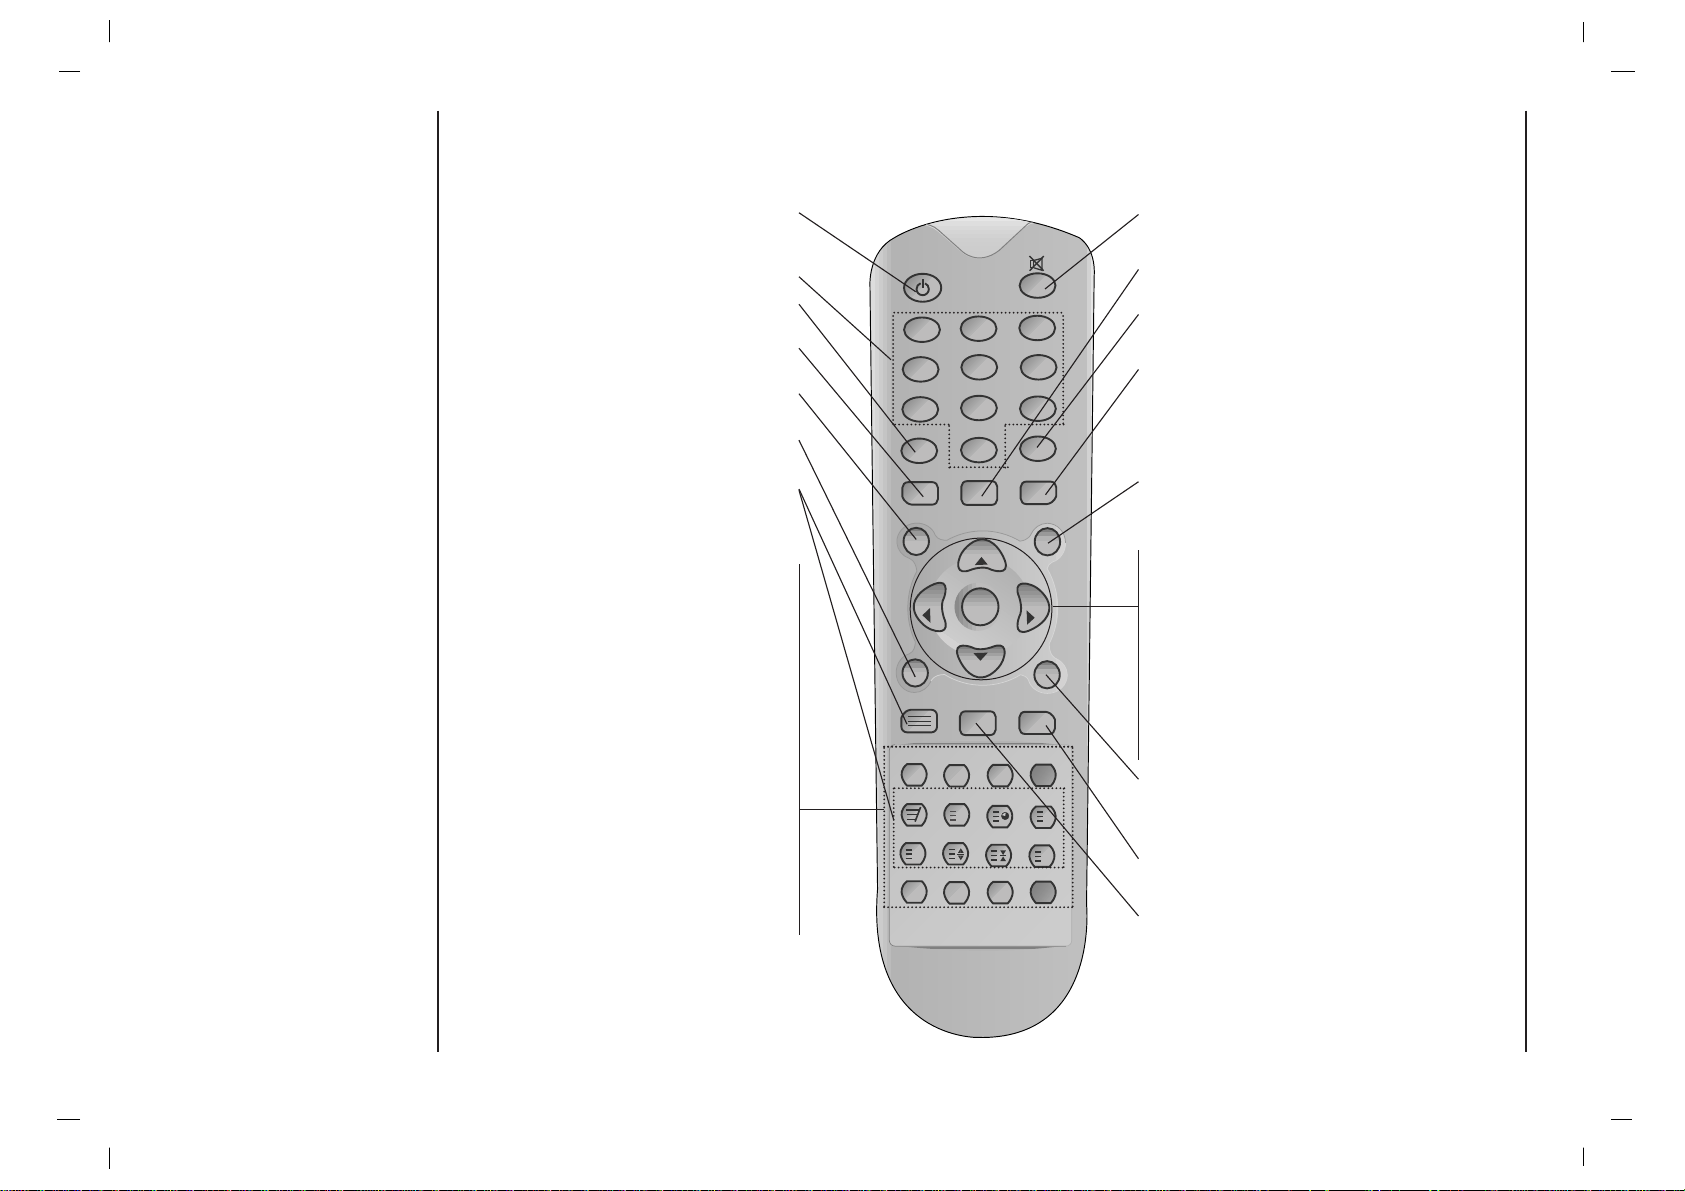
- All the functions can be controlled with the remote control handset.
- Some functions can also be adjusted with the buttons on the front panel of the set.
POWER
switches the set on from standby or off to
standby.
NUMBER BUTTONS
PSM (Picture Status Memory)
recalls your preferred picture setting.
LIST
displays the programme table.
MENU
selects a menu.
EXIT
exits from each mode.
TELETEXT BUTTONS (option)
These buttons are used for teletext.
For further details, see the ‘Teletext’ sec-
tion.
PIP
Switches the sub picture on or off.
PIP PR +/-
Selects a program for the sub picture.
SWAP
Alternates between main and sub picture.
PIP INPUT
Selects the input mode for the sub pic-
ture.
PIP POSITION
relocates the sub picture in clockwise
direction.
STILL
freezes motion of the sub picture.
SCAN
switches on the programme scan mode
through 4/12 sub pictures.
MUTE
switches the sound on or off.
ARC
select your desired picture format.
SSM (Sound Status Memory)
recalls your preferred sound setting.
I/II
selects the language during dual language
broadcast.
selects the sound output (option).
INPUT SELECT
Select TV, AV1, AV2, SAV, COMPONENT,
RGB-DTV, RGB-PC, RGB-DVI mode.
DD/ EE
(Programme Up/Down)
selects a programme or a menu item.
switches the set on from standby.
FF / GG (Volume Up/Down)
adjusts the volume.
adjusts menu settings.
OK
accepts your selection or displays the
current mode.
PC/DVI
selects COMPONENT, RGB-DTV, RGB-PC,
RGB-DVI mode.
SLEEP
sets the sleep timer.
Q.VIEW
returns to the previously viewed programme.
- COLOURED BUTTONS
These buttons are used for teletext (only
TELETEXT models) or programme edit.
Remote control handset
Controls
Before you use the remote
control handset, please
install the batteries.
4
i
?
REVEAL
MIX
INDEX
TIME
PIP PR+ PIP PR- SWAP
PIP INPUT
PIP
PIP POSITION
STILL
SCAN
UPDATE
MODE
SIZE
HOLD
MENU
INPUT SELECT
SLEEP
VOL
VOL
PR
OK
1
3
4 6
7 9
2
5
8
0
I / II
ARC
LIST
EXIT
PR
TEXT
PC/DVI
Q.VIEW
X
M
PSM
POWER
SSM
Page 5
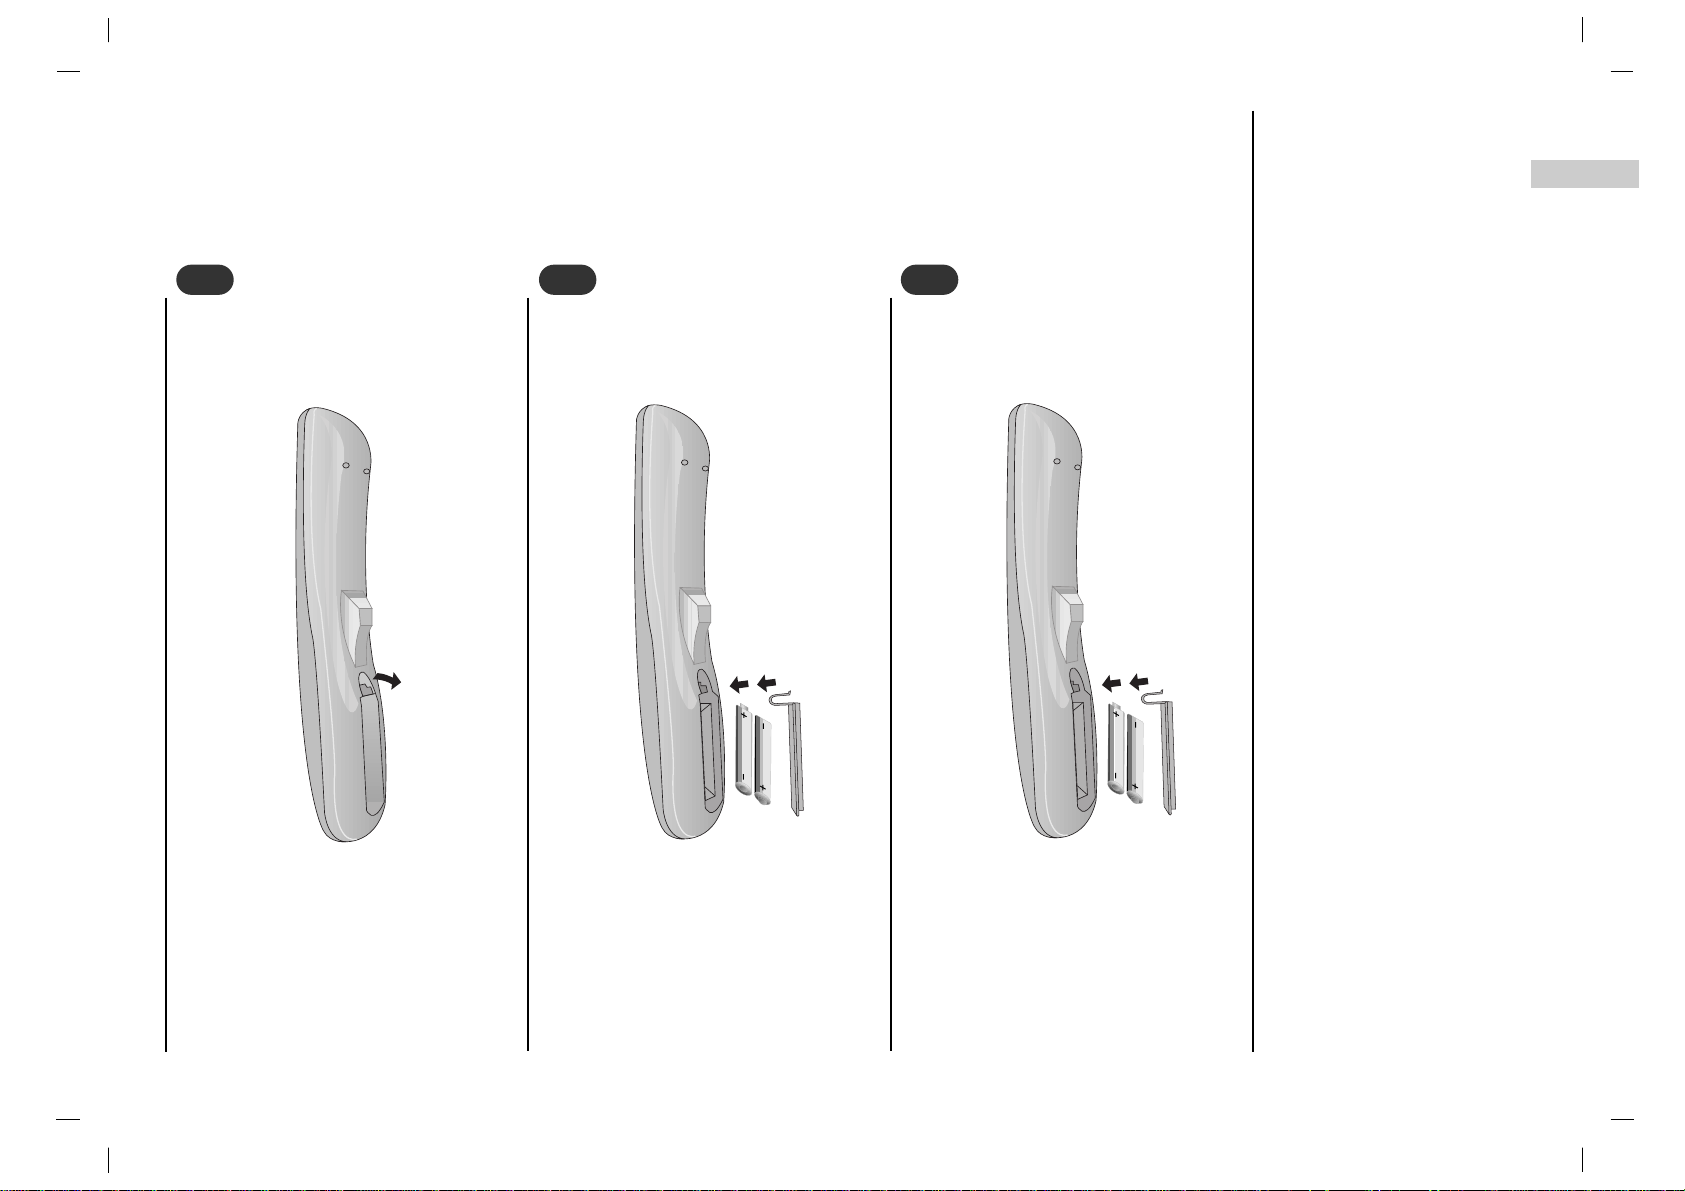
EN
- Your remote control handset is powered by two AAAtype batteries.
To insert batteries, turn the remote
control handset over and remove the
battery cover.
Remote control handset
Battery installation
5
1
1
Put the two batteries into the compartment observing battery polarity.
2
2
Replace the cover.
To avoid damage from possible battery leakage, remove the batteries if
you do not plan to use the remote control handset for an extended period
time. Do not use batteries of differing
age or type. Always discard of batteries safely.
3
3
Page 6
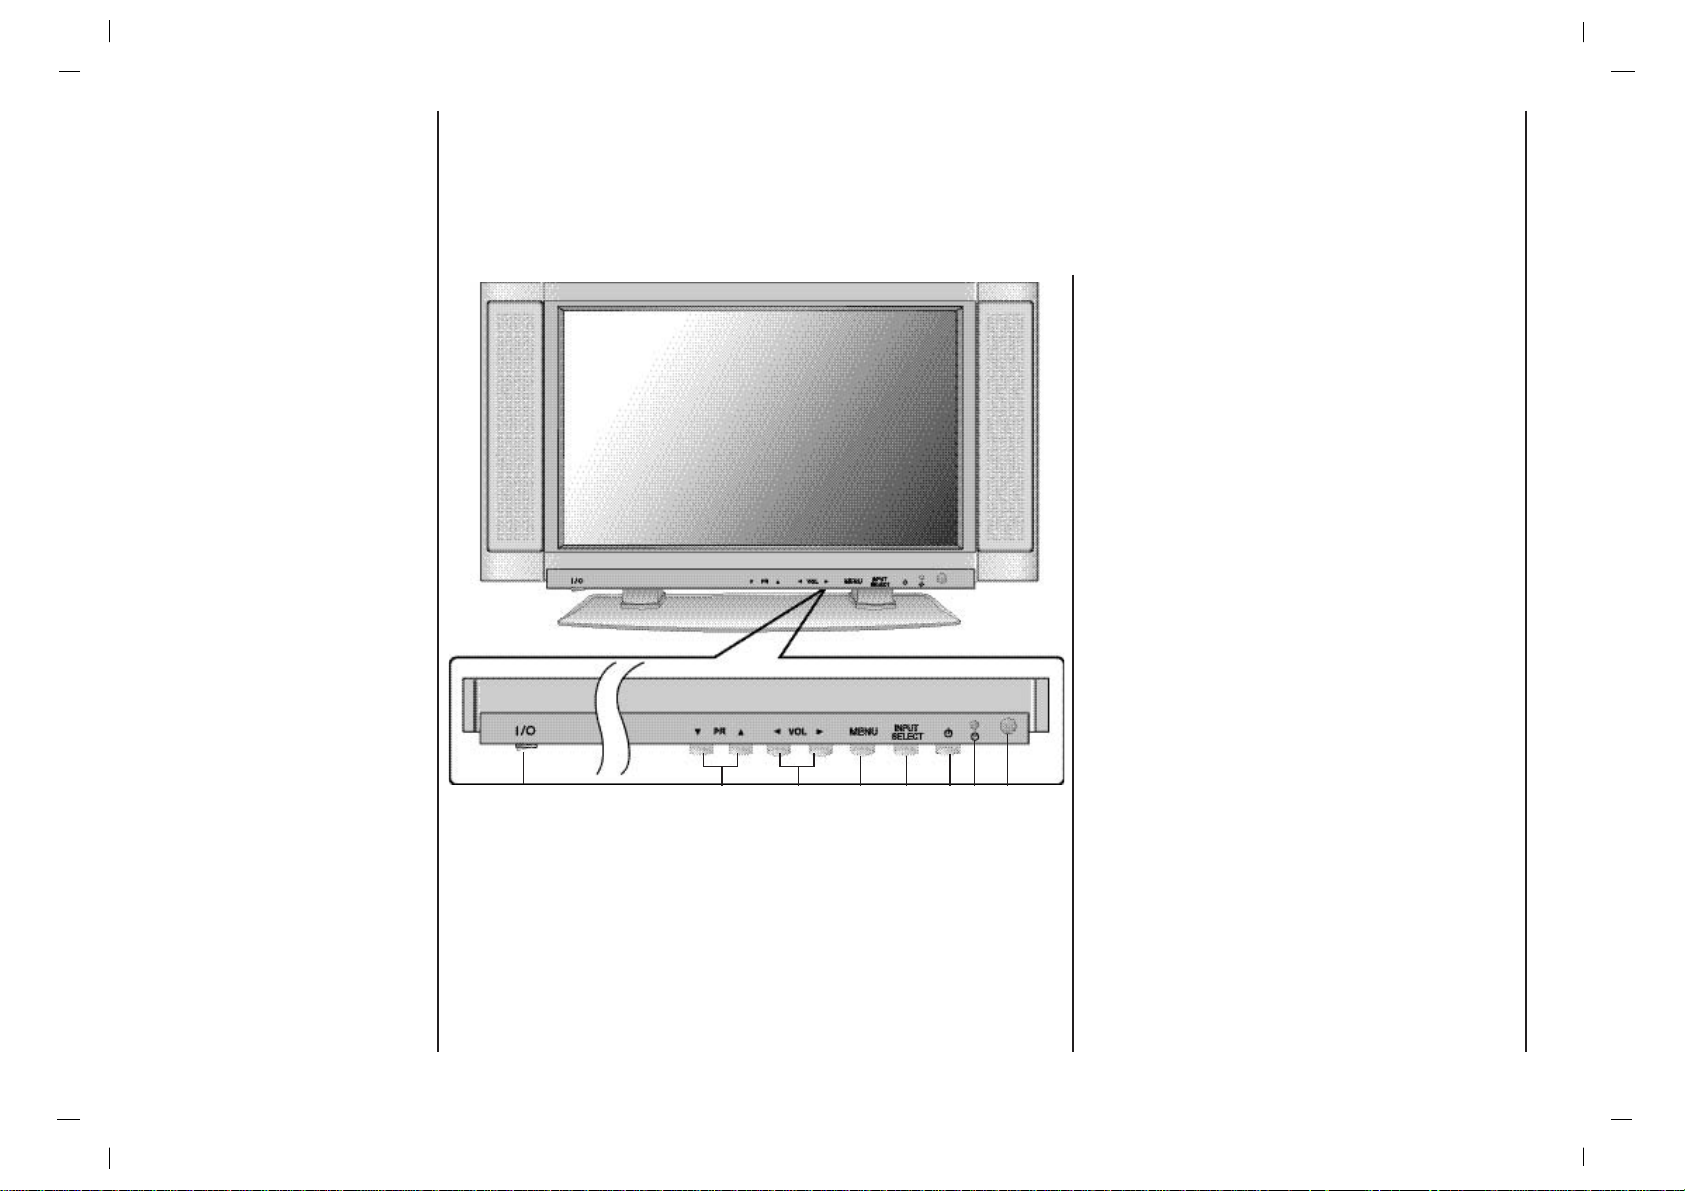
1. MAIN POWER
switches the set on or off.
2.
DD / EE
(Programme Up/Down)
selects a programme or a menu item.
switches the set on from standby.
3.
FF / GG (Volume Down/Up)
adjusts the volume.
adjusts menu settings.
4. MENU
selects a menu.
5. INPUT SELECT
selects
TV, AV1, AV2, S-Video, Component,
RGB-DTV, RGB-PC, RGB-DVI mode.
switches the set on from standby.
6. POWER (I /
rr )
switches the set on from standby or off to
standby.
7. POWER/STANDBY INDICATOR (rr)
illuminates red in standby mode.
illuminates green when the set is switched on.
8. REMOTE CONTROL SENSOR
(Front panel)
Controls of
Front panel
6
1
4 5 6 7 82 3
Page 7
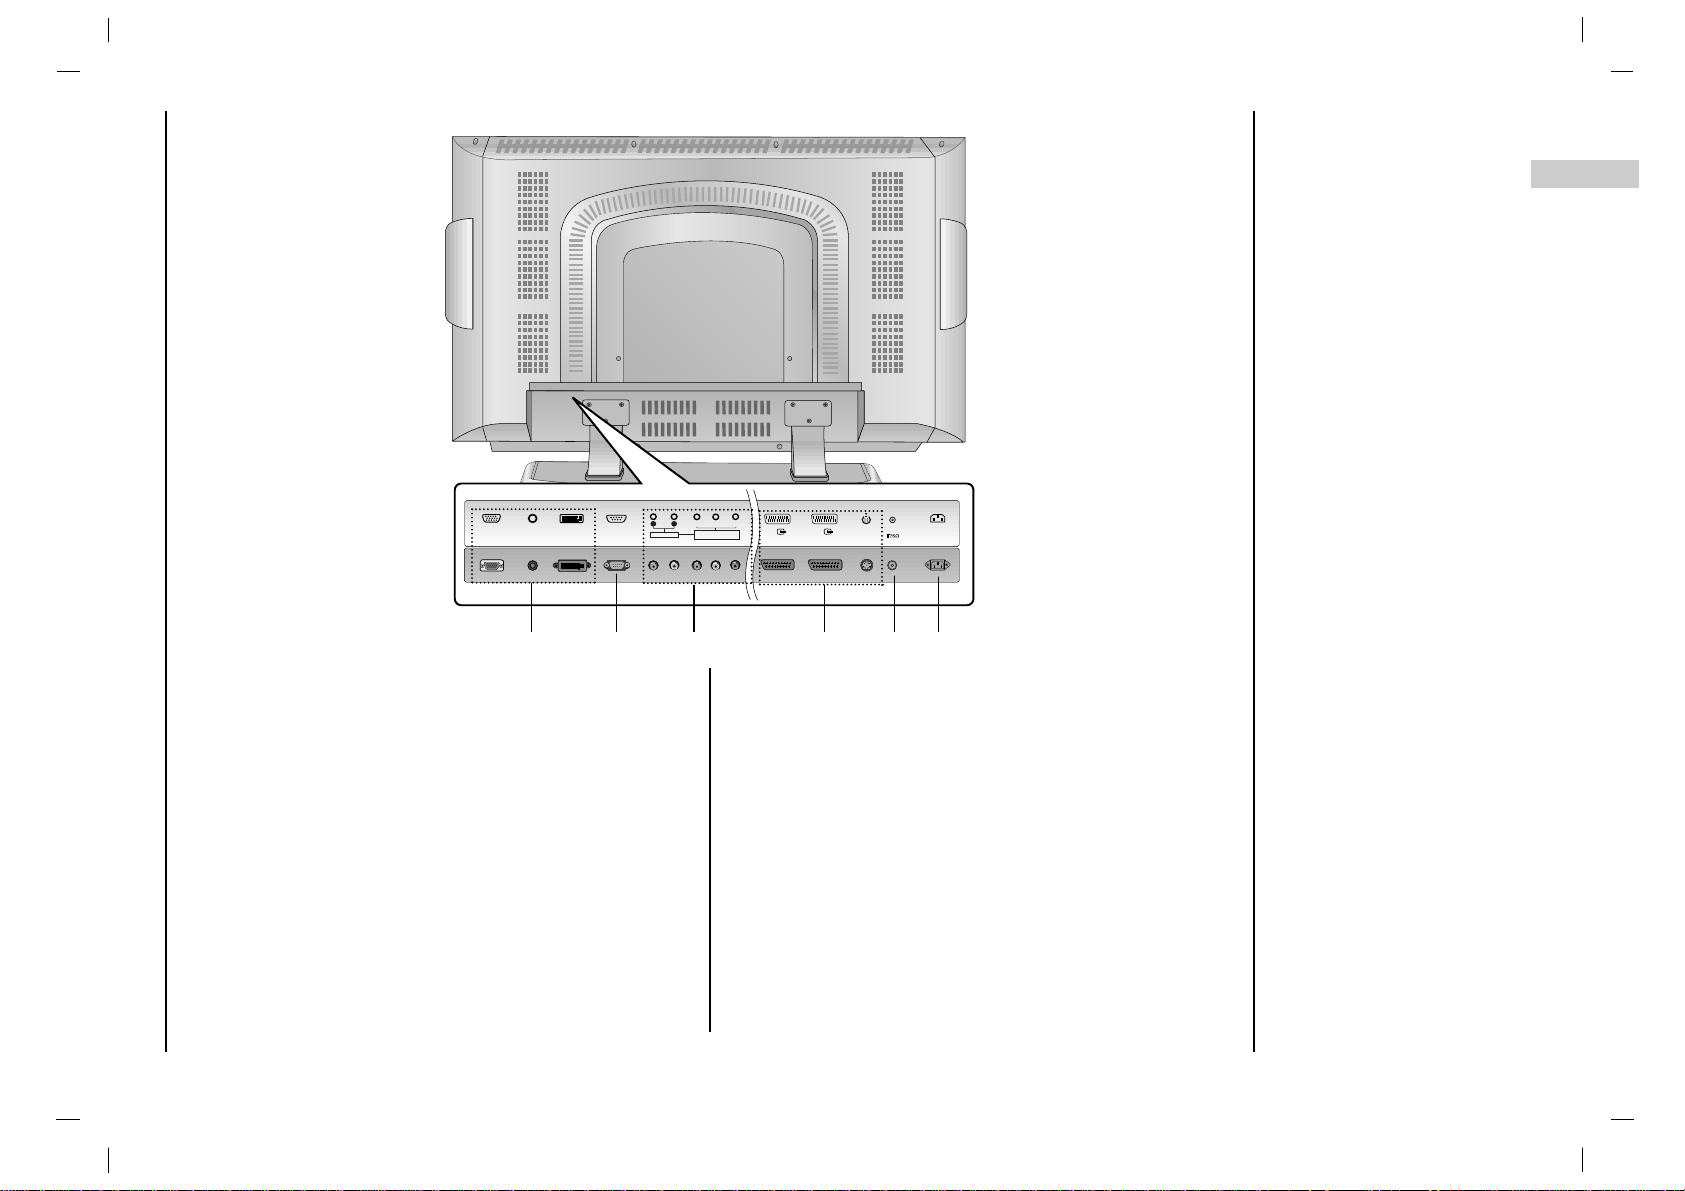
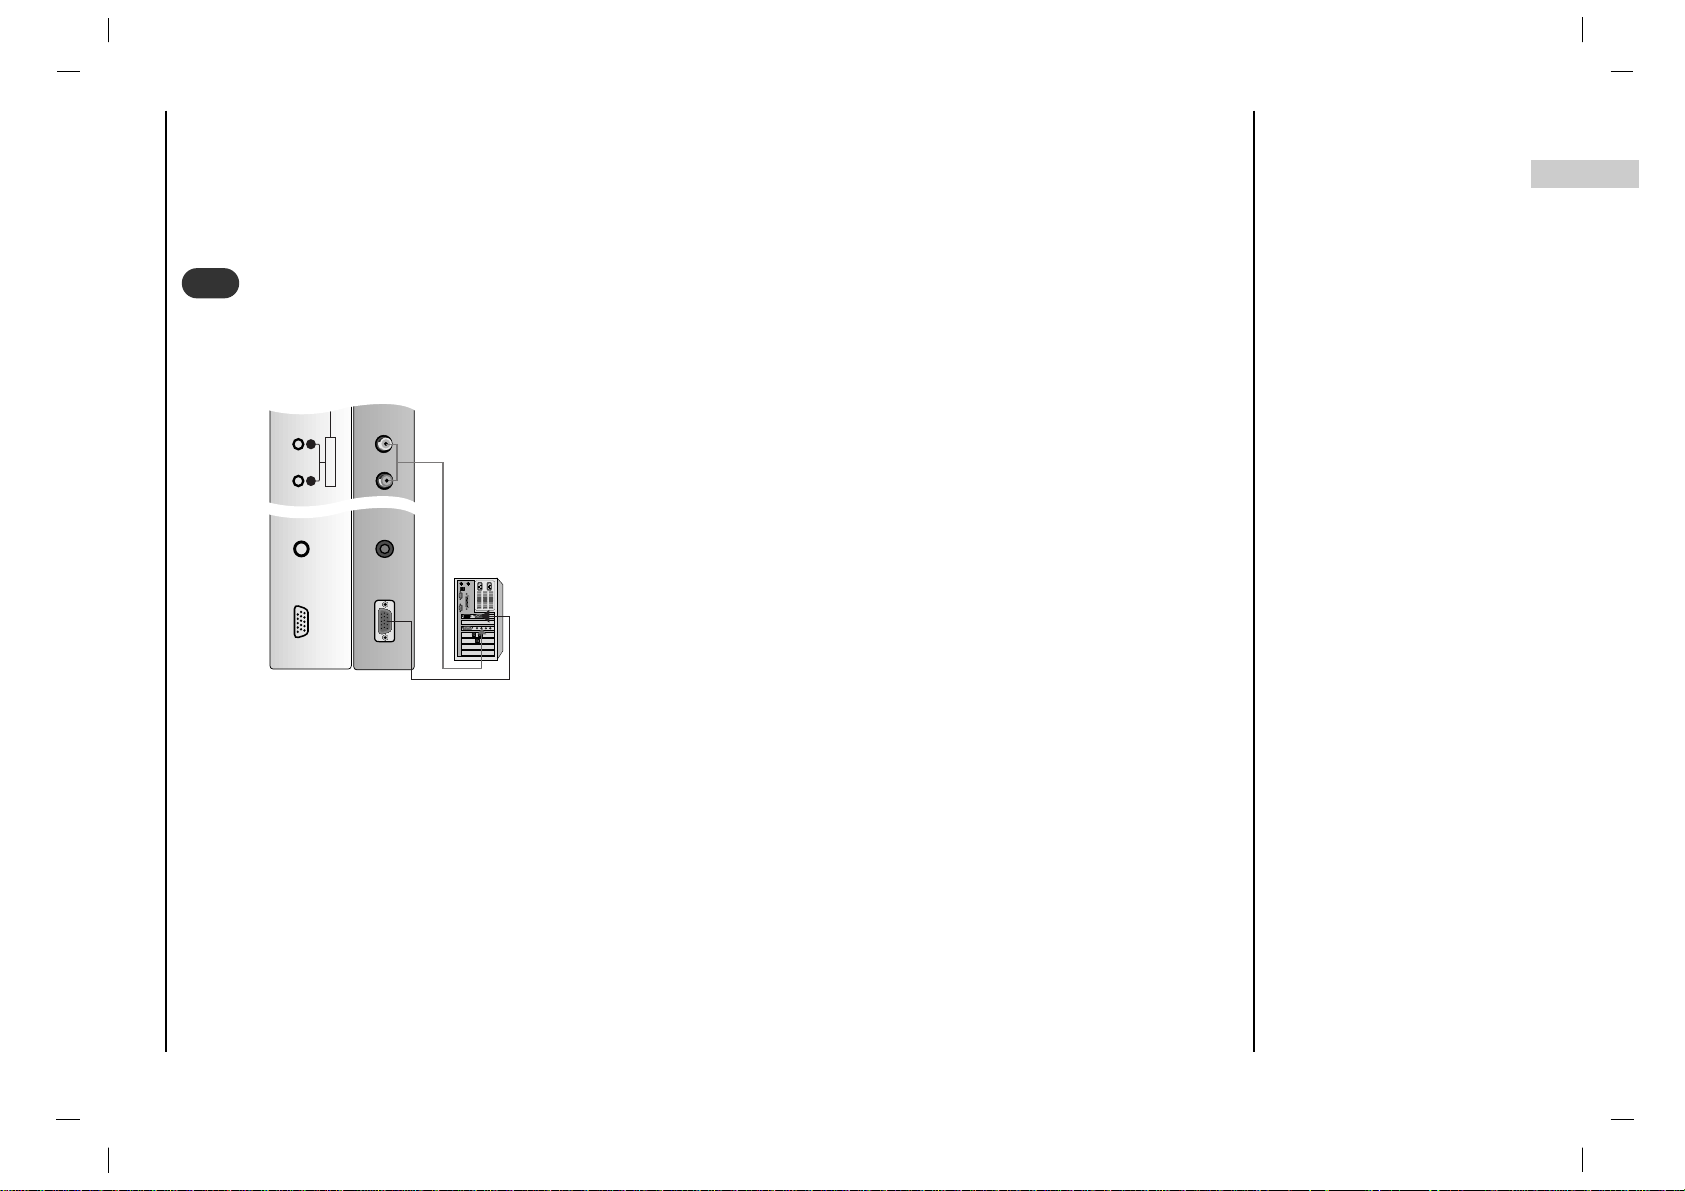
1. RGB INPUT / AUDIO INPUT / DVI INPUT SOCKETS
Connect the set output socket of the PERSONAL COM-
PUTER to this socket.
2. RS-232C INPUT(CONTROL/SERVICE) PORT
Connect to the RS-232C port on a PC.
3. AUDIO INPUT / COMPONENT INPUT (480i/480p/720p/
1080i) SOCKETS
4. S-VIDEO INPUT
connect video out from an S-VIDEO VCR to the SVIDEO input.
EURO SCART SOCKET
connect the euro scart socket of the VCR to these sockets.
5. AERIAL SOCKET
6. POWER CORD SOCKET
This set operates on an AC power. The voltage is indicated on the Specifications page. Never attempt to operate the set on DC power.
Connections of
Back panel
7
EN
RGB INP UTRGB INP UT
AUDI O I NPU TAUDI O I NPU T
DVI INP UTDVI INP UT
RS-2 32C IN PUTRS-2 32C IN PUT
(CON TRO L/S ER(CONTR OL/ SERV ICE )VICE)
S-VI DEOS-VI DEO
AAV1V1
AAV2V2
AUDIO INPUTAUDI O INPU T
AUDIOAUD IO
RR TT
COMPON ENT COMPON ENT INPU T INPU T
(480i/4 80p/720 p/1080i )( 480i/48 0p/720p /1080i)
YY PPbbPP
rr
ANTANT. IN. IN
AC I NPU TAC INP UT
1 2 3 4 5 6
Page 8
- You can connect additional equipment, such as VCRs, camcorders etc. to your set. However please check with your
manufacturers instruction books for specific information. Make sure all connections are made with both your set and
additional appliance unplugged from the mains to avoid damaging your equipment. Here shown may be somewhat different from your set.
Connect the RF out socket of the VCR to
the aerial socket on the back of the set.
Connect the aerial cable to the RF aerial
in socket of the VCR.
Store the VCR channel on a desired programme number using the ‘Manual programme tuning’ section.
Select the programme number where
the VCR channel is stored.
Press the PLAY button on the VCR.
Connect to Aerial socket
- If you connect an S-VIDEO VCR to
the S-VIDEO input, the picture
quality is improved; compared to
connecting a regular VCR to the
Video input.
- To avoid picture noise (interfer-
ence), leave an adequate distance
between the VCR and set.
Use the INPUT SELECT button on the remote control to select
AV1 or AV2.
(If connected to S-VIDEO, select the
S-Video external input source.)
Insert a video tape into the VCR and press the PLAY button on the VCR. (See
VCR owner’s manual)
Watching VCR
Connection to
External equipment
8
S-VIDEOS-VIDEO
AAV2V2
ANTANT. IN. IN
AC INPUTAC INPUT
VCR
S-VIDEO
OUT
IN
(R) AUDIO (L ) VID EO
S-V ID EOS-V ID EO
AAV1V1
AAV2V2
ANTANT. IN. I N
AC IN PUTAC IN PUT
1
1
2
2
< Back panel of the set >
< Back panel of VCR >
Page 9
EN
Connection to
External equipment
9
- After subscribing for a local cable TV station and installing a converter you can watch cable TV.
- For further information of cable TV, contact the local cable TV
station.
In using connection 1
Select programme number in programme switch of cable box.
Match the set programme with selected programme of cable box.
Select your desired programme with the remote control for cable
box.
In using connection 2
Use the INPUT SELECT button on the remote control and select
AV1 or AV2.
Tune to cable service provided channels using the cable box.
Cable
TV
(R) AUDIO (L) VIDEO
VCR
RF
DVI INPU TDVI INPU T
RS- 232C INPUTRS- 232C INPUT
(CO NTROL /SER(CO NTROL/S ERVIC E)VIC E)
S-V IDEOS-VID EO
AAV1V1
AAV2V2
AUDIO INP UTAUDIO INP UT
AUDIOAUDIO
RR TT
COMPO NENT COMP ONENT INPUT INPUT
(480i/ 480p/ 720p/ 1080i )(480i/ 480p/ 720p/ 1080i )
YY PPbbPP
rr
ANTA NT. IN. IN
AC INPUTAC INPU T
S-V IDEOS-VID EO
AAV1V1
AAV2V2
ANTA NT. IN. IN
AC INPUTAC INPU T
Cable
TV
(R) AUDIO (L) VIDEO
VCR
RF
Watching Cable TV
3
3
When connecting the set to an external source,
match the colours of AUDIO/VIDEO input jacks on
the set with the output jacks on the audio/video
equipment: Video = yellow, Audio (Left) = white,
Audio (Right) = red.
Use the INPUT SELECT button on the remote control to select
AV1 or AV2.
Operate the corresponding external equipment.
See external equipment operating guide.
R L
AUDIO VIDE O
S-VIDEOS-VIDEO
AAV1V1
AAV2V2
ANTAN T. IN. IN
AC INPUTAC INPUT
Watching external AV source
4
4
For cable TV
< Cable Box >
< Back panel of the set >
< Back panel of the set >
Camcorder
Video game set
< Back panel of the external
equipment >
2
1
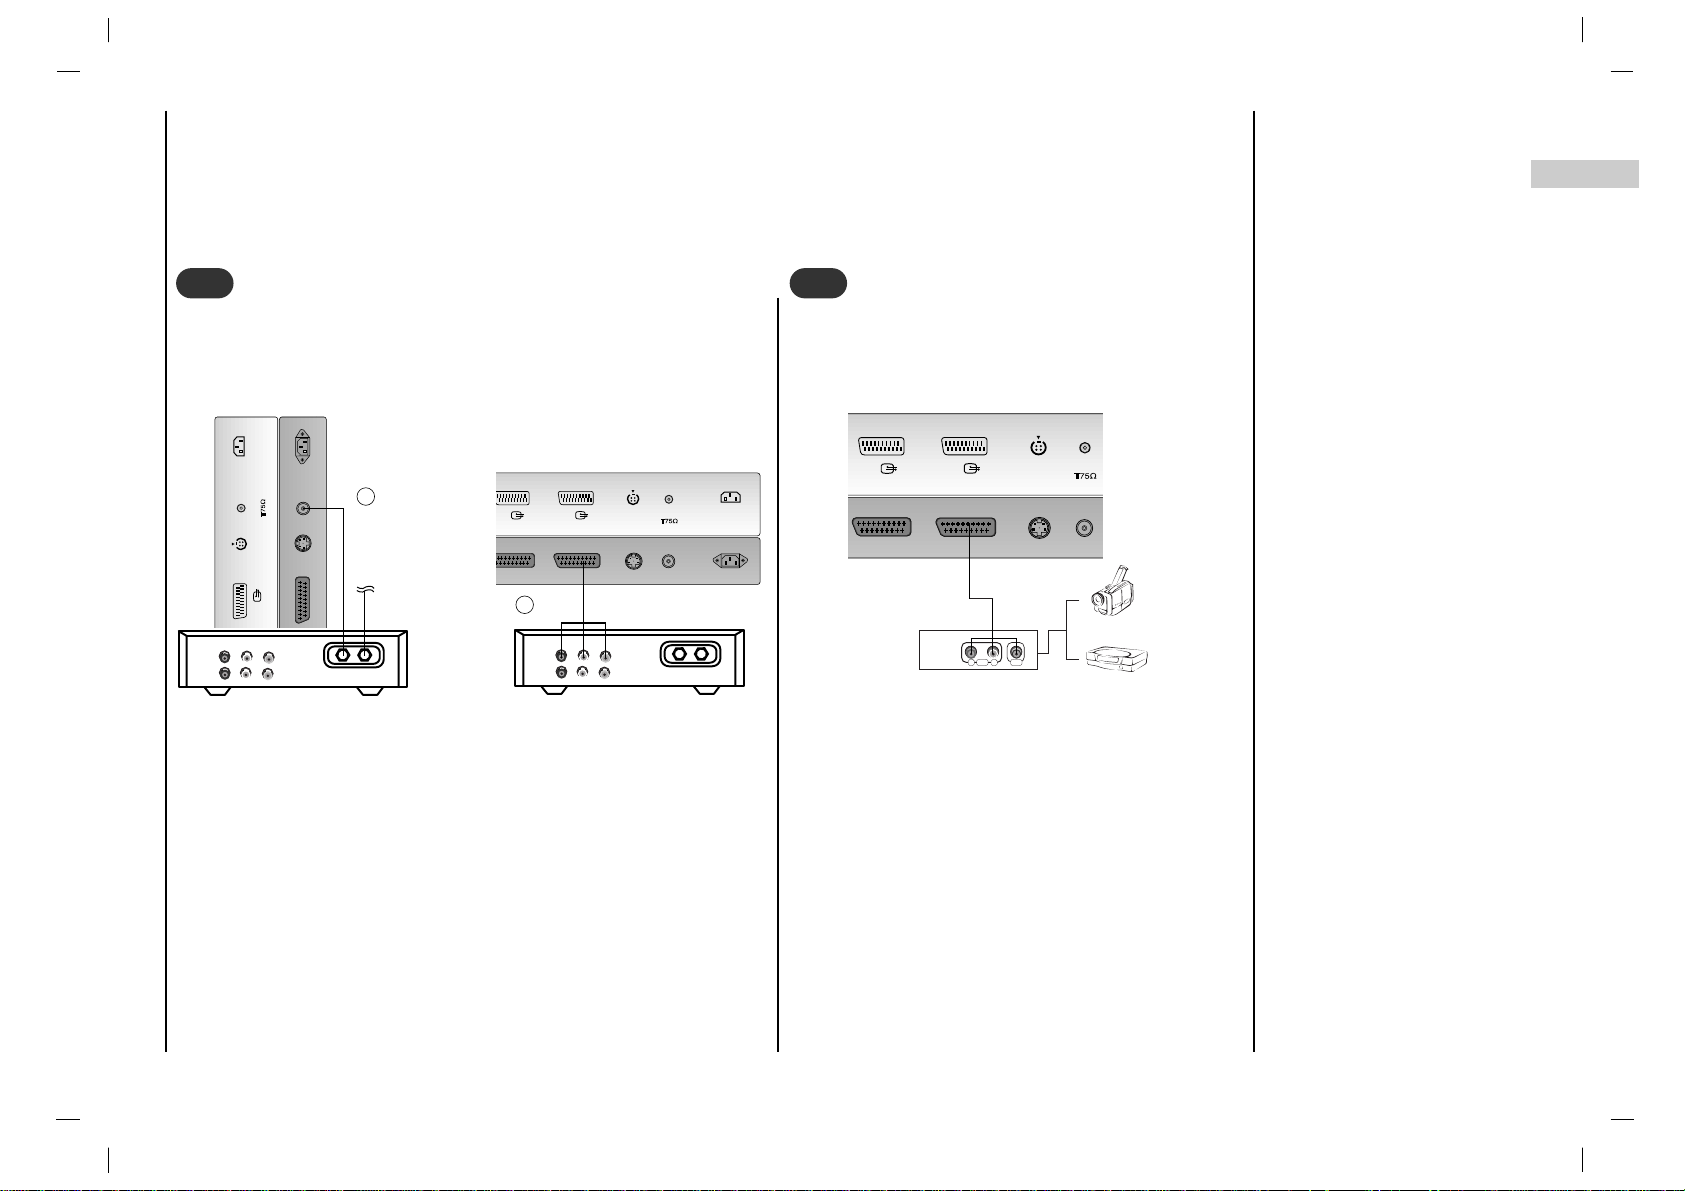
Page 10
• Component Input ports
You can get better picture quality if you connect DVD player with component input ports
as below.
Connection to
External equipment
10
How to connect
Connect DVD video inputs to Y, PB, PR of COMPONENT (DVD INPUT) and audio inputs to Audio sockets of AUDIO
INPUT.
How to use
Turn on the DVD player, and insert a DVD.
Use INPUT SELECT or PC/DVI button on the remote control to select
Component. Refer to the DVD player's man-
ual for operating instructions.
Watching DVD
DVI INPUT
RS-232C INPUT
(CONTROL/SERVICE)
S-VIDEO
AV1
AV2
AUDIO INPUT
AUDIO
R T
COMPONENT INPUT
(480i/480p/720p/1080i)
Y PbP
r
ANT. IN
AC INPUT
RS-232C INPUT
(CONTROL/SERVICE)
AV1
AV2
AUDIO INPUT
AUDIO
R T
COMPONENT INPUT
(480i/480p/720p/1080i)
Y P
b
P
r
B
R
(R) AUDIO (L)
RS-232C INPUT
(CONTROL/SERVICE)
AV1
AV2
AUDIO INPUT
AUDIO
R T
COMPONENT INPUT
(480i/480p/720p/1080i)
Y P
b
P
r
(R) AUDIO (L)
S-VIDEO
5
5
< Back panel of the set >
< Back panel of a DVD player >
or
Component ports of the
set
Y PB
PR
Video output ports
of DVD player
Y
Y
Y
Y
Pb
B-Y
Cb
P
B
Pr
R-Y
Cr
P
R
Page 11
EN
Connection to
External equipment
11
Connect the signal cable from the monitor output socket of the PERSONAL COMPUTER to the RGB INPUT socket of
the set.
Connect the audio cable from the PC to the AUDIO INPUT sockets of the set.
Press the INPUT SELECT or PC/DVI button to select
RGB.
Switch on the PC, and the PC screen appears on the set.
The set can be operated as the PC monitor.
Connecting PC
RGB INPUTRGB INPUT
AUDIO INPUTAUDIO INPUT
AUDIO INPUTAUDIO INPUT
AUDIOAUDIO
RR TT
6
6
Page 12

Press the FF / GG button to
adjust the volume.
If you want to switch the
sound off, press the MUTE
button.
You can cancel it by pressing the MUTE,
FF / GG, SSM
or I/II button.
You can select a programme
number with the
DD / EE
or
NUMBER buttons.
Press the main power button to switch the set on.
If the set is in standby mode,
press the POWER,
DD / EE
,
INPUT SELECT, PC/DVI or
NUMBER buttons on the
remote control handset to
switch it on fully.
Press the POWER button
on the remote control handset.
The set reverts to standby
mode.
Press the main power button again to switch the set
off.
Basic operation
12
1
1
On and Off
2
2
Programme selection
3
3
Volume adjustment
Press the MENU button and
then use
DD / EE
button to
select the SPECIAL menu.
Press the
GG button and then
use
DD / EE
button to select
Language.
Press the
GG button and then
use
DD / EE
button to select
your desired language.
All the on screen displays
will appear in the selected
language.
Repeatedly press the MENU
button to return to normal TV
viewing.
4
4
On screen language
selection (option)
Page 13
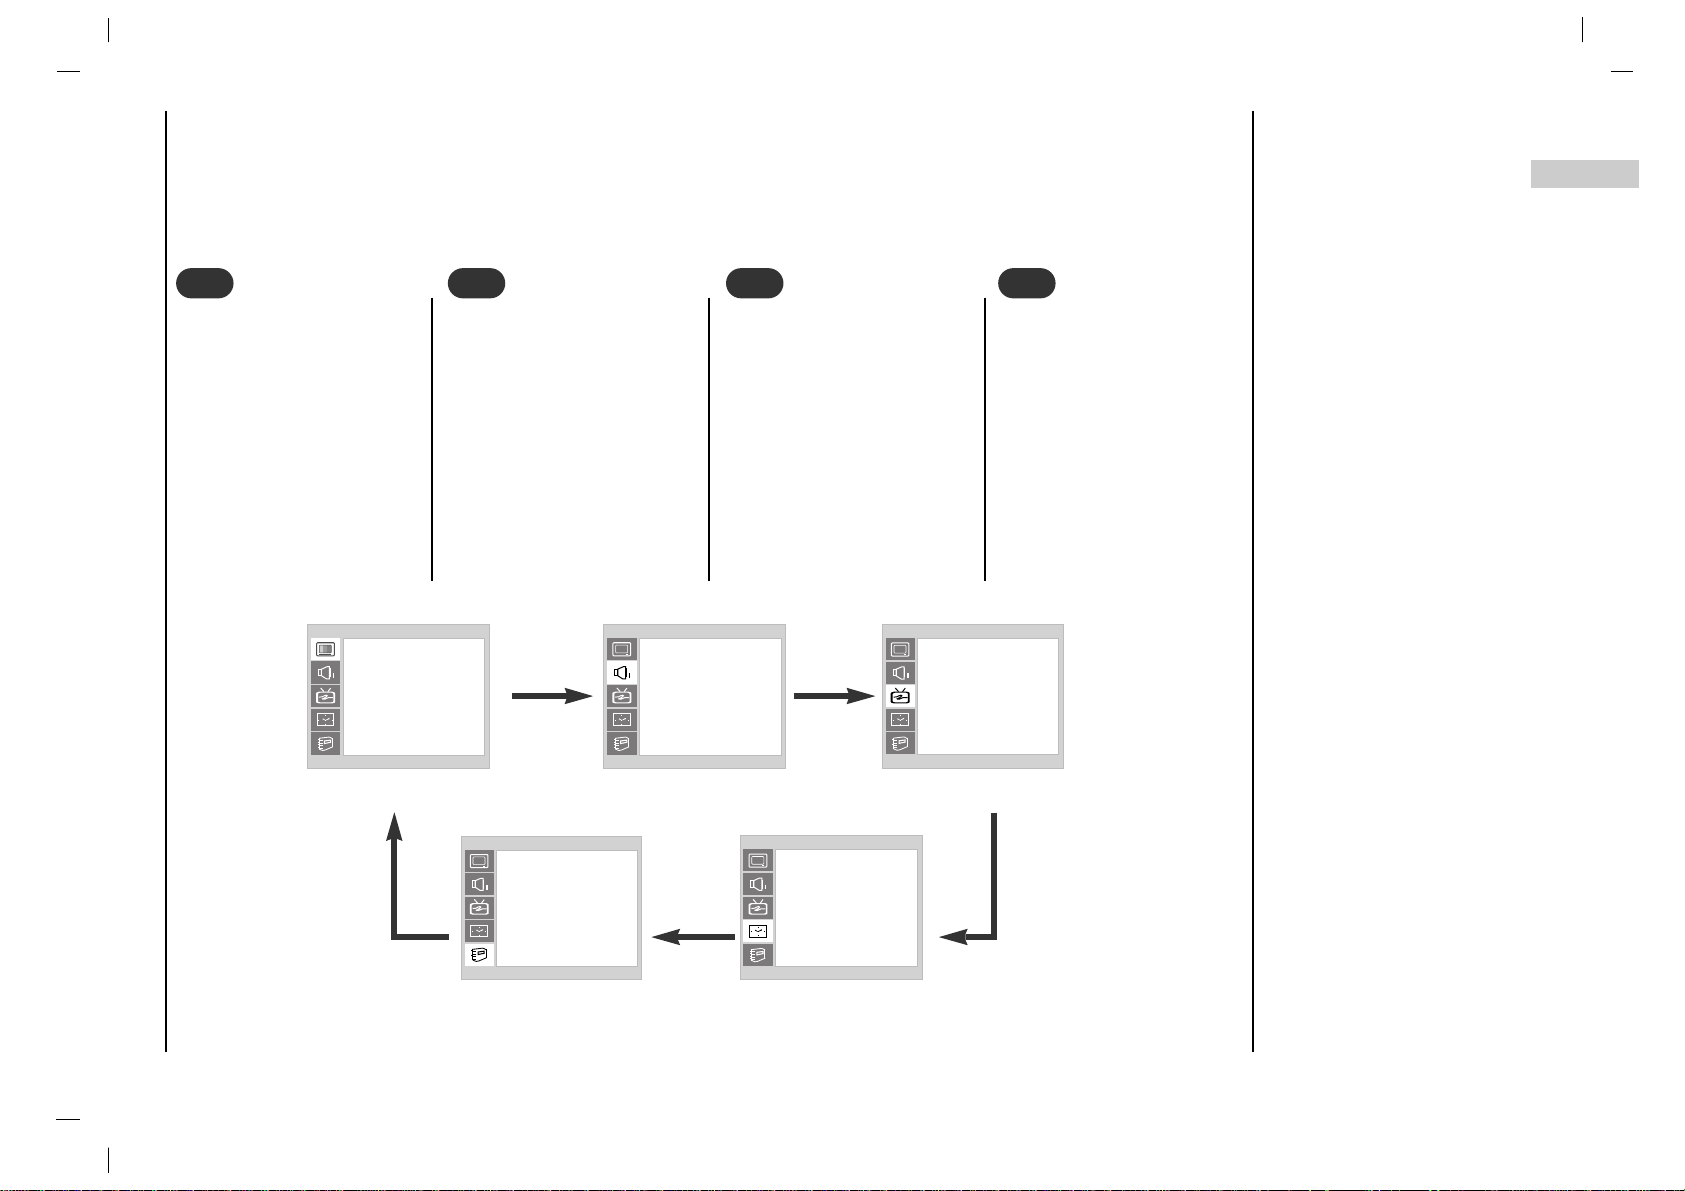
EN
- The dialogue between you and your set takes place on screen with an operator menu. The buttons required for the
operating steps are also displayed.
Press the MENU button
and then use
DD / EE
button
to display each menu.
On screen menus
Menu selection
13
1
1
Press the GG button and
then use
DD / EE
button to
select a menu item.
2
2
Press the GG button to dis-
play the sub menu or the
pull-down menu.
3
3
Change the setting of an
item in the sub or pulldown menu with FF / GG or
DD / EE
.
You can move to the higher level menu with
FF button
and to move to the lower
level menu press the
GG
button.
4
4
PICTURE
()OO}{OOOKOOMENU
PSM
Contrast
Brightness
Colour
Sharpness
SOUND
()OO}{OOOKOOMENU
SSM
Balance
AVL
STATION
()OO}{OOOKOOMENU
Auto
Manual
Edit
TIME
()OO}{OOOKOOMENU
Clock
Off Time
On Time
Auto Sleep
SPECIAL
()OO}{OOOKOOMENU
Language
CSM
PC Control
WXGA
Set ID
Page 14
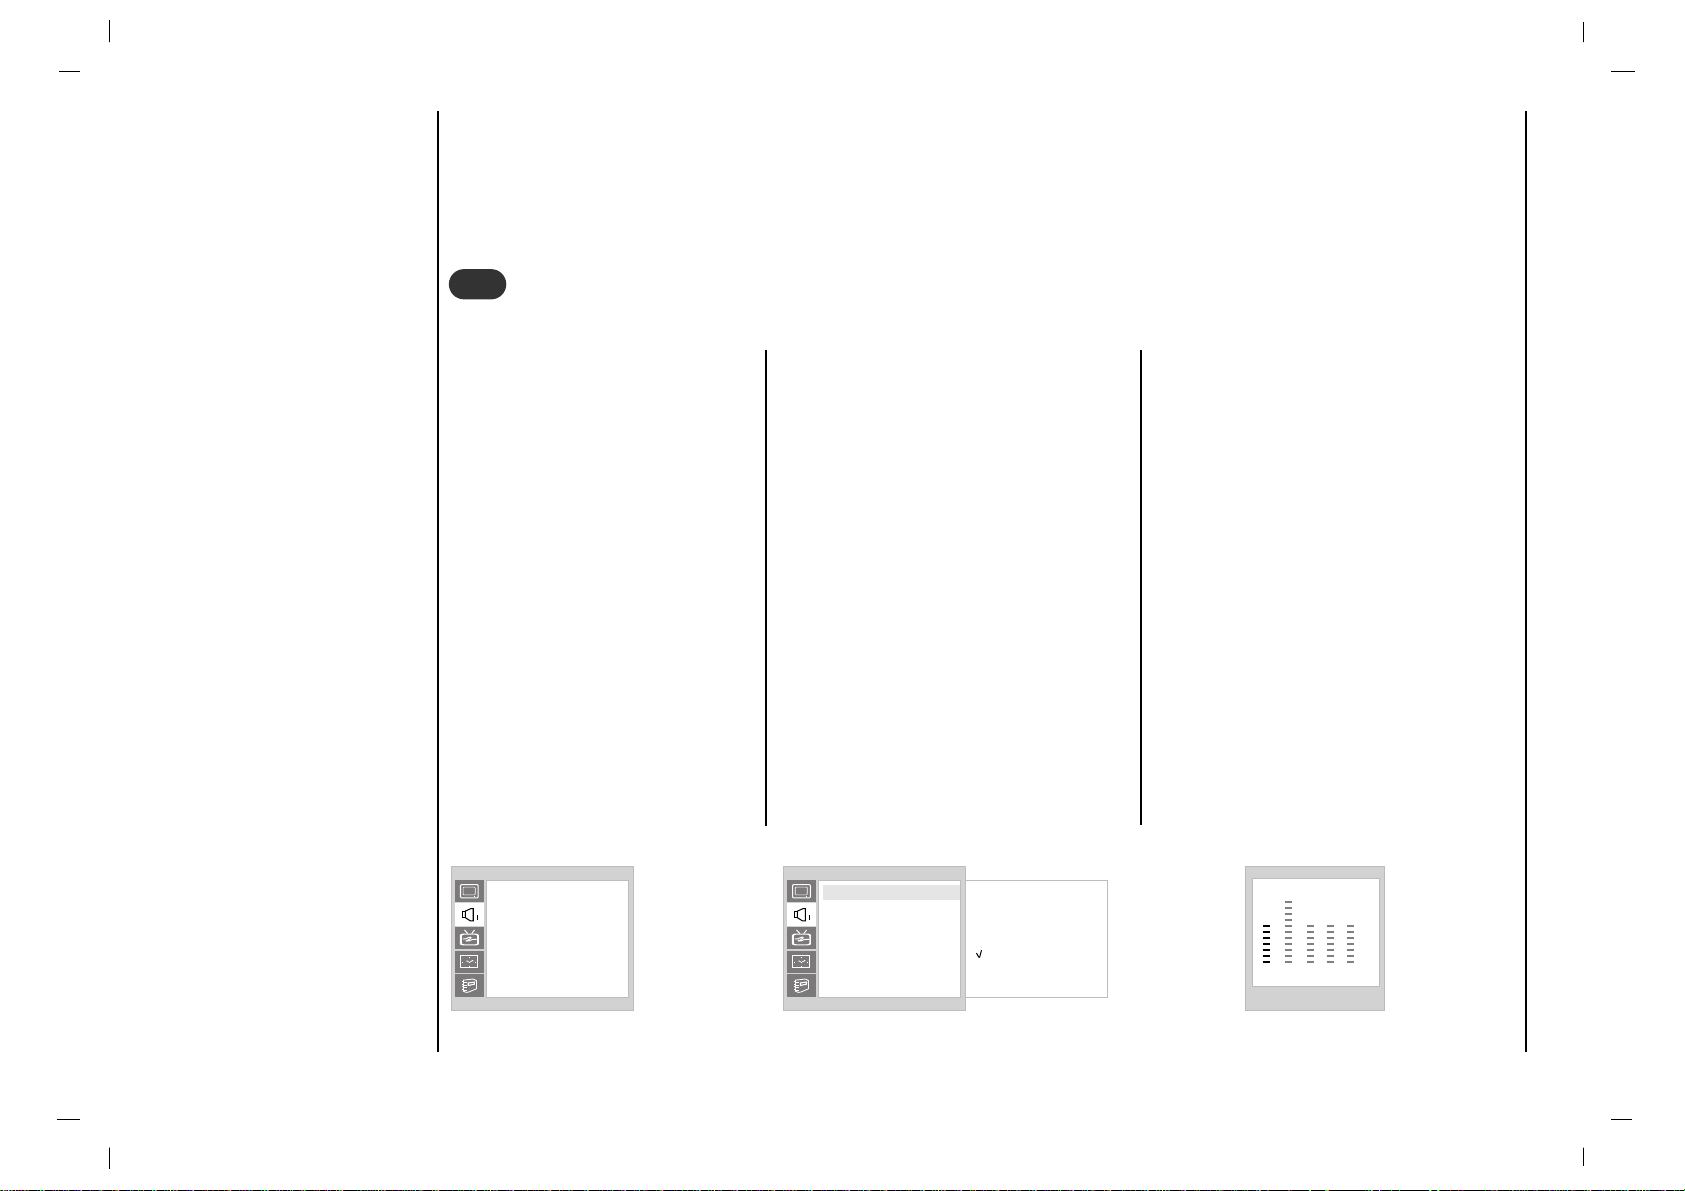
Picture adjustment
14
Press the MENU
button and then use
DD / EE
button to
select the PICTURE
menu.
Press the GG button
and then use
DD / EE
button to select
PSM.
Press the
GG button
and then use
DD / EE
button to select a
picture setting on
the
PSM pull-down
menu.
1
1
Repeatedly press the MENU button to return to normal TV viewing.
You can also recall a desired picture (
Dynamic, Standard, Mild
or User) with PSM button on the
remote control. The picture
Dynamic, Standard and Mild
are programmed for good picture
reproduction at the factory and
cannot be changed.
PSM (Picture Status Memory)
2
2
Manual Picture Control
PICTURE
()OO}{OOOKOOMENU
PSM
Contrast
Brightness
Colour
Sharpness
PICTURE
()OO}{OOOKOOMENU
PSM
Contrast
Brightness
Colour
Sharpness
PICTURE
()OO}{OOOKOOMENU
Dynamic
Standard
Mild
User
PSM
Contrast
Brightness
Colour
Sharpness
PICTURE
()OO}{OOOKOOMENU
100
PSM
Contrast
Brightness
Colour
Sharpness
Press the MENU
button and then use
DD / EE
button to
select the PICTURE
menu.
Press the
GG button
and then use
DD / EE
button to select the
desired picture option.
Press the GG button and then use
FF / GG button to make appropriate
adjustments.
You can adjust picture contrast,
brightness, colour, sharpness and
tint (NTSC input only) to the levels
you prefer.
Page 15
Picture adjustment
Picture Format
15
EN
You can watch TV in various picture formats; 16:9, 14:9, 4:3, Zoom, Panorama, Auto.
Repeatedly press the ARC button to select your desired picture format.
1. Press the ARC button to select a desired picture format.
• Each press of ARC button changes the screen display as shown below.
• You can also select
16:9, 14:9, 4:3, Zoom, Panorama, Auto in the SCREEN menu.
3
3
Picture format
16 : 9
Auto
14 : 9
4 : 3
Panorama
Zoom
Page 16
Sound adjustment
16
SOUND
()OO}{OOOKOOMENU
SSM
Balance
AVL
SOUND
()OO}{OOOKOOMENU
Flat
Speech
Movie
Music
User
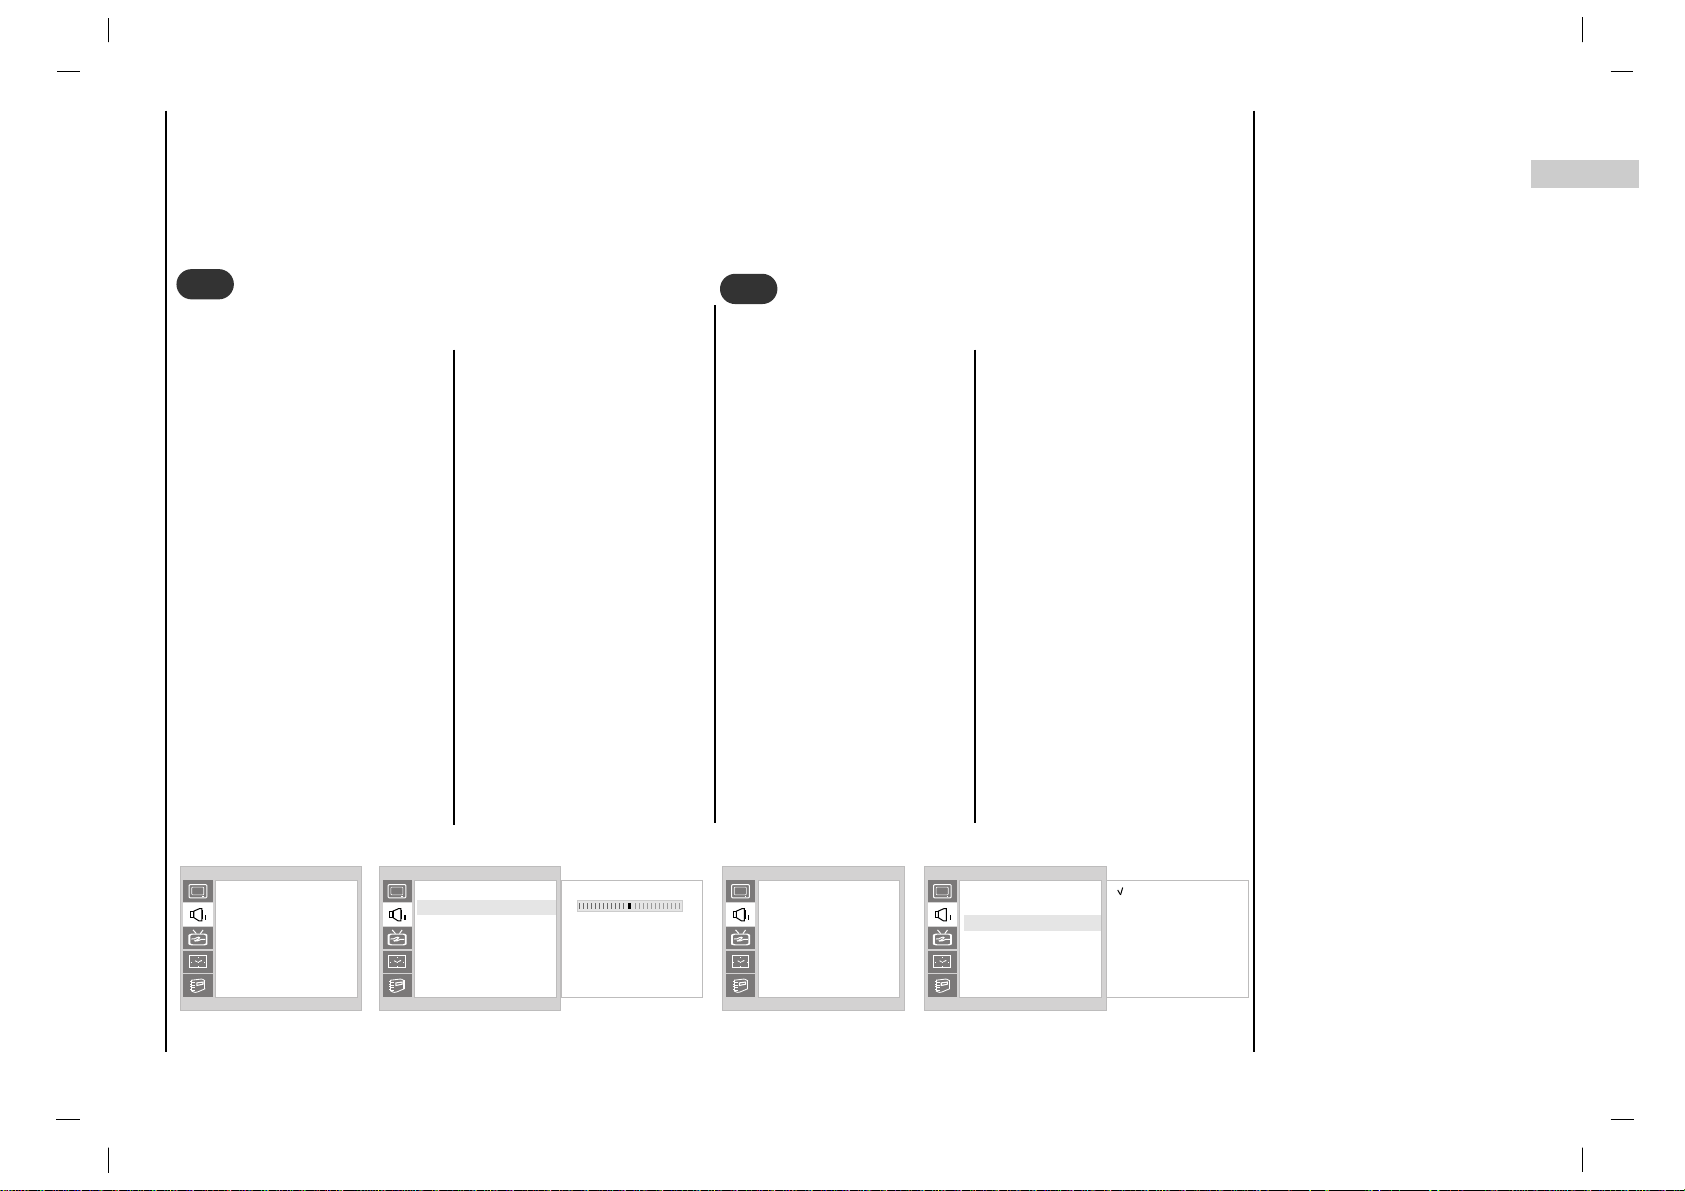
Press the MENU button and then
use
DD / EE
button to select the
SOUND menu.
Press the GG button and then use
DD / EE
button to select SSM.
Press the
GG button and then use
DD
/
EE
button to select a sound setting on
the
SSM pull-down menu.
Repeatedly press the MENU button to return to normal TV viewing.
1
1
Sound Frequency Adjustment
a. Press the GG button in User.
b. Select a sound band by pressing the
FF / GG button.
c. Make appropriate sound level with
the
DD / EE button.
d. Press the OK button to store it for the
sound
User.
The display Stored will appear.
You can also recall a desired sound
(
Flat, Speech, Movie, Music or
User) with SSM button on the remote
control. The sound
Flat, Speech,
Movie and Music are programmed for
good sound reproduction at the factory
and cannot be changed.
SSM (Sound Status Memory)
SSM
Balance
AVL
()OO}{OOOKOOMENU
0.1 0.5 1.0 5.0 10kHz
Page 17
Sound adjustment
17
EN
Press the MENU button
and then use
DD / EE
button
to select the SOUND
menu.
Press the
GG button and
then use
DD / EE
button to
select
AVL.
Press the GG button and
then use
DD / EE
button to
select
On or Off.
3
3
Repeatedly press the
MENU button to return to
normal TV viewing.
This feature maintains an
equal volume level; even if
you change channels.
AVL (Auto Volume Leveler)
SOUND
()OO}{OOOKOOMENU
SSM
Balance
AVL
Press the MENU button and
then use
DD / EE
button to
select the SOUND menu.
Press the
GG button and then
use
DD / EE
button to select the
desired sound item.
Press the
GG button and then
use
FF / GG button to make
appropriate adjustments.
2
2
Repeatedly press the
MENU button to return to
normal TV viewing.
Balance
SOUND
()OO}{OOOKOOMENU
0SSM
Balance
AVL
SOUND
()OO}{OOOKOOMENU
SSM
Balance
AVL
SOUND
()OO}{OOOKOOMENU
Off
On
SSM
Balance
AVL
Page 18

Sound adjustment
18
Language selection for dual language broadcast
If a programme received in two languages (dual language),
you can switch to
DUAL I, DUAL II or DUAL I+II by press-
ing the I/II button repeatedly.
DUAL I sends the primary broadcast language to the loud-
speakers.
DUAL II sends the secondary broadcast language to the
loudspeakers.
DUAL I+II sends a separate language to each loudspeaker.
If your set is equipped with the receiver for NICAM reception, the high quality NICAM (Near Instantaneous
Companding Audio Multiplex) digital sound can be
received.
Sound output can be selected according to the type of
received broadcast as follows by pressing the I/II button
repeatedly.
When NICAM mono is received, you can select
NICAM
MONO
or FM MONO.
When NICAM stereo is received, you can select NICAM
STEREO
or FM MONO. If the stereo signal is weak, switch
to FM mono.
When NICAM dual is received, you can select
NICAM
DUAL I
, NICAM DUAL II or NICAM DUAL I+II or
MONO. When FM mono is selected the display MONO
appears on the screen.
Mono sound selection
In stereo reception if the
stereo signal is weak, you
can switch to mono by
pressing the I/II button twice.
In mono reception the depth
of sound is improved. To
switch back to stereo, press
the I/II button twice again.
In AV mode, you can select
output sound for the left
and right loudspeakers.
Repeatedly press the I/II
button to select the sound
output.
L+R :Audio signal from
audio L input is sent to left
loud-speaker and audio
signal from audio R input is
sent to right loudspeaker.
L+L : Audio signal from
audio L input is sent to left
and right loudspeakers.
R+R : Audio signal from
audio R input is sent to left
and right loud-speakers.
4
4
Stereo/Dual/NICAM reception
Page 19
STATION
Setting up TV stations
Auto programme tuning
19
EN
- Up to 100 TV stations can be stored by programme numbers (0 to 99). Once you have preset the stations, you will be
able to use the
DD / EE
or NUMBER buttons to scan the stations you programmed.
Stations can be tuned using automatic or manual modes.
- All stations that can be received are stored by this method. It is recommended that you use auto programme during
installation of this set.
Press the MENU
button and then use
DD / EE
button to
select the STATION
menu.
1
1
Press the GG button and then use
DD / EE
button
to select
Auto.
Press the GG button to display the Auto menu.
Press the GG button. Select a TV system with the
FF / GG button on the System pull-down menu;
L : SECAM L/L’ (France)
BG : PAL B/G, SECAM B/G (Europe/East
Europe)
I : PAL I/II (U.K./Ireland)
DK : PAL D/K, SECAM D/K (East Europe)
Press the
DD / EE
button to select Storage.
Select the beginning programme number with
the
FF / GG button on the Storage pull-down
menu.
2
2
Press the
DD / EE
button to select Start.
Press the GG button to begin auto program-
ming.
All receivable stations are stored.
The station name is stored for stations which
broadcast VPS (Video Programme Service),
PDC (Programme Delivery Control) or TELETEXT data. If no station name can be
assigned to a station, the channel number is
assigned and stored as C (V/UHF 01-69) or S
(Cable 01-47), followed by a number.
To stop auto programming, press the MENU
button.
When auto programming is completed, the
edit menu appears on the screen. See the
‘Programme edit’section to edit the stored programme.
Repeatedly press the MENU button to return
to normal TV viewing.
3
3
STATION
()OO}{OOOKOOMENU
Auto
Manual
Edit
STATION
STOP : MENU
()OO}{OOOKOOMENU
Auto
Manual
Edit
System
FF
DK
GG
Storage From 7
Start
GGGGGG
Auto
Manual
Edit
System
FF
DK
GG
Storage From 7
Start
GGGGGG
7 14%
Page 20
Setting up TV stations
Manual programme tuning
20
- Manual programme lets you manually tune and arrange the stations in whatever order you desire. Also you can assign
a station name with five characters to each programme number.
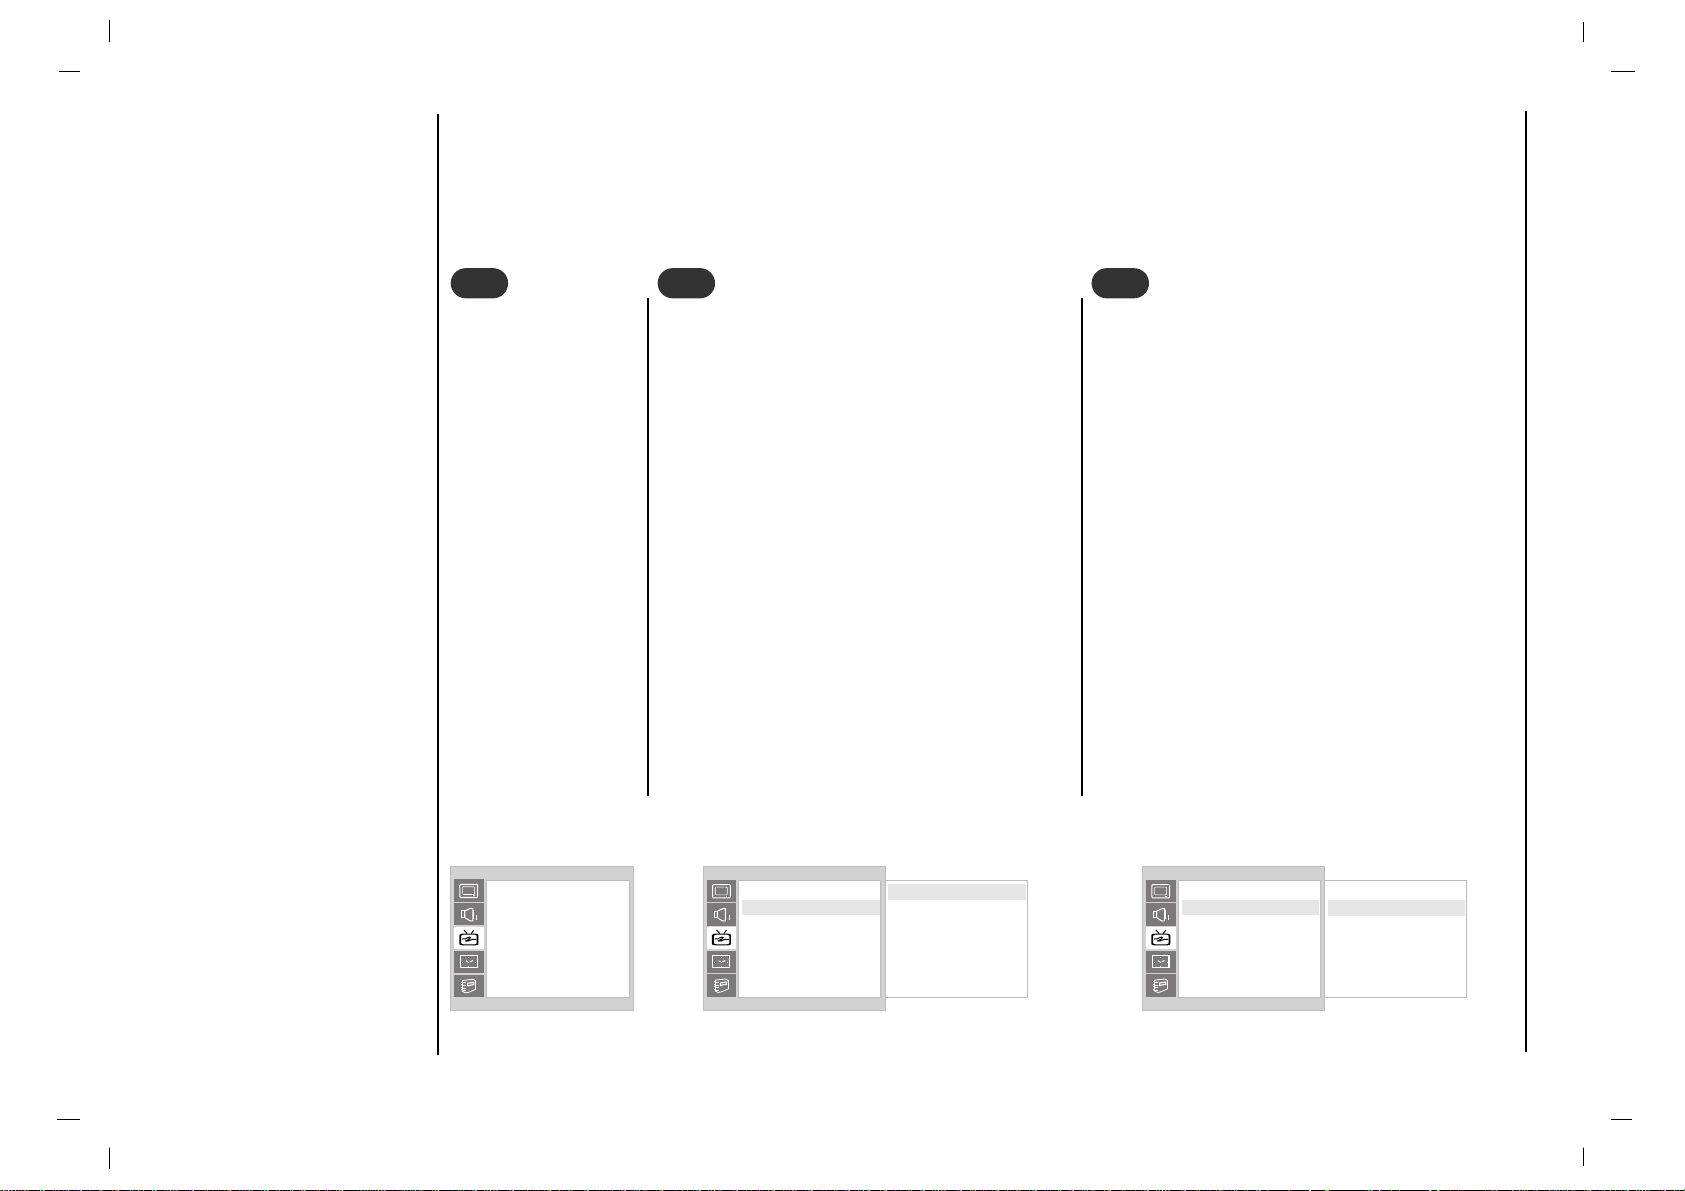
Press the MENU
button and then use
DD / EE
button to
select the STATION
menu.
Press the GG button and then use
DD / EE
button
to select
Manual.
Press the GG button to display the Manual
menu.
Press the
DD / EE
button to select Storage.
Press the
FF / GG button to select the pro-
gramme number.
1
1
2
2
Press the
DD / EE
button to select System.
Select a TV system with the FF / GG button on the
System pull-down menu;
L : SECAM L/L’ (France)
BG : PAL B/G, SECAM B/G (Europe/East
Europe)
I : PAL I/II (U.K./Ireland)
DK : PAL D/K, SECAM D/K (East Europe)
Press the
DD / EE
button to select Channel.
Press the
FF / GG button to select V/UHF or
Cable on the Channel pull-down menu.
3
3
STATION
()OO}{OOOKOOMENU
Auto
Manual
Edit
STATION
()OO}{OOOKOOMENU
Auto
Manual
Edit
Storage 4
System
FF
DK
GG
Channel V/UHF 33
Fine
GGGGGG
Search
GGGGGG
Name C 33
STATION
()OO}{OOOKOOMENU
Auto
Manual
Edit
Storage 4
System
FF
DK
GG
Channel V/UHF 33
Fine
GGGGGG
Search
GGGGGG
Name C 33
Page 21
Setting up TV stations
Manual programme tuning
21
EN
Press the
DD / EE
button to select Fine.
Press the
FF / GG button to fine tune for the best picture and
sound.
Normally fine tuning is only necessary if reception is poor.
Press the
DD / EE
button to select Search.
Press the
FF / GG button to commence searching on the
Search pull-down menu. If a station is found the search
will stop.
If this station is the one required, press the OK button to
store it.
4
4
Press the
DD / EE
button to select Name.
Press the
GG button on the Name pull-down menu.
Press the
DD
button. You can use a blank, +, -, the
numeric
0 to 9 and the alphabet A to Z.
With the
EE
button you can select in the opposite direc-
tion.
Select the position by pressing the
FF / GG button and
then take your choice of the second character, and so
on.
Press the OK button.
Repeatedly press the MENU button to return to normal
TV viewing.
5
5
STATION
()OO}{OOOKOOMENU
Auto
Manual
Edit
Storage 4
System
FF
DK
GG
Channel V/UHF 33
Fine
GGGGGG
Search
GGGGGG
Name C 33
STATION
()OO}{OOOKOOMENU
Auto
Manual
Edit
Storage 4
System
FF
DK
GG
Channel V/UHF 33
Fine
GGGGGG
Search
GGGGGG
Name C 33
Page 22
Setting up TV stations
Programme edit
22
- This function enables you to delete or skip the stored programmes. Also you can move some stations to other programme numbers or insert a blank station data into the selected programme number.
Press the MENU
button and then use
DD / EE
button to
select the STATION
menu.
1
1
Press the GG button and then
use
DD / EE
button to select
edit.
Press the
GG button to display
the edit menu.
Select a programme to be
deleted with the
DD / EE
or FF / GG
button.
Press the RED button twice.
The selected programme is
deleted, all the following programmes are shifted up one
position.
2
2
3
3
Deleting a programme
Select a programme to be
copied with the
DD / EE
or FF / GG
button.
Press the GREEN button.
All the following programmes
are shifted down one position.
4
4
Copying a programme
STATION
()OO}{OOOKOOMENU
Auto
Manual
Edit
GGGGGG
()OO}{OOOKOOMENU
0 C 04 5 - - - - 1 S 03 6 - - - - 2 S 04 7 - - - - 3 C 06 8 - - - - 4 C 33 9 - - - - -
Delete Copy
Move Skip
STATION
()OO}{OOOKOOMENU
Auto
Manual
Edit
Page 23

Setting up TV stations
Programme edit
23
EN
Select a programme to be
moved with the
DD / EE
or FF / GG
button.
Press the YELLOW button.
Move the programme to the
desired programme number
with the
DD / EE
or FF / GG but-
ton.
Press the YELLOW button
again to release this function.
5
5
Moving a programme
Select a programme number to be skipped with the
DD / EE
or FF / GG button.
Press the BLUE button. The skipped programme turns
to blue.
Press the BLUE button again to release the skipped
programme.
When a programme number is skipped it means that
you will be unable to select it using the
DD / EE
button
during normal TV viewing. If you want to select the
skipped programme, directly enter the programme
number with the NUMBER buttons or select it in the
programme edit or table menu.
6
6
Skipping a programme number
7
7
Repeatedly press the MENU
button to return to normal TV
viewing.
Page 24

Setting up TV stations
Calling the programme table
24
Press the LIST button to display the
Programme table menu.
The programme table appears on the
screen. One programme table contains ten programmes as below.
You may find some blue programmes. They have been set up to
be skipped by auto programming or
in the programme edit mode.
Some programmes with the channel
number shown in the programme
table indicate there is no station
name assigned.
1
1
Displaying programme table
Select a programme with the
DD / EE
or FF / GG button.
Then press the OK button.
The set switches to the chosen programme number.
2
2
Selecting a programme in the programme table
There are 10 programme table pages
which contain 100 programmes.
Pressing the
DD / EE
or FF / GG button
repeatedly turns the pages.
Repeatedly press the MENU button
to return to normal TV viewing.
3
3
Paging through a programme table
- You can check the programmes stored in the memory by displaying the programme table.
()OO}{OOOKOOMENU
0 - - - - - 5 - - - - 1 S 03 6 - - - - 2 C 33 7 - - - - 3 C 18 8 - - - - 4 9 - - - - -
Page 25
Time Menu
25
EN
Clock
You must set the time correctly before
using on/off time function.
Press the MENU button and then
DD / EE
button to select the TIME menu.
Press the
GG
button and then
DD / EE
but-
ton to select
Clock.
Press the
GG
button and then
DD / EE
but-
ton to adjust the hour.
Press the
GG
button and then
DD / EE
but-
ton to adjust the minute.
Press the MENU or OK button to save.
The off timer automatically switches the set to standby at the preset time.
Press the MENU button and then
DD / EE
button to select the TIME menu.
Press the
GG
button and then
DD / EE
button to select Off Time or On Time.
Press the
GG
button and then
DD / EE
button to select On.
To cancel
Off/On Time function, press the
DD / EE
button to select Off.
Press the
GG
button and then
DD / EE
button to adjust the hour.
Press the
GG
button and then
DD / EE
button to adjust the minute.
Only On time function; Press the
GG
button and then
DD / EE
button to adjust
volume level and programe number.
Press the MENU or OK to save.
Note :
a.In the event of power interruption (disconnection or power failure), the clock
must be reset.
b.Two hours after the set is switched on by the on time function it will auto-
matically switch back to standby mode unless a button has been pressed.
c.Once the on or off time is set, these functions operate daily at the preset
time.
d.Off Timer function overrides On Timer function if they are set to the same
time.
e.The set must be in standby mode for the On Timer to work.
1
1
On/Off Time
2
2
TIME
()OO}{OOOKOOMENU
Clock
Off Time
On Time
Auto Sleep
TIME
()OO}{OOOKOOMENU
--:-- AM
TIME
()OO}{OOOKOOMENU
06:59 AM
PR. 7
VOL. 46
On
Clock
Off Time
On Time
Auto Sleep
Clock
Off Time
On Time
Auto Sleep
Page 26
To initialize values (reset to
default settings), select the
Normal option.
Press the MENU button and
then
DD / EE
button to select
the SPECIAL menu.
Press the
GG button and then
DD / EE
button to select CSM.
Press the
GG button and then
DD / EE
button to select the
desired colour temperature.
Press the MENU button to
save.
CSM (Colour Status
Memory)
Time Menu /
Other functions
26
Auto sleep
If you select On on the Auto
Sleep
menu, the set will automatically switch itself to standby
mode approximately ten minutes
after a TV station stops broadcasting.
Press the MENU button and then
DD / EE
button to select the TIME
menu.
Press the
GG button and then
DD /
EE
button to select Auto Sleep.
Press the GG button and then
DD /
EE
button to select On or Off.
Press the MENU
or OK
button to
save.
You don’t have to remember to switch the set
off before you go to sleep. The sleep timer
automatically switches the set to standby
after the preset time has elapsed.
Press the SLEEP button to select the number
of minutes. The display ‘ ’ will appear
on the screen, followed by
10, 20, 30, 60, 90,
120, 180
and 240. The timer begins to count
down from the number of minutes selected.
Note :
a.To view the remaining sleep time, press the
SLEEP button once.
b.To cancel the sleep time, repeatedly press
the SLEEP button until the display Ô ’Õ
appears.
c.When you switch the set off, the set releas-
es the preset sleep time.
3
3
Sleep timer
4
4
TIME
()OO}{OOOKOOMENU
On
Off
Clock
Off Time
On Time
Auto Sleep
SPECIAL
()OO}{OOOKOOMENU
Cool
Normal
Warm
Language
CSM
PC Control
WXGA
Set ID
rr - - -
rr - - -
SPECIAL
()OO}{OOOKOOMENU
Language
CSM
PC Control
WXGA
Set ID
Page 27

27
EN
Connection of PC
You can adjust horizontal/vertical position, clock, phase, and auto-configure, reset as you prefer.
Press the MENU button and then
DD / EE
button to select the Special menu.
Press the
GG button and then
DD / EE
button to select the desired picture item.
Press the
FF / GG button to make appropriate adjustments.
H-Position / V-Position
This function is to adjust picture to left/right and up/down as you prefer.
Clock
This function is to minimize any vertical bars or stripes visible on the screen background. And the horizontal screen size
will also change.
Phase
This function allows you to remove any horizontal noise and clear or sharpen the image of characters.
Auto-configure
This function is for the automatic adjustment of the screen position, clock and phase. The displayed image will disappear
for a few seconds while the Auto-configuration is in progress.
Reset
This function allows you to return to the good picture reproduction programmed at the factory and cannot be changed.
Note : Some signal from some graphics boards may not function properly. If the results are unsatisfactory, adjust your
monitorÕs position, clock and phase manually.
Press the OK button to store it for the PC monitor picture.
Press the EXIT button to return to PC mode.
PC Setup
To see a normal picture, match the resolution of RGB mode and selection of XGA mode.
WXGA
SPECIAL
()OO}{OOOKOOMENU
H-Pos. 0
V-Pos. 0
Clock 10
Phase 15
Auto
Reset
Language
CSM
PC Control
WXGA
Set ID
Page 28
28
PIP (Picture-In-Picture) Feature
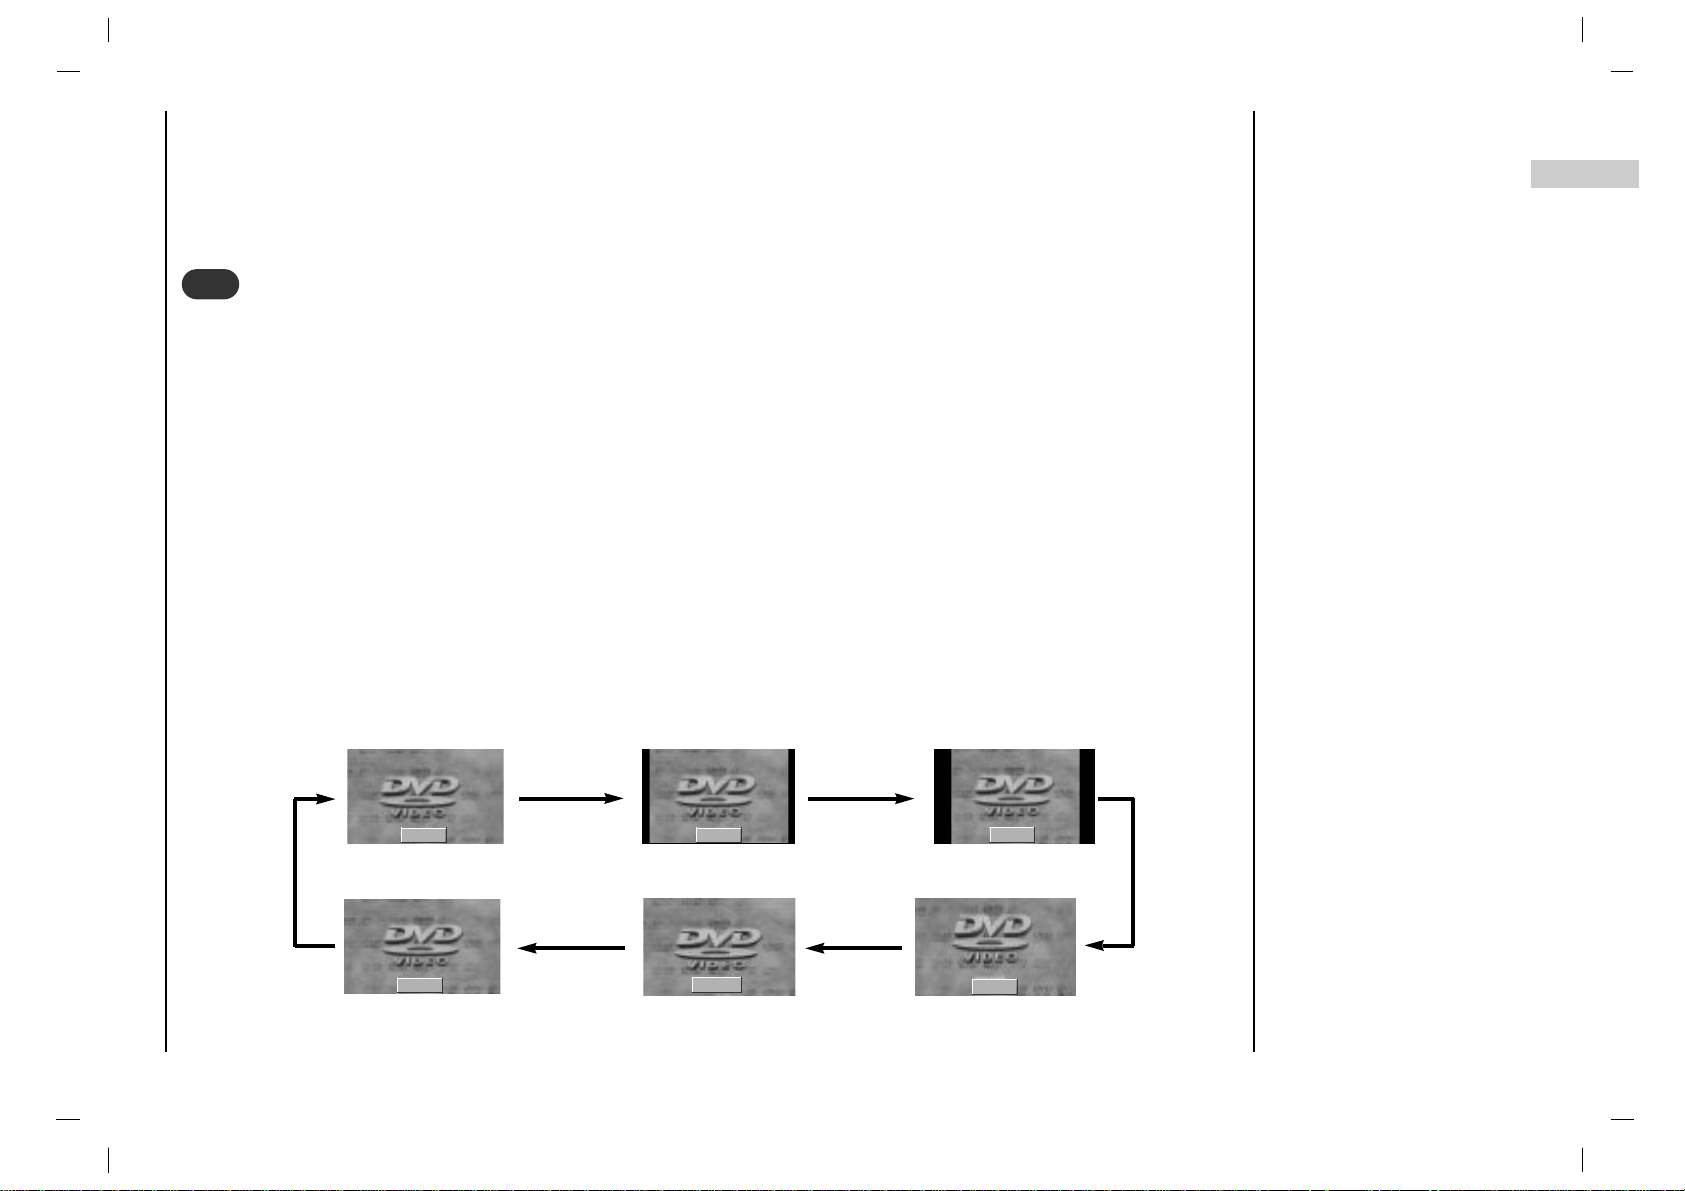
Press the PIP button to show the sub picture.
• Each press of PIP button changes the screen display as shown below.
1
1
Watching PIP
Press the PIP POSITION button.
Press the PIP POSITION button
repeatedly until desired position is
achieved. The sub pictures move
clockwise.
2
2
Moving the PIP
- PIP lets you view 2 different inputs (sources) on your monitor screen at the same time. One source will be large, and
the other source will show a smaller inset image.
Page 29
29
EN
PIP (Picture-In-Picture) Feature
Press the SWAP button to exchange
the main and sub pictures.
3
3
Swapping the PIP
Use the PIP INPUT button to
select the input source for the sub
picture.
4
4
Selecting a Input Signal
Source for the PIP
This function enables you to search all
the stored stations on 4 or 12 sub pictures and see your favourite station by
exchanging the main and sub pictures.
Press the SCAN button repeatedly to
select POP4/POP12.
The selected sub or main pictures
search all the stored stations.
Press the EXIT button to switch off
sub or main pictures.
6
6
Programme scan
Press the PIP PR +/- button. The
selected programme number is
displayed just below the programme number of main picture.
5
5
Programme selection for
sub picture
Main Picture Sub Picture
Page 30

30
Teletext (or TOP text) is an optional function, therefore only
a set with the teletext system can receive the teletext
broadcast.
Teletext is a free service broadcast by most TV stations
which gives up-to-the-minute information on news, weather, television programmes, share prices and many other
topics.
The teletext decoder of this TV can support the SIMPLE,
TOP and FASTEXT systems. SIMPLE (standard teletext)
consists of a number of pages which are selected by
directly entering the corresponding page number. TOPand
FASTEXT are more modern methods allowing quick and
easy selection of teletext information.
Switch on/off
Press the TEXT button to switch to teletext.
The initial page or last page appears on the screen.
Two page numbers, TV station name, date and time are
displayed on the screen headline. The first page number
indicates your selection, while the second shows the current page displayed.
Press the TEXT button to switch off teletext. The previous
mode reappears.
SIMPLE text
Page selection
1. Enter the desired page number as a three digit number
with the NUMBER buttons. If during selection you
press a wrong number, you must complete the three
digit number and then re-enter the correct page number.
2. The
DD / EE
button can be used to select the preced-
ing or following page.
Programming a colour button in LIST mode
If the TV is in SIMPLE text, TOP text or FASTEXT mode,
press the button to switch to LIST mode.
Four teletext page numbers of your choice can be colour
coded and easily selected by pressing the corresponding
coloured button on the remote control handset.
1. Press a coloured button.
2. Using the NUMBER buttons, select the page you wish
to programme.
3. Press the OK button. The selected page is stored as
the selected page number, blinking once to confirm
this. From now on, you can select this page with the
same coloured button.
4. The three other coloured buttons are programmed in
this way.
TOP text (option)
The user guide displays four fields-red, green, yellow and
blue at the bottom of the screen. The yellow field denotes
the next group and the blue field indicates the next block.
Block / group / page selection
1. With the blue button you can progress from block to
block.
2. Use the yellow button to proceed to the next group with
automatic overflow to the next block.
3. With the green button you can proceed to the next
existing page with automatic overflow to the next
group.
Alternatively the
DD
button can be used.
4. The red button permits to return to previous selection.
Alternatively the
EE
button can be used.
Direct page selection
Corresponding to the SIMPLE teletext mode, you can
select a page by entering it as a three digit number using
the NUMBER buttons in TOP mode.
Teletext (option)
Page 31

31
EN
FASTEXT
The teletext pages are colour coded along the bottom of
the screen and are selected by pressing the corresponding coloured button.
Page selection
1. Press the button to select the index page.
2. You can select the pages which are colour coded
along the bottom line with the same coloured buttons.
3. Corresponding to the SIMPLE teletext mode, you can
select a page by entering its three digit page number
with the NUMBER buttons in FASTEXT mode.
4. The
DD / EE
button can be used to select the preceding
or following page.
Special teletext functions
REVEAL
Press this button to display concealed information, such as
solutions of riddles or puzzles.
Press this button again to remove the information from the
display.
SIZE
Selects double height text.
Press this button to enlarge the top half of the page.
Press this button again to enlarge the bottom half of the
page.
Press this button again to return to the normal display.
UPDATE
Displays the TV picture on the screen while waiting for the
new teletext page. The display will appear at the top
left hand corner of the screen. When the updated page is
available then display will change to the page number.
Press this button to view the updated teletext page.
HOLD
Stops the automatic page change which will occur if a teletext page consists of 2 or more sub pages. The number of
sub pages and the sub page displayed is, usually, shown
on the screen below the time. When this button is pressed
the stop symbol is displayed at the top left-hand corner of
the screen and the automatic page change is inhibited.
To continue press this button again.
MIX
Displays the teletext pages superimposed on the TV picture.
To switch the TV picture off press this button again.
TIME
When viewing a TV programme, press this button to display the time at the top right hand corner of the screen.
Press this button again to remove the display. In the teletext mode, press this button to select a sub page number.
The sub page number is displayed at the bottom of the
screen. To hold or change the sub page, press the RED /
GREEN,
DD / EE
or NUMBER buttons.
Press this button again to exit this function.
Teletext (option)
Page 32

3232
- Connect the RS-232C input jack to an external control device (such as a computer or an A/V control system) and control the set’s functions externally.
Communication Parameters
• Baud rate : 115200 bps (UART)
• Data length : 8 bits
• Parity : None
• Stop bit : 1 bit
• Communication code : ASCII code
Connect the serial port of the control
device to the RS-232C jack on the set.
RS-232C connection cables are not
supplied with the Monitor.
The Monitor remote control and front
panel controls (except main power)
will not be functional if the set is controlled by a PC computer or other
external device.
How to connect external control
equipment
Type of connector; D-Sub 9-pin male
External Control Device Setup
RGB INPUTRGB INPUT
AUDIO INPUTAUDIO INPUT
DVI INPUTDVI INPUT
RS-232C INPUTRS-232C INPUT
(CONTROL/SER(CONTROL/SERVICE)VICE)
AUDIOAUDIO
RR
< Side panel of the set >
No. Pin name
1 No connection
2 RXD (Receive data)
3 TXD (Transmit data)
4 DTR (DTE side ready)
5 GND
6 DSR (DCE side ready)
7 RTS (Ready to send)
8 CTS (Clear to send)
9 No Connection
1
5
6
9
Page 33

33EN33
External Control Device Setup
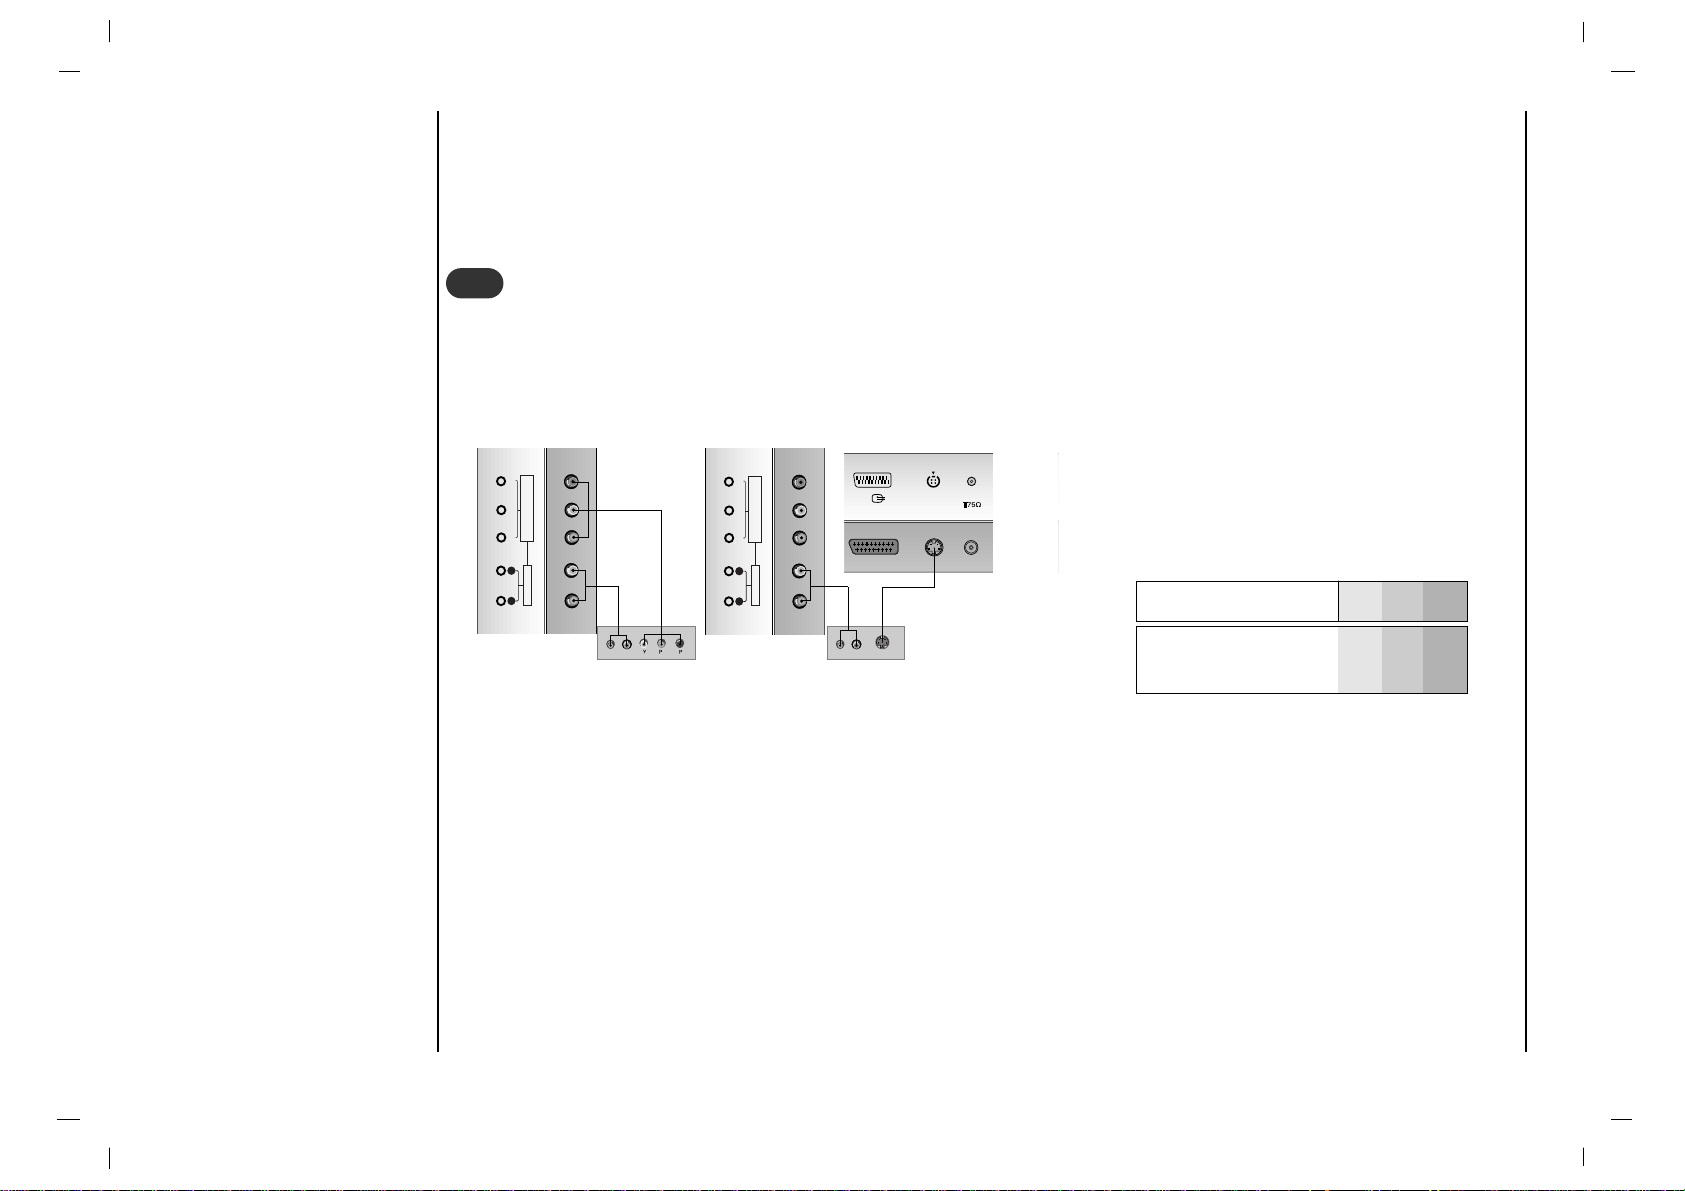
Command Reference List
01. Power k a 0 ~ 1
02. Input Select k m 0 ~ 7
03. Aspect Ratio k q 0 ~ 5
04. Screen Mute k b 0 ~ 1
05. Volume Mute k c 0 ~ 1
06. Volume Control k i 0 ~ 64
07. Contrast k d 0 ~ 64
08. Brightness k e 0 ~ 64
09. Colour k f 0 ~ 64
10. Tint k l 0 ~ 64
11. Sharpness k g 0 ~ 64
12.
Remote control lock mode
k p 0 ~ 1
13. PIP/Twin k r 0 ~ 2
14. PIP position k s 0 ~ 3
15. Balance k j 0 ~ 64
16. Colour temperature k u 0 ~ 2
17. PIP input source k y 0 ~ 4
18. SSM k h 1 ~ 5
19. AVL k k 0 ~ 1
20. Auto Sleep k n 0 ~ 1
21. Horizontal Shift k v 0 ~ C6
22. Vertical Shift k w 0 ~ 27
23. Auto Configure k ~ 1
24. Reset k ! 1
25.
On screen language selection
k ^ 0 ~ 4
26.
Programme Selection
k % 0 ~ 1
27.
Programme Number input
k $ 0~64(100PR)
0~C7(200PR)
28. PSM k t 0 ~ 3
COMMAND
1
COMMAND
2
DATA
(Hexadecimal)
Press the MENU button and then use
DD / EE
button to select the
Special menu.
Press the
GG button
and then use
DD / EE
button to select Set
ID
.
Press the
GG button and then use
F / G button to adjust Set ID to
choose the desired monitor ID
number.
The adjustment range of
Set ID is
1 ~ 99.
Use this function to specify a mon-
itor ID number.
Set ID
SPECIAL
()OO}{OOOKOOMENU
Language
CSM
PC Control
WXGA
Set ID
Page 34

3434
External Control Device Setup
Transmission
*
[Command 1] : k
*
[Command 2] : To control PDP set.
*
[Set ID] : You can adjust the set ID to choose
desired monitor ID number in special
menu. See previous page.
Adjustment range is 1 ~ 99.
When selecting Set ID ‘0’, every
connected PDP set is controlled.
*
[DATA] : To transmit command data.
Transmit ‘FF’ data to read status of
command.
*
[Cr] : Carriage Return
ASCII code ‘0x0D’
*
[ ] : ASCII code ‘space (0x20)’
[Command1][Command2][ ][Set ID][ ][Data][Cr]
OK Acknowledgement
* The Monitor transmits ACK (acknowledgement) based on
this format when receiving normal data. At this time, if the
data is data read mode, it indicates present status data. If
the data is data write mode, it returns the data of the PC
computer.
[Command2][ ][Set ID][ ][OK][Data][x]
Error Acknowledgement
* The Monitor transmits ACK (acknowledgement) based on
this format when receiving abnormal data from
non-viable functions or communication errors.
[Command2][ ][Set ID][ ][NG][x]
Transmission / Receiving Protocol
01. Power (Command2 : a)
G To control Power On/Off of the set.
Transmission
Data 0 : Power Off 1 : Power On
[k][a][ ][Set ID][ ][Data][Cr]
Acknowledgement
[a][ ][Set ID][ ][OK][Data][x]
G To show Power On/Off.
Transmission
[k][a][ ][Set ID][ ][FF][Cr]
Acknowledgement
Data 0 : Power Off 1 : Power On
* In like manner, if other functions transmit ‘FF’ data based
on this format, Acknowledgement data feed back presents
status about each function.
[a][ ][Set ID][ ][OK][Data][x]
02. Input Select (Command2 : m) (Main Picture Input)
G To select input source for the set.
You can also select an input source using the INPUT
SELECT button on the set's remote control.
T
ransmission
Data 0 : TV
1 : AV1
2 : AV2
3 : S-Video
4 : Component
5 : RGB-PC
6 : RGB-DTV
7 : RGB-DVI
[k][m][ ][Set ID][ ][Data][Cr]
Acknowledgement
[m][ ][Set ID][ ][OK][Data][x]
Page 35

35EN35
External Control Device Setup
03. Aspect Ratio (Command2 : q) (Main picture format)
G To adjust the screen format.
You can also adjust the screen format using the ARC
(Aspect Ratio Control) button on remote control handset.
T
ransmission
Data 0 : 16:9
1 : 14:9
2 : 4:3
3 : Zoom
4 : Panorama
5 : Auto
[k][q][ ][Set ID][ ][Data][Cr]
Acknowledgement
* Using the PC input, you select either 16:9 or 4:3 screen aspect
ratio.
[q][ ][Set ID][ ][OK][Data][x]
04. Screen Mute (Command2 : b)
G To select screen mute on/off.
Transmission
Data 0 : Screen mute off (Picture on)
1 : Screen mute on (Picture off)
[k][b][ ][Set ID][ ][Data][Cr]
Acknowledgement
[b][ ][Set ID][ ][OK][Data][x]
05. Volume Mute (Command2 : c)
G To control volume mute on/off.
You can also adjust mute using the MUTE button on
remote control handset.
T
ransmission
Data 1 : Volume mute on (Volume off)
0 : Volume mute off (Volume on)
[k][c][ ][Set ID][ ][Data][Cr]
Acknowledgement
[c][ ][Set ID][ ][OK][Data][x]
06. Volume Control (Command2 : i)
G To adjust volume.
You can also adjust volume with the volume buttons
on remote control handset.
T
ransmission
Data Min : 0 ~ Max : 64
• Refer to ‘Real data mapping 1’. See page 38.
[k][i][ ][Set ID][ ][Data][Cr]
Acknowledgement
[i][ ][Set ID][ ][OK][Data][x]
07. Contrast (Command2 : d)
G To adjust screen contrast.
You can also adjust contrast in the PICTURE menu.
T
ransmission
Data Min : 0 ~ Max : 64
• Refer to ‘Real data mapping 1’. See page 38.
[k][d][ ][Set ID][ ][Data][Cr]
Acknowledgement
[d][ ][Set ID][ ][OK][Data][x]
08. Brightness (Command2 : e)
G To adjust screen brightness.
You can also adjust brightness in the PICTURE menu.
T
ransmission
Data Min : 0 ~ Max : 64
• Refer to ‘Real data mapping 1’. See page 38.
[k][e][ ][Set ID][ ][Data][Cr]
Acknowledgement
[e][ ][Set ID][ ][OK][Data][x]
Page 36

36
36
14. PIP Position (Command2 : s)
G To select sub picture position for PIP.
You can also adjust the sub picture position using POSITION
on the remote control handset or in the WINDOW menu.
T
ransmission
Data 0: Right down on screen
1: Left down on screen
2: Left up on screen
3: Right up on screen
[k][s][ ][Set ID][ ][Data][Cr]
Acknowledgement
[s][ ][Set ID][ ][OK][Data][x]
External Control Device Setup
G To adjust the screen sharpness.
You can also adjust sharpness in the PICTURE menu.
Transmission
11. Sharpness (Command2 : g)
Data Min: 0 ~ Max: 64
• Refer to ‘Real data mapping 1’. See page 38.
[k][g][ ][Set ID][ ][Data][Cr]
Acknowledgement
[g][ ][Set ID][ ][OK][Data][x]
09. Colour (Command2 : f)
G To adjust the screen color.
You can also adjust color in the PICTURE menu.
T
ransmission
Data Min : 0 ~ Max : 64
• Refer to ‘Real data mapping 1’. See page 38.
[k][f][ ][Set ID][ ][Data][Cr]
Acknowledgement
[f][ ][Set ID][ ][OK][Data][x]
10. Tint (Command2 : l)
G To adjust the screen tint.
You can also adjust tint in the PICTURE menu.
T
ransmission
Data Red : 0 ~ Green : 64
*
Refer to ‘Real data mapping 1’. See page 38.
[k][l][ ][Set ID][ ][Data][Cr]
Acknowledgement
[l][ ][Set ID][ ][OK][Data][x]
12. Remote Control Lock Mode (Command2 : p)
G To lock the remote control and front panel controls on the
set
T
ransmission
[k][p][ ][Set ID][ ][Data][Cr]
Acknowledgement
Data 0: off 1: on
• If you’re not using the remote control, use this mode.
When main power is on/off, remote control lock is released.
[p][ ][Set ID][ ][OK][Data][x]
13. PIP / Twin (Command2 : r)
G To control the PIP (Picture In picture) or TWIN picture.
You can also control the PIP/TWIN picture using the PIP or
TWIN button on the remote control handset or in the WINDOW menu.
Transmission
Data 0: off
1: PIP
2: DW
[k][r][ ][Set ID][ ][Data][Cr]
Acknowledgement
[r][ ][Set ID][ ][OK][Data][x]
Page 37

37
EN
37
External Control Device Setup
16. Colour Temperature (Command2 : u)
G To adjust colour temperature.
You can also adjust Color Temp. in the PICTURE menu.
T
ransmission
Data 0: Cool 1: Normal 2: Warm
[k][u][ ][Set ID][ ][Data][Cr]
Acknowledgement
[u][ ][Set ID][ ][OK][Data][x]
15. Balance (Command2 : j)
G To adjust balance.
You can also adjust balance in the SOUND menu.
T
ransmission
Data Min: 0 ~ Max: 64
• Refer to ‘Real data mapping 1’. See page 38.
[k][j][ ][Set ID][ ][Data][Cr]
Acknowledgement
[j][ ][Set ID][ ][OK][Data][x]
17. PIP Input Select (Command2 : y)
G To select input source for sub picture in PIP/Twin picture
mode.
T
ransmission
* In Component 480i for main picture, you can select RGB and DVi
for sub picture.
Data 0 : TV
1 :
AV1
2 : AV2
3 : S-Video
4 : Component(480i)
[k][y][ ][Set ID][ ][Data][Cr]
Acknowledgement
[y][ ][Set ID][ ][OK][Data][x]
18. SSM (Command2 : h)
G To select sound mode.
Transmission
Data 1 : Flat
2 :
Speech
3 : Movie
4 : Music
5 : User
[k][h][ ][Set ID][ ][Data][Cr]
Acknowledgement
[h][ ][Set ID][ ][OK][Data][x]
19. AVL (Command2 : k)
G To keeps on an equal volume level even if you change
programmes.
T
ransmission
Data 0: Off 1: On
[k][k][ ][Set ID][ ][Data][Cr]
Acknowledgement
[k][ ][Set ID][ ][OK][Data][x]
*
Real data mapping 1
0 : Step 0
A : Step 10 (SET ID 10)
F : Step 15 (SET ID 15)
10 : Step 16 (SET ID 16)
64 : Step 100
*
Real data mapping 2
0 : -10
5 : -9
A : -8
2D: -1
32: 0
37: +1
5F: +9
64: +10
Page 38

3838
External Control Device Setup
20. Auto Sleep (Command2 : n)
G If there is no input signal, the set turn off automatically
after 10 minutes.
T
ransmission
Data 0: Off 1: On
[k][n][ ][Set ID][ ][Data][Cr]
Acknowledgement
[n][ ][Set ID][ ][OK][Data][x]
21. Horizontal Shift (Command2 : v)
G
To adjust picture to left/right as you prefer.
Transmission
Data 0 : 0~c6
[k][v][ ][Set ID][ ][Data][Cr]
Acknowledgement
[v][ ][Set ID][ ][OK][Data][x]
22. Verical Shift (Command2 : w)
G
To adjust picture to up/down as you prefer.
Transmission
Data 0 : 0 ~ 27
[k][w][ ][Set ID][ ][Data][Cr]
Acknowledgement
[w][ ][Set ID][ ][OK][Data][x]
23. Auto Configure (Command2 : ~)
G To adjust picture position and minimize image shaking
automatically. It works only in RGB (PC) mode.
T
ransmission
Data 1: Auto Configure start
[k][~][ ][Set ID][ ][Data][Cr]
Acknowledgement
[~][ ][Set ID][ ][OK][Data][x]
24. Reset (Command2 : !)
G
To return to the good picture reproduction pro-
grammed at the factory and cannot be changed.
Transmission
Data 1 : Reset start
[k][!][ ][Set ID][ ][Data][Cr]
Acknowledgement
[!][ ][Set ID][ ][OK][Data][x]
25. On screen language selection (Command2 : ^)
G To select your desired language.
Transmission
Data 0 : English
1 :
German
2 : French
3 : Italy
4 : Spain
[k][^][ ][Set ID][ ][Data][Cr]
Acknowledgement
[^][ ][Set ID][ ][OK][Data][x]
Page 39

3939
EN
External Control Device Setup
27. Programme Number input (Command2 : $)
G
To select a programme.
Transmission
100PR : Data 0 ~ 64 200PR : Data 0 ~ C7
[k][$][ ][Set ID][ ][Data][Cr]
Acknowledgement
[$][ ][Set ID][ ][OK][Data][x]
28. PSM (Command2 : t)
G To select picture mode.
Transmission
Data 0 : Dynamic
1 :
Standard
2 : Mild
3 : User
[k][t][ ][Set ID][ ][Data][Cr]
Acknowledgement
[t][ ][Set ID][ ][OK][Data][x]
26. Programme selection (Command2 : %)
G To select a programme for the main picture.
T
ransmission
Data 0 : Ch Up 1 :
Ch Down
[k][%][ ][Set ID][ ][Data][Cr]
Acknowledgement
[%][ ][Set ID][ ][OK][Data][x]
Page 40

40
Displayable Monitor
Specification
Note:
a. If the set is cold, there may be a small “flicker” when the set
is switched on. This is normal, there is nothing wrong with
the set.
b. If possible, use the VESA 1,024x768@60Hz video
mode to obtain the best image quality for your LCD
monitor. If used to PC vertical frequency 85Hz, some
noise can be seen when PIP is on. In this case, set the
PC vertical frequency to 60Hz. The set has been preadjusted to the mode VESA 1,024x768@60Hz.
c. Some dot defects may appear on the screen, like Red,
Green or Blue spots. However, this will have no impact
or effect on the monitor performance.
d. Do not press the LCD screen with your finger for a long
time as this may produce some temporary distortion
effects on the screen.
e. When the PC screen appears on the set, a message may
appear on the screen, and the message will differ according to the Window system version (Win98, 2000). If a
message appears click “Next” until the message finishes.
f. If the message “Out Of Range” appears on the screen,
adjust the PC as in the ‘Displayable Monitor Specification’
section.
RGB Mode / DVI Mode
Resolution
31.469
37.927
31.500
37.500
37.861
37.500
43.269
35.156
37.879
48.077
46.875
53.674
48.363
56.476
60.023
68.677
54.348
67.500
47.700
56.500
60.150
63.981
49.725
720X400
640X480
800X600
1024X768
1152X864
1280X768
1280X1024
832X624
MODE
DOS
VGA
SVGA
XGA
SXGA
WXGA
SXGA
MAC
Horizontal
Frequency (KHz)
70.08
85.03
60.00
67.00
72.80
75.00
85.00
56.25
60.31
72.18
75.00
85.06
60.00
70.06
75.02
84.99
60.05
75.00
60.00
70.00
75.00
60.02
74.55
Vertical
Frequency (Hz)
(Synchronization input form : separate)
Page 41

41
EN
NOTE
Page 42

42
NOTE
Page 43

43
EN
Troubleshooting
Check list
Check these items and try to adjust these
Symptoms
No picture, no sound
Sound OK, poor picture
Picture OK, poor sound
Picture blurred
Lines or streaks in picture
Poor reception on some channels
No colour
Poor colour
Remote control does not work
Incorrect position
Vertical bars or stripes on background
Horizontal noise
Signal Cable message appears
The mains plug-(plugged in and switched on)
Is the TV switched on
Try another channel (weak signal)
Check aerial (plugged into TV?)
Check aerial (broken lead?)
Check aerial
Check for local interference
Adjust contrast
Adjust brightness
Adjust colour
Adjust volume
Check the batteries in remote control
Check Audio/Video sockets (VCR only)
Auto-configure or adjust the H/V position
Auto-configure or adjust Clock
Auto-configure or adjust Clock Phase
Is the Signal Cable connected or loose
Page 44

Page 45

JV-DTV23 / JV-DTV27 / JV-DTV30
Avant de mettre en marche votre poste de télévision, lisez
attentivement ce mode d’emploi.
Vous pourrez aussi vous y référer pour tous les réglages
futurs.
Votre revendeur vous les demandera pour le service après
vente.
Page 46

Installation 3
Emplacement et fonctions des commandes 4-7
Le boîtier de télécommande 4
Installation des piles 5
Face avant 6
Face arrière 7
Branchements externes 8-11
Fonctionnement de base
Mise sous/hors tension du téléviseur 12
Sélection des programmes 12
Réglage du volume 12
Sélection de la langue pour l’affichage écran (en option)
12
Menus Žcran
Sélection des menus 13
RŽglage de lÕimage 14-15
PSM (Mémorisation des paramètres de l’image) 14
Réglage de l’image 14
Format de l’image 15
RŽglage du son 16-18
SSM (Mémorisation des paramètres du son) 16
Balace 17
AVL (Volume Sonore Automatique) 17
Sélection de la sortie audio 18
MŽmorisation des cha”nes 19-24
Programmation automatique 19
Programmation manuelle 20-21
Edition des programmes 22-23
Table des programmes 24
Menu TIME (Minuterie) / Autres fonctions 25-26
Horloge 25
Minuteur de mise en marche/arrêt 25
Mise en veille automatique / Mise en veille 26
CSM (Mémoire de mode de couleur) 26
Branchements ˆ un PC
Fonction PC 27
Incrustation dÕimage (PIP) 28-29
Incrustation d’image (PIP) 28
Déplacement de l'image incrustée 28
Vasculement entre image principale et image incrustée 29
Sélection du mode d’incrustation 29
Programme de sélection pour l’image incrustée 29
Programme de recherche 29
TŽlŽtexte (en option) 30-31
CaractŽristiques techniques dÕaffichage 32
DŽpannage 35
Table des mati•res
2
Page 47

Mise sous tension
Vérifiez que votre voltage correspond au voltage indiqué
sur la plaque signalétique fixée à l’arrière du poste.
Branchez votre appareil uniquement sur le courant alternatif. S’il y a des éclairs d’orage ou des coupures de
courant, débranchez la fiche d’antenne et la prise secteur.
Avertissement
Pour éviter les risques d’incendie ou d’électrocution, n’exposez pas ce téléviseur à la pluie ou à l’humidité. Ne frottez pas et ne heurtez pas l’écran à matrice active (à
cristaux liquides) avec quelque chose de dur car ceci peut
rayer, marquer ou abîmer cet écran à matrice active de
façon définitive.
Entretien
N’ôtez jamais le capot arrière de votre téléviseur. Vous
pourriez être exposé à un voltage très élevé ou à d’autres
dangers. Si l’appareil ne fonctionne pas, débranchez-le et
contactez votre revendeur.
Si le câble d’alimentation est endommagé, il doit être remplacé par le fabricant, son service après vente ou une personne de qualification similaire afin d’éviter un danger.
Antenne
Une antenne doit être raccordée à la prise marquée ++ 75 ½,
située à l’arrière du poste. Pour améliorer la réception, il est
conseillé d’utiliser une antenne extérieure.
Emplacement
Placez votre téléviseur de manière à ce que l’écran ne
reçoive pas directement la lumière du soleil ou d’une
lampe. Evitez, dans la mesure du possible, d’exposer l’appareil à des vibrations, à l’humidité, à la poussière et à la
chaleur. Veillez aussi à choisir une position où l’air peut circuler librement. Ne bouchez pas les ouvertures destinées
à la ventilation du téléviseur.
Lorsque vous installez le poste avec le support mural (en
option), fixez-le correctement pour éviter toute chute.
Nettoyage
Débranchez le poste avant de nettoyer la surface de
l’écran à cristaux liquides. Époussetez le poste en
essuyant l’écran et le coffret d’habillage à l’aide d’un chiffon doux et propre. Si l’écran nécessite un nettoyage complémentaire, utilisez un chiffon propre et humidifié.
N’employez pas de produits de nettoyage liquides ou en
aérosols.
Installation
3
FR
Page 48

-
Toutes les fonctions de cet appareil peuvent être exécutées à partir du boîtier de télécommande.
-
Certaines sont également accessibles à partir des touches situées sur la face avant du téléviseur.
- Avant de faire fonctionner la télécommande, n’oubliez pas d’install-er des piles dans le compartiment prévu à cet effet.
POWER
Pour passer en mode Veille ou pour
allumer le téléviseur lorsque vous êtes en
mode Veille.
NUMBER BUTTONS
PSM (mŽmorisation des param•tres de
lÕimage)
Pour rappeler les paramètres image et
son que vous avez choisis.
LIST
Affiche la table de programme.
MENU
Pour sélectionner un menu.
EXIT
Permet de quitter un mode.
TOUCHES TELETEXTE (en option)
Ces touches servent pour le télétexte.
Pour des informations détaillées, reportez-
vous à la section ‘Télétexte’.
PIP
Active ou désactive l’image incrustée.
PIP PR +/-
Selectionne un programme pour l’image
incrustée.
SWAP
Basculement entre image principale et
image incrustée.
PIP INPUT
Sélectionne le mode d’incrustation.
PIP POSITION
Positionne l’image incrustée dans le sens
des aiguilles d’une montre.
STILL
Gel de l’image incrustée.
SCAN
Active les images incrustées 4/12 du
mode de balayage des programmes.
MUTE
Pour couper ou remettre le son.
ARC (Contr™le du rapport dÕaspect)
Sélectionnez ARC pour choisir le format d’image.
SSM (mŽmorisation des param•tres du son)
Pour rappeler les paramètres audio que vous
avez choisis.
I/II
Pour choisir la langue uniquement si le programme émis est en deux langues.
Sélectionne de la sortie audio (en option).
INPUT SELECT
Pour sélectionner le mode TV, AV1, AV2, SAV,
COMPONENT, RGB-DTV, RGB-PC, RGB-DVI.
D/ E
(SŽlection des programmes, haut/bas)
Pour sélectionner un programme ou une
option de menu.
Pour allumer le téléviseur lorsqu’il est en mode
veille.
F / G (RŽglage du volume, haut/bas)
Pour régler le volume du son.
Pour régler les paramètres à l’intérieur d’un
menu.
OK
Pour valider votre sélection ou pour afficher le
mode actuel.
PC/DVI
Pour sélectionner le mode COMPONENT,
RGB-DTV, RGB-PC, RGB-DVI.
SLEEP (MISS EN VEILLE)
Permet d’activer la mise en veille.
Q.VIEW
Pour revenir au programme précédent.
- Boutons de couleur : ces boutons sont pour
le télétexte (modèles ayant cette fonction) ou
pour le menu édition programme.
Emplacement et fonctions
des commandes
Le bo”tier de tŽlŽcommande
4
i
?
REVEAL
MIX
INDEX
TIME
PIP PR+ PIP PR- SWAP
PIP INPUT
PIP
PIP POSITION
STILL
SCAN
UPDATE
MODE
SIZE
HOLD
MENU
INPUT SELECT
SLEEP
VOL
VOL
PR
OK
1
3
46
79
2
5
8
0
I / II
ARC
LIST
EXIT
PR
TEXT
PC/DVI
Q.VIEW
X
M
PSM
POWER
SSM
Page 49

FR
- Le boîtier de télécommande fonctionne avec deux piles de type AAA.
Tirez doucement sur le couvercle du
boîtier pour ouvrir le compartiment
des piles.
Emplacement et fonctions
des commandes
Installation des piles
5
1
1
Installez les deux piles en respectant
les symboles de polarité ( et )
inscrits à l’intérieur du compartiment.
2
2
Remettez le couvercle.
Pour éviter que les piles fuient et abiment le boîter, retirez les piles lorsque
vous ne pensez pas à utiliser la télécommande pendant une longue période de temps. Ne mélangez pas différents types de piles ou des interférences éventuelles.
3
3
+
-
Page 50

1. MAIN POWER (MISE SOUS)
Pour allumer ou éteindre le téléviseur.
2.
DD / EE
(SŽlection des programmes, haut/bas)
Pour sélectionner un programme ou une option
de menu.
Pour allumer le téléviseur lorsqu’il est en mode
veille.
3. FF / GG (RŽglage du volume, haut/bas)
Pour régler le volume du son.
Pour régler les paramètres à l’intérieur d’un
menu.
4. MENU
Pour sélectionner un menu.
5. INPUT SELECT
sélectionne les entrées
TV, AV1, AV2, S-
Video
, Component, RGB-DTV, RGB-PC,
RGB-DVI.
Pour allumer le téléviseur lorsqu’il est en
mode veille.
6. POWER (I / rr )
Pour passer en mode Veille ou pour allumer le
téléviseur lorsque vous êtes en mode Veille.
7. INDICATEUR DE MISE SOUS TENSION /
STANDBY (VEILLE) (rr)
s'allume en rouge lorsque le téléviseur est en
veille.
s'allume en vert lorsque le téléviseur est en
marche.
8. RECEPTEUR DE LA TELECOMMANDE
(Face avant)
Emplacement et fonctions des
commandes
Face avant
6
1
4 5 6 7 82 3
Page 51

1. ENTREE RGB / ENTREE AUDIO / ENTREE DVI
branchez le port de sortie de votre ordinateur sur cette
entrée.
2. PORT D'ENTREE RS-232C (CONTROLE / MAINTENANCE)
reliez un PC à cette prise.
3. ENTREE AUDIO / ENTREE COMPONENT
(480i/480p/720p/ 1080i)
4. ENTREE S-VIDEO
branchez la sortie vidéo d'un magnétoscope S-VIDEO
sur l'entrée S-VIDEO.
Via la prise PŽritel
branchez la prise Péritel du magnétoscope sur l'une de
ces entrées.
5. Via la prise de lÕantenne
6. PRISE DU CORDON D'ALIMENTATION
Ce moniteur doit être relié à une prise d’alimentation
secteur alternatif. Reportez-vous aux caractéristiques
d’alimentation à la fin du présent mode d’emploi. Ne le
branchez jamais sur une prise d’alimentation en courant
continu.
Emplacement et fonctions des
commandes
Face arri•re
7
FR
RGB INP UTRGB INP UT
AUDI O I NPU TAUDI O I NPU T
DVI INP UTDVI INP UT
RS-2 32C IN PUTRS-2 32C IN PUT
(CON TRO L/S ER(CONTR OL/ SERV ICE )V ICE )
S-VI DEOS-VI DEO
AAV1V1
AAV2V2
AUDIO INPUTAUDI O INPU T
AUDIOAUD IO
RR TT
COMPON ENT COMPON ENT INPU T INPU T
(480i/4 80p/720 p/1080i )( 480i/48 0p/720p /1080i)
YY PPbbPP
rr
ANTAN T. IN. IN
AC I NPU TAC INP UT
1 2 3 4 5 6
Page 52

- Vous pouvez raccorder à votre téléviseur d’autres appareils externes (magnétoscopes, caméscopes, etc.). Le matériel
représenté peut être quelque peu différent de votre téléviseur.
Raccordez la sortie RF du magnétoscope à la prise
d’antenne située à l’arrière du téléviseur.
Raccordez le câble de l’antenne à l’entrée RF du
magnétoscope.
Affectez au canal vidéo de votre magnétoscope le
numéro de programme de votre choix, en suivant la
procédure décrite dans la section ‘Programmation
manuelle’.
Sélectionnez le numéro de programme affecté au
canal vidéo.
Appuyez sur la touche de lecture (PLAY) du magné-
toscope.
Via la prise de lÕantenne
- Afin d’obtenir une qualité
d’image optimale, branchez
votre magnétoscope sur l’entrée S-VIDEO si ce dernier le
permet.
- Afin d’éviter d’interférences
éventuelles, veillez à laisser
une distance suffisante entre
le magnétoscope et le moniteur.
Appuyez sur la touche INPUT SELECT de la télécommande,
puis sélectionnez AV1 ou AV2).
(Lorsque le magnétoscope est branché sur la prise S-Vidéo,
sélectionnez
S-Video)
Insérez une cassette vidéo dans le magnétoscope, puis
appuyez sur la touche PLAY du magnétoscope. (Reportez-vous
au mode d’emploi d’utilisation de votre magnétoscope.)
Branchement dÕun magnŽtoscope
Branchements externes
8
S-VIDEOS-VIDEO
AAV2V2
ANTAN T. IN. IN
AC INPUTAC INPUT
VCR
S-VIDEO
OUT
IN
(R) AUDIO (L ) VID EO
S-V ID EOS-V ID EO
AAV1V1
AAV2V2
ANTANT. IN. I N
AA
1
1
2
2
<Face arrière du magnétoscope>
Page 53

FR
Branchements externes
9
-
Après vous être abonné au service Câble auprès de votre fournisseur, et une fois votre boîtier de raccordement installé, vous
êtes en mesure de regarder les chaînes câblées.
Appuyez sur la touche INPUT SELECT de la télécommande, puis
sélectionnez
AV1 ou AV2.
Sélectionnez la chaîne de votre choix à l’aide de la télécommande
du boîtier de raccordement. (Pour de plus amples informations sur
le service Câble, contactez votre fournisseur de services.)
Cable
TV
(R) AUDIO (L) VIDEO
VCR
RF
DVI INPU TDVI INPU T
RS- 232C INPUTRS- 232C INPUT
(CO NTROL /SER(CO NTROL/S ERVIC E)VIC E)
S-V IDEOS-VID EO
AAV1V1
AAV2V2
AUDIO INP UTAUDIO INP UT
AUDIOAUDIO
RR TT
COMPO NENT COMP ONENT INPUT INPUT
(480i/ 480p/ 720p/ 1080i )(480i/ 480p/ 720p/ 1080i )
YY PPbbPP
rr
ANTA NT. IN. IN
AC INPUTAC INPU T
S-V IDEOS-VID EO
AAV1V1
AAV2V2
ANTA NT. IN. IN
AC INPUTAC INPU T
Cable
TV
(R) AUDIO (L) VIDEO
VCR
RF
Raccordement au rŽseau c‰blŽ
3
3
- Lorsque vous branchez une source externe sur
votre écran plasma, veillez à respecter le code
de couleur des prises.
Apuyez sur la touche INPUT SELECT de la télécommande du moniteur, puis sélectionnez
AV1 ou
AV2.
Faites fonctionner la source externe correspondante.
R L
AUDIO VIDE O
S-VIDEOS-VIDEO
AAV1V1
AAV2V2
ANTAN T. IN. IN
AC INPUTAC INPUT
Branchement dÕune source externe
4
4
<Boîtier de raccordement>< Cable Box >
Caméscope
Console de jeu
2
1
Page 54

• EntrŽes vidŽo composante
Vous pouvez améliorer la qualité de l’image en branchant le lecteur DVD sur les
entrées vidéo composante, comme illustré
ci-dessous.
Branchements externes
10
Connexion
Branchez le lecteur DVD sur les entrées vidéo composante (entrées DVD) Y, PB, PR et sur les entrées audio du moniteur.
Utilisation
Appuyez sur la touche INPUT SELECT ou PC/DVI de la télécommande du moniteur pour sélectionner
Component.
Mettez votre lecteur DVD sous tension.
Branchement dÕun lecteur DVD
DVI INPUT
RS-232C INPUT
(CONTROL/SERVICE)
S-VIDEO
AV1
AV2
AUDIO INPUT
AUDIO
R T
COMPONENT INPUT
(480i/480p/720p/1080i)
Y PbP
r
ANT. IN
AC INPUT
RS-232C INPUT
(CONTROL/SERVICE)
AV1
AV2
AUDIO INPUT
AUDIO
R T
COMPONENT INPUT
(480i/480p/720p/1080i)
Y P
b
P
r
B
R
(R) AUDIO (L)
RS-232C INPUT
(CONTROL/SERVICE)
AV1
AV2
AUDIO INPUT
AUDIO
R T
COMPONENT INPUT
(480i/480p/720p/1080i)
Y P
b
P
r
(R) AUDIO (L)
S-VIDEO
5
5
< Face arrière du lecteur DVD>
ou
Entrées vidéo composante
du moniteur
Y PB
PR
Sorties vidéo du
lecteur DVD
Y
Y
Y
Y
Pb
B-Y
Cb
P
B
Pr
R-Y
Cr
P
R
Page 55

FR
Branchements externes
11
Connectez la prise externe du moniteur à la prise entrée du RGB INPUT situé au dos de l’appareil.
Connecter le câble audio depuis le magnétoscope PC jusqu’aux prises AUDIO INPUT situées dans le téléviseur.
Appuyez sur le bouton INPUT SELECT ou PC/DVI pour sélectionner la fonction RGB.
Allumez le PC et l’écran apparaît sur l’appareil.
Ce dernier peut être utilisé comme le moniteur
Branchement du PC
RGB INPUTRGB INPUT
AUDIO INPUTAUDIO INPUT
AUDIO INPUTAUDIO INPUT
AUDIOAUDIO
RR TT
6
6
Page 56

Pour régler le volume,
utilisez la touche FF / GG.
Coupure du son; Appuyez
sur la touche MUTE. Pour
restaurer le volume du son
initial, utilisez la touche
MUTE,
FF / GG, I/II ou SSM.
Pour sélectionner un programme, utilisez la touche
DD / EE ou les touches
NUMEROTEES.
Pour mettre le téléviseur en
marche, appuyez sur la
touche mise sous/hors tension.
Si l’appareil est en mode
veille, allumezle en utilisant
les touches POWER,
DD / EE
,
INPUT SELECT, PC/DVI ou
les touches NUMEROTEES
de la télécommande.
Pour repasser en mode
veille, appuyez sur la
touche POWER de la télé-
commande.
Pour mettre l’appareil hors
tension, appuyez sur la
touche mise sous/hors tension.
Fonctionnement de base
12
1
1
Mise sous/hors tension du tŽlŽviseur
2
2
SŽlection des programmes
3
3
RŽglage du volume
Appuyez le bouton MENU,
ensuite le bouton DD / EE
pour sélectionner le menu
Spécial.
Appuyez sur le bouton
G et
sur le bouton DD / EE pour
sélectionner la Langue.
Appuyez sur le bouton
G et
sur le bouton DD / EE pour
sélectionner la langue
désirée.
Toutes les indications à
l’écran s’affichent dans la
langue choisie.
Appuyez plusieurs fois le
bouton MENU pour retourn-
er à l'image normale TV.
4
4
SŽlection de la langue pour
lÕaffichage Žcran (en option)
Page 57

FR
- Le dialogue avec votre téléviseur se déroule par l’intermédiaire de menus écran.
Appuyez le bouton MENU
ensuite le bouton
DD / EE
pour afficher chaque
menu.
Menus Žcran
Sélection des menus
13
1
1
Appuyez sur le bouton G et
sur le bouton
DD / EE pour
sélectionner une option de
menu.
2
2
Appuyez sur le bouton G
pour afficher le sous menu
ou le menu déroulant.
3
3
Changez le paramétrage
d'une option dans le sousmenu ou le menu
déroulant avec le bouton
F / G ou D / E.
Pour aller au menu de
niveau supérieur, utiliser le
bouton
F, et pour aller au
menu de niveau inférieur,
appuyez sur le bouton
G.
4
4
IMAGE
()OO}{OOOKOOMENU
PREREGLAGES IMAGE
Contraste
Lumiére
Couleur
Téinte
SON
()OO}{OOOKOOMENU
PREREGLAGES SON
Balance
AVL
EMETTEUR
()OO}{OOOKOOMENU
Auto
Manuelle
Edition
HEURE
()OO}{OOOKOOMENU
Horloge
Heure Arret
Heure Marche
Arrêt Auto.
SPECIAL
()OO}{OOOKOOMENU
Langue (language)
CSM
PC Control
WXGA
Set ID
Page 58

RŽglage de lÕimage
14
Appuyez le bouton
MENU, ensuite le
bouton
DD / EE
pour
sélectionner le menu
IMAGE.
Appuyez sur la
touche
GG et la
touche
DD / EE
pour
sélectionner la PSM.
Appuyez sur la
touche
GG et la
touche
DD / EE
pour
sélectionner un
réglage de l'image
sur le menu
déroulant PSM.
1
1
Appuyez plusieurs fois le bouton
MENU pour retourner à l'image
normale TV.
Pour rappeler vos paramètres
préférés, appuyez sur la touche
PSM jusqu’à l’affichage de l’image
voulue (
Dynamique, Standard,
Doux ou Utilisateur). A l’excep-
tion de Dynamique, Standard
et Doux les paramètres de
chaque reproduction d’image
appropriée sont programmés en
usine.
PSM (MŽmorisation des param•tres de lÕimage)
2
2
RŽglage de lÕimage
IMAGE
()OO}{OOOKOOMENU
PREREGLAGES IMAGE
Contraste
Lumiére
Couleur
Téinte
IMAGE
()OO}{OOOKOOMENU
PREREGLAGES IMAGE
Contraste
Lumiére
Couleur
Téinte
IMAGE
()OO}{OOOKOOMENU
Dynamique
Standard
Doux
Utilisateur
PREREGLAGES IMAGE
Contraste
Lumiére
Couleur
Téinte
IMAGE
()OO}{OOOKOOMENU
100
PREREGLAGES IMAGE
Contraste
Lumiére
Couleur
Téinte
Appuyez le bouton
MENU, ensuite le
bouton
DD / EE
pour
sélectionner le menu
IMAGE.
Appuyez sur la
touche
GG et la
touche DD / EE pour
sélectionner l'image
désirée dans le
menu déroulant.
Appuyez sur le bouton GG. Appuyer
sur la touche FF / GG afin d’activer
les réglages appropriés sur
chaque sou-menus.
Vous pouvez régler le contraste, la
luminosté, l’intensité des couleurs,
la netteté de l’image et la teinte
(avec un mode NTSC AV) de l’image selon vos préférences.
Page 59

RŽglage de lÕimage
Format de lÕimage
15
FR
Les images peuvent être visualisées sous différents formats, le format : 16:9, 14:9, 4:3, Zoom, Panorama, Auto
.
Vous pouvez également sélectionner les formats 16:9, 14:9,4:3, Zoom, Panorama, Auto à l'aide de la touche ARC
de la télécommande.
1. Dans ce cas, appuyez la touche ARC pour sélectionner le format désiré.
• Chaque pression sur la touche ARC modifie l’affichage de l’écran comme illustré ci-dessous.
• Vous pouvez également sélectionner
16:9, 14:9, 4:3, Zoom, Panorama, Auto dans le menu SCREEN.
3
3
Format de lÕimage
16 : 9
Auto
14 : 9
4 : 3
Panorama
Zoom
Page 60

RŽglage du son
16
SON
()OO}{OOOKOOMENU
PREREGLAGES SON
Balance
AVL
SON
()OO}{OOOKOOMENU
Plat
Palole
Cinema
Musique
Utilisateur
Appuyez le bouton MENU,
ensuite le bouton DD / EE pour
sélectionnez le menu SON.
Appuyez sur la touche GG et la
touche DD / EE pour sélectionnez la
SSM.
Appuyez sur le bouton
G et sur le
bouton DD / EE pour sélectionnez
un paramétrage d'image dans le
menu déroulant
SSM.
Appuyez plusieurs fois le bouton
MENU pour retourner à l'image
normale TV.
1
1
RŽglage de la frŽquence sonore
a. Appuyez sur le OK,
Utilisateur.
b. Sélectionnez la bande de fréquence
en appuyant sur les touches
FF / GG
.
c. Réglez le niveau du son (sur la
fréquence sélectionnée précédemment) en appuyant sur les boutons
D / E.
d. Appuyez sur la touche OK pour met-
tre le réglage en mémoire
Utilisateur.
L'information Mémorisé apparaîtt.
Vous pouvez également rappeler un
son désiré (
Plat, Palole, Cinema,
Musique ou Utilisateur) avec le bou-
ton SSM placé sur la télécommande. A
l’exception de Plat, Palole, Cinema
et Musique, les paramètres de chaque
reproduction sonore appropriée sont
programmés en usine.
SSM (MŽmorisation des param•tres du son)
PREREGLAGES SON
Balance
AVL
()OO}{OOOKOOMENU
0.1 0.5 1.0 5.0 10kHz
Page 61

RŽglage du son
17
FR
Appuyez le bouton
MENU, ensuite le bouton
DD / EE pour sélectionner
le menu SON.
Appuyez sur la touche
GG
et la touche DD / EE pour
sélectionner la AVL.
Appuyez sur la touche
GG
et la touche DD / EE pour
sélectionner la Marche
ou l'Arrêt.
3
3
Appuyez plusieurs fois le bouton MENU pour retourner à
l'image normale TV.
Lorsque vous sélectionnez
cette fonction, votre appareil
régle automatiquement le volume sonore quelque soit le
type de programme que vous
recevez afin de conserver le
même niveau.
AVL (Volume Sonore Automatique)
SON
()OO}{OOOKOOMENU
PREREGLAGES SON
Balance
AVL
Appuyez le bouton MENU,
ensuite le bouton DD / EE pour
sélectionner le menu SON.
Appuyez sur le bouton
G et sur
le bouton D / E pour sélectionner l'élément de son désir.
Appuyez successivement sur
les touches
GG et FF / GG pour
effectuer vos réglages.
2
2
Appuyez plusieurs fois le
bouton MENU pour
retourner à l'image normale TV.
Balance
SON
()OO}{OOOKOOMENU
0
PREREGLAGES SON
Balance
AVL
SON
()OO}{OOOKOOMENU
PREREGLAGES SON
Balance
AVL
SON
()OO}{OOOKOOMENU
Arrêt
Marche
PREREGLAGES SON
Balance
AVL
Page 62

RŽglage du son
18
SŽlection de la langue pour les Žmissions bilingues
Si une émission est diffusée en deux langues, vous pouvez sélectionner
DUAL I, DUAL II ou DUAL I+II en
appuyant une ou plusieurs fois sur la touche I/II.
DUAL I permet de retransmettre la langue originale sur les
haut-parleurs.
DUAL II permet de retransmettre la langue du doublage
sur les haut-parleurs.
DUAL I+II permet de retransmettre une langue sur
chaque haut-parleur.
Votre magnétoscope est équipé d’un décodeur de son
numérique, qui vous permet de recevoir un son numérique
NICAM (Near Instantaneous Compressed Audio
Multiplexing) d’excellente qualité.
La sortie audio peut être sélectionnée en fonction du type
d’émission reçue avec la touche I/II.
Lorsque vous recevez un son NICAM mono, sélectionnez
NICAM MONO ou MONO.
Lorsque vous recevez un son NICAM stéréo, sélectionnez
NICAM STEREO ou MONO. Si le signal stéréo est mau-
vais, passez en mono.
Lorsque vous recevez un son NICAM dual (bilingue),
sélectionnez
NICAM DUAL I, NICAM DUAL II, NICAM
DUAL I+II
ou MONO. Si vous sélectionnez mono, le mes-
sage
MONO apparaît sur l’écran.
SŽlection du son mono
Si le signal stéréo est faible,
l’émission sera meilleure en
mono. Pour passer en
mono, appuyez sur la
touche I/II. Pour repasser en
stéréo, rappuyez sur la
touche I/II.
En mode AV, vous pouvez
diriger la sortie son vers le
haut-parleur droit ou
gauche.
Pour sélectionner la sortie
audio, appuyez une ou
plusieurs fois sur la touche
I/II.
L+R : Le signal audio de
l’entrée audio L sort sur le
haut-parleur gauche, le
signal audio de l’entrée R
sur le haut-parleur droit.
L+L : Le signal audio de
l’entrée audio L sort sur les
haut-parleurs droit et
gauche.
R+R : Le signal audio de
l’entrée audio R sort sur les
haut-parleurs droit et
gauche.
4
4
SŽlection de la sortie audio
Page 63

EMETTEUR
MŽmorisation des cha”nes
Programmation automatique
19
FR
-
Votre téléviseur peut mémoriser jusqu’a 100 chaînes, sous forme de numéros (de 00 à 99). Une fois les chaînes programmées, vous pouvez les visionner l’une après l’autre en utilisant la touche
DD / EE
ou les touches NUMEROTEES.
Vous avez la possibilité d’effectuer la programmation en mode automatique ou en mode mode d’emploi.
-
Cette méthode permet de mémoriser tous les programmes qui peuvent être reçus. Nous vous recommandons d’utiliser la programmation automatique lors de l’installation du téléviseur.
Appuyez plusieurs
fois sur la touche
MENU et la touche
DD / EE
pour sélectionnez le menu
Emetteur.
1
1
Appuyez sur la touche GG et la touche
DD / EE
pour sélectionnez la Auto.
Appuyez sur la touche GG pour afficher le menu
correspondant au mode Auto.
Appuyez sur la touche GG pour sélectionnez
Système. Sélectionnez le Système TV à l’aide
de la touche
FF / GG sur le menu déroulant ;
L : SECAM L/L’(France)
BG : PAL B/G, SECAM B/G (Europe/Europe
de l’Est)
I : PALI/II (Royaume-Uni/Irlande)
DK : PALD/K, SECAM D/K (Europe de l’Est)
Appuyez sur la touche
DD / EE
pour sélection-
nez
Mémoire.
Sélectionnez le numéro du premier programme
à enregistrer à l’aide de la touche
FF / GG ou des
touche numérotées dans le menu déroulant.
2
2
Appuyez sur la touche
DD / EE
pour sélection-
nez
Début.
Lancez la programmation automatique en
appuyant sur la touche
GG
.
Toutes les chaînes qui peuvent être reçues
sont mises en mémoire. Pour les chaînes qui
reçoivent les informations VPS (Video
Programme Service), PDC (Programme
Delivery Control), Télétexte, le nom de la
chaîne est mémorisé. Si aucun nom de chaîne
peut être associé à une chaîne, le numéro de
canal est attributé et mémorisé sous la forme
C (V/UHF 01-69) ou S (Câble 01-47), suivi
d’un numéro.
Pour arrêter la programmation automatique,
appuyez sur la touche MENU.
En fin de programmation automatique, le mode
Édition apparaît à l’écran. Pour éditer le pro-
gramme mémorisé, reportez-vous à la section
‘Edition des programmes’.
Appuyez plusieurs fois le bouton MENU pour
retourner à l'image normale TV.
3
3
EMETTEUR
()OO}{OOOKOOMENU
Auto
Manuelle
Edition
EMETTEUR
STOP : MENU
()OO}{OOOKOOMENU
Auto
Manuelle
Edition
Systéme
FF
DK
GG
Mémoire 7
Début
GGGGGG
Auto
Manuelle
Edition
Systéme
FF
DK
GG
Mémoire 7
Début
GGGGGG
7 14%
Page 64

MŽmorisation des cha”nes
Programmation manuelle
20
- Ce mode de programmation permet de rechercher manuellement les canaux et de leur affecter les numéros de votre
choix. Vous pouvez aussi affecter à chaque numéro un nom de cinq lettres.
Appuyez plusieurs
fois sur la touche
MENU et la touche
DD / EE
pour sélectionner le menu
Emetteur.
Appuyez sur la touche
GG et la touche DD / EE
pour sélectionner la Manuelle.
Appuyez sur la touche
GG pour afficher le menu
correspondant au mode Manuelle.
Appuyez sur la touche
DD / EE
pour sélection-
nez
Mémoire.
Sélectionnez le numéro du premier programme
à enregistrer à l’aide de la touche
FF / GG ou des
touche numérotées dans le menu déroulant.
1
1
2
2
Appuyez sur la touche
DD / EE
pour sélectionner
Système.
Sélectionnez le
Système TV à l’aide de la
touche FF / GG sur le menu déroulant ;
L : SECAM L/L’(France)
BG : PAL B/G, SECAM B/G (Europe/Europe
de l’Est)
I : PALI/II (Royaume-Uni/Irlande)
DK : PAL D/K, SECAM D/K (Europe de l’Est)
Appuyez sur la touche
DD / EE
pour sélectionnez
CH..
Appuyez sur la touche
FF / GG pour sélectionnez,
selon le cas, V/UHF ou Cable.
3
3
EMETTEUR
()OO}{OOOKOOMENU
Auto
Manuelle
Edition
EMETTEUR
()OO}{OOOKOOMENU
Auto
Manuelle
Edition
Mémoire 4
Systéme
FF
DK
GG
Canal V/UHF 33
Régl. fin
GGGGGG
Recherche
GGGGGG
Nom C 33
EMETTEUR
()OO}{OOOKOOMENU
Auto
Manuelle
Edition
Mémoire 4
Systéme
FF
DK
GG
Canal V/UHF 33
Régl. fin
GGGGGG
Recherche
GGGGGG
Nom C 33
Page 65

MŽmorisation des cha”nes
Programmation manuelle
21
FR
Appuyez sur la touche
DD / EE
pour sélectionner Régl. Fin.
Appuyez sur les touche
FF / GG pour activer une recherche
plus Régl. Fin des chaînes (afin d’améliorer l’image et le
son), dans le menu déroulant de recherche.
Normalement vous n’aurez à utiliser cette fonction que si
l’image est de mauvaise qualité.
Appuyez sur la touche
DD / EE
pour sélectionner
Recherche.
Appuyez sur la touche
FF / GG pour lancer dans le menu
déroulant.
Celle-ci s’arrête dès qu’une chaîne est détectée. Appuyez
sur la touche OK pour le mémoriser.
4
4
Appuyez sur la touche
DD / EE
pour sélectionner Nom.
Appuyez sur la touche
GG pour afficher le menu corre-
spondant au mode Nom.
Appuyez sur la touche
DD. Vous pouvez utiliser un
espace, le signe +, _, un chiffre de 0 à 9 ou une lettre
de l’alphabet, de A à Z.
Utilisez la touche EE pour faire défiler les caractères
dans le sens inverse.
Passez à l’emplacement suivant avec la touche
FF / GG et
choisissez le second caractère. Procédez ainsi pour les
autres caractères.
Appuyez sur le bouton OK.
Appuyez plusieurs fois le bouton MENU pour retourner
à l'image normale TV.
5
5
EMETTEUR
()OO}{OOOKOOMENU
Auto
Manuelle
Edition
Mémoire 4
Systéme
FF
DK
GG
Canal V/UHF 33
Régl. fin
GGGGGG
Recherche
GGGGGG
Nom C 33
EMETTEUR
()OO}{OOOKOOMENU
Auto
Manuelle
Edition
Mémoire 4
Systéme
FF
DK
GG
Canal V/UHF 33
Régl. fin
GGGGGG
Recherche
GGGGGG
Nom C 33
Page 66

MŽmorisation des cha”nes
Edition des programmes
22
- Cette fonction vous permet de supprimer ou de sauter les programmes mémorisés. Vous pouvez également déplacer
des chaînes vers d’autres numéros de programmes ou effectuer une copie vers les numéros de programmes suivants.
Appuyez plusieurs
fois sur la touche
MENU et la touche
DD / EE
pour sélectionner le menu
Emetteur.
1
1
Appuyez sur la touche GG et la
touche
DD / EE pour sélectionner
l’
Édition
.
Appuyez sur la touche
GG pour
afficher le menu correspondant au mode
Édition
.
Sélectionnez le programme
que vous voulez supprimer à
l’aide de la touche DD / EE ou
FF / GG.
Appuyez sur la touche
ROUGE deux fois. Le programme sélectionné est supprimé et tous les programmes
suivants sont avancés d’un
rang dans la programmation.
2
2
3
3
Supprimer un programme
Sélectionnez le programme
que vous voulez copier à l’aide
de la touche DD / EE ou FF / GG.
Appuyez sur la touche
VERTE. Tous les programmes
suivants sont avancés d’un
rang dans la programmation,
vers le numéro suivant dans la
table.
4
4
Copier un programme
EMETTEUR
()OO}{OOOKOOMENU
Auto
Manuelle
Edition
GGGGGG
()OO}{OOOKOOMENU
0 C 04 5 - - - - 1 S 03 6 - - - - 2 S 04 7 - - - - 3 C 06 8 - - - - 4 C 33 9 - - - - -
Effacer Copier
D
é
placer Sauter
EMETTEUR
()OO}{OOOKOOMENU
Auto
Manuelle
Edition
Page 67

MŽmorisation des cha”nes
Edition des programmes
23
FR
Sélectionnez le programme
que vous voulez déplacer à
l’aide de la touche DD / EE ou
FF / GG.
Appuyez sur la touche JAUNE.
Déplacez le programme vers
le numéro de programme
souhaite, à l’aide de la touche
DD / EE ou FF / GG.
Appuyez de nouveau sur la
touche JAUNE pour désactiver cette fonction.
5
5
DŽplacer un programme
Sélectionnez le programme que vous voulez sauter à
l’aide de la touche
DD / EE ou FF / GG.
Appuyez sur la touche BLEU. Le programme sauté
devient bleu.
Appuyez de nouveau sur la touche BLEU pour libérer
le programme sauté.
Losqu’un numéro de programme est sauté, cela veut
dire que vous ne pourrez pas le sélectionner en utilisant la touche
DD / EE pendant le fonctionnement nor-
mal de la télévision. Si vous voulez trouver directement
le programme sauté, saisissez le numéro de programme en utilisant les touches NUMEROTEES ou
sélectionnez-le en menu ‘Edition ou Table des programmes’.
6
6
Sauter un programme
7
7
Appuyez plusieurs fois le bouton MENU pour retourner à
l'image normale TV.
Page 68

MŽmorisation des cha”nes
Table des programmes
24
Appuyez sur la touche LIST pour
afficher la table des programmes.
La première page de la table des programmes s’affiche. Elle contient dix
programmes.
Certains numéros de programmes
peuvent apparaître en bleu. Il s’agit
des programmes que vous avez
sautés en mode Ranger les programmes.
Pour certains programmes, le
numéro de canal figure sur la table
des programmes : aucun nom de
chaîne n’est attribué.
1
1
Affichage de la table des programmes
sélectionnez le programmes pauvent
avec la touche DD / EE ou FF / GG.
Appuyez ensuite sur la touche OK.
Le téléviseur affiche le programme
sélectionné.
2
2
SŽlection dÕun programme dans la table
La liste des programmes est composée de 10 pages et peut donc contenir jusqu’à 100 programmes.
Pour passer d’une page à l’autre,
utilisez la touche DD / EE ou FF / GG.
Appuyez plusieurs fois le bouton
MENU pour retourner à l'image normale TV.
3
3
Pour faire dŽfiler la table des programmes
- Vous pouvez vérifier les programmes enregistrés en mémoire en affichant la table des programmes.
()OO}{OOOKOOMENU
0 - - - - - 5 - - - - 1 S 03 6 - - - - 2 C 33 7 - - - - 3 C 18 8 - - - - 4 9 - - - - -
Page 69

Menu TIME (Minuterie)
25
FR
Horloge
Vous devez régler l'horloge
avant d'utiliser la fonction de
mise en marche/arrêt automatique.
Appuyez le bouton MENU,
ensuite le bouton
DD / EE
pour
sélectionner le menu TIME.
Appuyez sur la touche
GG
et la
touche
DD / EE
pour sélectionner
la
Horloge.
Appuyez sur les touches GG, puis
DD / EE
pour régler les heures.
Appuyez sur les touches GG, puis
DD / EE
pour régler les minutes.
Appuyez sur la touche MENU
ou OK pour sauvegarder.
Le minuteur de mise en arrêt commute automatiquement l'appareil à la position
stand-by après que le temps de préréglage s
'
est écoulé.
Appuyez le bouton MENU, ensuite le bouton
DD / EE
pour sélectionner le menu TIME.
Appuyez sur la touche
GG et la touche
DD / EE
pour sélectionner la
Heure Arrêt
ou
Heure Depart
.
Appuyez sur la touche
GG et la touche
DD / EE
pour sélectionner la
Marche
.
Pour annuler la mise en marche/arrêt automatique, appuyez sur la touche
DD / EE
pour
sélectionner
Arrêt
.
Appuyez sur les touches
GG, puis
DD / EE
pour régler les heures.
Appuyez sur les touches
GG, puis
DD / EE
pour régler les minutes.
Fonction On time (Marche) seule ; appuyez sur
GG, puis sur la touche
DD / EE
, pour
régler le volume et le numéro du programme.
Appuyez sur la touche MENU ou OK pour sauvegarder.
Remarque :
a. En cas de coupure de courant prolongŽe (dŽbranchement ou panne de courant),
lÕhorloge doit •tre rŽglŽe de nouveau.
b. Si aucune touche de la tŽlŽcommande nÕest activŽe durant les deux heures qui
suivent la mise en service ,lÕappareil sÕarr•tera automatiquement.
c. Cette fonction de ÒdŽmarrage et arr•t automatique ˆ lÕheure choisieÓ est une pro-
grammation journali•re.
d. L'arr•t automatique prime sur la mise en marche automatique si la m•me heure
est programmŽe pour chacune de ces fonctions.
e. Le tŽlŽviseur doit •tre en mode veille pour pouvoir se mettre automatiquement en
marche.
1
1
Minuteur de mise en marche/arr•t
2
2
HEURE
()OO}{OOOKOOMENU
Horloge
Heure Arret
Heure Marche
Arrêt Auto.
HEURE
()OO}{OOOKOOMENU
--:-- AM
HEURE
()OO}{OOOKOOMENU
06:59 AM
PR. 7
VOL. 46
Marche
Horloge
Heure Arret
Heure Marche
Arrêt Auto.
Horloge
Heure Arret
Heure Marche
Arrêt Auto.
Page 70

Pour restaurer les réglages par
défaut, sélectionnez l'option
Plat.
Appuyez le bouton MENU,
ensuite le bouton
DD / EE pour
sélectionner le menu Spécial.
Appuyez sur la touche
GG et la
touche
DD / EE
pour sélectionner
la CSM.
Appuyez sur la touche GG et la
touche
DD / EE
pour sélectionner
la température de couleur de
votre choix.
Appuyez sur la touche MENU
pour sauvegarder.
CSM (MŽmoire de
mode de couleur)
Menu TIME (Minuterie) / Autres fonctions
26
Mise en veille automatique
Si vous sélectionnez Marche
dans le menu déroulant Arrêt
Auto
, l'appareil se commutera
automatiquement en mode
attente pendant environ dix minutes, après un arrêt de l'émission
de la station TV ou l'absence de
signal.
Appuyez le bouton MENU,
ensuite le bouton
DD / EE pour
sélectionner le menu TIME.
Appuyez sur la touche
GG et la
touche
DD / EE pour sélectionner la
Arrêt Auto.
Appuyez sur la touche
GG et la
touche
DD / EE pour sélectionner la
Marche ou Arrêt.
Appuyez sur la touche MENU
ou
OK
pour sauvegarder.
Vous n’avez plus à vous soucier d’éteindre le
poste avant d’aller vous coucher. Cette fonction vous permet de mettre automatique-ment
le téléviseur en mode veille après un certain
délai. En appuyant sur la touche SLEEP
plusieurs fois de suite ou de manière continue, choisissez un délai (en minutes). L’écran
affiche ‘ ’, puis, dans l’ordre,
10, 20,
30, 60, 90, 120, 180 et 240. Le compte à
rebours est lancé dès la fin du réglage.
Remarque :
a. Pour visionner le temps de veille restant,
appuyez sur le bouton SLEEP une fois.
b. Pour annuler le temps de veille, appuyez
plusieurs fois sur le bouton SLEEP
jusquÕˆ ce que lÕaffichage Ô Õ apparaisse.
c. Si vous Žteignez lÕappareil, le param•tre
sŽlectionnŽ est annulŽ.
3
3
Mise en veille
4
4
HEURE
()OO}{OOOKOOMENU
Marche
Arrêt
Horloge
Heure Arret
Heure Marche
Arrêt Auto.
SPECIAL
()OO}{OOOKOOMENU
Froid
Plat
Chaud
Langue (language)
CSM
PC Control
WXGA
Set ID
rr - - -
rr - - -
SPECIAL
()OO}{OOOKOOMENU
Langue (language)
CSM
PC Control
WXGA
Set ID
Page 71

27
FR
Branchements ˆ un PC
Vous pouvez régler la position horizontale / verticale, la horloge, la phase, la reset, la configuration automatique de l’image selon vos préférences
Appuyez plusieurs fois sur la touche MENU et la touche
DD/ EE
pour sélectionner le menu Spécial.
Appuyer sur la touche GGet la touche
DD / EE
pour sélectionner l'image désirée.
Appuyer sur la touche
FF / GG
afin d’activer les réglages appropriés.
Position H / Position V
Cette fonction vous permet d’ajuster votre image gauche/droite et haut/bas à votre convenance.
Horloge
Cette fonction vous permettra de minimiser les barres verticales et les ombres visibles sur le fond de l’image. Et la taille
horizontale de votre image changera aussi.
Phase
Cette fonction vous permet de régler le bruit horizontal et d’affiner la dureté de l’image.
Auto-configuration
Cette fonction vous permet d’ajuster automatiquement la position de l’image, l’horloge et la phase. Les menus disparaîtront après quelques secondes pendant le processus de configuration automatique.
Reset (RŽglages usine)
Cette fonction vous permet de revenir aux réglages par défaut et ne peut être modifiée.
Remarque : Certains graphismes peuvent ne pas •tre visibles avec nettetŽ. Si le rŽsultat nÕest pas satisfaisant, ajuster
lÕhorloge, la phase et la position manuellement.
Appuyez sur la touche OK pour mettre le réglage en mémoire réglage de l’image des PC moniteur.
Appuyez sur la touche EXIT pour retourner en mode PC.
Fonction PC
Pour afficher une image normale, sélectionnez une résolution identique pour les modes RGB et XGA.
WXGA
SPECIAL
()OO}{OOOKOOMENU
H-Pos. 0
V-Pos. 0
Horloge 10
Phase 15
Auto
Reset
Langue (language)
CSM
PC Control
WXGA
Set ID
Page 72

28
Incrustation dÕimage (PIP)
Appuyez sur le bouton PIP pour obtenir l’image incrustée, rappuyez sur le bouton pour désactiver la fonction.
• Chaque pression sur la touche PIP vous permet de modifier la taille de l’image incrustée comme illustré ci-dessous.
1
1
Incrustation dÕimage (PIP)
Appuyez sur la touche POSITION
en mode PIP.
Appuyez sur le bouton POSITION
jusqu’à obtenir la position désirée.
L’image incrustée se déplace dans
le sens des aiguilles d’une montre.
2
2
DŽplacement de l'image
incrustŽe
- Image dans l’image est une option.
Page 73

29
FR
Incrustation dÕimage (PIP)
Appuyez sur le bouton SWAP pour
permuter entre l’image principale et
l’image incrustée.
3
3
Vasculement entre image
principale et image
incrustŽe
Actionnez la touche PIP INPUT
pour sélectionner la source de
l’image de PIP (sous image).
4
4
SŽlection du mode
dÕincrustation
Cette fonction vous permet de
chercher toutes les fonctions enregistrées sur 3/12 images principale et
de voir votre station préférée entre
l’image principales et l’image
incrustées.
Appuyez sur le bouton SCAN pour
choisir POP4/POP12.
Les images incrustée/principale
choisies recherchent toutes les stations enregistrées.
Appuyez sur le bouton EXIT pour désactiver la fonction.
6
6
Programme de recherche
Appuyer sur les touches PR + /-
pour sélectionner les chaînes
dans l’image PIP. Le numéro de
programme sélectionné est affiché
juste en dessous du numéro de
programme de l'image principale.
5
5
Programme de sŽlection
pour lÕimage incrustŽe
I’image principale
I’image incrustée
Page 74

30
La fonction Télétexte (ou Texte TOP) est disponible en
option. Par conséquent, seuls les postes sur lesquels le
système Télétexte a été installé peuvent recevoir les émissions télétexte en utilisant les touches correspondantes.
Le télétexte est un service gratuit diffusé par la plupart des
chaînes de télévision. Il propose des informations de
dernières minutes concernant les actualités, la météo, les
programmes TV, les valeurs de la bourse, ainsi que de
nombreux autres sujets.
Le décodeur télétexte de ce téléviseur est compatible avec
les systèmes SIMPLE, TOP et FASTEXT. Un télétexte
SIMPLE (standard) contient un certain nombre de pages,
que l’on peut sélectionner en tapant directement le
numéro correspondant. TOP (Table Of Page) et FASTEXT
offrent des méthodes de sélection de page plus modernes,
vous permettant d’afficher une page sans connaître son
numéro.
Pour activer/dŽsactiver le tŽlŽtexte
Pour activer le télétexte, appuyez sur la touche TEXT.
La première page ou la dernière page sélectionnée s’affiche. Le décodeur de télétexte sélectionne le mode télétexte retransmis par la station.
Deux numéros de page, le nom de la chaîne, la date et
l’heure sont maintenant affichés sur la première ligne de
l’écran. Le premier numéro de page indique votre sélection, tandis que le second indique le numéro de la page
actuellement affichée.
Pour désactiver le télétexte, appuyez sur la touche TEXT.
Le téléviseur réaffiche le mode précédent.
Texte SIMPLE
SŽlection des pages
1. Tapez les trois chiffres correspondant au numéro de la
page avec les touches NUMEROTEES.
Si vous tapez un mauvais chiffre, complétez le numéro
erroné et recommencez, afin de sélectionner le numéro
correct.
2. Pour sélectionner la page précédente ou la page suivante, vous pouvez utiliser la touche
DD / EE
.
Programmation des touches de couleur en mode LIST
Pour passer en mode LIST lorsque le téléviseur est en
SIMPLE, TOP ou FASTEXT, appuyez sur la touche .
Vous avez la possibilité de programmer quatre numéros
de page de votre choix en leur affectant une couleur. Pour
les sélectionner, il vous suffira d’appuyer sur la touche de
couleur correspondante.
1. Appuyer sur un des boutons colorés.
2. Utiliser le clavier numérique pour sélectionner la page
du programme que vous souhaitez voir.
3. Appuyer sur le bouton OK, la page sélectionnée sera
mémorisée en accès direct sur. Par la suite, vous pourrez sélectionner cette page en accès direct en appuyant
sur ce même bouton coloré.
4. Les trois autres touches colorées peuvent être programmées de la même manière.
Texte TOP (en option)
Le guide utilisateur situé en haut de l’écran affiche quatre
zones colorées en rouge, vert, jaune et bleu. La zone
jaune désigne le groupe suivant, la zone bleue le bloc
suivant.
SŽlection des groupes/blocs/pages
1. La touche BLEU permet de passer d’un bloc au suiv-
ant.
2. La touche JAUNE permet de passer au groupe suivant
(avec fin de page automatique au bloc suivant).
3. La touche VERTE permet d’afficher la page suivante
(avec fin de page automatique au groupe suivant).
Vous pouvez également utiliser la touche
DD
.
4. La touche ROUGE permet de revenir en arrière. Vous
pouvez également utiliser la touche
EE
.
SŽlection directe des pages
En mode TOP, comme en mode SIMPLE, vous pouvez
sélectionner une page télétexte en tapant les trois chiffres
correspondant à son numéro avec les touches NUMEROTEES.
TŽlŽtexte (en option)
Page 75

31
FR
FASTEXT
Les pages télétexte sont codées en fonction des cases
colorées figurant en bas de l’écran. Pour sélectionner une
page, il suffit d’appuyer sur la touche de couleur correspondante.
SŽlection des pages
1. Sélectionnez la page d’index en appuyant sur la touche
.
2. Vous pouvez sélectionner les pages codées en fonc-
tion des cases colorées en appuyant sur la touche de
couleur correspondante.
3. En mode FASTEXT, comme en mode SIMPLE, vous
pouvez sélectionner une page télétexte en tapant les
trois chiffres correspondant à son numéro avec les
touches NUMEROTEES.
4. Pour sélectionner la page précédente ou la page suiv-
ante, utilisez la touche
DD / EE
.
Fonctions tŽlŽtexte spŽciales
INFORMATIONS CACHEES
Certaines pages contiennent des informations cachées
(solutions de devinettes ou d’énigmes, par exemple). Une
simple pression sur la touche permet d’afficher les informations cachées.
Une seconde pression cache à nouveau les informations.
SIZE (TAILLE)
Cette fonction permet de doubler la taille des lettres à
l’écran.
Une simple pression sur la touche agrandit la moitié
supérieure de la page.
Une deuxième pression agrandit la moitié inférieure de la
page.
Une troisième pression restaure l’affichage initial.
MISE A JOUR
Cette fonction permet d’afficher l’image TV, pendant la
recherche d’une page télétexte. Le symbole apparaît
alors dans le coin supérieur gauche de l’écran. Lorsque la
page mise à jour est disponible, le symbole est remplacé par le numéro de la page.
Appuyez sur cette touche pour visualiser la page de télétexte mise à jour.
HOLD (STILL)
Interrompt le défilement automatique des pages pour les
pages télétexte comprenant plusieurs pages écran. Le nombre de pages écran et le numéro de celle qui est actuellement affichée apparaît normalement au-dessous de l’heure.
Lorsque vous appuyez sur cette touche, le symbole stop
apparaît dans le coin supérieur gauche de l’image et le
défilement automatique des pages écran est bloqué.
Une nouvelle pression permet de relancer le défilement.
MIX
Les pages télétexte apparaissent en surimpression sur
l’image TV.
Pour faire disparaître l’image TV, rappuyez sur cette
touche.
TIME
Pour afficher l’heure en haut à droite de l’écran pendant la
retranssmission d’un programme de télévision. Pour la
faire disparaître, appuyez sur la touche. En mode télétexte, pressez le bouton pour sélectionner un numéro de
sous-page. Le numéro de sous-page est affiché en bas de
l’écran. Pour garder ou changer la sous-page, presser les
boutons Rouge/Vert ou
DD / EE
. Presser encore pour quitter
la fonction.
TŽlŽtexte (en option)
Page 76

32
CaractŽristiques techniques
dÕaffichage
Remarque :
a. Lors de la mise en service, la température trop basse de
l’appareil peut engendrer un phénomène de vacillement
d’image. Ce phénomène est tout à fait normal.
b. Dans la mesure du possible, utilisez le mode vidéo
1.280x768 á 60Hz qui offre une qualité d’image optimale pour votre moniteur á cristaux liquides (LCD). Si
vous utilisez un autre mode, certaines images mises á
l’échelle ou traitées peuvent apparaître.
c. Certains défauts de points peuvent apparaître sur
l’écran, tels que des spots de couleur rouge, verte ou
bleue. Cependant, cela n’aura aucun impact ni aucun
effet sur les performances du moniteur.
d. N’appuyez pas votre doigt sur l’écran à cristaux liquides
pendant une période prolongée, car cela peut provoquer l’apparition d’images rémanentes.
e. Lorsque l’écran PC apparaît sur le poste, certains mes-
sages peuvent s’afficher sur l’écran, et le message est
différent selon la version du système Windows (Win 98,
2000). Si un message quelconque s’affiche, cliquez sur
"Next" d’une manière répétée jusqu’à ce que le message de fin apparaisse.
f. Si le message ÒOut Of RangeÓ apparaît sur l'écran,
ajustez le PC comme dans la section de cahier des
charges de moniteur de Displayable.
Mode RGB / Mode DVI
Felbont‡s
31.469
37.927
31.500
37.500
37.861
37.500
43.269
35.156
37.879
48.077
46.875
53.674
48.363
56.476
60.023
68.677
54.348
67.500
47.700
56.500
60.150
63.981
49.725
720X400
640X480
800X600
1024X768
1152X864
1280X768
1280X1024
832X624
†ZEMMîD
DOS
VGA
SVGA
XGA
SXGA
WXGA
SXGA
MAC
Vizsz’ntes eltŽr’tŽsi
frekvencia (KHz)
70.08
85.03
60.00
67.00
72.80
75.00
85.00
56.25
60.31
72.18
75.00
85.06
60.00
70.06
75.02
84.99
60.05
75.00
60.00
70.00
75.00
60.02
74.55
FŸgg≠≠leges eltŽr’tŽsi
frekvencia (Hz)
(Forme d'entrée de Sync : séparé)
Page 77

Remarque
33
FR
Page 78

Remarque
34
Page 79

FR
DŽpannage
Effectuez les vŽrifications et les rŽglages suivants:
Sympt™mes:
Pas d’image, pas de son
Son correct, image de mauvaise qualité
Image brouillée
Image brouillée
Lignes ou raies sur l’image
Mauvaise réception de certains canaux
Pas de couleur
Mauvaise qualité de la couleur
La télécommande ne fonctionne pas
Position incorrecte
Bandes ou raies verticales présentes sur le fond
Parasites visualisés horizontalement
Affichage d’un message concernant le câble d’interface
Prise secteur (branchée, sous tension)
Avez-vous allumé le téléviseur?
Essayez un autre canal (signal faible)
Vérifiez l’antenne (est-elle branchée?)
Vérifiez l’antenne (câble défectueux?)
Vérifiez l’antenne
Recherchez des interférences locales
Réglez le contraste
Réglez la luminosité
Réglez la couleur
Réglez le volume
Vérifiez les piles de la télécommande
Vérifiez les prises A/V (avec un magnétoscope)
Auto-configuration ou réglez la position H/V
Auto-configuration ou réglez la Horloge
Auto-configuration ou réglez la Phase
Le câble d’interface est-il connecté ou débranché ?
35
Page 80

Page 81

JV-DTV23 / JV-DTV27 / JV-DTV30
Bitte lesen Sie vor Gebrauch des Gerätes diese Anleitung aufmerksam
durch.
Bewahren Sie die Anleitung für spätere Fragen sorgfältig auf.
Sie finden die Angaben auf dem Typenschild an der Rückwand des
Gerätes. Teilen Sie Ihrem Kundendienst die Nummern mit, wenn Sie
Hilfe benötigen.
Page 82

Aufstellung 3
Lage und Funktion der Bedienungselemente 4-7
Fernbedienung 4
Einlegen der Batterien 5
Gerätefront 6
Rückansicht 7
Anschlie§en externer GerŠte 8-11
Grundfunktionen
Ein- und Ausschalten 12
Programmwahl 12
Lautstärkeeinstellung 12
Einstellen der Menüsprache (Option) 12
BildschirmmenŸs
Menüauswahl 13
Bildeinstellungen 14-15
PSM (Bild Status Speicher) 14
Manuelle bild steuerung 14
Bildformat 15
Klangeinstellungen 16-18
Klangmuster einstellen (SSM - Sound Status Memory) 16
Balance 17
AVL (Automatischer Lautstärkepegel) 17
Stereo / Zweikanalton / NICAM-Empfang 18
Programmieren der Fernsehsender 19-24
Automatische Programmierung 19
Manuelle Programmierung 20-21
Senderliste ordnen 22-23
Senderliste aufrufen 24
ZEIT-MenŸ / Other functions 25-26
Zeit / On/Off-Time 25
Automatisches Abschalten des Fernsehgerätes 26
Automatische Abschaltzeit (Sleep Timer) 26
CSM (Farbstatus) 26
PC anschlie§en
PC-Eingangsbuchse 27
Bild-im-Bild 28-29
Ein- und Ausschalten 28
Kleinbild verschieben 28
Großbild und Kleinbild vertauschen 29
Bildquelle für Kleinbild auswählen 29
Programmwahl für Bild-im-Bild 29
Sender-Bildsuchlauf 29
Videotext (Option) 28-29
Technische Daten fŸr die Bildschirmanzeige 32
Problembehebung 35
InhaltsverzeichnisContents
2
Page 83

Stromversorgung
Dieses Gerät wird mit Wechselstrom betrieben. Die
Netzspannung ist auf dem Typenschild auf der Rückseite
des Geräts angegeben. Betreiben Sie das Gerät niemals
mit Gleichstrom. Bei Gewitter oder Stromausfall ziehen Sie
bitte den Netzstecker und den Antennenstecker ab.
Warnhinweis
Zum Schutz vor Feuer oder elektrischem Schlag darf das
Gerät weder Regen noch Feuchtigkeit ausgesetzt werden.
Achten Sie darauf, dass der Active Matrix LCD-Bildschirm
nicht mit harten Objekten/Putzmitteln usw. behandelt,
abgerieben oder angestoßen wird, da der Bildschirm
zerkratzt, zerbrochen oder auf andere Weise dauerhaft
beschädigt werden kann.
Reparaturen
Entfernen Sie niemals selbst die Rückwand des Gerätes,
da Sie sonst Hochspannung und anderen
Gefahrenquellen ausgesetzt sind. Wenn das Gerät nicht
ordnungsgemäß funktioniert, ziehen Sie den Netzstecker
ab, und verständigen Sie Ihren Kundendienst.
Antennenanschluss
Schließen Sie das Antennenkabel an dem Anschluss auf
der Rückseite des Gerätes, der mit +75 Ω bezeichnet ist,
an. Um einen bestmöglichen Empfang zu gewährleisten,
sollten Sie eine Außenantenne verwenden.
Standort
Stellen Sie Ihr Gerät so auf, dass kein direktes Licht bzw.
Sonnenlicht auf den Bildschirm einfällt. Das Gerät darf
auch keinen unnötigen Vibrationen, Feuchtigkeit, Staub
oder Hitze ausgesetzt sein. Außerdem sollte das Gerät so
aufgestellt werden, dass ungehinderte Luftzirkulation stattfinden kann. Die Lüftungsschlitze auf der Rückseite des
Gerätes dürfen dabei nicht verdeckt werden. Die Neigung
des Gerätes kann entsprechend der Abbildungen
eingestellt werden.
Reinigung
Ziehen Sie den Stecker ab, bevor Sie mit der Reinigung
des LCD-Bildschirms beginnen. Entstauben Sie den
Bildschirm und das Gehäuse mit einem weichen, sauberen
Tuch. Wenn der Bildschirm zusätzlicher Reinigung bedarf,
verwenden Sie ein sauberes, angefeuchtetes Tuch.
Verwenden Sie niemals Flüssigreiniger oder Reinigungssprays.
Aufstellung
3
DE
Page 84

- Alle Funktionen können mit der Fernbedienung ausgeführt werden.
- Einige der Funktionen lassen sich auch mit den Tasten an der Geräteseite bedienen.
POWER
Gerät aus dem Bereitschaftsmodus ein-
schalten bzw. ausschalten.
ZIFFERNTASTEN
PSM (Bild Status Speicher)
Gespeicherte Bildeinstellungen aufrufen.
LIST
Senderliste aufrufen.
MENU
Menü aufrufen.
BEENDEN (EXIT)
Beendigung von jedem Modus aus
möglich.
VIDEOTEXT-TASTEN (Option)
Diese Tasten werden für Videotext ver-
wendet.
Weitere Informationen finden Sie im
Abschnitt „Videotext“.
PIP
Kleinbild ein- bzw. ausschalten.
PIP PR +/-
Programm für das Kleinbild aufrufen.
SWAP
Zwischen Großbild und Kleinbild umschal-
ten.
PIP INPUT
Bildquelle (Eingang) für das Kleinbild
auswählen.
PIP POSITION
Bildschirmposition des PIP-Bild im
Uhrzeigersinn verschieben
STILL
PIP-Bild zum Standbild „einfrieren“.
SCAN
Schaltet den Sender-Bildsuchlauf in 4/12
Kleinbilder
MUTE
Ton ein- bzw. ausschalten. (Stummschaltung)
ARC
wählen Sie das gewünschte Bildformat aus.
SSM (Klangmuster einstellen)
Gespeicherte Toneinstellungen aufrufen.
I/II
Sprache bei Zweikanalton auswählen.
Tonsignal am Ausgang auswählen. (Option)
INPUT SELECT
TV-, AV1-, AV2-, SAV-, COMPONENT-, RGBDTV, RGB-PC, RGB-DVI auswählen.
D/E
(Programmumschaltung auf / ab)
Programm oder Menüpunkt aufrufen.
Gerät aus Bereitschaftsmodus einschalten.
F / G (LautstŠrke leiser / lauter)
Lautstärke einstellen.
Menüeinstellungen regeln.
OK
Auswahl bestätigen oder aktuellen Modus
anzeigen.
PC/DVI
COMPONENT-, RGB-DTV, RGB-PC, RGBDVI Anzeigemodus auswählen.
SLEEP
Sleep-Timer aufrufen.
Q.VIEW
Zu dem zuletzt gesehenen Programm zurückkehren.
- FARBTASTEN : Diese Tasten werden für
Videotext (nur bei VIDEOTEXT-Modellen)
oder für die Funktion "Senderliste ordnen"
verwendet.
Lage und Funktion der Bedienelemente
Fernbedienung
Legen Sie bitte vor dem
Gebrauch der Fernbedienung
die Batterien ein. (siehe nächste Seite)
4
i
?
REVEAL
MIX
INDEX
TIME
PIP PR+ PIP PR- SWAP
PIP INPUT
PIP
PIP POSITION
STILL
SCAN
UPDATE
MODE
SIZE
HOLD
MENU
INPUT SELECT
SLEEP
VOL
VOL
PR
OK
1
3
46
79
2
5
8
0
I / II
ARC
LIST
EXIT
PR
TEXT
PC/DVI
Q.VIEW
X
M
PSM
POWER
SSM
Page 85

DE
- Die Fernbedienung wird von zwei Batterien des Typs „AAA“/Alkaline mit Strom versorgt.
Öffnen Sie das Batteriefach auf der
Rückseite der Fernbedienung. Setzen
Sie die Batterien in der richtigen Lage
ein.
Lage und Funktion der Bedienelemente
Einlegen der Batterien
5
1
1
Achten Sie dabei auf korrekte Polarität
entsprechend der Symbole ( und )
im Inneren des Batteriefachs.
2
2
Deckel wieder aufsetzen.
Um Schäden durch auslaufende
Batterien zu vermeiden, entfernen Sie
die Batterien vor längerem
Nichtgebrauch aus der Fernbedienung.
3
3
+
-
Page 86

1. NETZSCHALTER
Schaltet das Gerät ein oder aus.
2.
DD / EE
(Programmumschaltung auf/ab)
Programm oder Menüpunkt aufrufen.
Gerät aus Bereitschaftsmodus einschalten.
3. FF / GG (LautstŠrke leiser/lauter)
Lautstärke einstellen.
Menüeinstellungen regeln ändern.
4. MENU
Menü auswählen.
5. INPUT SELECT
TV-, AV1-, AV2-, S-Video-, Component-,
RGB-DTV, RGB-PC, RGB-DVI Anzeigemodus
auswählen.
Gerät aus Bereitschaftsmodus einschalten.
6. POWER (I / rr )
Schaltet das Gerät aus dem Stand-by
(Bereitschaftsmodus) EIN oder in den Standby AUS.
7. BETRIEBS-/BEREITSCHAFTSANZEIGE (rr)
Leuchtet im Bereitschaftsmodus rot.
Leuchtet grün, wenn das Gerät eingeschaltet
ist.
8. SENSOR F†R FERNBEDIENUNG
Lage und Funktion der Bedienelemente
GerŠtefront
6
GerŠtefront
1
4 5 6 7 82 3
Page 87

1. RGB-EINGANG / AUDIO-EINGANG / DVI-EINGANG
Verbinden Sie den PC-Ausgang mit dieser Buchse.
2. RS-232C EINGANGS-BUCHSE (STEUERUNG / SERVICE)
zum Anschluss an den RS-232C-Anschluss eines PCs.
3. AUDIO-EINGANG / COMPONENT-EINGANG
(480i/480p/720p/ 1080i)
4. S-VIDEO INGANG
Verbinden Sie den Video-Ausgang z.B. eines S-VHSVideorecorders mit dem S-VIDEO Eingang.
Scart-Anschluss
Verbinden Sie den Euro-Scart-Anschluß z.B. des
Videorecorders mit diesen Buchsen.
5. Antennenanschluss
6. NETZKABELANSCHLUSS
Der Monitor benötigt die Versorgungsspannung, die auf
der inneren Umschlagseite dieser Anleitung genannt ist.
Den Monitor niemals an eine Gleichstromquelle
anschließen.
Lage und Funktion der Bedienelemente
RŸckansicht
7
DE
RGB INP UTRGB INP UT
AUDI O I NPU TAUDI O I NPU T
DVI INP UTDVI INP UT
RS-2 32C IN PUTRS-2 32C IN PUT
(CON TRO L/S ER(CONTR OL/ SERV ICE )V ICE )
S-VI DEOS-VI DEO
AAV1V1
AAV2V2
AUDIO INPUTAUDI O INPU T
AUDIOAUD IO
RR TT
COMPON ENT COMPON ENT INPU T INPU T
(480i/4 80p/720 p/1080i )( 480i/48 0p/720p /1080i)
YY PPbbPP
rr
ANTAN T. IN. IN
AC I NPU TAC INP UT
1 2 3 4 5 6
Page 88

- Sie haben die Möglichkeit, an Ihr Fernsehgerät zusätzliche Geräte, z.B. Videorecorder, Camcorder usw.,
anzuschließen. Die Anschlüsse sind möglicherweise anders als bei Ihrem Gerät dargestellt.
Verbinden Sie den Anschluss „RF out“ Ihres
Videorecorders mit dem Antennenanschluss am
Fernsehgerät.
Schließen Sie das Antennenkabel am „RF in“-Antenneneingang des Videorecorders an.
Speichern Sie das Videorecordersignal unter der
gewünschten Programmnummer im Fernsehgerät.
Gehen Sie dazu nach dem Abschnitt „Manuelle
Programmierung“ vor.
Wählen Sie am Fernsehgerät die Programmnummer für
das Videosignal.
Betätigen Sie die Taste PLAY am Videorecorder.
Antennenanschluss
- Wenn Sie einen MonoVideorecorder besitzen,
schließen Sie das AudioKabel vom
Videorecorder an den
AUDIO L/MONO Eingang des LCDFernsehers an.
- Lassen Sie ausreichenden Abstand zwischen
Videorecorder und
Monitor, um Störungen
wie Bildrauschen zu vermeiden.
Drücken Sie INPUT SELECT auf der Fernbedienung, und
wählen Sie die Option
AV1 oder AV2.
(Wählen Sie S-VIDEO beim Verbinden mit
S-Video aus.)
Legen Sie ein Videoband in den Videorecorder ein, und
drücken Sie PLAY am Videorecorder.
(Bitte beachten Sie auch die Bedienungshinweise Ihres
Videorecorders.)
Videorecorder
Anschlie§en externer GerŠte
8
S-VIDEOS-VIDEO
AAV2V2
ANTAN T. IN. IN
AC INPUTAC INPUT
VCR
S-VIDEO
OUT
IN
(R) AUDIO (L ) VID EO
S-V ID EOS-V ID EO
AAV1V1
AAV2V2
ANTANT. IN. I N
1
1
2
2
Page 89

DE
Anschlie§en externer GerŠte
9
-
Wenn Sie einen Vertrag mit einem Kabelanbieter vor Ort
abgeschlossen haben und einen Decoder installiert haben, können Sie Programme über Kabel empfangen.
-
Weitere Informationen zum Pay-TV erhalten Sie von Ihren
Anbietern vor Ort.
Drücken Sie
INPUT SELECT
auf der Fernbedienung, und wählen
Sie die Option
AV1
oder
AV2.
Stimmen Sie die Kanäle Ihres Kabelanbieters mit der Kabelbox ab.
Cable
TV
(R) AUDIO (L) VIDEO
VCR
RF
DVI INPU TDVI INPU T
RS- 232C INPUTRS- 232C INPUT
(CO NTROL /SER(CO NTROL/S ERVIC E)VIC E)
S-V IDEOS-VID EO
AAV1V1
AAV2V2
AUDIO INP UTAUDIO INP UT
AUDIOAUDIO
RR TT
COMPO NENT COMP ONENT INPUT INPUT
(480i/ 480p/ 720p/ 1080i )(480i/ 480p/ 720p/ 1080i )
YY PPbbPP
rr
ANTA NT. IN. IN
AC INPUTAC INPU T
S-V IDEOS-VID EO
AAV1V1
AAV2V2
ANTA NT. IN. IN
AC INPUTAC INPU T
Cable
TV
(R) AUDIO (L) VIDEO
VCR
RF
Kabelfernsehen
3
3
Wenn Sie den LCD- Fernseher an andere Geräte
anschließen, achten Sie darauf, dass die Farben
der Anschlüsse übereinstimmen.
Drücken Sie INPUT SELECT auf der
Fernbedienung des Monitors, und wählen Sie die
Option
AV1 oder AV2.
Bedienen Sie die angeschlossenen Geräte.
R L
AUDIO VIDE O
S-VIDEOS-VIDEO
AAV1V1
AAV2V2
ANTAN T. IN. IN
AC INPUTAC INPUT
Weitere AV-Quellen
4
4
< Kabelanschlüsse >
Camcorder
Video game set
Page 90

• Komponenten-Eingangsbuchsen
Die beste Bildqualität erhalten Sie, wenn
sie den DVD-Player an die
Komponenten-Eingangsbuchsen
anschließen.
Anschlie§en externer GerŠte
10
Anschlie§en
Verbinden Sie die DVD-Videoeingänge mit den Buchsen Y, PB, PR COMPONENT INPUT und die Audioeingänge mit
den Audiobuchsen AV INPUT.
Bedienung
Schalten Sie zuerst den DVD-Player ein.
Drücken Sie INPUT SELECT oder PC/DVI auf der Fernbedienung des Monitors, und wählen Sie die Option
Component.
DVD-Player
DVI INPUT
RS-232C INPUT
(CONTROL/SERVICE)
S-VIDEO
AV1
AV2
AUDIO INPUTAUDIO INPUT
AUDIO
R T
COMPONENT INPUT
(480i/480p/720p/1080i)
Y PbP
r
ANT. IN
RS-232C INPUT
(CONTROL/SERVICE)
AV1
AUDIO INPUTAUDIO INPUT
AUDIO
R T
COMPONENT INPUT
(480i/480p/720p/1080i)
Y P
b
P
r
B
R
(R) AUDIO (L)
RS-232C INPUT
(CONTROL/SERVICE)
AV1
AUDIO INPUTAUDIO INPUT
AUDIO
R T
COMPONENT INPUT
(480i/480p/720p/1080i)
Y P
b
P
r
(R) AUDIO (L)
S-VIDEO
5
5
< DVD-Player >
oder
Component ports of the
set
Y PB
PR
Video output ports
of DVD player
Y
Y
Y
Y
Pb
B-Y
Cb
PB
Pr
R-Y
Cr
P
R
Page 91

DE
Anschlie§en externer GerŠte
11
Verbinden Sie den Monitorausgang des PERSONAL COMPUTER über ein Signalkabel mit dem
RGB INPUT
Eingang
des Fernsehgerätes.
Verbinden Sie die Audio-Anschlüsse des PC über ein Kabel mit den
AUDIO INPUT
Buchsen des Fernsehgerätes.
Betätigen Sie die Taste
INPUT SELECT oder PC/DVI
, um die Signalquelle
RGB
einzustellen.
Schalten Sie den PC ein. Die PC-Anzeige erscheint auf dem Bildschirm.
Das Fernsehgerät kann jetzt als PC-Bildschirm betrieben werden.
PC-Eingangsbuchse
RGB INPUTRGB INPUT
AUDIO INPUTAUDIO INPUT
AUDIO INPUTAUDIO INPUT
AUDIOAUDIO
RR TT
6
6
Page 92

Betätigen Sie die Tasten
FF / GG
,
um die gewünschte Lautstärke
einzustellen.
Stummschaltung;
Betätigen Sie die Taste
MUTE.
Der Ton wird wieder
zugeschaltet, wenn Sie eine
der Tasten
MUTE, FF / GG,
SSM oder I/II
betätigen.
Wählen Sie das gewünschte
Programm entweder mit den
Tasten
DD / EE
oder mit den
Zifferntasten.
Drücken Sie den Netzschalter
am Fernsehgerät, um das
Gerät in Bereitschaft zu schalten.
Wenn sich das Gerät in
Bereitschaft befindet, drücken
Sie die Taste POWER,
DD / EE
,
INPUT SELECT, PC/DVI
oder eine Zifferntaste auf der
Fernbedienung, um das Gerät
in den Betriebszustand zu
schalten.
Drücken Sie erneut die
Taste POWER auf der
Fernbedienung.
Das Gerät schaltet wieder in
den Bereitschaftsmodus.
Drücken Sie erneut den
Netzschalter am Fernsehgerät,
um das Gerät komplett
auszuschalten.
Grundfunktionen
12
1
1
Ein- und Ausschalten
2
2
Programmwahl
3
3
LautstŠrkeeinstellung
Rufen Sie mit der Taste
MENU und anschließend
mit DD / EE das Menü Spezial
auf.
Betätigen Sie die Taste GG
und anschließend die Taste
DD / EE, um die Option
Sprache auszuwählen.
Betätigen Sie die Taste GG
und anschließend die Taste
DD / EE, um die gewünschte
Sprache auszuwählen.
Sämtliche Anzeigen auf
dem Bildschirm werden nun
in der ausgewählten
Sprache eingeblendet.
Betätigen Sie wiederholt die
Taste
MENU,
um zur normalen Fernsehansicht
zurückzukehren.
4
4
Einstellen der
MenŸsprache (Option)
Page 93

DE
Die Einstellungen am Fernsehgerät führen Sie über verschiedene Menüs aus, die am Bildschirm angezeigt werden.
Die für die einzelnen Bedienungsschritte erforderlichen Tasten werden ebenfalls am Bildschirm angezeigt.
Um die einzelnen Menüs
aufzurufen, drücken Sie
die Taste MENU und dann
die Taste
DD / EE.
BildschirmmenŸs
MenŸauswahl
13
1
1
Um einzelne Menüpunkte
aufzurufen, betätigen Sie
zunächst die Taste GG und
anschließend die Taste DD / EE.
2
2
Mit der Taste GG rufen Sie
die Untermenüs bzw. die
Pulldown-Menüs auf.
3
3
Mit der Taste FF / GG oder
DD / EE
ändern Sie die Einstellung
des Menüpunktes im betreffenden Untermenü bzw.
Pulldown-Menü.
Durch Betätigen der Taste
FF gelangen Sie auf die
nächst höhere Menüebene.
Die niedrigere Menüebene
erreichen Sie durch
Betätigen der Taste
GG.
4
4
BILD
()OO}{OOOKOOMENU
BILDEINSTELLUNGEN
Kontrast
Helligkeit
Farbe
Schärfe
TON
()OO}{OOOKOOMENU
KLANGEINSTELLUNGEN
Balance
AVL
SENDER
()OO}{OOOKOOMENU
Auto
Manuell
Ordnen
ZEIT
()OO}{OOOKOOMENU
Takt
Ausschaltzeit
Einschaltzeit
Auto-Aus
SPECIAL
()OO}{OOOKOOMENU
Sprache(language)
CSM
PC Control
WXGA
Set ID
Page 94

Bildeinstellungen
14
Rufen Sie mit der Taste
MENU und anschließend
mit DD / EE das BILD-Menü
auf.
Betätigen Sie die Taste
GG
und anschließend die
Taste DD / EE, um die Option
PSM auszuwählen.
Betätigen Sie die Taste
GG
und anschließend die Taste
DD / EE, um in dem Pulldown-
Menü
PSM eine Bildein-
stellung auszuwählen.
1
1
Betätigen Sie wiederholt die
Taste MENU, um zur normalen Fernsehansicht
zurückzukehren.
Be können die gewünschte
Bildeinstellung
(
Dynamisch, Standard,
Weich oder Anwender)
auch mit der Taste PSM auf
der Fernbedienung
aufrufen. Die Einstellungen
Dynamisch, Standard
und Weich sind werkseitig
für die einwandfreie Bildwiedergabe programmiert
worden und können nicht
geändert werden.
PSM (Bild Status Speicher)
2
2
Manuelle bild steuerung
BILD
()OO}{OOOKOOMENU
BILDEINSTELLUNGEN
Kontrast
Helligkeit
Farbe
Schärfe
BILD
()OO}{OOOKOOMENU
BILDEINSTELLUNGEN
Kontrast
Helligkeit
Farbe
Schärfe
BILD
()OO}{OOOKOOMENU
Dynamisch
Standard
Weich
Anwender
BILDEINSTELLUNGEN
Kontrast
Helligkeit
Farbe
Schärfe
BILD
()OO}{OOOKOOMENU
100
BILDEINSTELLUNGEN
Kontrast
Helligkeit
Farbe
Schärfe
Rufen Sie mit der Taste
MENU und
anschließend mit DD / EE
das BILD-Menü auf.
Betätigen Sie die Taste
GG und anschließend die
Taste DD / EE, um in dem
Pulldown-Menü Bild die
gewünschte Bildoption
auszuwählen.
Betätigen Sie die Taste GG und
anschließend die Taste
FF / GG,
um in den Untermenüs die
entsprechenden Einstellungen
vorzunehmen.
Sie haben die Möglichkeit,
Kontrast, Helligkeit,
Farbsättigung, Schärfe und
Farbton (nur NTSC AV) auf
den gewünschten Pegel
einzustellen.
Page 95

Bildeinstellungen
Bildformat
15
DE
Sie können Ihr Fernsehbild auf verschiedene Formate einstellen ; 16:9, 14:9, 4:3, Zoom, Panorama, Auto.
Betätigen Sie wiederholt die Taste ARC, um das gewünschte Bildformat einzustellen.
1. Wählen Sie mit der Taste ARC das gewünschte Bildformat.
• Durch wiederholtes Drücken der Tasten ARC wird die Bildschirmanzeige folgendermaßen geändert:
• Sie können die Optionen
16:9, 14:9, 4:3, Zoom, Panorama, Auto auch über das Menü SCREEN auswählen.
3
3
Bildformat
16 : 9
Auto
14 : 9
4 : 3
Panorama
Zoom
Page 96

Klangeinstellungen
16
TON
()OO}{OOOKOOMENU
KLANGEINSTELLUNGEN
Balance
AVL
TON
()OO}{OOOKOOMENU
Linear
Sprache
Spielfilm
Musik
Anwender
Rufen Sie mit der Taste MENU
und anschließend mit
DD / EE das
TON-Menü auf.
Betätigen Sie die Taste
GG und
anschließend die Taste
DD / EE, um
die Option
SSM auszuwählen.
Betätigen Sie die Taste GG und
anschließend die Taste
DD / EE, um
in dem Pulldown-Menü
SSM ein
Klangmuster auszuwählen.
Betätigen Sie wiederholt die Taste
MENU, um zur normalen
Fernsehansicht zurückzukehren.
1
1
Tonfrequenzen einstellen
a. Betätigen Sie auf dem Menüpunkt
Anwender die Taste OK.
b. Wählen Sie durch Betätigen der
Taste
FF / GG ein Frequenzband aus.
c. Stellen Sie mit der Taste DD / EE den
gewünschten Klangpegel ein.
d. Betätigen Sie die Taste OK, um die
Klangeinstellungen im Untermenü
Anwender zu speichern.
Die Meldung
Gespeichert wird einge-
blendet.
Sie können die gewünschte
Klangeinstellung (
Linear, Sprache,
Spielfilm, Musik oder Anwender)
auch mit der Fernbedienungstaste SSM
aufrufen. Die Klangmuster Linear,
Sprache, Spielfilm und Musik sind
für eine optimale Klangwiedergabe
werkseitig vorprogrammiert worden und
können nicht verändert werden.
Klangmuster einstellen (SSM - Sound Status Memory)
KLANGEINSTELLUNGEN
Balance
AVL
()OO}{OOOKOOMENU
0.1 0.5 1.0 5.0 10kHz
Page 97

Klangeinstellungen
17
DE
Rufen Sie mit der Taste
MENU und anschließend
mit DD / EE das TON-Menü
auf.
Betätigen Sie die Taste
GG
und anschließend die
Taste DD / EE, um die
Option AVL auszuwählen.
Betätigen Sie die Taste
GG
und anschließend die
Taste DD / EE, um die
Option Ein oder Aus
auszuwählen.
3
3
Betätigen Sie wiederholt die
Taste
MENU,
um zur normalen Fernsehansicht
zurückzukehren.
Wenn Sie AVL auf die
Einstellung Ein setzen, bleibt
der Lautstärkepegel auch bei
einem Programmwechsel
immer gleich.
AVL (Automatischer LautstŠrkepegel)
TON
()OO}{OOOKOOMENU
KLANGEINSTELLUNGEN
Balance
AVL
Rufen Sie mit der Taste
MENU und anschließend mit
DD / EE das TON-Menü auf.
Betätigen Sie die Taste GG
und anschließend die Taste
DD / EE, um den gewünschten
Menüpunkt auszuwählen.
Drücken Sie
GG und
anschließend
FF / GG, um die
entsprechenden Einstellungen
vorzunehmen.
2
2
Betätigen Sie wiederholt
die Taste
MENU,
um zur
normalen Fernsehansicht
zurückzukehren.
Balance
TON
()OO}{OOOKOOMENU
0
KLANGEINSTELLUNGEN
Balance
AVL
TON
()OO}{OOOKOOMENU
KLANGEINSTELLUNGEN
Balance
AVL
TON
()OO}{OOOKOOMENU
Aus
Ein
KLANGEINSTELLUNGEN
Balance
AVL
Page 98

Klangeinstellungen
18
Sprachauswahl bei Zweikanalton-†bertragungen
Wenn ein Sender zweisprachig empfangen wird
(Zweikanalton), können Sie zwischen den Einstellungen
DUAL I, DUAL II oder DUAL I+II wählen, indem Sie die
Taste I/II wiederholt betätigen.
DUAL I Erstsprache wird aus beiden Lautsprechern
wiedergegeben.
DUAL II Zweitsprache wird aus beiden Lautsprechern
wiedergegeben.
DUAL I+II Beide Sprachen werden aus getrennten
Lautsprechern wiedergegeben.
Wenn Ihr Gerät mit einem NICAM-Empfänger ausgestattet
ist, können Sie den qualitativ hochwertigen digitalen
NICAM-Klang (=Near Instantaneous Companding Audio
Multiplex) empfangen.
Je nach Art der Senderübertragung besteht die
Möglichkeit, das Tonsignal mit der Taste I/II
folgendermaßen einzustellen:
Bei NICAM-Mono-Empfang wählen Sie
NICAM MONO
oder FM MONO.
Bei NICAM-Stereo-Empfang wählen Sie NICAM STEREO
oder FM MONO. Wenn das Stereo-Signal zu schwach ist,
schalten Sie auf FM Mono um.
Bei NICAM-Zweikanalton-Empfang wählen Sie
NICAM
DUAL I
, NICAM DUAL II oder NICAM DUAL I+II oder
MONO. Wenn FM Mono eingestellt ist, wird die Anzeige
MONO am Bildschirm eingeblendet.
Mono-Wiedergabe
Wenn das Stereo-Signal zu
schwach empfangen wird,
können Sie auf Mono
umschalten. Drücken Sie
dazu zweimal auf die Taste
I/II. Bei der
Monowiedergabe wird die
Klangtiefe verbessert. Um
wieder auf Stereo zurückzuschalten, drücken Sie
erneut zweimal auf die Taste
I/II.
Im A V -Modus können Sie
die Art der Tonwiedergabe
für den rechten und linken
Lautsprecher auswählen
Betätigen Sie wiederholt
die Taste I/II, um die Art der
T onwiedergabe
einzustellen.
L+R Sie hören den linken
Kanal über den linken
Lautsprecher, den rechten
Kanal über den rechten
Lautsprecher.
L+L : Sie hören den linken
Kanal über den linken und
rechten Lautsprecher.
R+R : Sie hören den recht-
en Kanal über den linken
und rechten Lautsprecher.
4
4
Stereo / Zweikanalton / NICAM-Empfang
Page 99

SENDER
Programmieren der Fernsehsender
Automatische Programmierung
19
DE
- Sie haben die Möglichkeit, bis zu 100 Fernsehsender auf den Programmplätzen (0 bis 99) zu speichern. Die programmierten Fernsehsender lassen sich mit der Taste DD / EE oder mit den Zifferntasten aufrufen. Sie können die
Fernsehsender automatisch oder manuell einstellen.
- Mit dieser Methode können alle empfangenen Fernsehsender gespeichert werden. Wir empfehlen Ihnen, beim
Einrichten dieses Fernsehgeräts die automatische Programmierung zu verwenden.
Betätigen Sie die
Taste MENU und
anschließend die
Taste
DD / EE
um das
Menü 'Sender'
auszuwählen.
1
1
Betätigen Sie die Taste GGund anschließend
die Taste
DD / EE
, um die Option Auto.
auszuwählen.
Betätigen Sie die Taste GG, um das Menü
Auto.
aufzurufen.
Betätigen Sie die Taste GG, um den Menüpunkt
TV-Norm auszuwählen. Wählen Sie mit der
Taste
FF / GG
die gewünschte Norm aus dem
Pulldown-Menü
TV-Norm
;
L :
SECAM L/L’ (Frankreich)
BG :
PAL B/G, SECAM B/G (Europa/
Osteuropa)
I :
PAL I/II (GB/ Irland)
DK :
PAL D/K, SECAM D/K (Osteuropa)
Betätigen Sie die Taste
DD / EE
, um den
Menüpunkt
Speichern auszuwählen.
Wählen Sie mit der Taste
FF / GG
oder mit den
Zifferntasten im Menü
Speichern die
Programmnummer aus, bei der Sie mit dem
Speichern von Fernsehsendern beginnen
möchten.
2
2
Betätigen Sie die Taste
DD / EE
, um den
Menüpunkt
Start
auszuwählen.
Betätigen Sie die Taste
GG, um den automatis-
chen Programmiervorgang zu starten.
Alle empfangenen Sender werden gespeichert.
Zu allen Sendern, die VPS (Video Programme
Service), PDC (Programme Delivery Control)
oder Videotext-Daten übertragen, wird auch
der Sendername gespeichert. Wenn einem
Sender kein Name zugeordnet werden kann,
wird die Programmnummer mit der Kennung
C
(V/UHF 01-69) oder
S
(Cable 01-47) und mit
nachfolgender Nummer gespeichert.
Um den automatischen Programmiervorgang
zu stoppen, betätigen Sie die Taste MENU.
Wenn die automatische Programmierung
abgeschlossen ist, wird das Menü
Ordnen
am Bildschirm angezeigt. Wenn Sie die
Anordnung der Programme ändern möchten,
lesen Sie weiter im Abschnitt „Senderliste ordnen“.
Betätigen Sie wiederholt die Taste MENU, um
zur normalen Fernsehansicht zurückzukehren.
3
3
SENDER
()OO}{OOOKOOMENU
Auto
Manuell
Ordnen
SENDER
STOP : MENU
()OO}{OOOKOOMENU
Auto
Manuell
Ordnen
Fernsehnorm
FF
DK
GG
Speichern ab 7
Start
GGGGGG
Auto
Manuell
Ordnen
Fernsehnorm
FF
DK
GG
Speichern ab 7
Start
GGGGGG
7 14%
Page 100

Programmieren der Fernsehsender
Manuelle Programmierung
20
- Mit der Funktion Manuell programmieren können Sie die Fernsehsender in der gewünschten Reihenfolge manuell
abstimmen und anordnen.
- Sie haben auch die Möglichkeit, jeder Programmnummer einen fünfstelligen Sendernamen zuzuweisen.
Betätigen Sie die
Taste MENU und
anschließend die
Taste
DD / EE
um das
Menü 'Sender'
auszuwählen.
Betätigen Sie die Taste GG und anschließend
die Taste DD / EE, um die Option Manuell
auszuwählen.
Betätigen Sie die Taste
GG, um das Menü
Manuell aufzurufen.
Betätigen Sie die Taste
DD / EE, um die Option
Speichern auszuwählen.
Wählen Sie mit der Taste
FF / GG oder mit den
Zifferntasten im Menü Speichern die
Programmnummer aus, bei der Sie mit dem
Speichern von Fernsehsendern beginnen
möchten.
1
1
2
2
Betätigen Sie die Taste DD / EE, um den
Menüpunkt
TV-Norm
auszuwählen.
Wählen Sie mit der Taste
FF / GG die gewünschte
Norm aus dem Pulldown-Menü
TV-Norm
:
L : SECAM L/L’ (Frankreich)
BG
: PAL B/G, SECAM B/G (Europa/ Osteuropa)
I : PALI/II (GB/ Irland)
DK : PAL D/K, SECAM D/K (Osteuropa)
Betätigen Sie die Taste
DD / EE, um den
Menüpunkt Kan. auszuwählen.
Wählen Sie im Pulldown-Menü
Kan. mit der
Taste
FF / GG eine der Optionen V/UHF oder
Cable aus.
3
3
SENDER
()OO}{OOOKOOMENU
Auto
Manuell
Ordnen
SENDER
()OO}{OOOKOOMENU
Auto
Manuell
Ordnen
Speichren 4
Fernsehnorm
FF
DK
GG
Kanal V/UHF 33
Feinabst.
GGGGGG
Suchen
GGGGGG
Name C 33
SENDER
()OO}{OOOKOOMENU
Auto
Manuell
Ordnen
Speichren 4
Fernsehnorm
FF
DK
GG
Kanal V/UHF 33
Feinabst.
GGGGGG
Suchen
GGGGGG
Name C 33
 Loading...