

Page 1
R
JD-VD503
JD-VD503
SR
Page 2

For attention of parents:
In order to avoid the situation that you forget the parental lock
code and can not enter into the operation of parental lock setting,
here we offer you the super secret code: 1369. You may use this
code to enter into the operation of parental setting. To prevent
the young children from knowing this secret code, please tear the
note from this user's manual and keep in secret place. Thanks.
Page 3
R
Thanks for purchasing the jWIN DVD player. Before operating this player, please read
this manual and retain it for future reference.
SAFETY PRECAUTIONS
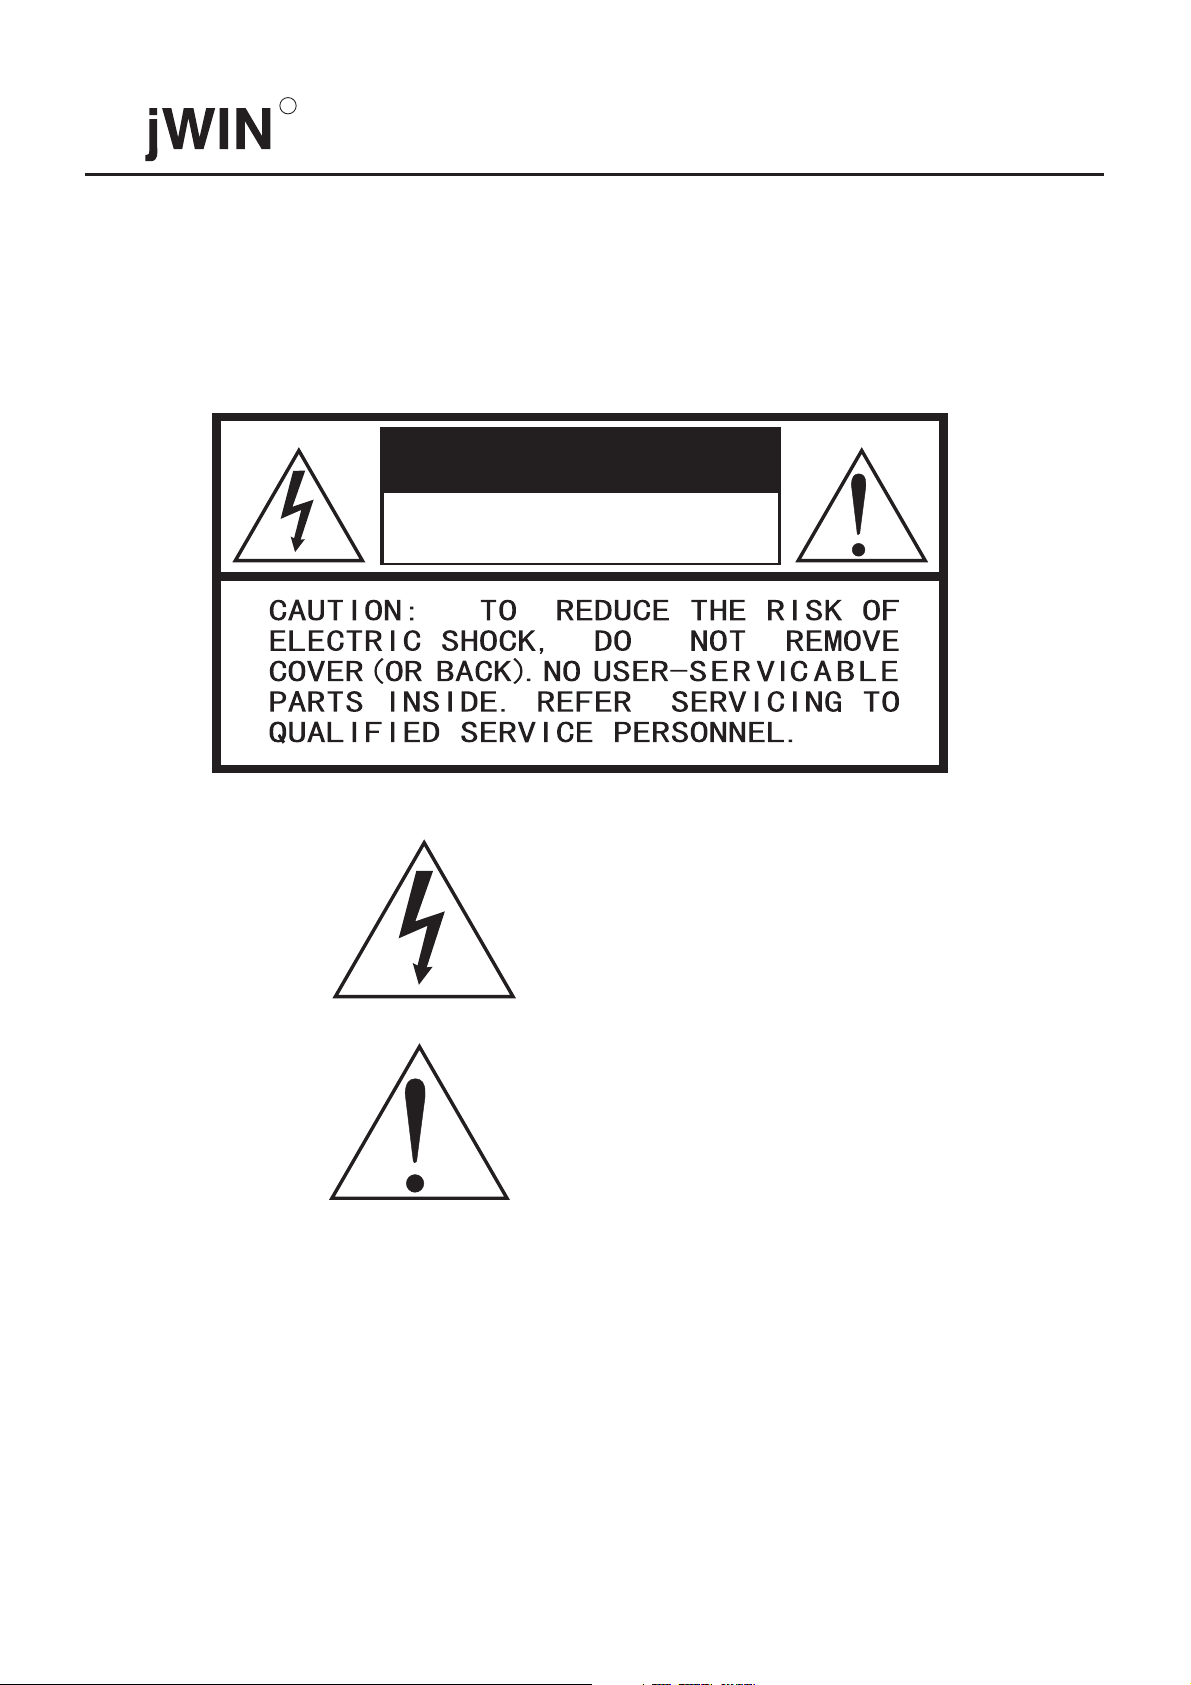
CAUTION
RISK OF ELECTRIC SHOCK
DO NOT OPEN
The lightning flash with arrowhead symbol, within an
equilateral triangle, is intended to alert the user to the
presence of uninsulated "dangerous voltage" within
the product's enclosure that may be of sufficient
magnitude to constitute a risk of electric shock to
persons.
The exclamation point within an equilateral triangle
is intended to alert the user to the presence of
important operating and maintenance (servicing)
instructions in the literature accompanying the
appliance.
WARNING:
TO REDUCE THE RISK OF FIRE OR ELECTRIC SHOCK, DO NOT EXPOSE THIS APPLIANCE TO
RAIN OR MOISTURE. DANGEROUS HIGH VOLTAGES ARE PRESENT INSIDE THE ENCLOSURE.
DO NOT OPEN THE CABINET. REFER SERVICING TO QUALIFIED PERSONNEL ONLY.
CAUTION:
When replacing the direct plug-in power supply or a separable, cord-connected power supply, the replacement
must be the exact duplicate, or one that has been recommended by the manufacturer.
1
1
Page 4

CAUTION:
TO PREVENT ELECTRIC SHOCK, MATCH THE WIDE BLADE OF THE PLUG TO THE WIDE SLOT,
AND FULLY INSERT.
This DVD player employs a laser system.
CAUTION:
Use of controls, adjustments or the performance of procedures other than those specified may result in
hazardous radiation exposure.
To prevent direct exposure to laser beam, do not try to open the enclosure.
R
DO NOT STARE INTO BEAM.
FCC NOTICE:
This equipment has been tested and proved to comply with the limits for a Class B digital device, pursuant to
part 15 of the FCC Rule. These limits are designed to provide reasonable protection against harmful
interference in a residential installation.
This equipment generates, uses, and can radiate radio frequency energy and, if not installed and used in
accordance with the instructions, may cause harmful interference to radio communications.
However, there is no guarantee that interference will not occur in a particular installation.
If this equipment does cause harmful interference to radio or television reception, which can be determined
by turning the equipment off and on, the user is encouraged to try to correct the interference by one or more
of the following measures:
- Reorient or relocate the receiving antenna.
- Increase the separation between the equipment and receiver.
- Connect the equipment into an outlet on a circuit different from that to which the receiver is connected.
- Consult the dealer or an experienced radio/TV technician for help.
WARNING:
Changes or modifications made to this equipment, not expressly approved by jWIN, or parties
authorized by jWIN, could void the user's authority to operate the equipment.
2
Page 5
R
IMPORTANT SAFETY INSTRUCTIONS
CAUTION:
This set has been designed and manufactured to assure personal safety. Improper use can result in electric shock or fire hazard.
The safeguards incorporated in this unit will protect you if you observe the following procedures for installation, use and servicing.
This unit is fully transistorized and does not contain any parts that can be repaired by the user.
DO NOT REMOVE THE CABINET COVER, OR YOU MAY BE EXPOSED TO DANGEROUS VOLTAGE. REFER
SERVICING TO QUALIFIED SERVICE PERSONNEL ONLY.
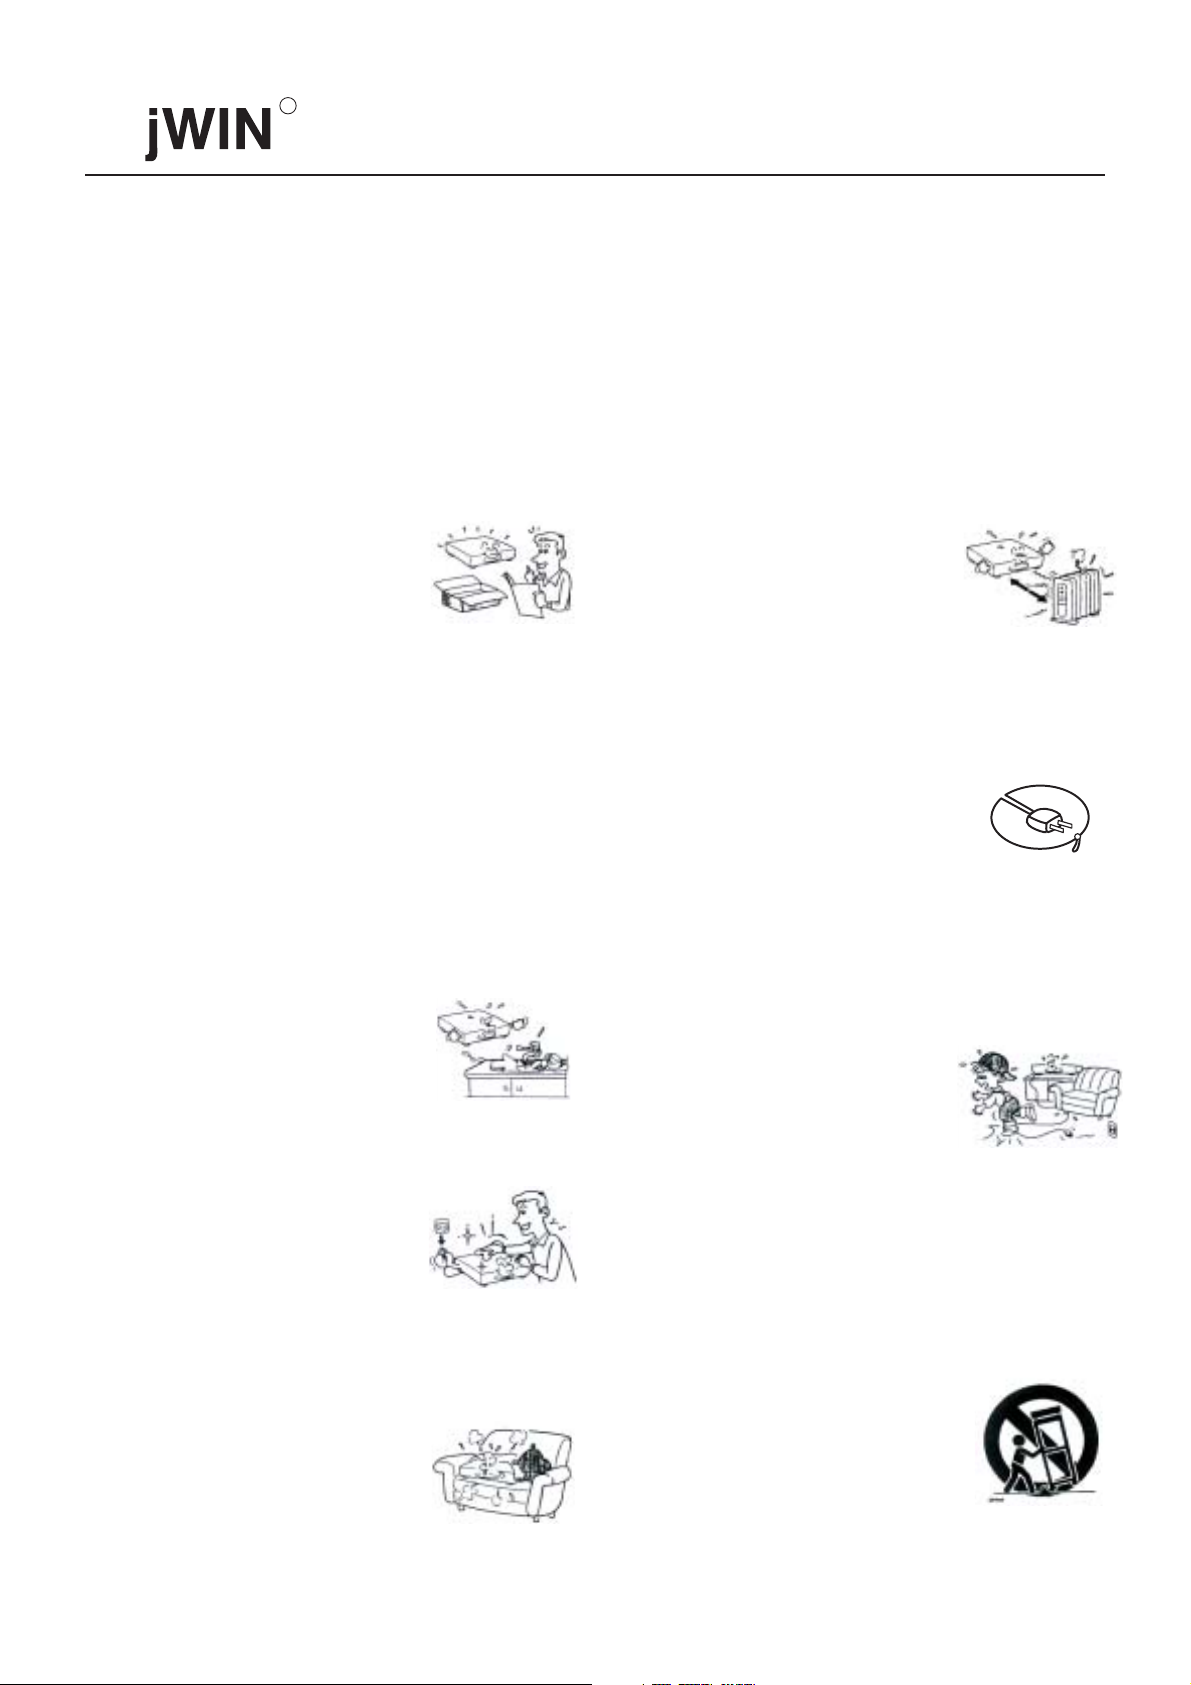
1.Read these instrucitons
After unpacking this product, read these
instructions carefully, and follow all the
instructions.
2.Keep these instructions.
3.Heed all warnings.
4.Follow all instructions.
PLEASE READ THESE INSTRUCTIONS AND KEEP THESE INSTRUCTIONS FOR FUTURE
REFERENCE. PLEASE HEED ALL WARNINGS AND FOLLOW ALL INSTRUCTIONS.
8.Do not install near any heat sources
such as radiators, heat registers, stoves,
or other apparatus (including amplifiers)
that produce heat.
9. Do not defeat the safety purpose of
the polarized or grounding-type plug.
A polarized plug has two blades with
one wider than the other. A grounding
type plug has two blades and a third
grounding prong. The wide blade or
the third prong are provided for your
safety. If the provided plug does not
fit into your outlet, consult an
electrician for replacement of the
obsolete outlet.
5.Do not use this apparatus near water.
6.Clean only with dry cloth.
7.Do not block any ventilation
openings. Install in accordance with
the manufacturer's instructions.
3
10.Protect the power cord from being
walked on or pinched particularly at
plugs, convenience receptacles, and
the point where they exit from the
apparatus.
11. Only use attachments/accessories
specified by the manufacturer.
12. Use only with the cart, stand, tripod,
bracket, or table specified by the
manufacturer, or sold with the apparatus.
When a cart is used, use caution when
moving the cart/apparatus combination
to avoid injury from tip-over.
Page 6
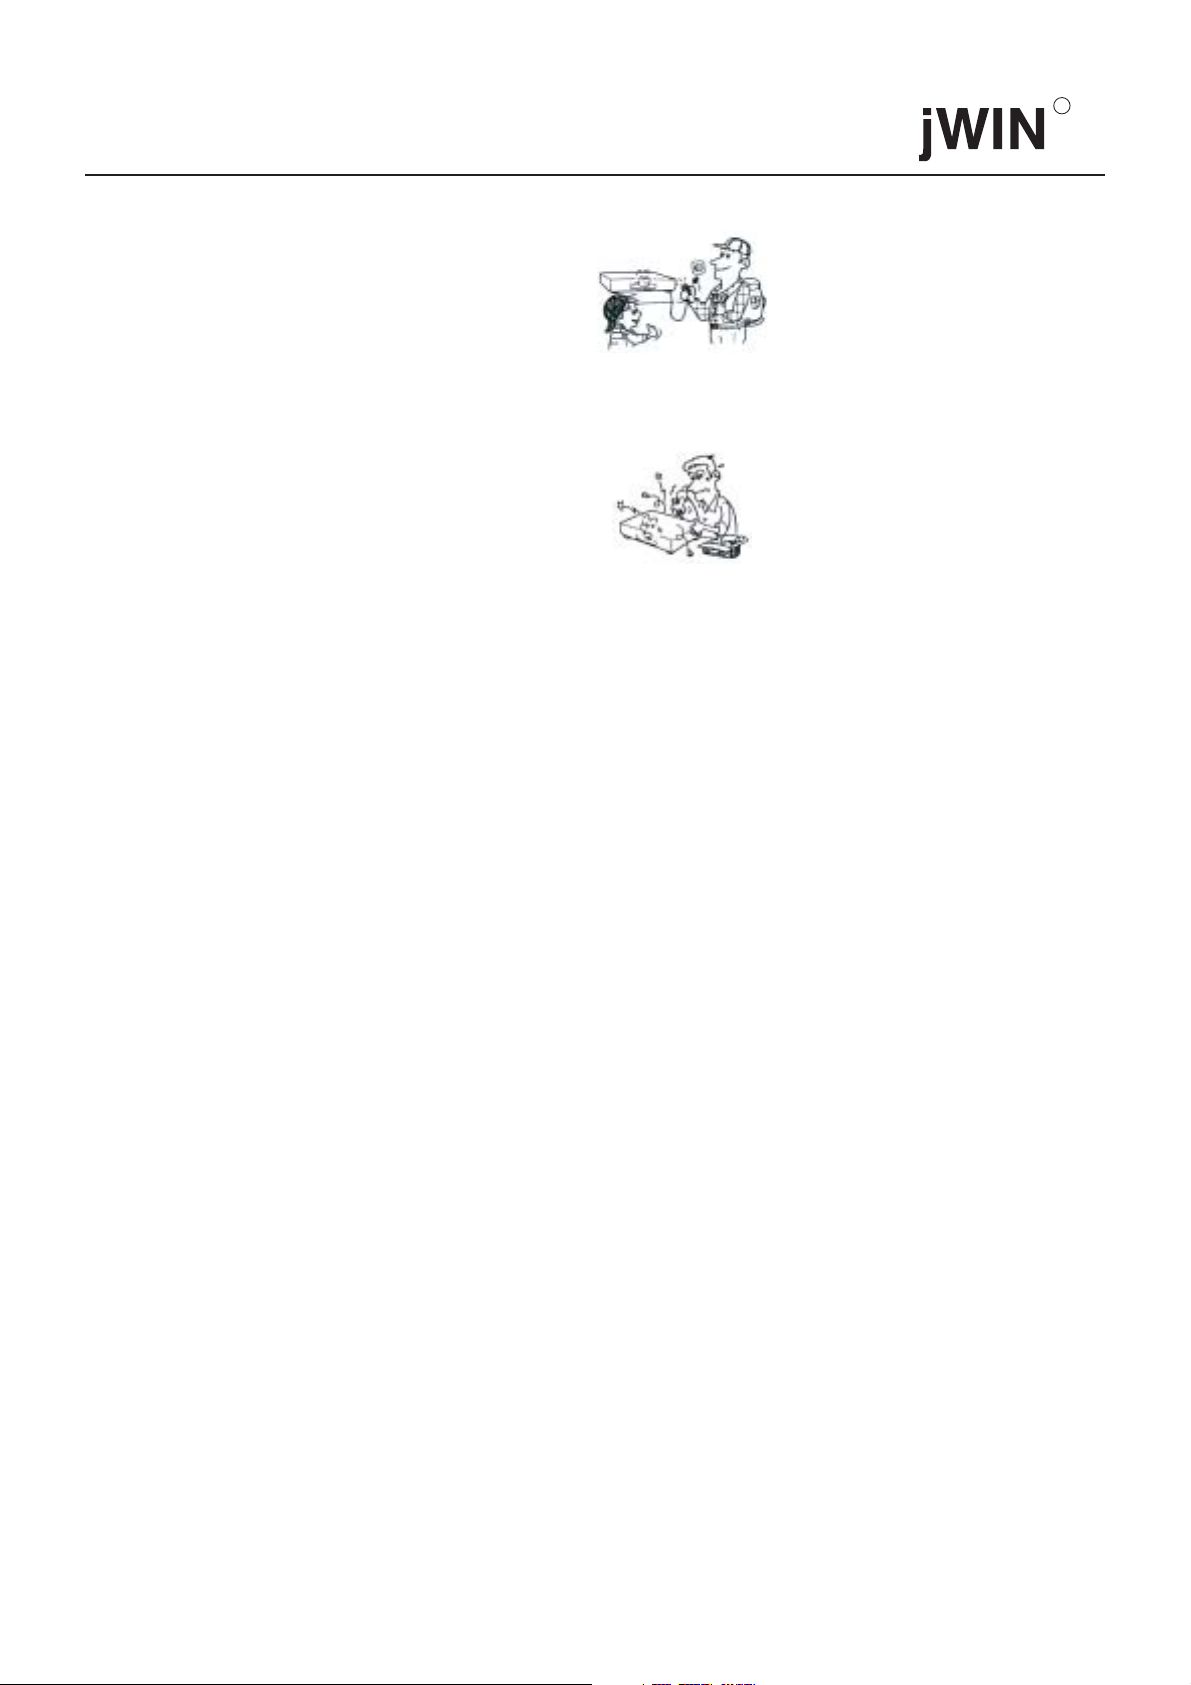
13. Unplug this apparatus during lightning storms
or when unused for long periods of time.
14. Refer all servicing to qualified service personnel.
Servicing is required when the apparatus has
been damaged in any way, such as power-supply
cord or plug is damaged, liquid has been spilled
or objects have fallen into the apparatus, the
apparatus has been exposed to rain or moisture,
does not operate normally, or has been dropped.
R
4
Page 7
R
Notes on Handling
When shipping the DVD player, the original shipping carton
and packing materials come in handy . For maximum
protection, repack the unit as it was originally packed at the
factory.
Do not use volatile liquids, such as insect spray, near the
DVD player. Do not leave rubber or plastic products in
contact with the DVD player for a long time. They will
leave marks on the finish.
The top and rear panels of the DVD player may become
warm after a long period of use. This is not a malfunction.
When the DVD player is not in use, be sure to remove
the disc and turn off the power.
If you do not use the DVD player for a long period, the unit
may not function properly in the future.Turn on and use the
DVD player occasionally.
Notes on Positioning
When you place this DVD player near a TV, radio, or VCR,
the playback picture may become poor and the sound may
be distorted. In this case, place the DVD player away from
the TV, radio, or VCR.
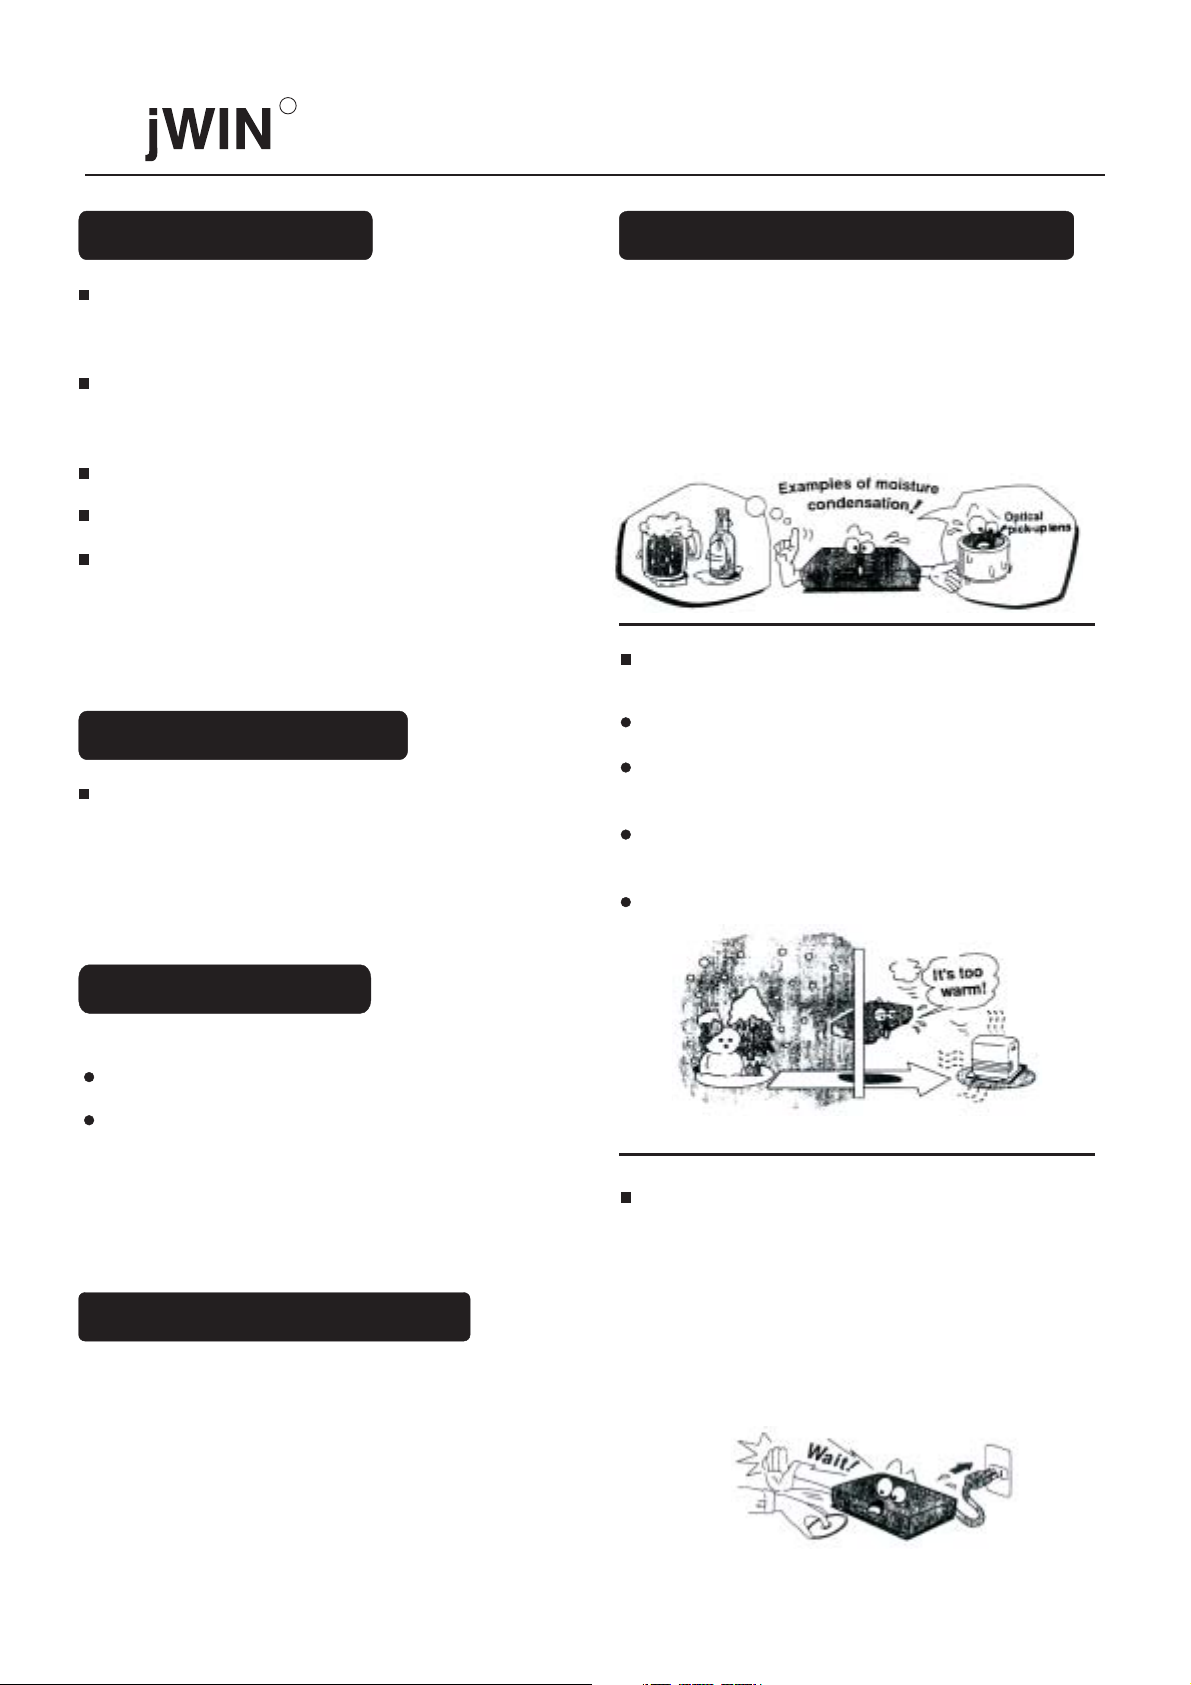
Notes on Moisture Condensation
Moisture condensation damages the DVD player.
Please read the following carefully.
Moisture condensation occurs , for example, when you pour
a cold drink into a glass on a warm day. Drops of water form
on the outside of the glass. In the same way, moisture may
condense on the optical pick-up lens inside this unit, one of
the most crucial internal parts of the DVD player.
Moisture condensation occurs during the
following cases.
When you bring the DVD player directly from a cold
place to a warm place.
When you use the DVD player in a room where you
just turned on the heater, or a place where the cold wind
from the air conditioner directly hits the unit.
In summer, when you use the DVD player in a hot and
humid place just after you move the unit from an air
conditioned room.
When you use the DVD player in a humid place.
Notes on Cleaning
Use a soft, dry cloth for cleaning.
For stubborn dirt, soak the cloth in a weak detergent
solution, wring well and wipe. Use a dry cloth to wipe it dry.
Do not use any type of solvent , such as thinner or benzine,
as they may damage the surface of the DVD player. If you
use a chemical saturated cloth to clean the unit, follow that
product's instructions.
To Obtain a Clear Picture
The DVD player is a high technology, precision device. If the
optical pick-up lens and disc drive parts are dirty or worn down,
the picture quality becomes poor. To obtain a clear picture,
we recommend regular inspection and maintenance (cleaning
or parts replacement ) every 1,000 hours of use depending
on the operating environment. For details, contact your nearest
dealer.
Do not use the DVD player when moisture
condensation may occur.
If you use the DVD player in such a situation , it may
damage discs and internal parts. Remove the disc,connect
the power cord of the DVD player to the wall outlet, turn
on the DVD player, and leave it for two or three hours.
After two or three hours , the DVD player will have
warmed up and evaporated any moisture. Keep the DVD
player connected to the wall outlet and moisture
condensation will seldom occur.
5
Page 8
R
Points For Attention
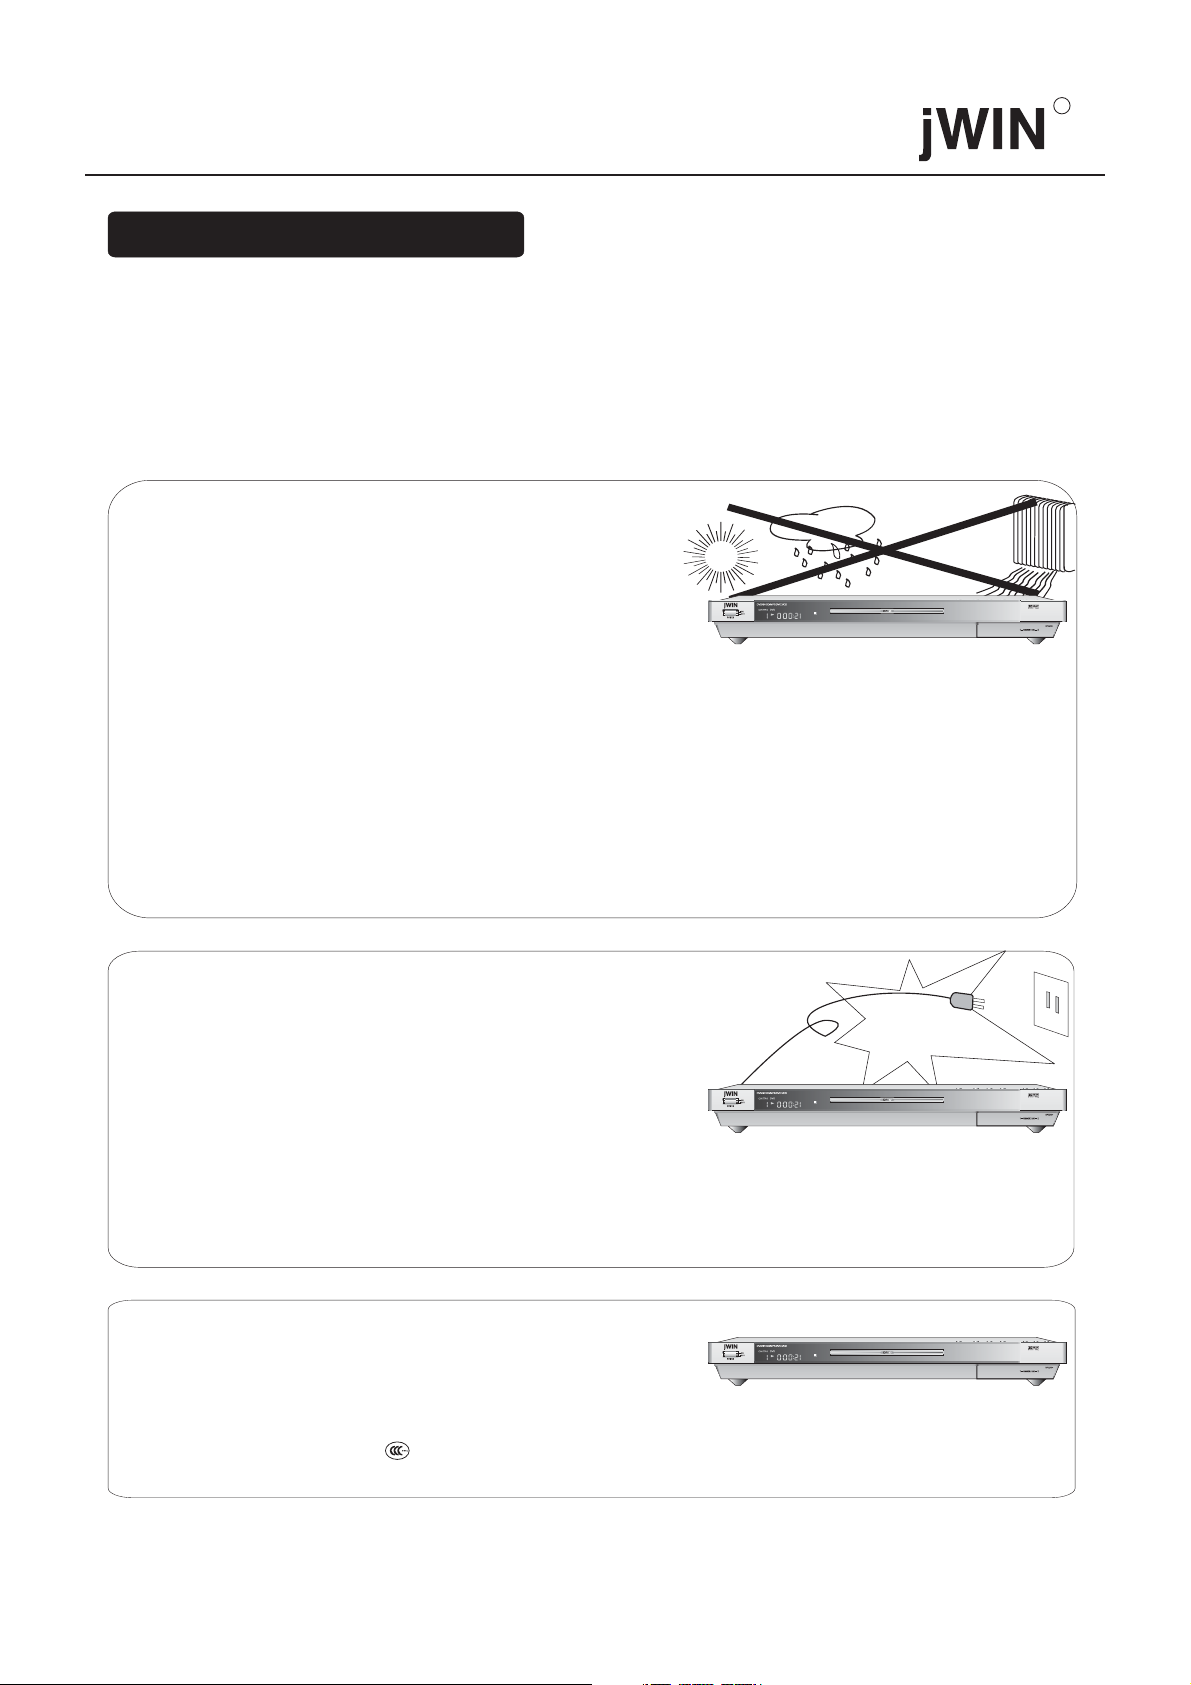
Warning: To reduce the risk of fire or electric shock, do not expose this appliance to rain or moisture.
Dangerous high-voltage parts and Laser are present inside the enclosure. Do not open the cabinet.
Refer servicing to qualified personnel only.
Precautions on Use: DVD players are high-end electric appliances, in which large-scale
integrated circuits and precise laser devices are incorporated. In order to prolong the lifespan of the
appliance, please don't turn on and turn off within a time interval of less than 10 seconds. For the sake
of safety, be sure to cut off the power supply of the appliance before conducting any connections.
Notes on Maintenance
Don't put the appliance in the following places:
* Places exposed to direct sunlight or close to heat
radiating appliances (e.g. heater).
* The top of other heat radiating objects.
* Places with poor ventilation or full of dust.
* Places apt to vibration, rain, moisture, or where
The appliance can not be stably placed.
* Places close to large-powerful loudspeakers or on the same table with loudspeakers so as to avoid vibration,
which may cause malfunction.
* Do not move the appliance from a cold place to a warm one with a sharp temperature difference and the dew
may be condensed on the pick-up head, which is apt to result in the malfunction of the appliance. Take out
the disc and connect the power supply. The appliance will resume its normal working state in 1-2 hours.
* If using the appliance under poor external surroundings for a long time, dust may accumulate on the laser
head. Use a laser head cleaning disc to clean. Please refer to the specifications of the cleaning disc for detail.
* Use a soft cotton cloth with neutral detergent to wipe the appliance. Do not use materials such as sand paper,
alcohol or gasoline, etc.
* Do not use seriously distorted or worn discs in order not to damage disc loading function of the appliance.
SR
Notes on the power supply
* Use proper power supply voltage Voltages other
than the rated value are strictly prohibited.
* Hold the plug tightly when plugging into or pulling
out the AC plug, and do not pull the power cord.
* Please make sure that power cord and other lines
are properly connected before turning on power supply.
* Please turn down the volume of the power amplifier
to the minimum before turning on power supply
and adjust the volume according to the need when starting play in order not to damage the power
amplifier or loudspeaker.
* If you intend not to use the appliance for a long time, please remove the plug of power cord from
the outlet.
SR
~120V/60Hz
Notes on servicing
* Don't open the appliance to repair by yourself. If
there is a problem, please refer servicing to a local
maintenance department.
* Be sure to cut off power supply before removing
the cover to avoid possible electric shock.
* The components with the mark must be replaced
with the ones of the same type and specification.
""
SR
Note: The illustrations in this operation instruction may be different from real objects.
6
Page 9

R
TABLE OF CONTENTS
SAFETY PRECAUTIONS--------------------1-2
IMPORTANT SAFETY INSTRUCTIONS---------3-6
Operating Interface ------------------------8-10
Front Panel
Back Panel Ports
Remote Control Unit
VFD Display
Supported Disc Formats-----------------------10
How to Set Up System----------------------26-31
General Setup
Audio Setup
Video Setup
Password Setup Page
Preference Setup Page
How to Use Programming Function---------------32
Programmed Play for SVCD, VCD and CD Discs
Programmed Play for DVD Disc
How to Use Search Function----------------- 33-35
For DVD Disc
For SVCD / VCD / CD Disc
Reference Guide----------------------------11
Preparation Before Playing-------------------11-14
Battery Installation for Remote Control
System Connection
Setup of TV Signal System
Basic Operation--------------------------14-20
Turn on The Player
Turn Off
Playing a Disc
NTSC/PAL System
Other Function Buttons----------------------20-25
Stop
Pause/Step
Fast Forward & Fast Rewind
Slow Motion
A-B Repeat
Repeat
Zoom
Return
Menu
Title (Applicable Only to DVD)
Direction & Enter
Angle
3D Surround Sound Effect
Frequency Spectrum
Screen Display
Clear
Standby
Spectrum (EQ)
How to Use KARAOKE Function-------------35-36
To Connect Microphone
Start KARAOKE
To Empoly The Special Functions of KARAOKE
How to Play MP3/WMA Discs 36-37
The Structure of MP3/WMA Discs
Directory Structure of MP3/WMA Disc Displayed In
The Player
How to Switch The Directory of MP3/WMA
How to Enter Tracks for Play
How to Enjoy The Digital Album of Picture CD---38-40
Play Mode
Previous Page/Next Page
Pause
Scan Mode Switch
Zoom
Rotation Function
Intelligent Screensaver and Stand-by Function-------41
Malfunction & Troubleshooting----------------41
DVD Introduction and Features---------------42-44
Disc Reference--------------------------44-45
Specification-----------------------------46
--------------
7
Page 10
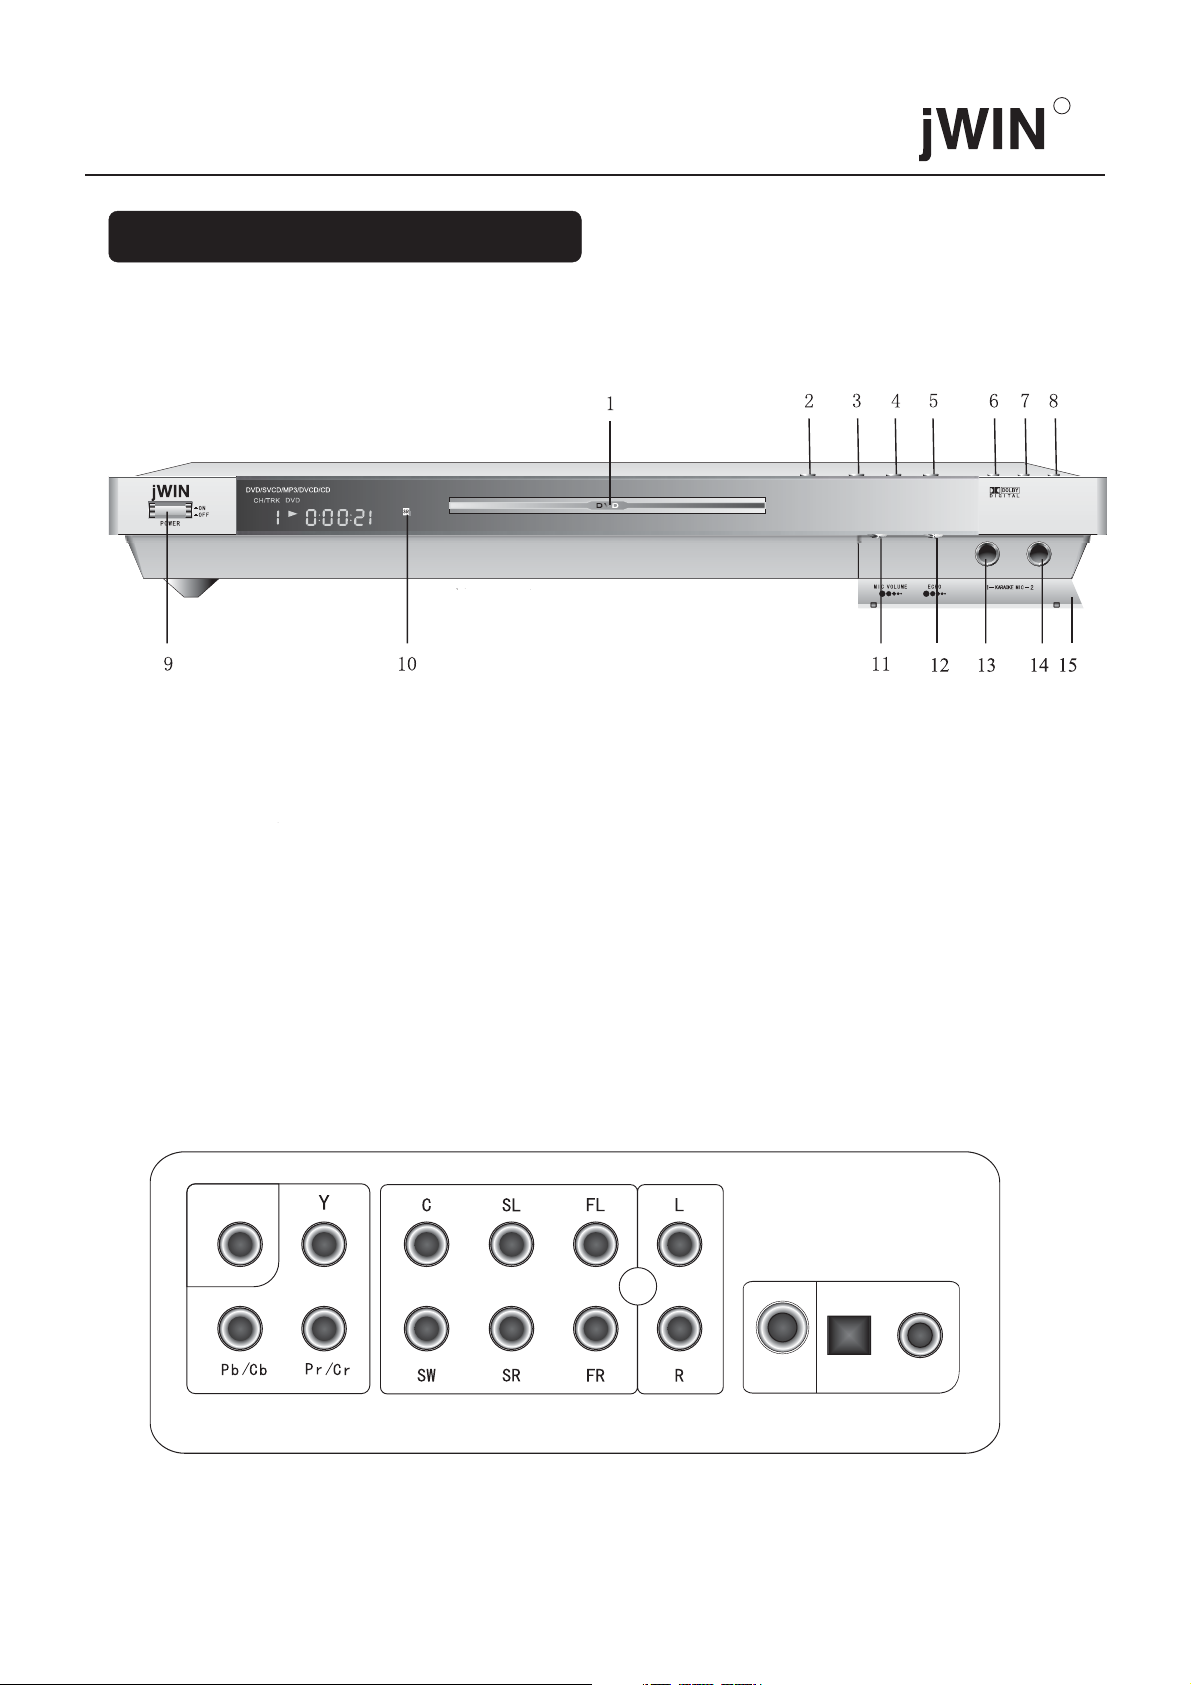
1. OPERATING INTERFACE
FRONT PANEL:
R
1. Disc Tray
2. OPEN/CLOSE Button
3. PLAY Button
4. PAUSE Button
5. STOP Button
6. STANDBY Button
7. RETURN Button
8. AUDIO Button
BACK PANEL PORTS:
VIDEO
9. POWER Button
10. Remote Control Signal Sensor
11. MIC Volume Control Knob
12. ECHO Control
13. MIC Jack1
14. MIC Jack2
15. MIC Cover
COMPONENT
VIDEO OUT
5.1CH SURROUND
AUDIO OUT
MIXED
AUDIO OUT
S-VIDEO
OPTICAL COAXIAL
8
Page 11
R
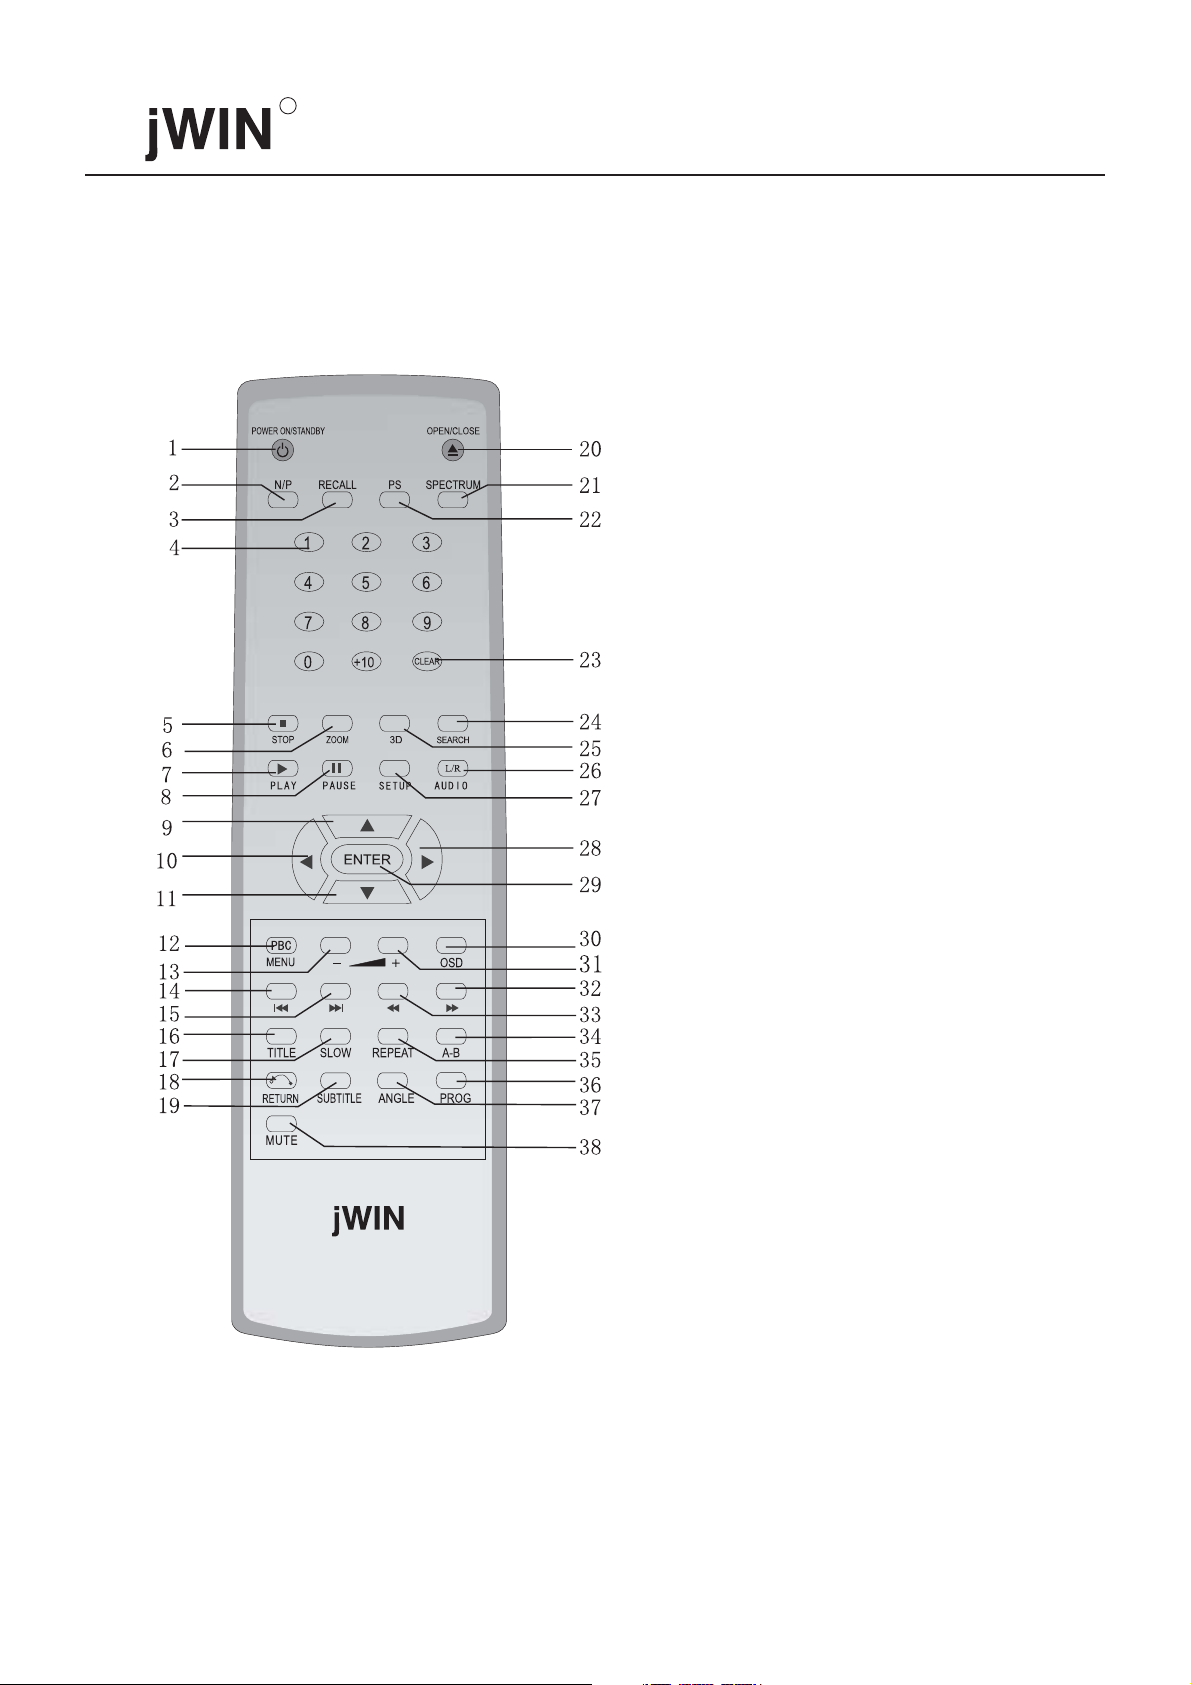
REMOTE CONTROL:
1.POWER ON/STANDBY button
2.NTSC/PAL button
3.RECALL button
4.NUMBER button
5.STOP button
6.ZOOM button
7.PLAY button
8.PAUSE button
9.UP button
10.LEFT button
11.DOWN button
12.MENU (PBC) button
13.VOLUME control (-)
14.PREV. button
15.NEXT button
16.TITLE button
17. SLOW MOTION button
18. RETURN button
19. SUBTITLE button
OPEN/CLOSE
20. button
21. SPECTRUM button
22. PROGRESSIVE button
23. CLEAR button
24. SEARCH button
25. 3D
26. AUDIO button
27. SETUP button
28. RIGHT button
29. ENTER button
30. OSD button
31. VOLUME control (+)
32. FAST FORWARD button
33. FAST REWIND button
34. A-B REPEAT button
35. REPEAT button
36. PROGRAM button
37. ANGL button
38. MUTE button
E
9
Page 12
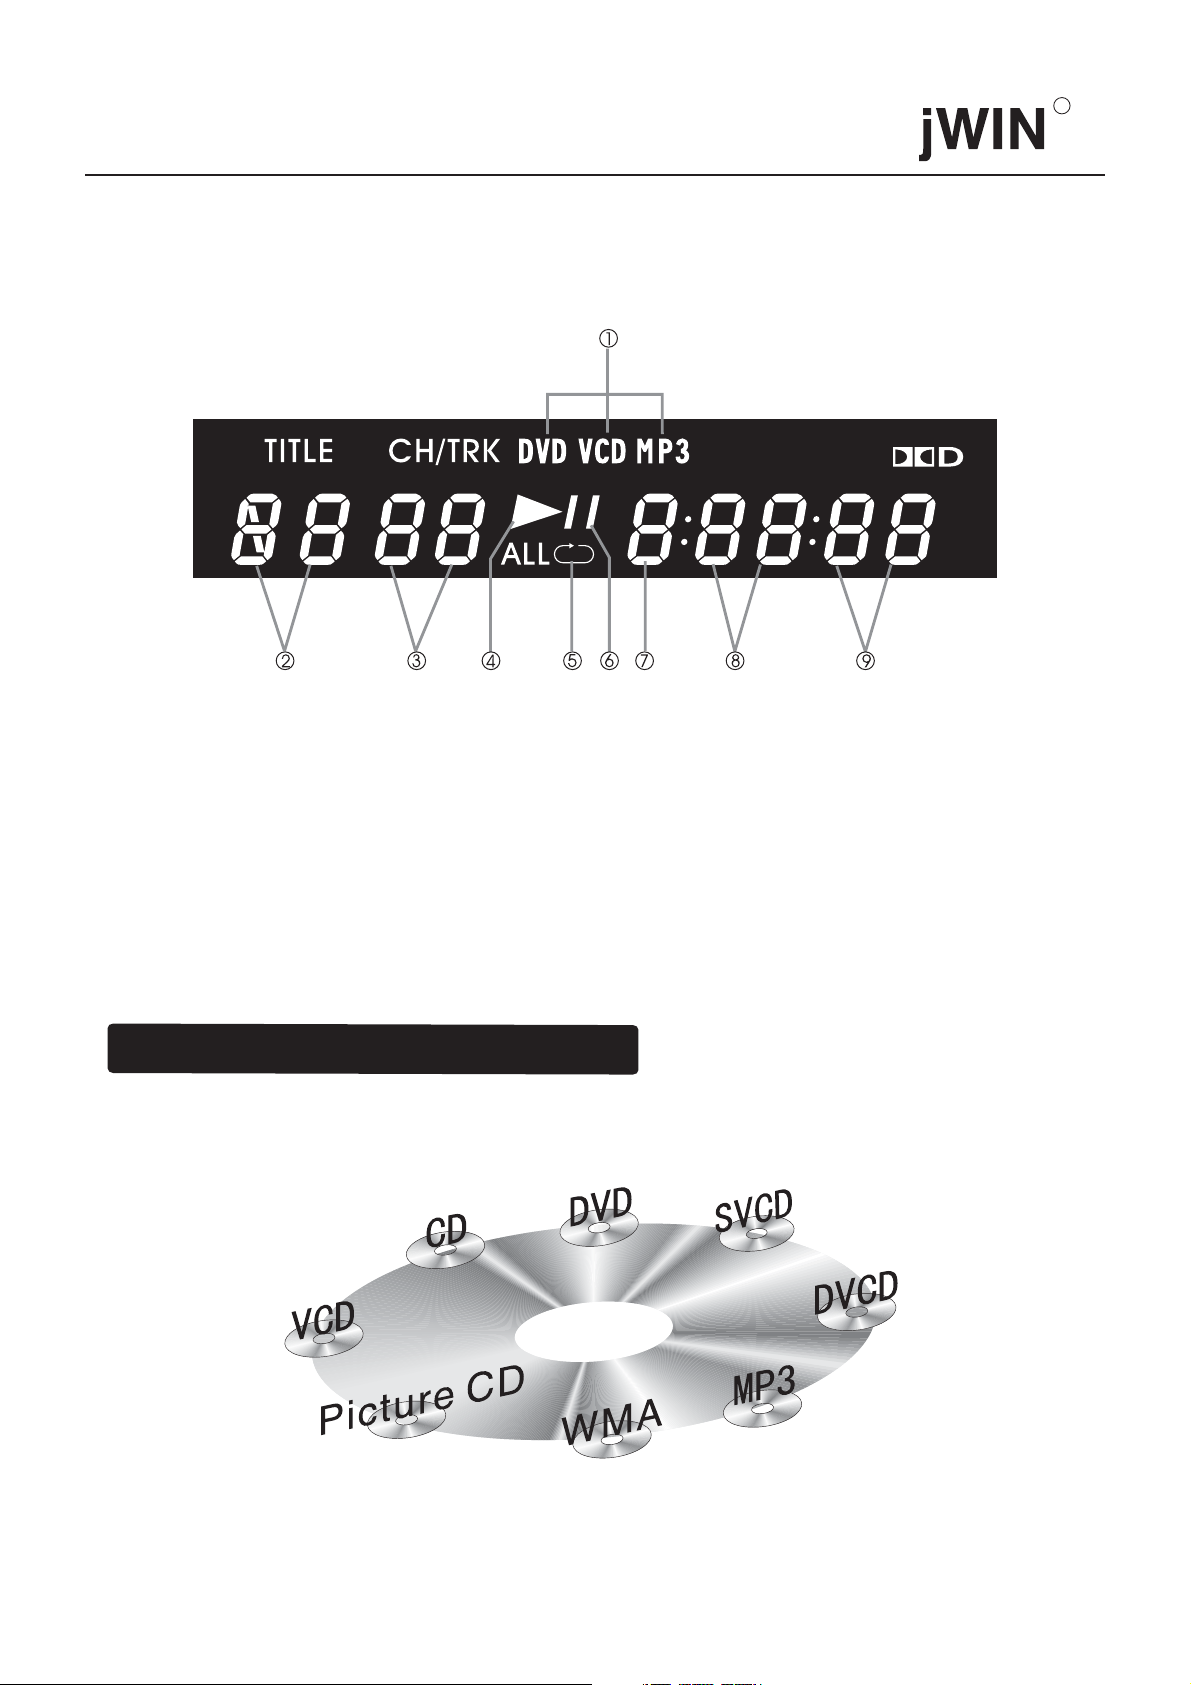
VFD DISPLAY:
When playing discs, VFD will be as follows.
R
<1> Disc Format Display
<2> Title Display
<3> Chapter/Track Display
<4> Playing Display
<5> Repeat Display
<6> Pause Display
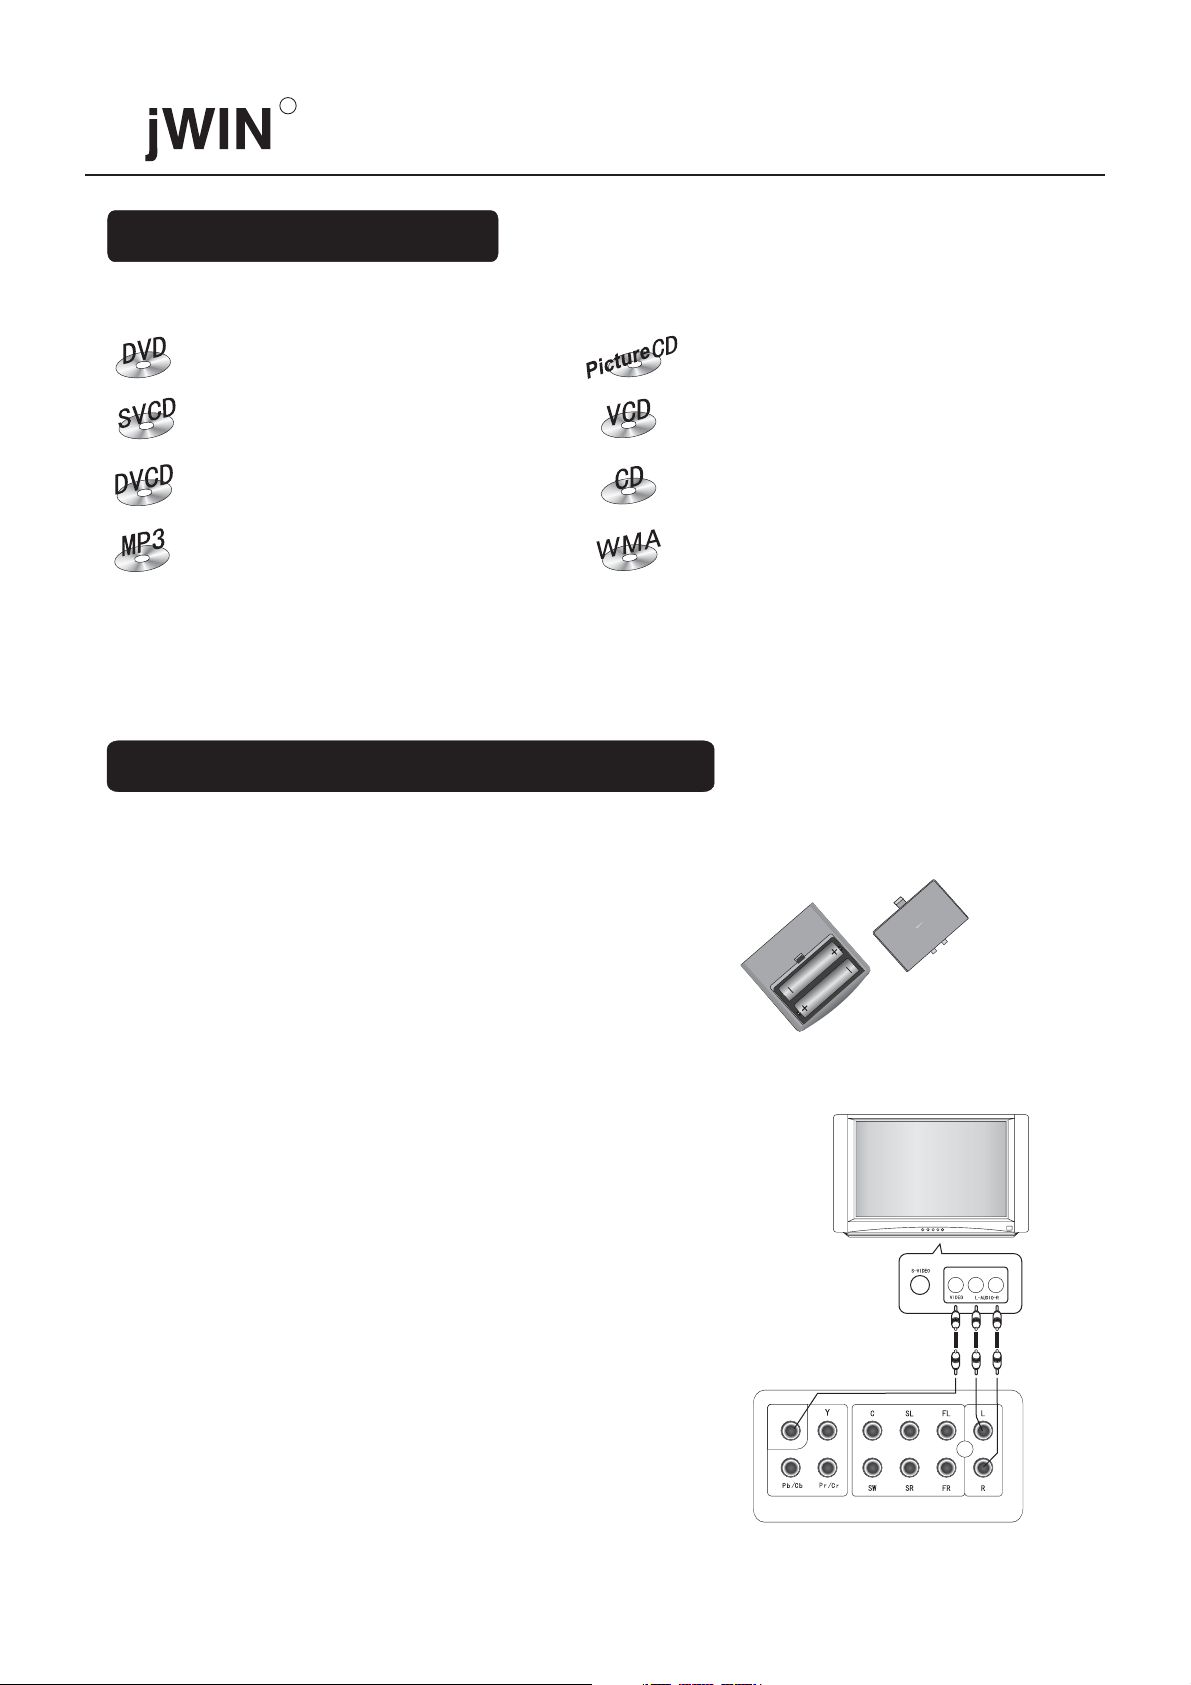
2. SUPPORTED DISC FORMATS
<7> Hour Display
<8> Minute Display
<9> Second Display
10
Page 13
R
3. REFERENCE GUIDE
On playing DVD discs
On playing Super VCD discs
On playing DVCD discs
On playing MP3 discs
4. PREPARATION BEFORE PLAYING
4.1 BATTERY INSTALLATION FOR REMOTE
CONTROL
On playing Picture CD discs
On playing VCD discs
On playing CD discs
On playing WMA discs
Open the battery compartment lid and insert a pair
of AAA batteries with correct polarity as indicated.
Please point at the remote sensor on the player while
using the remote control.
4.2 SYSTEM CONNECTION
1. Turn off the power before connection.
2. Turn on the power after finishing connection.
*Wires must be firmly connected; especially the
plug shall be fully inserted.
VIDEO
COMPONENT
VIDEOOUT
5.1CHSURROUND
AUDIOOUT
MIXED
AUDIOOUT
11
Page 14
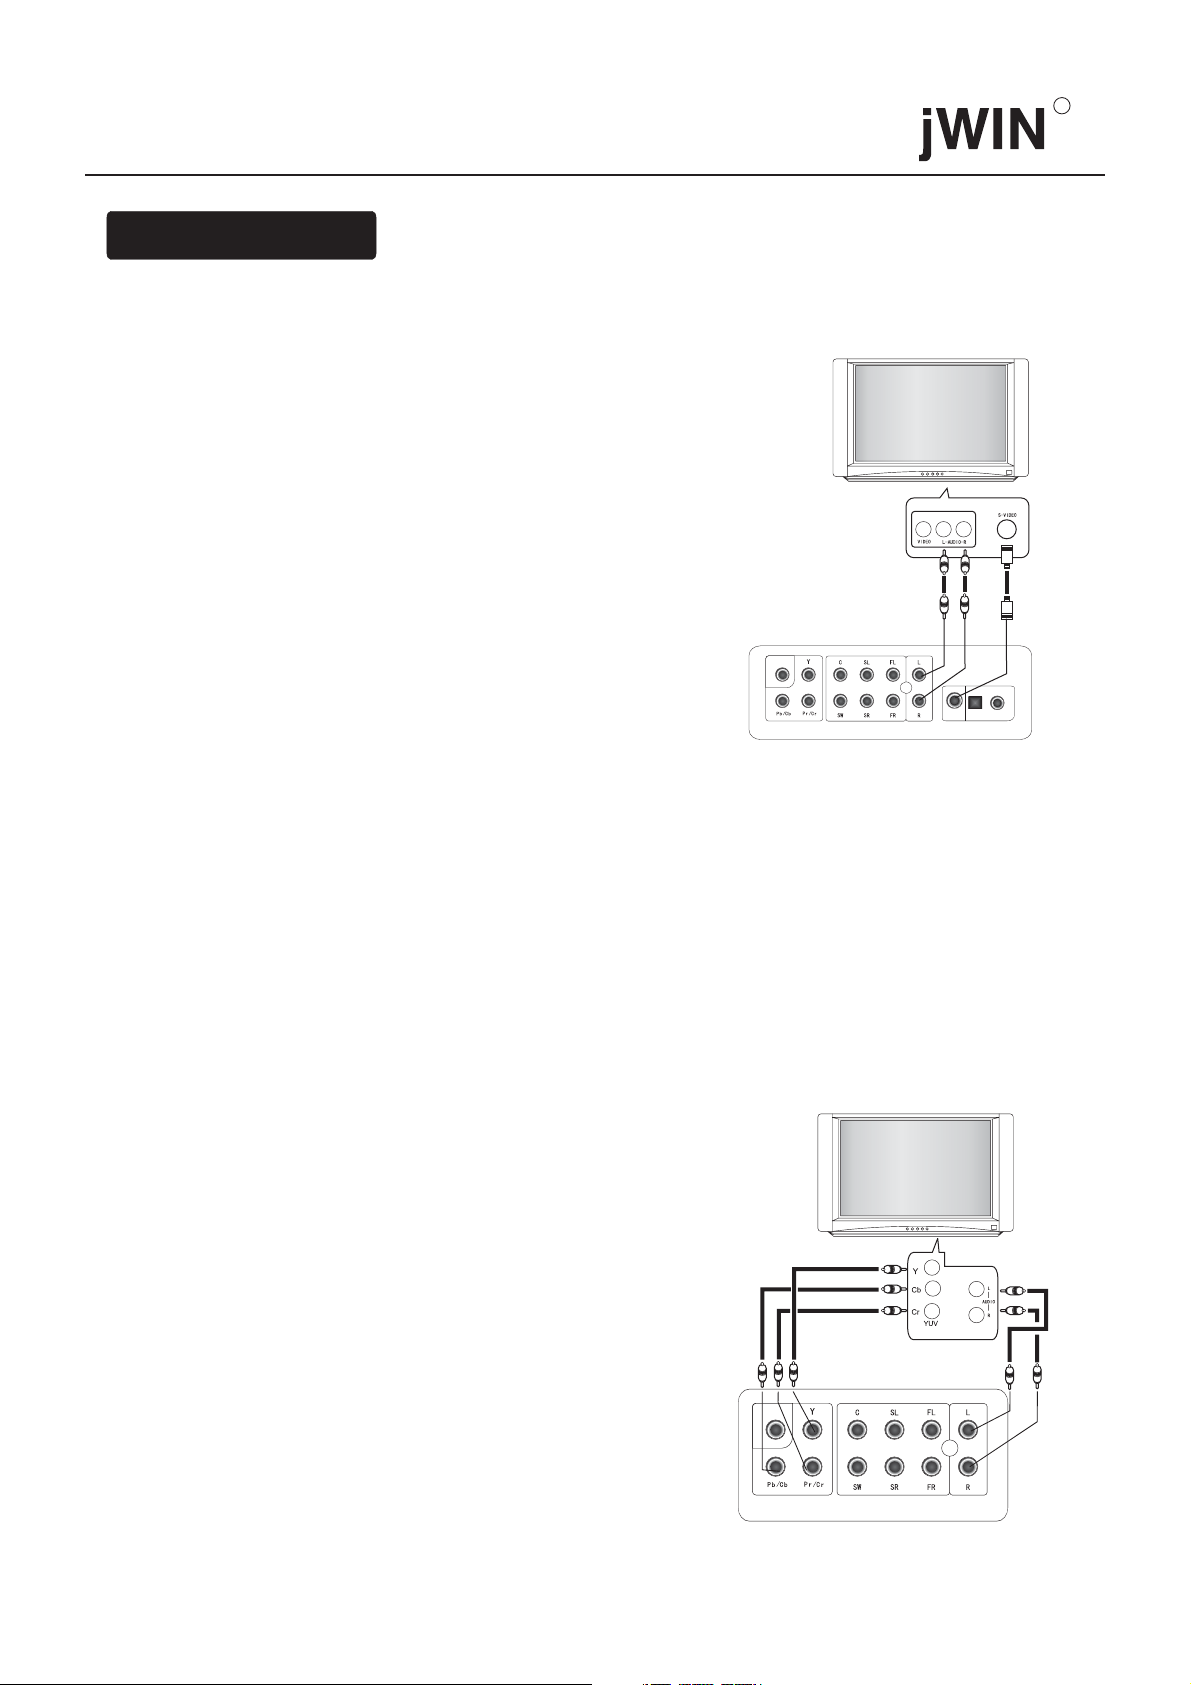
Connect with TV
1. Normal connection
Use the YUV cords to connect the player with the
corresponding ports of the TV set as shown in the
picture on the .right
R
VIDEO
2.Connect with S-Terminal
Connect one end of S-Terminal wire with S-Terminal
output socket on this player back-panel and another
with the S-Terminal input socket of the TV, and then
connect audio wire with the TV.
3.Connect with YUV (Y Cb Cr) Terminal
Connect one end of YUV wire with the Y, Pb/Cb, Pr/Cr
socket on the disc player and another with the corresponding
Y, Pb/Cb, Pr/Cr socket of the TV. And then connect
audio wire with TV. See picture at right.
When you connect the progressive scan TV, press the
PROGRESSIVE button on the remote control and if
no picture displays on the screen after DVD player
loads the discs, switch the video mode of the TV to
progressive scan and obtain the picture.
COMPONENT
VIDEOOUT
5.1CHSURROUND
AUDIOOUT
MIXED
AUDIOOUT
S-VIDEO
OPTICAL COAXIAL
Notes: For normal TV, if you press the PROGRESSIVE
button on the remote control, no picture displays on
the screen; press PROGRESSIVE button again and
it will shift to interlace scan mode. Then all information
will resume factory settings after pressing the RECALL
button.
VIDEO
COMPONENT
VIDEOOUT
5.1CHSURROUND
AUDIOOUT
MIXED
AUDIOOUT
12
Page 15
R
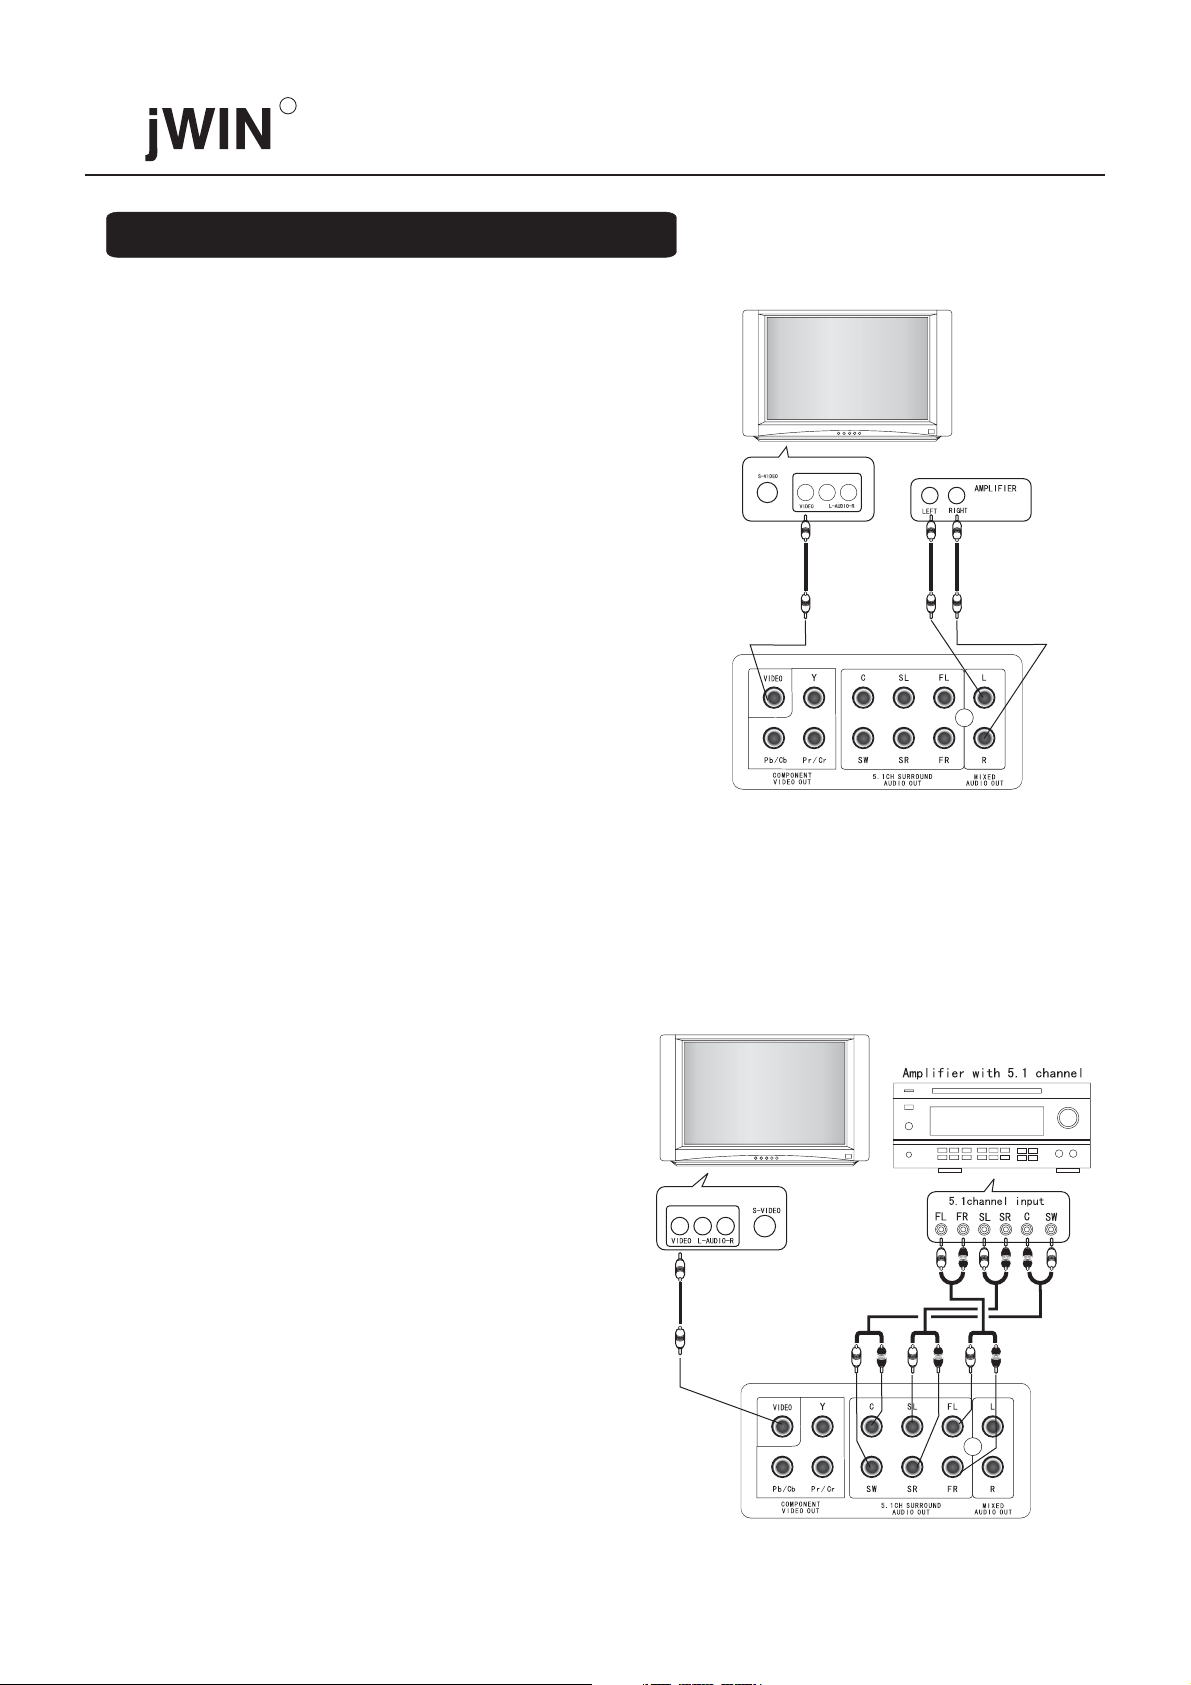
Connect with AV power amplifier
1. Normal Connection
The connection method is illustrated in the picture.
2. Connect with AV Amplifier with 5.1
Channel Surround Audio Input.
13
Page 16

3. Connect with Optical-Digital Audio
Terminal or Coaxial Terminal.
Directly connect the optical or coaxial cord of the
amplifier with optical or coaxial terminal of this
player (this factory setting mode is SPDIF-PCM ),
then connect video terminal of the player with video
interface of TV.
When using optical or coaxial output function of this
player, please refer to 7.2 Audio setting up for the
detailed setup method.
4.3 SETUP OF TV SIGNAL SYSTEM
If picture is not full screen or edge of the picture
has been covered or TV white-black phenomenon
exists, please press the NTSC/PAL button on the remote
control, adjust the whole player output system
according to TV system.
R
Note: Pictures are possible to be less than full screen
or partially covered, because DVD discs can support
different picture proportions.
5. BASIC OPERATION
After connection, you must make the following
preparations before operating this player.
1. Switch the TV on and select "video input".
2. Connect the power wires of the player with the
socket.
Notes: When the icon " " displays on the TV screen,
it means that the current operation is invalid probably
resulting from maloperation or restriction of the discs.
14
Page 17

R
Turn on the player
1.Press the POWER button to switch on the power
""
then it will load disc as illustrated at right.
Note: Turn the volume of amplifier to the minimum.
If this player has been connected with the amplifier,
then turn the amplifier power on and switch input
channeltoDVD.
SR
POWER
ON
OFF
Note: If no opening picture or no color shows when
turning on the player, please press NTSC/PAL""
button on the remote control, adjust the whole player
output mode to accord with TV system. Or press
PROGRESSIVE button to set the video output to
proper mode, see 4.3 for detail.
LOADING
NO DISC
Loading
No disc
2. Press the OPEN/CLOSE button on the remote
""
control or on the player.
OPEN/CLOSE
15
OPEN/CLOSE
OPEN
Page 18

R
3. Place a disc intothe disc tray and then press the OPEN/
CLOSE button on the remote control or on the player
to close the disc tray. The player can automatically
discern different kinds of discs, and disc information
may be displayed in the left upper corner of TV screen.
"
OPEN/CLOSE
OPEN/CLOSE
"
Type of disc
DVD
Note:The disc tray shall be opened/ closed by pressing
the OPEN/CLOSE button after power on. Do not
push or pull the tray by force so as to avoid damage
to the appliance.
4. After loading, the disc will be played automatically,
or press buttons for other operation.
Turn Off
Press the OPEN/CLOSE button on the remote control""
or the player to open the disc tray, take the disc out,
close the disc tray, and then press the STANDBY button
to standby mode, or press the POWER button to turn
off the player completely.
5.1 PLAYING A DISC
1. PLAY
PLAY
PLAY
16
Page 19

R
2. STOP
Press STOP once, the player enters memory-stop state;
""
press again, the player will completely stop.
3. PREV (Track or Page)
PRESS PLAY KEYTO CONTINUE
STATEOFMEMORYSTOP
4. NEXT (Track or Page)
Note: Some discs do not support the functions described
in item 3 and 4 above.
5. STANDBY
STANDBY
STANDBY
17
Page 20

6. RETURN
R
RETURN
Back
RETURN
5.2 NTSC/PAL SYSTEM
Continuously press NTSC/PAL on the remote control
to switch the following systems. Adjust the disc player
output mode to match the TV system , either:
MULTI
NTSC
PAL
Note:
1. This player has the function of automatically
discerning the format, and defaults to the NTSC system.
If playing discs in NTSC format, the player can
automatically switch to NTSC system. At this
time, it is normal that the picture will be instantly
flashed.
2. If the picture is not colorful, the color is abnormal,
or the sound and picture are temporarily interrupted,
(which may be caused by the discrepancy between
the disc format and TV system), at this time, you can
adjust TV system or picture output mode of the whole
disc player by this option to make them compatible.
Directly press NTSC/PAL button on the remote control
to change the system.
N/P
18
Page 21

R
5.3 MUTE & VOLUME CONTROL
Press "MUTE" button on the remote control to turn off
sound and press again to turn on the sound. "- +"
button is volume control button. Press "+" to increase
volume and "-" to decrease volume.
MUTE
Decrease volume
Increase volume
Note: Volume control is invalid for coaxial and optical
output.
5.4 TRACKS SELECTION
There are many titles including many chapters in
DVD VIDEO/DVD AUDIO discs, while Super VCD,
VCD and CD are only divided into tracks. Not only can
you use the title, chapter and track list to get the program
you want, but also use the "time setup" function. Refer
to "9/ How to use search function" for details.
5.5 AUDIO CHANNEL (L/R)
Press AUDIO on the remote control to select different
dubbing languages. (There are at most 8 kinds of
languages for DVD discs and 4 kinds for Super VCD,
this function only works with the discs that have
multiple languages).
19
AUDIO(L/R)
Page 22

For VCD, press this button to select different audio
channels as follows:
STEREO
MONO LEFT
MONO RIGHT
mix-MONO
PARTNER LEFT
PARTNER RIGHT
5.6 SUBTITLE SELECTION
Press SUBTITLE on the remote control to choose
different subtitles (There are at most 32 kinds of
subtitles for DVD and 4 kinds for Super VCD, this
function only works with discs that have multiple
subtitles).
SUBTITLE
R
SUBTITLE 01/03:ENGLISH
SUBTITLE 02/03: ENGLISH
6. OTHER FUNCTION BUTTONS
6.1 STOP
DVD player will be in the state of memory-stop
automatically when you press STOP . In this state,""
if you press PLAY , it will implement the function""
of memory-play. When in memory-stop state, press
""STOP once more-the player will completely stop
and the memory-play function will disappear.
PRESS PLAY KEYTO CONTINUE
20
Page 23

R
6.2 PAUSE
In play state, press PAUSE for the first time and
the player will be in pause state. Press the button
again, and the player will be in STEP state. Each time
the button is pressed, the picture on the Screen will
move to the next frame. Continuously press the button,
the picture on the screen will keep moving forward.
Pressing "PLAY" will return to normal play mode.
Note: The step function doesn't work with CD, MP3,
WMA, Picture CD, DVD AUDIO discs.
6.3 FAST FORWARD & FAST REWIND
FAST FORWARD:
In play mode, press the "FF" button on the remote
control to play at X2 speed, press it again to get X4
speed, press it for the third time to get X8 speed, press
it for the fourth time to get X16 speed and press for
the fifth time to get X32 speed. Press it for the sixth
time, it returns to the normal play state, or press "PLAY"
to return to normal play mode directly.
FAST REWIND:
In play mode, press the "FR" button on the remote
control to fast rewind at X2 speed, again to get X4
speed, a third time to get X8 speed, a fourth time to get
X16 speed and a fifth time to get X32 speed. Press FR""
button for the sixth time, the player return to the normal
play state, or press "PLAY" to return to normal play
mode directly.
21
Page 24

6.4 SLOW MOTION
R
In the play state, continuously press the SLOW "
"
button and you will get the following state and
information on the screen : slow forward 1/2, 1/4,
1/8, 1/16.
Notes:
1) This function doesn't work with CD, MP3,WMA,
Picture CD discs.
2) DVD disc is compatible with the function of slow
motion.
6.5 A-B REPEAT
Press the "A-B" button one time during playing at the
point where repeat play is to commence (marked A),
then press "A-B" button at the point where repeat play
is to be concluded (marked B). Then the player can
automatically repeat the segment from A to B. Press
-B" again, this will cancel the "A-B "operation."A
6.6 REPEAT
IN DVD VIDEO PLAYING MODE
Press REPEAT once to repeat the current chapter.
When finished playing, it will be repeated automatically.
Press the button twice to repeat the current title.
When finished playing, it will be repeated automatically.
Press the button three times to repeat the whole disc.
When the disc playing is finished, the player will
automatically repeat playing the disc.
CHAPTER
TITLE
ALL
22
Page 25

R
IN SVCD, VCD &CD DISCS PLAYING MODE:
Press "REPEAT" once to repeat one track. When the
track is over, the player will repeat it automatically.
Press "REPEAT" twice to repeat the entire disc.
When the whole disc is over, the player will repeat
it automatically.
Note: For SVCD, DVCD and VCD discs, the repeat
function must be used under the PBC off state.
IN WMA & MP3 DISCS PLAYING MODE:
Press "REPEAT" once during play to repeat one track.
When the track is over, the player will repeat it automatically.
Press "REPEAT" twice to repeat the current directory.
When the directory is over, the player will repeat it
automatically.
TRACK
ALL
Back
Play Mode
MENU
Repeat One Track
6.7 ZOOM
Successively press ZOOM to get different zoomed
pictures. In state of zoom play, pressing the Direction
buttons can shift the pictures""
accordingly.
Note: There may be zoom level differences among
different types of discs.
6.8 RETURN
When playing a DVD disc, press RETURN to return
to the main menu.
When playing VCD, SVCD, pressing the RETURN button
in PBC On state can return to the menu.
6.9 MENU
For DVD disc, press MENU to play the desired
tracks (depending on the discs being played). For
SVCD and VCD 2.0 discs, press this button and the
player will switch between the two play modes of
PBCONandPBCOFF.
* This function doesn't work with VCD1.1 and CD
discs.
23
Page 26

6.10 TITLE (applicable only to DVD)
Press TITLE to play the desired title.
(Only applicable to the discs with this function)
6.11 DIRECTION & ENTER
R
These buttons are used to move the highlighted bar
or cursor to desired items. Press "ENTER" to confirm.
6.12 ANGLE
Press ANGLE to watch the same scene from different
angles when enjoying sports, musical or drama programs.
Note: Only applicable to discs with this function.
6.13 3D SURROUND SOUND EFFECT
Press 3D button to activate the 3D surround soundthe
function. Output sound will have 3D stereo effect.
Press the button again to stop the function.
If you successively press 3D button, there are 8
choices for your option: ROCK, POP, LIVE, DANCE,
TECHNO, CLASSIC, SOFT, OFF.
ENTER
# # SURROUND: CLASSIC
3D
6.14 FREQUENCY SPECTRUM
Successively press the "SPEC" button to enter one of
the three frequency spectrum states with two displaying
two different frequency spectrum and one for frequency
spectrum off.
SPECTRUM
24
Page 27

R
6.15 SCREEN DISPLAY
When DVD player is playing DVD disc, continuously
press the "OSD button, the screen display is as follows"
in turn: play time, remaining time of the title, chapter
time, remaining time of the chapter, and display off.
When SVCD, VCD, CD disc is being played, continuously
press the OSD button, the screen display is as follows""
in turn: track time, remaining time of the track, time of
the whole disc, remaining time of the whole disc, and
display off.
OSD
TITLE ELAPSED
TT 01/07 CH 02/08 1:21:43
SINGLE ELAPSED
TRACK 01/09 01:43
SINGLE REMAIN
TRACK01/09 01:43
6.16 CLEAR
When you input the numbers, you can press the "CLEAR"
button to cancel the numbers entered.
6.17 STANDBY
Press STANDBY, the unit will enter into status of
standby. DVD display is not light, video has no output,
power consumption of the unit is largely reduced;
press it again to return to normal working state.
6.18 SPECTRUM (EQ)
Press this button to show the graphic equalizer on
TV screen, press it again for different kind display.
Press it once more to clear the display.
SINGLE ELAPSED
TRACK01/09 01:43
STANDBY
SPECTRUM
25
Page 28

7. HOW TO SETUP SYSTEM
Basic Operation
* Press the SETUP button on the remote control to""
enter the main page of the SETUP menu. And the
TV screen displays as shown in the picture on the
right:
* Press the arrow keys , , , to""""""""
select or adjust, and press ENTER to confirm.""
* Select EXIT THE SETUP MENU , or press the""
SETUP button again to exit from the setup interface.""
7.1 GENERAL SETUP
SETUP MENU--MAIN PAGE
GENERAL SETUP
AUDIO SETUP
VIDEO SETUP
PASSWORD SETUP
PREFERENCE SETUP
EXIT SETUP
R
Select to enter the menu mode,
GENERAL SETUP
and the TV screen displays as shown in the picture
at right.
7.1.1 TV type
Select this item to select the output system of the player
so that it can accord with the system of the TV set.
[PAL]
[MULTI]
[NTSC]
7.1.2 TV display
Through this item, users can conduct setups of normal/"
panoramic scene, normal/ letter box, wide screen"
according to the screen of the disc and TV set so as to
gain the best video effect.
7.1.3 OSD Lang
If English is selected, the words displayed on the TV
menu screen will be English. If Chinese is selected,
the words displayed on the TV menu screen will be
Chinese.
--GENERAL SETUP PAGE--
TV TYPE
TV DISPLAY
OSD LANG
SCREEN SAVER
MENU STYLE
MAIN PAGE
--GENERAL SETUP PAGE--
TV TYPE
TV DISPLAY
OSD LANG
SCREEN SAVER
MENU STYLE
MAIN PAGE
NORMAL/PS
NORMAL/LB
WIDE
ENGLISH
CHINESE
7.1.4 Screensaver
Selecting "ON" can start up the screensaver function.
Selecting "OFF" can turn off the screensaver function.
For details, see "13. Intelligent screensaver and
standby function".
26
Page 29

R
7.1.5 Menu Type
""""Type 1 and Type 2 are two different kinds of display
menus, which can be set according to your preference.
7.1.6 Main Page
If this item is selected, the menu will return to the
main page of the SETUP menu.
7.2 AUDIO SETUP
Use arrow keys to select the AUDIO SETUP item,
and press ENTER to enter the menu. The TV screen
""
will display as shown in Picture 1 on the right:
""
--AUDIO SETUP PAGE--
SPEAKER SETUP
SPDIF SETUP
DOLBY DIGITAL SETUP
EQUALIZER
3D PROCESSING
HDCD
MAIN PAGE
7.2.1 Speaker Setup
Select to enter the submenu, and the
TvscreendisplaysasshowninPicture2ontheright:
SPEAKER SETUP
7.2.1.1 Downmix Mode
Press arrow keys to enter this setup item. "LT/RT"
means the audio signal output of left/right channel;
"Stereo" means stereo audio signal output; "5.1
CH" means audio output of 5.1 channel.
7.2.1.2 Front Speaker
If the connected speaker is of big model, it can be set
as big; if the speaker is small, it can be set as small.
7.2.1.3 Central Speaker
The setting of big and small is the same as front speaker.
If it is set to OFF, the speaker has no signal output.
7.2.1.4 Rear Speaker
The setting is the same as front speaker.
PICTURE 1
--SPEAKER SETUP PAGE--
DOWNMIX
FRONT SPEAKER
CNTR SPEAKER
REAR SPEAKER
SUB WOOFER
DIALOG
BACK
PICTURE 2
STEREO
5.1CH
7.2.1.5 Subwoofer
If set as ON, the subwoofer has signal output. If set as
OFF, then the subwoofer has no signal output.
27
Page 30

R
7.2.1.6 Dialogue
It is used for enhancing the definition of dialogue.
When the audio channel mode is 5.1 CH, it doesn't
have such a function.
7.2.1.7 Back
Select this item to return to the higher menu.
7.2.2 SPDIF Setup
When this item is selected, the TV menu screen display
is as shown in the picture at right:
7.2.2.1 SPDIF Output
If the connected power amplifier has the function of
Dolby AC-3 decoding , it's best to select SPDIF RAW.
If the power amplifier doesn't have the decoding
function, but has coaxial or optical fiber input, it's best
to select SPDIF-PCM.
--SPEAKER SETUP PAGE--
DOWNMIX
FRONT SPEAKER
CNTR SPEAKER
REAR SPEAKER
SUB WOOFER
DIALOG
BACK
--SPDIF SETUP PAGE--
SPDIF OUTPUT
LPCM OUT
BACK
STEREO
5.1CH
SPDIF OFF
SPDIF/RAW
SPDIF-PCM
7.2.2.2 LPCM Output
When SPDIF output is set as SPDIF-PCM, it is used
for setting the sampling frequency of the output signal
of the optical fiber and coaxial terminal.
Note: This item shall be set cooperating with the disc
and power amplifier, or there may be no sound output.
7.2.2.3 Back
Select this item to return to the higher menu.
7.2.3 Dolby Digital Setup
7.2.3.1 Dynamic Scope Compression
Adjusting this item can gain different signal compression
effects. For example, you can adjust the linear
compression ratio higher when playing a disc in the
day so as to get a better acoustical effect; while at night,
you can adjust the ratio lower.
--DOLBY DIGITAL SETUP--
DYNAMIC
BACK
28
Page 31

R
7.2.3.2 Back
Selecting this item to return to the higher menu.
7.2.4 Equalizer Setup
Selecting this item, the TV screen display is as shown
in the picture at right:
7.2.4.1 EQ Type
Press arrow keys to select the sound field effect from
the 8 main kinds, i.e. Off, Concert, Living Room,
Hall, Bathroom, Cave, Arena and Church. Press ENTER""
to confirm.
--EQUALIZER PAGE--
EQ TYPE
BASS BOOST
SUPER BASS
TREBLE BOOST
BACK
OFF
CONCERT
LIVING ROOM
HALL
BATH ROOM
CAVE
ARENA
CHURCH
7.2.4.2 Bass Boost
Selecting ON , the bass will be boosted. Selecting
OFF , the bass boost effect will be turned off.
""
""
7.2.4.3 Super Bass
Selecting ON , the super bass will be turned on.
Selecting OFF , the super bass will be turned off.
""
""
7.2.4.4 Treble Boost
Selecting ON , the treble will be boosted. Selecting
OFF , the treble boost effect will be turned off.
""
""
7.2.4.5 Back
Select to return to the AUDIO SETUP page."Back"
7.2.5 3D Processing
Select this item, there will be 8 choices for sound
output: OFF, ROCK, POP, LIVE, DANCE, TECHNO,
CLASSIC, SOFT.
29
Page 32

7.3 VIDEO SETUP
After entering Video Setup mode, the TV screen
display is:
7.3.1 Component Video
When the player is connected with a TV set with
terminal or computer display, RGB shall be selected.
When the player is connected with a progressive TV
set, P-SCAN mode shall be selected. If the TV set is
a common one, INTERLACE mode shall be selected.
7.3.2Video Quality Setup
--VIDEO SETUP PAGE--
COMPONENT
QUALITY
MAIN PAGE
INTERLACE
P-SCAN
RGB
R
After entering mode, the
VIDEO QUALITY SETUP
TV screen display is as shown in the picture at right.
7.3.2.1 Sharpness
High, Medium, Low are three kinds of video images
of different definition, which can be set according to
users' preference.
7.3.2.2 Setup of Brightness, Contrast, Chroma,
and Saturation
Press arrow keys to select the desired setup item, then
press the arrow key to enter the adjusting interface,""
and press or to adjust till you get the""" "
satisfactory video effect. After the adjustment is
completed, press the to return to the" "arrow key
picture quality setup page.
7.3.2.3 Back
Select to return to the VIDEO SETUP page."Back"
--VIDEO QUALITY SETUP--
SHARPNESS
BRIGHTNESS
CONTRAST
HUE
SATURATION
BACK
HIGH
MEDIUM
LOW
7.4 PASSWORD SETUP PAGE
7.4.1 Password
Select CHANGE , to view the menu on the right, and
users can change the password according to need.
""
--PASS WORD SETUP PAGE--
OLD PASSWORD
NEW PASSWORD
CONFIRM PWD
30
Page 33

R
7.4.2 Age Control
If you set password in 7.4.1, you will input the password
when confirming the age control option.
7.4.3 Main page
Select Main page to return to the main page.
7.5 PREFERENCE SETUP PAGE
After the appliance is turned on, press the OPEN/"
CLOSE button to open the disc tray, or press STOP"""
button twice, and press the SETUP button again""
to enter the homepage of setup menu. Then use arrow
keys to select , andPREFERENCE SETUP PAGE
press ENTER button to enter the" " PREFERENCE
SETUP PAGE, the TV screen display is as shown in
--PREFERENCE PAGE
AUDIO
SUBTITLE
DISC MENU
DEFAULT
MAIN PAGE
ENGLISH
FRENCH
SPANISH
CHINESE
JAPANESE
KOREAN
RUSSIAN
THAI
OTHERS
the picture at right.
7.5.1 Audio Language (Disc support is required.)
7.5.2 Subtitle (Disc support is required.)
7.5.3 Disc Language (Disc support is required.)
According to the disc, you may choose different language
referring to AUDIO, SUBTITLE and DISC MENU setting.
7.5.4 Default
If selecting "RECALL" in this setup, each set
function item will be reverted to the initial state
when the player was delivered from the factory.
7.5.5 Main page
Selecting this item to return to the main page.
31
Page 34

8. HOW TO USE PROGRAMMING FUNCTION
8.1 PROGRAMMED PLAY FOR SVCD,
VCD AND CD DISCS
Press PROG to enter the interface as shown in picture
""
at right, then press number keys to input track number.
For example, if you want to play track
2, 6, 22, you can input as follows:
1 [02] ---------------- input 2
2 [06] ---------------- input 6
3 [22] ----------------press +10 button twice,""
and press 2 button once""
Move the highlighted bar to the START column, press
PLAY or ENTER to start a programmed play. If you
don't want a programmed play, you can enter the
programming menu, move the highlighted bar to the STOP
column, confirm and select EXIT , thus programmed""
play can be erased.
R
PROGRAM: TRACK(01-20)
EXIT START NEXT
Notes:
1. If the number of inputted track is more than that
of the total tracks on the disc, the player will
automatically clear the inputted track number.
2. For DVD disc with only one title, the programming
method is the same as that of SVCD and VCD disc.
8.2 PROGRAMMED PLAY FOR DVD DISC
Press the PROG button on the remote control and the
picture on the right will appear on the screen. The
first two digits are for title and the last two digits
are for chapter.
Users can input numbers according to the order of
Title-Chapter-Title-Chapter , other operations are
the same as 8.1.
Note: The inputted title number can't be more than
that of the total titles and the inputted chapter number
can't be more than that of the total chapters of the
selected title, otherwise the player will automatically
clear the inputted number.
PROGRAM:TT (12)/CH(--)
EXIT NEXT
32
Page 35

R
9. HOW TO USE SEARCH FUNCTION
Press this button to enter the search state.
9.1 FOR DVD DISC
1) Search of title/chapter
Press SEARCH and the picture as shown in Picture 1
(on the right) appears on the screen. Use arrow key " "
to select Title (as shown in Picture 2). Press number keys
to specify the desired title. Then input the desired chapter,
press ENTER button to play it.""
Disc total titles
TITLE 01/05 CHAPTER /16
Note: The inputted title number can't be more than
that of the total titles on the disc, and the inputted
chapter number can't be more than that of the total
chapters of the current title, or the operation will
be invalid.
SEARCH
2) Time search within a title
Press SEARCH twice, screen display is as shown in""
Picture 3, then press button to select Title Search"" " "
column, and directly press number keys to specify the
title, then input the time. For example, input number 1,
0, 6, 0, 8 and "1 06 08" (hour, minute, second) will
appear on the screen. Press ENTER to start play
from the specified time.
Note: The inputted time can't be more than of the
total time of the current chapter, or the operation
will be invalid.
PICTURE 1
TITLE /05 CHAPTER 00/00
PICTURE 2
TITLE 01/05 TIME : :
PICTURE 3
Note: The inputted time can't be more than the total
time of the current title, or the operation will be invalid.
3) Time search within a chapter
Press SEARCH three times, screen display is as shown in
Picture 4, then press button to select Chapter Search""
column, and directly press number keys to specify the chapter,
then input the time. For example, input number 1, 0, 6, 0,
8 and "1 06 08" (hour, minute, second) will appear on
the screen. Press ENTER to start playing from the specified
time.
33
CHAPTER 01/16 TIME : :
PICTURE 4
Page 36

9.2 FOR SVCD/VCD/CD DISCS
ENTER
Continuously press the SEARCH button and you can
conduct disc time search , track time search and
track search throughout the entire disc.
R
1) Whole disc time searching (search the
whole disc)
Press SEARCH to enter the interface as shown on
the right (Picture 1). Directly input numbers, for
example, input number 2, 2, 1, 8, and press ENTER
to play from the specified time, i.e. 22:18 (minute,
second).
2) Track time searching (search in current
track)
Press SEARCH twice to enter the interface as shown
on the right (picture 2). Input the time by pressing
numerical keys. For example, input number 0 1, 0, 8,
and press ENTER, then you can start play from the
specified time, i.e. 01:08 (minute, second).
DISC GOTO : --:--
PICTURE 1
TRACK GOTO : --:--
PICTURE 2
3) Search track (search the whole disc)
3.1 Press SEARCH three times, screen display is
as shown in Picture 3. Press number keys to specify
the track. For example, if you want to select track
22, directly press +10 button twice, then press 2 ,
and press ENTER for confirmation. The player
will play track 22.
""
"" ""
""
SELECT TRACK: --:26
PICTURE 3
34
Page 37

R
3.2 In state of PBC off, directly press number keys
to input the specified track. For example, if you
want to select track 22, press +10 button twice,
then press 2 , and press" " "ENTER" for confirmation.
T
he player will play track 22.
Note:
1 In Stop mode, you can only get whole disc time.
search and track search functions by pressing
the SEARCH button.
2. In state of PBC ON, you can't select tracks directly
by pressing number keys, but return to the menu,
then you can input numbers to select tracks directly.
""
10. HOW TO USE KARAOKE FUNCTION
10.1 To Connect The Microphone
Turn the MIC VOL and ECHO knob on the front
panel to the minimum and then connect microphones
to MIC jacks. You may connect two microphones
to enjoy duet singing.
10.2 Start KARAOKE
1. Turn MIC VOL knob to adjust the volume of
microphone.
2. Turn ECHO knob to adjust the volume of echo.
3. You may press number keys on the remote
control to select the track you want when it is
playing a KARAOKE disc.
10.3 To Employ The Special Functions
Of KARAOKE
Press AUDIO CH on the remote control and choose
from the following:
[STEREO]
[ LEFT]
MONO
[ RIGHT]
MONO
[mix-MONO]
[PARTNER LEFT]
[PARTNER RIGHT]
MIC VOLUME ECHO
Cancel Original Sound
You may press the AUDIO CH button and choose
[LEFT] or [RIGHT] to cancel original sound when
you are enjoying KARAOKE. You can also cancel
original sound by choosing a different audio output
state.
35
Page 38

The Operation Of Auto Replace KARAOKE
And Auto Follow KARAOKE
Choose [PARTNER LEFT] or [PARTNER RIGHT]
to gain auto replace KARAOKE (When person is
singing, the player doesn't sing; when person isn't
singing,theplayer sings)orautofollowKARAOKE
(whenperson is singing, the player is singing;when
person stops singing, the player stops too)
Note: This function only applies to VCD and DVCD
discs.
Noise handling:
1. Take the microphone far away from the TV set
or SPEAKER.
2. Turn down the volume of TV set or SPEAKER.
3. Turn down the volume or echo of microphone.
R
11.HOW TO PLAY MP3/WMA DISCS
11.1 THE STRUCTURE OF MP3/WMA
DISCS
An MP3/WMA disc has directories and a directory
has tracks.
11.2 DIRECTORY STRUCTURE OF MP3/WMA
DISC DISPLAYED IN THE PLAYER
For MP3/WMA discs, the player will display the
total directories after reading the disc (as shown in
Picture 1). Press the arrow key to select a directory,
press ENTER to enter the submenu (as shown in""
Picture 2), press to move the cursor to the right""
part of the menu, then press or to select"" ""
tracks, and press PLAY to start play.""
Note :
1. The player does not support display of track and
directory in Chinese. If the track or directory is
in Chinese, the player will display it with - .""
2. Track No. means the track No. of current directory.
MENU
Play Mode
PICTURE 1
MENU
UP DIR
Play Mode
PICTURE 2
FOLDER
Note 1
FOLDER
36
Page 39

R
11.3 HOW TO SWITCH THE DIRECTORY
OF MP3/WMA
MENU
Press arrow key " " to move the cursor
"" ""
PREV DIR on the left of the screen, press ENTER
to
on the remote control to return to the total directory.
Press the arrow keys to move the cursor to select a
different directory. Repeat the above operation to
browse all the directories of the whole MP3/WMA
disc.
11.4 HOW TO SELECT TRACKS FOR PLAY:
There are two methods for choosing tracks.
11.4.1 To choose the track serial number of
the whole disc:
With the number keys from 1 to 9 on the remote
control, you can directly choose corresponding
tracks to play. For example, you can press 1, 2, 2
directly to play 122 track.
nd
Play Mode Repeat One Thack
PICTURE 3
Notes: First, enter Stop state, press "PROG" button
to switch to the play state of "Document Mode", and
then the above mentioned function of selecting track
from the entire disc for play can be realized. In the Play
state of "Normal Mode", tracks can be selected only
from the current directory.
11.4.2 How to select tracks for play in normal
mode (directory structure) and document
mode of MP3/WMA.
1.In normal mode, pressing " ", " " can directly
select tracks in the directory. In document mode,
tracks can be selected from the entire disc.
2. Press the direction keys " ", " ", " ", " "
to move the cursor among the tracks on the page,
press ENTER button to play the specified track.
3. In state of normal mode, pressing numeric keys
can directly select track in the directory. In state of
document mode, pressing numeric keys can directly
select track in the entire disc.
37
Page 40

Notes:
1) The player has two kinds of play methods: normal
mode and document mode. In stop state, pressing the
PROG button can switch the play methods between
normal mode and document mode.
Document mode: All the documents in the disc will
be displayed for your selection.
Normal mode: The documents in the disc will be
displayed via directory structure.
2) If you want to play a MP3/WMA disc in sequence,
you can set the play state of the player as Document
Mode .
12. HOW TO ENJOY THE DIGITAL ALBUM OF PICTURE CD
R
12.1 PLAY MODE
The player will display the total directories of the
disc after recognizing the format of Picture CD,
then press PROG button to select Document Mode"" " "
or Normal Mode to play the disc. As show in picture""
1 on the right:
12.1.1 Digital Direct Play
Press digital buttons "0-9" and "+10" on the remote
control to select and play. Press digital buttons 6, 8
if you want to select the 68 picture, and press
ENTER to confirm. If play state is in Normal Mode ,
it is invalid when the inputted number is greater than
the number of the total files of the directory. If play state is
in Document Mode , it is invalid when the inputted
number is greater than the number of the total files
of the disc.
12.1.2 Multi picture browse & play
In Play mode, press STOP to enter into twelve picture
browse, as shown on the right (PICTURE 2). Press arrow
keys , , or to move the cursor""""""""
to "PREV" or "NEXT" then press "ENTER"to browse,
or directly press "PREV" or "NEXT" to browse. If you
want to play one certain picture, you can directly press
the number button to play or arrow keys to move the
cursor to this picture and press ENTER . You can also""
directly select "Slide Show " when browsing, and it
th
MENU
Play Mode
Slide Show Menu PREV NEXT
FOLDER
PICTURE 1
PICTURE 2
DIRECTION
PBC
38
Page 41

R
will play the pictures randomly. To get key explanation,
press arrow keys to move cursor to "MENU" button,
then press "ENTER" to display "Function Button
Explanation" page, as shown in picture 3 on the right.
Press "ENTER" to continue, and press it again to
leave "Function Button Explanation" page.
12.1.3 Directory browse & play
Press MENU to enter the disc menu. In Document
"" "
Mode , press PROG to switch to Normal Mode .
""" " "
12.1.3.1 Structure of Picture CD Disc
One Picture CD disc consists of a number of
directories, and each directory has CD pictures.
REMOTE KEY FUNCTION
PROGRAM TRANSITION EFFECT
STOP THUMBNAIL MODE
PLAY PICTURE MODE
NEXT PICTURE
PREVIOUS PICTURE
INVERT
MIRROR
PICTURE 3
CON INUET
12.1.3.2 Display of the directory structure
of Picture CD disc on the player
Directory structure is shown in picture 1 on the
previous page.
Note 1: This player will not support the display of
Pictures and directory names in Chinese. If picture
or directory's name is in Chinese, - will appear.""
Note 2: Picture number is the serial number of picture
in the current directory.
12.1.3.3 How to change Picture CD Directory
1. In the directory state, press " " to move the
cursor to the left part, and then press " "or
" " to move the cursor. Press "ENTER" to
enter the submenu. Press " "to move the cursor
to the right part, and then press " ", " ",
or "ENTER" to display the picture 2. In Play state,
Press to go "PBC" to enter the submenu, press
" " to go to the previous menu, and press "ENTER"
to the root directory. Operation is the same as 1.
39
Page 42

12.2 PREVIOUS PAGE/NEXT PAGE
Press " " button to shift to the previous picture,
and press " " button for the next picture.
12.3 PAUSE
Press PAUSE to stop in the current picture.
""
Press PLAY to resume play.
""
R
12.4 SCAN MODE SWITCH
In the sequential play, Press PROG to switch the
display mode of pictures. For example, picture is
displayed from up to down in mode 1 , but from
downtoupin mode2.
Note: This player provides 15 kinds of display modes.
""
12.5 ZOOM
Press ZOOM , the screen will enlarge by 100%, then
""
press FAST FORWARD and FAST REWIND keys
""""
to enlarge or reduce the picture by different times.
12.6 ROTATION FUNCTION
Continuously press arrow keys, the picture will
rotate 90 clockwise or counterclockwise.
O
PROG
ZOOM
DIRECTION
ZOOM100%
ZOOM125%
ZOOM50%
12.7
Press arrow keys " " and " ", the picture
display is up-down mirror image and left-right mirror
image respectively.
Note: Using Rotation Function and Zoom function
will cancel the sequential play. Please press PLAY""
to play forward automatically.
40
Page 43

R
13. INTELLIGENT SCREENSAVER AND STAND-BY FUNCTION
With the same function of screensaver and stand-by function as computer, it will automatically enter
into screensaver after three minutes under stop or no disc state, so as to protect your TV screen. It will
automatically enter into stand-by state after twenty minutes of screensaver, then DVD display is not
light, video has no output, power consumption of the appliance is largely reduced, so as to enhance the
safety and prolong lifespan. In stand-by state, press PLAY or OPEN/CLOSE on the front panel
of DVD to go normal working states.
""" "
14. MALFUNCTION & TROUBLESHOOTING
Before requesting after-sale warranty service, try the
following troubleshooting suggestions..
No sound:
* Ensure that the player is properly connected
with other systems, such as power amplifier or
TV set.
* Ensure that TV set or power amplifier is working
properly.
* Check if MUTE button of the appliance or TV
set is pressed.
* Check whether volume of the TV set or player
is adjusted to minimum.
No picture:
* Ensure that the player is connected firmly with
the other system, such as TV set.
* Ensure that the TV set is working properly.
* Ensure that the video output mode is set properly
(Refer to 4.3).
Disc not playing
* Ensure that the disc is placed correctly. (The
label side is facing up.)
* Ensure that the disc is clean.
Microphone has no sound:
* Adjust the volume of the microphone to proper
level.
Remote control does not work:
* Remove the obstacles between the player and
the remote control.
* Point the remote control at the sensor on the
front panel of the player.
* Check whether the energy of the battery is
adequate.
No display or partial display:
* Check whether the disc is scratched and ensure
that the disc is clean.
* When there is trouble, please turn off the
power because the appliance is controlled by
microcomputer, and turn on the player again
after several seconds. If the trouble is resolved,
the player may work properly again.
No output after turning on the player:
* Ensure that the time interval between turning off
turning-on is not too short.and
* Turn off the disc player, and turn on again after
10 seconds.
* Ensure that the video output mode is properly
set. (Refer to 4.3 for details)
Screen is not light and no output
* The appliance may enter the stand-by state.
Press the "PLAY" or "OPEN/CLOSE" button
on the panel to activate it.
* Switch off the power supply of the appliance,
and turn it on after 10 seconds.
41
Page 44

15. DVD INTRODUCTION AND FEATURES
DVD player is the ticket of your home theatre. Every technical index of this appliance is far superior to any
previous video player. This completely new digital technology has compressed the audio - visual effect of
cinema into a 12cm-diameter disc which is the same in dimension as the CD disc. It is also compatible with
the existing SVCD, VCD and CD.
COMPARE DVD DISC WITH OTHER DISCS:
DVD LD SVCD VCD CD
R
Recording
method
Capability
Playing time 133 242 266 484
Disc diameter 12cm/8cm 30cm/20cm 12cm 12cm 12cm/8cm
Horizontal
resolution
Picture
proportion
Digital/MPEG
Single-side
single-layer
4.7G
minutes minutes minutes minutes
Singleside
doublelayer
8.5G
500 lines or more
Multiple kinds one kind one kind one kind
II
Double
--side
single
--layer
9.4G
Doubleside
doublelayer
17G
Analog Digital
650MB 650MB 650MB
Single-side
60minutes
double-side
120minutes
No more than no more than no more than
430 line 350 line 250 line
45minutes 74minutes 74minutes
Digital/
MPEGI
Digital
Subtitle 32 kinds
Language 8 kinds
Sound quality 44.1kHz/48kHz,96kHz/192kHz 44.1kHz/ 44.1kHz/ 44.1kHz/
16, 20, 24bit
16 kinds
at most
4 kinds
at most
16bit 16bit 16bit 16bit
4 kinds
4 kinds
at most
2 kinds 2 kinds
42
Page 45

R
SPECIAL FUNCTIONS OF DVD
PARENTAL LOCK
Some DVD discs may be harmful to children because of their content, so different restriction levels (G,
PG, PG-13 or NC-17) are available to meet the users' requirements. The appliance can also restrict the
playing of some discs according to your requirement so as to prevent children from watching some discs
inappropriate to their age group.
MULTIPLE LANGUAGES
DVD discs can support 8 kinds of language sounds and 32 kinds of language subtitles.
MULTIPLE SECTION FUNCTION
Users can select any part of the story (beginning, development, climax, or drop scene) to play.
MULTIPLE ANGLES FOR VIEWING
Users can view the scene from different angles, such as near view, side view, and panorama.
MULTIPLE PICTURE PROPORTION MODES
Multiple picture proportions can be suitable for different types of TV screen.
Normal
Panoramic scene Letter box
Wide screen
DOLBY DIGITAL SURROUND (AC-3) SOUND 5.1 CHANNEL
The customer can enjoy 3-D space sound of Dolby digital surround sound (AC-3) 5.1 (contain 6 sorts
of independent sound channel), SUBWOOFER channel increases the effect of bass. (You can place the
subwoofer randomly.)
Notice: The above function needs disc support.
43
Page 46

FUNCTION SUPPORTED BY DVD DISCS
DVD discs support diverse functions. The discs produced by different manufacturers may support
different functions.
Dolby digital (AC-3)
Sort of language
Subtitle languages
Picture proportion
R
Parental lock
Angles for viewing
CLOSE CAPTION subtitle
16. DISC REFERENCE
DISC PROTECTION :
* Try not to scratch the disc. It shall be kept in the
box after using.
* Wipe the disc with a dry soft cloth from the center
hole toward the outer edge.
* Do not use chemical materials such as alcohol and
cleaner to clean the disc.
* Discs can't be heated, or they may deform.
* Do not stick anything or write on the disc.
44
Page 47

R
THIS APPLIANCE CAN PLAY THE FOLLOWING DISCS:
45
Page 48

17. TECHNICAL SPECIFICATION
VF Signal system MULTI/NTSC/PAL
Audio response 20Hz-20kHz 1dB
Audio s/n ratio 90 dB
R
Audio output
(analog audio)
Audio output
(digital audio)
Output
Video output
S-Video output
YUV(Y, Cb,
Cr) output
Input
Power AC 120V/60Hz
Power consumption <20W
Dimensions 430 (L) 290 (W) 50(H) mmXX
Electric level output : 1 2V
Electric level output : 0.5Vp--p
Electric level output :1Vp--p resistance : 75
Electric level output : brightness(Y)0.7Vp--p,chrominance(C):0.88Vp--p, resistance :75
Electric level output : Y/Cb/Cr 700 140mVp--p
Microphone X 2
Unbalanced negative
Weight 3.4 Kg
46
Page 49

R
Dolby:
* Produce under the authorization of Dolby laboratory. The symbol of Dolby and
double D are trademarks of Dolby laboratory. It is a secret product and cannot be
issued. C Dolby laboratory: 1992-1997. All rights reserved.
Macrovision:
This product incorporates copyright protection technology that is protected
by method claims of certain U.S. patents and other intellectual property rights
owned by Macrovision Corporation and other rights owners. Use of this
copyright protection technology must be authorized by Macrovision Corporation,
and is intended for home and other limited viewing uses only unless otherwise
authorized by Macrovision Corporation. Reverse engineering or disasssembly
is prohibited.
47
 Loading...