

Page 1

DVD VIDEO PLAYER
REPRODUCTOR DVD VIDEO
APARELHO DVD
XV-N5SL
TV DVD
STANDBY/ON
OPEN/
TV DVD
CLOSE
TV22TV1
TV3
1
3
TV55TV4
TV6
4
6
TV88TV7
TV9
7
9
TV0
TV-/--
MUTING
0
10
+10
TITLE/
TV/VIDEO
GROUP
CANCEL
SUBTITLERETURN
U
M
N
E
E
CH
O
T
VOL
C
H
DIGEST
PHONIC
M
P
-
O
I
C
SLOW
3D
N
U
+
VOL+
ENTER
N
CH
E
E
-
R
C
E
S
N
O
NEXTPREVIOUS
SELECT STROBECLEAR
-
SLOW+
VFPAUDIOSUB TITLEREPEAT
ANGLE
ZOOM
AMP VOL
XV-N5 DVD/SUPER VCD/VCD/CD PLAYER
RM-SXV010U
REMOTE CONTROL
VIDEO
INSTRUCTIONS
MANUAL DE INSTRUCCIONES
INSTRUÇÕES
LET0204-015A
[UW]
Page 2

Warnings, Cautions and Others
Avisos, precauciones y otras notas
Advertências, precauções e outras notas
Caution –– switch!
Disconnect the mains plug to shut the power off completely. The
switch in any position does not disconnect the mains line. The power
can be remote controlled.
Precaución ––
Desconectar el cable de alimentación para desactivar la alimentación
totalmente. Cualquier que sea la posición de ajuste del interruptor
, la alimentación no es cortada completamente. La alimentación
puede ser controlada remotamente.
Precaução –– Interruptor !
Desconectar o cabo de alimentação para desligar a alimentação por
completo. Qualquer que seja a posição de ajuste do interruptor ,
a alimentação não é completamente cortada. A alimentação pode
ser controlada remotamente.
CAUTION
• Do not block the ventilation openings or holes.
(If the ventilation openings or holes are blocked by a newspaper or
cloth, etc., the heat may not be able to get out.)
• Do not place any naked flame sources, such as lighted candles, on
the apparatus.
• When discarding batteries, environmental problems must be
considered and local rules or laws governing the disposal of these
batteries must be followed strictly.
• Do not expose this apparatus to rain, moisture, dripping or
splashing and that no objects filled with liquids, such as vases,
shall be placed on the apparatus.
Interruptor !
CAUTION
To reduce the risk of electrical shocks, fire, etc.:
1. Do not remove screws, covers or cabinet.
2. Do not expose this appliance to rain or moisture.
PRECAUCIÓN
Para reducir riesgos de choques eléctricos, incendio, etc.:
1. No extraiga los tornillos, los cubiertas ni la caja.
2. No exponga este aparato a la lluvia o a la humedad.
PRECAUÇÃO
Para reduzir riscos de choques elétricos, incêndio, etc.:
1. Não remova parafusos e tampas ou desmonte a caixa.
2. Não exponha este aparelho à chuva nem à umidade.
PRECAUÇÃO
• Não obstrua as aberturas e orifícios de ventilação.
(Se os orifícios ou aberturas de ventilação estiverem obstruídos
por qualquer papel ou tecido, não haverá circulação do ar quente.)
• Não coloque nenhum objeto com chamas, como velas acesas,
sobre o aparelho.
• Ao descartar as baterias, leve em consideração os problemas que
possam ser causados ao meio ambiente e os regulamentos e leis
locais e governamentais sobre recolhimento dessas baterias
devem ser rigorosamente seguidos.
• Não exponha este aparelho à chuva, umidade, pingos ou
esguichos de água, nem coloque em cima do mesmo qualquer tipo
de recipiente que contenha líquidos, como por exemplo vasos.
PRECAUCIÓN
• No obstruya las rendijas o los orificios de ventilación.
(Si las rendijas o los orificios de ventilación quedan tapados con un
periódico, un trozo de tela, etc., no se podrá disipar el calor).
• No ponga sobre el aparato ninguna llama al descubierto, como
velas encendidas.
• Cuando tenga que descartar las pilas, tenga en cuenta los
problemas ambientales y observe estrictamente los reglamentos o
las leyes locales sobre disposición de las pilas.
• No exponga este aparato a la lluvia, humedad, goteos o
salpicaduras. Tampoco ponga recipientes conteniendo líquidos,
como floreros, encima del aparato.
G–1
Page 3

Caution: Proper Ventilation
To avoid risk of electric shock and fire and to protect from damage.
Locate the apparatus as follows:
Front: No obstructions open spacing.
Sides: No obstructions in 3 cm from the sides.
Top: No obstructions in 5 cm from the top.
Back: No obstructions in 15 cm from the back
Bottom: No obstructions, place on the level surface.
Precaución: Ventilación Adecuada
Para evitar el riesgo de choque eléctrico e incendio y para proteger el
aparato contra daños.
Ubique el aparato de la siguiente manera:
Frente: Espacio abierto sin obstrucciones.
Lados: 3 cm sin obstrucciones a los lados.
Parte superior: 5 cm sin obstrucciones en la parte superior.
Parte trasera: 15 cm sin obstrucciones en la parte trasera.
Fondo: Sin obstrucciones, colóquelo sobre una superficie
nivelada.
Precaução: ventilação apropriada
Para prevenir o risco de choque elétrico ou incêndio e para proteger o
aparelho contra danos.
Localize-o da seguinte maneira:
Frente: Espaço aberto, sem obstruções.
Lados: Espaço de 3 cm sem obstruções nos lados.
Topo: Espaço de 5 cm sem obstruções acima.
Atrás: Espaço de 15 cm sem obstruções atrás.
Parte inferior: Sem obstruções. Coloque o aparelho em superfície
nivelada.
Wall or obstructions
Pared u obstrucciones
Parede ou obstáculo
Spacing 15 cm or more
Espacio de 15 cm o más
Espaço de 15 cm ou mais
XV-N5SL
Floor
Piso
Piso
Front
Frente
Frente
Stand height 5 cm or more
Allura del soporte 5 cm o más
Base com altura de 5 cm ou mais
G–2
Page 4
IMPORTANT FOR LASER PRODUCTS / IMPORTANTE PARA LOS PRODUCTOS LÁSER / IMPOTANTE PARA PRODUTOS LASER
CLASS 1
LASER PRODUCT
REPRODUCTION OF LABELS / REPRODUCCIÓN DE ETIQUETAS / REPRODUÇÃO DE ETIQUETAS
1 CLASSIFICATION LABEL, PLACED ON REAR ENCLOSURE
1 ETIQUETA DE CLASIFICACIÓN, PEGADA EN LA PARTE
POSTERIOR DE LA CAJA
1 ETIQUETA DE CLASSIFICAÇÃO LOCALIZADA NA PARTE
POSTERIOR DA CAIXA DO APARELHO.
1. CLASS 1 LASER PRODUCT
2. CAUTION: Invisible laser radiation when open and interlock
failed or defeated. Avoid direct exposure to beam.
3. CAUTION: Do not open the top cover. There are no user
serviceable parts inside the Unit; leave all servicing to qualified
service personnel.
2 WARNING LABEL, PLACED INSIDE THE UNIT
2 ETIQUETA DE ADVERTENCIA, PEGADA EN EL INTERIOR DE
LA UNIDAD
2 ETIQUETA DE ADVERTÊNCIA LOCALIZADA NA PARTE
INTERNA DA UNIDADE.
CAUTION: Invisible laser
radiation when open and
interlock failed or defeated.
AVOID DIRECT EXPOSURE
TO BEAM. (e)
VARNING: Osynlig laserstrålning när denna del är
öppnad och spärren är
urkopplad. Betrakta ej
strålen. (s)
ADVARSEL: Usynlig laserstråling ved åbning, når
sikkerhedsafbrydere er ude
af funktion. Undgå udsættelse for stråling (d)
VARO: Avattaessa ja suojalukitus ohitettaessa olet
alttiina näkymättömälle
lasersäteilylle. Älä katso
säteeseen. (f)
1. PRODUCTO LASER CLASE 1
2. PRECAUCIÓN: En el interior hay radiación láser visible. Evite el
contacto directo con el haz.
3. PRECAUCIÓN: No abra la tapa superior. En el interior de la
unidad no existen piezas reparables por el usuario; deje todo
servicio técnico en manos de personal calificado.
1. PRODUTO LASER CLASSE 1
2. CUIDADO: O laser emite uma rediação invisível que é perigosa,
caso o aparelho esteja aberto e a trava inoperante ou danificada.
Evite exposição direta ao feixe dos raios.
3. CUIDADO: Não abra a caixa do aparelho. Não existem peças
reparáveis pelo usuário na parte interna da unidade. Solicite
assistência técnica somente a pessoal técnico qualificado.
G–3
Page 5

Table of Contents
Introduction
Supplied accessories..........................................................2
Notes on handling..............................................................3
Important cautions...................................................................3
Safety precautions...................................................................3
About discs .........................................................................4
Playable disc types...................................................................4
Non-playable discs...................................................................4
Audio formats...........................................................................4
Disc structure............................................................................5
Video CDs and SVCDs with Playback Control function ........5
Care and handling of discs......................................................5
Getting started
Connections ........................................................................6
Before making any connections .............................................6
To connect to a TV...................................................................6
To connect to a stereo audio amplifier/receiver....................7
To connect to a digital audio device.......................................8
To connect the power cord .....................................................9
Using the remote control unit.........................................10
To install batteries in the remote control unit.....................10
Remote sensor .......................................................................10
To use the remote control unit for TV operation.................11
To control the volume of a JVC amplifier or receiver.........11
Page 2
Page 6
Repeat playback............................................................... 28
To repeat the current selection or all tracks
[Repeat playback] .................................... ...........................28
To repeat a desired part [A-B repeat playback]...................29
Changing the language, sound and scene angle.......... 30
To select the subtitle language [SUBTITLE] ........................30
To change the audio language or sound [AUDIO]..............31
To select a scene angle of DVD VIDEO [ANGLE].................32
Special picture playback and picture/sound effect...... 33
To display continuous still pictures [STROBE]....................33
To zoom in or out pictures [ZOOM] .....................................33
To adjust the picture character [VFP]...................................34
To simulate surround sound [3D PHONIC].......................... 35
Menu bar functions ......................................................... 36
To bring up the menu bar .....................................................36
Basic operation procedure....................................................36
Menu bar functions for DVD VIDEO .....................................37
Menu bar functions for Audio CD/Video CD/SVCD.............38
MP3 disc playback
Page 40
About MP3 discs.............................................................. 40
Operations........................................................................ 40
Basic operations.....................................................................40
Selecting the desired Group and Track................................41
Direct selection.......................................................................42
Repeat playback.....................................................................42
English
Basic operations
Page 12
Before operation...............................................................12
Turning on/off the unit...........................................................12
Initial setup before using the unit.........................................13
Basic playback ..................................................................14
Inserting and removing discs................................................14
To start playback....................................................................15
To stop playback completely ................................................15
To stop playback temporarily ...............................................15
Resuming playback ..........................................................16
To memorize the interrupt position......................................16
To resume playback...............................................................17
Variable speed playback..................................................18
To advance or reverse playback rapidly
while monitoring.................................................................18
To advance a still picture frame by frame ...........................18
To playback in slow motion..................................................19
To locate the beginning of the scene or song ...............20
To locate a desired selection using 4 or ¢...................20
To locate a desired selection using
the numeric buttons ...........................................................20
Other convenient functions.............................................21
To check the playback status ................................................21
To move back the playback position during DVD VIDEO
playback [One touch replay function]...............................22
To change the brightness of the display window ...............22
Advanced operations
Page 23
Playing from a specific position on a disc......................23
To locate a desired scene from the DVD menu...................23
To locate a desired scene from the menu of a Video CD/SVCD
with PBC ..............................................................................23
To specify a desired title........................................................24
To locate a desired position in the current title or track
[Time search].......................................................................24
To locate a specific scene from the display [DIGEST] ........25
Changing the playback order ..........................................26
To playback in a specific order [Program play]...................26
To playback in random order [Random play]......................27
JPEG disc playback
Page 43
About JPEG discs ............................................................ 43
Basic operations .............................................................. 44
To see a desired picture........................................................44
To zoom in or out the picture [ZOOM].................................45
To see pictures continuously [slide show mode]......... 45
Playback features...................................................................45
Selecting the start point of the slide show ..........................46
Repeat function......................................................................47
Changing the initial settings
Page 48
Selecting preferences...................................................... 48
About the Preference display................................................48
How to set preferences..........................................................48
LANGUAGE menu .................................................................49
PICTURE menu.......................................................................50
AUDIO menu..........................................................................51
OTHERS menu .......................................................................53
Limiting playback by children ........................................ 54
To set Parental Lock for the first time
[PARENTAL LOCK]..............................................................54
To change the settings [PARENTAL LOCK] .........................55
To temporarily release the Parental Lock
[PARENTAL LOCK]..............................................................56
Additional information
Page 57
Names of parts and controls .......................................... 57
Front panel .............................................................................57
Display window......................................................................57
Rear panel...............................................................................57
Remote control unit...............................................................58
AV COMPU LINK remote control system...................... 59
Connection and setup............................................................59
Operation................................................................................59
Troubleshooting .............................................................. 60
Frequently Asked Questions .......................................... 62
Specifications................................................................... 63
Appendix A: Country/Area code list
for Parental Lock........................................................... 64
Appendix B: Glossary...................................................... 65
1
Page 6
Introduction
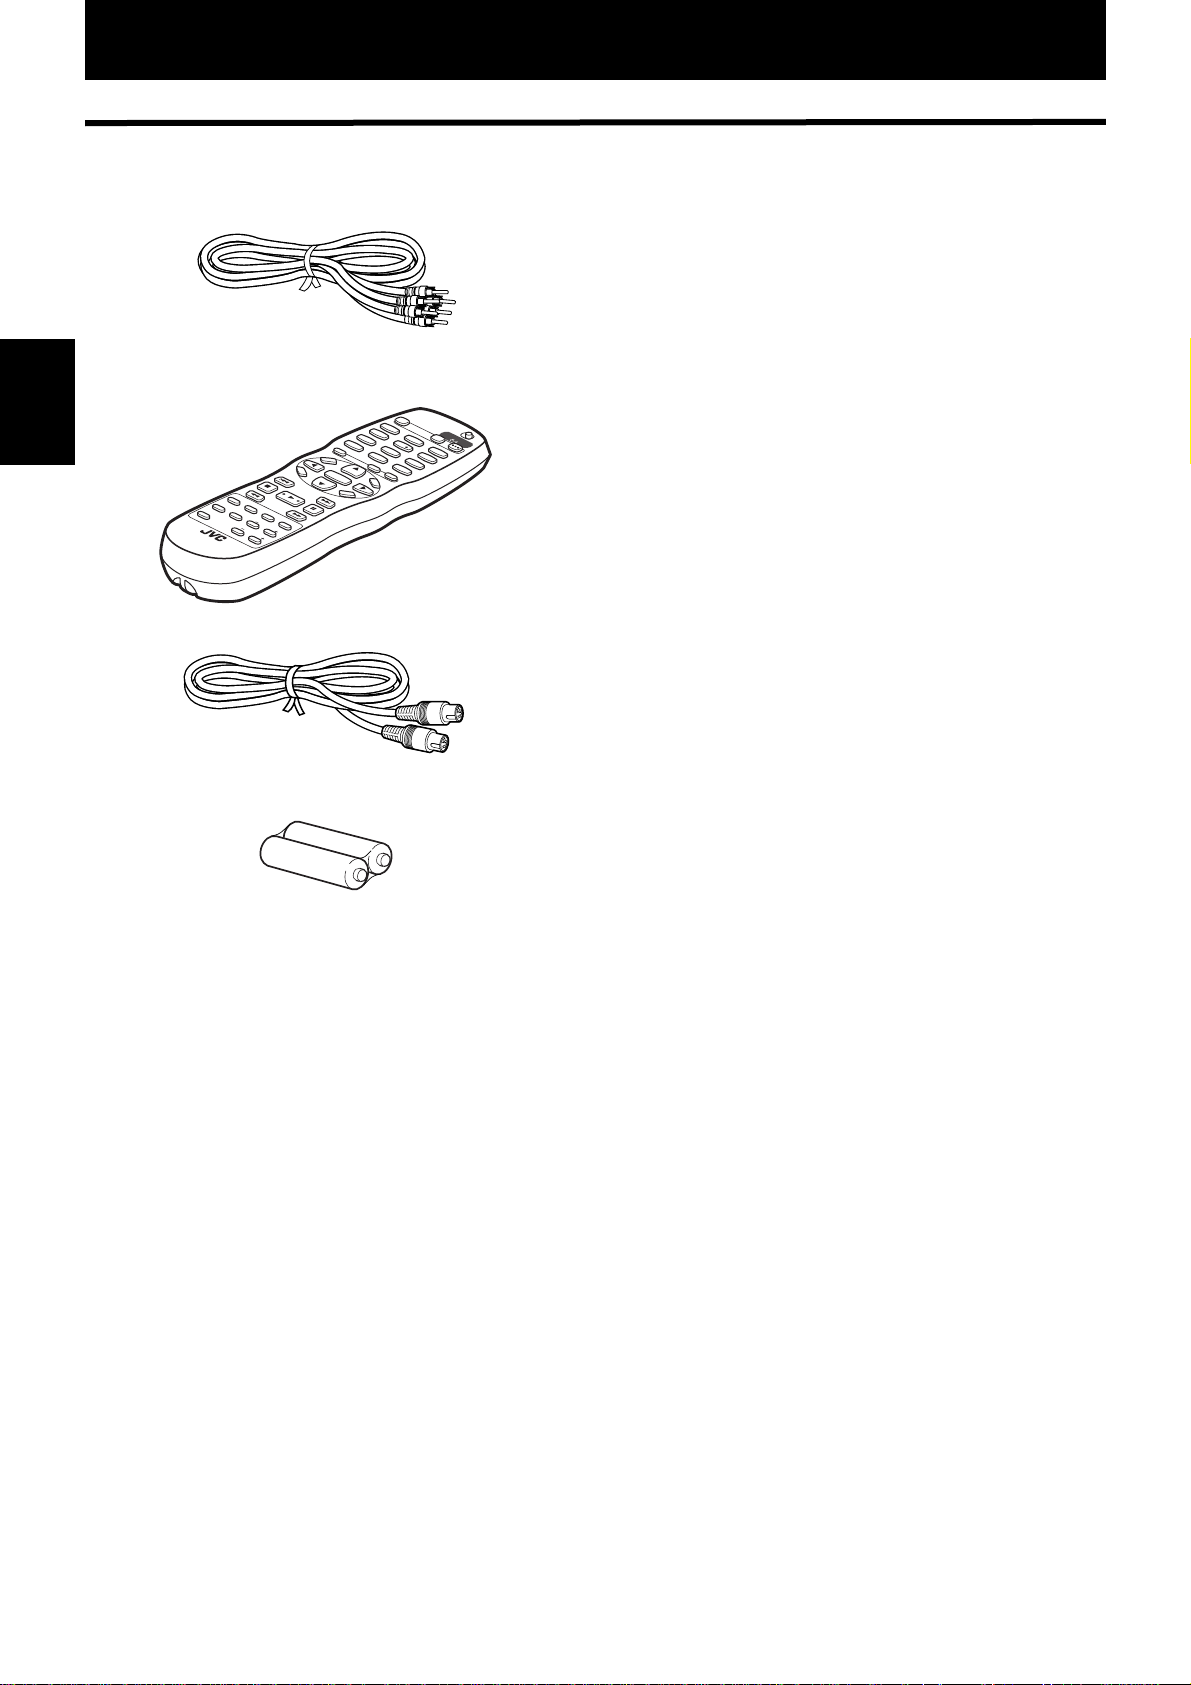
Supplied accessories
• Audio/Video cable (Yellow/White/Red) (× 1)
• Remote Control Unit (× 1)
TV
1
1
TV4
4
TV7
7
TV-/--
10
Introduction
RM-SXV010U
REMOTE CONTROL
• S-video cable (× 1)
ANGLE
O
T
P
M
E
N
U
VOL
-
C
H
O
ENTER
I
C
PREVIOUS
E
CH
-
CLEAR
SLOW
SELECT
-
REPEAT
DIGEST
SUBTITLE
PHONIC
3D
ANGLE
AUDIO
ZOOM
AMP VCL
O
N
NEXT
S
C
STROBE
SLOW+
VFP
5
TV8
8
TV0 MUTING
SUBT
0
I
TLE
CH
TITLE/
+
G
RO
+10
U
P
TV
C
/
VI
AN
D
E
CEL
M
E
N
U
V
OL+
R
E
E
N
OPEM/
CLOSE
TV
STANDBY/ON
TV DVD
TV2
2
TV5
9
O
DVD
TV3
3
TV6
6
TV9
• R6P(SUM-3)/AA(15F) battery (× 2)
• AC power plug (× 1)
2
Page 7

Notes on handling
Important cautions Safety precautions
Introduction
English
Installation of the unit
• Select a place which is level, dry and neither too hot
nor too cold (between 5
• Leave sufficient distance between the unit and the TV.
• Do not use the unit in a place subject to vibrations.
Power cord
• Do not handle the power cord with wet hands!
• A small amount of power (1.7 W) is always consumed
while the power cord is connected to the wall outlet.
• When unplugging the unit from the wall outlet, always
pull the plug, not the power cord.
To prevent malfunction of the unit
• There are no user-serviceable parts inside. If anything
goes wrong, unplug the power cord and consult your
dealer.
• Do not insert any metallic object into the unit.
• Do not use any non-standard shape disc available on
the market, because it may damage the unit.
• Do not use a disc with tape, seals, or paste on it,
because damage to the unit may result.
Note about copyright laws
• Please check the copyright laws in your country before
recording from DVD VIDEO, Audio CD, Video CD,
SVCD, MP3 and JPEG discs. Recording of copyrighted
material may infringe copyright laws.
Note about the copyguard system
• DVD VIDEO discs are protected by the copyguard
system. When you connect the unit to your VCR (or
integrated TV/Video system), the copyguard system
activates and the picture may not play back correctly.
o
C and 35oC, 41oF and 95oF).
Avoid moisture, water and dust
Do not place the unit in moist or dusty places.
Avoid high temperatures
Do not expose the unit to direct sunlight or place it near
a heating device.
When you are away
When you are away on travel or otherwise for an
extended period of time, remove the plug from the wall
outlet.
Do not insert foreign objects into the unit
Do not insert wires, hairpins, coins, etc. into the unit.
Do not block the vents
Blocking the vents may damage the unit.
Care of the cabinet
When cleaning the unit, use a soft cloth and follow the
relevant instructions on the use of chemically-coated
cloths. Do not use benzene, thinner or other organic
solvents and disinfectants. These may cause
deformation or discoloring.
If water gets inside the unit
Turn off the power switch and remove the plug from the
wall outlet, then call the store where you made your
purchase. Using the unit in this state may cause a fire or
electrical shock.
Introduction
This product incorporates copyright protection technology that is protected by method claims of cer tain U.S. patents
and other intellectual property rights owned by Macrovision Corporation and other rights owners. Use of this
copyright protection technology must be authorized by Macrovision Corporation, and is intended for home and
other limited viewing uses only unless otherwise authorized by Macrovision Corporation. Reverse engineering or
disassembly is prohibited.
Manufactured under license from Dolby Laboratories. "Dolby" and the double-D symbol are trademarks of Dolby
Laboratories.
Confidential unpublished works.
Copyright 1992-1997 Dolby Laboratories. All rights reserved.
Manufactured under license from Digital Theater Systems, Inc. US Pat. No. 5,451,942 and other world-wide patents
issued and pending. "DTS," "DTS Digital Surround," are trademarks of Digital Theater Systems, Inc.
Copyright 1996 Digital Theater Systems, Inc. All Rights Reserved.
3
Page 8
Introduction
About discs
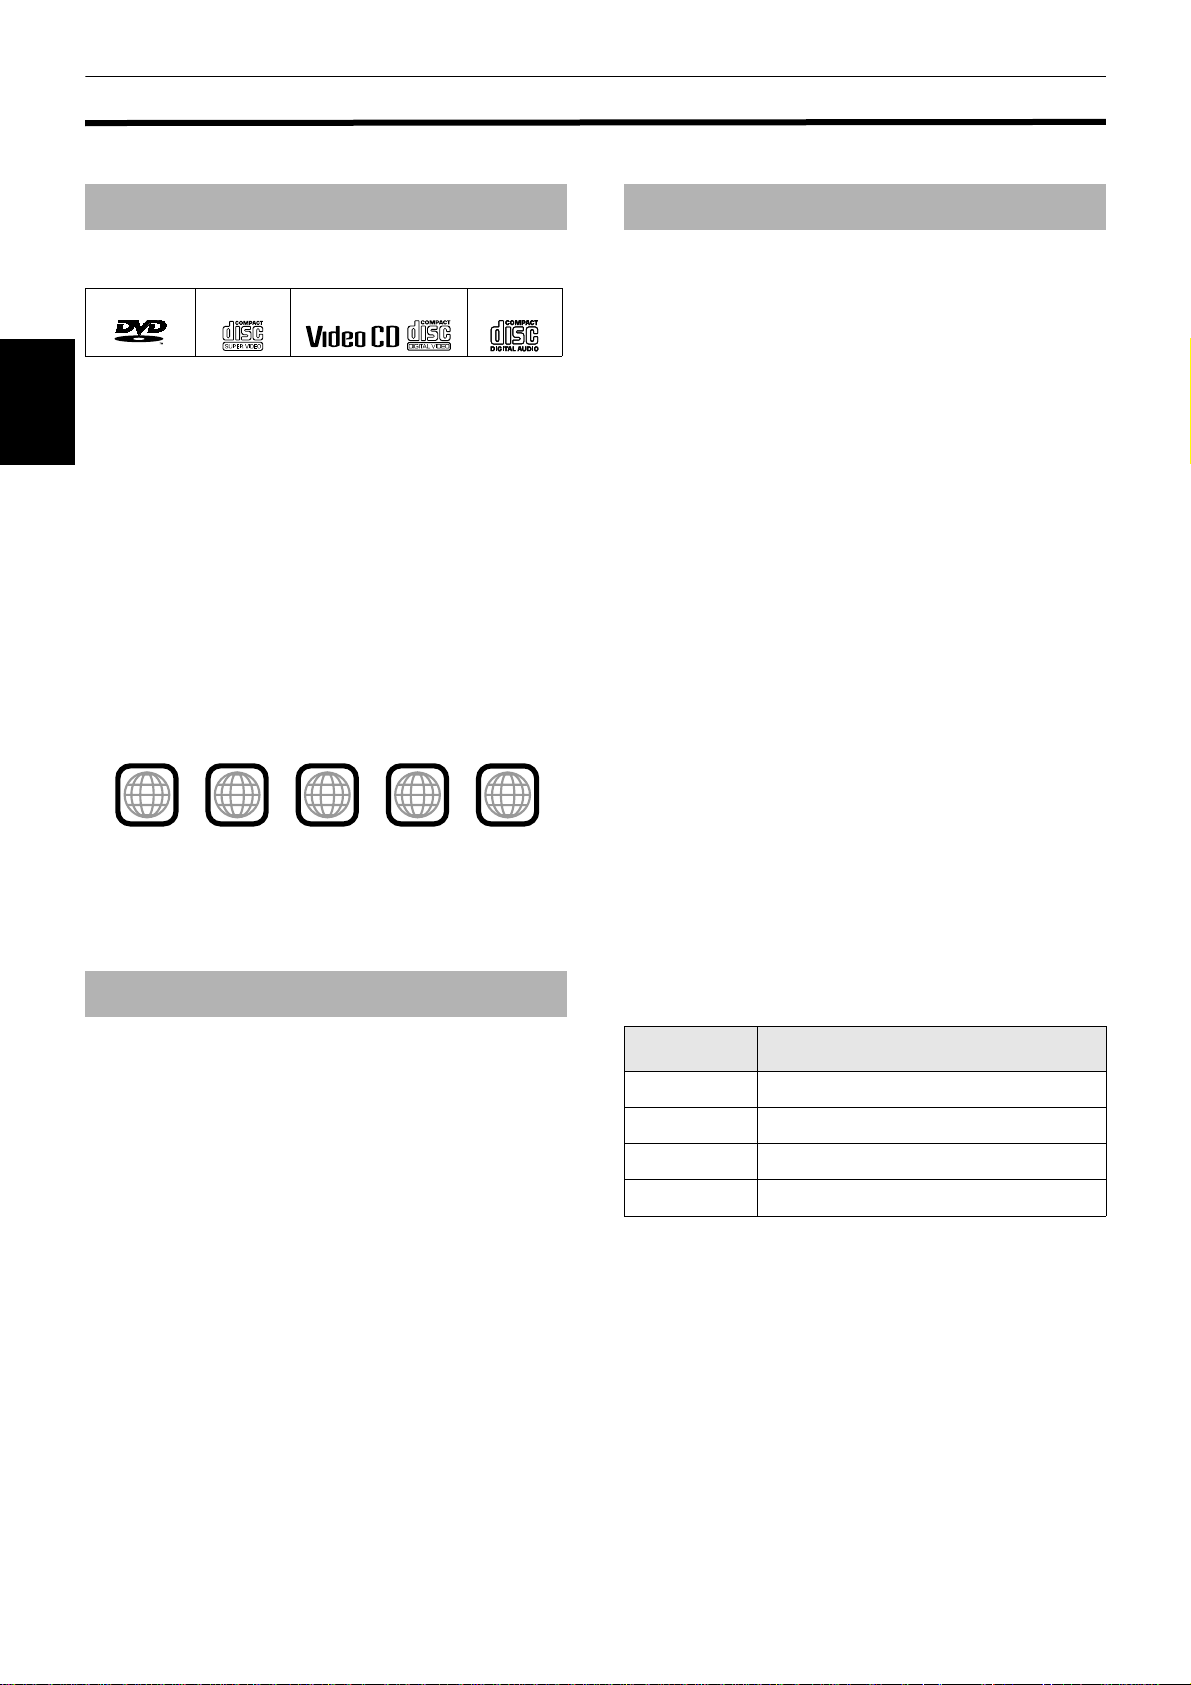
Playable disc types
Playable and non-playable disc types are as follows:
DVD VIDEO SVCD Video CD Audio CD
VIDEO
The DVD Logo is a trademark.
• CD-R and CD-RW discs recorded in the Audio CD,
Video CD, SVCD, MP3 or JPEG format can be played
Introduction
back. However, some discs may not be played back
because of the disc characteristics or recording
conditions.
Note that unfinalized discs cannot be played back.
• DVD-R discs recorded with the DVD VIDEO format can
be played back. However, some discs may not be
played back because of the disc characteristics or
recording conditions.
Note that unfinalized disc cannot be played back.
• DVD VIDEO players and DVD VIDEO discs have their
own Region Code numbers. This unit can play back
only DVD VIDEO discs whose Region Code numbers
include "4."
Examples of playable DVD VIDEO discs:
2
ALL
The unit is compatible with the PAL and NTSC systems,
and can play back discs whose Region Code numbers
include number "4." You can select "NTSC" or "PAL"
while using the PAL/NTSC switch on the rear panel. (For
details, see page 7.)
4
43
1
3
1
4
4
Audio formats
Some audio formats used on discs are described below.
•Linear PCM
Uncompressed digital audio, the same format used on
CDs and most studio masters.
DVD VIDEO supports 2 channels at sampling rates of
48/96 kHz and quantization of 16/20/24 bits.
Audio CD/Video CD is limited to 2 c hannels at 44.1 kHz
at 16 bits.
• MPEG Multichannel
A surround audio format which can handle the
augmentative 7.1-channel format (rare for home use),
as well as 5.1-channel.
• Dolby Digital
A surround audio format configured with six
channels. Because the "LFE (Low-Frequency Effect for
sub-woofer, etc)." channel, one of the six channels, is
an auxiliary channel, this format is called "5.1-channel
system."
Not all Dolby Digital discs contain six (5.1) channel
information.
2
3
5
6
• DTS (Digital Theater Systems)
A surround audio format configured with six (5.1)
channel which is same as Dolby Digital. Because the
compression ratio is lower than Dolby Digital, it
provides wider dynamic range and better separation.
Not all DTS discs contain six (5.1) channel
information.
Non-playable discs
DVD-ROM, DVD-RAM, DVD-RW, DVD+RW, DVD-AUDIO,
CD-ROM, PHOT O CD, CD-EXTRA, CD-G, CD-TEXT, SACD,
MIX-MODE CD
• Playing back discs listed as "Non-playable discs" above
may generate noise and damage speakers.
• This unit can play back audio signals recorded in CD-G,
CD-EXTRA, CD-TEXT and MIX-MODE CD discs.
The associated indicator lights up in the display window
when playing back a disc.
Indicator Audio format
LPCM Linear PCM
MPEG MPEG Multichannel
DOLBY DIGIT AL
DTS DTS (Digital Theater Systems)
Note that with some formats and/or depending on the
unit’s "DIGITAL AUDIO OUTPUT" setting, digital audio
signals may not always transmitted from the unit’s
DIGITAL OUT jacks as are recorded on the disc.
See "DIGITAL AUDIO OUTPUT" on page 51 for details.
Dolby Digital
4
Page 9
Introduction
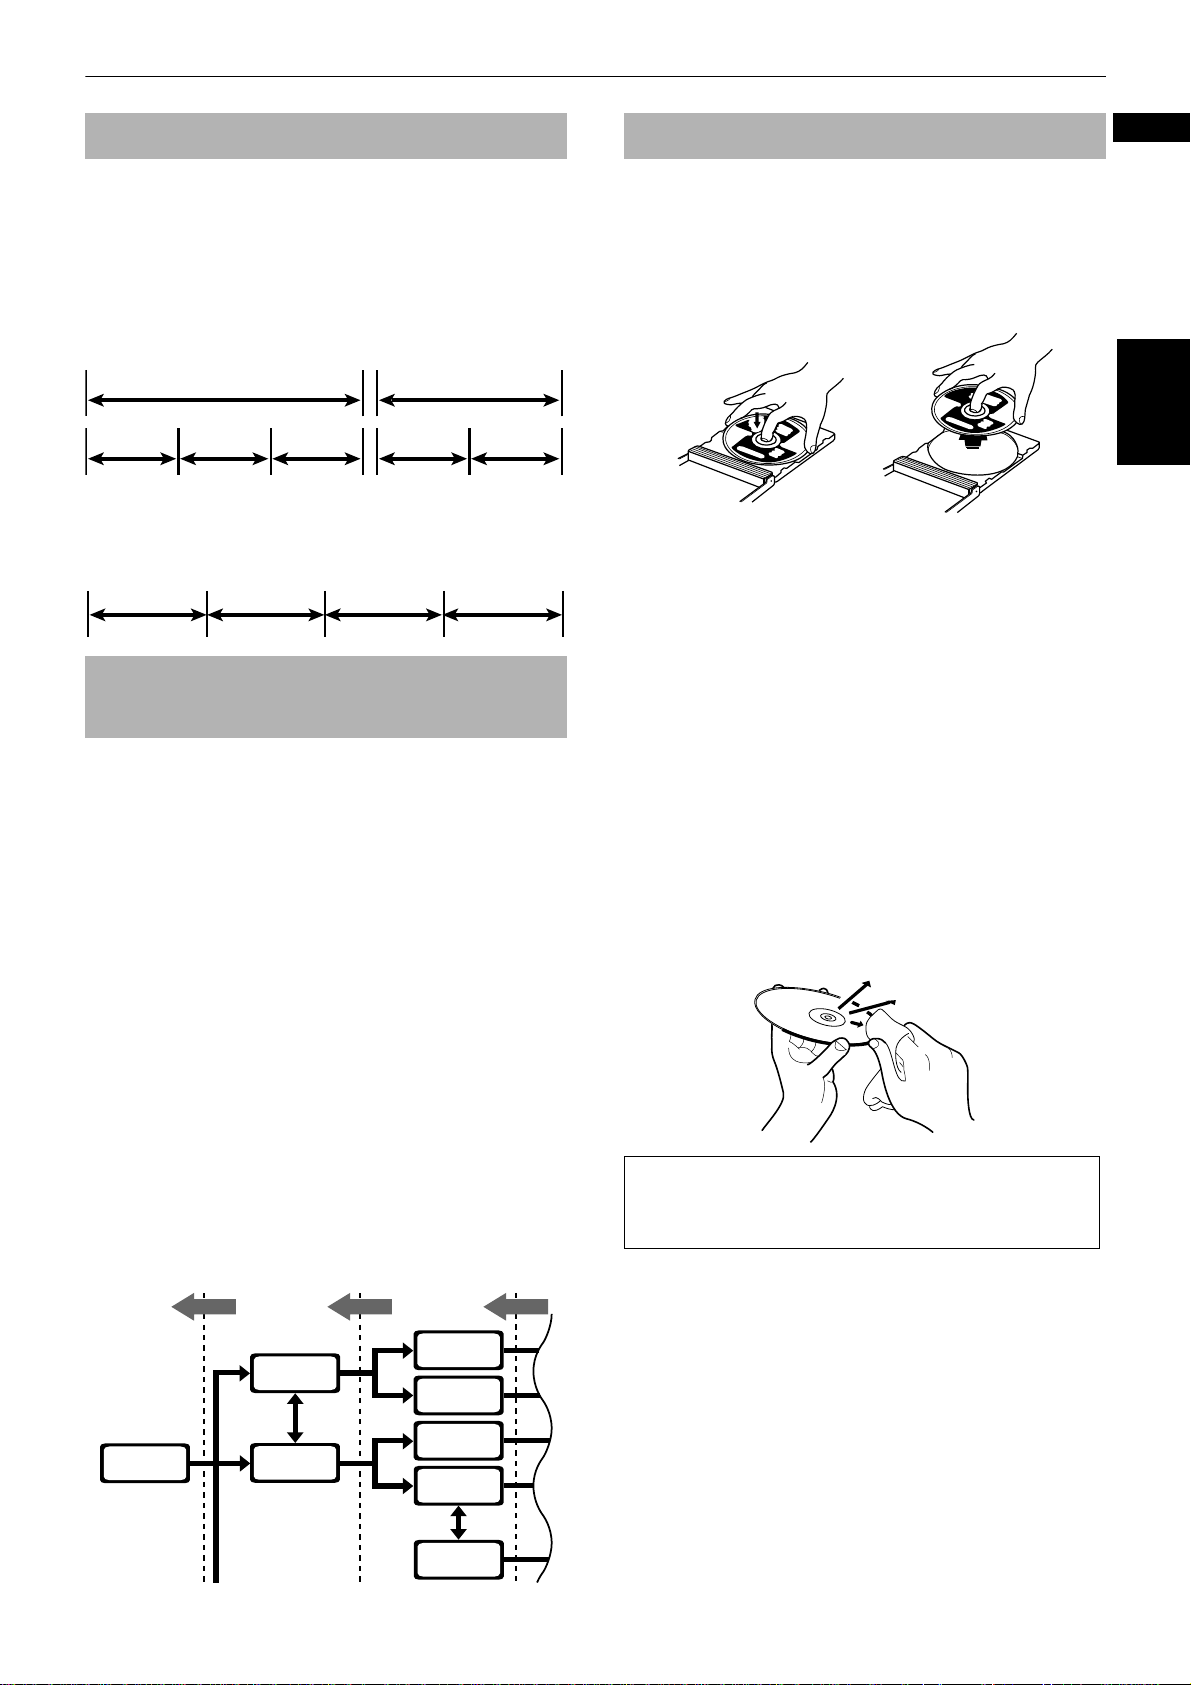
Disc structure
(For DVD VIDEO)
A DVD VIDEO disc is comprised of "titles" and each title
may be divided into "chapters." For example, if a DVD
VIDEO disc contains some movies, each mo vie may have
its own title number, and each movie may be divided
into some chapters. In a DVD VIDEO KARAOKE disc, eac h
song usually has its own title number and does not have
chapters.
Title 2Title 1
Chapter 1
Chapter 2 Chapter 3 Chapter 1 Chapter 2
(For Audio CD/Video CD/SVCD)
An Audio CD, Video CD or SVCD is simply comprised of
"tracks."
Track 1 Track 2 Track 3 Track 4
Video CDs and SVCDs with Playback
Control function
What is Playback Control (PBC) function?
The Playback Control function allows you to enjoy menudriven operation and high-resolution still images which
have a resolution four times greater than moving
pictures.
• High-resolution still image display
You can display high-quality images four times
clearer than moving pictures.
• Menu-driven playback
A selection menu is displayed when you start
playing a Video CD or SVCD disc with the Playback
Control feature. The selection menu shows a list of
numbers for selection. Some discs may show
moving pictures or a divided screen.
You can interact with the screen using the menu
display to select and play an entry.
See illustration below about basic feature of menudriven playback (See page 23 for more information
about PBC (Playback Control)).
Care and handling of discs
How to handle discs
When handling a disc, do not touch the surface of the
disc. Since discs are made of plastic, they are easily
damaged. If a disc gets dirty , dusty, scratched or w arped,
the images and sound will not be picked up correctly,
and such a disc may cause the player to malfunction.
Label side
Do not damage the label side, stick paper to or use any
adhesive on its surface.
Storage
Make sure that discs are kept in their cases. If discs are
piled on top of one another without their protective
cases, they can be damaged. Do not put discs in a
location where they may be exposed to direct sunlight,
or in a place where the humidity or temperature is high.
Avoid leaving discs in your car!
Maintenance of discs
If there are fingerprints or other dirt adhering to a disc,
wipe with a soft dry cloth, moving from the center
outwards.
If a disc is difficult to clean, wipe with a cloth moistened
with water. Never use record cleaners, petrol, alcohol or
any anti-static agents.
CAUTION
The image may be sometimes poor or noisy due to
defects in the disc itself.
English
Introduction
Menu
screen
1 2 3
Press
RETURN.
1
4
2
1 2
Moving
picture
Press
RETURN.
4
4
Moving
picture
Moving
picture
Still
picture
Still
picture
Still
picture
Press
RETURN.
4
5
Page 10

Getting started
Connections
*Before using the unit, you have to connect the unit to a TV and/or amplifier.
Before making any connections
• Do not connect the AC power cord until all other connections have been made.
• Connect VIDEO OUT of the unit directly to the video input of your TV. Connecting VIDEO OUT of the unit to a TV via a
VCR may cause a monitor problem when playing back a copy-protected disc. You may also have a monitor problem
when connecting the unit to an integrated TV/Video system.
TV
The unit
NOTES
• In the following description, "TV" may be substituted with "monitor" or "projector."
• Terminal names used for other components may be different from those used in the following description.
Getting started
VCR
Connect directly
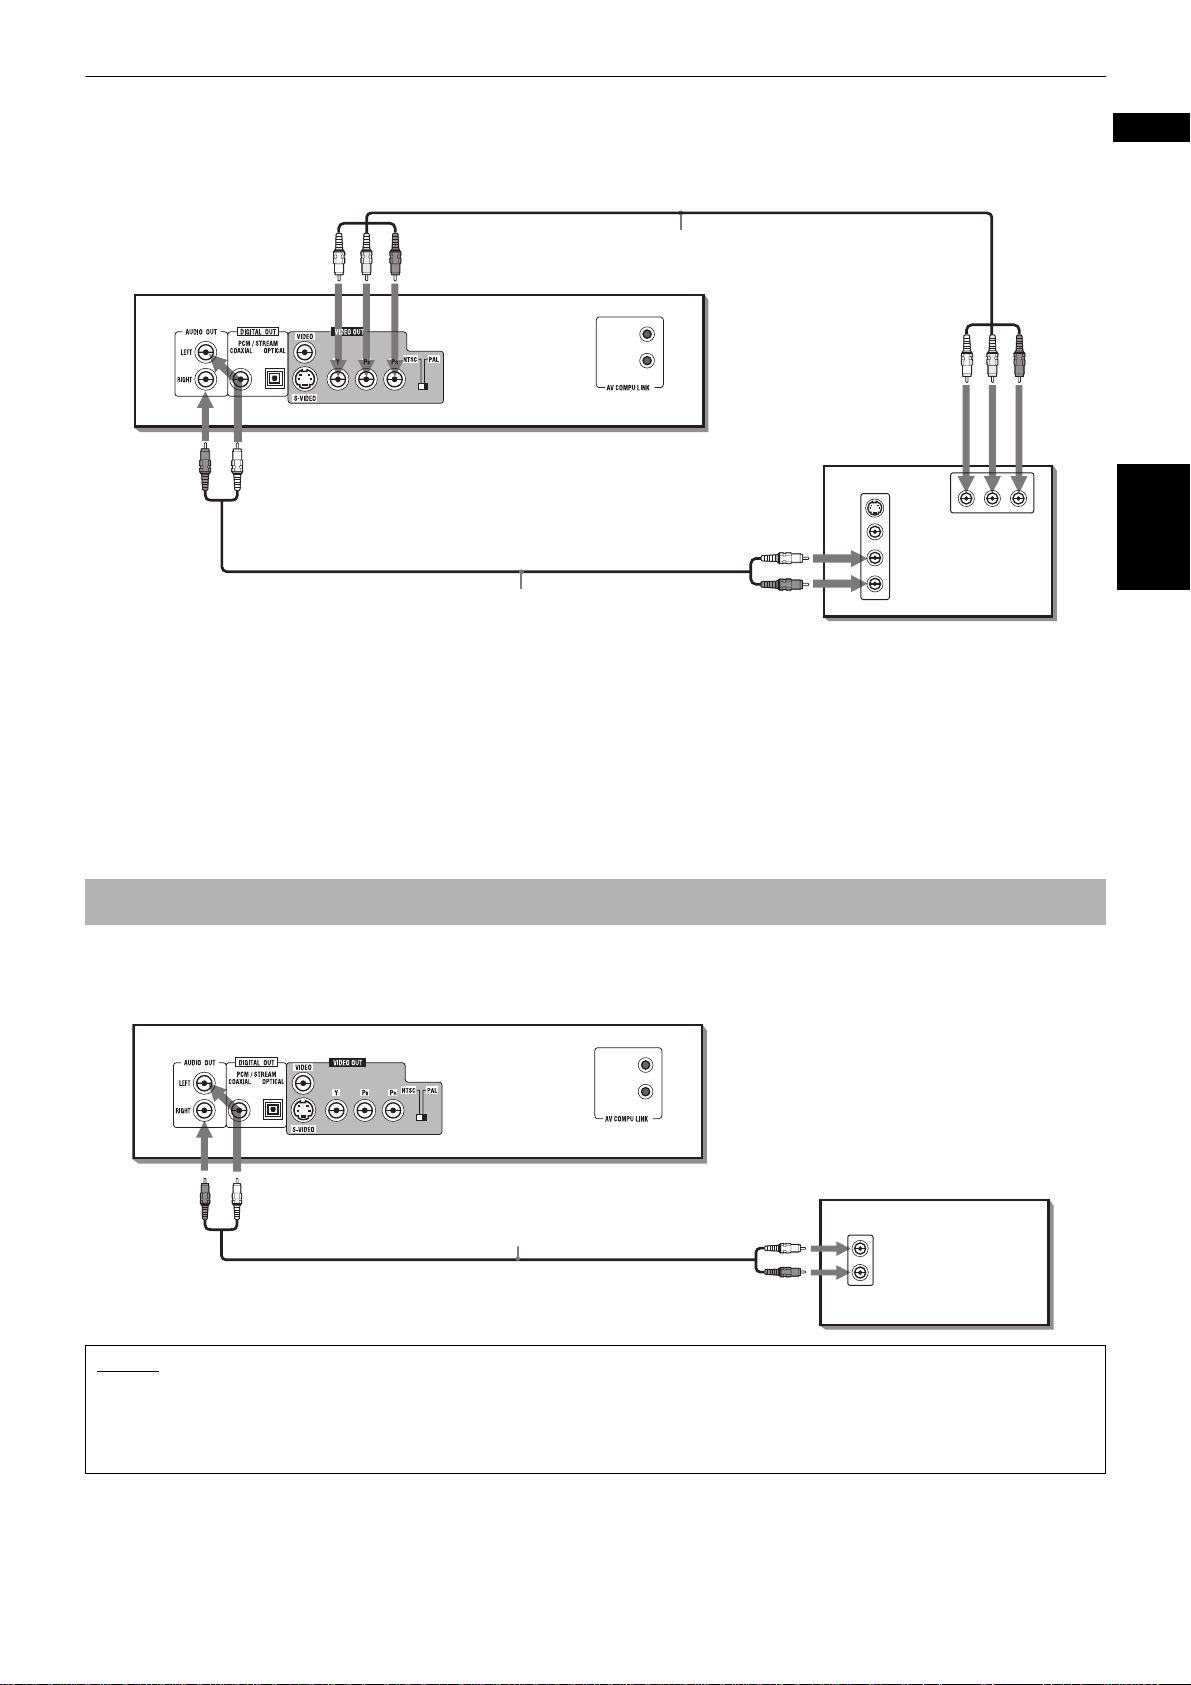
To connect to a TV
Connection to a conventional TV
You can enjoy playback by simply connecting the unit to a TV.
Connect the unit to a TV equipped with stereo audio input and video input jacks using the supplied Audio/Video cables.
The unit
TV
Red
Connection to a TV equipped with an S-video jack
If your TV has an S-VIDEO input, you can get better picture quality by connecting it with the S-VIDEO output of the unit
using an supplied S-video cable instead of connecting the video input of the TV to the VIDEO jack of the unit.
The unit
Yellow
White
Audio/Video cable (supplied)
White
Yellow
Red
IN
VIDEO
LEFT
AUDIO
RIGHT
TV
IN
Red White
S-video cable (supplied)
Audio cable (not supplied)
White
Red
S-VIDEO
VIDEO
LEFT
RIGHT
NOTE
• Make sure that the color system of a DVD VIDEO/video CD/SVCD disc labeled on the package matches your TV.
6
AUDIO
Page 11
Getting started
Connection to a TV equipped with component jacks
Y ou can enjoy high picture quality by connecting the unit’s COMPONENT VIDEO OUT jacks to the COMPONEN T VIDEO IN
jacks of your TV with the video cables.
Blue
Green Red
Component video cable (not supplied)
Blue
Green Red
Red
TV
YP
IN
S-VIDEO
VIDEO
LEFT
AUDIO
RIGHT
BPR
COMPONENT IN
Red White
• Connect "Y" to "Y," "P
White
Audio cable (not supplied)
B" to "PB"(CB), "PR" to "PR"(CR) correctly.
Selecting color system
The unit is compatible with the PAL and NTSC systems. Set the PAL/NTSC switch on the rear panel to match the color
system of your TV . Make sure that the color system of a D VD VIDEO/video CD/SV CD disc labeled on the package matches
your TV. However, note that you must change the switch position while the unit power is off (on standby) with the DVD
removed. Otherwise, the changed setting is not effective.
If you use a multi-color system TV, you can play discs recorded on both PAL and NTSC systems by setting the PAL/NTSC
switch appropriately.
Note that you must change the switch position while the unit power is off. Otherwise, the changed setting is not effective.
l
English
Getting started
To connect to a stereo audio amplifier/receiver
You can enjoy high-quality audio by connecting the unit’s audio output to your amplifier or receiver.
Connect the unit’s AUDIO OUT (LEFT/RIGHT) jacks to any line-level inputs (such as AUX, DVD, CD, etc.) of an audio
amplifier or receiver.
The unit
Red White
Audio cable (not supplied)
White
NOTES
• When using the unit with a stereo amplifier or receiver, set "ANALOG DOWN MIX" in the "AUDIO" preferences to "STEREO"
(see page 52).
• If your stereo amplifier or receiver has an AV COMPU LINK terminal, you can use the AV COMPU LINK function. See "AV
COMPU LINK remote control system" on page 59 for details.
Amplifier or receiver
IN
LEFT
RIGHT
Red
AUDIO
7
Page 12
Getting started
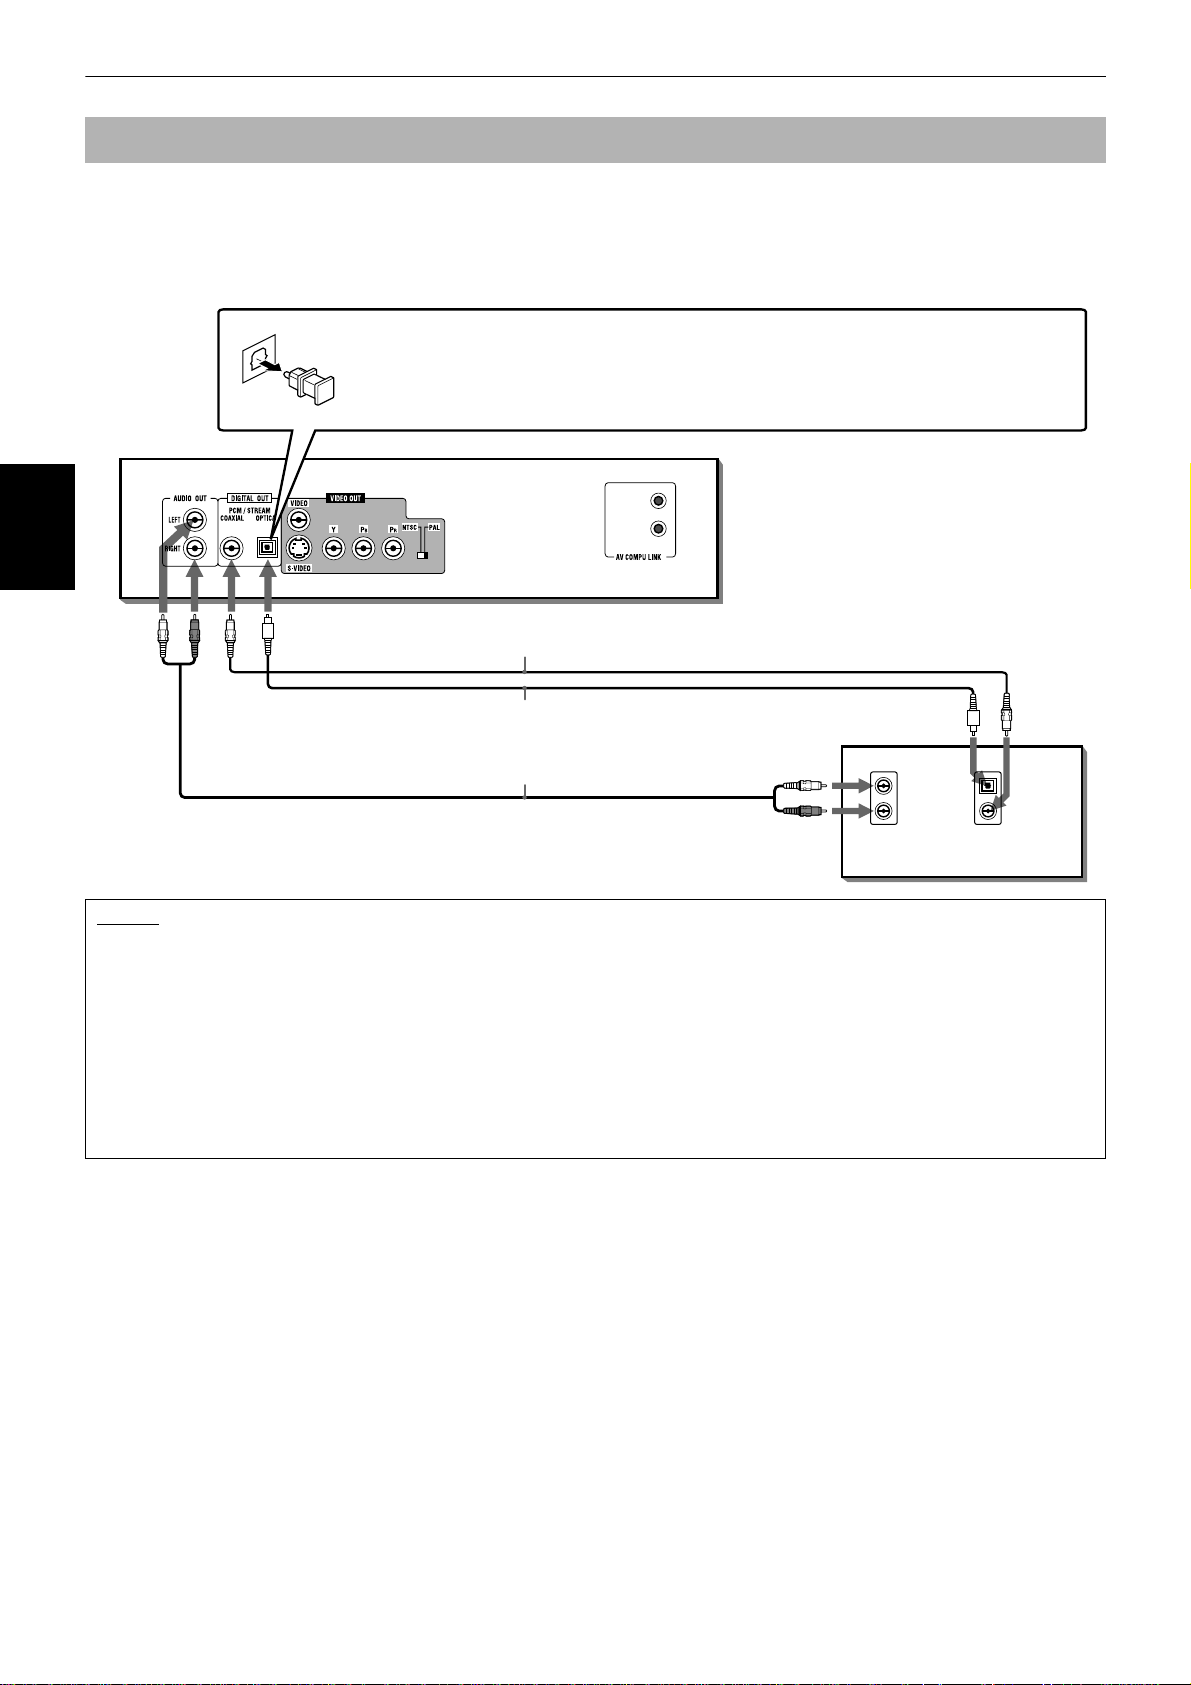
To connect to a digital audio device
You can enhance the playback sound quality by connecting either of the unit’s DIGITAL OUT jacks to the digital input of
an amplifier, etc. by using an optical or a coaxal digital cable (optional). The digital audio signal from a disc will be
transferred directly . If you connect the unit to a Dolby Digital or DTS decoder or an amplifier with a built-in decoder using
an optional digital cable, you can enjoy high-quality surround sound.
For a digital connection, connect the unit’s DIGITAL OUT (OPTICAL or COAXIAL) to the digital input of a digital audio
device using an optical or a coaxial digital cable.
When using the DIGIT AL OUT (OPTICAL) jac k, remove the protection cap. Do not lose
the removed cap.
When the DIGITAL OUT (OPTICAL) jack is not used, replace the protection cap in the
jack.
The unit
Getting started
Coaxial digital cable (not supplied)
White
Red
Optical digital cable (not supplied)
Digital equipment
Audio cable (not supplied)
White
IN
LEFT
AUDIO
RIGHT
IN
OPTICAL
DIGITAL
COAXIAL
Red
NOTES
• When you make digital connection, we recommend also to make the analog connection, because, depending on discs, no
signal may be output from the DIGITAL OUT.
• When you connect the unit’s DIGITAL OUT to a digital audio device, before using, set "DIGITAL AUDIO OUTPUT" in the
"AUDIO" preferences correctly according to the connected audio device. If "DIGITAL AUDIO OUTPUT" is not set correctly, loud
noise may be generated from speakers, causing damage to them. See "DIGITAL AUDIO OUTPUT" on page 51.
• When you connect the unit’s DIGITAL OUT to a Dolby Digital or DTS decoder (or amplifier with a built-in decoder) to enjoy
surround sound, the unit’s "D. RANGE COMPRESSION" setting in the "AUDIO" preferences is invalid. Make appropriate
surround audio settings on the decoder.
• If your digital audio device has an AV COMPU LINK terminal, you can use the AV COMPU LINK function. See "AV COMPU LINK
remote control system" on page 59 for details.
8
Page 13

Getting started
To connect the power cord
When all the audio/video connections have been made, insert the other end to the wall outlet. Make sure that plugs are
inserted firmly. The STANDBY/ON button on the front panel lights in red.
Warning
• Disconnect the power cord if you are not going to use the unit for a long time.
• Disconnect the power cord before cleaning the unit.
• Disconnect the power cord before moving the unit.
• Do not connect or disconnect the power cord with wet hands.
• Do not pull the power cord when disconnecting it, as this may damage the cord and cause fire, electric shock, or other
accidents.
Caution
• Do not alter, twist or pull the power cord, or put anything heavy on it, which may cause fire, electric shock, or other
accidents.
• If the cord is damaged, consult a dealer and have replacing to the new power cord.
English
Getting started
9
Page 14
Getting started
Using the remote control unit
Using the remote control, you can operate not only all the functions of the unit but also basic functions of your TV and
amplifier/receiver.
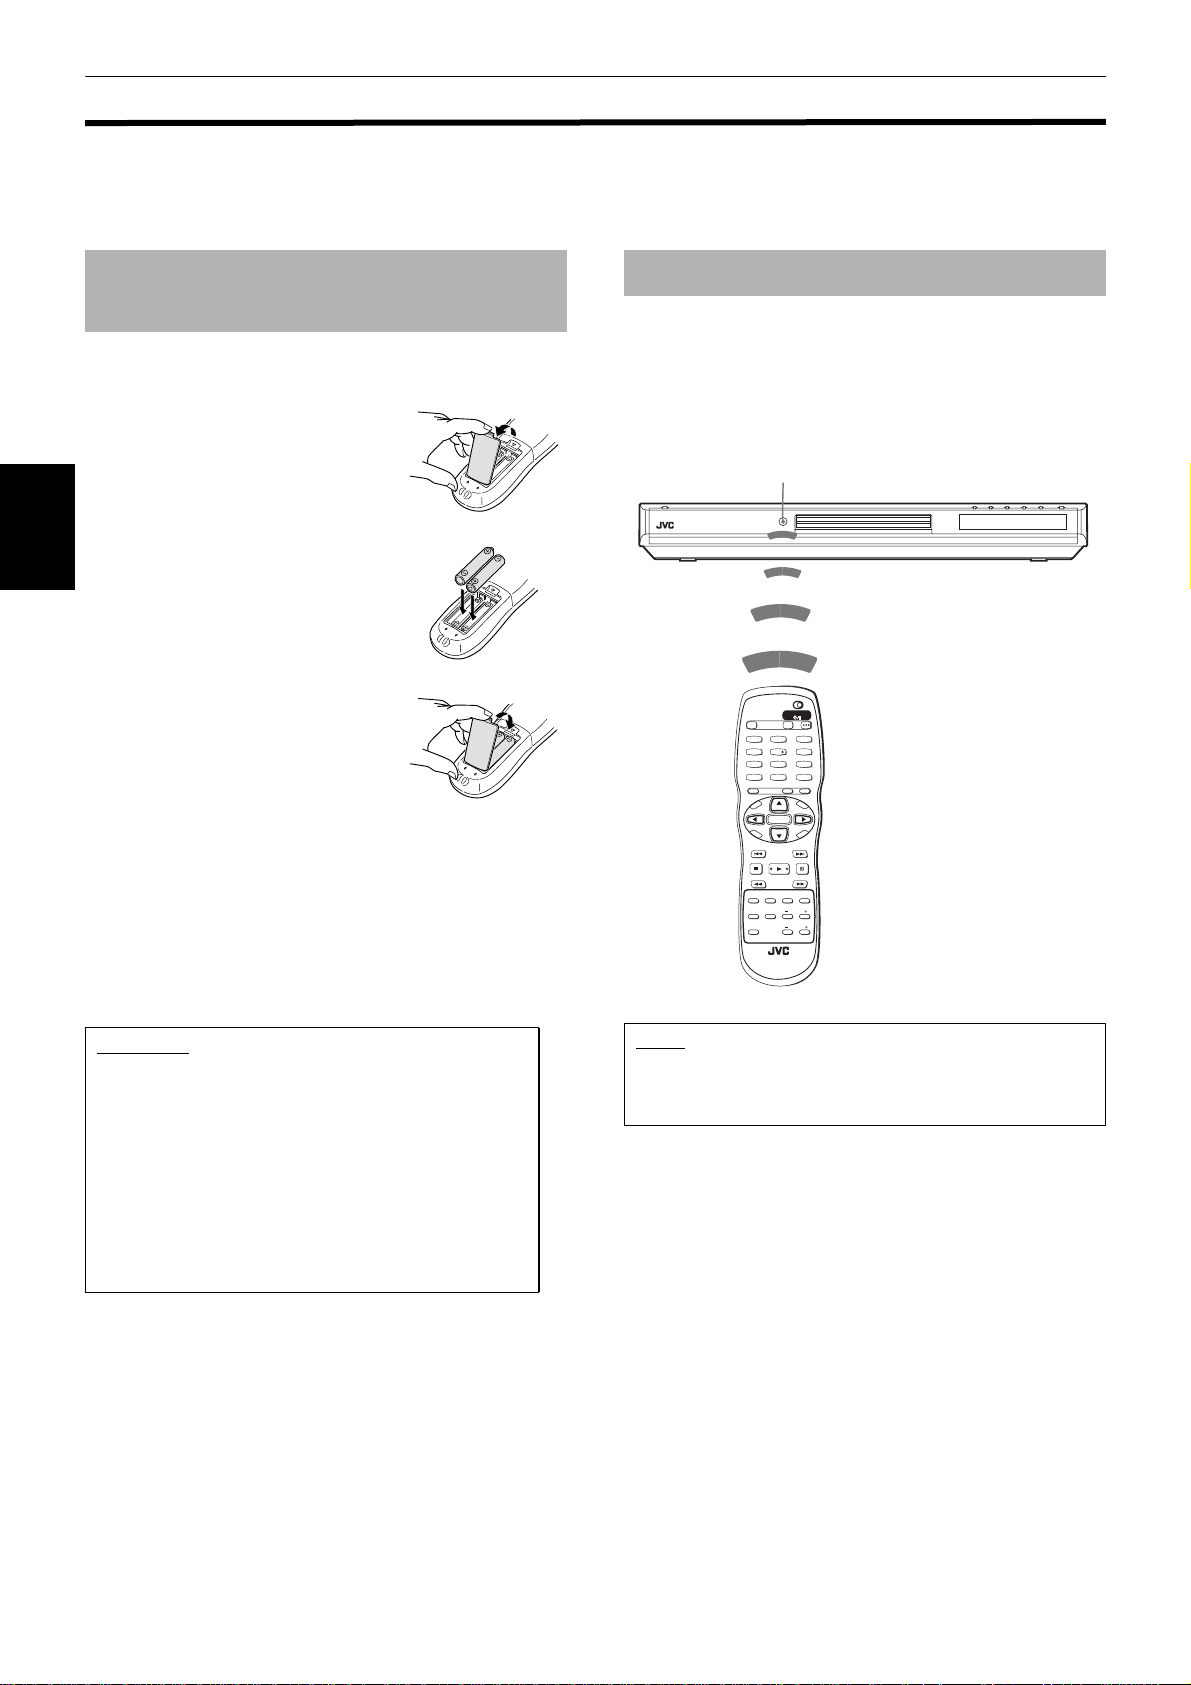
To install batteries in the remote
control unit
The battery compartment is located on the back of the
remote control unit.
1 Press down on the point shown by
the arrow at the top of the
compartment cover, and pull up
the cover to open the
compartment.
2 Place the two supplied R6P (SUM-
3)/AA(15F) batteries in the remote
Getting started
control unit according to the
polarity markings ("+" and "–")
inside the compartment and on the
batteries.
3 Place the cover over the
compartment, and press down
lightly.
The batteries will last about six months with normal use.
If the functions of the remote control become erratic,
replace the batteries. See below for more information.
Precautions for the safe use of batteries
Observe the following precautions for the safe use of
batteries. If they are used improperly their lives will be
shortened, they may burst or their contents may leak.
Remote sensor
• Operate the remote control unit while pointing it
toward the remote sensor on the unit.
• The remote control unit can be used within a range of
about 5 meters from the remote sensor. If you operate
the remote control unit from a diagonal position, range
may be shorter.
Remote sensor
XV-N5 DVD/SUPER VCD/VCD/CD PLAYER
TV DVD
STANDBY/ON
OPEN/
TV DVD
CLOSE
TV22TV1
TV3
1
3
TV55TV4
TV6
4
6
TV88TV7
TV9
7
9
TV00TV-/--10MUTING
+10
TITLE/
TV/VIDEO
GROUP
CANCEL
SUBTITLERETURN
U
M
N
E
E
CH
N
M
U
+
P
O
T
VOL
-
VOL+
ENTER
C
H
O
SLOW
DIGEST
3D
PHONIC
CH
-
I
C
E
-
ANGLE
RM-SXV010U
REMOTE CONTROL
N
E
E
R
C
S
N
O
NEXTPREVIOUS
SELECT STROBECLEAR
SLOW+
VFPAUDIOSUB TITLEREPEAT
PROGRESSSIVE
SCAN
ZOOM
AMP VOL
Precaution
• Remove the batteries from the remote control if it is
not going to be used for a long period of time.
• Remove dead batteries and dispose of them
properly.
• Never leave dead batteries lying around, take them
apart, mix them with other refuse, or throw them
into an incinerator.
• Never touch liquid that has leaked out of a battery.
• Do not mix new and old batteries, or batteries of
different types, when replacing them.
NOTE
• If the remote sensor on the unit is exposed to the
sunshine or strong light, you may not be able to control
the unit from the remote control unit.
10
Page 15
Getting started
To use the remote control unit for TV
operation
You can operate your TV from the remote control unit.
Setting the remote control signal for
operating your TV
TV DVD
STANDBY/ON
OPEN/
TV DVD
TV STANDBY/ON
ENTER
CLOSE
TV22TV1
TV3
1
3
TV55TV4
TV6
4
6
TV88TV7
TV9
7
9
TV0
TV-/--
MUTING
0
10
+10
TITLE/
TV/VIDEO
GROUP
CANCEL
SUBTITLERETURN
U
M
N
E
E
CH
M
P
O
T
VOL
-
C
H
O
I
C
SLOW
DIGEST
3D
PHONIC
N
U
+
VOL+
ENTER
N
CH
E
E
-
R
C
E
S
N
O
NEXTPREVIOUS
SELECT STROBECLEAR
-
SLOW+
VFPAUDIOSUB TITLEREPEAT
ZOOM
ANGLE
AMP VOL
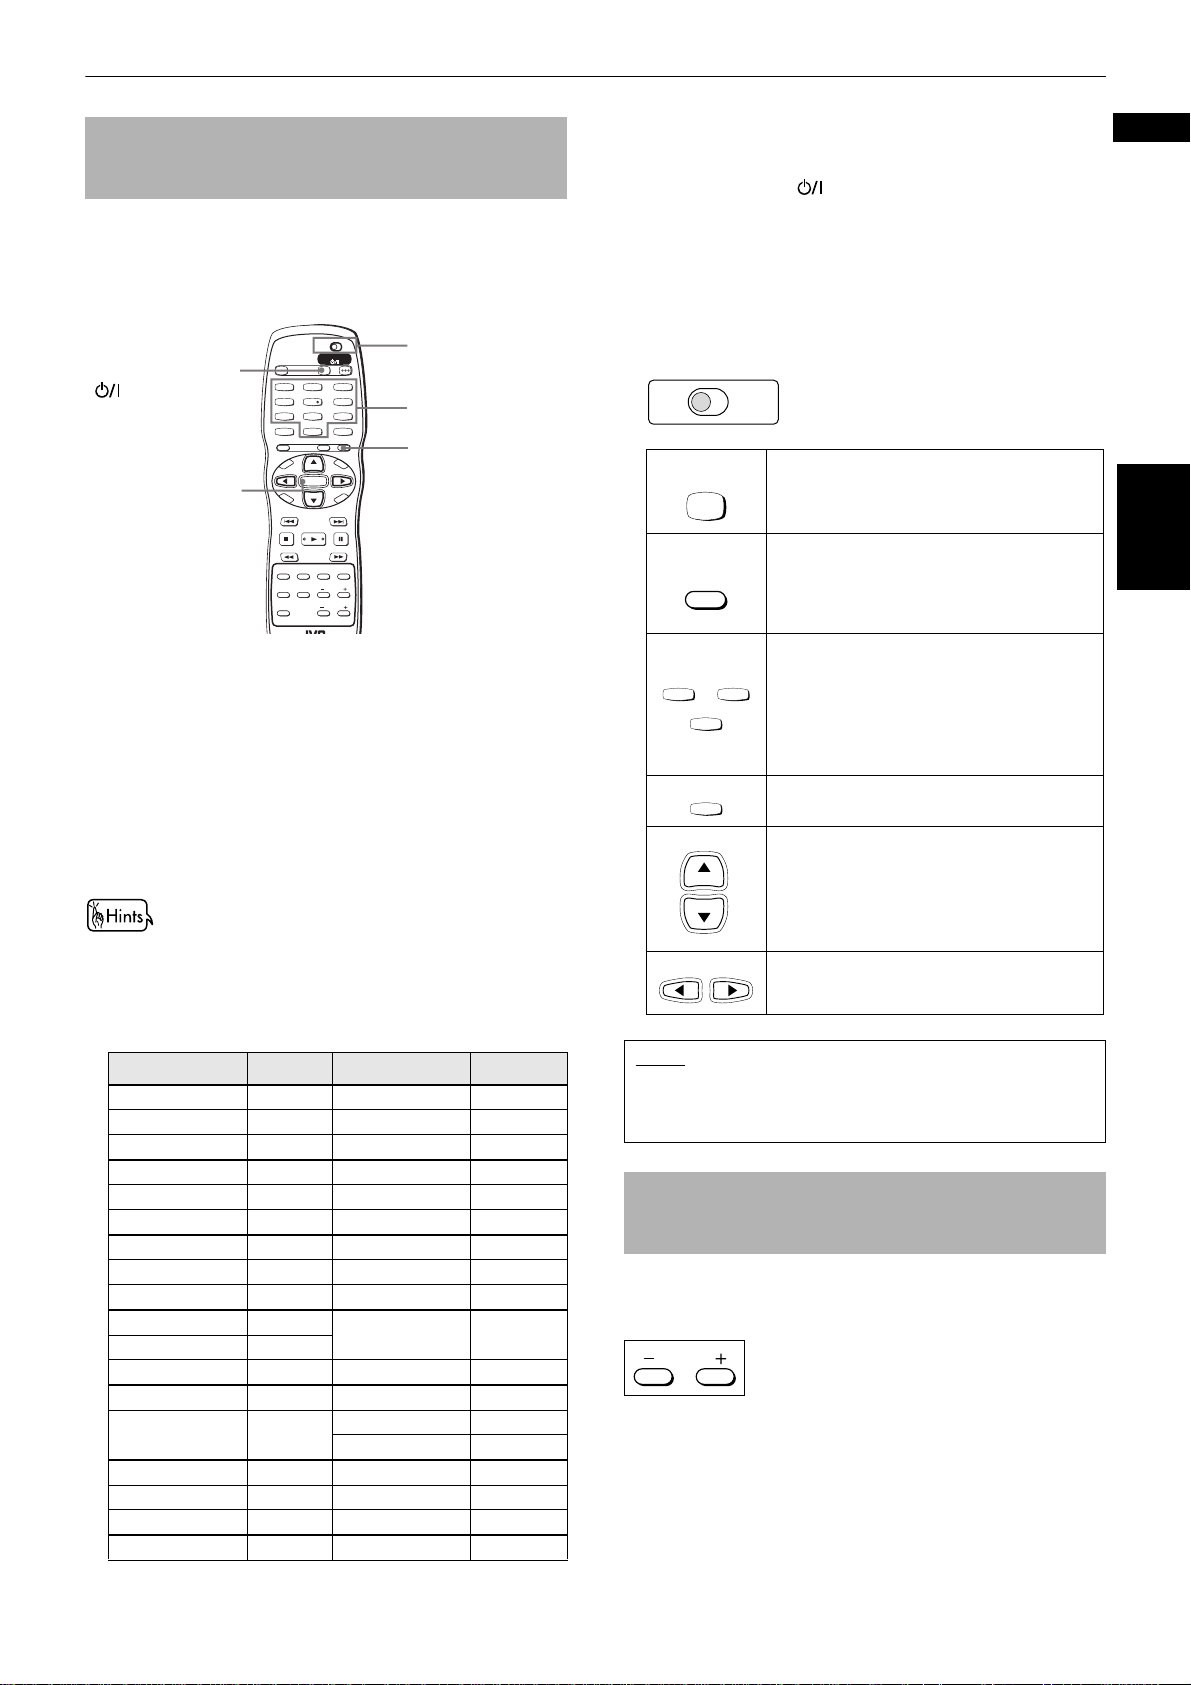
1 Set the TV - DVD switch to "TV."
2 Hold down TV/VIDEO - CANCEL until step 4 is
finished.
3 Enter the manufacturer code of your TV listed below
by using the numeric buttons (0 to 9).
Example:
To enter the manufacturer code "01": Press "0" then
"1."
TV - DVD switch
Numeric buttons
TV/VIDEO CANCEL
5 Release TV/VIDEO - CANCEL.
6 Try to operate the TV by pressing
TV STANDBY/ON .
If your TV turns on or off, you have successfully set
the control signal.
The following buttons can be used for operating the
TV.
To use 5/∞ (CH+, CH–), 2/3(VOL–, VOL+), TV/VIDEO CANCEL and numeric buttons for TV control, set the
TV - DVD switch to "TV."
TV DVD
Turns the TV on or off.
Switches the TV input mode between TV
and VIDEO.
Selects the TV channels directly.
* For some TVs, pressing "+10" functions as
TV-/--
10
the "100+," while "10" functions as the
ENTER button if your TV requires pressing
the ENTER button after selecting a
channel number.
Mutes the TV sound.
Changes the TV channels.
TV/VIDEO
CANCEL
TV1
1
MUTING
CH
+
TV
~
TV0
+10
0
English
Getting started
• When you purchased the unit, the manufacturer code is set
"JVC" (01).
to
4 Press ENTER.
Manufacturer code list
Manufacturer No. Manufacturer No.
AIWA 36 MIVAR 29
BEIJING 22 NEC 20
CCE 02 NOBLEX 22
CHANGHONG 34 NOKIA 31
DAEWOO 17, 37 PANASONIC 04, 11
FERGUSON 27 PEONY 34, 38, 39
FINLUX 30 PHILCO 10, 17, 21
FUNAI 32 PHILIPS 02
GRADIENTE 15, 20 RCA 05
GRUNDIG 19 SAMSUNG 12, 33, 34,
HITACHI 10
ITT 28 SANYO 13, 16
JINXING 38 SEARS 13
JVC 01, 23,
24, 25
SHARP 06
SONY 07
KONKA 40 TCL 41
LG (GOLDSTAR) 18 THOMSON 26
MAGNAVOX 02 TOSHIBA 08,14
MITSUBISHI 03 ZENITH 09
35
CH
-
VOL
-
VOL+
Adjusts the TV volume.
NOTE
• If there is more than one code listed for the
manufacturer of your TV, try them one by one until you
succeed.
To control the volume of a JVC
amplifier or receiver
You can control the volume of a JVC’s amplifier or
receiver by using the AMP VOL +/– buttons on the
remote control unit.
AMP VOL
Pressing the + button raises the audio volume of the
amplifier or receiver, while pressing the – button lowers
the volume.
11
Page 16
Basic operations
In the following description, we assume that the buttons on the remote control unit are mainly used; however, you may
use the corresponding buttons on the front panel if available.
NOTE
Make sure that the TV - DVD switch on the remote control unit is set to "DVD" when using the 5/∞/2/3 and
TV DVD
numeric buttons for controlling the unit.
Before operation
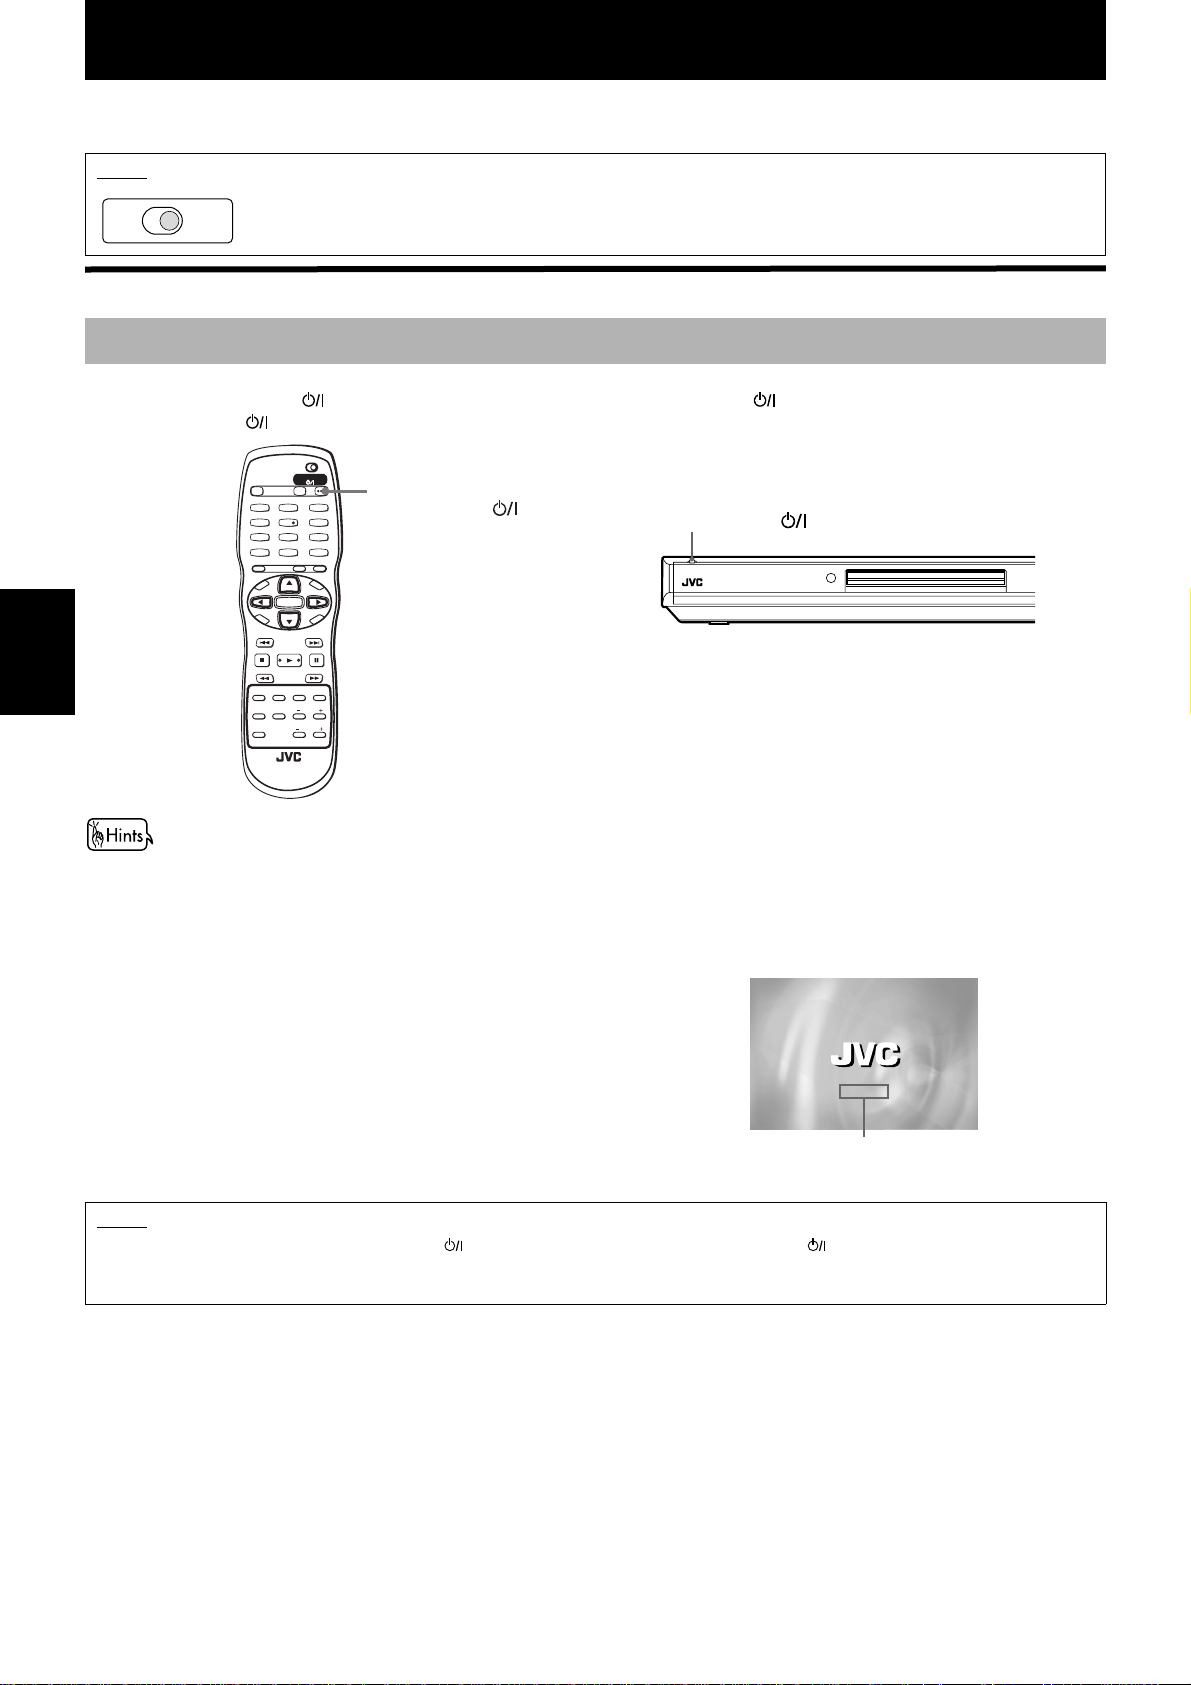
Turning on/off the unit
Press DVD STANDBY/ON on the remote control unit or press STANDBY/ON on the front panel.
The STANDBY/ON button on the front panel, which light in red during standby, lights in green.
TV DVD
STANDBY/ON
OPEN/
TV DVD
Basic operations
CLOSE
T
C
DIGEST
TV-/--
P
O
VOL
H
PHONIC
TV22TV1
1
TV55TV4
4
TV88TV7
7
TV0
MUTING
0
10
TITLE/
GROUP
SUBTITLERETURN
U
N
E
CH
M
+
-
ENTER
CH
O
-
I
C
E
O
NEXTPREVIOUS
SELECT STROBECLEAR
-
SLOW+
SLOW
ANGLE
ZOOM
3D
AMP VOL
TV/VIDEO
N
TV3
3
TV6
6
TV9
9
+10
CANCEL
M
E
N
U
VOL+
N
E
E
R
C
S
VFPAUDIOSUB TITLEREPEAT
DVD
STANDBY/ON
STANDBY/ON
XV-N5 DVD/SUPER VCD/VCD/CD PLAYER
RM-SXV010U
REMOTE CONTROL
• You can turn on the unit by pressing the 3 button. In this case, the unit starts playback if the disc is set in the disc tray.
If no disc is set, "NO DISC" appears on the display window.
• You can turn on the unit by pressing the 0 button on the front panel. In this case, the disc tray opens.
The opening display shown at right appears on the TV screen.
The following messages may appear at the bottom of the opening display.
• NOW READING:The unit is reading the disc information.
• REGION CODE ERROR!:
The region code of the DVD VIDEO disc does not
match the unit. The disc cannot be played back.
• OPEN: The disc tray is opening.
NOW READING
• CLOSE: The disc tray is closing.
• NO DISC: No disc is loaded.
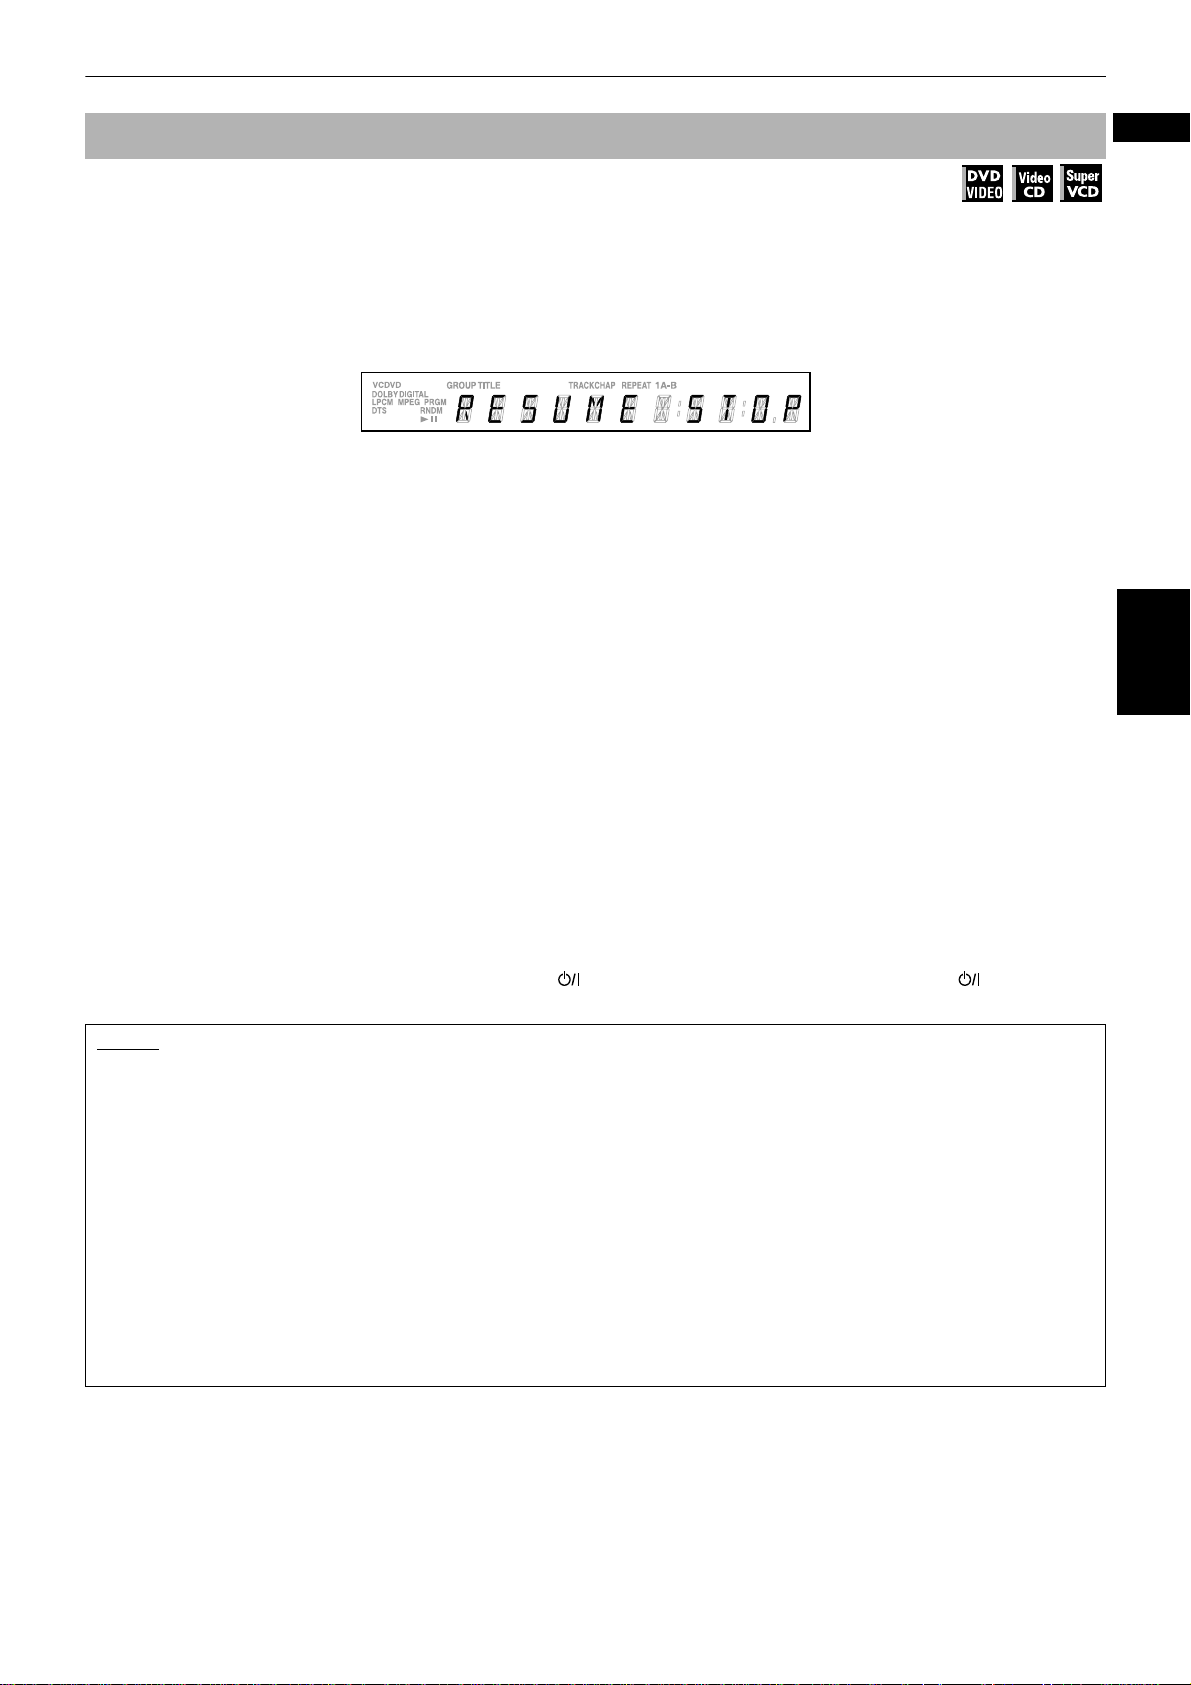
• RESUME STOP:The unit stops and memorizes the interrupted.
Message area
NOTE
• Even if you press the DVD STANDBY/ON on the remote control unit or STANDBY/ON on the front panel to turn off the
unit, the unit is not disconnected from the AC power source as long as it is connected to the wall outlet. This state is called
standby mode. In this state, the unit consumes a very small amount of power.
12
Page 17
Basic operations
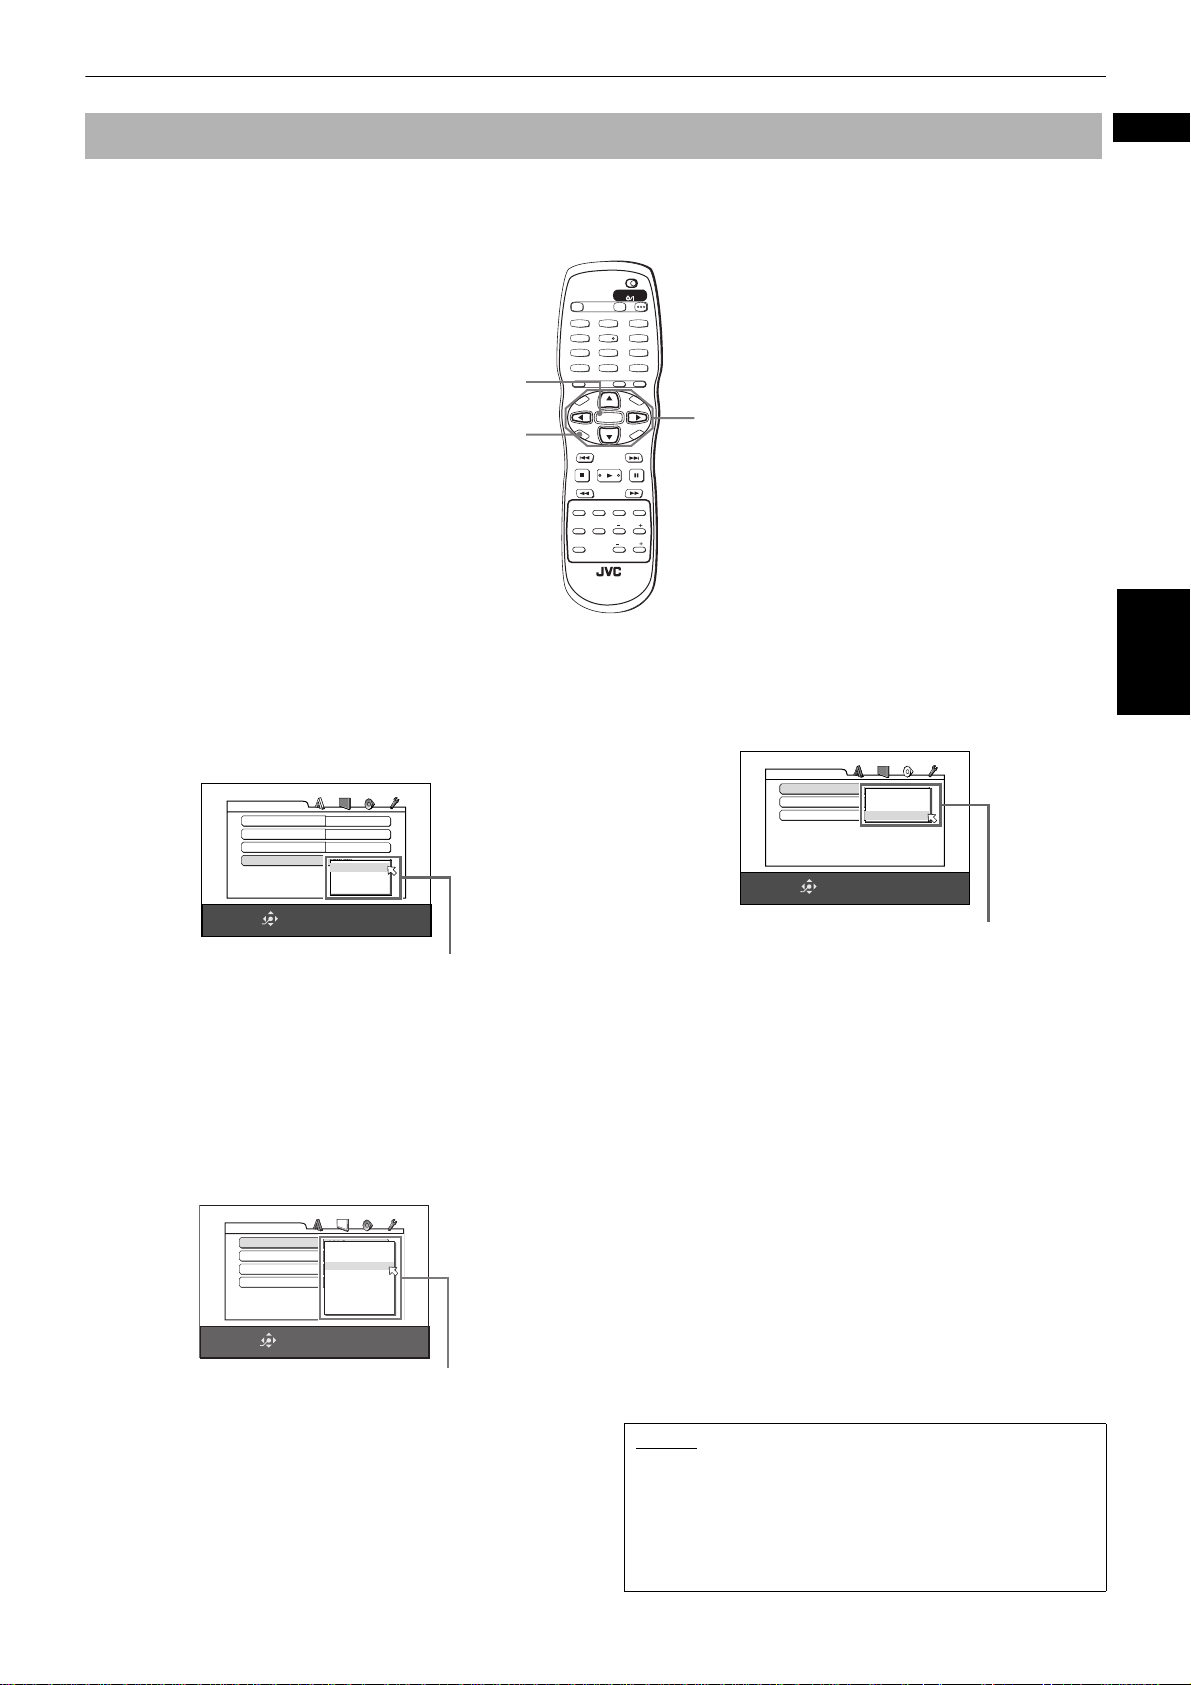
Initial setup before using the unit
We recommend you to set the display language, TV monitor type and digital output before using the unit, by following
the procedure below.
See "Changing the initial settings" beginning on page 48 for details about each setting item.
TV DVD
STANDBY/ON
OPEN/
TV DVD
CLOSE
TV22TV1
TV3
ENTER
CHOICE
1 Press CHOICE for a few seconds to bring up
the first page of the DVD PLAYER SET UP
display.
The pull-down menu of the "ON SCREEN
LANGUAGE" is already open.
DVD PLAYER SET UP
MENU LANGUAGE
AUDIO LANGUAGE
SUBTITLE
ON SCREEN LANGUAGE
SELECT
ENTER
ENGLISH
ENGLISH
ENGLISH
ENGLISH
ENGLISH
CHINESE
SPANISH
USE 5∞23 TO SELECT, USE ENTER TO CONFIRM
ON SCREEN LANGUAGE options
2 Use 5/∞ to select a desired language.
You can select the on-screen language for the
preference displays, etc. from among English,
Spanish and Chinese.
O
T
VOL
C
H
DIGEST
PHONIC
1
4
7
TV-/--
10
M
P
O
I
C
SLOW
3D
SUBTITLERETURN
U
N
E
CH
+
-
ENTER
CH
-
E
SELECT STROBECLEAR
-
ANGLE
RM-SXV010U
REMOTE CONTROL
3
TV55TV4
TV6
6
TV88TV7
TV9
9
TV0
MUTING
0
+10
TITLE/
TV/VIDEO
GROUP
CANCEL
M
E
N
U
AMP VOL
VOL+
C
S
N
O
NEXTPREVIOUS
SLOW+
VFPAUDIOSUB TITLEREPEAT
ZOOM
5/∞
N
E
E
R
5 Press ENTER.
The third (final) page is shown, in which the pulldown menu of the "DIGITAL AUDIO OUTPUT" is
already open.
DVD PLAYER SET UP
DIGITAL AUDIO OUTPUT
ANALOG DOWN MIX
D RANGE COMPRESSION
SELECT
ENTER
DOLBY DIGITAL/PCM
PCM ONLY
DOLBY PROLOGIC
DOLBY DIGITAL/PCM
STREAM/PCM
ON
USE 5∞23 TO SELECT, USE ENTER TO CONFIRM
DIGITAL AUDIO OUTPUT options
6 Use 5/∞ to select a desired digital output
signal type.
You must set this item correctly when you connect
the unit to an external surround decoder or D/A
convertor (including an amplifier/receiver with
built-in surround decoder or D/A convertor).
3 Press ENTER.
The second page is shown, in which the pull-down
menu of the "MONITOR TYPE" is already open.
DVD PLAYER SET UP
SELECT
ENTER
MONITOR TYPE
STILL MODE
SCREEN SAVER
MP3/JPEG
4:3 L.B.
16:9 NORMAL
AUTO
16:9 AUTO
4:3 LB
ON
4:3 PS
MP3
16:9 MULTI NORMAL
16:9 MULTI AUTO
4:3 MULTI LB
4:3 MULTI PS
USE 5∞23 TO SELECT, USE ENTER TO CONFIRM
MONITOR TYPE options
(If you do not connect the unit to such a device, you
do not have to set this item.)
• When connecting with a Dolby Digital decoder,
select "DOLBY DIGITAL/PCM."
• When connecting with a DTS or MPEG
Multichannel decoder, select "STREAM/PCM."
• When connecting with other digital device, select
"PCM ONLY."
See page 51 for details.
7 Press ENTER.
The TV screen returns to showing the opening
display.
4 Use 5/∞ to select a desired monitor type.
You can select the monitor type according to your TV.
• For a normal (conventional) TV, select "4:3 LB" or
"4:3 PS."
• For a wide-screen TV, select "16:9 AUTO" or "16:9
NORMAL."
See page 50 for details about each mode.
NOTES
• This setting may not be necessary except when first
turning on the power after purchasing the unit.
• You can also set these items, as well as other
preferences, by pressing CHOICE briefly to bring up the
preference display. See "Changing the initial settings"
on and after page 48 for details.
English
Basic operations
13
Page 18
Basic operations
Basic playback
This section describes basic operations for playback of DVD VIDEO, Audio CD, Video CD and SVCD discs. For MP3 and
JPEG disc playback, see the separate chapter beginning on pages 40 and 43.
TV DVD
STANDBY/ON
OPEN/
TV DVD
OPEN/CLOSE
CLOSE
TV22TV1
TV3
1
3
TV55TV4
TV6
4
6
TV88TV7
TV9
7
9
TV0
TV-/--
MUTING
0
10
+10
TITLE/
TV/VIDEO
GROUP
CANCEL
SUBTITLERETURN
U
M
N
E
E
CH
+
ENTER
CH
-
E
SELECT STROBECLEAR
-
ANGLE
RM-SXV010U
REMOTE CONTROL
AMP VOL
N
U
VOL+
N
E
E
R
C
S
N
O
NEXTPREVIOUS
SLOW+
ZOOM
3
8
VFPAUDIOSUB TITLEREPEAT
Disc tray
XV-N5 DVD/SUPER VCD/VCD/CD PLAYER
M
P
O
T
VOL
-
C
H
O
I
C
7
DIGEST
PHONIC
SLOW
3D
738 0
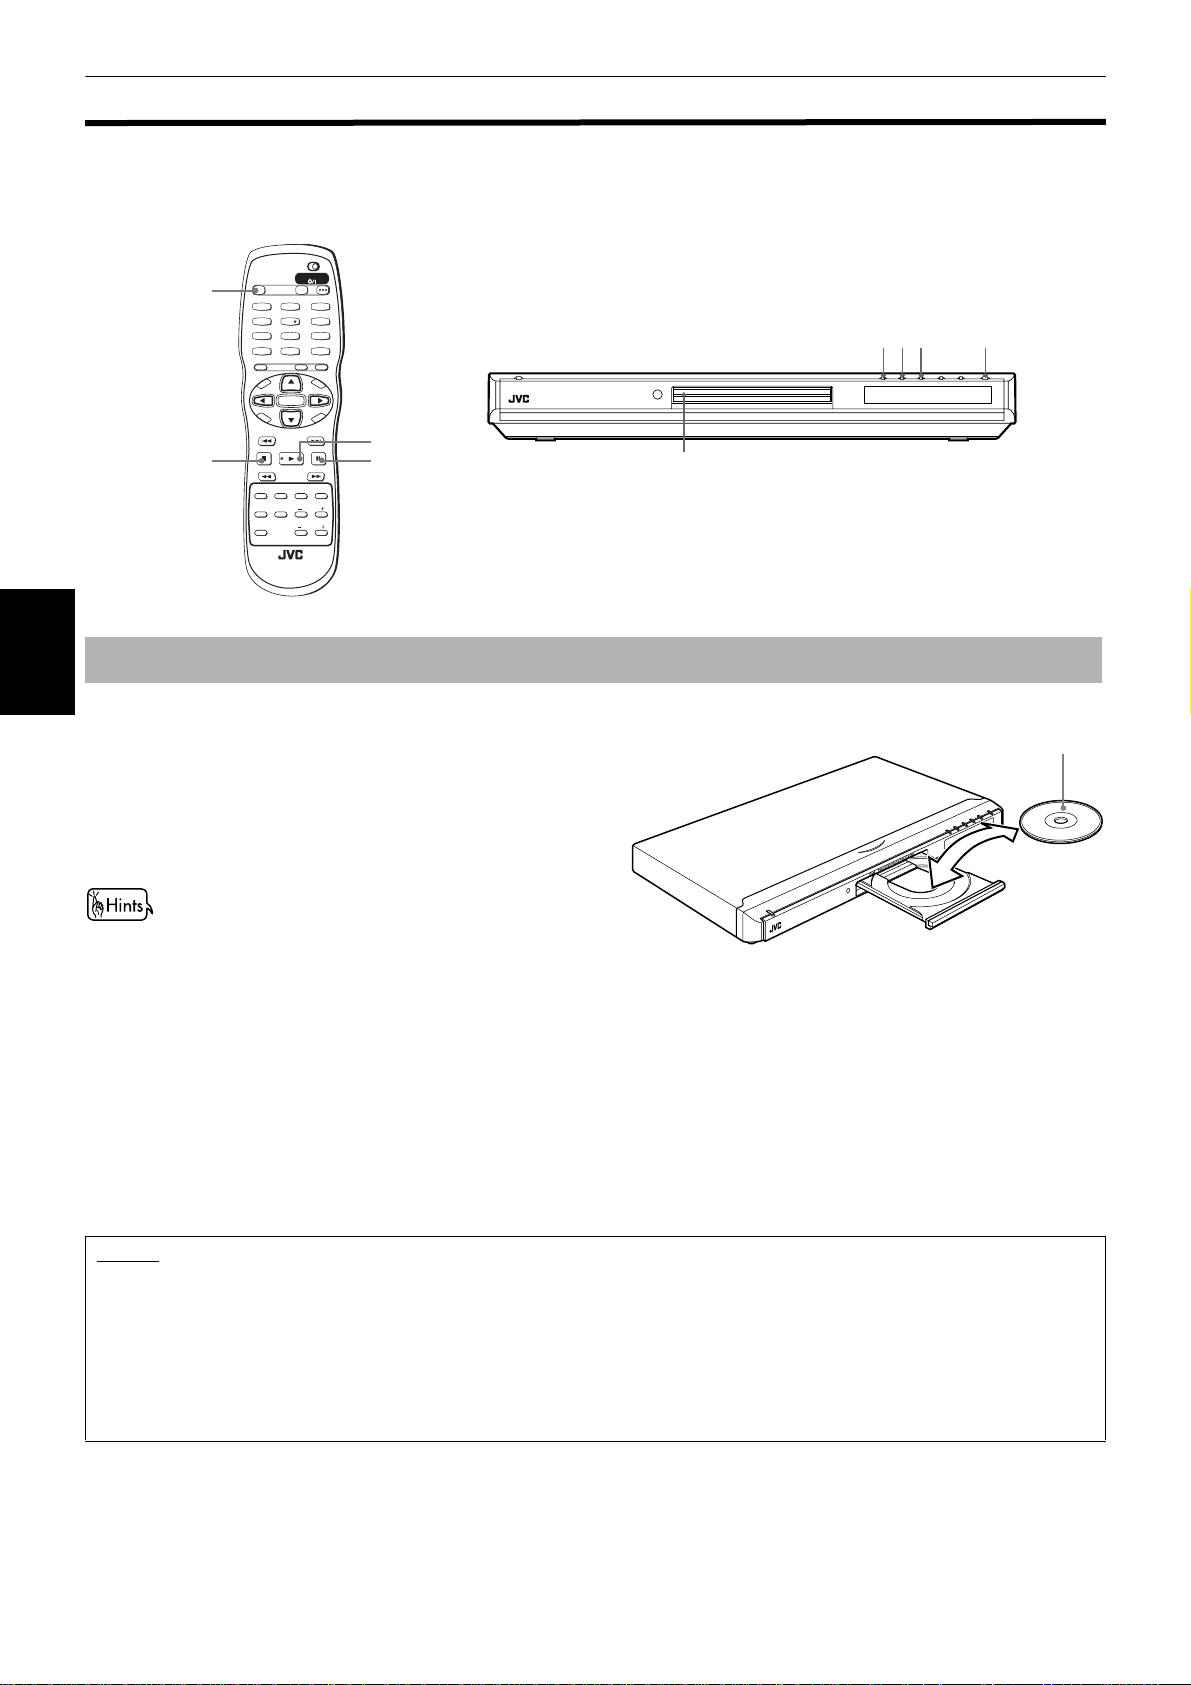
Inserting and removing discs
Basic operations
1 Press 0 to open the disc tray.
2 Place a disc in the tray.
3 Press 0 to close the disc tray.
The unit reads the disc information and the
opening display appears on the TV screen.
If a menu is shown on the TV screen
When inserting a DVD VIDEO, Video CD or SVCD disc,
a menu display may be automatically shown on the
TV screen. From the menu, you can select a desired
item to be played back by following the procedure
below.
(for DVD VIDEO)
1 Use 5/∞/2/3 to select a desired item.
2 Press ENTER.
The unit starts playback of the selected item.
(for Video CD/SVCD)
Use the numeric buttons to select a desired item.
The unit starts playbac k of the selected item.
With the label side up
• To insert an 8-cm disc,
place it in the inner
recess.
NOTES
• Do not load a non-playable disc. For details about playable and non-playable disc types, see page 4.
• When loading a disc on the disc tray, be sure to position the disc inside the recess. Otherwise, the disc may be damaged when
the disc tray is closed, or you may not be able to remove the disc from the unit.
• Do not use any stabilizer when playing back a disc.
• With some DVD VIDEO discs, the unit starts playback automatically after inserting the disc.
• If you insert a DVD VIDEO disc whose region code does not match the unit, "REGION CODE ERROR!" is shown in the opening
display. For details about the region code, see page 4.
14
Page 19

Basic operations
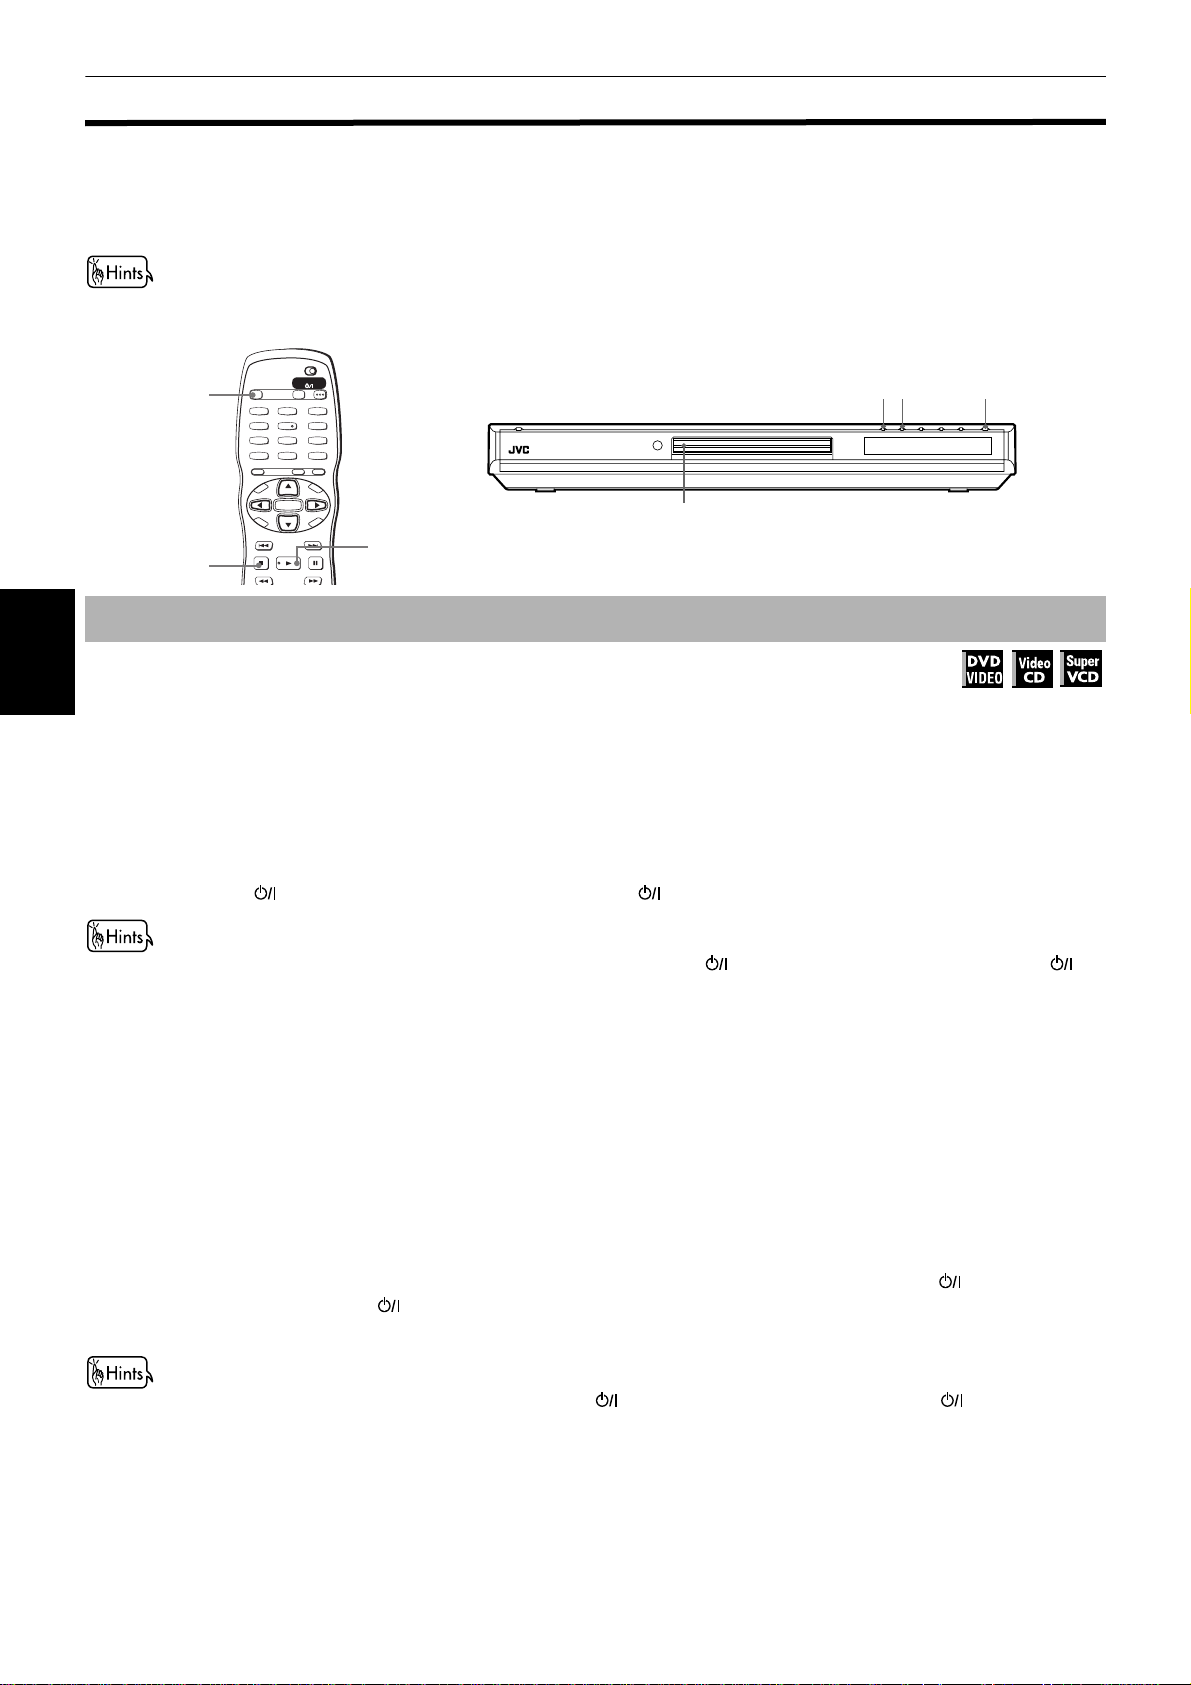
To start playback
Available :
Press 3.
The unit starts playback from the beginning.
About screen saver function
• A television monitor may have an image burned into it if a
static image is displayed for a long time. To prevent this,
the unit automatically activates the screen saver function if
a static picture, such as an on-screen display or menu, is
displayed for over 5 minutes.
• Pressing any buttons on the unit or the remote control unit
will release the screen saver function and return to the
previous display.
• You can also turn of f the screen saver function (see page 51).
About On-screen guide icons
• When you make an operation, you may see the following icons displayed over the picture for about 3 seconds. These have the
following meanings.
You can set the unit not to display these icons above via the preference settings described on page 53.
Icon Status
Appears at the beginning of playback mode.
Appears at the beginning of pause mode.
Appears at the beginning of fast forward/backward playback with the current speed (see page 18).
Appears at the beginning of slow-motion playback with the current speed (see page 19).
Appears at the beginning of Repeat playback mode (see page 28).
Appears at the beginning of a scene recorded from multiple angles (see page 32).
While the screen saver
function is not activated
While the screen saver
function is activated
English
Basic operations
Appears at the beginning of a scene recorded with multiple audio languages (see page 31).
Appears at the beginning of a scene recorded with multiple subtitle languages (see page 30).
Appears when the unit does not accept your operation because of disc contents, structure, playback status etc.
Note that some operations may not be performed even if is not displayed.
NOTES
• When the RESUME function is "ON" or "DISC RESUME" and a resume point is set, pressing 3 starts playback from that point
instead of the beginning. See page 17.
• During playback, the display window shows the title/chapter or track number being played.
• During DVD VIDEO playback, pressing 3 moves the playback position back 10 seconds before the current position. See page 22
for details.
To stop playback completely
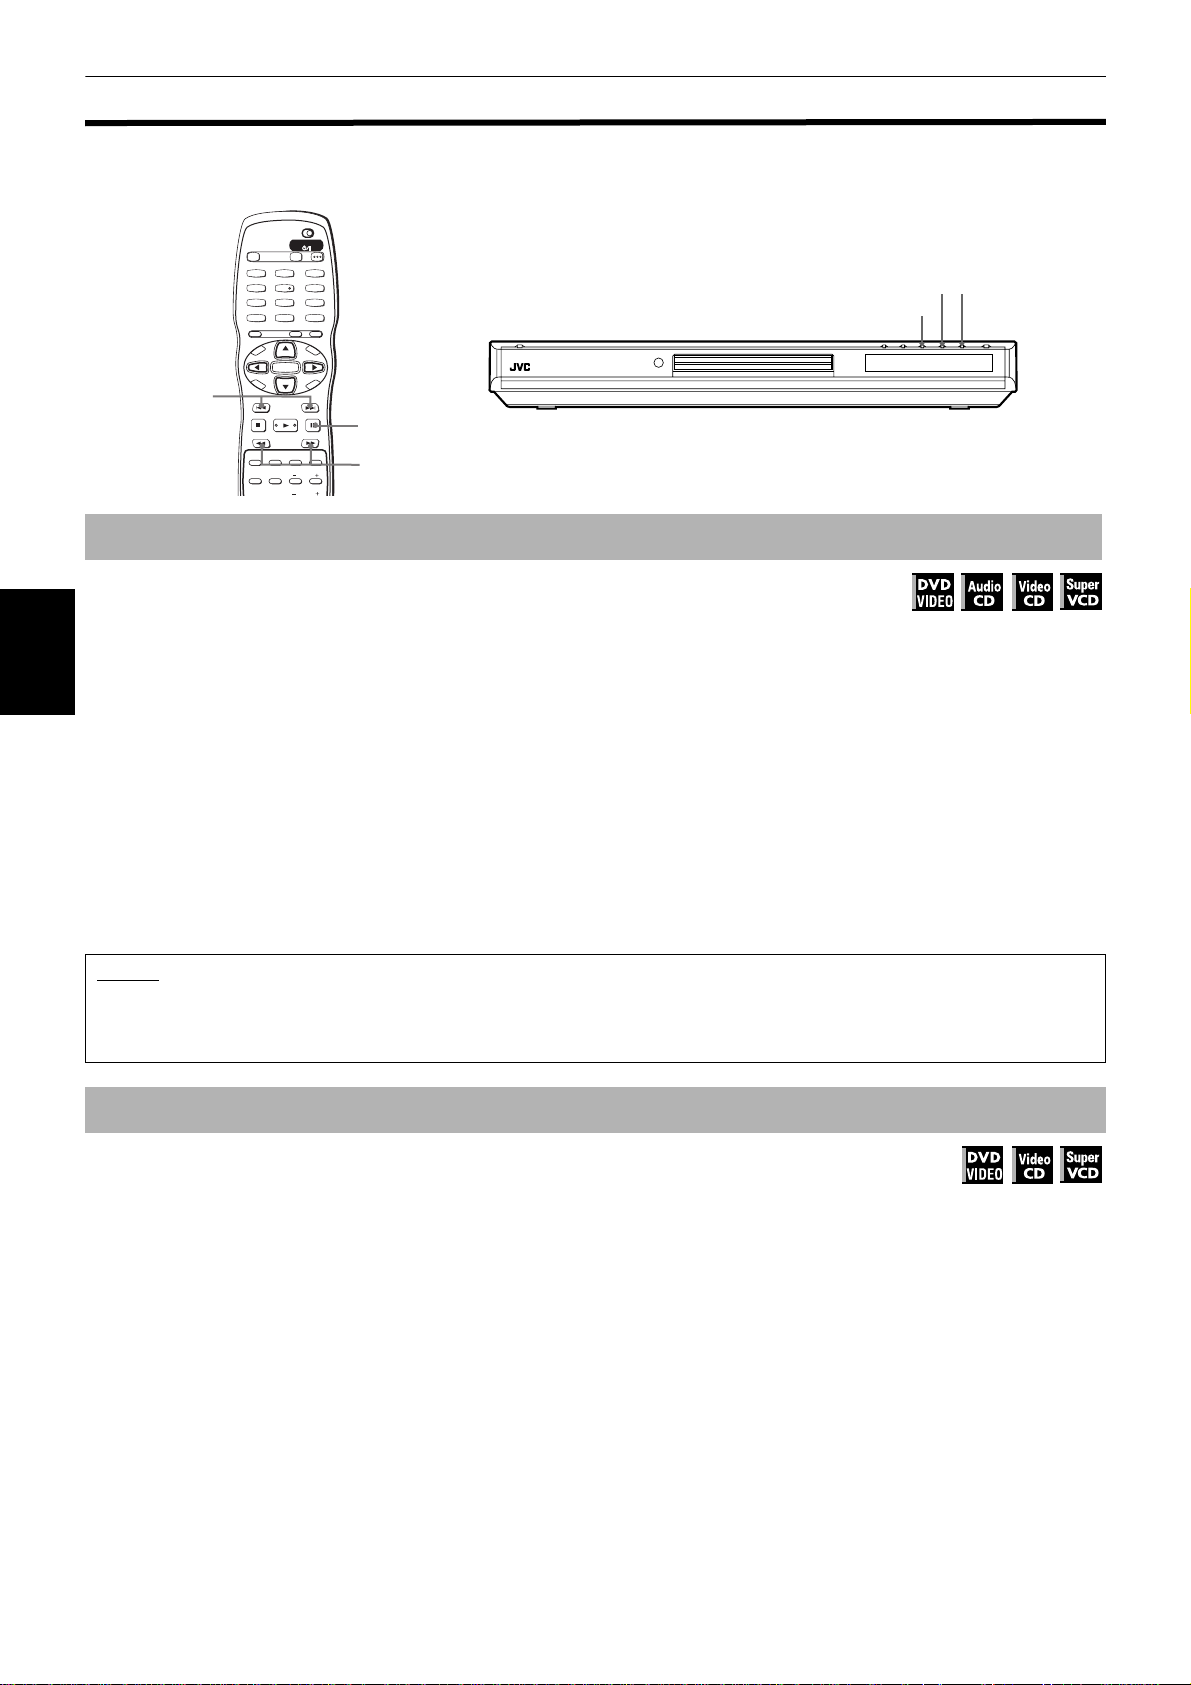
Available :
Press 7.
The unit stops playback.
• If you press 0 during playback, the unit stops playback and opens the disc tray.
To stop playback temporarily
Press 8.
The unit pauses playback. To resume playback, press 3.
Available :
15
Page 20
Basic operations
Resuming playback
The unit can remember the position on a disc where you interrupt playback, and resu me playback from that position later .
You can set two resume modes (DISC RESUME and ON) using the preference display. S ee page 53 for details about how
to set the resume mode.
• The resume mode is initially set to "ON" when you purchased.
• You can deactivate the resume mode by setting "RESUME" on the "OTHERS" preference display to "OFF."
TV DVD
STANDBY/ON
OPEN/
TV DVD
OPEN/CLOSE
.
CLOSE
TV2
TV1
TV4
TV7
TV-/--
P
O
T
VOL
C
H
O
7
TV3
2
1
3
TV5
TV6
5
4
6
TV8
TV9
8
7
9
TV0
MUTING
0
10
+10
TITLE/
TV/VIDEO
GROUP
CANCEL
SUBTITLERETURN
U
M
N
E
E
CH
M
-
I
C
SLOW
N
U
+
VOL+
ENTER
N
CH
E
E
-
R
C
E
S
N
O
NEXTPREVIOUS
SELECT STROBECLEAR
-
SLOW+
3
To memorize the interrupt position
XV-N5 DVD/SUPER VCD/VCD/CD PLAYER
Disc tray
73 0
Available :
Basic operations
¶ During playback
When the resume mode is set to "DISC RESUME"
Press 7.
The unit stops playback and memorizes the interrupt position. After pressing 7, the display window on the front
panel shows "RESUME STOP."
In this condition, the memory of the interrupt position is not cleared if you press 0 to open the disc tray, or press
STANDBY/ON (on the front panel) or DVD STANDBY/ON (on the remote control unit) to turn off the unit.
• The interrupt position is also remembered when you press 0 , STANDBY/ON (on the front panel) or DVD STANDBY/ON (on
the remote control unit). In this case, "RESUME STOP" is not shown on the display window.
• To clear the memory, press 7 while the disc stopped.
• The unit remembers interrupt positions for the last 30 discs played.
• If you interrupt the playback of a disc for which an interrupt position has already been stored, the memory will be updated with the
new interrupt position.
• After the unit has stored interrupt positions for 30 discs, storing a new interrupt position will cause the unit to delete the oldest
stored position. Interrupting playback of a disc for which an interrupt position is already stored may change the order in which the
positions are stored. This may potentially change the order in which positions are deleted.
When the resume mode is set to "ON"
Press 7.
The unit stops playback and memorizes the interrupt position.
In this condition, the memory of the interrupt position is not cleared if you press STANDBY/ON (on the front
panel) or DVD STANDBY/ON (on the remote control unit) to turn off the unit.
Note that if you press 0 to open the disc tray, the memory of the interrupt position is cleared.
• The interrupt position is also stored by pressing STANDBY/ON (on the front panel) or DVD STANDBY/ON (on the remote
control unit).
• To clear the memory, press 7 while the disc stopped.
16
Page 21
Basic operations
To resume playback
Available :
When the resume mode is set to "DISC RESUME"
¶ While stopped, or no disc is inserted
1 Press 0 to insert a disc for which the unit has stored an interrupt position.
After loading the disc, the display window on the front panel shows "RESUME STOP."
(If a disc for which you want to resume playback is already set in the disc tray, go to step 2.)
2 Press 3.
The display window shows "RESUME PLAY" and the unit resumes playback from the position where playback was
interrupted.
The unit maintains the memory of the interrupt position for the disc, even if you remove the disc from the disc tray
and replace it again. The unit also maintains the memory of the interrupt position while the disc is in the disc tray.
• To play back a disc from the beginning (instead of the interrupted position)
After loading the disc, press 7 before pressing 3 to start playback.
Pressing 7 while the disc is stopped clears the memory of the interrupted position.
Every time you interrupt playback, the position is remembered as the new "resume" point.
When the resume mode is set to "ON"
¶ While the disc you interrupted playback last time* is still on the disc tray (*by pressing 7 or by turning off the power).
English
Basic operations
Press 3.
The unit resumes playback from the position where playback was interrupted.
If you press 3 then 7, the unit starts playback after the display window shows "RESUME PLAY."
Note that you cannot resume playback if you interrupted playback last time by opening the disc tray.
• To play back a disc from the beginning (instead of the interrupted position)
Do any of the following:
* Press 7 while stopped, then press 3.
* Turn on the unit by pressing DVD STANDBY/ON on the remote control unit or STANDBY/ON on the front
panel then press
NOTES
• If you use the "OTHERS" preference display to change the "RESUME" setting from "DISC RESUME" to "OFF" or "ON," you
cannot resume playback of a disc whose "resuming" position is stored. However, if you again set "RESUME" to "DISC
RESUME," you will then be able to resume playback of the disc.
• If you open the disc tray while RESUME mode is set to ON, the "resume" point will be cleared.
• The resume function does not work with Audio CD, MP3 and JPEG discs.
• In the case of a Video CD/SVCD disc with PBC function, the unit may resume playback from a point slightly earlier or later than
the point where playback was interrupted.
• The unit may not resume playback exactly from the interrupt point.
• For a double-sided DVD VIDEO disc, the unit regards each side as a different disc. Therefore, to resume playback of such a disc,
the disc must be loaded with the same side down.
• When the unit remembers an interrupt point for a disc, it also remembers Audio, Subtitle and Angle settings (regardless of
whether "RESUME" is set to "DISC RESUME" or "ON").
• If you interrupt playback while the menu for a DVD VIDEO, SVCD or Video CD is shown on the TV screen, the unit may not
correctly remember the interrupt position, regardless of whether the "RESUME" mode is set to "ON" or "DISC RESUME."
3.
17
Page 22
Basic operations
Variable speed playback
You can speed up or slow down playback, or advance the video frame by frame.
TV DVD
STANDBY/ON
OPEN/
TV DVD
CLOSE
TV2
TV1
TV3
2
1
TV4
4
TV7
7
TV-/--
10
M
P
O
T
VOL
C
H
O
DIGEST
PHONIC
I
SLOW
3D
4/¢
To advance or reverse playback rapidly while monitoring
¶ During playback
3
TV5
TV6
5
6
TV8
TV9
8
9
TV0
MUTING
0
+10
TITLE/
TV/VIDEO
GROUP
CANCEL
SUBTITLERETURN
U
M
N
E
E
CH
N
U
+
-
VOL+
ENTER
N
CH
E
E
-
C
R
C
E
S
N
O
NEXTPREVIOUS
SELECT STROBECLEAR
-
ZOOM
ANGLE
AMP VOL
8
SLOW+
VFPAUDIOSUB TITLEREPEAT
1/¡
XV-N5 DVD/SUPER VCD/VCD/CD PLAYER
4¢
8
Available :
Method 1 (from the remote control unit only)
Basic operations
Press 1 or ¡.
Each press of 1 or ¡ decreases or increases the playback speed. You can select from 2 times, 5 times, 10 times,
20 times and 60 times normal speed.
Pressing 3 returns the unit to normal playback.
Method 2
Hold down 4 or ¢.
Holding down ¢ advances playback rapidly, while holding down 4 reverses playback rapidly, at 5 times the
normal speed. Releasing the button returns the unit to normal playback.
NOTES
• During rapid playback, the sound will be muted except when playing an Audio CD. When using rapid playback with an Audio
CD, the sound will be played discontinuously.
• This function does not work for an MP3 disc.
To advance a still picture frame by frame
Available :
¶ While paused (still)
Press 8.
Each time you press 8, the still picture advances to the next frame.
Pressing 3 returns to normal playbac k.
18
Page 23

Basic operations
To playback in slow motion
Available :
You can play back video in slow-motion. You can select from 1/32 times, 1/16 times, 1/8 times, 1/4 times and 1/2 times
normal speed.
¶ During playback
Press 8, then use 1/¡.
To play forward slow motion, press ¡, and to play reverse slow motion (for DVD VIDEO discs only), press 1 .
First, the unit plays the slowest speed, and each time you press the button, the playback speed increases.
Pressing 3 returns to normal playback. Pressing 8 pauses slow motion playback.
NOTES
• The sound is muted during slow motion playback.
• Reverse slow motion playback is not possible for a Video CD and SVCD.
English
Basic operations
19
Page 24
Basic operations
To locate the beginning of the scene or song
You can locate the desired title or chapter (for DVD VIDEO), or track (for Audio CD/Video CD/SVCD) from which the unit
starts playbac k.
Numeric
buttons
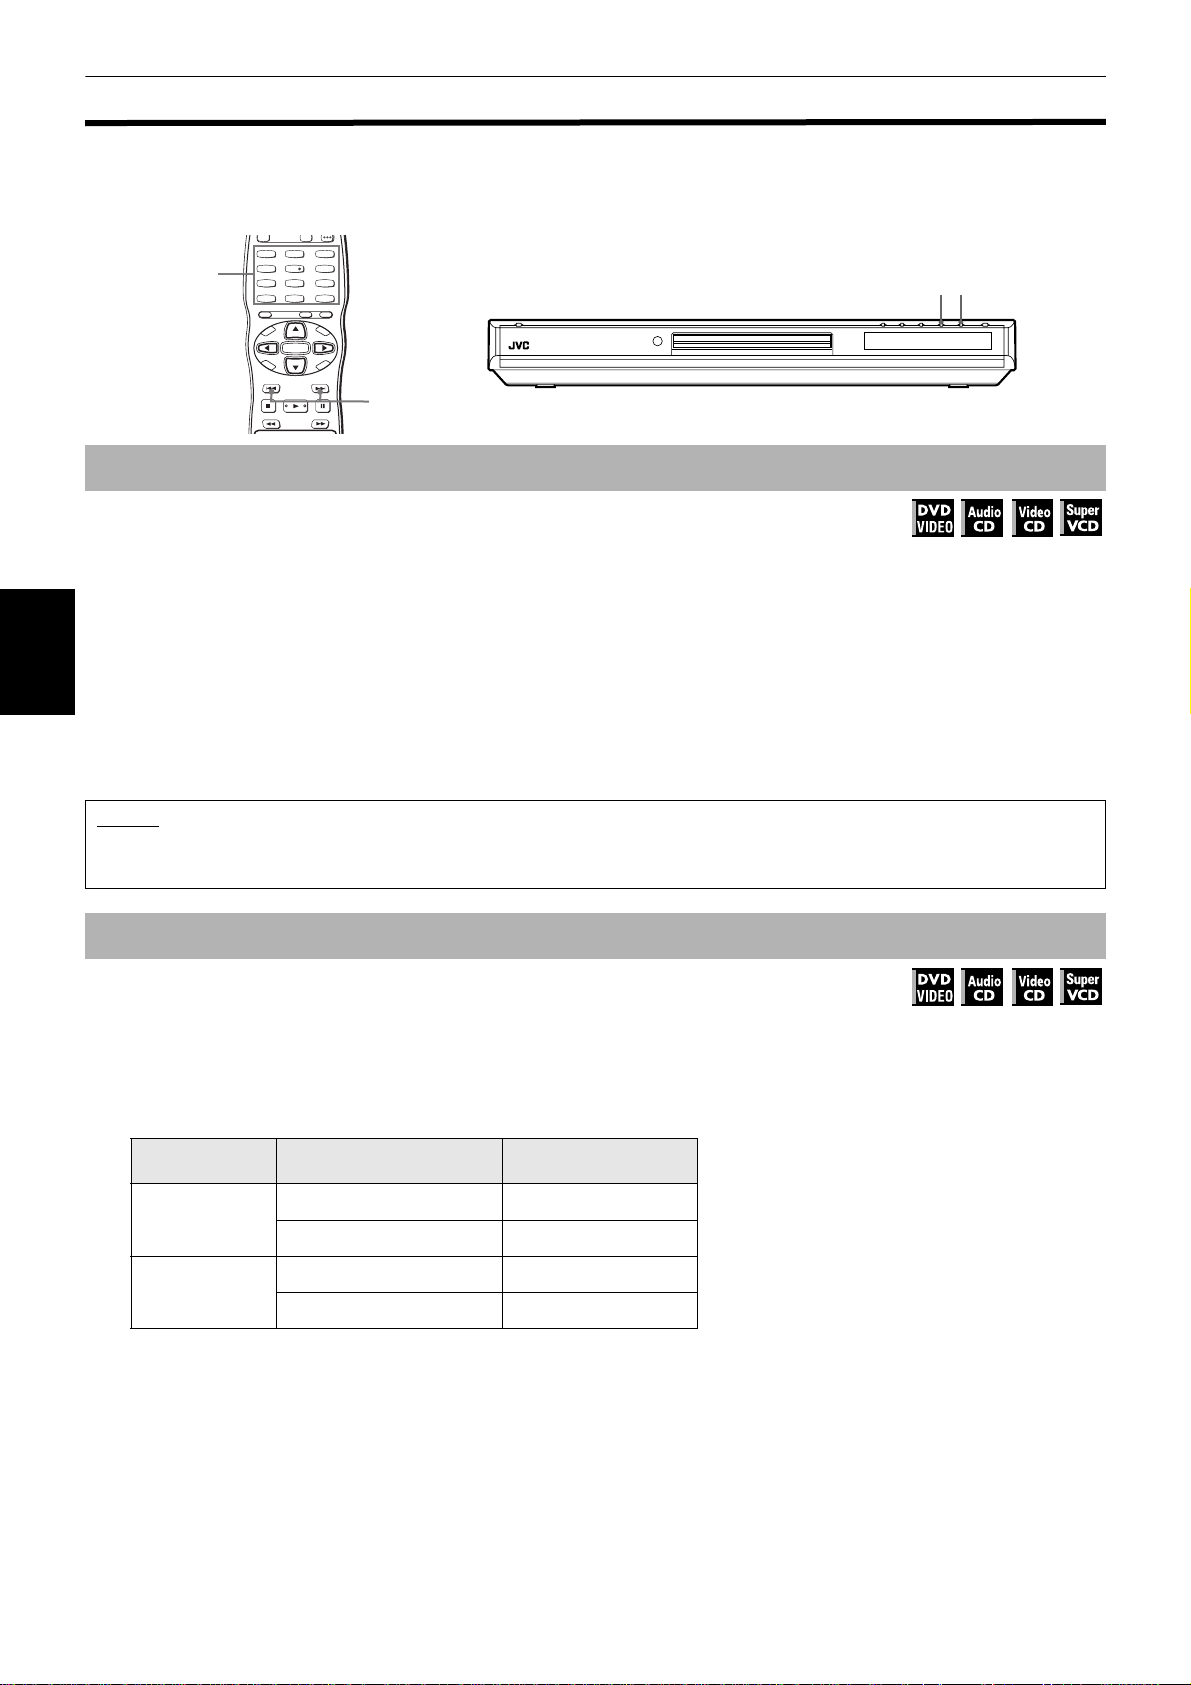
To locate a desired selection using 4 or ¢
¶ For DVD VIDEO: During playback
For Audio CD: During playback or while stopped
For Video CD/SVCD: During playback without PBC function
Press 4 or ¢.
With an Audio CD, Video CD or SVCD, pressing the but ton skips a track. With a DVD VIDEO disc, pressing the button
Basic operations
skips a chapter or title depending on the disc configuration.
The selection number appears in the display window on the front panel.
• To skip forward titles/chapters/tracks, press ¢ as many times as required.
• To skip to the beginning of the current track/title/chapter, press 4 once.
• To skip back titles/chapters/tracks, press 4 as many times as required.
TV22TV1
TV3
1
3
TV55TV4
TV6
4
6
TV88TV7
TV9
7
9
TV0
TV-/--
MUTING
0
10
+10
TITLE/
TV/VIDEO
GROUP
CANCEL
SUBTITLERETURN
U
M
N
E
E
CH
M
P
O
T
VOL
-
C
H
O
I
C
SLOW
N
U
+
VOL+
ENTER
N
CH
E
E
-
R
C
E
S
N
O
NEXTPREVIOUS
SELECT STROBECLEAR
-
4/¢
SLOW+
XV-N5 DVD/SUPER VCD/VCD/CD PLAYER
4¢
Available :
NOTES
• This function may not work with some DVD VIDEO discs.
• This function does not work during Video CD/SVCD playback with PBC function (see pages 5 and 23).
To locate a desired selection using the numeric buttons
.
¶ For DVD VIDEO/Audio CD: During playback or while stopped
For Video CD/SVCD: During playback without PBC function or while stopped
Use the numeric buttons to specify the number.
Depending on the disc type and the unit status, what is specified differs.
Unit status Disc type What is specified
DVD VIDEO title or chapter*
While stopped
Audio CD/ Video CD/SVCD track
DVD VIDEO chapter
During playback
Audio CD/ Video CD/SVCD track
* If a disc contains more than one title, a title is specified. If a disc contains only one title, a chapter is specified.
Available :
• To select a number between 1 and 10: Press the corresponding button for the number.
• To select a number higher than 10: Use the +10 button.
Examples:
To select 13: +10 →3
To select 34: +10 →+10 →+10 →4
To select 40: +10 →+10 →+10 →10
The unit starts playback from the beginning of the selection. The selected title, chapter or track number appears in
the display window on the front panel.
20
Page 25

Basic operations
NOTES
• You can also specify the desired title during DVD VIDEO playback. See page 24 for details.
• During DVD VIDEO playback, if a menu is shown on the TV screen, the numeric buttons may be used for selecting an item in the
menu.
• When appears on the TV screen:
The title, chapter or track you have selected is not contained in the disc.
• This function does not work during Video CD/SVCD playback with PBC function (see pages 5 and 23).
Other convenient functions
You can check the playback status, as well as change the brightness of the display window.
Also, you can move back the playback position 10 seconds from the current position.
TV DVD
STANDBY/ON
OPEN/
TV DVD
CLOSE
TV22TV1
TV3
1
3
TV55TV4
TV6
4
6
TV88TV7
TV9
7
9
TV0
TV-/--
MUTING
0
10
+10
TITLE/
TV/VIDEO
GROUP
CANCEL
SUBTITLERETURN
U
M
N
E
E
CH
5/∞
O
T
VOL
C
H
DIGEST
PHONIC
M
P
-
O
I
C
SLOW
3D
N
U
+
VOL+
ENTER
N
CH
E
ON SCREEN
E
-
R
C
E
S
N
O
NEXTPREVIOUS
SELECT STROBECLEAR
-
SLOW+
3
VFPAUDIOSUB TITLEREPEAT
ZOOM
ANGLE
AMP VOL
ANGLE
English
Basic operations
RM-SXV010U
REMOTE CONTROL
To check the playback status
Available :
You can see the current selection number (the title/chapter number for DVD VIDEO or track number for Audio CD/Video
CD/SVCD), time information (the track or chapter time while stopped, or the elapsed track or chapter time during
playback) and the transport status (stop, playback, pause etc.) on the TV screen.
¶ During playback or while stopped
Press ON SCREEN.
The playback status bar appears on the TV screen.
(for DVD VIDEO)
Transfer rate
8.5Mbps
(for Audio CD)
Current chapter
number
Current transport
status
TITLE 33 TOTAL 1:25:58CHAP 33
Current title number Current chapter
time
Current transport status
TIME 25:58TRACK 33
Current track number Disc elapsed
time
(for Video CD)
Current transport
status
TIME 25:58TRACK 33
Current track number Disc elapsed
time
(for SVCD)
Current transport
status
TIME 25:58TRACK 33
Current track number Disc elapsed
time
21
Page 26
Basic operations
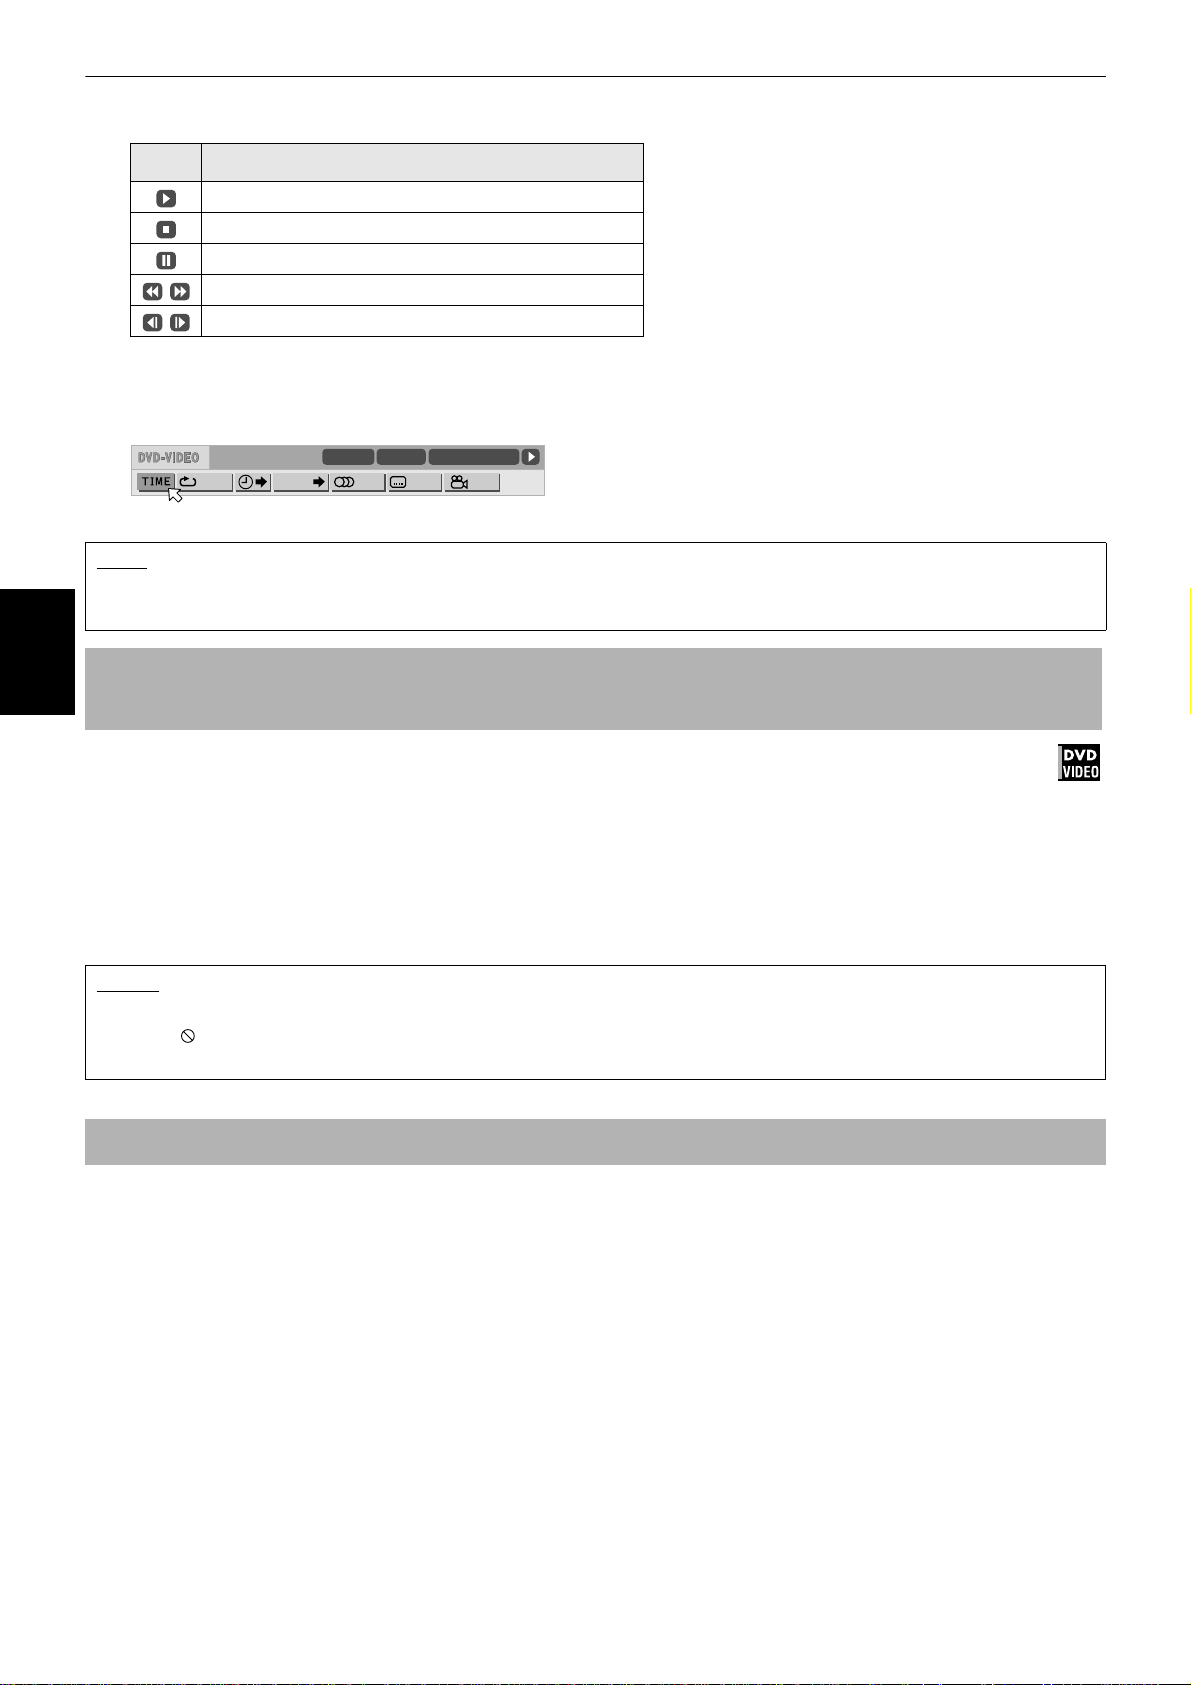
The indication on the rightmost end of the status bar shows the unit’s transport status as follows:
Icon Status
Playback mode.
Stop mode.
Pause mode.
Fast forward/backward playback mode.
Slow motion playback mode.
Note that pressing ON SCREEN again brings up the menu bar under the status bar, from which you can access
various functions.
(Example of the menu bar for DVD VIDEO)
CHAP.
TITLE 33 TOTAL 1:25:58CHAP 33
1/3 1/3OFF 1/5
8.5Mbps
See page 36 for details about the menu bar.
NOTE
• To dismiss the status bar:
Press ON SCREEN until the status bar is dismissed.
To move back the playback position during DVD VIDEO playback
Basic operations
[One touch replay function]
Available :
During playback of a DVD VIDEO disc, you can move back the playback position 10 seconds from the current position.
¶ During DVD VIDEO playback
Press 3.
The playback position moves back 10 seconds before the current position.
Note that this function works only within the same title, though it works between chapters.
If you press 3 within 10 seconds from the beginning of a title, playback starts from the beginning of the title.
NOTES
• This function works only with DVD VIDEO discs.
• When appears on the TV screen:
This function may not work with some DVD VIDEO discs.
To change the brightness of the display window
You can dim the brightness of the display window.
Press 5 or ∞ while holding down ANGLE.
You can select the display window brightness from four levels, or off. If the brightness is set to off, nothing will be
shown on the display.
22
Page 27
Advanced operations
This chapter describes operations for various advanced
functions of DVD VIDEO, Audio CD, Video CD and SVCD
discs. For MP3 and JPEG disc playback, see the separate
chapters beginning on pages 40 and 43.
NOTE
Make sure that the TV - DVD switch on
TV DVD
the remote control unit is set to "DVD"
when using the 5/∞/2/3, numeric and
TV/VIDEO - CANCEL buttons for
controlling the unit.
Playing from a specific
position on a disc
You can play a disc from the selected track, title or
chapter, or from the specified time.
To locate a desired scene from the DVD
menu
Available :
DVD VIDEO discs generally have their own menus which
show the disc contents. These menus contain various
items such as titles of movies, names of songs, or artist
information, and display them on the TV screen. Y ou can
locate a desired scene using the DVD menu.
TV DVD
STANDBY/ON
OPEN/
TV DVD
CLOSE
TV2
TV1
TV4
TV7
TV-/--
TOP
MENU
ENTER
P
O
T
VOL
C
H
O
¶ Whenever a DVD VIDEO disc is loaded
1 Press TOP MENU or MENU.
The menu appears on the TV screen.
TV3
2
1
3
TV5
TV6
5
4
6
TV8
TV9
8
7
9
TV0
MUTING
0
10
+10
TITLE/
TV/VIDEO
GROUP
CANCEL
SUBTITLERETURN
U
M
N
E
E
CH
M
-
I
C
E
N
U
+
ENTER
CH
-
N
O
NEXTPREVIOUS
SELECT STROBECLEAR
-
VOL+
R
C
S
N
E
E
MENU
5/∞/2/3
2 Use 5/∞/2/3 to select a desired item, then
press ENTER.
The unit starts playbac k of the selected item.
• With some discs, you can also select items by entering the
corresponding number using the numeric buttons, which
may cause the unit to automatically start playback.
NOTES
• When appears on the TV screen when you press TOP
MENU or MENU in step 1:
The disc does not have an appropriate menu listing the
titles.
• The MENU button does not work while stopped.
To locate a desired scene from the menu
of a Video CD/SVCD with PBC
Available :
Some Video CD/SVCD discs support the PBC function.
PBC is an abbreviation of "PlayBack Control." A Video
CD/SVCD disc recorded with PBC has its own menus,
such as a list of the songs of the disc. You can locate a
specific scene by using the PBC menu.
TV DVD
STANDBY/ON
OPEN/
TV DVD
CLOSE
TV22TV1
TV3
1
3
TV55TV4
TV6
4
6
TV88TV7
TV9
7
9
TV00TV-/--
MUTING
10
+10
TITLE/
TV/VIDEO
GROUP
CANCEL
RETURN
TOP
MENU
O
T
C
DIGEST
PHONIC
U
N
E
M
P
VOL
-
H
O
I
C
E
SLOW
3D
SUBTITLERETURN
CH
+
ENTER
CH
-
SELECT STROBECLEAR
-
ANGLE
RM-SXV010U
REMOTE CONTROL
AMP VOL
M
VOL+
C
S
N
O
NEXTPREVIOUS
SLOW+
VFPAUDIOSUB TITLEREPEAT
ZOOM
¶ When a Video CD/SVCD disc with PBC is stopped
Numeric
buttons
E
N
U
N
E
E
R
3
English
Advanced
operations
Example:
About DVD VIDEO menu
Normally, a DVD VIDEO disc which contains more than one title
may have a "title" menu which lists the titles. In this case, the
menu appears on the TV screen when you press the TOP MENU
button. Some DVD VIDEO discs may also have a dif ferent menu
which appears when the MENU button is pressed.
See the instructions of each D VD VIDEO disc for its par ticular
menu.
1 Press 3 or TOP MENU.
A disc menu appears on the TV screen (The PBC
function is activated).
Example:
"PBC" is indicated in the display window on the
front panel.
23
Page 28
Advanced operations
2 Use the numeric buttons to select the desired
item.
• To select a number between 1 and 10:
Press the corresponding button for the number.
• To select a number higher than 10:
Use the +10 button.
Examples:
To select 13: +10 →3
To select 34: +10 →+10 →+10 →4
To select 40: +10 →+10 →+10 →10
The unit starts playback of the selected item.
You can return to the menu by pressing the
RETURN button.
When something like "NEXT" or "PREVIOUS"
appears on the TV screen, the unit generally works
as follows:
• Pressing ¢ advances to the next page.
• Pressing 4 returns to the previous page.
* The method of the operation may be different on
different discs.
• If you want to play a PBC-compatible Video CD/SVCD disc
without activating the PBC function, start playback using
the numeric buttons instead of 3. (See page 20.)
• To activate the PBC function when a PBC-compatible Video
CD/SVCD disc is being played back without the PBC
function, do any of the following:
Advanced
operations
* Press TOP MENU or MENU.
* Press 7 to stop playback, then press 3.
To specify a desired title
Available :
While playing back a DVD VIDEO disc with more than
one title, you can specify a desired title to be played
using the numeric buttons.
TV DVD
STANDBY/ON
OPEN/
TV DVD
CLOSE
TV22TV1
TV3
1
3
TV55TV4
TITLE/
GROUP
¶ During playback
TV6
4
TV88TV7
TV9
7
TV0
TV-/--
MUTING
0
10
+10
TITLE/
TV/VIDEO
GROUP
CANCEL
SUBTITLERETURN
U
N
E
CH
M
+
P
O
T
VOL
-
ENTER
C
CH
H
O
-
I
C
E
S
N
O
NEXTPREVIOUS
SELECT STROBECLEAR
SLOW
-
SLOW+
Numeric
6
9
buttons
M
E
N
U
VOL+
N
E
E
R
C
1 Press TITLE/GROUP.
"--" is shown in the title display area of the display
window.
(Display window example)
2 Use the numeric buttons to specify a title to be
played.
• To select a number between 1 and 10:
Press the corresponding button for the number.
• To select a number higher than 10:
Use the +10 button.
Examples:
To select 13: +10 →3
To select 34: +10 →+10 →+10 →4
To select 40: +10 →+10 →+10 →10
The unit starts playback from the specified title.
NOTE
• This function may not work with some DVD VIDEO
discs.
To locate a desired position in the
current title or track [Time search]
Available :
You can play a disc from the desired position by
specifying the time from the beginning of the current
title (for DVD VIDEO), or the disc (for Audio CD/Video CD/
SVCD) using the time search function.
Note that some DVD VIDEO discs do not contain time
information, and the time search function cannot be
used.
TV2
TV1
TV4
TV7
TV-/--
2/3
ENTER
P
O
T
VOL
C
H
O
¶ For DVD VIDEO/Audio CD:
During playback or while stopped
¶ For Video CD/SVCD:
In any condition except Video CD/SVCD
playback with PBC
TV3
2
1
3
TV5
TV6
5
4
6
TV8
TV9
8
7
9
TV0
MUTING
0
10
+10
TITLE/
TV/VIDEO
GROUP
CANCEL
SUBTITLERETURN
U
M
N
E
E
CH
M
-
I
C
E
N
U
+
VOL+
ENTER
N
CH
E
E
-
R
C
S
N
O
NEXTPREVIOUS
Numeric
buttons
ON SCREEN
1 Press ON SCREEN twice.
The menu bar appears on the TV screen.
(See page 36 for details about menu bar.)
2 Use 2/3 to move to , then press
ENTER.
The pull-down menu for entering time appears
under the .
(Screen example for DVD VIDEO)
CHAP.
TITLE 33 TOTAL 1:25:58CHAP 33
1/3 1/3OFF 1/5
8.5Mbps
TIME _:__:__
24
Title display area Current chapter number
(Screen example for Audio CD)
TIME 25:58TRACK 33
OFF PROG. RND.
TIME __:__
Page 29
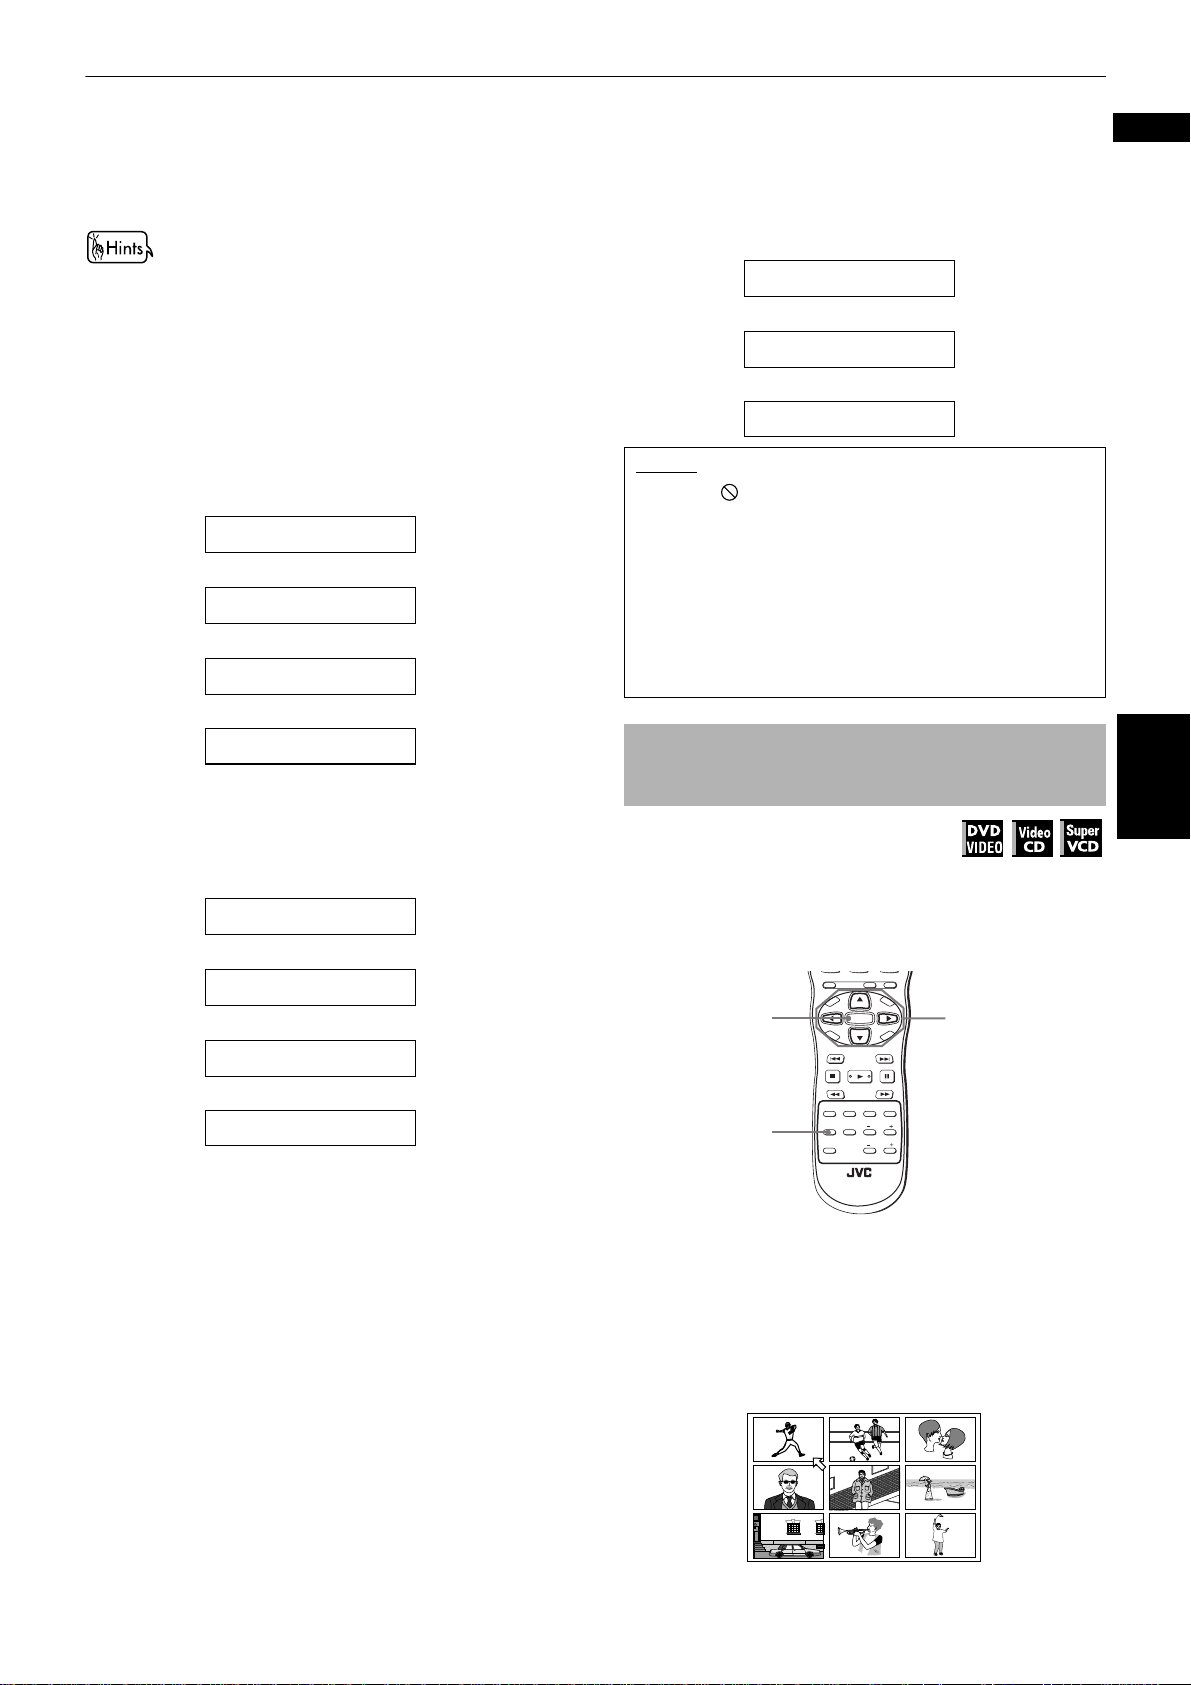
Advanced operations
3 Use the numeric buttons (0 to 10) to enter the
desired time.
The specified time is displayed in the pull-down
menu.
• "10" button works as "0" and "+10" button is not used with
this function.
• You can specify the time in hour/minute/second format for
DVD VIDEO discs, and in minute/second format for Audio
CD and Video CD/SVCD discs.
4 Press ENTER.
The unit starts playback from the specified time.
• Example (for DVD VIDEO)
To playback from 2(H):34(M):00(S)
TIME _ : _ _ : _ _
TIME 2 : _ _ : _ _
TIME 2 : 3 _ : _ _
→→
Press "2."
Press "3."
→
Press "4."
• To correct a mistake
Use 2 repeatedly to move bac k to the digit where you
entered a undesired numeral (the left most "-" digit),
and reenter the correct time.
(Example : changing "2:35:__" to "2:34:__.")
TIME 2 : 3 5 : _ _
→
Press 2.
TIME 2 : 3 _ : _ _
→
Press "4."
TIME 2 : 3 4 : _ _
NOTES
• When appears on the TV screen:
The time you have selected is not contained on the disc,
or the time search function does not work on the disc.
Also note that the time search function does not work
during Video CD/SVCD playback with the PBC function.
• To dismiss the menu bar:
Press ON SCREEN.
• The time search function cannot be used during
program playback.
English
TIME 2 : 3 4 : _ _
→
Press ENTER.
• Example (for Audio CD/Video CD/SVCD)
To playback from 23(M):40(S)
TIME _ _ : _ _
→→
Press "2."
TIME 2 _ : _ _
Press "3."
TIME 2 3 : _ _
→
Press "4."
TIME 2 3 : 4 _
→
Press ENTER.
You do not have to press "0" to enter the trailing zeros
(for the last two digits in the example above).
To locate a specific scene from the
display [DIGEST]
Available :
The unit can display the opening scene of each title or
chapter on a DVD VIDEO or each track of a Video CD/
SVCD. You can select a specific scene from those
displayed on the TV screen.
TITLE/
TV/VIDEO
GROUP
CANCEL
SUBTITLERETURN
U
M
N
E
E
CH
+
ENTER
CH
-
E
SELECT STROBECLEAR
-
ANGLE
RM-SXV010U
REMOTE CONTROL
AMP VOL
N
U
VOL+
C
S
N
O
NEXTPREVIOUS
SLOW+
VFPAUDIOSUB TITLEREPEAT
ZOOM
R
E
E
N
5/∞/2/3
M
P
O
T
VOL
ENTER
DIGEST
C
DIGEST
H
PHONIC
-
O
I
C
SLOW
3D
¶ For DVD VIDEO: During playbac k or while stopped
For Video CD/SVCD: In any condition except
Video CD/SVCD playback
with PBC
Advanced
operations
1 Press DIGEST.
Up to nine opening scenes are displayed.
25
Page 30
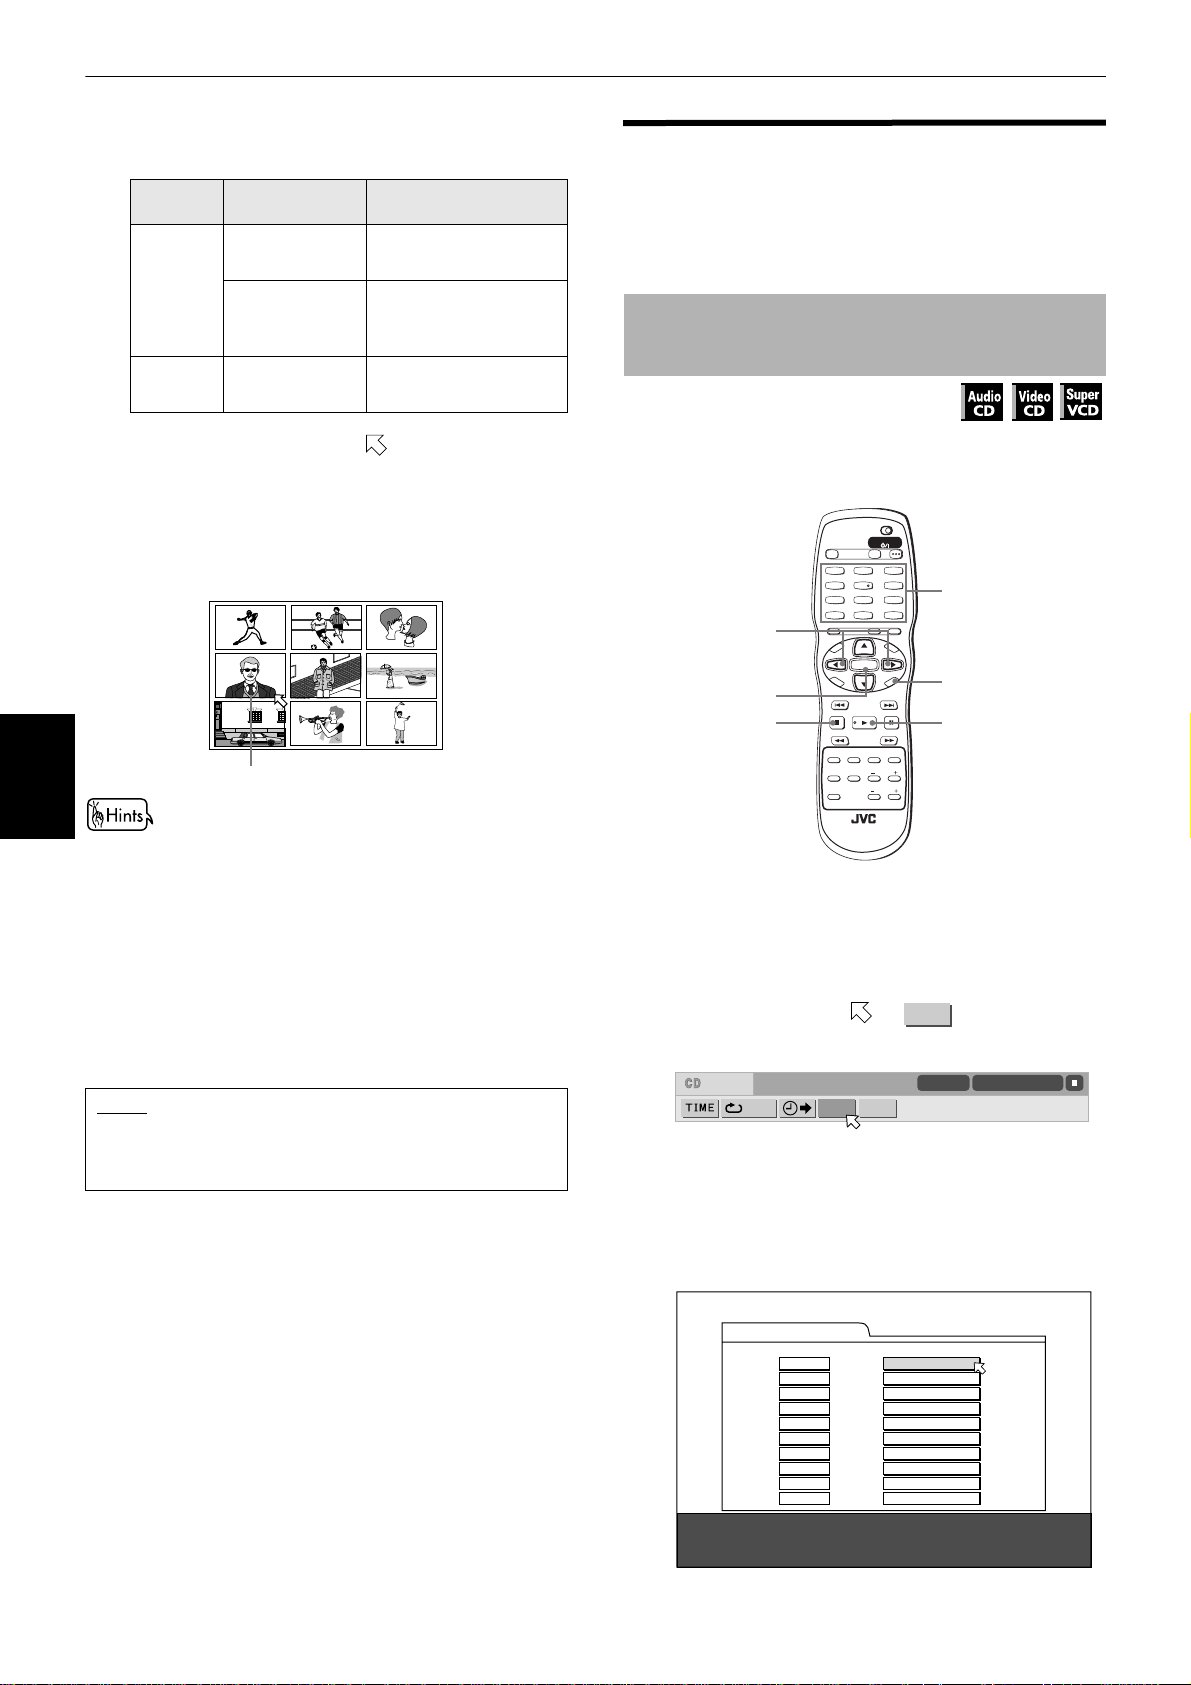
Advanced operations
Depending on the disc type and whether the disc is
being played back or not, the contents shown on
the TV screen differ.
Disc type Unit status What is displayed
While stopped The opening scene of
each title
DVD
VIDEO
During playback The opening scene of
each chapter in the
current title
Video CD/
SVCD
While stopped or
during playback
The opening scene of
each track
Changing the playback
order
Y ou can play trac ks on an Audio CD, V ideo CD or SV CD in
a specific order or in random order.
To playback in a specific order
[Program play]
Available :
Advanced
operations
2 Use 5/∞/2/3 to move to select the
desired scene.
If there are more than 9 scenes, the digest screen
will have more than one page. In this case, pressing
¢ advances to the next page, while pressing
4 returns to the previous page.
Selected scene
• When the lower right scene is selected, pressing 3
advances to the next page if available. Similarly, when the
upper left scene is selected, pressing 2 returns to the
previous page (if available).
• Depending on discs, it may take some time until all scenes
of the current page appear on the TV screen. If you want to
turn the page, you do not have to wait to press 4 or ¢
until all scenes appear.
3 Press ENTER.
The unit starts playback from the selected scene.
NOTE
• With some discs, depending on the contents, it may
take some time until all the scenes appear on the
screen.
By programming tracks, you can play up to 99 tracks in
any order. You may program the same track more than
once.
TV DVD
STANDBY/ON
OPEN/
TV DVD
CLOSE
TV22TV1
TV3
1
3
TV55TV4
TV6
4
6
TV9
9
+10
CANCEL
M
E
N
U
VOL+
N
E
E
R
C
S
VFPAUDIOSUB TITLEREPEAT
Numeric
buttons
ON SCREEN
3
2/3
ENTER
TV88TV7
7
TV0
TV-/--
MUTING
0
10
TITLE/
TV/VIDEO
GROUP
SUBTITLERETURN
U
N
E
CH
M
+
P
O
T
VOL
-
ENTER
C
CH
H
O
-
I
C
E
N
O
NEXTPREVIOUS
7
SLOW
DIGEST
3D
PHONIC
REMOTE CONTROL
SELECT STROBECLEAR
-
ANGLE
RM-SXV010U
SLOW+
ZOOM
AMP VOL
¶ While stopped
1 Press ON SCREEN twice.
The menu bar appears on the TV screen.
(See page 36 for details about menu bar.)
2 Use 2/3 to move to .
PROG.
(Screen example for Audio CD)
TIME 25:58TRACK 33
OFF PROG. RND.
3 Press ENTER.
26
The program table appears instead of the menu bar.
The PROGRAM indicator lights in the display
window on the front panel.
PROGRAM
No. TrackDisc
1 2
2 3
3 7
4 4
5 3
6 5
7 6
8
9
10
USE NUMERIC KEYS TO PROGRAM TRACKS.
CANCEL DELETES THE LAST STEP.
Total Program Time 00:00:00
7 DELETES ALL.
Page 31

Advanced operations
4 Specify tracks in the desired order using the
numeric buttons.
• To select a number between 1 and 10:
Press the corresponding button for the number.
• To select a number higher than 10:
Use the +10 button.
Examples:
To select 13: +10 →3
To select 34: +10 →+10 →+10 →4
To select 40: +10 →+10 →+10 →10
Up to 99 tracks can be programmed. You may
select the same track more than once.
The total program time is shown at the right top of
the program table.
The total program time
PROGRAM
No. TrackDisc
1 2 1
2 3 5
3 7 4
4 4 2
5 3 3
6 5 4
7 6 6
8
9
10
USE NUMERIC KEYS TO PROGRAM TRACKS.
CANCEL DELETES THE LAST STEP.
Total Program Time 00:25:12
7 DELETES ALL.
• To clear the program
While stopped and the program table is shown on the
TV screen, press 7.
All the programmed tracks are erased.
• To exit the program mode
After clearing all programmed tracks, press ON
SCREEN.
The program table is dismissed and the status bar
appears on the TV screen.
The PROGRAM indicator in the display window
disappears and the unit quits program playback
mode.
NOTES
• During program playback, you cannot edit the program
contents.
• During program playback, pressing ¢ skips to the
next selection of the program. Pressing 4 returns to
the beginning of the current selection.
• To dismiss the program table:
Press ON SCREEN. The program table is dismissed and
the status bar is shown.
• To dismiss the menu bar (and the status bar):
Press ON SCREEN.
To playback in random order
[Random play]
English
Selected track number
• If you specify a wrong track
Use 5/∞ to move to the wrong track, then
press TV/VIDEO - CANCEL. The track is erased
and the subsequent programmed tracks move up.
• To clear the program while programming
Press 7.
5 Press 3 to start program playback.
With a Video CD/SVCD disc, the program table is
automatically dismissed when the program
playback star ts.
With an Audio CD disc, the program table remains
on the TV screen during program playback.
However, pressing the ON SCREEN button brings
up the status bar.
When all of the programmed tracks have finished
playback, the unit stops and the program table
appears again.
Note that the program remains.
• To check the program contents
During playback, press 7. Playback stops and the
program table is shown.
When the unit is playing back an Audio CD and the
program table is not shown, you can bring up the
table by carrying out steps 1 to 3.
During Video CD/SVCD playback, you cannot see the
program table during playback.
Available :
You can play tracks on a disc in random order by using
the random function.
TV DVD
STANDBY/ON
OPEN/
TV DVD
CLOSE
TV22TV1
TV3
1
3
TV55TV4
TV6
4
6
TV88TV7
TV9
7
9
TV00TV-/--
MUTING
10
+10
TITLE/
TV/VIDEO
GROUP
CANCEL
2/3
ENTER
U
N
E
M
P
O
T
VOL
-
C
H
O
I
C
E
SLOW
DIGEST
3D
PHONIC
SUBTITLERETURN
CH
+
ENTER
CH
-
SELECT STROBECLEAR
-
ANGLE
RM-SXV010U
REMOTE CONTROL
AMP VOL
M
E
N
U
VOL+
N
ON SCREEN
E
E
R
C
S
N
O
NEXTPREVIOUS
SLOW+
VFPAUDIOSUB TITLEREPEAT
ZOOM
¶ While stopped
1 Press ON SCREEN twice.
The menu bar appears on the TV screen.
(See page 36 for details about menu bar.)
2 Use 2/3 to move to .
(Screen example for Audio CD)
OFF PROG. RND.
RND.
TIME 25:58TRACK 33
Advanced
operations
• To quit program playback
Press 7. Note that the program remains.
27
Page 32

Advanced operations
3 Press ENTER.
The unit starts random playback.
With a Video CD/SVCD disc, the menu bar is
automatically dismissed.
During random playback, the RANDOM indicator
lights in the display window on the front panel.
After playing all tracks of the disc, the unit stops the
disc and exits the random mode.
• The same track will not be played back more than once
during random play.
• During random playback, if you bring up the menu bar and
carry out steps 1 to 3 above, the unit cancels random
playback mode and continues playback from the current
selection in the recorded order.
• To stop and quit random playback
Press 7. The unit stops playback and exits the
random playback mode.
NOTE
• To dismiss the menu bar:
Press ON SCREEN.
Advanced
operations
Repeat playback
You can repeat playback of the current title/chapter (for
DVD VIDEO), or current/all trac ks (for Audio CD/V ideo CD/
SVCD).
You can also repeat playback of a desired part.
To repeat the current selection or all
tracks [Repeat playback]
Available :
SLOW
-
SLOW+
REPEAT
DIGEST
PHONIC
3D
¶ For DVD VIDEO: During playback
For Audio CD/Video CD/SVCD:
In any condition except Video CD/
SVCD playback with PBC
1 Press REPEAT.
Each time you press REPEAT, the repeat mode
cycles among All repeat, Repeat 1 and off.
The selected mode is reflected in icons displayed in
the front panel display window, as shown below.
If you press REPEA T while stopped, you need to
press 3 to start repeat playback.
REPEAT: Repeats the current title for DVD VIDEO
or all tracks for Audio CD/Video CD/
SVCD.
REPEAT1: Repeats the current chapter for DVD
VIDEO or the current track for Audio CD/
Video CD/SVCD.
No indication: The repeat mode is off.
ANGLE
RM-SXV010U
REMOTE CONTROL
VFPAUDIOSUB TITLEREPEAT
ZOOM
AMP VOL
(Display window)
Repeat mode indicators
A window which indicates the cur rent repeat mode
will be displayed on the TV screen.
The mode indication on the window is same as the
one on the menu bar (see pages 37 and 38).
(Repeat mode display window example)
CHAP.
• To stop repeat playback
Press 7.
When a DVD VIDEO disc is set, the unit stops playback
and quits the repeat mode.
When an Audio CD, Video CD or SVCD disc is set, the
unit stops playback but does not quit the repeat mode.
• To quit repeat playback
Press REPEA T until the repeat mode indicator goes of f
in the display window.
28
Page 33

Advanced operations
TV88TV7
TV9
NOTES
• You can also select the repeat mode via the menu bar.
See pages 37 and 38.
• When the program playback mode is active with an
Audio CD, Video CD or SVCD, the repeat mode changes in
the same manner.
Note that, however, in the " " mode the unit repeats all
the programmed tracks, instead of all tracks on the disc.
• During playback in the title/chapter/track repeat mode, if
you skip the title/chapter/track using 4/¢, etc., the
destination title/chapter/track is repeated.
• If appears when pressing REPEAT during DVD VIDEO
playback.
The disc content does not allow title or chapter repeat.
• Repeat playback function cannot be used during Video
CD/SVCD playback with PBC function.
To repeat a desired part
[A-B repeat playback]
Available :
7
9
TV0
TV-/--
MUTING
0
10
+10
TITLE/
TV/VIDEO
GROUP
CANCEL
SUBTITLERETURN
U
M
N
E
E
CH
N
U
+
VOL+
ENTER
CH
E
E
-
R
C
S
N
O
NEXTPREVIOUS
SELECT STROBECLEAR
-
N
5/∞/2/3
ON SCREEN
ENTER
M
P
O
T
VOL
-
C
H
O
I
C
E
¶ During playback except Video CD/SVCD playback
with PBC
1 Press ON SCREEN twice.
The menu bar appears on the TV screen.
(See page 36 for details about menu bar.)
2 Use 2/3 to move to , then press
ENTER.
The pull-down menu for repeat mode selection
appears under the .
• Audio CD/Video CD/SVCD
(Screen example for Audio CD)
TIME 25:58TRACK 33
PROG. RND.
A-B
Selected repeat mode
TRACK
ALL :
A-B :
current track repeat
:
all track repeat
repeats a desired part
(during playback only)
OFF
4 Press ENTER at the beginning of the part you
want to repeat (point A).
The pull-down menu disappears.
The repeat icon shows .
(Screen example for DVD VIDEO)
8.5Mbps
CHAP.
Repeat icon
A-
TITLE 33 TOTAL 1:25:58CHAP 33
1/3 1/3A- 1/5
5 Press ENTER at the end of the part you want
to repeat (point B).
The repeat icon show .
The unit locates "A" and starts repeat playback
between "A" and "B."
• To quit A-B repeat playback
Press ENTER. The A-B repeat mode turns off , while the
playback continues.
A-B
English
Advanced
operations
3 Use 5/∞ to select "A-B."
Depending on the disc type and unit’s status the
repeat mode changes as follows:
• During DVD VIDEO playback
8.5Mbps
A-B
Selected repeat mode
CHAPTER
:
TITLE :
A-B :
OFF
TITLE 33 TOTAL 1:25:58CHAP 33
CHAP.
1/3 1/31/5
current chapter repeat
current title repeat
repeats a desired part
(during playback only)
• Selecting "OFF" from the pull-down menu for repeat mode
selection, or pressing 4/¢ quits the A-B repeat mode
and continues playback.
• You can also stop and quit A-B repeat mode by pressing 7
NOTES
• The A and B points must be set in the same title/
chapter/track.
• To dismiss the menu bar:
Press ON SCREEN.
• If appears when pressing ENTER during DVD VIDEO
playback.
The disc content does not allow you to repeat the
selected part.
.
29
Page 34

Advanced operations
Changing the language,
sound and scene angle
2 Use 5/∞ or SUBTITLE to select the subtitle.
Each time you press 5/∞ or SUBTITLE, the subtitle
language changes.
See the following examples for subtitle selection.
With some DVD VIDEO discs, you can choose a desired
subtitle language and/or audio language/sound, as well
as a desired camera angle.
Similarly, you can choose a desired audio channel (or
channel combination) of a Video CD/SVCD disc, as well
as a subtitle channel of an SVCD disc.
To select the subtitle language
[SUBTITLE]
Available :
Some DVD VIDEO and SVCD discs for movies, guides,
etc. contain more than one subtitle language. You can
choose a desired one from them.
• At the beginning of the part where the subtitles are
recorded, appears on the TV screen (except when the
"ON SCREEN GUIDE" preference is set to "OFF"). See page
53 for details about "ON SCREEN GUIDE" preference.
TV DVD
STANDBY/ON
OPEN/
TV DVD
Advanced
operations
ENTER
SUB TITLE
CLOSE
TV22TV1
TV3
1
3
TV55TV4
TV6
4
6
TV88TV7
TV9
7
9
TV00TV-/--
MUTING
10
+10
TITLE/
TV/VIDEO
GROUP
CANCEL
SUBTITLERETURN
U
M
N
E
E
CH
M
P
O
T
VOL
-
C
H
O
I
C
SLOW
DIGEST
3D
PHONIC
N
U
+
VOL+
ENTER
N
CH
E
E
-
R
C
E
S
N
O
NEXTPREVIOUS
SELECT STROBECLEAR
-
SLOW+
VFPAUDIOSUB TITLEREPEAT
ZOOM
ANGLE
AMP VOL
• For DVD VIDEO
Pressing 5/∞ or SUBTITLE cycles through the
subtitles recorded on the disc.
Example:
1/3 ENGLISH
2/3 FRENCH
3/3 SPANISH
-/3 OFF
• For SVCD
An SVCD disc can have up to four subtitles.
Pressing 5/∞ cycles through those channels as
follows regardless of whether the subtitles are
recorded or not.
-/4 OFF
1/4
2/4
3/4
5/∞
4/4
3 Press ENTER.
Subtitles are displayed in the selected language.
The subtitle selection window is dismissed.
RM-SXV010U
REMOTE CONTROL
¶ During DVD VIDEO/SVCD playback
(except when the status bar is shown)
1 Press SUBTITLE.
The Subtitle selection window appears on the TV
screen.
1/3
ENGLISH
30
NOTES
• For DVD VIDEO, the selected language may be abbreviated
on the TV screen. See "Table of languages and their
abbreviations" on page 49.
• The Subtitle selection window will automatically
disappear if you do not change the subtitle for several
seconds.
• When appears on the TV screen (for DVD VIDEO
disc):
You cannot select the subtitle or no subtitle is recorded.
• You can also select the subtitle via the menu bar. See
pages 37 and 39.
Page 35

Advanced operations
To change the audio language or sound
[AUDIO]
Available :
The audio selection setting allows you to c hange the
audio language of a movie, or to listen to karaoke with or
without the vocal.
• At the beginning of the part where multiple audio tracks are
recorded, appears on the TV screen (except when the
"ON SCREEN GUIDE" preference is set to "OFF"). See page
53 for details about "ON SCREEN GUIDE" preference.
TV DVD
STANDBY/ON
OPEN/
TV DVD
CLOSE
TV22TV1
TV3
1
3
TV55TV4
TV6
4
6
TV88TV7
TV9
7
9
TV0
TV-/--
MUTING
0
10
+10
TITLE/
TV/VIDEO
GROUP
CANCEL
SUBTITLERETURN
U
M
N
E
E
CH
+
ENTER
CH
-
SELECT STROBECLEAR
-
ANGLE
RM-SXV010U
REMOTE CONTROL
AMP VOL
N
U
VOL+
N
E
E
R
C
S
N
O
NEXTPREVIOUS
SLOW+
VFPAUDIOSUB TITLEREPEAT
ZOOM
5/∞
AUDIO
ENTER
O
T
C
DIGEST
PHONIC
M
P
VOL
-
H
O
I
C
E
SLOW
3D
• For DVD VIDEO
Each time you press 5/∞ or AUDIO , the audio
language changes.
Example:
1/3 ENGLISH
2/3 FRENCH
3/3 SPANISH
• For Video CD/SVCD
Each time you press 5/∞ or AUDIO, the playback audio
changes as follows.
(for Video CD) (for SVCD)
ST (stereo)
L
R
ST1
ST2
L-1
R-1
L-2
R-2
English
Advanced
operations
¶ During playback
(except when the status bar is shown)
1 Press AUDIO.
The audio selection window appears on the TV
screen.
1/3
ENGLISH
2 Use 5/∞ or AUDIO to select the desired
audio.
Each time you press 5/∞ or AUDIO, the audio
changes.
See the following examples for audio selection.
3 Press ENTER.
You can hear the selected audio.
The audio selection window is dismissed.
NOTES
• For DVD VIDEO, the selected language may be abbreviated
on the TV screen. See "Table of languages and their
abbreviations" on page 49.
• The Audio selection window will automatically
disappear if you do not change the audio for several
seconds.
• When appears on the TV screen (for a DVD VIDEO
disc):
You cannot select the audio.
• If only one audio track is recorded, you cannot change
the audio selection.
• You can also select the audio via the menu bar. See
pages 37 and 39.
31
Page 36

Advanced operations
To select a scene angle of DVD VIDEO
[ANGLE]
Available :
Y ou can enjoy a variety of scene angles if the D VD VIDEO
disc contains "multi-angle" parts, where multiple
cameras were used to shoot the same scene from
different angles.
• At the beginning of a "multi-angle" part, appears on the
TV screen (except when the "ON SCREEN GUIDE"
preference is set to "OFF"). See page 53 for details about
"ON SCREEN GUIDE" preference.
TV DVD
STANDBY/ON
OPEN/
TV DVD
CLOSE
TV22TV1
TV3
1
3
TV55TV4
TV6
4
6
TV88TV7
TV9
7
9
TV00TV-/--
MUTING
10
+10
TITLE/
TV/VIDEO
GROUP
CANCEL
SUBTITLERETURN
U
M
N
E
E
CH
+
ENTER
CH
-
E
SELECT STROBECLEAR
-
ANGLE
RM-SXV010U
REMOTE CONTROL
AMP VOL
N
U
VOL+
5/∞/2/3
N
E
E
R
C
S
N
O
NEXTPREVIOUS
SLOW+
VFPAUDIOSUB TITLEREPEAT
ZOOM
3
Advanced
operations
ENTER
ANGLE
T
C
DIGEST
O
VOL
H
PHONIC
M
P
-
O
I
C
SLOW
3D
From the Angle selection window
¶ During DVD VIDEO playback
(except when the status bar is shown)
1 Press ANGLE.
The Angle selection window appears on the TV
screen.
3 Press ENTER.
You can see the picture from the selected angle.
The angle selection window is dismissed.
From the angle list
¶ During DVD VIDEO playback
1 Press and hold ANGLE for more than 1
second.
Up to nine camera angles recorded on a disc
appear on the TV screen.
The selected camera angle
2 Use 5/∞/2/3 to select the desired angle.
3 Press ENTER or 3.
The unit starts playbac k using the selected angle on
the full-sized screen.
NOTES
• The Angle selection window will automatically
disappear if you do not change the angle for several
seconds.
• When appears on the TV screen in step 1:
The current scene is not recorded from multiple angles.
• During the operation from the angle list display, audio is
muted.
• You can also select the angle via the menu bar. See
page 38.
1/3
1
2 Use ANGLE or 5/∞ to select the desired
angle.
Each time you press ANGLE or 5/∞, the angle
changes.
Example:
1/3
2/3
3/3
32
Page 37

Advanced operations
U
Special picture playback
and picture/sound effect
Y ou can view continuous still images, or z oom in or out of
the picture. Y ou can also adjust the picture c haracteristics, as
well as simulate surround sound using a stereo system.
To display continuous still pictures
[STROBE]
Available :
M
N
E
E
CH
+
ENTER
CH
-
E
SELECT STROBECLEAR
-
ANGLE
RM-SXV010U
REMOTE CONTROL
O
NEXTPREVIOUS
PROGRESSSIVE
ZOOM
AMP VOL
N
U
VOL+
N
E
E
R
C
S
N
SLOW+
VFPAUDIOSUB TITLEREPEAT
SCAN
8
M
P
O
T
VOL
-
C
H
O
I
C
SLOW
DIGEST
3D
PHONIC
¶ During playback
1 At the point where you want to begin viewing
continuous still images, press 8.
The unit pauses playback.
To zoom in or out pictures [ZOOM]
Available :
TV22TV1
TV3
1
3
TV55TV4
TV6
4
6
TV88TV7
TV9
7
9
TV0
TV-/--
MUTING
0
10
+10
TITLE/
TV/VIDEO
GROUP
CANCEL
SUBTITLERETURN
U
M
N
E
E
CH
+
ENTER
CH
-
SELECT STROBECLEAR
-
ANGLE
RM-SXV010U
REMOTE CONTROL
AMP VOL
N
U
VOL+
5/∞/2/3
N
E
E
R
C
S
N
O
NEXTPREVIOUS
SLOW+
VFPAUDIOSUB TITLEREPEAT
ZOOM
ZOOM +/–
M
P
O
T
VOL
-
C
H
O
I
C
E
SLOW
DIGEST
3D
PHONIC
¶ During playback or while paused
1 Press ZOOM + or –.
Pressing ZOOM + causes the unit to zoom in on the
image, and pressing ZOOM – causes the unit to
zoom out.
Each time you press ZOOM +, the magnification is
doubled (up to × 1024).
Each time you press ZOOM –, the magnification is
halved (down to × 1/8).
English
Advanced
operations
2 Press and hold 8 for more than 1 second.
Nine copies of the same frame (still images) will
appear on the TV screen.
You can advance these frames using the following
step.
3 Press 8 once.
The image in the middle of the top row shows the
next frame of video after the one on the upper left.
Each press of 8 advances the video by one frame.
Pressing 3 instead of 8 advances each frame at
normal playback speed with a time delay over the
whole nine pictures (while the sound is muted).
• To return to the normal screen
Press and hold 8 for more than 1 second.
Advanced frame
ZOOM x 4
At the top left of the screen, the information for the
current magnification appears for 5 seconds. While
zoomed in, an indication of the zoomed image
position also is displayed. The next step can be
used to move the image position.
2 Use 5/∞/2/3 to move the zoomed position.
If no button pressed for 5 seconds, the information
for the current magnification disappears.
To display the information, press ZOOM +/– or 5/∞/
2/3 again.
ZOOM x 4
NOTE
• If you press and hold 8 for more than 1 second during
playback, nine still pictures also appear but they
advance at normal playback speed (while the sound is
muted).
33
Page 38

Advanced operations
NOTES
• To return to normal playback.
Press ENTER.
• While zoomed, the picture may look coarse.
To adjust the picture character [VFP]
Available :
The VFP (Video Fine Processor) function allows you to
adjust the picture character according to the type of
programming, picture tone or personal preferences.
TV DVD
STANDBY/ON
OPEN/
TV DVD
CLOSE
TV22TV1
TV3
Advanced
operations
ENTER
1
4
7
TV-/--
10
M
P
O
T
VOL
C
H
O
I
SLOW
DIGEST
3D
PHONIC
SUBTITLERETURN
U
N
E
CH
+
-
ENTER
CH
-
C
E
-
ANGLE
RM-SXV010U
REMOTE CONTROL
3
TV55TV4
TV6
6
TV88TV7
TV9
9
TV0
MUTING
0
+10
TITLE/
TV/VIDEO
GROUP
CANCEL
M
E
N
U
VOL+
C
S
N
O
NEXTPREVIOUS
SELECT STROBECLEAR
SLOW+
VFPAUDIOSUB TITLEREPEAT
ZOOM
AMP VOL
R
E
N
E
5/∞/2/3
VFP
¶ During playback
1 Press VFP.
The VFP mode selection window appears on the TV
screen.
2 Use 2/3 to select the desired preset.
Each time you press the button, the VFP mode
changes as follows.
Set the video type most suitable to the current
program or the room conditions.
Selected preset
NORMAL
3 To define a user setting, select a parameter to
be edited using 5/∞ from the following.
• GAMMA
Controls the brightness of a shaded portion
without changing the brightness of the entire
picture.
This control is optimum when you adjust the
pictures of software which generates subdued
black in a bright room.
The setting range is +4 to –4.
• BRIGHTNESS
Controls the brightness of the screen.
The setting range is +16 to –16.
• CONTRAST
Controls the contrast of the screen.
The setting range is +16 to –16.
• S ATU R ATI O N
Controls the color depth of the screen.
The setting range is +16 to –16.
• TINT
Controls the tint of the screen.
Use the appearance of a natural skin tone as a
guideline.
The setting range is +16 to –16.
• SHARPNESS
Controls the sharpness of the screen.
The setting range is +3 to 0.
•Y DELAY
Controls the color gap of the screen.
The setting range is +2 to –2.
4 Press ENTER.
A window for setting parameters appears instead
of the VFP mode selection window.
SATURATION
4
+ 5
USER 1
GAMMA
+ 4
BRIGHTNESS
+ 4
CONTRAST
+13
SATURATION
+13
TINT
+13
SHARPNESS
+ 4
Y DELAY
+ 2
Parameter
CINEMA
USER 1
USER 2
"NORMAL" is suitable for watching TV in a general
room. "CINEMA" is suitable for watching a movie
software in a room with suppressed light.
They are factory presets and you cannot change
parameters for them.
If you select "USER 1" or "USER 2," you can adjust
parameters that affect the picture character and
store the settings as a user preset. See the next
step.
34
Selected parameter
5 Adjust the level of the parameter using 5/∞.
The higher value enhances the effect.
6 Press ENTER.
The parameter is set and the VFP mode selection
window appears again.
Repeat steps 3 to 6 if you want to set other
parameters.
Page 39

Advanced operations
NOTES
• The number of setting steps varies for different
parameters.
• To dismiss the VFP mode selection window:
Press VFP.
• The window for VFP mode selection and parameter
setting disappears if no operation is made for about 10
seconds.
To simulate surround sound
[3D PHONIC]
Available :
Using the 3D PHONIC function, you can get a simulated
surround effect from your stereo system.
TV DVD
STANDBY/ON
OPEN/
TV DVD
CLOSE
TV22TV1
TV3
1
3
TV55TV4
TV6
4
6
TV88TV7
TV9
7
9
TV0
TV-/--
MUTING
0
10
+10
TITLE/
TV/VIDEO
GROUP
CANCEL
SUBTITLERETURN
U
M
N
E
E
CH
+
ENTER
CH
-
SELECT STROBECLEAR
-
ANGLE
RM-SXV010U
REMOTE CONTROL
AMP VOL
N
U
VOL+
C
S
N
O
NEXTPREVIOUS
SLOW+
VFPAUDIOSUB TITLEREPEAT
ZOOM
E
R
N
E
5/∞/2/3
3D PHONIC
M
P
O
T
VOL
-
C
H
O
I
C
E
SLOW
DIGEST
3D
PHONIC
3 Press 5/∞ to adjust the effect level.
You can set the effect level from "1" to "5."
The higher value enhances the effect.
ACTION
+ 5
4
.
NOTES
• To dismiss the 3D PHONIC window:
Press 3D PHONIC.
• The 3D PHONIC window disappears if no operation is
made for about 10 seconds.
• The 3D PHONIC function works correctly only when
playing back a DVD VIDEO disc recorded with Dolby
Digital. Pressing the 3D PHONIC button will have no
effect with other content.
• When playing back a DVD VIDEO disc recorded with
Dolby Digital that does not contain the rear signal, you
can change the 3D PHONIC setting, but you will not be
able to achieve a correct 3D effect.
• The 3D PHONIC function does not affect the Dolby
Digital bitstream signal from the DIGITAL OUT jack.
• When the 3D PHONIC function is active, the "ANALOG
DOWN MIX" and "D. RANGE COMPRESSION" settings
in the "AUDIO" setting display are disabled.
Effect level
English
Advanced
operations
¶ During playback
1 Press 3D PHONIC.
The 3D PHONIC window appears on the TV screen.
2 Select the desired mode by using 2/3.
Each time you press the button, the 3D PHONIC
mode changes as follows:
ACTION
DRAMA
ACTION
+ 5
4
THEATER
Selected effect mode
NONE
•ACTION
Suitable for action movies and sports programs
in which the sound source moves.
•DRAMA
Natural and warm sound. You can enjoy movies
in a relaxed mood.
• THEATER
You can enjoy sound effects like in a major
theater in Hollywood.
35
Page 40

Advanced operations
Menu bar functions
This section describes the functions you can perform via
the menu bar.
The available menu bar functions differ depending on
the disc type.
To bring up the menu bar
TV DVD
STANDBY/ON
OPEN/
TV DVD
CLOSE
TV22TV1
TV3
1
3
TV55TV4
TV6
4
6
TV88TV7
TV9
7
9
TV0
TV-/--
MUTING
0
10
+10
TITLE/
TV/VIDEO
GROUP
CANCEL
SUBTITLERETURN
U
M
N
E
E
CH
+
ENTER
CH
-
E
O
NEXTPREVIOUS
SELECT STROBECLEAR
-
ZOOM
ANGLE
AMP VOL
TITLE 33 TOTAL 1:25:58CHAP 33
TITLE 33 TOTAL 1:25:58CHAP 33
N
U
VOL+
N
E
E
R
C
S
N
SLOW+
VFPAUDIOSUB TITLEREPEAT
1/3 1/3OFF 1/5
ON SCREEN
¶ When a disc is inserted
1 Press ON SCREEN.
A status bar for the type of disc loaded will appear
on the TV screen.
Advanced
operations
See page 21 about the status bar.
(Example of the status bar for DVD VIDEO)
2 Press ON SCREEN again.
A menu bar for the type of disc loaded will appear
together with the status bar. The menu bar includes
some icons which indicate their functions.
(for DVD VIDEO)
8.5Mbps
8.5Mbps
M
P
O
T
VOL
-
C
H
O
I
C
SLOW
DIGEST
3D
PHONIC
CHAP.
Basic operation procedure
TV DVD
STANDBY/ON
OPEN/
TV DVD
CLOSE
TV2
ENTER
T
C
DIGEST
O
VOL
H
PHONIC
TV1
TV4
TV7
TV-/--
P
O
1
4
7
10
SUBTITLERETURN
U
N
E
CH
M
+
-
CH
-
I
C
E
-
SLOW
ANGLE
3D
RM-SXV010U
REMOTE CONTROL
ENTER
SELECT STROBECLEAR
TV3
2
3
TV5
TV6
5
6
TV8
TV9
8
9
TV0
MUTING
0
+10
TITLE/
TV/VIDEO
GROUP
CANCEL
M
E
N
U
VOL+
N
E
E
R
C
S
N
O
NEXTPREVIOUS
SLOW+
VFPAUDIOSUB TITLEREPEAT
ZOOM
AMP VOL
Numeric
buttons
2/3
1 Use 2/3 to select the icon you want to work
with.
The selected icon is pointed to by .
2 Press ENTER.
With many icons, an appropriate pull-down
window appears, however, there are some
exceptions.
• See the following pages for details about each
function.
• Note that some functions are not available during
playback. (You cannot move
icon when it is not available.)
NOTES
• When appears on the TV screen:
You cannot use the selected function because of disc
contents.
• A mark or text on the menu icon for the function or
mode currently selected is shown in blue.
to the associated
(for Audio CD)
OFF PROG. RND.
(for Video CD)
OFF
(for SVCD)
OFF
PROG. RND.
NOTE
• To dismiss the menu bar (and status bar):
Press ON SCREEN.
36
STPROG. RND.
ST1
TIME 25:58TRACK 33
TIME 25:58TRACK 33
TIME 25:58TRACK 33
-/4
Page 41

Advanced operations
Menu bar functions for DVD VIDEO
The following table shows the menu bar
functions available for DVD VIDEO.
Note that, in the description of the
operation column, we assume the
associated icon is selected.
• If a disc has only one title and one
chapter, "TOTAL" and "TIME" show
the same value.
• If you select "OFF" during repeat
playback, the unit continues
playback without repeating.
• For information on subsequent
operations for A-B repeat, see page
29.
• The "10" and "+10" buttons are not
used in this function.
• You can also locate a desired
chapter directly by specifying the
chapter number using the numeric
buttons during playback. See page
20.
• For DVD VIDEO, the selected
language may be abbreviated on
the TV screen. See "Table of
languages and their abbreviations"
on page 49.
CHAP.
4
TITLE 33 TOTAL 1:25:58CHAP 33
1/3 1/3OFF 1/5
6
5
Menu icons
7
8.5Mbps
213
Selected Icon Operation Note
1
Time mode selection
(During playback only)
Selects the time mode shown in
the display window on the front
panel and in the status bar.
2
Repeat mode
(During playback only)
Selects the repeat mode.
3
Time search
Specifies a time from the
beginning of the current title as
the point from which to begin
playback.
CHAP.
4
Chapter search
(During playback only)
Specifies a desired chapter to be
played back from.
5
Audio selection
(During playback only)
Selects the audio language or
sound track.
6
Subtitle selection
(During playback only)
Selects the subtitle language.
Press ENTER to select the time mode from the following.
TOTAL T.REM TIME REM Return to
initial
• TOTAL: Current title elapsed time
• T.REM: Current title remaining time
• TIME: Current chapter elapsed time
• REM: Current chapter remaining time
1 Press ENTER to open the pull-down window.
2 Use 5/∞ to select the repeat mode from the
following.
CHAPTER j TITLE j A-B j OFF
• CHAPTER: Current chapter repeat
• TITLE: Current title repeat
• A-B: Repeats a desired part (A-B repeat)
3 Press ENTER to make the selected repeat
function active.
(See pages 28 and 29 for details about repeat
function.)
1 Press ENTER to open the pull-down window.
2 Use numeric buttons to enter a desired time.
3 Press ENTER to begin playback from the
specified time.
(See page 24 for details about the time search.)
1 Press ENTER to open the pull-down window.
2 Use numeric buttons to enter a desired chapter
number.
• For example, to enter "12," press "1" then "2."
3 Press ENTER to begin playback from the
specified chapter.
• When the chapter number is incorrect:
Overwrite the incorrect number with the correct
number.
1 Press ENTER to open the pull-down window.
2 Use 5/∞ to select a desired audio language or
sound track.
Example:
1/3 ENGLISH j 2/3 FRENCH j 3/3 SPANISH
3 Press ENTER to begin playback with the
selected audio.
(See page 31 for details about audio selection.)
1 Press ENTER to open the pull-down window.
2 Use 5/∞ to select a desired subtitle language.
Example:
1/3 ENGLISH j 2/3 FRENCH j 3/3 SPANISH j
-/3 OFF
3 Press ENTER to begin playback with the
selected subtitle.
(See page 30 for details about subtitle selection.)
English
Advanced
operations
37
Page 42

Advanced operations
Selected Icon Operation Note
7
Angle selection
(during playback only)
Selects a desired scene angle in a
multi-angle part.
1 Press ENTER to open the pull-down window.
2 Use 5/∞ to select a scene angle.
Example:
1/3 j 2/3 j 3/3
3 Press ENTER to begin playback with the
selected scene angle.
(See page 32 for details about angle selection.)
Menu bar functions for Audio CD/Video CD/SVCD
TIME 25:58TRACK 33
OFF PROG. RND.
213
OFF
213
OFF
213
4
4
PROG. RND.
4
5
5
5
6
6
STPROG. RND.
ST1
TIME 25:58TRACK 33
TIME 25:58TRACK 33
-/4
7
Menu icons
Menu icons
Menu icons
The following table shows the menu bar
functions available for Audio CD/Video CD/
SVCD.
Note that, in the description of the
operation column, we assume the
associated icon is selected.
Selected Icon Operation Note
1
Advanced
operations
Time mode selection
Selects the time mode shown in
the display window on the front
panel and in the status bar.
2
Repeat mode
Selects the repeat mode.
3
Time search
(Except during Video CD/SVCD
playback with PBC)
Specifies a time from the
beginning of the current title as
the point from which to begin
playback.
PROG.
4
Program
(While stopped only)
Specifies the playback order of
tracks.
Press ENTER to select the time mode among the
followings.
TIME REM TOTAL T.REM Return to
initial
• TIME: Current track elapsed time
• REM: Current track remaining time
• TOTAL: Disc elapsed time
• T.REM: Disc remaining time
1 Press ENTER to open the pull-down window.
2Use 5/∞ to select the repeat mode from the
following.
OFF j TRACK j ALL j A-B j OFF
• TRACK: Current track repeat
• ALL: All track repeat
• A-B: Repeats a desired part (A-B repeat)
3 Press ENTER to make the selected repeat
function active.
(See pages 28 and 29 for details about repeat
function.)
1 Press ENTER to open the pull-down window.
2 Use numeric buttons to enter a desired time.
3 Press ENTER to begin playback from the
specified time.
(See page 24 for details about the time search.)
1 Press ENTER to bring up the program table.
2 Specify tracks in the desired order using the
numeric buttons.
3 Press 3 to start program playback.
(See page 26 for details about the program.)
• When you have selected "REM" and
the disc is stopped, you can change
the track by pressing
• While the disc is stopped, "REM"
shows the total time of the current
track, and "T.REM" shows the total
time of the disc.
• If you select "OFF" during repeat
playback, the unit continues
playback without repeating.
• For information on subsequent
operations for A-B repeat, see page
29.
• This function cannot be used
during program playback.
4 or ¢.
38
Page 43

Advanced operations
Selected Icon Operation Note
5
RND.
Random
(While stopped only)
Activates random playback.
6
Audio selection
(During Video CD/SVCD playback
only)
Selects the audio channel(s).
7
Subtitle selection
(During SVCD playback only)
Selects the subtitle.
1 Press ENTER to activate random playback.
(See page 27 for details about random.)
1 Press ENTER to open the pull-down window.
2Use 5/∞ to select a desired audio channel(s).
3 Press ENTER to playback with the selected
audio channel(s).
(See page 31 for details about audio selection.)
1 Press ENTER to open the pull-down window.
2Use 5/∞ to select a desired subtitle.
3 Press ENTER to begin playback with the
selected subtitle.
(See page 30 for details about subtitle selection.)
English
Advanced
operations
39
Page 44

MP3 disc playback
010 +10
The unit can play back MP3 files on a personally
recorded CD-R/RW disc or commercial CD. We refer to a
disc that contains MP3 file as an "MP3 disc" in this
manual.
Though functions available with MP3 discs are limited,
operations for the available functions are similar to those
for Audio CD discs.
Note that if a disc contains both of MP3 and JPEG files,
you can only play back files of the type selected by the
MP3/JPEG setting in the PICTURE preference display
(see page 51).
What is MP3?
"MP3" stands for "MPEG Audio Layer-3," and is a part
of the MPEG standard. It can store high quality stereo
audio using very little space by only saving the
audible sounds and discarding the sounds your ears
won’t pick up. A CD can store up to around 1 0 hours of
MP3 audio, which is nearly10 times as much as an
Audio CD.
NOTE
Make sure that the TV - DVD switch on
TV DVD
the remote control unit is set to "DVD"
when using the 5/∞/2/3 and numeric
buttons for controlling the unit.
NOTES
• The unit does not support "packet writing" discs.
• Some tracks on an MP3 disc are skipped and may not be
played back normally because of the disc configuration or
characteristics determined by the writing (encoding)
software and hardware used for recording. Such
symptoms may occur regardless of whether using a disc
you recorded or using a commercially available disc.
• The unit does not support the ID3 tag.
• If the disc is recorded with multiple sessions, the unit
supports up to five sessions.
• Some discs may not play due to disc characteristics or
recording conditions.
• Programmed and random playback functions do not work
with MP3 discs.
• The unit only can play back Tracks with the following file
extensions; ".MP3," ".Mp3," ".mp3" and ".mP3."
• Time required for reading the disc contents may vary for
defferent discs, depending on the numbers of Groups
(folders) and Tracks (files) recorded, etc.
• While an MP3 disc is loaded, you cannot bring up any
preference display (see page 48).
Operations
About MP3 discs
On an MP3 disc, each song is recorded as a file. Files are
sometimes grouped into folders by artists, album,
category, etc. F o lders can exist within other folders,
creating hierarchical layers of folders. If you are familiar
with personal computers, the hierarchical file and folder
structure of an MP3 disc will be familiar to you as well.
This unit simplifies the hierarchical structure of a disc
and manages files and folders using "Tracks" and
playback
MP3 disc
"Groups," in the following manner.
• Each file is regarded as a Track.
• A folder which has one or more files (Tracks) is
regarded as a Group.
• A folder which does not directly contain any files is
ignored.
• Files which do not belong to any folder are grouped
into "Group 1."
• The unit recognizes up to 150 Trac ks per Group, and up
to 99 Groups per disc. It ignores those exceeding the
maximum numbers and cannot play them back. If
there are files other than MP3 files, they also count
against the 150-file total.
Group 1
Track 1
Group 1’
up to 150 Tracks per Group
NOTES for making your own MP3 disc
using a CD-R/CD-RW disc:
• Select "ISO 9660" as the disc format.
• Finalize the disc after completing recording.
• We recommend you record your material at a 44.1 kHz
sampling rate, using the 128 kbps data transfer rate.
Group 2
up to 99 Groups
per disc
Basic operations
TITLE/
TV/VIDEO
GROUP
CANCEL
SUBTITLERETURN
U
M
N
E
E
CH
O
T
C
DIGEST
PHONIC
M
P
VOL
-
H
O
I
C
E
SLOW
3D
N
U
+
VOL+
ENTER
N
CH
E
E
-
R
C
S
N
O
NEXTPREVIOUS
SELECT STROBECLEAR
-
SLOW+
VFPAUDIOSUB TITLEREPEAT
ZOOM
ANGLE
AMP VOL
The following table shows the basic functions of the
basic control buttons.
Button Functions
ENTER
3
7
8
4/¢
Starts playback while stopped.
Starts playback while stopped or
paused.
Stops playback.
Pauses playback.
Skips back or forward a Track in the
Group* during playback.
Selects the previous or next Track in the
Group* while stopped.
*You can skip a Track across a Group.
• If you press 3 during playback, or press 7 to stop
playback followed by 3, the unit starts playback from
the beginning of the current track.
• The 5/∞ buttons work the same as the 4/¢
buttons.
Available :
Basic control
buttons
40
Page 45

MP3 disc playback
NOTES
• The current Group and Track number are shown on the
display window in the following manner.
Current Group
number
Current T rack
number
Current track
elapsed time
• You cannot advance or reverse playback of an MP3 disc
rapidly.
• You cannot see any other time information but the
current track elapsed time.
Selecting the desired Group
and Track
Available :
When loading an MP3 disc, after the disc contents are
read, the MP3 CONTROL display automatically appears
on the TV screen.
MP3 CONTROL
Group : 01 / 10
spring
sumer
fall
winter
sea
mountain
camp
picnic
skiing
flower
Y ou can specify the desired Group/Track from the display
using the following procedure.
Track : 01 / 06 (Total 28)
begonia.mp3
german chamomile.mp3
kiwi fruit.mp3
orchard grass.mp3
petunia.mp3
north pole.mp3
2 Move the bar to a desired Group using 5/∞.
On the right column, Tracks in the selected Group
are shown.
When selecting a Group, Track 1 is initially selected
(highlighted).
3 Select a desired Track using 4/¢, then
press ENTER or 3.
or
Use the numeric buttons to directly specify a
desired Track number.
• To select a number between 1 and 10:
Press the corresponding button for the number.
• To select a number higher than 10:
Use the +10 button.
Examples:
To select 13: +10 →3
To select 34: +10 →+10 →+10 →4
To select 40: +10 →+10 →+10 →10
The unit starts playbac k from the selected Track.
In the MP3 CONTROL display and the display window
on the front panel, you can see the current Group and
Track numbers, as well as Track elapsed time.
Current Track elapsed time
MP3 CONTROL
Group : 01 / 10
spring
sumer
fall
winter
sea
mountain
camp
picnic
skiing
flower
Time : 00:03:08
Track : 01 / 06 (Total 28)
begonia.mp3
german chamomile.mp3
kiwi fruit.mp3
orchard grass.mp3
petunia.mp3
north pole.mp3
English
English
English
MP3 disc
playback
TV DVD
STANDBY/ON
OPEN/
TV DVD
CLOSE
TV22TV1
TV3
1
3
TV55TV4
5/∞/2/3
4/¢
4
7
TV-/--
10
N
E
M
P
O
T
VOL
-
C
H
O
I
C
E
SLOW
DIGEST
3D
PHONIC
TV88TV7
TV0
0
SUBTITLERETURN
U
CH
+
ENTER
CH
-
SELECT STROBECLEAR
-
ANGLE
RM-SXV010U
REMOTE CONTROL
TV6
6
TV9
9
MUTING
+10
TITLE/
TV/VIDEO
GROUP
CANCEL
M
E
N
VOL+
E
R
C
S
N
O
NEXTPREVIOUS
SLOW+
VFPAUDIOSUBTITLEREPEAT
ZOOM
AMP VOL
Numeric
buttons
U
ENTER
N
E
3
¶ When the MP3 CONTROL display is shown.
1 Make sure that the black (cursor) bar is in the
left (Group) column.
If it is in the right column, press 2 to move it to the
left column.
Group
column
T rac k column of the
current Group
Selected
Track
• You can also select a desired Track by pressing 3 to move
the black bar to the right (Track) column then using
5/∞.
NOTES
• If a MP3 file name includes any 2-byte character, the unit
may not show the file name correctly.
• Only MP3 files are shown on the MP3 CONTROL display.
• The order of Groups/Tracks shown in the MP3
CONTROL display may differ from the order shown on
your personal computer when you set the disc on your
computer.
41
Page 46

MP3 disc playback
Direct selection
Available :
Y ou can select a desired Group directly by specifying the
Group number.
TV DVD
STANDBY/ON
OPEN/
TV DVD
CLOSE
TV2
TV1
TV3
2
1
TV4
4
TV7
7
TV-/--
10
N
E
M
P
O
T
VOL
-
C
H
O
I
C
E
SLOW
DIGEST
3D
PHONIC
TV5
5
TV8
8
TV0
0
SUBTITLERETURN
U
CH
+
ENTER
CH
-
SELECT STROBECLEAR
-
ANGLE
RM-SXV010U
REMOTE CONTROL
3
TV6
6
TV9
9
MUTING
+10
TITLE/
TV/VIDEO
GROUP
CANCEL
M
E
N
VOL+
E
R
C
S
N
O
NEXTPREVIOUS
SLOW+
VFPAUDIOSUB TITLEREPEAT
ZOOM
AMP VOL
U
N
E
Numeric
buttons
TITLE/GROUP
¶ During playback or while stopped
1 Press TITLE/GROUP.
"--" is shown in the Group display area of the
display window.
(Front panel display window example)
playback
MP3 disc
Group
display area
Current track
number
2 Use the numeric buttons to specify a desired
Group number.
• To select a number between 1 and 10:
Press the corresponding button for the number.
• To select a number higher than 10:
Use the +10 button.
Examples:
To select 13: +10 →3
To select 34: +10 →+10 →+10 →4
To select 40: +10 →+10 →+10 →10
Specify the Group number within several seconds
after pressing TITLE/GROUP (i.e. while the display
window shows "--" for the Group number, instead
of the current Group number).
The unit starts playbac k from Track 1 of the selected
Group.
3 Use the numeric buttons to specify a desired
Track number.
The unit starts playback from the specified Track.
You can also use 4/¢ or 5/∞ to specify a track,
instead of the numeric buttons.
Repeat playback
Available :
You can repeat playback of the current Track, current
Group or all MP3 files on the disc.
ENTER
REPEAT
C
H
O
I
C
E
SLOW
DIGEST
3D
PHONIC
REMOTE CONTROL
CH
-
SELECT STROBECLEAR
-
ANGLE
RM-SXV010U
AMP VOL
N
E
E
R
C
S
N
O
NEXTPREVIOUS
SLOW+
VFPAUDIOSUB TITLEREPEAT
ZOOM
¶ During playback or while stopped
1 Press REPEAT.
Each time you press REPEAT, the repeat mode
changes as follows. You can see the current mode
via the display window as well as the MP3
CONTROL display.
If you press REPEA T while stopped, you need to
press ENTER or 3 to start repeat playback.
MP3 CONTROL
display
REPEAT TRACK REPEAT 1 Repeats the current
REPEAT GROUP REPEAT Repeats all Tracks in
REPEAT ALL REPEAT Repeats all Tracks on
No indication The repeat mode is off.
(TV screen)
MP3 CONTROL REPEAT TRACK
Group : 01 / 10
spring
sumer
fall
winter
sea
mountain
camp
picnic
skiing
flower
(Display window)
• To stop repeat playback
Press 7. Note that the repeat mode remains active.
• To quit repeat playback
During playback, press REPEAT until no repeat icon is
shown on the display window.
While stopped, press REPEA T until repeat mode
indication on the MP3 CONTROL display goes off.
Display
Window
Track.
the current Group.
the disc.
Selected repeat mode
Track : 01 / 06 (Total 28)
begonia.mp3
german chamomile.mp3
kiwi fruit.mp3
orchard grass.mp3
petunia.mp3
north pole.mp3
Repeat mode indicator
Function
42
Page 47

JPEG disc playback
The unit can play back JPEG files on a personally
recorded CD-R/RW disc. We refer to a disc that contains
JPEG files as a "JPEG disc" in this manual.
Note that if a disc contains both of MP3 and JPEG files,
you can only play back files of the type selected by the
MP3/JPEG setting in the PICTURE preference display
(see page 51).
What is JPEG?
"JPEG" is an abbreviation for the Joint Photographic
Experts Group. "JPEG" is used to refer to an image file
format that utilizes a certain compression technique.
There are three sub-types of the JPEG format as
follows.
• baseline JPEG: used for digital cameras, the web,
etc.
• progressive JPEG: used for the web
• lossless JPEG: an old type, rarely used now
The unit supports only the baseline JPEG format;
Therefore, it cannot display pictures saved in the
progressive or lossless formats. If a JPEG disc
contains JPEG files of non-baseline type, the unit
recognizes those files as JPEG files, the JPEG
CONTROL display and the display window shows the
information of the contents (filename, file number,
etc.), but you cannot show the still pictures of those
files (the TV screen appears only in black).
NOTE
Make sure that the TV - DVD switch on
TV DVD
the remote control unit is set to "DVD"
when using the 5/∞/2/3, numeric
buttons for controlling the unit.
About JPEG discs
On a JPEG disc, each picture is recorded as a file. Files
are sometimes grouped into folders by category, etc.
Folders can exist within other folders, creating
hierarchical layers of folders. If you are familiar with
personal computers, the hierarchical file and folder
structure of a JPEG disc will be familiar to you as well.
This unit simplifies the hierarchical structure of a disc
and manages folders using "Groups," in the following
manner.
• A folder which has one or more files is regarded as a
Group.
• A folder which does not directly contain any files is
ignored.
• Files which do not belong to any folder are grouped
into "Group 1."
• The unit recognizes up to 150 files per Group, and up
to 99 Groups per disc. It ignores those exceeding the
maximum numbers and cannot display them. If there
are files other than JPEG files, they also count against
the 150-file total.
Group 1
Group 2
NOTES for making your own JPEG disc
using a CD-R/CD-RW disc:
• Select "ISO 9660" as the disc format.
• Finalize the disc after completing recording.
• We recommend you record your material at a 640 x 480
pixel resolution.
• This unit supports only the baseline JPEG format.
Therefore, it cannot display pictures saved in the
progressive or lossless formats. If a JPEG disc contains
JPEG files of non-baseline type, the unit recognizes
those files as JPEG files. the JPEG CONTROL display
and the display window show the information of the
contents (filename, file number, etc.), but you cannot
show the still pictures of those files (the TV screen
appears only in black).
NOTES
• The unit does not support "packet writing" discs.
• If the disc is recorded with multiple sessions, the unit
supports up to five sessions.
• The unit may not be able to read some discs, or may take a
long time to display a picture on the disc, due to disc
characteristics or recording conditions.
• Programmed and random playback functions do not
work with JPEG discs.
• The screen saver function will be activated if the same
picture is displayed for more than 5 minutes except
during slide show playback (see page 45).
• The unit only can play back files with the following file
extensions; ".jpg," ".jpeg," ".JPG," ".JPEG" and any
other combination of upper case and lower case letters
(such as ".Jpg").
• If a JPEG file name includes any 2-byte character, the
unit may not show the file name correctly.
• If a picture has been saved at greater than 640 x 480
pixel resolution, it may take some time to display the
picture.
• The unit will not accept any commands (stopping
playback, zooming in or out of an image, etc.) while in
the process of displaying a picture.
• The time required to read the disc contents may vary for
different discs, depending on the numbers of Groups
(folders) and files recorded, etc.
• If you attempt to display a non-baseline JPEG image:
The unit will not be able to display the picture (the TV
screen will be black). Other operations (stopping
display, selecting a file, etc.) will be possible, but may
take a long time.
• While a JPEG disc is loaded, you cannot bring up any
preference display (see page 48).
• This unit does not support pixel size picture of more
than 2400 pixels. Make sure that the picture pixel size is
2400 pixels or less.
English
JPEG disc
playback
file 1
up to 150 files per directory
Group 1’
up to 99 Groups
per disc
43
Page 48

JPEG disc playback
Basic operations
To see a desired picture
When loading a JPEG disc, after the disc contents are
Available :
read, the JPEG CONTROL display automatically appears
on the TV screen.
JPEG CONTROL
Group : 01 / 10
spring
sumer
fall
winter
sea
mountain
camp
picnic
skiing
flower
File : 01 / 06 (Total 28)
begonia.jpg
german chamomile.jpg
kiwi fruit.jpg
orchard grass.jpg
petunia.jpg
north pole.jpg
JPEG
3 Select a desired file using 4/¢.
4 Press ENTER.
The selected file (still picture) is shown on the TV.
In the display window, you can see the current
Group and file numbers.
JPEG CONTROL
Group : 01 / 10
spring
sumer
fall
winter
sea
mountain
camp
picnic
skiing
flower
Group
column
File column of the
current Group
File : 01 / 06 (Total 28)
begonia.jpg
german chamomile.jpg
kiwi fruit.jpg
orchard grass.jpg
petunia.jpg
north pole.jpg
Selected
file
You can select a desired file for playback via this display.
TV DVD
STANDBY/ON
OPEN/
TV DVD
CLOSE
TV22TV1
TV3
playback
JPEG disc
ENTER
T
C
DIGEST
TV-/--
O
VOL
H
PHONIC
1
4
7
10
M
P
O
I
SLOW
3D
SUBTITLERETURN
U
N
E
CH
+
-
ENTER
CH
-
C
E
-
ANGLE
RM-SXV010U
REMOTE CONTROL
3
TV55TV4
TV6
6
TV88TV7
TV9
9
TV0
MUTING
0
+10
TITLE/
TV/VIDEO
GROUP
CANCEL
M
E
N
U
VOL+
N
E
E
R
C
S
N
O
NEXTPREVIOUS
SELECT STROBECLEAR
SLOW+
VFPAUDIOSUB TITLEREPEAT
ZOOM
AMP VOL
5/∞/2/3
4/¢
¶ When the JPEG CONTROL display is shown
1 Make sure that the black (cursor) bar is in the
left (Group) column.
If it is in the right column, press 2 to move it to the
left column.
• Y ou can also select a desired file by pressing 3 to move the
black bar to the right (file) column then using 5/∞.
• To return the black bar to the Group column, press
2.
• To display another picture:
Use 4/¢ or 5/∞ to select the desired picture.
You can select a picture in another Group.
• To dismiss the picture:
Press 7
or MENU.
The TV screen returns to showing the JPEG
CONTROL display.
NOTES
• The current Group and file number are also shown on
the display window in the following manner.
Current Group
number
• Only JPEG files are shown on the display window.
Current file
number
2 Move the bar to a desired Group using 5/∞.
On the right column, files in the selected Group are
shown.
When selecting a Group, file 1 is initially selected
(highlighted).
44
Page 49

JPEG disc playback
To zoom in or out the picture [ZOOM]
GROUP
CANCEL
SUBTITLERETURN
U
M
N
E
E
CH
O
T
C
DIGEST
PHONIC
M
P
VOL
-
H
O
I
C
E
SLOW
3D
N
U
+
VOL+
ENTER
N
CH
E
E
-
R
C
S
N
O
NEXTPREVIOUS
SELECT STROBECLEAR
-
SLOW+
VFPAUDIOSUB TITLEREPEAT
ZOOM
ANGLE
AMP VOL
¶ While a JPEG image is displayed on the TV screen
Available :
5/∞/2/3
ZOOM +/–
1 Press ZOOM + or –.
Pressing ZOOM + causes the unit to zoom in on the
image, and pressing ZOOM – causes the unit to
zoom out.
Each time you press ZOOM +, the magnification is
doubled (up to × 102 4).
Each time you press ZOOM –, the magnification is
halved (down to × 1/8).
JPEG
To see pictures continuously
[slide show mode]
You can see files (still pictures) one after another
automatically in the slide show mode.
In this mode, each file (still picture) is displayed for
approximately 3 seconds. The next file will then be
displayed.
Playback features
Available :
TV DVD
STANDBY/ON
OPEN/
TV DVD
CLOSE
TV22TV1
TV3
1
3
TV55TV4
TV6
4
6
TV88TV7
TV9
7
9
TV0
TV-/--
MUTING
0
10
+10
TITLE/
TV/VIDEO
GROUP
CANCEL
SUBTITLERETURN
U
M
N
E
E
CH
M
P
O
T
VOL
-
C
H
O
I
C
E
SLOW
DIGEST
3D
PHONIC
N
U
+
VOL+
ENTER
N
CH
E
E
-
R
C
S
N
O
NEXTPREVIOUS
SELECT STROBECLEAR
-
SLOW+
VFPAUDIOSUB TITLEREPEAT
ZOOM
ANGLE
AMP VOL
3
JPEG
English
ZOOM x 4
At the top left of the screen, the information for the
current magnification appears for 5 seconds. While
zoomed in, an indication of the zoomed image
position also is displayed. The next step can be
used to move the image position.
2 Use 5/∞/2/3 to move the zoomed position.
If no button pressed for 5 seconds, the information
for the current magnification disappears.
To display the information, press ZOOM +/– or 5/∞/
2/3 again.
ZOOM x 4
RM-SXV010U
REMOTE CONTROL
¶ After inserting a JPEG disc
1 Press 3.
The slide show starts from the beginning of the
disc.
NOTES
• To stop slide show playback (to dismiss the picture) in
the middle of slide show playback:
Press 7 or MENU.
The TV screen returns to showing the JPEG CONTROL
display.
Pressing 3 resumes slide show playback from the last
picture displayed.
• To keep showing the current picture while in slide show
mode:
Press
8 or ENTER.
The picture does not change to the next picture.
Pressing
next picture.
• If a black screen appears continuously in the slide show
playback:
The file currently displayed may be non-baseline JPEG
file. In this case, select a playable file (a baseline JPEG
file) again (e.g., pressing
CONTROL display, etc).
Note that it may take a long time to select another file.
3 resumes the slide show playback from the
7 or MENU to open the JPEG
playback
JPEG disc
NOTES
• You can zoom in or out of a picture in slide show mode
if the show is paused (see next column).
• To return to a normal screen:
Press ENTER.
• The image may look coarse when a zoomed image is
displayed.
45
Page 50

JPEG disc playback
Selecting the start point of the slide
show
Available :
TV DVD
STANDBY/ON
OPEN/
TV DVD
CLOSE
TV22TV1
1
4
7
10
U
N
E
M
P
O
T
VOL
-
C
H
O
I
C
E
SLOW
DIGEST
3D
PHONIC
REMOTE CONTROL
TV55TV4
TV88TV7
TV00TV-/--
SUBTITLERETURN
CH
+
ENTER
CH
-
SELECT STROBECLEAR
-
ANGLE
RM-SXV10U
TV3
3
TV6
6
TV9
9
MUTING
+10
TITLE/
TV/VIDEO
GROUP
CANCEL
M
E
N
U
VOL+
N
E
E
R
C
S
N
O
NEXTPREVIOUS
SLOW+
VFPAUDIOSUB TITLEREPEAT
ZOOM
AMP VOL
Numeric
buttons
TITLE/GROUP
5/∞/2/3
4/¢
3
From the JPEG CONTROL display
¶ While the JPEG CONTROL display is shown
1 Make sure that the black (cursor) bar is in the
left (Group) column.
If it is in the right column, press 2 to move it to the
left column.
JPEG CONTROL
Group : 01 / 10
spring
sumer
fall
winter
sea
mountain
camp
picnic
skiing
flower
File : 01 / 06 (Total 28)
begonia.jpg
german chamomile.jpg
kiwi fruit.jpg
orchard grass.jpg
petunia.jpg
north pole.jpg
JPEG
Direct selection
¶ During playback or while stopped
1 Press TITLE/GROUP.
"--" is shown in the Group display area of the
display window.
(Front panel display window example)
Group
display area
Current file
number
2 Use the numeric buttons to specify a desired
Group number.
• To select a number between 1 and 10:
Press the corresponding button for the number.
• To select a number higher than 10:
Use the +10 button.
Examples:
To select 13: +10 →3
To select 34: +10 →+10 →+10 →4
To select 40: +10 →+10 →+10 →10
Specify the Group number within several seconds
after pressing TITLE/GROUP (i.e. while the display
window shows "--" for the Group number, instead
of the current Group number).
3 Use the numeric buttons to specify a desired
file number.
You can specify the file number according to the
order in the JPEG CONTROL display. You must
specify a file number within 5 seconds after
carrying out step 2.
The unit starts slide show playback from the
specified file. If you do not specify a file number,
the unit starts slide show playbac k from the first file
in the Group.
playback
JPEG disc
• You can skip a file in the slide show by using 4/¢ or
5/∞.
• You can select a file in the current group by using the
numeric buttons.
2 Move the bar to a desired Group using 5/∞.
In the right column, files in the selected Group are
shown.
When selecting a Group, file 1 is initially selected
(highlighted).
3 Select a desired file using 4/¢.
4 Press 3.
The slide show starts from the specified file.
46
Page 51

JPEG disc playback
NOTES
• To stop slide show playback (to dismiss the picture) in
the middle of slide show playback:
Press 7 or MENU.
The TV screen returns to showing the JPEG CONTROL
display.
Pressing 3 resumes slide show playback from the last
picture you displayed.
• To keep showing the current picture while in slide show
mode:
Press
8 or ENTER.
The picture does not change to the next picture.
Pressing
3 resumes the slide show playback from the
next picture.
• If a black screen appears continuously in the slide show
playback:
The file currently displayed may be non-baseline JPEG
file. In this case, select a playable file (a baseline JPEG
file) again (e.g., pressing 7 or MENU to open the JPEG
CONTROL display, etc).
Note that it may take a long time to select another file.
Repeat function
Available :
In the slide show mode, you can repeat playback of JPE G
files in a Group or on the disc.
JPEG
(TV Screen)
Selected repeat mode
JPEG CONTROL REPEAT GROUP
Group : 01 / 10
spring
sumer
fall
winter
sea
mountain
camp
picnic
skiing
flower
File : 01 / 06 (Total 28)
begonia.jpg
german chamomile.jpg
kiwi fruit.jpg
orchard grass.jpg
petunia.jpg
north pole.jpg
(Display window)
Repeat mode indicator
• To stop repeat playback
Press 7. Note that the repeat mode remains active.
• To quit repeat playback
Press 7 or MENU while the JPE G CONTROL display is
shown, press REPEA T until the repeat mode indication
on the JPEG CONTROL display goes off.
English
TV DVD
STANDBY/ON
OPEN/
TV DVD
CLOSE
TV22TV1
TV3
1
3
TV55TV4
TV6
4
6
TV88TV7
TV9
7
9
TV0
TV-/--
MUTING
0
10
+10
TITLE/
TV/VIDEO
GROUP
CANCEL
SUBTITLERETURN
U
M
N
E
E
CH
+
ENTER
CH
-
SELECT STROBECLEAR
-
ANGLE
RM-SXV010U
REMOTE CONTROL
AMP VOL
N
U
VOL+
N
E
E
R
C
S
N
O
NEXTPREVIOUS
SLOW+
VFPAUDIOSUB TITLEREPEAT
ZOOM
REPEAT
O
T
C
H
DIGEST
PHONIC
M
P
VOL
-
O
I
C
E
SLOW
3D
¶ While the JPEG CONTROL display is shown
1 Press REPEAT.
Pressing REPEAT switch the repeat mode.
If you press REPEAT while the JPEG CONTROL
display is shown, you need to press 3 to start
repeat playback.
The selected mode is reflected by an icon displayed
in the front panel display window, and by the mode
name shown in the JPEG CONTROL display, as
described below.
playback
JPEG disc
JPEG
CONTROL
display
Display
Window
Function
REPEAT ALL REPEAT All files on the disc are
repeated.
REPEAT GROUP All files in the current
Group are repeated.
No indication The repeat mode is off.
47
Page 52

Changing the initial settings
NOTE
Make sure that the TV - DVD switch on
TV DVD
the remote control unit is set to "DVD"
when using the 5/∞/2/3 and numeric
buttons for controlling the unit.
Selecting preferences
This chapter refers to the settings which are already
made when you purchase the unit. Read this section
when you want to connect this machine to a wide-vision
TV set, or when you want to otherwise change the
settings according to your preferences and viewing
environment.
About the Preference display
The preference display consists of the LANGUAGE,
PICTURE, AUDIO, and OTHERS setting displays, each
having setting items.
• LANGUAGE
LANGUAGE
MENU LANGUAGE
AUDIO LANGUAGE
SUBTITLE
ON SCREEN LANGUAGE
ENGLISH
ENGLISH
ENGLISH
ENGLISH
How to set preferences
TV DVD
STANDBY/ON
OPEN/
TV DVD
CLOSE
TV22TV1
TV3
1
3
TV55TV4
TV6
4
6
TV88TV7
TV9
7
9
TV0
TV-/--
MUTING
0
10
+10
TITLE/
TV/VIDEO
GROUP
CANCEL
ENTER
CHOICE
SUBTITLERETURN
U
M
N
E
E
CH
M
P
O
T
VOL
-
C
H
O
I
C
E
N
U
+
VOL+
ENTER
CH
-
R
C
S
N
O
NEXTPREVIOUS
E
N
E
5/∞/2/3
¶ While stopped
1 Press CHOICE.
One of the Preference on-screen displays appears
on the TV screen.
You can see four icons at the top right of the onscreen display for the settings.
: Language menu
: Picture menu
: Audio menu
: Others menu (system setting)
2 Select the appropriate icon using 2/3.
The appropriate display appears on the TV screen.
Changing the
initial settings
•PICTURE
PICTURE
• AUDIO
AUDIO
•OTHERS
OTHERS
SELECT
ENTER
MONITOR TYPE
STILL MODE
SCREEN SAVER
MP3/JPEG
SELECT
ENTER
DIGITAL AUDIO OUTPUT
ANALOG DOWN MIX
D RANGE COMPRESSION
SELECT
ENTER
RESUME
ON SCREEN GUIDE
AUTO STANDBY
AV COMPULINK MODE
PARENTAL LOCK
SELECT
ENTER
USE 5∞23 TO SELECT, USE ENTER TO CONFIRM
TO EXIT, PRESS CHOICE.
4:3 LB
AUTO
ON
MP3
USE 5∞23 TO SELECT, USE ENTER TO CONFIRM
TO EXIT, PRESS CHOICE.
STREAM/PCM
STEREO
ON
USE 5∞23 TO SELECT, USE ENTER TO CONFIRM
TO EXIT, PRESS CHOICE.
ON
ON
OFF
DVD1
USE 5∞23 TO SELECT, USE ENTER TO CONFIRM
TO EXIT, PRESS CHOICE.
3 Move to select the item you want to edit
using 5/∞.
The color of the selected item changes.
4 Press ENTER.
A pull-down menu appears over the selected item.
LANGUAGE
MENU LANGUAGE
AUDIO LANGUAGE
SUBTITLE
ON SCREEN LANGUAGE
SELECT
ENTER
ENGLISH
ENGLISH
ENGLISH
ENGLISH
ENGLISH
CHINESE
SPANISH
USE 5∞ TO SELECT, USE ENTER TO CONFIRM
TO EXET, PRESS CHOICE.
Selected item
5 Press 5/∞ to select from the options and
press ENTER.
The selected option is set.
• For details about each setting, see the following.
NOTES
• To dismiss a preference display:
Press CHOICE.
• While an MP3 or JPEG disc is loaded, you cannot bring
up any preference display.
• When a preference display is shown on a wide TV
screen, the upper and lower parts of the TV picture
sometimes may be cut off. If this happens, adjust the
picture size control of the TV.
48
Page 53

LANGUAGE menu
Changing the initial settings
English
LANGUAGE
MENU LANGUAGE
AUDIO LANGUAGE
SUBTITLE
ON SCREEN LANGUAGE
SELECT
ENTER
ENGLISH
ENGLISH
ENGLISH
ENGLISH
USE 5∞23 TO SELECT, USE ENTER TO CONFIRM
TO EXIT, PRESS CHOICE.
Menu item Setting options Notes/examples
MENU LANGUAGE
You can select the default menu
language to be displayed if it is
contained on a DVD VIDEO disc.
AUDIO LANGUAGE
You can select the default audio
language to be played if it is
contained on a DVD VIDEO disc.
SUBTITLE
You can select the default subtitle
language to be displayed if it is
contained on a DVD VIDEO disc.
ON SCREEN LANGUAGE
You can select the on-screen
display language of the unit.
This menu allows you to select the languages used for DVD VIDEO playback,
as well as the on-screen display language of the unit.
NOTE
• During playback, you can bring up any page of the preference displays; however,
only "ON SCREEN LANGUAGE" can be set on the "LANGUAGE" page.
ENGLISH j SPANISH j FRENCH
j CHINESE j GERMAN j
ITALIAN j JAPANESE j language
code from AA to ZU
• If the disc does not have a menu in
the selected language, the disc’s
default language will be used.
• For details about language codes,
see "Table of languages and their
abbreviations" at the bottom of this
page.
OFF j ENGLISH j SPANISH j
FRENCH j CHINESE j GERMAN
j ITALIAN j JAPANESE j
language code from AA to ZU
ENGLISH j CHINESE j SPANISH
English
Chinese
Spanish
ON SCREEN LANGUAGE
IDIOMA EN PANTALLA
ENGLISH
ESPAÑOL
• Some on-screen messages are
shown in English regardless of the
setting.
• You cannot change the on-screen
language shown on the MP3 and
JPEG CONTROL displays.
Table of languages and their abbreviations
AA Afar FA Persian KM Cambodian OM (Afan) Oromo SU Sundanese
AB Abkhazian FI Finnish KN Kannada OR Oriya SV Swedish
AF Afrikaans FJ Fiji KO Korean (KOR) PA Panjabi SW Swahili
AM Ameharic FO Faroese KS Kashmiri PL Polish TA Tamil
AR Arabic FY Frisian KU Kurdish PS Pashto, Pushto TE Telugu
AS Assamese GA Irish KY Kirghiz PT Portuguese TG Tajik
AY Aymara GD Scots Gaelic LA Latin QU Quechua TH Thai
AZ Azerbaijani GL G alician LN Lingala RM Rhaeto-Romance TI Tigrinya
BA Bashkir GN Guarani LO Laothian RN Kirundi TK Turkmen
BE Byelorussian GU Gujarati LT Lithuanian RO Rumanian TL Tagalog
BG Bulgarian HA Hausa LV Latvian, Lettish RU Russian TN Setswana
BH Bihari HI Hindi MG Malagasy RW Kinyarwanda TO Tongan
BI Bislama HR Croatian MI Maori SA Sanskrit TR Turkish
BN Bengali, Bangla HU Hungarian MK Macedonian SD Sindhi TS Tsonga
BO Tibetan HY Armenian ML Malayalam SG Sangho TT Tatar
BR Breton IA Interlingua MN Mongolian SH Serbo-Croatian TW Twi
CA Catalan IE Interlingue MO Moldavian SI Singhalese UK Ukrainian
CO Corsican IK Inupiak MR Marathi SK Slovak UR Urdu
CS Czech IN Indonesian MS Malay (MAY) SL Slovenian UZ Uzbek
CY Welsh IS Icelandic MT Maltese SM Samoan VI Vietnamese
DA Danish IW Hebrew MY Burmese SN Shona VO Volapuk
DZ Bhutani JI Yiddish NA Nauru SO Somali WO Wolof
EL Greek JW Javanese NE Nepali SQ Albanian XH Xhosa
EO Esperanto KA Georgian NL Dutch SR Serbian YO Yoruba
ET Estonian KK Kazakh NO Norwegian SS Siswati ZU Zulu
EU Basque KL Greenlandic OC Occitan ST Sesotho
Changing the
initial settings
49
Page 54

Changing the initial settings
PICTURE menu
PICTURE
SELECT
ENTER
MONITOR TYPE
STILL MODE
SCREEN SAVER
MP3/JPEG
4:3 LB
AUTO
ON
MP3
USE 5∞23 TO SELECT, USE ENTER TO CONFIRM
TO EXIT, PRESS CHOICE.
Menu item Setting options Notes/examples
MONITOR TYPE
You can select the monitor type to
match your TV when you playback
DVD VIDEO discs recorded for
wide-screen televisions.
This menu allows you to select options having to do with picture quality or the
monitor screen.
• 16:9 NORMAL (Wide Television
screen)
Should be selected when you
connect the unit to a wide-screen
(16:9) TV whose aspect ratio is set
to 16:9 (the unit automatically
adjusts the screen width of the
output signal correctly when
playing back a 4:3 source).
• 16:9 AUTO (Wide Television screen)
Should be selected when you
connect a wide-screen (16:9) TV to
• If you play a 4:3 DVD VIDEO source
using the "16:9 NORMAL" mode, the
picture character changes slightly
due to the process for converting
the picture width.
the unit.
• 4:3 LB (Letter Box Conversion)
Should be selected when you
connect a normal (4:3) TV to the
unit.
When playing back a DVD VIDEO
disc recorded in wide picture
format, the picture is shown with
black bars at the top and bottom.
Changing the
initial settings
• 4:3 PS (Pan Scan Conversion)
Should be selected when you
connect a normal (4:3) TV to the
unit.
When playing back a DVD VIDEO
disc recorded in wide picture
format, the picture is zoomed to fill
the screen vertically, and the left
and right sides of the image are
chopped of f.
• With some discs recorded in wide
picture format, the picture will be
shown in the 4:3 LB mode even if
you select the 4:3 PS mode.
16:9 MULTI NORMAL These "MULTI" options should be
16:9 MULTI AUTO
4:3 MULTI LB
selected when you connect the unit to
a TV that supports both the PAL and
NTSC systems. If you select one of
these options, the unit outputs a PAL
or NTSC video signal according to the
4:3 MULTI PS
disc, regardless of the PAL-NTSC
selector setting.
50
Page 55

Changing the initial settings
Menu item Setting options Notes/examples
STILL MODE
This mode selects whether the
content on the disc is processed by
field or by frame. If set to AUTO,
the decision of how to process the
content is made automatically,
based on data and flags recorded
on the disc.
SCREEN SAVER
You can set the screen saver
function ON or OFF.
See page 15 for details about the
screen saver function.
MP3/JPEG
The unit can play MP3 and JPEG
files recorded on a CD-R/CD-RW
disc. However, if a disc contains
both MP3 and JPEG files, you can
only play files of the type selected
in this menu item.
•AUTO
The unit recognizes the picture type
(film or video source) of the current
disc.
•FIELD
Suitable for playing back a video
source disc.
•FRAME
Suitable for playing back a film
source disc.
•ON
The current picture gets dark.
•OFF
The screen saver function is off.
•MP3
Only MP3 files can be played bac k if
a disc contains both MP3 and JPEG
files.
• JPEG
Only JPEG files can be played back if
a disc contains both MP3 and JPEG
files.
English
• Normally, set to "AUTO."
• Some DVD VIDEO discs may not
play correctly if AUTO is selected. If
the picture is unclear or noisy with a
particular DVD VIDEO disc, try
changing the mode.
• When a disc contains either only
MP3 files or only JPEG files, the unit
can play back the files regardless of
the setting.
AUDIO menu
AUDIO
DIGITAL AUDIO OUTPUT
ANALOG DOWN MIX
D RANGE COMPRESSION
SELECT
ENTER
DIGITAL AUDIO OUTPUT
T o connect the unit’s digital output to
an external device equipped with a
digital input, this item must be set
correctly .
See the table following for details
about the relation between the
setting and output signals.
STREAM/PCM
STEREO
ON
USE 5∞23 TO SELECT, USE ENTER TO CONFIRM
TO EXIT, PRESS CHOICE.
Menu item Setting options Notes/examples
This menu allows you to select desired options concerning with audio sound.
• PCM ONLY
Should be selected when you
connect the DIGITAL OUT jack of
the unit to the linear PCM digital
input of other audio equipment.
• When playing a DVD VIDEO or
Audio CD disc with DTS, use a DTS
decoder to get correct signals from
your speakers.
• With some DVD VIDEO discs that
are not fully copy-protected, a 20 or
• DOLBY DIGITAL/PCM
Should be selected when you
connect the digital input of a Dolby
Digital decoder or an amplifier with
a built-in Dolby Digital decoder.
When this option is selected,
24 bit digital signal may be output.
• A signal recorded with the 88.2 kHz
or higher sampling frequency
cannot be output from the DIGITAL
OUT jack, regardless of the setting
(due to copy protection issues).
playing back a disc recorded by the
DTS or MPEG Multichannel format
outputs a linear PCM digital signal.
Changing the
initial settings
• STREAM/PCM
Should be selected when you
connect the digital input of an
amplifier with a built-in DTS, MPEG
Multichannel or Dolby Digital
decoder, or the stand-alone unit of
such a decoder.
51
Page 56

Changing the initial settings
Digital output signal chart
Disc type
PCM ONLY DOLBY DIGITAL/PCM STREAM/PCM
DVD with 48/44.1 kHz, 16/20/24
bit linear PCM
DVD with 96/88.2 kHz, 16/22/24
bit linear PCM
DVD with DTS 48 kHz, 16 bit, stereo linear PCM DTS bitstream
DVD with Dolby Digital 48 kHz, 16 bit, stereo linear
PCM
DVD with MPEG Multichannel 48 kHz, 16 bit, stereo linear PCM MPEG bitstream
Audio CD/Video CD/SVCD 44.1 kHz,16 bit, stereo linear PCM
Audio CD with DTS
CD-R/RW with MP3
44.1 kHz, 16 bit, stereo linear PCM DTS bitstream
48/44.1 kHz,16 bit, stereo linear PCM
Output
No output
Dolby Digital bitstream
No output
Menu item Setting options Notes/examples
ANALOG DOWN MIX
To correctly play the audio on a
DVD VIDEO disc recorded with
surround multichannel audio, you
must set this item properly
according to your audio system
configuration.
D. RANGE COMPRESSION
This setting provides optimal audio
quality for listening to DVD VIDEO
discs recorded in Dolby Digital
format, at low or middle volume.
Changing the
initial settings
• DOLBY SURROUND
Should be selected when listening
to multichannel sur r ound audio
when the unit’ s analog A UDIO OUT
terminals are connected to a
surround decoder.
• STEREO
Should be selected when listening
to conventional two-channel stereo
audio when the unit’s analog
AUDIO OUT terminals are
connected to a stereo amplifier/
receiver or television set, or when
you want to record the audio from
a DVD VIDEO disc to MiniDisc,
cassette, etc.
•AUTO
Audio is played back with the
dynamic range compressed
except when playing a disc
recorded with Dolby Digital 1- or 2channel format.
•ON
Audio is always played back with
the dynamic range compressed.
• This function does not work when
the 3D PHONIC function is activated
(see page 35).
• This setting affects only the output
signal from the analog AUDIO OUT
jacks when playing back a DVD
VIDEO disc recorded with surround
multichannel audio.
• This function works only when
playing back a disc recorded with
Dolby Digital. The setting does not
affect audio from other discs.
• This function does not work when
the 3D PHONIC function is activated
(see page 35).
52
Page 57

Changing the initial settings
OTHERS menu
OTHERS
RESUME
ON SCREEN GUIDE
AUTO STANDBY
AV COMPULINK MODE
PARENTAL LOCK
SELECT
ENTER
RESUME
Y ou can select the resume playbac k
mode.
ON
ON
OFF
DVD1
USE 5∞23 TO SELECT, USE ENTER TO CONFIRM
TO EXIT, PRESS CHOICE.
Menu item Setting options Notes/examples
This menu allows you to set various system options.
•ON
The unit can resume playback of
• See page 17 for details about the
resume playback function.
the disc from the position where
play was last interrupted, if the disc
is still in the disc tray.
•OFF
The resume function is not active.
• DISC RESUME
The unit can resume playback of
the last 30 discs played. The unit
retains a memory of the interrupt
positions of the last 30 discs
played, even though they have
been removed from the disc tray.
English
ON SCREEN GUIDE
The unit can display "on-screen
guide" icons or characters on the
picture, which show what is
happening to the disc or the unit.
AUTO STANDBY
When the unit is stopped for more
than 30 minutes or 60 minutes, the
unit enters standby mode
automatically.
AV COMPULINK MODE
You must set this item correctly to
use the AV COMPU LINK system.
PARENTAL LOCK
When this option is selected,
pressing ENTER on the remote
control unit brings up to the
PARENTAL LOCK display shown
following. This allows you to
restrict children from playing DVD
VIDEO discs.
•ON
On-screen guide icons will be
displayed.
•OFF
• See page 15 for information about
on-screen guide icons.
• Examples of "on-screen guide"
icons or characters: , ,
On-screen guide icons will not be
displayed.
60 j 30 j OFF
DVD 1j DVD 2 j DVD 3 • See page 59 for details about AV
COMPU LINK function.
See page 54 for details about the
Parental Lock setting.
(PARENTAL LOCK display)
PARENTAL LOCK
COUNTRY CODE
SET LEVEL
PASSWORD
SELECT
ENTER
EXIT
BR
NONE
_ _ _ _
...
NEW PASSWORD?
TO EXIT, PRESS CHOICE.
PRESS 0 ~ 9 KEY
Changing the
initial settings
53
Page 58

Changing the initial settings
Limiting playback by
children
This function restricts playback of DVD VIDEO discs
which contain violent (and other) scenes according to the
level set by the user. For example, if a movie which
includes violent scenes supports the parental lock
feature, such scenes which you do not want to let
children view can be cut or replaced with other scenes.
When P AREN T AL LOCK is set in the OTHERS menu of the
Preference display (see page 53), pressing ENTER on the
remote control unit brings up the PARENTAL LOCK
display shown following. This allows you to set limits on
DVD VIDEO playback.
(OTHERS display)
OTHERS
RESUME
ON SCREEN GUIDE
AUTO STANDBY
AV COMPULINK MODE
PARENTAL LOCK
SELECT
ENTER
USE 5∞23 TO SELECT, USE ENTER TO CONFIRM
TO EXIT, PRESS CHOICE.
(PARENTAL LOCK display)
PARENTAL LOCK
COUNTRY CODE
SET LEVEL
PASSWORD
EXIT
ON
ON
OFF
DVD1
Press ENTER.
BR
NONE
_ _ _ _
To set Parental Lock for the first time
[PARENTAL LOCK]
Available :
TV DVD
STANDBY/ON
OPEN/
TV DVD
CLOSE
TV22TV1
TV3
1
3
TV55TV4
TV6
4
ENTER
7
TV-/--
10
U
N
E
M
P
O
T
VOL
-
C
H
O
I
C
E
SLOW
DIGEST
3D
PHONIC
TV88TV7
TV0
0
TITLE/
GROUP
SUBTITLERETURN
CH
+
ENTER
CH
-
SELECT STROBECLEAR
-
ANGLE
RM-SXV010U
REMOTE CONTROL
AMP VOL
6
TV9
9
MUTING
+10
TV/VIDEO
CANCEL
M
E
N
U
VOL+
N
E
E
R
C
S
N
O
NEXTPREVIOUS
SLOW+
VFPAUDIOSUB TITLEREPEAT
ZOOM
Numeric
buttons
5/∞
¶ While the "OTHERS" menu of the preference display is
shown
1 Use
5/∞
to move to select "PARENTAL
LOCK" and press ENTER.
See page 53 for details about how to bring up the
"OTHERS" menu.
The Parental Loc k on-screen display appears on the
TV screen.
points [COUNTRY CODE].
2 While points to [COUNTRY CODE], press
ENTER to bring up the pull-down menu.
Changing the
initial settings
SELECT
ENTER
USE 5∞ TO SELECT, USE ENTER TO CONFIRM
TO EXIT, PRESS CHOICE.
3 Use
5/∞
to select the country code.
Select the code of the country whose standards
were used to rate the DVD VIDEO disc content.
See "Appendix A: Country/Area code list for
Parental Lock" on page 64.
PARENTAL LOCK
SELECT
ENTER
COUNTRY CODE
SET LEVEL
PASSWORD
EXIT
BR
BR
BS
NONE
BT
_ _ _ _
BV
BW
BY
BZ
USE 5∞ TO SELECT, USE ENTER TO CONFIRM
TO EXIT, PRESS CHOICE.
4 Press ENTER.
moves to [SET LEVEL].
54
Page 59

Changing the initial settings
5 While points [SET LEVEL], press ENTER to
bring up the pull-down menu.
In the pull-down menu, "NONE" and levels "8" to
"1" are available.
"NONE" does not restrict playback. Level "1" is the
strictest level. Discs rated higher than the selected
level are restricted.
PARENTAL LOCK
6 Use
COUNTRY CODE
SET LEVEL
PASSWORD
EXIT
SELECT
ENTER
5/∞
to select a desired parental lock
BR
NONE
8
NONE
7
_ _ _ _
6
5
4
3
USE 5∞ TO SELECT, USE ENTER TO CONFIRM
TO EXIT, PRESS CHOICE.
level, then press ENTER.
moves to [PASSWORD].
7 Enter a 4-digit password using the numeric
buttons (0 to 9).
PARENTAL LOCK
COUNTRY CODE
SET LEVEL
PASSWORD
EXIT
SELECT
ENTER
BR
NONE
1234
...
NEW PASSWORD?
TO EXIT, PRESS CHOICE.
PRESS 0 ~ 9 KEY
8 Press ENTER.
The parental lock feature is set.
moves to [EXIT].
Pressing ENTER again returns to the "OTHERS"
menu of the preference display.
To change the settings
[PARENTAL LOCK]
Available :
You can change the Parental Lock settings later.
TV DVD
STANDBY/ON
OPEN/
TV DVD
CLOSE
TV22TV1
TV3
1
3
TV55TV4
TV6
4
6
TV88TV7
TV9
7
9
TV00TV-/--
MUTING
10
+10
TITLE/
TV/VIDEO
GROUP
CANCEL
SUBTITLERETURN
U
M
N
E
E
CH
+
ENTER
CH
-
SELECT STROBECLEAR
-
ANGLE
RM-SXV010U
REMOTE CONTROL
AMP VOL
N
U
VOL+
N
E
E
R
C
S
N
O
NEXTPREVIOUS
SLOW+
VFPAUDIOSUB TITLEREPEAT
ZOOM
ENTER
T
C
DIGEST
O
VOL
H
PHONIC
M
P
-
O
I
C
E
SLOW
3D
¶ While the "OTHERS" menu of the preference display is
shown
1 Use
5/∞
to move to select "PARENTAL
LOCK" and press ENTER.
The Parental Loc k on-screen display appears on the
TV screen.
points to [P ASSW ORD].
See page 53 for details about how to bring up the
"OTHERS" menu.
PARENTAL LOCK
COUNTRY CODE
SET LEVEL
PASSWORD
EXIT
BR
NONE
_ _ _ _
Numeric
buttons
5/∞
English
• If you want to change the password in step 7, do it before
pressing ENTER.
NEW PASSWORD?
TO EXIT, PRESS CHOICE.
...
PRESS 0 ~ 9 KEY
SELECT
ENTER
2 Enter your current 4-digit password using the
numeric buttons (0 to 9) and press ENTER.
moves to [COUNTRY CODE] if you enter the
correct password.
If you enter the wrong password, "WRONG!
RETRY..." appears on the TV screen, and you cannot
go to the next step.
Changing the
initial settings
55
Page 60

Changing the initial settings
3 To change the "COUNTRY CODE" or
"SET LEVEL," press ENTER to bring up the
associated pull-down menu when is
pointing the desired item.
To select the item to be set, use 5/∞ when no pulldown menu is shown.
4 Use
5/∞
to select the desired option and
press ENTER.
Note that if you change the country code, you must
reselect the Parental Lock level.
5 With pointing to [PASSWORD], enter a 4-
digit password using the numeric buttons (0 to
9).
The password entered in this step becomes the
new password. If you want to keep the same
password as before, enter the same password you
did in step 2. Do not forget to enter a password
after changing the country code and/or parental
level. Otherwise, the new country code and/or
parental level will not take effect.
6 Press ENTER.
moves to [EXIT].
Pressing ENTER again returns to the "OTHERS"
menu of the preference display.
NOTES
• If you enter the wrong password more than 3 times in
step 2 above, moves to [EXIT] automatically and
5/∞ do not work.
• If you forget your password in step 2
Enter "8888." The current password is deleted and you
can set a new password.
To temporarily release the Parental
Lock [PARENTAL LOCK]
Available :
If the parental level is set to a strict value, some discs
may not play at all. When you insert such a disc and try
to play it, the following Parental Lock on-screen display
appears on the TV screen, asking you whether you want
the Parental Lock to be temporarily released or not.
TV DVD
STANDBY/ON
OPEN/
TV DVD
CLOSE
TV22TV1
TV3
1
4
7
TV-/--
10
M
P
O
T
ENTER
1 Use the
5/∞
RELEASE], then
VOL
C
H
O
I
C
SLOW
DIGEST
3D
PHONIC
to move to [TEMPORARY
press ENTER.
moves to [PASSWORD].
When selecting [NOT RELEASE], press 0 (OPEN/
CLOSE) to remove the disc.
PARENTAL LOCK
TEMPORARY RELEASE
NOT RELEASE
PASSWORD
SUBTITLERETURN
U
N
E
CH
+
-
ENTER
CH
-
E
-
ANGLE
RM-SXV010U
REMOTE CONTROL
3
TV55TV4
TV6
6
TV88TV7
TV9
9
TV0
MUTING
0
+10
TITLE/
TV/VIDEO
GROUP
CANCEL
M
E
N
U
VOL+
N
E
E
R
C
S
N
O
NEXTPREVIOUS
SELECT STROBECLEAR
SLOW+
VFPAUDIOSUB TITLEREPEAT
ZOOM
AMP VOL
_ _ _ _
Numeric
buttons
5/∞
Changing the
initial settings
56
SELECT
USE 5∞ TO SELECT, USE ENTER TO CONFIRM
TO EXIT, PRESS CHOICE
ENTER
2 Enter your 4-digit password using the numeric
buttons (0 to 9).
The Parental Lock is released, and the unit starts
playback.
If you enter the wrong password, "WRONG!
RETRY..." appears on the TV screen.
Enter the correct password.
NOTE
• When you enter the wrong password more than 3 times
in step 2 above, moves to [NOT RELEASE]
automatically and 5/∞ do not work.
Page 61

Additional information
Names of parts and controls
Refer to the corresponding pages indicated in () for details.
Front panel
1 23 7654
XV-N5 DVD/SUPER VCD/VCD/CD PLAYER
89 0
English
1 STANDBY/ON button (12)
2 7 button (15, 16, 40)
3 3 button (15, 17)
4 8 PAUSE button (15, 18)
5 4 button (18, 20)
Display window
1
1 Audio format indicators
2 Disc indicator
3 Group/title indicators
4 Track/chapter indicators
7 8
6
6 ¢ button (18, 20)
7 0 button (14, 16, 17)
8 Remote sensor (10)
9 Disc tray (14, 16, 17)
0 Display window (see the illustration below)
432
5 Repeat mode indicator
6 3(play)/8(pause) indicator
7 PROGRAM/RANDOM indicator
8 Multi-information window
5
Rear panel
1 AUDIO OUT jacks (6, 7, 8)
2 DIGITAL OUT jacks (OPTICAL/COAXIAL) (8)
3 VIDEO OUT - VIDEO jack (6)
4 VIDEO OUT - S-VIDEO jack (6)
41 8273
5
6
5 VIDEO OUT - COMPONENT jacks (Y/PB/PR) (7)
6 NTSC/PAL switch (7)
7 AV COMPU LINK jacks (59)
8 Region code label (4)
9 AC Power Cord (9)
9
4
Additional
information
57
Page 62

Additional information
Remote control unit
1
2
3
4
5
6
7
8
9
0
-
=
~
!
@
#
OPEN/
CLOSE
TV1
1
TV4
4
TV7
7
TV-/--
10
M
P
O
T
VOL
C
H
O
I
C
SLOW
DIGEST
3D
PHONIC
$
%
TV DVD
STANDBY/ON
TV DVD
^
&
TV2
2
TV5
5
TV8
8
TV0
0
SUBTITLERETURN
U
N
E
CH
+
-
ENTER
CH
-
E
TITLE/
GROUP
TV3
3
TV6
6
TV9
9
MUTING
+10
TV/VIDEO
CANCEL
M
E
N
VOL+
R
C
S
N
O
NEXTPREVIOUS
*
U
(
)
_
N
E
E
+
¡
SELECT STROBECLEAR
-
SLOW+
£
¢
ANGLE
VFPAUDIOSUB TITLEREPEAT
ZOOM
AMP VOL
1 OPEN/CLOSE button (14, 16)
2 Numeric buttons
3 RETURN button (23)
4 TOP MENU button (23)
5 Cursor selection (5 Up, ∞ Down) -
Additional
6 Cursor selection (2 Left, 3 Right) -
information
7 CHOICE button (13, 48)
8 4/PREVIOUS button (18, 20, 40, 44)
9 7/CLEAR button (15, 16, 27, 40, 47)
0 3/SELECT button (15, 23, 40, 45)
- 1/SLOW– button (18)
= REPEAT button (28, 42, 47)
~ SUB TITLE button (30)
! DIGEST button (25)
@ 3D PHONIC button (35)
CH (+/–) buttons (11)
VOL (+/–) buttons (11)
RM-SXV010U
REMOTE CONTROL
# ANGLE button (21, 32)
$ Infrared signal window (10)
% TV - DVD switch (11, 12, 23, 40, 43, 48)
^ TV STANDBY/ON button (11)
& DVD STANDBY/ON button (12)
* TV/VIDEO - CANCEL button (11)
( TITLE/GROUP button (24, 42, 46)
) MENU button (23)
_ ENTER button
+ ON SCREEN button (21, 36)
¡ ¢/NEXT button (18, 20, 40, 44)
8/STROBE button (15, 18, 19, 33, 40)
£ ¡/SLOW+ button (18)
¢ AUDIO button (31)
VFP button (34)
ZOOM +/– buttons (33, 45)
AMP VOL +/– buttons (11)
58
Page 63

AV COMPU LINK remote control system
The JVC AV COMPU LINK system allows you to enjoy video or audio with the simplest
operation.If your video/audio player (such as a DVD player, CD player and VCR) and
television or/and amplifier/receiver support the JVC AV COMPU LINK system and are tied
with the JVC AV COMPU LINK cable(s), simply starting the player will automatically make
all necessary settings on the television and/or amplifier/receiver to allow you to enjoy the
playback.
Additional information
English
Connection and setup
Using an AV COMPU LINK cable, connect the A V COMPU
LINK terminals of each component to one another.
• The unit’s AV COMPU LINK setting is controlled using
the OTHERS menu in the preference display. See page
53 for operation.
• For information on the connection between a TV and a
receiver, refer to the receiver’s instructions.
To AV COMPU LINK (II, EX or III)
TV
The unit
• If you connect the unit to a television via AV COMPU
LINK, set the unit’s AV COMPU LINK setting as follows.
• When connecting to the VIDEO-1 input terminal
of the television: DVD2
• When connecting to the VIDEO-2 input terminal
of the television: DVD3
To AV COMPU LINK
(II, EX or III)
TV
• If you connect the unit to a television and VCR via AV
COMPU LINK, set the VCR’s Remote Control Code and
the unit’s AV COMPU LINK setting as follows.
• When connecting to the VIDEO-1 input terminal
of the television:
The unit’s AV COMPU LINK setting: DVD2
VCR’s Remote Control Code: B
• When connecting to the VIDEO-2 input terminal
of the television:
The unit’s AV COMPU LINK setting: DVD3
VCR’s Remote Control Code: A
The unit
To AV COMPU LINK
VCR
To AV COMPU LINK
(II, EX or III)
TV
• If you connect the unit to a television and receiver via
AV COMPU LINK, set the unit’s AV COMPU LINK
setting to DVD1.
IMPORTANT!
• When you make video connection between the unit and
another device (such as a receiver and TV) via the
composite, S-video or component jacks, as well as AV
COMPU LINK connection, see also the instruction
manual of the other device.
Receiver
To AV COMPU LINK
The unit
Notes for connection
• If you connect the unit to a receiver via AV COMPU LINK
in a system including a Dolby Digital decoder, some
functions may not be performed automatically.
• Connect the AUDIO OUT jacks of the unit to the audio
input jacks of a receiver that indicating "DVD."
Otherwise, the system will not work correctly.
• There may be no description about connections to the
unit in the instruction manual of a television or VCR.
However a television or VCR with AV COMPU LINK
terminals indicating "II," "EX" or "III" can be connected
to the unit.
Operation
The JVC COMPU LINK system allows you to enjoy video
and/or audio by simply pressing Play on the source
component (the component which plays back the video
or audio, such as a DVD player or VCR). You don’t even
have to switch on power on the TV or receiver.
1 Turn on the main power of the television.
2 Insert a disc (or tape) into the source
component.
3 Press 3 of the source component.
The following actions are performed automatically:
• Turning on television power.
• Setting the source of the television to the external
input (VIDEO-1 or VIDEO-2).
• Turning on receiver power.
• Setting the source of the receiver to the component
which has star ted playback.
Additional
information
59
Page 64

Additional information
Troubleshooting
What appears to be a malfunction may not always be serious. Please go through the following list before requesting service.
POWER
Symptom Possible cause Remedy
Power does not come on. Power plug is not inserted securely. Plug in securely.
OPERATION
Symptom Possible cause Remedy
The remote control unit does not work. Too far from the unit. More closer to the unit.
The tip of the remote control unit is not
pointed in the right direction.
Batteries are exhausted. Replace the batteries with new ones.
Battery polarity is incorrect. Take out the batteries and insert them
The remote control unit is not set for
operating your TV.
The TV/VIDEO - CANCEL, 5/∞/2/3 or
numeric buttons do not work.
Operation is not possible. Microcomputer malfunction due to
When using the TITLE/GROUP button to
select a title during DVD VIDEO playback,
appears on the TV screen and the title
cannot be selected.
The TV - DVD switch is not correctly set. To control the unit, set the TV - DVD switch
lightning or static electricity.
Moisture condensation caused by a
sudden change of temperature or
humidity.
The disc does not allow the operation, or a
non-playable disc is loaded.
Disc content does not allow the operation. Try to press 7 and select a title using the
Point the infrared signal window toward
the remote sensor on the front panel (see
page 10).
again in the correct direction.
Set the remote control unit for operating
your TV (see page 11).
"DVD." T o control your TV, set the TV -
to
DVD switch to
Turn off the power and unplug the power
cord, then connect the power cord again.
Turn off the power, then turn it on a few
hours later.
Check and replace the disc (see page 4).
numeric buttons on the remote control.
"TV" (see page 11).
Additional
information
60
Page 65

Additional information
PICTURE
Symptom Possible cause Remedy
No picture is displayed on the monitor. Connection of video cable is incorrect. Connect the cable correctly.
Input selection of TV is incorrect. Select correctly.
Disc is not playable. Use a playable disc (see page 4).
The picture is noisy or blurred. The unit is connected to a VCR directly and
the copyguard function is activated.
With some discs, the picture may be
blurred when
"STILL MODE" is set to
Connect the unit so that the picture signal
flows directly to the TV.
Set "STILL MODE" to "FIELD" (see page
51).
"FRAME" or "AUTO."
The picture does not fit the television
screen.
The upper and lower parts of the
preference display are cut off when using
wide-aspect TV.
MONITOR TYPE is not set correctly. Selec t m o n i t o r t y p e c o rrectly ( s e e p a g e 5 0 ) .
TV settings are incorrect. Set the television correctly.
It depends on the setting on the TV. Adjust the TV screen using the controls on
the TV.
AUDIO
Symptom Possible cause Remedy
No audio is reproduced. Connection is incorrect. Check the connection.
Input selection of amplifier is incorrect. Select correctly.
No audio is reproduced when playing back
a DVD disc recorded with high sampling
frequency (88.2 kHz or more) linear PCM
audio using the DIGITAL OUT jack.
Audio volume is low when playing back
with the unit, compared with the TV or
VCR.
Sound is distorted or noise is generated. Disc is dirty. Wipe the disc surface (see page 5).
Audio signal is not emitted from the unit’s
DIGITAL OUT (see page 51).
The audio level recorded on a DVD VIDEO
is lower compared with a TV broadcast.
Use AUDIO OUT when playing back such
discs.
Turn up the volume of the TV or amplifier/
receiver.
Remember to turn the volume back down
before switching back to a TV broadcast to
prevent a sudden burst of high-volume
sound.
English
61
Additional
information
Page 66

Additional information
Frequently Asked Questions
Question Answer Ref. page
Can I play back DVD VIDEO and V ideo CD discs purchased
abroad?
Can I play back a DVD VIDEO disc without any Region
Code number?
Can I play back a CD-R/RW disc with still pictures in other
than the JPEG format?
Can I play back audio on a disc labeled "Dolby Digital EX"? Yes, you can play back the disc because Dolby Digital EX
Can I play back audio on a disc labeled "DTS ES"?
Is there any difference in the playback settings between
Discrete and Matrix recording systems for DTS ES?
Can this unit play back a disc labeled "THX"?
What does "THX" mean?
You can play DVD VIDEO discs with the Region Code
(local code) containing "ALL" or "4" recorded using the
NTSC or PAL formats. You can select "NTSC" or "PAL"
while using the PAL/NTSC switch on the rear panel.
The Region code indicates conformity to DVD standards.
Any DVD VIDEO which does not conform to the DVD
standards cannot be played.
No, the unit cannot display pictures in formats other than
JPEG.
is compatible with Dolby Digital. However, to get the
maximum performance of Dolby Digital EX, we
recommend to connect the DIGITAL OUT jac k to a decoder
or amplifier/receiver with built-in decoder that supports
Dolby Digital EX. In this case, set "DIGITAL AUDIO
OUTPUT" on the "AUDIO" preference display to
"STREAM/PCM."
You cannot listen to the audio using the analog audio
outputs (AUDIO OUT). However, you can listen to DTS ES
audio by connecting the DIGITAL OUT jac k to a decoder or
amplifier/receiver with built-in decoder that supports DTS
ES. In this case, set "DIGITAL AUDIO OUTPUT" on the
"AUDIO" preference display to "STREAM/PCM."
Yes you can. "THX" is the name of a standard for high
quality picture and audio recording, established by
Lucasfilm Ltd. The "THX" label on a disc certifies that it
meets this standard.
4,7
4
4
51, 52
51, 52
When files of the MP3 and Audio CD formats are recorded
on a same disc, can the unit play files of both formats?
Some Dolby Digital discs contain 5.1-ch Surround or
Dolby Surround audio data. What is the difference
between these two types?
When playing back a DVD VIDEO or Video CD disc,
something like a mosaic appears on the TV screen. Is this
because of a malfunction of the unit?
The unit does not function as described in this Instruction
Additional
information
Manual.
Can I record DVD VIDEO data on a video tape? Most of all DVD VIDEO discs are copy-protected so that
Can this unit record data? No, it cannot.
Discs like this are of the data CD format, not the Audio CD
format. The unit can play only the MP3 files.
Both are surround sound standards developed by Dolby
Laboratories Inc. in the U.S.A.
In Dolby Surround, two-channel surround audio
information is recorded onto the analog stereo (left and
right) channels together with front stereo audio
information. When played back, the surround signals are
separated by a Dolby Surround or Dolby Pro Logic
decoder.
Dolby Digital digitally encodes and records up to six
channels of information for left, right, center, rear left, rear
right and LFE (Low-Frequency Effect, for use with a
subwoofer).
When played back, a Dolby Digital decoder decodes the
data and outputs signals separately.
Generally, Dolby Digital sounds better.
This is block noise specific to a digitally recorded motion
picture. It is not a malfunction of the unit.
The operation of this unit may occasionally be
unacceptable due to the intention of the disc contents
creator and/or structural restrictions.
you cannot record DVD VIDEO data onto any video tape.
4, 40
4
3
62
Page 67

Additional information
Specifications
*Specifications and appearance are subject to change without prior notice.
General
Readable discs: DVD VIDEO, DVD-R (V ideo format), SV CD, Video CD, Audio CD (CD-D A), MP3 format, JPE G,
CD-R/RW (CD-DA, SVCD, Video CD, MP3 format, JPEG)
Video format: NTSC/PAL
Other
Power requirements: AC 110 - 240 V Ó, 50/60 Hz
Power consumption: 15 W (POWER ON), 1.7 W (STANDBY mode)
Mass: 2.4 kg
Dimensions (W × H × D): 435 mm × 55 mm × 258.4 mm
Video outputs
COMPONENT (pin jacks): Y Output: 1.0 Vp-p (75 Ω)
B/PR Output: 0.7 Vp-p (75 Ω)
P
VIDEO OUT (pin jack): 1.0 Vp-p (75 Ω)
S-VIDEO OUT (S jack): Y Output: 1.0 Vp-p (75 Ω)
C Output: 286 mVp-p (75 Ω)
Horizontal resolution: 500 Lines or more
English
Audio outputs
ANALOG OUT (pin jack): 2.0 Vrms (10 kΩ)
DIGITAL OUT: (COAXIAL): 0.5 Vp-p (75 Ω termination)
(OPTICAL): –21 dBm to –15 dBm (peak)
Audio characteristics
Frequency response: CD (sampling frequency 44.1 kHz): 2 Hz to 20 kHz
DVD (sampling frequency 48 kHz): 2 Hz to 22 kHz
(4 Hz to 20 kHz for DTS and Dolby Digital bitstream signals)
DVD (sampling frequency 96 kHz/88.2 kHz):2 Hz to 44 kHz
Dynamic range: 16 bit: More than 98 dB
20 bit: More than 106 dB
24 bit: More than 106 dB
Wow and flutter: Unmeasurable (less than ± 0.002%)
Total harmonic distortion: less than 0.002%
63
Additional
information
Page 68

Additional information
Appendix A: Country/Area code list for Parental Lock
This list is used for the Parental Lock operation. For details, see page 54.
AD Andorra
AE United Arab Emirates
AF Afghanistan
AG Antigua and Barbuda
AI Anguilla
AL Albania
AM Armenia
AN Netherlands Antilles
AO Angola
AQ Antarctica
AR Argentina
AS American Samoa
AT Austria
AU Australia
AW Aruba
AZ Azerbaijan
BA Bosnia and Herzegovina
BB Barbados
BD Bangladesh
BE Belgium
BF Burkina Faso
BG Bulgaria
BH Bahrain
BI Burundi
BJ Benin
BM Bermuda
BN Brunei Darussalam
BO Bolivia
BR Brazil
BS Bahamas
BT Bhutan
BV Bouvet Island
BW Botswana
BY Belarus
BZ Belize
CA Canada
CC Cocos (Keeling) Islands
CF Central African Republic
CG Congo
CH Switzerland
CI Cô te d’Ivoire
CK Cook Islands
CL Chile
CM Cameroon
CN China
CO Colombia
CR Costa Rica
CU Cuba
CV Cape Verde
Additional
CX Christmas Island
information
CY Cyprus
CZ Czech Republic
DE Germany
DJ Djibouti
DK Denmark
DM Dominica
DO Dominican Republic
DZ Algeria
EC Ecuador
EE Estonia
EG Egypt
EH Western Sahara
ER Eritrea
ES Spain
ET Ethiopia
FI Finland
FJ Fiji
Falkland Islands
FK
(Malvinas)
Micronesia (Federated
FM
States of)
FO Faroe Islands
FR France
FX "France, Metropolitan"
GA Gabon
GB United Kingdom
GD Grenada
GE Georgia
GF French Guiana
GH Ghana
GI Gibraltar
GL Greenland
GM Gambia
GN Guinea
GP Guadeloupe
GQ Equatorial Guinea
GR Greece
South Georgia and the
GS
South Sandwich Islands
GT Guatemala
GU Guam
GW Guinea-Bissau
GY Guyana
HK Hong Kong
Heard Island and
HM
McDonald Islands
HN Honduras
HR Croatia
HT Haiti
HU Hungary
ID Indonesia
IE Ireland
IL Israel
IN India
British Indian Ocean
IO
Territory
IQ Iraq
IR Iran (Islamic Republic of)
IS Iceland
IT Italy
JM Jamaica
JO Jordan
JP Japan
KE Kenya
KG Kyrgyzstan
KH Cambodia
KI Kiribati
KM Comoros
KN Saint Kitts and Nevis
"Korea, Democratic
KP
People’s Republic of"
KR "Korea, Republic of"
KW Kuwait
KY Cayman Islands
KZ Kazakhstan
Lao People’s Democratic
LA
Republic
LB Lebanon
LC Saint Lucia
LI Liechtenstein
LK Sri Lanka
LR Liberia
LS Lesotho
LT Lithuania
LU Luxembourg
LV Latvia
LY Libyan Arab Jamahiriya
MA Morocco
MC Monaco
MD "Moldova, Republic of"
MG Madagascar
MH Marshall Islands
ML Mali
MM Myanmar
MN Mongolia
MO Macau
MP Northern Mariana Islands
MQ Martinique
MR Mauritania
MS Montserrat
MT Malta
MU Mauritius
MV Maldives
MW Malawi
MX Mexico
MY Malaysia
MZ Mozambique
NA Namibia
NC New Caledonia
NE Niger
NF Norfolk Island
NG Nigeria
NI Nicaragua
NL Netherlands
NO Norway
NP Nepal
NR Nauru
NU Niue
NZ New Zealand
OM Oman
PA Panama
PE Peru
PF French Polynesia
PG Papua New Guinea
PH Philippines
PK Pakistan
PL Poland
PM Saint Pierre and Miquelon
PN Pitcairn
PR Puerto Rico
PT Portugal
PW Palau
PY Paraguay
QA Qatar
RE Réunion
RO Romania
RU Russian Federation
RW Rwanda
SA Saudi Arabia
SB Solomon Islands
SC Seychelles
SD Sudan
SE Sweden
SG Singapore
SH Saint Helena
SI Slovenia
SJ Svalbard and Jan Mayen
SK Slovakia
SL Sierra Leone
SM San Marino
SN Senegal
SO Somalia
SR Suriname
ST Sao Tome and Principe
SV El Salvador
SY Syrian Arab Republic
SZ Swaziland
TC Turks and Caicos Islands
TD Chad
French S o uthern
TF
Territories
TG Togo
TH Thailand
TJ Tajikistan
TK Tokelau
TM Turkmenistan
TN Tunisia
TO Tonga
TP East Timor
TR Turkey
TT Trinidad and Tobago
TV Tuvalu
TW Taiwan
"T anzania, United Republic
TZ
of"
UA Ukraine
UG Uganda
United States Minor
UM
Outlying Islands
US United States
UY Uruguay
UZ Uzbekistan
Vatican City State (Holy
VA
See)
Saint Vincent and the
VC
Grenadines
VE Venezuela
VG Virgin Islands (British)
VI Virgin Islands (U.S).
VN Vietnam
VU Vanuatu
WF Wallis and F utuna Islands
WS Samoa
YE Yemen
YT Mayotte
YU Yugoslavia
ZA South Africa
ZM Zambia
ZR Zaire
ZW Zimbabwe
64
Page 69

Appendix B: Glossary
Aspect ratio
A ratio which defines the shape of the rectangular
picture in a TV. It is the width of the picture relative to
the height. A conventional TV picture is 4:3 in aspect
ratio.
Bitstream
The digital form of multichannel audio data (e.g., 5.1channel) before it is decoded into its various channels.
Additional information
English
Dynamic range
The difference between the loudest and softest
sounds.
Dynamic range compression
The dynamic range compression (DRC) reduces the
dynamic range so that you can turn down the volume
to avoid disturbing others yet still hear the detail of
quiet passages.
Channel, CH
Stereo or multichannel audio consists of "channel"
signals. "Stereo" audio consists of left and right
channels, while 5.1-channel Dolby Digital consists of
six channels (front left, front right, rear left, rear right,
center and LFE (Low-Frequency Effect channel), for
use with a sub-woofer).
Chapter
The smallest division on DVD VIDEO. It is a division of
a title and similar to a track for Audio CD or Video CD.
Component video
Video signals with three channels of separate
information that makes up the picture. There are
some types of component video, such as R/G/B and Y/
C
B(PB)/CR(PR).
Composite video
A single video signal commonly used in most
consumer video products that contains all luminance,
color, and synchronization information.
Dolby Digital (AC3)
A six-channel system consisting of left, center, right,
left rear, right rear and LFE (Low-Frequency Effect
channel, for use with a sub-woofer) channels. All
processing is done in the digital domain.
Not all Dolby Digital discs contain six (5.1) channels of
information.
Dolby Surround/Dolby Pro Logic
Dolby Surround is a five-channel system consisting of
left, center, right and left rear, right rear channels. All
processing is done in the digital domain.
Dolby Pro Logic is a four-channel system consisting of
left, center, right and rear channels. The single rear
channel is usually played through two speakers.
Downmix
Internal stereo mix of multichannel sur round audio by
a DVD player. The downmix signals are output from
stereo output connectors.
DTS
A Digital Surround audio encoding format configured
with six (5.1) channels, similar to Dolby Digital. It
requires a decoder, either in the player or in an
external receiver. DTS stands for Digital Theater
Systems.
Not all DTS discs contain six (5.1) channels of
information.
Extension
Several letters at the end of a file name. File name
extensions usually follow a period and indicate the
type of information stored in the file.
Finalize
When conducting multisession recording, this means
the closing of a session (fixing) by indicating the
halting of writing so as to prevent the addition of any
more sessions.
Fs
See "Sampling frequency."
ID3 tag
A tag embedded in an MP3 file indicating what song,
artist, and album it comes from. You can edit these
tags.
Interlaced scanning
In a conventional video system, a picture is shown on
the display monitor in between lines of two halves.
The Interlaced scanning system places lines of the
second half of the picture in-between lines of the first
half of the picture.
ISO 9660 Format
The most common international standard for the
logical format of files and directories on a CD-ROM.
JPEG
A popular file format for still image compression and
storage.
JPEG stands for Joint Photographic Experts Group.
There are three sub-types of the JPEG format as
follows.
• baseline JPEG: used for digital cameras, the
web, etc.
• progressive JPEG:used for the web
• lossless JPEG: an old type, rarely used now
Letter box
A type of video display for normal (4:3) TV screens.
Black bars are shown at the top and bottom of the
image to allow playing of a wide-screen (16:9) movie
without cutting off any of the image.
Linear PCM audio
PCM stands for "pulse code modulation." Linear PCM
is the usual method for digitally encoding audio
without compression, and is used for the audio tracks
on DVD VIDEO discs, Audio CDs, etc.
Additional
information
65
Page 70

Additional information
Menu
Most DVD VIDEO or Video CD/SVCD discs provide a
menu, through which users can select desired
material, conditions, etc.
MP3
MP3 is an audio data compression format, which
stands for MPEG-1 Audio Layer 3. Using MP3, you can
achieve a data reduction of about 1:10.
MPEG
A family of Standards for compressing audio-visual
information. "MPEG" standards include MPEG-1,
MPEG-2 and MPE G-4. Video CD and MP3 are based on
MPEG-1, while DVD is based on MPEG-2. MPEG
stands for Moving Picture coding Experts Group.
MPEG Multichannel
This feature expands the 5.1 channel audio format
recorded on the disc to a 7.1 channel format. The
further expansion of the 5.1 channel audio makes it
easy for you to reproduce the movie theater
experience in your own home.
Multisession
A method of adding data to a CD-R/CD-RW in more
than one recording session using the Track-At-Once
method.
NTSC (National television system committee)
A black and white and color television system format
used in the U.S.A., Canada, Mexico and Japan.
Parental lock
A DVD function that prevents undesired viewing by
children depending on disc content. Ordinarily, a
password is required to play back a locked disc.
Otherwise, undesirable scenes are automatically
skipped or replaced with other pictures.
PBC
PBC stands for "Playback control" and is a method of
controlling disc play for Video CDs (VCD). You are able
to interact with the disc through menus.
Region code
Code identifying a geographic region of compatibility
for a DVD.
Sampling frequency
The rate at which measurements of an audio signal
are taken during A/D conversion. The sampling
frequency is expressed in samples per second.
Surround
An audio system with more than two (left and right)
channels, usually including rear channels, etc.
S-video
A video signal which improves picture quality over
standard composite connections. Used on Super VHS,
DVD, high end TV monitors, etc.
Title
The largest division on DVD VIDEO.
Packet Writing
A method of writing data on a CD-R/CD-RW in small
increments. Packets can be of fixed or variable length.
PAL (Phase Alternation by Line)
A color television system format used extensively in
Western Europe.
Pan and scan
A type of video display for normal (4:3) TV screens.
The image is zoomed to fill the screen vertically, and
the field of view may be panned while the left and/or
right sides of the picture are cut off.
Additional
information
Tr a c k
The smallest division on Audio CD, Video CD and
SVCD discs.
Transfer rate
The rate of transferring digital data. The transfer rate
is usually expressed in bits per second. The DVD
system uses a variable transfer rate for high efficiency .
66
Page 71

Índice
Español
Introducción
Página 2
Accesorios suministrados..................................................2
Notas sobre la manipulación.............................................3
Precauciones importantes.......................................................3
Precauciones de seguridad.....................................................3
Observaciones sobre los discos........................................4
Discos que pueden reproducirse............................................4
Discos que no pueden reproducirse.......................................4
Formatos de audio...................................................................4
Estructura de los discos...........................................................5
Discos Vídeo CD y SVCD con función de control de
reproducción.........................................................................5
Cuidado y manipulación de los discos...................................5
Para empezar
Página 6
Conexiones .........................................................................6
Antes de realizar las conexiones ............................................6
Para conectar la unidad a un televisor...................................6
Conexión a un amplificador/receptor de audio estéreo .......7
Conexión a un equipo de audio digital..................................8
Conexión del cable de alimentación ......................................9
Empleo del mando a distancia........................................10
Instalación de las pilas en el mando a distancia.................10
Sensor de control remoto .....................................................10
Empleo del mando a distancia para la
operación del televisor.......................................................11
Control del volumen de un amplificador o receptor JVC...11
Funciones básicas
Página 12
Antes de la operación ......................................................12
Encendido/apagado de la unidad.........................................12
Configuración inicial antes de utilizar la unidad .................13
Reproducción básica ........................................................14
Inserción y extracción de los discos.....................................14
Para iniciar la reproducción ..................................................15
Para detener por completo la reproducción........................15
Para detener provisionalmente la reproducción.................15
Reanudación de la reproducción.....................................16
Para memorizar la posición de interrupción........................16
Para reanudar la reproducción .............................................17
Reproducción a velocidad variable.................................18
Para que la reproducción avance o retroceda
mientras se monitoriza.......................................................18
Para hacer avanzar una imagen fija fotograma por
fotograma............................................................................18
Reproducción a cámara lenta ...............................................19
Para encontrar el principio de una escena o canción....20
Búsqueda de la selección deseada utilizando 4 o ¢...20
Búsqueda de la selección deseada utilizando los botones
numéricos............................................................................20
Otras funciones convenientes.........................................21
Comprobación del estado de reproducción ........................21
Para hacer retroceder la posición de reproducción durante la
reproducción de discos DVD VIDEO [Función de repetición
de la reproducción de un accionamiento]........................22
Cambio del brillo de la ventana de visualización................22
Funciones avanzadas
Página 23
Reproducción desde una posición
específica del disco........................................................23
Búsqueda de una escena deseada desde el menú
de un disco DVD..................................................................23
Búsqueda de una escena deseada desde el menú
de un Vídeo CD/SVCD con PBC .........................................23
Para especificar el título deseado.........................................24
Para buscar la posición deseada en el título o pista actual
[Búsqueda del tiempo].......................................................24
Para buscar la escena deseada desde la visualización
[DIGEST]..............................................................................25
Cambio del orden de reproducción ................................26
Reproducción en un orden específico
[Reproducción programada]..............................................26
Reproducción en orden aleatorio
[Reproducción aleatoria]....................................................27
Reproducción repetida.................................................... 28
Repetición de la selección actual o de todas las pistas
[Reproducción repetida].....................................................28
Para repetir una parte seleccionada
[Reproducción de A-B repetida] ........................................29
Cambio del idioma, del sonido y del ángulo
de la escena................................................................... 30
Selección del idioma de los subtítulos [SUBTITLE]............30
Para cambiar el idioma de audio o el sonido [AUDIO].......31
Para seleccionar el ángulo de una escena en un disco
DVD VIDEO [ANGLE] ..........................................................32
Reproducción especial de la imagen y efectos
de imagen y de sonido ................................................. 33
Para visualizar imágenes fijas seguidas [STROBE].............33
Para acercar o alejar las imágenes [ZOOM] ........................33
Ajuste del carácter de la imagen [VFP] ................................34
Simulación del sonido perimétrico
[3D PHONIC]........................................................................35
Funciones de la barra del menú ..................................... 36
Para que aparezca la barra del menú...................................36
Procedimiento básico de operación.....................................36
Funciones de la barra del menú para DVD VIDEO..............37
Funciones de la barra del menú para
Audio CD/Vídeo CD/SVCD..................................................38
Reproducción de discos MP3
Página 40
Observaciones sobre los discos MP3............................. 40
Operaciones ..................................................................... 40
Operaciones básicas..............................................................40
Selección del Grupo y de la Pista deseados........................41
Selección directa....................................................................42
Reproducción repetida ..........................................................42
Reproducción de discos JPEG
Página 43
Observaciones sobre los discos JPEG........................... 43
Operaciones básicas........................................................ 44
Para ver la imagen deseada..................................................44
Para acercar o alejar la imagen [ZOOM]..............................45
Para mirar imágenes seguidas continuamente [modo de
imágenes seguidas]...................................................... 45
Características de reproducción ...........................................45
Selección del punto de inicio de la reproducción en el modo
de imágenes seguidas........................................................46
Función de repetición............................................................47
Cambio de los ajustes iniciales
Página 48
Selección de preferencias ............................................... 48
Observación sobre la visualización de preferencias...........48
Forma de ajustar las preferencias ........................................48
Menú IDIOMA.........................................................................49
Menú IMAGEN .......................................................................50
Menú AUDIO ..........................................................................51
Menú OTROS .........................................................................53
Restricción de la reproducción para niños.................... 54
Ajuste de la restricción paterna por primera vez
[BLOQUEO INFANTIL]........................................................54
Cambio de los ajustes [BLOQUEO INFANTIL].....................55
Para desactivar temporalmente la restricción paterna
[BLOQUEO INFANTIL]........................................................56
Información adicional
Página 57
Nomenclatura de dispositivos y controles.................... 57
Panel frontal...........................................................................57
Ventana de visualización.......................................................57
Panel posterior.......................................................................57
Mando a distancia..................................................................58
Sistema de control remoto AV COMPU LINK............... 59
Conexión y configuración .....................................................59
Operación...............................................................................59
Solución de problemas ................................................... 60
Preguntas frecuentes ...................................................... 62
Especificaciones............................................................... 63
Apéndice A: Lista de códigos de países/zonas para
bloqueo infantil............................................................. 64
Apéndice B: Glosario....................................................... 65
1
Page 72

Introducción
Accesorios suministrados
• Cable de audio/vídeo (amarillo/blanco/rojo) (× 1)
• Mando a distancia (× 1)
OPEM/
CLOSE
TV
1
1
Introducción
RM-SXV010U
REMOTE CONTROL
TV4
4
TV7
7
TV-/--
10
ANGLE
TV8
8
TV0 MU
SUBTI
O
T
P
0
M
E
N
U
TLE
VO
L
-
CH
TITLE/
+
G
ENTER
NEXT
ROUP
TV/
C
AN
M
E
N
U
V
OL+
O
N
S
C
R
E
E
N
C
H
O
I
C
PREVIOUS
E
CH
-
CLEAR
SLOW
SELECT
-
DIGEST
SUBTITLEREPEAT
PHONIC
3D
ANGLE
AMP VCL
STROBE
SLOW+
AUDIO
VFP
ZOOM
TV
STANDBY/ON
TV DV
TV2
2
TV5
5
TV3
3
TV6
6
TV9
9
+10
T
ING
VI
D
EO
CEL
DVD
D
• Cable de S-vídeo (× 1)
• Pilas R6P (SUM-3)/AA (15F) (× 2)
• Clavija de alimentación de CA (× 1)
2
Page 73

Introducción
Notas sobre la manipulación
Precauciones importantes Precauciones de seguridad
Instalación de la unidad
• Seleccione un lugar nivelado, seco y que no sea ni
muy caluroso ni muy frío (entre 5°C y 35°C).
• Deje espacio suficiente entre la unidad y el televisor.
• No emplee la unidad en lugares sometidos a vibraciones
Cable de alimentación
• ¡No manipule el cable de alimentación con las manos
mojadas!
• Siempre se consume una pequeña cantidad de
corriente (1,7 W) mientras el cable de alimentación
está enchufado a la toma de cor riente.
• Para desenchufar la unidad de la toma de corriente,
tire siempre de la clavija y nunca del cable de
alimentación.
Para evitar el mal funcionamiento de la unidad
• En el interior de la unidad no hay ninguna parte que
pueda reparar el usuario. Si hay algo que no funciona
bien, desenchufe el cable de alimentación y consulte a
su distribuidor.
• No introduzca ningún objeto metálico en la unidad.
• No emplee ningún disco que no tenga una forma
estándar, aunque esté a la venta en el mercado,
porque podría dañar la unidad.
• No emplee discos que tengan cintas, pegatinas ni nada
adherido a los mismos porque podría producir daños
en la unidad.
Observación sobre las leyes de Copyright
• Compruebe las leyes de Copyright de su país antes de
grabar discos DVD VIDEO, Audio CD, Vídeo CD, SVCD,
MP3 y JPEG. La grabación de material protegido con
derechos de autor puede infringir las leyes de
Copyright.
Observación sobre el sistema de protección contra
copias
• Los discos DVD VIDEO están protegidos con el sistema
de protección contra copias. Cuando conecte la unidad
a su videograbadora (o sistema de televisor/vídeo
integrado), se activará el sistema de protección contra
copias y es posible que la imagen no se reproduzca
correctamente.
Evite la humedad, el agua y el polvo
No ponga la unidad en lugares húmedos o con polvo.
Evite las altas temperaturas
No exponga la unidad a la luz directa del sol ni la ponga
cerca de aparatos que generen calor.
Cuando se ausente
Cuando se encuentre de viaje o esté ausente durante
períodos prolongados de tiempo, desenchufe la clavija
de la toma de corriente.
No introduzca objetos extraños en la unidad
No introduzca alambres, horquillas, monedas, etc. en la
unidad.
No obstruya las rejillas de ventilación
Si se obstruyen las rejillas de ventilación, pueden
producirse daños en la unidad.
Cuidados del exterior
Cuando limpie el aparato, emplee un paño blando y siga
las instrucciones pertinentes sobre el empleo de paños
químicamente tratados. No utilice bencina, disolvente ni
otros solventes orgánicos ni desinfectantes. Estos
productos podrían deformar o decolorar el exterior de la
unidad.
Si entra agua en el interior de la unidad
Desconecte el interruptor de la alimentación y
desenchufe la clavija de la toma de corriente, y luego
llame al establecimiento donde compró la unidad. Si
sigue empleando la unidad en este estado, correrá el
peligro de un incendio o de descargas eléctricas.
Español
Introducción
Este producto incorpora una tecnología para la protección del copyright que está protegida por medio de
determinadas patentes de EE.UU. y otros derechos de propiedad intelectual adquiridos por Macrovision
Corporation y otros titulares de derechos. La utilización de esta tecnología para la protección del copyright debe ser
autorizada por Macrovision Corporation, y solamente está destinada para uso doméstico y otras formas limitadas
de visión a menos que Macrovision Corporation lo autorice de otro modo. Se prohibe la ingeniería inversa o el
desmontaje.
Fabricado bajo licencia de Dolby Laboratories.
"Dolby" y el símbolo con una doble D son marcas registradas de Dolby Laboratories.
Trabajos confidenciales no publicados. © 1992-1997 por Dolby Laboratories. Todos los derechos queden reservados.
Fabricado bajo licencia de Digital Theater Systems, Inc. Patente estadounidense No. 5,451,942 y otras patentes
mundiales tramitadas y pendientes. “DTS” y “DTS Digital Surround” son marcas comerciales de Digital Theater
System, Inc.
© 1996 Digital Theater Systems, Inc. Todos los derechos reservados.
3
Page 74

Introducción
Observaciones sobre los discos
Discos que pueden reproducirse
Los tipos de discos que puede reproducirse y que no
pueden reproducirse son los siguientes:
DVD VIDEO SVCD Video CD Audio CD
VIDEO
El logotipo DVD es una marca comercial.
• Los discos CD-R y CD-RW grabados en el formato
Introducción
Audio CD, Vídeo CD, SVCD, MP3 o JPEG pueden
reproducirse. Sin embargo, es posible que algunos
discos no puedan reproducirse debido a las
características del disco o a las condiciones de
grabación.
Tenga presente que los discos que no estén finalizados
no podrán reproducirse.
• Los discos DVD-R grabados en el formato de DVD
VIDEO pueden reproducirse. Sin embargo, es posible
que algunos discos no puedan reproducirse debido a
las características del disco o a las condiciones de
grabación.
Tenga presente que los discos que no estén finalizados
no podrán reproducirse.
• Los reproductores de discos DVD VIDEO y los discos
DVD VIDEO tienen sus propios números de código de
región. Esta unidad puede reproducir sólo los discos
DVD VIDEO cuyos códigos de región incluyan el "4".
A continuación se muestran ejemplos de discos DVD
VIDEO que pueden reproducirse:
ALL
Esta unidad es compatible con los sistemas PAL y NTSC,
y puede reproducir discos cuyos números de códigos de
región incluyan el "4". Podrá seleccionar "NTSC" o "PAL"
empleando el selector PAL/NTSC del panel posterior.
(Para más detalles, consulte la página 7)
4
43
1
423
2
1
5
4
Discos que no pueden reproducirse
DVD-ROM, DVD-RAM, DVD-RW, DVD+RW, DVD-AUDIO,
CD-ROM, PHOT O CD, CD-EXTRA, CD-G. CD-TEXT, SACD,
MIX MODE CD
Formatos de audio
A continuación se describen algunos de los formatos de
audio utilizados en los discos.
• PCM lineal
Es el audio digital sin compresión, que es el mismo
formato que el empleado en los discos CD y en la
mayor parte de "master" de los estudios.
El DVD VIDEO es compatible con 2 canales a
frecuencias de muestreo de 48/96 kHz y cuantificación
de 16/20/24 bitios.
Los discos Audio CD/Vídeo CD se limitan a 2 canales a
44,1 kHz a 16 bitios.
• MPEG de canales múltiples
Es un formato de audio de sonido perimétrico que
puede manipular el canal de aumento de 7,1 canales
(raro para aplicaciones en el hogar), así como de 5,1
canales.
• Dolby Digital
Es un formato de sonido perimétrico configurado con
seis canales. Puesto que el canal "LFE (efecto de bajas
frecuencias para altavoz de subgraves, etc.)", uno de
los seis canales, es un canal auxiliar, este formato se
denomina "sistema de 5,1 canales (5,1-ch)".
No todos los discos Dolby Digital contienen
información de seis (5,1) canales.
• DTS (Digital Theater System)
Es un formato de sonido perimétrico configurado con
3
6
seis canales (5,1) igual que el de Dolby Digital. Puesto
que la relación de compresión es menor que la de
Dolby Digital, proporciona un margen dinámico más
amplio y mejor separación.
No todos los discos DTS contienen información de
seis (5,1) canales.
El indicador correspondiente se enciende en la ventana
de visualización cuando se reproduce un disco.
Indicador Formato de audio
LPCM PCM lineal
MPEG MPEG de canales múltiples
• La reprodución de los discos enumerados arriba como
"Discos que no pueden reproducirse" puede generar
ruido y causar daños en los altavoces.
• Esta unidad puede reproducir señales de audio
grabadas en los discos CD-G, CD-EXTRA, CD-TEXT y
MIX-MODE CD.
4
DOLBY DIGIT AL
DTS DTS (Digital Theater System)
Tenga presente que con algunos formatos de audio, y/o
dependiendo del ajuste de "SALIDA DE AUDIO DIGITAL"
de la unidad, las señales de audio no se transmiten
siempre desde las tomas DIGIT AL OUT de la unidad tal y
como están grabadas en el disco.
Para ver más detalles al respecto, consulte el apartado
"SALIDA DE AUDIO DIGITAL" en la página página 51.
Dolby Digital
Page 75

Introducción
Estructura de los discos
(Para DVD VIDEO)
Un disco DVD VIDEO consta de "títulos", y cada título
puede estar dividido en "capítulos". Por ejemplo, si un
disco DVD VIDEO contiene más de una película, cada
película puede tener su propio número de título, y cada
película puede estar dividida en varios capítulos. En un
disco DVD VIDEO KARAOKE, cada canción tiene
normalmente su propio número de título y no tiene
capítulos.
Título 2Título 1
Capítulo 1
Capítulo 2 Capítulo 3 Capítulo 1 Capítulo 2
(Para Audio CD/Vídeo CD/SVCD)
Los discos Audio CD, Vídeo CD o SVCD constan
solamente de "pistas".
Pista 1 Pista 2 Pista 3 Pista 4
Discos Vídeo CD y SVCD con función de
control de reproducción
¿Qué es la función de control de
reproducción (PBC)?
La función de control de reproducción le permite realizar
la operación controlada con un menú y disfrutar de
imágenes fijas de alta definición con una definición
cuatro veces superior a la de las imágenes en
movimiento.
• Visualización de imágenes fijas de alta definición
Podrá visualizar las imágenes fijas de alta
definición con una claridad cuatro veces mejor que
las imágenes en movimiento.
Cuidado y manipulación de los discos
Español
Cómo manipular los discos
Cuando manipule los discos, no toque la superficie del
disco. Los discos se pueden dañar fácilmente porque
son de plástico. Si el disco se ensucia, se llena de polvo,
se raya, o se deforma, no podrán captarse correctamente
las imágenes ni el sonido, y por lo tanto pueden causar
el mal funcionamiento del reproductor.
Introducción
Cara de la etiqueta
Procure no dañar la cara de la etiqueta ni pegar ningún
tipo de papel o adhesivo en su superficie.
Almacenaje
Asegúrese de mantener los discos guardados en sus
cajas. Si los discos se amontonan unos encima de otros
sin las cajas de protección, pueden estropearse. No
ponga los discos en lugares expuestos a la luz directa del
sol ni en lugares donde haya mucha humedad o altas
temperaturas. ¡No deje los discos en el coche!
Mantenimiento de los discos
Si el disco tiene huellas dactilares u otro tipo de
suciedad adherida, frótelo con un paño suave y seco
desde el centro hacia fuera.
Si resulta difícil limpiar el disco, frótelo con un paño
humedecido con agua. No utilice nunca limpiadores de
discos, petróleo, alcohol ni otros productos antiestáticos.
• Reproducción controlada con un menú
Cuando inicia la reproducción de un disco Vídeo CD
o SVCD con la función de control de reproducción,
se visualiza un menú de selección. Este menú de
selección tiene una lista de números para la
selección. Algunos discos muestran imágenes o
una pantalla dividida.
Podrá interactuar con la pantalla utilizando la
visualización del menú para seleccionar y
reproducir los elementos deseados.
La ilustración de abajo muestra la característica básica
de la reproducción controlada con menú. (Para más
información sobre la función de PBC (control de
reproducción), consulte la página página 23.)
Presione
RETURN
4
Imagen en
movimiento
Imagen en
movimiento
Imagen
fija
Imagen
fija
4
Imagen
fija
Pantalla
del menú
1 2 3
Presione
RETURN
1
Imagen en
movimiento
4
2
1 2
PRECAUCIÓN
Es posible que la imagen sea a veces insatisfactoria o
que muestre ruido debido a defectos propios del
disco.
Presione
RETURN
4
5
Page 76

Para empezar
Conexiones
*Antes de poder emplear la unidad, deberá conectarla a un televisor y/o amplificador.
Antes de realizar las conexiones
• No enchufe el cable de alimentación de CA hasta haber completado todas las demás conexiones.
• Conecte directamente la toma VIDEO OUT de la unidad a la entrada de vídeo de su televisor. Si conecta la toma VIDEO
OUT de la unidad a un televisor a través de una videograbadora, pueden producirse problemas en el monitor durante
la reproducción de discos con protección contra copias. También pueden producirse problemas con el monitor cuando
se conecta la unidad a un sistema de televisor con vídeo integrado.
La unidad
Videograbadora
Conecte directamente
NOTAS
• En la descripción siguiente, "televisor" podrá sustituirse por "monitor" o "proyector".
• Los nombres de los terminales utilizados en los otros componentes pueden ser distintos de los utilizados en la descripción siguiente.
Para empezar
Televisor
Para conectar la unidad a un televisor
Conexión a un televisor convencional
Podrá realizar la reproducción conectando simplemente la unidad a un televisor.
Conecte la unidad a un televisor provisto de tomas de entrada de audio estéreo y de entrada de vídeo empleando los
cables de audio/vídeo suministrados.
La unidad
Televisor
Rojo
Conexión a un televisor provisto de toma S-vídeo
Si su televisor tiene una entrada de S-VIDEO, podrá obtener una mejor calidad de imagen conectándola a la salida
S-VIDEO de la unidad mediante un cable de S-vídeo, en lugar de conectar la entrada de vídeo del televisor a la toma VIDEO de la unidad.
La unidad
Amarillo
Blanco
Cable de audio/vídeo (suministrado)
Blanc
Amarillo
Rojo
IN
VIDEO
LEFT
AUDIO
RIGHT
Televisor
IN
Rojo Blanco
Cable de S-vídeo (suministrado)
Cable de audio (no suministrado)
Blanco
Rojo
S-VIDEO
VIDEO
LEFT
AUDIO
RIGHT
NOTA
• Asegúrese de que el sistema de color del disco DVD VIDEO/vídeo CD/SVCD mostrado en la envoltura corresponda con el de su
televisor.
6
Page 77

Para empezar
Conexión a un televisor con tomas componentes
Podrá obtener alta calidad de imagen conectando las tomas COMPONENT VIDEO OUT de la unidad a las tomas
COMPONENT VIDEO IN de su televisor con los cables de vídeo.
Azul
Español
Verde Rojo
Cable de vídeo de componentes (no suministrado)
Azul
Verde Rojo
Rojo
Televisor
IN
S-VIDEO
VIDEO
LEFT
AUDIO
RIGHT
YP
BPR
COMPONENT IN
Rojo Blanco
Cable de audio (no suministrado)
• Conecte correctamente "Y" a "Y", "P
Blanco
B" a "PB" (CB), y "PR" a "PR" (CR).
Selección del sistema de color
Esta unidad es compatible con los sistemas PAL y NTSC. Ajuste el selector PAL/NTSC del panel posterior a la posición
correspondiente al sistema de colore de su televisor. Asegúrese de que el sistema de color del disco DVD VIDEO/vídeo
CD/SVCD mostrado en la envoltura corresponda con el de su televisor. No obstante, tenga presente que deberá cambiar
la posición del selector mientras la alimentación de la unidad esté desconectada (en estado de espera) con el DVD
extraído, porque de no hacerse así el ajuste no tendrá efectividad.
Si emplea un televisor de sistemas múltiples de color, podrá reproducir discos grabados con los sistemas PAL y NTSC
ajustando apropiadamente el selector PAL/NTSC.
Tenga presente que deberá cambiar la posición del selector mientras la alimentación de la unidad esté desconectada. De
lo contrario, el ajuste no tendrá efectividad.
Para empezar
Conexión a un amplificador/receptor de audio estéreo
Podrá disfrutar de audio de alta calidad conectando la salida de audio de la unidad a su amplificador o receptor.
Conecte las tomas AUDIO OUT (LEFT/RIGHT) a unas tomas de entrada de nivel de línea (tales como AUX, DVD, CD, etc.)
de un amplificador o receptor de audio.
La unidad
Rojo Blanco
Cable de audio (no suministrado)
Blanco
NOTAS
• Cuando utilice la unidad con un amplificador o receptor estéreo, ajuste "MEZCLA ANALÓGICA" de las preferencias de "AUDIO"
en "ESTÉREO" (vea la página 52).
• Si su amplificador o receptor estéreo está provisto de un terminal AV COMPU LINK, podrá emplear la función AV COMPU LINK.
Para ver más detalles al respecto, consulte el apartado "Sistema de control remoto AV COMPU LINK" en la página 59.
Amplificador o receptor
IN
LEFT
AUDIO
RIGHT
Rojo
7
Page 78

Para empezar
Conexión a un equipo de audio digital
Podrá mejorar la calidad del sonido reproducido conectando una de las tomas DIGITAL OUT de la unidad a la entrada
digital de un amplificador, etc. con un cable digital óptico o coaxial (opcional). La señal de audio digital de un disco se
transferirá directamente. Si conecta la unidad a un decodificador Dolby Digital o DTS o a un amplificador con
decodificador incorporado empleando un cable digital opcional, podrá obtener sonido perimétrico de alta calidad.
Para realizar una conexión digital, conecte la toma DIGITAL OUT (OPTICAL o COAXIAL) a la entrada digital de un equipo
de audio digital empleando un cable digital óptico o coaxial.
Cuando emplee la toma DIGITAL OUT (OPTICAL), deberá extraer la tapa protectora.
No pierda la tapa protectora extraída.
Cuando no utilice la toma DIGITAL OUT (OPTICAL), deberá tapar la toma con la tapa
protectora.
La unidad
Para empezar
Cable digital coaxial (no suministrado)
Blanco
Rojo
Cable digital óptico (no suministrado)
Equipo digital
Cable de audio (no suministrado)
Blanco
IN
LEFT
AUDIO
RIGHT
IN
OPTICAL
DIGITAL
COAXIAL
Rojo
NOTAS
• Cuando haga una conexión digital, le recomendamos que también haga la conexión analógica, porque, dependiendo del disco,
es posible que no se emita ninguna señal por la toma DIGITAL OUT.
• Cuando haya conectado la toma DIGITAL OUT de la unidad a un equipo de audio digital, antes de su utilización, ajuste
correctamente "SALIDA DE AUDIO DIGITAL" de las preferencias de "AUDIO" de acuerdo con el equipo de audio conectado. Si
no ajusta correctamente "SALIDA DE AUDIO DIGITAL", puede generarse ruido muy fuerte por los altavoces, ocasionándoles
daños. Vea "SALIDA DE AUDIO DIGITAL" en la página 51.
• Cuando conecte la toma DIGITAL OUT de la unidad a un decodificador Dolby Digital o DTS (o a un amplificador con
decodificador incorporado) para obtener sonido perimétrico, el ajuste de "COMPR. GAMA DINÁMICA" de las preferencias de
"AUDIO" queda inválido. Deberá efectuar los ajustes de sonido perimétrico apropiados en el decodificador.
• Si su equipo de audio digital está provisto de un terminal AV COMPU LINK, podrá emplear la función AV COMPU LINK. Para ver
más detalles al respecto, consulte el apartado "Sistema de control remoto AV COMPU LINK" en la página 59.
8
Page 79

Para empezar
Conexión del cable de alimentación
Cuando haya terminado todas las conexiones de audio/vídeo, enchufe la clavija del cable de alimentación de CA a la
toma de corriente de la pared.
Asegúrese de que las clavijas queden insertadas a fondo. El botón STANDBY/ON se encenderá en color rojo.
Aviso
• Desenchufe el cable de alimentación si no se propone utilizar la unidad durante períodos prolongados de tiempo.
• Desenchufe el cable de alimentación antes de limpiar la unidad.
• Desenchufe el cable de alimentación antes de mover la unidad.
• No enchufe ni desenchufe el cable de alimentación con las manos mojadas.
• No tire del cable de alimentación para desenchufarlo, porque podría causar daños en el cable y ocasionar un incendio,
descargas eléctricas, u otros accidentes.
Precaución
• No modifique, retuerza ni tire del cable de alimentación, y no ponga nada pesado encima del mismo, porque correría
el peligro de incendio, descargas eléctricas, o de otros accidentes.
• Si el cable está dañado, consulte a un distribuidor y solicite que le cambie el cable de alimentación por otro nuevo.
Español
Para empezar
9
Page 80

Para empezar
Empleo del mando a distancia
Con el mando a distancia podrá operar no sólo todas las funciones de la unidad, sino también las funciones básicas de
su televisor y amplificador/receptor.
Instalación de las pilas en el mando a
distancia
El compartimiento de las pilas se encuentra en la parte
posterior del mando a distancia.
1 Presione el punto indicado con la
flecha, en la parte superior de la
cubierta del compartimiento, y
levante la cubierta para abrir el
compartimiento.
2 Coloque las dos pilas R6P (SUM-3)/
Para empezar
AA(15F) suministradas en el mando
a distancia teniendo en cuenta las
marcas de las polaridades ("+" y "–")
del interior del compartimiento y de
las mismas pilas.
3 Ponga la cubierta sobre el
compartimiento, y presiónela con
cuidado.
Las pilas durarán unos seis meses utilizando con
normalidad el mando a distancia. Si sus funciones
muestran un comportamiento irregular , cambie las pilas.
Lea lo siguiente para obtener más información al
respecto.
Precauciones para emplear correctamente
las pilas
Tenga en cuenta las precauciones siguientes para utilizar
las pilas correctamente. Si las utiliza incorrectamente, se
acortará su vida de servicio, correrá el peligro de que
exploten o que se produzcan fugas de su líquido.
Precauciónes
• Extraiga las pilas del mando a distancia si no se
propone utilizarlo durante períodos prolongados de
tiempo.
• Extraiga las pilas gastadas y deshágase de ellas de
forma apropiada.
• No deje nunca las pilas gastadas en cualquier sitio,
no las desmonte, no las mezcle con otro tipo de
basura, y no las tire a un incinerador.
• No toque nunca el líquido que haya salido de las
pilas.
• Cuando cambie las pilas, no mezcle nunca pilas
gastadas con pilas nuevas, ni pilas de tipos
distintos.
Sensor de control remoto
• Opere el mando a distancia orientándolo hacia el
sensor de control remoto de la unidad.
• El mando a distancia puede utilizarse dentro de una
distancia de unos 5 metros desde el sensor de control
remoto. Si opera el mando a distancia desde una
posición en diagonal, es posible que se reduzca el
alcance.
Sensor de control remoto
XV-N5 DVD/SUPER VCD/VCD/CD PLAYER
TV DVD
STANDBY/ON
OPEN/
TV DVD
CLOSE
TV22TV1
TV3
1
3
TV55TV4
TV6
4
6
TV88TV7
TV9
7
9
TV00TV-/--10MUTING
+10
TITLE/
TV/VIDEO
GROUP
CANCEL
SUBTITLERETURN
U
M
N
E
E
CH
N
M
U
+
P
O
T
VOL
-
VOL+
ENTER
C
H
O
SLOW
3D
PHONIC
NOTA
• Si el sensor de control remoto de la unidad está
expuesto a la luz directa del sol o a iluminación fuerte,
es posible que no responda al mando a distancia.
CH
-
I
C
E
-
ANGLEDIGEST
RM-SXV010U
REMOTE CONTROL
N
E
E
R
C
S
N
O
NEXTPREVIOUS
SELECT STROBECLEAR
SLOW+
VFPAUDIOSUB TITLEREPEAT
PROGRESSSIVE
SCAN
ZOOM
AMP VOL
10
Page 81

Empleo del mando a distancia para la
operación del televisor
Podrá operar su televisor con este mando a distancia.
Para empezar
5 Suelte TV/VIDEO-CANCEL.
6 Trate de operar el televisor presionando
TV STANDBY/ON .
Si se enciende o apaga el televisor, significa que ha
ajustado con éxito la señal de control.
Español
Ajuste de la señal de control remoto para
operar su televisor
TV DVD
STANDBY/ON
OPEN/
TV DVD
TV STANDBY/ON
ENTER
CLOSE
T
C
DIGEST
O
VOL
H
PHONIC
TV22TV1
TV3
1
3
TV55TV4
TV6
4
6
TV88TV7
TV9
7
9
TV0
TV-/--
MUTING
0
10
+10
TITLE/
TV/VIDEO
GROUP
CANCEL
SUBTITLERETURN
U
M
N
E
E
CH
M
P
-
O
I
C
SLOW
3D
N
U
+
VOL+
ENTER
N
CH
E
E
-
R
C
E
S
N
O
NEXTPREVIOUS
SELECT STROBECLEAR
-
SLOW+
VFPAUDIOSUB TITLEREPEAT
ZOOM
ANGLE
AMP VOL
1 Ajuste el selector TV-DVD en "TV".
2 Mantenga presionado TV/VIDEO-CANCEL hasta
terminar el paso 4.
3
Introduzca el código de la marca de su televisor, abajo
enumerados, empleando los botones numéricos (0 al 9).
Ejemplo:
Para introducir el código de la marca "0 1": Presione "0"
y luego "1".
Selector de
TV-DVD
Botones
numéricos
TV/VIDEO CANCEL
Podrá utilizar los botones siguientes para operar el
televisor.
Para emplear 5/∞ (CH+, CH–), 2/3 (VOL–, VOL+),
TV/VIDEO-CANCEL y los botones numéricos para el
control del televisor, ajuste el selector TV-DVD en
"TV".
TV DVD
TV
TV/VIDEO
CANCEL
TV1
1
~
TV0
0
MUTING
+10
Enciende o apaga el televisor.
Cambia el modo de entrada del televisor
entre TV y VIDEO.
Selecciona directamente los canales de
televisor.
TV-/--
10
* Para algunos televisores, la presión de
"+10" funciona como "100+", mientras
que "10" funciona como el botón ENTER
si en su televisor resulta necesario
presionar el botón ENTER después de
seleccionar un número de canal.
Silencia el sonido del televisor.
Para empezar
• Cuando compró la unidad, el código de la marca estaba
ajustado en "JVC" (01).
4 Presione ENTER.
Lista de códigos de marcas
Marca N.° Marca N.°
AIWA 36 MIVAR 29
BEIJING 22 NEC 20
CCE 02 NOBLEX 22
CHANGHONG 34 NOKIA 31
DAEWOO 17, 37 PANASONIC 04, 11
FERGUSON 27 PEONY 34, 38, 39
FINLUX 30 PHILCO 10, 17, 21
FUNAI 32 PHILIPS 02
GRADIENTE 15, 20 RCA 05
GRUNDIG 19 SAMSUNG 12, 33, 34,
HITACHI 10
ITT 28 SANYO 13, 16
JINXING 38 SEARS 13
JVC 01, 23,
24, 25
SHARP 06
SONY 07
KONKA 40 TCL 41
LG (GOLDSTAR) 18 THOMSON 26
MAGNAVOX 02 TOSHIBA 08,14
MITSUBISHI 03 ZENITH 09
35
CH
+
CH
-
VOL
-
Cambia los canales del televisor.
VOL+
Ajusta el volumen del televisor.
NOTA
• Si la marca de su televisor tiene más de un código
enumerado en la lista, pruebe los códigos uno por uno
hasta que tenga éxito.
Control del volumen de un
amplificador o receptor JVC
Podrá controlar el volumen de un amplificador o
receptor JVC utilizando los botones AMP VOL +/– del
mando a distancia.
AMP VOL
Si pulsa el botón + subirá el volumen del sonido del
amplificador o receptor, y presionando el botón –, bajará
el volumen.
11
Page 82

Funciones básicas
En la descripción siguiente, asumimos que se utilizarán principalmente los botones del mando a distancia; no obstante,
también podrá emplear los botones correspondiente del panel frontal si están disponibles.
NOTA
Asegúrese de que el selector TV - DVD del mando a distancia esté ajustado en "DVD" cuando emplee los
TV DVD
botones 5/∞/2/3 y los botones numéricos para controlar la unidad.
Antes de la operación
Encendido/apagado de la unidad
Presione DVD STANDBY/ON en el mando a distancia, o presione STANDBY/ON en el panel frontal.
El indicador STANDBY del botón STANDBY/ON/ , que estaba encendido en rojo en el estado de espera, se encenderá
en verde.
TV DVD
STANDBY/ON
OPEN/
TV DVD
básicas
Funciones
CLOSE
TV22TV1
1
TV55TV4
4
TV88TV7
7
TV00TV-/--
MUTING
10
TITLE/
GROUP
SUBTITLERETURN
U
N
E
CH
M
+
P
O
T
VOL
-
ENTER
C
CH
H
O
-
I
C
E
O
NEXTPREVIOUS
SELECT STROBECLEAR
-
SLOW+
SLOW
ANGLE
DIGEST
ZOOM
3D
PHONIC
AMP VOL
TV/VIDEO
CANCEL
N
TV3
3
TV6
6
TV9
9
+10
M
E
N
U
VOL+
N
E
E
R
C
S
VFPAUDIOSUB TITLEREPEAT
DVD
STANDBY/ON
STANDBY/ON
XV-N5 DVD/SUPER VCD/VCD/CD PLAYER
RM-SXV010U
REMOTE CONTROL
• Podrá encender la unidad presionando el botón 3. En este caso, la unidad iniciará la reproducción si hay un disco puesto en la
bandeja de discos. Si no hay ningún disco, aparecerá "NO DISC" en la ventana de visualización.
• Podrá encender la unidad presionando el botón 0 del panel frontal. En este caso, se abrirá la bandeja de discos.
En la pantalla del televisor, aparecerá la visualización inicial que se muestra a la derecha.
Puede aparecen uno de los mensajes siguientes en la parte inferior de la visualización inicial.
• LEYENDO: La unidad está leyendo la información del disco.
• ¡ERROR CÓDIGO REGIONAL!:
El código de región del disco DVD VIDEO no
corresponde con el de la unidad. No puede reproducirse
el disco.
• ABRIR: Se está abriendo la bandeja de discos.
• CERRAR: Se está cerrando la bandeja de discos.
LEYENDO
• NO HAY DISCO: No hay ningún disco insertado.
• PARADA DE REANUDACIÓN:La unidad se para y memoriza la posición de la
interrupción.
Área del mensaje
NOTA
• Aunque presione DVD STANDBY/ON en el mando a distancia o STANDBY/ON en el panel frontal para apagar la unidad,
ésta no se desconecta de la fuente de alimentación de CA mientras esté enchufada a la toma de corriente de la pared. Este
estado se denomina modo de espera. En este estado, la unidad consume un cantidad muy reducida de corriente.
12
Page 83

Funciones básicas
Configuración inicial antes de utilizar la unidad
Le recomendamos que ajuste el idioma de visualización, el tipo de monitor de televisor y la salida digital antes de utilizar
la unidad, realizando el procedimiento siguiente.
Consulte el apartado "Cambio de los ajustes iniciales", a partir de la página 48, para ver los detalles sobre cada elemento
de la configuración.
TV DVD
STANDBY/ON
OPEN/
TV DVD
CLOSE
TV22TV1
TV3
ENTER
CHOICE
O
T
VOL
C
H
DIGEST
PHONIC
1
4
7
TV-/--
10
M
P
O
I
C
SLOW
3D
SUBTITLERETURN
U
N
E
CH
+
-
ENTER
CH
-
E
SELECT STROBECLEAR
-
ANGLE
RM-SXV010U
REMOTE CONTROL
3
TV55TV4
TV6
6
TV88TV7
TV9
9
TV0
MUTING
0
+10
TITLE/
TV/VIDEO
GROUP
CANCEL
M
E
N
U
AMP VOL
VOL+
C
S
N
O
NEXTPREVIOUS
SLOW+
VFPAUDIOSUB TITLEREPEAT
ZOOM
5/∞
N
E
E
R
Español
1
Presione CHOICE durante algunos segundos
para que aparezca la primera página de la
visualización de CONFIG. REPROD. DVD.
El menú desplegable de "IDIOMA EN PANTALLA"
quedará abierto.
CONFIG. REPROD. DVD
IDIOMA DE MENU
IDIOMA DE AUDIO
SUBTÍTULO
IDIOMA EN PANTALLA
SELECC
INTRO
INGLÉS
INGLÉS
INGLÉS
INGLÉS
INGLÉS
CHINO
ESPAÑOL
5∞23 PARA ELEGIR Y ENTER PARA CONFIRMAR.
Opciones de IDIOMA EN PANTALLA
2
Emplee 5/∞ para seleccionar el idioma
deseado.
Podrá seleccionar el idioma de la pantalla para las
visualizaciones de las preferencias, etc. entre
inglés, francés y alemán.
3
Presione ENTER.
Se mostrará la segunda página, en la que el menú
desplegable de "TIPO DE MONITOR" quedará
abierto.
CONFIG. REPROD. DVD
TIPO DE MONITOR
MODO IMAGEN FIJA
SALVAPANTALLA
MP3/JPEG
SELECC
INTRO
4:3 L.B.
16:9 NORMAL
AUTO
16:9 AUTO
4:3 BUZÓN
ON
4:3 PS
MP3
16:9 MULTI NORMAL
16:9 MULTI AUTO
4:3 MULTI BUZÓN
4:3 MULTI PS
5∞23 PARA ELEGIR Y ENTER PARA CONFIRMAR.
Opciones de TIPO DE MONITOR
4 Emplee 5/∞ para seleccionar el tipo de
monitor deseado.
Podrá seleccionar el tipo de monitor correspondiente
a su televisor.
• Para un televisor normal (convencional),
seleccione "4:3 BUZÓN" o "4:3 PS".
• Para un televisor de pantalla panorámica,
seleccione "16:9 AUTO" o "16:9 NORMAL".
Para encontrar más detalles sobre cada modo,
consulte la página 50.
5 Presione ENTER.
Se mostrará la tercera (última) página, en la que el
menú desplegable de "SALIDA DE A UDIO DIGITAL"
quedará abierto.
CONFIG. REPROD. DVD
SALIDA DE AUDIO DIGITAL
MEZCLA ANALÓGICA
COMPR. GAMA DINÁMICA
SELECC
INTRO
DOLBY DIGITAL/PCM
PCM SÓLO
DOLBY PROLOGIC
DOLBY DIGITAL/PCM
STREAM/PCM
ON
5∞23 PARA ELEGIR Y ENTER PARA CONFIRMAR.
Opciones de SALIDA DE AUDIO DIGITAL
6 Emplee 5/∞ para seleccionar el tipo de señal
de salida digital.
Este elemento deberá ajustarlo correctamente
cuando conecte la unidad a un decodificador de
sonido perimétrico o a un convertidor D/A
(incluyendo un amplificador/receptor con
decodificador de sonido perimétrico incorporado o
convertidor D/A) externos.
(Si no conecta la unidad a tales equipos, no será
necesario que ajuste este elemento.)
• Cuando efectúe la conexión con un decodificador
Dolby Digital, seleccione "DOLBY DIGITAL/PCM".
• Cuando efectúe la conexión con un decodificador
multicanales DTS o MPEG, seleccione "STREAM/
PCM".
• Cuando efectúe la conexión con otro equipo
digital, seleccione "PCM SÓLO".
Para más detalles, consulte la página 51.
7 Presione ENTER.
La pantalla del televisor volverá a mostrar la
visualización inicial.
NOTAS
• Este ajuste probablemente no será necesario a
excepción de cuando se conecta la alimentación la
primera vez después de haber comprado la unidad.
• También podrá ajustar estos elementos, así como las
demás preferencias, presionando brevemente CHOICE
para que aparezca la visualización de las preferencias.
Para encontrar más detalles al respecto, consulte el
apartado de "Cambio de los ajustes iniciales", a partir
de la página 48.
básicas
Funciones
13
Page 84

Funciones básicas
Reproducción básica
Esta sección describe las operaciones básicas para reproducir discos DVD VIDEO, Audio CD, Vídeo CD, y SVCD. Para la
reproducción de discos MP3 y JPEG, consulte los capítulos de las páginas 40 y 43.
TV DVD
STANDBY/ON
OPEN/
TV DVD
OPEN/CLOSE
CLOSE
TV22TV1
TV3
1
3
TV55TV4
TV6
4
6
TV88TV7
TV9
7
9
TV0
TV-/--
MUTING
0
10
+10
TITLE/
TV/VIDEO
GROUP
CANCEL
SUBTITLERETURN
U
M
N
E
E
CH
+
ENTER
CH
-
E
SELECT STROBECLEAR
-
ANGLE
RM-SXV010U
REMOTE CONTROL
AMP VOL
N
U
VOL+
N
E
E
R
C
S
N
O
NEXTPREVIOUS
SLOW+
ZOOM
3
8
VFPAUDIOSUB TITLEREPEAT
Bandeja de discos
XV-N5 DVD/SUPER VCD/VCD/CD PLAYER
M
P
O
T
VOL
-
C
H
O
I
C
7
DIGEST
PHONIC
SLOW
3D
738 0
Inserción y extracción de los discos
básicas
Funciones
1 Presione 0 para abrir la bandeja de discos.
2 Ponga un disco en la bandeja.
3 Presione 0 para cerrar la bandeja de discos.
La unidad leerá la información del disco y
aparecerá la visualización inicial en la pantalla del
televisor.
Si aparece un menú en la pantalla del televisor
Cuando inserte un disco DVD VIDEO, Vídeo CD o
SVCD, es posible que aparezca automáticamente un
menú en la pantalla del televisor. En este menú podrá
seleccionar la reproducción de un elemento deseado
mediante el procedimiento siguiente.
(para DVD VIDEO)
1 Emplee 5/∞/2/3 para seleccionar el elemento
deseado.
2 Presione ENTER.
La unidad iniciará la reproducción del elemento
seleccionado
(para Vídeo CD/SVCD)
Emplee los botones numéricos para seleccionar el
elemento deseado.
La unidad iniciará la reproducción del elemento
seleccionado.
Con la cara de la etiqueta arriba.
• Para insertar un disco
de 8 cm, colóquelo en
el hueco central.
NOTAS
• No inserte discos que no puedan reproducirse. Para encontrar más detalles sobre los discos que pueden reproducirse y los que
no pueden reproducirse, consulte la página 4.
• Cuando inserte un disco en la bandeja de discos, asegúrese de poner el disco dentro del hueco. Si no lo hace así, el disco podría
dañarse al cerrarse la bandeja de discos, o quedar de forma que no pudiera extraer el disco de la unidad.
• No emplee ningún estabilizador para la reproducción de los discos.
• Con algunos discos DVD VIDEO, la unidad inicia automáticamente la reproducción después de haber insertado el disco.
• Si inserta un disco DVD VIDEO cuyo código de región no corresponde con el de la unidad, aparecerá "¡ERROR CÓDIGO
REGIONAL!" en la visualización inicial. Para encontrar más detalles sobre el código de región, consulte la página 4.
14
Page 85

Para iniciar la reproducción
Presione 3.
La unidad iniciará la reproducción desde el principio.
Funciones básicas
Español
Disponible :
Información sobre la función de protección de pantalla
• El monitor de televisión podría quemarse si se dejara
visualizada una imagen fija durante mucho tiempo seguido.
Para evitarlo, la unidad activa automáticamente la función
de protección de pantalla si se deja visualizada una imagen
fija, como pueda ser una visualización en pantalla o un
menú, durante más de 5 minutos.
• La presión de cualquier botón de la unidad o del mando a
distancia desactivará la función de protección de pantalla y
se volverá a la visualización anterior.
• Usted también podrá desactivar la función de protección de
pantalla (vea la página 51).
Información sobre los iconos guía en la pantalla
• Cuando usted realiza una operación, es posible que aparezcan los iconos siguientes sobre la imagen durante unos 3 segundos.
Estos iconos tienen los significados siguientes.
También podrá ajustar la unidad para que no se visualicen estos iconos en los ajustes de las preferencias que se describen en la
página 53.
Mientras la función de
protección de pantalla
no está activada
Mientras la función de
protección de pantalla
está activada
Icono Estado
Aparece al principio del modo de reproducción.
Aparece al principio del modo de pausa.
Aparece al principio de la reproducción en avance/retroceso rápidos con la velocidad actual (vea la página 18).
Aparece al principio de la reproducción en cámara lenta con la velocidad actual (vea la página 19).
Aparece al principio del modo de reproducción repetida (vea la página 28).
Aparece al principio de una escena grabada desde varios ángulos (vea la página 32).
básicas
Funciones
Aparece al principio de una escena grabada con varios idiomas de audio (vea la página 31).
Aparece al principio de una escena grabada con varios idiomas de subtítulos (vea la página 30).
Aparece cuando la unidad no acepta la operación que usted desea realizar debido al contenido del disco, a su
estructura, al estado de reproducción, etc.
Tenga presente que es posible no puedan efectuarse ciertas operaciones aunque no se visualice .
NOTAS
• Cuando la función RESUME está ajustada en "CONECTAR" o "REANUDAR DISCO" y haya ajustado un punto de reanudación, al
presionar 3 se inicia la reproducción desde este punto en lugar de hacerlo desde el principio. Vea la página 17.
• Durante la reproducción, la ventana de visualización muestra el título/capítulo o el número de pista que se está reproduciendo.
• Durante la reproducción de un disco DVD VIDEO, al presionar 3 la posición de reproducción retrocede 10 segundos por delante
de la posición actual. Para encontrar más detalles al respecto, consulte la página 22.
Para detener por completo la reproducción
Disponible :
Presione 7.
La unidad detendrá la reproducción.
• Si presiona 0 durante la reproducción, la unidad detendrá la reproducción y abrirá la bandeja de discos.
Para detener provisionalmente la reproducción
Presione 8.
La unidad pausará la reproducción. Para reanudar la reproducción, presione 3.
Disponible :
15
Page 86

Funciones básicas
Reanudación de la reproducción
La unidad puede memorizar la posición de un disco en la que usted interrumpió la reproducción para reanudar la
reproducción posteriormente desde este punto. Podrá ajustar dos modos de reanudación (REANUDAR DISCO y
CONECTAR) utilizando la visualización de las preferencias. Para los detalles sobre el ajuste del modo de reanudación,
consulte la página 53.
• El modo de reanudación está ajustado inicialmente en "CONECTAR" como ajuste predeterminado.
• Podrá desactivar el modo de reanudación ajustando "REANUDAR", en la visualización de preferencias de "OTROS", en
"DESCONECTAR".
TV DVD
STANDBY/ON
OPEN/
TV DVD
OPEN/CLOSE
.
CLOSE
TV2
TV1
TV3
2
1
3
TV5
TV4
TV6
5
4
6
TV8
TV7
TV9
8
7
9
TV0
TV-/--
MUTING
0
10
+10
TITLE/
TV/VIDEO
GROUP
CANCEL
SUBTITLERETURN
U
M
N
E
E
CH
M
P
O
T
VOL
-
C
H
O
I
C
7
SLOW
N
U
+
VOL+
ENTER
N
CH
E
E
-
R
C
E
S
N
O
NEXTPREVIOUS
SELECT STROBECLEAR
-
SLOW+
3
Bandeja de discos
XV-N5 DVD/SUPER VCD/VCD/CD PLAYER
73 0
Para memorizar la posición de interrupción
básicas
Funciones
¶ Durante la reproducción
Cuando se ha ajustado el modo de reanudación en "RENUDAR DISCO"
Presione 7.
La unidad detiene la reproducción y memoriza la posición de la interrupción. Después de haber presionado 7 , la
ventana de visualización del panel frontal muestra "RESUME STOP".
En este estado, la memoria de la posición de interrupción no se borra al presionar 0 para que se abra la bandeja de
discos, ni al presionar ST ANDB Y/ON (en el panel frontal) ni DVD STANDBY/ON (en el mando a distancia) para
apagar la unidad.
• La posición de interrupción también se memoriza cuando se presiona 0, STANDBY/ON (en el panel frontal) o
DVD STANDBY/ON
• Para borrar la memoria, presione 7 mientras el disco esté parado.
• La unidad memorizará las posiciones de interruptor de los últimos 30 discos reproducidos.
• Si interrumpe la reproducción de un disco para el que se ha memorizado una posición de interrupción, la memoria se actualizará
con la nueva posición de interrupción.
• Una vez la unidad ha memorizado posiciones de interrupción para 30 discos, al memorizar una nueva posición de interrupción, la
unidad borrará la posición memorizada más antigua. Si se interrumpe la reproducción de un disco para el que ya se tiene
memorizada una posición de interrupción, es posible que cambie el orden en el que se almacenan las posiciones. Esto, a su vez,
puede cambiar el orden en el que se borran las posiciones.
(en el mando a distancia). En este caso, "RESUME STOP" no aparece en la ventana de visualización.
Disponible :
Cuando el modo de reanudación está ajustado en "CONECTAR"
Presione 7
La unidad detiene la reproducción y memoriza la posición de la interrupción.
En este estado, la memoria de la posición de interrupción no se borra al presionar STANDBY/ON (en el panel
frontal) ni DVD STANDBY/ON (en el mando a distancia) para apagar la unidad.
Tenga presente que si presiona 0 para abrir la bandeja de discos, se borrará la memoria de la posición de
interrupción.
• La posición de interrupción también se memoriza presionando STANDBY/ON (en el panel frontal) o DVD STANDBY/ON (en
el mando a distancia).
• Para borrar la memoria, presione 7 mientras el disco esté parado.
16
.
Page 87

Funciones básicas
Para reanudar la reproducción
Disponible :
Cuando el modo de reanudación está ajustado en "REANUDAR DISCO"
¶ Mientras el disco está parado o cuando no hay ningún disco insertado.
1 Presione 0 para insertar el disco para el que la unidad tenga una posición de interrupción memorizada.
Después de insertar el disco, la ventana de visualización del panel frontal mostrará "RESUME STOP".
(Si ya hay un disco en el que usted desea reanudar la reproducción, insertado en la bandeja de discos, salte al paso
2.)
2 Presione 3.
La ventana de visualización mostrará "RESUME PLAY" y la unidad reanudará la reproducción desde la posición en
la que interrumpió la reproducción.
La unidad conserva memorizada la posición de interrupción para el disco, aunque usted saque el disco de la
bandeja de discos y luego lo vuelva a poner. La unidad también conserva memorizada la posición de interrupción
mientras el disco está en la bandeja de discos.
Español
• Para reproducir un disco desde el principio (en lugar de hacerlo desde la posición de interrupción)
Después de haber insertado el disco, presione 7 antes de presionar 3 para iniciar la reproducción.
Si se presiona 7 mientras el disco está parado, se borra la posición de interrupción memorizada.
Cada vez que usted interrumpa la reproducción, la posición se memorizará como el nuevo punto de "reanudación".
Cuando el modo de reanudación está ajustado en "CONECTAR"
¶ Mientras que el disco que usted interrumpió la última vez* sigue estando en la bandeja de discos (*presionando 7 o
apagando la unidad.)
Presione 3.
La unidad reanudará la reproducción desde la posición en la que se interrumpió la reproducción.
Si presiona 3 y luego 7, la unidad iniciará la reproducción después de que la ventana de visualización haya
mostrado "RESUME PLAY".
Tenga presente que no podrá reanudar la reproducción si la interrumpió la última vez abriendo la bandeja de
discos.
• Para reproducir un disco desde el principio (en lugar de hacerlo desde la posición de interrupción)
Haga una de las cosas siguientes:
* Presione 7 mientras el disco está parado, y luego presione 3.
* Encienda la unidad presionando DVD STANDBY/ON en el mando a distancia o STANDBY/ON en el panel
frontal, y presionando luego 3.
NOTAS
• Si emplea la visualización de preferencias de "OTROS" para cambiar el ajuste de "REANUDAR DISCO" a "DESCONECTAR" o a
"CONECTAR", no podrá reanudar la reproducción de un disco cuya posición de "reanudación" esté memorizada. Sin embargo,
si ajusta de nuevo "REANUDAR" a "REANUDAR DISCO", podrá reanudar la reproducción del disco.
• Si abre la bandeja de discos mientras el modo de REANUDAR está ajustado en CONECTAR, se borrará el punto de
"reanudación".
• La función de reanudación no opera con discos Audio CD, MP3 ni JPEG.
• En el caso de un disco Vídeo CD/SVCD con función de PBC, es posible que la unidad reanude la reproducción desde un punto
algo adelantado o atrasado con respecto al punto en el que se interrumpió la reproducción.
• Es posible que la unidad no reanude la reproducción exactamente desde el punto de interrupción.
• Para un disco DVD VIDEO de dos caras, la unidad considera cada cara como un disco distinto. Por lo tanto, para reanudar la
reproducción de estos discos, el disco deberá insertarse con la misma cara abajo.
• Cuando la unidad memoriza un punto de interrupción para un disco, también memoriza los ajustes de Audio, Subtítulos, y de
Ángulo (independientemente de si "REANUDAR" está ajustado en "REANUDAR DISCO" o en "CONECTAR").
• Si interrumpe la reproducción mientras se muestra en menú de un disco DVD VIDEO, SVCD o Vídeo CD en la pantalla del
televisor, es posible que la unidad no memorice correctamente la posición de interrupción, independientemente de si
"REANUDAR" está ajustado en "CONECTAR" o en "REANUDAR DISCO".
básicas
Funciones
17
Page 88

Funciones básicas
Reproducción a velocidad variable
Podrá acelerar o aminorar la velocidad de reproducción, o hacer que avance fotograma por fotograma.
TV DVD
STANDBY/ON
OPEN/
TV DVD
CLOSE
TV2
TV1
TV3
2
1
3
TV5
TV4
TV6
5
4
6
TV8
TV7
TV9
8
7
9
TV0
TV-/--
MUTING
0
10
+10
TITLE/
TV/VIDEO
GROUP
CANCEL
SUBTITLERETURN
U
M
N
E
E
CH
N
U
+
VOL+
ENTER
N
CH
E
E
-
R
C
E
S
N
O
NEXTPREVIOUS
SELECT STROBECLEAR
-
ZOOM
ANGLE
AMP VOL
8
SLOW+
VFPAUDIOSUB TITLEREPEAT
1/¡
XV-N5 DVD/SUPER VCD/VCD/CD PLAYER
4/¢
M
P
O
T
VOL
-
C
H
O
I
C
SLOW
DIGEST
3D
PHONIC
Para que la reproducción avance o retroceda mientras se monitoriza
Disponible :
¶ Durante la reproducción
4¢
8
Método 1 (sólo desde el mando a distancia)
básicas
Funciones
Presione 1 o ¡.
Cada presión de 1 o ¡ hará que se reduzca o incremente la velocidad de reproducción. Podrá seleccionar entre
2 veces, 5 veces, 10 veces, 20 veces, y 60 veces de la velocidad normal.
Presionando 3, la unidad volverá a la reproducción normal.
Método 2
Mantenga presionado 4 o ¢.
Si mantiene presionado ¢, la reproducción avanzará con rapidez, mientras que si mantiene presionado 4 , la
reproducción retrocederá con rapidez, a 5 veces la velocidad normal. Al soltar el botón, la unidad volverá a la
reproducción normal.
NOTAS
• Durante la reproducción rápida, el sonido se silencia, con excepción de la reproducción de discos Audio CD. Cuando se utiliza la
reproducción rápida con un disco Audio CD, el sonido se reproduce interrumpidamente.
• Esta función no opera con discos MP3.
Para hacer avanzar una imagen fija fotograma por fotograma
¶ Mientras está pausada (imagen fija)
Disponible :
Presione 8.
Cada vez que presione 8, la imagen fija avanzará al fotograma siguiente.
Al presionar 3, volverá a la reproducción normal.
18
Page 89

Funciones básicas
Reproducción a cámara lenta
Disponible :
Podrá reproducir el vídeo a cámara lenta. Podrá seleccionar entre 1/32 vaces, 1/16 vaces, 1/8 vaces, 1/4 vaces y 1/2 vaces
e de la velocidad normal.
¶ Durante la reproducción
Presione 8, y luego emplee 1/¡.
Para reproducir en avance a cámara lenta, presione ¡, y para reproducir en inversión a cámara lenta (sólo con
discos DVD VIDEO), presione 1 . Primero la unidad reproducirá a la velocidad más lenta, y cada vez que presione
el botón, aumentará la velocidad de reproducción.
Al presionar 3, volverá a la reproducción normal. Presionando 8 se pausa la reproducción a cámara lenta.
NOTAS
• El sonido se silencia durante la reproducción a cámara lenta.
• La reproducción en retroceso a cámara lenta no puede realizarse con discos Vídeo CD ni SVCD.
Español
básicas
Funciones
19
Page 90

Funciones básicas
Para encontrar el principio de una escena o canción
Podrá buscar el título o capítulo (para DVD VIDEO), o la pista (para discos Audio CD/Vídeo CD/SVCD) desde el que desea
que se inicie la reproducción.
TV22TV1
TV3
1
3
TV55TV4
TV6
4
Botones
numéricos
10
M
P
O
T
VOL
C
H
O
SLOW
Búsqueda de la selección deseada utilizando 4 o ¢
6
TV88TV7
TV9
7
9
TV00TV-/--
MUTING
+10
TITLE/
TV/VIDEO
GROUP
CANCEL
SUBTITLERETURN
U
M
N
E
E
CH
N
U
+
-
VOL+
ENTER
N
CH
E
E
-
I
C
R
C
E
S
N
O
NEXTPREVIOUS
SELECT STROBECLEAR
-
4/¢
SLOW+
XV-N5 DVD/SUPER VCD/VCD/CD PLAYER
4¢
¶ Para DVD VIDEO: Durante la reproducción
Para Audio CD: Durante la reproducción o mientras está parado
Para Vídeo CD/SVCD: Durante la reproducción sin función de PBC
Presione 4 o ¢.
Con discos Audio CD, Vídeo CD o SVCD, al presionar el botón se saltará una pista. Con discos DVD VIDEO, al
básicas
Funciones
presionar el botón se saltará un capítulo o título, dependiendo de la configuración del disco.
El número seleccionado aparecerá en la ventana de visualización del panel frontal.
• Para saltar títulos/capítulos/pistas hacia delante, presione ¢ tantas veces como sea necesario.
• Para saltar al principio de la pista/título/capítulo actual, presione 4 una vez.
• Para saltar títulos/capítulos/pistas hacia atrás, presione 4 tantas veces como sea necesario.
NOTAS
• Es posible que esta función no opere con ciertos discos DVD VIDEO.
• Es posible que esta función no opere durante la reproducción de discos Vídeo CD/SVCD con función de PBC (consulte las
páginas 5 y 23).
Búsqueda de la selección deseada utilizando los botones numéricos
.
¶ Para DVD VIDEO/Audio CD: Durante la reproducción o mientras está parado
Para Vídeo CD/SVCD: Durante la reproducción sin función de PBC o mientras está parado
Emplee los botones numéricos para especificar el número.
Dependiendo del tipo del disco y del estado de la unidad, cambia lo que se especifica.
Disponible :
Disponible :
Estado de la unidad Tipo de disco Lo que se especifica
Mientras está parado
Durante la
reproducción
DVD VIDEO título o capítulo*
Audio CD/Vídeo CD/SVCD pista
DVD VIDEO capítulo
Audio CD/Vídeo CD/SVCD pista
* Si un disco contiene más de un título, se especifica un título. Si un disco sólo contiene un título, se especifica un
capítulo.
• Para seleccionar un número ente el 1 y el 10: Presione el botón correspondiente al número.
• Para seleccionar un número mayor que 10: Emplee el botón +10.
Ejemplos:
Para seleccionar 13: +10 →3
Para seleccionar 34: +10 →+10 →+10 →4
Para seleccionar 40: +10 →+10 →+10 →10
La unidad inicia la reproducción desde el principio de la selección. El número de título, capítulo o pista
seleccionado aparece en la ventana de visualización del panel frontal.
20
Page 91

Funciones básicas
NOTAS
• También podrá especificar el título deseado durante la reproducción de discos DVD VIDEO. Para encontrar más detalles al
respecto, consulte la página 24.
• Durante la reproducción de discos DVD VIDEO, si se muestra un menú en la pantalla del televisor, los botones numéricos
podrán emplearse para seleccionar un elemento del menú.
• Cuando aparece en la pantalla del televisor:
El título, capitulo, o pista seleccionados no existen en el disco.
• Esta función no opera durante la reproducción de discos Vídeo CD/SVCD con función de PBC (consulte las páginas 5 y 23).
Otras funciones convenientes
Podrá comprobar el estado de la reproducción, así como cambiar el brillo de la ventana de visualización.
Además, también podrá hacer retroceder la posición de reproducción 10 segundos desde la posición actual.
TV DVD
STANDBY/ON
OPEN/
TV DVD
CLOSE
TV22TV1
TV3
1
3
TV55TV4
TV6
4
6
TV88TV7
TV9
7
9
TV0
TV-/--
MUTING
0
10
+10
TITLE/
TV/VIDEO
GROUP
CANCEL
SUBTITLERETURN
U
M
N
E
E
CH
5/∞
M
P
O
T
VOL
-
C
H
O
I
C
SLOW
DIGEST
3D
PHONIC
N
U
+
VOL+
ENTER
N
CH
E
ON SCREEN
E
-
R
C
E
S
N
O
NEXTPREVIOUS
SELECT STROBECLEAR
-
SLOW+
3
VFPAUDIOSUB TITLEREPEAT
ZOOM
ANGLE
AMP VOL
ANGLE
Español
Funciones
básicas
RM-SXV010U
REMOTE CONTROL
Comprobación del estado de reproducción
Disponible :
Podrá ver el número de la selección actual (el número de título/capítulo para discos DVD VIDEO o el número de pista
para discos Audio CD/Vídeo CD/SVCD), la información del tiempo (el tiempo de la pista o capítulo mientas está parado, o
el tiempo transcurrido de la pista o capítulo durante la reproducción) y el estado de transporte (parada, reproducción,
pausa, etc.) en la pantalla del televisor.
¶ Durante la reproducción o mientras está parado
Presione ON SCREEN.
Aparecerá la barra de estado de reproducción en la pantalla del televisor.
(para DVD VIDEO)
Velocidad de
transferencia
8.5Mbps
título actual capítulo actual
Número del
capítulo actual
Estado de
transporte actual
TITLE 33 TOTAL 1:25:58CHAP 33
Número del Tiempo del
(para Audio CD)
Estado de transporte actual
TIME 25:58TRACK 33
Número de la Tiempo
pista actual transcurrido del
disco
(para Vídeo CD)
Estado de
transporte actual
TIME 25:58TRACK 33
Número de Tiempo
la pista actual transcurrido deldisco
(para SVCD)
Estado de
transporte actual
TIME 25:58TRACK 33
Número de Tiempo
la pista actual transcurrido deldisco
21
Page 92

Funciones básicas
La indicación del extremo de la derecha de la bar ra de estado muestra el estado de transporte de la unidad de la
forma siguiente:
Icono Estado
Modo de reproducción
Modo de parada
Modo de pausa
Modo de reproducción de avance/retroceso rápidos
Modo de reproducción a cámara lenta
Tenga presente que al presionar ON SCREEN, aparecerá la barra del menú debajo de la barra de estado, desde
donde podrá acceder a diversas funciones.
(Ejemplo de la barra del menú para un disco DVD VIDEO)
CHAP.
TITLE 33 TOTAL 1:25:58CHAP 33
1/3 1/3OFF 1/5
8.5Mbps
Para encontrar los detalles sobre la barra del menú, consulte la página 36.
NOTA
• Para que desaparezca la barra de estado:
Presione ON SCREEN hasta que desaparezca la barra de estado.
básicas
Funciones
Para hacer retroceder la posición de reproducción durante la reproducción de
discos DVD VIDEO [Función de repetición de la reproducción de un accionamiento]
Disponible :
Durante la reproducción de un disco DVD VIDEO, podrá hacer retroceder la posición de reproducción 10 segundos desde
la posición actual.
¶ Durante la reproducción de un disco DVD VIDEO
Presione 3.
La posición de reproducción retrocederá 10 segundos desde la posición actual.
Tenga presente que esta función sólo opera dentro del mismo título, aunque funciona entre capítulos.
Si presiona 3 antes de que hayan transcurrido 10 segundos desde el principio de un título, la reproducción
comenzará desde el principio del título.
NOTAS
• Esta función sólo opera con discos DVD VIDEO.
• Cuando aparece en la pantalla del televisor:
Es posible que esta función no opere con ciertos discos DVD VIDEO.
Cambio del brillo de la ventana de visualización
Podrá regular el brillo de la ventana de visualización.
Presione 5 o ∞ mientras mantiene presionado ANGLE.
Podrá seleccionar el brillo de la ventana de visualización entre cuatro niveles, y apagado. Si se apaga el brillo, no se
verá nada en el visualizador.
22
Page 93

Funciones avanzadas
Este capítulo describe las operaciones para varias
funciones avanzadas para discos DVD VIDEO, Audio CD,
Vídeo CD, y SVCD. Para la reproducción de discos MP3 y
JPEG, consulte los capítulos de las páginas 40 y 43.
NOTA
Asegúrese de que el selector TV - DVD
TV DVD
del mando a distancia esté ajustado en
"DVD" cuando emplee 5/∞/2/3, los
botones numéricos y TV/VIDEO CANCEL para controlar la unidad.
Reproducción desde una
posición específica del disco
Podrá reproducir un disco desde la pista, título o capítulo
seleccionado, o desde el tiempo especificado.
Búsqueda de una escena deseada
desde el menú de un disco DVD
Disponible :
Los discos DVD VIDEO tienen por lo general sus propios
menús que indican el contenido del disco. Estos menús
contienen varios elementos, tales como los títulos de las
películas, nombres de las canciones, o información
sobre los artistas, y la muestran en la pantalla del
televisor. Usted también podrá buscar la escena que
desee empleando el menú del DVD.
TV DVD
STANDBY/ON
OPEN/
TV DVD
CLOSE
TV22TV1
TV3
1
3
TV55TV4
TV6
4
6
TV88TV7
TV9
7
9
TV00TV-/--
MUTING
10
+10
TITLE/
TV/VIDEO
GROUP
CANCEL
TOP
MENU
ENTER
¶ Siempre que se haya insertado un disco DVD VIDEO
1 Presione TOP MENU o MENU.
El menú aparecerá en la pantalla del televisor.
Ejemplo:
SUBTITLERETURN
U
M
N
E
E
CH
M
P
O
T
VOL
-
C
H
O
I
C
E
SLOW
N
U
+
ENTER
CH
-
N
O
NEXTPREVIOUS
SELECT STROBECLEAR
-
SLOW+
VOL+
R
C
S
N
E
E
MENU
5/∞/2/3
2 Emplee 5/∞/2/3 para seleccionar el
elemento deseado, y presione entonces
ENTER.
La unidad iniciará la reproducción del elemento
seleccionado.
• Con algunos discos, podrá también seleccionar los
elementos introduciendo el número correspondiente con
los botones numéricos, lo que puede provocar que la
unidad inicie automáticamente la reproducción.
NOTAS
• Cuando aparece en la pantalla del televisor al
presionar TOP MENU o MENU en el paso 1:
Significa que el disco no tiene el menú apropiado que
enumera los títulos.
• El botón MENU no funciona mientras el disco está
parado.
Búsqueda de una escena deseada desde
el menú de un Vídeo CD/SVCD con PBC
Disponible :
Algunos discos Vídeo CD/SVCD son compatibles con la
función de PBC. PBC es una abreviatura inglesa de
"control de la reproducción". Un disco Vídeo CD/SVCD
grabado con PBC tiene sus propios menús, tales como
una lista de las canciones del disco. Podrá buscar
escenas específicas empleando el menú de PBC.
TV DVD
STANDBY/ON
OPEN/
TV DVD
CLOSE
TV22TV1
TV3
1
3
TV55TV4
TV6
6
TV9
9
+10
CANCEL
M
E
N
U
VOL+
N
E
E
R
C
S
VFPAUDIOSUB TITLEREPEAT
Botones
numéricos
3
RETURN
TOP
MENU
4
7
10
U
N
E
M
P
O
T
VOL
-
C
H
O
I
C
E
SLOW
DIGEST
3D
PHONIC
REMOTE CONTROL
TV88TV7
TV00TV-/--
SUBTITLERETURN
CH
+
ENTER
CH
-
SELECT STROBECLEAR
-
ANGLE
RM-SXV010U
MUTING
TITLE/
TV/VIDEO
GROUP
N
O
NEXTPREVIOUS
SLOW+
ZOOM
AMP VOL
Español
Funciones
avanzadas
Información sobre el menú del DVD VIDEO
Normalmente, los discos DVD VIDEO que contienen más de un
título pueden tener un menú de "título" que enumera los títulos
incluidos en el disco. En este caso, el menú aparece en la
pantalla del televisor cuando se presiona el botón TOP MENU.
Algunos discos DVD VIDEO pueden tener también otro menú
que aparece cuando se presiona el botón MENU.
En cuanto a los detalles del menú particular de cada disco DVD
VIDEO; consulte sus instrucciones.
¶ Cuando un disco Vídeo CD/SVCD con PBC está parado
1 Presione 3 o TOP MENU.
Aparecerá un menú del disco en la pantalla del
televisor (se activará la función de PBC).
Ejemplo:
"PBC" se indica en la ventana de visualización del
panel frontal.
23
Page 94

Funciones avanzadas
2 Emplee los botones numéricos para
seleccionar el elemento deseado.
• Para seleccionar un número entre el 1 y el 10:
Presione el botón correspondiente al número.
• Para seleccionar un número mayor que 10:
Emplee el botón +10.
Ejemplos:
Para seleccionar 13: +10 →3
Para seleccionar 34: +10 →+10 →+10 →4
Para seleccionar 40: +10 →+10 →+10 →10
La unidad inicia la reproducción del elemento
seleccionado.
Podrá volver al menú presionando el botón
RETURN.
Cuando aparezca algo semejante a "DESPUÉS" o
"ANTERIOR" en la pantalla del televisor, la unidad
generalmente funcionará de la forma siguiente:
• Presionando ¢ se avanzará a la página
siguiente.
• Presionando 4 se volverá a la página anterior.
* El método de operación puede ser distinto según
el disco.
• Si desea reproducir un disco Vídeo CD/SVCD compatible
con PBC sin activar la función de PBC, inicie la
reproducción empleando los botones numéricos en lugar
de 3. (Vea la página 20).
• Para activar la función de PBC cuando se está
Funciones
avanzadas
reproduciendo un disco Vídeo CD/SVCD compatible con
PBC sin emplear la función de PBC, siga uno de los dos
procedimientos siguientes:
* Presione TOP MENU o MENU.
* Presione 7 para detener la reproducción, y presione
entonces 3.
Para especificar el título deseado
2 Emplee los botones numéricos para
especificar el título que desee reproducir.
• Para seleccionar un número entre el 1 y el 10:
Presione el botón correspondiente al número.
• Para seleccionar un número mayor que 10:
Emplee el botón +10.
Ejemplos:
Para seleccionar 13: +10 →3
Para seleccionar 34: +10 →+10 →+10 →4
Para seleccionar 40: +10 →+10 →+10 →10
La unidad inicia la reproducción desde el título
especificado.
NOTA
• Esta función no opera con algunos discos DVD VIDEO.
Para buscar la posición deseada en el título
o pista actual [Búsqueda del tiempo]
Disponible :
Podrá reproducir un disco desde la posición que desee
especificando el tiempo desde el principio del título
actual (para DVD VIDEO), o del disco (para Audio CD/
Vídeo CD/SVCD) empleando la función de búsqueda del
tiempo.
Tenga presente que algunos discos DVD VIDEO no
contienen información del tiempo, y que la función de
búsqueda del tiempo no puede utilizarse.
TV22TV1
TV3
1
3
TV55TV4
2/3
ENTER
TV6
4
6
TV88TV7
TV9
7
9
TV00TV-/--
MUTING
10
+10
TITLE/
TV/VIDEO
GROUP
CANCEL
SUBTITLERETURN
U
M
N
E
E
CH
M
P
O
T
VOL
-
C
H
O
I
C
E
N
U
+
VOL+
ENTER
N
CH
E
E
-
R
C
S
N
O
NEXTPREVIOUS
Botones
numéricos
ON SCREEN
Disponible :
Mientras reproduce un disco DVD VIDEO con más de un
título, podrá especificar el título que desee reproducir
empleando los botones numéricos.
TV DVD
STANDBY/ON
OPEN/
TV DVD
CLOSE
TV22TV1
TV3
1
3
TV55TV4
TV6
TITLE/
GROUP
4
TV88TV7
7
TV00TV-/--
MUTING
10
TITLE/
GROUP
SUBTITLERETURN
U
N
E
CH
M
+
P
O
T
VOL
-
ENTER
C
CH
H
O
-
I
C
E
O
NEXTPREVIOUS
SELECT STROBECLEAR
-
SLOW+
SLOW
TV/VIDEO
N
6
TV9
9
+10
CANCEL
M
E
N
U
VOL+
E
E
R
C
S
Botones
numéricos
N
¶ Durante la reproducción
1 Presione TITLE/GROUP.
Se mostrará "--" en el área de visualización de la
ventana de visualización.
(Ejemplo de la ventana de visualización)
Área de visualización
del título
Número de capítulo actual
¶ Para DVD VIDEO/Audio CD:
Durante la reproducción o mientras
están parados
¶ Para Vídeo CD/SVCD:
En cualquier estado excepto la
reproducción de Vídeo CD/SVCD con
PBC.
1 Presione ON SCREEN dos veces.
Aparecerá la barra del menú en la pantalla del
televisor.
(Para encontrar más detalles sobre la barra del
menú, consulte la página 36.)
2 Emplee 2/3 para desplazar a , y
presione entonces ENTER.
Debajo de aparecerá el menú desplegable para
introducir el tiempo.
(Ejemplo de la pantalla para un DVD VIDEO)
CHAP.
TITLE 33 TOTAL 1:25:58CHAP 33
1/3 1/3OFF 1/5
TIME 25:58TRACK 33
8.5Mbps
TIME _:__:__
(Ejemplo de la pantalla para un Audio CD)
OFF PROG. RND.
TIME __:__
24
Page 95

Funciones avanzadas
010 +10
3 Emplee los botones numéricos (0 a 10) para
introducir el tiempo deseado.
El tiempo especificado se visualizará en el menú
desplegable.
• El botón "10" funciona como "0" y el botón "+10" no se
emplea con esta función.
• Podrá especificar el tiempo en el formato de horas/
minutos/segundos para discos DVD VIDEO, y en el formato
de minutos/segundos para discos de Audio CD y Vídeo CD/
SVCD.
4 Presione ENTER.
La unidad iniciará la reproducción desde el tiempo
especificado.
• Ejemplo (para un DVD VIDEO)
Para reproducir a partir de 2(H):34(M):00(S)
TIME _ : _ _ : _ _
TIME 2 : _ _ : _ _
TIME 2 : 3 _ : _ _
TIME 2 : 3 4 : _ _
• Ejemplo (para un Audio CD/Vídeo CD/SVCD)
Para reproducir a partir de 23(M):40(S)
TIME _ _ : _ _
TIME 2 _ : _ _
→→
Presione "2".
Presione "3".
→
Presione "4".
→
Presione ENTER.
→→
Presione "2".
Presione "3".
(Ejemplo: "2:35:__" a "2:34:__".)
TIME 2 : 3 5 : _ _
→
Presione 2.
TIME 2 : 3 _ : _ _
→
Presione "4".
TIME 2 : 3 4 : _ _
NOTAS
• Cuando aparece en la pantalla del televisor:
El tiempo seleccionado no existen en el disco, o la
función de búsqueda del tiempo no funciona con este
disco.
Tenga también presente que la función de búsqueda del
tiempo no opera durante la reproducción de discos
Vídeo CD/SVCD con función de PBC.
• Para que desaparezca la barra del menú:
Presione ON SCREEN.
• La función de búsqueda del tiempo no puede utilizarse
durante la reproducción programada.
Para buscar la escena deseada desde
la visualización [DIGEST]
Disponible :
La unidad puede visualizar la escena inicial de cada título
o capítulo de un DVD VIDEO o de cada pista de un Vídeo
CD/SVCD. Puede seleccionar una escena determinada de
las que se muestran en la partalla del televisor.
TITLE/
TV/VIDEO
GROUP
CANCEL
SUBTITLERETURN
U
M
N
E
E
CH
N
U
+
VOL+
ENTER
CH
-
E
S
N
O
NEXTPREVIOUS
SELECT STROBECLEAR
-
SLOW+
VFPAUDIOSUB TITLEREPEAT
ZOOM
ANGLE
AMP VOL
R
C
N
E
E
5/∞/2/3
ENTER
DIGEST
T
C
DIGEST
O
VOL
H
PHONIC
M
P
-
O
I
C
SLOW
3D
Español
Funciones
avanzadas
TIME 2 3 : _ _
→
Presione "4".
TIME 2 3 : 4 _
→
Presione ENTER.
No es necesario presionar "0" para introducir los ceros
de la izquierda (para los dos últimos dígitos en el
ejemplo anterior).
• Para corregir una equivocación
Emplee repetidamente 2 para retroceder al dígito en
el que introdujo un número equivocado (el dígito "-"
de la izquierda), y vuelva a introducir el tiempo
correcto.
RM-SXV010U
REMOTE CONTROL
¶ Para DVD VIDEO: Durante la reproducción o
mientras está parado
Para Vídeo CD/SVCD:En cualquier estado excepto el de
reproducción de Vídeo CD/SVCD
con PBC
1 Presione DIGEST.
Se visualizan hasta nueve escenas iniciales.
25
Page 96

Funciones avanzadas
Dependiendo del tipo del disco y de si se está o no
se está reproduciendo el disco, el contenido
mostrado en la pantalla del televisor es distinto.
Tipo de
disco
DVD
VIDEO
Estado de la
unidad
Mientras está
parado
Durante la
reproducción
Lo que se especifica
La escena inicial de
cada título
La escena inicial de
cada capítulo del título
actual
Cambio del orden de
reproducción
Podrá reproducir las pistas de los de Audio CD, Vídeo CD
o SVCD en un orden específico o en orden aleatorio.
Reproducción en un orden específico
[Reproducción programada]
Funciones
avanzadas
NOTA
Vídeo CD/
SVCD
Mientras está
parado o durante
La escena inicial de
cada pista
la reproducción
2 Emplee 5/∞/2/3 para mover para
seleccionar la escena deseada.
Si hay más de 9 escenas, la pantalla de resumen de
inicio tendrá más de una página. En este caso,
presionando ¢ se avanza a la página siguiente, y
presionando 4 se vuelve a la página anterior.
Escena seleccionada
• Cuando se selecciona la escena inferior derecha, al
presionar 3 se avanza a la página siguiente, si está
disponible. De forma similar, cuando se selecciona la
escena superior izquierda, al presionar 2 se vuelve a la
página anterior (si está disponible).
• Dependiendo del disco, puede tardarse cierto tiempo hasta
que aparezcan todas las escenas de la página actual en la
pantalla del televisor. Si desea cambiar la página, no será
necesario que espere para presionar 4 o ¢ hasta que
aparezcan todas las escenas.
3 Presione ENTER.
La unidad iniciará la reproducción desde la escena
seleccionada.
• Con ciertos discos, dependiendo del contenido, puede
tardarse cierto tiempo hasta que aparezcan todas las
escenas en la pantalla.
Disponible :
Programando las pistas, podrá reproducir hasta 99 pistas
en cualquier orden. Podrá programar la misma pista más
de una vez.
TV DVD
STANDBY/ON
OPEN/
TV DVD
CLOSE
TV22TV1
TV3
1
3
TV55TV4
TV6
4
6
TV9
9
+10
CANCEL
M
E
N
U
VOL+
N
E
E
R
C
S
VFPAUDIOSUB TITLEREPEAT
Botones
numéricos
ON SCREEN
3
2/3
ENTER
TV88TV7
7
TV0
TV-/--
MUTING
0
10
TITLE/
TV/VIDEO
GROUP
SUBTITLERETURN
U
N
E
CH
M
+
P
O
T
VOL
-
ENTER
C
CH
H
O
-
I
C
E
N
O
NEXTPREVIOUS
7
SLOW
DIGEST
3D
PHONIC
REMOTE CONTROL
SELECT STROBECLEAR
-
ANGLE
RM-SXV010U
SLOW+
ZOOM
AMP VOL
¶ Mientras está parado
1 Presione dos veces ON SCREEN.
Aparecerá la barra del menú en la pantalla del
televisor.
(Para encontrar los detalles sobre la barra del
menú, consulte la página 36.)
2 Emplee 2/3 para mover a .
PROG.
(Pantalla de ejemplo para un Audio CD)
TIME 25:58TRACK 33
OFF PROG. RND.
3 Presione ENTER.
Aparece la tabla del programa en lugar de la barra
del menú.
El indicador PROGRAM se enciende en la ventana
de visualización del panel frontal.
26
PROGRAMA
No. TrackDisc
1 2
2 3
3 7
4 4
5 3
6 5
7 6
8
9
10
USE TECLAS NUMÉRICAS PARA PROGRAMAR PISTAS.
CANCEL BORRA ULT. PASO.
Total Program Time 00:00:00
7 BORA TODO.
Page 97

Funciones avanzadas
4 Especifique las pistas en el orden deseado
empleando los botones numéricos.
• Para seleccionar un número entre el 1 y el 10:
Presione el botón correspondiente al número.
• Para seleccionar un número mayor que 10:
Emplee el botón +10.
Ejemplos:
Para seleccionar 13: +10 →3
Para seleccionar 34: +10 →+10 →+10 →4
Para seleccionar 40: +10 →+10 →+10 →10
Pueden programarse hasta 99 pistas. Podrá
seleccionar la misma pista más de una vez.
El tiempo total del programa se mostrará en la
parte superior derecha de la tabla del programa.
Tiempo total del programa
PROGRAMA
No. TrackDisc
1 2 1
2 3 5
3 7 4
4 4 2
5 3 3
6 5 4
7 6 6
8
9
10
USE TECLAS NUMÉRICAS PARA PROGRAMAR PISTAS.
CANCEL BORRA ULT. PASO.
Número de pista seleccionada
• Si especifica una pista equivocada
Emplee 5/∞ para mover a la pista equivocada,
y presione entonces TV/VIDEO - CANCEL. La pista
se borrará y las pistas programas detrás
avanzarán una posición.
Total Program Time 00:25:12
7 BORA TODO.
Durante la reproducción de Vídeo CD/SVCD, no podrá
ver la tabla del programa durante la reproducción.
• Para abandonar la reproducción programada
Presione 7. Tenga presente que el programa no se
borra.
• Para borrar el programa
Mientras el disco está parado y se muestra la tabla del
programa en la pantalla del televisor, presione 7.
Se borrarán todas las pistas programadas.
• Para abandonar el modo programado
Después de haber borrado todas las pistas
programadas, presione ON SCREEN.
Desaparecerá la tabla del programa y aparecerá la
tabla de estado en la pantalla del televisor.
El indicador PROGRAM de la ventana de visualización
desaparecerá y la unidad cancelará el modo de
reproducción programada.
NOTAS
• Durante la reproducción programada, no podrá editar el
contenido del programa.
• Durante la reproducción programada, presionando ¢
saltará a la selección siguiente del programa.
Presionando 4 volverá al principio de la sección
actual.
• Para que desaparezca la tabla del programa:
Presione ON SCREEN. La tabla del programa
desaparecerá y se mostrará la barra de estado.
• Para que desaparezca la barra del menú (y la barra de
estado):
Presione ON SCREEN.
Reproducción en orden aleatorio
[Reproducción aleatoria]
Español
Funciones
avanzadas
• Para borrar el programa durante la
programación.
Presione 7.
5 Presione 3 para iniciar la reproducción
programada.
Con un disco Vídeo CD/SVCD, la tabla del programa
desaparecerá automáticamente cuando se inicie la
reproducción programada.
Con un disco Audio CD, la tabla del programa
quedará en la pantalla del televisor durante la
reproducción programada.
Sin embargo, si presiona el botón ON SCREEN,
aparecerá la barra de estado.
Cuando se ha terminado la reproducción de todas
las pistas programadas, la unidad se detiene y
vuelve a aparecer la tabla del programa.
Tenga presente que el programa no se borra.
• Para comprobar el contenido del programa
Durante la reproducción, presione 7. La reproducción
se detendrá y se mostrará la tabla del programa.
Cuando la unidad esté reproduciendo un Audio CD y
no se esté mostrando la tabla del programa, podrá
hacer que aparezca la tabla realizando los pasos 1 al 3.
Disponible :
Podrá reproducir las pistas de un disco en orden
aleatorio empleando la función de reproducción
aleatoria.
TV DVD
STANDBY/ON
OPEN/
TV DVD
CLOSE
TV22TV1
TV3
1
3
TV55TV4
TV6
4
6
TV88TV7
TV9
7
9
TV0
TV-/--
MUTING
0
10
+10
TITLE/
TV/VIDEO
GROUP
CANCEL
2/3
ENTER
U
N
E
M
P
O
T
VOL
-
C
H
O
I
C
E
SLOW
DIGEST
3D
PHONIC
REMOTE CONTROL
SUBTITLERETURN
CH
+
ENTER
CH
-
SELECT STROBECLEAR
-
ANGLE
RM-SXV010U
AMP VOL
M
E
N
U
VOL+
N
ON SCREEN
E
E
R
C
S
N
O
NEXTPREVIOUS
SLOW+
VFPAUDIOSUB TITLEREPEAT
ZOOM
27
Page 98

Funciones avanzadas
¶ Mientras está parado
1 Presione dos veces ON SCREEN.
Aparecerá la barra del menú en la pantalla del
televisor.
(Para encontrar los detalles sobre la barra del
menú, consulte la página 36.)
2 Emplee 2/3 para mover a .
(Pantalla de ejemplo para un disco Audio CD)
OFF PROG. RND.
3 Presione ENTER.
La unidad iniciará la reproducción aleatoria.
Con un disco Vídeo CD/SVCD, la barra del menú
desaparecerá automáticamente.
Durante la reproducción aleatoria, se enciende el
indicador RANDOM en la ventana de visualización
del panel frontal.
Después de haberse reproducido toda las pistas del
disco, la unidad detendrá el disco y cancelará el
modo de reproducción aleatoria.
• Durante la reproducción aleatoria no se reproduce ninguna
pista más de una vez.
• Durante la reproducción aleatoria, si hace que aparezca la
Funciones
avanzadas
barra del menú y realiza los pasos 1 al 3 anteriores, la
unidad cancelará el modo de reproducción aleatoria y
seguirá la reproducción a partir de la selección actual en el
orden en que las pistas estén grabadas.
• Para detener y abandonar la reproducción aleatoria
Presione 7. La unidad detendrá la reproducción y
cancelará el modo de reproducción aleatoria.
NOTA
• Para que desaparezca la barra del menú:
Presione ON SCREEN.
RND.
TIME 25:58TRACK 33
Reproducción repetida
Podrá repetir la reproducción del título o capítulo actual
(para DVD VIDEO), o la pista actual o todas las pistas
(para Audio CD/Vídeo CD/SVCD).
T ambién podrá repetir la reproducción de cualquier par te
que desee.
Repetición de la selección actual o de
todas las pistas [Reproducción
repetida]
Disponible :
SLOW
-
SLOW+
REPEAT
DIGEST
PHONIC
3D
¶ Para DVD VIDEO: Durante la reproducción
Para Audio CD/Vídeo CD/SVCD:
En cualquier estado excepto el de
reproducción de discos
Vídeo CD/SVCD con PBC
1 Presione REPEAT.
Cada vez que presione REPEAT, el modo de
repetición cambiará dentro del ciclo de repetición
completa (All repeat), repetición de 1 selección
(Repeat 1) y desactivación de la repetición.
El modo seleccionado se refleja con los iconos
visualizados en la ventana de visualización del
panel frontal, como se muestra a continuación.
Si presiona REPEAT mientras el disco está parado,
deberá presionar 3 para que se inicie la
reproducción repetida.
REPEA T: Repite el título actual para DVD VIDEO o
todas las pistas para Audio CD/Vídeo
CD/SVCD.
REPEAT 1: Repite el capítulo actual para DVD
VIDEO o la pista actual para Audio CD/
Vídeo CD/SVCD.
Sin indicación:
Se desactiva el modo de repetición.
ANGLE
RM-SXV010U
REMOTE CONTROL
VFPAUDIOSUB TITLEREPEAT
ZOOM
AMP VOL
28
(Ventana de visualización)
Indicadores del modo de repetición
En la pantalla del televisor, se visualizará una
ventana que indica el modo de repetición actual.
La indicación del modo en la ventana es la misma
que la de barra del menú (vea las páginas 37 y 38.)
(Ejemplo de la ventana de visualización del modo de reproducción)
CHAP.
Page 99

Funciones avanzadas
TV88TV7
TV9
• Para detener la reproducción repetida
Presione 7.
Cuando se ha puesto un disco DVD VIDEO, la unidad
detendrá la reproducción y cancelará el modo de
reproducción repetida.
Cuando se ha puesto un disco Audio CD, Vídeo CD, o
SVCD, la unidad detendrá la reproducción pero no
cancelará el modo de reproducción repetida.
• Para abandonar la reproducción repetida
Presione REPEA T hasta que se apague el indicador del
modo de repetición en la ventana de visualización.
NOTAS
• También podrá seleccionar el modo de repetición
mediante la barra del menú. Vea las páginas 37 y 38.
• Cuando se activa el modo de reproducción repetida con
un Audio CD, Vídeo CD, o SVCD, el modo de repetición
cambia del mismo modo.
No obstante, deberá tener presente que en el modo
" ", la unidad repite todas las pistas programadas en
lugar de todas las pistas del disco.
• Durante la reproducción en el modo de repetición de
título/capítulo/pista, si salta el título/capítulo/pista
empleando 4/¢, etc., se repetirá el título/capítulo/
pista de destino.
• Si aparece cuando se presiona REPEAT durante la
reproducción de un DVD VIDEO.
Significa que el contenido del disco no permite la
repetición de títulos ni de capítulos.
• La función de reproducción repetida no puede emplearse
durante la reproducción de Vídeo CD/SVCD con función
de PBC.
Para repetir una parte seleccionada
[Reproducción de A-B repetida]
Disponible :
ENTER
7
10
M
P
O
T
VOL
C
H
O
I
SLOW
9
TV00TV-/--
MUTING
+10
TITLE/
TV/VIDEO
GROUP
CANCEL
SUBTITLERETURN
U
M
N
E
E
CH
N
U
+
-
VOL+
ENTER
CH
E
-
C
R
C
E
S
N
O
NEXTPREVIOUS
SELECT STROBECLEAR
-
SLOW+
N
E
5/∞/2/3
ON SCREEN
¶ Durante la reproducción excepto de Vídeo CD/SVCD
con función de PBC
1 Presione dos veces ON SCREEN.
Aparecerá la barra del menú en la pantalla del
televisor.
(Para encontrar los detalles sobre la barra del
menú, consulte la página 36.)
2 Emplee 2/3 para mover a , y
presione entonces ENTER.
Aparecerá el menú desplegable debajo de para
seleccionar el modo de repetición.
3 Emplee 5/∞ para seleccionar "A-B".
Dependiendo del tipo de disco y del estado de la
unidad, el modo de repetición cambiará de la forma
siguiente:
• Durante la reproducción de un DVD VIDEO
CHAP.
TITLE 33 TOTAL 1:25:58CHAP 33
1/3 1/31/5
8.5Mbps
A-B
Modo de repetición seleccionado
CAPÍTULO :
repetición del capítulo
actual
TÍTULO :
A-B :
repetición del título actual
se repite la parte deseada
(sólo durante la reproducción
DESCONECTAR
• Audio CD/Vídeo CD/SVCD
(Pantalla de ejemplo para un Audio CD)
TIME 25:58TRACK 33
PROG. RND.
A-B
Modo de repetición seleccionado
PISTA :
TODAS :
repetición de la pista actual
repetición de todas las
pistas
A-B :
se repite la parte deseada
(sólo durante la reproducción
DESCONECTAR
4 Presione ENTER al principio de la parte que
desee repetir (punto A).
Desaparecerá el menú desplegable.
El icono de repetición mostrará .
(Pantalla de ejemplo para un DVD VIDEO)
CHAP.
TITLE 33 TOTAL 1:25:58CHAP 33
1/3 1/3A- 1/5
8.5Mbps
Icono de repetición
A-
5 Presione ENTER al final de la parte que desee
repetir (punto B).
El icono de repetición mostrará .
La unidad buscará el punto "A" e iniciará la
reproducción repetida entre los puntos "A" y "B".
• Para abandonar la reproducción de A-B repetida
Presione ENTER. El modo de repetición de A-B se
desactivará, mientas que prosigue la reproducción.
• La selección de "DESCONECTAR" en el menú desplegable
para la selección del modo de repetición, o la presión de
4/¢ cancelan el modo de repetición de A-B, y prosigue
la reproducción.
• También podrá detener y abandonar el modo de repetición
de A-B presionando 7
.
NOTAS
• Los puntos A y B deberán estar dentro del mismo
título/capítulo/pista.
• Para que desaparezca la barra del menú:
Presione ON SCREEN.
• Si aparece cuando se presiona ENTER durante la
reproducción de un disco DVD VIDEO.
Significa que el contenido del disco no permite la
repetición de la parte seleccionada.
A-B
Español
)
)
Funciones
avanzadas
29
Page 100

Funciones avanzadas
Cambio del idioma, del sonido
y del ángulo de la escena
Con algunos discos DVD VIDEO, podrá seleccionar el
idioma de los subtítulos y/o el idioma de audio/sonido,
así como el ángulo de cámara que desee.
De forma similar, podrá seleccionar el canal de audio (o
la combinación de canales) deseado de un disco Vídeo
CD/SVCD, así como un canal de subtítulos de un disco
SVCD.
2 Emplee 5/∞ o SUBTITLE para seleccionar el
subtítulo.
Cada vez que presione 5/∞ o SUBTITLE, cambiará
el idioma de los subtítulos.
Para la selección de subtítulos, vea los ejemplos
siguientes.
• Para DVD VIDEO
Presionando 5/∞ o SUBTITLE irá cambiando por
el ciclo de los subtítulos grabados en el disco.
Ejemplo:
1/3 INGLÉS
Selección del idioma de los subtítulos
[SUBTITLE]
Disponible :
Algunos discos DVD VIDEO y SVCD para películas, guías,
etc. contienen más de un idioma para los subtítulos.
Podrá seleccionar el que desee.
• Al principio de la parte en la que se han grabado subtítulos,
aparece en la pantalla del televisor (excepto cuando la
preferencia de "GUÍA EN PANTALLA" se ha ajustado en
"DESCONECTAR"). Para encontrar los detalles sobre la
preferencia de "GUÍA EN PANTALLA", consulte la página
53.
Funciones
avanzadas
ENTER
SUB TITLE
OPEN/
CLOSE
1
4
7
TV-/--
10
N
E
M
P
O
T
VOL
-
C
H
O
I
C
E
SLOW
DIGEST
3D
PHONIC
TV22TV1
TV55TV4
TV88TV7
TV0
0
TITLE/
GROUP
SUBTITLERETURN
U
CH
+
ENTER
CH
-
SELECT STROBECLEAR
-
ANGLE
RM-SXV010U
REMOTE CONTROL
TV DVD
STANDBY/ON
TV DVD
ZOOM
AMP VOL
MUTING
TV/VIDEO
CANCEL
N
O
NEXTPREVIOUS
SLOW+
TV3
3
TV6
6
TV9
9
+10
M
E
N
U
VOL+
N
E
E
R
C
S
VFPAUDIOSUB TITLEREPEAT
¶ Durante la reproducción de DVD VIDEO/SVCD
(excepto cuando se muestra la barra de estado)
1 Presione SUBTITLE.
Aparecerá la ventana de selección de subtítulos en
la pantalla del televisor.
1/3
INGLÉS
5/∞
2/3 FRANCÉS
3/3 ESPAÑOL
-/3 DESCONECTAR
•Para SVCD
Un disco SVCD puede tener hasta cuatro subtítulos.
Presionando 5/∞ irá cambiando por estos
canales de la forma siguiente,
independientemente de si los subtítulos están o
no están grabados.
-/4 DESCONECTAR
1/4
2/4
3/4
4/4
3 Presione ENTER.
Los subtítulos se visualizarán en el idioma
seleccionado. Desaparecerá la ventana de
selección de subtítulos.
NOTAS
• Para DVD VIDEO, es posible que el idioma seleccionado
esté abreviado en la pantalla del televisor. Consulte la
"Tabla de idiomas y sus abreviaturas" en la página 49.
• La ventana de selección de subtítulos desaparecerá
automáticamente si no cambia los subtítulos durante
varios segundos.
• Cuando aparece en la pantalla del televisor (para
discos DVD VIDEO):
Significa que no podrá seleccionar los subtítulos o que
no hay subtítulos grabados.
• También podrá seleccionar los subtítulos mediante la
barra del menú. Vea las páginas 37 y 39.
30
 Loading...