

Page 1
COM P ACT D ISC R EC ORD ER
PR OGR AM SE T CLE AR
RE PE AT
_
ON/ ÑOFF
POW ER
RA ND OM
AUT O
TR AC K
DIS PL AY
RE C
PA US E
RE C
RE C LEV EL
MIN MA X
FINA LIZ E
ER AS E
RE C
SOU RC E
DIGITA L
SY NC HR O
X L-R 9 1 0
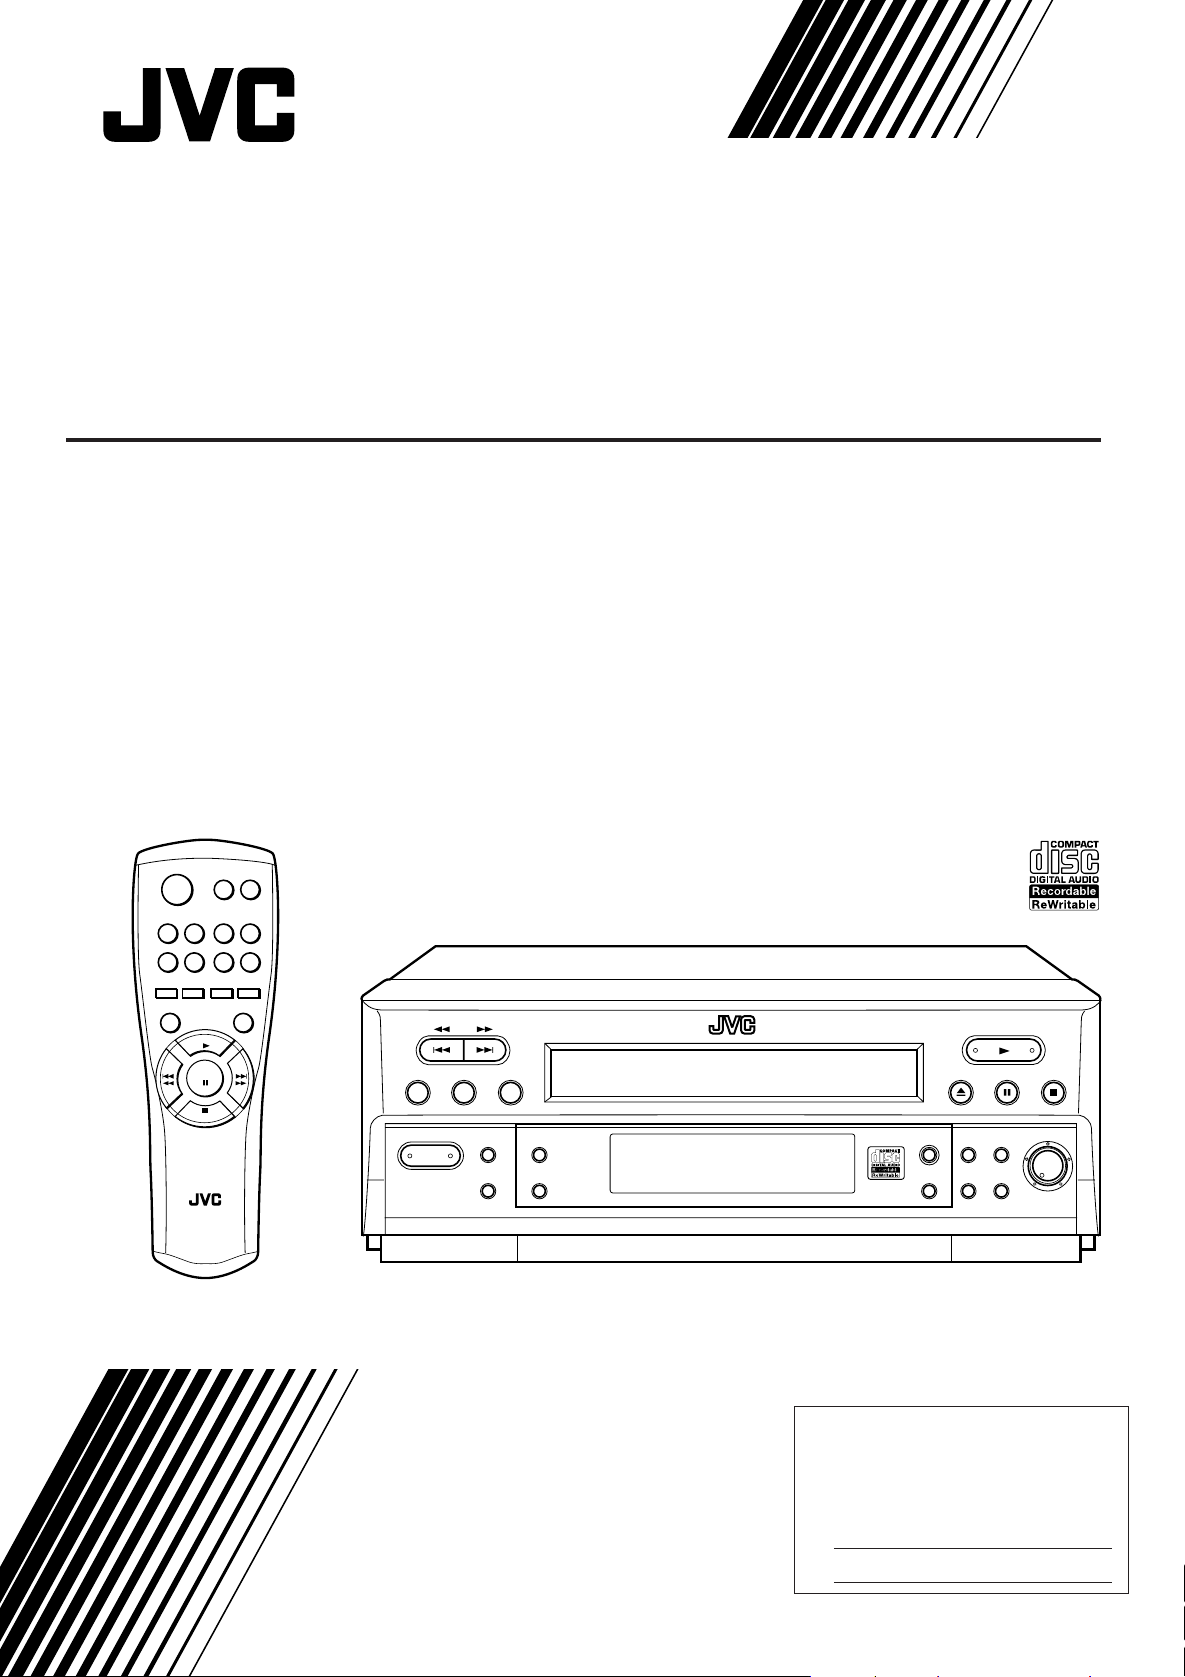
COMPACT DISC RECORDER
ENREGISTREUR DE DISQUES LASER
XL-R910SL
OP EN / CLO SE
1
0
3 4 5 6
7 8 9 0
RE C
PA US E
RE P EA T
2
RE C
RE C
RA N DOM
SOU R CE
DIS P LAY
PL AY
PA US E
ST OP
R M -SX LR 9 1 0 A
RE M OTE CON T RO L
INSTRUCTIONS
MANUAL DÕINSTRUCTIONS
For Customer Use:
Enter below the Model No. and Serial
No. which are located either on the rear,
bottom or side of the cabinet. Retain this
information for future reference.
Model No.
Serial No.
LVT0728-002A
[C]
Page 2

Warnings, Cautions and Others
CAUTION
RISK OF ELECTRIC SHOCK
DO NOT OPEN
CAUTION: TO REDUCE THE RISK OF ELECTRIC SHOCK.
DO NOT REMOVE COVER (OR BACK)
NO USER SERVICEABLE PARTS INSIDE.
REFER SERVICING TO QUALIFIED SERVICE PERSONNEL.
The lightning flash with arrowhead symbol,
within an equilateral triangle is intended to
alert the user to the presence of uninsulated
"dangerous voltage" within the product's
enclosure that may be of sufficient
magnitude to constitute a risk of electric
shock to persons.
The exclamation point within an equilateral
triangle is intended to alert the user to the
presence of important operating and
maintenance (servicing) instructions in the
literature accompanying the appliance.
WARNING: TO REDUCE THE RISK OF FIRE
OR ELECTRIC SHOCK, DO NOT EXPOSE
THIS APPLIANCE TO RAIN OR MOISTURE.
CAUTION
To reduce the risk of electrical shocks, fire, etc.:
1. Do not remove screws, covers or cabinet.
2. Do not expose this appliance to rain or moisture.
ATTENTION
Afin d’éviter tout risque d’électrocution, d’incendie, etc.:
1. Ne pas enlever les vis ni les panneaux et ne pas ouvrir
le coffret de l’appareil.
2. Ne pas exposer l’appareil à la pluie ni à l’humidité.
7 Caution — POWER switch
This apparatus is provided with a POWER switch to be
able to minimize power consumption for safe use.
Therefore,
1.When doing initial setting, complete all the
connections required, connect the mains plug into the
wall outlet, and set the POWER switch to ON.
2.When not in use, set the POWER switch to OFF.
3.Disconnect the mains plug to shut the power off
completely. The POWER switch in any position do
not disconnect the mains line.
7 Précaution — interrupteur POWER
Cet appareil est doté d’un interrupteur POWER qui
permet de réduire la consommation d’énergie à des fins
de sécurité. En conséquence,
1.Lors des réglages initiaux, effectuer tous les
raccordements, brancher la fiche secteur dans la
prise secteur, puis mettre l’interrupteur POWER sur
ON.
2.Lorsqu’on ne sert pas de l’appareil, mettre
l’interrupteur POWER sur OFF.
3.Débrancher l’appareil de la prise secteur pour couper
complètement l’alimentation. L’interrupteur POWER
ne coupe pas l’appareil du secteur, quelle que soit la
position sur laquelle il est réglé.
G-1
Page 3

For Canada/pour le Canada
CAUTION: TO PREVENT ELECTRIC SHOCK, MATCH WIDE
BLADE OF PLUG TO WIDE SLOT, FULLY INSERT
ATTENTION: POUR EVITER LES CHOCS ELECTRIQUES,
INTRODUIRE LA LAME LA PLUS LARGE DE LA FICHE DANS LA
BORNE CORRESPONDANTE DE LA PRISE ET POUSSER
JUSQUAU FOND
For U.S.A.
This equipment has been tested and found to comply with the limits
for a Class B digital device, pursuant to part 15 of the FCC Rules.
These limits are designed to provide reasonable protection against
harmful interference in a residential installation.
This equipment generates, uses and can radiate radio frequency
energy and, if not installed and used in accordance with the
instructions, may cause harmful interference to radio
communications. However, there is no guarantee that interference
will not occur in a particular installation. If this equipment does cause
harmful interference to radio or television reception, which can be
determined by turning the equipment off and on, the user is
encouraged to try to correct the interference by one or more of the
following measures:
Reorient or relocate the receiving antenna.
Increase the separation between the equipment and receiver.
Connect the equipment into an outlet on a circuit different from that
to which the receiver is connected.
Consult the dealer or an experienced radio/TV technician for help.
For Canada/pour Le Canada
THIS DIGITAL APPARATUS DOES NOT EXCEED THE
CLASS B LIMITS FOR RADIO NOISE EMISSIONS
FROM DIGITAL APPARATUS AS SET OUT IN THE
INTERFERENCE-CAUSING EQUIPMENT STANDARD
ENTITLED “DIGITAL APPARATUS,” ICES-003 OF THE
DEPARTMENT OF COMMUNICATIONS.
CET APPAREIL NUMERIQUE RESPECTE LES LIMITES
DE BRUITS RADIOELECTRIQUES APPLICABLES AUX
APPAREILS NUMERIQUES DE CLASSE B
PRESCRITES DANS LA NORME SUR LE MATERIEL
BROUILLEUR; “APPAREILS NUMERIQUES”, NMB-003
EDICTEE PAR LE MINISTRE DES COMMUNICATIONS.
IMPORTANT FOR LASER PRODUCTS
Precautions:
1. CLASS 1 LASER PRODUCT
2. DANGER: Invisible laser radiation when open and
interlock failed or defeated. Avoid direct exposure to
beam.
3. CAUTION: Do not open the top cover. There are no
user-serviceable parts inside. Leave all servicing to
qualified service personnel.
IMPORTANT POUR PRODUITS LASER
Precautions
1. PRODUIT LASER CLASSE 1
2. DANGER: Radiation laser invisible quand l’appareil est
ouvert ou que le verrouillage est en panne ou désactivé.
Éviter une exposition directe au rayon.
3. ATTENTION: Ne pas ouvrir le volet supérieur. Il n’y a
pas de pièce réparable par l’utilisateur à l’intérieur.
Confier le service après-vente à un personnel qualifié.
G-2
Page 4

Table of Contents
English
Before Operating the Unit ............................ 2
Before Installation ...................................................................... 2
About Discs and Their Logos..................................................... 2
Location of the Buttons and Controls ............ 3
Getting Started ........................................... 5
Checking the Supplied Accessories ........................................... 5
Putting Batteries in the Remote Control .................................... 5
Connecting the Unit ................................................................... 5
Playing Back a Disc ..................................... 7
1 Turn On the Power .................................................................. 7
2 Load a Disc ............................................................................. 7
3 Start Playback ......................................................................... 7
Basic Playback Operations......................................................... 8
Selecting Playback Modes ............................ 9
Programming the Playing Order of the Tracks
— Program Play .................................................................... 9
Playing at Random — Random Play ....................................... 10
Recording on a CD-R/CD-RW ...................... 11
• Before You Start Recording ................................................. 11
• Using Automatic Tracking while Recording ....................... 11
• Adjusting the Recording Level through the Analog
Input Jacks ......................................................................... 11
1 Load a Recordable Disc and Prepare the Playback Source .. 12
2 Select the Recording Source (Input) ..................................... 12
3 Start Recording ..................................................................... 12
Other Recording Functions ......................... 13
Synchronized Digital Recording .............................................. 13
Finalizing a Disc — CD-R/CD-RW......................................... 14
Unfinalizing a Disc — CD-RW ............................................... 14
Erasing the Tracks on a CD-RW .............................................. 14
Additional Information ................................ 15
Glossary.................................................................................... 15
Maintenance ............................................. 16
Handling Discs ......................................................................... 16
Troubleshooting ......................................... 17
Specifications ............................................ 18
Remote
ONLY
This mark indicates that the remote control CAN
ONLY be used for the operation explained.
1
Remote
NOT
This mark indicates that only the remote control
CANNOT be used for the operation explained.
Page 5
Before Operating the Unit
Thank you for purchasing this JVC product. Please read these
instructions thoroughly and carefully before starting operation to
ensure that you will derive the optimum performance and a long
service life from your unit.
Before Installation
General Precautions
• DO NOT insert any metal object into the unit.
• DO NOT disassemble the unit or remove screws, covers, or
cabinet.
• DO NOT modify the power cord in any way.
• DO NOT bend the cord at a sharp angle, and do not pull or twist it.
• DO NOT expose the unit to rain or moisture.
Locations
• Install the unit in a location that is level and protected from
moisture.
• The temperature around the unit must be between 41˚F and 95˚F
(5˚C and 35˚C).
• Make sure there is good ventilation around the unit. Poor
ventilation could cause overheating and damage the unit.
• Avoid placing the unit on or adjacent to an amplifier. This is to
prevent the humming caused by the unit’s proximity to some types
of amplifiers. Move the unit where it will not be affected by the
amplifier.
Handling the unit
• DO NOT touch the power cord with wet hands.
• DO NOT pull on the power cord to unplug the cord. When
unplugging the cord, always grasp the plug so as not to damage
the cord.
• If the power cord is damaged, consult your dealer.
About Discs and Their Logos
Recording
This unit has been designed to record on the discs bearing the
following logos:
CD Recordable
CD Rewritable
In addition to the logos shown above, the phrases shown below or
their equivalent should also be indicated somewhere on the package
or accompanying documentation.
• For Customer Use
• For Music Use
The following discs cannot be used for recording:
• Discs bearing logos other than the above.
• Discs intended for professional use.
• Discs intended for recording computer data.
Playback
This unit has been also designed to play back on the discs bearing
the following logos:
CD Recordable
English
CD Rewritable
Audio CD
In addition to the above discs, this unit can play back audio data
recorded on CD-G (CD Graphics), CD-EXTRA, and CD-Text discs.
Note:
This unit can playback a CD-R or CD-RW recorded on a personal
computer only if it has been recorded in the CD audio format.
2
Page 6
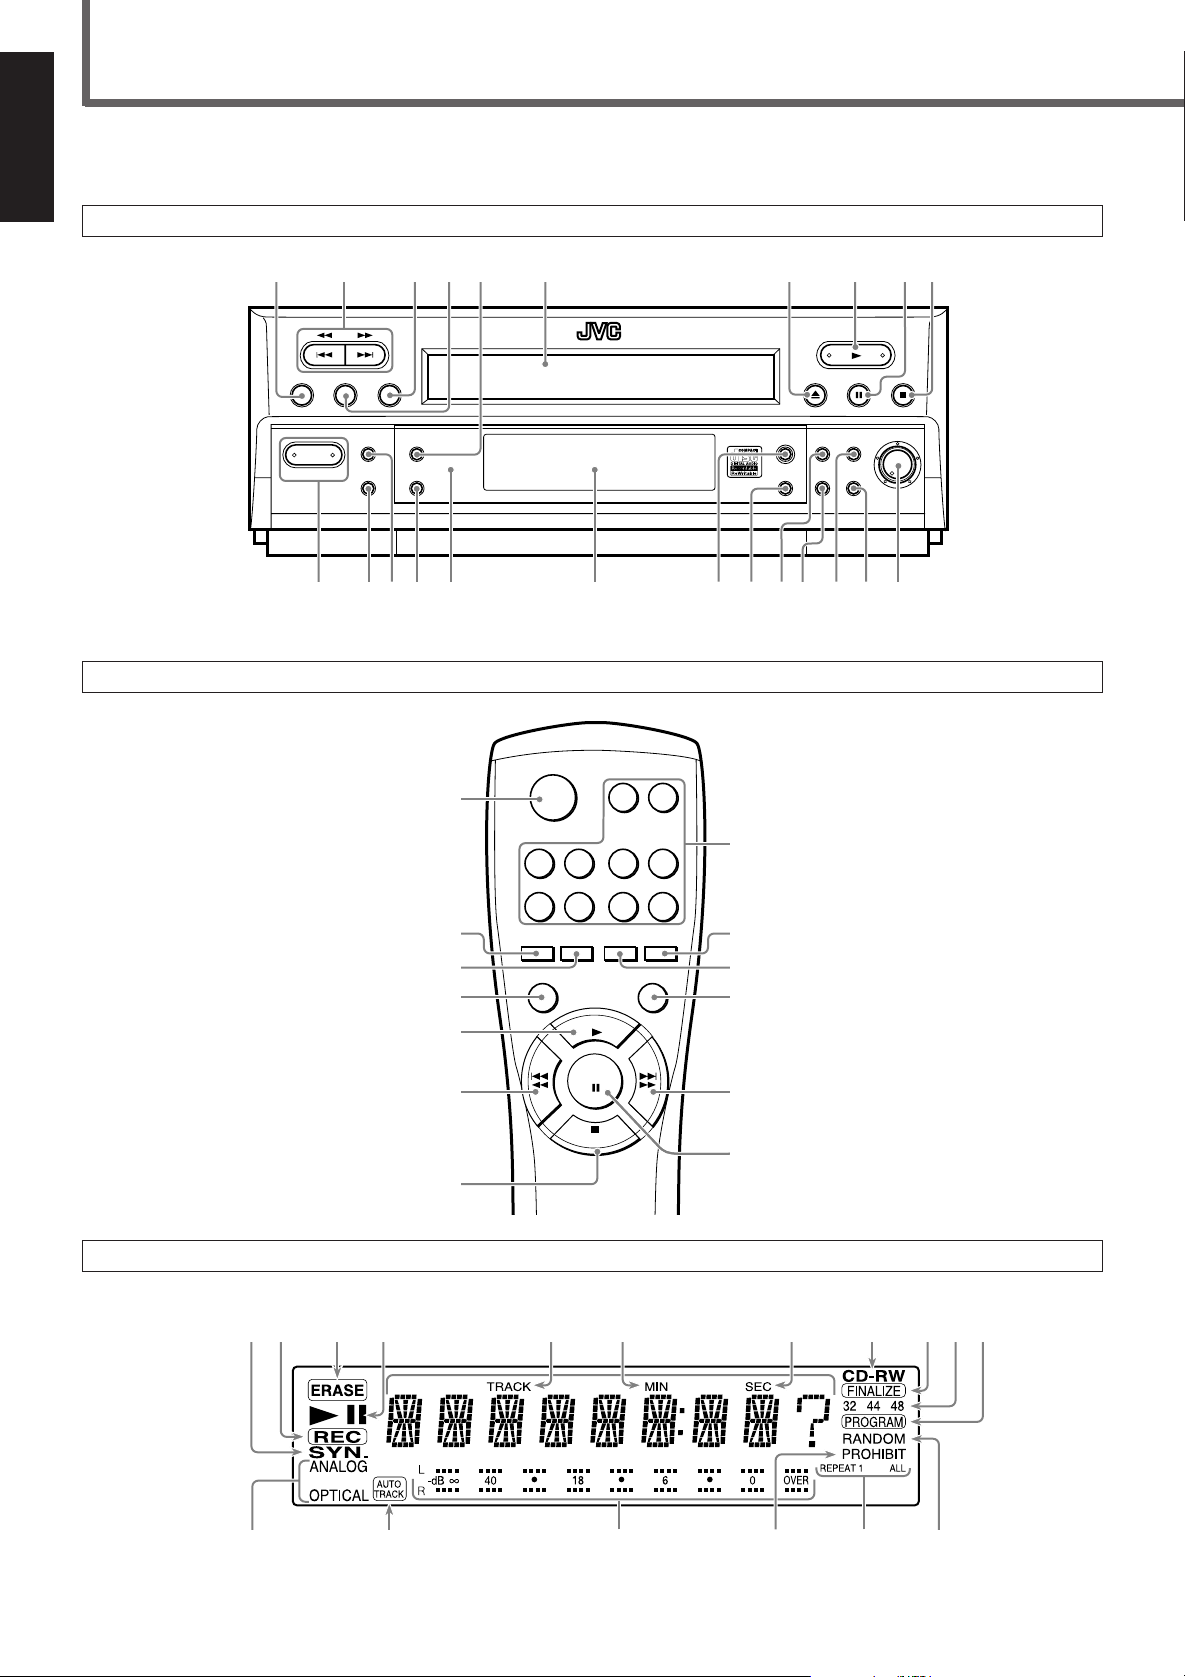
Location of the Buttons and Controls
Be familiar with the buttons and controls on your unit.
English
Front Panel
2 4 5 61 87 9 p3
Remote Control
PROGRAM SET CLEAR
REPEAT
POWER
_
ON/ —OFF
RANDOM
w e r t y u dsai o ;
q
AUTO
TRACK
DISPLAY
1
2
3
4
5
COMPACT DISC RECORDER
OPEN/CLOSE
0
34 56
78 90
REC
REC
PAUSE
REPEAT
SOURCE
PLAY
REC
1
2
RANDOM
DISPLAY
XL-R910
8
9
p
q
FINALIZE
REC
SOURCE
REC
PAUSE
ERASE
REC
DIGITAL
SYNCHRO
REC LEVEL
MIN MAX
Display Window
3
6
PAUSE
STOP
w
e
7
2 3 4 5 6 7 8 9 p q1
w e r yt u
Page 7

See pages in the parentheses for details.
Front Panel
1 PROGRAM button (9)
2 4 / 1 (Reverse Skip/Reverse Search) buttons (8 – 10)
¢ / ¡ (Forward Skip/Forward Search) buttons (8 – 10)
3 CLEAR button (9, 10, 14)
4 SET button (13, 14)
5 AUTO TRACK button (11)
6 Disc tray
7 0 (Open/Close) button (7, 12)
8 3 (Play) button (7, 9)
9 8 (Pause) button (8)
p 7 (Stop) button (7, 9, 10, 12, 13)
q POWER button (7, 12)
w RANDOM button (10)
e REPEAT button (8)
r DISPLAY button (8)
t Remote sensor
y Display window
u FINALIZE button (14)
i REC SOURCE button (12, 13)
o REC PAUSE button (12)
; ERASE button (14)
a REC button (12)
s DIGITAL SYNCHRO button (13)
d REC LEVEL control (11)
Remote Control
1 OPEN/CLOSE 0 button (7, 12)
2 REC PAUSE button (12)
3 REC button (12)
4 REPEAT button (8)
5 PLAY 3 button (7, 9)
6 4 / 1 (Reverse Skip/Reverse Search) buttons (8 – 10)
7 STOP 7 button (7, 9, 10, 12, 13)
8 Number buttons (8)
9 RANDOM button (10)
p REC SOURCE button (12, 13)
q DISPLAY button (8)
w ¢ / ¡ (Forward Skip/Forward Search) buttons (8 – 10)
e PAUSE 8 button (8)
Display Window
1 SYN. (Synchronization) indicator (13)
• Lights up when Digital Synchronized Recording mode is
activated.
2 REC (Recording) indicator (12, 13)
• Lights up while recording. (Also lights up while recording
pause – with the 8 indicator this time.)
3 ERASE indicator (14)
4 3 (Play)/8 (Pause) indicators (7, 8)
• 3 : Lights up during play.
• 8 : Lights up during pause.
5 TRACK indicator
• Lights up when the track number is shown below this
indicator.
6 MIN (Minute) indicator
• Lights up when the minutes are shown below this indicator.
7 SEC (Second) indicator
• Lights up when the seconds are shown below this indicator.
8 Disc indicator
— CD, CD-R, CD-RW
• Lights up to indicate the type of the disc loaded.
9 FINALIZE indicator (14)
• Lights up when a finalized disc is loaded.
p Sampling frequency indicators
— 32, 44, 48
• Lights up to indicate the sampling frequency of the incoming
signal.
q PROGRAM indicator (9)
• Lights up when the unit is in program play mode.
w Recording source (input) indicators (12, 13)
— ANALOG, OPTICAL
• Lights up to indicate the recording source (input).
e AUTO TRACK indicator (11)
• Lights up when Automatic Tracking is activated.
r Level indicator
• Illuminates to indicate the signal level.
t PROHIBIT indicator
• Lights up when recording from the loaded disc is prohibited.
y Repeat mode indicator (8)
— REPEAT 1, REPEAT ALL
• Lights up to indicate repeat play mode.
u RANDOM indicator (10)
• Lights up while the unit is in random play mode.
English
4
Page 8
Getting Started
English
Checking the Supplied Accessories
Check to be sure you have all of the following supplied accessories.
The number in the parentheses indicates the quantity of the pieces
supplied.
• Remote Control (1)
• Batteries (2)
• Audio cord (2)
• Optical digital cord (1)
If anything is missing, contact your dealer immediately.
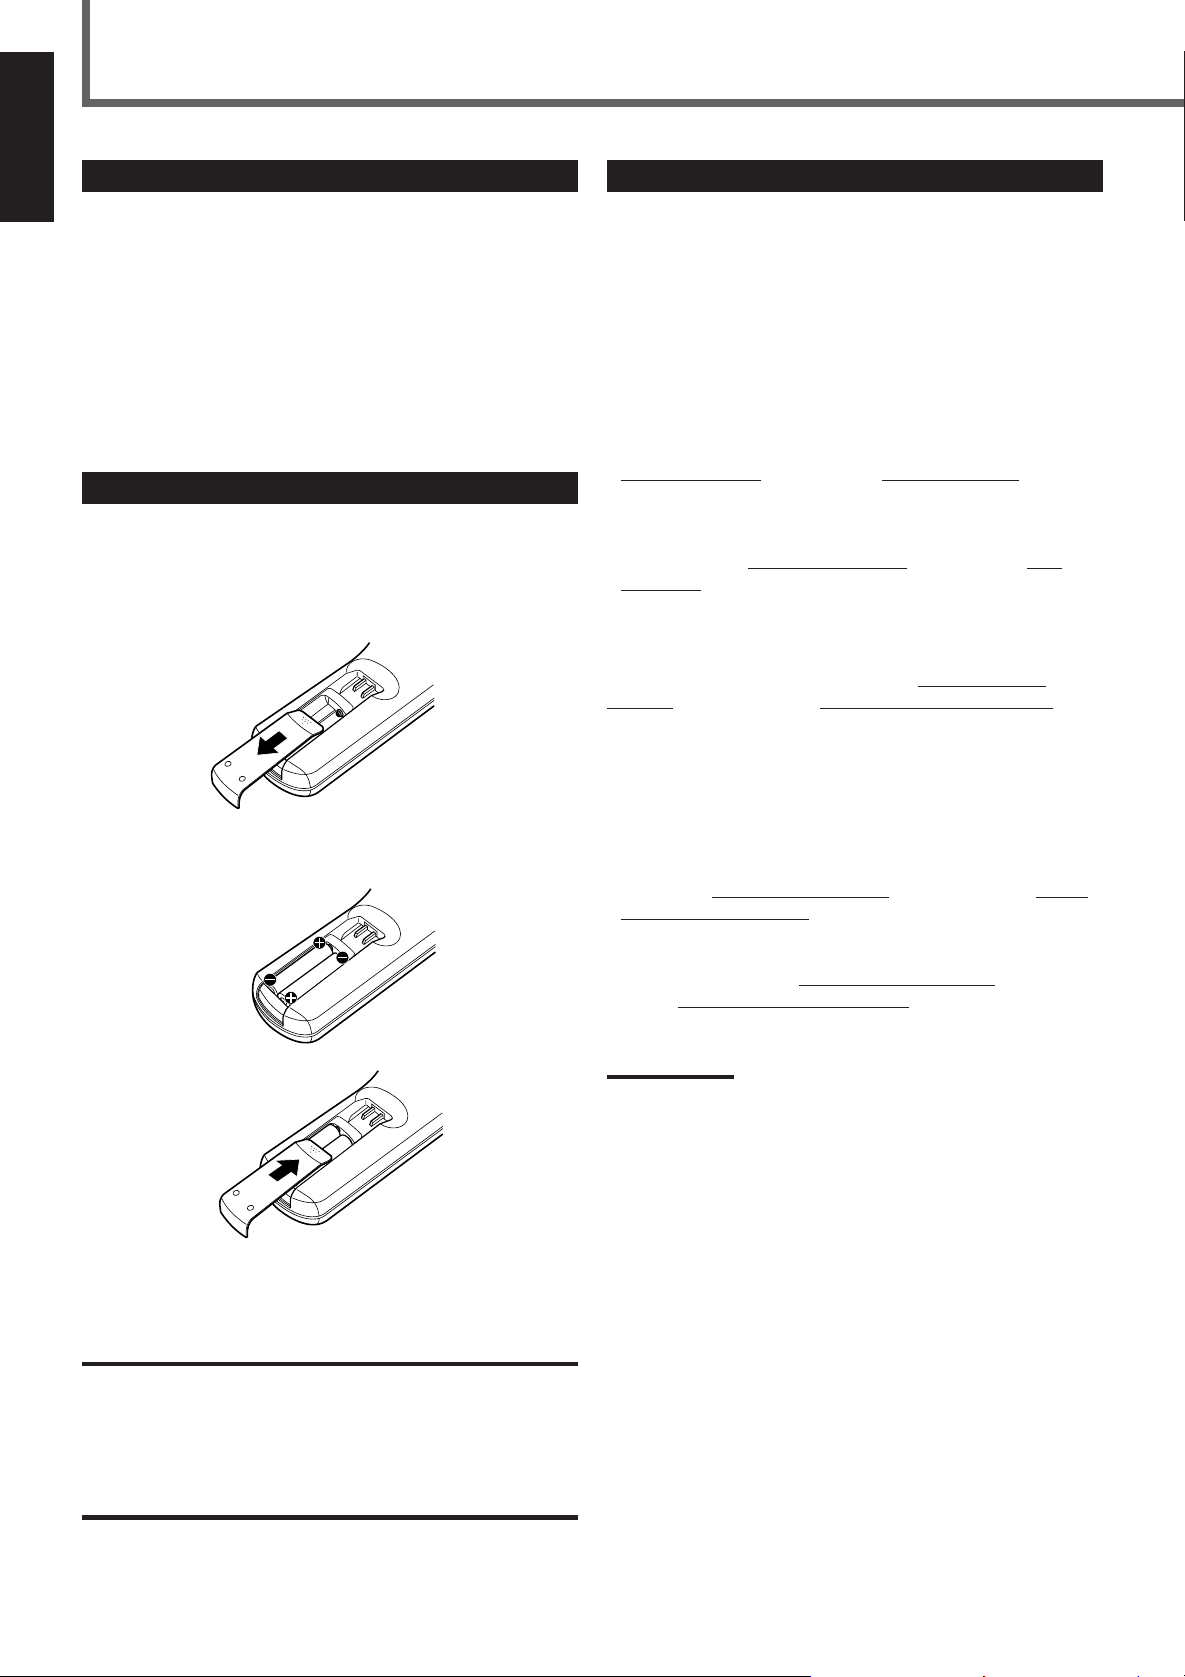
Putting Batteries in the Remote Control
Before using the remote control, put two supplied batteries first.
• When using the remote control, aim the remote control directly at
the remote sensor on the unit (at a distant of up to 23 feet — 7 m).
1. On the back of the remote control, remove the
battery cover.
Connecting the Unit
You need to connect this unit to an amplifier/receiver and some
playback components such as CD player, Compact Component
System.
The illustration on the next page indicates a typical connection with
a CD player and an amplifier.
Remember NOT to turn on the power until all the connections
have been completed.
Analog Connection Å
• For recording on this unit: Connect an audio cord between the
ANALOG IN jack on this unit and Line Output jack on the
playback equipment — e.g. AUX-OUT on an amplifier or LINE
OUT on the CD player.
• For playback or recording on the other unit: Connect an audio
cord between the
Input jack (e.g. AUX-IN, CD-R IN, TAPE-IN) on an amplifier or
another analog recording component.
Digital Connection — Coaxial ı
Connect a coaxial digital cord between the COAXIAL OUT
terminal on this unit and the Digital Coaxial Input terminal (e.g.
COAXIAL IN) on an amplifier or another digital recording
component.
ANALOG OUT jack on this unit and Line
2. Insert batteries. Make sure to match the polarity:
(+) to (+) and (–) to (–).
3. Replace the cover.
If the range or effectiveness of the remote control decreases, replace
the batteries. Use two AAA/R03(UM-4) type dry-cell batteries.
CAUTION:
Follow these precautions to avoid leaking or cracking cells:
• Place batteries in the remote control so they match the polarity: (+)
to (+) and (–) to (–).
• Use the correct type of batteries. Batteries that look similar may
differ in voltage.
• Always replace both batteries at the same time.
• Do not expose batteries to heat or flame.
Digital Connection — Optical Ç
Before connecting optical cables, disconnect the protective caps
from the OPTICAL IN and OUT terminals.
• For recording on this unit: Connect an optical digital cord
between the
Optical Output terminal on a playback component — e.g.
OPTICAL OUT on the CD player.
• For playback or recording on the other unit: Connect an optical
digital cord between the
and the
amplifier or another digital recording component.
Notes:
• It is not required to do all three connections. You can connect your
components and this unit using only one or two of the connections
listed above.
• It is recommended to use one of the digital connections to obtain
the optimum recording quality on this unit.
OPTICAL IN terminal on this unit and the Digital
OPTICAL OUT terminal on this unit
Digital Optical Input terminal (e.g. OPTICAL IN) on an
5
Page 9

Turn the power off to all components before connections.
To a wall outlet
English
ANALOG
IN OUT
L
R
COAXIAL
OUT
L
R
OPTICAL
IN OUT
XL-R910SL
Disconnect the protective
plug(s) before inserting
the optical cord(s).
LINE OUT
L
R
OPTICAL
OUT
CD Player
A CB
L
R
OUT -AUX- IN CD TUNER OUT-TAPE-IN
Illustrations of the input/output terminals above are
typical examples.
When you connect other components, refer also to
their manuals since the terminal names actually
printed on the rear vary among the components.
LRL
LRL
R
R
L
R
COAXIAL OPTICAL
IN IN
CAUTION:
Before plugging the unit into an AC outlet, make sure that all
connections have been completed.
Amplifier
6
Page 10

Playing Back a Disc
English
This manual mainly explains operations using the buttons and controls on the front panel. You can also use the buttons on the remote
control if they have the similar names (or marks) as those on the front panel.
If operations using the remote control are different from those using the front panel, they are then explained.
4 / 1
¢ / ¡
PROGRAM SET CLEAR
AUTO
REPEAT
RANDOM
TRACK
DISPLAY
POWER
_
ON/ —OFF
DISPLAY
1
This unit has been designed to play back the following discs:
• Audio CD (CD)
• CD Recordable (CD-R) — both finalized and unfinalized discs
• CD Rewritable (CD-RW) — both finalized and unfinalized discs
COMPACT DISC RECORDER
REPEAT
Disc tray
XL-R910
3
Press 3.
23
REC LEVEL
REC
FINALIZE
PAUSE
REC
REC
DIGITAL
SOURCE
SYNCHRO
ERASE
MIN MAX
8
Start Playback
7
1
Turn On the Power
Press POWER to set it to the _ ON position.
The display illuminates.
POWER
_
ON/ —OFF
If a disc is already loaded, the total track
number and the total playing time appear.
2
Load a Disc
1 Press 0 to open the disc tray.
2 Insert a disc — CD, CD-R or CD-RW.
CORRECT
• When using a CD single (8 cm), place it on the inner circle of
the tray.
INCORRECT
Remote
NOT
The disc tray automatically closes (“CLOSE” flashes on the
display), and the unit starts reading the disc information recorded on
the disc (“TOC READ” flashes), then starts playback — Normal
Play.
When you have loaded a CD.
(See also notes below.)
Notes:
• If you have loaded a CD-R, the CD-R indicator lights up. (If the disc
is finalized, the FINALIZE indicator also lights up.)
• If you have loaded a CD-RW, the CD-RW indicator lights up. (If the
disc is finalized, the FINALIZE indicator also lights up.)
To stop playing, press 7.
To eject the disc, press 0.
To turn off the unit, press POWER to set it in the — OFF position
so that the display goes off.
7
Page 11

Basic Playback Operations
Elapsed playing time
of the current track
Remaining time
of the current track
Remaining time
of the disc
Elapsed playing time
of the disc
While playing a CD, you can do the following operations.
To stop play for a moment
Press 8.
To check the remaining time
During play or pause, press DISPLAY.
• Each time you press DISPLAY, the following information appear
on the display in sequence.
DISPLAY
English
While pausing, the 8 (Pause) indicator lights up on the display.
To resume playback, press 3.
To go to another track
Press 4 / 1 or ¢ / ¡ before or during playback.
• 4 / 1 : Goes back to the beginning of the current or
previous tracks.
• ¢ / ¡ : Skips to the beginning of the next or succeeding
tracks.
To locate a particular point in a track
During play, press and hold 4 / 1 or ¢ / ¡.
• 4 / 1 : Fast reverses the track.
• ¢ / ¡ : Fast forwards the track.
Note:
When you stop playing, this setting is reset. Next time you start
playing, the elapsed playing time of the current track will be shown on
the display.
To repeat playback
You can have all the tracks in a disc, the program or the individual
track currently playing repeat as many times as you like.
To repeat playing, press REPEAT during or before play.
• Each time you press the button, Repeat play mode changes as
follows, and the following indicator lights up on the display:
REPEAT
REPEAT 1 :Repeats one track on a disc or in the program.
REPEAT ALL : Repeats all the tracks or program.
To cancel Repeat play, press REPEAT repeatedly until neither
REPEAT 1 nor REPEAT ALL indicator lights up on the display.
REPEAT 1 REPEAT ALL
Canceled
To go to another track directly using
the number buttons
Pressing the number buttons (two digits) on the remote control
before or during play allows you to start playing the track number
you want.
Ex.: For track number 5, press 0, then 5.
For track number 15, press 1, then 5.
For track number 20, press 2, then 0.
For track number 32, press 3, then 2.
Note:
You can also select a one-digit number (0 – 9) simply pressing the
number button. (Ex.: For track number 5, press 5 then wait for three
seconds.)
Remote
ONLY
Note:
You cannot use the repeat play mode during random play.
• If you start random play, the repeat mode will be canceled.
• If you press REPEAT during random play, random playback mode is
canceled and normal play resumes.
8
Page 12

English
Selecting Playback Modes
PROGRAM
POWER
_
ON/ —OFF
POWER = _ ON
PROGRAM SET CLEAR
REPEAT
POWER
_
ON/ —OFF
RANDOM
AUTO
TRACK
DISPLAY
RANDOM CLEAR
Programming the Playing Order of the
Tracks — Program Play
You can arrange the order in which tracks play before you start
playing. You can program up to 30 tracks.
1
Load a disc.
4 / 1
¢ / ¡
COMPACT DISC RECORDER
XL-R910
0
FINALIZE
REC
SOURCE
PAUSE
ERASE
REC
REC
DIGITAL
SYNCHRO
73
REC LEVEL
MIN MAX
To exit from program play mode, press 7 again or CLEAR before
or after play. The PROGRAM indicator goes off. The program you
have made is also erased.
• When you press 0, the program is also erased.
Note:
The display cannot show the hundred digit even if the total playing
time exceeds 100 minutes. (e.g. “105:00” will be shown as “05:00.”)
2
Press PROGRAM so that the unit enters
program mode.
PROGRAM
3
Press ¢ / ¡ (or 4 / 1) to select a track,
then press PROGRAM again.
PROGRAM
Ex.: Track 3 is stored into program step 1.
4
Repeat the above step to program other tracks.
5
Press 3.
The tracks are played in the order
you have programed.
To confirm the program contents
Before playing, you can check the program contents by pressing
PROGRAM repeatedly.
The programed tracks will be shown on the display in the programed
order.
Track number
Step number in the program
(“C” stands for “Confirm.”)
To stop playing, press 7.
9
Page 13

To modify the program
While confirming, you can change the track numbers in the
program.
Example: To change the track number (from “18” to “6”)
programed in program step 4
1 Press PROGRAM repeatedly until the contents of program
step 4 appears on the display.
PROGRAM
2 Press ¢ / ¡ (or 4 / 1) to select a new track number,
then press PROGRAM again.
• If you want to erase the track from your program, press
CLEAR. (In this case, you can see no change on display.)
To add tracks in the program before playing, press PROGRAM
repeatedly until the unit enters program play mode.
(“– –” under the TRACK indicator will start flashing on the display),
then select the track numbers by following step 3 of the
programming procedure (on the previous page).
Playing at Random — Random Play
The tracks will play at random.
1
Load a disc.
• If the unit is in program play mode (the PROGRAM indicator
is lit on the display), you cannot go to the next step. If this
happens, press 7 to exit from program play mode.
2
Press RANDOM so that the unit enters random
mode.
RANDOM
Random play ends when all the tracks are played once.
The RANDOM indicator lights up on the
display.
The tracks are played at random.
English
To skip the currently playing track, press ¢ / ¡
(or 4 / 1).
• You cannot go back to the previous tracks during random play
even if you press 4 / 1.
To stop playing, press 7.
• Random play mode is also canceled when you press 0.
To exit from random play mode, press RANDOM again.
• Each time you press the button, random playback mode turns on
and off.
Notes:
• You can turn on random playback mode during normal play.
• You cannot repeat random play. If you press REPEAT during
random play, random playback mode is canceled and normal play
resumes.
10
Page 14

English
REC LEVEL
MIN MAX
Recording on a CD-R/CD-RW
Before You Start Recording
• This unit has been designed to record on the following discs — both blank and unfinalized CD Recordable (CD-R) and
CD Rewritable (CD-RW).
• It should be noted that it may be unlawful to re-record pre-recorded tapes, records, or discs without the consent of the
owner of copyright in the sound or video recording, broadcast or cable programme and in any literary, dramatic, musical,
or artistic embodied therein.
• The sampling frequency rate converter built in the unit allows you to record a digital source if its sampling frequency is 32 kHz,
44.1 kHz, or 48 kHz. If no playback component is connected to the OPTICAL IN terminal or if the sampling frequency of the
connected component is not 32 kHz, 44.1 kHz, or 48 kHz, “UN LOCK” appears on the display (no recording is possible).
The sampling frequency indicator (32, 44, 48) lights up to indicate the sampling frequency of the incoming signals through the
OPTICAL IN terminal.
• You cannot record the entire Dolby Digital or DTS Digital Surround signals through the OPTICAL IN terminal.
• When you record onto an unfinalized CD-R or CD-RW, its recordings are not erased or overwritten. The recording starts from the
point following the last recorded track on the disc.
If you want to record on such a CD-RW from its beginning, you have to erase its contents first (see “Erasing the Tracks on a CDRW” on page 14. This is only possible on CD-RWs).
• The recording level is automatically set correctly when recording through the digital terminals, so it is not affected by the REC
LEVEL control.
• When an unfinalized CD-R or CD-RW is loaded, this unit checks the disc and automatically adjusts the laser for optimum
recording setting — Optimum Power Control (OPC).
Using Automatic Tracking while Digital
Recording
Press AUTO TRACK so that the AUTO TRACK indicator
lights up on the display. A track marking is automatically
recorded.
• Each time you press the button, automatic tracking turns
on and off.
AUTO
TRACK
The AUTO TRACK indicator lights up.
When automatic track marking is activated:
Track markings are recorded automatically at the points
where the tracks change.
Note:
When “ANALOG” is selected as the recording source (see
page 12), automatic track marking is canceled temporarily.
(The AUTO TRACK indicator goes off.)
When automatic track marking is deactivated:
No track mark is recorded on a disc. This means that, when
playing this disc, this unit (or another CD player compatible
with CD-R/CD-RW) will regard the entire recording as one
track (track 1). You will not be able to directly select a song
or navigate through songs.
To put a track mark manually while recording, press
SET at the place you want to put a track mark.
SET
Adjusting the Recording Level through the
Analog Input Jacks
Before recording through the Analog Input jacks, adjust the
recording level properly.
To adjust the recording level, follow the procedure below
BEFORE you start recording procedure described on page 12:
1 Start playback on the playback component.
2 Check the level indicator on the display while listening to
the playback.
3 Adjust the REC LEVEL control so that the OVER
indicator will never lights up when the highest signal
comes in.
The OVER indicator
Note:
Do not turn the REC LEVEL control while recording; otherwise,
recording level will change.
11
Page 15

This manual mainly explains operations using the buttons and controls on the front panel. You can also use the buttons on the remote
control if they have the similar names (or marks) as those on the front panel.
English
POWER
_
ON/ —OFF
POWER = _ ON
PROGRAM SET CLEAR
REPEAT
POWER
_
ON/ —OFF
RANDOM
AUTO
TRACK
DISPLAY
AUTO TRACK
1
Load a Recordable Disc and Prepare
the Playback Source
1 Press POWER to set it to the _ ON position.
2 Press 0 to open the disc tray, and load a disc.
3 Press 0 again to close the disc tray.
The disc tray automatically closes (“CLOSE” flashes on the
display), and the unit starts reading the disc information
recorded on the disc (“TOC READ” flashes), then the display
shows the following.
7
REC LEVEL
MIN MAX
COMPACT DISC RECORDER
XL-R910
133
REC
FINALIZE
PAUSE
REC
REC
DIGITAL
SOURCE
SYNCHRO
ERASE
REC LEVEL
2
Notes:
•
If you want to use automatic tracking, see “Using Automatic
Tracking while Recording” on page 11.
*
When you select “ANALOG,” you have to adjust the recording level
using the REC LEVEL control (see page “Adjusting the Recording
Level through the Analog Input Jacks” on page 11).
3
Start Recording
1 Press REC PAUSE to enter the unit into recording
pause
REC
PAUSE
The recording pause (8) indicator starts
flashing on the display.
Ex.: When a CD-R is loaded with the recording
source (input) set to “OPTICAL”
4 Enter the playback component into play pause.
• Refer also to its Instruction manual — normally, press the Play
(3) button, then soon press the Pause (8) button.
2
Select the Recording Source (Input)
Press REC SOURCE.
• Each time you press the button, the recording source (input)
alternates between “ANALOG” and “OPTICAL.”
REC
SOURCE
ANALOG OPTICAL
ANALOG* : Select this to record through the Analog Input
jacks.
OPTICAL :Select this to record through the Digital Optical
terminal.
2 Press REC to start recording.
REC
3 Start playback on the playback component.
To stop recording, press 7.
“BUSY” appears when writing the signals on the disc.
• When no sound comes in for 8 seconds while recording through
the Analog Input, recording automatically stops.
• If you are to play the disc on another CD player compatible with
CD-R/CD-RW, you need to finalize the disc, see “Finalizing a
Disc — CD-R/CD-RW” on page 14.
To eject the disc, press 0.
To turn off the unit, press POWER to set it in the — OFF position
so that the display goes off.
12
Page 16

Other Recording Functions
English
SET
POWER
_
ON/ —OFF
POWER = _ ON
Synchronized Digital Recording
You can use the synchronized recording method when recording
through the Digital Optical Input terminal.
With this recording method, recording automatically starts when
digital signal comes into this unit, and stops automatically when
signal stops coming in.
• One-track recording: You can record one track at a time. By
using this one-track recording, you can record only your favorite
songs on one disc.
• All-track recording: You can record all the tracks at once.
PROGRAM SET CLEAR
REPEAT
POWER
_
ON/ —OFF
RANDOM
AUTO
TRACK
DISPLAY
COMPACT DISC RECORDER
Remote
NOT
FINALIZE
REC
SOURCE
4
Press SET.
SET
XL-R910
FINALIZE
PAUSE
REC
SOURCE
ERASE
ERASE
PAUSE
REC
DIGITAL
SYNCHRO
REC
REC
7
REC LEVEL
MIN MAX
DIGITAL
SYNCHRO
1
Load a recordable disc and prepare the playback
source.
• See page 12 for details.
• If you want to use automatic tracking, see “Using Automatic
Tracking while Recording” on page 11.
2
Press REC SOURCE to select the Digital Optical
Input as the recording source (the OPTICAL
indicator lights up).
REC
SOURCE
• Each time you press the button, the recording source alternates
between “ANALOG” and “OPTICAL.”
3
Press DIGITAL SYNCHRO repeatedly to select
either one-track recording or all-track recording.
• Each time you press DIGITAL SYNCHRO, the display
changes to show as follows.
DIGITAL
SYNCHRO
ONE ? ALL ?
Canceled
5
Start playback on the playback component.
As soon as signals come into this unit, recording starts on this
unit.
• If you have selected one-track recording, recording will end
when one track is played back. You can continue recording
other tracks simply by repeating steps 3 to 5.
To stop any time during recording, press 7.
“BUSY” appears when writing the signals on the disc.
Notes:
• If the PROHIBIT indicator lights up when you start playback, you
cannot make a recording since duplication of the disc played back
is prohibited by SCMS. (See page 15.)
• If you are to play the disc on another CD player compatible with
CD-R/CD-RW, you need to finalize the disc, see “Finalizing a Disc
— CD-R/CD-RW” on page 14.
ONE ? : Select this to record only one track.
ALL ? : Select this to record all the tracks.
13
Page 17

Finalizing a Disc — CD-R/CD-RW
Remote
NOT
Erasing the Tracks on a CD-RW
Remote
NOT
English
Finalization is the final process in recording on a CD-R or CD-RW.
“Finalizing a disc” means to finish writing the TOC (Table of
Contents) on the recorded disc. Only after this process is completed,
a recorded CD-R or CD-RW can be played back on a CD player
compatible with CD-R/CD-RW.
IMPORTANT
• Once a CD-R has been finalized, no more recording can be made
on the disc.
• If you unplug the power cord or if a power failure occurs during
finalization process, recorded data will be lost and the disc may not
be utilized any more.
1
Press FINALIZE while a disc you want to finalize
is placed on the disc tray.
“FINALIZE?” appears on the display.
FINALIZE
• If you want to cancel finalization, press CLEAR.
2
Press SET to finalize the disc.
SET
Unfinalizing a Disc — CD-RW
Once a CD-R has been finalized, no more recording will be made on
the disc. However, by erasing the TOC (Table of Contents), you can
record on a recorded CD-RW. This erasing process of the TOC is
called “Unfinalization.”
• Unfinalization is just to erase the TOC only, but not the recorded
music signals on the disc.
1
Press REC PAUSE while a disc you want to
The FINALIZE indicator starts flashing on the
display.
The finalization process requires about a few
minutes to complete (when finalized, the
FINALIZE indicator stops flashing and remains
lit).
Remote
NOT
unfinalize is placed on the disc tray.
“UN FINAL?” appears on the display.
REC
PAUSE
You can erase a track or all the tracks on a CD-RW.
• One-track erasure: You can erase the last track.
• Disc erasure: You can erase all the tracks at once.
One-track Erasure
1
Load a disc — either a finalized or unfinalized
CD-RW.
• If the disc is already finalized, first unfinalize the disc. See
“Unfinalizing a Disc — CD-RW” on the left column.
2
Press ERASE repeatedly so that “TRACK ?”
appears on the display.
• Each time you press the button, the display alternately shows
“TRACK ?” and “DISC ?.”
ERASE
To cancel the erasure, press 7.
3
Press SET.
SET
4
Repeat steps 2 and 3 to erase the other tracks.
The ERASE indicator starts flashing and the last
recorded track is erased.
Disc Erasure
1
Load a disc — either a finalized or unfinalized
CD-RW.
• If the disc is already finalized, first unfinalize the disc. See
“Unfinalizing a Disc — CD-RW” on the left column.
2
Press ERASE repeatedly so that “DISC ?” appears
on the display.
• Each time you press the button, the display alternately shows
“TRACK ?” and “DISC ?.”
ERASE
To cancel the erasure, press 7.
• If you want to cancel unfinalization, press CLEAR.
2
Press SET to unfinalize the disc.
SET
The FINALIZE indicator starts flashing on the
display.
The unfinalization process requires about a few
minutes to complete (when unfinalized, the
FINALIZE indicator goes off).
3
Press SET.
SET
The ERASE indicator starts flashing and all the
tracks on the disc are erased.
14
Page 18

Additional Information
English
Glossary
Finalization
This is the final process in recording on a CD-R or CD-RW.
“Finalizing a disc” means to finish writing the TOC (Table of
Contents) on the recorded disc. Only after this process is completed,
a recorded CD-R or CD-RW can be played back on a CD player
compatible with CD-R/CD-RW.
Sampling Frequency
When analog signals are converted into digital signals, they are
divided into many points and digitized. This dividing method is
called “sampling.” The sampling frequency indicates how many
points one second is divided into – for example, for CD sound, one
second is divided into 44100 points since its sampling frequency is
44.1 kHz.
SCMS (Serial Copy Management System)
Digital audio components, such as CD recorder, MD (Mini-Disc)
recorder and DAT (Digital Audio Tape) recorder, can exchange
audio signals in the digital forms through digital input/output
terminals. The digital audio components allow digital copy of music
signals with little deterioration. This has made it necessary to have a
copy restriction rule for protecting the copyright, and “SCMS
(Serial Copy Management System)” has been established as a
result.
To protect the copyright, the SCMS allows only first-generation
digital copies to be made from premastered software (like CDs or
prerecorded MDs).
If you try to record from such copied discs on this unit, the
PROHIBIT indicator will light up on the display.
OPC (Optimum Power Control)
OPC is a function that checks the loaded disc and automatically
adjusts the laser for optimum recording setting before recording
through the Digital Optical Input terminal.
TOC (Table of Contents)
TOC is a kind of disc information containing sub-data (track
number, playing time, etc.) that enables us to search for tracks
quickly on the disc.
To write the TOC on a CD-R or CD-RW, you need to finalize the
disc.
3:12
4:15
6:05
Track mark
When playing a disc, you can move among the tracks.
You can do this because there is a mark recorded at the beginning of
each track enabling you to locate the track. This mark is called a
“track mark” and the portion between two adjacent track marks is
called a “track.”
Unfinalization
This means to erase the TOC (Table of Contents) on a finalized CDRW. This makes it possible to erase the recorded data from the CDRW.
I
T
G
I
D
G
F
E
D
C
B
A
OK
A
L
G
F
E
D
C
B
A
I
T
A
G
I
D
NO
L
G
F
E
D
C
B
A
15
Page 19

Maintenance
Handling Discs
How to handle discs
When removing a disc from its case, press down
the center holder of the case and lift the disc out,
holding it by the edges.
• Always hold the disc by the edges. Do not
touch its recording surface.
When storing a disc into its case, gently insert
the disc around the center holder (with the
printed surface facing up).
• Make sure to store discs into the cases after
use.
To keep discs clean
A dirty disc may not play correctly. If a disc
does become dirty, wipe it with a soft cloth in a
straight line from center to edge.
Moisture condensation
Moisture may condense on the lens inside the unit in the following
cases:
• After starting the heater.
• When the unit is moved from the extremely hot place to the
extremely cold place.
Should this occur, the unit may malfunction. In this case, eject the
disc and leave the unit turned on for a few hours until the moisture
evaporates.
CAUTIONS:
• Do not insert any disc of unusual shape — like a heart or flower;
otherwise, it will cause a malfunction.
• Do not expose discs to direct sunlight or any heat source or place
them in a place subject to high temperature and humidity. Do not
leave them in a car.
• Do not use any solvent (for example, conventional record cleaner,
spray, thinner, benzine, etc.) to clean discs.
English
To play new discs
New discs may have some rough spots around the inner and outer
edges. If such a disc is used, this unit may reject the disc.
To remove these rough spots, rub the edges with a pencil or
ballpoint pen, etc.
16
Page 20

Troubleshooting
If you are having a problem with your unit, check this list for a possible solution before calling for service.
English
If you cannot solve the problem from the hints given here, or the unit has been physically damaged, call a qualified person, such as your
dealer, for service.
Symptom
Playback
No sound is heard.
Playback does not start.
Only a certain portion cannot be played
back.
Recording
Recording is not performed.
“UN LOCK” appears on the display.
“NO AUDIO” appears on the display.
Erasure is not performed.
Cause
Unrecorded CD-R or CD-RW has been
loaded.
• Disc has been loaded upside down.
• Condensation occurs on the lens.
The disc is dirty or scratched.
• CD-R or CD-RW has been loaded upside
down. (“NO DISC” appears on the
display.)
• Finalized CD-R or CD-RW has been
loaded.
• Source you are trying to copy is a digitally
copied disc. (The PROHIBIT indicator
lights up.)
• Disc is dirty or scratched.
• No digital signal comes in.
• No optical digital cord is connected to the
OPTICAL IN terminal.
Loaded CD-R or CD-RW is for computer
use.
Disc is damaged.
Action
Load a recorded disc.
• Load it correctly with the label side facing
up.
• Leave the power on for a few hours until
moisture evaporates.
Clean or replace the disc.
• Replace the disc.
• CD-R: Replace the disc.
CD-RW: Unfinalize the CD-RW (see page
14).
• Select “ANALOG” as the recording
source (input).
• Clean or replace the disc.
• Source you are trying to copy is a digitally
copied disc.
• Connect the optical digital cord correctly.
Replace the disc. Use a disc for music use.
Remote control
Operations are disabled.
If the unit fails to operate properly even when the remedial
action suggested above has been taken
This unit uses a microcomputer to perform a large number of
operations. If it fails to operate no matter which button is pressed,
disconnect the power cord, wait for a few moments, then reconnect
it.
• The path between the remote control and
the remote sensor on the unit is blocked.
• The batteries are exhausted.
• Remove the obstruction.
• Replace the batteries.
IMPORTANT
• If you are going to record something important, always test-record
first to check that the recording turns out properly before proceeding
with the actual recording.
• The manufacturer assumes no liability whatsoever for any damage
resulting from missed opportunity or accidental erasure that occurs
while conducting recording or playback operations due to
malfunctioning of or trouble in the unit, or for any incidental damage.
17
Page 21

Specifications
CDR section
System: Compact disc digital audio recording system
Sampling frequency: 44.1 kHz
Signal-to-noise ratio: 90 dB
Dynamic range: 90 dB
Frequency response: 20 Hz to 20 kHz
Wow and flutter: Less than measurable limit
Total harmonic distortion:0.01%
Input:
ANALOG IN: Minimum input level: 300 mV
(Full scale –12 dB)/47 kΩ
OPTICAL IN: Input level: –23 dBm to –15 dBm
(with sampling rate 32 kHz, 44.1 kHz, 48 kHz)
Output:
ANALOG OUT: 2V/50 kΩ (Full scale)
(Full scale –12 dB)/50 kΩ
OPTICAL OUT: Output level: –21 dBm to –15 dBm
(with sampling rate 44.1 kHz)
COAXIAL OUT: 0.5 Vp-p/75 Ω
General
Power requirement: AC 120 V , 60 Hz
Power consumption: 20 W
Dimensions (approx.): 270 mm x 95 mm x 353 mm (W/H/D)
Mass (approx.): 3.8 kg (8.4 lbs)
11
/16 in. x 3 3/4 in. x 13
(10
15
/16 in.)
English
Supplied accessories
See page 5.
Design and specifications are subject to change without notice.
18
Page 22

VICTOR COMPANY OF JAPAN, LIMITED
EN, FR
0301KSMMDWSAM
JVC
 Loading...