

Page 1
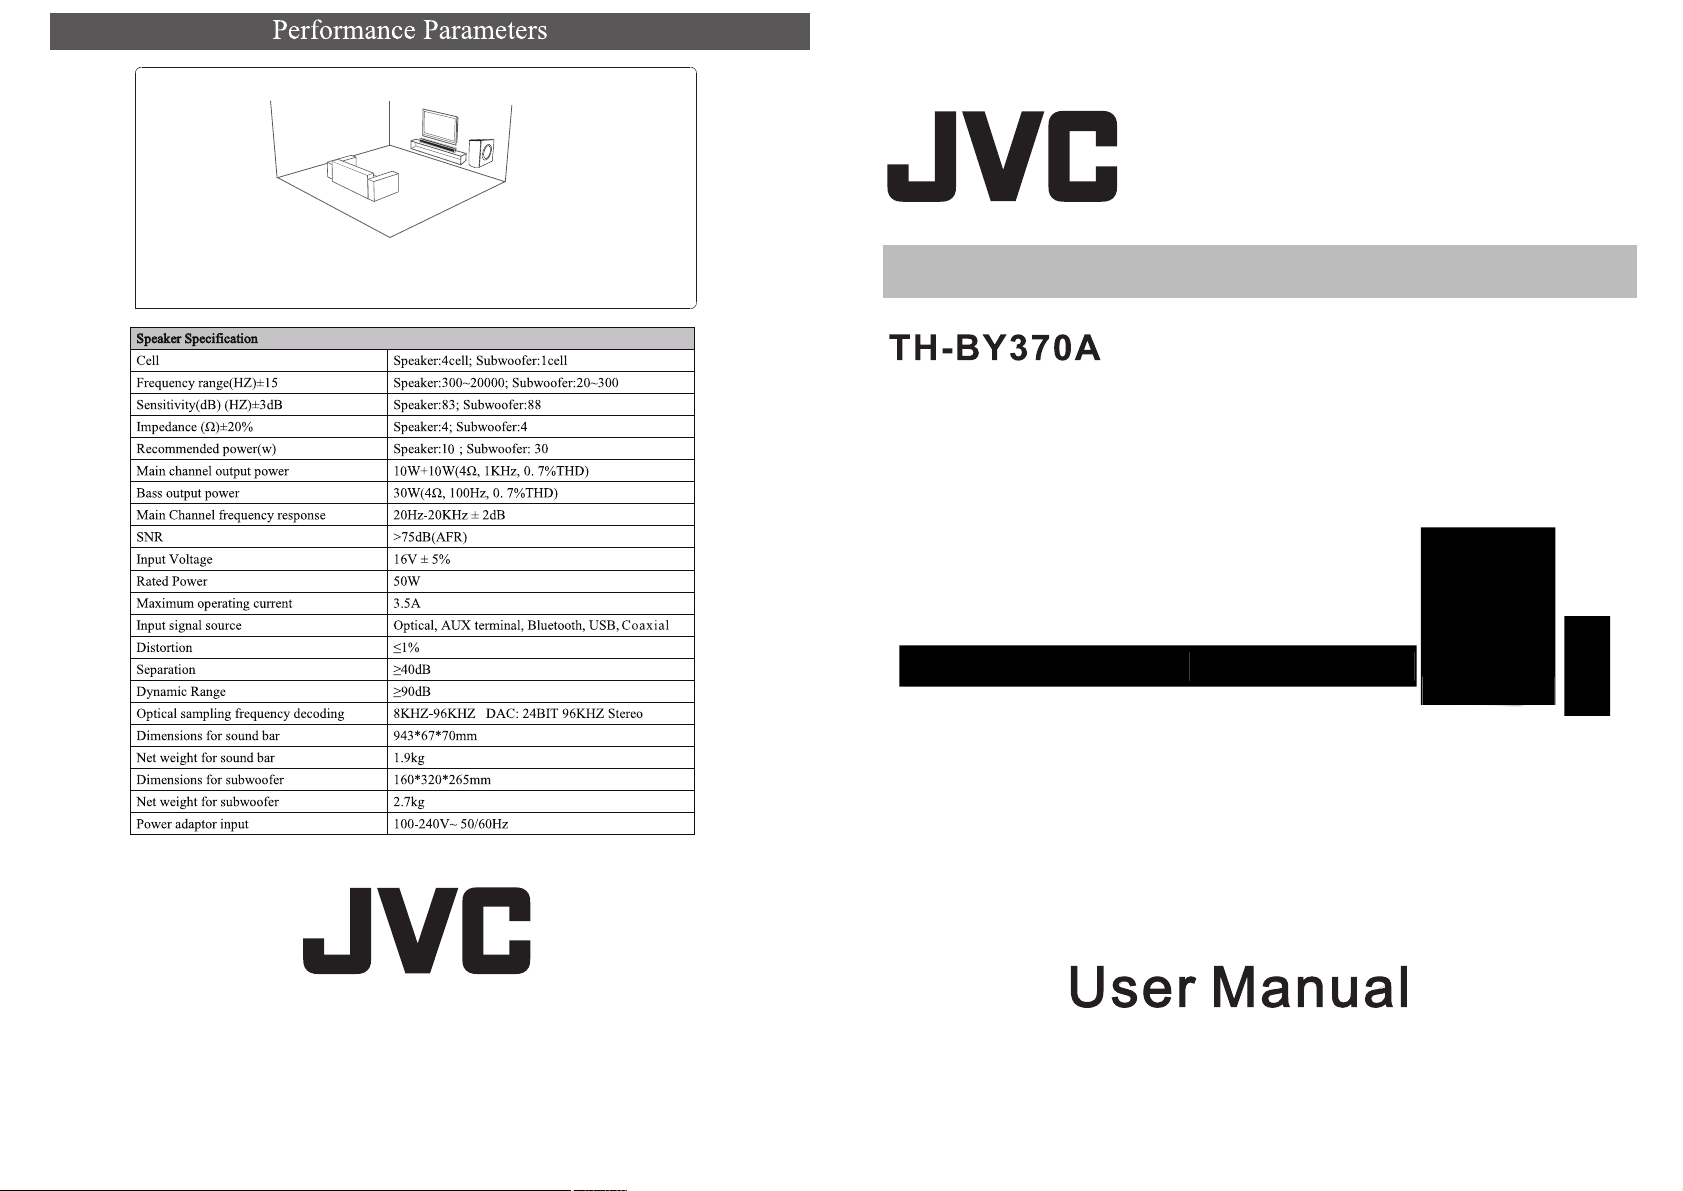
RE CO MM EN DE D PL AC EM EN T
So un db ar : Under the TV(if wall-mounted)/ In front of the TV
Su bw oo fe r: On the floor, alongside the TV (or in the front corner of
the room)
2.1 CH SOUNDBAR
Page 2
with liquids; do not place unit on windowsills or other places where it may be
This product is not a toy! Children should be
supervised to ensure that they do not
play
Do not impede ventilation by covering ventilation
openings with cloths, curtains or similar items.
15.When removing the power plug from the wall outlet, always pull directly on the plug;
16. Do not expose the batteries to excessive heat, direct sunlight, fire or similar.
17. Do not throw used batteries in your household rubbish. Dispose of it responsibly according
to local regulations.
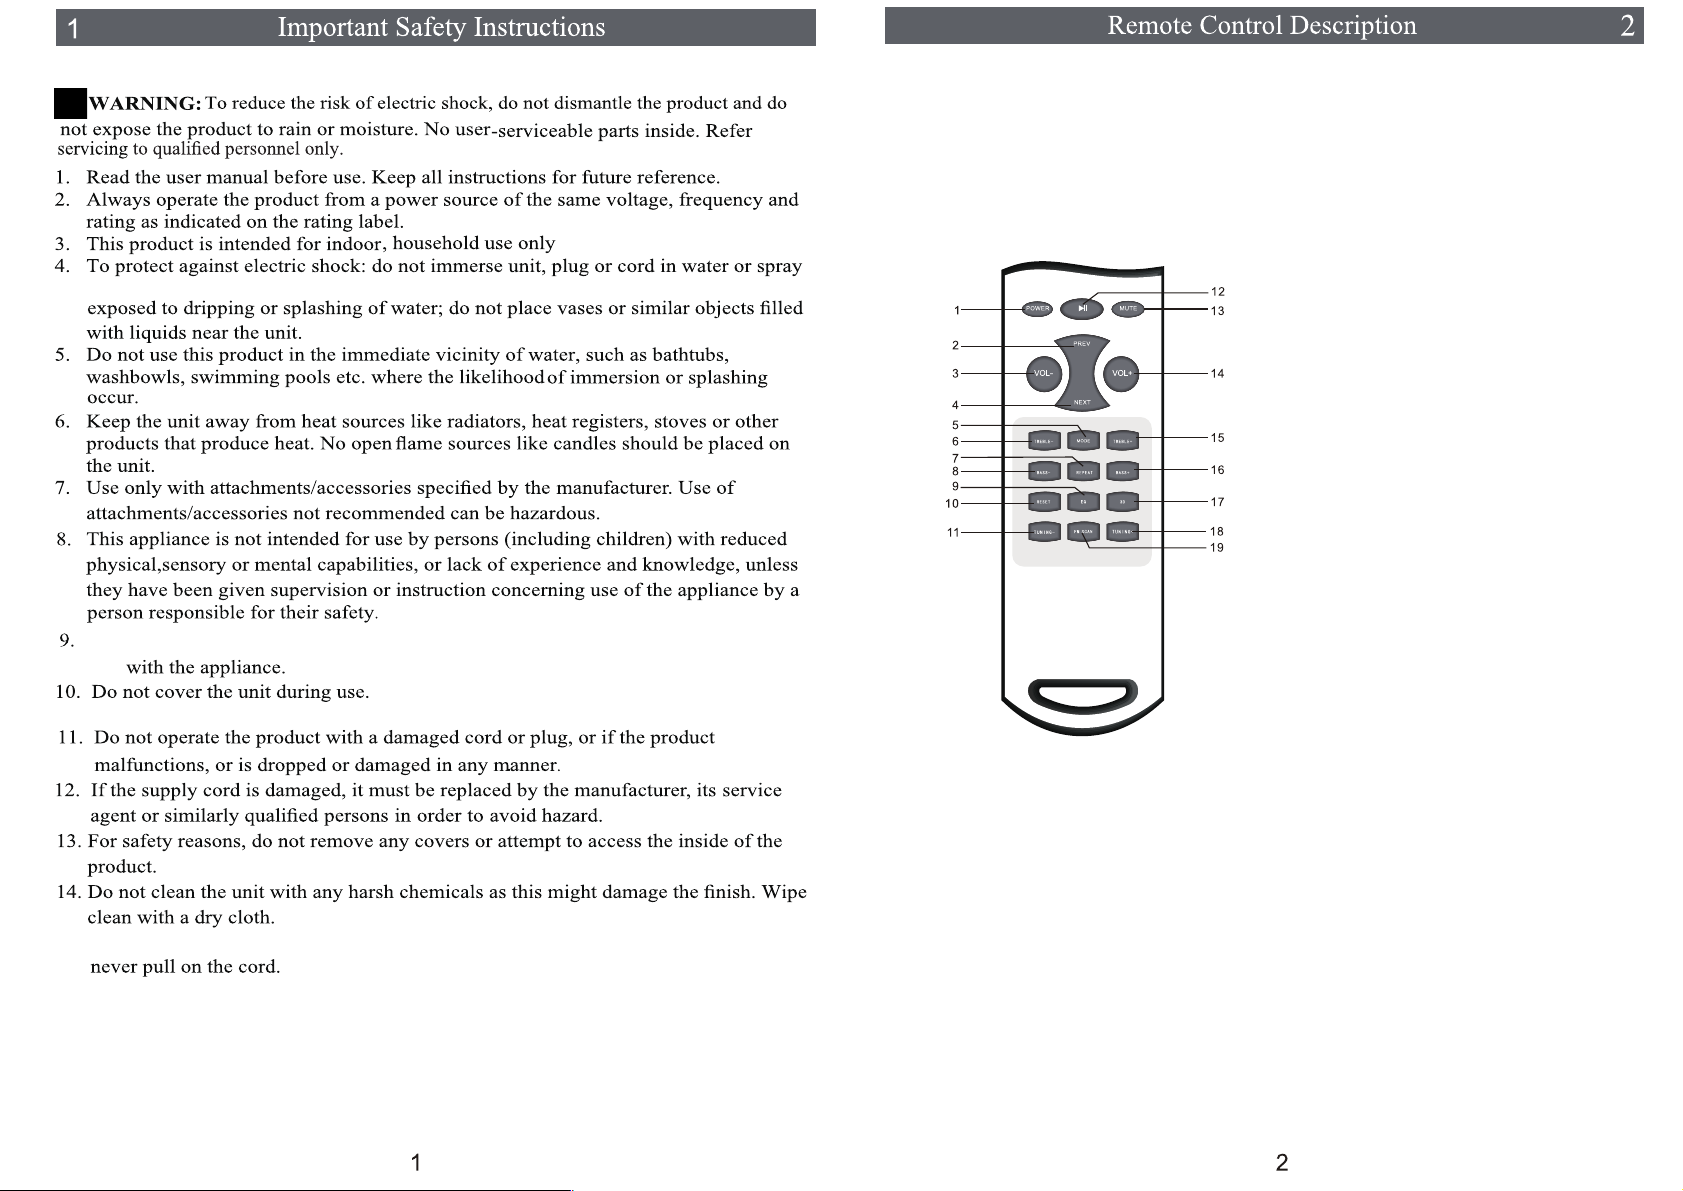
Using the remote control:
1. Battery spec: 2 x AAA, place the battery into the battery compartment,
ensuring correct polarity. After inserting the battery, replace the battery
compartment cover.
2. Remove the battery, if the remote control will not be used for a longer
period of time as it might be damaged by leaking batteries.
1.POWER
Switch the unit between ON and STANDBY
mode
2. PREV
Play previous song, or choose previous mode
3. VOL-
Reduce the volume
4. NEXT
When playing music, it goes to the next song, or
when selecting modes, choose the next mode
5. MODE
The choices are: B/T,OPT, COA, AUX, FM; If
you plug in a USB device, the options would be:
10. RESET
Press to go back to the initial default
settings
11. TUNING-
Press and release to tune channels
manually. Press and hold to enter half
auto channel state where it auto tunes
to the available lower frequency
12. PLAY/PAUSE
Play music/ Pause music
13. MUTE
No sound
14. VOL+
Increase the volume
"B/T, USB,OPT, COA
6. TREBLE-
Reduce treble
7. REPEAT
In USB mode, press ‘REPEAT’ button once to
repeat a single song ; press again to repeat all
songs
8. BASS-
Reduce bass
9. EQ
Sound mode switch
15. TREBLE+
Increase treble
16. BASS+
Increase bass
17. 3D
3D sound effect switch
18. TUNING+
Press and release to tune channels manually.
Press and hold to enter half auto channel
state where it auto tunes to the available
higher frequency.
19. FM SCAN
Press to auto search available channels
, AUX, FM
"
Page 3

Front/ Back panels
Page 4

Operating Instructions
1. POWER ON: Turn on the power switch on the back of the sound bar; the
sound bar and subwoofer will now be in Standby mode. The indicator light on
the front panel shows red.
2. ON/ STANDBY: Press the ‘STANDBY’ button on the front of the sound bar
OR the ‘POWER’ button on the remote control to switch on the unit. The
indicator light shows blue.
Bluetooth Mode:
1. Press the ‘MODE’ button repeatedly until Bluetooth Mode is selected. Display
shows BLUE.
2. On your Bluetooth-enabled device, choose ‘TH-BY370A’, the name of the
sound bar. The indicator blinks indicating that it is pairing and there is a beep
sound. Once pairing is successful, the indicator remains on.
3. Now you can play music from your Bluetooth-enabled device on the sound
bar. Press the ‘PREV/ ‘NEXT’ button on the remote control to play the
previous or next song.
USB Mode:
1. Conn
ect a USB memory device to the USB port.
2. Press the ‘MODE’ button repeatedly until USB Mode is selected. Display
shows ‘USB’.
3. Now you can play music from the USB device on the sound bar.
4. Important: Do not exceed current 500mA.
Notes:
In any working state, the mode automatically switches to USB when the USB
device is plugged in.
The music will be played in the same order as on the USB disk. If song
numbers are assigned, you can use numeric buttons on remote control to play
ticular song.
a par
The USB device must be formatted in “FAT 16/FAT32/EXFAT”, maximum
size of device possible is 32G.
Only mp3 formats can be played.
Optical/ Coaxial/AUX mode:
1. Connect the device using any of these modes.
2. Press MODE button repeatedly until the corresponding mode is selected.
Display shows ‘OPT’/ ‘COA’/ ‘AUX’.
3. Now you can play music from the connected device on the sound bar.
FM Radio function:
1. Press ‘MODE’ button repeatedly until ‘FM’ mode is selected. The display
shows station frequency.
2. Press ‘FM SCAN’ on the remote control to auto search the available
channels. These channels are stored in working state.
3. Press ‘TUNING -‘ and ‘TUNING +’ buttons to tune channels manually.
4. Press and hold ‘TUNING -‘ or ‘TUNING + ’ buttons to enter half auto search
channel state. Here, it searches the available frequencies and stops at the
next lower (TUNING-) or higher (TUNING+) frequency.
 Loading...