

Page 1
English
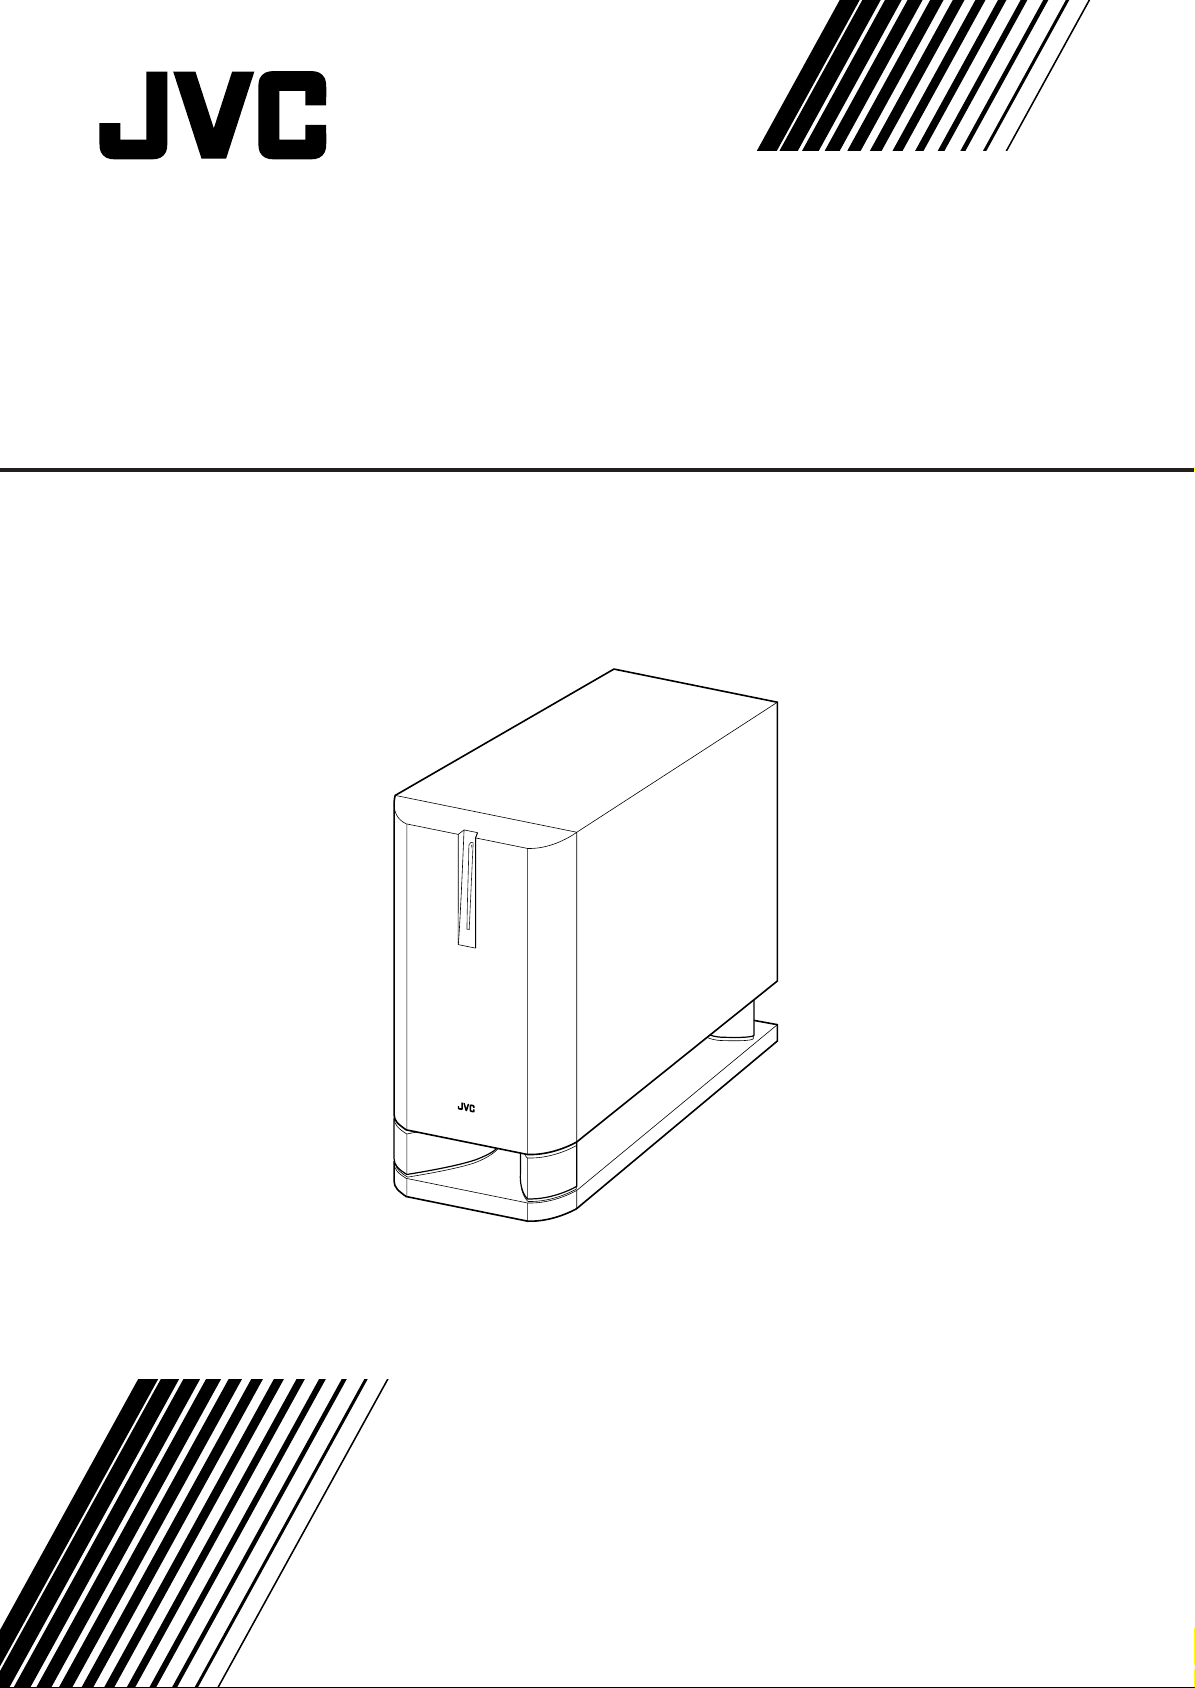
POWERED SUBWOOFER
SUBWOOFER MIT VERSÄTRKER
CAISSON DE GRAVE ACTIF
SUBWOOFER MET INGEBOUWDE VERSTERKER
SUBWOOFER MOTRIZ
COMPACT COMPONENT SYSTEM
SUBWOOFER (ALTOPARLANTE PER TONI BASSI) ALIMENTATO
NÄTDRIVEN LÅGBASHÖGTALARE
SUBWOOFER MED INDBYGGET FORSTÆRKER
TEHOSTETTU APUBASSOKAIUTIN
SP-DW103
INSTRUCTIONS
BEDIENUNGSANLEITUNG
MANUEL D’INSTRUCTIONS
GEBRUIKSAANWIJZING
MANUAL DE INSTRUCCIONES
ISTRUZIONI
BRUKSANVISNING
VEJLEDNING
KÄYTTÖOHJE
– 1 –
LVT1030-003A
[E]
Page 2
15 cm15 cm
20 cm
10 cm
20 cm
20 cm
IMPORTANT for the U.K.
DO NOT cut off the mains plug from this equipment. If the plug fitted
is not suitable for the power points in your home or the cable is too
short to reach a power point, then obtain an appropriate safety
approved extension lead or consult your dealer.
English
BE SURE to replace the fuse only with an identical approved type,
as originally fitted.
If nonetheless the mains plug is cut off ensure to remove the fuse
and dispose of the plug immediately, to avoid a possible shock
hazard by inadvertent connection to the mains supply.
If this product is not supplied fitted with a mains plug then follow the
instructions given below:
IMPORTANT:
DO NOT make any connection to the terminal which is marked with
the letter E or by the safety earth symbol or coloured green or greenand-yellow.
The wires in the mains lead on this product are coloured in
accordance with the following code:
Blue : Neutral
Brown : Live
As these colours may not correspond with the coloured markings
identifying the terminals in your plug proceed as follows:
The wire which is coloured blue must be connected to the terminal
which is marked with the letter N or coloured black.
The wire which is coloured brown must be connected to the terminal
which is marked with the letter L or coloured red.
IF IN DOUBT - CONSULT A COMPETENT ELECTRICIAN.
— SAFETY INSTRUCTIONS —
“SOME DOS AND DON’TS ON THE SAFE USE OF EQUIPMENT”
This equipment has been designed and manufactured to meet
international safety standards but, like any electrical equipment, care
must be taken if you are to obtain the best results and safety is to be
assured.
Do read the operating instructions before you attempt to use the
equipment.
Do ensure that all electrical connections (including the mains plug,
extension leads and interconnections between pieces of equipment)
are properly made and in accordance with the manufacturer’s
instructions. Switch off and withdraw the mains plug when making or
changing connections.
Do consult your dealer if you are ever in doubt about the installation,
operation or safety of your equipment.
Do be careful with glass panels or doors on equipment.
DON’T continue to operate the equipment if you are in any doubt about
it working normally, or if it is damaged in any way—switch off, withdraw
the mains plug and consult your dealer.
DON’T remove any fixed cover as this may expose dangerous voltages.
DON’T leave equipment switched on when it is unattended unless it is
specifically stated that it is designed for unattended operation or has a
standby mode.
Switch off using the switch on the equipment and make sure that your
family know how to do this.
Special arrangements may need to be made for infirm of handicapped
people.
DON’T use equipment such as personal stereos or radios so that you
are distracted from the requirements of traffic safety. It is illegal to watch
television whilst driving.
DON’T listen to headphones at high volume as such use can
permanently damage your hearing.
DON’T obstruct the ventilation of the equipment, for example with
curtains or soft furnishing.
Overheating will cause damage and shorten the life of the equipment.
DON’T use makeshift stands and NEVER fix legs with wood screws—
to ensure complete safety always fit the manufacturer’s approved stand
or legs with the fixings provided according to the instructions.
DON’T allow electrical equipment to be exposed to rain or moisture.
Thank you for purchasing a JVC speaker.
Before you begin using it, please read the instructions carefully
to be sure you get the best possible performance. If you have any
questions, consult your JVC dealer.
Warnings, Cautions and Others
To reduce the risk of electrical shocks, fire, etc.:
1. Do not remove screws, covers or cabinet.
2. Do not expose this appliance to rain or moisture.
Caution—POWER switch
This apparatus is provided with the POWER switch to minimize
power consumption for safe use. Therefore,
1. Before doing initial settings, complete all the connections
required, connect the mains plug into the wall outlet, then set
the POWER switch to ON [ ❙ ].
2. When not in use, set the POWER switch to OFF [ ‡ ].
This disconnects the mains line.
Cautions
• Do not block the ventilation openings or holes.
(If the ventilation openings or holes are blocked by a
newspaper or cloth, etc., the heat may not be able to get out.)
• Do not place any naked flame sources, such as lighted
candles, on the apparatus.
• When discarding batteries, environmental problems must be
considered and local rules or laws governing the disposal of
these batteries must be followed strictly.
• Do not expose this apparatus to rain, moisture, dripping or
splashing and that no objects filled with liquids, such as vases,
shall be placed on the apparatus.
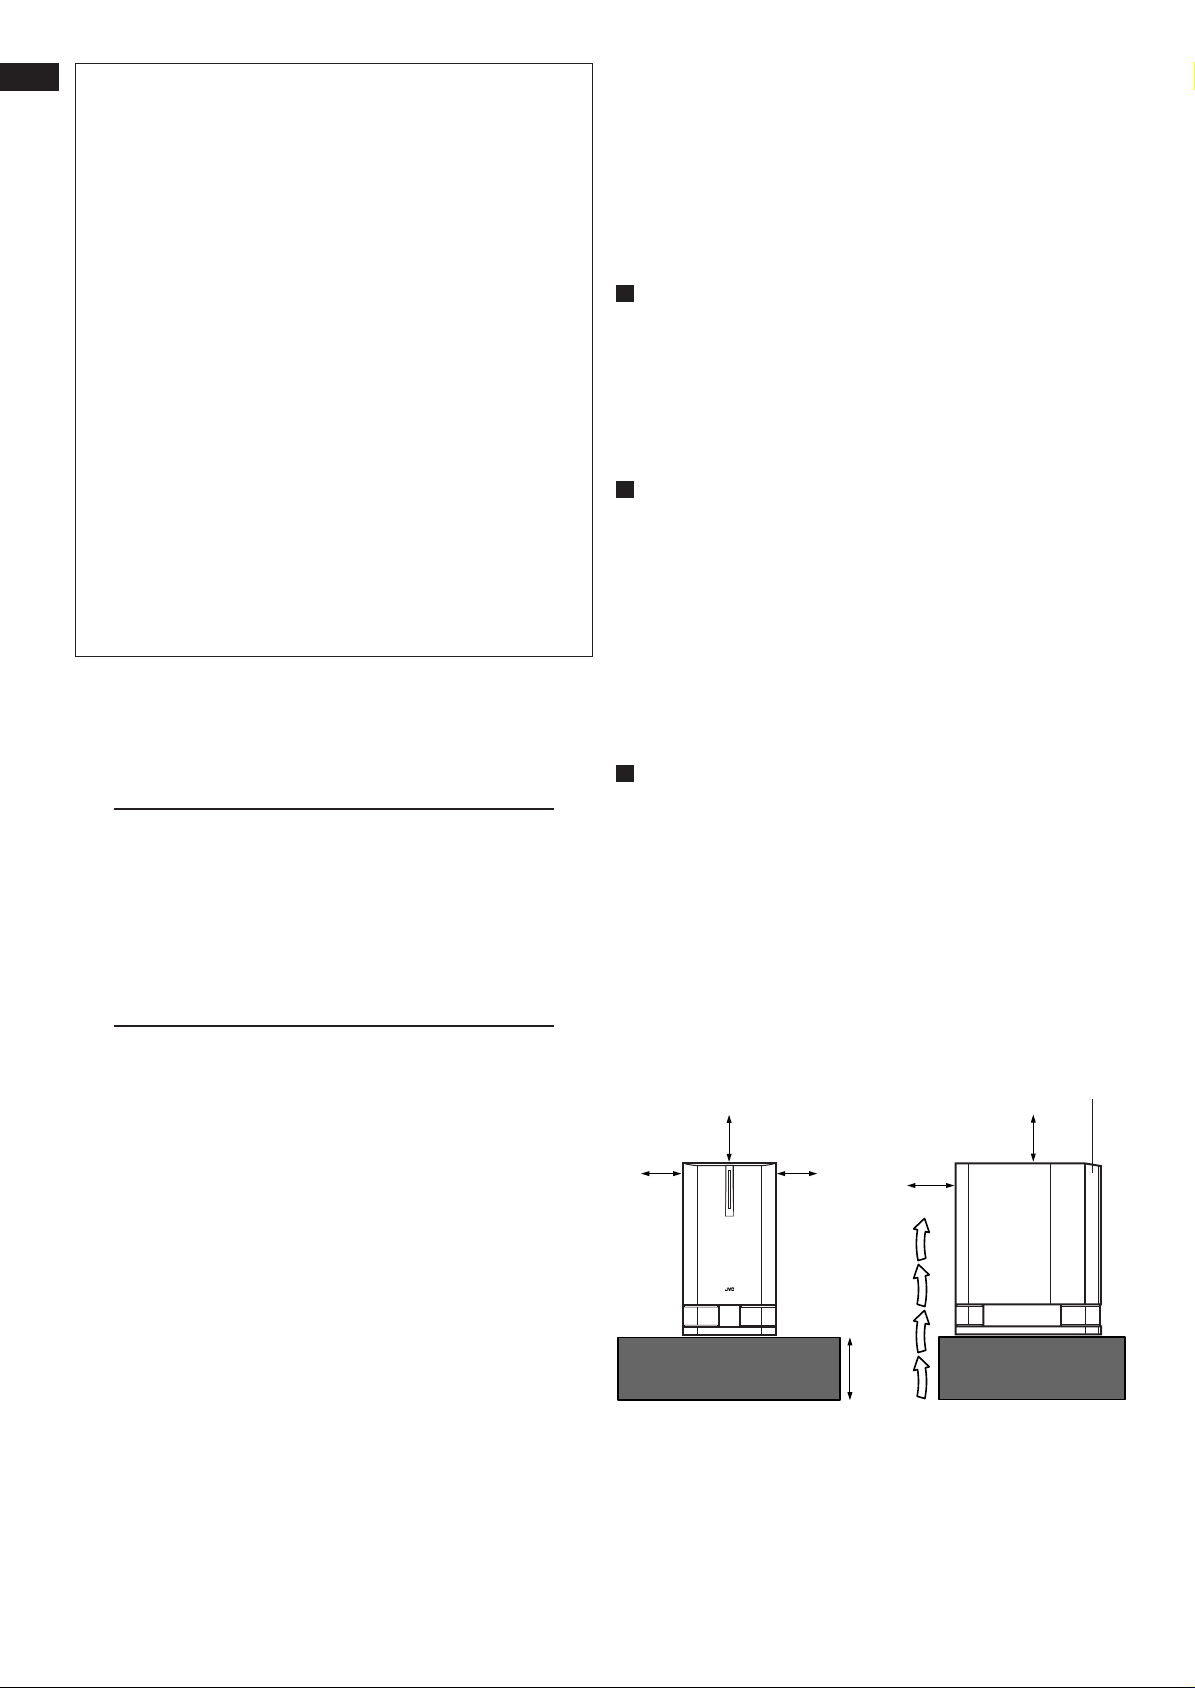
Caution—Proper Ventilation
To avoid risk of electric shock and fire, and to prevent damage,
locate the apparatus as follows:
1 Front:
No obstructions and open spacing.
2 Sides/ Top/ Back:
No obstructions should be placed in the areas shown by the
dimensions below.
3 Bottom:
Place on the level surface. Maintain an adequate air path
for ventilation by placing on a stand with a height of 10 cm
or more.
Front view Side view
Front
ABOVE ALL.
– NEVER let anyone, especially children, push anything into holes,
slots or any other opening in the case—this could result in a fatal
electrical shock.
– NEVER guess or take chances with electrical equipment of any kind—
it is better to be safe than sorry!
– 2 –
Page 3
Precautions for installation
• To prevent deformation or discoloration of the
cabinet, do not install the unit where it is exposed
to direct sunlight or high humidity, and avoid
installation near air conditioning outlets.
• Speaker vibrations may cause howling. Place the
unit as far away from the player as possible.
• Take the occurrence of earthquakes or other
physical shocks into consideration when selecting
the installation place, and secure the unit
thoroughly.
• This unit is magnetically shielded to avoid color distortions on
TVs. However, if not installed properly, it may cause color
distortions. So, pay attention to the following when installing
the unit.
– When placing this unit near a TV set, turn off the TV’s main
power switch or unplug it before installing this unit.
Then wait at least 30 minutes before turning on the TV’s
main power switch again.
Some TVs may still be affected even though you have followed
the above. If this happens, move this unit away from the TV.
• Tuner reception may become noisy or hissing if this unit is
installed nearby the tuner. In this case, leave a more distance
between the tuner and this unit or use an outdoor antenna for
better tuner reception without interference from this unit.
Precautions for Daily Use
• To maintain the appearance of the unit
Wipe with a dry, soft cloth if the cabinet or control panel should
become dirty.
If very dirty, apply a small amount of water or neutral detergent
to the cloth and wipe clean. Then wipe with a dry cloth.
• To improve the sound field
If the speakers are facing a solid wall or glass
door, etc., it is recommended to furnish the wall
with materials that absorb sounds, for example by
hanging up thick curtains, to prevent reflections
and standing waves.
Warnings, Cautions and Others ........................................ 2
Connections ..................................................................... 4
Checking Your Amplifier ..................................................... 4
Connecting to the Amplifier ............................................... 4
Operations .......................................................................6
Contents
Additional Information .................................................... 8
Warnungen, Vorsichtshinweise usw................................... 1
Anschlüsse ...................................................................... 2
Überprüfen Ihres Verstärkers............................................. 2
Anschließen an den Verstärker.......................................... 2
Inhalt
Vorderansicht................................................................... 4
Zusätzliche Informationen ..............................................6
Avertissements, précautions et autres .............................. 1
Connexions ......................................................................2
Vérification de votre amplificateur ..................................... 2
Connexion de l’amplificateur ............................................. 2
Fonctionnement ..............................................................4
Contenus
Informations complémentaires ...................................... 6
Waarschuwingen en andere aandachtspunten ................. 1
Aansluiten ........................................................................ 2
Controle van uw versterker................................................ 2
Verbinden met de versterker ............................................. 2
Inhoud
Bediening ......................................................................... 4
Extra informatie ............................................................... 6
Advertencias, precauciones y notas .................................. 1
Conexiones ...................................................................... 2
Verificación de su amplificador .......................................... 2
Conexión al amplificador ................................................... 2
Operaciones ..................................................................... 4
Contenido
Información adicional ..................................................... 6
Avvertenze, Precauzioni e Altro ........................................ 1
Collegamenti ....................................................................2
Controllo dell’amplificatore ................................................ 2
Collegamento all’amplificatore ..........................................2
Indice
Funzionamento ................................................................4
Ulteriori informazioni ...................................................... 6
English
Deutesch
Français
Nederlands
Español
Italiano
Checking the Supplied Accessories
Check to be sure you have the following supplied accessories.
The number in parenthesis indicates the quantity of the piece
supplied.
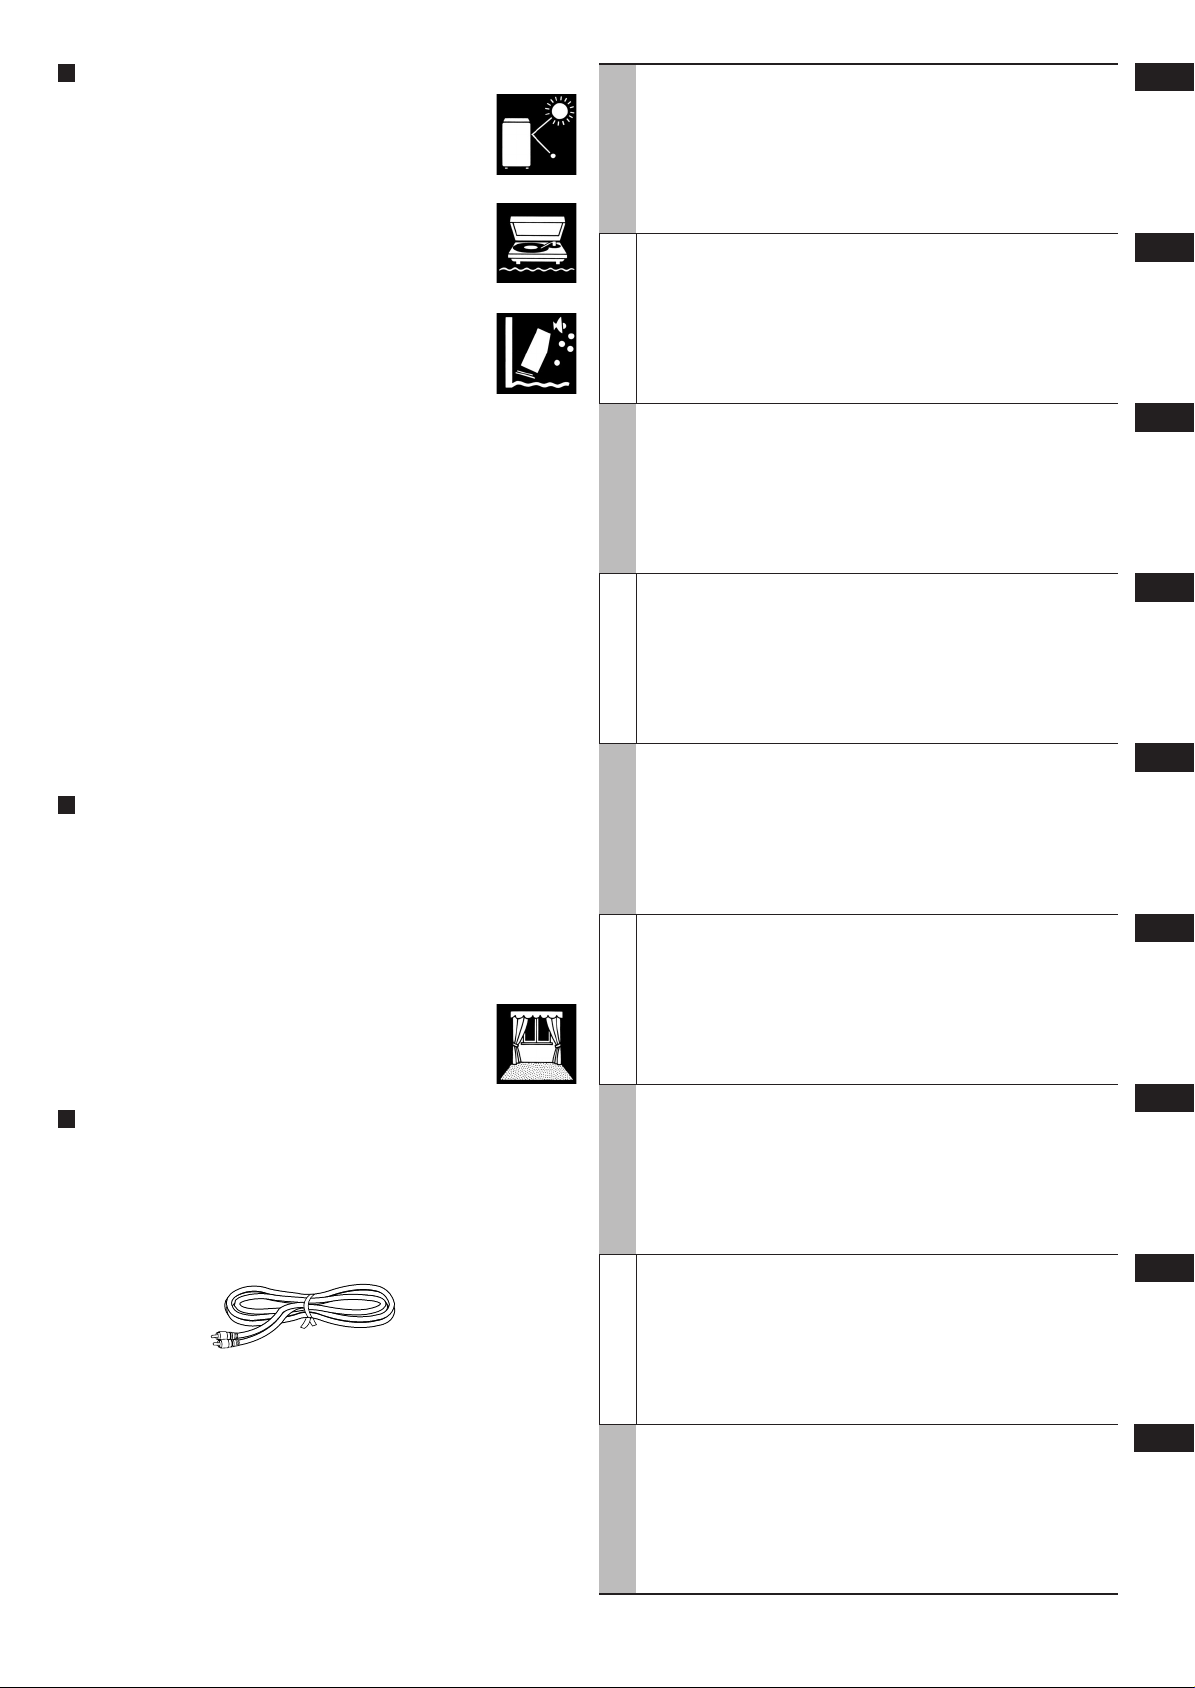
• Monaural audio cord (1)
If the item mentioned above is missing, contact your dealer
immediately.
– 3 –
Varningar, försiktighetsåtgärder m.m................................. 1
Anslutningar .................................................................... 2
Kontroll av förstärkaren ..................................................... 2
Inkoppling till förstärkaren .................................................2
Innehåll
Drift ................................................................................... 4
Ytterligare information ....................................................6
Advarsler, forsigtighedsregler og andet ............................. 1
Forbindelser ..................................................................... 2
Sådan kontrollerer du din forstærker ................................. 2
Sådan forbindes der til forstærkeren ................................. 2
Indhold
Betjening .......................................................................... 4
Yderligere oplysninger ...................................................6
Varoituksia, huomautuksia ym........................................... 1
Liitännät ...........................................................................2
Vahvistimen tarkistaminen................................................. 2
Vahvistimen liitäntä............................................................ 2
Sisältö
Käyttö ............................................................................... 4
Lisätietoja ......................................................................... 6
Svenska
Dansk
Suomi
Page 4

Connections
SUBWOOFER
OUT
LINE OUT
L
R
RIGHT
LEFT
FRONT SPEAKERS
2
1
SUBWOOFER
OUT
RIGHT LEFT/MONO
(LOW-LEVEL)
INPUT 1
TO MAIN
SPEAKERS
RIGHT
RIGHT LEFT
RIGHT LEFT
LEFT/MONO
MAX
VOLUME
50Hz
200Hz
MIN
ONOFF
FIXED
VARIABLE
POWER
FREQUENCY
CUT OFF FILTER
INPUT 2
(HIGH-LEVEL)
(LOW-LEVEL)
INPUT 1
AUTO POWER ON/STANDBY
PHASE
CANCEL
ON
REVERSE
NORMAL
Checking Your Amplifier
English
Before connecting this unit to your amplifier (or receiver), check
what types of connecting terminals your amplifier has.
Follow the instructions below to find a proper connection method
for your equipment.
• Illustrations of jacks and terminals in this manual may be
different from the ones actually used for your amplifier. The
illustrations are of the most used type.
First check whether your amplifier has a subwoofer output
jack.
It is usually named and printed as the “SUBWOOFER OUT” or
“SUBWOOFER.”
If you find it on your amplifier, follow Connecting Method Å.
If you cannot
find any
Before connecting this unit to the amplifier (or receiver),
observe the following carefully.
• Before connecting this unit to an amplifier, turn off the
amplifier first.
• Make all connections before plugging in this unit.
• DO NOT use the INPUT 1 (LOW-LEVEL) and INPUT 2
(HIGH-LEVEL) terminals on the rear of this unit at the
same time; otherwise, noise will be heard and may
damage the unit.
• DO NOT connect this unit to the REC OUT jacks of your
amplifier.
Connecting to the Amplifier
When connecting to your amplifier (or receiver), refer also the
manual supplied for your equipment.
Connecting Method Å
Connect an amplifier having a subwoofer output jack to the
LEFT/MONO jack of the INPUT 1 (LOW-LEVEL) terminal.
Preparation:
Use the supplied monaural
audio cord.
Next check whether your amplifier has line output jacks.
They are usually named and printed as “LINE OUT” or “LINE
OUTPUT.”
If you find them on your amplifier, follow Connecting Method ı.
If you cannot
find any
Follow Connecting Method Ç.
This connection can be used for any amplifier, by connecting the
front speaker terminals of the amplifier (usually named and
printed as “FRONT SPEAKERS” or “MAIN SPEAKERS”).
Main (Front) Speakers
(not supplied)
Your Amplifier
SP-DW103
To an AC outlet
Monaural audio cord
(supplied)
When using Connecting Method Å, no signal comes out of
the TO MAIN SPEAKERS terminal.
– 4 –
Page 5

TO MAIN
SPEAKERS
RIGHT
RIGHT LEFT
RIGHT LEFT
LEFT/MONO
MAX
VOLUME
50Hz
200Hz
MIN
ONOFF
FIXED
VARIABLE
POWER
FREQUENCY
CUT OFF FILTER
RIGHT
LEFT
FRONT SPEAKERS
TO MAIN
SPEAKERS
INPUT 2
(HIGH-LEVEL)
RIGHT LEFT
RIGHT LEFT
INPUT 2
(HIGH-LEVEL)
(LOW-LEVEL)
INPUT 1
AUTO POWER ON/STANDBY
PHASE
CANCEL
ON
REVERSE
NORMAL
2
1
Connecting Method ı
TO MAIN
SPEAKERS
RIGHT
RIGHT LEFT
RIGHT LEFT
LEFT/MONO
MAX
VOLUME
50Hz
200Hz
MIN
ONOFF
FIXED
VARIABLE
POWER
FREQUENCY
CUT OFF FILTER
LINE OUT
L
R
RIGHT LEFT/MONO
(LOW-LEVEL)
INPUT 1
INPUT 2
(HIGH-LEVEL)
(LOW-LEVEL)
INPUT 1
AUTO POWER ON/STANDBY
PHASE
CANCEL
ON
REVERSE
NORMAL
123
Connect an amplifier having line output jacks to the INPUT 1
(LOW-LEVEL) terminal.
Preparation:
Purchase a stereo audio cord at
an audio shop or electric shop.
Main (Front) Speakers
(not supplied)
English
Your Amplifier
Speaker cords
(not supplied)
SP-DW103
To an AC
outlet
Your Amplifier
Stereo audio cord
(not supplied)
SP-DW103
If your amplifier has only a monaural line output (MONO)
jack, connect it to the LEFT/MONO jack of the INPUT 1
(LOW-LEVEL) terminal (see Connecting Method Å).
Connecting Method Ç
Connect an amplifier without a subwoofer output jack and line
output jacks to the INPUT 2 (HIGH-LEVEL) terminal.
• When this method is used, connect your main (front) speakers
to the TO MAIN SPEAKERS terminal on the rear of this unit.
Preparation:
Purchase speaker cords at an
audio shop or electric shop.
To an AC outlet
Speaker cords
(not supplied)
Main (Front) Speakers
(not supplied)
Right speaker
Left speaker
How to connect the speaker cords:
1 Press and hold the clamp of the speaker terminal.
2 Insert the end of the speaker cord into the terminal as
illustrated below.
• Match the polarity of the speaker terminals: ª to ª and ·
to ·.
3 Release the finger from the clamp.
• When you connect main (front) speakers to the TO MAIN
SPEAKERS terminal, use the speakers within the
impedance range indicated by the amplifier connected to
the INPUT 2 (HIGH-LEVEL) terminal. If not, the amplifier
connected to the INPUT 2 (HIGH-LEVEL) terminal may
malfunction and be damaged.
• DO NOT connect more than one speaker to one speaker
terminal.
– 5 –
Page 6

Operations
MAX
VOLUME
MIN
MAX
VOLUME
MIN
TO MAIN
INPUT 2
(HIGH-LEVEL)
(LOW-LEVEL)
RIGHT
RIGHT LEFT
RIGHT LEFT
LEFT/MONO
MAX
VOLUME
50Hz
200Hz
MIN
CANCEL
ON
ONOFF
REVERSE
NORMAL
FIXED
VARIABLE
INPUT 1
POWER
FREQUENCY
AUTO POWER ON/STANDBY
PHASE
CUT OFF FILTER
Å
Ç
ı
Ç
Î
‰
POWER
PHASE
AUTO POWER
ON/STANDBY
VOLUME
FREQUENCY
CUT OFF
FILTER
SPEAKERS
English
Front view
Rear view
Turning On the Power—POWER Å
Press the ON [ ❙ ] portion of the POWER switch.
The main power turns on and the power lamp in the front panel
lights in green.
• The power lamp lights in red when the Auto Power On/
Standby places the unit into standby mode (see page 7).
Power
lamp
To completely cut off the power to this unit
Press the OFF [ ‡ ] portion of the POWER switch.
This will disconnect the mains lead.
Adjusting the Volume—VOLUME ı
Adjust the volume output level through this unit while comparing
with the sounds coming out of the main (front) speakers.
• Once you have adjusted the volume output level of this unit,
you do not need to adjust it each time you use this unit.
Adjusting the volume level on the connected amplifier will also
adjust the volume level through this unit.
1 Turn the VOLUME knob to the MIN position.
2 Turn on the connected amplifier and start playing a
source.
Playback sounds come out of the main (front) speakers and
this unit.
3 Adjust the VOLUME knob to obtain a well-balanced sound
level with that of the main (front) speakers.
If the volume is set at a high level before starting play, the
sudden blast of sound energy can permanently damage
your hearing and/or ruin your speakers.
– 6 –
Page 7

Adjusting the Crossover Frequency
200Hz
FREQUENCY
50Hz
FIX
VARIABLE
CUT OFF FILTER
REVERSE
NORMAL
PHASE
CANCEL
ON
AUTO POWER ON / STANDBY
CANCEL
ON
AUTO POWER ON / STANDBY
FIX
VARIABLE
CUT OFF FILTER
—CUT OFF FILTER and FREQUENCY Ç
You can adjust the crossover frequency to determine the bass
sound level this unit handles.
• Once it is set, only the sounds below the frequency come out
of the built-in speaker.
When the main speakers in use are JVC’s SP-X103,
SP-F303 or SX-XD33
Press in the CUT OFF FILTER button to set it to the _ FIX
position.
• The FREQUENCY knob is deactivated.
• When your amplifier is equipped with crossover frequency
setting, set it within the range of 100 Hz to 150 Hz.
• When your amplifier is equipped with speaker size setting,
select “small.”
Changing the Phase—PHASE Î
You can change the sound phase to match your preference.
Select either “NORMAL” or “REVERSE” to obtain a better bass
sound.
Press in or out the PHASE button to select either the
NORMAL position or the REVERSE position.
• NORMAL : Normally select this.
• REVERSE: Select this when you feel the bass sound is better
with this mode rather than with “NORMAL.”
Operating the Unit Automatically According to the
Incoming Signals—AUTO POWER ON/STANDBY ‰
By using this function, this unit automatically enters standby
mode even though the POWER switch is turned ON [ ❙ ].
English
If your amplifier is not provided with a crossover
frequency setting:
1 Press out the CUT OFF FILTER button to set it to the —
VARIABLE position.
Now the FREQUENCY knob is activated and you can adjust
the crossover frequency on this unit.
2 Turn the FREQUENCY knob to obtain the best matching
crossover frequency with your main speakers.
Adjust the frequency (50 Hz to 200 Hz) while listening to
playback sound coming out of both the main speakers and this
unit.
• If your main speakers can reproduce the bass sound well,
adjust the frequency at a lower level.
• If you feel bass sounds are not sufficient, adjust the
frequency at a higher level.
Press the AUTO POWER ON/STANDBY button to the — ON
position.
• If no sound comes in for about 10 minutes, the unit
automatically enters standby mode. The power lamp lights in
red. Then if the unit detects incoming signals, this unit starts
operating automatically (the power lamp now lights in green).
If Auto Power On/Standby does not work correctly (see
“MEMO” below), press out the AUTO POWER ON/STANDBY
button to set it to the _ CANCEL position. Auto Power On/
Standby is canceled.
When the volume level of the amplifier is so low or the
incoming signals are so weak that this unit cannot detect
sounds, Auto Power On/Standby may not work correctly.
• This unit may enter standby mode even though signals
are coming in.
• This unit may not start operating after entering standby
mode, even though signals start coming in.
– 7 –
Page 8

Additional Information
Subwoofer
Left front
speaker
Right front
speaker
Center
speaker
Listening position
Left surround
speaker
Right surround
speaker
Speaker layout
English
To obtain the best possible sound from your unit:
—Place a subwoofer wherever you like since bass sound is non-
directional. Normally place it in front of you.
—Place all the main speakers at the same distance from the
listening position.
Troubleshooting
Use this chart to help you solve daily operational problems. If there is any problem you cannot solve, contact your dealer.
Symptom
Power does not come on.
Auto Power On/Standby does not function
correctly.
No sound is heard.
Sounds fluctuate (suddenly become loud
or soft).
Suddenly no sound comes out.
—the power lamp lights in red.
Suddenly no sound comes out.
—the power lamp still lights in green.
Specifications
Output power of built-in amp : 100 W (45 Hz, 4 Ω, 10 % THD)
Possible Cause
Is the unit pugged in?
Signals are too weak or volume level is
too low.
Is the VOLUME knob turned to the MIN
position?
Connections are incorrect, or loose.
Audio signals through the amplifier are
extremely weak.
The built-in protective circuit is working.
The VOLUME knob on the rear is set to
a very high level.
The volume of the playback source is too
high.
Type : Powered Subwoofer
Bass-reflex type, (magnetically shielded type)
Speaker unit : 16.0 cm cone (× 1)
Frequency range : 30 Hz to 200 Hz
Input impedance : 50 kΩ (LOW-LEVEL)
470 Ω (HIGH-LEVEL)
Input terminals : INPUT 1 (LOW-LEVEL)
Power requirements : AC 230 V
Power consumption : 27 W
Dimensions : 210 mm (width) × 392 mm (height) × 348 mm (depth)
Mass : 10 kg
Accessories : Monaural audio cord (× 1)
INPUT 2 (HIGH-LEVEL)
Action
Plug the AC power cord firmly into the AC
outlet.
This is not a malfunction. If this happens,
cancel Auto Power On/Standby.
Turn the VOLUME knob until a suitable volume
is found.
Check the connections. If incorrect, redo the
corrections. (See pages 4 and 5.)
Increase the volume level on the amplifier.
Lower the volume level on the amplifier so that
the symptom will not occur.
Turn down the volume, then turn off and on
this unit.
Turn down the volume of the playback source,
turn off and on the source, then adjust the
volume properly on the source.
, 50 Hz
– 8 –
Page 9

VICTOR COMPANY OF JAPAN, LIMITED
EN, GE, FR, NL, SP, IT, SW, DA, FI
©2003 VICTOR COMPANY OF JAPAN LIMITED
0303NSMMDWJSC
Page 10

CAUTION
Handling the subwoofer (SP-DW103)
This sub-woofer has a speaker unit attached underneath the cabinet.
Be careful not to touch the speaker unit directly by hand when
you carry the sub-woofer.
Touching the speaker unit directly by hand can result in
damaging the unit.
ACHTUNG
Handhabung des Subwoofers (SP-DW103)
Dieser Subwoofer hat eine unter dem Gehäuse angebrachte
Lautsprechereinheit.
Achten Sie darauf, die Lautsprechereinheit nicht direkt mit der
Hand zu berühren, wenn Sie den Subwoofer tragen.
Direktes Berühren der Lautsprechereinheit kann zu
Beschädigung des Gerätes führen.
ATTENTION
Manipulation du caisson de graves (SP-DW103)
Ce caisson de graves possède un haut-parleur fixé sous le coffret.
Faire attention de ne pas toucher le haut-parleur directement
avec la main lors du transport du caisson de graves.
Le fait de toucher le haut-parleur directement avec la main risque
d’endommager l’appareil.
LET OP
Hanteren van de subwoofer (SP-DW103)
Deze subwoofer is voorzien van een ingebouwde luidspreker.
Wees voorzichtig dat u de luidspreker niet aanraakt met uw hand
of zo wanneer u de subwoofer vastpakt.
Aanraken van de luidspreker kan leiden tot schade.
PRECAUCION
Manejo del subwoofer (SP-DW103)
Este subwoofer cuenta con una unidad de altavoz fijada en la
parte inferior del gabinete.
Tenga la precaución de no tocar directamente la unidad de
altavoz con la mano cuando transporte el subwoofer.
Si llegara a tocar la unidad de altavoz directamente con la mano
se podrán producir daños en la unidad.
ATTENZIONE
Come maneggiare il subwoofer (SP-DW103)
Questo subwoofer possiede un’unità altoparlante situata sotto il
mobiletto esterno.
Fare molta attenzione a non toccare l’unità altoparlante quando
si trasporta il subwoofer.
Toccare direttamente, con le mani, l’unità altoparlante può
danneggiare l’unità.
OBSERVERA
Hantering av bashögtalaren (SP-DW103)
Denna bashögtalare har en högtalarenhet fäst under höljet.
Var noga med att inte vidröra denna högtalarenhet direkt med
handen när du bär på bashögtalaren.
Direkt vidrörning av högtalarenheten kan orsaka skador på enheten.
Sub-woofer
Subwoofer
Caisson de graves
Subwoofer
Subwoofer
Subwoofer
Bashögtalare
Apubassokaiutin
Subwoofer
Subwoofer
Mélynyomó
Cабвуфер
Basový reproduktor
Speaker unit
Lautsprechereinheit
Haut-parleur
Luidspreker
Unidad de altavoz
Unità altoparlante
Högtalarenhet
Kaiutinyksikkö
Højttalerenhed
Głośnik
Hangszóróegység
Кopпус динамикa
Reproduktorová soutava
HUOMAUTUS
Apubassokaiuttimen käsittely (SP-DW103)
Tässä apubassokaiuttimessa on kaiutinyksikkö kiinnitettynä
kotelon alle.
Varo koskettamasta kaiutinyksikköä suoraan kädelläsi, kun
kannat apubassokaiutinta.
Kaiutinyksikön koskettaminen suoraan kädellä saattaa
vahingoittaa laitetta.
FORSIGTIG
Håndtering af subwooferen (SP-DW103)
Denne subwoofer er udstyret med en højttalerenheden, der
sidder under kabinettet.
Undgå omhyggeligt at berøre højttalerenheden direkte med
hænderne, når subwooferen bæres.
Direkte berøring af højttalerenheden med hænderne kan
medføre beskadigelse af enheden.
UWAGA
Przenoszenie subwoofera (SP-DW103)
Głośnik subwoofera znajduje się na spodzie obudowy.
Przy przenoszeniu subwoofera należy uważać, aby nie dotknąć
głośnika ręką.
W przeciwnym wypadku może dojść do jego uszkodzenia.
FIGYELEM
A kezelése (SP-DW103)
A mélynyomóhoz egy hangszóró egység van csatlakoztatva
a burkolat alatt.
Ügyeljen arra, hogy a mélynyomó szállításakor ne érintse
közvetlenül a hangszóróegységet.
A hangszóróegység közvetlen érintése az egység károsodását
okozhatja.
ПРЕДУПРЕЖДЕНИЕ
Обращение с сабвуфером (SP-DW103)
Данный сабвуфер снабжен динамиком, прикрепленным
книжней части корпуса.
Будьте осторожны: не касайтесь поверхности динамика
руками при транспортировке сабвуфера.
Непосредственное касание динамика руками может
привести к его повреждению.
UPOZORNĚNÍ
Zacházení s basovým reproduktorem (SP-DW103)
Basový reproduktor má reproduktorovou soutavu připojenou na
spodní straně skříně.
Dejte pozor, abyste se při jeho přenášení nedotykali
reproduktorové soustavy přímo rukou. Mohlo by to způsobit
poškození přístroje.
LV43479-002A
[E/EV]
 Loading...