

Page 1
Instructions PDF
Installation
Specifications
POWERED WOOFER
SYSTEM
RV-S5B/RV-S3DB/
RV-S1B/RV-S1W
Thank you for purchasing a JVC product.
English
© 2012 JVC KENWOOD Corporation
Accessories
Check that you have all the following items,
which are supplied for the System.
• AC power cord .........................................................1
• Remote control ........................................................1
• Lithium coin battery CR2025 ..............................1
(The battery has been installed in the remote
control when shipped from the factory)
• CD-ROM (Instruction Manual) ............................1
If any of these items are missing, contact your
dealer immediately.
QUICK GUIDE
LVT2392-001A [E]
1112SKYMDWANA
EN
The instruction manual is included on the
supplied CD-ROM as a PDF file. "Instructions"
allows you full operation of the unit.
Required environment
Adobe Reader 6.0 or later
• To download and install Adobe Reader, access
http://adobe.com/go/EN_US-H-GET-READER
* Adobe and Adobe reader are either registered
trademarks or trademarks of Adobe Systems
Incorporated in the United States and/or
other countries.
Downloading the Instructions PDF
If you do not have CD/DVD drive, you can
download the Instruction PDF from our website.
http://www.jvc.net/worldwide/index.html
If you do not have any method to read the
instruction manual, you can ask about further
operations which are not written on this paper to
our customer service center.
How to read the Instructions PDF
Insert the supplied software CD-ROM into
1
the CD/DVD drive of your computer.
The cover page appears automatically on
your browser.
If the cover page does not appear, double
click "index.htm" on the CD-ROM.
Choose your language and click the icon.
2
The selected Instructions PDF opens.
NOTE
• If the Instructions PDF is not displayed correctly,
update Adobe reader to the latest version.
Caution: Proper Ventilation
To avoid risk of electric shock and fire, and to
prevent damage, locate the apparatus as follows:
1 Front: No obstructions and open spacing.
2 Sides/ Top/ Back: No obstructions should
be placed in the areas indicated by the
dimensions in the illustration.
3 Bottom: Place on a level surface.
Front view
15 cm
Side view
Notes on installation
• Select a place which is level, dry and neither too
hot nor too cold–between 5˚C and 35˚C.
15 cm
15 cm
Rear of the System
15 cm
Preparing the remote control
Pull out the
insulation sheet.
A copy of the Declaration of Conformity with
regard to the R&TTE Directive 1999/5/EC can
be downloaded from the following Web sites
(http://www.jvc.co.jp/ecdoc/).
Hereby, JVC declares that this System RV-S5B is
in compliance with the essential requirements
and other relevant provision of Directive
1999/5/EC.
Tuner
DAB tuning range (RV-S3DB only)
BAND III: 174.928 MHz – 239.200 MHz
FM tuning range: 87.50 MHz – 108.00 MHz
Antenna: Telescopic antenna
Input/Output terminal
iPod
• Output power: DC 5 V
USB
• Output power
USB1, USB: DC 5 V
USB2 (RV-S3DB/RV-S1B/RV-S1W only):
DC 5 V
General
Power supply
• AC: AC 230 V
• DC:
DC 15 V (R14 (SUM-2)/C (14D)-size batteries x 10)
Power consumption
When using an AC outlet: 35 W (at operation)
0.50 W or less (on standby)
Dimensions
615 mm x 196 mm x 267 mm (W/H/D)
(RV-S3DB/RV-S1B/RV-S1W)
615 mm x 196 mm x 277 mm (W/H/D) (RV-S5B
Mass
Approx. 6.3 kg (without batteries stored in the
battery compartment)
(RV-S5B only)
WiFi: IEEE 802.11 b/g
Frequency band: 2.4 GHz
BLUETOOTH
BLUETOOTH version:
certified
Output power: BLUETOOTH power class 2
Service area: max.10 m (10.9 yd.)*
* Communication range may vary depending
on the environmental conditions.
Frequency band:
2.4 GHz (2.4000 GHz – 2.4835 GHz)
BLUETOOTH profile:
A2DP (Advanced Audio Distribution Profile),
AVRCP (Audio/Video Remote Control Profile)
Design and specifications are subject to change
without notice.
BLUETOOTH 2.1 + EDR
1 A
1 A
500 mA
/50 Hz
)
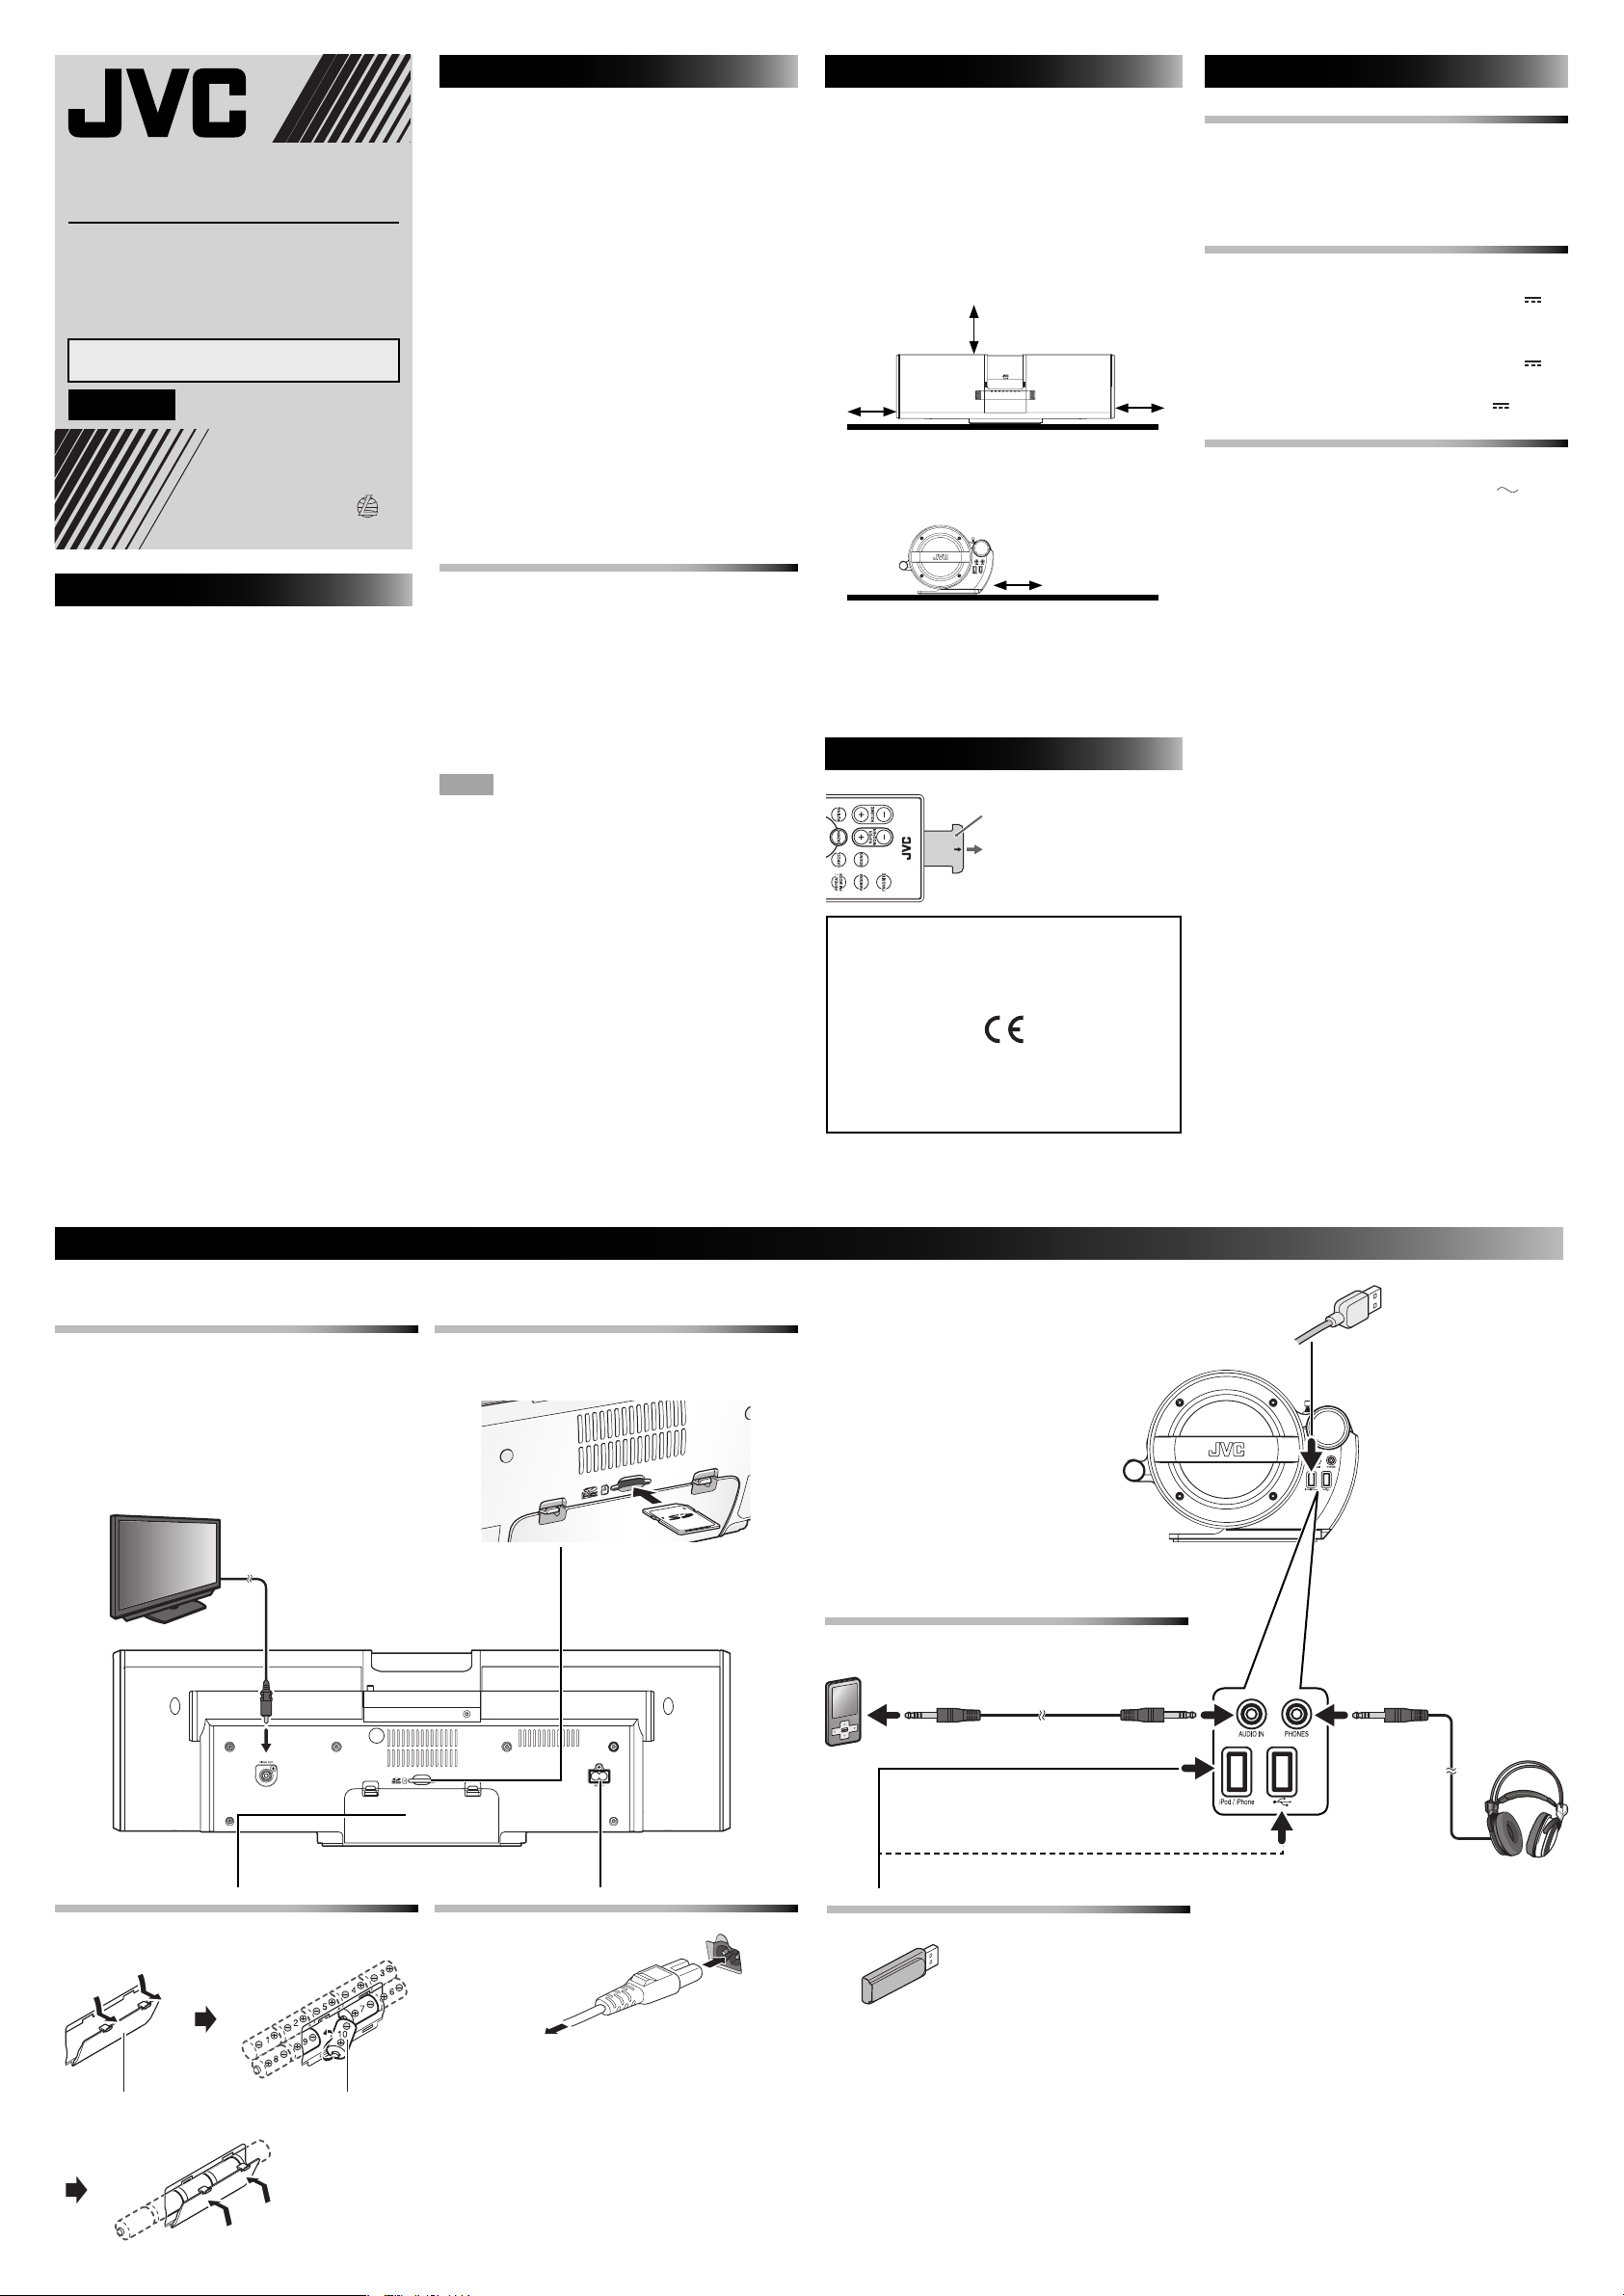
Connection
Connect the power cord to a wall outlet only after all other connections have been made.
Viewing video/picture from iPod
You can view video/picture from iPod on an
external monitor.
• Before connecting a monitor display, turn off the
power of this System.
Monitor
(not supplied)
Composite video cord
(not supplied)
Inserting an SD card
• When removing the SD card, push it in and then
pull it out.
Rear of the unit
Side of the unit
Connecting an external device
External device
(not supplied)
Headphone jack, etc.
Stereo mini plug cord
(not supplied)
USB cable for iPod
(not supplied)
Stereo
mini plug
Inserting batteries to the main unit
Match the polarities (+ and –) of the batteries.
Battery compartment R14 (SUM-2)/C (14D) x 10
(not supplied)
Connecting the power cord
Power cord
(supplied)
AC outlet
Connecting a USB device
USB memory
(not supplied)
RV-S3DB/RV-S1B/RV-S1W only
Headphones
(not supplied)
Page 2

Basic operations
Main unit
Adjust the DAB/FM telescopic antenna’s or wire
antenna’s angle and direction until the best
reception is obtained.
S
U
P
E
R
W
O
O
F
ER
V
O
L
U
M
E
If a DAB/FM broadcast is hard to listen to, extend
the wire antenna from the battery compartment.
Looking for a better reception state, stick a wire
antenna on the wall or a pole.
Connecting iPodAdjusting the antenna
You can operate iPod through the System.
• Do not connect or disconnect iPod when the System is turned on.
• You can also connect iPod to [USB 1] (iPod/iPhone) connector with USB
cable. In this case, press [USB 1 6] instead of [iPod 6] to select "iPod."
NOTE
• iPod is charged through the dock when the System is turned on. (When
the power is supplied through the batteries, iPod is charged only when
iPod is selected as the source.)
• iPod is charged through the USB cable when iPod is connected to the
[USB 1] (iPod/iPhone) connector and "USB1" is selected as the source.
CAUTION
• You cannot send any data to iPod from the System.
• Connect iPod firmly.
• Do not carry the System with iPod connected. Doing so might cause
damage to the dock or you might drop iPod.
Remote control
RV-S3DB/RV-S1B/RV-S1W
SERVICE +/- : RV-S3DB only
RV-S5B
Battery compartment
Playback FM DAB/DAB+ (RV-S3DB only)
Turn on the System.
1
Select a source and start playback.
2
/ / /
Adjust the volume.
3
(Press repeatedly) (Press repeatedly)
• Adjustable range:
MIN, 1 — 29, MAX
To mute the volume temporarily
• Adjustable range:
1 — 6
To restore the sound, press [MUTING] or
[VOLUME] +.
To pause
/ / /
To cancel pause, press the button again.
To select a track
To fast forward/reverse (except iPod)
• During playback...
/
Each time you press the button, the fastforward/reverse speed changes as follows:
x5
x20 x1 (normal playback)
To resume normal playback, press
[USB 1 6], [USB 2 6] or [SD 6].
To stop (except iPod)
• If you start playback again after stopping,
the track which was being played is played
from the beginning ("Resume Play"). Press
[7] again while stopped to cancel Resume
Play. (except iPod)
• Resume playback is canceled when another
source is selected.
To operate the menu of iPod
Display the menu.
1
Select a menu item.
2
/
(Press repeatedly)
Searching for stations
Select "TUNER FM."
1
(Press repeatedly)
Select a station.
2
/
(Press repeatedly)
To search a station with good reception
/
(Hold)
The search stops automatically when a station with
good reception is found.
To stop the search manually, press the button.
To improve the FM reception
If an FM stereo broadcast is hard to listen to,
you can improve the reception by switching to
monaural mode.
(Press repeatedly)
"AUTO": Auto
"MONO": Monaural
Searching for services
• When you change the source to DAB for the first
time after plugging in the power cord or after
inserting batteries, the System automatically
performs the scanning for the DAB bands to
pick out available ensembles. It will take a few
minutes depending on the location.
• When the scanning is complete, the System
starts playing the first service of the ensemble
found first.
• When you move the System or adjust the
antenna position, perform the scanning. Press
and hold [SET] while DAB is selected as the
source.
• Press "CANCEL" to stop scanning.
Select "DAB."
1
(Press repeatedly)
Select an ensemble.
2
/
(Press repeatedly)
Select a service.
3
/
(Press repeatedly)
To select an ensemble manually
Start the manual ensemble skip.
1
‘
/
(Press repeatedly)
To return to the previous menu, press [MENU].
/
(Hold)
Release the button at the desired channel of
2
the ensemble.
Listening to a BLUETOOTH device (RV-S5B only)
Pairing
Select BLUETOOTH.
1
• While "CONNECT" is blinking, you cannot
perform any operations except for turning
the System off.
Perform the pairing operation on the target
2
BLUETOOTH device.
For information on operating the target
BLUETOOTH device, see the instruction manual
for the BLUETOOTH device.
Select
"
RV-S5" from the list.
When the target device requests the passkey
during pairing operation, enter "0000."
The pairing is completed and the target
BLUETOOTH device is connected to the System
automatically. The BLUETOOTH indicator lights.
Start playback of the target BLUETOOTH
3
device.
The sound from the BLUETOOTH device is
emitted from the System.
Playback may start automatically with some
BLUETOOTH devices.
NOTE
• The pairing is necessary only when connecting
for the first time.
• The BLUETOOTH device last used will be
connected automatically by turning on the
BLUETOOTH function of the device while
"CONNECT" is blinking on the display window.
To re-connect another BLUETOOTH device,
operate the device to connect while "BT READY"
appears on the display.
To pause
To cancel pause, press the button again.
To select a track
/
(Press repeatedly)
To stop
 Loading...