

Page 1
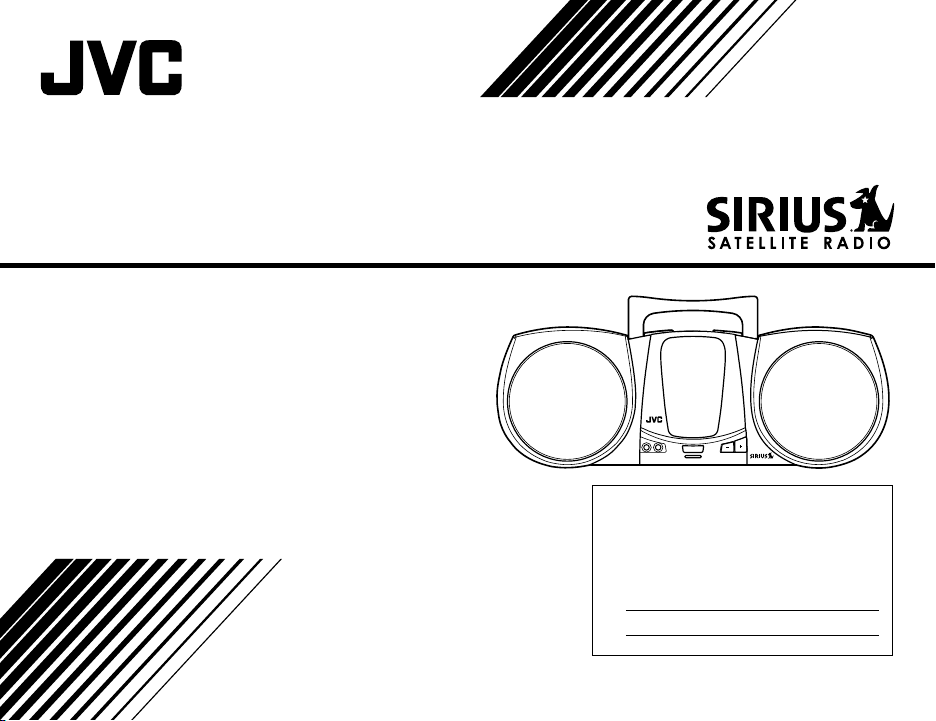
BOOM BOX
KS-SB200
INSTRUCTIONS
For Customer Use:
Enter below the Model No. and Serial No.
which are located either on the rear, bottom or side of the cabinet. Retain this
information for future reference.
Model No.
Serial No.
LVT1307-001B
[J]
Page 2
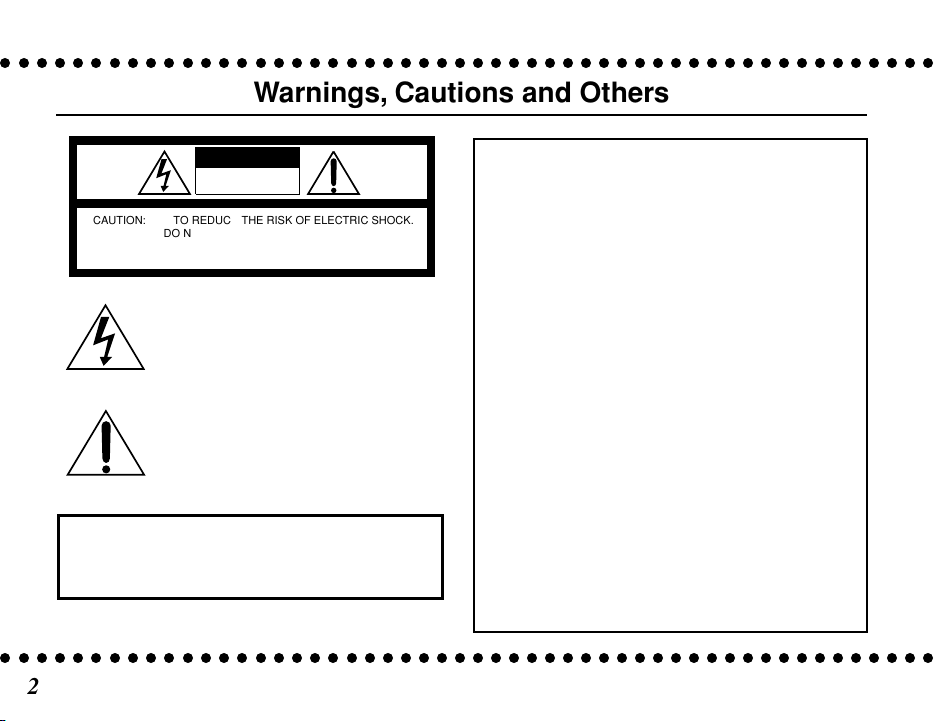
Warnings, Cautions and Others
CAUTION
RISK OF ELECTRIC SHOCK
DO NOT OPEN
CAUTION: TO REDUCE THE RISK OF ELECTRIC SHOCK.
DO NOT REMOVE COVER (OR BACK)
NO USER SERVICEABLE PARTS INSIDE.
REFER SERVICING TO QUALIFIED SERVICE PERSONNEL.
The lightning flash with arrowhead symbol,
within an equilateral triangle is intended to
alert the user to the presence of uninsulated
“dangerous voltage” within the product's
enclosure that may be of sufficient
magnitude to constitute a risk of electric
shock to persons.
The exclamation point within an equilateral
triangle is intended to alert the user to the
presence of important operating and
maintenance (servicing) instructions in the
literature accompanying the appliance.
WARNING: TO REDUCE THE RISK OF FIRE
OR ELECTRIC SHOCK, DO NOT EXPOSE
THIS APPLIANCE TO RAIN OR MOISTURE.
2
This equipment has been tested and found to
comply with the limits for a Class B digital device,
pursuant to part 15 of the FCC Rules. These limits
are designed to provide reasonable protection
against harmful interference in a residential
installation.
This equipment generates, uses and can radiate
radio frequency energy and, if not installed and
used in accordance with the instructions, may cause
harmful interference to radio communications.
However, there is no guarantee that interference will
not occur in a particular installation. If this
equipment does cause harmful interference to radio
or television reception, which can be determined by
turning the equipment off and on, the user is
encouraged to try to correct the interference by one
or more of the following measures:
Reorient or relocate the receiving antenna.
Increase the separation between the equipment and
receiver.
Connect the equipment into an outlet on a circuit
different from that to which the receiver is
connected.
Consult the dealer or an experienced radio/TV
technician for help.
Page 3
CAUTION—POWER button!
Disconnect the mains plug and remove all the batteries
to shut the power off completely (all lamps and
indications go off). The POWER button in any position
does not disconnect the mains line.
•
When the unit is turned off, the power-on lamp goes off.
• When the unit is turned on, the power-on lamp lights
green.
• For battery use:
When the batteries are almost exhausted, the poweron lamp lights red (see page 8).
CAUTION
To reduce the risk of electrical shocks, fire, etc.:
1. Do not remove screws, covers or cabinet.
2. Do not expose this appliance to rain or moisture.
CAUTION
• Do not block the ventilation openings or holes.
(If the ventilation openings or holes are blocked by a
newspaper or cloth, etc., the heat may not be able to
get out.)
• Do not place any naked flame sources, such as
lighted candles, on the apparatus.
• When discarding batteries, environmental problems
must be considered and local rules or laws governing
the disposal of these batteries must be followed
strictly.
• Do not expose this apparatus to rain, moisture,
dripping or splashing and that no objects filled with
liquids, such as vases, shall be placed on the
apparatus.
3
Page 4
We would like to thank you for purchasing Boom Box.
This product is designed to enjoy JVC PnP easily either inside or outside of your house.
Before operating this unit, read this manual carefully and thoroughly to obtain the best possible performance from your unit,
and retain this manual for future reference.
IMPORTANT CAUTIONS
Where to place the unit
• Select a place which is level, dry and neither too hot nor
too cold (between 5°C and 35°C or 41°F and 95°F).
• Leave sufficient distance between the unit and a TV.
• Do not use the unit in a place subject to vibrations.
Power cord
• Do not handle the power cord with wet hands!
• Some power is always consumed as long as the power
cord is connected to the wall outlet.
• When unplugging the unit from the wall outlet, always
pull the plug, not the power cord.
When carrying the unit
• Disconnect all the cords from the unit.
Malfunctions, etc.
• There are no user serviceable parts inside. In case of
system failure, unplug the AC power cord, remove all the
batteries, and consult your dealer.
• Do not insert any metallic object into the unit.
• The unit is not waterproof or dust proof.
4
Table of contents
Preparations .......................................................................... 5
Operations ............................................................................ 8
Troubleshooting .................................................................. 10
Specifications ..................................................................... 11
Supplied Accessories
• AC power cord
• AC adaptor
• Antenna
If any of these items are missing, contact your dealer
immediately.
CAUTION:
Only use the power cord and AC adaptor provided for this
unit to avoid malfunction or damage to the unit.
Page 5

Preparations
Do not connect the AC power cord until all other connections have been made.
Connecting the Antenna
Connect the supplied antenna by referring to the illustration.
•
Refer also to the manual supplied to the JVC PnP (KTSR2000) for details.
For indoor use, place the antenna closer to the window.
For outdoor use, place the antenna at a location from
obstructions.
To store the antenna, attach
the four holes on the bottom of
the antenna into the four
projections on top of the unit.
Then, slide backward to
engage it fully.
•
You can wind the antenna
cord around the antenna
cord holder on the rear of
the unit.
Antenna cord Antenna cord holder
5
Page 6

Preparations
Do not connect the AC power cord until all other connections have been made.
Mounting
IMPORTANT: Make sure to turn the power off of both
the unit and JVC PnP when attaching/removing JVC PnP.
1
2
3
Note: The internal cooling fan ventilates automatically.
Do not close the ventilation slits or the proper ventilation
is obstructed.
To remove JVC PnP,
press PUSH on the top of
the unit, then pull out JVC
PnP by holding the sides of
JVC PnP.
JVC PnP
Press PUSH on the top of the unit to open the dock holder.
Attach
JVC PnP
• Press in
Close the dock holder.
by sliding it down to the dock.
JVC PnP
firmly to the dock.
Ventilation slits
6
Dock holder
Page 7

Putting the Batteries into the Unit
1243
5687
1
Push and pull up tabs to open the battery
compartment cover on the bottom of the unit to the
direction of .
2
Insert 8 batteries by matching the polarity as marked
on the compartment.
• Insert batteries in order of number as shown in the
illustration.
3
Close the battery compartment cover.
• When the power is supplied from AC power with AC
adaptor connected to the unit, the batteries are not
consumed.
CAUTION:
To avoid battery leakage or explosion:
– Remove the batteries when the unit is not in use for an
extended period of time.
– When you need to replace the batteries, replace all 8
batteries at the same time.
– Do not use different types of batteries together.
Battery compartment cover
Bottom of the unit
Tabs
– + ––++ ++
5687
1243
+ –+ –++–
–
7
Page 8

Preparations
Do not connect the AC power cord until
all other connections have been made.
Connecting the AC power cord
Connect the unit to the outlet as described in the illustration
below.
2
Operations
Turning on the Power
1
Press POWER on the unit.
2
Turn on
JVC PnP.
• The sound does not come out when JVC PnP is turned
off.
The power-on lamp lights green.
• When the power-on lamp lights red, the batteries are
almost exhausted. This condition may cause degraded
performance. Replace the batteries.
AC adaptor
Outlet
3
CAUTIONS:
•
Only use the power cord and AC adaptor provided for
this unit to avoid malfunction or damage to the unit.
• Be sure to unplug the power cord from the outlet
when going out or when the unit is not in use for an
extended period of time.
8
AC power cord
1
To turn off the power, press POWER on the unit.
The power-on lamp goes off.
• JVC PnP also turns off.
Power-on lamp POWER
Page 9

Adjusting the Volume
Listening to auxiliary equipment
Press VOLUME + to increase the volume or press
VOLUME – to decrease it.
• When you press and hold VOLUME + or –, the volume
changes rapidly.
Even if you turn down the volume to the minimum
level, the volume cannot be turned off completely.
For private listening:
Connect a pair of headphones to the PHONES jack on the unit.
No sound comes out of the speakers.
• Be sure to turn down the volume before connecting or
putting on headphones.
CAUTION:
DO NOT start playing any source without first setting
the volume to minimum, as a sudden blast of sound can
damage your hearing, speakers and/or headphones.
PHONES jack
(3.5 mm stereo mini jack)
VOLUME + and –
Connect auxiliary equipment to AUX jack on the unit.
• The unit changes the listening source to auxiliary
equipment automatically.
Note: Turn
auxiliary equipment to save the battery power.
To listen to JVC PnP, unplug the cord from the AUX jack.
JVC PnP
’s power off while listening to the
AUX jack
(3.5 mm stereo mini jack)
9
Page 10

Troubleshooting
If you are having a problem with your unit, check this list for a possible solution before calling for service.
If you cannot solve the problem, or the unit has been physically damaged, call a qualified person, such as your dealer for
service.
Symptom
The unit does not turn on.
The unit does not operate using
batteries.
Operation stops intermittently.
“Antenna Not Detected” appears on the
tuner’s display.
“Acquiring Signal” appears on the
tuner’s display.
No sound is heard.
•
JVC PnP
• Batteries are not installed or not
installed properly.
• AC adaptor and/or AC power cord is
not connected properly.
Battery operation is not active if the AC
adaptor is connected to the unit.
The batteries are exhausted.
• Antenna is not connected to the unit.
•
JVC PnP
the dock.
There are obstacles over or around the
antenna.
Headphones are connected to the unit.
Possible Cause
is not turned on.
is not attached correctly to
Action
• Turn on
• Install batteries by matching the
• Check the connection of both AC
Disconnect the AC adaptor from the
unit.
Replace the batteries.
• Connect the antenna.
• Make sure
Change the position and direction of the
antenna.
Disconnect headphones.
JVC PnP
.
polarity.
adaptor and AC power cord to the
unit.
correctly to the dock.
JVC PnP
is attached
10
Page 11

Specifications
Amplifier
Output Power:
4 W per channel, min. RMS, driven into 8 Ω at 1 kHz
with no more than 10% total harmonic distortion.
Input Impedance (AUX): 8 kΩ
Input Level (Satellite Radio/AUX):
2.0 V (Maximum)
Output Impedance (PHONES):
32 Ω
Output Level (Variable) (PHONES):
20 mV (Maximum)
Connector Type (PHONES, AUX):
3.5 mm Stereo Jack
Signal-to-noise ratio: 86 dB (Maximum)
Speakers
Speaker Type: Bass-reflex type 12.6 cm
(5 inches)
Tweeter 28 mm (1 - 1/8 inches)
Speaker Impedance: 8 Ω
Frequency Response: 100 Hz to 20 kHz
General
Power Requirements: DC 12V
(“R20/D (13F)” batteries (8))
External DC 12V
(TESA2-1202500 AC adaptor)
Dimensions: 497 mm x 183 mm x 196 mm
(W x D x H)
(19 - 5/8 inches x 7 - 1/4 inches x
7 - 3/4 inches)
Mass: 3.3 kg (7.3 lbs) (without batteries)
4.1 kg (9.1 lbs) (with batteries)
Design and specifications are subject to change without
notice.
11
Page 12

Having TROUBLE with operation?
USA ONLY
Call 1-800-252-5722
http://www.jvc.com
We can help you!
EN
© 2004 Victor Company of Japan, Limited
© 2004 SIRIUS Satellite Radio Inc. “SIRIUS” and the SIRIUS dog logo
are registered trademarks of SIRIUS Satellite Radio Inc.
KS-SB200
BOOM BOX
1004MNMMDWZAC
 Loading...