

Page 1
VIDEOGRABADOR
VIDEO CASSETTE RECORDER
HR-J7005UM
AUDIOVCR TVCABLE/DBS
POWER
DISPLAY
TV/VCR
ENTER
123
2
456
DAILY(M-F)
WEEKLY
89
7
C. RESET
AUX
4
CANCEL
TIMER
0
START STOP DATE
CH
EXPRESS PROGRAMMING
PROG.
SKIP SEARCH
PROG.
1
CHECK
PLAY
FF
REW
STOP
PAUSE
REC
O
R
G
P
V
+
T
T
+
V
V
T
–
T
–
V
P
G
R
O
K
M
O
E
N
3
U
A
/
B
JOG/
SHUTTLE
POWER
PUSH JOG
/OK
+
8
(MONO)
L – AUDIO – R
VIDEO
4
0
6
15dB
NORM
SP
VCR
CH
PLAY
REW
MENU
REC STOP/EJECT PAUSE
FF
ESPAÑOLENGLISH
MANUAL DE
INSTRUCCIONES
INSTRUCTIONS
LPT0067-001A
Page 2
2 ES
Estimado cliente:
Le agradecemos la adquisición del videograbador VHS de JVC. Antes de utilizarlo, lea la información y precauciones de seguridad
contenidas en este página para utilizar su nuevo videograbador con seguridad.
PRECAUCIONES
ADVERTENCIA: ALTA TENSION EN EL INTERIOR
ADVERTENCIA: PARA EVITAR RIESGOS DE INCENDIO O
ELECTROCUCION, NO EXPONGA ESTE
APARATO A LA LLUVIA O HUMEDAD.
El botón POWER no interrumpe completamente la
alimentación principal, sino que conecta y desconecta la
corriente de funcionamiento. indica la espera de la
alimentación eléctrica y " " indica la conexión de la
alimentación.
Esta unidad ha sido fabricada de acuerdo con la normal IEC
Publ. 65.
SISTEMA DE ALIMENTACION:
Este aparato funciona con 110 – 220V`, 50/60 Hz con
conmutación automática.
Utilice la clavija de conversión (suministrado) según el tipo
de tomacorriente de pared.
La placa de especificaciones y la de indicaciones de
seguridad están en la parte trasera de la unidad.
IMPORTANTE:
Podría resultar ilegal grabar o reproducir materiales con
propiedad intelectual sin el consentimiento del propietario
de los mismos.
Advertencia sobre la pila de litio
La pila utilizada en este aparato podría ocasionar
incendios o quemaduras por sus productos químicos si no
se la trata adecuadamente. No la recargue, desarme,
caliente a más de 100°C o incinere.
Cámbiela por una CR2025 de Panasonic (Matsushita
Electric), Sanyo, Sony o Maxell; el uso de otra pila podría
acarrear riesgos de incendio o explosión.
n Descarte inmediatamente las pilas usadas.
n Manténgala alejada del alcance de los niños.
n No la desarme ni la arroje al fuego.
USO DE ESTE MANUAL DE
INSTRUCCIONES
● Todas las secciones principales y subsecciones están
listadas en el contenido, en la página 3. Refiérase al
índice para buscar información sobre un procedimiento
o función específica.
● El índice de la página 45 a 47 lista los términos
frecuentemente utilizados, y el número de la primera
página dónde son utilizados o explicados en el manual.
Esta sección también ilustra los controles y las
conexiones del panel frontal y trasero, el panel de
indicación frontal y el control remoto.
● La marca Z señala una referencia en otra página de
instrucciones o información relacionada.
● Los botones de operación necesarios para los diferentes
procedimientos están claramente indicados en todas las
ilustraciones al principio de cada sección principal.
ANTES DE INSTALAR SU NUEVO
VCR...
. . . Lea detenidamente las precauciones en esta
página.
VCR Plus+ y PlusCode son marcas registradas de Gemstar
Development Corporation.
El sistema VCR Plus+ es fabricado bajo licencia de Gemstar
Development Corporation.
DSS™ es una marca de fábrica oficial de DIRECTV. Inc., una
unidad de GM Hughes Electronics. PRIMESTAR es una marca
registrada de servicio de Primestar Partners, L.P. DISH Network™
es una marca de fábrica de Echostar Communications Corporation.
n Los cassettes marcados con "VHS" (o "S-VHS") pueden ser
usados con esta grabadora de cassettes de video. Sin
embargo, la grabación de S-VHS no es posible con este
modelo.
n Este modelo está equipado con SQPB (S-VHS QUASI
PLAYBACK) que le permite mirar cintas grabadas en formato
S-VHS con resolución VHS normal.
n HQ VHS es compatible con el equipo VHS existente.
ATENCION:
n Cuando no utilice el grabador de video durante un largo
período, se recomiendo desconectar el cordón eléctrico
del tomacorriente de CA.
n En el interior del aparato hay alta tensión. En caso de
reparaciones, acuda a técnicos de reparaciones
calificados. Para evitar riesgos de electrocución o
incendio, desenchufe el cordón de alimentación del
tomacorriente antes de conectar o desconectar cualquier
cable de señal o antena.
n Los cambios o modificaciones no autorizados por JVC
anularán la garantía.
Page 3

CONTENIDO
INSTALACION DE SU NUEVO VCR 4
Conexiones básicas ............................... 4
A JUSTES INICIALES 6
Plug & Play (Instalación Fácil) ................6
Idioma...................................................8
Reloj ...................................................... 9
Sintonizador ........................................ 10
Ajuste de los canales para recepción .............. 10
Adición u omisión de un canal ....................... 11
EPRODUCCION Y GRABACION
R
SENCILLA 12
Reproducción sencilla........................... 12
Grabación sencilla ...............................13
UNCIONES DE REPRODUCCION Y
F
GRABACION 14
Funciones de reproducción ................... 14
Reproducción de imagen fija/cuadro
por cuadro ......................................................14
Cámara lenta/cámara lenta hacia atrás ............ 14
Búsqueda de velocidad variable/
reproducción hacia atrás................................. 15
Búsqueda de alta velocidad ............................ 15
Búsqueda por salto ......................................... 15
Búsqueda de índice ........................................ 15
Revisión instantánea (ReView) ........................ 16
Seguimiento manual ....................................... 16
Estabilizador de video ..................................... 17
Repetición de reproducción ............................ 18
Reposición del contador ................................. 18
Indicador de la posición de la cinta ................ 18
Memoria de próxima función.......................... 18
Superposición .................................................19
Selección de la banda de sonido..................... 20
Reproducción AV COMPU LINK ..................... 21
Sistema de imagen B.E.S.T.................... 22
Preparativos ....................................................22
Grabación....................................................... 23
Reproducción ................................................. 23
Funciones de grabación ....................... 24
Grabación de un programa mientras
mira otro ......................................................... 24
Indicación del tiempo de grabación
transcurrido .................................................... 24
Estereofónico y SAP (Segundo Programa de
Audio) ............................................................. 25
Grabación de programas SAP ......................... 25
ES 3
RABACION POR
G
TEMPORIZADOR 26
Programación del VCR Plus+
temporizado ........................................ 26
Ajuste del VCR Plus+ ............................ 28
Programación del temporizador
expreso ............................................... 30
Verificación, cancelación y revisión de
programas ....................................................... 32
Temporizador SP→EP automático ................... 33
Temporizador automático ............................... 33
Grabación instantánea por
temporizador (ITR) ............................... 34
EDICION 35
Edición desde o hacia otro VCR ............35
Edición desde una videocámara ........... 36
F
UNCIONES ESPECIALES 38
Control remoto para múltiples marcas de TV .. 38
Control remoto para múltiples marcas
de caja de cable.............................................. 39
Control remoto para múltiples marcas
de receptor DBS.............................................. 40
Control de dos VCR de JVC ............................. 41
OCALIZACION Y REPARACION
L
DE AVERIAS 42
Alimentación ....................................... 42
Transporte de cinta .............................. 42
Reproducción ....................................... 42
Grabación ........................................... 42
Grabación por temporizador ............... 43
Otros problemas.................................. 43
PREGUNTAS Y RESPUESTAS 44
Reproducción ....................................... 44
Grabación ........................................... 44
Grabación por temporizador ............... 44
INDICE 45
Vista frontal ........................................ 45
Vista trasera ........................................ 46
Panel frontal de indicación...................46
Control remoto .................................... 47
ESPAÑOL
ESPECIFICACIONES 48
Page 4
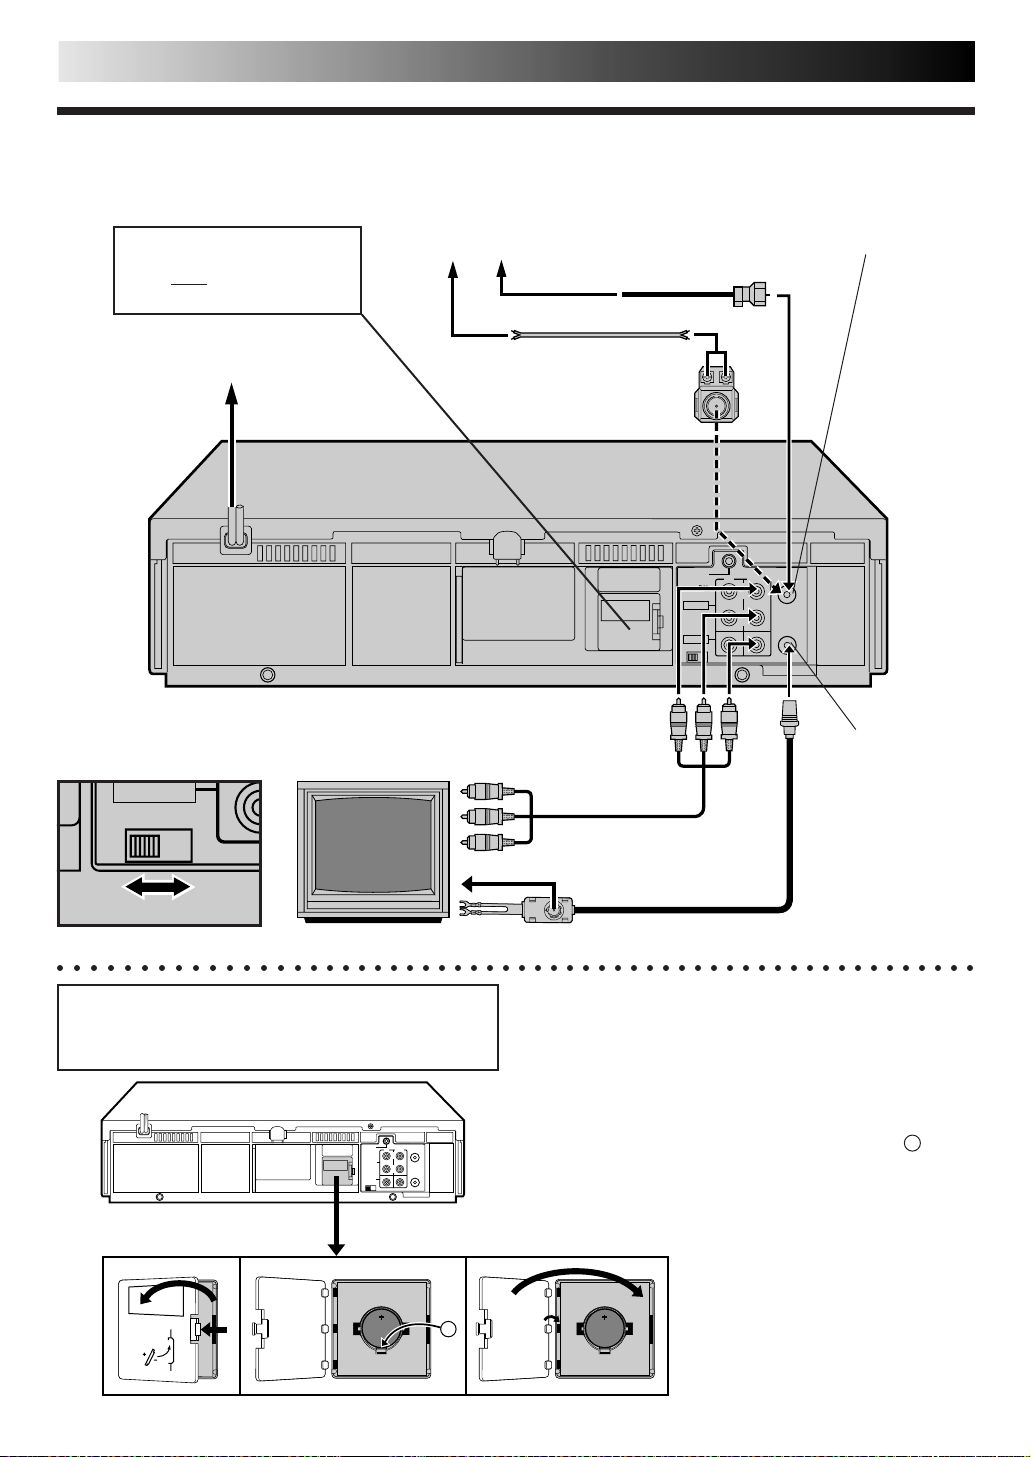
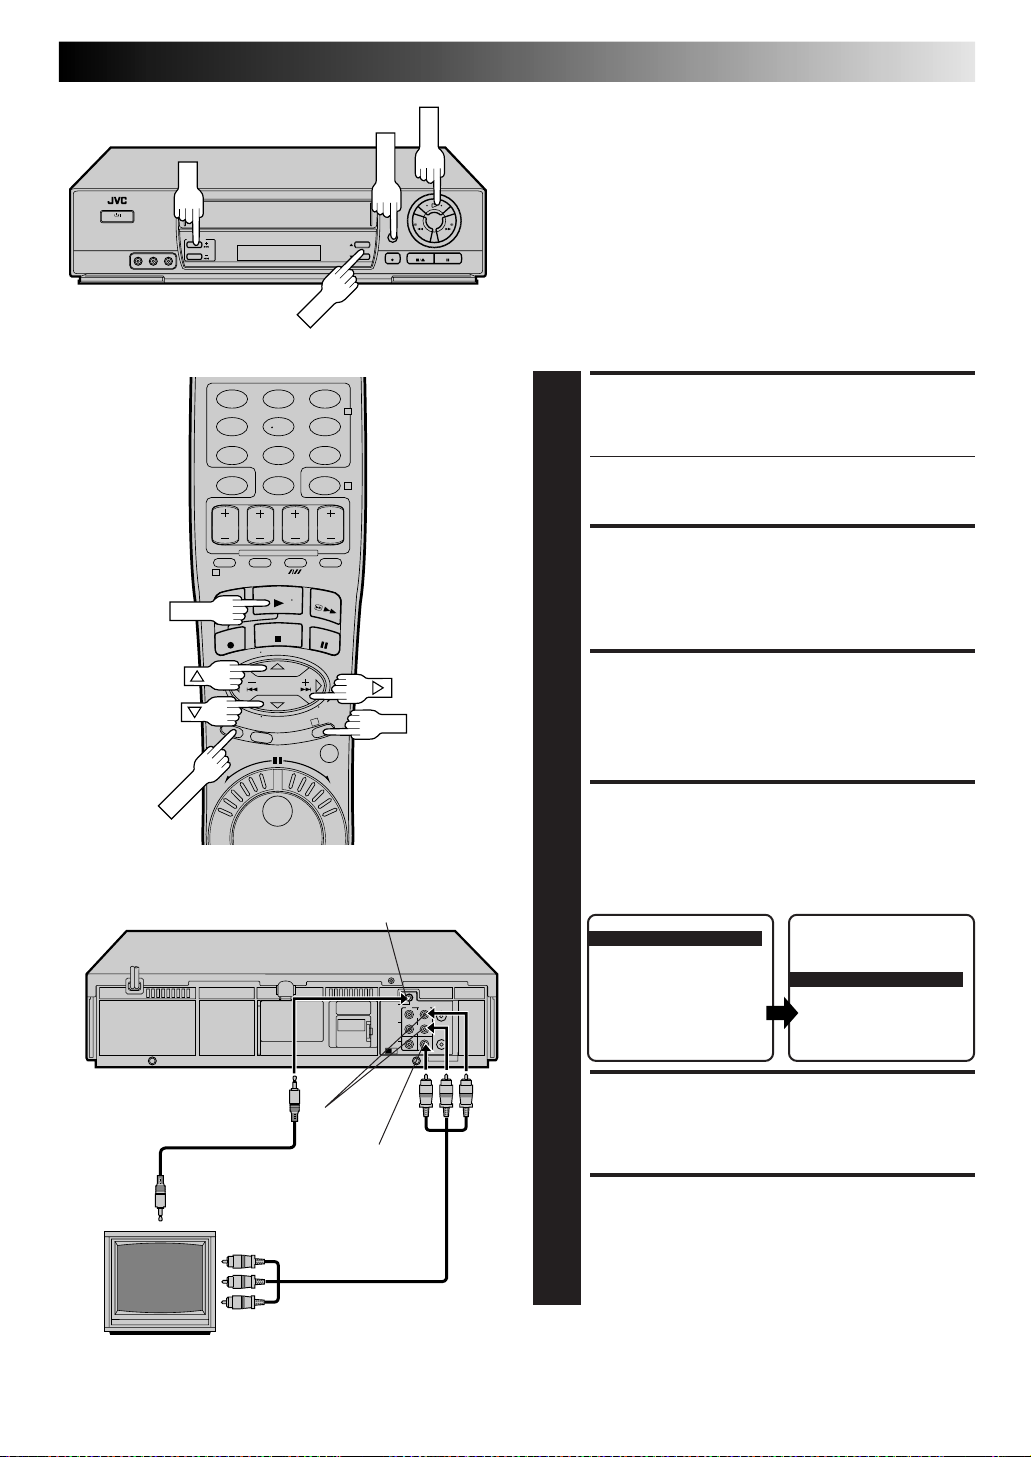
4 ES
VIDEO
INSTALACION DE SU NUEVO VCR
Conexiones básicas
Conecte el enchufe de
alimentación a un tomacorriente
de CA antes de instalar la pila de
litio. (véa abajo)
Alimentador plano
ANT. IN
(Entrada de antena o cable)Antena o cable
Cable coaxial
Tomacorriente de CA
Transformador de adaptación
(no suministrado)
Cordón de CA
PAUSE/
AV
COMPU
-LINK
AUDIO
VIDEO
CH3 CH4
OUTIN
ANT. IN
R
L
RF OUT
Parte trasera del VCR
TVParte trasera del VCR
Cable VIDEO/
AUDIO (no
Salida de RF
(RF OUT)
suministrado)
CH3 CH4
Cable RF
Terminal de 75 ohmios
Terminal de 300 ohmios
○○○○○○○○○○○○○○○○○○○○○○○○○○○○○○○○○○○○○○○○○○○○○○○○○○○○○○○○○
Asegúrese de conectar el enchufe de alimentación a un
tomacorriente de CA antes de colocar la pila de litio, de lo
contrario la vida de servicio de la pila se reducirá
drásticamente.
Colocación/extracción de la pila de litio
1
Asegúrese de que el enchufe de alimentación esté
conectado a un tomacorriente de CA y desconecte la
alimentación del VCR.
2 Abra el portapila presionando la lengüeta de abertura como
se muestra en la ilustración.
3 Coloque una pila de litio con el polo positivo (+) apuntando
hacia arriba y empújela hacia adentro.
● Para extraer la pila de litio, presione la lengüeta A hacia
abajo empleando un objeto punzante no metálico, y luego
extraiga la pila de litio.
4 Cierre el portapila hasta que escuche un "clic".
(suministrado)
A
Page 5

ES 5
INSPECCION DE
CONTENIDO
Asegúrese de que el paquete contiene todos los
accesorios listados en “ESPECIFICACIONES” (Z p. 48).
1
UBICACION DEL VCR
Coloque el VCR sobre una superficie estable y
horizontal.
2
CONEXION DEL VCR A UN
TV
El método para conectarlos depende del tipo de TV que
usted posee.
3
Conexión de RF
●
Conexión a un TV SIN terminales de entrada de AV
a– Desconecte la antena del TV del mismo.
b– Conecte el cable de la antena del TV al jack ANT.
IN ubicado en la parte trasera del VCR.
c– Conecte el cable RF suministrado al jack RF OUT
en la parte trasera del VCR y el terminal para
antena del TV. Ajuste TV en el CH3 o CH4
correspondiente al ajuste del conmutador CH3 –
CH4 en la parte trasera del VCR.
Conexión de AV
●
Conexión a un TV con terminales de entrada AV
a– Conecte la antena, el VCR y el TV como se
muestra en la ilustración.
b– Conecte un cable de audio/video a los jacks AUDIO
OUT y VIDEO OUT, en la parte trasera del VCR y a
los jacks AV IN del TV. Refiérase al manual de
instrucciones del TV.
NOTAS:
●
El canal del VCR es el canal del TV que indicará las señales
de audio y video provenientes del VCR. El conmutador CH3CH4 del VCR en la parte trasera del VCR ajusta el canal del
VCR en CH3 o CH4.
●
El conmutador CH3-CH4 está preajustado en la posición
CH3. Colóquelo en CH4 si utiliza CH3 para programas en su
área y ajuste el canal del TV para que corresponda al ajuste
del conmutador CH3-CH4 del VCR.
●
Si la conexión RF al TV es empleada, cuando se conmuta del
modo VCR al de TV, puede ser necesario enviar un CH UP y
luego CH DOWN al TV para obtener una imagen de buena
calidad.
●
Aunque esté empleando cables de AV para conectar su VCR
al TV, deberá también conectarlo usando el cable RF. Esto
asegurará que usted pueda grabar un programa mientras mira
otro (Z pg. 24).
●
Para la indentificación perfecta del panel trasero del VCR,
refiérase al índice (VISTA TRASERA Z p. 46).
CONEXION DEL VCR A UNA
FUENTE DE ALIMENTACION
Conecte el enchufe a un tomacorriente de CA.
4
PREPARATIVOS FINALES
PARA USO
Seleccione el canal del VCR (3 o 4), ajustando el
conmutador en la parte trasera del VCR como se
5
muestra en la ilustración.
Vaya a las páginas 6, 7 para efectuar "Plug & Play".
Page 6
6 ES
MENU
POWER
MENU
CH5∞
OK
Plug & Play
(Instalación Fácil)
Antes de comenzar...
● Conecte el cable de la antena del TV en el jack ANT. IN
en el VCR y enchufe el cable de alimentación en el
tomacorriente de CA.
● Conecte la alimentación del TV y seleccione el canal 3 o
4 del VCR (o modo AV).
AJUSTES INICIALES
La función Instalación Fácil simplifica la instalación guiándolo a
través de los procedimientos de ajuste de lenguaje, reloj y canales
del sintonizador, simplemente siga los menúes en pantalla que
aparecen cuando se presiona por primera vez el botón POWER
para conectar la alimentación del VCR después de conectar el
enchufe de alimentación a un tomacorriente de CA.
IMPORTANTE
● No presione ningún botón en el VCR o control remoto
que no esté directamente relacionado con el paso que
está efectuando mientras la función Instalación Fácil está
siendo ejecutada.
● Si usted efectúa la Instalación Fácil exitosamente durante
la instalación, no hay necesidad de efectuar
independientemente la selección de lenguaje, ajuste del
reloj o los procedimientos de ajuste de canal, pero si son
necesarios los ajustes, éstos pueden ser efectuados de la
siguiente manera:
– Para cambiar el lenguaje seleccionado Z pg. 8
– Para reposicionar o ajustar la hora Z pg. 9
– Para agregar/borrar canales manualmente Z pg. 11
– Para reposicionar el sintonizador después de mudarse
a un área diferente Z pg. 10
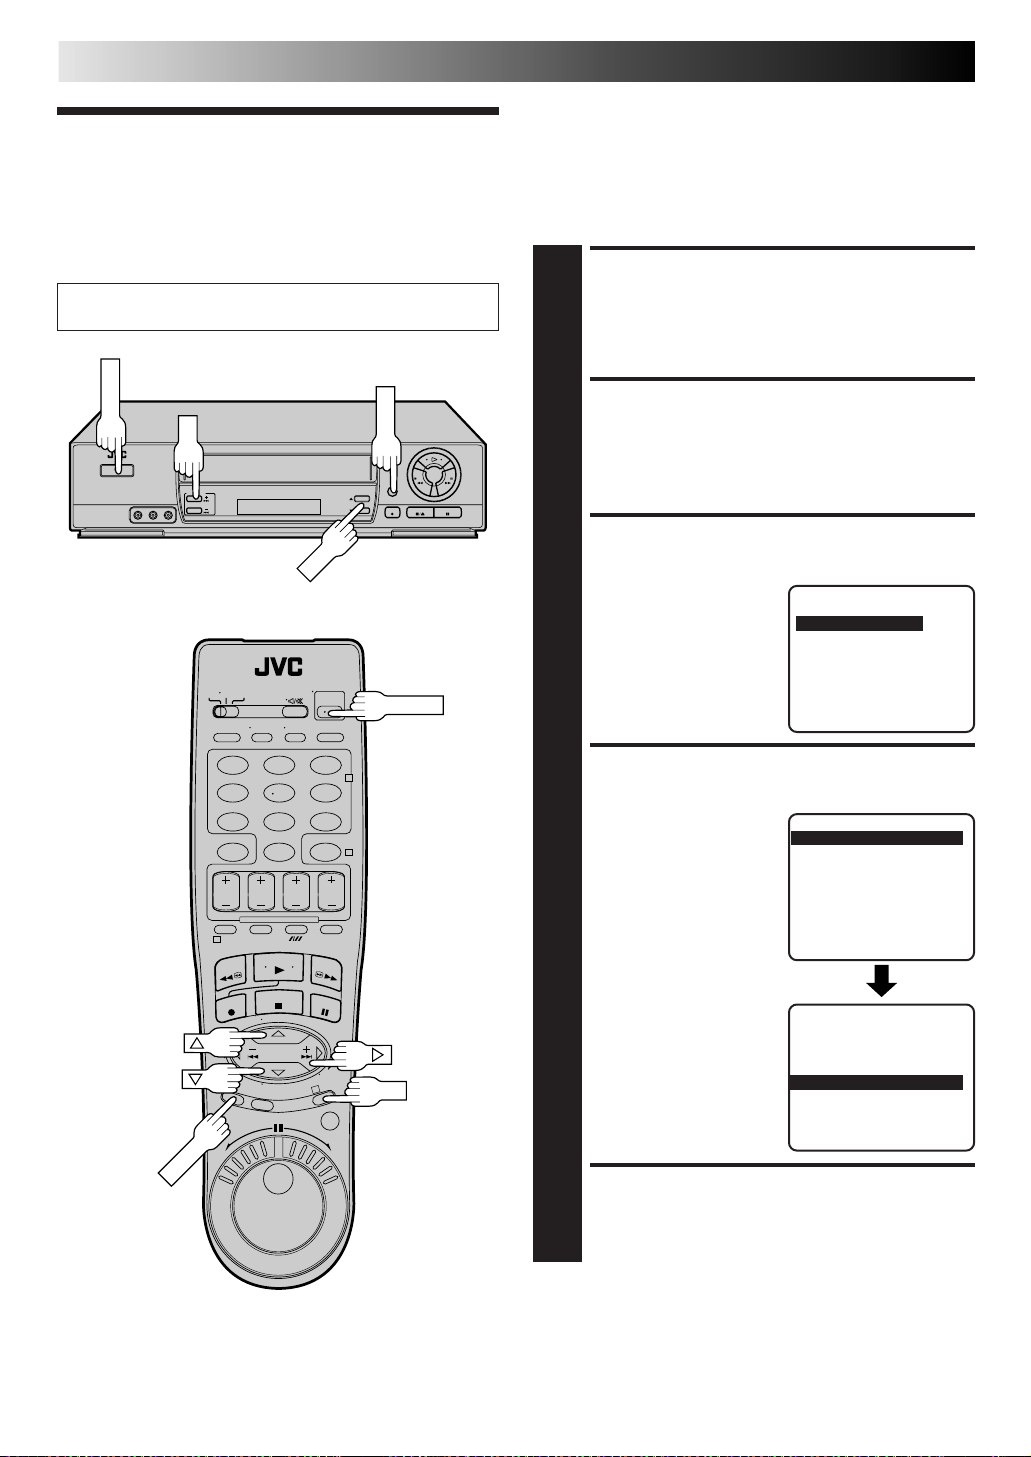
ACTIVACION DE LA
INSTALACION FACIL
Presione POWER.
● Aparecerá la pantalla de selección de lenguaje.
1
123
456
89
7
0
1
3
2
4
POWER
OK
SELECCION DEL LENGUAJE
Presione CH5∞ o %
para mover la barra
2
iluminada (flecha) al
lenguaje deseado
(ENGLISH o ESPAÑOL), y
presione OK o .
● Aparecerá la pantalla de
ajuste del reloj.
fi
%
SELECCION DE IDIOMA
=ESPAÑOL
ELEGIR CON (5,∞) Y (OK)
PRESIONE (MENU) P/TERMINAR
AJUSTE DE LA HORA
Presione CH5∞ o %fi
para ajustar la hora y
3
después presione OK o .
● Mantenga presionado
uno de los botones para
atrasar o adelantar la hora
en 30 minutos.
%
AJUSTE DE RELOJ
HORA FECHA AÑO
– –:– –AM 1/ 1 98
ELEGIR CON (5,∞) Y (OK)
PRESIONE (MENU) P/TERMINAR
AJUSTE DE LA FECHA
Presione CH5∞ o %fi para ajustar la fecha, y después
presione OK o .
4
● Mantenga presionado uno de los botones para cambiar
la fecha en 15 días.
%
AJUSTE DEL AÑO
Presione CH5∞ o %fi para ajustar el año.
ENGLISH
5
Page 7
123
MENU
MENU
OK
CH
456
89
7
0
2
4
CH+/–
AJUSTE AUTOMATICO DE
CANALES
Presione MENU.
● Los canales recibibles en
6
su área serán asignados
automáticamente a los
botones CH5∞ (+/–) y
los canales que no
pueden ser recibidos son
omitidos.
● Si los canales del sintonizador han sido correctamente
ajustados la pantalla mostrará el mensaje "FIN DE
EXPLORACION". Si aparece indicado en pantalla
"SEÑAL NO DETECTADA", asegúrese de que el cable
de la antena esté conectado correctamente al VCR y
presione OK o . El VCR efectuará el ajuste automático
de canal otra vez.
%
AJUSTE AUTOMATICO
PRESIONE (MENU) P/TERMINAR
VUELTA A LA PANTALLA
NORMAL
Presione MENU.
7
ES 7
DE CANAL
EXPLORANDO...
1
3
OK
Page 8
8 ES
MENU
POWER
MENU
OK
CH
Idioma
AJUSTES INICIALES (cont.)
Este VCR le ofrece la opción de ver los mensajes en pantalla en,
español o inglés (no se incluyen los mensajes superpuestos en
la imagen del TV). Seleccione el idioma deseado empleando
este procedimiento. El ajuste por falta es "ESPAÑOL".
Conecte la alimentación de TV y seleccione el canal 3 o 4
del VCR (o el modo AV).
POWER
123
456
89
7
0
1
2
4
CONEXION DE LA
ALIMENTACION DEL VCR
Presione POWER.
1
ACCESO A LA PANTALLA
DEL MENU PRINCIPAL
Presione MENU.
2
ACCESO A LA PANTALLA
DE AJUSTE INICIAL
En la pantalla de menú
principal mueva barra
3
iluminada (flecha) a
“AJUSTE INICIAL”,
presionando CH5∞ o
%
fi, y después presione
%
OK o .
SELECCION DE IDIOMA
Mueva la barra iluminada
(flecha) a "IDIOMA"
4
presionando CH5∞ o %fi,
luego presione OK o
para seleccionar el idioma
deseado.
%
AJUSTE DE FUNCION
AJUSTE DE SINTONIZADOR
= AJUSTE INICIAL
ELEGIR CON (5,∞), Y (OK)
PRESIONE (MENU) P/TERMINAR
AJUSTE DE RELOJ
=IDIOMA ESPAÑOL
AJUSTE DE CANAL GUIA
ELEGIR CON (5,∞), Y (OK)
PRESIONE (MENU) P/TERMINAR
MENU PRINCIPAL
AJUSTE INICIAL
3
OK
VUELTA A LA PANTALLA
NORMAL
Presione MENU.
5
Page 9
Reloj
MENU
POWER
MENU
OK
CH
ES 9
CONEXION DE LA
ALIMENTACION DEL VCR
Presione POWER.
Conecte la alimentación de TV y seleccione el canal 3 o 4
del VCR (o el modo AV).
POWER
123
456
89
7
0
2
4
1
ACCESO A LA PANTALLA DEL
MENU PRINCIPAL
Presione MENU.
2
ACCESO A LA PANTALLA DE
AJUSTE INICIAL
En la pantalla de menú
principal mueva barra
iluminada (flecha) a
3
“AJUSTE INICIAL”,
presionando CH5∞ o
%
fi, y después presione
%
OK o .
ACCESO A LA PANTALLA DE
AJUSTE DEL RELOJ
En la pantalla de ajuste
inicial mueva barra
iluminada (flecha) a
4
“AJUSTE DE RELOJ”
presionado CH5∞ o %fi,
y después presione OK o
%
.
ELEGIR CON (5,∞), Y (OK)
PRESIONE (MENU) P/TERMINAR
ELEGIR CON (5,∞), Y (OK)
PRESIONE (MENU) P/TERMINAR
MENU PRINCIPAL
AJUSTE DE FUNCION
AJUSTE DE SINTONIZADOR
= AJUSTE INICIAL
AJUSTE INICIAL
=AJUSTE DE RELOJ
IDIOMA ESPAÑOL
AJUSTE DE CANAL GUIA
1
3
OK
Para efectuar correcciones
Presione OK o hasta que el item que desea cambiar destelle,
luego presione CH 5∞ o %fi.
%
AJUSTE DE LA HORA
Presione CH 5∞ o %
hasta que aparezca la hora
deseada y presione OK o
5
%
.
● Mantenga presionado
CH 5∞ o %fi para
cambiar la hora en 30
minutos.
fi
HORA FECHA AÑO
– –:– –AM 1/ 1 98
ELEGIR CON (5,∞) Y (OK)
PRESIONE (MENU) P/TERMINAR
AJUSTE DE RELOJ
AJUSTE DE LA FECHA
Presione CH 5∞ o %fi hasta que aparezca la fecha
deseada y presione OK o .
6
● Mantenga presionado CH 5∞ o %fi para cambiar la
fecha en 15 días.
%
AJUSTE DEL AÑO
Presione CH 5∞ o %fi hasta que aparezca el año
deseado.
7
ACTIVACION DEL RELOJ
Presione MENU para que aparezca la pantalla normal.
8
Page 10
10 ES
MENU
POWER
MENU
OK
CH5∞
Sintonizador
AJUSTES INICIALES (cont.)
Ajuste de los canales para
recepción
Conecte la alimentación de TV y seleccione el canal 3 o 4
del VCR (o el modo AV).
POWER
123
456
89
7
0
1
3
2
4
CH+/–
OK
CONEXION DE LA
ALIMENTACION DEL VCR
Presione POWER.
1
ACCESO A LA PANTALLA
DEL MENU PRINCIPAL
Presione MENU.
2
ACCESO A LA PANTALLA DE
AJUSTE DEL SINTONIZADOR
Mueva barra iluminada
(flecha) a “AJUSTE DE
3
SINTONIZADOR”
presionando CH5∞ o
%fi, y después presione
%
OK o .
AJUSTE AUTOMATICO DE
CANALES
Mueva barra iluminada
(flecha) a “AJUSTE AUTO
4
DE CANAL” presionando
CH5∞ o %fi, y después
presione OK o .
● Los canales su TV puede
recibir en el área en que
se encuentra son
asignados
automáticamente a los
botones CH5∞ (+/–), y
los canales que no
puede recibir son
omitidos.
%
MENU PRINCIPAL
AJUSTE DE FUNCION
= AJUSTE DE SINTONIZADOR
AJUSTE INICIAL
ELEGIR CON (5,∞), Y (OK)
PRESIONE (MENU) P/TERMINAR
AJUSTE DE SINTONIZADOR
BANDA CABLE
=AJUSTE AUTO DE CANAL
AJUSTE MANUAL DE CANAL
ELEGIR CON (5,∞), Y (OK)
PRESIONE (MENU) P/TERMINAR
AJUSTE AUTOMATICO
DE CANAL
EXPLORANDO...
INFORMACION
El VCR detecta la banda, TV o CABLE y seleccinona la
banda correcta automáticamente durante el ajuste
automático de canal. La banda seleccionada será indicada
en el lado derecho de BANDA en la pantalla de ajuste del
sintonizador.
NOTAS:
●
Al terminar el ajuste
automático de canal, apareceráen la pantalla el
mensaje “FIN DE EXPLORACION”.
●
Si la búsqueda no fue exitosa, aparecerá en la
pantalla el mensaje “FIN DE EXPLORACION –
SEÑAL NO DETECTADA–”. Inspeccione las
conexiones, e inicie el proceso otra vez.
VUELTA A LA PANTALLA
NORMAL
Presione MENU.
5
PRESIONE (MENU) P/TERMINAR
Page 11
123
MENU
MENU
OK
CH
456
89
7
0
1
2
4
NUMBER
ES 11
Adición u omisión de un
canal
ACCESO A LA PANTALLA
DEL MENU PRINCIPAL
Presione MENU.
1
ACCESO A LA PANTALLA DE
AJUSTE DEL SINTONIZADOR
Mueva barra iluminada (flecha) a “AJUSTE DE
SINTONIZADOR” presionando CH5∞ o %fi, y
2
después presione OK o .
ACCESO A LA PANTALLA
DE AJUSTE MANUAL DE
CANAL
Mueva barra iluminada
(flecha) a “AJUSTE
3
MANUAL DE CANAL”
presionando CH5∞ o
%fi, y después presione
%
OK o .
%
AJUSTE DE SINTONIZADOR
BANDA CABLE
AJUSTE AUTO DE CANAL
=AJUSTE MANUAL DE CANAL
ELEGIR CON (5,∞), Y (OK)
PRESIONE (MENU) P/TERMINAR
3
OK
ALMACENAMIENTO DEL
CANAL DESEADO
Ingrese el número de canal
empleando las teclas
4
NUMBER o presionando
CH5∞ o %fi, y después
presione OK o para
ajustar "AGREGADO" o
"OMITIDO" como sea
necesario. Repita el
procedimiento para cada
canal que desee agregar o saltar.
%
PRESIONE (5,∞) O NUMEROS
PRESIONE (MENU) P/TERMINAR
VUELTA A LA PANTALLA
NORMAL
Presione MENU.
5
AJUSTE MANUAL DE CANAL
(CABLE)
CANAL 125 AGREGADO
(0–9) Y (OK)
Page 12
12 ES
FF
PLAY
REW
STOP/EJECT
PLAY
STOP
REPRODUCCION Y GRABACION SENCILLA
Reproducción
sencilla
Conecte la alimentación de TV y seleccione el canal 3 o 4
del VCR (o el modo AV).
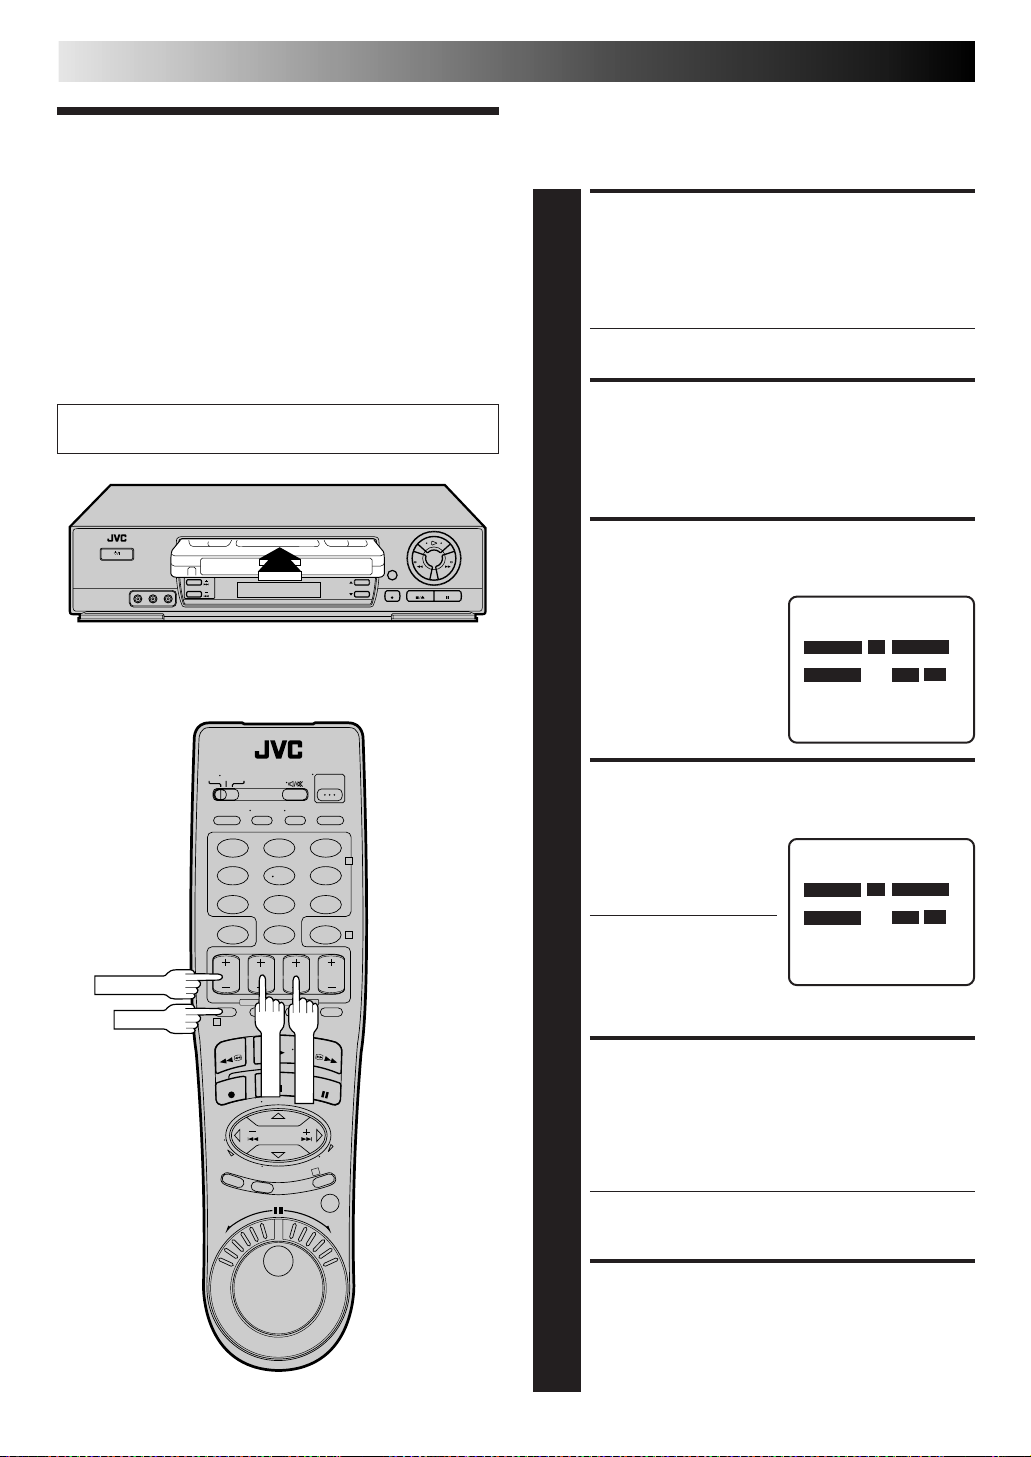
COLOCACION DE UN CASSETTE
Asegúrese de que el lado con la ventanilla esté
apuntando hacia arriba y que el lado con la etiqueta
1
trasera esté apuntando hacia usted, mientras que la
flecha en el frente del cassette esté apuntando hacia el
VCR. No aplique presión excesiva para colocarlo.
● La alimentación del VCR se conecta automáticamente.
● El contador se reposiciona automáticamente a "0H
00M 00S".
● Si la lengüeta de protección de grabación del cassette
ha sido extraída, la reproducción comienza
automáticamente.
LOCALIZACION DEL PRINCIPIO
DEL PROGRAMA
Si la cinta ha avanzado después del principio, presione
REW. Para avanzarla presione FF.
2
INICIO DE LA REPRODUCCION
Presione PLAY. En la pantalla aparecerá el mensaje
“B.E.S.T. PICTURE SYSTEM” (Cuando “B.E.S.T.” está
3
calocado en "SI") (Z p. 22).
PARADA DE LA REPRODUCCION
Presione STOP o STOP/EJECT. Luego presione STOP/
EJECT para extraer el cassette.
4
REW (Rewind)
123
456
89
7
0
1
3
2
4
FF (Fast-Forward)
INFORMACION
Esta grabadora de video está equipada con SQPB (S-VHS
QUASI PLAYBACK) que le permite mirar cintas grabadas en
formato S-VHS con resolución VHS normal.
● SQPB no ofrece la resolución del super VHS.
● La grabación en S-VHS no es posible con esta grabadora
de video.
Cassettes utilizables
VHS
T-30 (ST-30**)
T-60 (ST-60**)
T-90
T-120 (ST-120**)
T-160 (ST-160**)
ST-210**
VHS-C*
TC-20 (ST-C20**)
TC-30 (ST-C30**)
TC-40 (ST-C40**)
* Las grabaciones con videocámaras VHS compactas
pueden reproducirse en este videograbador.
Simplemente coloque el cassette grabado en un
adaptador de cassette VHS y utilícelo como lo haría
como cualquier cassette VHS de tamaño normal.
** Este videograbador puede grabar sobre cassettes VHS y
Super VHS. Sin embargo, grabará señales de video VHS
normal solamente.
Page 13
Grabación
STOP/EJECT
STOP
PLAY
PAUSE
REC
COLOCACION DE UN CASSETTE
Asegúrese de que la lengüeta de protección de
grabación esté intacta. Si no lo está, cubra el orificio
1
con cinta adhesiva antes de colocar el cassette.
ES 13
sencilla
Conecte la alimentación de TV y seleccione el canal 3 o 4
del VCR (o el modo AV).
CH5∞
3
ENTER
2
4
SP/EP
NUMBER
CH+/–
PAUSE
TV/VCR
REC
Prevención de borrados accidentales
● Para prevenir borrados accidentales del cassette grabado,
extraiga la lengüeta de protección de grabación. Para
poder grabar después, cubra el orificio con cinta
adhesiva.
123
456
7
1
PLAY
89
0
SELECCION DEL CANAL QUE
DESEA GRABAR
Presione CH5
apropiadas, y después presione ENTER. (El canal
2
cambia después de transcurridos unos pocos segundos,
aunque usted haya presionado ENTER o no).
● Si emplea la conexión RF, presionando el botón TV/VCR,
seleccione el modo VCR para ver un programa a ser
grabado.
. O presione las teclas NUMBER
∞ (+/–)
AJUSTE DE LA VELOCIDAD DE LA
CINTA
Presione SP/EP para ajustar la velocidad de grabación.
3
INICIO DE LA GRABACION
Mantenga presionado REC y presione PLAY en el control
remoto, o presione REC en el panel frontal del VCR.
4
El B.E.S.T. se efectúa al principio de la primera
grabación SP o EP después de colocar el cassette
(Cuando "B.E.S.T." está calocado en "SI")(Z p. 22).
PAUSA/CONTINUACION DE
GRABACION
Presione PAUSE. Presione PLAY para continuar la
grabación.
5
● Con la pausa de grabación activada, usted puede
cambiar el canal que desea grabar empleando los
botones CH5
El B.E.S.T. no se efectuará si la velocidad de la cinta
es cambiada mientras está activado el modo de
pausa de grabación.
o las teclas NUMBER.
∞ (+/–)
PARADA DE GRABACION
Presione STOP o STOP/EJECT. Luego presione STOP/
EJECT para extraer el cassette.
6
Función de continuación de
grabación
Si hay un corte de alimentación durante la grabación (o
grabación instantánea por temporizador o grabación por
temporizador), la grabación continuará automáticamente
cuando se restaure la alimentación del VCR.
Lengüeta de protección
de grabación
Page 14
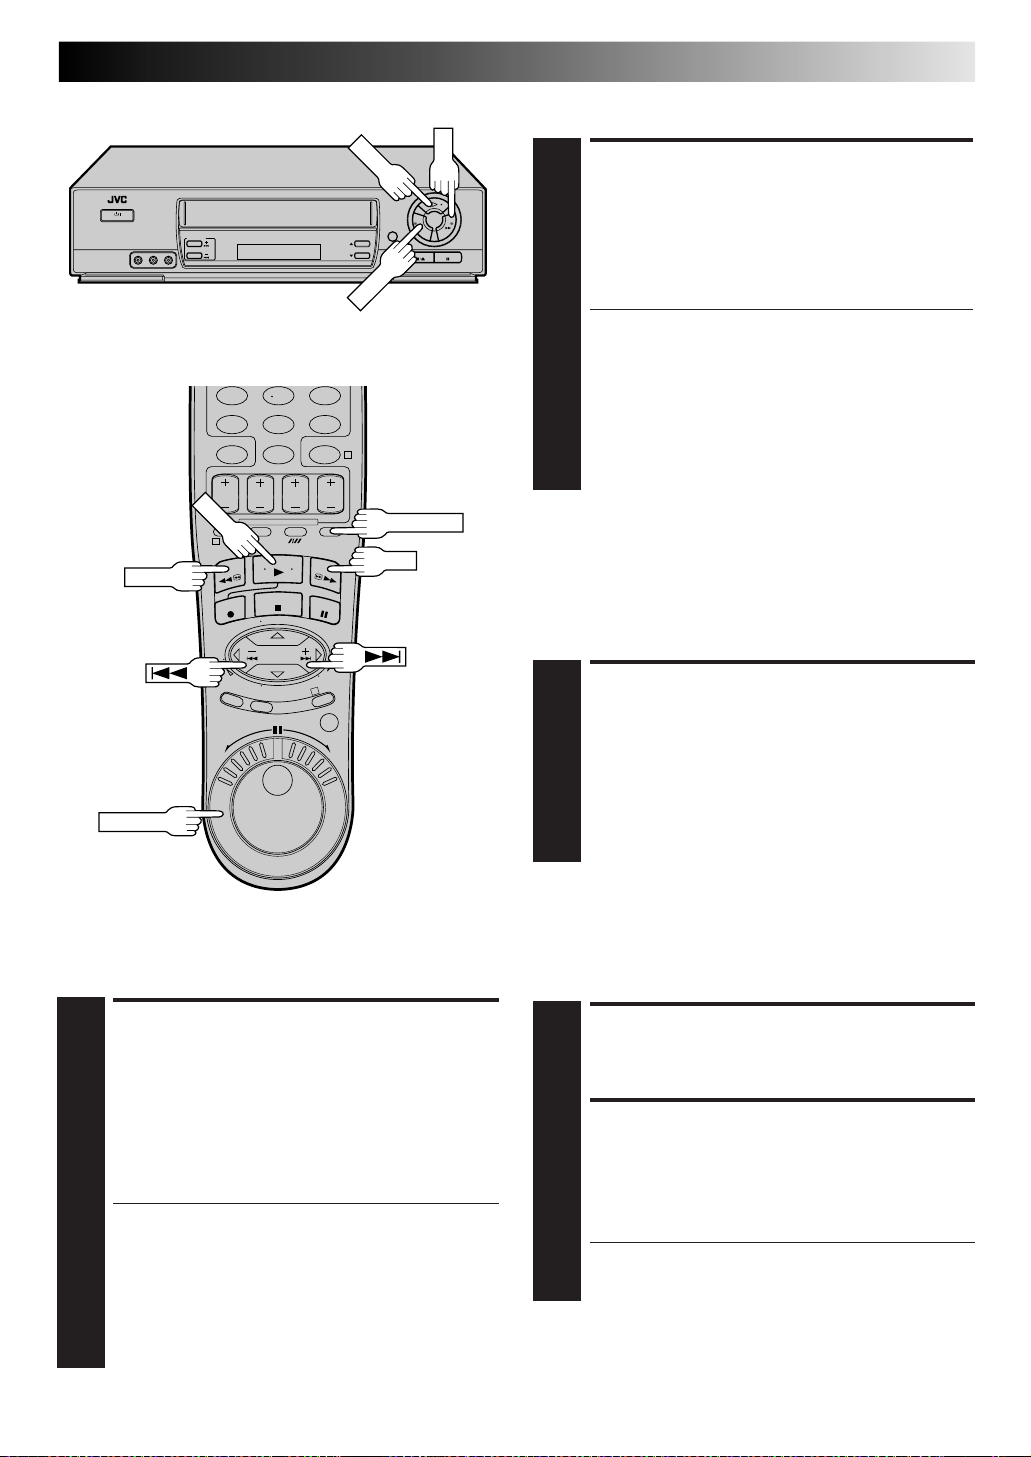
14 ES
PLAY
PAUSE
PLAY
CH5∞
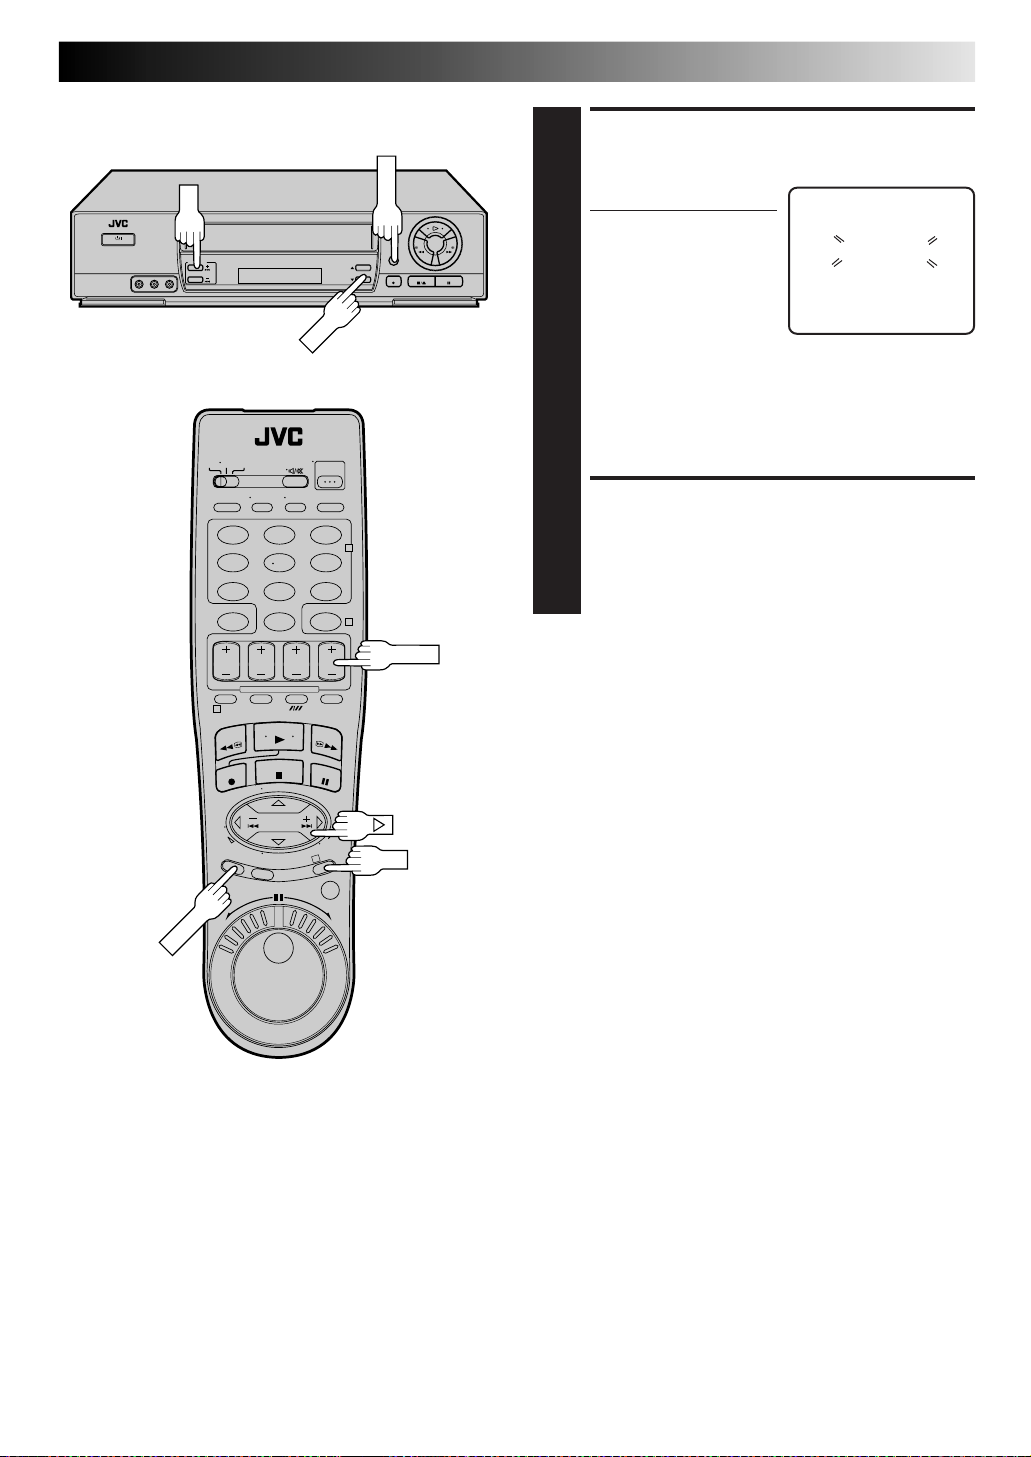
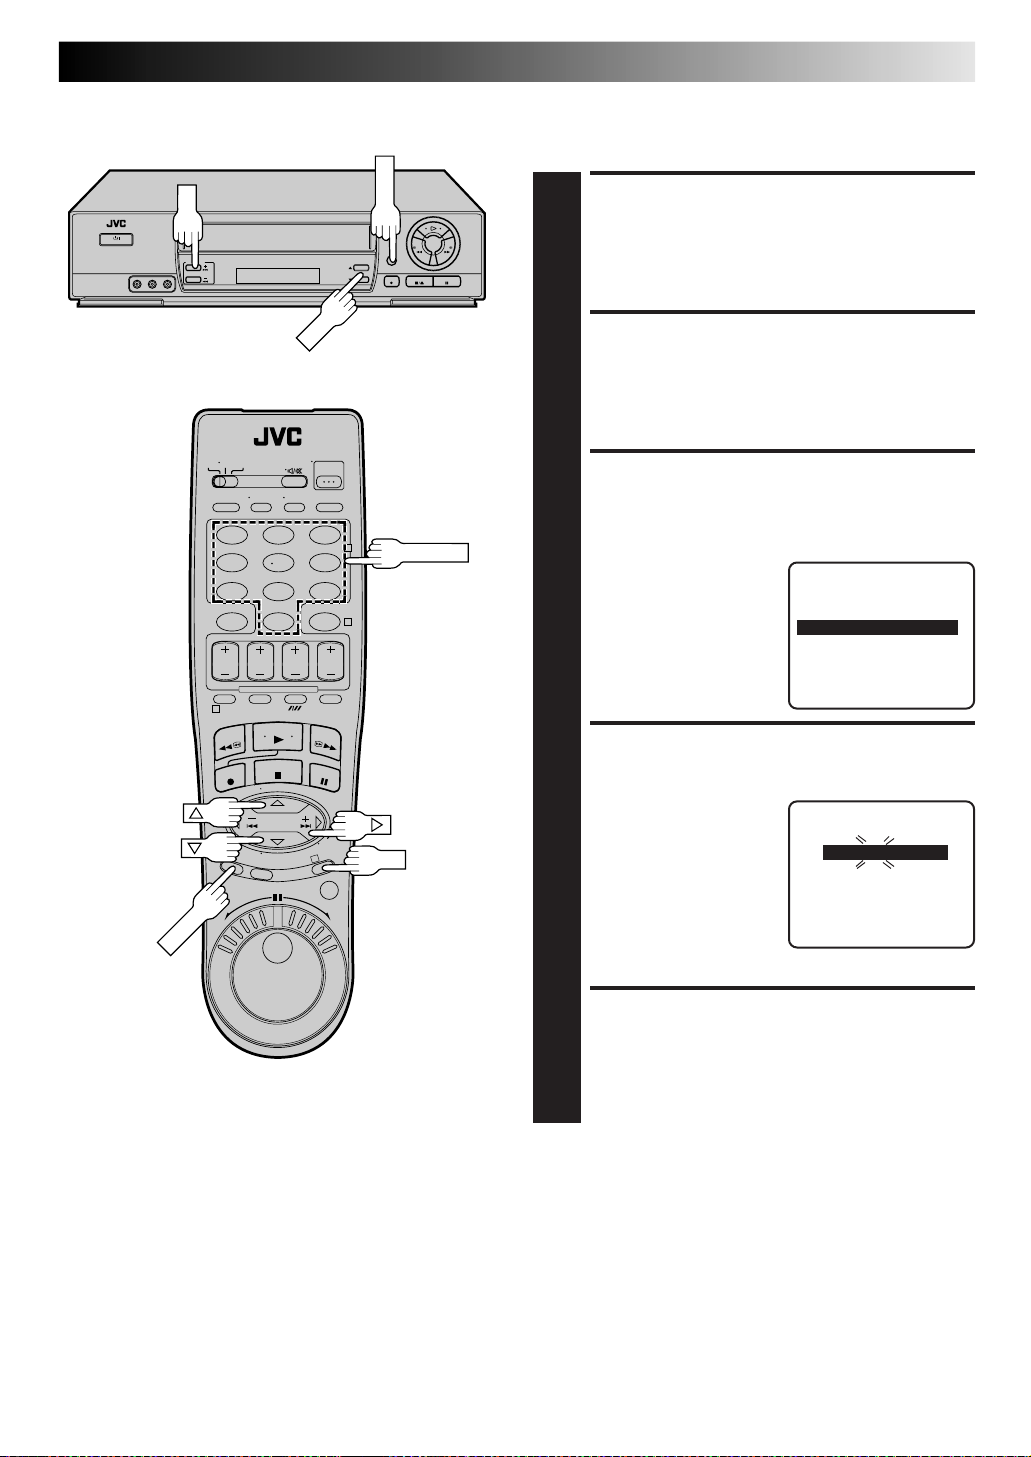
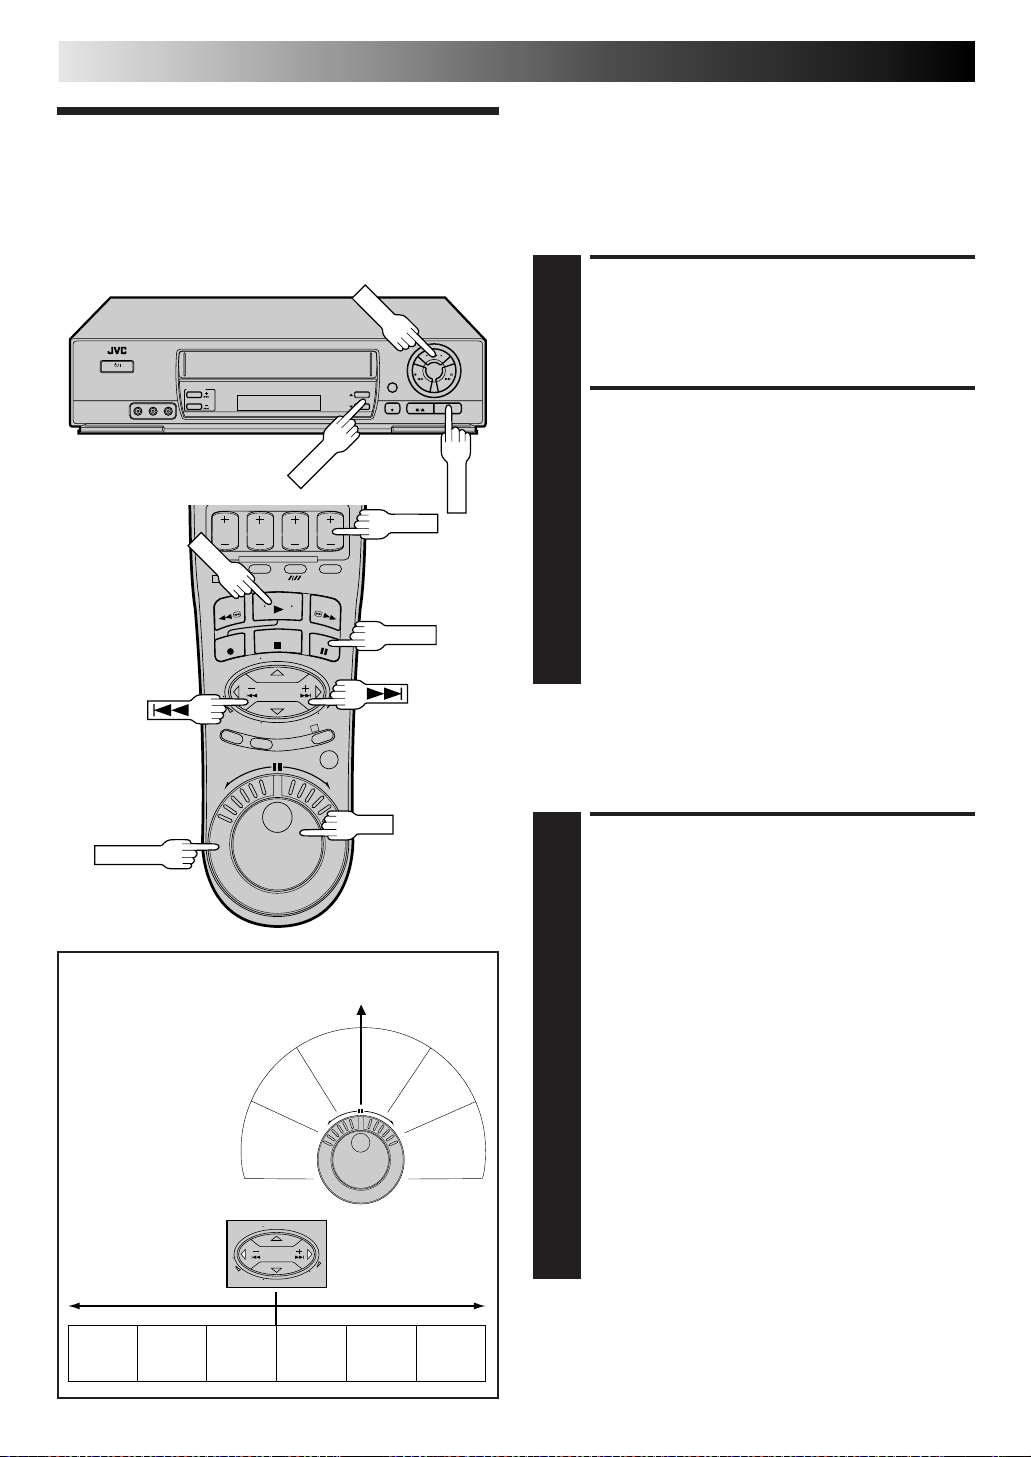
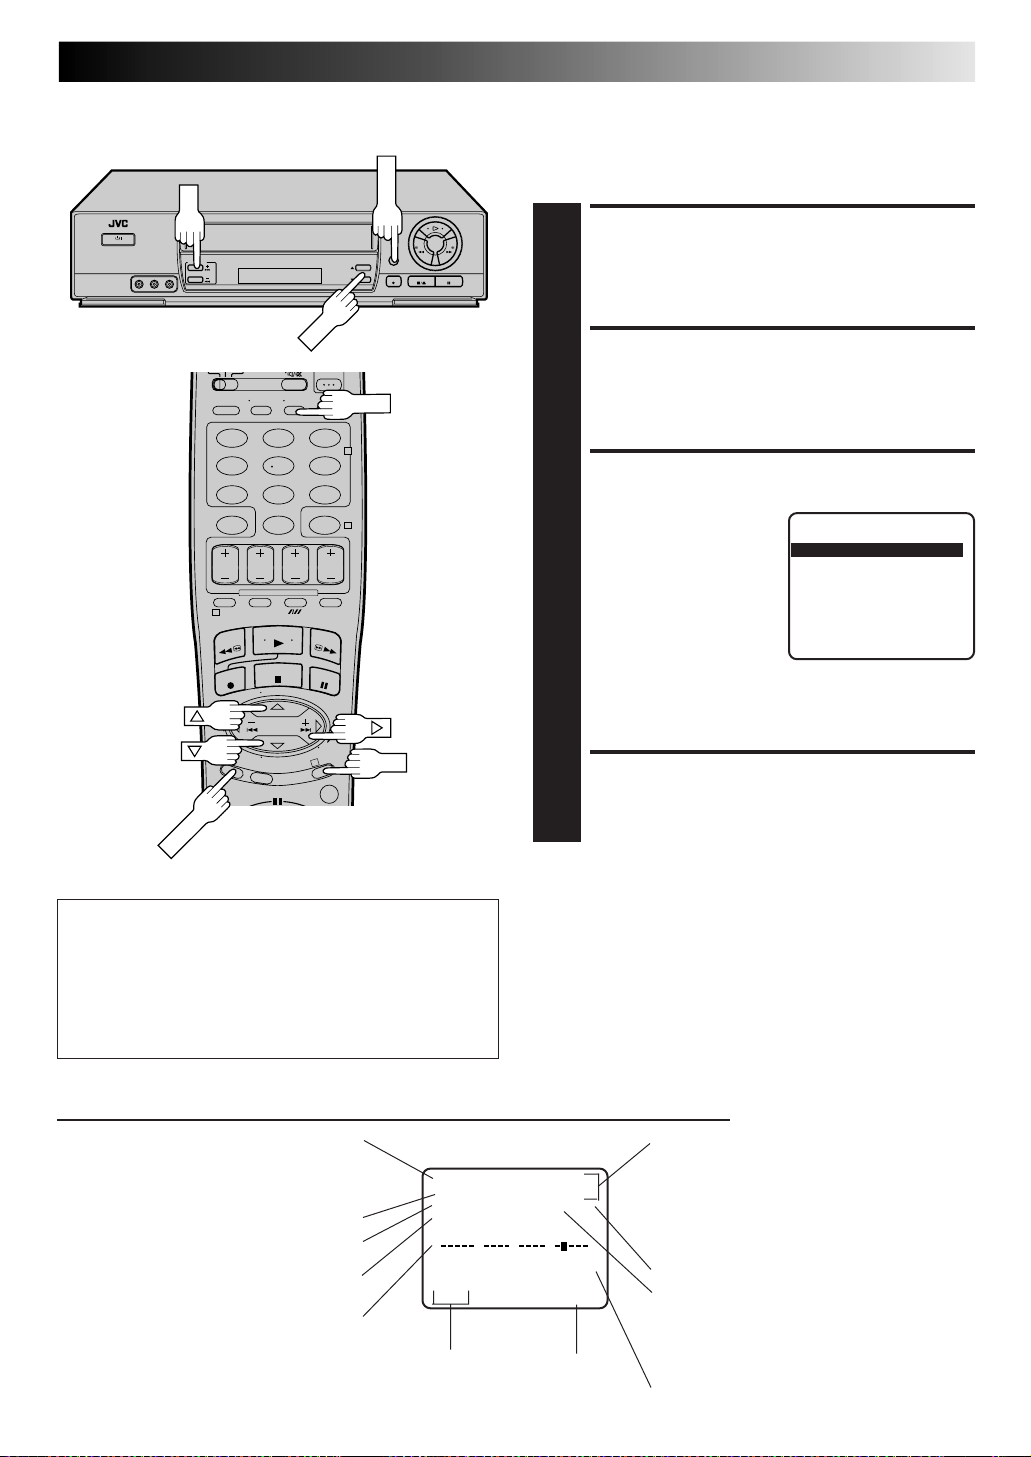
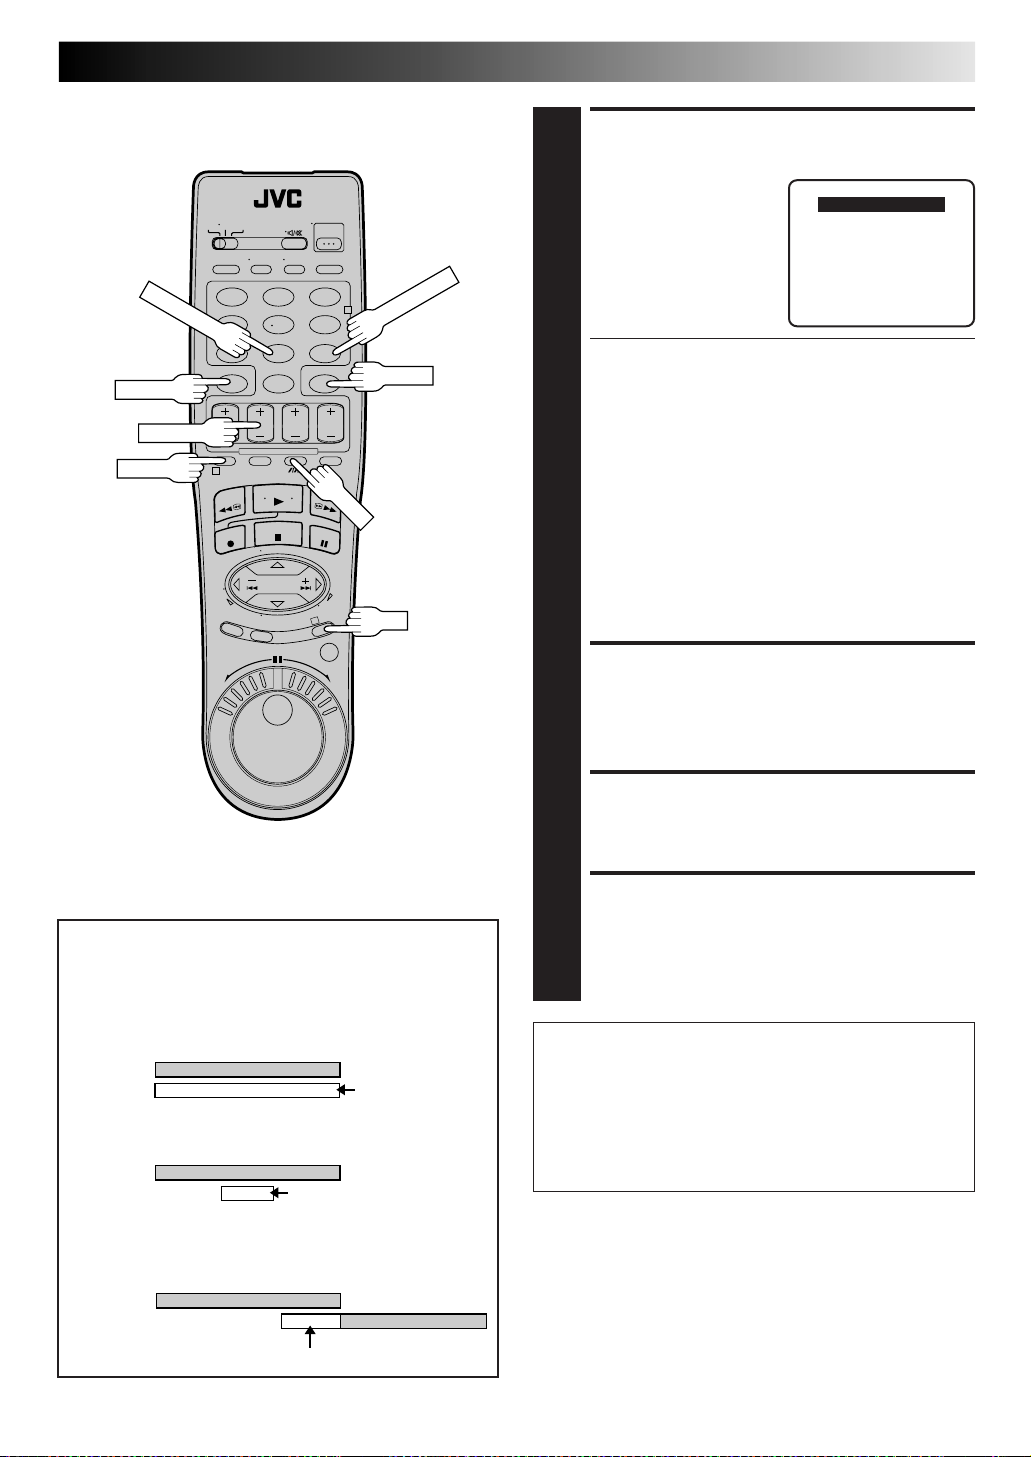
FUNCIONES DE REPRODUCCION Y GRABACION
Funciones de
reproducción
CH+/–
1
PAUSE
NOTA:
Para emplear el disco JOG o el anillo SHUTTLE del control
remoto, presione JOG/SHUTTLE primero de tal manera que el
botón se encienda. El presionar el botón otra vez apaga la luz.
Reproducción de imagen fija/
cuadro por cuadro
PAUSA DURANTE LA
REPRODUCCION
Presione PAUSE. Si hay fluctuación vertical de imagen,
emplee el botón CH 5 (+) o el botón ∞ (–) para
1
corregir el problema.
ACTIVACION DE LA
REPRODUCCION CUADRO POR
CUADRO
Gire el disco JOG hacia la derecha para obtener
reproducción cuadro por cuadro, o hacia la izquierda
2
para la reproducción cuadro por cuadro hacia atrás.
O
Presione PAUSE repetidamente para avanzar un cuadro
de cada vez.
O
Presione £ repetidamente para la reproducción hacia
adelante cuadro por cuadro o ™ repetidamente para
la reproducción hacia atrás cuadro por cuadro.
SHUTTLE
NOTA: Refiérase a lo siguiente
para las operaciones
descritas en esta página
Modos del anillo SHUTTLE
Búsqueda hacia
adelante : 3 pasos
Reproducción normal
Cámara lenta : 2 pasos
Cámara lenta hacia
atrás : 2 pasos
Reproducción hacia
atrás Búsqueda hacia
atrás : 3 pasos
Hacia atrás
Reproducción
3 pasos 5 pasos 5 pasos
hacia atrás
Búsqueda
hacia atrás en
T
V
–
Cámara lenta
hacia atrás en
3
Cámara lenta/cámara lenta
hacia atrás
Para continuar con la reproducción normal presione PLAY.
JOG
Imagen Fija
C
á
a
r
m
a
a
i
c
a
h
s
á
r
Reproducción
a
r
a
l
e
n
t
a
R
e
p
c
r
o
c
i
ó
n
a
d
e
l
a
n
t
e
Hacia adelante
Búsqueda
hacia
adelante en
4 pasos
d
u
-
B
ú
h
s
a
q
c
u
i
e
a
d
a
m
á
C
a
t
n
e
l
-
u
t
a
a
d
i
c
o
r
a
p
h
s
e
n
á
R
r
ó
t
i
a
c
c
a
d
e
a
s
i
u
c
á
q
r
a
t
s
h
a
ú
B
O
R
G
P
V
+
T
+
V
T
T
–
V
P
G
R
O
Cámara
lenta en
ACTIVACION DE LA
REPRODUCCION EN CAMARA
LENTA
Durante la reproducción o imagen fija, gire el anillo
SHUTTLE hacia la derecha para obtener cámara lenta
1
hacia adelante, o hacia la izquierda para la cámara
lenta hacia atrás (vea la ilustración abajo).
O
Para activar la cámara lenta sin usar las manos, presione y
suelte ™ durante la reproducción para reducir la
velocidad hacia adelante. Continúe presionando y soltando
™ para seleccionar la cámara lenta hacia atrás, la
reproducción hacia atrás y la búsqueda hacia atrás.
O
Durante la imagen fija, mantenga presionado £ para
cámara lenta hacia adelante o mantenga presionado
™ para la cámara lenta hacia atrás. Suelte para
volver a la imagen fija.
O
Para el avance en cámara lenta durante la imagen fija,
mantenga presionado PAUSE durante más de 2 segundos.
Presione PAUSE otra vez para volver a la imagen fija.
Para continuar con la reproducción normal presione PLAY.
Page 15
FF
PLAY
REW
REW
PLAY
456
89
7
0
1
4
SKIP SEARCH
FF
ES 15
Búsqueda de alta velocidad
ACTIVACION DE LA BUSQUEDA
DE ALTA VELOCIDAD
Durante la reproducción o imagen fija, gire
completamente hacia la derecha el anillo SHUTTLE para
la búsqueda de alta velocidad, o hacia la izquierda para
1
la búsqueda de alta velocidad hacia atrás. Para
seleccionar la reproducción de imagen fija suelte
SHUTTLE.
● Para la búsqueda de alta velocidad hacia adelante,
gire el anillo SHUTTLE completamente hacia la
derecha y suéltelo dentro de 1 segundo.
● Para la búsqueda de alta velocidad hacia atrás, gire
el anillo SHUTTLE completamente hacia la izquierda
y suéltelo dentro de 1 segundo.
O
Durante la reproducción o imagen fija, presione FF
para la búsqueda de alta velocidad hacia adelante o
REW para la búsqueda de alta velocidad hacia atrás.
Para continuar con la reproducción normal presione PLAY.
NOTA:
Para búsquedas de corta duración durante la reproducción o
imagen fija, mantenga presionado FF o REW más de 2 segundos.
Cuando se lo suelta se reinicia la reproducción normal.
Búsqueda por salto
3
SHUTTLE
Búsqueda de velocidad variable/reproducción hacia atrás
ACTIVACION DE LA BUSQUEDA
HACIA ATRAS
Durante la reproducción o imagen fija, gire el anillo
SHUTTLE hacia la derecha para obtener búsqueda de
velocidad variable, o hacia la izquierda para la
1
reproducción hacia atras (vea la ilustración a la página 14).
O
Durante la reproducción presione y suelte repetidamente
™ o £ para seleccionar la velocidad de búsqueda.
● Para aumentar la velocidad hacia adelante, presione
y suélte £ repetidamente para seleccionar los
diferentes modos de búsqueda hacia adelante.
● Para reducir la velocidad hacia adelante, presione y
suélte ™.
● Para reproducir en cámara lenta hacia atrás y para
activar el modo de reproducción hacia atrás,
continúe presionando ™ repetidamente después
de seleccionar todos los modos de reproducción en
Para continuar con la reproducción normal presione PLAY.
cámara lenta hacia adelante.
SALTO DE SECCIONES NO
DESEADAS
Presione SKIP SEARCH de 1 a 4 veces durante la
reproducción. Cada presión inicia un período de 30
segundos de reproducción con avance rápido. La
1
reproducción normal se reinicia automáticamente.
NOTA:
Para volver a la reproducción normal durante una
búsqueda por salto, presione PLAY.
Búsqueda de índice
Los códigos de índice son colocados en la cinta al principio de
cada grabación. Usted puede localizarlos y reproducir
automáticamente desde el principio de cualquier grabación
empleando la función de búsqueda de índice.
INICIO DE LA BUSQUEDA
Presione ™ o £ ( o ) mientras la cinta está
detenida.
%
fi
1
ACCESO A UN CODIGO DISTANTE
Para acceder a una grabación que está de 2 a 9 códigos
de índice más lejos, presione ™ o £ ( o )
repetidamente hasta que aparezca en la pantalla en
2
número correcto (sólo si SUPERPOSICION está colocada
en “SI” (Z p. 19). La reproducción comienza
automáticamente cuando localiza la grabación deseada.
● Si es necesario presione REW o FF cuando la inicie la
reproducción para buscar visualmente el principio
del programa deseado.
NOTA:
La unidad no coloca código de índice en la cinta cuando se
hace una pausa de grabación y continúa con la misma.
fi
%
Page 16
16 ES
FF
REW
CH5∞
REVIEW
REW
FUNCIONES DE REPRODUCCION Y GRABACION (cont.)
Revisión instantánea (ReView)
A la presión de un sólo botón usted puede activar su VCR,
rebobinar la cinta y comenzar a ver el programa más
recientemente grabado por temporizador.
ACTIVACION DE REVISION
INSTANTANEA (ReView)
Después de asegurarse de que el modo de
temporizador está desactivado, presione REVIEW.
1
● Se conectará la alimentación del VCR y se inicia la
búsqueda del código de índice que indica el principio
del último programa grabado por temporizador, después
de lo cual se inicia la reproducción automáticamente.
● Usted puede acceder a un programa ubicado de 2 a 9
códigos más lejos desde la posición actual de la cinta.
Si por ejemplo, usted ha grabado 5 programas y desea
mirar el tercero, presione REVIEW tres veces.
● Si es necesario presione REW o FF cuando la inicie la
reproducción para buscar visualmente el principio
del programa deseado.
123
456
89
7
0
1
2
4
CH+/–
FF
● Si la cinta ya está rebobinada cuando presiona REVIEW,
la misma será reproducida desde el principio. La cinta no
será avanzada rápidamente hasta un código de índice.
● La función de revisión instantánea también funcionará si
la alimentación del VCR está conectada.
Seguimiento manual
Una vez que se inicia la reproducción, el VCR activa la función
de seguimiento automático. Si aparece interferencia de
seguimiento en la imagen, usted puede solucionarla ajustando
manualmente el seguimiento.
3
ACTIVACION DEL MODO DE
SEGUIMIENTO MANUAL
Presione simultáneamente los botones CH5 y ∞ en el
panel frontal del VCR durante la reproducción, para
1
desactivar el modo de seguimiento automático y
posibilitar el ajuste manual de seguimiento.
AJUSTE MANUAL DE
SEGUIMIENTO
Presione CH5 (+) o ∞ (–) en el panel frontal del VCR o
en el control remoto. Presione rápidamente para el
2
ajuste fino o manténgalo presionado para lograr el ajuste
aproximado. Observe la pantalla y continúe ajustando
hasta logar una calidad de imagen y de sonido óptimas.
REACTIVACION DEL
SEGUIMIENTO AUTOMATICO
Presione simultáneamente los botones CH5 y ∞ en el
panel frontal del VCR.
3
● Cuando se reactiva el seguimiento automático, también
se activa automáticamente la función B.E.S.T. activa de
video.
NOTAS:
●
Para obtener una imagen fija sin interferencia puede ser
necesario ajustar el seguimiento durante la reproducción en
cámara lenta y luego activar pausa.
●
Durante la reproducción en cámara lenta y para ajustar el
seguimiento, simplemente presione CH5 (+) o ∞ (–) en el
panel frontal del VCR o en el control remoto.
Page 17
123
MENU
MENU
OK
CH
456
89
7
0
1
3
2
4
OK
ES 17
Estabilizador de video
Activando el estabilizador de video usted puede corregir las
fluctuaciones verticales de la imagen cuando reproduce una
grabación inestable que fue efectuada en otro VCR. Cuando
coloca esta función en "SI", la fluctuación vertical será
automáticamente corregida. *El ajuste por falta es "NO".
ACCESO A LA PANTALLA
DE MENU PRINCIPAL
Presione MENU.
1
ACCESO A LA PANTALLA
DE AJUSTE DE FUNCION
Mueva barra iluminada
(flecha) a "AJUSTE DE
2
FUNCION" presionando
CH5∞ o %fi, y luego
presione OK o .
%
ACTIVACION DEL
ESTABILIZADOR DE VIDEO
Mueva la barra iluminada
(flecha) a "VIDEO
3
ESTABILIZADOR"
presionando CH5∞ o %
y luego presione OK o
para ajustar en "SI".
fi
%
VUELTA A LA PANTALLA
NORMAL
Presione MENU.
MENU PRINCIPAL
= AJUSTE DE FUNCION
AJUSTE DE SINTONIZADOR
AJUSTE INICIAL
ELEGIR CON (5,∞), Y (OK)
PRESIONE (MENU) P/TERMINAR
FUNCIONES
TEMPORIZADOR APAGADO
SUPERPOSICION SI
AUTOCONTROL SP
=VIDEO ESTABILIZADOR SI
PAGINA SIGUIENTE
ELEGIR CON (5,∞), Y (OK)
PRESIONE (MENU) P/TERMINAR
=EP NO
4
NOTAS:
●
Esta función no tiene efecto, durante la grabación y durante la
reproducción de efectos especiales, independientemente del
ajuste.
●
Cuando termine de ver una cinta, asegúrese de colocarlo otra
vez en "NO".
●
Las indicaciones del modo de superposición pueden fluctuar
verticalmente cuando se ajusta "VIDEO ESTABILIZADOR" en
"SI".
Page 18
18 ES
POWER
PLAY
POWER
PAUSE
STOP
FF
PLAY
FUNCIONES DE REPRODUCCION Y GRABACION (cont.)
Repetición de reproducción
INICIO DE LA REPETICION
Mantenga presionado PLAY (hasta que la indicación
" " parpadee en el panel frontal de indicación),
1
durante la reproducción y después suéltelo.
REW
● Toda la cinta es reproducida 50 veces.
PARADA DE REPETICION
Para desactivar esta función presione STOP en
cualquier momento.
2
NOTA:
El presionar PLAY, REW, FF, PAUSE o ™ o
también detiene la repetición de reproducción.
£
DISPLAY
C.RESET
REW
123
456
7
1
STOP
89
0
3
2
4
TIMER
FF
PAUSE
Memoria de próxima función
La memoria de próxima función "le indica" al VCR qué hacer
después de rebobinar. Antes de continuar asegúrese de que el
VCR está en el modo de parada.
a– Para activación automática de la reproducción después de
rebobinar una cinta...
... Presione REW y después presione PLAY dentro de los 2
segundos.
b– Para la desconexión automática de la alimentación después
de rebobinar la cinta ...
... Presione REW y después presione POWER dentro de los 2
segundos.
c– Para la espera del temporizador automático después de
rebobinar la cinta ...
... Presione REW y después presione TIMER dentro de los 2
segundos.
Reposición del contador
REPOSICION DEL
CONTADOR A CERO
Presione C.RESET.
1
NOTA:
Presionando el botón DISPLAY, usted puede cambiar la
indicación para llamar la lectura del contador, el
número de canal o la hora del reloj. (El número de
canal no es indicado durante la reproducción).
Indicador de la posición de
la cinta
El indicador de posición de la cinta
aparece en la pantalla cuando
usted presiona FF, REW o efectúa
una búsqueda de índice a partir
del modo de parada. La posición
" " en relación a “B” (Beginning),
o “E” (End), le indica en qué punto
está la cinta.
NOTAS:
●
SUPERPOSICION debe ser colocada en SI, de lo contrario el
indicador no aparecerá (Z p. 19).
●
Puede tardar unos pocos segundos para que el indicador de
posición de cinta aparezca.
+++
BE
COUNT 0:33:27
NOTA:
No es posible seleccionar las funciones del temporizador
automático si no hay lengüetas de protección contra borrado en
el cassette.
Page 19
123
MENU
MENU
OK
CH
456
89
7
0
1
3
2
4
OSD
OK
ES 19
Superposición
Esta función puede ser conmutada entre SI y NO determinando
que los indicadores de operación aparezcan o no en la
pantalla.
ACCESO A LA PANTALLA DEL MENU
PRINCIPAL
Presione MENU.
1
ACCESO A LA PANTALLA DE AJUSTE
DE FUNCION
Mueva barra iluminada (flecha) a “AJUSTE DE
FUNCION” presionando CH5∞ o %fi, y después
2
presione OK o .
SELECCION DEL MODO DE AJUSTE
DE SUPERPOSICION
Mueva la barra iluminada
(flecha) a
3
"SUPERPOSICION"
presionando CH5∞ o %fi
y después presione OK o
para seleccionar el modo
deseado:
a– Seleccione "SI" si desea superponer las indicaciones
en la pantalla de TV.
b– Seleccione "NO" si no desea superponer las
indicaciones operacionales en pantalla.
VUELTA A LA PANTALLA NORMAL
Presione MENU.
%
FUNCIONES
TEMPORIZADOR APAGADO
=SUPERPOSICION SI
AUTOCONTROL SP
VIDEO ESTABILIZADOR NO
%
PAGINA SIGUIENTE
ELEGIR CON (5,∞), Y (OK)
PRESIONE (MENU) P/TERMINAR
=EP NO
4
Llamada de una indicación
1 Presione OSD.
n Todas las indicaciones correspondientes al estado
actual aparecen durante 5 segundos, dejando la
información del contador. Después de ello, la
información del contador y de RECORD/PAUSE si la
grabadora está en el modo de pausa, quedan
indicadas en pantalla.
2 Presione OSD otra vez para borrar la indicación.
La indicación superpuesta en la pantalla del TV le indica lo que el VCR está haciendo.
Canal sintonizado o modo AUX(iliar)
Cuando se cambia el canal el nuevo
canal aparece indicado en la pantalla
durante 5 segundos.
Hora del reloj
Indicación del programa estereofónico
Indicación del programa de audio
Indicador de la posición de la cinta
Indicaciones de modo de audio
CH 125 RECORD
THU 12:00 AM PAUSE
STEREO ] SP
SAP
BE
NORM
HI–FI COUNT –1:23:45
NOTAS:
●
Si usted activa el modo de pausa de grabación, aparecerá
RECORD/PAUSE independientemente del ajuste del modo de
superposición.
●
Si usted selecciona un canal en el cual no se reciben señales,
el número de canal es indicado independientemente del
ajuste del modo de superposición.
+++
INDEX-1
Lectura del
contador
Modo de operación
Cuando cambia el modo de operación el nuevo
modo aparece indicado – RECORD (5 seg.),
PLAY (5 seg.), FF/REW (5 seg. cuando se lo
activa en el modo de parada), RECORD/PAUSE
(el tiempo que el modo de pausa esté
activado), e ITR *:** (5 seg.).
Indicador de la velocidad de la cinta
Marca "Cassette Loaded"
Cuando se coloca un cassette, la marca
aparece durante 5 segundos. La misma
destella cuando se presiona el botón EJECT
del VCR.
Indicación INDEX (índice)
Page 20
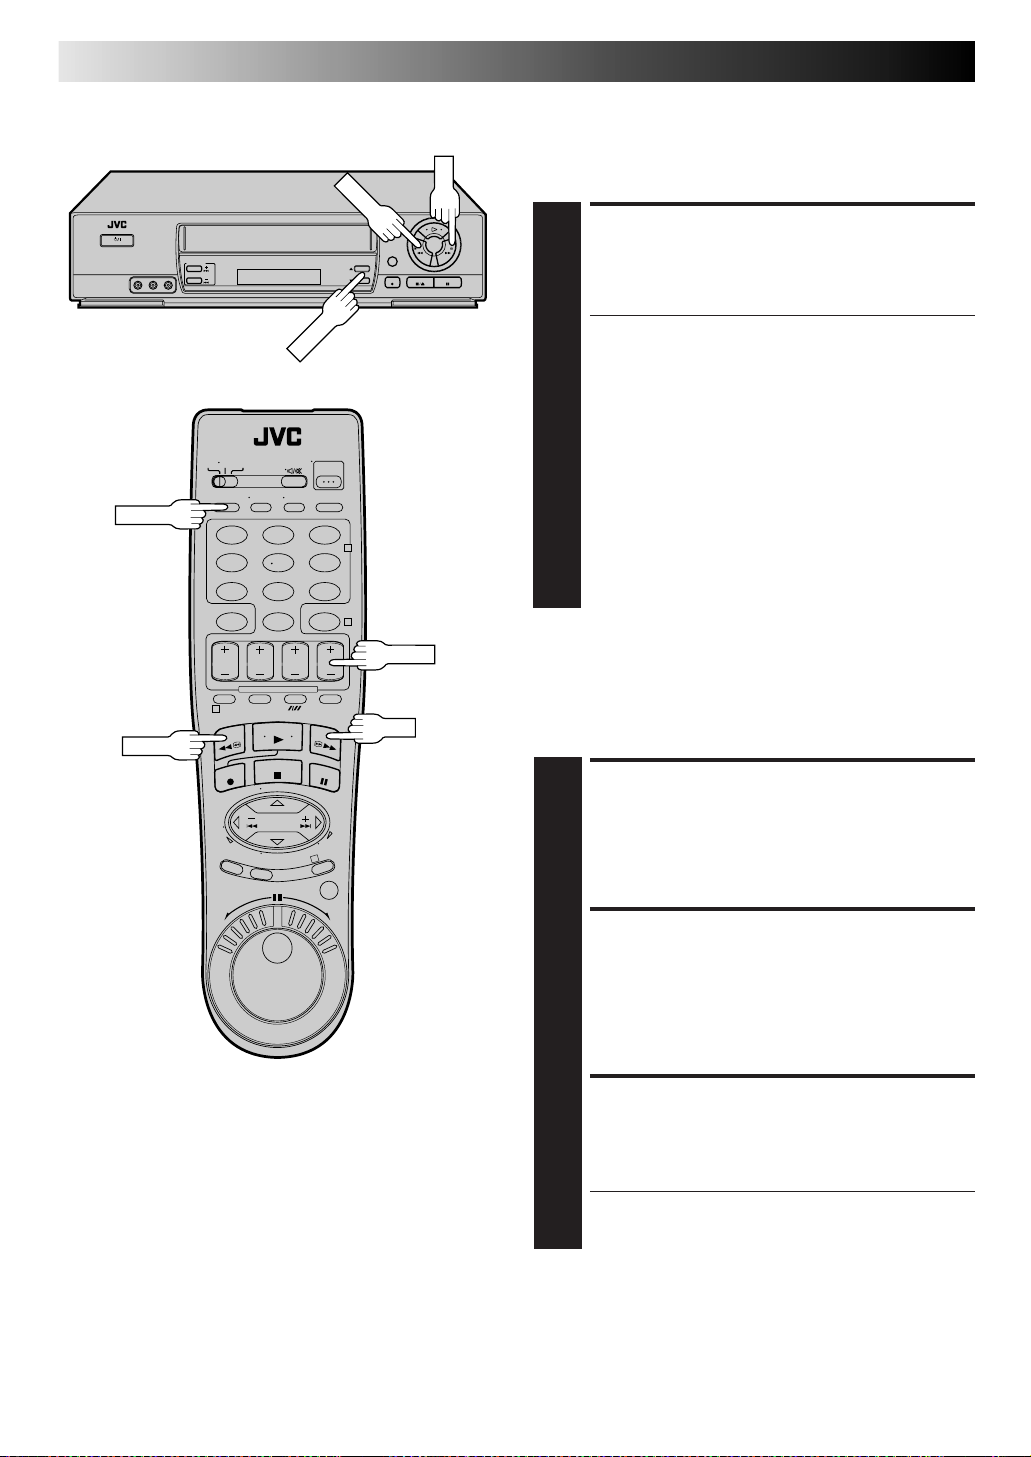
20 ES
MENU
MENU
OK
CH
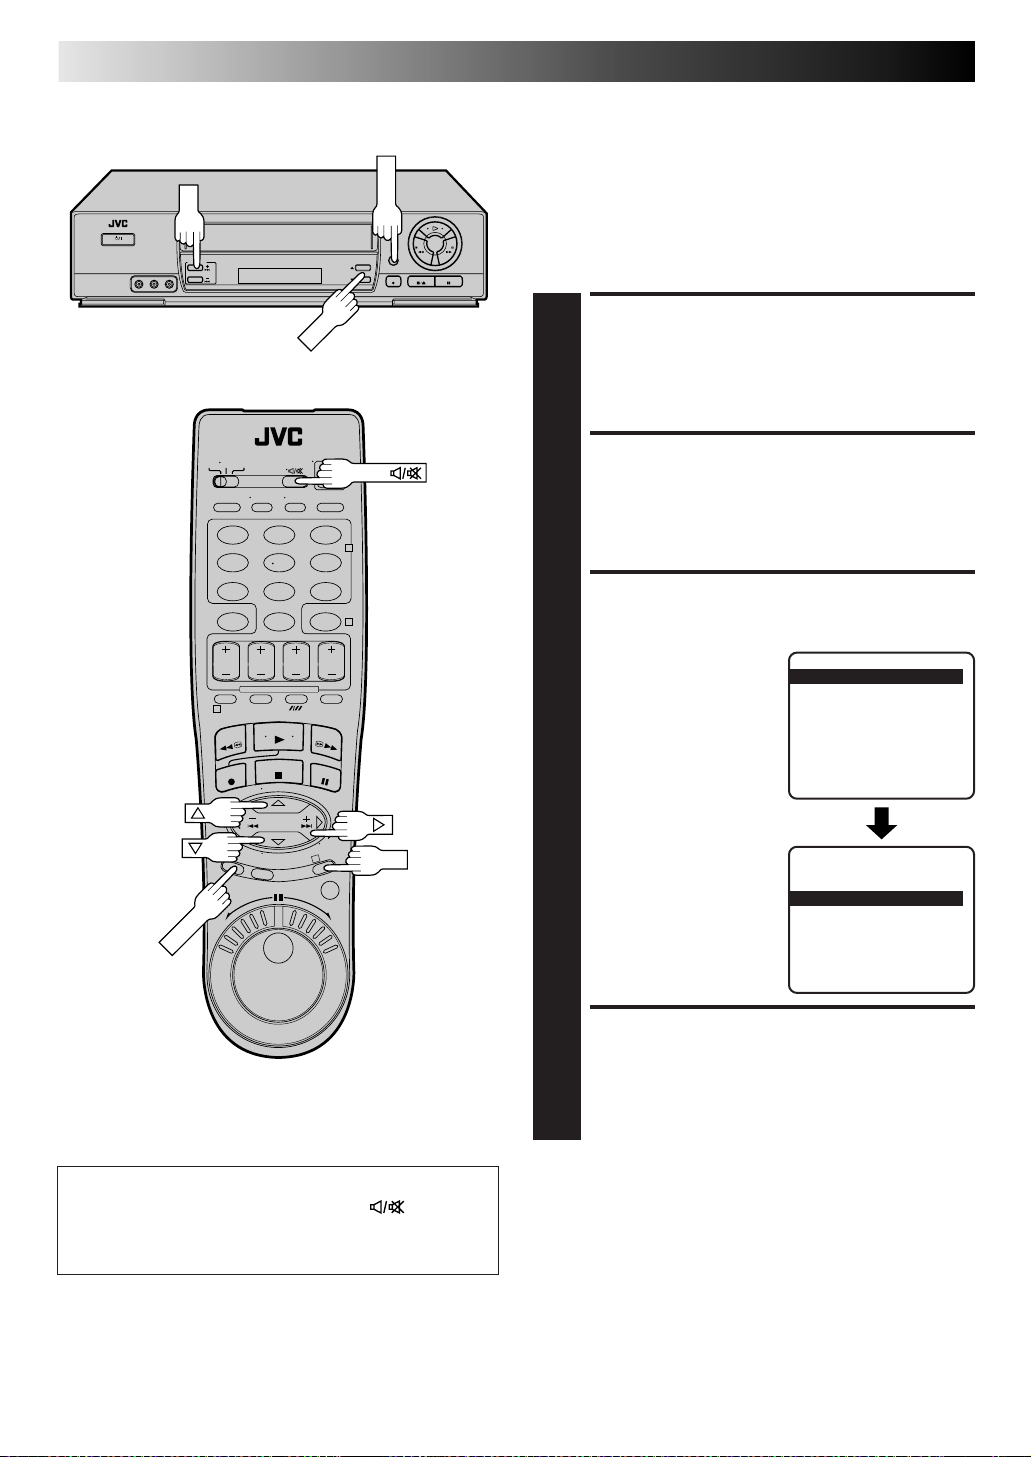
FUNCIONES DE REPRODUCCION Y GRABACION (cont.)
Selección de la banda de
sonido
Su VCR puede grabar dos bandas de sonido simultáneamente
(normal y Hi-Fi), y reproducir la seleccionada o ambas
conjuntamente. O cuando se mira una cinta grabada que
contiene dos programas de audio Hi-Fi independientes, usted
puede escoger escuchar uno de ellos seleccionado "HI-FI L" o
"HI-FI R" en el paso 3.
ACCESO A LA PANTALLA
DEL MENU PRINCIPAL
Presione MENU.
1
123
456
89
7
0
1
3
AUDIO
2
4
OK
ACCESO A LA PANTALLA
DE AJUSTE DE FUNCION
Mueva barra iluminada (flecha) a “AJUSTE DE
FUNCION” presionando CH5∞ o %fi, y después
2
presione OK o .
%%
SELECCION DEL MODO DE
AJUSTE DE SUPERPOSICION
Mueva la barra iluminada
(flecha) a "ESCUCHO
3
AUDIO" presionando
CH5∞ o %fi y después
presione OK o para
seleccionar el modo
deseado:
a– Alta fidelidad (HI-FI)
b– Izquierda (HI-FI L)
c– Derecha (HI-FI R)
d– Normal
e– Mezcla
=TEMPORIZADOR APAGADO
SUPERPOSICION SI
AUTOCONTROL SP
VIDEO ESTABILIZADOR NO
PAGINA SIGUIENTE
ELEGIR CON (5,∞), Y (OK)
PRESIONE (MENU) P/TERMINAR
PAGINA ANTERIOR
GRABO SEGUNDO AUDIO NO
=ESCUCHO AUDIO HI–FI
AV COMU-LINK SI
B.E.S.T. SI
ELEGIR CON (5,∞), Y (OK)
PRESIONE (MENU) P/TERMINAR
VUELTA A LA PANTALLA
FUNCIONES
=EP NO
Usted también puede seleccionar la pista de sonido
simplemente presionando el botón AUDIO
remoto como sigue:
Hi-Fi → Hi-Fi L → Hi-Fi R → Normal → Mezcla → Hi-Fi
del control
NORMAL
Presione MENU.
4
NOTAS:
●
Si la cinta que está siendo reproducida no tiene banda de
sonido Hi-Fi, la banda de sonido normal se oirá
independientemente de la selección que usted realice en el
paso 3.
●
Si se emplea la conexión RF para el TV, aunque el monitor de
audio Hi-Fi esté seleccionado, el sonido será monofónico y
será reproducido por ambos altavoces.
Page 21
ES 21
MENU
MENU
OK
CH
PLAY
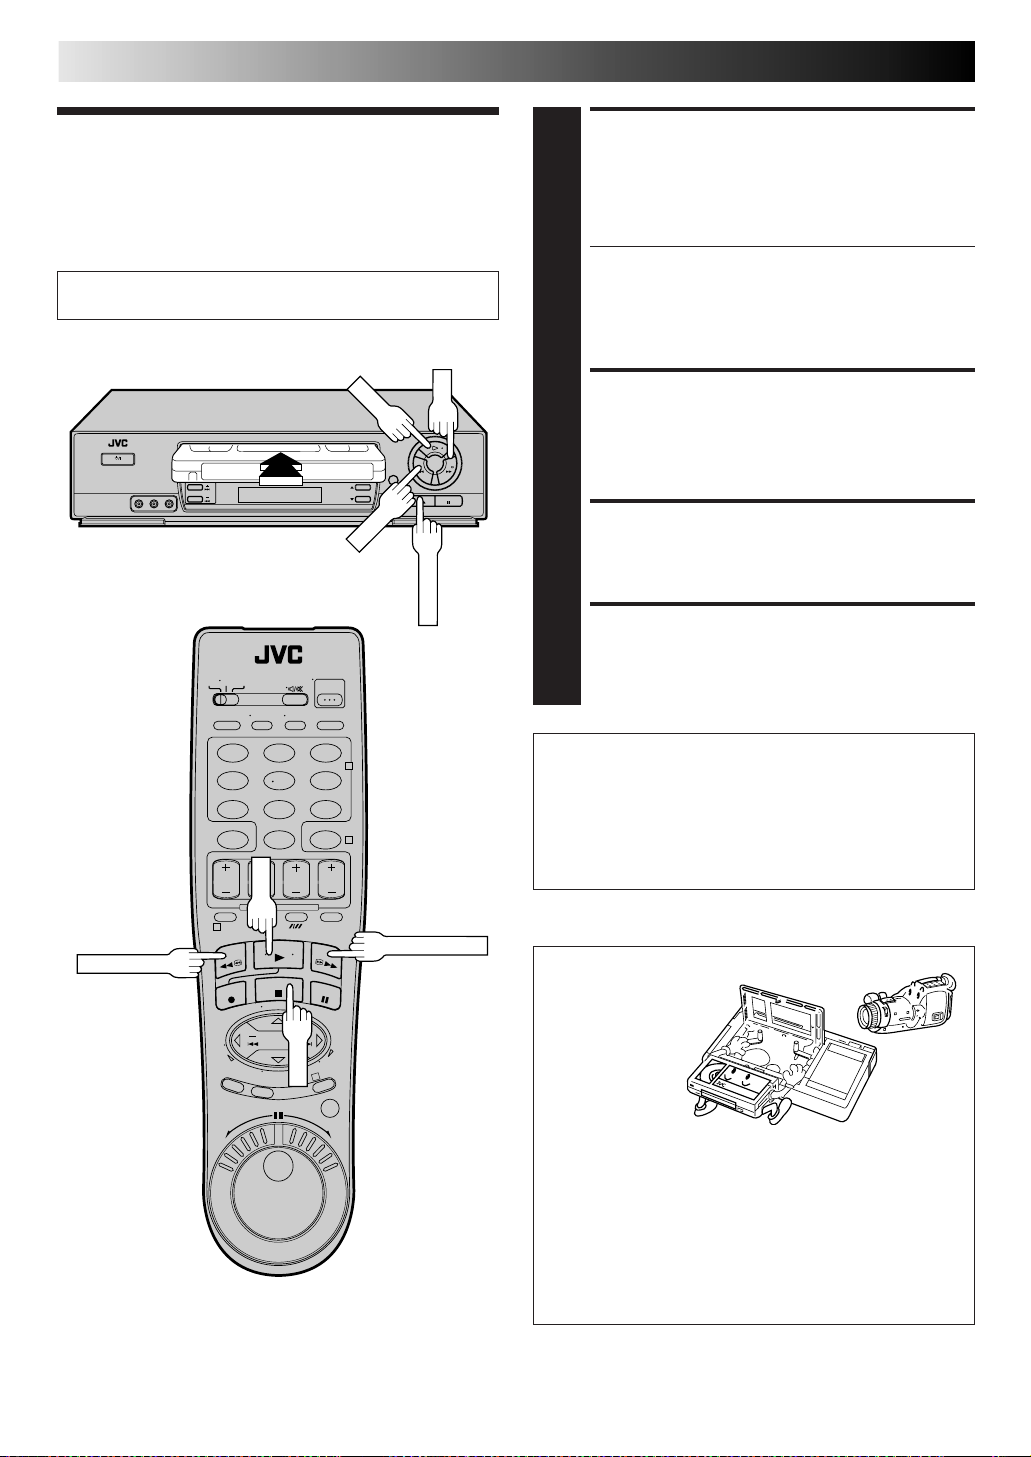
Reproducción AV COMPU
LINK
Su VCR es compatible con los componentes AV COMPU LINK
de JVC, incluyendo amplificadores (o receptores), y televisores.
AV COMPU LINK suministra control de un sólo toque para los
componentes de audio y video que están conectados vía sus
conectores AV COMPU LINK.
Por ejemplo: simplemente coloque un cassette en el VCR y
presione PLAY. Los componentes AV COMPU LINK se activarán
automáticamente y se activa el modo AV del TV y el VCR ingresa
en el modo de reproducción. (No es necesario presionar PLAY si
se ha extraído la lengüeta de protección de grabación del cassette).
Ejemplo
Su VCR
123
456
7
1
PLAY
2
89
0
4
3
PAUSE/AV COMPU-LINK
OK
CONEXION
Conecte su VCR a un componente AV COMPU LINK
como se muestra en la ilustración a la izquierda.
1
● El cable con miniclavija es monofónico con un
miniconector de 3,5 mm a conector monofónico con
miniconector de 3,5 mm.
ACCESO A LA PANTALLA DEL
MENU PRINCIPAL
Presione MENU.
2
ACCESO A LA PANTALLA DE
AJUSTE DE FUNCION
Presione CH 5∞
(flecha) a “AJUSTE DE FUNCION” y después presione
OK o .
%
3
ACTIVACION DE LA REPRODUCCION AV COMPU LINK
Presione CH 5∞
(flecha) a “AV COMPU-LINK”, y después presione OK
4
%
o para ajustar en "SI".
FUNCIONES
=TEMPORIZADOR APAGADO
SUPERPOSICION SI
AUTOCONTROL SP
VIDEO ESTABILIZADOR NO
PAGINA SIGUIENTE
o %fi
para mover la barra iluminada
o %fi
para mover la barra iluminada
PAGINA ANTERIOR
GRABO SEGUNDO AUDIO NO
=EP NO
ESCUCHO AUDIO HI–FI
=AV COMU-LINK SI
B.E.S.T. SI
Cable con miniclavija
(no suministrado)
AV COMPU
LINK II (VCR
EXCLUSIVAMENTE)
AV COMPU LINK
Televisor
AUDIO
OUT
Cable audio/video
(no suministrado)
Entrada de video
Entrada de audio
VIDEO OUT
ELEGIR CON (5,∞), Y (OK)
PRESIONE (MENU) P/TERMINAR
ELEGIR CON (5,∞), Y (OK)
PRESIONE (MENU) P/TERMINAR
VUELTA A LA PANTALLA NORMAL
Presione MENU.
5
REPRODUCCION AV COMPU LINK
Simplemente inserte un cassette y presione PLAY (si la
lengüeta de seguridad de grabación del cassette ha sido
6
extraída, la reproducción se inicia automáticamente).
Los componentes conectados se activan y el TV es
¡activado automáticamente en el modo AV!
NOTA:
La conexión depende del tipo del TV de JVC que usted posea.
Por favor refiérase al manual de instrucciones del TV para
efectuar esta conexión.
Page 22
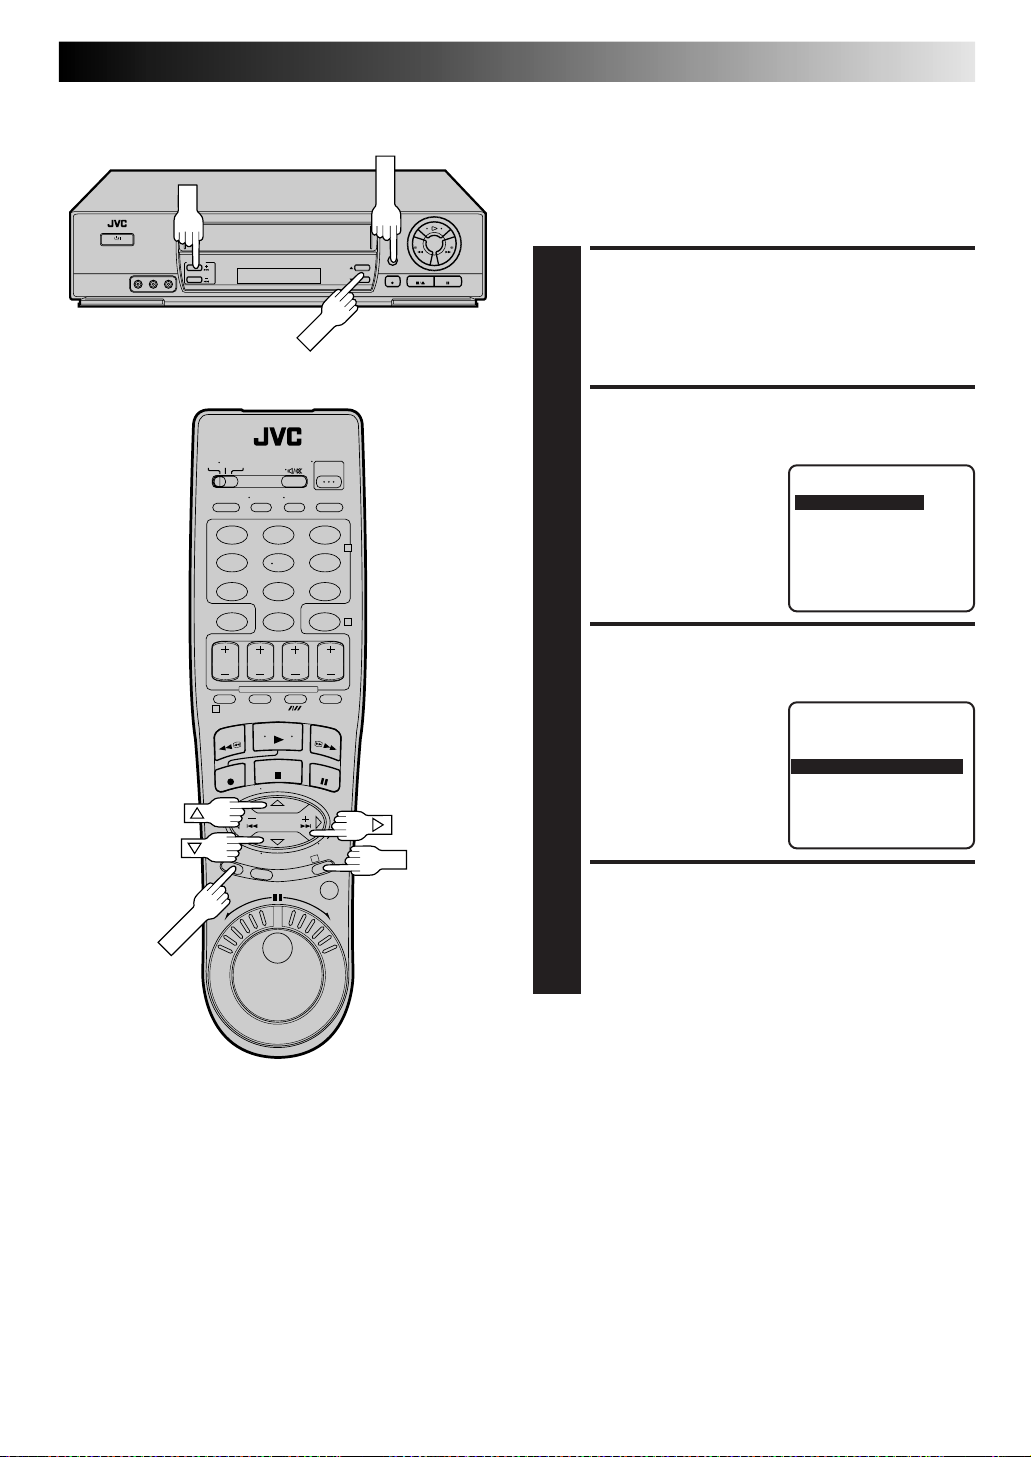
22 ES
MENU
POWER
MENU
OK
CH
FUNCIONES DE REPRODUCCION Y GRABACION (cont.)
Sistema de
La función B.E.S.T. (Biconditional Equalized Signal Tracking=
Seguimiento Bicondicional Equalizado de Señal) verifica la
condición de la cinta durante la reproducción, grabación y
compensa la reproducción inadecuada suministrando la mejora
calidad de grabación y reproducción. *El ajuste por falta es "SI".
imagen B.E.S.T.
Conecte la alimentación de TV y seleccione el canal 3 o 4
del VCR (o el modo AV).
POWER
123
456
89
7
0
1
3
2
4
OK
Preparativos
CONEXION DE LA
ALIMENTACION DEL VCR
Presione POWER.
1
ACCESO A AL PANTALLA DEL
MENU PRINCIPAL
Presione MENU.
2
ACCESO A LA PANTALLA DE
AJUSTE DE FUNCION
Mueva barra iluminada
(flecha) a “AJUSTE DE
3
FUNCION” presionando
CH5∞ o %fi, y después
presione OK o .
SELECCION DEL MODO DE
B.E.S.T.
Mueva barra iluminada
(flecha) a “B.E.S.T.”
4
presionando CH5∞ o
%
fi, y después presione
%
OK o para ajustar en "SI"
o "NO".
NOTA:
Cuando graba o reproduce
cintas grabadas en este VCR,
ajuste el B.E.S.T. en "SI".
%
=TEMPORIZADOR APAGADO
ELEGIR CON (5,∞), Y (OK)
PRESIONE (MENU) P/TERMINAR
=B.E.S.T. SI
ELEGIR CON (5,∞), Y (OK)
PRESIONE (MENU) P/TERMINAR
MENU PRINCIPAL
= AJUSTE DE FUNCION
AJUSTE DE SINTONIZADOR
AJUSTE INICIAL
ELEGIR CON (5,∞), Y (OK)
PRESIONE (MENU) P/TERMINAR
FUNCIONES
SUPERPOSICION SI
AUTOCONTROL SP
VIDEO ESTABILIZADOR NO
PAGINA SIGUIENTE
PAGINA ANTERIOR
GRABO SEGUNDO AUDIO NO
ESCUCHO AUDIO HI–FI
AV COMPU-LINK SI
=EP NO
VUELTA A LA PANTALLA NORMAL
Presione MENU.
5
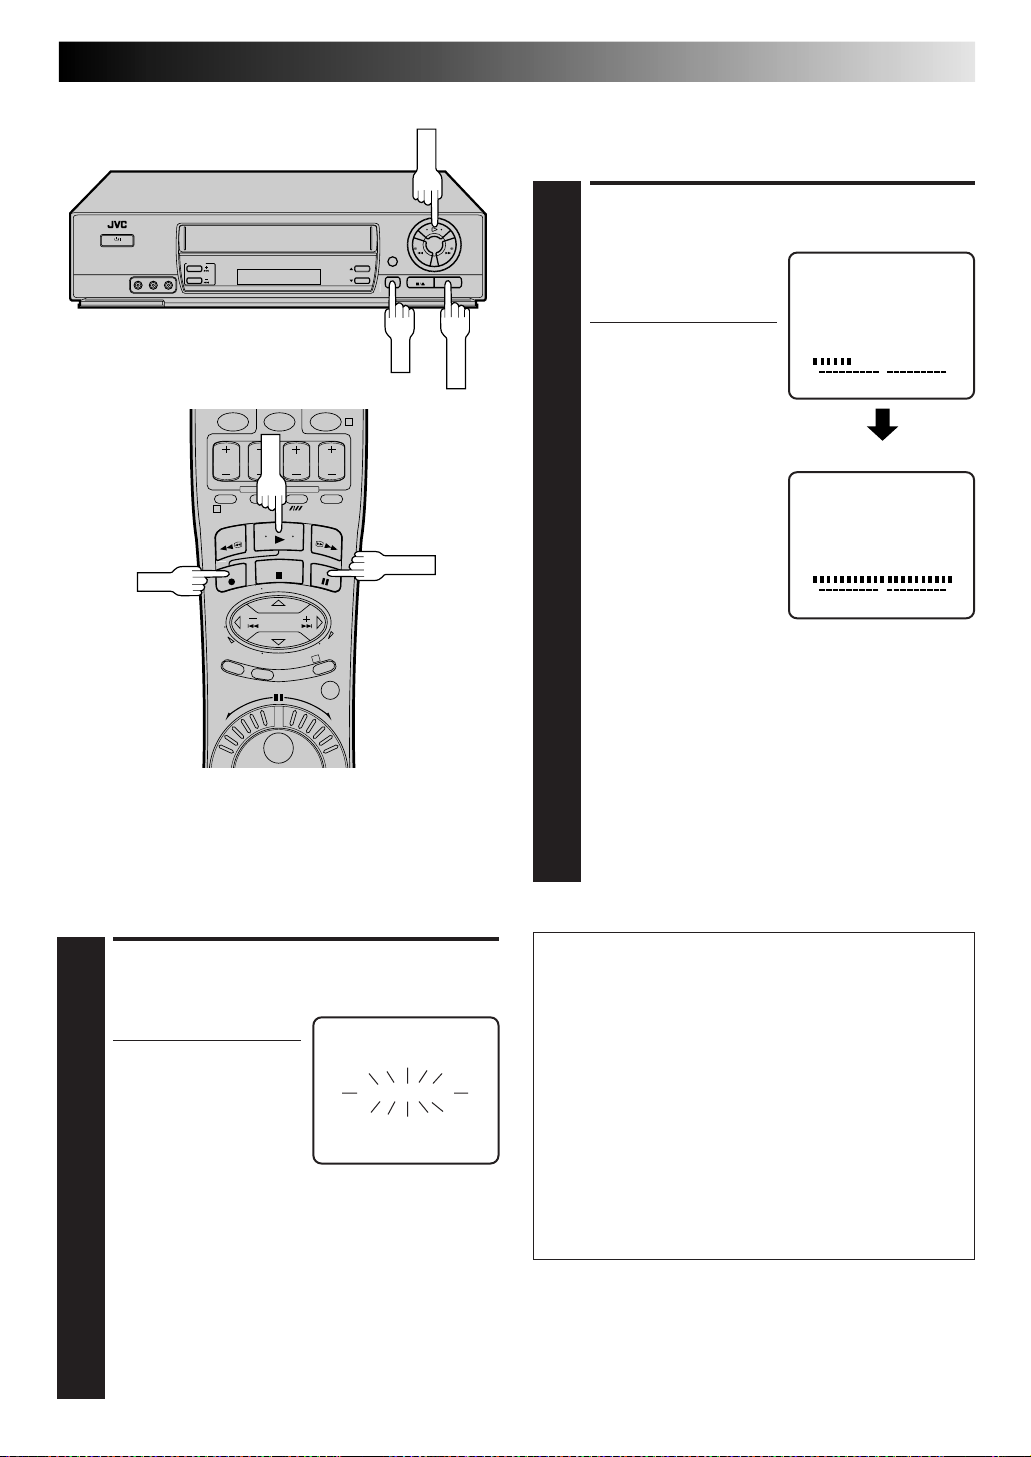
Page 23
0
PAUSE
PLAY
REC
PLAY
1
REC
4
PAUSE
3
Reproducción
El VCR juzga la calidad de la cinta una vez que usted
inicia la reproducción.
Efectúe los pasos 1 y 2 de la página 12 ("Reproducción sencilla")
antes de continuar.
ES 23
Grabación
Efectúe los pasos de 1 a 3 en la página 13 ("Grabación
sencilla"), antes de continuar.
INICIO DE LA GRABACION
Mantenga presionado REC
y presione PLAY en el
1
control remoto, o presione
REC en el panel frontal del
VCR.
● El VCR tarda
aproximadamente 7
segundos en juzgar la
calidad de la cinta en
uso, y luego se inicia la
grabación con el nivel
de imagen optimizado.
NOTAS:
●
El B.E.S.T. ocurre
inmediatamente antes de
la primera grabación SP y
de la primera EP, después
de colocar el cassette. El
calibrado no se efectúa
durante la grabación.
●
Durante la grabación
por temporizador el B.E.S.T. es realizado en la
primera grabación SP y EP por temporizador antes de
colocar el cassette (independientemente de la
velocidad de cinta seleccionada para esa grabación).
●
Una vez que el cassette es eyectado, los datos de
B.E.S.T. se borran. La próxima vez que se utilice el
cassette para grabación, se efectúa un nuevo B.E.S.T.
●
Mientras está activado el el B.E.S.T., el botón PAUSE no
funciona.
●
Para llamar a pantalla la indicación del B.E.S.T., es
necesario ajustar primero "SUPERPOSICION" en "SI",
de lo contrario no aparecerá la pantalla de sistema de
imagen B.E.S.T. (Z p. 19).
DURANTE EL B.E.S.T.
START END
+++
IMAGEN B.E.S.T.
FIN DEL B.E.S.T.
START END
+++
IMAGEN B.E.S.T.
+
+
INICIO DE LA
REPRODUCCION
Presione PLAY.
● El VCR ajusta la calidad
1
de imagen de
reproducción basándose
en la calidad de la cinta
en uso.
NOTAS:
●
Cuando utilice cintas de alquiler, o cintas grabadas
en otros VCR, coloque "B.E.S.T." en el paso 4 de los
procedimientos preparativos, en "SI" o en "NO",
como desee para obtener la mejor imagen (Z p. 22).
●
La pantalla de sistema de imagen B.E.S.T. sólo
aparece al principio del seguimiento automático.
Aunque la pantalla no aparezca después de ello, la
función de B.E.S.T. está activada.
●
Para llamar a pantalla la indicación del B.E.S.T., es
necesario ajustar primero "SUPERPOSICION" en "SI",
de lo contrario no aparecerá la pantalla de sistema de
imagen B.E.S.T. (Z p. 19).
IMAGEN B.E.S.T.
ATENCION
n Como el B.E.S.T. se realiza antes de que se inicie la
grabación, hay un retardo de 7 segundos después de
presionar REC y PLAY en el control remoto, o de
presionar REC en el panel frontal del VCR.
Para asegurarse de que grabó la escena deseada o todo el
programa, primero efectúe los pasos siguientes:
1) Mantenga presionado PAUSE y presione REC para
activar el modo de pausa de grabación.
● El VCR verifica automáticamente la condición de la
cinta y después de 7 segundos aproximadamente,
reingresa en el modo de pausa de grabación.
2) Presione PLAY para iniciar la grabación.
n Si desea saltar el B.E.S.T. e iniciar la grabación
inmediatamente, coloque "B.E.S.T." en "NO", en el paso 4
de los procedimientos preparativos (Z p. 22).
Page 24
24 ES
FUNCIONES DE REPRODUCCION Y GRABACION (cont.)
Funciones de
grabación
Grabación de un programa
mientras mira otro
ACTIVACION DEL MODO TV
Durante la grabación....
● Presione TV/VCR. El indicador VCR del VCR se apaga.
1
(Si está usando la conexión RF (Z p. 4) para ver la
salida del VCR, el programa de TV que está siendo
grabado desaparece.
● Si utiliza la conexión AV (Z p. 4) para ver la salida del
VCR, cambie el modo de entrada del TV de AV a TV.
C.RESET
TV/VCR
123
456
89
7
0
1
3
OSD
2
4
SELECCION DEL CANAL
QUE DESEA MIRAR
Utilice el selector de canales del TV para sintonizar el
canal que desea mirar.
2
Indicación del tiempo de
grabación transcurrido
REPOSICION DEL
CONTADOR A CERO
Antes de iniciar la grabación presione C.RESET. El
contador se reposiciona a cero e indica exactamente el
1
tiempo transcurrido a medida que la cinta es
transportada.
INDICACION EN
PANTALLA DEL TIEMPO
TRANSCURRIDO
Durante la grabación presione OSD en cualquier
momento para ver el tiempo transcurrido. Todas las
2
indicaciones correspondientes al estado actual del VCR
aparecen durante 5 segundos. La indicación del
contador permanece en la pantalla indicando el tiempo
transcurrido. Presione OSD otra vez para borrar la
indicación.
● Asegúrese de que “SUPERPOSICION” esté colocado
en “SI” (Z p. 19).
● Las indicaciones no serán grabadas.
Page 25
ES 25
MENU
MENU
OK
CH
Estereofónico y SAP
(Segundo Programa de Audio)
El descodificador incorporado MTS de su VCR permite la
recepción de programas de TV con sonido multicanal.
Cuando cambia el canal...
● El indicador "STEREO" aparece en pantalla durante 5
segundos aprox. si el programa es estereofónico.
● La indicación "SAP" aparece en la pantalla durante 5
segundos si el programa es SAP.
● Ambas indicaciones aparecen cuando el programa
estereofónico está acompañado por audio SAP.
Grabación de programas estereofónicos
Simplemente efectúe el procedimiento básico de grabación.
Escucha de banda estereofónica de sonido durante la grabación
Ajuste "ESCUCHO AUDIO" en "HI-FI" en la pantalla de función.
(
Z p. 20)
Grabación de programas SAP
123
456
89
7
0
1
3
2
4
OK
ACCESO A LA PANTALLA DEL
MENU PRINCIPAL
Presione MENU.
1
ACCESO A LA PANTALLA DE
AJUSTE DE FUNCION
Mueva barra iluminada (flecha) a “AJUSTE DE
FUNCION” presionando CH5∞ o %fi, y después
2
presione OK o .
ACCESO A LA 2DA. PANTALLA
DE AUDIO
Mueva barra iluminada
(flecha) a “GRABO
3
SEGUNDO AUDIO”
presionando CH 5∞ o
%fi, y después presione
%
OK o para ajustar en
"SI".
%
=TEMPORIZADOR APAGADO
SUPERPOSICION SI
AUTOCONTROL SP
VIDEO ESTABILIZADOR NO
PAGINA SIGUIENTE
ELEGIR CON (5,∞), Y (OK)
PRESIONE (MENU) P/TERMINAR
PAGINA ANTERIOR
=GRABO SEGUNDO AUDIO SI
ESCUCHO AUDIO HI–FI
AV COMPU-LINK SI
B.E.S.T. SI
FUNCIONES
=EP NO
NOTAS:
●
Al recibir un programa SAP y "GRABO SEGUNDO AUDIO"
está colocado en "SI", el audio SAP es grabado en pista
normal y de alta fidelidad. El programa principal de audio no
es grabado.
●
Al recibir un programa que no es SAP, el audio principal es
grabado en pista de audio normal y de alta fidelidad.
ELEGIR CON (5,∞), Y (OK)
PRESIONE (MENU) P/TERMINAR
VUELTA A LA PANTALLA NORMAL
Presione MENU.
4
Page 26
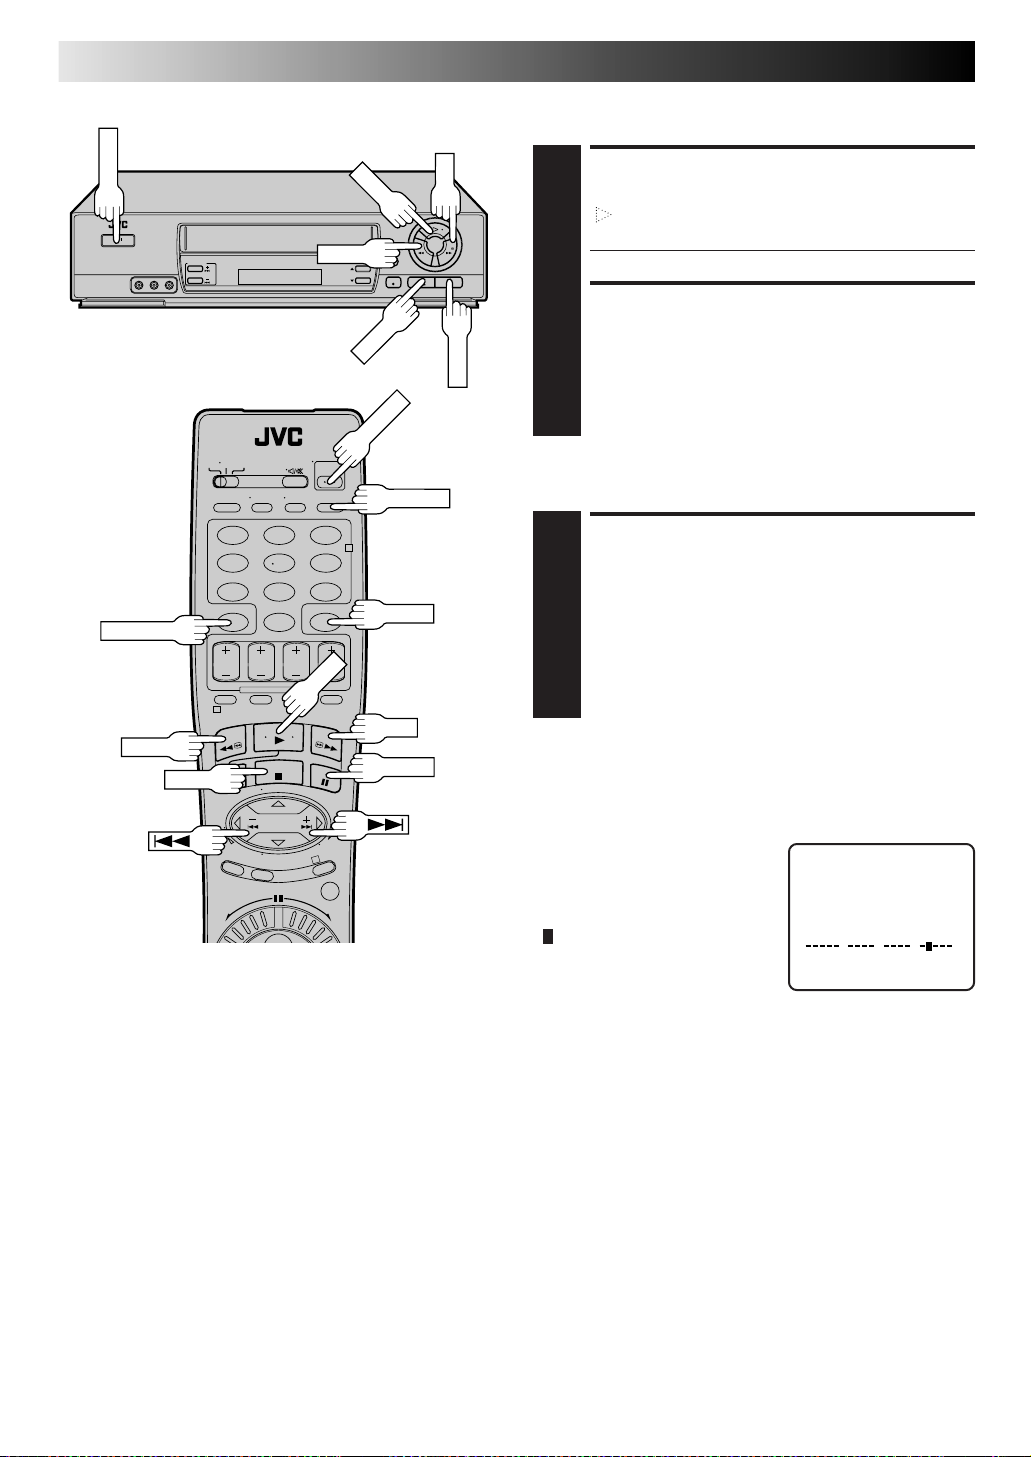
26 ES
CH
Programación
del VCR Plus+
temporizador
GRABACION POR TEMPORIZADOR
La grabación por temporizador le permite programar el VCR para
que grabe automáticamente un programa que será televisado en
un momento futuro. La función de grabación por temporizador
puede ser programada empleando la programación VCR Plus+ o
el temporizador expreso con un máximo de 8 programas y un
año por adelantado (
El sistema de programación de temporizador VCR Plus+ elimina
la necesidad de ingresar un canal, fecha, hora de principio y fin
cuando ajusta las funciones de grabación por temporizador.
Simplemente ingrese el número PlusCode para el programa de
TV que desea grabar y el temporizador del VCR quedará
automáticamente programado. (Los PlusCodes son números
próximos a los programas en la mayoría de los listados de TV).
Z p. 26 o 30).
Conecte la alimentación de TV y seleccione el canal 3 o 4
del VCR (o el modo AV).
CANCEL
PROG.
123
456
89
7
0
1
2
4
NUMBER
COLOCACION DE UN CASSETTE
Asegúrese de que la lengüeta de protección de
grabación esté en su lugar.
1
● La alimentación del VCR se conecta automáticamente.
ACCESO A LA PANTALLA VCR
PLUS+
Presione PROG. en el
control remoto.
2
● El reloj debe ser ajustado
para poder acceder a la
pantalla VCR Plus+. Si
no ha ajustado el reloj,
la pantalla principal de
menú aparecerá después
de la indicación de un
mensaje de error. Refiérase a la página 6 para el
procedimiento de "Plug & Play" a la página 9 para el
procedimiento de ajuste del reloj.
VCR PLUS+
PRESIONE NUMEROS (0–9)
EXPRESS PROGRAMMING CON
LOS BOTONES (+/–)
PRESIONE (PROG) P/TERMINAR
INGRESO DEL NUMERO
PLUSCODE
Presione las teclas
NUMBER apropiadas para
ingresar el número
3
PlusCode impreso en los
listados de TV para el
programa de TV que desee
grabar presione OK.
Si aparece la pantalla de
ajuste de canal guía, vaya
al paso 4. Si aparece la pantalla de programación VCR
Plus+ vaya al paso 5.
● Si comete un error, presione CANCEL e ingrese el
número PlusCode correcto.
VCR PLUS+
123
PRESIONE NUMEROS (0–9)
PRESIONE (PROG) P/TERMINAR
Y (OK)
3
OK
INGRESO DEL NUMERO DE
CANAL RECEPTOR
El número de canal guía
que está asignado al TV o
estación de cable para el
4
número PlusCode que ha
ingresado en el paso 3,
aparecerá
automáticamente en la
pantalla de ajuste de canal
guía. Ingrese el número
del canal en el cual se
recibirá el programa para el número PlusCode en el
VCR o caja de cable, usando las teclas NUMBER, CH
5∞ or %fi y presione OK.
● La pantalla de ajuste del canal guía aparecerá sólo si
ingresa el número PlusCode de una estación para la
cual el número de canal guía no ha sido ajustado.
AJUSTE DE CANAL GUIA
CANAL GUIA : 12
CANAL GRABADOR : –––
PRESIONE (5,∞) O NUMEROS
(0–9) Y (OK)
PRESIONE (PROG) P/TERMINAR
Page 27
SP/EP
NUMBER "9"
CANCEL
NUMBER "8"
STOP+/–
PROG.
123
456
89
7
0
1
3
2
4
TIMER
OK
COMPROBACION DE LOS
DATOS DEL PROGRAMA
El número PlusCode que
ingresó y la información
de grabación por
5
temporizador coincidente
será mostrada en la
pantalla de programa.
Compruebe para
asegurarse de que es
correcta.
● Para cambiar el tiempo de fin de programa presione
STOP +/–.
● Para grabación de series diarias o semanales por
temporizador, presione DAILY (NUMBER "8") o
WEEKLY (NUMBER "9"). "LU-VI" o "SEMANAL"
aparecerá en la pantalla de programa.
El presionar el botón otra vez hace que desaparezca
la indicación correspondiente.
● Si ha cometido un error, presione CANCEL para
acceder otra vez a la pantalla VCR Plus+ e ingresar el
número PlusCode correcto.
● Si el número PlusCode que ingresó es incorrecto,
aparecerá "ERROR" en la pantalla para indicarle el
error. Esto ocurre cuando el número PlusCode es para
un programa que ya ha sido televisado. "ERROR"
aparece durante 5 segundos aproximadamente y
reaparece la pantalla VCR Plus+.
(VCR PLUS+ 12345678)
DESDE HASTA
8:00PM = 10:00PM
DIA CANAL
12/24/98 12 SP
JUE
EL (8=LU–VI O 9=SEMANAL,
STOP+/–=HASTA, SP/EP)
PRESIONE (OK) P/TERMINAR
ES 27
PROGRAMA 1
ATENCION
Si hay conflicto en la programación del temporizador y un
programa se sobrepone a otro, sólo las partes mostradas
abajo en gris serán grabadas.
Patrón 1: Graba el programa con el número más bajo.
Programa 1
Programa 2
Patrón 2: El programa que es televisado primero será
Programa 1
Patrón 3: El programa que fue televisado primero será
Programa 1
10:00
grabado.
10:00
Programa 2
grabado seguido por la porción restante del otro
programa.
10:00
11:00
CH10
CH40 No es grabado
11:00
CH10
CH40
11:00
CH10
Programa 2
12:00
12:00
No es grabado
12:00
CH40
No es grabado
AJUSTE DE LA VELOCIDAD DE LA
CINTA
Presione SP/EP.
6
VUELTA A LA PANTALLA NORMAL
Presione PROG. u OK. Aparecerá en pantalla durante
unos 5 segundos "PROGRAMA COMPLETADO" y
aparecerá la pantalla normal.
7
ACTIVACION DEL MODO DE
TEMPORIZADOR
Presione TIMER. La alimentación del VCR se
desconecta automáticamente y "‰" aparece indicado
en el panel de indicación.
8
IMPORTANTE
Si usted se ha mudado a un área diferente o si ha
cambiado el número de canal de televisión, el número
equivocado de CANAL GRABADOR o CABLE aparecerá
en la pantalla de programación del VCR Plus+ en el paso
5. Si ocurre ésto, ajuste el número de canal guía para esa
estación. (Z p. 28 "Ajuste del VCR Plus+).
NOTAS:
●
Para desactivar el temporizador antes de iniciar la grabación,
presione TIMER otra vez. El presionarlo otra vez lo reactiva.
●
En caso de un corte de energía después de programar, la
memoria del VCR conserva sus selecciones (si la pila de litio
no está agotada).
●
Cuando graba por temporizador canales recibidos vía caja de
cable, asegúrese de conservar la alimentación de la caja de
cable conectada.
Page 28
28 ES
MENU
POWER
MENU
OK
CH
GRABACION POR TEMPORIZADOR (cont.)
Ajuste del VCR
Plus+
IMPORTANTE
Si usted se ha mudado a un área diferente o si ha cambiado
el número de canal de televisión, el número equivocado de
CANAL GRABADOR o CABLE aparecerá en la pantalla de
programación del VCR Plus+ (Z paso 5 en la página 27). Si
ocurre ésto, realice los siguientes pasos para ajustar el
número correcto de canal guía para esa estación.
Conecte la alimentación de TV y seleccione el canal 3 o 4
del VCR (o el modo AV).
POWER
123
456
89
7
0
2
4
Para asegurarse de que la grabación por temporizador VCR
Plus+ funciona correctamente es necesario ajustar el canal guía
del VCR Plus+ para cada estación. Lea la siguiente información
detenidamente.
Coincidencia de canal guía del VCR Plus+
El VCR Plus+ asigna un canal guía del VCR Plus+ para
transmisión y los canales de TV por cable. Estos números de
canal guía son también denominados códigos de canal VCR
Plus+. La mayoría de los listados de TV tienen una sección,
generalmente una tabla, indicando los números del canal guía
asignados a cada estación. Para programación precisa del VCR
Plus+ el número de canal guía de VCR Plus+ debe coincidir
con el número de canal que se recibe en su área.
NOTAS:
●
En muchos casos los números de canal guía VCR Plus+ para
cable y estaciones de TV NO coinciden con el número de
canal que es recibido en su VCR o caja de cable. Verifique el
listado de TV o póngase en contacto con su proveedor de
cable por detalles.
●
Muchas estaciones de TV pueden ser vistas en cable.
Compruebe el listado de TV o póngase en contacto con su
proveedor de cable por detalles.
CONEXION DE LA
ALIMENTACION DEL VCR
Presione POWER.
1
1
3
OK
ACCESO A LA PANTALLA
DEL MENU PRINCIPAL
Presione MENU.
2
ACCESO A LA PANTALLA
DE AJUSTE INICIAL
En la pantalla de menú
principal mueva barra
3
iluminada (flecha) a
“AJUSTE INICIAL”,
presionando CH
%
fi
OK o .
5
o
, y después presione
%
∞
AJUSTE DE FUNCION
AJUSTE DE SINTONIZADOR
= AJUSTE INICIAL
ELEGIR CON (5,∞), Y (OK)
PRESIONE (MENU) P/TERMINAR
MENU PRINCIPAL
Page 29
123
MENU
MENU
OK
CH
456
89
7
0
2
4
NUMBER
CH
ACCESO A LA PANTALLA
DE AJUSTE DE CANAL
GUIA
Presione CH5∞ o %
para mover la barra
4
iluminada (flecha) a
"AJUSTE DE CANAL
GUIA" y presione OK
%
o .
fi
AJUSTE INICIAL
AJUSTE DE RELOJ
IDIOMA ESPAÑOL
=AJUSTE DE CANAL GUIA
ELEGIR CON (5,∞), Y (OK)
PRESIONE (MENU) P/TERMINAR
INGRESO DEL NUMERO DE
CANAL GUIA
Presione CH5∞, %fi o
las teclas |NUMBER
5
apropiadas para ingresar
el número de canal guía
VCR Plus+ como se
muestra en el listado de
TV. Luego presione OK
%
o .
(EJ.) Cuando ingresa el
número de canal guía 6
para WNJU (Ind.)
AJUSTE DE CANAL GUIA
CANAL GUIA : 6
CANAL GRABADOR : –––
PRESIONE (5,∞) O NUMEROS
(0–9) Y (OK)
PRESIONE (MENU) P/TERMINAR
ES 29
1
3
ATENCION A LOS ABONADOS DE CAJA DE CABLE
● Para ajustar el canal guía para un programa por cable, es
necesario seleccionar el canal de salida de la caja de
cable como canal VCR en el paso 6. Si la caja de cable
es conectada al conector ANT. IN de su VCR, seleccione
el canal de salida RF de la caja de cable. Si la caja de
cable está conectada a los conectores VIDEO IN y
VIDEO OUT de su VCR, presione la tecla NUMBER "0"
y/o CH para seleccionar "F-1" (para los conectores
AUDIO y VIDEO del panel frontal o "L-1" (para los
conectores AUDIO IN y VIDEO IN del panel trasero)
como canal VCR.
● Es importante que mantenga la alimentación de la caja
de cable conectada y sintonizada en la estación de cable
del programa que desea grabar hasta que termine la
grabación por temporizador.
OK
INGRESO DEL NUMERO DE
CANAL RECEPTOR
Presione CH5∞, %fi o las
teclas NUMBER apropiadas
6
para ingresar el número
de canal en el cual se
reciben las transmisiones
de canal guía. Luego
presione OK o .
● Repita los pasos 5 y 6
para cada caso.
%
(Ej.) Si WNJU(Ind.) es
recibido en el canal 2.
AJUSTE DE CANAL GUIA
CANAL GUIA : 6
CANAL GRABADOR : 47
PRESIONE (5,∞) O NUMEROS
(0–9) Y (OK)
PRESIONE (MENU) P/TERMINAR
VUELTA A LA PANTALLA
NORMAL
Presione MENU.
7
Page 30
30 ES
STOP+/–
DATE+/–
GRABACION POR TEMPORIZADOR (cont.)
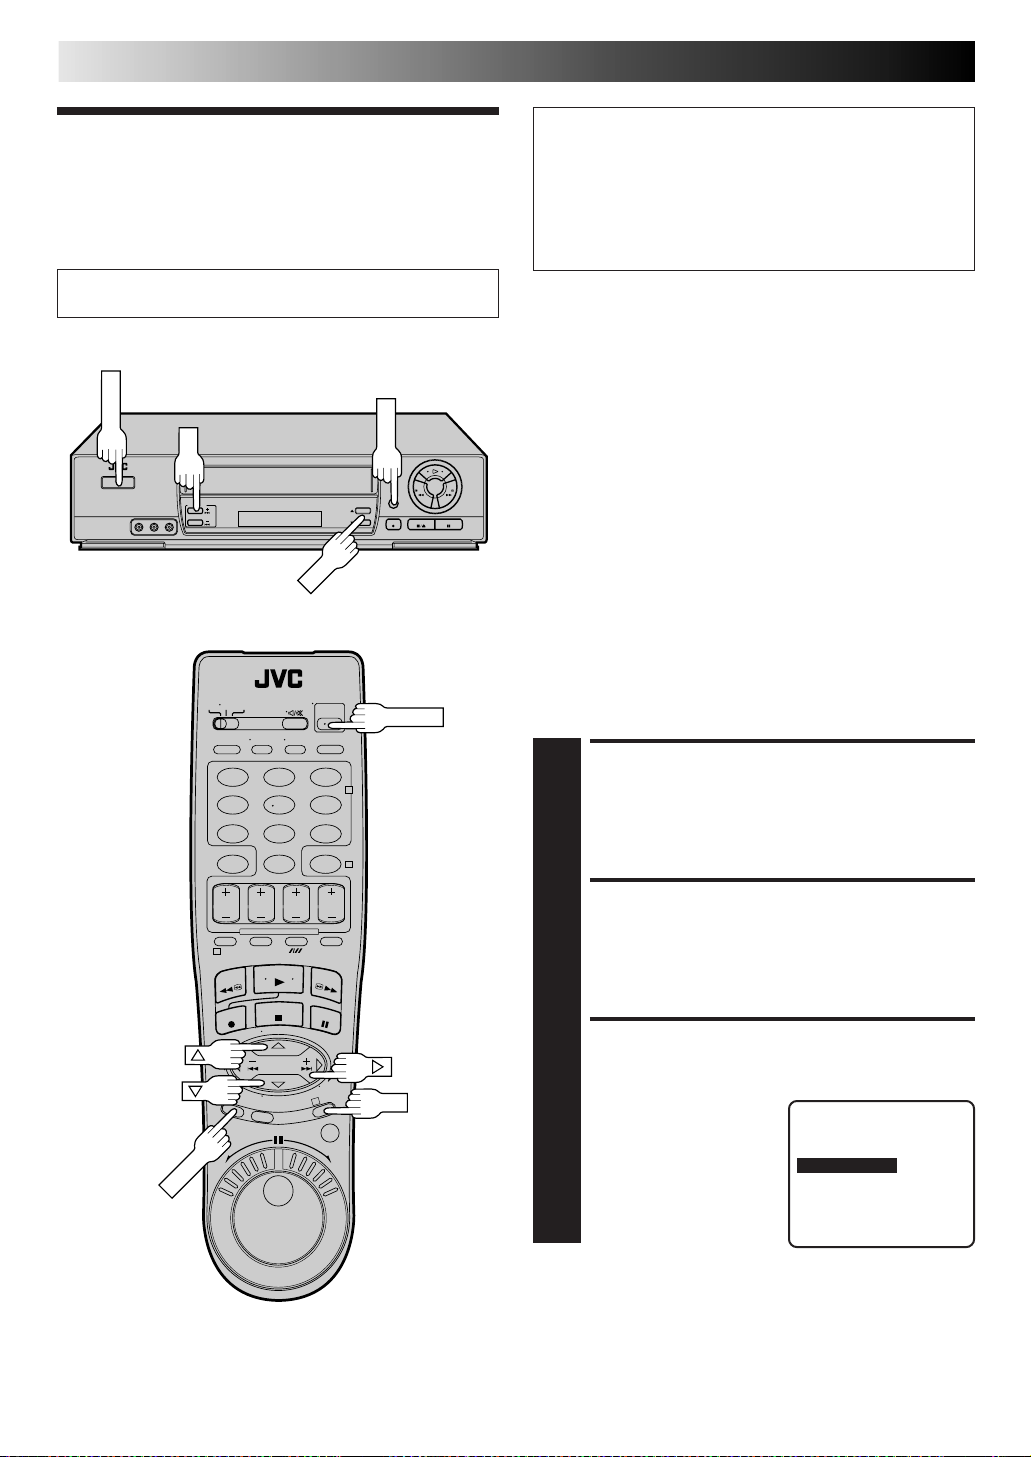
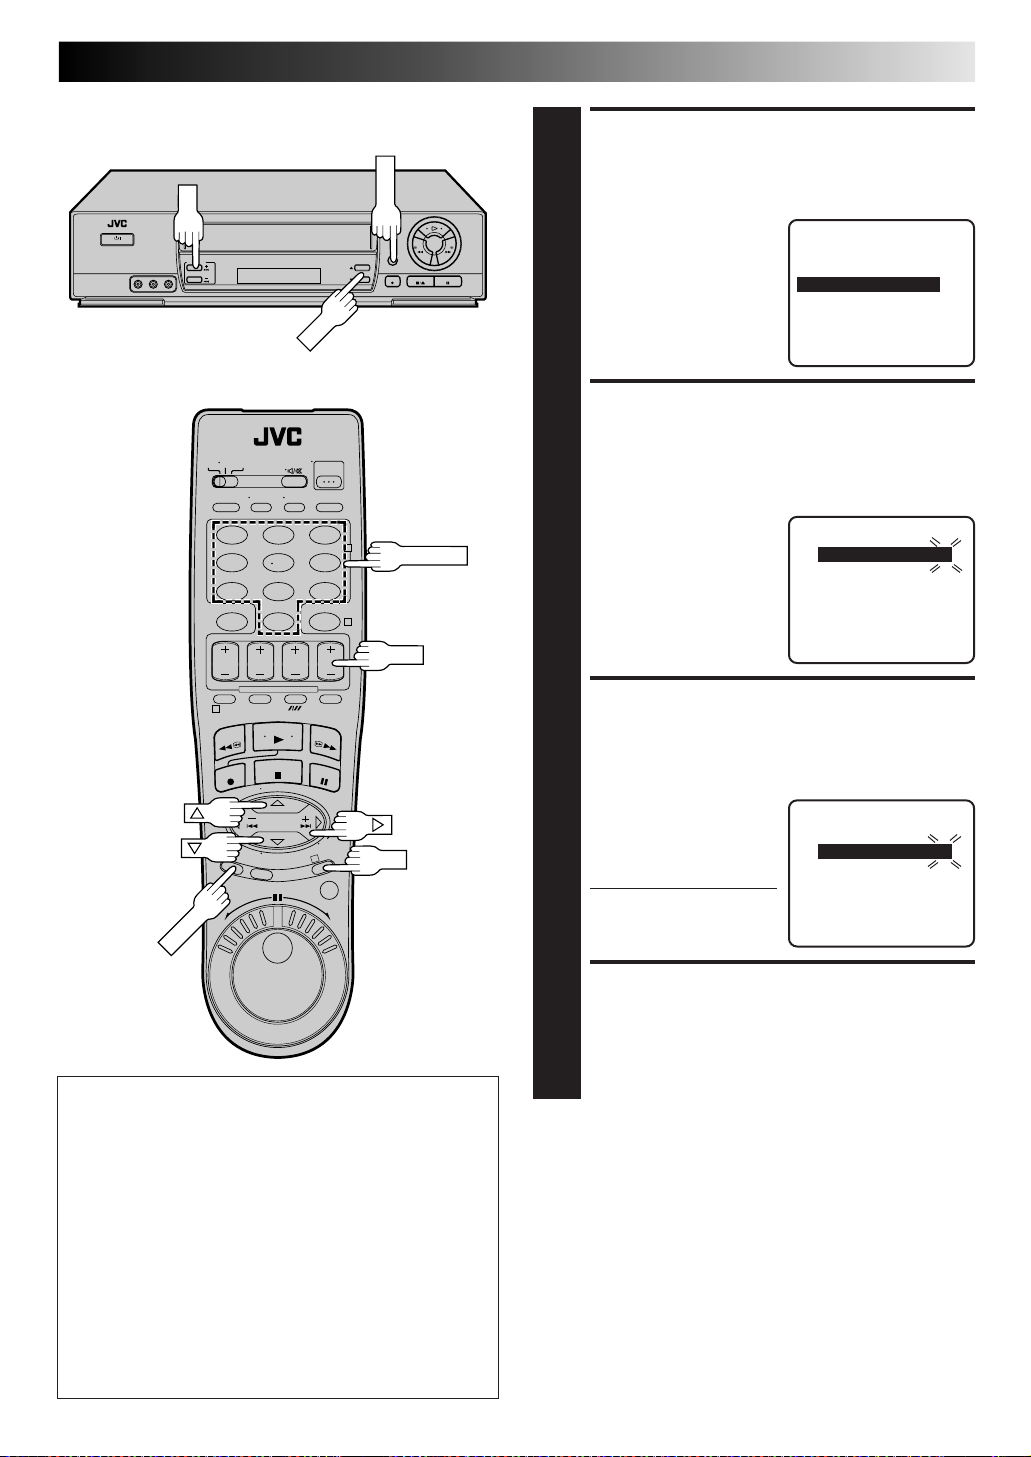
Programación
Usted puede programar directamente el temporizador del VCR
para grabar un máximo de 8 programas hasta un año por
adelantado. Recuerde que el reloj debe ser ajustado antes de
programar el temporizador (Z p. 6 o 9).
del
temporizador
expreso
Turn on the TV and select the VCR channel 3 or 4 (or AV
mode).
START+/–
PROG.
123
456
89
7
0
1
2
4
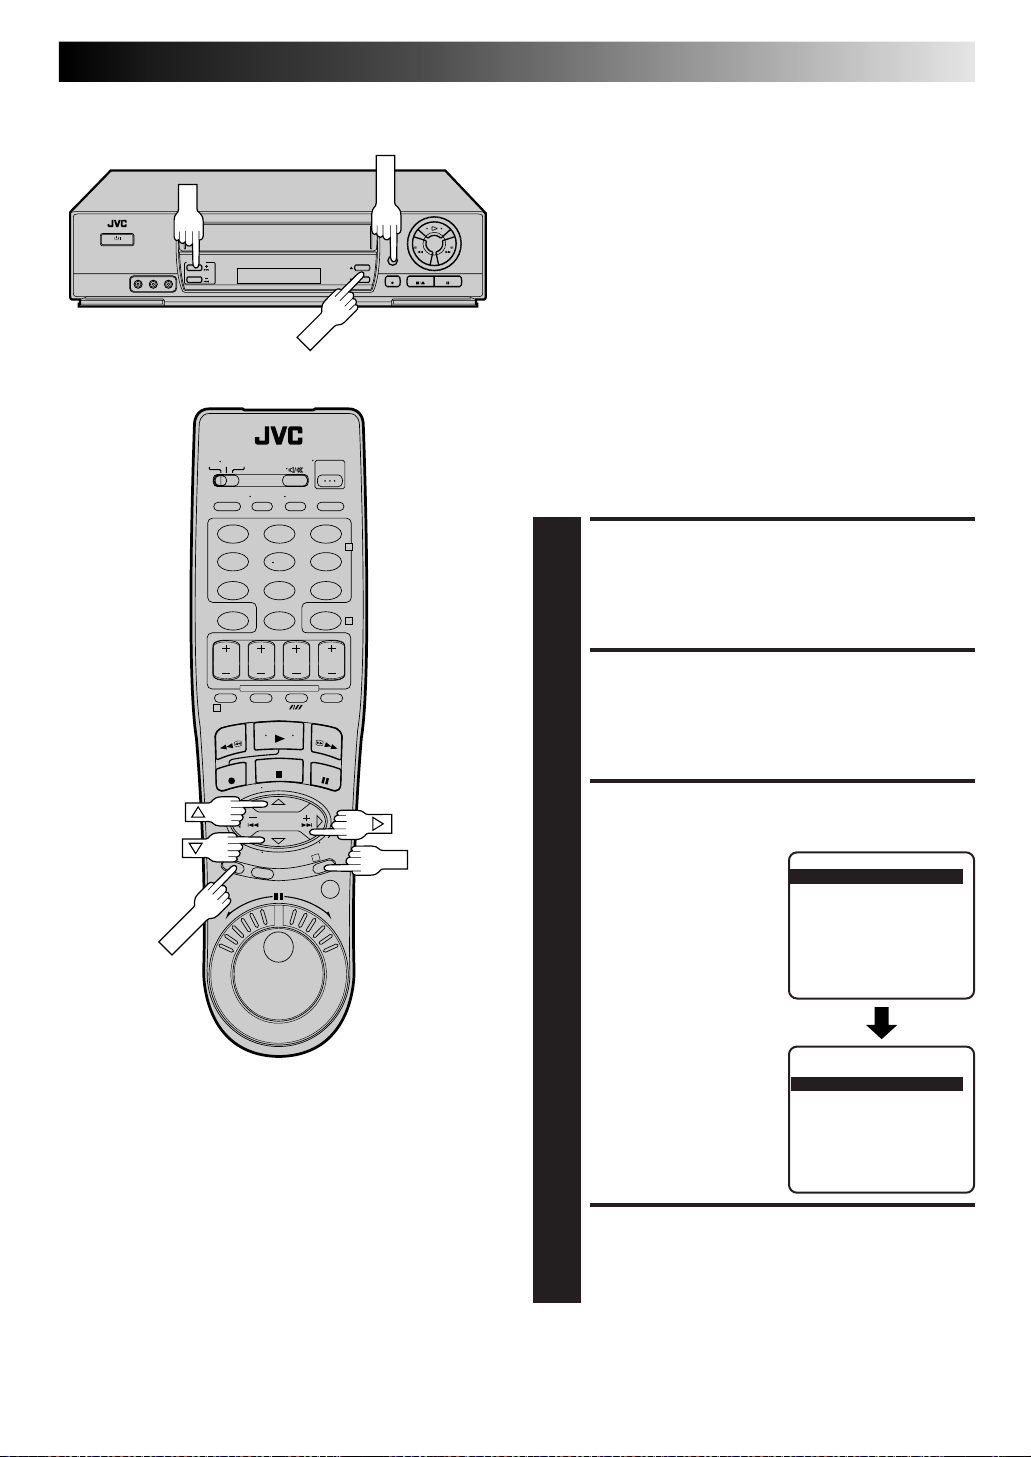
COLOCACION DE UN
CASSETTE
Asegúrese de que la lengüeta de protección contra
borrado esté intacta. De lo contrario cubra el orificio
1
con cinta adhesiva y coloque el cassette en el VCR.
● Se conectará a alimentación del VCR y el contador es
automáticamente reposicionado.
ACCESO A LA PANTALLA
VCR PLUS+
Presione PROG.
2
ACCESO A LA PANTALLA
DE PROGRAMA
Presione PROG. (Si usted
está comenzando,aparacerá
3
"PROGRAMA 1".)
AJUSTE DE LA HORA DE
INICIO DEL PROGRAMA
Presione START +/– para
ingresar la hora a la que
4
desea que se inicie la
grabación.
● Mantenga presionado
START +/– para mover
en incrementos de 30
minutos o presione y
suelte repetidamente para mover 1 minuto de cada
vez.
DESDE HASTA
– –:– –AM = – –:– –AM
DIA CANAL
– –/– –/– – – – – S P
PROGRAME CON BOTONES (+/–
SP/EP, 8, 9) Y (OK)
PRESIONE (PROG) P/TERMINAR
DESDE HASTA
8:00 AM = – –:– –AM
DIA CANAL
– –/– –/– – – – – S P
PROGRAME CON BOTONES (+/–
SP/EP, 8, 9) Y (OK)
PRESIONE (PROG) P/TERMINAR
PROGRAMA 1
PROGRAMA 1
3
AJUSTE DE LA HORA DE
TERMINACION DEL
PROGRAMA
Presione STOP +/– para ingresar la hora a la que desea
que termine la grabación.
5
● Mantenga presionado STOP +/– para mover en
incrementos de 30 minutos o presione y suelte
repetidamente para mover 1 minuto de cada vez.
AJUSTE DE LA FECHA DEL
PROGRAMA
Presione DATE +/–. (Aparece indicada la fecha actual
en la pantalla. La fecha que usted ingresa aparece en su
6
lugar).
Page 31

NUMBER "8"
PROG.
SP/EP
123
456
89
7
0
1
2
4
NUMBER "9"
TIMER
CH
AJUSTE DEL NUMERO DE
CANAL
Presione CH +/–.
● El mantener presionado CH +/– busca rápidamente
7
entre los canales.
● Si usted está usando una caja de cable, ingrese el canal
de la caja de cable, no el canal a ser grabado. El canal a
ser grabado debe ser seleccionado en la caja de cable.
(El canal de la caja de cable es el canal del VCR que
muestra los canales recibidos por la caja de cable.)
● Para grabar por temporizador canales de cable o de
DBS a través de un sintonizador externo conectado a
los conectores de entrada externa del panel trasero o
ftontal del VCR, presione la tecla NUMBER "0" y/o CH
para que aparezca "F-1" o "L-1" en lugar del número
de canal.
AJUSTE DE LA VELOCIDAD
DE LA CINTA
Presione SP/EP para ajustar la velocidad de la cinta.
8
ES 31
ATENCION
Si hay conflicto en la programación del temporizador y un
programa se sobrepone a otro, sólo las partes mostradas
abajo en gris serán grabadas.
Patrón 1: Graba el programa con el número más bajo.
Programa 1
Programa 2
Patrón 2: El programa que es televisado primero será
Programa 1
Patrón 3: El programa que fue televisado primero será
Programa 1
3
10:00
grabado.
10:00
Programa 2
grabado seguido por la porción restante del otro
programa.
10:00
11:00
CH10
CH40 No es grabado
11:00
CH10
CH40
11:00
CH10
Programa 2
12:00
12:00
No es grabado
12:00
No es grabado
OK
CH40
VUELTA A LA PANTALLA
NORMAL
Presione PROG. o OK. Aparecerá en la pantalla
"PROGRAMA COMPLETADO" durante 5 segundos
9
aproximadamente y luego aparecerá la pantalla normal.
ACTIVACION DEL MODO
DE TEMPORIZADOR
Presione TIMER. La alimentación del VCR se
desconectará automáticamente y "‰" aparecerá
10
indicado en el panel de indicación.
Para grabación de series diarias o semanales por temporizador...
... En cualquier momento durante los pasos de 2 a 8 presione
WEEKLY (tecla NUMBER "9) para series semanales o DAILY
(tecla NUMBER "8") para series diarias (lunes a viernes).
"SEMANAL" o "LU-VI" aparecerá en pantalla.
El presionar el botón otra vez hace que desaparezca la
indicación correspondiente.
NOTAS:
●
Para desactivar la grabación por temporizador antes de
iniciarse la grabación, presione TIMER otra vez. El
presionarlo una vez más lo reactiva.
●
En caso de un corte de alimentación después de la
programación, la memoria del VCR conserva sus selecciones
(si la pila de litio no está agotada).
●
Los programas que se inician después de la medianoche
deben tener la fecha del próximo día.
●
Después de terminar la grabación por temporizador, la
alimentación del VCR se desconecta automáticamente.
●
Usted puede programar el temporizador mientras una
grabación normal está siendo efectuada; el menú en pantalla
no será grabado.
●
Si la cinta llega al fin durante la grabación por temporizador,
el cassette es eyectado automáticamente.
●
Cuando se realiza la grabación por temporizador vía cable o
canales de satélite a través de un sintonizador externo,
asegúrese de conservar la alimentación de la caja de cable o
del receptor de DBS conectada.
Page 32

32 ES
MENU
POWER
MENU
OK
SP/EP
STOP+/–
DATE+/–
CANCEL
START+/–
PROG. CHECK
123
456
89
7
0
1
GRABACION POR TEMPORIZADOR (cont.)
Verificación, cancelación y
revisión de programas
DESACTIVACION DEL
TEMPORIZADOR
Presione TIMER y después presione POWER.
1
ACCESO A LA PANTALLA
DE AJUSTE DE PROGRAMA
2
4
POWER
TIMER
CH+/–
Presione PROG. CHECK.
2
VERIFICACION DE LA
INFORMACION DEL
PROGRAMA
Presione PROG. CHECK otra vez para ver más
información. Cada vez que presiona PROG. CHECK
3
aparece la información sobre el próximo programa.
PR DESDE HASTA CANAL DIA
1 8:00P 10:00 12 12/24
2 10:00A 10:45 40 12/25
3 11:30P 01:00 125 12/25
4
5
6
7
8
PRESIONE (CHECK) AVANZAR
3
OK
Para cancelar o revisar un
programa ...
CANCELACION O
REVISION DE UN
PROGRAMA
Para cancelar un programa presione CANCEL.
Para revisar un programa, presione el botón apropiado:
4
START +/–, STOP +/–, DATE +/–, CH +/–, SP/EP.
VUELTA A LA PANTALLA
NORMAL
Presione PROG. CHECK tantas veces como sea
necesario. Si aun quedan programas, vaya al paso 6.
5
REACTIVACION DEL
TEMPORIZADOR
Presione TIMER.
6
Page 33

ES 33
Temporizador SP→EP automático
Si cuando graba en el modo SP no ha suficiente cinta para
grabar todo el programa, el VCR conmuta automáticamente al
modo EP para permitirle la grabación del programa completo.
Esta función es especialmente útil cuando graba un programa
que tiene más de 2 horas de duración.
Por ejemplo:
Grabación de un programa de 140 minutos de duración en una
cinta de 120 minutos.
110 minutos aproximadamente
Modo SP
140 minutos en total
Asegúrese de ajustar "AUTOCONTROL SP→EP" en "SI" en la
pantalla de función antes de que se inicie la grabación por
temporizador.
30 minutos aproximadamente
Modo EP
ACCESO A LA PANTALLA DEL
MENU PRINCIPAL
Presione MENU.
1
ACCESO A LA PANTALLA DE
AJUSTE DE FUNCION
Mueva barra iluminada (flecha) a "AJUSTE DE
FUNCION", presionando CH 5∞ o %fi, y después
presione OK o .
2
ACCESO A LA PANTALLA DEL
TEMPORIZADOR SP→EP
AUTOMATICO
Mueva barra iluminada
(flecha) a "AUTOCONTROL
SP→EP" presionando CH
3
5∞ o %fi
presione OK o para ajustar
en "SI".
VUELTA A LA PANTALLA NORMAL
Presione MENU.
%
, y después
%
FUNCIONES
TEMPORIZADOR APAGADO
SUPERPOSICION SI
= AUTOCONTROL SP
VIDEO ESTABILIZADOR NO
PAGINA SIGUIENTE
ELEGIR CON (5,∞), Y (OK)
PRESIONE (MENU) P/TERMINAR
=EP SI
Temporizador automático
Cuando el temporizador automático está ajustado en
"AUTOMATICO", se activa automáticamente cuando se
desconecta la alimentación del VCR y se desactiva
automáticamente cuando se conecta otra vez la alimentación
del VCR.
ACCESO A LA PANTALLA
PRINCIPAL
Presione MENU.
1
ACCESO A LA PANTALLA DE
AJUSTE DE FUNCION
Mueva barra iluminada (flecha) a "AJUSTE DE
FUNCION" presionando CH 5∞
2
presione OK o .
%
o %fi
, y después
ACCESO A LA PANTALLA DE
TEMPORIZADOR AUTOMATICO
Mueva barra iluminada
(flecha) a "TEMPORIZADOR
3
" presionando CH 5∞
%fi
, y después presione OK
%
o para ajustar en
"AUTOMATICO" o
"APAGADO".
o
FUNCIONES
=TEMPORIZADOR APAGADO
SUPERPOSICION SI
AUTOCONTROL SP
VIDEO ESTABILIZADOR NO
PAGINA SIGUIENTE
ELEGIR CON (5,∞), Y (OK)
PRESIONE (MENU) P/TERMINAR
=EP NO
VUELTA A LA PANTALLA NORMAL
Presione MENU.
4
NOTA:
Por seguridad cuando el TEMPORIZADOR está colocado en
"APAGADO", todas las otras funciones del VCR queda
inhabilitadas mientras el modo de temporizador está activado.
Para desactivar el temporizador, presione TIMER.
4
NOTAS:
●
Si usted ha programado el VCR para grabar por temporizador
2 o más programas, el segundo programa y los siguientes
pueden no entrar en la cinta si usted colocó el modo de
temporizador SP→EP automático en "SI". En este caso
asegúrese de que el modo no está activado, y ajuste la
velocidad de la cinta manualmente durante la programación
del temporizador.
●
Para asegurar que la grabación quepa en la cinta, esta función
puede dejar una breve porción sin grabar al fin de la cinta.
●
Puede haber alguna interferencia en la cinta en el punto
dónde el VCR conmuta del modo SP al modo EP.
●
La función de temporizador SP/EP automático no está
disponible durante la grabación ITR (grabación instantánea
por temporizador), y la función no funcionará con las cintas
siguientes T(ST)-30, T(ST)-60, T(ST)-90 y T(ST)-120.
Page 34

34 ES
REC
Grabación
GRABACION POR TEMPORIZADOR (cont.)
Este es un método fácil que le permite grabar desde 30 minutos
a 6 horas (seleccionable en incrementos de 30 minutos), y que
desconecta su VCR después de que la grabación haya
terminado.
instantánea
por temporizador (ITR)
SP
VCR
INICIO DE LA GRABACION
Presione REC en el panel frontal.
1
ACTIVACION DEL MODO ITR
Presione REC otra vez. " " parpadea y 0:30 aparece en
el panel frontal de indicación.
2
AJUSTE DE LA DURACION
DE LA GRABACION
Si usted desea grabar durante más de 30 minutos,
presione REC para extender el tiempo. Cada presión
3
extiende el tiempo de grabación en 30 minutos.
NOTAS:
●
Usted sólo puede efectuar ITR utilizando el botón REC en el
panel frontal del VCR.
●
Después de ajustar la hora, aparecerá la indicación anterior.
●
Para verificar el tiempo de grabación restante, presione REC
una vez durante la grabación, y el tiempo restante aparecerá
durante 5 minutos aproximadamente. Tome precauciones
para no presionar REC otra vez dentro de estos 5 segundos de
lo contrario el tiempo de grabación será ajustado con un
incremento de 30 minutos.
Page 35

EDICION
PLAY
ES 35
Usted puede utilizar su VCR como reproductor o grabador.
Edición desde
o hacia otro
VCR
Reproductor
AUDIO OUT
VIDEO OUT
Cable VIDEO/AUDIO
(no suministrado)
Entrada de video
Su VCR
Entrada de audio
CONEXIONES
Conecte un cable de AV, a los conectores VIDEO OUT y
AUDIO OUT del reproductor y a los conectores VIDEO
1
IN y AUDIO IN del grabador.
● Cuando utiliza su VCR como grabador y un VCR
monofónico como reproductor, connecte el conector
AUDIO OUT del reproductor al conector AUDIO IN
L en el grabador.
COLOCACION DE
CASSETTES
Coloque el cassette a reproducir dentro del reproductor
y el cassette a ser grabado dentro del grabador.
2
AJUSTE DEL MODO DE
ENTRADA DEL GRABADOR
Colóquelo en "AUX". Presione la tecla NUMBER "0" y/o
CH en este videograbador para seleccionar en base al
3
conector que está siendo usado ; "L-1" para los
conectores AUDIO/VIDEO IN del panel trasero, o "F-1"
para los conectores AUDIO/VIDEO IN del panel frontal.
ACTIVACION DEL
REPRODUCTOR
Active el modo de reproducción del reproductor.
Grabador
NUMBER "0"
CH
456
89
7
0
1
4
PLAY
Otro VCR
CH
4
NOTA:
Si el reproductor está equipado con función de
superposición desactive la función u ajuste la
superposición en "NO" antes de presionar el botón
PLAY, Z p. 19.
ACTIVACION DEL
GRABADOR
Active el modo de grabación del grabador.
5
Page 36
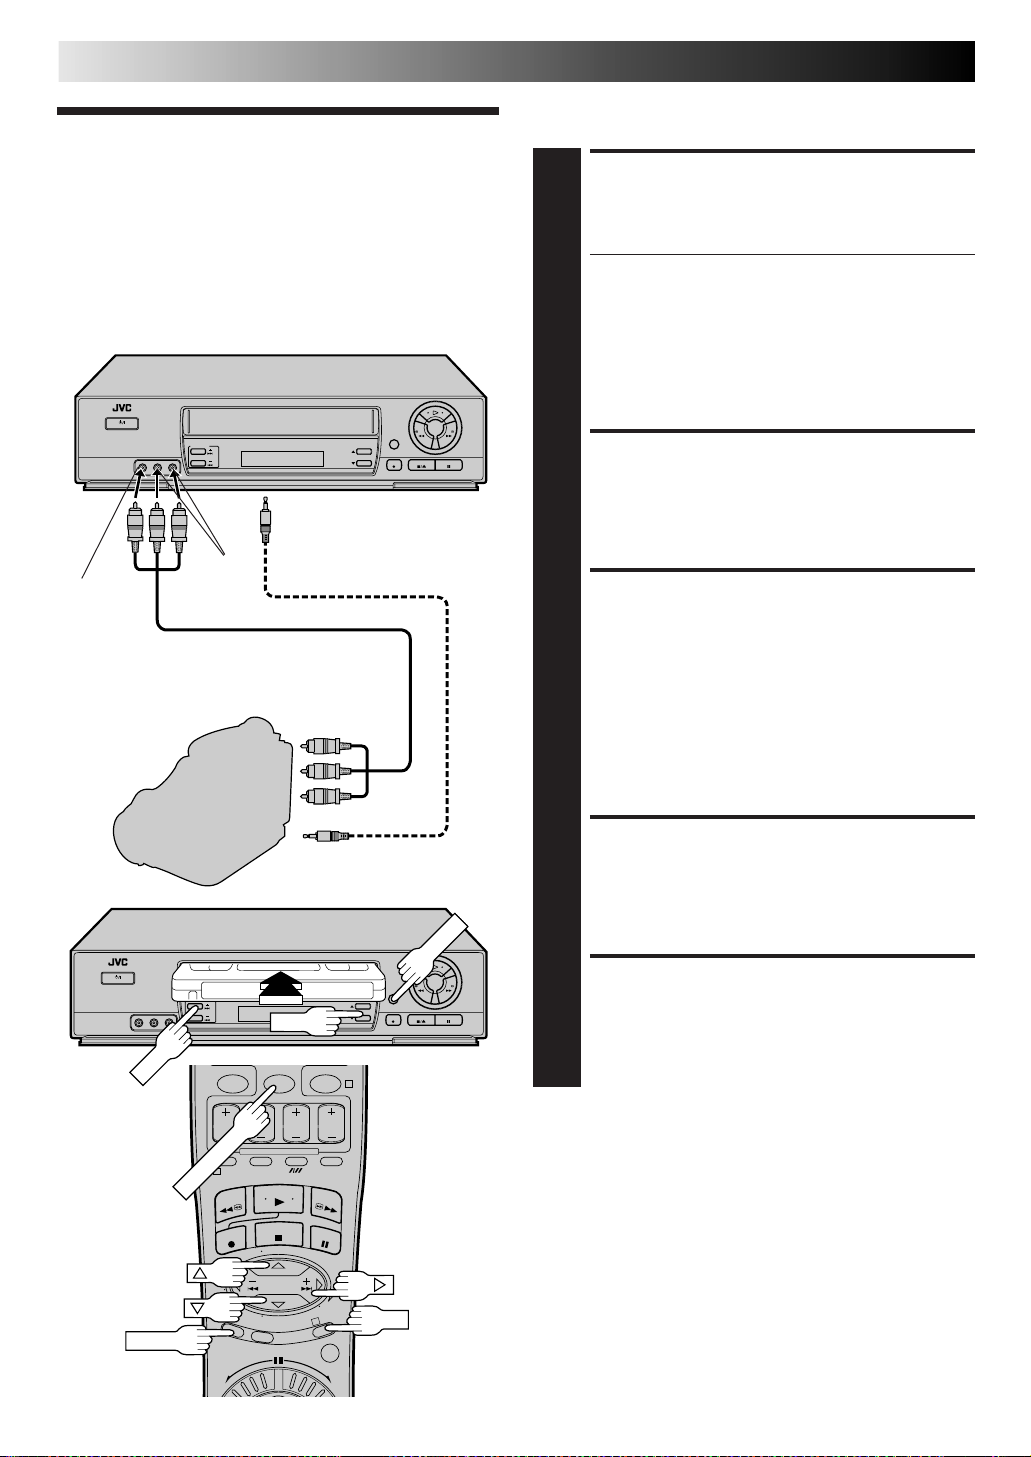
36 ES
NUMBER "0"
MENU
OK
EDICION (cont.)
Usted puede utilizar una videocámara como reproductor y su
VCR como grabador.
Edición desde
una
videocámara
VIDEO IN
Grabador
Al conector PAUSE/AV
COMPU-LINK en el panel
trasero
El cable con nimiclavija no es
AUDIO
IN
Cable VIDEO/AUDIO
(no suministrado)
suministrado. (videocámara de
JVC exclusivamente)
Salida de
video
Su VCR
CONEXIONES
Conecte un cable de AV, a los conectores VIDEO OUT y
AUDIO OUT de la videocámara y a los conectores
1
VIDEO IN y AUDIO IN de su VCR.
● Cuando se utiliza una videocámara de JVC equipada
con control maestro de edición, la videocámara es
capaz de controlar su VCR.
El cable con miniclavija es monofónico con un
miniconector de 3,5 mm a conector monofónico con
miniconector de 3,5 mm.
● Si conecta a una videocámara con una salida
monofónica, conecte el conector de salida de audio
en la videocámara al AUDIO IN L del VCR.
COLOCACION DE UN
CASSETTE
Coloque el cassette a ser grabado dentro del VCR.
2
AJUSTE DEL MODO DE
ENTRADA DEL GRABADOR
Colóquelo en "AUX". Presione la tecla NUMBER "0" y/o
CH para seleccionar en base al conector que está
3
siendo usado ; "L-1" para los conectores AUDIO/VIDEO
IN del panel trasero, o "F-1" para los conectores
AUDIO/VIDEO del panel frontal.
Reproductor
MENU
Videocámara
1
Salida de audio
EDIT
CH
0
3
Si usted está usando una videocámara de JVC equipada
con control maestro de edición vaya al paso 4, de lo
contrario vaya al paso 8.
ACCESO A LA PANTALLA
PRINCIPAL DEL MENU
Presione MENU.
4
ACCESO A LA PANTALLA
DE AJUSTE DE FUNCION
Presione CH 5∞ o %fi para mover la barra iluminada
(flecha) a "AJUSTE DE FUNCION" y después presione
4
OK
5
%
OK o .
Page 37

123
MENU
MENU
OK
CH
456
89
7
0
2
4
FUNCION DE HABILITACION
DE PAUSA REMOTA
Presione CH 5∞ o %fi
para mover la barra
6
iluminada (flecha) a "AV
COMPU-LINK", y después
presione OK o para
ajustar en "NO".
● El conector PAUSE/AV
COMPU-LINK funciona
como conector de
reproducción AV
Compulink cuando se
ajusta "AV COMPULINK" en "SI" (Z p. 21) y
funciona como conector
de pausa remoto cuando
se ajusta "AV COMPULINK" en "NO".
%
=TEMPORIZADOR APAGADO
SUPERPOSICION SI
AUTOCONTROL SP
VIDEO ESTABILIZADOR NO
PAGINA SIGUIENTE
ELEGIR CON (5,∞), Y (OK)
PRESIONE (MENU) P/TERMINAR
PAGINA ANTERIOR
=GRABO SEGUNDO AUDIO SI
ESCUCHO AUDIO HI–FI
AV COMPU-LINK SI
B.E.S.T. SI
ELEGIR CON (5,∞), Y (OK)
PRESIONE (MENU) P/TERMINAR
VUELTA A LA PANTALLA
NORMAL
Presione MENU.
ES 37
FUNCIONES
=EP NO
1
3
OK
7
ACTIVACION DEL
REPRODUCTOR
Active el modo de reproducción de la videocámara.
8
NOTA:
Si la videocámara está equipada con función de
superposición desactive la función u ajuste la
superposición o indicación en "NO" antes de presionar
el botón de reproducción.
ACTIVACION DEL
GRABADOR
Coloque su VCR en el modo de grabación.
● Si está utilizando una videocámara de JVC equipada
9
con control maestro de edición, la misma podrá
activar automáticamente el modo de grabación del
grabador. (Refiérase al manual de instrucciones de la
videocámara).
Page 38

38 ES
POWER
TV PROG –
TV PROG +
VCR/TV/CABLE/DBS
TV/VCR
123
456
89
7
0
1
ENTER
2
4
NUMBER
FUNCIONES ESPECIALES
Control remoto para
múltiples marcas de TV
El control remoto del VCR puede controlar varias funciones de
TV a control remoto de JVC y funciones de las marcas de TV a
control remoto listadas abajo.
CONEXION DE LA
ALIMENTACION DEL TV
Conecte la alimentación del TV utilizando el control
remoto.
1
AJUSTE DEL MODE DEL
CONTROL REMOTO
Coloque el conmutador VCR/TV/CABLE/DBS del
control remoto del VCR en TV.
2
STOP
TV
MARCA DE TV CODIGO DE MARCA
JVC 01
GRADIENTE 05, 15, 18, 20
PHILIPS 02
CCE 02
SANYO 16
PHILICO 10, 17, 21
SHARP 06
TOSHIBA 14
MITSUBISHI 03
SAMSUNG 12
LG 18
RCA 05
PANASONIC 11
GRUNDIG 19
SONY 07
NEC 20
NOBLEX 22
HITACHI 10
DAEWOO 17
3
TV
AJUSTE DEL CODIGO DE
MARCA DE TV
Refiérase a la tabla de abajo. Mantenga presionado
POWER en el control remoto del VCR e ingrese el
3
código de marca de su TV utilizando las teclas
NUMBER, y después presione STOP.
Siga el ejemplo mostrado al pie a la izquierda.
Compruebe que la alimentación del TV se desconecte
como debe. Si se desconecta, intente otras operaciones
(Z paso 4).
● Una vez que haya ajustado el control remoto para
que opere su TV, no es necesario que repita este
procedimiento hasta que reemplace la pilas del
control remoto.
● GRADIENTE y PHILICO tienen varios códigos
diferentes. Si el TV no funciona con un código,
intente ingresar otro.
OPERACION DEL TV
Presione el botón correspondiente : POWER, TV PROG
+/–, TV/VCR, TV +/–, (silenciamento de TV), y
4
las teclas NUMBER.
● Para algunas marcas de TV es necesario presionar
ENTER después de presionar las teclas NUMBER.
● Para volver a activar el contorol remoto para que
controle el videograbador, coloque el conmutador
VCR/TV/CABLE/DBS en VCR.
NOTA:
Dependiendo del tipo de TV, puede haber casos dónde algunas
o todas las funciones no pueden ser activadas utilizando el
control remoto.
(Ej.) Para ajustar el control remoto en PHILIPS 03:
POWER
Manténgalo
presionado
0
Presiónelo sucesivamente
3
STOP
Suéltelo
Page 39

POWER
VCR/TV/CABLE/DBS
123
456
89
7
0
1
ENTER
2
4
NUMBER
ES 39
Control remoto para múltiples
marcas de caja de cable
El control remoto del VCR puede controlar varias funciones de
las marcas de caja de cable a control remoto listadas abajo.
Algunas marcas de caja de cable tienen más de un código. Si la
caja de cable no funciona con un código, intente ingresar otro.
CONEXION DE LA ALIMENTACION
DE LA CAJA DE CABLE
Conecte la alimentación de la caja de cable utilizando
el control remoto.
1
AJUSTE DEL MODE DEL CONTROL
REMOTO
Coloque el conmutador VCR/TV/CABLE/DBS del
control remoto del VCR en CABLE/DBS.
2
STOP
TV PROG –
MARCA DE CAJA DE CABLE CODIGO DE MARCA
ARCHER 01, 05, 17
CABLETENNA 01, 17
CABLEVIEW 15, 16, 17
CITIZEN 15, 16, 17
CURTIS 02
DIAMOND 01, 17
GC BRAND 15, 16, 17
GEMINI 15
GENERAL INSTRUMENTS 01, 04, 06, 11, 12, 15
HAMLIN 10, 18, 23
JASCO 15
JERROLD 01, 04, 06, 11, 12, 15
NOVAVISION 02
OAK 07
PANASONIC 13, 14
PULSER 15, 16, 17
RCA 13, 14
REGAL 10, 18
REMBRANDT 01, 16, 17
SAMSUNG 05, 16, 24
SCIENTIFIC ATLANTA 02
SIGMA 07
SL MARX 05, 16, 17, 24
SPRUCER 13, 14
STARGATE 05, 15, 16, 17, 24
TELEVIEW 05, 16, 24
TOCOM 01, 04, 16
UNIKA 01, 17
UNIVERSAL 16, 17
VIDEOWAY 03, 09
ZENITH 03, 09
LG 26
TAIHAN (DEHAN) 27
TV PROG +
3
AJUSTE DEL CODIGO DE MARCA
DE CAJA DE CABLE
Mantenga presionado POWER en el control remoto del
VCR, elija el código de marca de su caja de cable de la
tabla a la izquierda, ingréselo utilizando las teclas
3
NUMBER, y después presione STOP.
Siga el ejemplo mostrado al pie a la izquierda.
Compruebe que la alimentación de caja de cable se
desconecte como debe. Si se desconecta, intente otras
operaciones (
● Una vez que haya ajustado el control remoto para
que opere su caja de cable, no es necesario que
repita este procedimiento hasta que reemplace la
pilas del control remoto.
Z paso 4).
OPERACION DE LA CAJA DE CABLE
Presione el botón correspondiente : POWER, TV PROG
+/– y las teclas NUMBER.
4
● Para algunas marcas de caja de cabl es necesario
presionar ENTER después de presionar las teclas
NUMBER.
● Para cambiar el canal de la caja de cable, presione TV
PROG +/– o las teclas NUMBER. (El botón CH +/–
puede ser empleado par a cambiar el canal del VCR
solamente).
● Para volver a activar el contorol remoto para que
controle el videograbador, coloque el conmutador
VCR/TV/CABLE/DBS en VCR.
NOTAS:
●
Dependiendo del tipo de caja de cable, puede haber casos
dónde algunas o todas las funciones no pueden ser activadas
utilizando el control remoto.
●
No es posible ajustar el control remoto para la caja de cable y
para el receptor DBS al mismo tiempo, usted sólo puede ajustar el
control remoto para la marca de una de las aplicaciones.
●
Usted tiene que inscribirse en un servicio de cable para
recibir canales por cable.
(Ej.) Para ajustar el control remoto en ARCHER 01:
POWER
Manténgalo
presionado
0
Presiónelo sucesivamente
1
STOP
Suéltelo
Page 40

40 ES
POWER
VCR/TV/CABLE/DBS
123
456
89
7
0
2
4
ENTER
NUMBER
FUNCIONES ESPECIALES (cont.)
Control remoto para
múltiples marcas de
receptor DBS
El control remoto del VCR puede controlar varias funciones de
las marcas de receptor DBS (Direct Broadcast Satellite) a control
remoto listadas abajo.
CONEXION DE LA
ALIMENTACION DEL RECEPTOR
DBS
Conecte la alimentación del receptor de satélite
utilizando el control remoto.
1
1
STOP
TV PROG –
(Ej.) Para ajustar el control remoto en RCA 40:
POWER
4
Manténgalo
presionado
MARCA DE RECEPTOR CODIGO DE MARCA
DBS
ECHOSTAR (DISH Network) 51
PRIMESTAR 50
SONY (DSS) 41
RCA (DSS) 40
Presiónelo sucesivamente
0
TV PROG +
3
STOP
Suéltelo
AJUSTE DEL MODE DEL
CONTROL REMOTO
Coloque el conmutador VCR/TV/CABLE/DBS del
control remoto del VCR en CABLE/DBS.
2
AJUSTE DEL CODIGO DE MARCA
DE RECEPTOR DBS
Mantenga presionado POWER en el control remoto del
VCR, elija el código de marca de su receptor DBS de la
3
tabla a la izquierda, ingréselo utilizando las teclas
NUMBER, y después presione STOP.
Siga el ejemplo mostrado al pie a la izquierda.
Compruebe que la alimentación de receptor DBS se
desconecte como debe. Si se desconecta, intente otras
operaciones (Z paso 4).
● Una vez que haya ajustado el control remoto para
que opere su receptor DBS, no es necesario que
repita este procedimiento hasta que reemplace la
pilas del control remoto.
OPERACION DEL RECEPTOR DBS
Presione el botón correspondiente : POWER, TV PROG
+/–, y las teclas NUMBER.
4
● Dependiendo del receptor DBS, es necesario
presionar ENTER después de presionar las teclas
NUMBER.
● Para cambiar el canal de la caja de cable, presione TV
PROG +/– o las teclas NUMBER. (El botón CH +/–
puede ser empleado par a cambiar el canal del VCR
solamente).
● Para volver a activar el contorol remoto para que
controle el videograbador, coloque el conmutador
VCR/TV/CABLE/DBS en VCR.
NOTAS:
●
Dependiendo del tipo de receptor DBS, puede haber casos
dónde algunas o todas las funciones no pueden ser activadas
utilizando el control remoto.
●
Aunque ECHOSTAR tiene various códigos del control remoto
diferentes, este control remoto es aplicable solamente a uno
de estos codigos preajustados en la fábrica.
●
No es posible ajustar el control remoto para la caja de cable y
para el receptor DBS al mismo tiempo, usted sólo puede ajustar el
control remoto para la marca de una de las aplicaciones.
●
Usted tiene que inscribirse en una emisora DBS para recibir
canales por satélite.
Page 41

A/B
NUMBER "1"
123
456
89
7
0
NUMBER "2"
2
4
POWER
ES 41
Control de dos VCR de JVC
El control remoto es capaz de controlar independientemente
dos VCR de JVC, una unidad para responder a las señales de
control código A del control remoto y la otra unidad para
responder a las señales de control código B. El control remoto
está preajustado para enviar señales de código A ya que su VCR
está inicialmente programada para responder a las señales de
código A. Usted puede modificar fácilmente su VCR para que
responda a señales de código B.
DESENCHUFE EL CORDON
DE ALIMENTACION
Desenchufe el cordón principal de alimentación del
tomacorriente.
1
STOP
1
3
AJUSTE DEL CODIGO DEL
CONTROL REMOTO
Mantenga presionado A/B en el control remoto, presione
la tecla NUMBER "2", y después presione STOP.
2
ENCHUFE EL CORDON DE
ALIMENTACION
Enchufe el cordón principal de alimentación al
tomacorriente.
3
ACTIVACION DE LA
GRABADORA DE VIDEO
Presione POWER en el control remoto.
4
El VCR sólo responderá a las señales de código B.
Para ajustar el VCR para que responda otra vez a las señales
código A, repita el mismo procedimiento indicado arriba,
presionando tecla NUMBER "1" en lugar de la tecla "2" en el
paso 2.
Usted puede controlar dos VCR con el mismo control remoto
conmutando el código del mismo entre A y B (
Z paso 2).
Page 42

42 ES
Antes de solicitar el servicio por causa de un problema, utilice esta tabla para ver si puede repararlo usted mismo. Los pequeños
problemas son a menudo fáciles de corregir, y esto puede ahorrarle el trabajo de enviar su VCR para reparación.
LOCALIZACION Y REPARACION DE AVERIAS
ALIMENTACION
SINTOMA
1. La alimentación no se conecta.
2. El reloj funciona, pero la
alimentación del VCR no se
conecta.
3. El control remoto no funciona.
TRANSPORTE DE CINTA
SINTOMA
1. El cassette se atasca a mitad de
camino al colocarlo y es eyectado.
REPRODUCCION
SINTOMA
1. La cinta es transportada pero no
hay imagen.
2. Aparece interferencia durante la
búsqueda visual.
3. Hay cortes en la banda de sonido
de alta fidelidad.
4. La imagen reproducida es borrosa
o se interrumpe aunque los
programas de TV sean claros.
5. No se escucha la banda de sonido
de alta fidelidad.
CAUSA PROBABLE
● El cordón de alimentación está
desenchufado.
● El modo de temporizador está activado
con el ajuste de temporizador
automático en "APAGADO" (Z p. 33).
● Las pilas están agotadas.
● El conmutador TV/CABLE/VCR/DBS
está en posición incorrecta.
CAUSA PROBABLE
● El cassette fue incorrectamente
colocado.
CAUSA PROBABLE
● Si usted está usando la conexión RF
OUT (
Z pg. 4), el selector de canal
del TV está incorrectamente ajustado.
● Si usted está usando la conexión AV
(
Z pg. 4), el receptor de TV está
ajustado en el modo incorrecto.
● Esto es normal.
● El seguimiento automático está
activado.
● Las cabezas de video pueden estar
sucias.
● La opción ESCUCHO AUDIO fue
incorrectamente ajustada.
ACCION CORRECTIVA
Enchufe el cordón de alimentación.
Presione TIMER para desactivarlo.
Reemplace las pilas agotadas por unas
nuevas.
Ajuste el conmutador en la posición
correspondiente a la unidad que desea
operar.
ACCION CORRECTIVA
Asegúrese que el lado de la ventanilla
esté apuntando hacia arriba, la etiqueta
trasera apuntando hacia usted y la
flecha en la parte frontal del cassette,
apuntando hacia el VCR. Coloque el
cassette en esta posición.
ACCION CORRECTIVA
Coloque el selector de canal en el
canal 3 o 4.
Coloque el TV receptor en el modo
AV.
Active y ajuste manualmente el
seguimiento (Z p. 16).
Es necesario limpiar las cabezas.
Consulte con su agente JVC.
Coloque ESCUCHO AUDIO en "HI-FI"
(
Z p. 20).
GRABACION
SINTOMA
1. No se inicia la grabación.
2. No pueden grabar correctamente
los programas de TV.
3. La edición de cinta a cinta no
funciona.
CAUSA PROBABLE
● No hay ningún cassette colocado.
● La lengüeta de protección de
grabación del cassette colocado ha
sido extraída.
● El VCR ha sido colocado en el modo
AUX por error.
● Los VCR o la videocámara y el VCR
han sido conectados incorrectamente.
● No se ha conectado la alimentación
de una o más unidades.
● Ajuste incorrecto del modo de
entrada del grabador.
ACCION CORRECTIVA
Coloque un cassette.
Extraiga el cassette y cubra el orificio
con cinta adhesiva, o coloque un
cassette con la lengüeta de protección
de grabación intacta.
Coloque el VCR en el canal apropiado.
Refiérase a las indicaciones y a la
ilustración en "Edición desde o hacia
otro VCR" (
desde una videocámara" (
conecte las unidades correctamente.
Aségurese de que esté conectada la
alimentación para todas las unidades.
Seleccione el modo de entrada
apropiado en la grabadora.
Z p. 35) o a "Edición
Z p. 36) y
Page 43

GRABACION POR TEMPORIZADOR
ES 43
SINTOMA
1. La grabación por temporizador no
funciona.
2. La programación por temporizador
no funciona.
3. ‰ y ] en el panel frontal de
indicación, no dejan de parpadear.
4. El cassette es automáticamente
eyectado y ‰ y ] en el panel
frontal de indicación no dejan de
parpadear.
5. ‰ parpadea durante 10 segundos y
se desactiva el modo de
temporizador.
6. El cassette es eyectado
automáticamente, la alimentación
se desconecta y ‰ y ] ni dejan
de parpadear.
7. Nos mudamos y ahora VCR Plus+
no funciona correctamente.
8. En pantalla aparece "LA MEMORIA
DE PROGRAMA ESTA LLENA".
CAUSA PROBABLE
● El reloj y/o el temporizador han sido
incorrectamente ajustados.
● El temporizador no está activado.
● El VCR no ha sido correctamente
ajustado.
● Se está efectuando la grabación por
temporizador.
● El temporizador está activado pero
no hay cassette colocado.
● El cassette colocado carece de
lengüeta de protección de
grabación.
● Se ha presionado TIMER sin
programas en memoria, o la
información del programa de
grabación por temporizador no ha
sido correctamente ingresada.
● La cinta ha llegado al fin durante la
grabación por temporizador.
● Los canales recibibles en la nueva área
son recibidos en canales diferentes que
los del área anterior.
● Los 8 programas de la memoria del
temporizador del VCR han sido
usados.
ACCION CORRECTIVA
Ajuste el rojo y/o el temporizador
correctamente.
Presione TIMER y asegúrese de que ‰
aparezca en el panel frontal de
indicación.
Reejecute los procedimientos de
ajuste.
La programación por temporizador no
puede ser realizada cuando se está
efectuando una grabación por
temporizador. Espere hasta que la
misma termine.
Coloque un cassette con la lengüeta
de protección de grabación intacta, o
cubra el orificio con cinta adhesiva.
Extraiga el cassette y cubra el orificio
con cinta adhesiva, o reemplácelo por
uno que tenga la lengüeta de
protección de grabación intacta.
Verifique los datos programados y
reprograme como sea necesario.
Después presione TIMER otra vez.
El programa puede no haber sido
completamente grabado. La próxima vez
asegúrese de que haya suficiente tiempo
de cinta para grabar todo el programa.
Efectúe otra vez el ajuste del VCR
Plus+. (Z p. 28)
Espere hasta que se abra un espacio
de memoria o borre la información
innecesaria de programa (Z p. 32).
OTROS PROBLEMAS
SINTOMA
1. Durante la búsqueda de canales,
algunos de ellos son omitidos.
2. No es posible cambiar el canal.
3. El control remoto no funciona con
su TV, caja de cable o receptor
DBS.
4. En el panel de indicación frontal
aparece indicado "--:--" después de
un corte de alimentación.
● Esos canales han sido
● Se está efectuando la grabación.
● El ajuste de la marca del control
● La pila de litio está agotada.
CAUSA PROBABLE
preprogramados para ser omitidos.
remoto es incorrecto.
ATENCION
Este VCR contiene microcomputadores. El ruido o interferencia externa pueden hacer que el microcomputador falle. Si el VCR
no funciona correctamente desconecte la alimentación y desenchufe el cable de alimentación del tomacorriente de CA. Espere
unos momentos y conecte otra vez la alimentación. Eyecte e inspeccione el estado del cassette. Si todo parece normal continúe
la operación del VCR como de costumbre.
ACCION CORRECTIVA
Si necesita los canales omitidos,
resintonícelos (Z p. 11).
Presione PAUSE para hacer una pausa
en la grabación, cambiar los canales,
después presione PLAY para continuar
la grabación.
Reajuste el control remoto en la marca
correcta (Z p. 38 o 39 o 40).
Reemplace la pila de litio por una
nueva (Z p. 4).
Page 44

44 ES
PREGUNTAS Y RESPUESTAS
REPRODUCCION
P. ¿Qué sucede si la cinta llega al fin durante la
reproducción o búsqueda?
R. La cinta es rebobinada automáticamente hasta el
principio de la misma.
○○○○○○○○○○○○○○○○○○○○○○○○○○○○
P. ¿Puede el VCR permanecer indefinidamente en el
modo de imagen fija?
R. No. El mismo para automáticamente después de
transcurridos 5 minutos, para proteger las cabezas.
○○○○○○○○○○○○○○○○○○○○○○○○○○○○
P. Durante la búsqueda, cámara lenta, y reproducción
de imagen fija o cuadro por cuadro no puedo
escuchar el audio. ¿Cuál es el problema?
R. Esto es normal, no hay ningún problema.
○○○○○○○○○○○○○○○○○○○○○○○○○○○○
P. Durante la búsqueda, reproducción de imagen fija o
cuadro por cuadro la imagen es intermitente. ¿Cuál
es la causa?
R. Hay pérdida de imagen cuando se utilizan estos tipos
de reproducción con una cinta grabada en modo LP.
Presione PLAY para volver a la reproducción normal
y restaurar la imagen.
○○○○○○○○○○○○○○○○○○○○○○○○○○○○
P. Cuando se vuelve de la búsqueda de múltiples
velocidades a la reproducción normal, la imagen
presenta disturbios. ¿Es ésto un problema?
R. No, es normal.
○○○○○○○○○○○○○○○○○○○○○○○○○○○○
P. Aparecen barras de interferencia durante la
búsqueda de múltiples velocidades. ¿Cuál es el
problema?
R. Esto es normal.
○○○○○○○○○○○○○○○○○○○○○○○○○○○○
P. Cuando se reproducen programas que han sido
grabados por temporizador sucesivamente (tal como
un programa de 8:00 a 9:00 y otro desde las 9:00 a
las 10:00), la imagen y el sonido se distorsionan
momentáneamente en el punto dónde termina el
primer program y comienza el segundo programa.
¿Es ésto una falla?
R. No, es normal.
○○○○○○○○○○○○○○○○○○○○○○○○○○○○
P. Además de evitar las grabaciones ¿cual es el efecto
que produce el extraer la lengüeta de protección?
R. Inhabilita el marcado de códigos de índice.
○○○○○○○○○○○○○○○○○○○○○○○○○○○○
P. Algunas veces durante la búsqueda de índice el VCR
no encuentra el programa que quiero mirar.
¿Porqué?
R. Puede haber códigos de índice demasiado juntos.
○○ ○○○○○○○○○○○○○○○○○○○○○○○○○○
P. Durante la reproducción los indicadores
operacionales en pantalla fluctúan algunas veces.
¿Porqué ocurre ésto?
R. Si el estado de la cinta que está siendo reproducida
no es bueno, pueden ocurrir fluctuaciones de video
(incluyendo los indicadores en pantalla).
GRABACION
P. Cuando hago una pausa y continúo la grabación, el
fin de la grabación antes de la pausa queda
superpuesto a la nueva grabación. ¿Porque ocurre
ésto?
R. Es normal ya que reduce la distorsión en la pausa y
en los puntos de continuación.
○○ ○○○○○○○○○○○○○○○○○○○○○○○○○○
P. ¿Puede el VCR permanecer indefinidamente en el
modo de pausa de grabación?
R. No. El VCR ingresa automáticamente en el modo de
parada después de transcurridos 5 minutos, para
proteger las cabezas. Cuando se hace una pausa
durante la grabación instantánea por temporizador
(ITR), el VCR se desconecta automáticamente
después de transcurridos 5 minutos.
○○ ○○○○○○○○○○○○○○○○○○○○○○○○○○
P. ¿Qué sucede si la cinta termina durante la
grabación?
R. El VCR la rebobina automáticamente hasta el
principio de la misma.
GRABACION POR TEMPORIZADOR
P. REC y ‰ permanecen encendidos en el panel frontal
de indicación. ¿Es ésto un problema?
R. No. Esto es una condición normal al realizarse una
grabación por temporizador.
○○ ○○○○○○○○○○○○○○○○○○○○○○○○○○
P. ¿Puedo programar el temporizador mientras estoy
mirando una cinta o un programa de TV?
R. Usted no verá la imagen ya que la misma es
reemplazada por el menú en pantalla, peor podrá
escuchar el audio proveniente del programa o de la
cinta que estaba mirando.
Page 45

INDICE
VISTA FRONTAL
ES 45
1
POWER
PUSH JOG
VIDEO
(MONO)
L – AUDIO – R
/OK
+
8
4
0
6
15dB
NORM
7 8
1 Botón de alimentación [POWER ] (Z p. 6)
2 Abertura para colocación del cassette
3 Botón de menú [MENU] (Z p. 8)
4 Botón de rebobinado [REW] (Z p. 12)
5 Botón de reproducción [PLAY] (Z p. 12)
6 Botón de avance rápido [FF] (Z p. 12)
7 Conectores de entrada de VIDEO/AUDIO
(Z p. 36)
8 Botón PUSH JOG ™ (Z p. 14)
2
SP
VCR
CH
43 5
REW
MENU
REC STOP/EJECT PAUSE
#@! $09
9 Botón PUSH JOG £ (Z p. 14)
Botón OK (Z p. 6)
0 Panel frontal de indicación (Z p. 46)
! Sensor del control remoto
@ Botones de canal [CH] 5∞ (Z p. 13)
# Botón de grabación [REC] (Z p. 13)
$ Botón de parada/expulsión [STOP/EJECT]
(Z p. 12)
% Botón de pausa [PAUSE] (Z p. 14)
6
PLAY
FF
%
Page 46

46 ES
VISTA TRASERA
INDICE (cont.)
1
1 Cordón de alimentación (Z p. 4)
2 Compartimiento de la pilla de litio (Z p. 4)
3 Conectores de entrada de VIDEO/AUDIO
(Z pg. 35)
4 Conector PAUSE/AV COMPU-LINK
● Conector PAUSE remoto (Z p. 36)
● Conector AV COMPU LINK (Z p. 21)
5 Conectores de salida de VIDEO/AUDIO (Z p. 35)
6 Conector ANT. IN (Z p. 4)
7 Conmutador de canal 3 y 4 (Z p. 4)
8 Conector de salida de RF [RF OUT] (Z p. 4)
PANEL FRONTAL DE INDICACION
2 4 5 63
PAUSE/
AV
COMPU
-LINK
AUDIO
VIDEO
CH3 CH4
OUTIN
ANT. IN
R
L
RF OUT
87
+
8
4
0
6
15dB
NORM
54
1 Simbolizan las indicaciones de modo
REPRODUCCION:
BUSQUEDA
PROGRESIVA/
REGRESIVA
VARIABLE:
IMAGEN FIJA:
CAMARA LENTA:
GRABACION:
PAUSA DE GRABACION:
1
VCR
6
2
3
SP
7
2 Indicador de modo de temporización
3 Indicadores de la velocidad de la cinta (Z p. 13)
4 Medidor de nivel de audio
5 Marca "cassette colocado"
6 Indicador de modo de VCR (Z p. 24)
7 Indicación de canal ["L-1" y "F-1" para modo AUX]
Indicación del contador (Z p. 12)
Indicación del reloj (Z p. 6)
Page 47

ES 47
q
p
6
5
0
!
@
$
%
^
&
*
Q
W
R
T
o
2
3
7
8
4
9
(
)
y
u
i
w
e
r
t
E
1
#
CONTROL REMOTO
123
456
7
C. RESET
CANCEL
START STOP DATE
PROG.
1
REW
REC
T
V
M
Los botones con un punto pequeño en la parte izquierda
del nombre también pueden ser usados para operar su TV
con el conmutador VCR/TV/CABLE/DBS colocado en
“TV”. Z p. 38.
Colocación de las pilas
1
Abra la tapa del portapilas.
2 Coloque 2 pilas tamaño "AA" (suministradas) con las
polaridades correctas.
3 Recoloque la tapa.
TV/VCR
DAILY(M-F)
89
AUX
0
EXPRESS PROGRAMMING
PROG.
CHECK
PLAY
STOP
R
P
V
T
–
T
V
P
R
E
N
U
A
/
B
AUDIOVCR TV CABLE/DBS
ENTER/QSD
O
G
+
–
G
O
SHUTTLE
POWER
DISPLAY
WEEKLY
TIMER
SKIP SEARCH
PAUSE
3
JOG/
1 Conmutador VCR/TV/CABLE/DBS (Z p. 38, 39, 40)
2 Botón TV/VCR (
3 Botón REVIEW instantánea (
4 Teclas números [NUMBER] (
5 Botón de cancelación [CANCEL] (
Botón de reposición de contador [C. RESET] (
6 Botón de hora de parada [STOP +/–] (
7 Botón de hora de inicio [START +/–] (
8 Botón de programación [PROG.] (
2
9 Botón PROG. CHECK (
0 Botón de rebobinado [REW] (
! Botón de grabación [REC] (
@ Botón de parada [STOP] (
4
CH
# Botón %fi (
Botones de canal TV [PROG] +/– (
$ Botón MENU (
% Botón de código A/B (A/B CODE) (
^ Disco JOG (
& Anillo SHUTTLE (
* Botón de silenciamento de TV (AUDIO
FF
( Botón de alimentación [POWER
) Botón de ingreso [ENTER] (
Botón de indicación en pantalla [OSD] (
q Botón de indicación [DISPLAY] (
Z p. 24)
Z p. 16)
Z p. 13, 26)
Z p. 32)
Z p. 18)
Z p. 30)
Z p. 30)
Z p. 26, 30)
Z p. 32)
Z p. 12)
Z p. 13)
Z p. 12)
Z p. 6)
Z p. 38, 39, 40)
Z p. 8)
Z p. 41)
Z p. 14)
Z p. 14)
) (Z p. 38)
] (Z p. 6)
Z p. 13)
Z p. 19)
Z p. 18)
w Botón de grabación por temporizador de series diarias
+
V
T
K
O
[DAILY] (
e Botón de grabación por temporizador de series
semanales [WEEKLY] (
r Botón selector del modo "AUX" (
Z p. 27, 31)
Z p. 27, 31)
Z p. 35)
t Botón de grabación por temporizador [TIMER]
(
Z p. 27, 31)
Z p. 30)
Z p. 13, 31)
Z p. 12)
Z p. 14)
fi
Z p. 14)
Z p. 12)
%
Z p. 14, 15)
] +/– (Z p. 38)
Z p. 15)
Z p. 13)
y Botón de fecha [DATE +/–] (
u Botones de canal [CH +/–] (
i Botón de búsqueda por salto [SKIP SEARCH] (
o Botón de velocidad de grabación [SP/EP] (
p Botón de reproducción [PLAY] (
Q Botón de avance rápido [FF] (
W Botón de pausa [PAUSE] (
E Botón PUSH JOG ™£ ( ) (
Botones de volumen TV [TV VOL.
R Botón OK (
Z p. 6)
T Teclas JOG/SHUTTLE (
Método para usar el control remoto
El control remoto puede operar las funciones de su VCR.
1 Apunte el control remoto hacia la ventanilla del sensor.
2 Presione el botón de operación apropiado.
3 La distancia máxima de alcance del control remoto es de
8 m aproximadamente.
NOTAS:
●
Este control remote también opera diferentes marcas de TV,
cajas de cable y receptores de satélite; coloque el
conmutador VCR/TV/CABLE/DBS en la posición apropiada
dependiendo de la unidad que desea operar. Por más
detalles, Z p. 38 – 40.
●
Si por alguna razón el control remoto no funciona
correctamente, extraiga las pilas del mismo y espere un
corto tiempo, reemplace por las nuevas e intente otra vez.
Page 48

48 ES
ESPECIFICACIONES
GENERALIDADES
Alimentación : 110 – 220 V CA, 50/60 Hz
Consumo
Alimentación
conectada : 22W
Alimentación
desconectada : 5 W
Temperatura
De funcionamiento : 5°C a 40°C (41°F a 104°F)
De almacenamiento : –20°C a 60°C (–4°F a 140°F)
Posición de
funcionamiento : Unicamente horizontal
Dimensiones
(An x Al x Pr) : 400 x 94 x 277 mm
Peso : 3.1 kg
Formato : Norma NTSC VHS
Tiempo máximo de
grabación
(SP) : 210 min. con un cassette
ST-210
(EP) : 630 min. con un cassette
ST-210
VIDEO/AUDIO
Sistema de señales : Señales cromáticas NTSC y
señales monocromas EIA,
525 líneas/60 campos
Sistema de grabación/
reproducción : Sistema de exploración
helicoidal de 4 cabezas DA-4
(doble acimut)
Relación señal a ruido : 45 dB
Resolución horizontal : 240 líneas
Gama de frequencia
Audio normal : 70 Hz a 10.000 Hz
Audio de alta fidelidad : 20 Hz a 20.000 Hz
Entrada/Salida : Conectores RCA
(IN x 2, OUT x 1)
SINTONIZADOR
Sistema de sintonía : Sintonizador de frecuencia
sintetizada
Cobertura de canales
(VHF) : Canales 2 al 13
(UHF) : Canales 14 al 69
(CATV) : 113 canales
Salida de RF : Canal 3 ó 4 (conmutable;
preajustado en el canal 3 en
fábrica), 75Ω, asimétrica
TEMPORIZADOR
Referencia de reloj : Cristal de cuarzo
Capacidad de
programación : Temporizador de 1 año/
8 programas
Tiempo de protección
de memoria : Aprox. 6 meses
Cifra estimada basada en la
pila nueva suministrada; las
prestaciones reales pueden
ser diferentes.
ACCESORIOS
Accesoriossuministrados : Cable RF,
Unidad de control remoto
de infrarrojo,
Pila de litio CR2025,
Enchufe de conversión,
2 pilas "AA"
Las especificaciones dadas son para el modo SP a menos que se
especifique lo contrario.
El diseño y las especificaciones están sujetos a modificaciones sin
aviso previo.
El no cumplir con las siguientes precauciones puede
resultar en daños al VCR, al control remoto o al
cassette de video.
1. NO COLOQUE el VCR en:
... un lugar expuesto a temperaturas o humedad extremas.
... a la luz directa del sol.
... en un lugar polvoriento.
... en un ambiente dónde se generen fuertes campos
magnéticos
... sobre una superficie inestable o sujeta a vibración.
2. NO BLOQUEE las aberturas para ventilación del VCR.
3. NO COLOQUE objetos pesados sobre el VCR o control
remoto.
4. NO COLOQUE sobre el VCR o control remoto nada que
pueda derramarse.
5. EVITE golpear violentamente el VCR cuando lo
transporta.
**CONDENSACION DE HUMEDAD
La humedad del aire se condensará en el VCR cuando lo
cambia de un lugar frío a un lugar tibio, o cuando hay mucha
humedad. La formación de condensación es igual a la de la
superficie externa de un vaso de vidrio lleno de agua fría. La
condensación de humedad sobre el tambor de cabezas
puede dañar la cinta. En condiciones en las cuales pueda
ocurrir condensación, mantenga conectada la alimentación
del VCR durante unas pocas horas para que la humedad se
seque.
**LIMPIEZA DE CABEZAS
La acumulación de suciedad y otras partículas sobres las
cabezas de video puede hacer que la imagen reproducida
sea borrosa o inestable. En caso de que ocurra este problema,
asegúrese de ponerse en contacto con su agente JVC más
cercano.
Page 49

MEMO
ES 49
Page 50

2 EN
Dear Customer,
Thank you for purchasing the JVC VHS video cassette recorder. Before use, please read the safety information and precautions
contained on this page to ensure safe use of your new VCR.
CAUTIONS
WARNING: DANGEROUS VOLTAGE INSIDE
WARNING: TO PREVENT FIRE OR SHOCK HAZARD, DO
NOT EXPOSE THIS UNIT TO RAIN OR
MOISTURE.
The POWER button does not completely shut off mains
power from the unit, but switches operating current on and off.
" " shows electrical power standby and " " shows ON.
This unit is produced to comply with Standard IEC Publ. 65.
POWER SYSTEM:
This set operates on voltage of AC 110 – 220V`, 50/60 Hz
with automatic switching.
Use the conversion plug (provided) depending on the type
of your AC WALL outlet.
The rating plate and safety caution are on the rear of the
unit.
Warning on lithium battery
The battery used in this device may present a fire or
chemical burn hazard if mistreated. Do not recharge,
disassemble, heat above 100°C or incinerate.
Replace battery with Panasonic (Matsushita Electric),
Sanyo, Sony or Maxell CR2025; use of another battery may
present a risk of fire or explosion.
n Dispose of used battery promptly.
n Keep away from children.
n Do not disassemble and do not dispose of in fire.
HOW TO USE THIS INSTRUCTION
MANUAL
● All major sections and subsections are listed in the Table
Of Contents on page 3. Use this when searching for
information on a specific procedure or feature.
● The Index on pages 45 – 47 lists frequently-used terms,
and the number of the first page on which they are used
or explained in the manual. This section also illustrates
the controls and connections on the front and rear panel,
the front display panel and the remote control.
● The Z mark signals a reference to another page for
instructions or related information.
● Operation buttons necessary for the various procedures
are clearly indicated through the use of illustrations at
the beginning of each major section.
IMPORTANT:
It may be unlawful to record or play back copyrighted
material without the consent of the copyright owner.
VCR Plus+ and PlusCode are trademarks of Gemstar Development
Corporation.
The VCR Plus+ system is manufactured under license from
Gemstar Development Corporation.
TM
DSS
is an official trademark of DIRECTV, Inc., a unit of GM
Hughes Electronics. PRIMESTAR is a registered service mark of
Primestar Partners, L.P. DISH Network
Echostar Communications Corporation.
n Cassettes marked "VHS" (or "S-VHS") can be used with this
video cassette recorder. However, only "VHS" recordings can
be played back in this model.
n This model is equipped with SQPB (S-VHS QUASI PLAY-
BACK) that makes it possible to play back S-VHS recordings
with regular VHS resolution.
n HQ VHS is compatible with existing VHS equipment.
TM
is a trademark of
BEFORE YOU INSTALL YOUR NEW
VCR . . .
. . . please read thoroughly the cautions on this page.
CAUTION
n When you are not using the VCR for a long period of
time, it is recommended that you disconnect the power
cord from the AC outlet.
n Dangerous voltage inside. Refer internal servicing to
qualified service personnel. To prevent electric shock or fire
hazard, remove the power cord from the AC outlet prior to
connecting or disconnecting any signal lead or aerial.
n Changes or modifications not approved by JVC could
void user's authority to operate the equipment.
Page 51

CONTENTS
EN 3
NSTALLING YOUR NEW VCR 4
I
Basic Connections .................................. 4
NITIAL SETTINGS 6
I
Plug & Play .................................................. 6
Language ..................................................... 8
Clock ............................................................ 9
Tuner .......................................................... 10
Set Receivable Channels ..........................................10
Add Or Delete A Channel........................................11
IMPLE PLAYBACK AND
S
RECORDING 12
Simple Playback ......................................... 12
Simple Recording ........................................ 13
LAYBACK AND RECORDING
FEATURES 14
P
Playback Features ...................................... 14
Still Picture/Frame-By-Frame Playback.....................14
Slow Motion/Reverse Slow Motion ..........................14
Variable-Speed Search/Reverse Motion Playback .....15
High-Speed Search ..................................................15
Skip Search ..............................................................15
Index Search ............................................................15
Instant ReView.........................................................16
Manual Tracking ......................................................16
Video Stabilizer .......................................................17
Repeat Playback ......................................................18
Counter Reset ..........................................................18
Tape Position Indicator ............................................18
Next-Function Memory............................................18
Superimpose ............................................................19
Select The Soundtrack ............................................. 20
AV COMPU LINK Playback .....................................21
B.E.S.T. Picture System ................................ 22
Preparation ..............................................................22
Recording ................................................................23
Playback ..................................................................23
Recording Features ..................................... 24
Record One Program While
Watching Another....................................................24
Display Elapsed Recording Time..............................24
Stereo And SAP (Second Audio Program) .................25
To Record SAP Programs ..........................................25
PECIAL FEATURES 38
S
TV Multi-Brand Remote Control .............................. 38
Cable Box Multi-Brand Remote Control ...................39
DBS Receiver Multi-Brand Remote Control..............40
Control Two JVC VCRs ............................................ 41
ROUBLESHOOTING 42
T
Power ........................................................ 42
Tape Transport ............................................ 42
Playback .................................................... 42
Recording ...................................................42
Timer Recording.......................................... 43
Other Problems .......................................... 43
UESTIONS AND ANSWERS 44
Q
Playback .................................................... 44
Recording ...................................................44
Timer Recording.......................................... 44
NDEX 45
I
Front View .................................................. 45
Rear View .................................................. 46
Front Display Panel..................................... 46
Remote Control ........................................... 47
PECIFICATIONS 48
S
ENGLISH
IMER RECORDING 26
T
VCR Plus+ Timer Programming ................... 26
VCR Plus+ Setup ......................................... 28
Express Timer Programming ....................... 30
Check, Cancel And Revise Programs ....................... 32
Auto SP→EP Timer ..................................................33
Auto Timer............................................................... 33
Instant Timer Recording (ITR)....................... 34
DITING 35
E
Edit To Or From Another VCR ...................... 35
Edit From A Camcorder ............................... 36
Page 52

4 EN
VIDEO
Basic Connections
Connect the power plug to an
AC outlet
before installing the
lithium battery. (See below)
AC Outlet
AC Power Cord
Antenna or Cable
Flat Feeder
Matching Transformer
(not supplied)
INSTALLING YOUR NEW VCR
ANT. IN
(Antenna or Cable input)
Coaxial Cable
PAUSE/
AV
COMPU
-LINK
AUDIO
VIDEO
CH3 CH4
OUTIN
ANT. IN
R
L
RF OUT
Back of VCR
RF OUT
Back of VCR
TV
Audio/Video Cable
(not supplied)
CH3 CH4
RF Cable (supplied)
75 ohm terminal
300 ohm terminal
○○○○○○○○○○○○○○○○○○○○○○○○○○○○○○○○○○○○○○○○○○○○○○○○○○○○○○○○○
Be sure to connect the power plug to an AC outlet first
before installing the lithium battery; otherwise, the
battery's service life will be drastically shortened.
Installing/Removing the lithium battery
Make sure that the power plug is connected to an AC outlet
1
and turn off the VCR power.
2 Open the battery cover while pressing the release tab as
illustrated.
3 Insert a lithium battery with the plus (+) side up and push it
in.
● To remove the lithium battery, press the latch A down-
ward using a pointed non-metallic object, then pull out
the lithium battery.
4 Close the battery cover until it clicks in place.
A
Page 53

EN 5
CHECK CONTENTS
Make sure the package contains all of the accessories
listed in “SPECIFICATIONS” (Z pg. 48).
1
SITUATE VCR
Place the VCR on a stable, horizontal surface.
2
CONNECT VCR TO TV
The connection method you use depends on the type of
TV you have.
3
RF Connection
●
To Connect To A TV With NO AV Input Terminals . . .
a– Disconnect the TV antenna from the TV.
b– Connect the TV antenna cable to the ANT. IN jack
on the rear of the VCR.
c– Connect the supplied RF cable between the RF
OUT jack on the rear of the VCR and the TV’s
antenna terminal. Set TV on CH3 or CH4
corresponding to the CH3 – CH4 switch setting on
the back of the VCR.
AV Connection
●
To Connect To A TV With AV Input Terminals . . .
a– Connect the antenna, VCR and TV as shown in
the illustration.
b– Connect an Audio/Video Cable between the AUDIO
OUT and VIDEO OUT jacks on the rear of the VCR
and the AV IN jacks on the TV. Set your TV in video
input mode or A/V input mode. Refer to the TV
Instruction Manual.
NOTES:
●
The VCR channel is the channel on the TV which will display
the audio and video signals from the VCR. The VCR's CH3CH4 switch, on the back of the VCR, sets the VCR channel to
CH3 or CH4.
●
The CH3–CH4 switch is preset to the CH3 position.
Set to CH4 if CH3 is used for broadcasting in your area and
set the channel on the TV to correspond to the VCR's CH3–
CH4 switch setting.
●
If RF connection to TV is used, when switching from VCR to TV
mode and from TV to VCR it may be necessary to issue a CH UP
and then CH DOWN on TV to obtain a good quality picture.
●
Even if you are using AV cables to connect your VCR to your
TV, you must also connect it using the RF cable. This will
ensure that you can record one show while watching another
(Z pg. 24).
●
For full identification of the VCR's rear panel, refer to the
Index (REAR VIEW Z pg. 46).
CONNECT VCR TO
POWER SOURCE
Connect the power plug to an AC outlet.
4
FINAL PREPARATION FOR
USE
Select the VCR channel (3 or 4) by setting the switch on
the rear of the VCR as shown in the illustration.
5
Perform Plug & Play (Z pg. 6 and 7).
Page 54
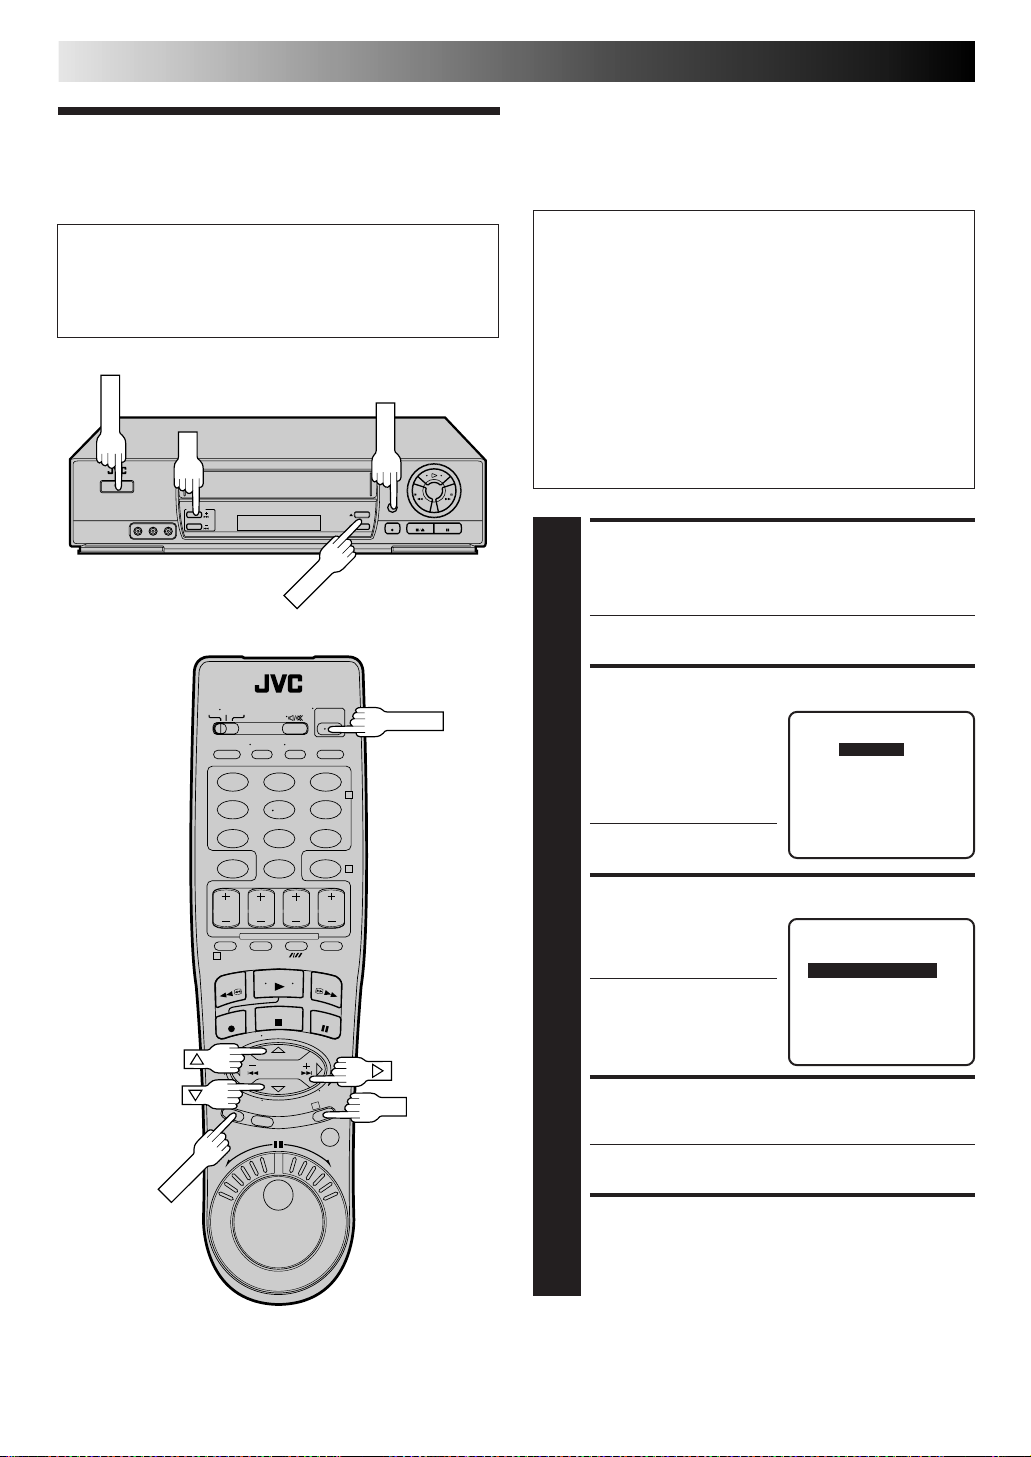
6 EN
MENU
POWER
MENU
CH5∞
OK
Plug & Play
INITIAL SETTINGS
The Plug & Play function simplifies installation by guiding you
through the procedures of setting the language, clock and tuner
channels — simply follow the on-screen menus that appear
when the POWER button is first pressed to power on the VCR
after you connect the power plug to an AC outlet.
Before starting...
● Connect the TV antenna cable to the ANT. IN jack on the
VCR and plug the power cord into the AC outlet.
● Turn on the TV and select the VCR channel 3 or 4 (or AV
mode).
POWER
123
456
89
7
0
1
2
4
IMPORTANT
● Don't press any buttons on the VCR or remote that are
not directly related to the step you are performing while
Plug & Play is in progress.
● If you perform Plug & Play successfully during
installation, there's no need to separately perform the
Language Select, Clock Set or Channel Set procedures,
but if adjustments become necessary they can be
performed as follows:
– To change the selected language Z pg. 8
– To reset or adjust the time Z pg. 9
– To add/delete channels manually Z pg. 11
– To reset the tuner after moving to a different location
Z pg. 10
PERFORM PLUG & PLAY
SETUP
Press POWER.
● The Language Select screen appears.
1
SELECT LANGUAGE
Press CH5∞ or %fi to
move the highlight bar
2
(arrow) to your desired
language (ENGLISH or
ESPAÑOL), then press OK
%
or .
● The Clock Set screen
appears.
LANGUAGE SELECT
=ENGLISH
ESPAÑOL
PRESS (5,∞), THEN (OK)
PRESS (MENU) TO END
SET TIME
Press CH5∞ or %fi to set
the hour, then press OK or
%
3
.
● Press and hold either
button to delay or
advance the time by 30
minutes.
CLOCK SET
TIME DATE YEAR
– –:– –AM 1/ 1 98
PRESS (5,∞), THEN (OK)
PRESS (MENU) TO END
3
OK
SET DATE
%
days.
5
∞
Press CH
● Press and hold either button to change the date by 15
4
to set the date, then press OK or .
or
fi
SET YEAR
Press CH5∞ or %fi to set the year.
5
%
Page 55

123
MENU
MENU
OK
CH
456
89
7
0
2
4
CH+/–
START AUTO CHANNEL
SET
Press MENU.
● Receivable channels in
6
your area are automatically assigned to the
CH5∞ (+/–) buttons,
and non-receivable
channels are skipped.
● If the tuner channels
have been set properly "SCAN
COMPLETED" will be displayed on the screen. If "NO
SIGNAL" is displayed on the screen, make sure that
the antenna cable is connected to the VCR properly
and press OK or . The VCR will try Auto Channel
Set again.
%
RETURN TO NORMAL
SCREEN
Press MENU.
7
EN 7
AUTO CHANNEL SET
SCANNING...
PRESS (MENU) TO END
1
3
OK
Page 56
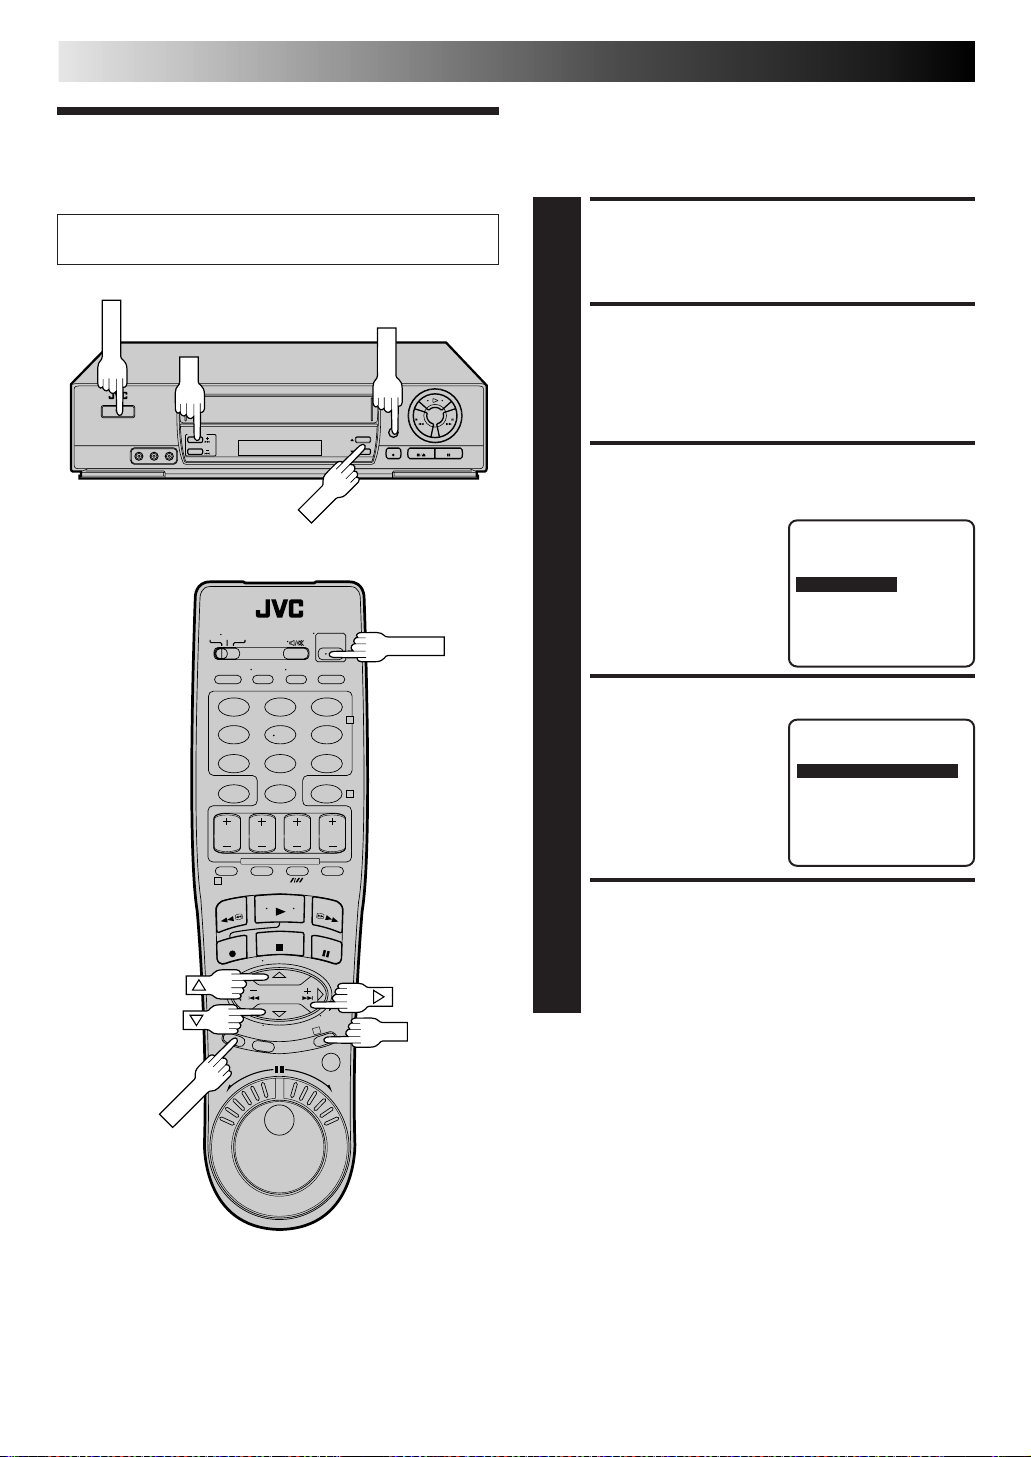
8 EN
MENU
POWER
MENU
OK
CH
Language
INITIAL SETTINGS (cont.)
This VCR offers you the choice to view on-screen messages in
Spanish or English (not including messages superimposed on the
TV picture). Select the desired language using this procedure. The
default setting is "SPANISH".
Turn on the TV and select the VCR channel 3 or 4 (or AV
mode).
POWER
123
456
89
7
0
1
2
4
TURN ON THE VCR
Press POWER.
1
ACCESS MAIN MENU
SCREEN
Press MENU.
2
ACCESS INITIAL SET
SCREEN
At the Main Menu screen,
move the highlight bar
3
(arrow) to “AJUSTE
INICIAL” by pressing
CH5∞ or %fi, then press
%
OK or .
SELECT LANGUAGE
Move the highlight bar
(arrow) to "IDIOMA" by
4
pressing CH
then press OK or to
select the desired
language.
RETURN TO NORMAL
SCREEN
Press MENU.
%
5
∞
or
,
fi
%
MENU PRINCIPAL
AJUSTE DE FUNCION
AJUSTE DE SINTONIZADOR
= AJUSTE INICIAL
ELEGIR CON (5,∞), Y (OK)
PRESIONE (MENU) P/TERMINAR
AJUSTE INICIAL
AJUSTE DE RELOJ
=IDIOMA ESPAÑOL
AJUSTE DE CANAL GUIA
ELEGIR CON (5,∞), Y (OK)
PRESIONE (MENU) P/TERMINAR
3
5
OK
Page 57

Clock
MENU
POWER
MENU
OK
CH
EN 9
TURN ON THE VCR
Press POWER.
1
Turn on the TV and select the VCR channel 3 or 4 (or AV
mode).
POWER
123
456
89
7
0
1
2
4
ACCESS MAIN MENU SCREEN
Press MENU.
2
ACCESS INITIAL SET SCREEN
At the Main Menu screen,
move the highlight bar
3
(arrow) to “INITIAL SET”
by pressing CH5∞ or %fi,
then press OK or .
%
ACCESS CLOCK SET SCREEN
Move the highlight bar
(arrow) at the Initial Set
4
screen to “CLOCK SET” by
pressing CH5∞ or %fi,
then press OK or .
%
SET TIME
Press CH5∞ or %fi until
the desired time appears,
5
then press OK or .
● Press and hold CH5∞
or %fi to change the
time by 30 minutes.
%
= INITIAL SET
=CLOCK SET
MAIN MENU
FUNCTION SET
TUNER SET
PRESS (5,∞), THEN (OK)
PRESS (MENU) TO END
INITIAL SET
LANGUAGE ENGLISH
GUIDE CHANNEL SET
SELECT WITH (5,∞) AND (OK)
PRESS (MENU) TO END
CLOCK SET
TIME DATE YEAR
– –:– –AM 1/ 1 98
PRESS (5,∞), THEN (OK)
PRESS (MENU) TO END
3
OK
SET DATE
Press CH5∞ or %fi until the desired date appears, then
press OK or .
6
● Press and hold CH5∞ or %fi to change the date by
15 days.
%
SET YEAR
Press CH5∞ or %fi until the desired year appears.
7
START CLOCK
Press MENU and normal screen appears.
8
To Make Corrections
Press OK or until the item you want to change blinks, then
press CH5∞ or %fi.
%
Page 58

10 EN
MENU
POWER
MENU
OK
CH5∞
INITIAL SETTINGS (cont.)
Set Receivable Channels
Tuner
Turn on the TV and select the VCR channel 3 or 4 (or AV
mode).
POWER
123
456
89
7
0
1
3
2
4
CH+/–
OK
TURN ON THE VCR
Press POWER.
1
ACCESS MAIN MENU
SCREEN
Press MENU.
2
ACCESS TUNER SET
SCREEN
Move the highlight bar
(arrow) to "TUNER SET" by
3
pressing CH5∞ or %fi,
then press OK or .
%
PERFORM AUTO CHANNEL
SET
Move the highlight bar
(arrow) to "AUTO
4
CHANNEL SET" by
pressing CH5∞ or %fi,
then press OK or .
● Receivable channels in
your area are
automatically assigned to
the CH5∞ (+/–) buttons,
and non-receivable
channels are skipped.
NOTES:
●
At the end of Auto
Channel Set, “SCAN
COMPLETED” appears
on screen.
●
If the scan was unsuccessful, “SCAN COMPLETED–
NO SIGNAL” appears on screen. Check the
connections and start again.
%
FUNCTION SET
= TUNER SET
INITIAL SET
PRESS (5,∞), THEN (OK)
PRESS (MENU) TO END
BAND CATV
=AUTO CHANNEL SET
MANUAL CHANNEL SET
SELECT WITH (5,∞) AND (OK)
PRESS (MENU) TO END
AUTO CHANNEL SET
PRESS (MENU) TO END
MAIN MENU
TUNER SET
SCANNING...
INFORMATION
The VCR detects the band (TV or CATV) and selects the
correct band automatically during Auto Channel Set.
The selected band will be displayed on the right side of
"BAND" on the Tuner Set screen.
RETURN TO NORMAL
SCREEN
Press MENU.
5
Page 59

123
MENU
MENU
OK
CH
456
89
7
0
2
4
NUMBER
EN 11
Add Or Delete A Channel
ACCESS MAIN MENU
SCREEN
Press MENU.
1
ACCESS TUNER SET
SCREEN
Move the highlight bar (arrow) to "TUNER SET" by
pressing CH5∞ or %fi, then press OK or .
%
2
ACCESS MANUAL
CHANNEL SET SCREEN
Move the highlight bar
(arrow) to "MANUAL
3
CHANNEL SET" by
pressing CH5∞ or %fi,
then press OK or .
%
TUNER SET
BAND CATV
AUTO CHANNEL SET
=MANUAL CHANNEL SET
SELECT WITH (5,∞) AND (OK)
PRESS (MENU) TO END
1
3
OK
ADD OR SKIP DESIRED
CHANNEL
Input the channel number
using the NUMBER keys or
4
by pressing CH5∞ or %fi,
then press OK or to set
to "ADD" or "SKIP" as
required. Repeat for each
channel you want to add
or skip.
%
RETURN TO NORMAL
SCREEN
Press MENU.
5
MANUAL CHANNEL SET
(CATV)
CH 45 ADD
PRESS NUMBER KEY (0–9)
OR (5,∞), THEN (OK)
PRESS (MENU) TO END
Page 60

12 EN
FF
PLAY
REW
STOP/EJECT
PLAY
STOP
Simple
Playback
Turn on the TV and select the VCR channel 3 or 4 (or AV
mode).
SIMPLE PLAYBACK AND RECORDING
LOAD A CASSETTE
Make sure the window side is up, the rear label side is
facing you and the arrow on the front of the cassette is
1
pointing towards the VCR. Don’t apply too much
pressure when inserting.
● The VCR’s power comes on automatically.
● The counter is automatically reset to "0:00:00".
● If the cassette's record safety tab has been removed,
playback begins automatically.
FIND PROGRAM START
POINT
If the tape is advanced past the start point, press REW.
To go forward, press FF.
2
START PLAYBACK
Press PLAY. "B.E.S.T. PICTURE SYSTEM" appears on the
screen (when B.E.S.T. is set to "ON" Z pg. 22).
3
STOP PLAYBACK
Press STOP or STOP/EJECT. Then press STOP/EJECT
to remove the cassette.
4
REW (Rewind)
123
456
89
7
0
1
3
2
4
FF (Fast-Forward)
INFORMATION
This video recorder is equipped with SQPB (S-VHS QUASI
PLAYBACK) that lets you watch tapes recorded in the S-VHS
format with regular VHS resolution.
● SQPB does not deliver Super VHS resolution.
● S-VHS recording is not possible with this video recorder.
Usable cassettes
Full-Size VHS
T-30 (ST-30**)
T-60 (ST-60**)
T-90
T-120 (ST-120**)
T-160 (ST-160**)
ST-210**
Compact VHS*
TC-20 (ST-C20**)
TC-30 (ST-C30**)
TC-40 (ST-C40**)
* Compact VHS camcorder recordings can be played on
this video recorder. Simply place the recorded cassette
into a VHS Cassette Adapter and it can be used just like
any full-sized VHS cassette.
** This video recorder can record on regular VHS and
Super VHS cassettes. However, it will record regular
VHS signals only.
Page 61

Simple
STOP/EJECT
STOP
PLAY
PAUSE
REC
EN 13
LOAD A CASSETTE
Make sure the record safety tab is intact. If not, cover the
hole with adhesive tape before inserting the cassette.
1
Recording
Turn on the TV and select the VCR channel 3 or 4 (or AV
mode).
CH5∞
TV/VCR
PLAY
REC
123
456
89
7
0
1
ENTER
2
4
SP/EP
NUMBER
CH+/–
PAUSE
SELECT RECORDING
CHANNEL
Press CH 5∞ (+/–). Or press the appropriate NUMBER
keys, then press ENTER. (The channel changes after a
2
few seconds whether you press ENTER or not.)
● If you use the RF connection, by pressing the TV/VCR
button, select VCR mode to view the program to be
recorded.
SET TAPE SPEED
Press SP/EP to set the recording speed.
3
START RECORDING
Press and hold REC and press PLAY on the remote
control, or press REC on the VCR's front panel.
4
B.E.S.T. takes place at the beginning of both the first
SP and the first EP recording after inserting the
cassette (when B.E.S.T. is set to "ON",
PAUSE/RESUME
RECORDING
Press PAUSE. Press PLAY to resume recording.
● During record pause, you can change the recording
5
channel by using the CH 5∞ (+/–) buttons or
NUMBER keys.
B.E.S.T. will not take place if the tape speed is
changed while in record pause mode.
STOP RECORDING
Press STOP or STOP/EJECT. Then press STOP/EJECT to
remove the cassette.
6
Z pg. 22).
3
Recording Resume Function
If there is a power outage during recording (or Instant Timer
Recording or timer recording), the recording will resume
automatically when power is restored to the VCR.
Accidental erasure prevention
● To prevent accidental recording on a recorded cassette,
remove its record safety tab.
To record on it later, cover the hole with adhesive tape.
Record safety tab
Page 62

14 EN
2
PLAY
PAUSE
PLAY
CH5∞
Playback
Features
456
89
7
0
4
PLAYBACK AND RECORDING FEATURES
NOTE:
To use the remote control's JOG dial or SHUTTLE ring, press
JOG/SHUTTLE first so that the button lights. Pressing the button
again turns off the light.
Still Picture/Frame-By-Frame
Playback
PAUSE DURING PLAYBACK
Press PAUSE. If there is vertical jitter, use the CH 5 (+)
or ∞ (–) button to correct the picture.
1
ACTIVATE FRAME-BY-FRAME
PLAYBACK
Turn the JOG dial to the right for forward frame-by-frame
playback, or to the left for reverse frame-by-frame playback.
2
OR
Press PAUSE repeatedly to advance one frame at a time.
OR
Press £ repeatedly for forward frame-by-frame playback
or ™ repeatedly for reverse frame-by-frame playback.
To resume normal playback, press PLAY.
Slow Motion/Reverse Slow
CH+/–
Motion
1
PAUSE
3
JOG
SHUTTLE
NOTE: Refer to the following for the operations described above.
Still
Shuttle Ring Modes
Forward search : 3 steps
Normal playback
Slow motion : 2 steps
Reverse slow motion : 2 steps
Reverse playback
Reverse search : 3 steps
F
s
o
e
r
w
a
a
r
c
r
d
h
S
e
l
s
o
r
w
e
v
e
m
R
e
s
r
e
y
v
a
e
l
p
R
e
h
s
c
r
r
e
a
v
e
e
s
R
o
t
w
i
o
o
l
s
o
m
n
n
o
i
t
P
l
a
y
ACTIVATE SLOW-MOTION
PLAYBACK
During playback or still, turn the SHUTTLE ring to the
right for forward slow motion, or to the left for reverse
slow motion (refer to the illustration below).
1
OR
For hands-free slow-motion, press and release ™ during
playback to decrease speed in the forward direction.
Continue to press and release ™ to select the reverse
slow motion, reverse play and reverse search modes.
OR
During still picture, press and hold £ for forward
slow motion, or press and hold ™ for reverse slow
motion. Release to return to still picture.
OR
For forward slow motion during still picture, press and
hold PAUSE for more than 2 seconds. Press PAUSE
again to return to still picture.
To resume normal playback, press PLAY.
O
R
G
P
V
+
T
T
V
–
T
V
Reverse
Reverse
search
3 steps 5 steps 5 steps 4 steps
Reverse
play
Reverse
slow motion
+
V
T
–
P
G
R
O
Slow motion Play
Forward
Forward
search
Page 63

FF
PLAY
REW
REW
PLAY
456
89
7
0
1
4
SKIP SEARCH
FF
EN 15
High-Speed Search
ACTIVATE HIGH-SPEED
SEARCH
During playback or still, turn the SHUTTLE ring all the
way to the right for forward high-speed search, or to
1
the left for reverse high-speed search. By releasing
SHUTTLE still picture playback is selected.
● For forward high-speed search, turn the SHUTTLE
ring all the way to the right and release it within 1
second.
● For reverse high-speed search, turn the SHUTTLE ring
all the way to the left and release it within 1 second.
OR
During playback or still, press FF for forward highspeed search, or REW for reverse high-speed search.
To resume normal playback, press PLAY.
NOTE:
For short searches, during playback or still, press and hold FF or
REW for over 2 seconds. When released, normal playback
resumes.
Skip Search
3
SHUTTLE
Variable-Speed Search/
Reverse Motion Playback
ACTIVATE VARIABLE-SPEED
SEARCH
During playback or still, turn the SHUTTLE ring to the
right for forward variable-speed search, or to the left for
1
reverse variable-speed search (refer to the illustration on
page 14).
OR
During playback, repeatedly press and release ™ or
to select the search speed.
£
● To increase the speed in the forward direction, press
and release £ repeatedly to select the various
forward search modes.
● To decrease the speed in the forward direction, press
and release ™.
● To play in reverse slow motion, and in reverse play
mode, continue to press ™ repeatedly after
To resume normal playback, press PLAY.
selecting all the forward slow motion modes.
SKIP OVER UNWANTED
SECTIONS
Press SKIP SEARCH 1 to 4 times during playback. Each
press initiates a 30-second period of fast- motion
1
playback. Normal playback resumes automatically.
NOTE:
To return to normal playback during a Skip Search,
press PLAY.
Index Search
Index codes are placed on the tape at the start of each
recording. You can find and automatically play back from the
start of any recording using the Index Search function.
START SEARCH
While the tape is stopped, press ™ or £ ( or ).
fi
1
ACCESS DISTANT CODE
To access a recording 2–9 index codes away, press
™ or £ ( or ) repeatedly until the correct
2
number is displayed on screen (only if SUPERIMPOSE is
set to ON (Z pg. 19). Playback begins automatically
when the desired recording is located.
● If necessary press REW or FF when play starts to
search visually to find the very beginning of the
desired program.
NOTE:
An index code is not placed on the tape when recording is
paused and then resumed.
fi
%
%
Page 64

16 EN
FF
REW
CH5∞
REVIEW
REW
123
456
89
7
0
1
3
PLAYBACK AND RECORDING FEATURES (cont.)
Instant ReView
At the press of a button, you can power up your VCR, rewind the
tape and begin viewing the most recent timer-recorded program.
ACTIVATE INSTANT REVIEW
After ensuring that the Timer mode is disengaged, press
REVIEW.
1
● The power comes on and the VCR rewinds to the index
code indicating the start of the last timer-recorded
program, then begins playback automatically.
● You can access a program 2–9 index codes away
from the current position on the tape. If, for example,
you have 5 programs recorded and you want to
watch the third one, press REVIEW three times.
● If necessary press REW or FF when play starts to
search visually to find the very beginning of the
desired program.
● If the tape is already rewound when REVIEW is
pressed, it will play the tape from the beginning. It
will not fast forward to an index code.
● The Instant Review function will also operate if the
2
4
CH+/–
FF
Manual Tracking
Once playback begins, the VCR’s automatic tracking function is
engaged. If tracking noise appears in the picture, you can
override this and make the adjustment manually.
VCR's power is on.
ENGAGE MANUAL
TRACKING MODE
During playback, press the CH5 and ∞ buttons on the
VCR's front panel simultaneously to cancel the
1
automatic tracking mode and enable manual tracking
adjust.
ADJUST MANUAL
TRACKING
(+) or
Press CH 5
remote. Press briefly for fine adjust, or press and hold for
coarse adjust. Watch the screen and continue adjusting
2
until optimum picture and sound quality are achieved.
(–) on the VCR's front panel or
∞
RE-ENGAGE AUTOMATIC
TRACKING
Press the CH5 and ∞ buttons on the VCR's front panel
simultaneously.
3
● When automatic tracking is re-engaged, B.E.S.T. is
automatically activated.
NOTES:
●
To obtain a noiseless still picture it may be necessary to adjust
tracking in slow playback and then engage Pause.
●
Manual tracking is possible during hands-free slow-motion.
During hands-free slow-motion playback, simply press CH
(+) or ∞ (–) on the VCR's front panel or remote to adjust
tracking.
5
Page 65

123
MENU
MENU
OK
CH
456
89
7
0
1
2
4
EN 17
Video Stabilizer
By activating the Video Stabilizer you can correct vertical
vibrations in the picture when playing back unstable recordings
that were made on another VCR. When this function is set to
"ON", vertical vibration will be automatically corrected. *The
default setting is "OFF".
ACCESS MAIN MENU
SCREEN
Press MENU.
1
ACCESS FUNCTION SET
SCREEN
Move the highlight bar
(arrow) to "FUNCTION
2
SET" by pressing CH5∞ or
%
fi, then press OK or .
%
ACTIVATE VIDEO STABILIZER
Move the highlight bar
(arrow) to "VIDEO
3
STABILIZER" by pressing
CH5∞ or %fi
OK or
, then press
%
to set to "ON"
.
MAIN MENU
= FUNCTION SET
TUNER SET
INITIAL SET
PRESS (5,∞), THEN (OK)
PRESS (MENU) TO END
FUNCTION
AUTO TIMER OFF
SUPERIMPOSE ON
AUTO SP
=EP TIMER OFF
=VIDEO STABILIZER ON
NEXT PAGE
SELECT WITH (5,∞) AND (OK)
PRESS (MENU) TO END
3
OK
RETURN TO NORMAL
SCREEN
Press MENU.
4
NOTES:
●
Regardless of the setting, this function has no effect, during
recording and during special-effects playback.
●
When you finish viewing the tape, be sure to set it back to
"OFF".
●
The Superimpose mode indications may jitter vertically when
"VIDEO STABILIZER" is set to "ON".
Page 66

18 EN
POWER
PLAY
POWER
PAUSE
STOP
FF
PLAY
PLAYBACK AND RECORDING FEATURES (cont.)
Repeat Playback
START REPEAT
Press and hold PLAY (until " " blinks on the front
display panel) during playback, then release.
1
REW
● The entire tape is played back 50 times.
STOP REPEAT
To stop, press STOP at any time.
2
NOTE:
Pressing PLAY, REW, FF, PAUSE or ™ or £ also
stops Repeat Playback.
Counter Reset
C.RESET
REW
123
456
7
1
STOP
2
89
0
4
3
DISPLAY
TIMER
FF
PAUSE
RESET COUNTER TO ZERO
Press C.RESET.
1
NOTE:
By pressing the DISPLAY button, you can change the
display to show the counter reading, channel number
or clock time. (Channel number is not displayed during
playback.)
Tape Position Indicator
The Tape position indicator
appears on screen when, from the
stop mode, you press FF or REW,
or perform an Index Search. The
position of " " in relation to "B"
(Beginning) or "E" (End) shows you
where you are on the tape.
NOTES:
●
"SUPERIMPOSE" must be set to "ON", or the indicator will not
appear (Z pg. 19).
●
It may take a few seconds for the Tape Position Indicator to be
displayed.
Next-Function Memory
The Next Function Memory “tells” the VCR what to do after
rewinding. Before continuing, ensure that the VCR is in stop
mode.
a– For Automatic Start Of Playback After Tape Rewind . . .
. . . press REW, then press PLAY within 2 seconds.
b– For Automatic Power Off After Tape Rewind . . .
. . . press REW, then press POWER within 2 seconds.
c– For Automatic Timer Standby After Tape Rewind . . .
. . . press REW, then press TIMER within 2 seconds.
+++
BE
COUNT 0:33:27
NOTE:
It is not possible to select the Automatic Timer functions if the
cassette's record safety tab is removed.
Page 67

123
MENU
MENU
OK
CH
456
89
7
0
1
2
4
OSD
EN 19
Superimpose
This function, switchable between ON and OFF, determines
whether or not operational indicators will appear on screen.
ACCESS MAIN MENU
SCREEN
Press MENU.
1
ACCESS FUNCTION SET
SCREEN
Move the highlight bar (arrow) to "FUNCTION SET" by
pressing CH5∞ or %fi, then press OK or .
%
2
SELECT SUPERIMPOSE SET
MODE
Move the highlight bar
(arrow) to "SUPERIMPOSE"
3
by pressing CH5∞ or %fi,
then press OK or to
select the desired mode:
a– Select "ON" if you want
the superimposed
operational indications
on the TV screen.
b– Select "OFF" if you do not want the superimposed
operational indications on the screen.
%
=SUPERIMPOSE ON
FUNCTION
AUTO TIMER OFF
AUTO SP
=EP TIMER OFF
VIDEO STABILIZER OFF
NEXT PAGE
SELECT WITH (5,∞) AND (OK)
PRESS (MENU) TO END
3
OK
RETURN TO NORMAL
SCREEN
Press MENU.
4
To recall an indication
1 Press OSD.
n All indications corresponding to the current status are
displayed for 5 seconds. After that, the counter
information and RECORD/PAUSE if in the Record
Pause mode, are left displayed on the screen.
2 Press OSD again to clear the display.
The superimposed indication on the TV screen tells you what the VCR is doing.
Tuned-in channel or AUX(iliary) mode
When the channel is changed, the new
channel is displayed on the screen for 5
seconds.
Clock time
Stereo program indication
Second Audio Program indication
Tape position indicator
Audio mode indications
CH 125 RECORD
THU 12:00 AM PAUSE
STEREO ] SP
SAP
BE
NORM
HI–FI COUNT –1:23:45
NOTES:
●
If you engage the Record Pause mode, RECORD/PAUSE is
displayed regardless of the Superimpose mode setting.
●
If you select a channel on which no signal is received, the
channel number is displayed regardless of the Superimpose
mode setting.
+++
INDEX-1
Counter reading
Operation mode
When the operation mode is changed,
the new mode is displayed — RECORD
(5 sec.), PLAY (5 sec.), FF/REW (5 sec.
when engaged from Stop mode),
RECORD PAUSE (for as long as Pause is
engaged), and ITR *:** (5 sec.).
Tape speed indication
"Cassette Loaded" mark
When a cassette is loaded, the mark is
displayed for 5 seconds. It blinks when the
VCR's EJECT button is pushed.
INDEX indication
Page 68

20 EN
MENU
MENU
OK
CH
PLAYBACK AND RECORDING FEATURES (cont.)
123
456
89
7
0
1
3
AUDIO
2
4
OK
Select The Soundtrack
Your VCR can record two soundtracks simultaneously (Normal
and Hi-Fi) and play back the selected one, or both together. Or,
when viewing a pre-recorded tape that contains two separate
Hi-Fi audio programs, you can choose to listen to either one by
selecting either "Hi-Fi L" or "Hi-Fi R" in step 3.
ACCESS MAIN MENU
SCREEN
Press MENU.
1
ACCESS FUNCTION SET
SCREEN
Move the highlight bar (arrow) to "FUNCTION SET" by
pressing CH5∞ or %fi, then press OK or .
%
2
SELECT AUDIO MONITOR
SET MODE
Move the highlight bar
(arrow) to "AUDIO
3
MONITOR" by pressing
CH5∞ or %fi, then press
OK or to select the
desired mode:
a– Hi-Fi
b– Hi-Fi L
c– Hi-Fi R
d– Normal
e– Mix
=AUTO TIMER OFF
%
=AUDIO MONITOR HI–FI
FUNCTION
SUPERIMPOSE ON
AUTO SP
=EP TIMER OFF
VIDEO STABILIZER OFF
NEXT PAGE
SELECT WITH (5,∞) AND (OK)
PRESS (MENU) TO END
PREVIOUS PAGE
2ND AUDIO RECORD OFF
AV COMPU-LINK ON
B.E.S.T. ON
You can also select the soundtrack by simply pressing the
remote control's AUDIO
Hi-Fi → Hi-Fi L → Hi-Fi R → Normal → Mix → Hi-Fi
button as follows:
SELECT WITH (5,∞) AND (OK)
PRESS (MENU) TO END
RETURN TO NORMAL
SCREEN
Press MENU.
4
NOTES:
●
If the tape being played back has no Hi-Fi soundtrack, the
Normal soundtrack will be heard no matter what choice you
make in step 3.
●
If RF connection is used for TV, even if Hi-Fi audio monitor is
selected the sound will be mono and will be reproduced in
both loudspeakers.
Page 69

123
MENU
MENU
OK
CH
PLAY
456
7
1
PLAY
2
89
0
4
3
OK
EN 21
AV COMPU LINK Playback
Your VCR is compatible with JVC’s AV COMPU LINK components,
including amplifiers (or receivers) and televisions. AV COMPU
LINK provides one touch control of the audio and video components that are linked via their AV COMPU LINK connectors.
For example: simply load a cassette in the VCR and press PLAY and
the AV COMPU LINK components automatically power on, the TV's
AV mode is selected and the VCR goes into play mode. (PLAY need
not be pressed if the cassette's record safety tab is removed.)
MAKE CONNECTION
Connect your VCR to an AV COMPU LINK component
as shown in the illustration in the left column.
1
● The mini-plug cable is a mono 3.5 mm mini-plug to
mono 3.5 mm mini-plug connector.
ACCESS MAIN MENU SCREEN
Press MENU.
2
ACCESS FUNCTION SET SCREEN
Press CH5∞ or %fi to move the highlight bar (arrow)
to “FUNCTION SET”, then press OK or .
%
3
ENABLE AV COMPU LINK
PLAYBACK
Press CH5∞ or %fi to
move the highlight bar
4
(arrow) to “AV COMPULINK”, then press OK or
%
to set to "ON".
=AUTO TIMER OFF
FUNCTION
SUPERIMPOSE ON
AUTO SP
=EP TIMER OFF
VIDEO STABILIZER OFF
NEXT PAGE
SELECT WITH (5,∞) AND (OK)
PRESS (MENU) TO END
Example
Your VCR
AV COMPU LINK
Television
Mini-plug cable
(not supplied)
AV COMPU
LINK II
(VCR ONLY)
VIDEO IN
AUDIO IN
PAUSE/AV COMPULINK
AUDIO
OUT
VIDEO OUT
Audio/Video cable
(not supplied)
PREVIOUS PAGE
2ND AUDIO RECORD OFF
AUDIO MONITOR HI–FI
=AV COMPU-LINK OFF
B.E.S.T. ON
SELECT WITH (5,∞) AND (OK)
PRESS (MENU) TO END
RETURN TO NORMAL SCREEN
Press MENU.
5
PERFORM AV COMPU LINK
PLAYBACK
Simply insert a cassette and press PLAY (if the cassette’s
record safety tab has been removed, playback begins
6
automatically). Linked components are turned on, and
the TV set to its AV mode, automatically!
NOTE:
Connection varies depending on the type of JVC TV you have.
Please refer to the TV’s instruction manual when making this
connection.
Page 70

22 EN
MENU
POWER
MENU
OK
CH
PLAYBACK AND RECORDING FEATURES (cont.)
B.E.S.T.
Picture System
Turn on the TV and select the VCR channel 3 or 4 (or AV
mode).
The B.E.S.T. (Biconditional Equalized Signal Tracking) checks
the condition of the tape during recording and playback, and
compensates for poor reproduction to provide the best quality
recording and playback pictures. *The default setting is "ON".
Preparation
TURN ON THE VCR
Press POWER.
1
ACCESS MAIN MENU
SCREEN
Press MENU.
2
ACCESS FUNCTION SET
SCREEN
Press CH5∞ or %fi to
move the highlight bar
3
(arrow) to “FUNCTION
SET”, then press OK or .
%
MAIN MENU
= FUNCTION SET
TUNER SET
INITIAL SET
123
456
89
7
0
1
3
2
4
POWER
OK
SELECT B.E.S.T. MODE
%
Press CH5∞ or
move the highlight bar
(arrow) to "B.E.S.T.", then
4
press OK or to set to
"ON" or "OFF".
to
fi
%
NOTE:
When recording or when
playing back tapes
recorded on this VCR set
the B.E.S.T. to "ON".
RETURN TO NORMAL
SCREEN
Press MENU.
5
PRESS (5,∞), THEN (OK)
PRESS (MENU) TO END
FUNCTION
=AUTO TIMER OFF
SUPERIMPOSE ON
AUTO SP
=EP TIMER OFF
VIDEO STABILIZER OFF
NEXT PAGE
SELECT WITH (5,∞) AND (OK)
PRESS (MENU) TO END
PREVIOUS PAGE
2ND AUDIO RECORD OFF
AUDIO MONITOR HI–FI
AV COMPU-LINK ON
=B.E.S.T. ON
SELECT WITH (5,∞) AND (OK)
PRESS (MENU) TO END
Page 71

EN 23
PAUSE
PLAY
REC
PLAY
Recording
Perform steps 1 – 3 on page 13 ("Simple Recording") before
continuing.
START RECORDING
Press and hold REC and
press PLAY on the remote
1
control, or press REC on
the VCR's front panel.
● The VCR takes about 7
seconds to assess the
quality of the tape in
use, then recording
0
4
begins with the picture
level optimized.
DURING B.E.S.T.
START END
+++
B.E.S.T. PICTURE SYSTEM
+
1
REC
3
PAUSE
Playback
The VCR assesses the quality of the tape once you start
playback.
Perform steps 1 and 2 on page 12 ("Simple Playback") before
continuing.
START PLAYBACK
Press PLAY.
● The VCR adjusts the
1
playback picture quality
based on the quality of
the tape in use.
B.E.S.T. PICTURE SYSTEM
NOTES:
●
When using rental tapes,
or tapes recorded on other VCRs, set “B.E.S.T.” in step
4 of the Preparation procedure to either “ON” or
“OFF” as desired to give the best picture (Z pg. 22).
●
The B.E.S.T. Picture System screen only appears at the
beginning of automatic tracking. Even though the
screen doesn't appear after that, the B.E.S.T. function
is operative.
●
To display the B.E.S.T. Picture System screen,
“SUPERIMPOSE” must be set to "ON" or the B.E.S.T.
Picture System screen will not appear (Z pg. 19).
NOTES:
●
B.E.S.T. occurs immediately prior to both the
first SP and the first EP
recording after inserting
the cassette. It does not
take place during
recording.
●
In the case of timer
recording, B.E.S.T. takes
place for both SP and EP before the first timer recording
after inserting the cassette (regardless of the tape speed
selected for that recording).
●
Once the cassette is ejected, the B.E.S.T. data is
canceled. The next time the cassette is used for
recording, B.E.S.T. is re-performed.
●
While B.E.S.T. is operative, the PAUSE button will not
function.
●
To display the B.E.S.T. Picture System, "SUPERIMPOSE" must be set to "ON" or the B.E.S.T. Picture
System screen will not appear (Z pg. 19).
B.E.S.T. COMPLETE
START END
+++
B.E.S.T. PICTURE SYSTEM
ATTENTION
n As B.E.S.T. takes place before recording actually starts,
there is a delay of about 7 seconds after REC and PLAY on
the remote, or REC on the VCR's front panel, are pressed.
To make sure you record the desired scene or program
completely, first perform the following steps:
1) Press and hold PAUSE, and press REC to engage the
RECORD PAUSE mode.
● The VCR then automatically checks the condition of
the tape and, after about 7 seconds, re-enters RECORD
PAUSE.
2) Press PLAY to start recording.
n If you want to bypass B.E.S.T. and start recording right
away, set "B.E.S.T." to "OFF" in step 4 of the Preparation
procedure (Z pg. 22).
+
Page 72

24 EN
Recording
Features
PLAYBACK AND RECORDING FEATURES (cont.)
Record One Program While
Watching Another
ENGAGE TV MODE
During recording...
● Press TV/VCR. The VCR's VCR indicator goes out. (If
1
you are using the RF connection (Z pg. 4) to view
the output from your VCR, the TV broadcast being
recorded disappears.)
● If you are using the AV connection (Z pg. 4) to view
the output from your VCR, change the TV's input
mode from AV to TV.
C.RESET
TV/VCR
123
456
89
7
0
1
3
OSD
2
4
SELECT CHANNEL FOR
VIEWING
Use the TV’s channel selector to set the channel you
want to watch.
2
Display Elapsed Recording
Time
RESET COUNTER TO ZERO
Before recording starts, press C.RESET. The counter
resets to zero and displays the exact elapsed time as the
1
tape runs.
DISPLAY ELAPSED TIME ON
SCREEN
During recording, press OSD at any time to see the
elapsed time.
2
All indications corresponding to the current status of the
VCR are displayed for 5 seconds. The counter display
remains on the screen indicating the elapsed time.
Press OSD again to remove the display.
● Make sure "SUPERIMPOSE" is set to "ON" (Z pg. 19).
● The indications are not recorded.
Page 73

123
MENU
MENU
OK
CH
456
89
7
0
2
4
EN 25
Stereo And SAP
(Second Audio Program)
Your VCR’s built-in MTS decoder enables reception of Multichannel TV Sound broadcasts.
When the channel is changed...
● The "STEREO" indication appears on the screen for about 5
seconds if the program is a stereo broadcast.
● The "SAP" indication appears on the screen for about 5
seconds if the program is an SAP broadcast.
● Both indications appear when a stereo program is
accompanied by SAP audio.
To Record Stereo Programs . . .
. . . simply follow the basic recording procedure.
To Listen To Stereo Soundtrack During Recording . . .
. . . set "AUDIO MONITOR" to "HI-FI" at the Function screen
(
Z pg. 20).
To Record SAP Programs...
ACCESS MAIN MENU SCREEN
Press MENU.
1
1
3
OK
ACCESS FUNCTION SET SCREEN
Move the highlight bar (arrow) to "FUNCTION SET" by
pressing CH5∞ or %fi, then press OK or .
2
SELECT 2ND AUDIO RECORD SET
MODE
Move the highlight bar
(arrow) to "2ND AUDIO
3
RECORD" by pressing
CH5∞ or %fi, then press
%
OK or to set to "ON".
RETURN TO NORMAL SCREEN
Press MENU.
=AUTO TIMER OFF
SUPERIMPOSE ON
AUTO SP
VIDEO STABILIZER OFF
NEXT PAGE
SELECT WITH (5,∞) AND (OK)
PRESS (MENU) TO END
PREVIOUS PAGE
=2ND AUDIO RECORD ON
AUDIO MONITOR HI–FI
AV COMPU-LINK ON
B.E.S.T. ON
SELECT WITH (5,∞) AND (OK)
PRESS (MENU) TO END
%
FUNCTION
=EP TIMER OFF
4
NOTES:
●
If a SAP program is received and "2ND AUDIO RECORD" is
set to "ON", the SAP audio is recorded on both the Normal
and Hi-Fi tracks. The main audio program is not recorded.
●
If a non-SAP program is received, the main audio is recorded
on both the Hi-Fi and Normal audio tracks.
Page 74

26 EN
CH
VCR Plus+
Timer
Programming
TIMER RECORDING
Timer recording allows you to program the VCR to automatically
record a program that will be broadcast at some future time.
The timer record function can be programmed using VCR Plus+
or Express Timer Programming up to 8 shows as far as a year in
advance. (Z pg. 26 or 30)
The VCR Plus+ timer programming system eliminates the need
to input channel, date, start and stop time data when setting the
timer record function. Simply key in the PlusCode number for
the TV program you wish to record and the VCR's timer will be
automatically programmed. (The PlusCodes are the numbers
next to the programs in most TV listings.)
Turn on the TV and select the VCR channel 3 or 4 (or AV
mode).
CANCEL
PROG.
123
456
89
7
0
1
3
2
4
NUMBER
OK
LOAD A CASSETTE
Make sure the record safety tab is present.
● The VCR’s power comes on automatically.
1
ACCESS VCR PLUS+ SCREEN
Press PROG. on the
remote control.
2
● The clock must be set in
order to access the VCR
Plus+ screen. If you
haven’t set the clock, the
Main Menu screen
appears after an error
message is displayed.
Refer to page 6 for the Plug & Play procedure or page
9 for the clock setting procedure.
VCR PLUS+
PRESS NUMBER KEY (0–9)
PRESS (+/–) TO SET
EXPRESS PROGRAMMING
PRESS (PROG.) TO END
ENTER PLUSCODE NUMBER
Press the appropriate
NUMBER keys to enter the
3
PlusCode number printed
in the TV listings for the
TV program you wish to
record and press OK.
If the Guide Channel Set
screen appears, go to step
4. If the VCR Plus+
Program screen appears, go to step 5.
● To make corrections, press CANCEL and input the
correct PlusCode number.
VCR PLUS+
123
PRESS NUMBER KEY (0–9)
PRESS (PROG.) TO END
INPUT RECEIVING CHANNEL
NUMBER
The Guide Channel
Number, which is assigned
4
to the TV or cable station
for the PlusCode number
that you entered in step 3,
will appear automatically
on the Guide Channel Set
screen. Input the number
of the channel on which
the broadcast for the PlusCode number is received on
the VCR or cable box using the NUMBER keys, CH 5
or %fi, then press OK.
● The Guide Channel Set screen appears only when
you input the PlusCode number of a station for which
the Guide Channel number has not been set already.
GUIDE CHANNEL SET
GUIDE CH: 12
VCR CH : –– –
PRESS NUMBER KEY (0–9)
OR (5,∞), THEN (OK)
PRESS (PROG.) TO END
THEN (OK)
∞
Page 75

SP/EP
NUMBER "9"
CANCEL
NUMBER "8"
STOP+/–
PROG.
123
456
89
7
0
1
3
2
4
TIMER
OK
CHECK PROGRAM DATA
The PlusCode number you
entered and the matching
5
Timer-Recording information is displayed on the
Program screen. Check to
make sure it’s accurate.
● To change the stop time,
press STOP +/–.
● To timer-record daily or weekly serials, press DAILY
(NUMBER “8”) or WEEKLY (NUMBER “9”). “DAILY”
or “WEEKLY” appears on the Program screen.
Pressing the button again makes each corresponding
display disappear.
● If you made a mistake, press CANCEL to access the
VCR Plus+ screen again and input the correct
PlusCode number.
● If the PlusCode number you inputted is incorrect,
"ERROR" may appear on the screen to advise you of
the error. This happens when the PlusCode number is
for a program which has already passed. "ERROR" is
displayed for about 5 seconds and the VCR Plus+
screen reappears.
(VCR PLUS+ 12345678)
START STOP
8:00PM = 10:00PM
DATE CH
12/24/98 12 SP
THU
PRESS (8=DAILY, 9=WEEKLY
STOP+/– = STOP TIME, SP/EP)
PRESS (OK) TO END
SET TAPE SPEED
Press SP/EP.
EN 27
PROGRAM 1
ATTENTION
If there is a conflict in the timer schedule and one program
overlaps with another, only the parts shown below in gray
will be recorded.
Pattern 1: The program with the lower program number
Program 1
Program 2
Pattern 2: The program that is broadcast earlier will be
Program 1
Pattern 3: The program that is broadcast earlier will be
Program 1
will be recorded.
10:00
recorded.
10:00
Program 2
recorded, followed by the remaining portion of
the other program.
10:00
11:00
CH10
CH40 Not recorded
11:00
CH10
CH40
11:00
CH10
Program 2
12:00
12:00
Not recorded
12:00
CH40
6
RETURN TO NORMAL
SCREEN
Press PROG. or OK. "PROGRAM COMPLETED"
appears on the screen for about 5 seconds, then normal
7
screen appears.
ENGAGE TIMER MODE
Press TIMER. The VCR turns off automatically and "‰"
is displayed on the display panel.
8
IMPORTANT
If you have moved to a different area or if a broadcasting
station's channel number has been changed, the wrong
VCR or CABLE CH number will be displayed on the VCR
Plus+ Program screen in step 5. When this happens, set the
correct the Guide Channel number for that station.
(Z pg. 28, "VCR Plus+ Setup")
NOTES:
●
To disengage the timer before recording starts, press TIMER
again. Pressing once more re-engages it.
●
In case of a power failure after programming, the VCR’s
memory backup keeps your selections (if the lithium battery is
not exhausted).
●
When timer-recording cable channels received through a
Cable Box, be sure to keep the Cable Box set to ON.
Not recorded
Page 76

28 EN
MENU
POWER
MENU
OK
CH
VCR Plus+
Setup
TIMER RECORDING (cont.)
IMPORTANT
If you have moved to a different area or if a broadcasting
station's channel number has been changed, the wrong VCR
or CABLE CH number will be displayed on the VCR Plus+
Program screen (Z step 5 on page 27). When this happens,
perform the following steps to set the correct the Guide
Channel number for that station.
Turn on the TV and select the VCR channel 3 or 4 (or AV
mode).
POWER
123
456
89
7
0
1
2
4
To ensure that VCR Plus+Timer Recording operates correctly it
is necessary to set the VCR Plus+ "Guide Channel Set " for each
station. Please read the following information carefully.
VCR Plus+ Guide Channel Matching
VCR Plus+ assigns a VCR Plus+ "Guide Channel" to broadcast
and cable TV channels. These Guide Channel numbers are also
called the VCR Plus+ Channel Codes. Most TV listings have a
section, usually a chart, indicating the "Guide Channel"
numbers assigned to each station. For accurate VCR Plus+
Programming the VCR Plus+ Guide Channel number for each
station should match the channel number on which it is
received in your area.
NOTES:
●
In many instances the VCR Plus+ Guide Channel numbers for
cable and broadcast TV stations DO NOT match the channel
number on which it is received by your VCR or cable box.
Check your TV listing, or contact your cable supplier for
details.
●
Many broadcast TV stations can be viewed on cable. Check
your TV listing, or contact your cable supplier for details.
TURN ON THE VCR
Press POWER.
1
ACCESS MAIN MENU
SCREEN
Press MENU.
2
3
OK
ACCESS INITIAL SET
SCREEN
%
Press CH
move the highlight bar
(arrow) to “INITIAL SET”,
3
then press OK or .
5
∞
or
to
fi
%
MAIN MENU
FUNCTION SET
TUNER SET
= INITIAL SET
PRESS (5,∞), THEN (OK)
PRESS (MENU) TO END
Page 77

123
MENU
MENU
OK
CH
456
89
7
0
1
3
2
4
NUMBER
CH
OK
ACCESS GUIDE CHANNEL
SET SCREEN
Press CH5∞ or %fi to
move the highlight bar
4
(arrow) to “GUIDE
CHANNEL SET”, then
press OK or .
%
CLOCK SET
LANGUAGE ENGLISH
=GUIDE CHANNEL SET
SELECT WITH (5,∞) AND (OK)
PRESS (MENU) TO END
INPUT GUIDE CHANNEL
NUMBER
Press CH5∞, %fi or the
appropriate NUMBER keys
5
to input the VCR Plus+
Guide Channel number as
shown in the TV listing.
Then press OK or .
%
(Ex.) When inputting the
Guide Channel number
6 for WNJU(Ind.)
GUIDE CHANNEL SET
GUIDE CH : 6
VCR CH : – – –
PRESS NUMBER KEY (0-9)
OR (5,∞), THEN (OK)
PRESS (MENU) TO END
INPUT RECEIVING CHANNEL
NUMBER
%
Press CH
appropriate NUMBER keys
to input the number of the
6
channel on which the
Guide Channel’s broadcasts are received. Then
press OK or .
● Repeat steps 5 and 6 for
each instance.
5
or the
,
fi
∞
%
(Ex.) If WNJU(Ind.) is
received on channel 47
GUIDE CHANNEL SET
=
GUIDE CH : 6
VCR CH : 47
PRESS NUMBER KEY (0-9)
OR (5,∞), THEN (OK)
PRESS (MENU) TO END
EN 29
INITIAL SET
RETURN TO NORMAL
SCREEN
Press MENU.
7
ATTENTION CABLE BOX SUBSCRIBERS
● In order to set the Guide Channel for a cable program,
you must select your cable box's output channel as the
VCR channel in step 6. If the cable box is connected to
your VCR's ANT. IN connector, select the cable box's RF
output channel. If the cable box is connected to your
VCR's VIDEO IN and AUDIO IN connectors, press
NUMBER key "0" and/or CH to select "F-1" (for the front
panel AUDIO/VIDEO connectors) or "L-1" (for the rear
panel AUDIO/VIDEO IN connectors) as the VCR
channel.
● It is important that you keep the cable box ON and
tuned to the cable station of the program you want to
record until timer recording is completed.
Page 78

30 EN
STOP+/–
DATE+/–
Express Timer
Programming
Turn on the TV and select the VCR channel 3 or 4 (or AV
mode).
TIMER RECORDING (cont.)
You can directly program the VCR’s timer to record up to 8
shows, as far as a year in advance. Remember, the clock must be
set before you can program the timer (Z pg. 6 or 9).
LOAD A CASSETTE
Make sure the record safety tab is intact. If not, cover
the hole with adhesive tape, then load it into the VCR.
1
● The VCR comes on, and the counter is reset,
automatically.
ACCESS VCR PLUS+
SCREEN
Press PROG.
2
ACCESS PROGRAM
SCREEN
Press START +/–. (If you’re
just starting out,
3
“PROGRAM 1” appears.)
PROGRAM 1
START STOP
– –:– –AM = – –:– –AM
DATE CH
– –/– –/– – – – – S P
PRESS (+/–, SP/EP, 8=DAILY,
9=WEEKLY), THEN (0K)
PRESS (PROG.) TO END
START+/–
PROG.
123
456
89
7
0
1
3
2
4
SET PROGRAM START TIME
Press START +/– to enter
the time you want
4
recording to start.
● Press and hold START
+/– to move in 30-
minute increments, or
press and release
repeatedly to move 1
minute at a time.
START STOP
8:00 AM = – –:– –AM
DATE CH
– –/– –/– – – – – S P
PRESS (+/–, SP/EP, 8=DAILY,
9=WEEKLY), THEN (0K)
PRESS (PROG.) TO END
SET PROGRAM STOP TIME
Press STOP +/– to enter the time you want recording to
stop.
5
● Press and hold STOP +/– to move in 30-minute
increments, or press and release repeatedly to move 1
minute at a time.
SET PROGRAM DATE
Press DATE +/–. (The current date is displayed on
screen. The date you enter appears in its place.)
6
PROGRAM 1
Page 79

NUMBER "8"
PROG.
SP/EP
123
456
89
7
0
1
3
2
4
NUMBER "9"
TIMER
CH
OK
SET CHANNEL NUMBER
Press CH +/–.
● Holding down CH +/– rapidly scans through the
7
channels.
● If you are using a cable box, enter the cable box
channel, not the channel to be recorded. The channel
to be recorded must be selected on the cable box.
(The cable box channel is the VCR's channel that
displays the channels received by the cable box.)
● To timer-record cable or DBS channels through an
external tuner connected to the VCR's rear or front
external input connectors, press the NUMBER key "0"
and/or CH so that "F-1" or "L-1" appears instead of a
channel number.
SET TAPE SPEED
Press SP/EP to set the tape speed.
8
RETURN TO NORMAL
SCREEN
Press PROG. or OK. "PROGRAM COMPLETED"
appears on the screen for about 5 seconds, then normal
9
screen appears.
EN 31
ATTENTION
If there is a conflict in the timer schedule and one program
overlaps with another, only the parts shown below in gray
will be recorded.
Pattern 1: The program with the lower program number
Program 1
Program 2
Pattern 2: The program that is broadcast earlier will be
Program 1
Pattern 3: The program that is broadcast earlier will be
Program 1
will be recorded.
10:00
recorded.
10:00
Program 2
recorded, followed by the remaining portion of
the other program.
10:00
11:00
CH10
CH40 Not recorded
11:00
CH10
CH40
11:00
CH10
Program 2
12:00
12:00
Not recorded
12:00
CH40
Not recorded
ENGAGE TIMER MODE
Press TIMER. The VCR turns off automatically and "‰"
is displayed on the display panel.
10
To Timer-Record Weekly Or Daily Serials . . .
. . . anytime during steps 2 through 8, press WEEKLY (NUMBER
key “9”) for weekly serials or DAILY (NUMBER key “8”) for
daily serials (Monday–Friday). Either "WEEKLY" or "DAILY"
appears on the screen. Pressing the button again makes the
corresponding indication disappear.
NOTES:
●
To disengage the timer before recording starts, press TIMER
again. Pressing once more re-engages it.
●
In case of a power failure after programming, the VCR’s memory
backup keeps your selections (if the lithium battery is not
exhausted).
●
Programs that start after midnight must have the next day’s date.
●
After timer recording is completed, the VCR’s power goes off
automatically.
●
You can program the timer while a regular recording is in
progress; the on-screen menu will not be recorded.
●
If the end of tape is reached during timer recording, the
cassette is automatically ejected.
●
When timer-recording cable or satellite channels through an
external tuner, be sure to keep the cable box or DBS
receiver's power ON.
Page 80

32 EN
MENU
POWER
MENU
OK
SP/EP
STOP+/–
DATE+/–
POWER
TIMER RECORDING (cont.)
Check, Cancel And Revise
Programs
DISENGAGE TIMER
Press TIMER, then press POWER.
1
ACCESS PROGRAM
CHECK SCREEN
Press PROG. CHECK.
2
PR START STOP CH DATE
1 8:00P 10:00 12 12/24
2 10:00A 10:45 40 12/25
3 11:30P 01:00 125 12/25
4
5
6
7
8
PRESS (CHECK) TO NEXT
CANCEL
START+/–
PROG. CHECK
123
456
89
7
0
1
3
2
4
TIMER
CH+/–
OK
ACCESS PROGRAM
SCREEN
Press PROG. CHECK again to check more information.
Each time you press PROG. CHECK, the next program's
3
information appears.
To Cancel Or Revise A Program...
CANCEL OR REVISE A
PROGRAM
To cancel a program, press CANCEL.
To revise a program, press the appropriate button:
4
START+/–, STOP+/–, DATE+/–, CH+/–, SP/EP.
RETURN TO NORMAL
SCREEN
Press PROG. CHECK as many times as necessary. If
there are still programs remaining, go to step 6.
5
RE-ENGAGE TIMER
Press TIMER.
6
Page 81

EN 33
Auto SP→EP Timer
If, when recording in SP mode, there is not enough tape to record
the entire program, the VCR automatically switches to EP mode
to allow complete recording. This feature is especially handy
when recording a program of more than 2 hours in length.
For Example . . .
Recording a program of 140 minutes in length onto a 120minute tape
Approximately 110 minutes
SP mode
Total 140 minutes
Make sure you set "AUTO SP→EP TIMER" to “ON” at the
Function screen before the timer recording starts.
Approximately 30 minutes
EP mode
ACCESS MAIN MENU
SCREEN
Press MENU.
1
ACCESS FUNCTION SET
SCREEN
Move the highlight bar (arrow) to "FUNCTION SET" by
pressing CH5∞ or %fi, then press OK or .
%
2
SELECT AUTO SP→EP
TIMER SET MODE
Move the highlight bar
(arrow) to "AUTO SP→EP
3
TIMER" by pressing CH5∞
or %fi, then press OK or
to set to "ON".
RETURN TO NORMAL
SCREEN
Press MENU.
%
=AUTO SP
FUNCTION
AUTO TIMER OFF
SUPERIMPOSE ON
=EP TIMER ON
VIDEO STABILIZER OFF
NEXT PAGE
SELECT WITH (5,∞) AND (OK)
PRESS (MENU) TO END
Auto Timer
When the Auto Timer is set to ON the timer is automatically
engaged when the VCR's power is turned off. It is automatically
disengaged when the VCR is powered back on.
ACCESS MAIN MENU
SCREEN
Press MENU.
1
ACCESS FUNCTION SET
SCREEN
Move the highlight bar (arrow) to "FUNCTION SET" by
pressing CH5∞ or %fi, then press OK or .
%
2
SELECT AUTO TIMER SET
MODE
Move the highlight bar
(arrow) to "AUTO TIMER"
3
by pressing CH5∞ or %fi,
then press OK or to set
to "ON" or "OFF".
%
=AUTO TIMER OFF
FUNCTION
SUPERIMPOSE ON
AUTO SP
=EP TIMER OFF
VIDEO STABILIZER OFF
NEXT PAGE
SELECT WITH (5,∞) AND (OK)
PRESS (MENU) TO END
RETURN TO NORMAL
SCREEN
Press MENU.
4
NOTE:
For safety, when AUTO TIMER is set to “OFF”, all other VCR
functions are disabled while the Timer mode is engaged. To
disengage the timer, press TIMER.
4
NOTES:
●
If you have programmed the VCR to timer-record 2 or more
programs, the second program and those thereafter may not
fit on the tape if you set the Auto SP→EP Timer mode to
"ON". In this case, make sure the mode is not engaged, then
set the tape speed manually during timer programming.
●
In order to ensure that the recording fits on the tape, this feature
may leave a slight non-recorded section at the end of the tape.
●
There may be some noise at the point on the tape where the
VCR switches from SP to EP mode.
●
The Auto SP→EP Timer feature is not available during ITR
(Instant Timer Recording), and the feature will work with the
following tapes: T(ST)-30, T(ST)-60, T(ST)-90, and T(ST)-120.
Page 82
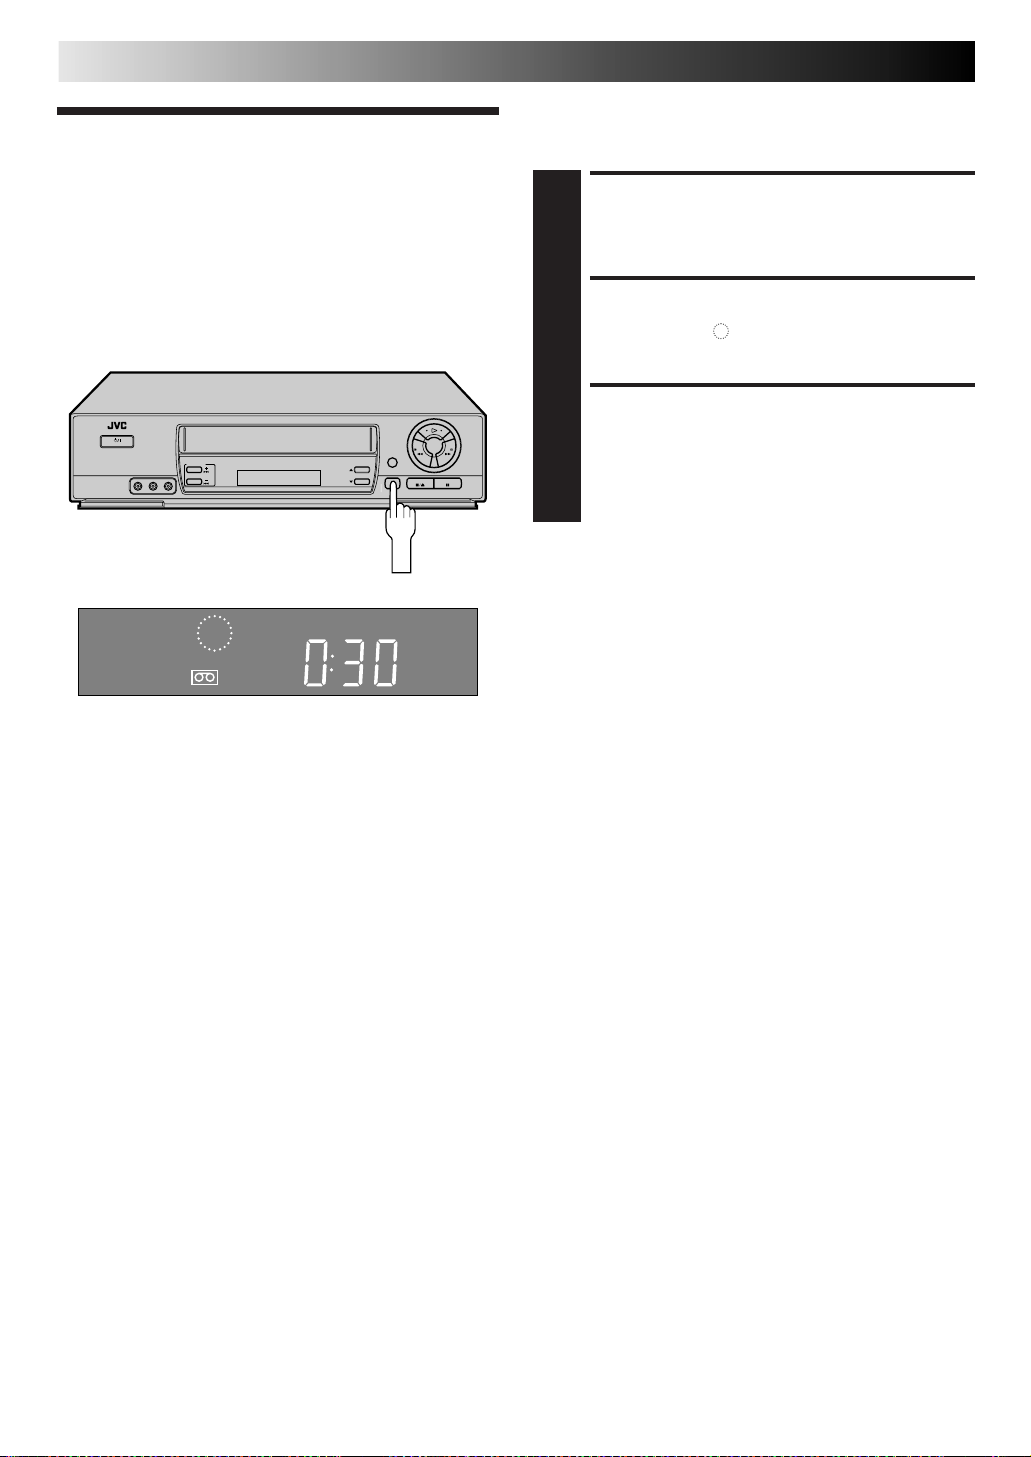
34 EN
REC
Instant Timer
Recording
TIMER RECORDING (cont.)
This easy method lets you record from 30 minutes to 6 hours
(selectable in 30-min. increments) and shuts the VCR off after
recording is finished.
START RECORDING
Press REC on the front panel.
1
(ITR)
VCR
ENGAGE ITR MODE
Press REC again. " " blinks and 0:30 appears on the
front display panel.
2
SET RECORDING
DURATION
If you want to record for more than 30 minutes, press
REC to extend the time. Each press extends recording
3
time by 30 minutes.
NOTES:
●
You can only perform ITR using the REC button on the VCR's
front panel.
●
SP
After you set the ITR time, the previous display reappears.
●
To check the remaining time, press REC once during record-
ing and the remaining time will be displayed for about 5
seconds. Be careful not to press REC again within these 5
seconds, or you will round the recording time up to the next
30 minute increment.
Page 83

EDITING
PLAY
EN 35
You can use your VCR as the player or the recorder.
Edit To Or
From Another
VCR
Player
AUDIO OUT
VIDEO OUT
VIDEO IN
Your VCR
Audio/Video cable
(not supplied)
AUDIO IN
MAKE CONNECTIONS
Connect an AV cable between the player’s VIDEO OUT
and AUDIO OUT connectors and the recorder’s VIDEO
1
IN and AUDIO IN connectors.
● When using your VCR as the recorder and a monaural
VCR as the player, connect the player’s AUDIO OUT
connector to the AUDIO IN L connector on the recorder.
LOAD CASSETTES
Insert the playback cassette into the player and the
cassette to be recorded on into the recorder.
2
SET RECORDER’S INPUT
MODE
Set to "AUX". With this VCR, press the NUMBER key "0"
and/or CH to select depending on the connector being
3
used – "L-1" for the rear AUDIO/VIDEO IN connectors,
or "F-1" for the front AUDIO/VIDEO IN connectors.
START PLAYER
Set to its play mode.
4
NOTE:
If the player is equipped with a superimpose/OSD
disable feature then set "SUPERIMPOSE" to OFF before
pressing PLAY (Z pg. 19).
Recorder
NUMBER "0"
CH
456
89
7
0
1
START RECORDER
Set to its record mode.
5
Another VCR
4
CH
PLAY
Page 84

36 EN
MENU
MENU
OK
EDITING (cont.)
You can use a camcorder as the player and your VCR as the
recorder.
Edit From A
Camcorder
Recorder
VIDEO IN
AUDIO
IN
Camcorder
Player
To rear panel PAUSE/AV
COMPULINK connector
Mini-plug cable (not supplied)
(JVC camcorder only)
Audio/Video cable
(not supplied)
VIDEO OUT
AUDIO OUT
EDIT
Your VCR
MAKE CONNECTIONS
Connect an AV cable between the camcorder’s VIDEO
OUT and AUDIO OUT connectors and your VCR’s
1
VIDEO IN and AUDIO IN connectors.
● When a Master Edit Control-equipped JVC camcorder is
used, the camcorder is capable of controlling your VCR.
The mini-plug cable is a mono 3.5 mm mini-plug to
mono 3.5 mm mini-plug connector.
● If connecting to a camcorder with a monaural output,
connect the audio output connector on the
camcorder to AUDIO IN L of the VCR.
LOAD A CASSETTE
Insert the cassette to be recorded on into the recorder.
2
SET RECORDER’S INPUT
MODE
Set to "AUX". Press the NUMBER key “0” and/or CH to
select depending on the connector being used – "L-1"
3
for the rear AUDIO/VIDEO IN connectors, or "F-1" for
the front AUDIO/VIDEO connectors.
If you’re using a JVC Master Edit Control-equipped
camcorder — step 4
If not — step 8
ACCESS MAIN MENU
SCREEN
Press MENU.
4
NUMBER "0"
1
7
CH
89
0
4
3
OK
ACCESS FUNCTION SET
SCREEN
%
Press CH
“FUNCTION SET”, then press OK or .
5
∞
to move the highlight bar (arrow) to
or
fi
5
%
Page 85

123
MENU
MENU
OK
CH
456
89
7
0
2
4
ENABLE REMOTE PAUSE
FUNCTION
Press CH 5∞ or %fi to
move the highlight bar
6
(arrow) to "AV COMPULINK", then press OK or
to set to "OFF".
● The PAUSE/AV COMPULINK connector works as
the AV Compulink
Playback connector when
"AV COMPU-LINK" is set
to "ON" (Z pg. 21), and
works as the Remote
Pause connector when
"AV COMPU-LINK" is set
to "OFF".
=AUTO TIMER OFF
%
=AV COMPU-LINK OFF
RETURN TO NORMAL
SCREEN
Press MENU.
EN 37
FUNCTION
SUPERIMPOSE ON
AUTO SP
=EP TIMER OFF
VIDEO STABILIZER OFF
NEXT PAGE
SELECT WITH (5,∞) AND (OK)
PRESS (MENU) TO END
PREVIOUS PAGE
2ND AUDIO RECORD OFF
AUDIO MONITOR HI–FI
B.E.S.T. ON
SELECT WITH (5,∞) AND (OK)
PRESS (MENU) TO END
1
3
OK
7
START PLAYER
Set the camcorder to its play mode.
8
NOTE:
If the camcorder is equipped with a superimpose/OSD
disable feature then set its superimpose or display
feature to OFF before pressing play.
START RECORDER
Set your VCR to its record mode.
● If you are using a Master Edit Control-equipped JVC
9
camcorder, it can put the recorder automatically into
Record mode. (Refer to camcorder's instruction
manual.)
Page 86

38 EN
POWER
TV PROG –
TV PROG +
SPECIAL FEATURES
TV Multi-Brand Remote
Control
The VCR's remote control can control several functions on JVC
remote control TVs and on the brands of remote control TVs
listed below.
VCR/TV/CABLE/DBS
TV/VCR
STOP
TV
123
456
89
7
0
1
3
ENTER
2
4
TV
NUMBER
TURN ON THE TV
Turn the power on using the TV's remote control.
1
SET REMOTE CONTROL
MODE
Set the VCR/TV/CABLE/DBS switch on the VCR's
remote control to TV.
2
SET TV BRAND CODE
Refer to the chart below. While holding down POWER
on the VCR's remote control, enter your TV’s brand
3
code using the NUMBER keys, then press STOP.
Follow the example shown at bottom right.
Check if the TV's power goes off as it should. If it does,
try other operations (Z step 4).
● Once you have set the remote control to operate the
TV, you don’t have to repeat this step until you
replace your remote control’s batteries.
● GRADIENTE and PHILICO have several different
codes. If the TV does not function with one code, try
entering another.
OPERATE TV
Press the corresponding button: POWER, TV PROG +/–,
TV/VCR, TV
4
keys.
● For some brands of TV, you must press ENTER after
having pressed the NUMBER keys.
● To return the remote to VCR control, set the VCR/TV/
CABLE/DBS switch to VCR.
+/–, (TV Muting) and NUMBER
TV BRAND NAME BRAND CODE
JVC 01
GRADIENTE 05, 15, 18, 20
PHILIPS 02
CCE 02
SANYO 16
PHILICO 10, 17, 21
SHARP 06
TOSHIBA 14
MITSUBISHI 03
SAMSUNG 12
LG 18
RCA 05
PANASONIC 11
GRUNDIG 19
SONY 07
NEC 20
NOBLEX 22
HITACHI 10
DAEWOO 17
NOTE:
Depending on the kind of TV, there may be cases where some
or all functions cannot be operated using the remote control.
(Ex.) To set remote control to PHILIPS 03:
POWER
Hold
down
0
3
Press in succession
STOP
Release
Page 87

POWER
VCR/TV/CABLE/DBS
123
456
89
7
0
1
ENTER
2
4
NUMBER
EN 39
Cable Box Multi-Brand
Remote Control
The VCR's remote control can control functions on the brands
of cable boxes listed below. Some cable box brands have more
than one code. If your cable box does not function with a
specified code, try other codes.
TURN ON THE CABLE BOX
Turn the power on using the cable box’s remote control.
1
SET REMOTE CONTROL
MODE
Set the VCR/TV/CABLE/DBS switch on the VCR's
remote control to CABLE/DBS.
2
STOP
TV PROG –
CABLE BOX BRAND NAME BRAND CODE
ARCHER 01, 05, 17
CABLETENNA 01, 17
CABLEVIEW 15, 16, 17
CITIZEN 15, 16, 17
CURTIS 02
DIAMOND 01, 17
GC BRAND 15, 16, 17
GEMINI 15
GENERAL INSTRUMENTS 01, 04, 06, 11, 12, 15
HAMLIN 10, 18, 23
JASCO 15
JERROLD 01, 04, 06, 11, 12, 15
NOVAVISION 02
OAK 07
PANASONIC 13, 14
PULSER 15, 16, 17
RCA 13, 14
REGAL 10, 18
REMBRANDT 01, 16, 17
SAMSUNG 05, 16, 24
SCIENTIFIC ATLANTA 02
SIGMA 07
SL MARX 05, 16, 17, 24
SPRUCER 13, 14
STARGATE 05, 15, 16, 17, 24
TELEVIEW 05, 16, 24
TOCOM 01, 04, 16
UNIKA 01, 17
UNIVERSAL 16, 17
VIDEOWAY 03, 09
ZENITH 03, 09
LG 26
TAIHAN (DEHAN) 27
TV PROG +
3
ENTER CABLE BOX BRAND
While holding down POWER on the VCR's remote
control, use the NUMBER keys to enter the cable box
3
brand number from the chart at bottom left and then
press STOP.
Follow the example shown below.
Check if the cable box's power goes off as it should. If it
does, try other operations (Z step 4).
● Once you have set the remote control to operate the
cable box, you don't have to repeat this step until you
replace the remote control's batteries.
OPERATE CABLE BOX
Press the corresponding button: POWER, TV PROG +/–
and NUMBER (TV Muting) keys.
4
● For some brands of cable box, you must press ENTER
after having pressed the NUMBER keys.
● To change the cable box's channel, press TV PROG
+/– or the NUMBER keys. (The CH +/– button can be
used to change the VCR's channel only.)
● To return the remote to VCR control, set the VCR/TV/
CABLE/DBS switch to VCR.
NOTES:
●
Depending on the kind of cable box, there may be cases
where some or all functions cannot be operated using the
remote control.
●
It's not possible to set the remote control for both your cable
box and your DBS receiver at the same time; you can only set
the remote control to the brand of either one.
●
You have to subscribe to a cable service to receive cable
channels.
(Ex.) To set remote control to ARCHER 01:
POWER
Hold
down
0
1
Press in succession
STOP
Release
Page 88

40 EN
POWER
SPECIAL FEATURES (cont.)
DBS Receiver Multi-Brand
Remote Control
The VCR's remote control can control functions on the brands
of DBS (Direct Broadcast Satellite) receivers listed below.
VCR/TV/CABLE/DBS
STOP
TV PROG –
123
456
89
7
0
1
3
ENTER
2
4
TV PROG +
NUMBER
TURN ON THE DBS
RECEIVER
Turn the power on using the DBS receiver’s remote
control.
1
SET REMOTE CONTROL
MODE
Set the VCR/TV/CABLE/DBS switch on the VCR's
remote control to CABLE/DBS.
2
ENTER DBS RECEIVER
BRAND
While holding down POWER on the VCR's remote
control, use the NUMBER keys to enter the DBS receiver
3
brand number from the chart below and then press STOP.
Follow the example shown at bottom right.
Check if the DBS reciever's power goes off as it should.
If it does, try other operations (Z step 4).
● Once you have set the remote control to operate the
DBS receiver, you don't have to repeat this step until
you replace the remote control's batteries.
OPERATE DBS RECEIVER
Press the corresponding button: POWER, TV PROG +/–,
NUMBER keys.
4
● Depending on the DBS receiver you may have to
press ENTER after having pressed the NUMBER keys.
● To change the DBS receiver's channel, press TV
PROG +/– or the NUMBER keys. (The CH +/– button
can be used to change the VCR's channel only.)
● To return the remote to VCR control, set the VCR/TV/
CABLE/DBS switch to VCR.
DBS BRAND NAME BRAND CODE
ECHOSTAR (DISH Network) 51
PRIMESTAR 50
SONY (DSS) 41
RCA (DSS) 40
NOTES:
●
Depending on the kind of DBS receiver, there may be cases
where some or all functions cannot be operated using the
remote control.
●
Though ECHOSTAR has a number of different remote codes,
this remote control is applicable only to one of those codes
preset at the factory.
●
It's not possible to set the remote control for both your cable
box and your DBS receiver at the same time; you can only set
the remote control to the brand of either one.
●
You have to subscribe to a satellite broadcaster to receive
DBS channels.
(Ex.) To set remote control to RCA 40:
POWER
Hold
down
4
Press in succession
0
STOP
Release
Page 89

A/B
POWER
EN 41
Control Two JVC VCRs
The remote control is capable of controlling two JVC VCRs
independently; one set to respond to your remote control's A
code control signals and another set to respond to B code control
signals. The remote control is preset to send A code signals
because your VCR is initially set to respond to A code signals.
You can easily modify your VCR to respond to B code signals.
NUMBER "1"
123
456
7
1
STOP
NUMBER "2"
2
89
0
4
3
UNPLUG VCR'S POWER
CORD
Unplug from the AC outlet.
1
SET REMOTE CONTROL
CODE
While holding down A/B on the remote control, press
the NUMBER key "2" and then press STOP.
2
PLUG IN POWER CORD
Plug back in to the AC outlet.
3
TURN VCR POWER ON
Press POWER on the remote.
4
The VCR will now respond only to B-code commands.
To set the VCR back to respond to A code signals, repeat the
same procedure as shown above except pressing NUMBER key
"1" instead of "2" in step 2.
You can control two VCRs with the same remote control by
switching the remote's code between A and B (Z Step 2).
Page 90

42 EN
Before requesting service for a problem, use this chart and see if you can repair the trouble yourself. Small problems are often easily
corrected, and this can save you the trouble of sending your VCR off for repair.
TROUBLESHOOTING
POWER
SYMPTOM
1. The power won’t come on.
2. The clock works, but the VCR’s
power won’t come on.
3. The remote control won’t function.
TAPE TRANSPORT
SYMPTOM
1. The cassette gets stuck partway
during loading, and is ejected.
PLAYBACK
SYMPTOM
1. The tape is running but the picture
won’t appear.
2. Noise appears during visual search.
3. Breaks are noticeable in Hi-Fi
soundtrack.
4. The playback picture is blurred or
interrupted, even though TV
broadcasts are clear.
5. The Hi-Fi soundtrack cannot be
heard.
POSSIBLE CAUSE
● The power cord is disconnected.
● The TIMER mode is engaged with
Auto Timer set to "OFF" (Z pg. 33).
● The batteries are discharged.
● The VCR/TV/CABLE/DBS switch is
in the wrong position.
POSSIBLE CAUSE
● The cassette was inserted incorrectly.
POSSIBLE CAUSE
● If you’re using the RF OUT connection (Z pg. 4), the channel selector
on the TV is set incorrectly.
● If you’re using the AV connection
(Z pg. 4), the TV receiver is set to
the wrong mode.
● This is normal.
● Automatic tracking is engaged.
● The video heads may be dirty.
● The AUDIO MONITOR option was
set incorrectly.
CORRECTIVE ACTION
Connect the power cord.
Press TIMER to disengage.
Replace the dead batteries with new
ones.
Set the switch to the position
corresponding with the unit you want
to operate.
CORRECTIVE ACTION
Make sure the cassette's window is
facing up, the rear label side is facing
you and the arrow on the front of the
cassette is pointing towards the VCR.
Then insert the cassette.
CORRECTIVE ACTION
Set the channel selector to channel 3
or 4.
Set the TV receiver to its AV mode.
Disengage Auto Tracking and adjust
the tracking manually (Z pg. 16).
The heads must be cleaned. Consult
your JVC dealer.
Set AUDIO MONITOR to "HI-FI"
(Z pg. 20).
RECORDING
SYMPTOM
1. Recording won’t start.
2. TV broadcasts won’t record
properly.
3. Tape-to-tape editing won’t work.
POSSIBLE CAUSE
● There’s no cassette loaded.
● The loaded cassette has had its
record safety tab removed.
● The VCR has been set to its AUX
mode by mistake.
●The VCRs or the camcorder and the
VCR have been incorrectly connected.
● The power to one or more of the
units has not been turned on.
● The recorder’s input mode has been
set incorrectly.
CORRECTIVE ACTION
Insert a cassette.
Remove the cassette and cover the
hole with adhesive tape, or load a
cassette on which the record safety
tab is intact.
Set the VCR to the appropriate
channel.
Refer to the directions and the
illustration under “Edit To Or From
Another VCR” (
From A Camcorder” (Z pg. 36) and
properly connect the units.
Make sure the power to all units is on.
Select the recorder’s appropriate
input mode.
Z pg. 35) or “Edit
Page 91

TIMER RECORDING
EN 43
SYMPTOM
1. Timer recording won’t work.
2. Timer programming won’t work.
3. ‰ and ] on the front display
panel won’t stop blinking.
4. The cassette is automatically
ejected, and ‰ and ] on the
front display panel won’t stop
blinking.
5. ‰ blinks for 10 seconds and the
timer mode is disengaged.
6. The cassette is automatically
ejected, the power shuts off and ‰
and ] won’t stop blinking.
7. We moved, and now VCR Plus+
doesn’t work properly.
8. “PROGRAM FULL” is displayed on
the screen.
POSSIBLE CAUSE
● The clock and/or the timer have
been set incorrectly.
● The timer is not engaged.
● The VCR has not been set up properly.
● Timer recording is in progress.
● The timer is engaged but there’s no
cassette loaded.
● The loaded cassette has had its
record safety tab removed.
● TIMER has been pressed when there
are no programs in memory, or the
timer record program information
has not been programmed correctly.
● The end of tape was reached during
timer recording.
● The receivable stations in the new area
are received on different channels than
those in the previous area.
● All 8 programs of the VCR’s timer
memory are used.
CORRECTIVE ACTION
Set the clock and/or timer correctly.
Press TIMER and check to make sure
that ‰ appears on the front display
panel.
Re-perform the set-up procedures.
Timer programming can’t be performed
when timer recording is in progress.
Wait until it finishes.
Load a cassette with the record safety
tab intact, or with the hole covered
with adhesive tape.
Remove the cassette and cover its
hole with adhesive tape, or replace it
with a cassette on which the safety
tab is intact.
Check the programmed data and reprogram as necessary, then press
TIMER again.
The program may not have been
recorded in its entirety. Next time
make sure you have enough time on
the tape to record the entire program.
Re-perform the VCR Plus+ setup
procedure (
Wait until a space in memory clears,
or cancel unnecessary program
information (Z pg. 32).
Z pg. 28).
OTHER PROBLEMS
SYMPTOM
1. When scanning channels, some of
them are skipped over.
2. The channel can’t be changed.
3. The remote control won’t operate
my TV or cable box or DBS receiver.
4. "– –:– –" is displayed on the front
display panel after a power outage.
● Those channels have been preset to
● Recording is in progress.
● The remote control brand setting is
● The lithium battery is exhausted
POSSIBLE CAUSE
be skipped.
incorrect.
ATTENTION
This VCR contains microcomputers. External electronic noise or interference can cause microcomputer to malfunction. If the VCR
does not operate correctly switch its power off and unplug the power cord from the AC supply. Wait for a while and then plug the
power back in. Eject and check the condition of the cassette. If everything appears normal resume operating the VCR as usual.
CORRECTIVE ACTION
If you need the skipped channels,
restore them (Z pg. 11).
Press PAUSE to pause the recording,
change channels, then press PLAY to
resume recording.
Re-set the remote control to the
correct brand (Z pg. 38 or 39 or 40).
Replace the lithium battery with a new
one. (
Z pg. 4)
Page 92

44 EN
QUESTIONS AND ANSWERS
PLAYBACK
Q. What happens if the end of the tape is reached
during playback or search?
A. The tape is automatically rewound to the beginning.
○○○○○○○○○○○○○○○○○○○○○○○○○○○○
Q. Can the VCR indefinitely remain in the still mode?
A. No. It stops automatically after 5 minutes to protect
the heads.
○○○○○○○○○○○○○○○○○○○○○○○○○○○○
Q. During search, slow, still and frame-by-frame
playback, I can’t hear any audio. What’s the
problem?
A. This is normal.
○○○○○○○○○○○○○○○○○○○○○○○○○○○○
Q. During search, still and frame-by-frame playback,
the picture is intermittent. What’s the cause?
A. Picture loss occurs when these types of playback are
attempted with a tape recorded in LP mode. Pressing
PLAY to return to normal playback will restore the
picture.
○○○○○○○○○○○○○○○○○○○○○○○○○○○○
Q. When returning from multi-speed search to normal
playback, the picture is disturbed. Should I be
concerned about this?
A. No, it is normal.
○○○○○○○○○○○○○○○○○○○○○○○○○○○○
Q. Noise bars appear during multi-speed search. What’s
the problem?
A. This is normal.
○○○○○○○○○○○○○○○○○○○○○○○○○○○○
Q. When playing back programs that have been timer-
recorded with consecutive times (such one program
from 8:00 to 9:00 and another one from 9:00 to
10:00), the picture and sound become momentarily
distorted at the point where the first program ends
and the second program begins. Is this a
malfunction?
A. No. This is normal.
○○○○○○○○○○○○○○○○○○○○○○○○○○○○
Q. Other than preventing further recording, what effect
does removing the safety tab have?
A. It disables marking of index codes.
○○○○○○○○○○○○○○○○○○○○○○○○○○○○
Q. Sometimes, during Index Search, the VCR can’t find
the program I want to see. Why not?
A. There may be index codes too close together.
○○○○○○○○○○○○○○○○○○○○○○○○○○○○
Q. During playback, on-screen operational indicators
sometimes jitter. Why does this happen?
A. If the condition of the tape being played back is not
good, jittering of the video (including on-screen
indicators) may occur.
RECORDING
Q. When I pause and then resume a recording, the end
of the recording before the pause is overlapped by
the new recording. Why does this happen?
A. This is normal. It reduces distortion at the pause and
resume points.
○○ ○○○○○○○○○○○○○○○○○○○○○○○○○○
Q. Can the VCR indefinitely remain in the Record-Pause
mode?
A. No. The VCR automatically goes to its Stop mode
after 5 minutes to protect the heads. When paused
during Instant Timer Recording (ITR), the VCR shuts
off automatically after 5 minutes.
○○ ○○○○○○○○○○○○○○○○○○○○○○○○○○
Q. What happens if the tape runs out during recording?
A. The VCR automatically rewinds it to the beginning.
TIMER RECORDING
Q. REC and ‰ remain lit on the front display panel. Is
there a problem?
A. No. This is a normal condition for a timer recording
in progress.
○○ ○○○○○○○○○○○○○○○○○○○○○○○○○○
Q. Can I program the timer while I’m watching a tape
or a TV broadcast?
A. Yes, but while you are setting the timer you won't see
the tape's or broadcast program's picture as it is
replaced by the on-screen menu. The audio from the
tape or broadcast program will be present during the
setting of the timer.
Page 93

INDEX
FRONT VIEW
EN 45
1
POWER
PUSH JOG
VIDEO
(MONO)
L – AUDIO – R
/OK
7 8
1 POWER Button (Z pg. 6)
2 Cassette Loading Slot
3 MENU Button (Z pg. 8)
4 Rewind [REW] Button (Z pg. 12)
5 PLAY Button (Z pg. 12)
6 Fast-Forward [FF] Button (Z pg. 12)
7 VIDEO/AUDIO Input Connectors (Z pg. 36)
8 PUSH JOG ™ Button (Z pg. 14)
2
+
8
4
0
6
15dB
NORM
VCR
SP
CH
43 5
PLAY
REW
MENU
REC STOP/EJECT PAUSE
#@! $09
%
6
FF
9 PUSH JOG £ Button (Z pg. 14)
OK Button (Z pg. 6)
0 Front Display Panel (Z pg. 46)
! Remote Control Sensor
@ Channel [CH] 5∞ Button (Z pg. 13)
# Record [REC] Button (Z pg. 13)
$ STOP/EJECT Button (Z pg. 12)
% PAUSE Button (Z pg. 14)
Page 94

46 EN
REAR VIEW
INDEX (cont.)
1
1 Power Cord (Z pg. 4)
2 Lithium Battery Compartment (Z pg. 4)
3 VIDEO/AUDIO Input Connectors (Z pg. 35)
4 PAUSE/AV COMPU LINK Connector
● Remote PAUSE Connector (Z pg. 36)
● AV COMPU LINK Connector (Z pg. 21)
FRONT DISPLAY PANEL
2 4 5 63
PAUSE/
AV
COMPU
-LINK
AUDIO
VIDEO
CH3 CH4
OUTIN
ANT. IN
R
L
RF OUT
87
5 VIDEO/AUDIO Output Connectors (Z pg. 35)
6 ANT. IN Connector (Z pg. 4)
7 Channel 3/4 Switch (Z pg. 4)
8 RF OUT Connector (Z pg. 4)
+
8
4
0
6
15dB
NORM
1 Symbolic Mode Indicators
STILL:
PLAY:
FF/REW VARIABLE
SEARCH:
SLOW:
RECORD:
RECORD PAUSE:
1
2
3
SP
VCR
54
6
7
2 Timer Mode Indicator
3 Tape Speed Indicators (Z pg. 13)
4 Audio Level Meter
5 “Cassette Loaded” Mark
6 VCR Mode Indicator (Z pg. 24)
7 Channel Display ["L-1" and "F-1" for AUX mode]
Counter Display (Z pg. 12)
Clock Display (Z pg. 6)
Page 95

EN 47
q
p
6
5
0
!
@
$
%
^
&
*
Q
W
R
T
o
2
3
7
8
4
9
(
)
y
u
i
w
e
r
t
E
1
#
REMOTE CONTROL
C. RESET
CANCEL
START STOP DATE
PROG.
1
REW
REC
T
V
Buttons with a small dot on the left side of the name can
also be used to operate your TV with the VCR/TV/CABLE/
DBS switch set to "TV". Z pg. 38
Installing Batteries
1
Open the battery compartment cover.
2 Insert 2 "AA"-size batteries (provided) in the direction
indicated under the battery cover.
3 Replace the cover.
AUDIOVCR TV CABLE/DBS
POWER
TV/VCR
123
456
DAILY(M-F)
7
EXPRESS PROGRAMMING
PROG.
CHECK
T
–
T
M
E
N
U
A
/
DISPLAY
ENTER/QSD
WEEKLY
89
AUX
TIMER
0
CH
SKIP SEARCH
PLAY
FF
STOP
PAUSE
O
R
G
P
V
+
V
T
–
V
P
G
R
O
K
O
3
B
JOG/
SHUTTLE
2
4
+
1 VCR/TV/CABLE/DBS Switch (Z pg. 38, 39, 40)
2 TV/VCR Button (Z pg. 24)
3 Instant REVIEW Button (Z pg. 16)
4 NUMBER Buttons (Z pg. 13, 26)
5 CANCEL Button (Z pg. 32)
Counter [C.] RESET Button (Z pg. 18)
6 STOP +/– Button (Z pg. 30)
7 START +/– Button (Z pg. 30)
8 PROG. Button (Z pg. 26, 30)
9 PROG. CHECK Button (Z pg. 32)
0 Rewind [REW] Button (Z pg. 12)
! Record [REC] Button (Z pg. 13)
@ STOP Button (Z pg. 12)
# %fi Button (Z pg. 6)
TV Channel [PROG] +/– Button (Z pg. 38, 39, 40)
$ MENU Button (Z pg. 8)
% A/B Code Button (Z pg. 41)
^ JOG Dial (Z pg. 14)
& SHUTTLE Ring (Z pg. 14)
* AUDIO (TV Muting) Button (Z pg. 38)
( POWER Button (Z pg. 6)
) ENTER Button (Z pg. 13)
On-Screen Display [OSD] Button (Z pg. 19)
q DISPLAY Button (Z pg. 18)
w DAILY Timer Recording Button (Z pg. 27, 31)
e WEEKLY Timer Recording Button (Z pg. 27, 31)
r "AUX" Mode Select Button (Z pg. 35)
t TIMER Button (Z pg. 27, 31)
y DATE +/– Button (Z pg. 30)
u Channel [CH] +/– Button (Z pg. 13, 31)
i SKIP SEARCH Button (Z pg. 15)
o Recording Speed [SP/EP] Button (Z pg. 13)
p PLAY Button (Z pg. 12)
Q Fast-Foward [FF] Button (Z pg. 12)
W PAUSE Button (Z pg. 14)
fi
%
E ™£ ( ) Button (Z pg. 14, 15)
TV Volume [ ] +/– Button (Z pg. 38)
R OK Button (Z pg. 6)
T JOG/SHUTTLE Button (Z pg. 14)
How To Use
The remote control can operate most of your VCR's functions.
1 Point the remote control toward the sensor window.
2 Press the appropriate operation button.
3 The maximum operating distance of the remote control is
about 8 m.
NOTES:
●
This remote control can also operate various brands of TVs,
Cable Boxes and Satellite Receivers; set the VCR/TV/
CABLE/DBS switch to the appropriate position depending
on the unit you want to operate. For details, Z pg. 38 – 40.
●
If the remote control doesn't work properly, remove its
batteries, wait a short time, replace the batteries and then
try again.
Page 96

48 EN
SPECIFICATIONS
GENERAL
Power requirement : AC 110 – 220 V` , 50/60 Hz
Power consumption
Power on : 22 W
Power off : 5 W
Temperature
Operating : 5°C to 40°C (41°F to 104°F)
Storage : –20°C to 60°C (–4°F to140°F)
Operating position : Horizontal only
Dimensions (W x H x D) : 400 x 94 x 277 mm
(15-3/4" x 3-3/4" x 10-13/16")
Weight : 3.1 kg (6.8 lbs)
Format : VHS NTSC standard
Maximum recording time
SP : 210 min. with ST-210 video
cassette
EP : 630 min. with ST-210 video
cassette
VIDEO/AUDIO
Signal system : NTSC-type color signal and
EIA monochrome signal, 525
lines/60 fields
Recording/
Playback system : DA-4 (Double Azimuth) head
helical scan system
Signal-to-noise ratio : 45 dB
Horizontal resolution : 240 lines
Frequency range
Normal audio : 70 Hz to 10,000 Hz
Hi-Fi audio : 20 Hz to 20,000 Hz
Input/Output : RCA connectors
(IN x 2, OUT x 1)
TUNER
Tuning system : Frequency-synthesized tuner
Channel coverage
VHF : Channels 2–13
UHF : Channels 14–69
CATV : 113 Channels
RF output : Channel 3 or 4 (switchable;
preset to Channel 3 when
shipped) 75 ohms,
unbalanced
TIMER
Clock reference : Quartz
Program capacity : 1-year programmable timer/
8 programs
Memory backup time : Approx. 6 months
Estimated figure based on
supplied fresh battery; actual
performance may differ.
ACCESSORIES
Provided accessories : RF cable,
Infrared remote control unit,
Lithium battery CR2025,
Conversion plug,
“AA” battery x 2
Specifications shown are for SP mode unless otherwise specified.
E. & O.E. Design and specifications subject to change without
notice.
Failure to heed the following precautions may result
in damage to the VCR, remote control or video
cassette.
1. DO NOT place the VCR ...
... in an environment prone to extreme temperatures or
humidity.
... in direct sunlight.
... in a dusty environment.
... in an environment where strong magnetic fields are
generated.
... on a surface that is unstable or subject to vibration.
2. DO NOT block the VCR’s ventilation openings.
3. DO NOT place heavy objects on the VCR or remote
control.
4. DO NOT place anything which might spill on top of the
VCR or remote control.
5. AVOID violent shocks to the VCR during transport.
**MOISTURE CONDENSATION
Moisture in the air will condense on the VCR when you
move it from a cold place to a warm place, or under
extremely humid conditions—just as water droplets form on
the surface of a glass filled with cold liquid. Moisture
condensation on the head drum will cause damage to the
tape. In conditions where condensation may occur, keep the
VCR’s power turned on for a few hours to let the moisture
dry.
**ABOUT HEAD CLEANING
Accumulation of dirt and other particles on the video heads
may cause the playback picture to become blurred or
interrupted. Be sure to contact your nearest JVC dealer if such
troubles occur.
Page 97

MEMO
EN 49
Page 98

MEMO
Page 99

MEMO
Page 100

HR-J7005UM
VICTOR COMPANY OF JAPAN, LIMITED
COPYRIGHT © 1998 VICTOR COMPANY OF JAPAN, LTD.
UM
Printed in Malaysia
0498IYV
*UN*
PJ
 Loading...