

Page 1
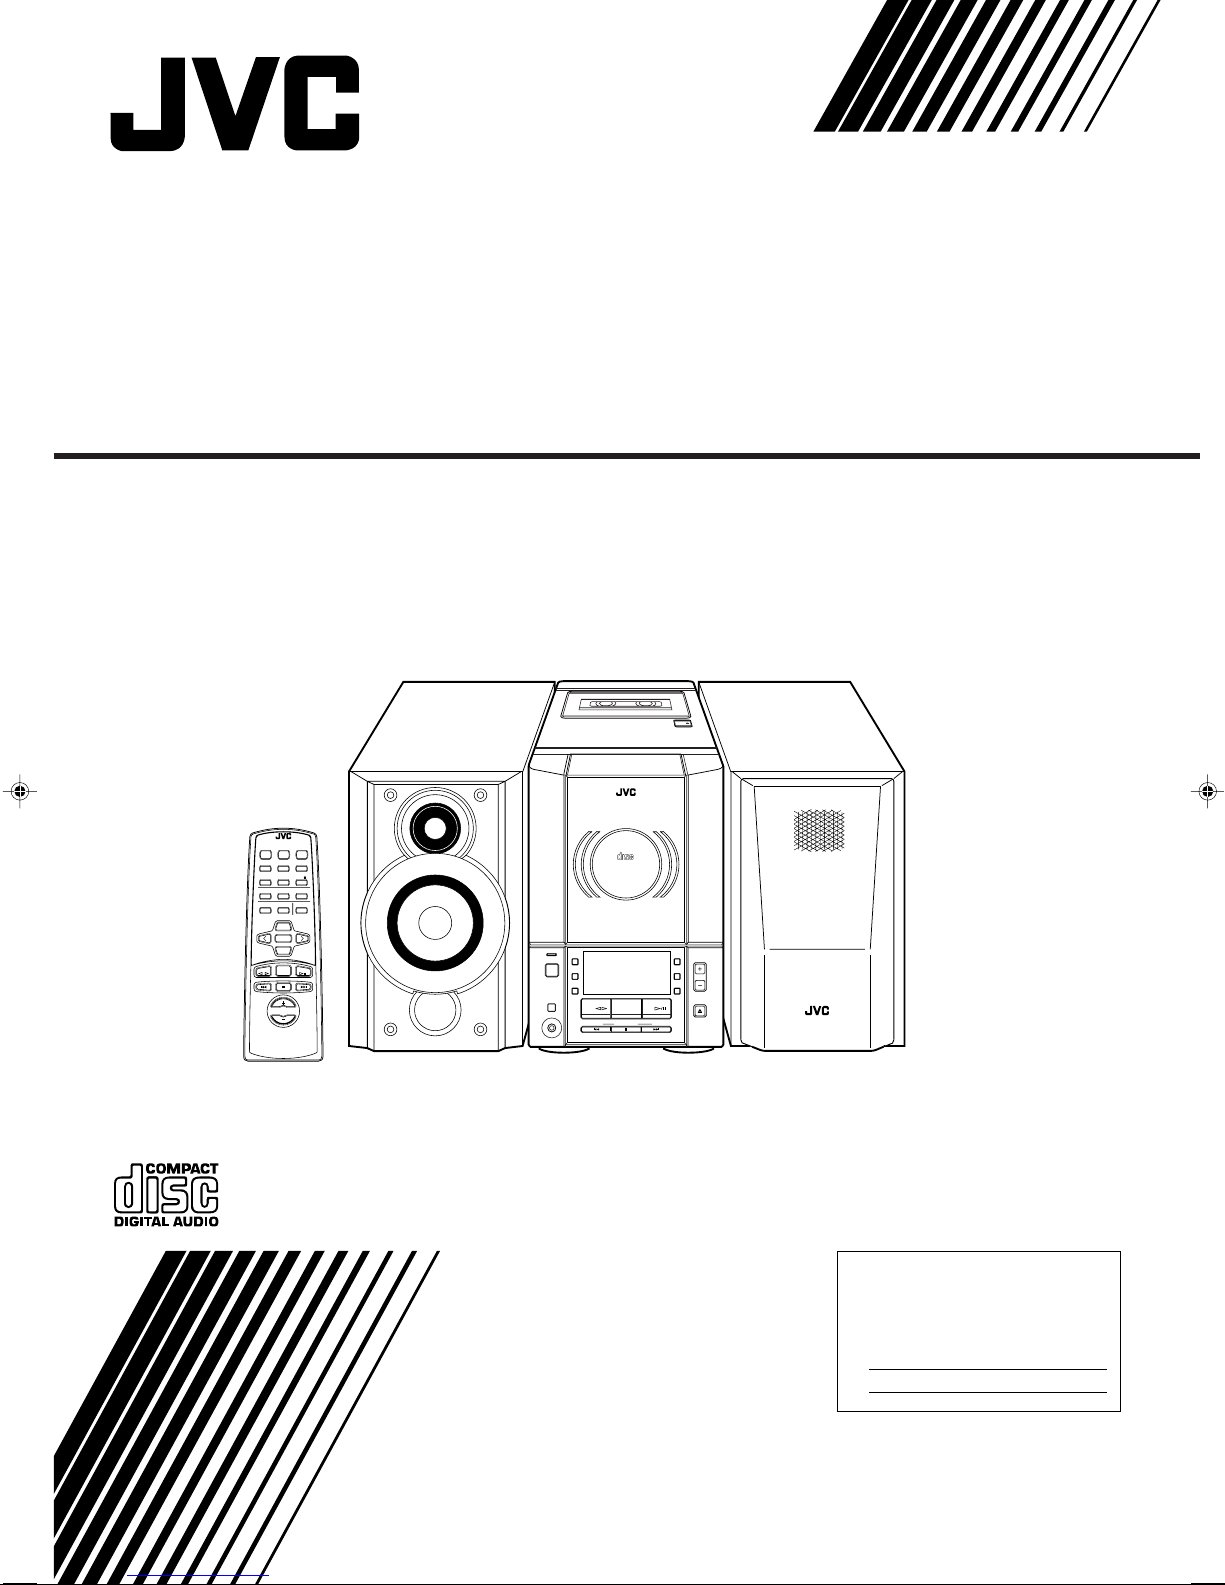
COMPACT COMPONENT SYSTEM
SYSTEME DE COMPOSANTS COMPACT
FS-V30
REMOTE CONTROL RM-RXFSV5
DIMMER SLEEP
DISPLAY FM MODE MD/AUX
AUTO
AHB PRO
PRESET
PROGRAM RANDOM REPEAT
BASS TREBLE CANCEL
UP
SET
DOWN
TUNER
TAPE
BAND
VOLUME
AUTO TAPE SELECTOR
AUTO REVERSE
POWER
VERTICAL DISC
POWER
LOADING MECHANISM
COMPACT COMPONENT SYSTEM FS-V30
MD/
AUX
REC
REV.
MODE
TAPE FM/AM CD
DOWN UPMULTI CONTROL
CD
STANDBY/ON
CD
PHONES
INSTRUCTIONS
MANUEL D’INSTRUCTIONS
TAPE
COMPACT
DIGITAL AUDIO
AHB
PRO
VOLUME
TIMER
CLOCK
CD
OPEN/CLOSE
For Customer Use:
Enter below the Model No. and Serial No.
which are located either on the rear, bottom or side of the cabinet. Retain this
information for future reference.
Model No.
Serial No.
GVT0032-001A
[J(C)]
Page 2
Mises en garde, précautions et indications diverses
CAUTION
RISK OF ELECTRIC SHOCK
DO NOT OPEN
Warnings, Cautions and Others
CAUTION
To reduce the risk of electrical shocks, fire, etc.:
1. Do not remove screws, covers or cabinet.
2. Do not expose this appliance to rain or moisture.
CAUTION: TO REDUCE THE RISK OF ELECTRIC SHOCK,
DO NOT REMOVE COVER (OR BACK).
NO USER SERVICEABLE PARTS INSIDE.
REFER SERVICING TO QUALIFIED SERVICE PERSONNEL.
The lightning flash with arrowhead symbol,
within an equilateral triangle is intended to
alert the user to the presence of uninsulated
"dangerous voltage" within the product's
enclosure that may be of sufficient
magnitude to constitute a risk of electric
shock to persons.
The exclamation point within an equilateral
triangle is intended to alert the user to the
presence of important operating and
maintenance (servicing) instructions in the
literature accompanying the appliance.
For U.S.A.
This equipment has been tested and found to comply with the limits
for a Class B digital device, pursuant to part 15 of the FCC Rules.
These limits are designed to provide reasonable protection against
harmful interference in a residential installation.
This equipment generates, uses and can radiate radio frequency
energy and, if not installed and used in accordance with the
instructions, may cause harmful interference to radio
communications. However, there is no guarantee that interference
will not occur in a particular installation. If this equipment does cause
harmful interference to radio or television reception, which can be
determined by turning the equipment off and on, the user is
encouraged to try to correct the interference by one or more of the
following measures:
Reorient or relocate the receiving antenna.
Increase the separation between the equipment and receiver.
Connect the equipment into an outlet on a circuit different from that
to which the receiver is connected.
Consult the dealer or an experienced radio/TV technician for help.
ATTENTION
Afin d’éviter tout risque d’électrocution, d’incendie, etc.:
1. Ne pas enlever les vis ni les panneaux et ne pas ouvrir le
coffret de l’appareil.
2. Ne pas exposer l’appareil à la pluie ni à l’humidité.
Caution –– POWER switch!
Disconnect the mains plug to shut the power off completely (the
STANDBY/ON lamp goes off).
The POWER switch in any position does not disconnect the mains
line.
• When the unit is on standby, the STANDBY/ON lamp lights red.
• When the unit is turned on, the STANDBY/ON lamp lights green.
The power can be remote controlled.
Attention –– Commutateur POWER!
Déconnectez la prise d’alimentation secteur pour mettre l’appareil
complètement hors tension (le témoin STANDBY/ON s’éteint).
L’interrupteur POWER, sur n’importe quelle position, ne peut
pas déconnecter l’appareil du secteur.
• Quand l’appareil est en mode de veille, le témoin STANDBY/ON
est allumé en rouge.
• Quand l’appareil est sous tension, le témoin STANDBY/ON est
allumé en vert.
L’alimentation peut être télécommandée.
1. CLASS 1 LASER PRODUCT
2. DANGER: Invisible laser radiation when open and interlock
failed or defeated. Avoid direct exposure to beam.
3. CAUTION: Do not open the top cover. There are no user
serviceable parts inside the Unit; leave all servicing to qualified
service personnel.
WARNING: TO REDUCE THE RISK OF FIRE
OR ELECTRIC SHOCK, DO NOT EXPOSE
THIS APPLIANCE TO RAIN OR MOISTURE.
G-1
1. PRODUIT LASER CLASSE 1
2. ATTENTION: Radiation laser invisible quand l’appareil est
ouvert ou que le verrouillage est en panne ou désactivé. Eviter
une exposition directe au rayon.
3. ATTENTION: Ne pas ouvrir le couvercle du dessus. Il n’y a
aucune pièce utilisable à l’intérieur. Laisser à un personnel
qualifié le soin de réparer votre appareil.
Page 3

English
For Canada/pour le Canada
CAUTION: TO PREVENT ELECTRIC SHOCK, MATCH WIDE
BLADE OF PLUG TO WIDE SLOT, FULLY INSERT.
ATTENTION: POUR EVITER LES CHOCS ELECTRIQUES,
INTRODUIRE LA LAME LA PLUS LARGE DE LA FICHE DANS
LA BORNE CORRESPONDANTE DE LA PRISE ET POUSSER
JUSQUAU FOND.
For Canada/pour le Canada
THIS DIGITAL APP ARA TUS DOES NOT EXCEED THE CLASS
B LIMITS FOR RADIO NOISE EMISSIONS FROM DIGITAL
APPARA TUS AS SET OUT IN THE INTERFERENCE-CAUSING
EQUIPMENT ST ANDARD ENTITLED “DIGIT AL APP ARATUS,”
ICES-003 OF THE DEPARTMENT OF COMMUNICATIONS.
CET APPAREIL NUMERIQUE RESPECTE LES LIMITES DE
BRUITS RADIOELECTRIQUES APPLICABLES AUX
APPAREILS NUMIRIQUES DE CLASSE B PRESCRITES
DANS LA NORME SUR LE MATERIEL BROUILLEUR:
“APPAREILS NUMERIQUES”, NMB-003 EDICTEE PAR LE
MINISTRE DES COMMUNICATIONS.
Français
Français
G-2
Page 4

Instructions for safe use
(Statement in accordance with the UL standards)
1) Read Instructions — Read carefully this instructions for
your safe use before this appliance is installed, wireconnected, and operated.
2) Retain Instructions — For your future reference, retain this
instruction.
3) Follow Instructions — Follow and obey all warnings,
cautions and instructions marked on this appliance and this
instruction.
4) Water and Moisture — Do not expose this appliance to rain,
water and moisture, or operate it near water — for example
near a bathtub, wash bowl, kitchen sink, laundry tub, in a
wet basement or near a swimming pool, and the like.
5) Ventilation and Heat — This appliance should be situated
so that its location does not interfere with its proper
ventilation. For example, this appliance should not be
situated on a bed, sofa, rug, or similar surface that may
block the ventilation openings; or, placed in a built-in
installation, such as a bookcase or cabinet that may
impede the flow of air through the ventilation openings. This
appliance should be situated away from heat sources such
as radiators, heat registers, stoves, or other appliances
(including amplifiers) that produce heat.
6) Power sources — This appliance should be connected to a
power supply only of the type as marked on this appliance.
7) Polarization — The precautions that should be taken so
that the polarization means of this appliance is not
defeated.
11) Outdoor Antenna Grounding — If this appliance is provided
with means to connect the outdoor antenna and outside
antenna is connected to this appliance, be sure the
antenna system is grounded so as to provide some
protection against voltage surges and built-up static
charges. Article 810 of the National Electrical Code, ANSI/
NFPA 70, provides information with regard to proper
grounding of the mast and supporting structure, grounding
of the lead-in wire to an antenna-discharge unit, size of
grounding conductors, location of antenna-discharge unit,
connection to grounding electrodes, and requirements for
the grounding electrode. Example of antenna grounding is
illustrated in here.
EXAMPLE OF ANTENNA GROUNDING AS PER
NATIONAL ELECTRICAL CODE
ANTENNA
LEAD IN
WIRE
GROUND
CLAMP
ANTENNA
DISCHARGE UNIT
(NEC SECTION 810–20)
ELECTRIC
SERVICE
EQUIPMENT
NEC — NATIONAL ELECTRICAL CODE
GROUNDING CONDUCTORS
(NEC SECTION 810–21)
GROUND CLAMPS
POWER SERVICE GROUNDING
ELECTRODE SYSTEM
(NEC ART 250. PART H)
8) Power Cord Protection — Power supply cords should be
routed so that they are not likely to be walked on or pinched
by items placed upon or against them, paying particular
attention to cords at plugs, convenience receptacles, and
the point where they exit from the appliance.
9) Cleaning — The appliance should be cleaned only as
recommended by the manufacturer.
10) Power Lines — An outdoor antenna should be located
away from power lines.
12) Nonuse Periods — The power cord of the appliance should
be unplugged from the outlet when left unused for a long
period of time.
13) Object and Liquid Entry — Care should be taken so that
objects do not fall and liquids are not spilled into the
enclosure through openings.
14) Damage Requiring Service — The appliance should be
serviced by qualified service personnel when : (a) The
power-supply cord or the plug has been damaged; or (b)
Objects have fallen, or liquid has been spilled into the
appliance; or (c) The appliance has been exposed to rain;
or (d) The appliance does not appear to operate normally
or exhibits a marked change in performance; or (e) The
appliance has been dropped, or the enclosure damaged.
15) Servicing — The user should not attempt to service the
appliance beyond that described in the operating
instructions. All other servicing should be referred to
qualified service personnel.
G-3
Page 5

Thank you for purchasing the JVC Compact Component System.
We hope it will be a valued addition to your home, giving you years of enjoyment.
Be sure to read this instruction manual carefully before operating your new stereo system.
In it you will find all the information you need to set up and use the system.
If you have any query that is not answered by the manual, please contact your dealer.
Features
Here are some of the things that make your System both powerful and simple to use.
■ The controls and operations have been designed to make them very easy to use, freeing you to just enjoy the music.
• With JVC’s COMPU PLAY you can turn on the System and automatically start the Radio, Cassette deck or CD
Player with a single touch.
■ The System incorporates Active Hyper Bass PRO circuitry to faithfully reproduce low frequency sounds.
■ Forty-five-station preset capability (30 FM and 15 AM) in addition to auto-seek and manual tuning.
■ Versatile CD options include repeat, random and program play.
■ When the Unit is turned on and the CD door is closed, the illuminations on the CD door light up.
■ Timer functions; Daily Timer, Recording Timer and Sleep Timer.
■ Auto-reverse tape function.
■ You can connect various external units, such as an MD recorder.
How This Manual Is Organized
• Basic information that is the same for many different functions – e.g. setting the volume – is given in the section “Common
Operations,” and not repeated under each function.
• The names of buttons/controls and display messages are written in all capital letters: e.g. TAPE, “NO DISC.”
IMPORTANT PRECAUTIONS
English
1 Installation of the System
• Select a place which is level, dry and neither too hot nor too cold. (Between 5°C (41°F) and 35°C (95°F).)
• Leave sufficient distance between the System and a TV.
• Do not use the System in a place subject to vibrations.
2 Power cord
• Do not handle the power cord with wet hands!
• Some power is always consumed as long as the power cord is connected to the wall outlet.
• When unplugging the System from the wall outlet, always pull the plug, not the power cord.
3 Malfunctions, etc.
• There are no user serviceable parts inside. In case of a system failure, unplug the power cord and consult your dealer.
• Do not insert any metallic object into the System.
Table of Contents
Features.................................................................................. 1
How This Manual Is Organized ............................................. 1
IMPORTANT PRECAUTIONS ............................................1
Getting Started ...........................................................2
Common Operations..................................................6
Using the Tuner ..........................................................8
Using the CD Player .................................................10
Using the Cassette Deck (Recording) ................... 14
Using External Equipment.......................................16
Using the Timers ......................................................17
Care and Maintenance .............................................20
Troubleshooting .......................................................21
Specifications ...........................................................22
Using the Cassette Deck (Listening to a Tape) ..... 13
1
Page 6

Getting Started
AUTO REVERSE
AUTO TAPE SELECTOR
TAPE
DOWN UPMULTI CONTROL
TAPE FM/AM CD
STANDBY/ON
PHONES
MD/
AUX
REC
REV.
MODE
AHB
PRO
TIMER
CLOCK
VERTICAL DISC
LOADING MECHANISM
COMPACT
DIGITAL AUDIO
VOLUME
CD
OPEN/CLOSE
COMPACT COMPONENT SYSTEM
FS-V30
POWER
English
Accessories
Make sure that you have all of the following items, which are supplied with the System.
AC Power Cord (1)
AM Loop Antenna (1)
Remote Control (1)
Batteries (2)
FM Wire Antenna (1)
If any of these items are missing, contact your dealer immediately.
How to Put Batteries in the Remote Control
Match the polarity (+ and –) on the batteries with the + and – markings in the battery compartment.
R6(SUM-3)/AA(15F)
CAUTION: Handle batteries properly.
To avoid battery leakage or explosion:
• Remove batteries when the Remote Control will not be used for a long time.
• When you need to replace the batteries, replace both batteries at the same time with new ones.
• Do not use an old battery with a new one.
• Do not use different types of batteries together.
Using the Remote Control
The Remote Control makes it easy to use many of the functions of the System from a distance of up to 7 m (23 ft.) away.
You need to point the Remote Control at the remote sensor on the System’s front panel.
Remote sensor
2
Page 7

CAUTION: Make all connections before plugging the System into an AC power outlet.
Connecting the FM Antenna
Rear Panel of the Unit
OPTICAL
DIGITAL OUT
RL
L
R
SPEAKERS
IMPEDANCE
MIN 4Ω
Using the supplied Wire Antenna
FM Wire Antenna
(supplied)
Using the coaxial type connector
(not supplied)
A 75 Ω antenna with coaxial type connector (IEC or DIN 45325)
should be connected to the FM (75 Ω) COAXIAL terminal.
English
AC IN
Connecting the AM Antenna
Rear Panel of the Unit
RL
OPTICAL
DIGITAL OUT
L
R
SPEAKERS
IMPEDANCE
MIN 4Ω
If reception is poor, connect the outdoor antenna.
FM outdoor antenna
(not supplied)
Coaxial cable
Note: Before attaching a 75 Ω coaxial lead (the kind with a
round wire going to an outdoor antenna), disconnect the
supplied FM Wire Antenna.
AM Loop Antenna (supplied)
Attach the AM loop to its base by snapping the tabs on the loop
into the slot in the base.
ANTENNA
AM EXT
AM LOOP
CAUTION:
To avoid noise, keep antennas away from the
System, the connecting cord and the AC power
cord.
AC IN
FM (75Ω)
COAXIAL
Turn the loop until you have the best reception.
3
Page 8

CAUTION: Make all connections before plugging the System into an AC power outlet.
Connecting the Speakers
English
For each speaker, connect one end of the speaker wire to the speaker terminals on the back of the System.
1. Open each of the terminals and insert the speaker wires firmly, then close the terminals.
2. Connect the red (+) and black (–) wires of the right side speaker to the red (+) and black (–) terminals marked R on the System.
Connect the red (+) and black (–) wires of the left side speaker to the red (+) and black (–) terminals marked L on the System.
Right speaker (rear side)
L
R
SPEAKERS
IMPEDANCE
MIN 4Ω
Black
Left speaker (rear side)
CAUTION:
If a TV is installed near the speakers, the picture on the TV may be distorted. If this happens, set the
speakers away from the TV.
Connecting External Equipment
Connect signal cords (not supplied) between the System’s LINE IN (AUX)/LINE OUT terminals and the output/input terminals of an
external MD recorder, cassette deck, etc.
You can then listen to the external source through the System, or record the System’s CD player, cassette tape, or tuner to the external unit.
Signal cord (not supplied)
To audio input
MD recorder or
cassette deck (not supplied)
To audio output
RL
LINE OUT
LINE IN
(AUX)
Pin-plug x 2
Pin-plug x 2
Signal cord (not supplied)
Pin-plug x 2Pin-plug x 2
Connecting an MD Recorder, etc. (Digital Output)
Unplug the cap and connect an optical digital cord (not supplied) between the System’s OPTICAL DIGITAL OUT terminal and the input
terminal of an MD recorder, etc.
You can record the digital output signal from the System’s CD Player to the MD recorder, etc.
Cap
MD recorder, etc. (not supplied)
OPTICAL
DIGITAL OUT
Optical digital cord (not supplied)
4
To optical digital
input
Page 9

Connecting the AC Power Cord
,,,,,,,,,,,,,,,,,,,,,
,,,,,,,,,,,,,,,,,,,,,
,,,,,,,,,,,,,,,,,,,,,
,,,,,,,,,,,,,,,,,,,,,
yyyyyyyyyyyyyyyyyyyyy
yyyyyyyyyyyyyyyyyyyyy
yyyyyyyyyyyyyyyyyyyyy
yyyyyyyyyyyyyyyyyyyyy
Firmly insert the supplied AC power cord into the AC inlet on the back of the Unit.
AC IN
AC power cord
CAUTIONS:
• ONLY USE JVC POWER CORD PROVIDED WITH THIS SYSTEM TO AVOID MALFUNCTION OR DAMAGE
TO THE SYSTEM.
• BE SURE TO UNPLUG THE POWER CORD FROM THE OUTLET WHEN YOU ARE GOING OUT OR WHEN
THE SYSTEM IS NOT IN USE FOR AN EXTENDED PERIOD OF TIME.
Now you can plug the AC power cord into the wall outlet, and your System is at your command!
COMPU PLAY
The JVC’s COMPU PLAY feature lets you control the most frequently used System functions with a single touch.
With One Touch Operation you can play a CD, a tape, turn on the radio, or listen to an external equipment at a single press of the play button
for that function. One Touch Operation turns the power on for you, then starts the function you have specified.
How One Touch Operation works in each case is explained in the section dealing with that function.
The COMPU PLAY buttons are:
English
On the Unit
CD #/8 button
FM/AM button
TAPE @ # button
MD/AUX button
On the Remote Control
CD #8 button
TUNER BAND button
TAPE @ # button
MD/AUX button
AUTOMATIC POWER ON
The System automatically turns on with the following operation.
• When you press the CD OPEN/CLOSE 0 button on the Unit (or CD 0 button on the Remote Control), the System automatically turns
on and the CD cover opens to allow CD insertion. However, this operation does not change the source to CD.
When you press the POWER button to turn on or off the System, the CD cover will automatically close if it is open.
Removing the speaker grilles
• The speaker grilles can be removed.
• When removing,
1. Insert your fingers at the top and pull toward you.
2. Pull the bottom toward you as well.
Attaching the speaker grille
Speaker grille
Match the fittings when attaching the grille.
5
Page 10
Common Operations
English
DIMMER
DISPLAY
AHB PRO
BASS
TREBLE
VOLUME +, –
REMOTE CONTROL RM-RXFSV5
POWER
DIMMER SLEEP
DISPLAY FM MODE MD/AUX
AUTO
AHB PRO
PRESET
PROGRAM RANDOM REPEAT
BASS TREBLE CANCEL
UP
SET
DOWN
TUNER
TAPE
BAND
VOLUME
POWER
CD
UP
DOWN
CD
Turning the Power On and Off
Turning the System on –––––––––––––––
Press the POWER button.
The STANDBY/ON lamp lights in green.
The System comes on ready to play the source it was for when the
power was last turned off.
■ For example, if the last thing you were doing was listening to a
CD, you are now ready to listen to a CD again. If you wish,
you can change to another source.
■ If you were listening to the Tuner last, the Tuner comes on
playing the station it was last set to.
Turning the System off –––––––––––––––
Press the POWER button again.
The STANDBY/ON lamp lights in red.
■ Some power is always consumed even though power is turned
off (called Standby Mode).
■ To switch off the System completely, unplug the AC power
cord from the wall outlet. When you unplug the AC power
cord, the clock will be reset to AM 12:00.
Adjusting the Brightness
(Dimmer)
STANDBY/ON lamp
POWER
PHONES
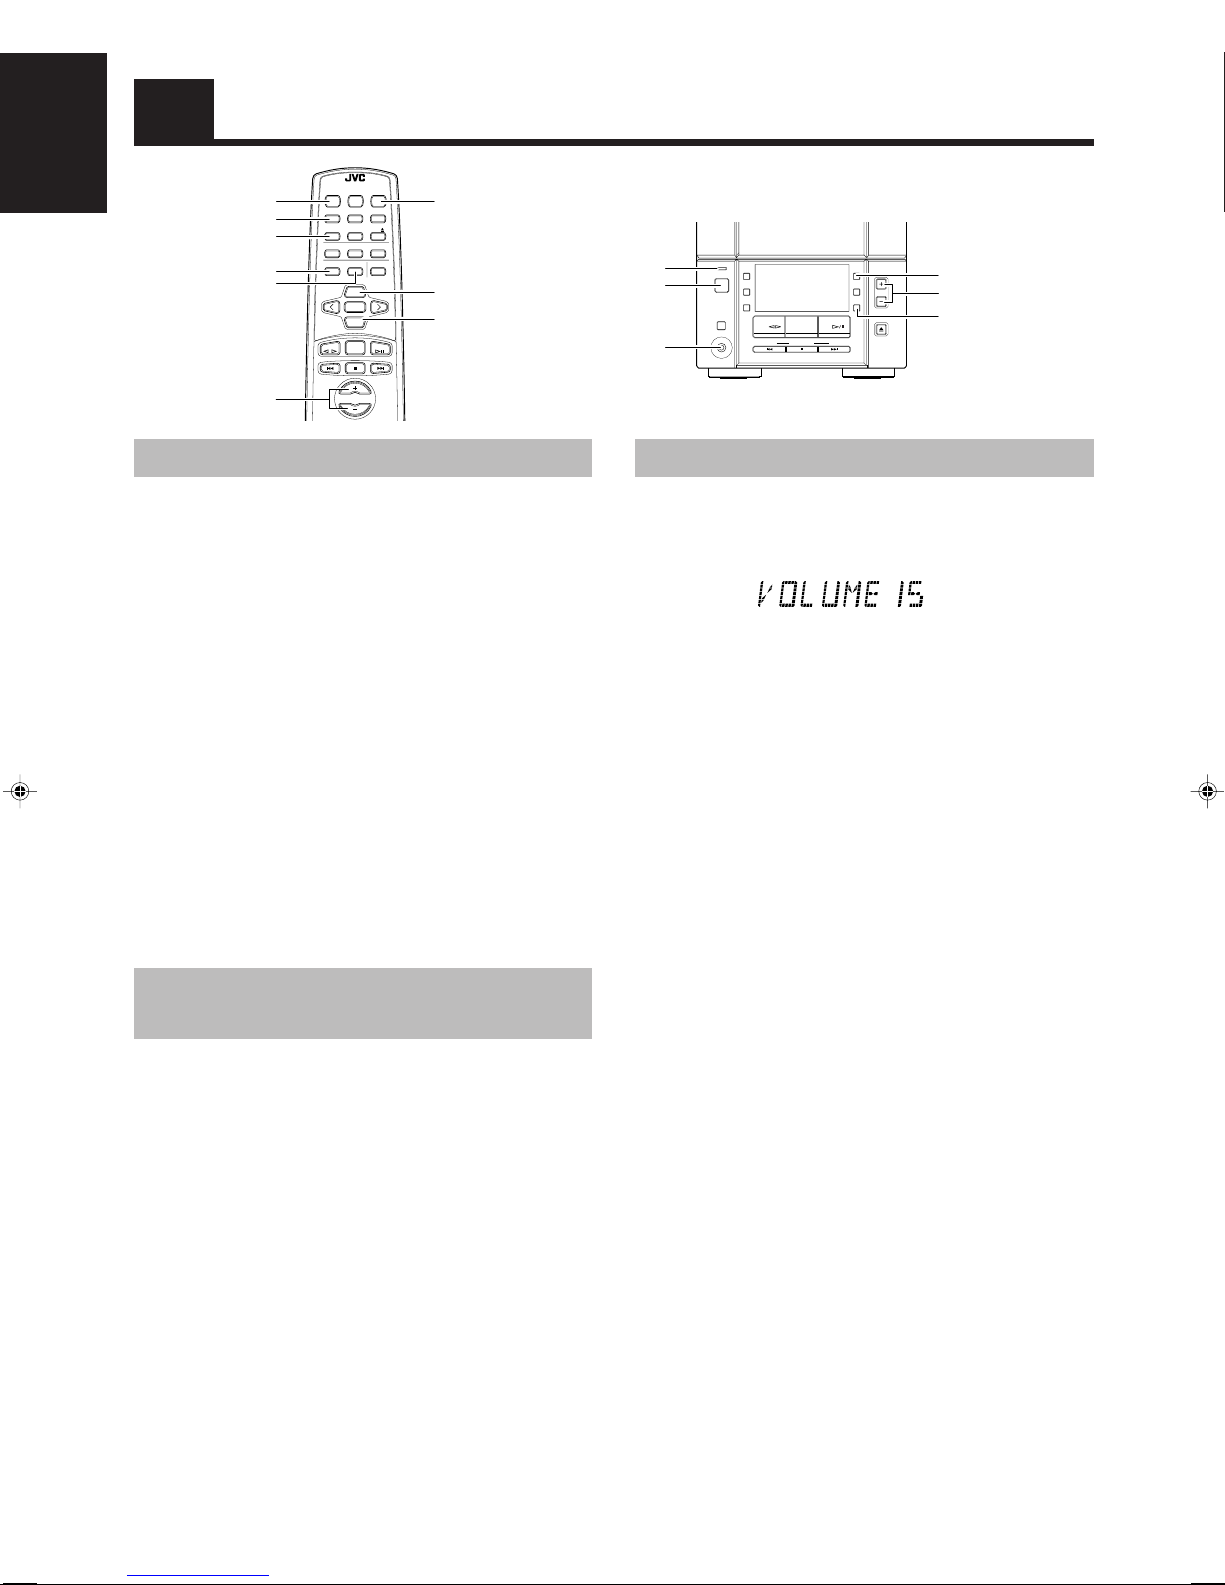
Press the VOLUME + button to increase the volume or press the
VOLUME – button to decrease it.
You can adjust the volume level between 0 and 40.
CAUTION:
DO NOT turn off (on standby) the Unit with the
volume set to an extremely high level; otherwise
a sudden blast of sound could damage your
hearing, speakers and/or headphones when you
turn on the Unit or start playing any source next
time.
REMEMBER you cannot adjust the volume level
while the Unit is on standby.
For private listening
Connect a pair of headphones to the PHONES jack. No sound
comes out of the speakers.
Be sure to turn down the volume before connecting or putting on
headphones.
STANDBY/ON
POWER
PHONES
MD/
AUX
REC
REV
MODE
TAPE FM/AM CD
DOWN UPMULTI CONTROL
AHB
PRO
VOLUME
TIMER
CLOCK
CD
OPEN/CLOSE
AHB PRO
VOLUME +, –
CLOCK
Adjusting the Volume
SLEEP
You can adjust the brightness of the backlighting for the display.
When the System is turned on –––––––
To make the brightness of the backlighting darker, press
the DIMMER button on the Remote Control.
To make the brightness brighter, press the DIMMER button
on the Remote Control again.
6
Page 11
Reinforcing the Bass Sound
(AHB PRO)
You can reinforce the bass sound to maintain rich, full bass at low
volume (you can use this effect only for playback):
To get the effect, press the AHB (Active Hyper Bass) PRO
button.
The BASS indicator lights up on the display.
To cancel the effect, press the button again.
The BASS indicator goes out.
Controlling the Tone (Bass/
Treble)
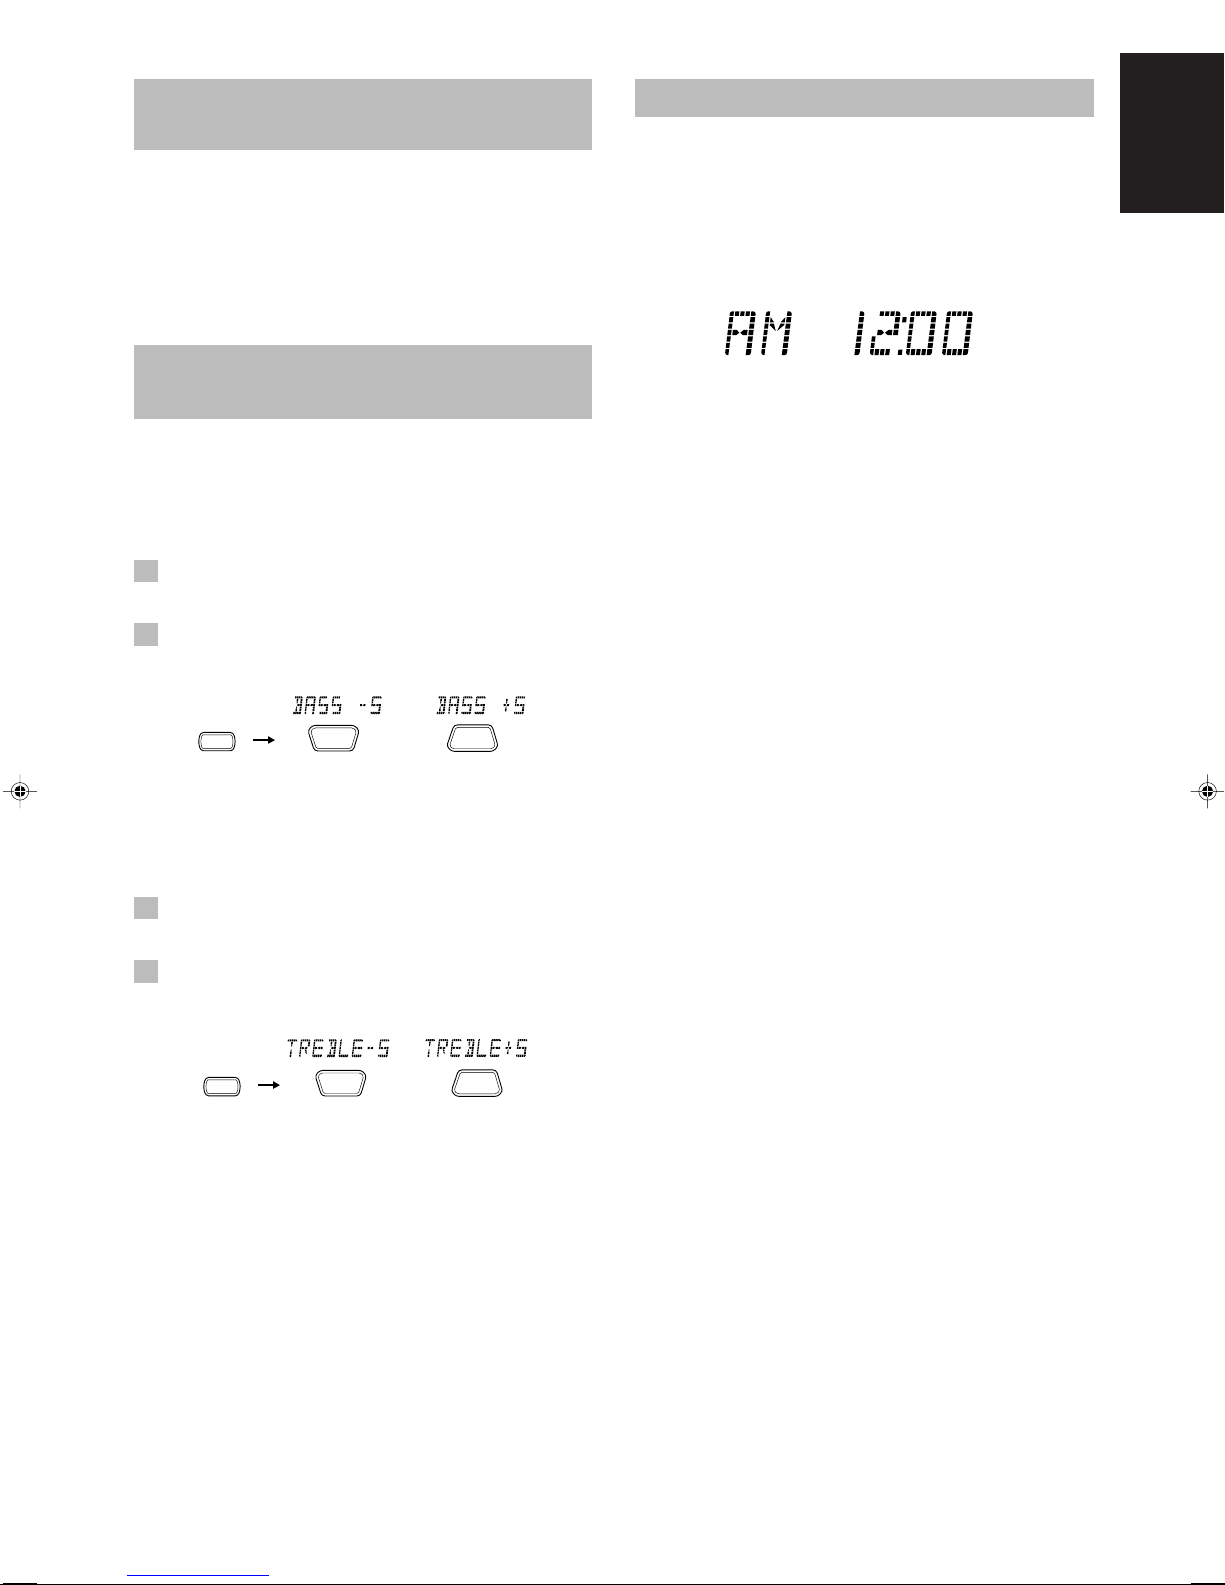
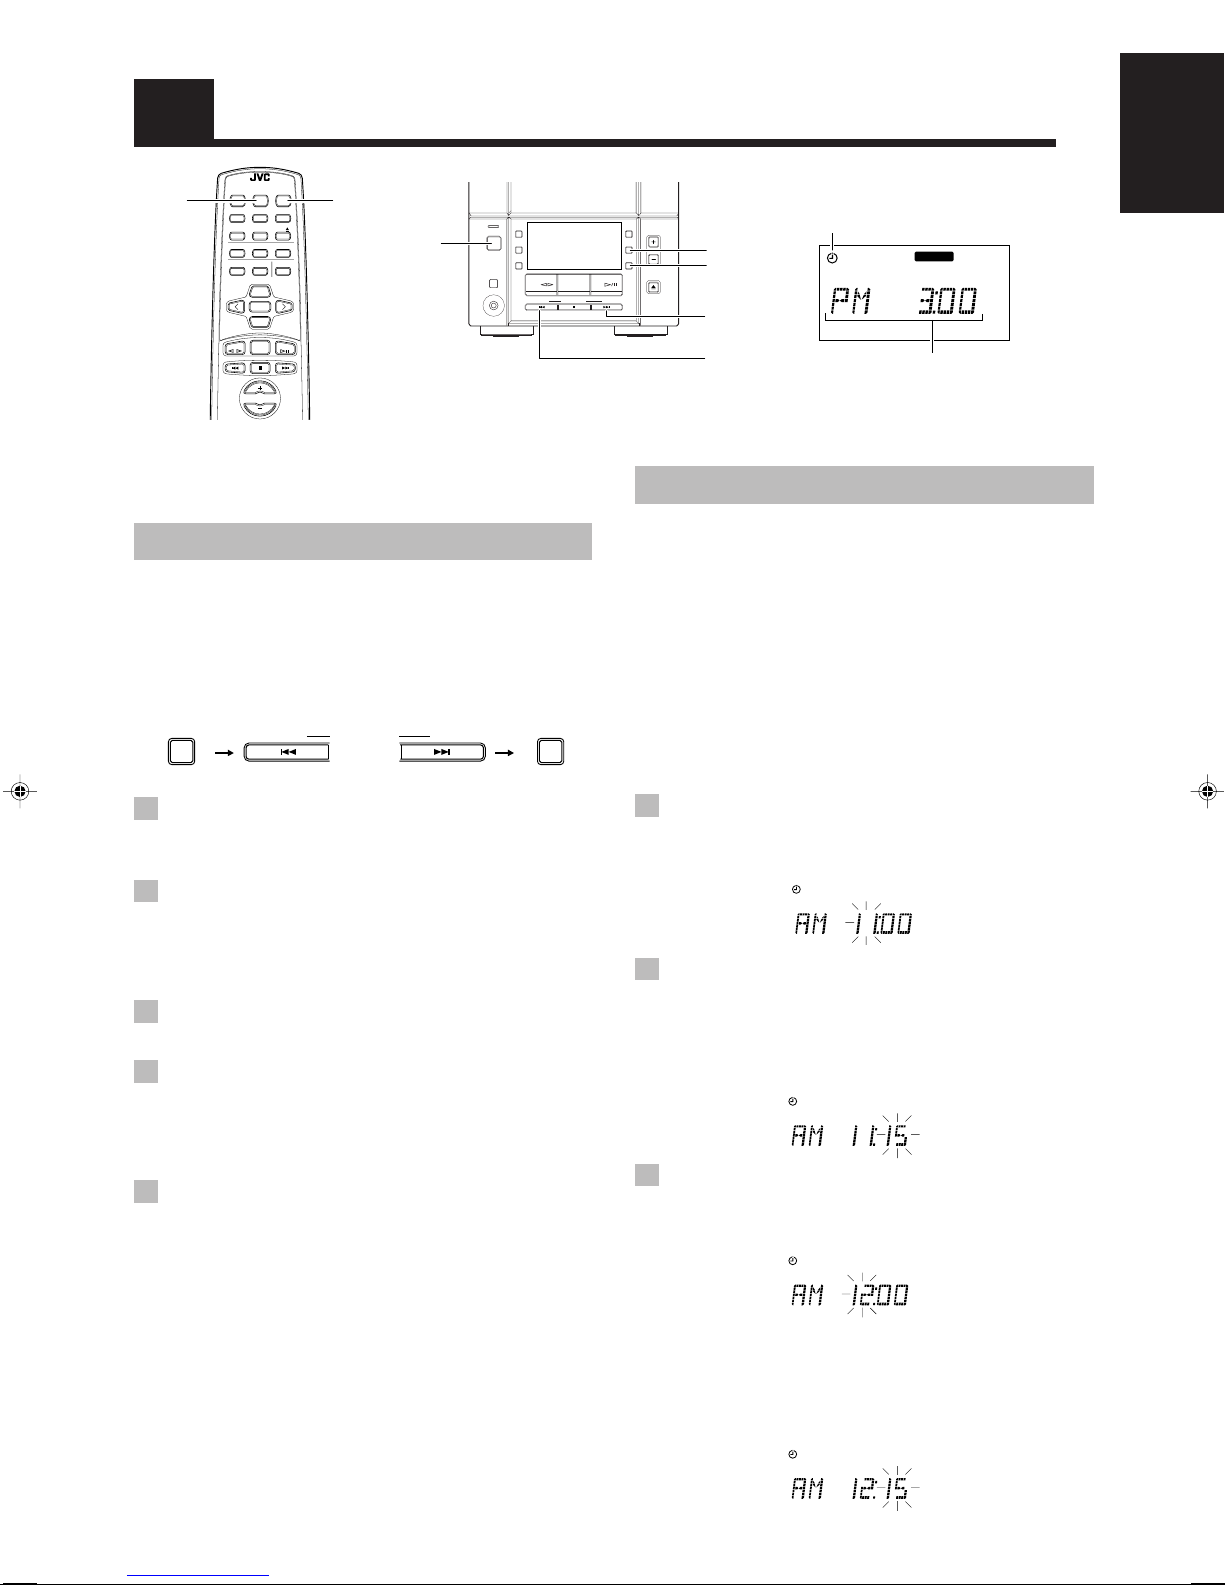
Showing the Clock Time
In Standby mode, the digital clock appears on the display.
When the System is turned on, you can display the digital clock
any time.
To display the digital clock, press the CLOCK button on the
Unit or DISPLAY button on the Remote Control.
To return to the previous mode, press the same button again.
English
You can control the tone by changing the bass and treble.
Adjusting the bass level –––––––––––––
You can adjust the bass level (low frequency range level) between
–5 and +5. (0: Flat)
1 Press the BASS button on the Remote
Control.
2 Press the UP or DOWN button on the
Remote Control to adjust the bass level.
BASS
DOWN
or
UP
Adjusting the treble level ––––––––––––
You can adjust the treble level (high frequency range level)
between –5 and +5. (0: Flat)
1 Press the TREBLE button on the Remote
Control.
2 Press the UP or DOWN button on the
Remote Control to adjust the treble level.
Note: To let the clock work, you need to set the clock beforehand.
(See “Setting the Clock” on page 17.)
TREBLE
DOWN
or
UP
7
Page 12
English
SET
SET
FM = 30, AM = 15
STORED
TUNER
BAND
SET
UP
DOWN
Using the Tuner
REMOTE CONTROL RM-RXFSV5
POWER
DIMMER SLEEP
SET
4
DISPLAY FM MODE MD/AUX
AUTO
CD
AHB PRO
PRESET
PROGRAM RANDOM REPEAT
BASS TREBLE CANCEL
UP
<
SET
DOWN
TUNER
TAPE
BAND
VOLUME
When the System is in use, the display shows other items as well.
For simplicity, only the items described in this section are shown here.
CD
FM MODE
AUTO PRESET
UP
>
DOWN
TUNER BAND
¢
STANDBY/ON
PHONES
POWER
MD/
AUX
REC
REV
MODE
TAPE FM/AM CD
DOWN UPMULTI CONTROL
AHB
PRO
VOLUME
TIMER
CLOCK
CD
OPEN/CLOSE
FM/AM
¢
4
MONOMONO STEREOSTEREO
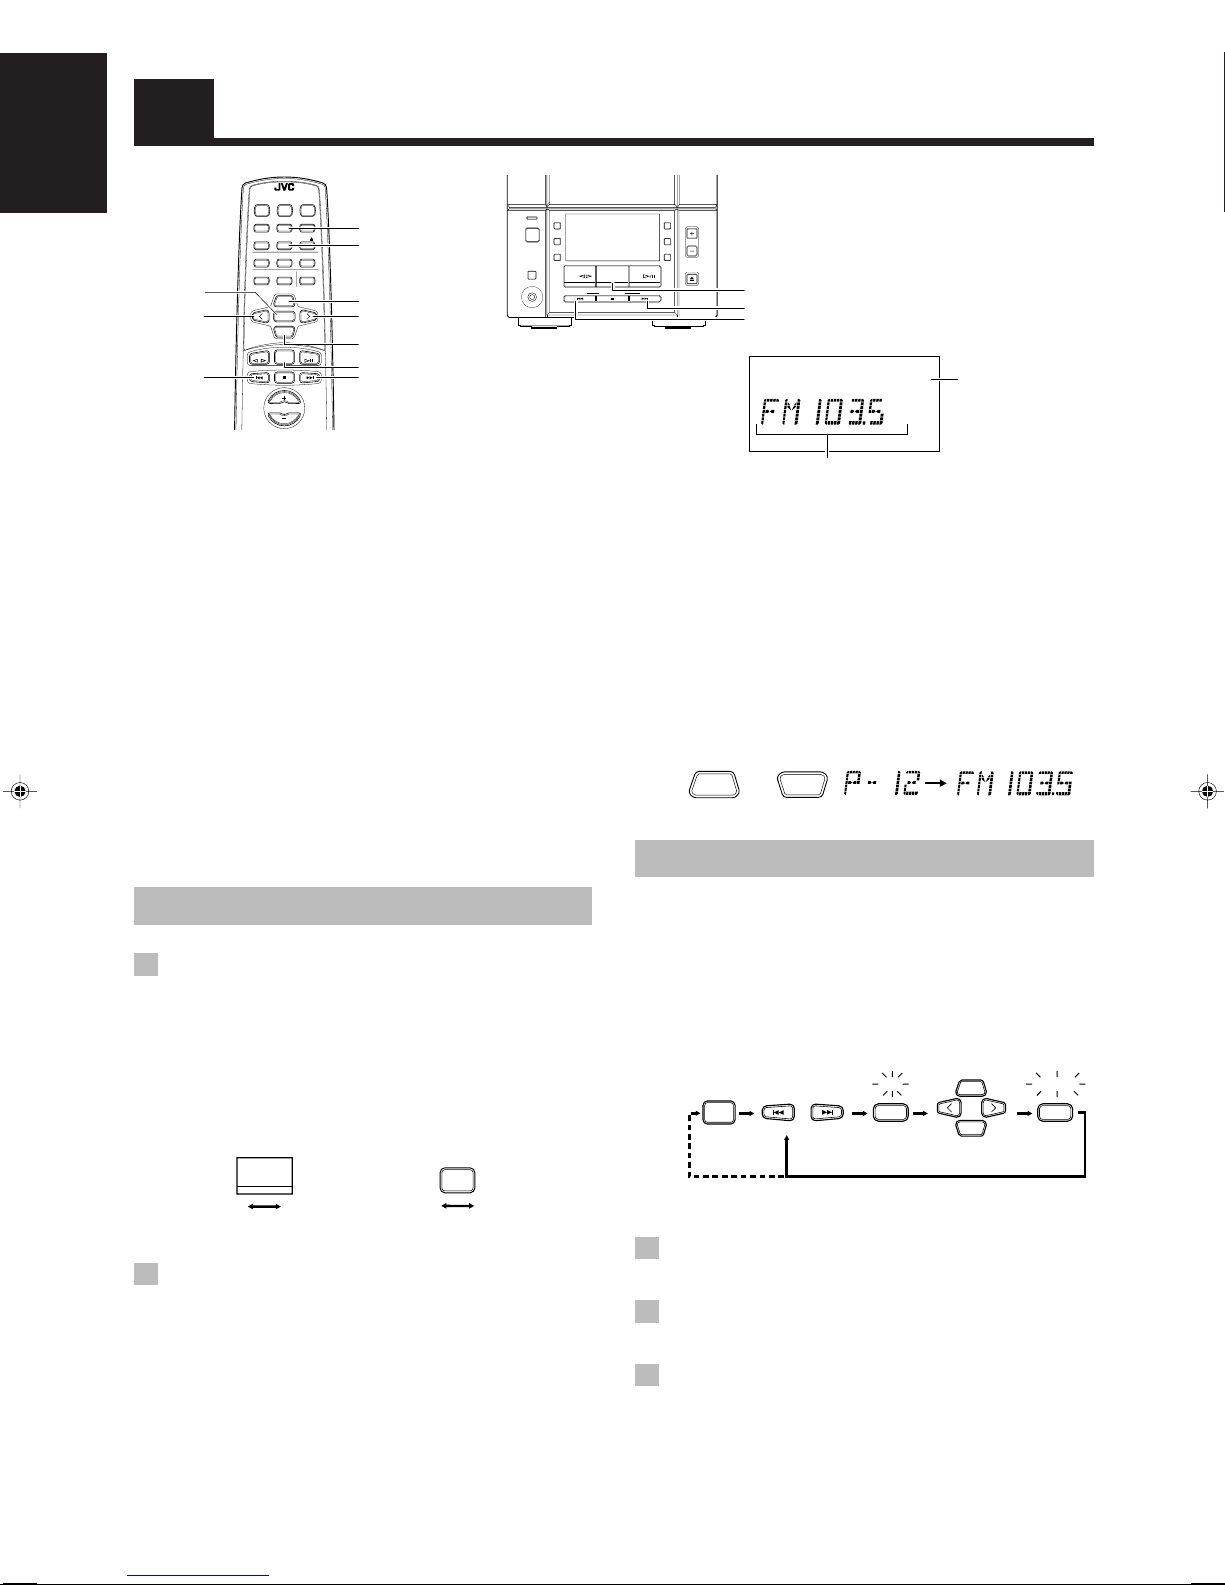
FM mode indicators
Band display, Frequency
display, Preset channel
You can listen to FM and AM stations. Stations can be tuned in
manually, automatically, or from preset memory storage.
■ Before listening to the radio:
• Make sure that both the FM and AM antennas are correctly
connected. (See page 3.)
One touch radio ––––––––––––––––––––––
Just press the FM/AM button on the Unit (or the TUNER BAND
button on the Remote Control) to turn on the System and start
playing the station you were last tuned to.
■ You can switch from any other sound source to the radio by
pressing the FM/AM button on the Unit (or the TUNER BAND
button on the Remote Control).
Tuning In a Station
1 Press the FM/AM button on the Unit (or
the TUNER BAND button on the Remote
Control).
The band and frequency you were last tuned to appear on the
display.
(If the last station was selected using the preset number, the
preset number appears first.)
Each time you press the button, the band alternates between
FM and AM.
FM/AM
FM
AM
(On the Unit) (On the Remote Control)
2 Select a station using one of the
following methods.
■ Manual Tuning
Press the 4 or ¢ button repeatedly to move from
frequency to frequency until you find the station you want.
OR
■ Auto Tuning
If you press and hold the 4 or ¢ button for one second or
more, the frequency changes down, or up, automatically until a
station is found.
8
FM
TUNER
BAND
AM
OR
■ Preset Tuning using the Remote Control (Possible
only after presetting stations)
Select the desired preset number using the UP, DOWN, > or <
button on the Remote Control. After 1 second the display will
show the preset number’s band and frequency.
Example: Press the UP button until the preset number 12 “P-12”
appears.
UP
DOWN
or
(After 1 second)
Presetting Stations
You can preset up to 30 FM stations and up to 15 AM stations
using the Remote Control.
Note: Preset numbers may have been set to factory test
frequencies prior to shipment. This is not a malfunction.
You can preset the stations you want into memory by
following one of the presetting methods below.
Presetting stations manually ––––––––
or
(Within 5 seconds)
When changing the Band
1 Select a band by pressing the TUNER
BAND button.
2 Press the 4 or ¢ button to tune in a
station.
3 Press the SET button.
“SET” will flash for 5 seconds.
Within 5 seconds, proceed to the next step.
When the display returns to the one set in Step 2 after 5
seconds, press the SET button again.
Page 13

4 Press the UP, DOWN, > or < button within
5 seconds to select the preset number.
UP or > button: Increases the preset number by 1.
DOWN or < button: Decreases the preset number by 1.
• When the > or < button is held down, the preset number
changes rapidly.
5 Press the SET button within 5 seconds.
“STORED” appears and after 2 seconds, the display returns to
the broadcast frequency display.
6 Repeat above steps 1 to 5 for each
station you want to store in memory with
a preset number.
To change the preset stations, repeat the same steps as above.
Changing the FM Reception
Mode
When you have tuned into an FM stereo broadcast, the STEREO
indicator lights up and you can hear stereo effects.
If an FM stereo broadcast is hard to receive or noisy, you can select
Monaural mode. Reception improves, but you lose any stereo
effect.
Press the FM MODE button on the Remote
Control so that the MONO indicator lights up
on the display.
FM MODE
English
Presetting stations automatically –––
In each band, you can automatically preset 30 FM and 15 AM
stations. Preset numbers will be allocated as stations are found,
starting from the lowest frequency and moving up the frequency.
AUTO
TUNER
BAND
1 Select a band by pressing the FM/AM
button on the Unit (or the TUNER BAND
button on the Remote Control).
2 Press the AUTO PRESET button on the
Remote Control for more than 2 seconds.
3 Repeat steps 1 – 2 for the other band.
■ If you want to change the preset stations, carry out the Manual
Presetting for the desired preset numbers.
CAUTION:
Even if the system is unplugged or if a power
failure occurs, the preset stations will be stored
for about 24 hours. However, in case the preset
stations are erased, you will need to preset the
stations again.
PRESET
(For more than 2 seconds)
STEREO
To restore the stereo effect, press the FM MODE button on
the Remote Control so that the MONO indicator goes off.
MONO
9
Page 14

English
PROGRAM RANDOMPROGRAM RANDOM OVER
OVER
ALL
ALL
1 2 3 4 5 6 7 8 9 1010 11 1212 1313 1414 1515
REMOTE CONTROL RM-RXFSV5
DIMMER SLEEP
DISPLAY FM MODE MD/AUX
AHB PRO
AUTO
PRESET
CD
PROGRAM RANDOM REPEAT
BASS TREBLE CANCEL
UP
SET
DOWN
TUNER
BAND
TAPE
VOLUME
CD
POWER
RANDOM
PROGRAM
Using the CD Player
LOADING MECHANISM
COMPACT COMPONENT SYSTEM FS-V30
STANDBY/ON
MD/
AUX
POWER
SET
4
POWER
CD 0
REPEAT
CANCEL
<
UP
>
DOWN
CD #8
¢
7
When the System is in use, the display shows other items as well.
For simplicity, only the items described in this section are shown here.
PHONES
REC
REV
MODE
TAPE FM/AM CD
DOWN UPMULTI CONTROL
COMPACT
DIGITAL AUDIO
VERTICAL DISC
CD Cover
AHB
PRO
VOLUME
TIMER
CLOCK
OPEN/CLOSE
CD OPEN/
CD
CLOSE 0
CD #/8
¢
7
Track number, Playing time,
Program order number
4
Music calendar
OVER indicator
Play mode indicator
Repeat indicator
Track number exceeding
15 is not displayed.
You can use Normal, Random, Program or Repeat Play. Repeat
Play can repeat all the tracks or just one of the tracks on the CD.
Here are the basic things you need to know to play a CD and locate
the different tracks on it.
The quickest way to start a CD is with the one touch
operation
■ Press the CD #/8 button on the Unit or the Remote Control.
• The power is automatically turned on. If a CD is already
inserted, it will start playing from the first track.
• If no CD is inserted, “NO DISC” appears on the display and
the CD Player remains in Stop mode.
Inserting a CD
1 Press the CD OPEN/CLOSE 0 button on
the Unit (or the CD 0 button on the
Remote Control).
The CD cover opens.
2 Place a CD, with its label side out as
shown below. Press down on the portions
around the CD’s center hole until you
hear a click.
3 Press the CD OPEN/CLOSE 0 button on
the Unit (or the CD 0 button on the
Remote Control) again to close the CD
cover.
• To close the CD cover and play the CD, you can just press the
CD #/8 button.
■ You can place an 8 cm (3 in.) CD without an adaptor.
■ When a CD with 16 tracks or more is loaded, the OVER
indicator will light up on the display.
■ If the CD cannot be read correctly (because it is scratched, for
example), “00 0000” appears on the display.
■ You can insert a CD while listening to another source.
CAUTIONS:
• DO NOT try to open or close the CD cover by
hand as it will be damaged.
• When you place or take out a CD, do not let it
fall. Be careful not to scratch your fingers
with the CD cover.
Unloading a CD
Take out the CD as shown below.
10
Page 15

Basics of Using the CD
Player — Normal Play
Playing a CD––––––––––––––––––––––––––
1 Insert a CD.
2 Press the CD #/8 button.
The first track of the CD begins playing.
Track number
• The track number that has already played disappears from the
music calendar.
• The CD Player automatically stops when the last track of the
CD has finished playing.
To stop playing the CD, press the 7 button.
The following information for the CD is displayed.
Total track number
To stop playing and remove the CD, press the CD OPEN/
CLOSE 0 button on the Unit or CD 0 button on the Remote
Control to open the CD cover. Then remove the CD.
To pause, press the CD #/8 button. The playback time flashes on
the display.
To cancel pause, press the same button again. Play continues
from the point where it was paused.
Playback time
Total playback time
Selecting a track–––––––––––––––––––––
During playback, press the 4 or ¢ button (or the <, >, DOWN
or UP button on the Remote Control) to select the track you want.
The selected track starts playing.
• Press the ¢ button (or the > or UP button on the Remote
Control) once to skip to the beginning of the next track.
• Press the 4 button (or the < or DOWN button on the
Remote Control) to skip to the beginning of the track being
played. Press twice quickly to skip to the beginning of the
previous track.
• When the > or < button on the Remote Control is held
down, the tracks are successively skipped.
Selecting a passage within a track
Holding down the 4 or ¢ button (or the DOWN or UP button
on the Remote Control), during playback, will fast-forward/reverse
the CD so you can quickly find a particular passage in the track
you are listening to.
––––
Programing the Playing
Order of the Tracks
You can program the playing order of the tracks using the
Remote Control.
■ You can program up to 20 tracks in any desired order including
the same tracks.
■ You can only make a program when the CD Player is stopped.
4 Press the PROGRAM button.
The System enters the programing mode and the PROGRAM
indicator lights up.
PROGRAM
PROGRAM RANDOM
5 Press the > or < button to select the track
to program.
> button: Increases the track number by 1.
< button: Decreases the track number by 1.
• When the > or < button is held down, the track number
changes rapidly.
6 Press the SET button.
Program order number
SET
Total playback time of the
programed tracks
7 Repeat steps 5 and 6 to select the other
tracks for the program.
You can see the total playback time of programed tracks on the
display. You can also see the programed tracks on the music
calendar.
8 Press the CD #/8 button.
The System plays the tracks in the order you have programed
them.
■ You can skip to a particular program track by pressing the 4
or ¢ button (or the <, >, DOWN or UP button on the Remote
Control) during Program Play.
■ To stop playing, press the 7 button once.
To confirm the programed tracks while the CD player is
stopped, press the PROGRAM button; the tracks making up the
program will successively be displayed in the programed order.
To delete all the tracks in the program while the CD
player is stopped, press the 7 button. Pressing the CD 0 button
on the Remote Control (or the CD OPEN/CLOSE 0 button on the
Unit) to open the CD cover will also clear the programed tracks.
To exit from the program mode while the CD player is
stopped, press the 7 button to light off the PROGRAM indicator.
All the programed tracks will be cleared.
Notes:
• If the total playback time of the programed tracks exceeds 99
minutes 59 seconds, “-- -- : -- --” appears on the display.
• If you try to program the 21st track, “FULL” appears on the
display for about 2 seconds.
Modifying the program –––––––––––––––
Modify the contents of the program while the CD Player is stopped.
Each time you press the CANCEL button, the last track in the
program is deleted. To add new tracks to the end of the program,
repeat above steps 5 to 7.
English
1 Insert a CD.
2 Press the CD #/8 button.
3 Press the 7 button to stop the CD.
11
Page 16

Playing at Random
The tracks will play in no particular order when you use this mode.
English
Press the RANDOM button on the Remote
Control.
The RANDOM indicator lights up on the display, and tracks will
be played in random order.
To skip a track during playback, press the ¢ button (or the
> or UP button on the Remote Control) to jump to the next
randomly selected track. Press the 4 button (or the < or DOWN
button on the Remote Control) to jump back to the start of a track
being played.
To exit from Random Play mode, press the 7 button.
Repeating Tracks
You can set the program or individual track currently playing to
repeat as many times as you like.
Press the REPEAT button on the Remote
Control.
The Repeat indicator changes at each press of the button, as shown
below.
ALL
blank display
: Repeats one track.
ALL : In Normal Play mode, repeats all the tracks.
In Program Play mode, repeats all the tracks in
the program.
In Random Play mode, repeats all the tracks in
random order.
To exit from Repeat mode, press the REPEAT button until the
Repeat indicator on the display goes out.
■ In Random Play
■ Repeat mode remains in effect even when you change the play
mode.
cannot be selected.
Locking the CD cover
You can lock the CD cover and prohibit to unload the CD.
• This operation is possible only using the buttons on the unit.
To prohibit unloading the CD, press the POWER button while
holding the 7 button. (If the CD cover is opened, close it first.)
“LOCKED” appears for a while, and the CD cover is locked.
To cancel the prohibition and unlock the CD cover, press
the POWER button while holding the 7 button.
“UNLOCKED” appears for a while, and the CD cover is unlocked.
Note: If you try to unload the CD, “LOCKED” appears to inform
you that the CD cover is locked.
12
Page 17
AUTO REVERSE
AUTO TAPE SELECTOR
TAPE
REMOTE CONTROL RM-RXFSV5
DIMMER SLEEP
DISPLAY FM MODE MD/AUX
AHB PRO
AUTO
PRESET
CD
PROGRAM RANDOM REPEAT
BASS TREBLE CANCEL
UP
SET
DOWN
TUNER
BAND
TAPE
VOLUME
CD
POWER
Using the Cassette Deck
(Listening to a Tape)
STANDBY/ON
MD/
AUX
POWER
REC
REV
REV . MODE
TAPE @ #
¢
7
4
When the System is in use, the display shows other items as well.
For simplicity, only the items described in this section are shown here.
The Cassette Deck allows you to play and record audio tapes.
■ With Automatic Tape Detection, you can listen to type I, II or
IV tapes without having to change any settings.
The use of tapes longer than 120 minutes is not recommended,
since characteristic deterioration may occur and these tapes
easily jam in the pinch-rollers and the capstans.
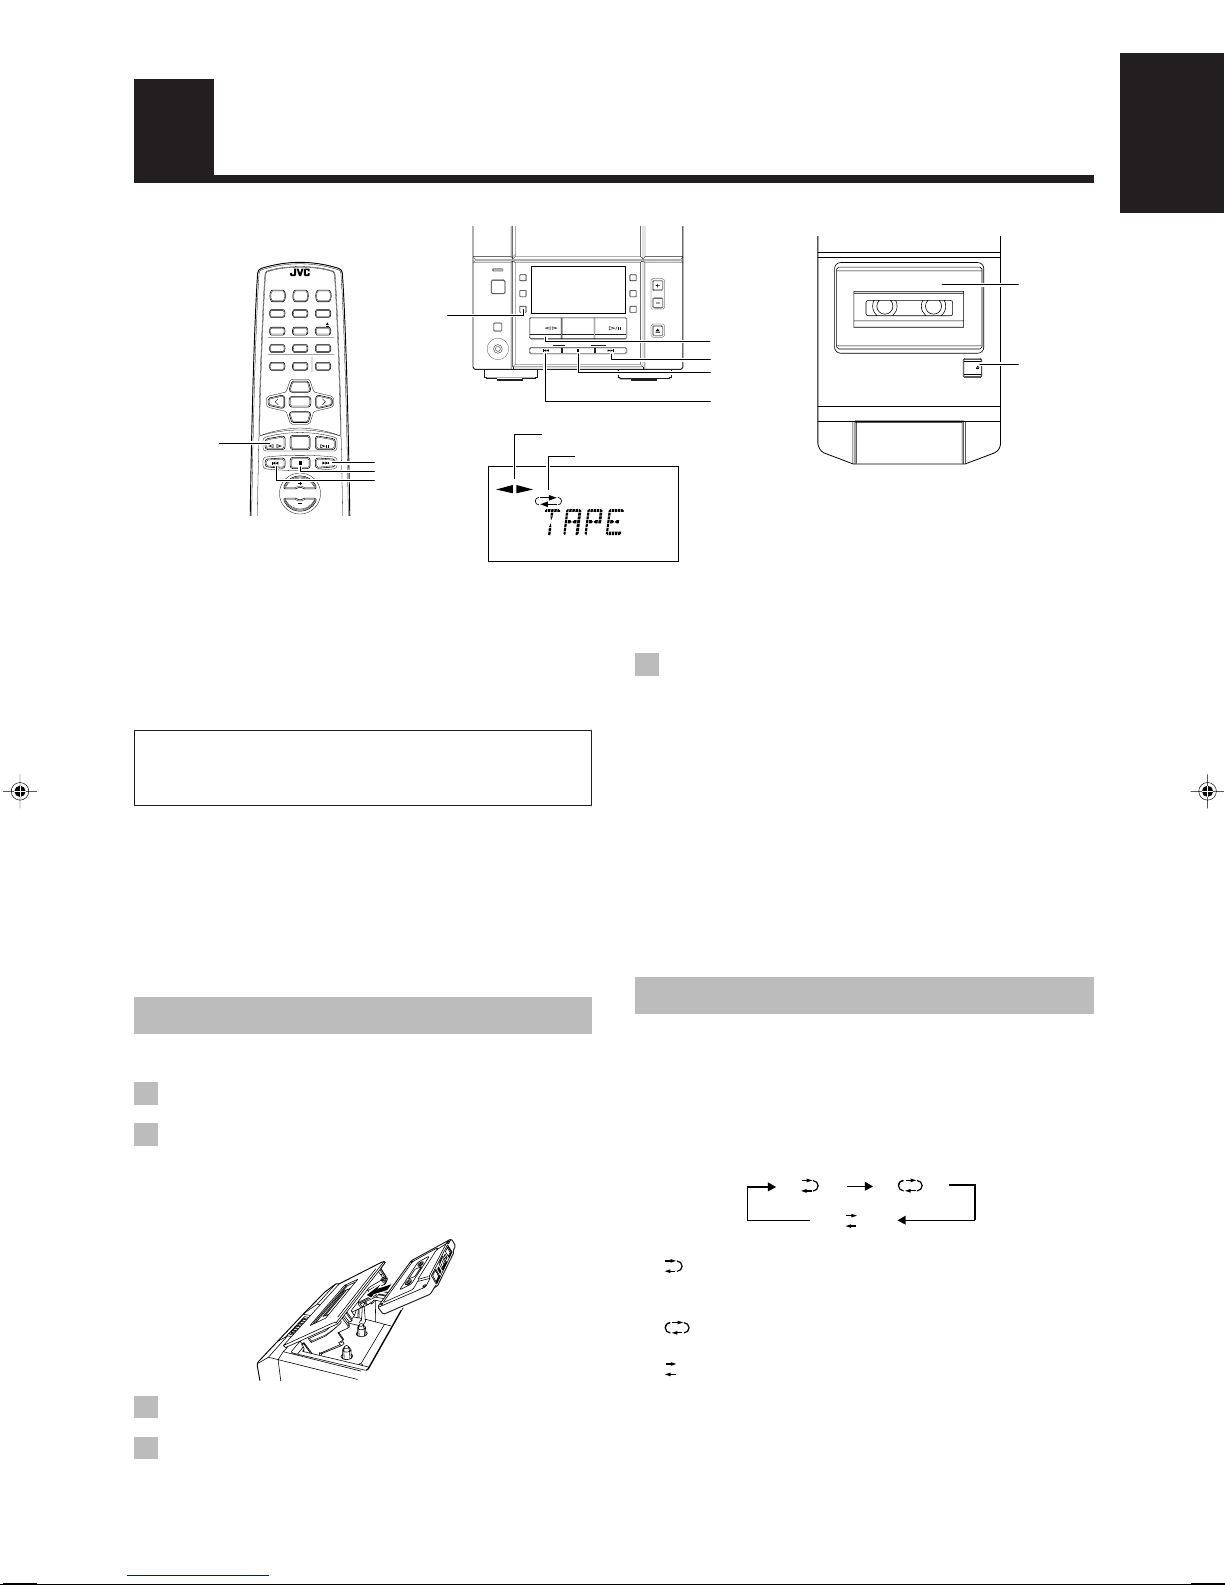
One touch play –––––––––––––––––––––––
By pressing the TAPE @ # button on the Unit or the Remote
Control, the Unit will come on, “TAPE” appears on the display,
and if a tape is in the deck, it will start to play. If no tape is loaded,
the Unit will come on and wait for you to insert a tape, or select
another function.
MODE
TAPE FM/AM CD
PHONES
DOWN UPMULTI CONTROL
Tape Direction indicator
AHB
PRO
VOLUME
TIMER
CLOCK
CD
OPEN/CLOSE
TAPE @ #
¢
7
4
Reverse Mode indicator
5 If you need to change the playback
direction, press the TAPE @ # button
again.
The other Tape Direction indicator lights up and the tape
playback direction changes.
To stop playing, press the 7 button.
T o remove the tape, stop the tape, and press the T APE 0 button on
the Unit.
Fast-winding a tape ––––––––––––––––––
■ Press the ¢ or 4 button to fast-wind the tape.
• The Cassette Deck automatically stops when the tape
reaches its end.
English
Cassette
holder
TAPE 0
Standard Play
When the power is already on, you can use this basic procedure:
1 Press the TAPE 0 button on the Unit.
2 When the cassette holder opens, put the
cassette in, with the side you want to
listen to facing up.
• If the cassette holder does not open, turn the Unit off, then
back on and press the TAPE 0 button again.
3 Close the holder gently until it clicks.
4 Press the TAPE @ # button.
The tape is played in the direction shown by the Tape Direction
indicator.
Reverse Mode
You can set the cassette deck to play just one side of a tape, both
sides once, or both sides continuously.
Press the REV. (reverse) MODE button on
the Unit.
The indicator changes at each press of the button as shown.
: The Cassette Deck automatically stops after playing both
sides of the tape. (Stops when playback in the 2
direction is finished.)
: The Cassette Deck continues to play both sides of the
tape until the 7 button is pressed.
: The Cassette Deck automatically stops after playing one
side of the tape.
13
Page 18
Using the Cassette Deck
English
TAPE @ #
(Recording)
REMOTE CONTROL RM-RXFSV5
POWER
DIMMER SLEEP
DISPLAY FM MODE MD/AUX
AUTO
CD
AHB PRO
PRESET
PROGRAM RANDOM REPEAT
BASS TREBLE CANCEL
UP
SET
DOWN
TUNER
TAPE
BAND
CD
CD #8
REC
REV . MODE
TAPE @ #
7
VOLUME
When the System is in use, the display shows other items as well.
For simplicity, only the items described in this section are shown here.
Recording onto a tape from any of the sound sources is simple. Just
place a tape in the Cassette Deck, have the source ready, make one
or two settings, and you’re ready to record. For each source the
procedure is a little bit different so we explain each separately. But
first, here are a few things to make your recordings better.
Things to know before you start
recording –––––––––––––––––––––––––––––
■ It should be noted that it may be unlawful to re-
record pre-recorded tapes, records, or discs without
the consent of the owner of copyright in the sound or
video recording, broadcast or cable program and in
any literary, dramatic, musical, or artistic embodied
therein.
■ When you want to record onto both sides of a tape, you can set
Reverse mode to do so. Recording automatically stops after
recording in the 2 direction. Therefore, make sure that the tape
direction is 3 when recording with Reverse mode on.
■ The recording level, which is the volume at which the new tape
is being made, is automatically set correctly, so it is not
affected by the VOLUME control on the System. Nor is it
affected by adjusting the sound effects. Thus, during recording
you can adjust the sound you are actually listening to without
affecting the recording level.
■ Two small tabs on the back of the cassette tape, one for side A
and one for side B, can be removed to prevent accidental
erasure or recording.
■ To record on a cassette with the tabs removed, you must cover
the holes with adhesive tape first. However, when a type II tape
is used, only cover part of the hole as shown, since the other
part of the hole (Type II detection slot) is used to detect the
tape type.
■ Type I and Type II tapes can be used for recording.
Note: At the start and end of cassette tapes, there is leader tape
which cannot be recorded onto. Thus, when recording CDs
or radio broadcasts, wind on the leader tape first to ensure
that the recording will be made without any music part lost.
Type II detection
slot
Adhesive tape
STANDBY/ON
MD/
AUX
POWER
REC
REV
MODE
TAPE FM/AM CD
PHONES
DOWN UPMULTI CONTROL
7
AHB
PRO
TIMER
CLOCK
VOLUME
CD
OPEN/CLOSE
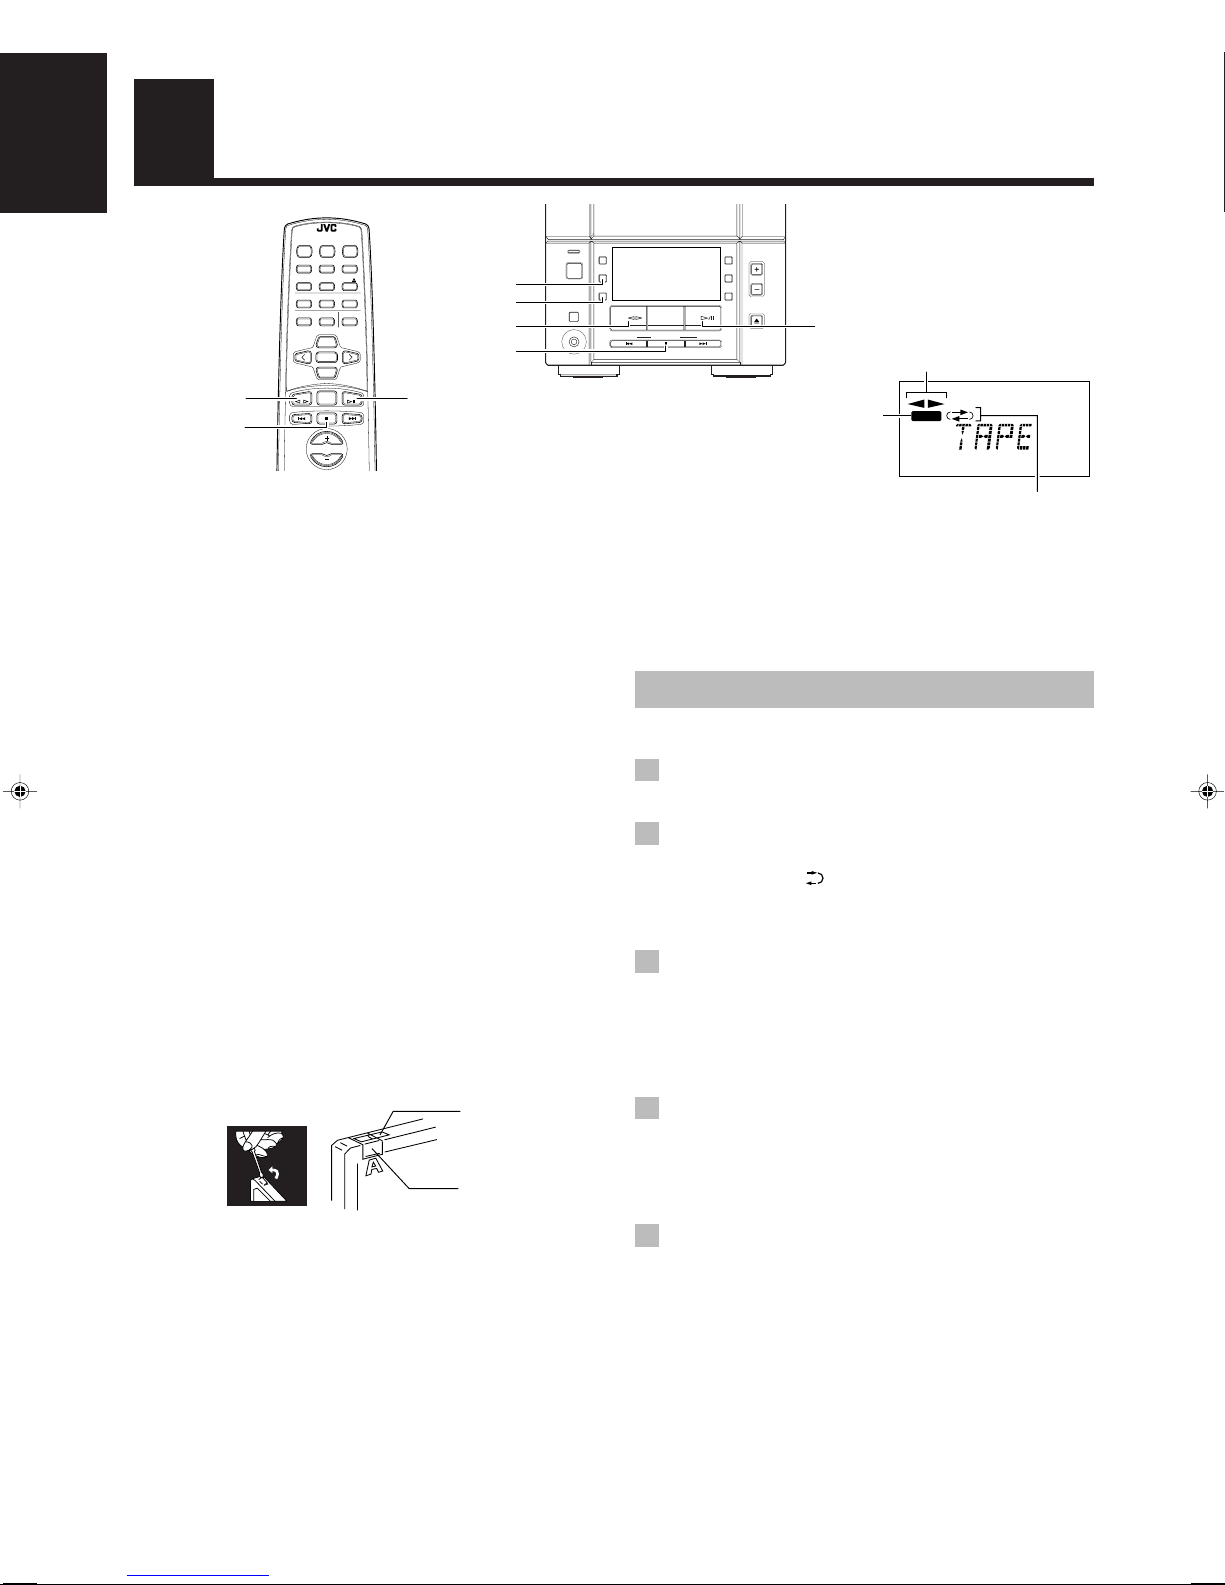
REC indicator
CD #/8
Tape Direction indicator
RECREC
Reverse Mode indicator
CAUTION:
If a recording you make has excessive noise or
static, the Unit may have been too close to a TV
which was on during the recording. Either turn
off the TV or increase the distance between the
TV and the System.
Standard Recording
You can record any sound source to tape as follows:
1 Insert a blank or erasable tape into the
Cassette Deck.
2 If you want to record on both sides of a
tape, press the REV. MODE button on the
Unit until the indicator is lit.
• When using Reverse mode, insert the tape so that it will be
recorded in the forward 3 direction.
3 Check the recording direction for the
tape.
Make sure that the Tape Direction indicator is the same as that
for the tape in the Cassette Deck. If the directions are different,
press the TAPE @ # button to correct the tape direction and
then press the 7 button to stop the tape.
4 Prepare the source by, for example,
tuning in a radio station or turning on
connected auxiliary equipment.
Note: For CD recording, refer to “CD Direct Recording” on page
15.
5 Press the REC button on the Unit.
The REC indicator lights up and the System begins recording.
Notes for using Reverse mode for recording
When recording in Reverse mode, the System automatically stops
when it reaches the end of the reverse 2 direction. To record on
both sides of a tape, make sure that the recording direction for the
tape inserted is forwards 3, and that the Tape Direction indicator is
also forwards 3, before you start recording.
To stop at any time during the recording
process
Press the 7 button.
14
Page 19

CD Direct Recording
Everything on the CD goes onto the tape in the order it is on the
CD, or according to the order you have set in a program.
1 Insert a blank or erasable tape into the
Cassette Deck.
One track recording––––––––––––––––––
1 Insert a blank or erasable tape into the
Cassette Deck.
2 Play the track on the CD you wish to
record.
English
2 Insert a CD.
3 Press the CD #/8 button.
4 Press the 7 button.
• If you want to record specific tracks only, program the
tracks beforehand. You can check their total playback time
on the display during programing. (See page 11.)
5 If you want to record on both sides of a
tape, press the REV. MODE button on the
Unit until the indicator is lit.
• Make sure that the recording direction for the tape and the
Tape Direction indicator are correct. (See “Notes for using
Reverse mode for recording” on page 14.)
6 Select whether to have pauses left
between recorded selections.
• If nothing is done, a non-recorded pause of about four
seconds will be automatically left between selections.
• If you do not want pauses left between selections, do the
following before proceeding to the next step.
Press the CD #/8 button twice.
The CD player enters Pause mode.
7 Press the REC button on the Unit.
The REC indicator lights up and the System begins recording.
• When recording a CD onto tape with Reverse mode on:
If a song is recorded for more than 12 seconds (which
corresponds to the length of leader tape) but not finished
before the first side of tape comes to an end, this song will
automatically be recorded on the second side from its
beginning to avoid being split on both sides.
If a song is recorded for less than 12 seconds before the
first side of tape comes to an end, the song preceding this
song will also be recorded on the second side from its
beginning as it may not be completely recorded on the first
side because of leader tape.
• After the CD player has played the entire CD, or all the
programed tracks, the tape automatically stops.
3 Press the REC button on the Unit.
The CD player returns to the beginning of that track and the
track is recorded on the tape. After recording, the CD player
and Cassette Deck automatically stop.
To stop at any time during the recording process, press
the 7 button. The tape stops after 4 seconds.
Note: When making SLEEP timer settings while doing CD Direct
recording, set enough time to allow for the CD to finish
playing, otherwise the power will go off before recording is
completed.
15
Page 20
English
Using External Equipment
REMOTE CONTROL RM-RXFSV5
POWER
DIMMER SLEEP
AHB PRO
BASS
DISPLAY FM MODE MD/AUX
AUTO
AHB PRO
PRESET
PROGRAM RANDOM REPEAT
BASS TREBLE CANCEL
UP
SET
DOWN
TUNER
TAPE
BAND
MD/AUX
CD
STANDBY/ON
MD/
TREBLE
CD
MD/AUX
POWER
PHONES
AUX
REC
REV
MODE
TAPE FM/AM CD
DOWN UPMULTI CONTROL
AHB
PRO
VOLUME
TIMER
CLOCK
CD
OPEN/CLOSE
AHB PRO
VOLUME +, –
VOLUME +, –
VOLUME
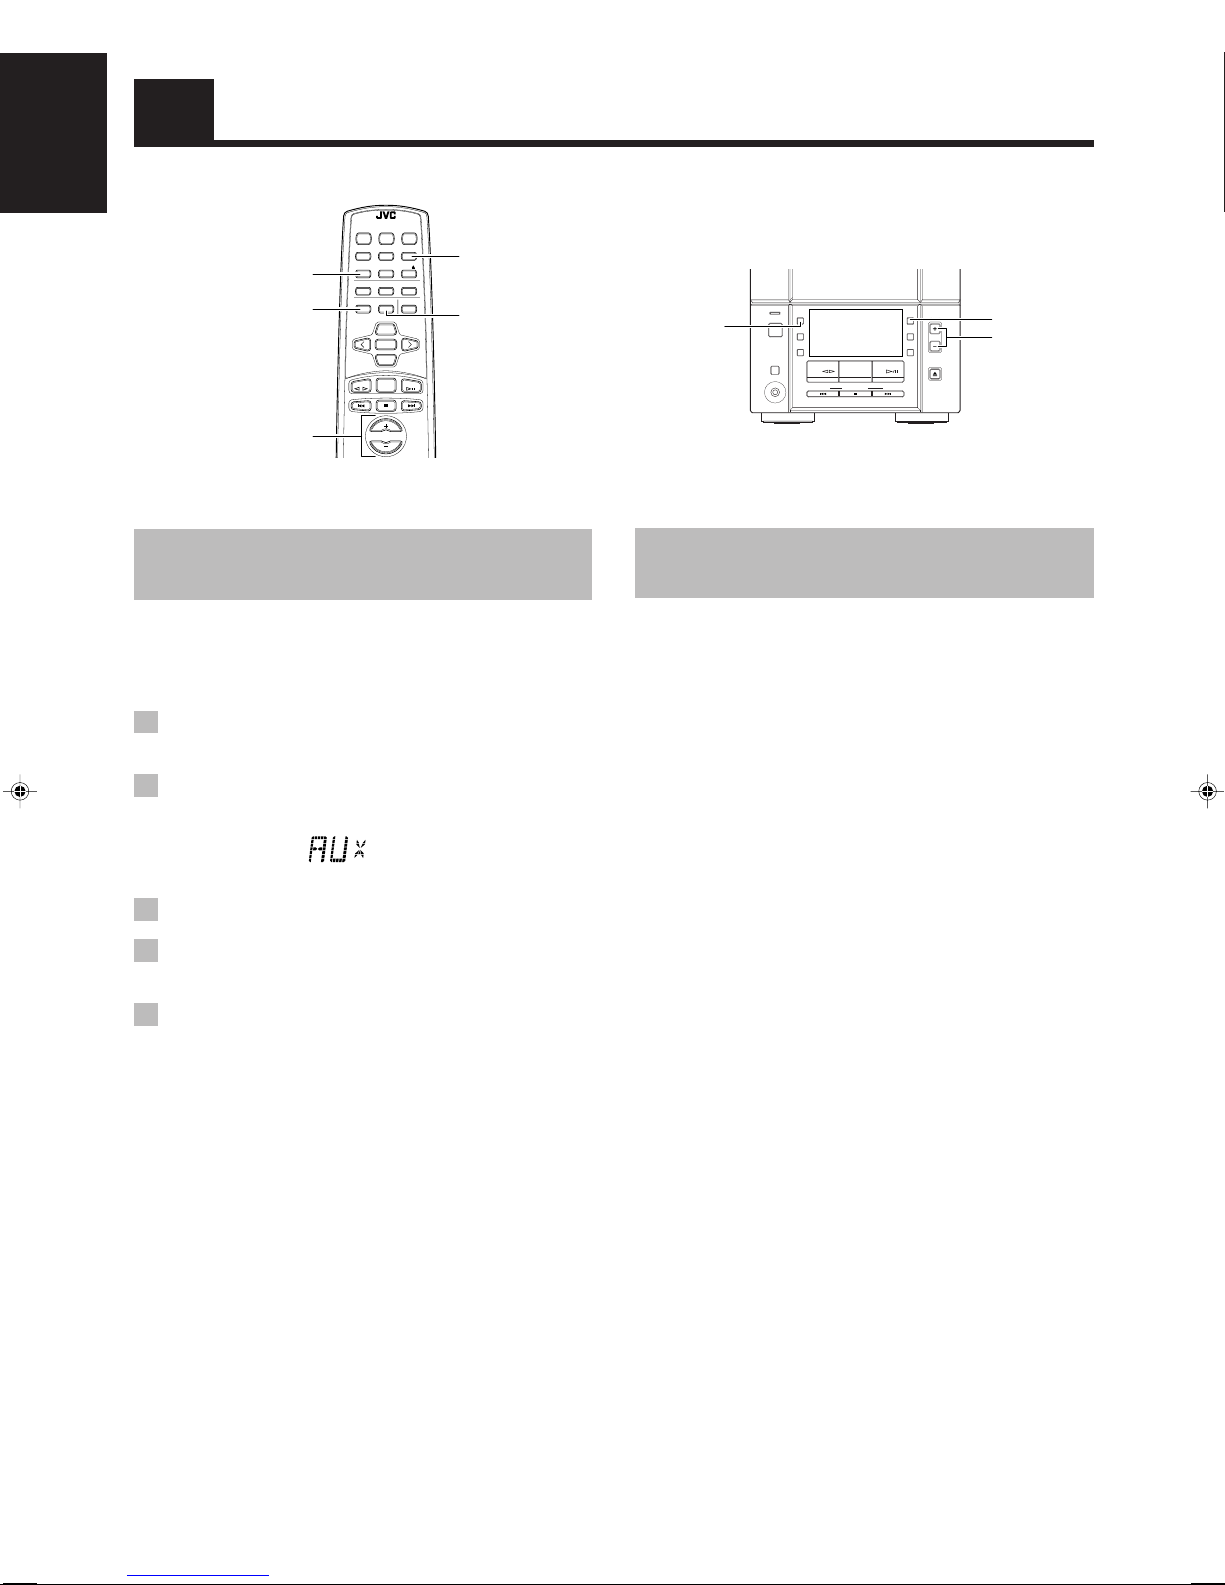
Listening to External
Equipment
You can listen to external equipment such as an MD recorder,
turntable or other auxiliary equipment.
■ First make sure that the external equipment is properly
connected to the System. (See page 4.)
1 Set the VOLUME control to the minimum
position.
2 Press the MD/AUX button.
“AUX” appears on the display.
3 Start playing the external equipment.
4 Adjust the VOLUME control to the desired
listening level.
Recording the System’s
Source to External Equipment
You can record the System’s sources to external equipment which
is connected to the LINE OUT or OPTICAL DIGITAL OUT
terminals of the System, such as cassette deck or MD recorder, etc.
■ First make sure that the external equipment is properly
connected to the System. (See page 4.)
Play the System’s CD Player or Cassette
Deck, or tune into a station.
■ The recording level is not affected by the VOLUME level. It is
not affected by any sound effect, either.
Note: For operation of the external equipment, refer to its
Instructions.
5 Apply sound effects, if you wish.
■ Press the AHB PRO button to reinforce the bass sound.
■ Press the BASS/TREBLE button on the Remote Control to
control the tone. (See “Controlling the Tone (Bass/Treble)” on
page 7.)
To exit from MD/AUX mode, select another source.
Note: For operation of the external equipment, refer to its
Instructions.
16
Page 21
Using the Timers
REMOTE CONTROL RM-RXFSV5
POWER
SLEEP
DIMMER SLEEP
DISPLAY FM MODE MD/AUX
AUTO
AHB PRO
PRESET
PROGRAM RANDOM REPEAT
BASS TREBLE CANCEL
UP
SET
DOWN
TUNER
TAPE
BAND
VOLUME
CD
POWER
STANDBY/ON
MD/
AUX
POWER
PHONES
REC
REV
MODE
TAPE FM/AM CD
DOWN UPMULTI CONTROL
POWER
CD
The timers let you control listening and recording functions
automatically.
Setting the Clock
• When you plug the AC power cord into the wall outlet, the
CLOCK indicator flashes on the display.
You can set the clock whether the System is on or off.
Notes:
• The clock must be correctly set for the timers to work.
• The procedure must be completed within 2 minutes. Otherwise,
the setting is cleared and must be repeated from the beginning.
CLOCK CLOCK
(For 2 seconds)
1 Press the CLOCK button on the Unit for
more than 2 seconds.
The hour digits rapidly flash on the display.
2 Press the ¢ or 4 button to set the
hour.
Pressing the ¢ button moves the hour forwards and pressing
the 4 button moves it backwards. Hold down the button to
move the hour rapidly.
3 Press the CLOCK button.
The minute digits rapidly flash on the display.
4 Press the ¢ or 4 button to set the
minute.
Pressing the ¢ button moves the minute forwards and
pressing the 4 button moves it backwards. Hold down the
button to move the minute rapidly.
5 Press the CLOCK button again.
The selected time is set and the seconds start counting from 0.
The CLOCK indicator remains lit on the display.
CAUTION:
If the System is unplugged, or a power failure
occurs, the timer setting will be lost. You will
need to reset the clock first, then the timer.
Note: The clock may gain or lose 1 to 2 minutes per month.
DOWN UP
or
AHB
PRO
VOLUME
TIMER
CLOCK
OPEN/CLOSE
TIMER
CLOCK
CD
Timer indicator
ONON
OFFOFF CLOCKCLOCK
SLEEPSLEEP
¢
4
ON time, OFF time
When the System is in use, the display shows other items as well.
For simplicity, only the items described in this section are shown here.
Setting the Daily Timer
Once you have set the Daily Timer, the timer will be activated at
the same time every day. It can be canceled and re-activated
whenever you wish.
The Timer indicator on the display shows when the Daily Timer
you have set will be activated.
Notes:
• Finish each step within 30 seconds. Otherwise, the setting is
cleared and the procedure must be repeated from the beginning.
• The clock must be correctly set for the timers to work.
If the clock has not been set, the CLOCK indicator will flash
on the display when you press the TIMER button for more than
2 seconds, and then the display alternates between “ADJUST”
and “CLOCK” for about 5 seconds.
1 Press the TIMER button on the Unit for
more than 2 seconds.
The ON indicator lights up, and then the current ON time
flashes on the display. (Example: AM 11:00)
2 Set the ON time. (Example: AM 11:15)
Press the ¢ or 4 button on the Unit to set the hour you
want the Unit to come on.
Pressing the ¢ button moves the hour forwards and pressing
the 4 button moves it backwards. Hold down the button to
move the hour rapidly. Press the TIMER button to adjust the
minute.
3 Set the OFF time. (Example: AM 12:15)
1. Press the TIMER button on the Unit.
The hour digits of the current OFF time flashes, and then
the OFF indicator lights up on the display.
2. Press the ¢ or 4 button on the Unit to set the time you
want the Unit to be turned off.
Pressing the ¢ button moves the hour forwards and
pressing the 4 button moves it backwards. Hold down
the button to move the hour rapidly. Press the TIMER
button again to adjust the minute.
SLEEP
ON
SLEEP
ON
SLEEP
OFF
SLEEP
OFF
English
17
Page 22

4 Select the music source.
1. Press the TIMER button on the Unit.
“TUNER” flashes on the display.
2. Press the ¢ or 4 button to select the music source you
English
want to listen to.
The display changes as shown below.
5 Set the volume level.
1. Press the TIMER button on the Unit.
The current volume setting flashes on the display.
2. Press the ¢ or 4 button to select the volume level.
-- : The current volume level will be used.
0 to 40 : When the timer is turned on, the volume will be
automatically set to the selected level.
SLEEP
6 Press the TIMER button on the Unit.
The timer setting is completed and the display returns to the
indications before you set the timer. The Timer indicator
remains lit.
Setting the Recording Timer
With the Recording Timer, you can make a tape of radio broadcast
automatically.
How Recording Timer actually works
The Unit automatically turns on, tunes into the last received station,
and starts recording when the on-time comes. Then, when the offtime comes, the Unit automatically turns off (stands by).
The timer setting remains in memory until you change it.
Notes:
• Finish each step within 30 seconds. Otherwise, the setting is
cleared and the procedure must be repeated from the beginning.
• The clock must be correctly set for the timers to work.
If the clock has not been set, the CLOCK indicator will flash
on the display when you press the TIMER button for more than
2 seconds, and then the display alternates between “ADJUST”
and “CLOCK” for about 5 seconds.
1 Press the POWER button to turn on the
System.
2 Tune in to the desired station.
See page 8.
3 Press the TIMER button on the Unit for
more than 2 seconds.
The ON indicator lights up, and then the current ON time
flashes on the display. (Example: AM 11:00)
SLEEP
ON
7 Before turning off the System, prepare
the music source selected in step 4.
TUNER: Tune in to the desired station.
REC
TUNER: See “Setting the Recording Timer.”
CD: Insert a CD.
TAPE: Insert a tape.
8 Press the POWER button to turn off the
System.
To cancel the timer, press the TIMER button for more than 2
seconds. The Timer indicator goes out on the display.
To re-activate the canceled timer, press the TIMER button for
more than 2 seconds to light the Timer indicator. Then, press the
TIMER button until the display returns to the previous indications.
The Timer indicator should remain lit.
To confirm the timer settings, cancel the timer once by
pressing the TIMER button, and press the button again for more
than 2 seconds. Then, press the TIMER button repeatedly, to see
the current timer settings (ON time, OFF time, source, and
volume). Press the TIMER button to set the timer again.
To change the timer setting, repeat the setting procedure from
the beginning.
• When the timer turns on, the Timer indicator starts flashing.
Note: If the Unit is turned on when the timer-on time comes,
Daily Timer does not work.
CAUTION:
If the System is unplugged, or a power failure
occurs, the timer will be canceled. You will need
to reset the clock first, then the timer.
4 Set the ON time. (Example: AM 11:15)
Press the ¢ or 4 button on the Unit to set the hour you
want the Unit to come on.
Pressing the ¢ button moves the hour forwards and pressing
the 4 button moves it backwards. Hold down the button to
move the hour rapidly. Press the TIMER button to adjust the
minute.
SLEEP
ON
5 Set the OFF time. (Example: AM 12:15)
1. Press the TIMER button on the Unit.
The hour digits of the current OFF time flashes, and then
the OFF indicator lights up on the display.
SLEEP
OFF
2. Press the ¢ or 4 button on the Unit to set the time you
want the Unit to be turned off.
Pressing the ¢ button moves the hour forwards and
pressing the 4 button moves it backwards. Hold down
the button to move the hour rapidly. Press the TIMER
button again to adjust the minute.
SLEEP
OFF
6 Press the TIMER button on the Unit.
18
Page 23

7 Press the ¢ or 4 button until “TUNER”
appears and the REC indicator lights up
on the display.
The display changes as shown below.
8 Set the volume level.
1. Press the TIMER button on the Unit.
The current volume setting flashes on the display.
2. Press the ¢ or 4 button to select the volume level.
-- : The current volume level will be used.
0 to 40 : When the timer is turned on, the volume will be
automatically set to the selected level.
To turn off the volume while the Recording Timer is
working, set the volume level to “0.”
9
Press the TIMER button on the Unit.
The timer setting is completed and the display returns to the
indications before you set the timer. The Timer indicator
remains lit.
Note: If you change the station before turning off the System,
the last received station will be recorded.
10
Insert a blank or erasable tape into the
Cassette Deck.
• Make sure that the tape has the enough length for recording.
11
Press the POWER button to turn off the
System.
To cancel the timer, press the TIMER button for more than 2
seconds. The REC and Timer indicators go out on the display.
To re-activate the canceled timer, press the TIMER button for
more than 2 seconds to light the REC and Timer indicators.
To confirm the timer settings, cancel the timer once by
pressing the TIMER button, and press the button again for more
than 2 seconds. Then, press the TIMER button repeatedly, to see
the current timer settings (ON time, OFF time, source, and
volume). Press the TIMER button to set the timer again.
To change the timer setting, repeat the setting procedure from
the beginning.
• When the timer turns on, the Timer indicator starts flashing.
Setting the Sleep Timer
When a source is playing, use the Sleep Timer to turn the System
off after a certain number of minutes. By setting the Sleep Timer,
you can fall asleep to music and know that your System will turn
off by itself rather than play all night.
■ You can only set the Sleep Timer when the System is on.
Note: The clock must be correctly set for the timers to work.
If the clock has not been set, the CLOCK indicator will
flash on the display when you press the TIMER button for
more than 2 seconds, and then the display alternates
between “ADJUST” and “CLOCK” for about 5 seconds.
1 Play a CD or a cassette tape, or tune in to
the desired station.
2 Press the SLEEP button on the Remote
Control.
The SLEEP indicator lights up.
3 Set the length of time you want the
source to play before shutting off.
• Each time you press the SLEEP button, it changes the number
of minutes shown on the display in this sequence:
10
Canceled
After setting the number of minutes for the Sleep Timer, the
display will stop flashing and return to the previous state.
The System is now set to turn off after the number of minutes you
set.
To confirm the Sleep Time
When the SLEEP button is pressed, the remaining sleep time is
displayed.
To cancel the Sleep Timer setting
Press the SLEEP button until the SLEEP indicator goes out on the
display.
Turning off the System also cancels the Sleep Timer.
20 30
60
90120
English
Note: If the Unit is turned on when the timer-on time comes,
Recording Timer does not work.
CAUTION:
If the System is unplugged, or a power failure
occurs, the timer will be canceled. You will need
to reset the clock first, then the timer.
19
Page 24

Care and Maintenance
English
Handle your CDs carefully, and they will last a long time.
Compact Discs
• Only CDs bearing this mark can be used with
this System. However, continued use of
irregular shape CDs (heart-shape, octagonal,
etc.) can damage the System.
• Remove the CD from its case by holding it at
the edges while pressing the case’s center hole
lightly.
• Do not touch the shiny surface of the CD, or
bend the CD.
• Put the CD back in its case after use to prevent
warping.
• Be careful not to scratch the surface of the CD
when placing it back in the case.
• Avoid exposure to direct sunlight, temperature
extremes, and moisture.
• A dirty CD may not play correctly. If a CD
does become dirty, wipe it with a soft cloth in a
straight line from center to edge.
• If there are fingerprints, etc. on the lens, gently wipe clean with
a cotton swab.
Moisture Condensation
Moisture may condense on the lens inside the
System in the following cases:
• After turning on heating in the room
• In a damp room
• If the System is brought directly from a cold to
a warm place
Should this occur, the System may malfunction. In
this case, leave the System turned on for a few
hours until the moisture evaporates, unplug the AC
power cord, and then plug it in again.
Cassette Tapes
• If the tape is loose, it may get stretched, cut, or
caught in the cassette. Take up the slack by
inserting a pencil in one of the reels and
rotating.
CAUTION: Do not use any solvent (for example,
conventional record cleaner, spray thinner,
benzine, etc.) to clean a CD.
General Notes
In general, you will have the best performance by keeping your
CDs and the mechanism clean.
• Store CDs in their cases, and keep them in cabinets or on
shelves.
• Keep the system’s CD cover closed when not in use.
Cleaning the Lens
If the lens in the CD pickup is dirty, sound degradation may take
place.
Open the CD cover and clean the lens as shown.
• Use a blower (available from a camera store) to blow dust off
the lens.
Blower
Lens
• Do not touch the tape surface.
• Do not store the tape:
- In dusty places
- In direct sunlight or heat
- In moist areas
- On a TV or speaker
- Near a magnet
Cassette Deck
• If the heads, capstans, or pinch-rollers of the Cassette Deck
become dirty, the following may occur:
- Loss of sound quality
- Discontinuous sound
- Fading
- Incomplete erasure
- Difficulty in recording
• Clean the heads, capstans, and pinch-rollers using a cotton
swab moistened with alcohol.
Capstans
Erase head
Pinch-rollers
Record/play head
20
• If the heads become magnetized, the Unit will produce noise or
lose high frequency notes.
• To demagnetize the heads, turn off the Unit, and use a head
demagnetizer (available at electronics and record shops).
Page 25

Troubleshooting
• If you are having a problem with your System, check this list for a possible solution before calling for service.
• If you cannot solve the problem from the hints given here, or the System has been physically damaged, call a qualified person, such as
your dealer, for service.
Symptom
No sound is heard.
Poor radio reception
The CD does not play.
The CD skips.
The CD cover does not open or close.
The cassette holder cannot be opened.
Unable to record.
Operations are disabled.
Unable to operate the Remote Control.
Possible Cause
• Connections are incorrect, or loose.
• Headphones are connected.
• Antennas are disconnected.
• The AM Loop Antenna is too close to
the System.
• The FM Wire Antenna is not properly
extended and positioned.
The CD is upside down.
The CD is dirty or scratched.
The AC power cord is not plugged in.
During tape playing, the power cord was
unplugged.
Cassette record protect tabs are removed.
The built-in microprocessor has
malfunctioned due to external electrical
interference.
• The path between the Remote Control
and the sensor on the Unit is blocked.
• The batteries have lost their charge.
• Check all connections and make
corrections. (See pages 2 – 5.)
• Disconnect the headphones.
• Reconnect the antenna securely.
• Change the position and direction of the
AM Loop Antenna.
• Extend FM Wire Antenna to the best
reception position.
Put the CD in with the label side up.
Clean or replace the CD.
Plug the AC power cord.
Plug in the power cord, press the POWER
button, and then press the TAPE 0 button.
Cover the holes on the back edge of the
cassette with adhesive tape.
Unplug the System then plug it back in.
• Remove the obstruction.
• Replace the batteries.
Action
English
21
Page 26

English
Specifications
FS-V30 (CA-FSV30 and SP-UXV30)
Amplifier
Output Power 25 W per channel, min. RMS, at 4 Ω from 80 Hz to 15 kHz, with no more than
10% total harmonic distortion (for U.S.A.)
44 W (22 W + 22 W) at 4 Ω (Max.) (for Canada)
Input Sensitivity/Impedance (1 kHz)
LINE IN (AUX) 400 mV/48 kΩ
Output Sensitivity/Impedance (1 kHz)
LINE OUT 260 mV/5.8 kΩ
Optical out –21 dBm - –15 dBm
Speaker terminals 4 Ω - 16 Ω
Phones 16 Ω - 1 kΩ
0 mW - 15 mW per channel output into 32 Ω
Cassette Deck
Frequency Response
Type I (Normal) 50 Hz - 14 kHz
Type II (CrO2) 50 Hz - 15 kHz
Wow and Flutter 0.15% (WRMS)
CD Player
Signal-To-Noise Ratio 90 dB
Wo w And Flutter Immeasurable
Tuner
FM T uner
Tuning Range 87.5 MHz - 108.0 MHz
AM T uner
Tuning Range 530 kHz - 1,710 kHz
Speaker Specifications
(each unit)
Speakers Woofer 9 cm x 1, Tweeter 4 cm x 1
Impedance 4 Ω
Dimensions 140 mm x 230 mm x 226 mm (W/H/D)
Mass Approx. 1.9 kg (4.2 lbs)
General
Dimensions 438 mm x 234 mm x 279 mm (W/H/D)
Mass Approx. 7.0 kg (15.4 lbs)
Power Specifications
Power Requirements AC 120 V , 60 Hz
Power Consumption 50 W (power on mode)
Accessories
9
/16 in. x 9 1/16 in. x 8 15/
(5
1
/4 in. x 9 7/32 in. x 10 31/
(17
3.7 W (in Standby mode)
See page 2.
in.)
16
in.)
32
Design and specifications are subject to change without notice.
22
Page 27

Merci d’avoir fait l’acquisition du système de composants compact de JVC.
Nous espérons qu’elle représentera un atout supplémentaire pour votre foyer et qu’elle vous enchantera des années durant.
Veuillez cependant lire attentivement le présent manuel d’utilisation avant de la faire fonctionner.
Vous y trouverez toutes les informations nécessaires pour installer et utiliser la chaîne.
Si vous avez des questions auxquelles le manuel ne fournit pas de réponse, veuillez prendre contact avec votre revendeur.
Caractéristiques
Vous trouverez néanmoins ci-dessous une explication de certaines des fonctions qui rendent votre chaîne si puissante et si simple à utiliser.
■ Les commandes et les opérations ont été revues pour les rendre plus faciles encore, vous laissant juste le plaisir de la musique.
• Grâce à la fonction COMPU PLAY de JVC, vous pouvez mettre la chaîne sous tension et démarrer
automatiquement la radio, la platine à cassettes ou le lecteur CD en activant une seule touche.
■ La chaîne comprend des circuits actifs PRO d’extrêmes graves qui permettent de reproduire fidèlement les sons les plus graves.
■ Possibilité de présélectionner jusqu’à 45 émetteurs (30 FM et 15 AM) en plus des fonctions de réglage automatique et manuel.
■ Les nombreuses options du lecteur CD comprennent la lecture répétée, la lecture en ordre quelconque (aléatoire) et la lecture programmée.
■ Quand cet appareil est sous tension et que la porte du CD est fermée, celle-ci est illuminée.
■ Fonctions de minuterie: minuteries Bonjour, d’enregistrement et Bonsoir.
■ Fonction auto-reverse des cassettes.
■ Vous pouvez également raccorder différents appareils externes comme un lecteur MD, etc.
Structure du mode d’emploi
• Des informations de base identiques pour de nombreuses fonctions différentes – par ex. le réglage du volume – sont traitées dans le
chapitre “Opérations communes” et ne sont pas répétées sous chaque fonction.
• Les noms des touches/des commandes et les messages affichés sont indiqués entièrement en lettres majuscules: par ex. TAPE, “NO
DISC” (Pas de disque).
AVERTISSEMENTS IMPORTANTS
Français
1 Installation des appareils
• Choisissez une surface plane, horizontale, sèche, dans un endroit ni trop chaud ni trop froid. (Entre 5°C (41°F) et 35°C (95°F).)
• Laissez une distance suffisante entre la chaîne et un téléviseur.
• N’utilisez jamais la chaîne dans un endroit soumis à des vibrations.
2 Cordon d’alimentation
• Ne manipulez jamais le cordon d’alimentation avec les mains humides!
• La chaîne consomme toujours un certain courant tant que le cordon d’alimentation est branché à la prise secteur.
• Débranchez toujours l’appareil de la prise secteur en tirant sur la fiche et non sur le cordon d’alimentation.
3 Mauvais fonctionnement, etc.
• Aucun élément interne n’est accessible à l’utilisateur. En cas de mauvais fonctionnement de la chaîne, débranchez le cordon
d’alimentation et contactez votre revendeur.
• N’introduisez jamais d’objets métalliques dans l’appareil.
Table des matières
Caractéristiques ..................................................................... 1
Structure du mode d’emploi .................................................. 1
AVERTISSEMENTS IMPORTANTS ................................... 1
Pour commencer ........................................................2
Opérations communes ..............................................6
Utilisation du tuner.....................................................8
Utilisation du lecteur CD..........................................10
Utilisation de la platine à cassettes
(Ecoute d’une cassette) ...........................................13
Utilisation de la platine à cassettes
(Enregistrement).......................................................14
Utilisation d’appareils externes ............................. 16
Utilisation des minuteries........................................17
Entretien - Divers......................................................20
Dépistage des défaillances......................................21
Caractéristiques .......................................................22
1
Page 28

Pour commencer
Accessoires
Vérifiez que vous avez tous les éléments suivants qui sont fournis avec la chaîne.
Cordon d’alimentation (1)
Antenne cadre AM (1)
Télécommande (1)
Piles (2)
Français
Fil d’antenne FM (1)
Si l’un de ces éléments fait défaut, veuillez contacter immédiatement votre revendeur.
Comment installer les piles dans la télécommande
Faites correspondre la polarité des piles (+ et –) avec les indications + et – de leur logement.
R6(SUM-3)/AA(15F)
ATTENTION: Toujours manipuler les piles correctement.
Pour éviter que les piles coulent ou explosent:
• Retirez les piles de la télécommande si elle ne doit pas servir pendant un certain temps.
• Lorsque les piles doivent être remplacées, remplacez-les toutes les deux en même temps.
• N’utilisez jamais une pile neuve avec une pile usée.
• Ne mélangez pas des piles de types différents.
Utilisation de la télécommande
La télécommande permet d’utiliser la plupart des fonctions de la chaîne jusqu’à une distance d’environ 7 m (23 pieds).
Dirigez la télécommande vers le capteur situé sur la face avant de la chaîne.
AUTO TAPE SELECTOR
AUTO REVERSE
COMPACT
DIGITAL AUDIO
VERTICAL DISC
LOADING MECHANISM
COMPACT COMPONENT SYSTEM
STANDBY/ON
MD/
AUX
POWER
REC
REV.
MODE
Capteur de télécommande
PHONES
TAPE FM/AM CD
DOWN UPMULTI CONTROL
TAPE
FS-V30
AHB
PRO
VOLUME
TIMER
CLOCK
CD
OPEN/CLOSE
2
Page 29

ATTENTION: Effectuez tous les raccordements avant de brancher la chaîne dans une prise secteur.
Raccordement de l’antenne FM
Panneau arrière de l’appareil
OPTICAL
DIGITAL OUT
RL
L
R
SPEAKERS
IMPEDANCE
MIN 4Ω
AC IN
Utilisation du fil d’antenne fourni
Fil d’antenne FM (fourni)
Utilisation du raccord du type coaxial (en option)
Une antenne de 75 Ω avec un raccord du type coaxial (IEC ou DIN 45325)
doit être raccordée à la borne FM (75 Ω) COAXIAL.
Si la réception est mauvaise, branchez une antenne extérieure.
Antenne FM extérieure
(en option)
Câble coaxial
Remarque: Avant de fixer les fils d’un câble coaxial de 75 Ω (du genre
avec un fil rond allant vers une antenne extérieure),
débranchez le fil d’antenne FM fourni.
Français
Raccordement de l’antenne AM
Panneau arrière de l’appareil
RL
OPTICAL
DIGITAL OUT
L
R
SPEAKERS
IMPEDANCE
MIN 4Ω
AC IN
ATTENTION:
Pour éviter les parasites, éloignez les
antennes de la chaîne, des câbles de
raccordement et du cordon
d’alimentation secteur.
Antenne cadre AM (fourni)
Fixez le cadre de l’antenne AM à son socle en enfonçant les taquets dans
les fentes d’insertion prévues sur le socle.
Tournez le cadre de sorte à obtenir la meilleure réception possible.
ANTENNA
AM EXT
AM LOOP
FM (75Ω)
COAXIAL
3
Page 30

ATTENTION: Effectuez tous les raccordements avant de brancher la chaîne dans une prise secteur.
Raccordement des haut-parleurs
Pour chaque haut-parleur, raccordez une extrémité du câble aux bornes de sortie des haut-parleurs situées au dos de la chaîne.
1. Ouvrez chacune des bornes et introduisez fermement les câbles des haut-parleurs, puis refermez les bornes.
2. Raccordez les fils rouge (+) et noir (–) du haut-parleur droit aux bornes rouge (+) et noire (–) marquées R sur la chaîne.
Raccordez les fils rouge (+) et noir (–) du haut-parleur gauche aux bornes rouge (+) et noire (–) marquées L sur la chaîne.
Haut-parleur droit (dos)
Noir
L
Haut-parleur gauche (dos)
Français
R
SPEAKERS
IMPEDANCE
MIN 4Ω
ATTENTION:
Si un téléviseur se trouve à proximité des enceintes, l’image du téléviseur risque d’être déformée. Dans
ce cas, éloignez les haut-parleurs du téléviseur.
Raccordement d’appareils externes
Raccordez les cordons de signaux (en option) entre les bornes LINE IN (AUX)/LINE OUT de la chaîne et les bornes de sortie/d’entrée d’un
enregistreur MD ou d’une platine à cassettes externe, etc.
Vous pouvez alors écouter la source externe par la chaîne ou enregistrer un CD, une cassette ou les émissions de la radio de la chaîne sur un
appareil externe.
RL
LINE OUT
LINE IN
(AUX)
Fiche à broches x 2
Cordon de signaux (en option)
À l’entrée audio
Fiche à broches x 2
Enregistreur MD ou platine
à cassettes (en option)
Cordon de signaux (en option)
Raccordement d’un enregistreur MD, etc (sortie numérique)
Débranchez la protection et raccordez un cordon optico-numérique (en option) entre la borne OPTICAL DIGITAL OUT de la chaîne et la
borne d’entrée de l’enregistreur MD, etc.
Vous pouvez enregistrer le signal de sortie numérique du lecteur CD de la chaîne sur un enregistreur MD, etc.
Cap
Protection
OPTICAL
DIGITAL OUT
4
Fiche à broches x 2Fiche à broches x 2
Cordon optico-numérique (en option)
À la sortie audio
À l’entrée numérique optique
Enregistreur MD, etc.
(en option)
Page 31

Raccordement du cordon d’alimentation secteur
,,,,,,,,,,,,,,,,,,,,,
,,,,,,,,,,,,,,,,,,,,,
,,,,,,,,,,,,,,,,,,,,,
,,,,,,,,,,,,,,,,,,,,,
yyyyyyyyyyyyyyyyyyyyy
yyyyyyyyyyyyyyyyyyyyy
yyyyyyyyyyyyyyyyyyyyy
yyyyyyyyyyyyyyyyyyyyy
Introduisez fermement le cordon d’alimentation secteur dans la borne secteur située au dos de l’appareil.
AC IN
Cordon d’alimentation
ATTENTIONS:
• N’UTILISEZ PAS D’AUTRE CORDON D’ALIMENTATION QUE LE CORDON JVC FOURNI AVEC LE
PRESENT APPAREIL POUR EVITER TOUT MAUVAIS FONCTIONNEMENT OU DES DEGATS MATERIELS.
• DEBRANCHEZ TOUJOURS LE CORDON D’ALIMENTATION DE LA PRISE SECTEUR LORSQUE VOUS
PARTEZ OU QUE VOUS NE COMPTEZ PAS UTILISER L’APPAREIL PENDANT UN CERTAIN TEMPS.
Vous pouvez à présent brancher le cordon d’alimentation secteur dans la prise de courant et la chaîne
est prête à recevoir vos commandes!
COMPU PLAY
La fonction COMPU PLAY de JVC permet de commander les fonctions les plus utilisées de la chaîne à l’aide d’une seule touche.
Les opérations à une seule touche permettent d’écouter un CD ou une cassette, d’allumer la radio, ou d’écouter des appareils externes en
appuyant simplement sur la touche de lecture correspondant à cette fonction. La pression d’une seule touche met l’appareil sous tension pour
vous et démarre la fonction demandée.
Le fonctionnement des opérations à une seule touche est expliqué pour chaque cas dans le chapitre qui traite de la fonction correspondante.
Les touches COMPU PLAY sont:
Français
Sur l’appareil
Touche CD #/8
Touche FM/AM
Touche TAPE @ #
Touche MD/AUX
Sur la télécommande
Touche CD #8
Touche TUNER B AND
Touche TAPE @ #
Touche MD/AUX
MISE SOUS TENSION AUTOMATIQUE
La chaîne est automatiquement sous tension à l’opération suivante.
• Lorsque vous appuyez sur la touche CD OPEN/CLOSE 0 de l’appareil (ou sur la touche CD 0 de la télécommande), la chaîne est
automatiquement sous tension et le tiroir de CD s’ouvre pour permettre l’insertion du CD. Cependant, cette opération ne modifie pas la
fonction en CD.
Quand vous appuyez sur la touche POWER pour mettre l’appareil sous ou hors tension, la porte du CD se referme automatiquement si
elle est ouverte.
Retrait des grilles des haut-parleurs
• Vous pouvez retirer les grilles des haut-parleurs.
• Pour les ôter,
1. Introduisez vos doigts au-dessus des grilles et tirez vers vous.
2. Tirez également le bas vers vous.
Pour mettre la grille des haut-parleurs en place
Grille des haut-parleurs
Faire correspondre les orifices
avec les attaches lors de la mise
en place de la grille.
5
Page 32

Français
Opérations communes
REMOTE CONTROL RM-RXFSV5
POWER
DIMMER
DISPLAY
AHB PRO
BASS
TREBLE
DIMMER SLEEP
DISPLAY FM MODE MD/AUX
AUTO
AHB PRO
PRESET
PROGRAM RANDOM REPEAT
BASS TREBLE CANCEL
UP
SET
DOWN
TUNER
TAPE
BAND
POWER
CD
Témoin STANDBY/ON
UP
POWER
DOWN
CD
PHONES
STANDBY/ON
PHONES
POWER
MD/
AUX
REC
REV
MODE
TAPE FM/AM CD
DOWN UPMULTI CONTROL
AHB
PRO
VOLUME
TIMER
CLOCK
CD
OPEN/CLOSE
AHB PRO
VOLUME +, –
CLOCK
VOLUME +, –
VOLUME
Mise sous et hors tension
Mise sous tension de la chaîne ––––––
Appuyez sur la touche POWER.
La diode verte du témoin STANDBY/ON s’allume.
La chaîne se met sous tension, prête à reproduire la source utilisée
en dernier avant la mise hors tension.
■ Ainsi, si vous écoutiez un CD en dernier lieu, vous êtes prêt
pour écouter à nouveau un CD, mais vous pouvez changer pour
toute autre source si vous le souhaitez.
■ Si vous écoutiez le tuner, le dernier émetteur sélectionné
revient automatiquement.
Mise hors tension de la chaîne ––––––
Appuyez à nouveau sur la touche POWER.
La diode rouge du témoin STANDBY/ON s’allume.
■ La chaîne consomme toujours un peu de courant même si elle
est éteinte (en mode de veille ou Standby).
■ Pour mettre la chaîne complètement hors circuit, débranchez le
cordon d’alimentation secteur de la prise murale. Lorsque vous
débranchez le cordon d’alimentation secteur, l’horloge est
réinitialisée à AM 12:00.
Réglage de la luminosité
(Assombrissement)
Vous pouvez régler la luminosité de l’affichage.
Réglage du volume
Appuyez sur la touche VOLUME + pour augmenter le volume ou
sur la touche VOLUME – pour le diminuer.
SLEEP
Vous pouvez régler le niveau du volume entre 0 et 40.
ATTENTION:
NE METTEZ PAS l’appareil hors tension (en mode
d’attente) avec le volume réglé sur un niveau
très élevé; sinon, une soudaine déflagration
sonore peut endommager votre ouïe, vos
enceintes ou votre casque d’écoute quand
l’appareil est remis sous tension ou qu’une
source est reproduite la fois suivante.
RAPPELEZ-VOUS qu’il n’est pas possible
d’ajuster le volume quand l’appareil est en mode
d’attente.
Pour une écoute en privé
Raccordez un casque d’écoute à la prise PHONES. Dans ce cas,
aucun son ne sort par les haut-parleurs.
Mettez toujours le volume sur le niveau minimum avant de
brancher ou d’utiliser un casque d’écoute.
Lors de la mise sous tension de la
chaîne ––––––––––––––––––––––––––––––––
Pour rendre l’affichage plus sombre, appuyez sur la touche
DIMMER de la télécommande.
Pour rendre l’affichage plus clair, appuyez à nouveau sur la
touche DIMMER de la télécommande.
6
Page 33
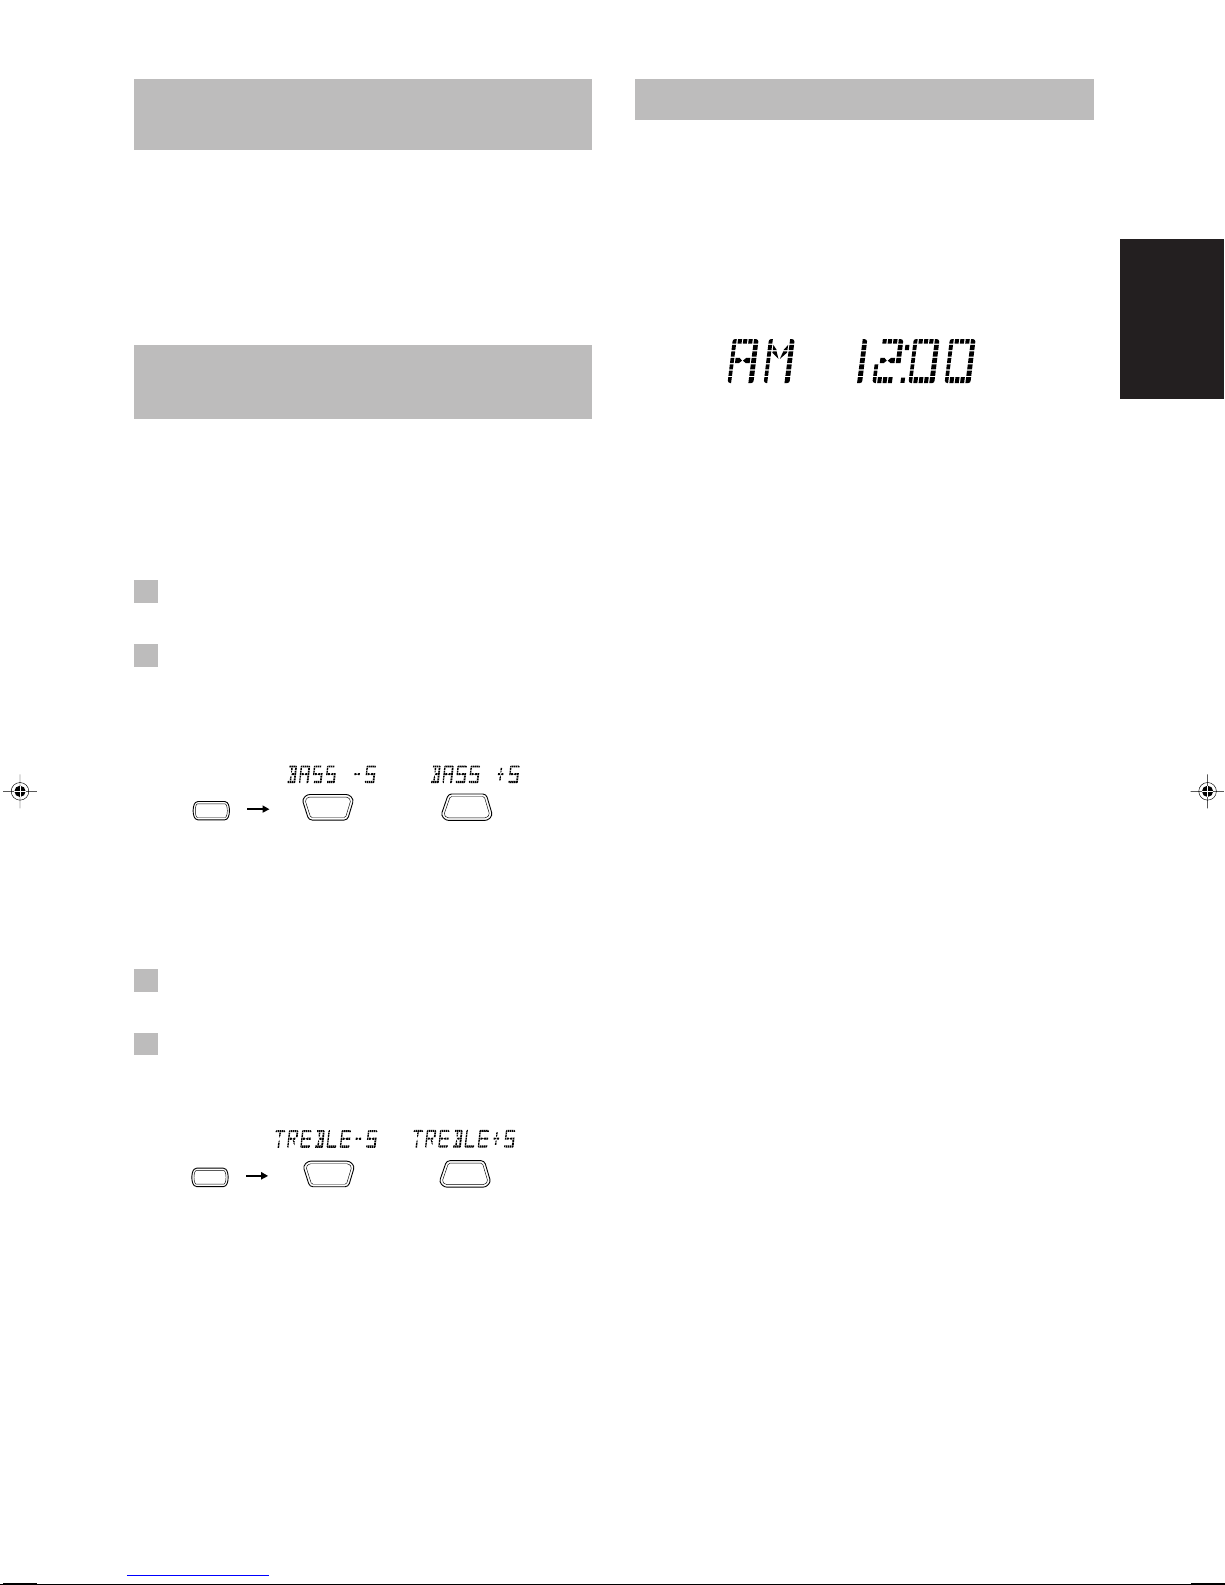
Accentuation des sons
graves (AHB PRO)
Vous pouvez à présent accentuer les sons graves pour conserver
toute leur richesse à un faible volume (cet effet est uniquement
disponible pour la lecture):
Pour obtenir l’effet, appuyez sur la touche AHB (Active Hyper
Bass) PRO.
Le témoin BASS s’allume sur l’affichage.
Pour supprimer l’effet, appuyez à nouveau sur la touche.
Le témoin BASS s’éteint.
Affichage de l’horloge
En mode Standby, l’horloge numérique apparaît en même temps
sur l’affichage.
Lorsque la chaîne est allumée, vous pouvez afficher l’horloge
numérique à tout moment.
Pour afficher l’horloge numérique, appuyez sur la touche
CLOCK de l’appareil ou sur la touche DISPLAY de la
télécommande.
Contrôle de la tonalité
(Graves/Aigus)
Vous pouvez contrôler la tonalité en modifiant les graves et les
aigus.
Ajustement du niveau des graves –––
Vous pouvez régler le niveau des graves (la plage des basses
fréquences) entre –5 et +5. (0: pas d’effet)
1 Appuyez sur la touche BASS de la
télécommande.
2 Appuyez sur la touche UP ou DOWN de la
télécommande pour régler le niveau des
graves.
BASS
DOWN
ou
Ajustement du niveau des aigus –––
Vous pouvez régler le niveau des aigus (la plage des hautes
fréquences) entre –5 et +5. (0: pas d’effet)
UP
Français
Pour revenir au mode précédent, réappuyez sur la même
touche.
Remarque: Vous devez d’abord mettre l’horloge à l’heure. (Voir
“Mise à l’heure de l’horloge” à la page 17.)
1 Appuyez sur la touche TREBLE de la
télécommande.
2 Appuyez sur la touche UP ou DOWN de la
télécommande pour régler le niveau des
aigus.
TREBLE
DOWN
ou
UP
7
Page 34

Français
SET
SET
FM = 30, AM = 15
STORED
TUNER
BAND
SET
UP
DOWN
Utilisation du tuner
REMOTE CONTROL RM-RXFSV5
POWER
SET
4
DIMMER SLEEP
DISPLAY FM MODE MD/AUX
AUTO
CD
AHB PRO
PRESET
PROGRAM RANDOM REPEAT
BASS TREBLE CANCEL
UP
<
SET
DOWN
TUNER
TAPE
BAND
VOLUME
CD
FM MODE
AUTO PRESET
UP
>
DOWN
TUNER BAND
¢
STANDBY/ON
PHONES
POWER
MD/
AUX
REC
REV
MODE
TAPE FM/AM CD
DOWN UPMULTI CONTROL
AHB
PRO
VOLUME
TIMER
CLOCK
CD
OPEN/CLOSE
FM/AM
¢
4
MONOMONO STEREOSTEREO
Témoins du
mode FM
Lorsque la chaîne est en lecture, d’autres fonctions sont aussi affichées.
Dans un souci de simplicité, nous ne montrons ici que les fonctions
décrites dans ce chapitre.
Vous pouvez écouter les émetteurs en FM et AM. La syntonisation
peut se faire manuellement, automatiquement ou par présélections.
■ Avant d’écouter la radio:
• Assurez-vous que les antennes FM et AM sont
correctement raccordées. (Voir page 3).
Commande de la radio par une seule
touche ––––––––––––––––––––––––––––––––
Appuyez sur la touche FM/AM de l’appareil (ou sur la touche
TUNER BAND de la télécommande) pour que la radio diffuse
automatiquement le dernier émetteur écouté.
■ Vous pouvez passer de n’importe quelle source à la radio en
appuyant simplement sur la touche FM/AM de l’appareil (ou
sur la touche TUNER BAND de la télécommande).
Recherche d’un émetteur
1 Appuyez sur la touche FM/AM de
l’appareil (ou sur la touche TUNER BAND
de la télécommande).
L’onde et la fréquence du dernier émetteur sélectionné s’affichent.
(Si le dernier émetteur avait été sélectionné par son numéro de
présélection, ce numéro apparaît en premier.)
Chaque fois que vous appuyez sur la touche, la bande change
entre FM et AM.
Affichage de bande, affichage de
fréquences, canal présélectionné
OU
■ Recherche des présélections à l’aide de la
télécommande (Possible uniquement après la
présélection des émetteurs)
Sélectionnez le numéro de présélection souhaité en utilisant les
touches UP, DOWN, > ou < de la télécommande. Après une
seconde, l’affichage indique la bande et la fréquence du
numéro présélectionné.
Exemple: Appuyez sur la touche UP jusqu’à ce que le numéro
de présélection 12 “P-12” apparaisse.
UP
ou
DOWN
or
(Après 1 seconde)
Présélection des émetteurs
Vous pouvez ainsi présélectionner jusqu’à 30 émetteurs FM et
jusqu’à 15 émetteurs AM à l’aide de la télécommande.
Remarque: Certains numéros de présélections peuvent avoir été
programmés à l’usine pour tester les fréquences
avant la livraison de l’appareil. Il ne s’agit pas d’un
problème de fonctionnement. Vous pouvez
mémoriser les émetteurs que vous souhaitez en
utilisant une des méthodes de présélection décrites
ci-dessous.
Présélection manuelle –––––––––––––––
FM/AM
FM
(Sur l’appareil)
AM
(Sur la télécommande)
2 Sélectionnez un émetteur en utilisant une
des méthodes suivantes.
■ Réglage manuel
Appuyez à plusieurs reprises sur la touche 4 ou ¢ pour
passer de fréquence en fréquence jusqu’à ce que vous
atteigniez l’émetteur souhaité.
OU
■ Réglage automatique
Maintenez enfoncée la touche 4 ou ¢ pendant plus d’une
seconde; la fréquence diminuera ou augmentera
automatiquement jusqu’à ce qu’un émetteur soit localisé.
8
FM
TUNER
BAND
AM
ou
(dans les 5 secondes qui suivent)
Lorsque la Band est changée
1 Choisissez une bande de fréquences en
appuyant sur la touche TUNER BAND.
2 Appuyez sur la touche 4 ou ¢ pour
localiser un émetteur.
3 Appuyez sur la touche SET.
L’indication “SET” clignotera pendant 5 secondes.
Procédez à l’opération suivante dans les 5 secondes qui suivent.
Lorsque, après 5 secondes, l’affichage réglé au point 2
réapparaît, réappuyez sur la touche SET.
Page 35

4 Appuyez sur la touche UP, DOWN, > ou <
dans les 5 secondes qui suivent pour
sélectionner le numéro de présélection.
Touche UP ou >: Augmente le numéro de présélection
d’une unité.
Touche DOWN ou <: Diminue le numéro de présélection
d’une unité.
• Si vous maintenez appuyée la touche > ou <, le numéro de
la présélection change rapidement.
5 Appuyez sur la touche SET dans les 5
secondes qui suivent.
“STORED (memorise)” s’inscrit sur l’affichage et après 2
secondes, l’affichage de la fréquence de l’émission réapparaît.
6 Répétez les opérations 1 à 5 pour chaque
émetteur à mémoriser avec un numéro de
présélection.
Pour changer les émetteurs présélectionnés, répétez les
opérations indiquées ci-dessus.
Réglage automatique des
présélections ––––––––––––––––––––––––
Dans chaque bande de fréquences, vous pouvez automatiquement
présélectionner 30 émetteurs FM et 15 émetteurs AM. Les numéros
présélectionnés seront attribués en premier aux stations de basse
fréquence puis aux stations de plus haute fréquence au fur et à
mesure que celles-ci seront trouvées.
AUTO
TUNER
BAND
(pendant plus de 2 secondes)
1 Choisissez une bande de fréquences en
appuyant sur la touche FM/AM de
l’appareil (ou sur la touche TUNER BAND
de la télécommande).
PRESET
Changement du mode de
réception FM
Lorsque vous écoutez une émission FM en stéréo, le témoin
STEREO s’allume et vous pouvez alors entendre les effets stéréo.
Si la réception d’une émission FM stéréo est difficile à capter ou
bruyante, vous pouvez sélectionner le mode monaural. La
réception s’améliore mais vous perdez l’effet stéréo.
Appuyez sur la touche FM MODE de la
télécommande de sorte que le témoin MONO
s’allume sur l’affichage.
FM MODE
STEREO
Pour rétablir l’effet stéréo, réappuyez sur la touche FM MODE
de la télécommande; le témoin MONO s’éteint.
MONO
Français
2 Appuyez sur la touche AUTO PRESET de
la télécommande pendant plus de deux
secondes.
3 Répétez les opérations 1 – 2 pour l’autre
bande de fréquences.
■ Pour changer les émetteurs présélectionnés, présélectionnez
manuellement les numéros de présélections souhaités.
ATTENTION:
Même si la chaîne est débranchée ou qu’une
panne de courant se produit, les stations
présélectionnées resteront en mémoire pendant
environ 24 heures. Au cas où les stations
présélectionnées sont effacées, vous devrez les
présélectionner de nouveau.
9
Page 36

RANDOM
PROGRAM RANDOMPROGRAM RANDOM OVER
OVER
ALL
ALL
1 2 3 4 5 6 7 8 9 1010 11 1212 1313 1414 1515
PROGRAM
Français
Utilisation du lecteur CD
VERTICAL DISC
LOADING MECHANISM
COMPACT COMPONENT SYSTEM
DOWN UPMULTI CONTROL
FS-V30
AHB
PRO
VOLUME
TIMER
CLOCK
CD
OPEN/CLOSE
REMOTE CONTROL RM-RXFSV5
DIMMER SLEEP
SET
4
POWER
DISPLAY FM MODE MD/AUX
AUTO
CD
AHB PRO
PRESET
PROGRAM RANDOM REPEAT
BASS TREBLE CANCEL
UP
<
SET
DOWN
TUNER
TAPE
CD
BAND
VOLUME
CD 0
REPEAT
CANCEL
UP
>
DOWN
CD #8
¢
7
POWER
STANDBY/ON
PHONES
POWER
MD/
AUX
REC
REV
MODE
TAPE FM/AM CD
Lorsque la chaîne est en lecture, d’autres fonctions sont aussi affichées.
Dans un souci de simplicité, nous ne montrons ici que les fonctions décrites
dans ce chapitre.
Tiroir de CD
CD OPEN/
CLOSE 0
CD #/8
¢
7
Numéro de plage, temps d’écoute,
numéro d’ordre dans le programme
4
Témoin du mode
de lecture
Liste des plages
musicales
Témoin de OVER
Témoin de répétition
Un numéro de plage dépassant
15 n’est pas affiché.
Vous pouvez utiliser les fonctions de lecture normale, de lecture en
ordre quelconque (aléatoire), de lecture programmée ou de lecture
répétée. La lecture répétée permet de répéter toutes les plages ou
juste une plage du disque compact.
Vous trouverez ci-dessous l’essentiel de ce que vous devez sa voir sur
la lecture d’un CD pour localiser les différentes plages qu’il comporte.
Le moyen le plus rapide pour écouter un CD est
d’appuyer sur la touche unique.
■ Appuyez sur la touche CD #/8 de l’appareil ou de la
télécommande.
• L’appareil se met automatiquement sous tension. S’il y a un
CD dans le tiroir de disque, la lecture commence à partir de la
première plage.
• S’il n’y a pas de CD dans le tiroir de disque, le message “NO
DISC” s’affiche et le lecteur CD reste en mode d’arrêt.
Introduction d’un CD
1 Appuyez sur la touche CD OPEN/CLOSE 0
de l’appareil (ou sur la touche CD 0 de la
télécommande).
Le tiroir de CD s’ouvre.
2 Posez un disque dans le tiroir, avec les
inscriptions tournées vers le haut,
comme indiqué ci-dessous. Appuyez sur
la partie voisine du centre du CD jusqu’à
ce que vous entendiez un déclic.
3 Appuyez à nouveau sur la touche CD
OPEN/CLOSE 0 de l’appareil (ou sur la
touche CD 0 de la télécommande) pour
refermer le tiroir de CD.
• Pour refermer le tiroir de CD et lire le CD, il suffit d’appuyer
sur la touche CD #/8.
■ Vous pouvez y placer un CD de 8 cm (3 pouces) sans ada ptateur.
■ Quand un CD avec 16 plages ou plus est inséré, l’indicateur
OVER s’allume sur l’affichage.
■ Si le lecteur ne parvient pas à lire correctement le CD (par
exemple, parce qu’il est rayé), le message “00 0000” apparaît
sur l’affichage.
■ Vous pouvez insérer un CD dans le tiroir tout en écoutant une
autre source.
ATTENTIONS:
• NE JAMAIS essayer d’ouvrir ou de refermer le
tiroir de CD à la main car vous risqueriez de
l’endommager.
• Lorsque vous introduisez ou retirez un CD, ne le
laissez pas tomber. Veillez également à ne pas
vous érafler les doigts avec un tiroir de CD.
Retrait d’un CD
Retirez le CD comme illustré ci-dessous.
10
Page 37

Utilisation du Lecteur CD —
Lecture normale
Lecture d’un CD ––––––––––––––––––––––
1 Placez un CD dans le tiroir.
3 Appuyez sur la touche 7 pour arrêter le
disque CD.
4 Appuyez sur la touche PROGRAM.
L’appareil se met en mode de programmation et le témoin
PROGRAM s’allume.
PROGRAM
2 Appuyez sur la touche CD #/8.
La lecture de la première plage du CD commence.
Numéro de plage Temps de lecture
• Le numéro de la plage qui a été lue disparaît de la liste des
plages musicales.
• Le lecteur CD s’arrête automatiquement après la lecture de la
dernière plage du disque.
Pour arrêter la lecture du CD, appuyez sur la touche 7.
Les informations suivantes s’affichent pour le CD.
Nombre total de plages
Pour arrêter la lecture et retirer le CD, appuyez sur la touche
CD OPEN/CLOSE 0 de l’appareil ou sur la touche CD 0 de la
télécommande afin d’ouvrir le tiroir de disque. Puis retirez le CD.
Pour mettre en pause, appuyez sur la touche CD #/8. Le
temps de lecture clignote alors sur l’affichage.
Pour annuler le mode pause, appuyez de nouveau sur la
même touche. La lecture reprend là où elle s’était arrêtée.
Temps de lecture total
Sélection d’une plage ––––––––––––––––
Pendant la lecture, appuyez sur la touche 4 ou ¢ (ou sur la
touche <, >, DOWN ou UP de la télécommande) pour sélectionner
la plage souhaitée.
La lecture de la plage choisie commence.
• Appuyez une fois sur la touche ¢ (ou sur la touche > ou
UP de la télécommande) pour passer au début de la plage
suivante.
• Appuyez sur la touche 4 (ou sur la touche < ou DOWN
de la télécommande) pour revenir au début de la plage en
cours de lecture. Appuyez deux fois rapidement pour
revenir au début de la plage précédente.
• Quand la touche > ou < sur la télécommande est maintenue
pressée, les plages sont sautées les unes après les autres.
Sélection d’un passage à l’intérieur
d’une plage –––––––––––––––––––––––––––
Maintenez la touche 4 ou la touche ¢ (ou sur la touche DOWN
ou UP de la télécommande) enfoncée pendant la lecture pour obtenir
l’avance/le recul rapide du CD de sorte à pouvoir localiser f acilement
un passage précis sur la plage en cours de lecture.
Programmation de l’ordre de
lecture des plages
La télécommande permet de programmer l’ordre de lecture des
plages.
■ Vous pouvez programmer jusqu’à 20 plages dans n’importe
quel ordre, y compris plusieurs fois les mêmes plages.
■ Vous ne pouvez effectuer une programmation que si le lecteur
CD est à l’arrêt.
1 Placez un CD dans le tiroir.
PROGRAM RANDOM
5 Appuyez sur la touche > ou < pour
sélectionner la plage à programmer.
Touche >: Augmente le numéro de plage d’une unité.
Touche <: Diminue le numéro de plage d’une unité.
• Si vous maintenez appuyée la touche > ou <, le numéro de
plage change rapidement.
6 Appuyez sur la touche SET.
Numéro d’ordre dans le
programme
SET
Temps de lecture total des
plages programmées
7 Répétez les points 5 et 6 afin de
sélectionner les autres plages pour les
programmer.
Vous pouvez visualiser le temps de lecture total des plages
programmées sur l’affichage. Vous pouvez également voir les
plages programmées sur la liste des plages musicales.
8 Appuyez sur la touche CD #/8.
Le lecteur commence à lire les plages dans l’ordre où vous les
avez programmées.
■ Vous pouvez passer directement à une plage du programme en
appuyant sur la touche 4 ou ¢ (ou sur la touche <, >, DO WN
ou UP de la télécommande) pendant la lecture du programme.
■ Pour arrêter la lecture, appuyez une fois sur la touche 7.
Pour confirmer la programmation des plages lorsque le
lecteur CD est arrêté, appuyez sur la touche PROGRAM; les
plages composant le programme s’afficheront successivement dans
l’ordre programmé.
Pour effacer toutes les plages d’un programme lorsque
le lecteur CD est arrêté, appuyez sur la touche 7. Une pression
sur la touche CD 0 de la télécommande (ou sur la touche CD
OPEN/CLOSE 0 de l’appareil) pour ouvrir le tiroir de disque
effacera aussi les plages programmées.
Pour sortir du mode programme lorsque le lecteur CD
est arrêté, appuyez sur la touche 7 pour éteindre le témoin
PROGRAM. Toutes les plages du programme sont annulées.
Remarques:
• Si le temps de lecture total des plages programmées dépasse 99
minutes et 59 secondes, la mention “-- -- : -- --” apparaît sur
l’affichage.
• Si vous essayez de programmer une 21ème plage, l’indication
“FULL” s’affiche pendant environ 2 secondes.
Pour modifier le programme –––––––––
Modifier le contenu du programme avec le lecture CD à l’arrêt.
Chaque fois que vous appuyez sur la touche CANCEL, la dernière
plage du programme est supprimée. Pour ajouter de nouvelles plages
à la fin du programme, répétez les points 5 à 7 indiqués ci-dessus.
Français
2 Appuyez sur la touche CD #/8.
11
Page 38

Lecture en ordre quelconque
Lorsque ce mode est utilisé, les plages sont lues dans un ordre
totalement aléatoire.
Appuyez sur la touche RANDOM de la
télécommande.
L’indicateur RANDOM s’allume sur l’affichage et les plages sont
reproduites dans un ordre aléatoire.
Pour sauter une plage pendant la lecture, appuyez sur la
touche ¢ (ou sur la touche > ou UP sur la télécommande) pour
passer à la plage choisie aléatoirement suivante. Appuyez sur la
touche 4 (ou sur la touche < ou DOWN sur la télécommande)
pour revenir au début de la plage en cours de lecture.
Français
Pour quitter le mode de lecture en ordre aléatoire
(quelconque), appuyez sur la touche 7.
Répétition des plages
Vous pouvez choisir un programme ou la plage actuellement en
cours de lecture pour la répétition de la lecture autant de fois que
vous le souhaitez.
Appuyez sur la touche REPEAT de la
télécommande.
Le témoin de répétition change comme indiqué ci-dessous chaque
fois que vous appuyez sur la touche.
ALL
affichage inexistant
: Répète une plage.
ALL : En mode de lecture normale, répète toutes les plages.
En mode de lecture programmée, répète toutes les
plages d’un programme.
En mode de lecture en ordre quelconque (aléatoire),
répète toutes les plages dans un ordre quelconque.
Pour quitter le mode de répétition, appuyez sur la touche
REPEAT jusqu’à ce que le témoin REPEAT disparaisse de
l’affichage.
■ En mode de lecture en ordre quelconque (aléatoire),
pas être sélectionné.
■ Le mode de répétition reste affiché même lorsque vous changez
le mode de lecture.
ne peut
Verrouillage du tiroir de CD
Vous pouvez verrouiller le tiroir de CD et interdire le retrait des
CD.
• Cette opération n’est possible qu’avec les touches de l’appareil.
Pour interdire le retrait des CD, appuyez sur la touche
POWER tout en maintenant pressée la touche 7. (Si le tiroir de CD
est ouvert, refermez-le d’abord.)
“LOCKED” apparaît pendant quelques instants et le tiroir est
verrouillé.
Pour annuler l’interdiction et déverrouiller le tiroir de CD,
appuyez sur la touche POWER tout en maintenant pressée la
touche 7.
“UNLOCKED” apparaît pendant quelques instants et le tiroir est
déverrouillé.
Remarque : Si vous essayez de retirer un CD, “LOCKED”
apparaît pour vous informer que le tiroir de CD est
verrouillé.
12
Page 39
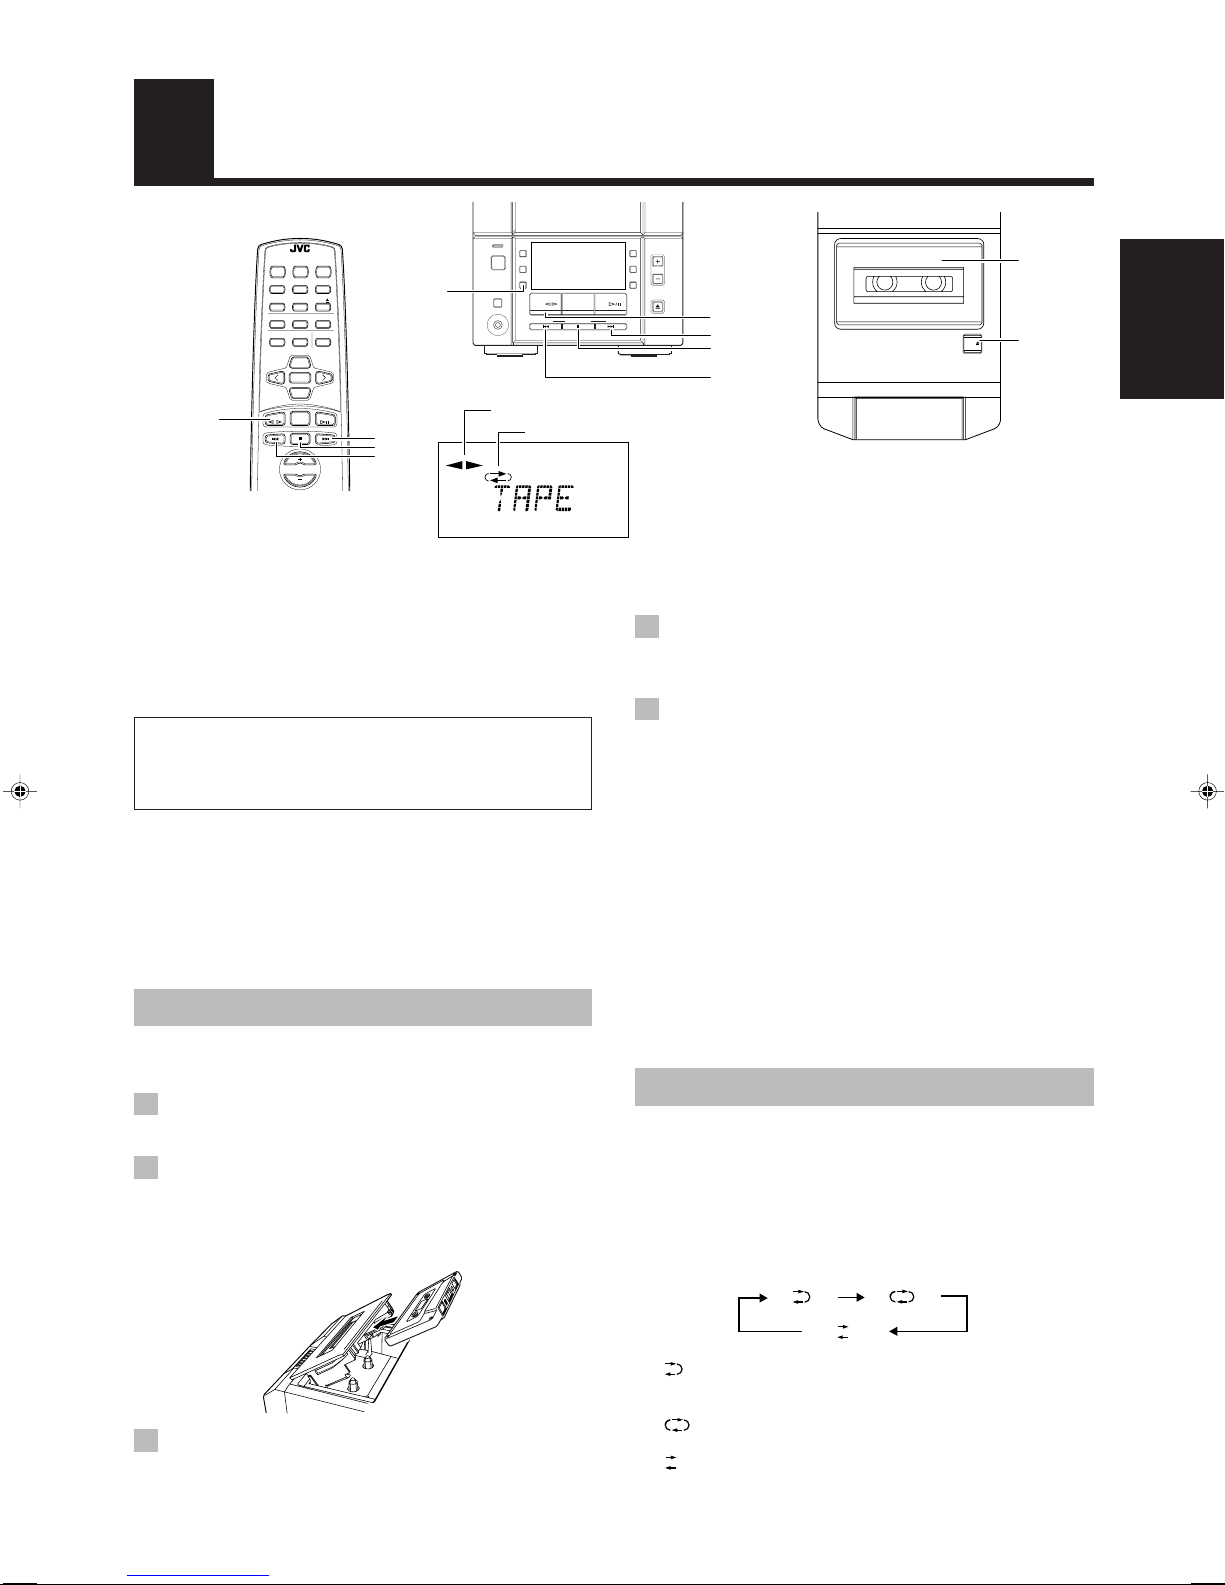
AUTO REVERSE
AUTO TAPE SELECTOR
TAPE
REMOTE CONTROL RM-RXFSV5
DIMMER SLEEP
DISPLAY FM MODE MD/AUX
AHB PRO
AUTO
PRESET
CD
PROGRAM RANDOM REPEAT
BASS TREBLE CANCEL
UP
SET
DOWN
TUNER
BAND
TAPE
VOLUME
CD
POWER
TAPE @ #
Utilisation de la platine à cassettes
(Ecoute d’une cassette)
STANDBY/ON
MD/
AUX
POWER
REC
REV
REV . MODE
PHONES
MODE
TAPE FM/AM CD
DOWN UPMULTI CONTROL
Témoin de sens de déroulement de la bande
¢
7
4
Témoin Reverse Mode
Lorsque la chaîne est en lecture, d’autres fonctions sont aussi affichées.
Dans un souci de simplicité, nous ne montrons ici que les fonctions décrites dans ce chapitre.
AHB
PRO
VOLUME
TIMER
CLOCK
CD
OPEN/CLOSE
Portecassettes
TAPE @ #
¢
7
TAPE 0
4
Français
La platine à cassettes permet de lire et d’enregistrer des cassettes
audio.
■ La détection automatique de type de bande permet d’utiliser
indifféremment les types I, II ou IV de cassettes sans devoir
modifier aucun réglage.
Il est déconseillé d’utiliser des cassettes de plus de 120 minutes
car elles peuvent produire des déformations caractéristiques et
leurs bandes se coincent facilement dans les galets-presseurs et
dans les cabestans.
Lecture par une seule touche –––––––
Appuyez sur la touche TAPE @ # de l’appareil ou de la
télécommande pour que la platine s’allume et que “TAPE”
s’affiche. Si une cassette est installée dans la platine, la lecture
commence. Si aucune cassette n’est chargée, l’appareil se met sous
tension et attend que vous introduisiez une cassette ou
sélectionniez une autre fonction.
Lecture standard
Si l’appareil est déjà allumé, suivez simplement les instructions
fondamentales suivantes:
1 Appuyez sur la touche TAPE 0 de
l’appareil.
2 Quand le porte-cassette s’ouvre, placez
la cassette dedans, avec la face que vous
voulez écouter tournée vers le haut.
• Si le porte-cassette ne s’ouvre pas, éteignez l’appareil puis
rallumez-le et réappuyez sur la touche TAPE 0.
3 Fermez le porte-cassette doucement,
jusqu’à ce qu’il se mette en place avec un
déclic.
4 Appuyez sur la touche TAPE @ #.
La lecture de la cassette se fait dans le sens indiqué par le
témoin de sens de la cassette.
5 Pour changer le sens de lecture de la
cassette, appuyez à nouveau sur la
touche TAPE @ #.
Le témoin du sens de lecture opposé s’allume et le sens de
lecture de la cassette est modifié.
Pour arrêter la lecture, appuyez sur la touche 7.
Pour sortir la cassette, arrêtez-la et appuyez sur la touche
TAPE 0.
Pour rembobiner ou faire avancer
une cassette rapidement ––––––––––––
■ Appuyez sur la touche ¢ ou 4 pour avancer rapidement la
bande.
• La platine à cassettes s’arrête automatiquement à la fin de
la bande.
REVERSE MODE
Vous pouvez régler la platine cassette pour reproduire une seule
face d’une cassette, les deux faces une fois ou les deux faces en
continu.
Appuyez sur la touche REV. MODE de
l’appareil.
Le témoin change comme indiqué chaque fois que vous appuyez
sur la touche.
: La platine à cassette s’arrête automatiquement après la
lecture des deux faces. (S’arrête lorsque la lecture dans le
sens 2 est terminée.)
: La platine à cassettes continue de lire les deux faces de la
bande jusqu’à ce que vous appuyez sur la touche 7.
: La platine à cassettes s’arrête automatiquement après la
lecture d’une face.
13
Page 40
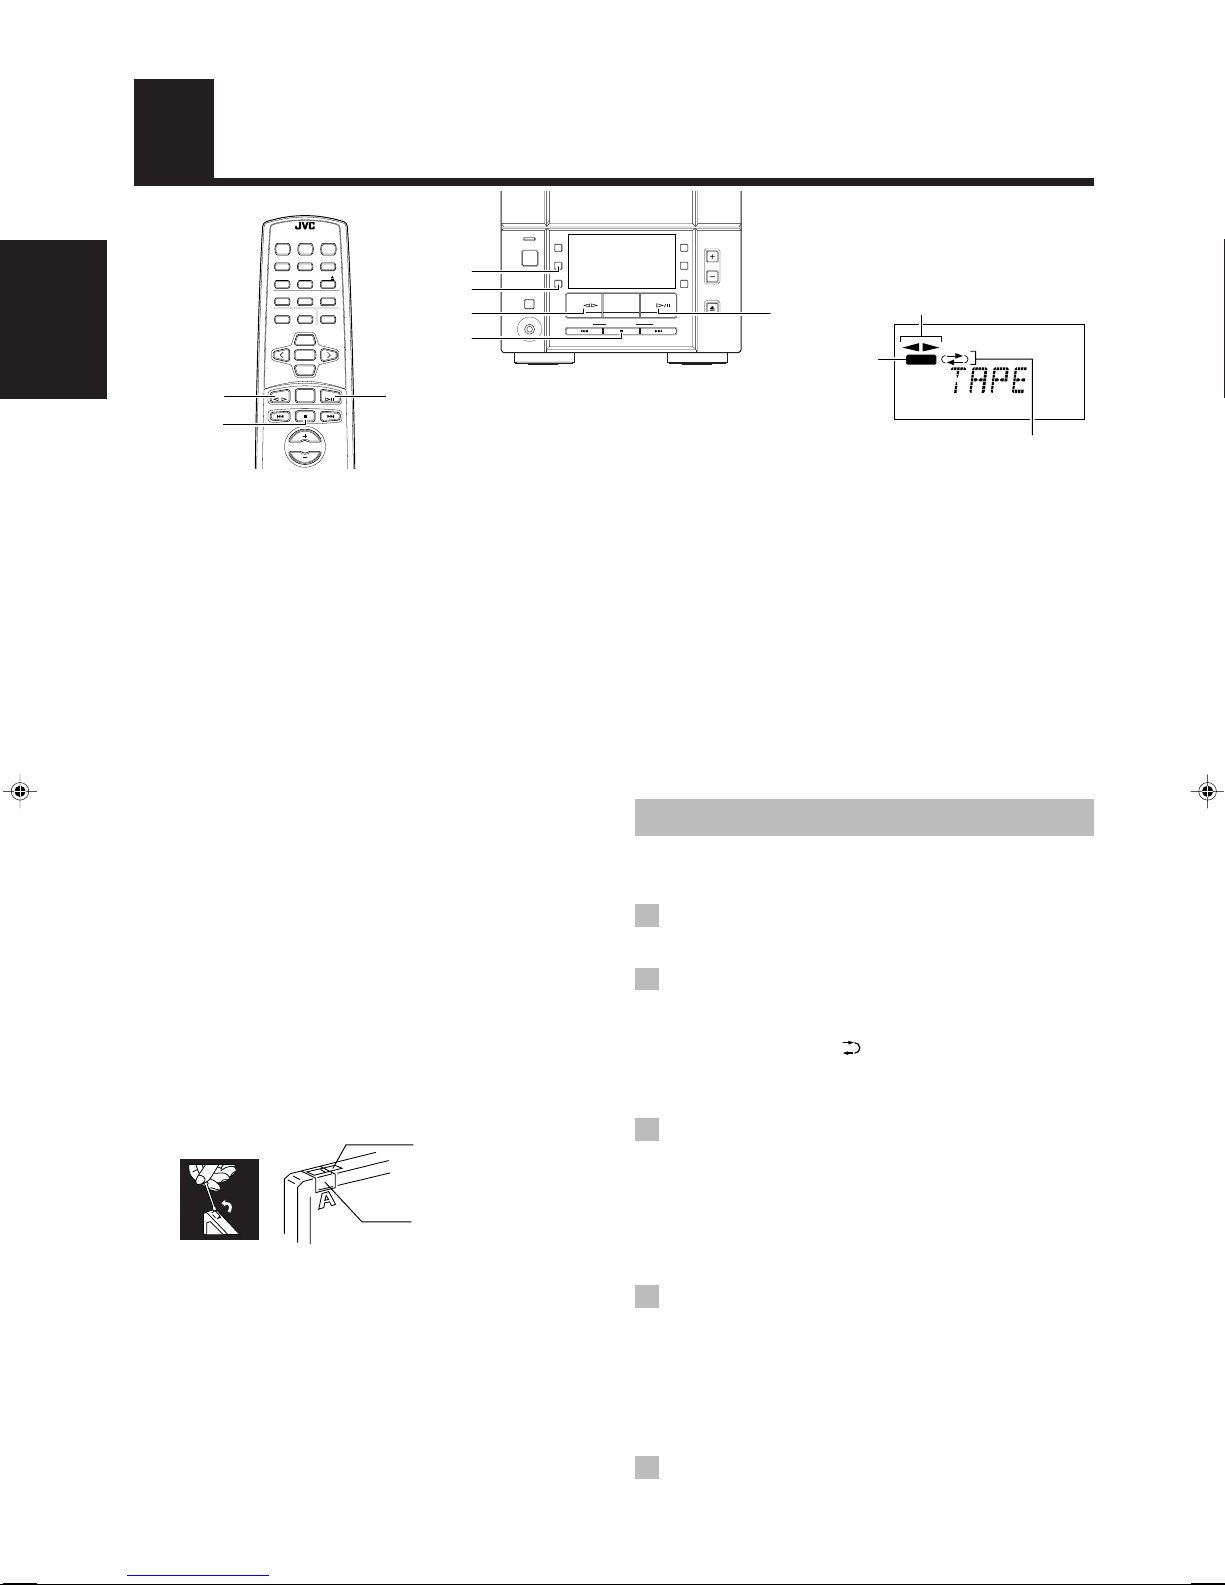
Utilisation de la platine à cassettes
(Enregistrement)
REMOTE CONTROL RM-RXFSV5
POWER
DIMMER SLEEP
DISPLAY FM MODE MD/AUX
Français
TAPE @ #
AUTO
AHB PRO
PRESET
PROGRAM RANDOM REPEAT
BASS TREBLE CANCEL
UP
SET
DOWN
TUNER
TAPE
BAND
CD
CD
REC
REV . MODE
TAPE @ #
7
CD #8
7
VOLUME
Lorsque la chaîne est en lecture, d’autres fonctions sont aussi affichées.
Dans un souci de simplicité, nous ne montrons ici que les fonctions décrites dans ce chapitre.
Il est facile d’enregistrer sur une cassette à partir de n’importe
quelle sources sonore de la chaîne. Il suffit de placer une cassette
dans la platine, de préparer la source, de régler une ou deux
commandes et vous êtes prêt pour l’enregistrement. La procédure
est un peu différente pour chaque source et nous allons donc
expliquer chaque méthode séparément. Mais tout d’abord, quelques
conseils pour améliorer la qualité de vos enregistrements.
Ce qu’il faut savoir avant de commencer l’enregistrement–––––––––––––
■ Notez qu’il peut être illégal d’enregistrer des
cassettes préenregistrées, des disques analogiques
ou numériques sans le consentement du propriétaire
des droits de l’enregistrement sonore ou vidéo, des
émissions de télévision ou de télévision par câble e
de tout programme littéraire, dramatique, musical ou
artistique.
■ Lorsque vous souhaitez enregistrer les deux faces d’une cassette,
vous pouvez activer le Reverse Mode. L’enregistrement s’arrête
automatiquement lorsque l’enregistrement dans le sens 2 est
terminé. Dès lors, assurez-vous toujours que la cassette se déroule
bien dans le sens 3 lors de l’enregistrement en Reverse Mode.
■ Le niveau d’enregistrement, c’est-à-dire le niveau auquel la
copie est reproduite se règle automatiquement et il ne dépend
donc pas de la position de la commande VOLUME de la
chaîne. Il n’est pas non plus affecté par le réglage des effets
sonores. Vous pouvez donc régler le son d’écoute pendant
l’enregistrement sans modifier le niveau d’enregistrement.
■ Vous pouvez retirer les deux petites languettes à l’arrière de la
cassette, une pour la face A et l’autre pour la face B, pour éviter
tout effacement ou enregistrement accidentel.
Fente de détection Type II
Ruban adhésif
■ Pour enregistrer sur une cassette dont on a retiré les languettes,
recouvrez d’abord les orifices avec du ruban adhésif.
Cependant, lorsqu’une cassette de type II est utilisée, ne
recouvrez qu’une partie de l’orifice, comme illustré, car l’autre
partie de l’orifice (fente de détection Type II) est utilisée pour
détecter le type de cassette.
■ Pour l’enregistrement, vous pouvez utiliser des cassettes de
types I et II.
STANDBY/ON
POWER
PHONES
MD/
AUX
REC
REV
MODE
TAPE FM/AM CD
DOWN UPMULTI CONTROL
AHB
PRO
VOLUME
TIMER
CLOCK
CD
OPEN/CLOSE
CD #/8
Témoin
Témoin de sens de
déroulement de la bande
REC
REC
Témoin Reverse Mode
Remarque: En début et en fin de bande, il y a une amorce sur
laquelle il n’est pas possible d’enregistrer. Ainsi, lors
de l’enregistrement de CD ou d’émissions de radio,
bobinez d’abord la cassette pour dépasser l’amorce
afin de ne perdre aucune partie de la musique.
ATTENTION:
Si vos enregistrements sont excessivement
bruyants ou contiennent trop de déclics
d’électricité statique, il se peut que l’appareil se
trouve trop près d’un téléviseur, qui était allumé
pendant l’enregistrement. Eteignez le téléviseur
ou éloignez la chaîne.
Enregistrement normal
Il vous suffit de suivre la méthode suivante afin d’enregistrer le son
de n’importe quelle source sur cassette:
1 Introduisez une cassette vierge ou
effaçable dans la platine à cassettes.
2 Si vous souhaitez enregistrer sur les deux
faces de la cassette, appuyez sur la
touche REV. MODE de l’appareil jusqu’à
ce que le témoin s’allume.
• Lors de l’utilisation du Reverse mode, introduisez la
cassette de sorte que la bande s’enregistre vers l’avant 3.
3 Vérifiez le sens d’enregistrement pour la
cassette.
Assurez-vous que le témoin de sens de défilement de la bande
est le même que celui pour la bande qui se trouve dans la
platine à cassette. Si les directions sont différentes, appuyez sur
la touche TAPE @ # pour corriger le sens de défilement de la
bande puis appuyez sur la touche 7 pour arrêter la cassette.
4 Préparez la source; par exemple,
recherchez un émetteur radio ou allumez
les appareils auxiliaires raccordés à la
chaîne.
Remarque: Lorsque vous désirez enregistrer un CD, veuillez
vous reporter à la section “Enregistrement direct de
CD” à la page 15.
14
5 Appuyez sur la touche REC de l’appareil.
Le témoin REC s’allume et l’enregistrement commence.
Page 41

Remarques concernant l’utilisation du
Reverse mode pour l’enregistrement
Lors de l’enregistrement en Reverse mode, la chaîne s’arrête
automatiquement lorsque la cassette arrive à la fin du sens Reverse
2. Pour enregistrer sur les deux faces d’une cassette, assurez-vous
que la bande de la cassette défile vers l’avant 3, et que le témoin
de sens de défilement de la bande indique également l’avant 3,
avant de commencer l’enregistrement.
Pour arrêter à tout moment pendant
l’enregistrement
Appuyez sur la touche 7.
Enregistrement direct de CD
Tout le contenu du CD est enregistré sur la cassette dans l’ordre du
CD ou en fonction de l’ordre programmé.
1 Introduisez une cassette vierge ou
effaçable dans la platine à cassettes.
2 Placez un CD dans le tiroir.
3 Appuyez sur la touche CD #/8.
4 Appuyez sur la touche 7.
• Pour enregistrer uniquement certaines plages, il faut les
programmer auparavant. Pendant la programmation, vous
pouvez vérifier le temps de lecture total sur l’affichage.
(Voir page 11.)
Pour arrêter l’enregistrement à tout moment, appuyez sur
la touche 7. La cassette s’arrête au bout de 4 secondes.
Remarque: Lorsque vous programmez la minuterie Bonsoir
(SLEEP) pendant l’enregistrement direct d’un CD,
laissez suffisamment de temps pour terminer la
lecture du CD sinon la chaîne s’éteindra avant la fin
de l’enregistrement.
Enregistrement d’une plage –––––––––
1 Introduisez une cassette vierge ou
effaçable dans la platine à cassettes.
2 Ecoutez la plage du CD à enregistrer.
3 Appuyez sur la touche REC de l’appareil.
Le lecteur CD revient au début de cette plage et la plage
s’enregistre sur la cassette. Après l’enregistrement, le lecteur
CD et la platine à cassettes s’arrêtent automatiquement.
Français
5 Si vous souhaitez enregistrer sur les deux
faces de la cassette, appuyez sur la
touche REV. MODE de l’appareil jusqu’à
ce que le témoin s’allume.
• Assurez-vous que le sens d’enregistrement de la cassette et
le témoin de sens de défilement sont corrects. (Voir
“Remarques concernant l’utilisation du Reverse mode pour
l’enregistrement”.)
6 Choisissez si vous souhaitez laisser des
blancs entre les différents morceaux
sélectionnés pour l’enregistrement.
• Si vous ne prenez aucune mesure, l’appareil laisse
automatiquement un blanc d’environ quatre secondes entre
les différentes sélections.
• Si vous ne voulez pas de blanc entre les différents
morceaux, effectuez l’opération ci-dessous avant de passer
au point suivant.
Appuyez deux fois sur la touche CD #/8.
Le lecteur CD se met en mode Pause.
7 Appuyez sur la touche REC de l’appareil.
Le témoin REC s’allume et l’enregistrement commence.
• Lors de l’enregistrement d’un CD sur une cassette avec le
mode autoreverse en service:
Si un morceau est enregistré pendant plus de 12 secondes
(ce qui correspond à la longueur de la bande amorce) mais
ne se termine pas avant la fin de la première face de la
cassette, ce morceau est enregistré à nouveau
automatiquement sur la face arrière de la cassette pour qu’il
ne soit pas coupé en deux.
Si un morceau est enregistré pendant moins de 12 secondes
avant que la face avant se termine, le morceau précédant ce
morceau est aussi réenregistré sur la face arrière à partir du
début car il risque de ne pas l’être entièrement à cause de la
bande amorce.
• A la fin de la lecture de tout le CD, ou de toutes les plages
programmées, la cassette s’arrête automatiquement.
15
Page 42

Français
Utilisation d’appareils externes
REMOTE CONTROL RM-RXFSV5
POWER
DIMMER SLEEP
AHB PRO
BASS
DISPLAY FM MODE MD/AUX
AUTO
AHB PRO
PRESET
PROGRAM RANDOM REPEAT
BASS TREBLE CANCEL
UP
SET
DOWN
TUNER
TAPE
BAND
MD/AUX
CD
STANDBY/ON
MD/
TREBLE
CD
MD/AUX
POWER
PHONES
AUX
REC
REV
MODE
TAPE FM/AM CD
DOWN UPMULTI CONTROL
AHB
PRO
VOLUME
TIMER
CLOCK
CD
OPEN/CLOSE
AHB PRO
VOLUME +, –
VOLUME +, –
VOLUME
Utilisation d’appareils
externes
Vous pouvez écouter des appareils externes comme un lecteur de
MD, un tourne-disques ou tout autre élément auxiliaire.
■ Assurez-vous tout d’abord que les appareils externes sont
correctement raccordés à la chaîne. (Voir page 4).
1 Réglez la commande de VOLUME sur le
minimum.
2 Appuyez sur la touche MD/AUX.
La mention “AUX” apparaît sur l’affichage.
3 Faites jouer l’appareil externe.
4 Réglez la commande de VOLUME sur le
niveau d’écoute souhaité.
5 Choisissez les effets sonores voulus.
■ Appuyez sur la touche AHB PRO pour accentuer les sons
graves.
■ Appuyez sur la touche BASS/TREBLE de la télécommande
pour contrôler la tonalité. (Voir “Contrôle de la tonalité
(Graves/Aigus)” à la page 7.)
Enregistrement de la source
de la chaîne sur un appareil
externe
Vous pouvez enregistrer la source de la chaîne, comme la platine à
cassettes ou le lecteur MD, sur un appareil externe raccordé aux
bornes de sortie LINE OUT ou OPTICAL DIGITAL OUT de la
chaîne.
■ Assurez-vous tout d’abord que les appareils externes sont
correctement raccordés à la chaîne. (Voir page 4).
Faites fonctionner le lecteur CD de la
chaîne, la platine à cassettes ou localisez
un émetteur.
■ Le niveau d’enregistrement n’est pas affecté par le niveau de
VOLUME. Il n’est pas non plus affecté par les effets sonores.
Remarque: Pour plus de détails sur les appareils auxiliaires, se
reporter à leurs propres manuels d’utilisation.
Pour quitter le mode MD/AUX, choisissez une autre source.
Remarque: Pour plus de détails sur le fonctionnement des
appareils auxiliaires, se reporter à leurs propres
manuels d’utilisation.
16
Page 43
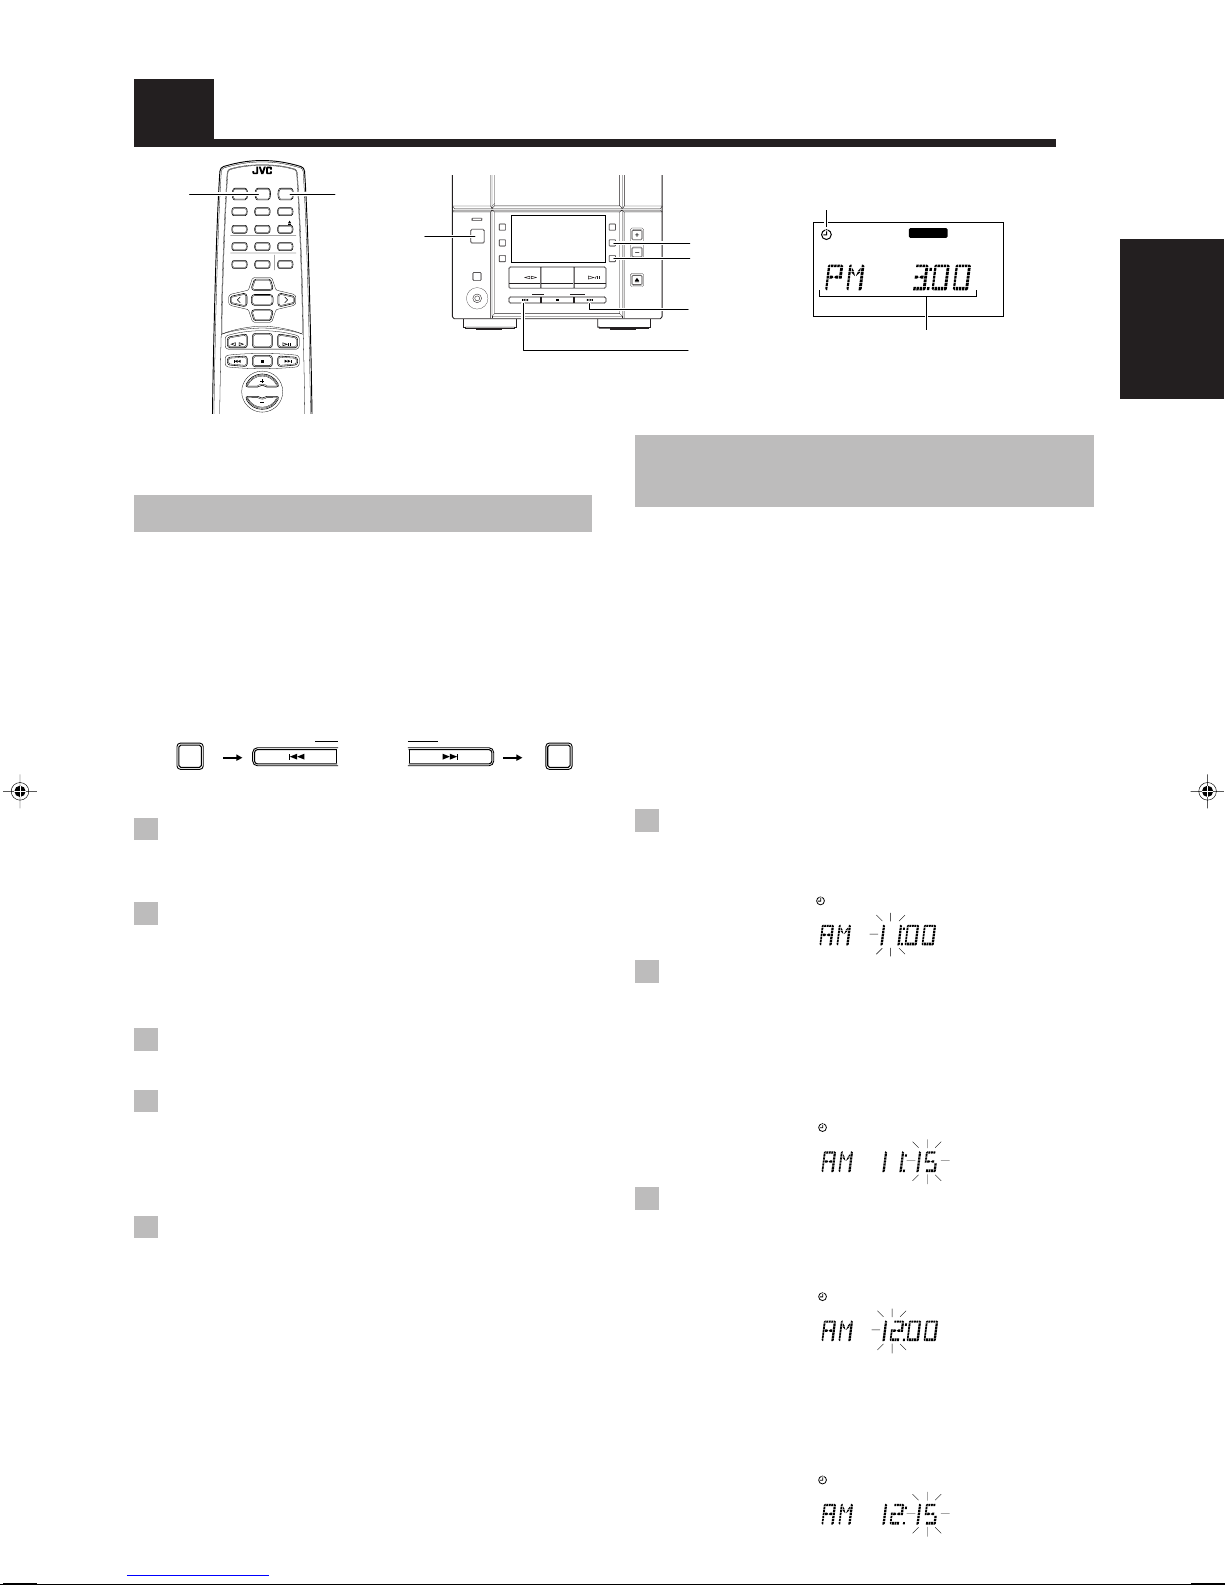
SLEEP
Utilisation des minuteries
REMOTE CONTROL RM-RXFSV5
POWER
DIMMER SLEEP
DISPLAY FM MODE MD/AUX
AUTO
AHB PRO
PRESET
PROGRAM RANDOM REPEAT
BASS TREBLE CANCEL
UP
SET
DOWN
TUNER
TAPE
BAND
VOLUME
CD
POWER
POWER
STANDBY/ON
PHONES
POWER
MD/
AUX
REC
REV
MODE
TAPE FM/AM CD
DOWN UPMULTI CONTROL
AHB
PRO
VOLUME
TIMER
CLOCK
CD
OPEN/CLOSE
TIMER
CLOCK
Témoin de la minuterie
¢
CD
4
Lorsque la chaîne est en lecture, d’autres fonctions sont aussi affichées.
Dans un souci de simplicité, nous ne montrons ici que les fonctions décrites dans ce chapitre.
SLEEPSLEEP
ONON
OFFOFF CLOCKCLOCK
Heure d’enclenchement ON,
heure d’extinction OFF
Français
Les minuteries permettent de programmer automatiquement les
fonctions d’écoute et d’enregistrement.
Mise à l’heure de l’horloge
• Quand vous branchez le cordon d’alimentation secteur sur une
prise murale, l’indicateur CLOCK clignote sur l’affichage.
Vous pouvez régler l’horloge quand l’appareil est allumé ou éteint.
Remarques:
• L’horloge doit être à l’heure pour que les minuteries puissent
fonctionner correctement.
• La procédure doit s’effectuer en moins de 2 minutes. Sinon, le
réglage est effacé et doit être recommencé depuis le début.
CLOCK CLOCK
(pendant 2 secondes)
1 Appuyez sur la touche CLOCK de
l’appareil pendant plus de 2 secondes.
Le chiffre des heures clignote rapidement sur l’affichage.
2 Appuyez sur la touche ¢ ou 4 pour
régler les heures.
Appuyer sur la touche ¢ augmente les heures et appuyer sur
la touche 4 les diminue. Maintenez la touche pressée pour
changer les heures rapidement.
3 Appuyez sur la touche CLOCK.
Le chiffre des minutes clignote rapidement sur l’affichage.
4 Appuyez sur la touche ¢ ou 4 pour
régler les minutes.
Appuyer sur la touche ¢ augmente les minutes et appuyer
sur la touche 4 les diminue. Maintenez la touche pressée
pour changer les minutes rapidement.
5 Appuyez de nouveau sur la touche
CLOCK.
L’heure choisie est validée et les secondes commencent à
avancer à partir de 0.
L’indicateur CLOCK reste allumé sur l’affichage.
DOWN UP
ou
Réglage de la minuterie
Bonjour
Lorsque vous avez programmé la minuterie Bonjour, celle-ci
s’enclenche tous les jours à la même heure. Elle peut cependant
être annulée ou réactivée quand vous le souhaitez.
Le témoin de la minuterie présent sur l’affichage indique quand la
minuterie Bonjour est opérationnelle ou non.
Remarques:
• Réalisez chaque étape en moins de 30 secondes, sinon le
réglage est effacé et doit être recommencé depuis le début.
• L’horloge doit être à l’heure pour que les minuteries puissent
fonctionner correctement.
Si l’horloge n’a pas été réglée, l’indicateur CLOCK clignote sur
l’affichage quand vous appuyez sur la touche TIMER pendant
plus de deux secondes, l’affichage passe alternativ ement sur
“ADJUST” et “CLOCK” pendant environ 5 secondes.
1 Appuyez sur la touche TIMER de
l’appareil pendant plus de 2 secondes.
L ’indicateur ON s’allume et l’heure de démarrage actuelle
clignote sur l’affichage. (Exemple: AM 11:00)
2 Réglez l’heure d’enclenchement ON.
(Exemple: AM 11:15)
Appuyez sur la touche ¢ ou 4 de l’appareil pour régler
l’heure à laquelle l’appareil doit s’allumer.
Appuyez sur la touche ¢ pour avancer l’heure ou sur la
touche 4 pour la retarder. Maintenez la touche enfoncée
pour avancer ou retarder l’heure rapidement. Appuyez sur la
touche TIMER pour ajuster les minutes.
3 Réglez l’heure de désactivation OFF.
(Exemple: AM 12:15)
1. Appuyez sur la touche TIMER de l’appareil.
Le chiffre des heures de l’heure d’arrêt actuelle clignote,
puis l’indicateur OFF s’allume sur l’affichage.
SLEEP
ON
SLEEP
ON
SLEEP
OFF
ATTENTION:
Si l’appareil est débranché ou en cas de panne
de courant, la programmation de la minuterie
sera effacée. Vous devrez alors remettre
l’horloge à l’heure puis reprogrammer la
minuterie.
Remarque: Il se peut que l’horloge avance ou retarde d’une ou
deux minutes en plus par mois.
2. Appuyez sur la touche ¢ ou 4 de l’appareil pour
régler l’heure à laquelle l’appareil doit s’éteindre.
Appuyez sur la touche ¢ pour avancer l’heure et sur la
touche 4 pour la retarder. Maintenez la touche enfoncée
pour avancer ou retarder l’heure rapidement. Appuyez sur
la touche TIMER pour ajuster les minutes.
SLEEP
OFF
17
Page 44

4 Sélectionnez de la source de musique.
1. Appuyez sur la touche TIMER de l’appareil.
L’indication “TUNER” clignote sur l’affichage.
2. Appuyez sur la touche ¢ ou 4 pour sélectionner la
source de musique que vous voulez écouter.
L’affichage change comme illustré ci-dessous.
ATTENTION:
Si la chaîne est débranchée ou si une coupure de
courant se produit, la minuterie est annulée. Vous
devrez alors remettre l’horloge à l’heure puis
reprogrammer la minuterie.
Réglage de la minuterie
d’enregistrement
Avec la minuterie d’enregistrement, vous pouvez enregistrer
automatiquement une émission de radio sur une cassette.
5 Réglez du volume.
Français
1. Appuyez sur la touche TIMER de l’appareil.
Le niveau du volume clignote sur l’affichage.
2. Appuyez sur les touches ¢ ou 4 pour sélectionner le
volume souhaité.
-- : Le niveau de volume actuel sera utilisé.
0 à 40 : Lorsque la minuterie s’enclenche, le volume est
automatiquement réglé sur le niveau défini.
SLEEP
6 Appuyez sur la touche TIMER de l’appareil.
La programmation de la minuterie est terminée et l’affichage
précédent réapparaît. Le témoin de la minuterie reste allumé.
7 Avant d’éteindre l’appareil, préparez la
source de musique sélectionnée au
point 4.
TUNER: Recherchez l’émetteur souhaité.
REC
TUNER: Voir “Réglage de la minuterie d’enregistrement”.
CD: Placez un CD dans le tiroir.
TAPE: Insérez une cassette.
8 Appuyez sur la touche POWER pour
mettre la chaîne hors tension.
Pour annuler la minuterie, appuyez sur la touche TIMER
pendant plus de 2 secondes. Le témoin de la minuterie disparaît de
l’affichage.
Pour réactiver la minuterie annulée, appuyez sur la touche
TIMER pendant plus de 2 secondes; le témoin se rallume. Puis
appuyez sur la touche TIMER jusqu’à ce que l’affichage retourne
aux indications précédentes. Le témoin de la minuterie doit rester
allumé.
Pour confirmer les réglages de la minuterie, supprimez une
fois la minuterie en appuyant sur la touche TIMER, réappuyez sur
la touche TIMER pendant plus de 2 secondes. Appuyez ensuite sur
la touche TIMER de manière répétée, pour visualiser la
programmation de la minuterie (heure d’activation ON, heure de
désactivation OFF, source et volume). Appuyez sur la touche
TIMER pour régler de nouveau la minuterie.
Pour modifier la programmation de la minuterie, répétez
toute la procédure depuis le début.
• Lorsque la minuterie s’enclenche, son témoin commence à
clignoter.
Remarque: Si l’appareil est sous tension quand l’heure de
démarrage arrive, la minuterie quotidienne ne
fonctionne pas.
Fonctionnement de la minuterie d’enregistrement
L’appareil se met automatiquement sous tension, accorde la
dernière station reçue et démarre l’enregistrement quand l’heure de
début arrive. Puis, quand l’heure de fin arrive, l’appareil se met
automatiquement hors tension (attente).
Le réglage de la minuterie reste en mémoire jusqu’à ce que vous le
changiez.
Remarques:
• Réalisez chaque étape en moins de 30 secondes, sinon le
réglage est effacé et doit être recommencé depuis le début.
• L’horloge doit être à l’heure pour que les minuteries puissent
fonctionner correctement.
Si l’horloge n’a pas été réglée, l’indicateur CLOCK clignote
sur l’affichage quand vous appuyez sur la touche TIMER
pendant plus de deux secondes, l’affichage passe
alternativement sur “ADJUST” et “CLOCK” pendant environ 5
secondes.
1 Appuyez sur la touche POWER pour
mettre la chaîne sous tension.
2 Recherchez l’émetteur souhaité.
Voir page 8.
3 Appuyez sur la touche TIMER de
l’appareil pendant plus de 2 secondes.
L’indicateur ON s’allume et l’heure de démarrage actuelle
clignote sur l’affichage. (Exemple: AM 11:00)
SLEEP
ON
4 Réglez l’heure d’enclenchement ON.
(Exemple: AM 11:15)
Appuyez sur la touche ¢ ou 4 de l’appareil pour régler
l’heure à laquelle l’appareil doit s’allumer.
Appuyez sur la touche ¢ pour avancer l’heure ou sur la
touche 4 pour la retarder. Maintenez la touche enfoncée
pour avancer ou retarder l’heure rapidement. Appuyez sur la
touche TIMER pour ajuster les minutes.
SLEEP
ON
5 Réglez l’heure de désactivation OFF.
(Exemple: AM 12:15)
1. Appuyez sur la touche TIMER de l’appareil.
Le chiffre des heures de l’heure d’arrêt actuelle clignote,
puis l’indicateur OFF s’allume sur l’affichage.
SLEEP
OFF
18
Page 45

2. Appuyez sur la touche ¢ ou 4 de l’appareil pour
régler l’heure à laquelle l’appareil doit s’éteindre.
Appuyez sur la touche ¢ pour avancer l’heure et sur la
touche 4 pour la retarder. Maintenez la touche enfoncée
pour avancer ou retarder l’heure rapidement. Appuyez sur
la touche TIMER pour ajuster les minutes.
SLEEP
OFF
6 Appuyez sur la touche TIMER de l’appareil.
7 Appuyez sur la touche ¢ ou 4 jusqu’à
ce que “TUNER” apparaisse et que
l’indicateur REC s’allume sur l’affichage.
L’affichage change comme illustré ci-dessous.
8 Réglez du volume.
1. Appuyez sur la touche TIMER de l’appareil.
Le niveau du volume clignote sur l’affichage.
2. Appuyez sur les touches ¢ ou 4 pour sélectionner le
volume souhaité.
-- : Le niveau de volume actuel sera utilisé.
0 à 40 : Lorsque la minuterie s’enclenche, le volume est
automatiquement réglé sur le niveau défini.
Pour couper le son pendant qu’un enregistrement
par minuterie est en cours, réglez le niveau de volume sur
“0”.
9 Appuyez sur la touche TIMER de l’appareil.
La programmation de la minuterie est terminée et l’affichage
précédent réapparaît. Le témoin de la minuterie reste allumé.
Remarque: Si vous changez la station avant de mettre la
chaîne hors tension, la dernière station reçue sera
enregistrée.
10
Introduisez une cassette vierge ou
effaçable dans la platine à cassettes.
• Assurez-vous que la bande est suffisamment longue pour
l’enregistrement.
ATTENTION:
Si la chaîne est débranchée ou si une coupure de
courant se produit, la minuterie est annulée.
Vous devrez alors remettre l’horloge à l’heure
puis reprogrammer la minuterie.
Réglage de la minuterie
Bonsoir
Quand une source est reproduite, utilisez la minuterie d’arrêt pour
mettre la chaîne hors tension après un certain nombre de minutes.
Cette minuterie permet de s’endormir agréablement en musique
sans avoir à se soucier d’éteindre la chaîne.
■ Vous ne pouvez régler la minuterie d’arrêt que quand la chaîne
est sous tension.
Remarque: L’horloge doit être à l’heure pour que les minuteries
puissent fonctionner correctement.
Si l’horloge n’a pas été réglée, l’indicateur CLOCK
clignote sur l’affichage quand vous appuyez sur la
touche TIMER pendant plus de deux secondes,
l’affichage passe alternativement sur “ADJUST” et
“CLOCK” pendant environ 5 secondes.
1 Ecoutez un CD ou une cassette, ou
localisez l’émetteur souhaité.
2 Appuyez sur la touche SLEEP de la
télécommande.
Le témoin SLEEP s’allume.
3 Déterminez la durée d’écoute avant
l’extinction de la chaîne.
• Chaque fois que vous appuyez sur SLEEP, la minuterie Bonsoir
change le nombre de minutes affiché dans l’ordre suivant:
10
Après avoir réglé le nombre de minutes pour la minuterie d’arrêt,
l’affichage s’arrête de clignoter et retourne à son état précédent.
La chaîne est à présent prête à s’éteindre après le nombre de
minutes programmé.
Annulé
20 30
60
90120
Français
11
Appuyez sur la touche POWER pour
mettre la chaîne hors tension.
Pour annuler la minuterie, appuyez sur la touche TIMER
pendant plus de 2 secondes. L’indicateur REC et l’indicateur de
minuterie disparaissent de l’affichage.
Pour réactiver la minuterie annulée, appuyez sur la touche
TIMER pendant plus de 2 secondes de façon à allumer l’indicateur
REC et l’indicateur de minuterie.
Pour confirmer les réglages de la minuterie, supprimez une
fois la minuterie en appuyant sur la touche TIMER, réappuyez sur
la touche TIMER pendant plus de 2 secondes. Appuyez ensuite sur
la touche TIMER de manière répétée, pour visualiser la
programmation de la minuterie (heure d’activation ON, heure de
désactivation OFF, source et volume). Appuyez sur la touche
TIMER pour régler de nouveau la minuterie.
Pour modifier la programmation de la minuterie, répétez
toute la procédure depuis le début.
• Lorsque la minuterie s’enclenche, son témoin commence à
clignoter.
Remarque: Si l’appareil est sous tension quand l’heure de
démarrage arrive, la minuterie d’enregistrement ne
fonctionne pas.
Pour confirmer l’heure d’extinction OFF
Lorsque vous appuyez sur la touche SLEEP, le temps restant avant
l’extinction s’affiche.
Pour supprimer la programmation de la minuterie
Bonsoir
Appuyez sur la touche SLEEP jusqu’à ce que le témoin SLEEP
s’éteigne.
Si vous éteignez la chaîne, la minuterie Bonsoir est également
déprogrammée.
19
Page 46

Entretien - Divers
Prenez soin de vos CD afin d’assurer leur bon et long
fonctionnement.
Disques compacts
• N’utilisez que les CD portant la marque cicontre avec cet appareil. L’utilisation continue
de CD de formes irrégulières (en forme de
coeurs, octogonaux, etc.) risque cependant
Français
ATTENTION: Ne jamais utiliser de solvants (par
exemple des produits de nettoyage pour disques
vinyles, des liquides à pulvériser à base de
diluant, d’essence, etc.) pour nettoyer un CD.
d’endommager le lecteur.
• Retirez le CD de son boîtier en le tenant par les
bords et en appuyant légèrement sur l’orifice
central du boîtier.
• Ne touchez pas la surface brillante du CD et ne
le pliez pas.
• Rangez immédiatement le CD dans son boîtier
après l’écoute pour éviter toute détérioration.
• Veillez à ne pas rayer la surface du CD lorsque
vous l’enlevez de son boîtier ou que vous l’y
rangez.
• Evitez toute exposition aux rayons directs du soleil,
à des températures extrêmes ou à l’humidité.
• Si le CD est sale, sa lecture risque d’être
déformée. Dans ce cas, nettoyez-le avec un
chiffon doux, en l’essuyant en mouvements
rectilignes allant du centre vers le bord.
Divers
De manière générale, vous obtiendrez toujours les meilleurs
résultats en gardant vos CD et les appareils en parfait état de
propreté.
• Rangez les CD dans leurs boîtiers et conservez-les dans une
armoire ou sur une étagère.
• Veillez à fermer le tiroir de disque lorsque l’appareil n’est pas
utilisé.
Nettoyage de la lentille
Si la lentille du capteur CD est sale, une déformation du son peut
se produire.
Ouvrez le tiroir de CD et nettoyez la lentille comme illustré.
• Utilisez un soufflet (disponible dans les magasins de matériel
photo) pour souffler la poussière de la lentille.
Soufflet
Lentille
• S’il y a des traces de doigts, etc., sur la lentille, essuyez-les
soigneusement avec un coton-tige.
Condensation
Dans les cas suivants, de l’humidité peut se
condenser sur la lentille à l’intérieur du lecteur:
• Après avoir allumé un chauffage dans la pièce
• Dans une pièce humide
• Si l’appareil est transporté d’une pièce froide à
une pièce chaude
Dans ce cas, la chaîne risque de mal fonctionner.
Laissez alors l’appareil allumé pendant quelques
heures pour que l’humidité s’évapore. Ensuite,
débranchez la fiche de la prise de courant et
rebranchez-la.
Cassettes
• Si la bande n’est pas tendue, elle risque de
s’étirer, de se couper ou de se coincer dans le
mécanisme de la platine. Insérez alors un
crayon dans un des axes et tournez pour la
retendre.
• Ne touchez jamais la surface sensible de la
bande.
• Ne rangez pas vos cassettes:
- Dans des endroits poussiéreux
- Au soleil ou près d’une source de chaleur
- Dans des endroits humides
- Sur un téléviseur ou un haut-parleur
- A proximité d’un aimant
Platine à cassettes
• Si les têtes, les cabestans ou les galets-presseurs de la platine
sont encrassés, vous risquez les problèmes suivants:
- Une diminution de la qualité sonore
- Des interruptions dans le son
- Des pertes de niveau
- Un effacement incomplet
- Des difficultés à obtenir un bon enregistrement
• Nettoyez les têtes, les cabestans et les galets-presseurs à l’aide
d’un coton-tige imbibé d’alcool.
Cabestans
Tête d’effacement
Galets-presseurs
Tête
d’enregistrement/
de lecture
20
• Si les têtes se magnétisent, la reproduction sonore comportera
davantage de bruit de fond et une perte des aigus.
• Pour démagnétiser les têtes, éteignez l’appareil et utilisez un
démagnétiseur de têtes (que vous trouverez chez les revendeurs
de matériel électronique ou dans les magasins de disques).
Page 47

Dépistage des défaillances
• Si votre chaîne présente certaines défaillances, vérifiez la liste ci-dessous pour y trouver un remède possible avant d’appeler votre revendeur.
• Si vous ne parvenez pas à résoudre le problème avec ces indications, ou si la chaîne a été endommagée, demandez l’intervention
technique d’une personne qualifiée, comme votre revendeur.
Symptôme
Pas de son.
Mauvaise réception radio.
Pas de lecture du CD.
Le son du CD saute.
Le tiroir de CD ne s’ouvrent pas ni ne se
ferme.
Le porte-cassettes ne s’ouvre pas.
Impossible d’enregistrer.
Les commandes sont inopérantes.
La télécommande refuse de fonctionner.
Cause possible
• Les branchements sont incorrects ou
défaits.
• Le casque d’écoute est branché.
• Les antennes sont déconnectées.
• L’antenne cadre AM est trop près de
l’appareil.
• Le fil d’antenne FM est mal déplié ou
mal orienté.
Le CD est placé à l’envers.
Le CD est sale ou rayé.
Le cordon d’alimentation n’est pas branché.
La fiche secteur a été débranchée pendant la
lecture d’une cassette.
Les languettes de protection contre
l’enregistrement ont été brisées.
Le microprocesseur interne est perturbé par
des interférences extérieures.
• Il y a un obstacle entre la télécommande
et le capteur de l’appareil.
• Les piles sont épuisées.
Action
• Vérifiez tous les branchements et
effectuez les modifications adéquates.
(Voir pages 2 – 5.)
• Débranchez le casque d’écoute.
• Rebranchez l’antenne convenablement.
• Changez la position et l’orientation de
l’antenne cadre AM.
• Dépliez le fil d’antenne FM et orientezle de manière à obtenir la meilleure
réception possible.
Posez le CD avec les inscriptions vers le
haut.
Nettoyez ou remplacez le CD.
Branchez le cordon d’alimentation secteur.
Branchez le cordon d’alimentation, appuyez
sur la touche POWER puis sur la touche
TAPE 0.
Couvrez les orifices à l’arrière de la cassette
avec un ruban adhésif.
Débranchez la chaîne et rebranchez-la.
• Supprimez l’obstacle.
• Remplacez les piles.
Français
21
Page 48

Français
Caractéristiques
FS-V30 (CA-FSV30 et SP-UXV30)
Amplificateur
Puissance 25 W par canal, efficacité min. sous 4 Ω, de 80 Hz à 15 kHz, avec une distorsion
harmonique totale maximum de 10% (aux Etats-Unis)
44 W (22 W + 22 W) à 4 Ω (Max.) (pour le Canada)
Sensibilité/Impédance d’entrée (1 kHz)
LINE IN (AUX) 400 mV/48 kΩ
Sensibilité/Impédance de sortie (1 kHz)
LINE OUT 260 mV/5,8 kΩ
Sortie optique –21 dBm - –15 dBm
Bornes des haut-parleurs 4 Ω - 16 Ω
Casque d’écoute 16 Ω - 1 kΩ
0 mW - 15 mW par canal dans 32 Ω
Platine à cassettes
Réponse en fréquence
Type I (Normal) 50 Hz - 14 kHz
Type II (CrO
Pleurage et scintillement 0,15% (WRMS)
Lecteur CD
Rapport signal/bruit 90 dB
Pleurage et scintillement Non mesurable
) 50 Hz - 15 kHz
2
Tuner
T uner FM
Bande de fréquence 87,5 MHz - 108,0 MHz
T uner AM
Bande de fréquence 530 kHz - 1.710 kHz
Caractéristiques des haut-parleurs
(Chaque unité)
Haut-parleurs Haut-parleur de graves 9 cm x 1
Haut-parleur des aigus 4 cm x 1
Impédance 4 Ω
Dimensions 140 mm x 230 mm x 226 mm (L/H/P)
Poids Approx. 1,9 kg (4,2 livres)
(5
9
/
16
Caractéristiques générales
Dimensions 438 mm x 234 mm x 279 mm (L/H/P)
Poids Approx. 7,0 kg (15,4 livres)
1
(17
/4 x 9 7/32 x 10 31/
Alimentation
Tension requise CA 120 V , 60 Hz
Consommation 50 W (allumé)
3,7 W (en mode Standby)
Accessoires
Voir page 2.
x 9 1/16 x 8 15/
pouces)
16
32
pouces)
Le modèle et les caractéristiques peuvent être sujets à modifications sans avis préalable.
22
Page 49

QUALITY SERVICE
HOW TO LOCATE YOUR JVC SERVICE CENTER
TOLL FREE : 1-800-537-5722
http://www.jvcservice.com
Dear customer:
In order to receive the most satisfaction from your purchase, read the instruction booklet before operating the unit. In the event
that repair is necessary, or for the address nearest your location, please refer to the factory service center list below or within
the Continental United States, Call 1-800-537-5722 for your authorized servicer. Remember to retain your Bill of Sale for
Warranty Service.
—JVC
JVC SERVICE & ENGINEERING
COMPANY OF AMERICA
DIVISION OF JVC AMERICAS CORP.
FACTORY SERVICE CENTER LOCATIONS
10 New Maple Avenue
Pine Brook, NJ 07058-9641
(973) 396-1000
5665 Corporate Avenue
Cypress, CA 90630-0024
(714) 229-8011
13 Cummings Park
Woburn, MA 01801
(781) 376-9100
Sophisticated electronic products may require occasional service. Just as quality is a keyword in the engineering and production
of the wide array of JVC products, service is the key to maintaining the high level of performance for which JVC is world
famous. The JVC service and engineering organization stands behind our products.
JVC SERVICE & ENGINEERING COMPANY OF AMERICA
1500 Lakes Parkway
Lawrenceville, GA 30243-5857
(770) 339-2582
2969 Mapunapuna Place
Honolulu, HI 96819-2040
(808) 833-5828
8192 State Road 84
Davie, FL 33324
(954) 472-1960
NATIONAL HEADQUARTERS
DIVISION OF JVC AMERICAS CORP.
1700 Valley Road
Wayne, NJ 07470
705 Enterprise Street
Aurora, IL 60504-8149
(630) 851-7855
10700 Hammerly, Suite 110
Houston, TX 77043
(713) 935-9331
890 Dubuque Avenue
South San Francisco, CA 94080-1804
(650) 871-2666
If you ship the product • • •
Don’t service it yourself.
Pack your JVC unit in the original carton or one of equivalent
size and strength. Enclose, with the unit, a letter stating the
problem or symptom that exists and also a copy of the receipt
or bill of sale you received when you purchased your JVC unit.
Print your home return address on the outside and the inside
of the carton. Send to the appropriate JVC Factory Service
Center as listed above.
To prevent electrical shock, do not open the cabinet.
No user serviceable parts inside.
Refer servicing to qualified service personnel.
CAUTION
ACCESSORIES
To purchase accessories for your JVC product, you may contact your local JVC Dealer.
Or from the 48 Continental United States call toll free : 800-882-2345
(1099)
Page 50
LIMITED WARRANTY AUDIO-1
JVC COMPANY OF AMERICA warrants this product and all parts thereof, except as set forth below ONLY TO THE
ORIGINAL PURCHASER AT RETAIL to be FREE FROM DEFECTIVE MATERIAL AND WORKMANSHIP from the date of
original retail purchase for the period as shown below. (“The Warranty Period.”)
PARTS LABOR
THIS LIMITED WARRANTY IS VALID ONLY IN THE FIFTY(50) UNITED STATES, THE DISTRICT OF COLUMBIA AND IN
COMMONWEALTH OF PUERTO RICO.
WHAT WE WILL DO:
If this product is found to be defective, JVC will repair or replace defective parts at no charge to the original owner. Such
repair and replacement services shall be rendered by JVC during normal business hours at JVC authorized service
centers.
Parts used for replacement are warranted only for the remainder of the Warranty Period. All products and parts thereof may
be brought to a JVC authorized service center on a carry-in basis except for Television sets having a screen size 25 inches
and above which are covered on an in-home basis.
WHAT YOU MUST DO FOR WARRANTY SERVICE:
Return your product to a JVC authorized service center with a copy of your bill of sale. For your nearest JVC authorized
service center, please call toll free: (800)537-5722.
If service is not available locally, box the product carefully, preferably in the original carton, and ship, insured, with a copy of
your bill of sale plus and letter of explanation of the problem to the nearest JVC Factory Service Center, the name and
location of which will be given to you by the toll-free number.
If you have any questions concerning your JVC Product, please contact our Customer Relations Department.
WHAT IS NOT COVERED:
This limited warranty provided by JVC does not cover:
1. Products which have been subject to abuse, accident, alteration, modification, tampering, negligence, misuse, faulty
installation, lack of reasonable care, or if repaired or serviced by anyone other than a service facility authorized by JVC
to render such service, or if affixed to any attachment not provided with the products, or if the model or serial number
has been altered, tampered with, defaced or removed;
2. Initial installation and installation and removal for repair;
3. Operational adjustments covered in the Owner’s Manual, normal maintenance, video and audio head cleaning;
4. Damage that occurs in shipment, due to act of God, and cosmetic damage;
5. Signal reception problems and failures due to line power surge;
6. Video Pick-up Tubes/CCD Image Sensor, Cartridge, Stylus(Needle) are covered for 90 days from the date of purchase;
7. Accessories;
8. Batteries (except the Rechargeable Batteries are covered for 90 days from the date of purchase);
There are no express warranties except as listed above.
THE DURATION OF ANY IMPLIED WARRANTIES, INCLUDING THE IMPLIED WARRANTY OF MERCHANTABILITY, IS
LIMITED TO THE DURATION OF THE EXPRESS WARRANTY HEREIN.
JVC SHALL NOT BE LIABLE FOR THE LOSS OF USE OF THE PRODUCT, INCONVENIENCE, LOSS OR ANY OTHER
DAMAGES, WHETHER DIRECT, INCIDENTAL OR CONSEQUENTIAL (INCLUDING, WITHOUT LIMITATION, DAMAGE
TO TAPES, RECORDS OR DISCS) RESULTING FROM THE USE OF THIS PRODUCT, OR ARISING OUT OF ANY
BREACH OF THIS WARRANTY. ALL EXPRESS AND IMPLIED WARRANTIES, INCLUDING THE WARRANTIES OF
MERCHANTABILITY AND FITNESS FOR PARTICULAR PURPOSE, ARE LIMITED TO THE WARRANTY PERIOD SET
FORTH ABOVE.
Some states do not allow the exclusion of incidental or consequential damages or limitations on how long an implied
warranty last, so these limitations or exclusions may not apply to you. This warranty gives you specific legal rights and you
may also have other rights which vary from state to state.
JVC COMPANY OF AMERICA 1700 Valley Road
DIVISION OF JVC AMERICAS CORP. Wayne, NJ 07470
1YR 1YR
REFURBISHED PRODUCTS CARRY A SEPARATE WARRANTY, THIS WARRANTY DOES NOT APPLY. FOR DETAILS OF
REFURBISHED PRODUCT WARRANTY, PLEASE REFER TO THE REFURBISHED PRODUCT WARRANTY
INFORMATION PACKAGED WITH EACH REFURBISHED PRODUCT.
For customer use:
Enter below the Model No. and Serial No. which is located either on the rear, bottom or side of the cabinet. Retain this
information for future reference.
Model No.: Serial No.:
Purchase date: Name of dealer:
Page 51

VICTOR COMPANY OF JAPAN, LIMITED
EN, FR 0400MWMMDWJEM
 Loading...