

Page 1
COMPACT COMPONENT SYSTEM
English
DX-T5
—Consists of CA-DXT5, SP-XT5 and SP-XST5
CA-DXT5
SP-XT5 SP-XST5
INSTRUCTIONS
GVT0146-001A
[US, UN]
Page 2
Warnings, Cautions and Others
Caution–– button!
Disconnect the mains plug to shut the power off completely.
The button in any position does not
disconnect the mains line. The power can be remote
controlled.
CAUTION
To reduce the risk of electrical shocks, fire, etc.:
1. Do not remove screws, covers or cabinet.
2. Do not expose this appliance to rain or moisture.
CAUTION
• Do not block the ventilation openings or holes.
(If the ventilation openings or holes are blocked by a
newspaper or cloth, etc., the heat may not be able to get
out.)
• Do not place any naked flame sources, such as lighted
candles, on the apparatus.
• When discarding batteries, environmental problems must
be considered and local rules or laws governing the
disposal of these batteries must be followed strictly.
• Do not expose this apparatus to rain, moisture, dripping or
splashing and that no objects filled with liquids, such as
vases, shall be placed on the apparatus.
G-1
28 kg / 62 lbs.
CAUTION!
To avoid personal injury or accidentally dropping
the unit, have two persons unpack, carry, and install the
unit.
Page 3
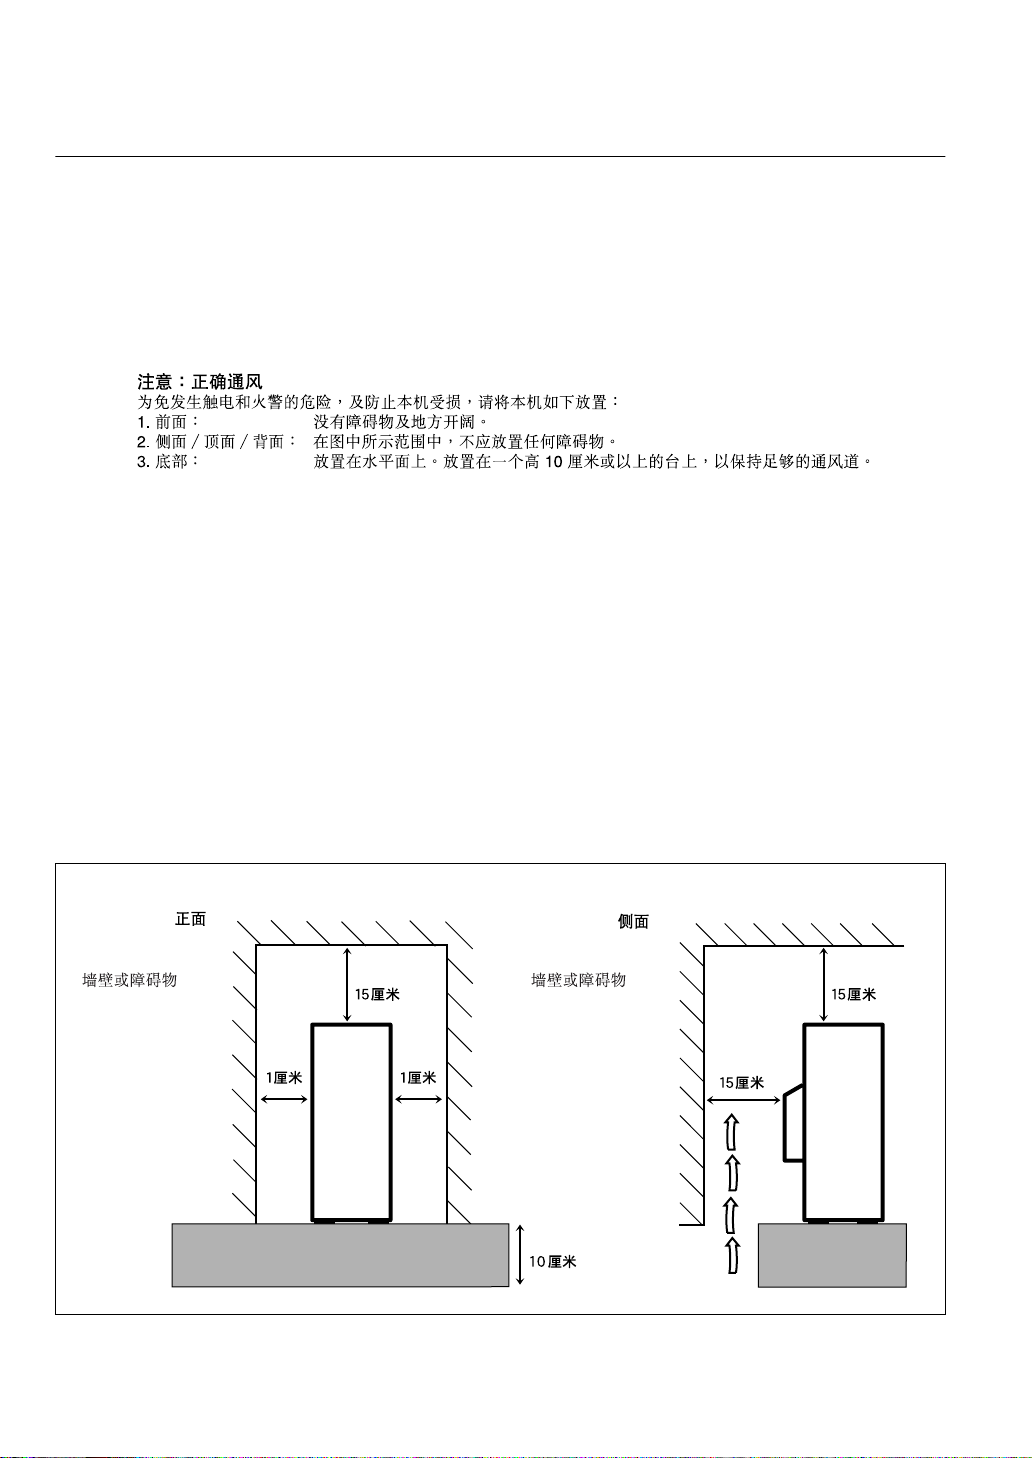
Caution: Proper Ventilation
To avoid risk of electric shock and fire, and to prevent damage, locate the apparatus as follows:
1. Front: No obstructions and open spacing.
2. Sides/Top/Back: No obstructions should be placed in the areas shown by the dimensions below.
3. Bottom: Place on the level surface. Maintain an adequate air path for ventilation by placing
on a stand with a height of 10 cm or more.
Front view Side view
Wall or obstructions Wall or obstructions
15 cm 15 cm
1 cm
1 cm
CA-DXT5 CA-DXT5
10 cm
15 cm
G-2
Page 4
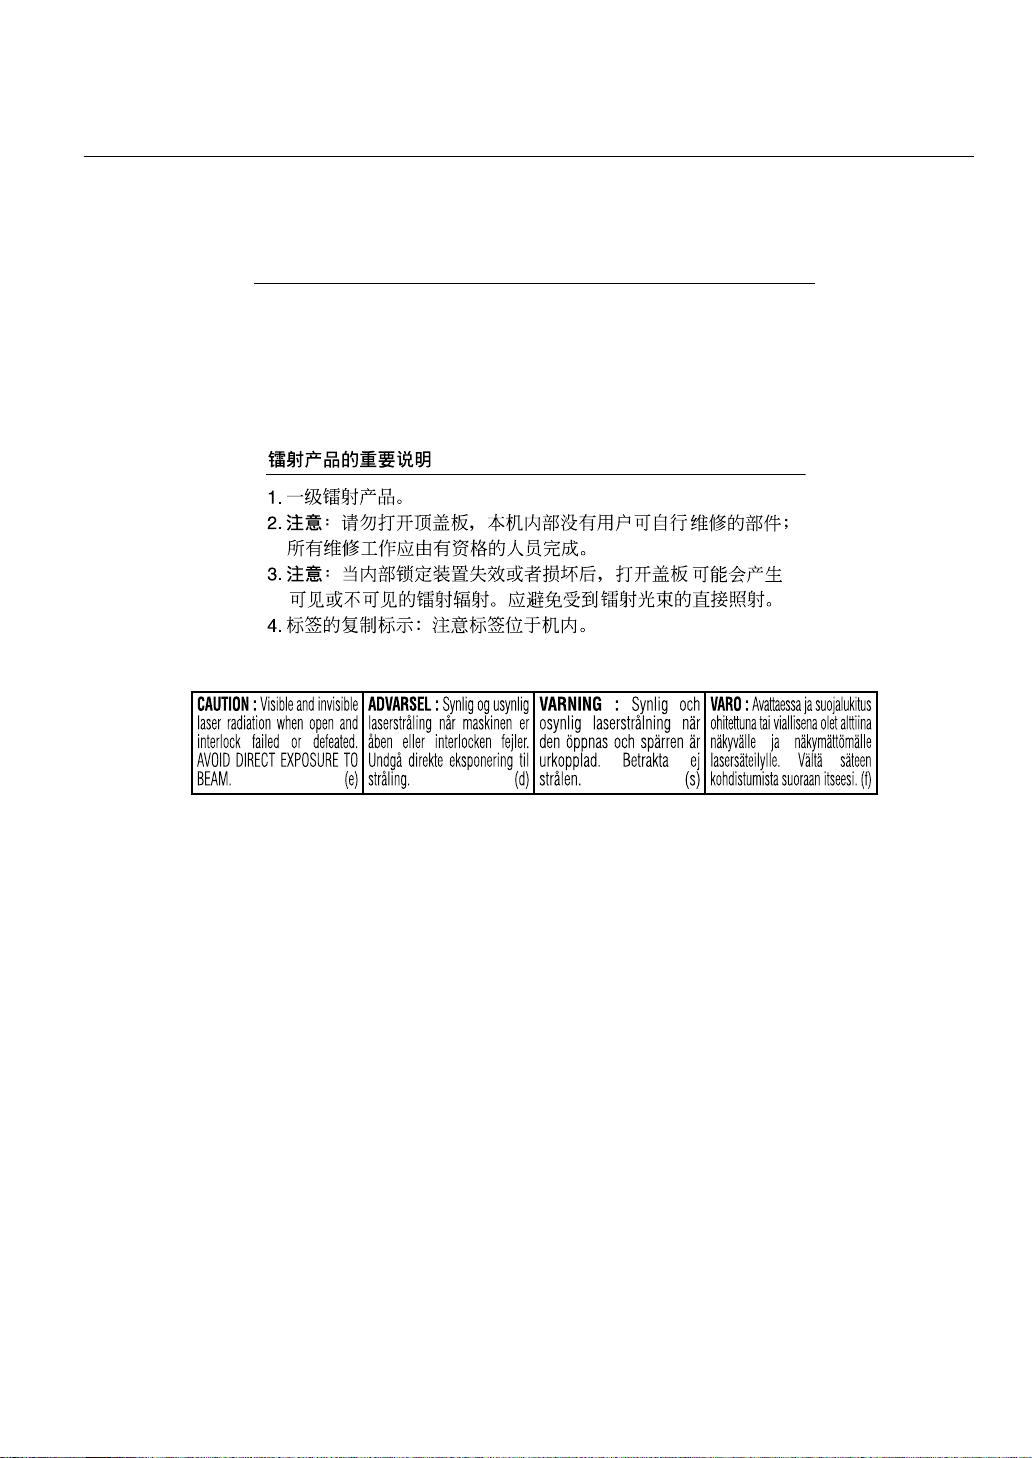
IMPORTANT FOR LASER PRODUCTS
1. CLASS 1 LASER PRODUCT
2.
CAUTION
inside the unit; leave all servicing to qualified service personnel.
3.
CAUTION
failed or defeated. Avoid direct exposure to beam.
4. REPRODUCTION OF LABEL: CAUTION LABEL, PLACED INSIDE UNIT.
: Do not open the top cover. There are no user serviceable parts
: Visible and invisible laser radiation when open and interlock
G-3
Page 5
Introduction
Precautions
Installation
• Install the System in a location with adequate ventilation to
prevent internal heat buildup in the System.
DO NOT install the System in a location near
heat sources, or in a place subject to direct
sunlight, excessive dust or vibration.
• Install in a place which is level, dry and neither too hot nor
too cold—between 5°C and 35°C.
• Leave sufficient distance between the System and the TV.
• Keep the speakers away from the TV to avoid interference
with TV.
Power sources
• When unplugging the System from the wall outlet, always
pull on the plug, not the AC power cord.
DO NOT handle the AC power cord with wet
hands.
Moisture condensation
Moisture may condense on the lenses inside the System in
the following cases:
• After starting to heat the room
• In a damp room
• If the System is brought directly from a cold to a warm
place.
Should this occur, the System may malfunction. In this case,
leave the System turned on for a few hours until the moisture
evaporates, unplug the AC power cord, then plug it in again.
Internal heat
• Make sure there is good ventilation around the unit. Poor
ventilation could overheat and damage the unit.
–A cooling fan is inside the unit to prevent heat buildup.
DO NOT block the ventilation openings or
holes. If they are blocked by a newspaper or
cloth, etc., the heat may not be able to get out.
Others
• Should any metallic object or liquid fall into the System,
unplug the AC power cord and consult your dealer before
operating any further.
DO NOT disassemble the System since there
are no user serviceable parts inside.
• If you are not going to operate the System for an extended
period of time, unplug the AC power cord from the wall
outlet.
If anything goes wrong, unplug the AC power cord and
consult your dealer.
Contents
Connections........................................................................ 3
Display Indication .............................................................6
Daily Operations—Playback............................................ 7
Canceling the Demonstration .......................................... 7
Listening to the Radio ..................................................... 8
Playing Back a Disc ........................................................ 9
Playing Back a Tape...................................................... 11
Daily Operations—Sound&Other Adjustments
Adjusting the Volume ................................................... 12
Reinforcing the Bass Sound .......................................... 12
Adjusting the Output Balance ....................................... 12
Selecting the Sound Modes ........................................... 13
Creating Your Own Sound Modes—User Mode .......... 13
Creating 3-dimensional Sound Field—3D Phonic........ 14
Presetting Automatic DVD Video Sound
Increase Level............................................................ 14
Changing the Color System and Scanning Mode.......... 14
Changing the Picture Tone............................................ 14
Changing the Display Brightness.................................. 15
Setting the Clock ........................................................... 15
Turning Off the Power Automatically .......................... 15
Unique DVD/VCD Operations....................................... 16
Selecting the Sound Track............................................. 16
Selecting the Subtitle Language.................................... 17
Selecting the View Angle.............................................. 17
Reviewing the Playback Quickly .................................. 17
Selecting Browsable Still Pictures ................................ 17
Playing Back Bonus Group ........................................... 18
Special Picture Playback ............................................... 18
Advanced Disc Operations ............................................. 19
Programming the Playing Order—Program Play.......... 19
Playing at Random—Random Play............................... 20
Playing Repeatedly—Repeat Play ................................ 21
Prohibiting Disc Ejection—Child Lock ........................ 21
On-Screen Disc Operations ............................................ 22
On-screen Bar Information............................................ 22
Operations Using the On-screen Bar............................. 23
Operations on the Control Screen ................................. 26
Recording Operations..................................................... 29
Enjoying Karaoke ...........................................................31
Singing Along (Karaoke) .............................................. 31
Reducing the Lead Vocal—Vocal Masking.................. 32
Scoring Your Karaoke Skill .......................................... 32
Reserving Karaoke Songs—Karaoke Program Play..... 33
Timer Operations............................................................ 34
Setup Menu Operations.................................................. 36
Operating the TV ............................................................38
Additional Information................................................... 39
Troubleshooting ............................................................ 42
Specifications ................................................................ 44
Parts Index ...................................................................... 46
............. 12
English
1
Page 6
English
Main Unit
ONLY
Playable Disc Types
DIGITAL VIDEO
DVD Logo is a trademark of DVD Format/Logo Licensing
Corporation.
• CD-R/-RW: Recorded in the Audio CD/Video CD/
SVCD formats and MP3/WMA/JPEG files.
• DVD-R: Recorded in the DVD Video format.
• DVD-RW: Recorded in the DVD Video format or the
Video Recording (DVD-VR) format.
• DVD-RAM: Recorded in the Video Recording (DVDVR) format.
In addition to the above discs, this system can play back
audio data recorded on CD Text, CD-G (CD Graphics), and
CD-Extra.
• The following discs cannot be played back:
DVD+R, DVD+RW, CD-I (CD-I Ready), Photo CD, etc.
Playing back these discs will generate noise and damage
the speakers.
• In this manual, “file” and “track” are interchangeably used
for MP3/WMA/JPEG operations.
Caution for DualDisc playback:
The Non-DVD side of a “DualDisc” does not comply
with the “Compact Disc Digital Audio” standard.
Therefore, the use of Non-DVD side of a DualDisc on
this product may not be recommended.
About color system
This System accommodates both NTSC and PAL system
and can play back discs recorded with either system.
To change the color system, see page 14.
Note on Region Code
This System can play back only DVD Videos whose Region
Code numbers include “3.”
EX.:
INFO
When playing a multi-channel encoded DVDs, the System
properly converts these multi-channel signals into 2
channels, and emits the downmixed sound from the main
speakers and matrix surround speakers.
•
To enjoy the powerful sound of these multi-channel
encoded DVDs,
connect a proper decoder or an amplifier
with a proper built-in decoder to the OPTICAL DIGITAL
OUTPUT terminal on the rear.
IMPORTANT: Before playing a disc, make sure of
the following...
• Turn on the TV and select an appropriate input mode on
the TV to view the pictures or on-screen displays.
• For disc playback, you can change the initial setting to
your preference. See “Setup Menu Operations” on
page 36.
If “ ” appears on the TV screen when you press a
button,
the disc cannot accept the operation you have
tried to do.
How to Read This Manual
• Button and control operations are explained as listed in the
table below.
•
Some related tips and notes are explained later in the
sections “Learning More about This System” and
“Troubleshooting,” but not in the same section
explaining the operations ( indicates that the
content has some information).
Indicates that you press the button
Indicates that you press the button
repeatedly
selected.
Indicates that you press one of the buttons.
2
Indicates that you
sec.
for a specified period.
The number inside the arrow indicates the
period of press (in the example, 2 seconds).
Indicates that you turn the control toward the
specified direction(s).
INFO
briefly.
briefly and
until an option you want is
press and hold
the button
Audio formats
The System can play back the following digital audio
formats.
•
LPCM
(Linear PCM),
DTS
(Digital Theater Systems),
Packing)
2
DIGITAL
MLP
(Dolby Digital),
(Meridian Lossless
Remote
ONLY
Indicates that this operation is only
possible using the remote control.
Indicates that this operation is only
possible using the main unit.
Page 7
Connections
Do not connect the AC power cord until all other
connections have been made.
• Connect VIDEO OUT directly to the video input of your
TV. Connecting VIDEO OUT to a TV via a VCR may
interfere with your viewing when playing back a copyprotected disc. Your viewing may be interfered when
connecting VIDEO OUT to an integrated TV/VCR system.
~ From the video input of TV/monitor
See page 4.
Ÿ From the digital input of digital audio
component such as CD recorder
See page 4.
! From the analog audio output of auxiliary
equipment (VCR, etc.)
See page 4.
⁄ From AM/FM antenna
See page 4.
Supplied accessories
English
• FM antenna (x1)
• AM loop antenna (x1)
• Composite video cord (x1)
• Remote control (x1)
• Batteries (x2)
• AC plug adapter (x1)
If any item is missing, consult your dealer immediately.
@ From the main front/matrix surround
speakers
See page 5.
¤ From the powered subwoofer
See page 5.
# Voltage selector
Before plugging in, confirm the position the
voltage selector points at. See page 5.
‹ To a wall outlet
Plug the AC power cord only after all
connections are complete.
• If the wall outlet does not match the AC plug,
use the supplied AC plug adapter.
3
Page 8
English
~
TV/monitor
Composite video
cord (supplied)
S video cord
(not supplied)
⁄
AM/FM antenna
To assemble the AM loop antenna
Green
Component video cord (not supplied)
• To select progressive scanning mode (see page 14), use
COMPONENT jacks.
• Connect the VIDEO jack, S-VIDEO jack, or
COMPONENT jacks whichever you want to use.
Ÿ
Digital audio component
OPTICAL
DIGITAL
OUTPUT
Protective cap
• Set “DIGITAL AUDIO OUTPUT” in the “AUDIO” menu
correctly according to the connected digital audio
equipment (see page 37). If setting is incorrect, loud noise
may be generated causing damage to the speakers.
!
Auxiliary equipment
Red
Blue
To connect AM/FM antenna
AM loop antenna (supplied)
Turn it until the best reception is
obtained.
FM antenna (supplied)
Extend it so that you can obtain the best
reception.
For better AM/FM reception
AM loop antenna (supplied)
Keep it connected.
Vinyl-covered wire (not supplied)
Extend it horizontally.
Stereo audio cord
(not supplied)
4
Red
White
FM outdoor antenna
(not supplied)
• Disconnect the supplied FM antenna, and connect to an
outdoor FM antenna using a 75
connector (IEC or DIN45325).
• Make sure the antenna conductors do not touch any other
terminals, connecting cords and power cord. Also, keep the
antennas away from metallic parts of the System,
connecting cords, and the AC power cord. This could cause
poor reception.
Ω
wire with coaxial type
Page 9
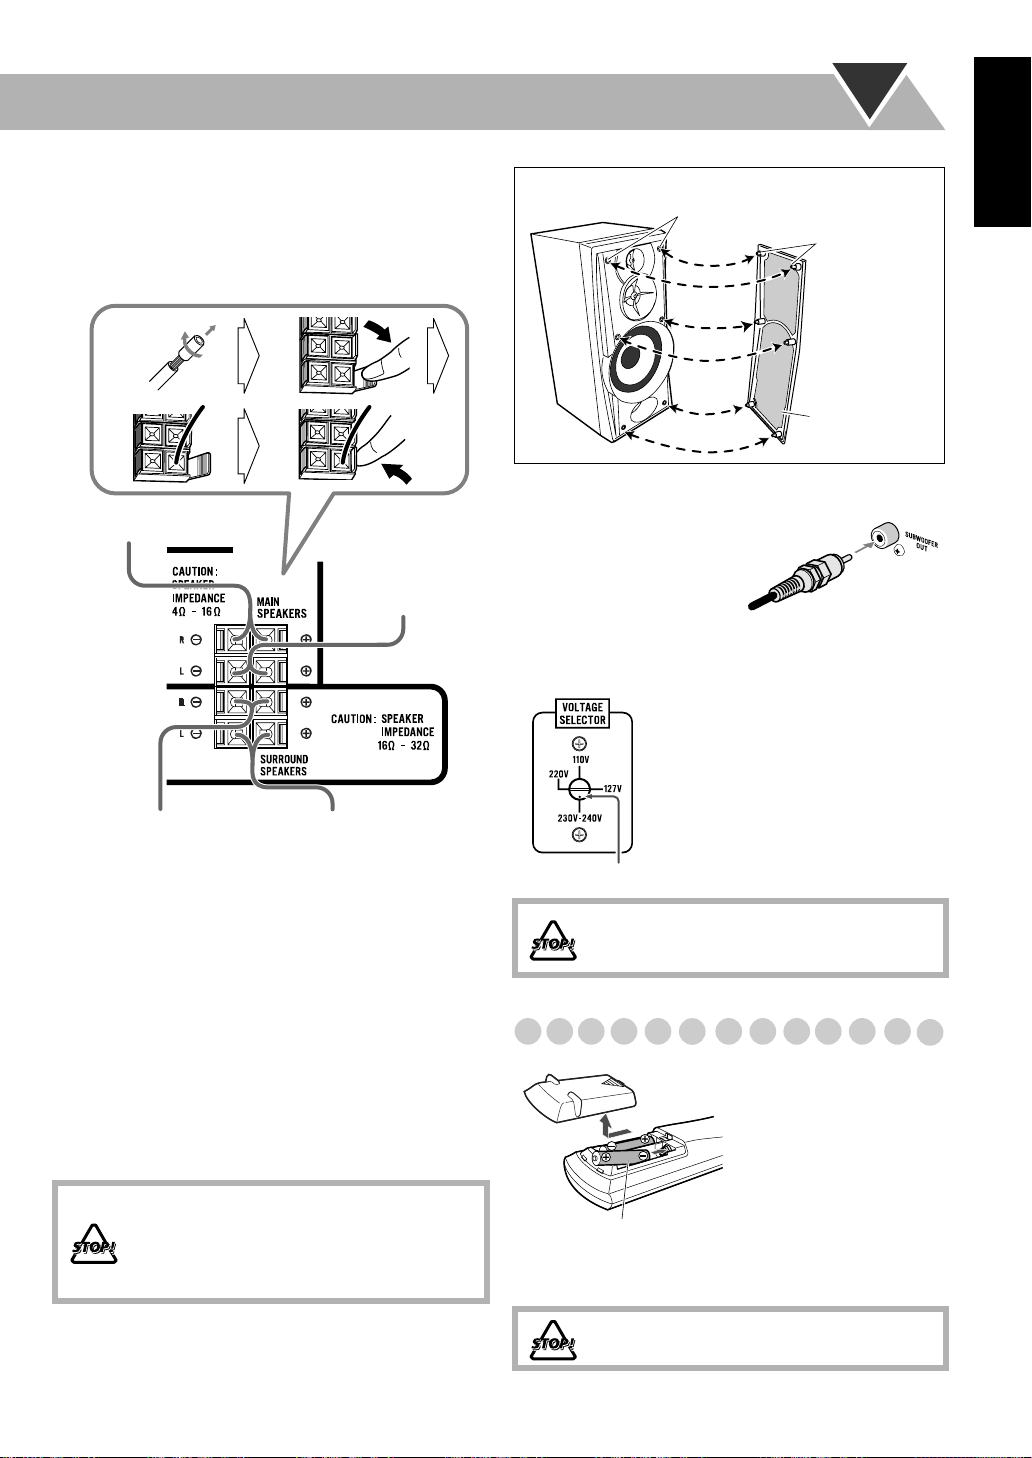
@
Front main speakers and matrix surround
speakers
• When connecting the speaker cords, match their polarity
with that of the speaker terminals: red/white to (+) and black
to (–).
12
To remove the speaker grilles of the main speakers
Holes
Projection
English
34
From right front main
speaker
From left front
main speaker
From right matrix
surround speaker
• Use only speakers with the same speaker impedance as
indicated by the speaker terminals on the rear of the System.
• The front main speakers are magnetically shielded to avoid
color distortions on TVs. However, if not installed properly,
it may cause color distortions. So, pay attention to the
following when installing the speakers.
– When placing the speakers near a TV set, turn off the
TV’s main power switch or unplug it before installing the
speakers.
Then wait at least 30 minutes before turning on the TV’s
main power switch again.
Some TVs may still be affected even though you have
followed the above instruction. If this happens, move the
speakers away from the TV.
• DO NOT connect more than one speaker to
each terminal.
• DO NOT push or pull the speakers as this
will damage the foot spacers at the bottom
of the speakers.
From left matrix
surround speaker
Speaker grille
Powered subwoofer
¤
From the powered subwoofer
(not supplied)
#
To adjust the voltage selector
Use a screwdriver to rotate the
voltage selector so that the voltage
mark is pointing at the same voltage
as where you are plugging in the unit.
(See also the back cover page.)
Voltage mark
DO NOT plug in before setting the voltage
selector and all connection procedures are
complete.
Preparing the remote control
When using the remote
control,
point the top of the
remote control toward the
remote sensor as directly as
possible. If you operate it
from a diagonal position,
the operating range (approx.
R6(SUM-3)/AA(15F)
• Dispose of batteries in the proper manner, according to
federal, state, and local regulations.
5 m) may be shorter.
DO NOT recharge, short, disassemble or
heat the battery or dispose of it in a fire.
5
Page 10
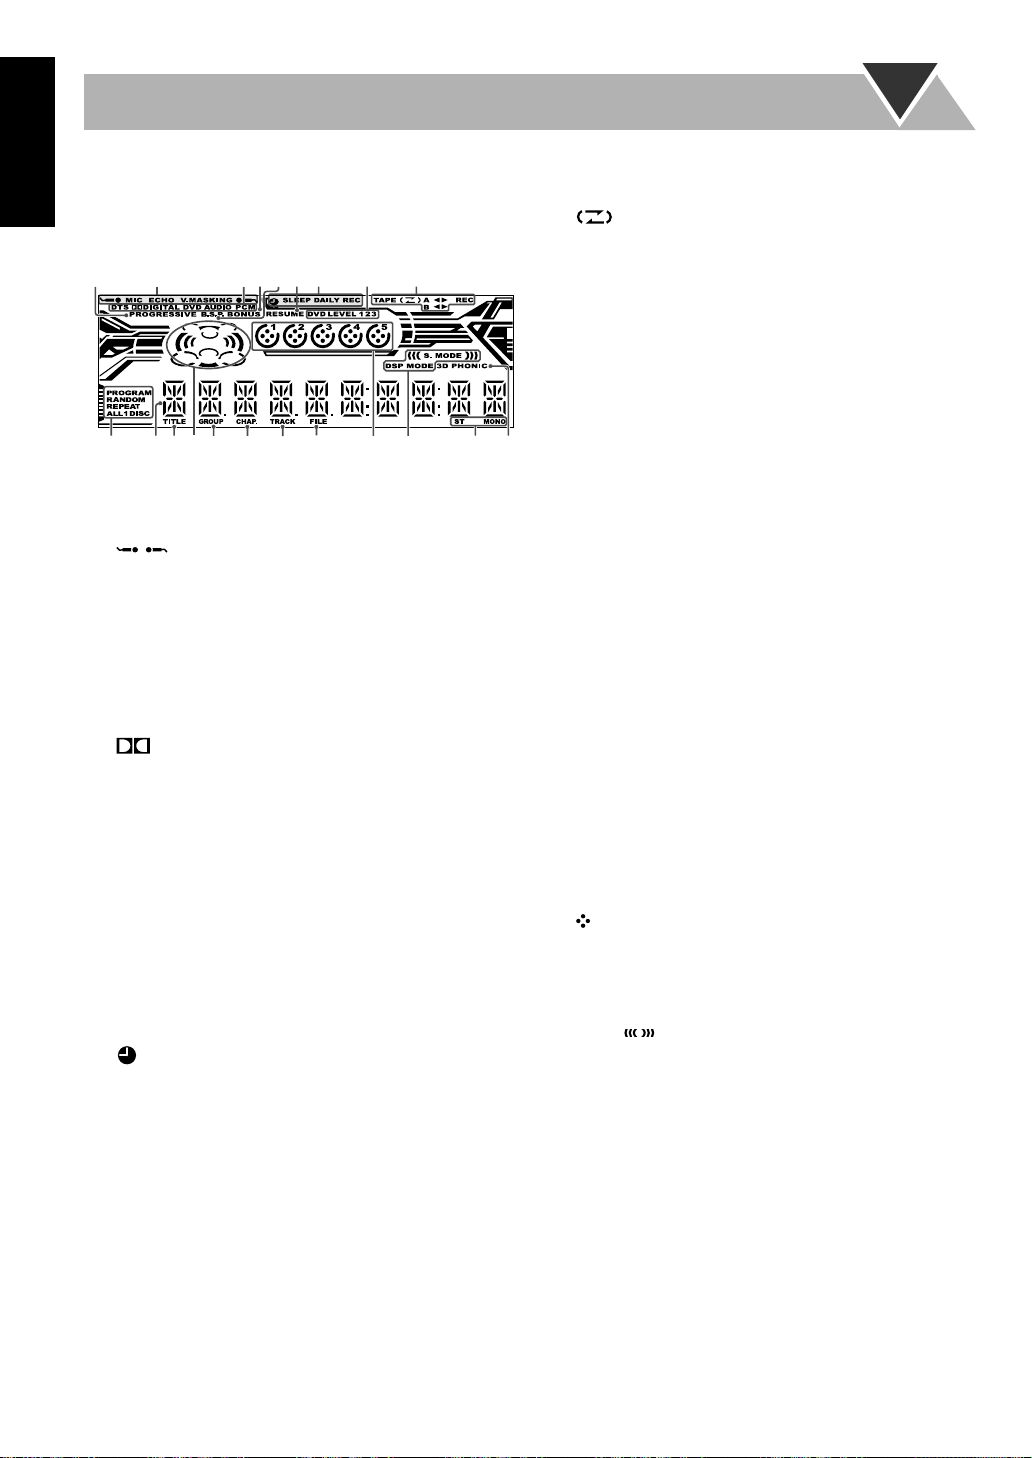
Display Indication
English
The indications on the display teach you a lot of things while
you are operating the System,
Before operating the System, be familiar with when and how
the indicator illuminates on the display.
13289
e
wpq
1
PROGRESSIVE indicator
• Lights when the progressive scanning mode is selected.
2
Karaoke operation indicators
•: lights when the Mic Mixing Mode is activated;
/
flashes when scoring function is in use.
• MIC: lights when the Mic Mixing Mode is activated;
flashes when scoring function is in use.
• ECHO: lights when the echo effect is activated.
• V.MASKING: lights when the Vocal Masking Mode is
activated.
3
Source signal indicators
• DTS: lights when a source signal is DTS.
• DIGITAL: lights when a source signal is Dolby
Digital.
• DVD: lights when DVD Video is detected.
• DVD AUDIO: lights when DVD Audio is detected.
• PCM: l
4
BONUS indicator
• Lights when DVD Audio with bonus group is detected
5
B.S.P. indicator
• Lights when browsable still pictures on DVD Audio are
6
RESUME indicator
• Lights when Resume is activated (see page 37).
7
Timer indicators
•: lights when Daily Timer or Recording Timer stands
• SLEEP: lights when the Sleep Timer is activated.
• DAILY: lights when the Daily Timer stands by; flashes
• REC: lights when the Recording Timer stands by; flashes
8
DVD LEVEL 1/2/3 indicators
• Lights to indicate the DVD Video increase level.
ights when a source signal is linear PCM.
(see page 18).
available (see page 17).
by or is working or being set.
while working or being set.
while working or being set.
r
45
t
76
yu
i
(see pages 31 to 33)
;o
a
9
Tape operation indicators
• TAPE: lights when a tape is loaded in either deck A or B.
• (Reverse Mode): lights to indicate the current
Reverse Mode (see page 11).
• A: lights when a tape is in the deck A.
• B: lights when a tape is in the deck B.
•
2 3
(tape direction):
– Lights to indicate the current tape running direction.
– Flashes slowly during playback and recording.
– Flashes quickly while rewinding a tape.
• REC: lights while recording.
p
Disc operation indicators
• PROGRAM: lights when Program Play is activated.
• RANDOM: lights when Random Play is activated.
• REPEAT: lights when Repeat Play is activated.
• ALL DISC: lights when All Disc Repeat is activated.
•1 DISC: lights when One Disc Repeat is activated.
• 1: lights when One Track/Chapter/Step Repeat is
activated.
q
Main display
w
TITLE indicator
• Lights to indicate the title number for DVD Video.
e
Audio signal indicators
• Lights to indicate the incoming audio channel signals.
r
GROUP indicator
• Lights to indicate the group number.
t
CHAP. indicator
• Lights to indicate the chapter number.
y
TRACK indicator
• Lights to indicate the track number.
u
FILE indicator
• Lights to indicate the file number.
i
Disc indicators
•1 – 5: lights to indicate the current disc tray.
•: lights when a disc is detected on the disc tray; rotates
during playback or paused.
o
Sound Mode indicators
• S.MODE: lights when one of the Sound Modes
(Surround/SEA/User Modes) is activated (for Surround
mode, also lights).
• DSP MODE: lights when one of the Surround Modes is
activated.
;
FM reception indicators
• ST (stereo): lights while an FM stereo station with
sufficient signal strength is tuned in.
• MONO: lights while receiving an FM stereo station in
monaural.
a
3D PHONIC indicator
• Lights when 3D Phonic is activated (see page 14).
(see page 13)
6
Page 11
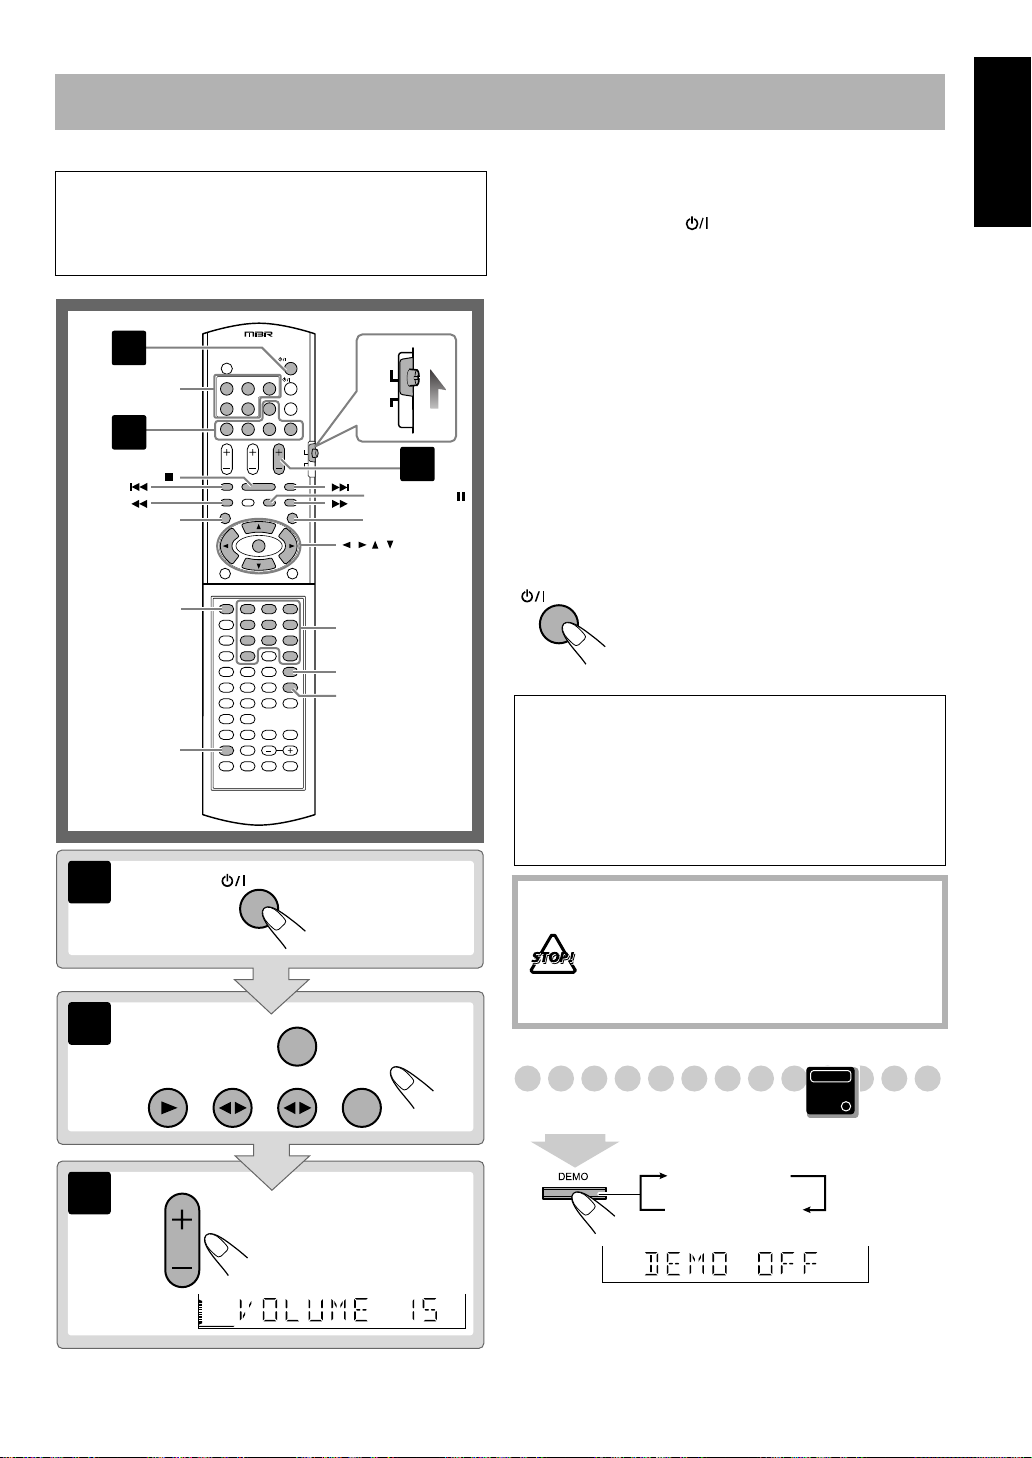
Daily Operations
—Playback
In this manual, the operation using the remote control
is mainly explained; however, you can use the buttons
and controls on the main unit if they have the same (or
similar) name and marks.
1
DISC 1 –
DISC 5
AUDIO
TV
2
3
FM MODE /
TOP MENU
GROUP/TITLE
SET
123
456
789
10 0 +10
MENU
////
ENTER
10 keys
RETURN
REVERSE
MODE
¥
Turn on the power.
The STANDBY lamp on the main unit goes off.
• Without pressing AUDIO, the System also turns
on by pressing one of the source select buttons in the
next step.
ø
Select the source.
Playback automatically starts if the selected source is
ready to start playback.
• If you press AUX, start playback source on the external
component.
π
Adjust the volume.
[
Operate the target source as explained
later.
To turn off (stand by) the system
AUDIO
For private listening
Connect a pair of headphones to the PHONES jack on the
main unit. The sound will no longer come out of the
speakers.
connecting or putting the headphones.
• Disconnecting the headphones will activate the
speakers again.
The STANDBY lamp on the main unit
lights in red.
•A small amount of power is always
consumed even while on standby.
Be sure to turn down the volume before
English
1
2
3
AUDIO
AUX
DVD/CD TAPE-A TAPE-B FM/AM
AUDIO VOL
DO NOT turn off (stand by) the System with
the volume set to an extremely high level;
Otherwise, the sudden blast of sound can
damage your hearing, speakers and/or
headphones when you turn on the System or
start playback.
Canceling the Demonstration
2
sec.
DEMO OFF
DEMO START
To start the demonstration,
select DEMO START.
Main Unit
ONLY
7
Page 12
English
SET
SET
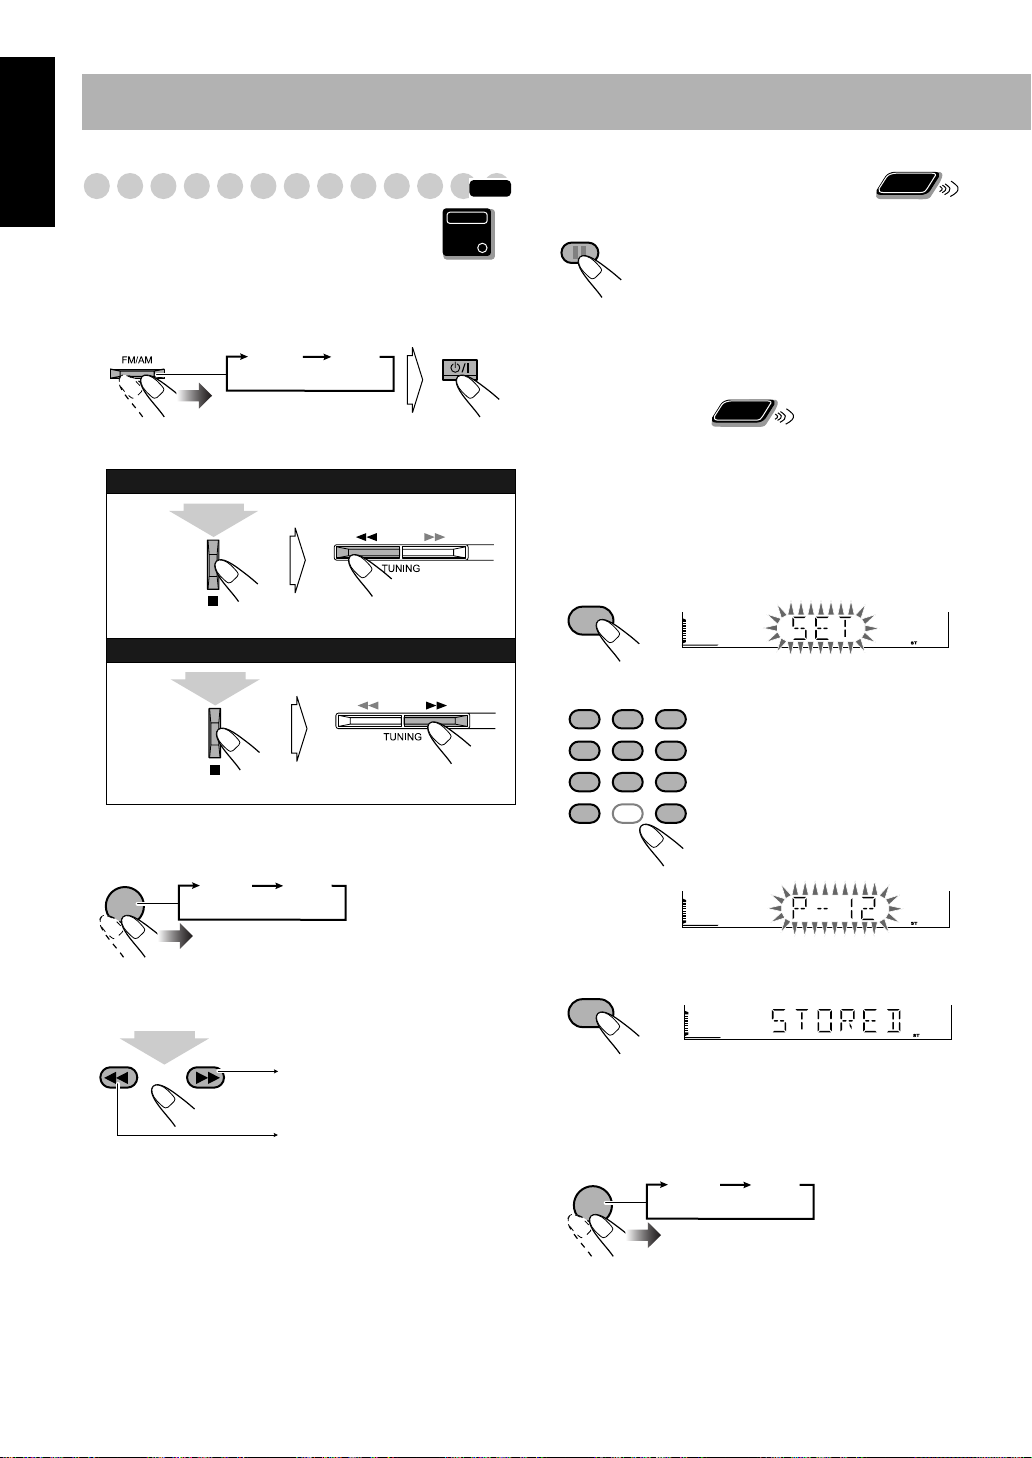
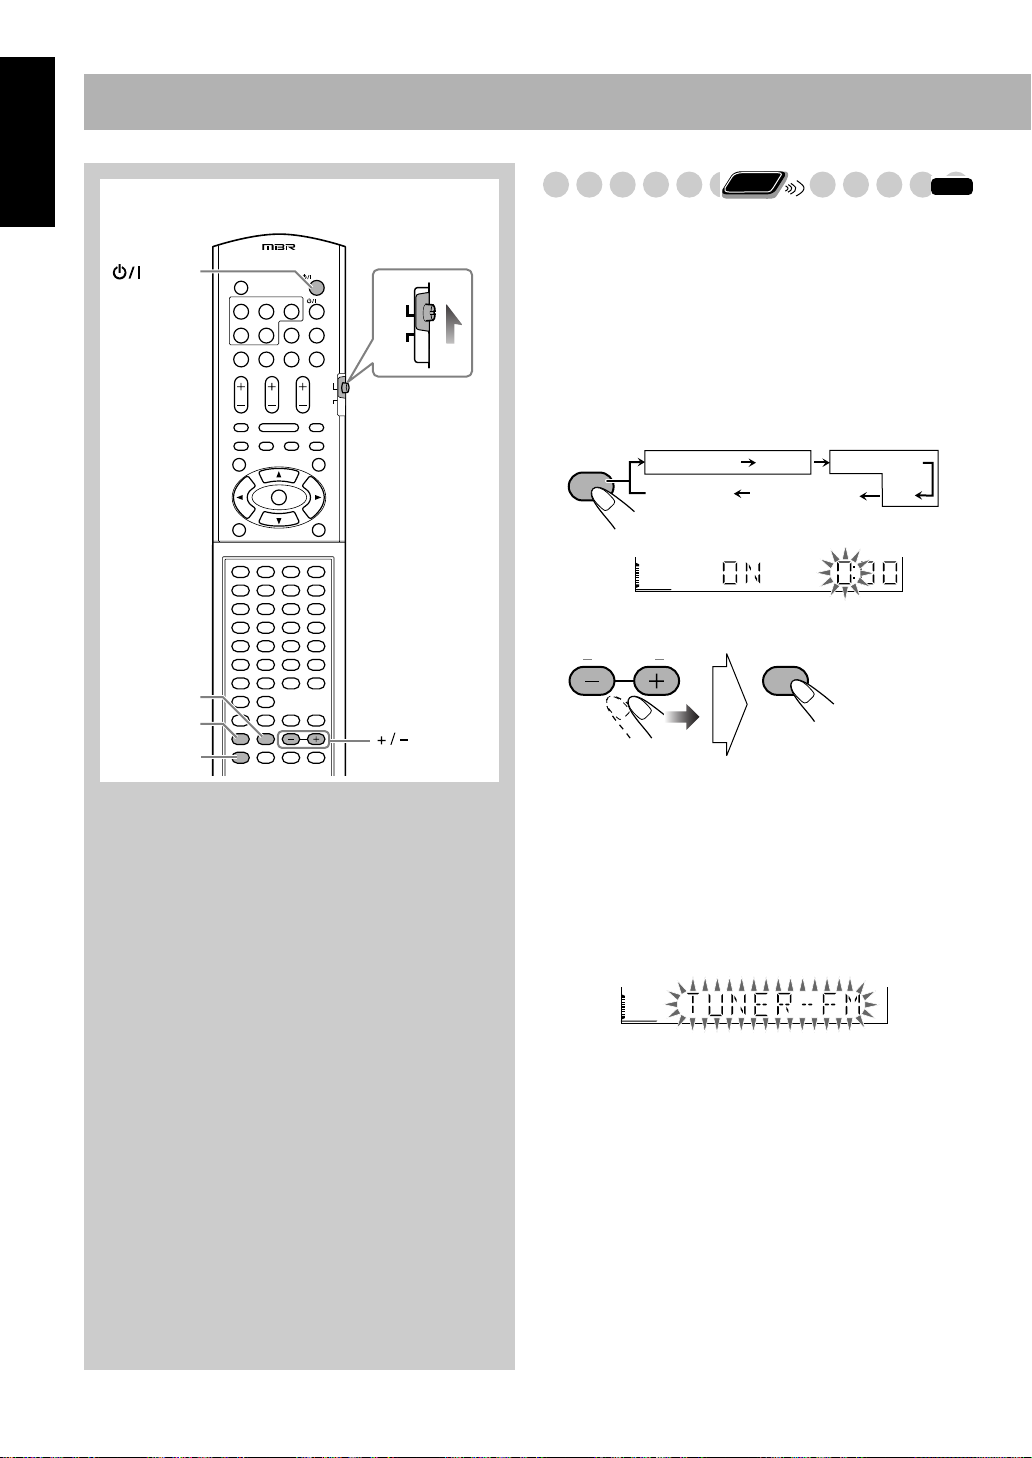
Listening to the Radio
To select the AM tuner interval spacing
Some countries space AM stations 9 kHz apart, and other
countries use 10 kHz spacing.
1
Select “AM,” then turn off (stand by) the System.
FM AM
2
Select the AM tuner interval spacing.
To select 9 kHz:
(holding then...)
To select 10 kHz:
(holding then...)
To select the band (FM/AM)
FM/AM
FM AM
Main Unit
ONLY
INFO
Remote
If the received FM station is hard to listen
FM MODE
The MONO indicator lights on the
display. Reception will improve though
ONLY
stereo effect is lost—monaural reception
mode.
To restore the stereo effect,
press the
button again (the MONO indicator goes
off).
Remote
To preset stations
ONLY
You can preset 30 FM and 15 AM stations.
• To cancel the operation during process, press CANCEL.
1
Tune in to a station you want to preset.
• You can also store the monaural reception mode for FM
preset stations if selected.
Start presetting.
2
3
Select a preset number.
123
456
789
10 0 +10
Examples:
To select preset number 5, press 5.
To select preset number 15, press +10,
then 5.
To select preset number 30, press +10,
+10, then 10.
• You can also use +/– buttons.
To tune in to a station
While FM or AM is selected...
1
sec.
Increases the frequencies.
Decreases the frequencies.
Frequency starts changing on the display.
When a station (frequency) with sufficient signal strength is
tuned in, the frequency search stops.
• When you repeatedly press the button, the frequency
changes step by step.
To stop searching manually,
press either button.
8
Store the station.
4
To tune in to a preset station
1
Select the band (FM or AM).
FM/AM
FM AM
Page 13

2
Select a preset number.
123
456
789
10 0 +10
Examples:
To select preset number 5, press 5.
To select preset number 15, press
+10, then 5.
To select preset number 30, press
+10, +10, then 10.
• You can also use 4/¢
buttons on the remote control or
PRESET +/– buttons on the main
unit.
Playing Back a Disc
INFO
Before operating a disc, be familiar how a disc is recorded.
• DVD Video comprises of “
“
Chapters,
“
Groups
“
Groups
comprise of only “
” DVD Audio/MP3/WMA comprise of
” which includes “
” which includes “
Tracks
Titles
” which includes
” JPEG comprises of
Tracks,
Files,
” and CD/SVCD/VCD
.”
• For JPEG playback, see page 27.
To insert discs
Main Unit
ONLY
On-screen guide icons
• During disc playback, the following icons may appear for
a while on the TV screen:
Appears at the beginning of a scene containing
multi-angle views.
Appears at the beginning of a scene containing
multi-audio languages.
Appears at the beginning of a scene containing
multi-subtitle languages.
• The following icons will be also shown on the TV screen
to indicate your current operation.
, , , , ,
• To deactivate the on-screen guide icons, see “ON
SCREEN GUIDE” on page 37.
To select a disc
DISC 1 DISC 2
DISC 4 DISC 5
DISC 3
Playback starts.
English
• When using an 8 cm disc, place it on the inner circle of the
disc tray.
To close the disc tray,
• If you press 3
for the same tray, the disc tray closes
press the same 0
again.
automatically and playback starts.
To start:
DVD/CD
Playback of the
current disc starts.
While playing DVD/SVCD/VCD/MP3:
To pause: To stop:
FM MODE
To release it, press
DVD/CD 3
.
This System can
store the stop point, and when you start playback again by
pressing DVD/CD 3
, it starts from the position where you
have stopped—Resume Play. (RESUME indicator lights up
when you stop playback.)
press 7
To stop completely while Resume is activated,
twice. (To cancel Resume, see “RESUME” on page 37.)
To select a title/group
While playing a disc...
123
GROUP/TITLE
456
789
10 0 +10
To select a chapter/track
While playing a disc...
or
• First time you press
4
, you can go back
to the beginning of the
current chapter/track.
Remote
ONLY
123
456
789
10 0 +10
9
Page 14
English
To locate a particular portion
While playing a disc except MP3/WMA...
7
For SVCD/VCD with PBC
While playing a disc with PBC, “PBC” appears on the
display instead of the playing time.
When disc menu appears on the TV screen, select an item on
the menu. Playback of the selected item starts.
• No sound comes out while searching on DVD Video/
SVCD/VCD.
To return to normal playback,
T
o select
an item directly
press DVD/CD 3
Remote
ONLY
.
You can select a title/chapter/track directly and start
playback.
• For DVD Video, you can select
playback
playback
, while you can select
.
123
456
789
10 0 +10
Examples:
To select number 5, press 5.
To select number 15, press +10,
then 5.
To select number 30, press +10,
+10, then 10.
To play back by using the disc menu
a title before starting
a chapter after starting
Remote
ONLY
You can operate the disc play using the disc menu.
123
456
789
10 0 +10
To move to the next or
previous page of the
Examples:
To select number 5, press 5.
To select number 15, press +10,
then 5.
To select number 30, press +10,
+10, then 10.
To return to the previous
menu:
current menu:
RETURN
To cancel PBC
You can also cancel PBC by pressing the 10 keys to start
playback when disc menu is not shown on the TV screen.
7
For DVD Video/DVD Audio
Show the disc menu.
1
TOP MENU/PG MENU/PL
Select an item on the disc menu.
2
or
ENTER
• On some discs, you can also select items by entering the
number using the 10 keys.
10
To reactivate PBC, press 7
, then press 4
.
Page 15
Playing Back a Tape
TAPE-A TAPE-B
To insert a tape
You can play back type I tapes.
• The use of C-120 or longer tape is not recommended.
To change the tape running direction
TAPE-A TAPE-B
3 (
2 (
forward
reverse
English
)
)
To start:
Push
Close
To stop:
Insert
To reverse the tape automatically
REVERSE
MODE
Tape is reversed, and playback repeats until
you stop it.
Tape is not reversed. When the current side of
the tape reaches its end, playback stops.
Tape is reversed once.
To playback the both decks A and B continuously
—Relay Play
When the cassettes are set in the both decks...
REVERSE
MODE
TAPE-A TAPE-B
To rewind tape:
You can start playback of either deck A or B.
11
Page 16
Daily Operations
—Sound&Other Adjustments
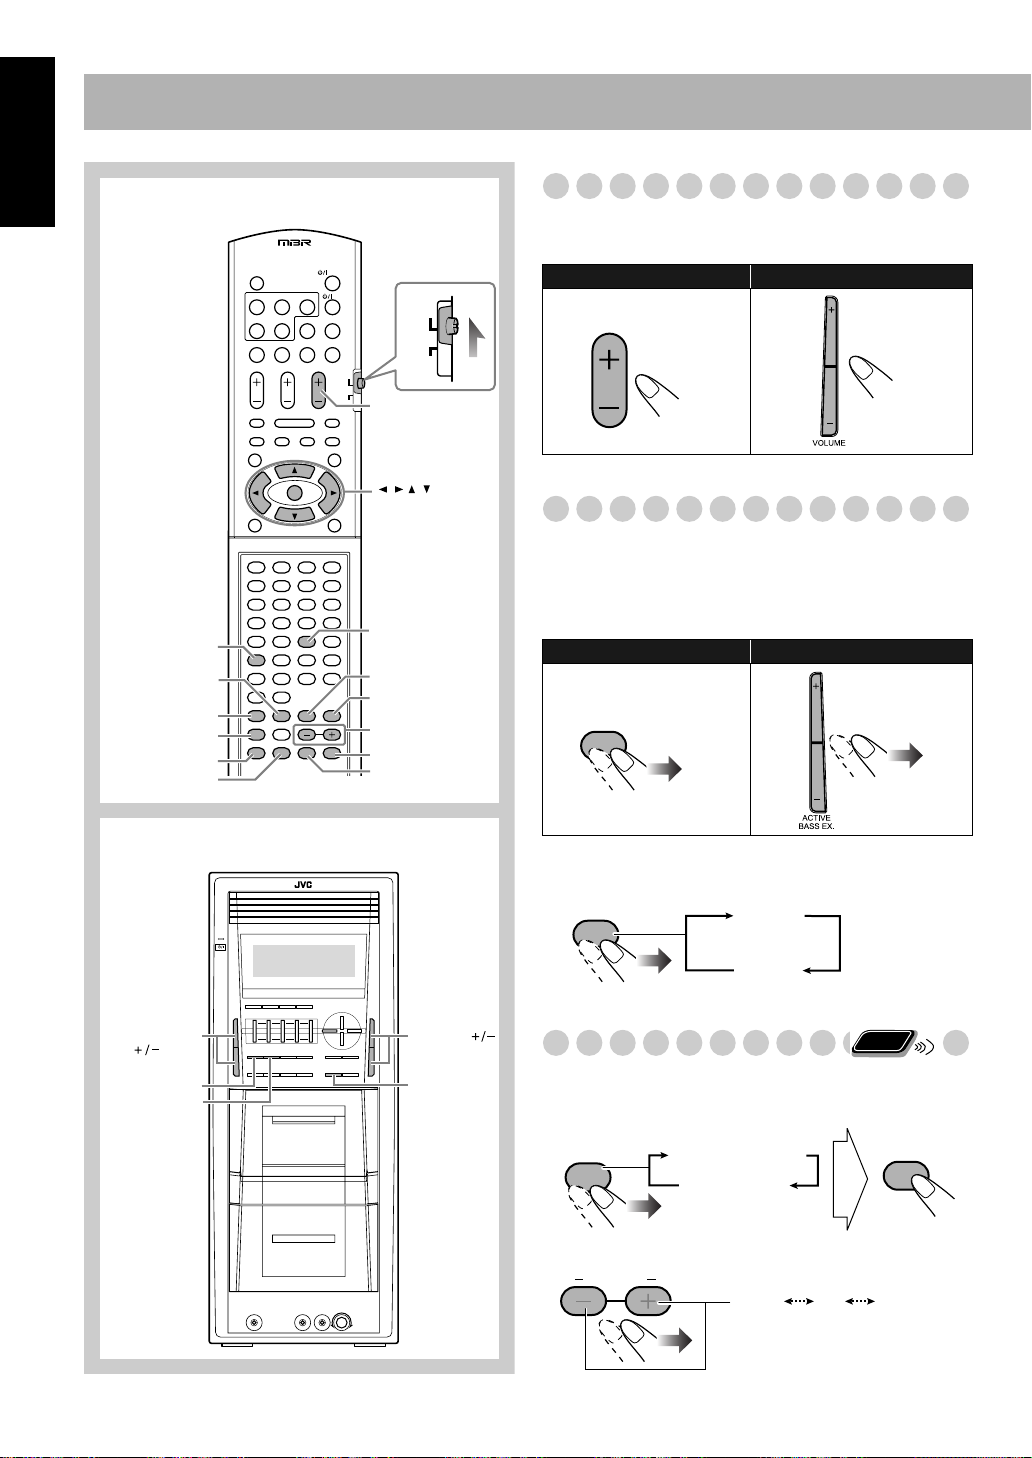
English
Remote Control
DVD LEVEL
ACTIVE
BASS EX.
RHYTHM AX
SET
CLOCK/TIMER
SLEEP
123
456
789
10 0 +10
AUDIO
TV
AUDIO VOL +/–
////
ENTER
VFP /
SCAN MODE
SOUND MODE
3D PHONIC
+/–
L/R BALANCE
SETTING
DIMMER
Adjusting the Volume
The volume level can be adjusted in 32 steps (VOLUME
MIN, VOLUME 1 – VOLUME 30, and VOLUME MAX).
Remote control:
AUDIO VOL
Main unit:
Reinforcing the Bass Sound
To adjust the bass level gradually—ACTIVE
BASS EX.
You can select the bass level from level 0 (minimum) to
level 2 (maximum).
Remote control: Main unit:
ACTIVE
BASS EX
Main unit
ACTIVE BASS
EX.
SOUND MODE
DVD LEVEL
12
VOLUME
RHYTHM AX
To emphasize rhythmical feeling—RHYTHM AX
This function emphasizes bass attack feeling.
RHYTHM AX
Adjusting the Output Balance
You can adjust the speaker output balance.
1
Enter the balance setting mode.
SETTING
2
Adjust the balance.
LRBALANCE
LR BALANCE
FANFARE
ON
OFF
R –6 L –60
Remote
ONLY
SET
Page 17

Selecting the Sound Modes
You can select one of the preset Sound Modes.
SEA Modes
SOUND
MODE
ROCK
STADIUM
Surround Modes*
POP CLASSIC
HALL
DANCE
MULTI
OFF
Remote
Creating Your Own Sound
ONLY
INFO
Modes—User Mode
You can adjust the preset Sound Modes to create your own
Sound Modes which suit your taste. The changed settings can
be stored as the USER1, USER2 and USER3 Modes.
• If you want to add surround elements into your Sound
Mode, select one of the Surround Modes to adjust.
English
SEA (Sound Effect Amplifier) Modes
ROCK
Boosts low and high frequency. Good for
acoustic music (initial setting).
POP
CLASSIC
Good for vocal music.
Good for classical music.
User Modes
USER1/2/3
Your individual mode stored in memory.
See the next column “Creating Your Own
Sound Modes—User Mode.”
Multi Mode
MULTI
Outputs the same sound from the
surround speakers as the sound output
from the main speakers.
Surround Modes*
DANCE
HALL
STADIUM
Increases resonance and bass.
Adds depth and brilliance to the sound.
Adds clarity and spreads the sound, as in
an outdoor stadium.
* Surround elements are added to the SEA elements to create
being-there feeling in your room.
To cancel the Sound Mode,
select “OFF.”
While the Sound Mode name is shown on the display...
Enter the SEA Control Mode.
1
SET
2
SET
3
Adjust the SEA pattern.
1
Adjust BASS.
2
Adjust TREBLE.
LRBALANCE
• You can adjust the bass and treble level from –5 to
+5.
4
Select one of the User Modes.
LRBALANCE
SET
USER1 USER2 USER3
5
Store the setting.
SET
• The Sound Mode changes to the one you have stored.
13
Page 18
English
Creating 3-dimensional Sound
Field—3D Phonic
While playing a disc...
3D PHONIC
3D PHONIC
3D PHONIC
3D ACTION
3D DRAMA
3D THEATER
ACTION
OFF
On the TV screen
Suitable for action movies and sports
programs.
Creates natural and warm sound. Enjoy
movies in a relaxed mood.
Enjoy sound effects like in a major
theater.
Remote
ONLY
3D PHONIC
3D PHONIC
DRAMA
THEATER
INFO
Changing the Color System and
Remote
Scanning Mode
ONLY
You can select the video output to match it to the color
system of your TV (NTSC or PAL).
• If you connect a progressive TV through the
COMPONENT jacks, you can enjoy a high quality picture
from the built-in DVD player by selecting progressive
scanning mode.
• You can change the setting only while the disc playback is
stopped.
1
Enter the color system setting mode.
4
sec.
SCAN MODE
VFP
Select the color system and scanning mode.
2
INFO
Presetting Automatic DVD Video Sound
Increase Level
The DVD Video sound is sometimes recorded at a lower
level than for other discs and sources. You can set the
increase level for the currently loaded DVD Video, so you
do not have to adjust the volume when you change the
source.
DVD LEVEL
As the number increases, sound level also increases.
• The initial setting is “DVD LEVEL3.”
DVD LEVEL1 DVD LEVEL2
DVD LEVEL3
LRBALANCE
NTSC / PAL
NTSC
PAL PROG
NTSC or PAL Interlaced scanning. For
PAL
NTSC PROG
a conventional PAL or NTSC TV.
NTSC / PAL
PROG
3
Store the setting.
SET
Changing the Picture Tone
NTSC or PAL Progressive scanning.
For a progressive NTSC or PAL TV.
Remote
ONLY
While viewing a playback pictures on the TV, you can select
the preset picture tone, or adjust it and store your own
preference.
To select a preset picture tone
1
While playing, display VFP setting screen.
SCAN MODE
VFP
NORMAL
GAMMA
BRIGHTNESS
CONTRAST
SATURATION
TINT
SHARPNESS
On the TV screen
0
0
0
0
0
0
14
Page 19
2
Select a preset picture tone.
NORMAL CINEMA
USER2 USER1
Changing the Display Brightness
DIMMER
DIMMER 1 DIMMER 2
DIMMER OFF
(Canceled)
Remote
ONLY
English
NORMAL
CINEMA
USER1/USER2
Normally select this.
Suitable for a movie source.
You can adjust parameters and can
store the settings (see below).
To adjust the picture tone
Select “USER1” or “USER2.”
1
• Follow steps 1 and 2 explained on the previous page.
2
Select a parameter you want to adjust.
ENTER
GAMMA
BRIGHTNESS
CONTRAST
SATURATION
TINT
SHARPNESS
3
Adjust the parameter.
4
Repeat steps 2 to 3 to adjust other parameters.
To erase the VFP screen,
Adjust if the neutral color is bright
or dark. The brightness of dark and
bright portions is maintained
(–3 to +3).
Adjust if the picture is bright or
dark as a whole (–8 to +8).
Adjust if the far and near position
is unnatural (–7 to +7).
Adjust if the picture is whitish or
blackish (–7 to +7).
Adjust if the human skin color is
unnatural (–7 to +7).
Adjust if the picture is indistinct
(–8 to +8).
ENTER
press VFP again.
DIMMER 1
Dims the display and the illumination
on the main unit*.
DIMMER 2
Dims the display (same as DIMMER 1)
and turns off the illumination on the
main unit*.
* Except for the RHYTHM AX and KARAOKE SCORING
lamps.
Remote
Setting the Clock
ONLY
INFO
Without setting the build-in clock, you cannot use any
timers.
• To exit from the clock setting, press CLOCK/TIMER as
required.
• To correct a misentry during the process, press CANCEL.
You can return to the previous step.
Activate clock setting mode.
1
CLOCK/
TIMER
• If you have already adjusted the clock before, press the
button repeatedly until the clock time starts flashing.
Adjust the hour, then minute.
2
LRBALANCE
SET
Now the built-in clock starts working.
Remote
Turning Off the Power Automatically
ONLY
With Sleep Timer, you can fall asleep while listening to
music.
1
Specify the time (in minutes).
SLEEP
2
Wait until the set time goes off.
10 20 30 60 90
Canceled
120150
To check the time remaining until the shut-off time
SLEEP
• If you press the button repeatedly, you can
change the shut-off time.
15
Page 20
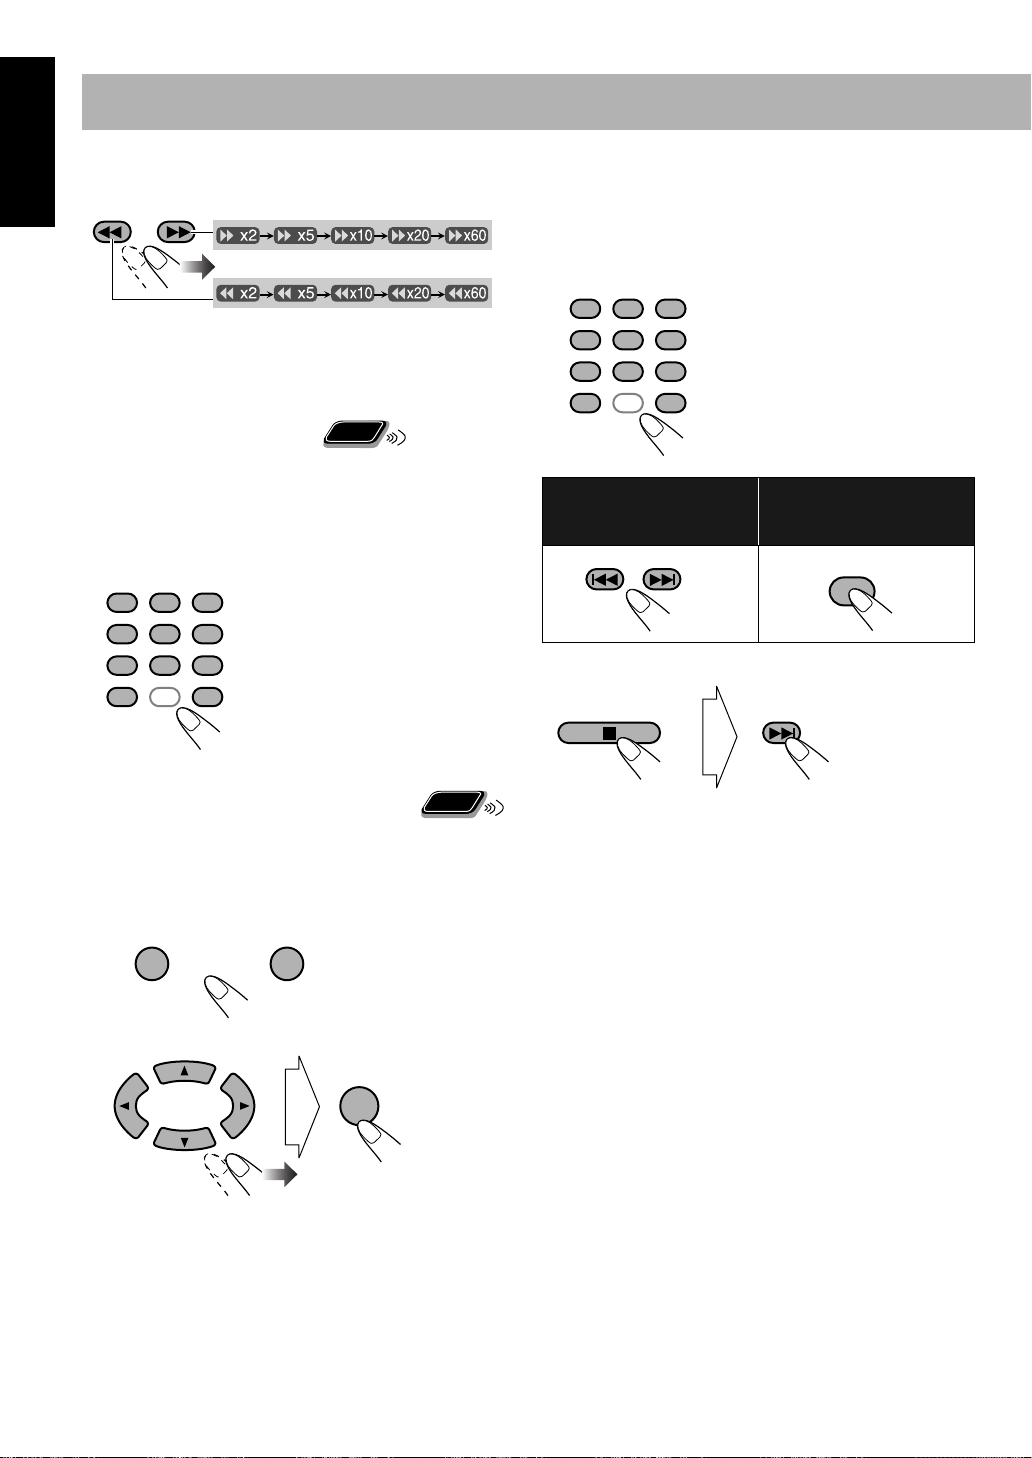
Unique DVD/VCD Operations
English
Remote Control
DVD/CD 3
GLANCE
BACK
AUDIO
SUB TITLE
ANGLE
ZOOM
PA GE
123
456
789
10 0 +10
AUDIO
TV
////
ENTER
10 keys
Remote
Selecting the Sound Track
For DVD Video:
While playing back a chapter containing
ONLY
INFO
audio languages, you can select the language to listen to.
For DVD Audio:
While playing back a track containing
audio channels, you can select the audio channel to listen to.
For DVD-VR/Karaoke SVCD/VCD:
When playing back a
track, you can select the audio channel to play.
• You can also select the audio track using the on-screen bar
(see page 23).
While playing DVD Video...
AUDIO
Ex.:
3/3
JAPANESE
3/3
JAPANESE
1/3
ENGLISH
1/3
ENGLISH
FRENCH
2/3
FRENCH
2/3
While playing a DVD-VR, SVCD, or VCD...
AUDIO
ST1/ST2/ST
ST1 ST2
L2
DVD-VR/VCD
ST L R
To listen to normal stereo (2 channel)
L1
R1R2
SVCD
playback.
L1/L2/L
R1/R2/R
To listen to the left audio channel.
To listen to the right audio channel.
• SVCD can have 4 audio channels. Karaoke SVCD usually
uses these 4 channels to record two 2-channel recordings
(ST1/ST2).
16
Page 21
Remote
Selecting the Subtitle Language
For DVD Video:
While playing back a chapter containing
ONLY
subtitles in different languages, you can select the subtitle
language to display on the TV screen.
For DVD-VR:
While playing, you can turn on or off the
subtitle.
For SVCD:
While playing, you can select the subtitles even
if no subtitles are recorded on the disc.
• You can also select the subtitle language using the onscreen bar (see page 23).
Remote
Selecting the View Angle
For DVD Video only:
While playing back a chapter
ONLY
containing multi-view angles, you can view the same scene
from different angles.
• You can also select the view angle using the on-screen bar
(see page 23).
While playing back...
ANGLE
English
While playing a DVD Video...
1
Display the subtitle selection window.
SUB TITLE
2
Select the subtitle language.
Ex.:
1/3 2/3
ENGLISH FRENCH JAPANESE
1/3
2/3
FRENCH JAPANESEENGLISH
While playing a DVD-VR...
SUB TITLE
3/3
JAPANESE
3/3
Ex.:
1/3
1
1/3
1
2/3
2
2/3
2
Reviewing the Playback Quickly
For DVD Video/DVD-VR only:
You can move the
3/3
3
3/3
3
Remote
ONLY
playback position to 10 seconds before the current position
(only within the same title)—Glance Back.
While playing back...
GLANCE BACK
Remote
Selecting Browsable Still Pictures
ONLY
ON
ON
OFF
OFF
While playing an SVCD...
SUB TITLE
For DVD Audio only:
While playing back a track linked to
browsable still pictures (B.S.P.), you can select the still
picture (turn the page) to be shown on the TV screen.
• If a track is linked to browsable still pictures (B.S.P.), they
are usually shown in turn automatically during playback.
• You can also select the page using the on-screen bar (see
page 23).
PAG E
Each time you press the button, the still
picture changes one after another (if
available).
17
Page 22
English
Playing Back Bonus Group
For DVD Audio only:
Some DVD Audios have a special
Remote
ONLY
group called “bonus group” whose contents are not open to
the public.
• To play back a bonus group, you have to enter the specific
“key number” (a kind of password) for the bonus group.
The way of getting the key number depends on the disc.
1
Select the bonus group.
• The bonus group is usually recorded as the last group
(for example, if a disc contains 4 groups including a
bonus group, “group 4” is the bonus group).
• For how to select the group, see “To select a title/group”
on page 9.
Enter the key number.
2
123
456
789
10 0 +10
Follow the interactive instruction shown on the TV
3
ENTER
screen.
To cancel the key number entry,
press 7
.
INFO
Slow-motion playback
While playing...
1
FM MODE
Still picture playback starts.
Select slow motion speed.
2
1/32 1/16 1/8 1/4 1/2
1/32 1/16 1/8 1/4 1/2
* Not available for DVD-VR/SVCD/VCD.
To resume normal playback,
Remote
m
ZOOM
ONLY
ZOOM 1 ZOOM 2 ZOOM 3 ZOOM 4
ZOOM OFF
Zoo
1
While playing...
press DVD/CD 3
.
ZOOM 5ZOOM 6
Special Picture Playback
Still picture playback
While playing...
FM MODE
Still picture playback starts.
To resume normal playback,
Frame-by-frame playback
1
While playing...
FM MODE
Still picture playback starts.
Advance the still picture frame by frame.
2
FM MODE
To resume normal playback,
press DVD/CD 3
press DVD/CD 3
INFO
As the number increases, magnification also increases.
• For JPEG, see page 28.
2
Move the zoomed-in position.
.
To resume normal playback,
press ZOOM repeatedly until
“ZOOM OFF” appears on the TV screen.
.
18
Page 23
Advanced Disc Operations
Remote Control
DVD/CD 3
REPEAT
CANCEL
Main unit
DVD/CD
123
456
789
10 0 +10
AUDIO
TV
////
10 keys
PLAY MODE
Remote
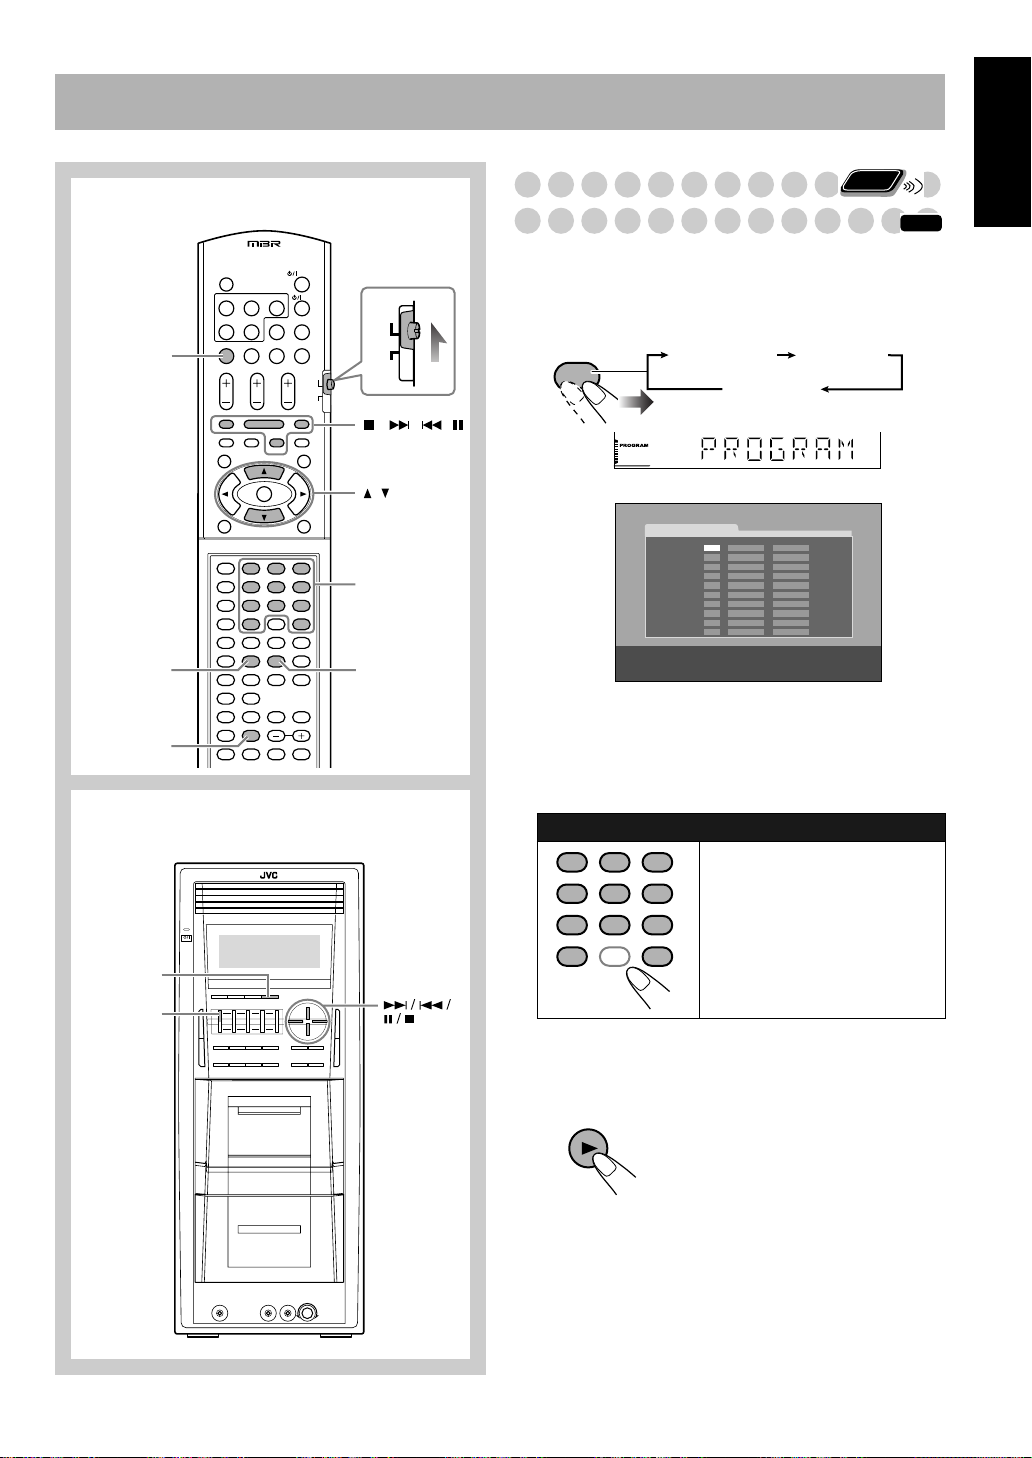
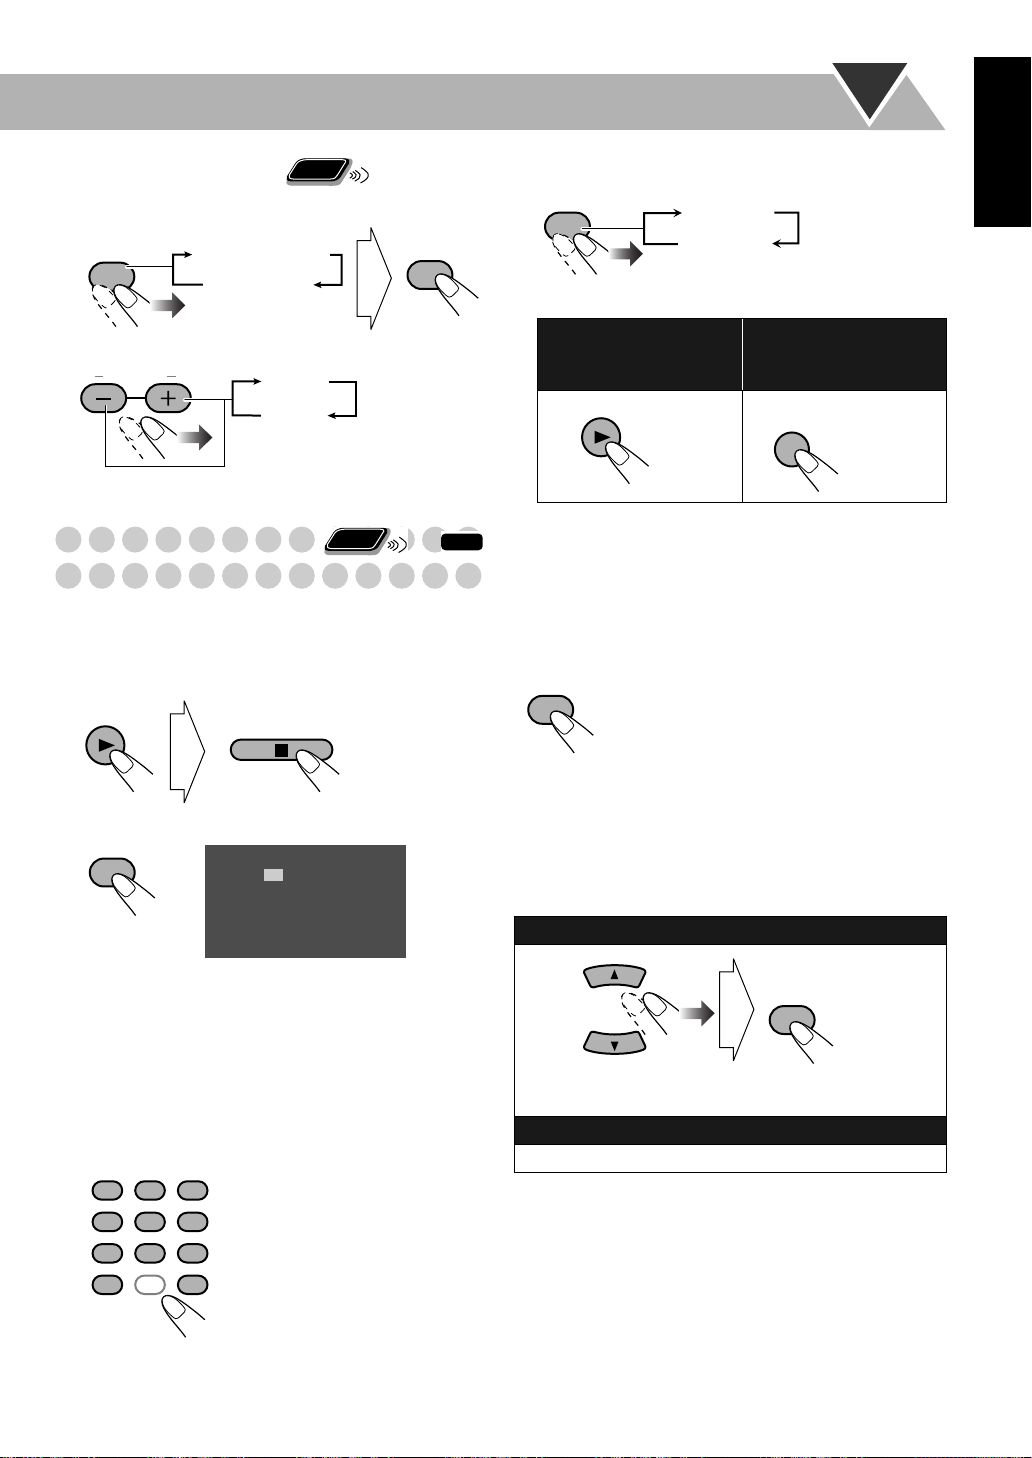
Programming the Playing Order
—Program Play
ONLY
INFO
You can arrange the playing order of the tracks (up to 99)
before you start playback.
1
Before starting playback, activate Program Play.
PLAY MODE
PROGRAM RANDOM
Canceled
On the display
PROGRAM
No Group/TitleDisc Track/Chapter
1
2
3
4
5
6
7
8
9
10
USE NUMERIC KEYS TO PROGRAM TRACKS.
USE CANCEL TO DELETE THE PROGRAM.
On the TV screen
Select chapters or tracks you want for Program Play.
2
1
Select a disc number.
2
Select a title or group number.
3
Select a chapter or track number.
To enter the numbers:
123
456
789
10 0 +10
Examples:
To enter number 5, press 5.
To enter number 15, press +10,
then 5.
To enter number 30, press +10,
+10, then 10.
English
DISC 1 0
3
Repeat the above step 2 until you finish what you want
to program.
4
Start playback.
DVD/CD
Playback starts in the order you
have programmed.
19
Page 24

English
To skip a track:
To pause: To stop*:
FM MODE
To release, press
DVD/CD 3
* Resume does not work for Program Play.
To check the programmed contents
Before or after playback...
in the reverse order
in the programmed order
To modify the program
Before or after playback...
To erase the last step:
CANCEL
.
Remote
ONLY
To erase the entire
program:
Remote
Playing at Random—Random Play
ONLY
You can play the contents of all the loaded discs at random.
• Random Play cannot be used for some DVDs.
1
Before starting playback, activate Random Play.
PLAY MODE
PROGRAM RANDOM
Canceled
2
Start playback.
DVD/CD
To skip:
Playback of the current disc
starts in a random order. When
all chapters/tracks on the current
disc are played, playback of the
next disc starts. Random Play
ends when all loaded discs are
played.
To pause: To stop:
FM MODE
To add steps in the program:
Repeat step 2 on page 19.
To exit from Program Play
Before or after playback...
PLAY MODE
PROGRAM RANDOM
Canceled
To go to the
beginning of the
current track,
press 4
.
To release, press
DVD/CD 3
To exit from Random Play
Before or after playback...
PLAY MODE
PROGRAM RANDOM
.
Canceled
20
Page 25
Remote
Playing Repeatedly—Repeat Play
ONLY
You can repeat playback.
• You can also select the repeat mode using the on-screen bar
(see page 23).
• The indicator(s) lights on the display as follows to indicate
the current repeat mode.
•
For DVD Video:
While playing...
REPEAT
REPEAT 1 REPEAT
Canceled
REPEAT ALL DISC
REPEAT 1
REPEAT
REPEAT 1
DISC
*
REPEAT ALL
DISC
*
REPEAT ALL
Repeats the current chapter/track.
Repeats the current title/group.
Repeats the current disc.
Repeats all discs.
Repeats all programmed tracks.
* These modes may not work correctly for DVD Video.
English
•
For DVD Audio:
While playing or before playback...
REPEAT
For MP3/WMA:
•
REPEAT 1 REPEAT
Canceled
REPEAT ALL DISC
While playing or before playback...
REPEAT
For CD/SVCD/VCD:
•
REPEAT 1 REPEAT
Canceled
REPEAT ALL DISC
REPEAT 1 DISC
While playing or before playback (without PBC for SVCD/
VCD)...
REPEAT
•
For Random Play:
REPEAT 1
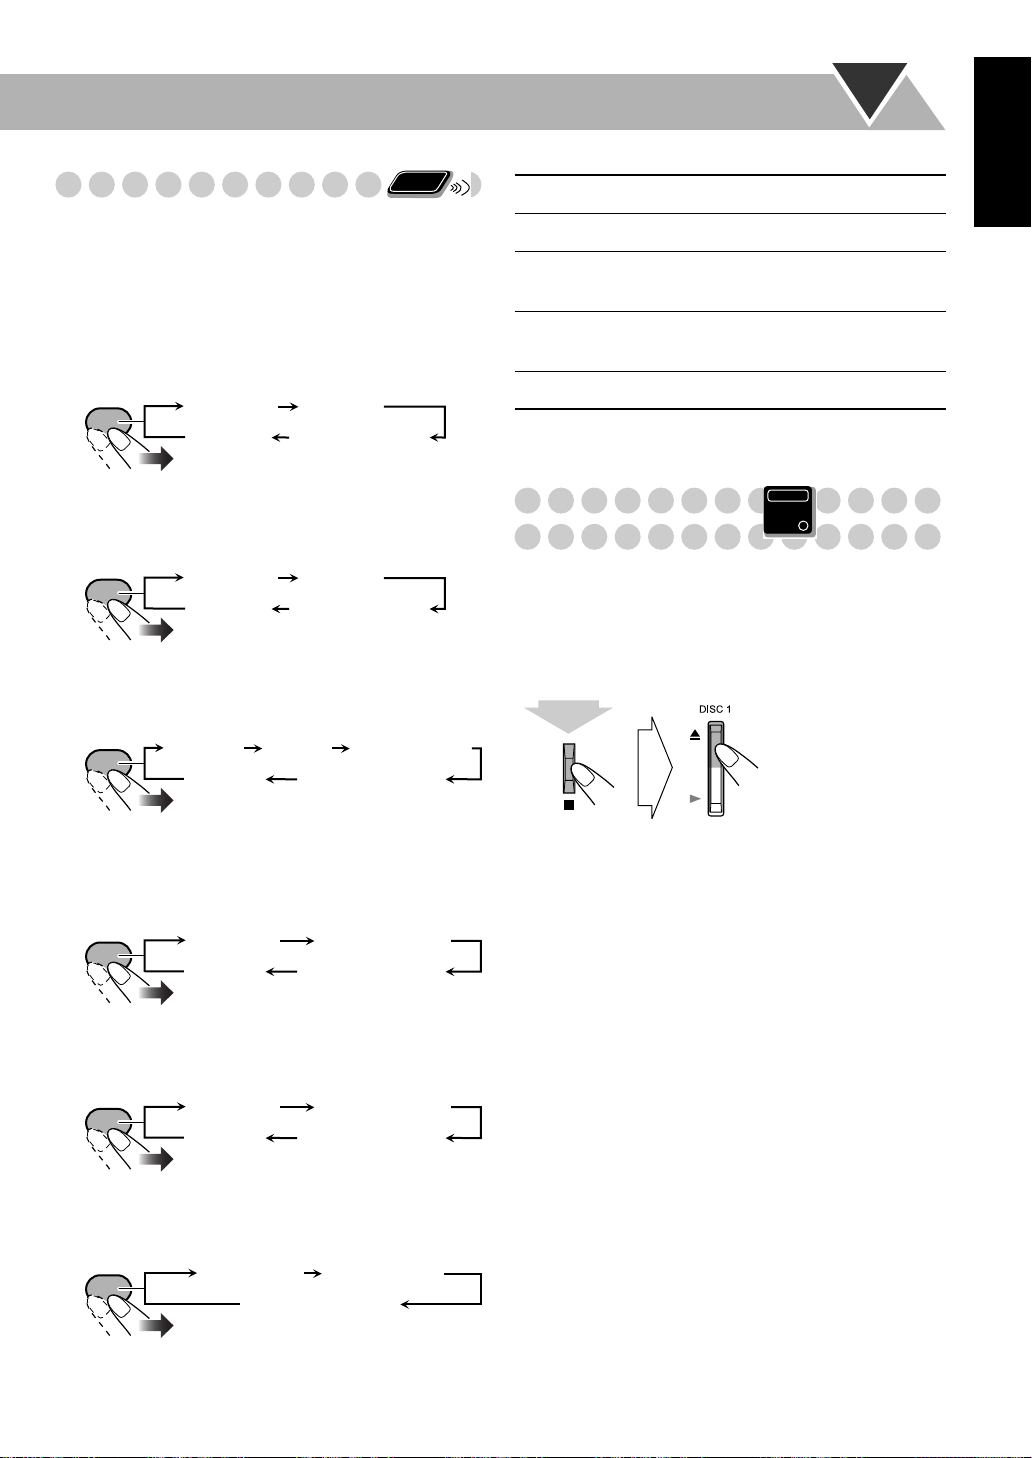
Canceled
REPEAT 1 DISC
REPEAT ALL DISC
While playing or before playback...
REPEAT
REPEAT 1
Canceled
REPEAT 1 DISC
REPEAT ALL DISC
Prohibiting Disc Ejection
Main Unit
ONLY
—Child Lock
You can lock the disc trays so that no one can eject the
loaded discs.
• This operation is possible only when the source is the disc
player.
While in standby mode...
(holding then...)
To cancel the prohibition,
“UNLOCKED” appears on the display.
repeat the same procedure.
•
For Program Play:
While playing or before playback...
REPEAT
REPEAT 1
Canceled
REPEAT ALL
21
Page 26
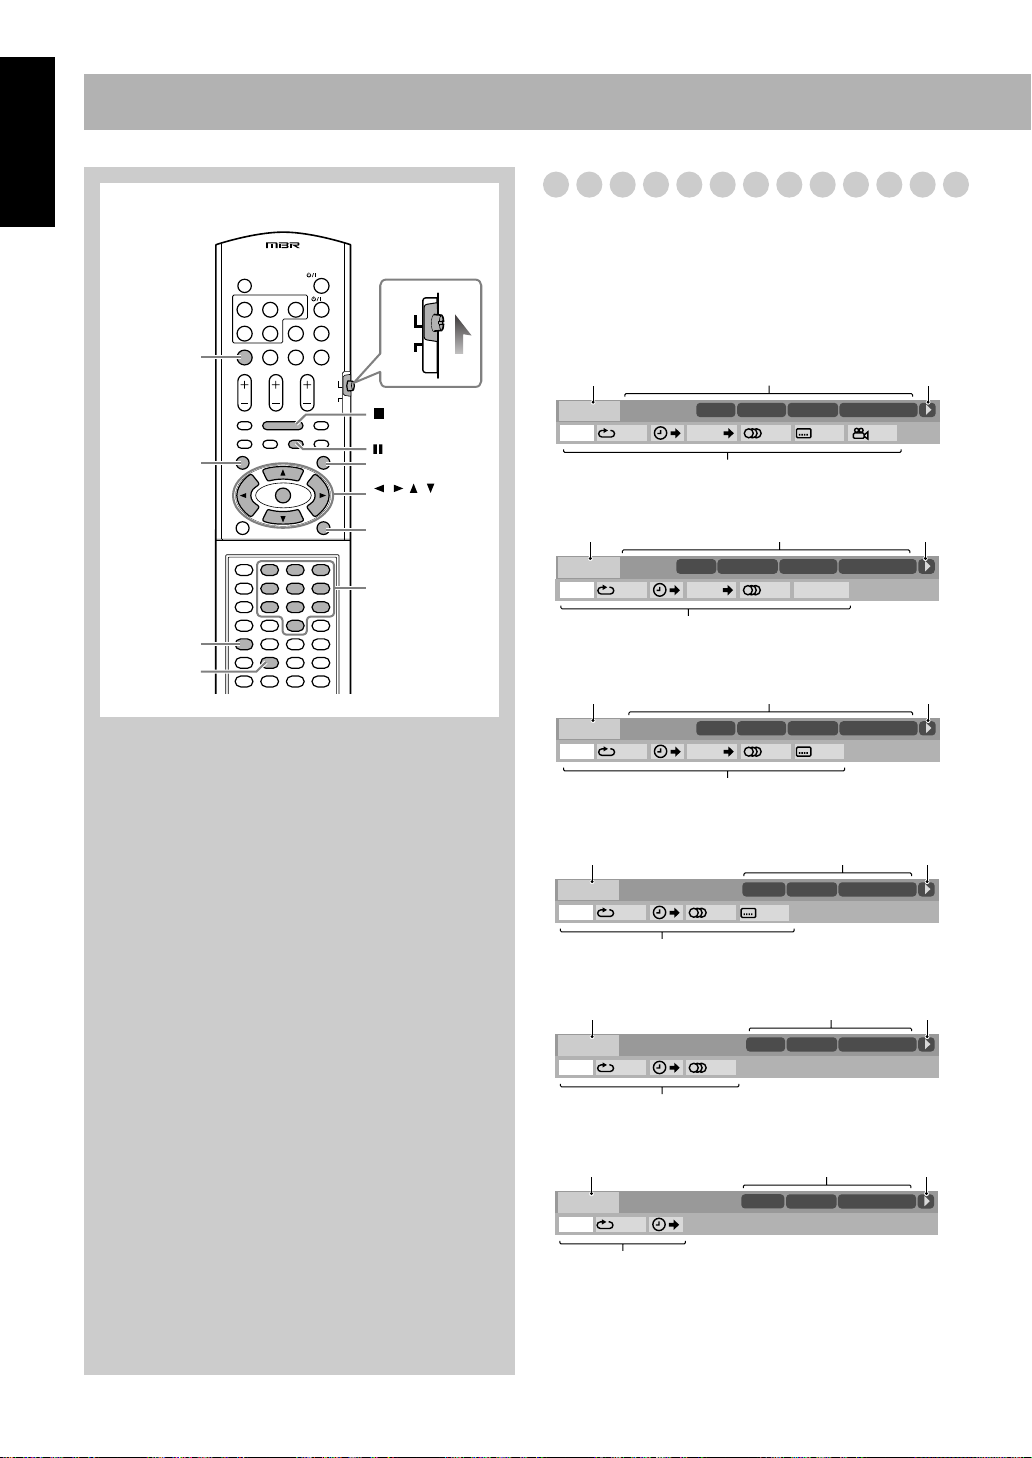
On-Screen Disc Operations
English
Remote control
DVD/CD 3
PG
ZOOM
REPEAT
123
456
789
10 0 +10
AUDIO
TV
PL
////
ENTER
ON SCREEN
10 keys
On-screen Bar Information
You can check the information on disc (except for MP3/
WMA/JPEG disc) and use some functions through the onscreen bar.
On-screen bars
DVD Video
12
DVD-VIDEO
TIME OFF CHAP. 1/31/31/1
Dolby D
3/2.1ch
DISC 1
TITLE 2
CHAP 3
TOTAL 1:01:58
4
DVD Audio
12
DVD-AUDIO
TIME
PPCM
3/2.1ch
OFF
DISC 2
TRACK
GROUP 14
1/31/3
TRACK 23
PAGE
TIME 0:15:58
4
DVD-VR
12
DVD-VR
TIME OFF CHAP. ST ON
Dolby D
2/0.0ch
DISC 1
PG 2
CHAP 3
TOTAL 0:01:58
3
3
3
4
SVCD
12
TIME 0:04:58
TRACK 3
DISC
SVCD
TIME OFF ST1
3
-/ 4
3
4
VCD
12
TIME 0:04:58
VCD
TIME OFF ST
TRACK 3DISC 4
3
4
CD
12
TIME 0:04:58
TRACK 3
CD
TIME OFF
DISC 5
3
4
22
Page 27
1
Disc type
2
Playback information
Indication Meanings
Dolby D/
Audio format
PPCM
3/2.1 ch/
Channel number
2.0/0 ch
DISC
1
TITLE
2
CHAP
3
GROUP 1
TRACK
PG 2
PL 2
TOTAL
1:25:58
3
Playback conditions
14
Current disc
Current title
Current chapter
Current group
Current track
Current title
Current play list
Time indications
Indication Meanings
Playback
/ Forward/Reverse search
/ Forward/Reverse slow-motion
Pause
Stop
4
Operation icons (on the pull-down menu)
Indication Meanings
TIME
Select to change the time indication
(see also page 24).
Select to repeat playback (see also
pages 21, 24 and 25).
Select for time search (see also
page 25).
CHAP.
Select for chapter search (see also
page 26).
TRACK
Select for track search (see also
page 26).
1/3
Select to change the audio language or
channel (see also page 16).
1/3
Select to change subtitle language (see
also page 17).
1/3
Select to change view angle (see also
page 17).
PA GE 1/15
Select to change the page (see also
page 17).
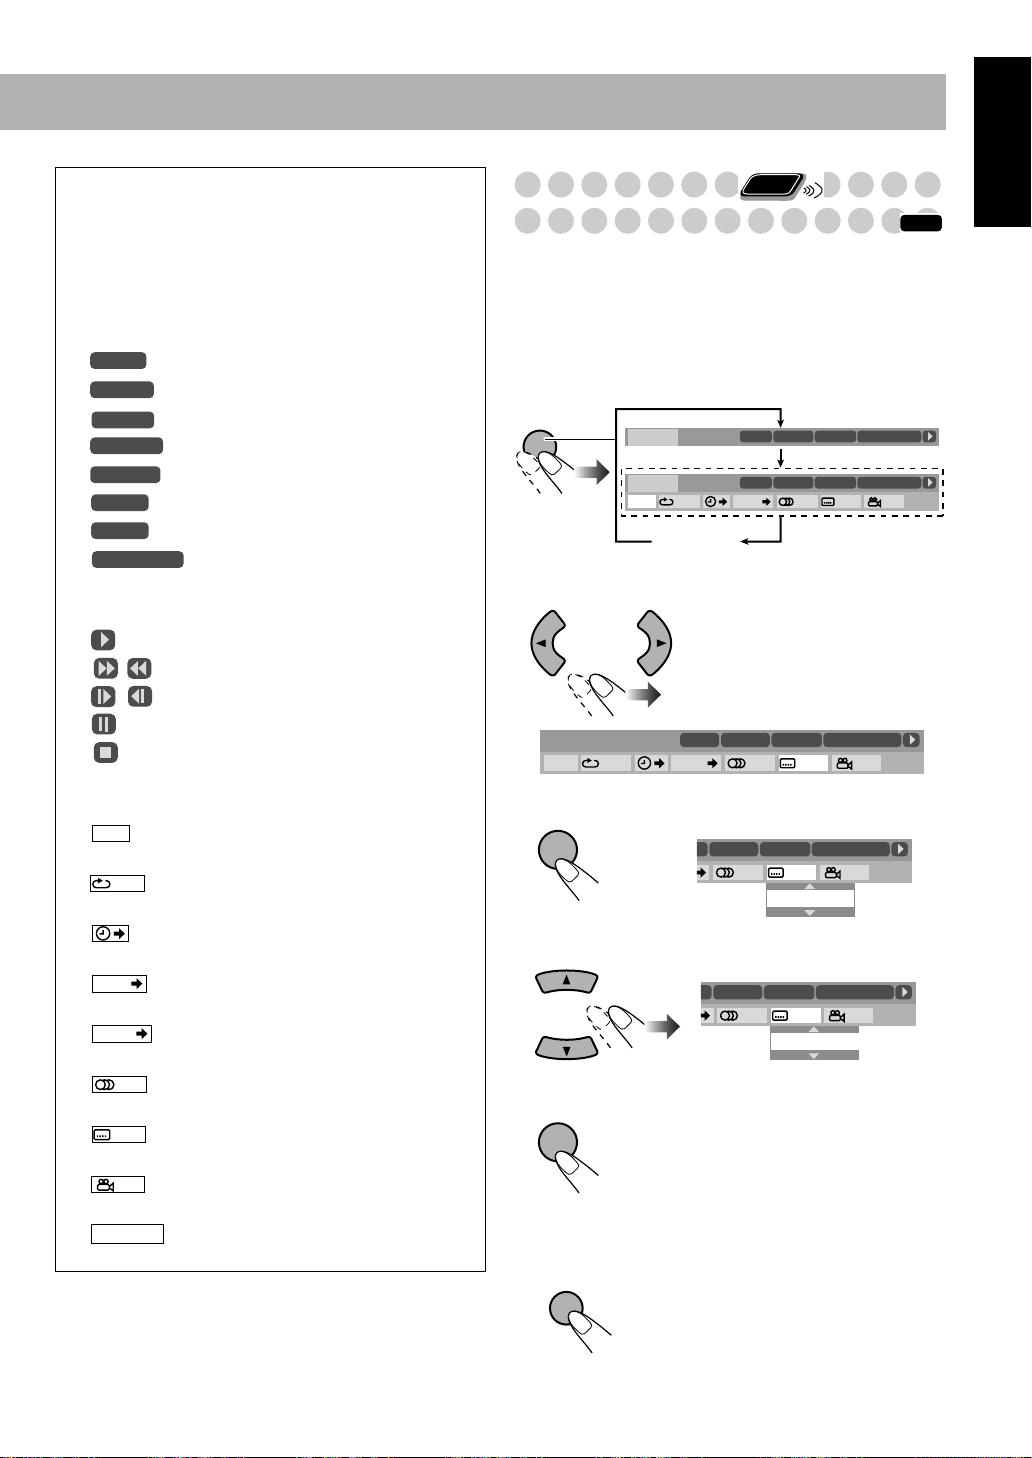
Remote
perations Using the
O
On-screen Bar
ONLY
INFO
Basic operation procedure through the on-screen bar is as
follows:
Ex.: Selecting a subtitle (French) for DVD Video:
While a disc is selected as the source...
1
Display the on-screen bar with the pull-down menu.
ON
SCREEN
Dolby D
DISC 1
DISC 1
TITLE 2
TITLE 2
DVD-VIDEO
3/2.1ch
Dolby D
DVD-VIDEO
3/2.1ch
TIME OFF CHAP. 1/31/31/1
CHAP 3
CHAP 3
TOTAL 1:01:58
TOTAL 1:01:58
Goes off
Select (highlight) the item you want.
2
DVD-VIDEO
TIME OFF CHAP. 1/31/31/1
3
Display the pop-up window.
ENTER
4
Select the desired option in the pop-up window.
Finish the setting.
5
Dolby D
3/2.1ch
DISC 1
TITLE 2
TITLE 21
TITLE 21
CHAP 3
1/31/31/1
1/32/31/1
Pop-up window goes off.
ENTER
To erase the on-screen bar
ON
SCREEN
CHAP 3
ENGLISH
CHAP 3
FRENCH
TOTAL 1:01:58
TOTAL 1:01:58
TOTAL 1:01:58
English
23
Page 28
English
ENTER
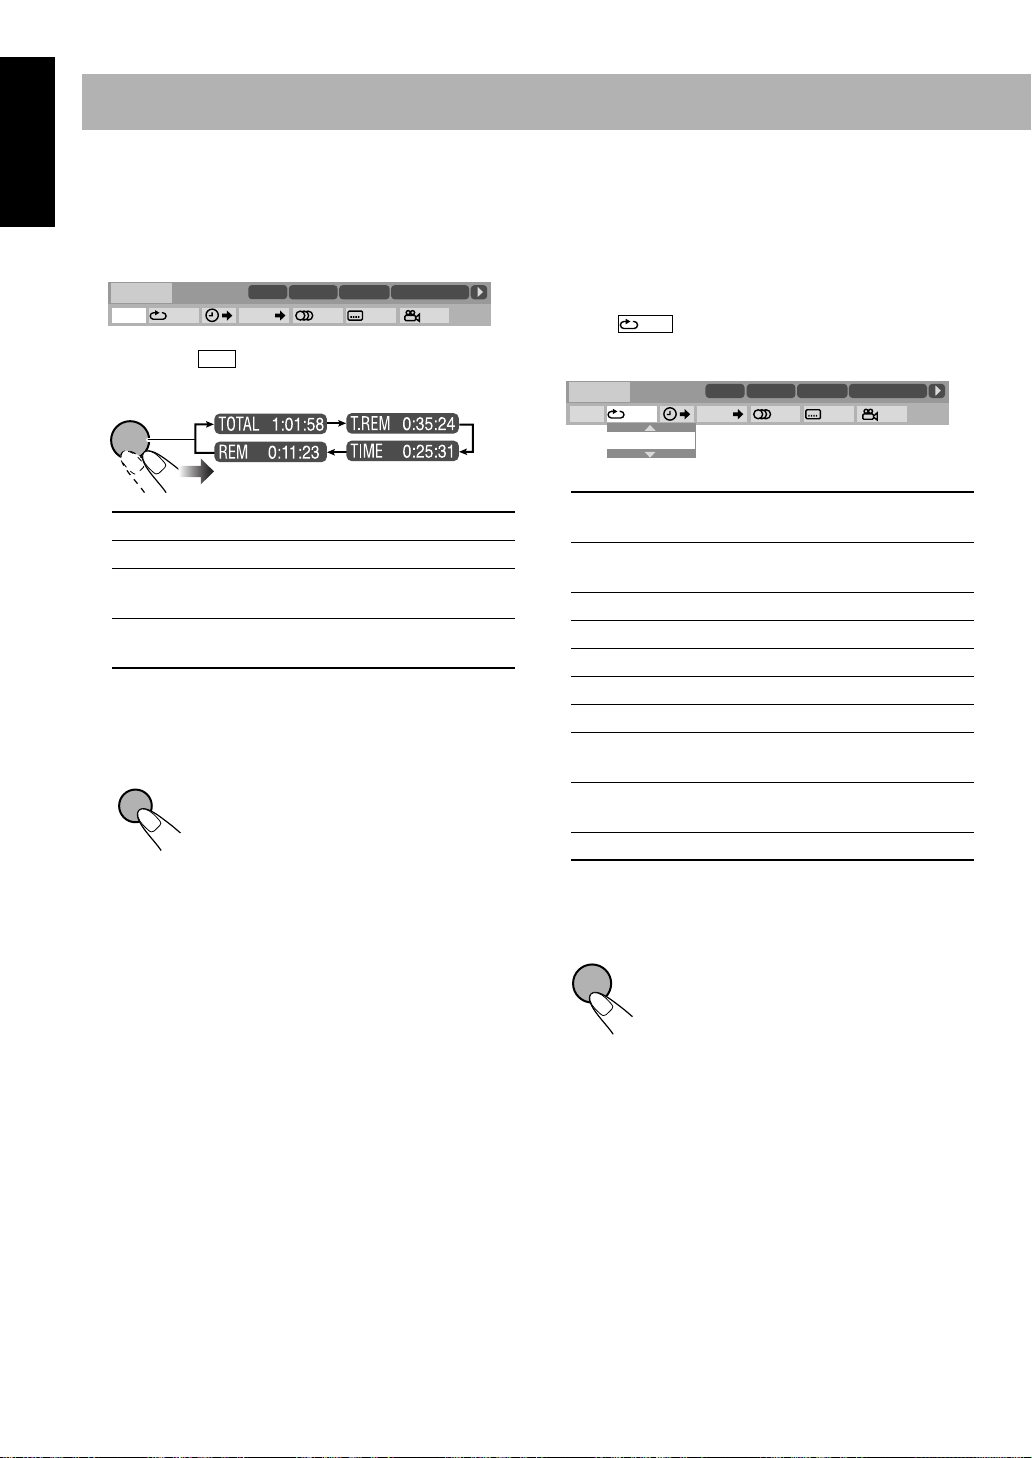
To change the time information
You can change the time information in the on-screen bar
and the display window on the main unit.
1 Display the on-screen bar with the pull-down menu.
OFF
Dolby D
3/2.1ch
DVD-VIDEO
TIME
TIME OFF CHAP. 1/31/ 3 1/1
2 Make sure is selected (highlighted).
TIME
DISC 1
TITLE
TITLE 2
14
1/3
CHAP 3
CHAP
23
1/3 1/3
3 Change the time indication.
ENTER
TOTAL
T.REM
TIME
Elapsed disc time.
Remaining disc time.
* Elapsed playing time of the current
chapter/track.
REM
* Remaining time of the current chapter/
track.
* Not available for DVD-VR.
To erase the on-screen bar
ON
SCREEN
TOTAL 1:01:58
TOTAL
1:25:58
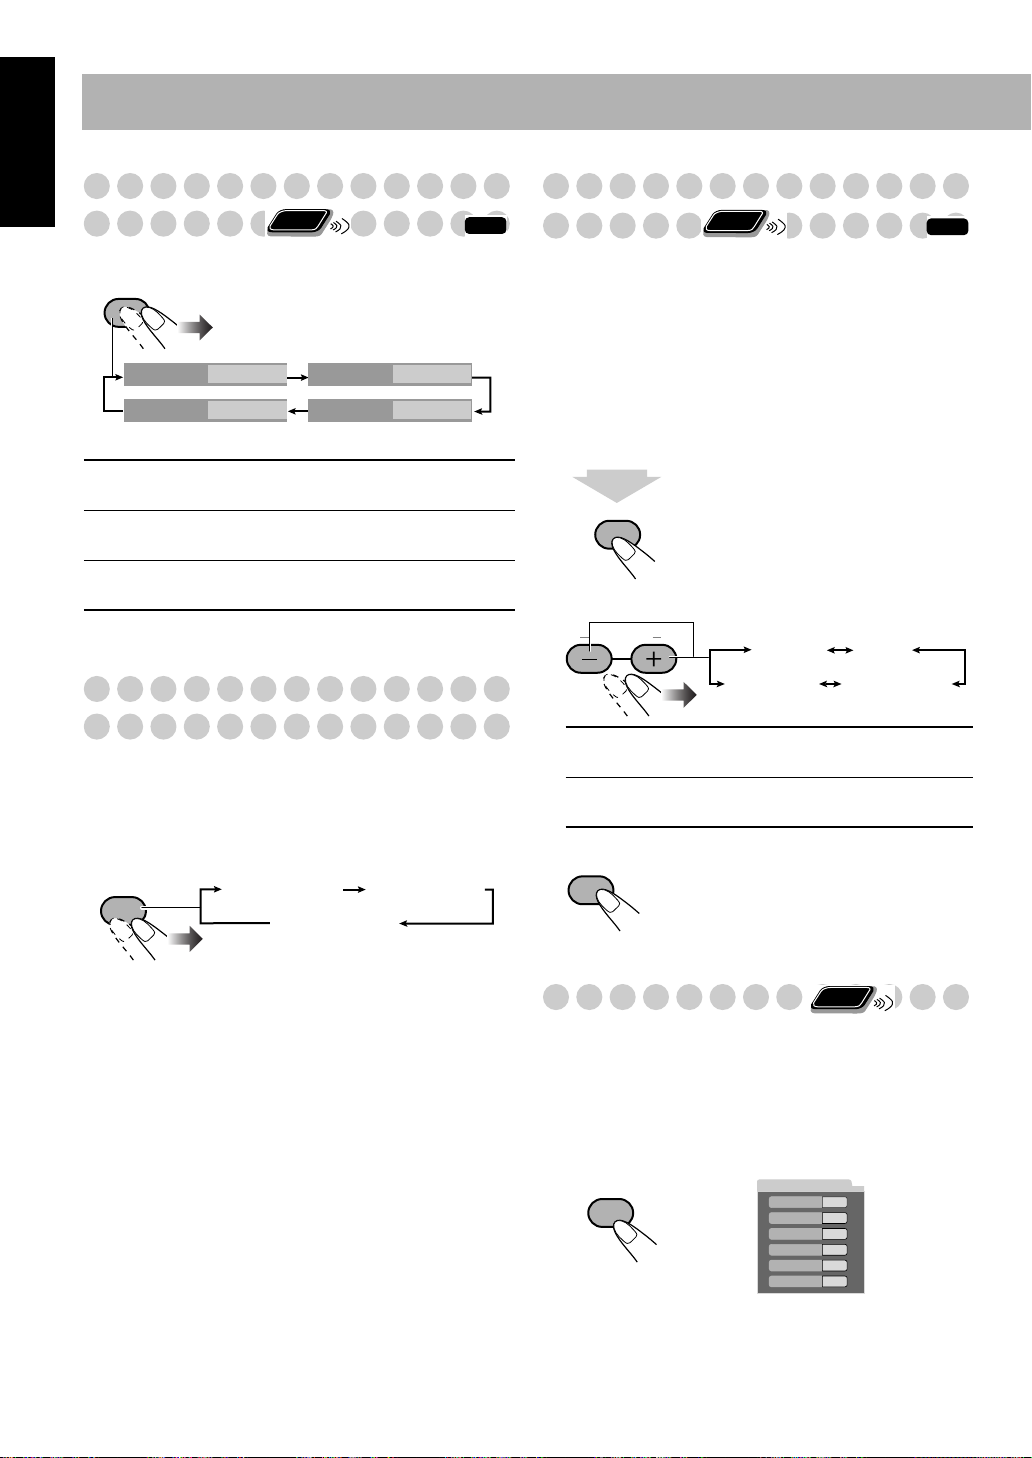
Repeat Play
• See also page 21.
1 While playing a disc (without PBC for SVCD/VCD),
display the on-screen bar with the pull-down menu.
• Except for DVD Video: Repeat Play can be selected
before starting playback.
2 Select .
3 Display the pop-up window.
OFF
Dolby D
3/2.1ch
OFF
DVD-VIDEO
TIME
TIME OFF CHAP. 1/31/ 3 1/1
DISC 1
TITLE
TITLE 2
14
1/3
CHAP
4 Select the repeat mode you want.
ALL
Repeats all discs or all programmed
tracks.
A-B
Repeats a desired portion (see the next
page).
TITLE
GROUP
DISC
CHAPTER
TRACK
PG
Repeats the current title.
Repeats the current group.
Repeats the disc (except for DVD).
Repeats the current chapter.
* Repeats the current track.
Repeats the current title (for DVD-VR
only). See also page 28.
PL
Repeats the current play list (for DVDVR only). See also page 28.
OFF
Cancels Repeat Play.
* During Program Play or Random Play, “STEP”
appears.
5 Finish the setting.
Pop-up window goes off.
CHAP 3
23
1/3 1/3
TOTAL 1:01:58
TOTAL
1:25:58
24
Page 29
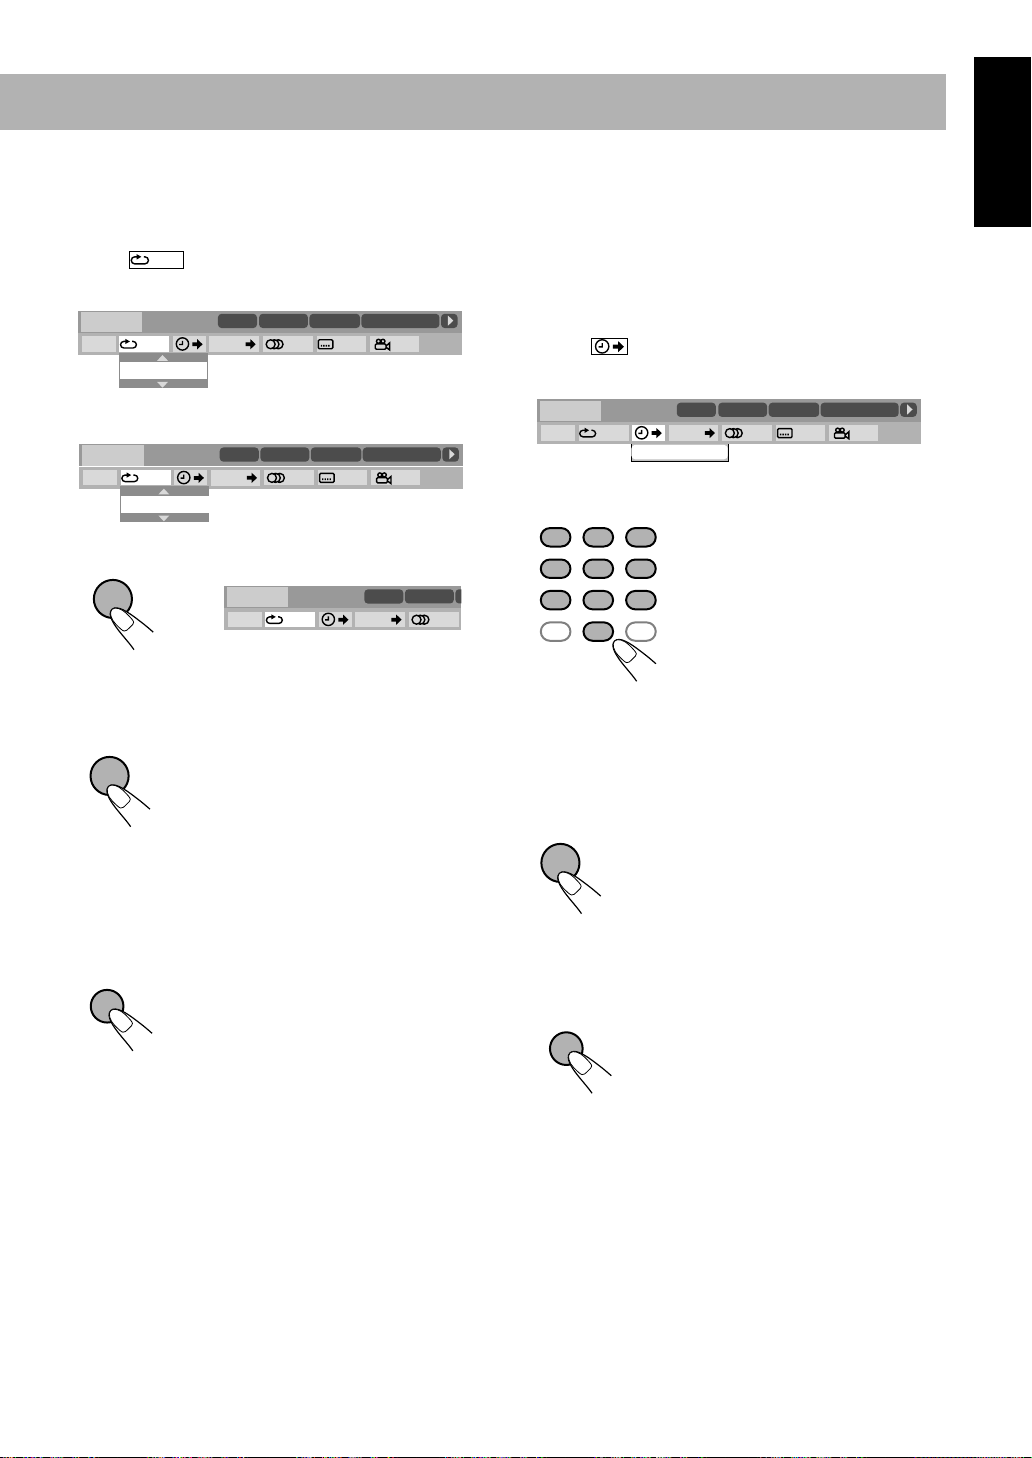
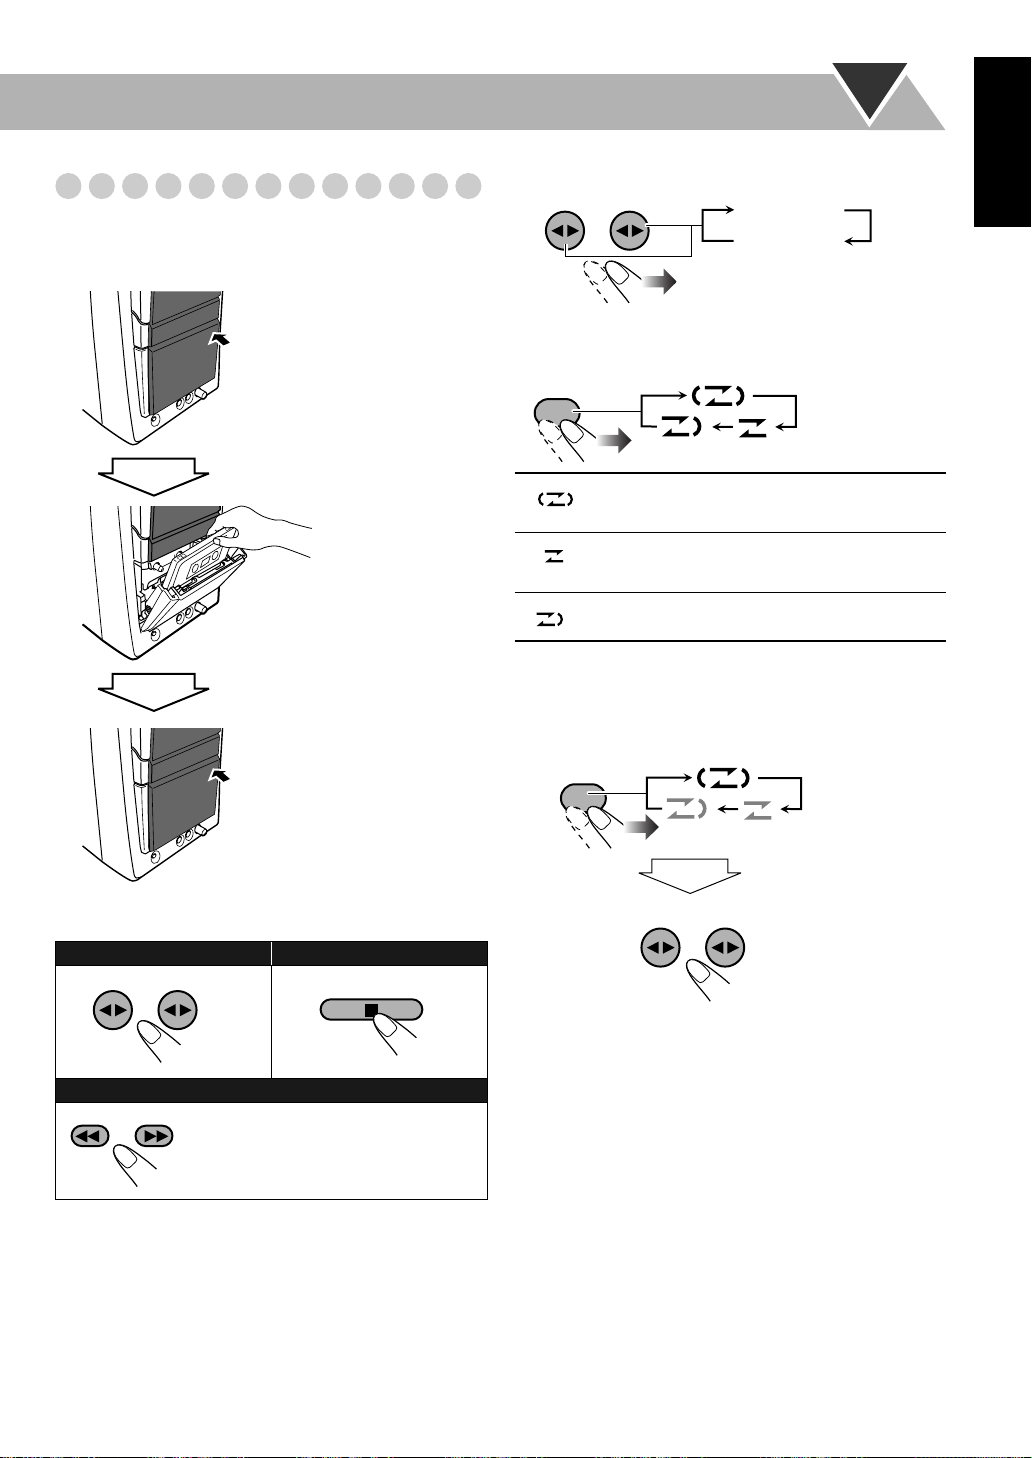
A-B Repeat
H
C
1 While playing, display the on-screen bar with the pull-
down menu.
2 Select .
3 Display the pop-up window.
OFF
OFF
Dolby D
3/2.1ch
DVD-VIDEO
TIME
TIME OFF CHAP. 1/31/ 3 1/1
DISC 1
TITLE
TITLE 2
14
1/3
CHAP
4 Select “A-B”.
DVD-VIDEO
TIME
TIME OFF CHAP. 1/31/ 3 1/1
Dolby D
3/2.1ch
OFF
A–B
DISC 1
TITLE
TITLE 2
14
1/3
CHAP
5 Select the start point (A).
OFF
Dolby D
3/2.1ch
ENTER
DVD-VIDEO
TIME
TIME A- CHAP. 1/3
• After selecting the starting point (A), you can search for
the end point using ¡
.
6 Select the end point (B).
A-B Repeat starts. The selected
ENTER
To cancel A-B Repeat,
portion plays repeatedly.
repeat steps 1 to 3, and select “OFF”
in step 4.
CHAP 3
23
1/3 1/3
CHAP 3
23
1/3 1/3
TOTAL 1:01:58
TOTAL
1:25:58
TOTAL 1:01:58
TOTAL
1:25:58
TITLE 2
DISC 1
TITLE
C
14
1/3
Time Search
You can move to a particular point by specifying the elapsed
playing time from the beginning.
1 While playing (without PBC for SVCD/VCD), display
the on-screen bar with the pull-down menu.
• Except for DVD: Time Search can be used before
starting playback.
2 Select .
3 Display the pop-up window.
OFF
Dolby D
3/2.1ch
TIME _ : _ _ : _ _
DVD-VIDEO
TIME
TIME OFF CHAP. 1/31/ 3 1/1
DISC 1
TITLE
TITLE 2
14
1/3
CHAP
4 Enter the time.
You can specify the time in hours/minutes/seconds.
123
456
789
10 0 +10
Examples:
To move to a point of 1 (hours):
02 (minutes): 00 (seconds), press
1, 0, 2, 0, then 0.
To move to a point of 54
(minutes): 00 (seconds), press 0,
5, 4, 0, then 0.
•
It is always required to enter the hour digit (even “0”
hour), but it is not required to enter trailing zeros (the
last two digits in the examples above).
•
To correct a misentry,
press cursor 2
entry.
5 Finish the setting.
The System starts playing from the
ENTER
specified time.
CHAP 3
23
1/3 1/3
TOTAL 1:01:58
TOTAL
1:25:58
to erase the last
English
To erase the on-screen bar
ON
SCREEN
To erase the on-screen bar
ON
SCREEN
25
Page 30
English
MENU/PL
Chapter/Track Search
You can search for the number of the item to play.
For DVD Video/DVD-VR: Chapter
For DVD Audio: Track
1 While playing, display the on-screen bar with the pull-
down menu.
2 Select or
CHAP.
TRACK
.
3 Display the pop-up window.
DVD-VIDEO
TIME
TIME OFF CHAP. 1/31/ 3 1/1
Dolby D
3/2.1ch
TITLE 2
DISC 1
TITLE
CHAPTER _
CHAP
14
1/3
CHAP 3
23
1/3 1/3
TOTAL 1:01:58
TOTAL
4 Enter the desired chapter/track number.
123
456
789
10 0 +10
•
To correct a misentry, press the 10 keys until the
Examples:
To select chapter/track 5, press 5.
To select chapter/track 15, press
1, then 5.
To select chapter/track 30, press
3, then 0.
desired number is shown in the pop-up window.
5 Finish the setting.
The System starts playing the
ENTER
searched chapter or track.
To erase the on-screen bar
ON
SCREEN
1:25:58
Remote
Operations on the Control
Screen
For DVD-VR/MP3/WMA/JPEG:
ONLY
INFO
You can search for and
play the desired items through the control screen.
Control screen for DVD-RW/RAM in DVD-VR
format
The control screen is superimposed on the TV screen when
you call up Original Program (PG) or Play List (PL).
To select playback type
To select the Original
Program:
TOP MENU/PG
When Original Program is selected.
ORIGINAL PROGRAM
No Date Ch ime itle
1 25/04/04 4ch 19:00 JVC DVD World 2004
2 17/05/04 8ch 10:30
3 22/05/04 8ch 17:00 Music Festival
4 26/05/04 L-1 13:19 children 001
5 20/06/04 4ch 22:00
6 25/06/04 L-1 8:23 children 002
12 3 4 5
When Play List is selected.
PLAY LIST
No Date Chap Length Title
1 25/05/04 001 1:03:16 My JVC World
2 17/06/04 005 1:35:25
3 20/06/04 003 0:10:23 Favorite music
4 25/06/04 001 0:07:19 children001-002
To select the Play List:
TT
6
26
1 789
1
Title/Play list number
2
Recording date
3
Recording source (TV station, the input terminal of the
5
6
recording equipment, etc.)
4
Start time of recording
5
Title of the program/play list*
6
Highlight bar (current selection)
7
Creating date of play lists
8
Number of chapters
9
Playback time
* The title of the original program or play list may not be
displayed depending on the recording equipment.
To erase the control screen for DVD-VR,
press ENTER.
Page 31

Control screen for MP3/WMA/JPEG disc
ENTER
The control screen automatically appears on the TV screen
when you load an MP3, WMA, or JPEG disc.
Ex.: When the MP3 disc is loaded.
6
1
Group : 2 / 3
Blue
Red
2
Green
3
4
Tr ack Information
Title
Rain
Artist
5
Album
1
Current group number/total group number
2
Current group
3
Group list
4
Current track
5
Track information (ID3 Tag Version 1.0: only for
Time : 00:00:14REPEAT TRACK
Tr ack : 5 / 14 (Total 41)
Cloudy.mp3
Fair.mp3
Fog.mp3
Hail.mp3
Indian summer.mp3
Rain.mp3
Shower.mp3
Snow.mp3
Thunder.mp3
Typhoon.mp3
Wind.mp3
Winter sky.mp3
MP3/WMA)
6
Repeat Play setting
7
Elapsed playing time of the current track
(only for MP3/WMA)
8
Operation mode icon
9
Current track number/total number of tracks in the
current group (total number of tracks on the loaded
disc)
0
Highlight bar
-
Track list
• If both types of files (MP3/WMA files and JPEG files)
are recorded on a disc, select the file type to play (see
page 36).
7
8
9
0
-
To move the highlight (green) bar between group list and
track list (for MP3/WMA/JPEG):
Moves the bar to the track list.
Moves the bar to the group list.
To select an item in the list:
Move the highlight bar to a
desired item.
• If you move the highlight bar
while playing back DVD-VR/
MP3/WMA, the selected item
starts playback automatically.
To start playback
For DVD-VR/MP3/WMA:
Playback starts with the selected
ENTER
chapter/track.
• Pressing DVD/CD 3
also starts
playback.
For JPEG:
The selected track (still picture) is
displayed until you change it.
DVD/CD
Slide-show playback starts.
Each track (still picture) is shown on
the screen for a few seconds, then
changes one after another.
English
• Once you start playing back a JPEG track, the control
screen goes off.
• To cancel slide-show, and display the current still picture,
press 8
.
27
Page 32

To stop playback
English
To repeat title/play list for DVD-VR
While playing or before starting playback...
For Original Program
REPEAT
For Play List
REPEAT
REPEAT 1 REPEAT
( CHAP)
Canceled
OFF)
(
REPEAT 1 REPEAT
( CHAP)
Canceled
OFF)
(
( PG)
REPEAT 1 DISC
REPEAT ALL DISC
(
( PL)
REPEAT ALL DISC
(
( DISC)
ALL)
ALL)
To zoom in the still picture (for JPEG)
1
During being paused...
ZOOM
ZOOM 1 ZOOM 2
ZOOM OFF
As the number increases, magnification also increases.
Move the zoomed-in position.
2
To cancel Zoom,
press ZOOM repeatedly until “ZOOM
OFF” appears on the TV screen.
REPEAT 1*
REPEAT*
REPEAT 1
Repeats the current chapter.
Repeats the current title/play list.
Repeats all titles on the current disc.
DISC*
REPEAT
Repeats all loaded discs.
ALL DISC
* Not available before starting playback.
To repeat slide-show for JPEG
While playing or before starting playback...
REPEAT
REPEAT
REPEAT 1
REPEAT
( GROUP)
Canceled
( OFF)
Repeats the current group.
Repeats all files on the current disc.
REPEAT 1 DISC
( DISC)
REPEAT ALL DISC
( ALL)
DISC
REPEAT ALL
Repeats all loaded discs.
DISC
• For Repeat Play of MP3/WMA, see pages 21 and 24.
28
Page 33

Recording Operations
Main unit
TAPE-A /
TAPE-B
DISC 1–5 3
DISC REC
START
REC
START/STOP
FM/AM
DVD/CD
REVERSE
MODE
DUBBING
Deck A
Deck B
IMPORTANT
It may be unlawful to record or play back copyrighted
material without the consent of the copyright owner.
Recording on a Tape
Main Unit
ONLY
You can use type I tapes for recording.
• To play a tape, see page 11.
Insert a recordable cassette in deck B.
1
Push Insert Close
Check the tape running direction and Reverse Mode
2
settings on the display.
Tape direction
Reverse Mode indicator
indicator
English
INFO
Current source
To change the direction
3 (
2 (
forward
reverse
)
)
Change the Reverse Mode if necessary
To record on both sides.
When using Reverse Mode, start
•
()
recording in the forward (
To record on only one side.
3
) direction.
29
Page 34

3
English
Start playing the source—“FM,” “AM,” “DVD/CD,”
“TAPE-A” or “AUX.”
• When recording a disc, you can also use “Synchronized
Disc Recording” (see the right column).
• When recording from deck A, you can also use
“Dubbing” (see below).
Start recording.
4
To stop recording
or
Dubbing Tapes
Change the source to TAPE.
1
Insert the source cassette in deck A, and a recordable
2
cassette in deck B.
3
Check the tape running direction and Reverse Mode
settings on the display.
See step 2 of “Recording on a Tape” on page 29.
4
Start dubbing.
• When either tape playback or recording ends, both cassette
deck stop at the same time.
To stop dubbing
Main Unit
ONLY
Synchronized Disc Recording
You can start and stop both disc play and tape recording at
the same time.
1
Load a disc and insert a recordable cassette.
Check the tape running direction and Reverse Mode
2
settings on the display.
• See step 2 of “Recording on a Tape” on page 29.
Select the disc number you want to start recording
3
from.
For recording desired tracks on discs:
You can program tracks to record in your preferred order.
• Select Program Play (and make a program; see page 19)
without starting playback.
4
Start recording.
The disc playback and recording start
from the first track.
• The System automatically creates 4second blanks between the tunes
recorded on the tapes.
• When either disc play or recording ends, both disc player
and the cassette deck stop at the same time.
Main Unit
ONLY
INFO
To record only your favorite track—One Track
Recording
You can specify tracks to be recorded on the tape while
listening to a disc (except for DVD Video).
While the track you want to record on the tape is
playing...
The disc player returns to the
beginning of that track and the track is
recorded on the tape. After recording,
the disc player and cassette deck
automatically stop.
30
To cancel while recording
or
Page 35

Enjoying Karaoke
Remote control
KARAOKE
SCORING
Source
buttons
V.MASKING
ECHO
MIC MIX
SET
CANCEL
Main unit
123
456
789
10 0 +10
AUDIO
TV
AUDIO VOL +/–
10 keys
/
KEY
RESERVE
+ / –
SETTING
The functions described in this section are not available for
DVD Audio/DVD-VR.
IMPORTANT
• Always set MIC LEVEL to MIN when connecting or
disconnecting the microphone.
• MIC LEVEL adjustment is valid for both microphones
connected to the MIC 1 and MIC 2 jacks.
DO NOT keep the microphones connected
while they are not in use.
Singing Along (Karaoke)
You can enjoy singing along (Karaoke) by using two
microphones.
• By pressing REC START/STOP, you can record your
singing-along.
Turn MIC LEVEL to MIN.
1
2
Connect the microphone(s) (not supplied) to the
MIC 1 and/or MIC 2 jack.
Activate the Mic Mixing Mode.
3
MIC MIX
MIC MIX
MIC OFF
English
Source
buttons
VOLUME +/–
KARAOKE
SCORING
MIC 1
MIC 2
MIC LEVEL
Start playing the source—“FM,” “AM,” “DVD/CD,”
4
“TAPE,” or “AUX.”
•
For Karaoke SVCD/VCD:
Select a desired audio
channel. See “Selecting the Sound Track” on page 16.
5
Sing into the microphone.
6
Adjust the MIC LEVEL and VOLUME.
To cancel from the Mic Mixing Mode,
select “MIC OFF”
in step 3.
To use only microphones,
select “DVD/CD” in step 4, but
do not start playback.
31
Page 36
English
To apply an echo to your voice
While the Mic Mixing Mode is activated...
ECHO
ECHO 1 ECHO 2 ECHO 3
ECHO 4ECHO 0
(Canceled)
• As the number increases, echo level also increases.
To adjust the Key (disc playback only)
While playing back...
KEY KEY
#
To raise the key (up to +6).
To lower the key (up to –6).
Remote
ONLY
Remote
ONLY
Scoring Your Karaoke Skill
INFO
This System can score your Karaoke skill by comparing your
singing along with the vocal on the playback disc.
• This function is for disc playback only.
• It is recommended to select the sound track as follows (see
page 16):
For DVD Video:
For SVCD/VCD:
• It is recommended to sing for more than
minutes
1
to make the scoring function work properly.
Select “DVD/CD” as the source.
DVD/CD
Select the sound track with vocal.
Select “ST,” “ST1,” or “ST2.”
one and a half
To cancel the Key Control
KEY KEY
#
–6 +60
KEYCON
JAPANESE
0
On the display
On the TV screen
• Key Control is also canceled when you deactivate the Mic
Mixing Mode, or select another track or disc.
Remote
Reducing the Lead Vocal
ONLY
INFO
—Vocal Masking
If you want to reduce the lead vocal (of any source except
DVD Audio/DVD-VR), you can use the Vocal Masking
Mode.
V. MASKING
V.MASK1
V.MASK2
V.MASK1 V.MASK2
OFF
Cancels vocal on stereo sources.
Cancels the right audio channel.
2
Activate the scoring function.
KARAOKE
SCORING
KARAOKE SCORE BOARD
SINGING
On the TV screen
Playback of the first track starts and the Mic Mixing
Mode is automatically activated (with the last adjustment
for echo).
3
Sing into the microphone.
See steps 1, 2, and 6 on page 31.
• Adjust echo level and key if you want (see the left
column).
After the song ends, playback stops and the score board
appears on the TV screen with fanfare.
Ex.:
KARAOKE SCORE BOARD
Your score
85 POINTS
Very good!!
93 POINTS1 ST
2 ND
3 RD
The latest top 3
85 POINTS
73 POINTS
To sing into microphone(s),
activate the Mic Mixing Mode
(follow steps 1 to 3 and 6 on page 31).
To cancel from the Vocal Masking Mode,
32
select “OFF.”
To stop the playback in the middle of the song,
press 7
The scoring function is not canceled and your singing along
is scored if the playback time is more than one minute.
To cancel the scoring function,
press KARAOKE
SCORING. The screen on the TV disappears. (The Mic
Mixing Mode remains activated.)
.
Page 37
To turn on/off the fanfare
KARAOKE
SCORING
1 Enter the fanfare setting mode.
SETTING
2 Select the fanfare setting.
LRBALANCE
LR BALANCE
FANFARE
ON
OFF
Remote
ONLY
SET
4
Activate the Mic Mixing Mode.
MIC MIX
MIC MIX
MIC OFF
Start playback.
5
To start Karaoke
Program Play:
DVD/CD
English
To start Karaoke
Program Play with the
scoring function:
Remote
Reserving Karaoke Songs
ONLY
INFO
—Karaoke Program Play
You can determine the playback order of the titles or tracks
on the disc player. You can program up to 12 steps.
1
Change the source to “DVD/CD.”
DVD/CD
2
Activate Karaoke Program Play.
RESERVE
• PROGRAM indicator flashes during this mode.
3
Select songs you want for Karaoke Program Play.
Press the number buttons to select a song in the following
order.
1
Select a disc.
2
Select a title/group.
3
Select a chapter/track.
123
456
789
10 0 +10
No
Gr/Tt
Disc Tr/Chap
1
2
3
4
5
On the TV screen
Examples:
To select number 5, press 5.
To select number 15, press
+10, then 5.
To select number 30, press
+10, +10, then 10.
Playback starts in the order you have programmed.
•
For the Karaoke Program Play with the scoring
function:
Each time the song ends, playback stops and
the score board appears. Press KARAOKE SCORING
twice to start playback of the next track.
To check the programmed contents
RESERVE
The Karaoke reserve screen appears.
• You cannot display the Karaoke reserve screen while the
scoring function is in use.
To modify the program
While the Karaoke reserve screen is shown on the TV...
To erase the unwanted step:
CANCEL
To erase the entire program,
To add steps in the program:
Repeat step 3.
repeat the procedure.
33
Page 38
Timer Operations
English
Remote control
AUDIO
CANCEL
SET
CLOCK/
TIMER
123
456
789
10 0 +10
AUDIO
Remote
Setting the Timer
ONLY
INFO
Using Daily Timer, you can wake up with your favorite
song. On the other hand, with Recording Timer, you can
make a tape of a radio broadcast automatically.
• You cannot activate Daily Timer and Recording Timer at a
time. (Activating either timer deactivates the other timer.)
• To correct a misentry during the process, press CANCEL.
TV
You can return to the previous step.
1
Select one of the timer setting modes—ON for Daily
Timer or Recording Timer.
CLOCK/
TIMER
2
Make the timer setting as you want.
LRBALANCE
Recording Timer Daily Timer
REC TIMER
Canceled
ON
DAILYTIMER
Clock setting
SET
ON
Repeat the procedure until you finish setting in the
following order:
1
Set the hour then minute for on-time.
2
Set the hour then minute for off-time.
3
For Recording Timer: Select the playback
source—“TUNER-FM” or “TUNER-AM.”
For Daily Timer: Select the playback source—
“TUNER-FM,” “TUNER-AM,” “DISC,”
“TAPE-A,” “TAPE-B” or “AUX IN.”
34
EX.: When “TUNER-FM” is selected.
4
Select a preset station for “TUNER-FM” and
“TUNER-AM,” or select a disc, group, and then
track number for “DISC.”
5
Select the volume level.
• You can select the volume level (“VOLUME 0” –
“VOLUME 30” and “VOLUME --”). If you select
“VOLUME --,” the volume is set to the last level
when the System has been turned off.
Page 39

3
Turn off the System (on standby) if you have set the
timer with the System turned on.
AUDIO
To turn off the Timer after the setting is done
You can turn off the timer after it has been set.
• Since Daily Timer is activated at the same time everyday,
you may need to cancel it on some particular days.
1
Select the timer you want to cancel (REC TIMER or
DAILYTIMER) you want to cancel.
English
How Daily Timer actually works
Once the Daily Timer has been set, the timer ( )
indicator and DAILY indicator are lit on the display.
Daily Timer is activated at the same time everyday until
the timer is turned off manually (see the next column).
• Daily Timer starts working only when the System is
turned off (on standby).
When the on-time comes
The System turns on, tunes in to the specified station or
starts playing the specified source, and sets the volume
level to the preset level.
When the off-time comes
The System stops playback, and turns off (standby).
• The timer setting remains in memory until you change
it.
How Recording Timer actually works
When Recording Timer has been set, Timer ( )
indicator and the REC indicator are lit on the display.
Recording Timer works only once.
• Recording Timer starts working only when the System
is turned off (on standby).
When the on-time comes
The System turns on, tunes in to the specified station, sets
the volume level to the preset level, and starts recording.
When the off-time comes
The System stops recording, and turns off (standby).
• The timer setting remains in memory until you change
it.
CLOCK/
TIMER
2
Turn off the selected timer.
CANCEL
Recording Timer Daily Timer
REC TIMER
Canceled
ON
Clock setting
DAILYTIMER
ON
• The timer ( ) indicator goes off.
To turn on the timer again,
repeat the step 1 and press SET
in step 2.
Timer Priority
If the settings for Sleep Timer and Recording Timer/Daily
Timer overlap, the timers work as described below.
• Sleep Timer (see page 15) has priority over the Recording
Timer and Daily Timer.
Canceled
Recording Timer/
Daily Timer
Sleep Timer
• In this case, Recording Timer/Daily Timer does not work.
6:00 6:30 7:00 7:30
The System turns off.
Recording/Playback
Canceled
6:00 6:30 7:00 7:30
Recording Timer/
Daily Timer
Sleep Timer
The System turns off.
• In this case, Recording Timer/Daily Timer is canceled. (If
Sleep Timer shuts off the System earlier than the off time
you have set for Recording Timer, recording stops when
Sleep Timer shuts off the System.)
35
Page 40

Setup Menu Operations
123
456
789
10 0 +10
English
Remote Control
SET UP
LANGUAGE menu
MENU LANGUAGE
AUDIO LANGUAGE
SUBTITLE
ON SCREEN LANGUAGE
Item
Initial settings
Some items in the menus cannot be changed during
playback.
1
AUDIO
TV
////
ENTER
You can select the initial menu language of DVD Video (see page 43).
You can select the initial audio language of DVD Video (see page 43).
You can select the initial subtitle language of DVD Video (see page 43).
You can select “ENGLISH,” “CHINESE,” or “SPANISH” as the on-screen language.
Press SET UP.
LANGUAGE
MENU LANGUAGE
AUDIO LANGUAGE
SUBTITLE
ON SCREEN LANGUAGE
2
Press 2 (or 3
Press 5 (or ∞)
3
Press ENTER.
4
5
Press 5 (or ∞)
ENGLISH
ENGLISH
ENGLISH
ENGLISH
) to select the menu.
to move to select the item.
to select the options, then press
ENTER.
To erase a preference display
Press SET UP.
Contents
INFO
PICTURE menu
MONITOR TYPE
16:9 4:3 LB
4:3 PS
PICTURE SOURCE
SCREEN SAVER
FILE TYPE
36
Item
Contents
You can select the monitor type to match your TV when you play back DVD Video discs recorded for
wide-screen televisions.
16:9/16:9 MULTI (Wide television screen):
4:3 LB/4:3 MULTI LB (Letter box conversion):
screen picture to fit the width of the TV screen keeping the aspect ratio.
4:3 PS/4:3 MULTI PS (Pan Scan conversion):
up for filling the screen vertically and the left and right sides of the picture are cut off.
• By selecting “MULTI” mode, the color system of the System changes automatically to match the
color system of the loaded disc. For the color system setting, see page 14.
You can obtain optimal picture quality by selecting the source type of the disc contents.
AUTO:
Normally, select this option. The System recognizes the picture type (film or video source) of
the current disc according to the disc information.
FILM:
For a film source disc.
VIDEO:
You can set the screen saver function to ON or
ON:
OFF:
You can select a file type to play.
AUDIO:
STILL PICTURE:
For a video source disc.
The on-screen display becomes dark when no operation is done for about 5 minutes.
To cancel the screen saver.
To play MP3/WMA files.
To play JPEG files.
For a wide-screen (16:9) TV.
For a conventional (4:3) TV. Displays a wide-
For a conventional (4:3) TV. The picture is zoomed
OFF.
Page 41

AUDIO menu
English
Item
DIGITAL AUDIO OUTPUT
DOWN MIX
D.RANGE COMPRESSION
OTHERS menu
Item
RESUME
ON SCREEN GUIDE
Contents
Set this item correctly when using the OPTICAL DIGITAL OUTPUT terminal on the rear.
PCM ONLY:
DOLBY DIGITAL/PCM:
in Dolby Digital decoder.
STREAM/PCM:
Set this item properly according to your digital audio connection to play sound of the surround
multichannel audio on a DVD Video.
• This setting is effective for digital audio output if “DIGITAL AUDIO OUTPUT” is set to “PCM
ONLY.”
DOLBY SURROUND:
STEREO:
Set this item to listen to DVD Video recorded in Dolby Digital format at low or middle volume.
AUTO:
ON:
Select this if the sound level of DVD Video is lower than the one of TV program to make the
sound at a lower volume clear.
When connecting to audio equipment which can decode only linear PCM signals.
When connecting to a Dolby Digital decoder or an amplifier with a built-
When connecting to a DTS decoder or an amplifier with a built-in DTS decoder.
Select this when connecting to a surround decoder.
Select this when connecting to a stereo receiver, MD player, TV, etc.
You can enjoy powerful playback sound.
Contents
You can select Resume.
ON:
The System resumes playback from the position where playback has been stopped if the disc is
still in the disc tray.
OFF:
Resume is deactivated.
Activate or deactivate the on-screen guide.
ON:
Activate the on-screen guide.
OFF:
Deactivate the on-screen guide.
37
Page 42

Operating the TV
TV
English
Remote control
TV
TV/VIDEO
TV VOL +/–
CHANNEL +/–
123
456
789
10 0 +10
AUDIO
TV
ENTER
10 keys
Operating TV
You can operate the JVC’s or other manufacturers’ TV using
this remote control.
1
Slide the AUDIO/TV selector to “TV.”
AUDIO
TV
2
Press and hold until the following steps are complete.
TV
3
ENTER
4
Enter the 2-digit manufacture’s code number.
123
456
789
10 0 +10
38
Manufacture’s code
Manufacture Code number
JVC 01
Hitachi 10
Magnavox 02
Mitsubishi 03
Panasonic 04,11
Philips 15
RCA 05
Samsung 12
Sanyo 13, 14
Sharp 06
Sony 07
Toshiba 08
Zenith 09
5
Release TV.
To operate the TV
To turn on or
off the TV:
To select the TV channel:
123
456
789
10 0 +10
To select the input
mode (either TV or
VIDEO):
TV/VIDEO
or
To adjust TV
volume:
TV VOL
CHANNEL
Page 43

Additional Information
Learning More about This System
Introduction
Playable Disc Types:
• About audio format
Linear PCM:
–
format used for CDs and most studio masters.
–
Dolby Digital:
Dolby Laboratories, which enables multi-channel
encode to create the realistic surround sound.
–
DTS (Digital Theater Systems):
audio, developed by Digital Theater Systems, Inc., which
enables multi-channel like Dolby Digital. As the
compression ratio is lower than for Dolby Digital, it
provides wider dynamic range and better separation.
• If you use a DVD-RAM with a cartridge, take the disc out
of the cartridge before inserting.
Daily Operations—Playback
Listening to the Radio:
• If you store a new station into an occupied preset number,
the previously stored station in that number will be erased.
• When you unplug the AC power cord or if a power failure
occurs, the preset stations will be erased in a few days. If
this happens, preset the stations again.
Playing Back a Disc:
• On some DVD, SVCD, or VCD discs, the actual operations
may be different from what is explained in this manual, due
to the programming and disc structure; such differences are
not a malfunction of this System.
• Some DVD Audios prohibit downmix. When you play
back such a disc, “LR ONLY” appears on the display and
the System plays back the left front and right front signals.
• When playing back a DVD Audio disc recorded in MLP
(Meridian Lossless Packing; a lossless audio compression
system that can completely recreate the PCM signal), the
signals are recognized as the linear PCM signals, however,
no indicator lights up on the display.
• For MP3/WMA playback...
– MP3/WMA discs require a longer readout time than
regular CDs. (It depends on the complexity of the group/
file configuration.)
– Some MP3/WMA files cannot be played back and will
be skipped. This results from their recording processes
and conditions.
– When making MP3/WMA discs, use ISO 9660 Level 1
or Level 2 for the disc format.
– This System can play back MP3/WMA files with the
extension code <.mp3> or <.wma> (regardless of the
letter case—upper/lower).
– It is recommended that you make each MP3/WMA file at
a sampling rate of 44.1 kHz and at bit rate of 128 kbps.
This System cannot play back files made at bit rate of less
than 64 kbps.
(see pages 1 to 2)
Uncompressed digital audio, the same
Compressed digital audio, developed by
Compressed digital
(see pages 7 to 11)
Daily Operations—Sound&Other Adjustments
(see pages 12 to 15)
Creating Your Own Sound Modes—User Mode:
• When you unplug the AC power cord or if a power failure
occurs, the User Mode settings will be erased in a few days.
If this happens, set the User Modes again.
Creating 3-dimensional Sound Field—3D Phonic:
• While you use the headphones, 3D Phonic is canceled
temporary.
• 3D Phonic is also applied to the optical digital output
signals through the OPTICAL DIGITAL OUTPUT
terminal.
Changing the Color System and Scanning Mode:
• If you play back an NTSC disc with the color system set to
“PAL (PROG),” the disc will be reproduced using “PAL
60” format, however, if the TV does not support this
format, the screen may rolls over upward and downward
rapidly.
• If you play back a PAL disc with the color system set to
“NTSC (PROG),” you can watch the playback pictures, but
the following symptoms may occur:
– The items on the disc menu will be blurred, and be shown
slightly shifted when highlighted.
– The aspect ratio of the picture may differ from the
original aspect ratio.
– The picture movement is not smooth.
• You cannot change the scanning mode to progressive in the
following cases:
– When your TV does not support the progressive video
input.
– When you have not connected your TV to the unit using
a component video cord.
• When you play back an NTSC disc in progressive scanning
mode, the System outputs the NTSC signal regardless of
the color system settings.
Setting the Clock:
• “0:00” will flash on the display until you set the clock.
• The clock may gain or lose 1 to 2 minutes per month. If this
happens, reset the clock.
Unique DVD/VCD Operations
Selecting the Sound Track:
• On some DVD Videos, you cannot change audio languages
while playing back.
Playing Back Bonus Group:
• You cannot select a track in the bonus group for Program
Play.
(see pages 16 to 18)
English
39
Page 44

Special Picture Playback:
English
• During slow-motion playback, no sound will be
reproduced.
• You cannot use frame-by-frame playback for DVD-VR.
• While zoomed in, the picture may look coarse.
Advanced Disc Operations
Programming the Playing Order—Program Play:
• While programming steps...
– Your entry will be ignored if you have tried to program
an item number that does not exist on the disc (for
example, selecting track 14 on a disc that only has 12
tracks).
– For SVCD/VCD/CD loaded on the other tray than the
current one, the System may prompt for the group
number entry as well, however, these entries will be
ignored during playback.
• You cannot use Program Play and Random Play for DVDVR/JPEG discs.
• The programmed contents will remain until you erase it.
• While the PROGRAM indicator is on, you cannot change
the disc to play. (DISC 1 – 5 on the remote control and 3
on the main unit do not work.)
On-Screen Disc Operations
Operations Using the On-screen Bar:
• A-B Repeat:
– A-B Repeat cannot be used on some DVDs.
– A-B Repeat is possible only within the same title or
within the same track.
Operations on the Control Screen:
• For DVD-VR playback...
–
Original Program:
original picture in the recorded order.
–
Play List:
by the recording equipment. The control screen for the
play list appears only when the disc has the play list.
– Resume is not available.
– For details about DVD-VR format and play list, refer to
the manual of the recording equipment.
• For JPEG files playback...
– It is recommended that you record a file at 640 x 480
resolution. (If a file has been recorded at a resolution of
more than 640 x 480, it will take a long time to be
shown.)
– This System can play only baseline JPEG files*.
Progressive JPEG files* or lossless JPEG files* cannot
be played.
* Baseline JPEG format: Used for digital cameras,
The System can play back the play list edited
Progressive JPEG format: Used for web.
Lossless JPEG format: An old type and rarely used
The System can play back the
(see pages 19 to 21)
(see pages 22 to 28)
web, etc.
now.
• This System can play back JPEG files with the extension
code <.jpg> or <.jpeg> (regardless of the letter case—
upper/lower).
• This System may not play back JPEG files properly if they
are recorded on the devices other than digital still camera.
• During slide-show playback, zoom cannot be operated.
Recording Operations
General:
• You cannot change the source during recording.
• There is leader tape which cannot be recorded onto at the
start and the end of cassette tapes. Thus, when recording
discs or radio broadcasts, wind the leader tape first to
ensure that the recording will be made without any music
part lost.
• If no cassette is inserted or a protected tape has been
inserted, “NO REC” appears on the display.
• If you select the Surround Mode (DANCE, HALL,
STADIUM—see page 13), you can also record the
surround elements. (Other sound adjustments do not affect
the recording level.)
Recording on a Tape:
• When using Reverse Mode for recording, start recording in
the forward (3
stop when only one side (reverse) of the tape is recorded.
Synchronized Disc Recording:
• Recording starts from the first track even if you have
selected a track by using ¢/4. To specify track(s) to
record, program them (or use One Track Recording).
• While recording, you cannot use disc operation buttons
(except for 7
volume control).
• Everything on the disc goes onto the tape in the order on
the disc, or according to the order you have made for
Program Play.
• You cannot use Repeat Play while synchronized recording
(Repeat Play will be canceled).
• DISC REC START button does not work:
– While playback is paused.
– When Random Play is activated.
– While playing back or being paused with Program Play.
• When the tape reaches its end in the forward direction (3
during recording, the last song will be re-recorded at the
beginning of the reverse side (2
• When the tape reaches its end in the reverse side (2
during recording, recording stops even though the disc is
not entirely recorded.
) direction first; otherwise, recording will
) and sound setting buttons (except for
(see pages 29 to 30)
).
)
)
40
Page 45

Enjoying Karaoke
Reducing the Lead Vocal—Vocal Masking:
• The Vocal Masking Mode setting is not applied to the
optical digital output signals through the OPTICAL
DIGITAL OUTPUT terminal.
• When playing a Karaoke disc in the Vocal Masking Mode,
the vocal may not be reduced or the volume may be lower.
• On some music, the Vocal Masking Mode does not provide
the correct effect.
Scoring Your Karaoke Skill:
• Before the scoring function is activated, you can select the
track by pressing ¢/4 (except for DVD Video and
SVCD/VCD with PBC).
• If you press ¢/4 while scoring, playback stops and
scoring is canceled (but the track is not skipped).
• If you activate the scoring function while playback is
stopped with Resume function, playback starts from the
position you have stopped.
• You can also activate the scoring function while playing
back. In this case, the scoring starts from that point.
• While the scoring function is in use, you cannot use the
following buttons: V.MASKING, MIC MIX, RESERVE,
and disc operation buttons (except for ¢/4/7
• Activating the scoring function cancels Repeat Play.
• You cannot use the scoring function during Program Play,
Random Play, or recording.
• The ranking (top 3) is cleared when you turn off the
System. (If the number of songs scored is less than 3, “0
POINT” appears.)
Reserving Karaoke Songs—Karaoke Program Play:
• If you have selected a disc tray on which DVD Audio or
DVD-VR is loaded, that disc number is skipped.
• If DVD Audio or DVD-VR is loaded on the current tray,
you cannot use Karaoke Program Play.
• When the track starts playback, that track number will be
erased from the Karaoke reserve screen (the programmed
contents will remain until you erase it).
• While the PROGRAM indicator is flashing, you cannot
change the disc to play. (DISC 1 – 5 on the remote control
and 3
on the main unit do not work.)
Timer Operations
Setting the Timer:
• If you do not specify the preset station or track number
correctly while setting a timer, the currently selected
station or the first track will be played when timer is
activated.
• When you unplug the AC power cord or if a power failure
occurs, the timer will be canceled. You need to set the
clock first, then the timer again.
• Without stopping the recording, you cannot change the
source after Recording Timer starts recording.
• If you set DVD Video as the source, Daily Timer will not
work correctly.
(see pages 31 to 33)
).
(see pages 34 to 35)
Setup Menu Operations
General:
• If the upper and lower parts of the menu are cut off, adjust
the picture size control of the TV.
LANGUAGE menu:
• When the language you have selected for MENU
LANGUAGE, AUDIO LANGUAGE, or SUBTITLE is
not recorded on a disc, the original language is used as the
initial language.
PICTURE menu—MONITOR TYPE:
• Even if “4:3 PS (MULTI)” is selected, the screen size may
become 4:3 letter box with some DVD Videos. This
depends on how the discs are recorded.
• When you select “16:9 (MULTI)” for a picture whose
aspect ratio is 4:3, the picture slightly changes due to the
process for converting the picture width.
AUDIO menu—DOWN MIX:
• This setting is not effective when DTS software is played
back.
OTHERS menu—ON SCREEN GUIDE:
• The setup menu and on-screen bar will be displayed (and
recorded) even though this function is set to “OFF.”
Subtitles and the information for zoom-in always appear on
the display regardless of this setting.
(see pages 36 to 37)
Maintenance
To get the best performance of the System, keep your discs,
tapes, and mechanism clean.
Handling discs
• Remove the disc from its case by holding it at the edge
while pressing the center hole lightly.
• Do not touch the shiny surface of the disc, or bend the disc.
• Put the disc back in its case after use to prevent warping.
• Be careful not to scratch the surface of the disc when
placing it back in its case.
• Avoid exposure to direct sunlight, temperature extremes,
and moisture.
To clean the disc:
Wipe the disc with a soft cloth in a straight line from center
to edge.
English
41
Page 46

English
Handling cassette tapes
• If the tape is loose in its cassette, take up the slack by
inserting a pencil in one of the reels and rotate it.
– If the tape is loose, it may get stretched, cut, or caught in
the cassette.
• Be careful not to touch the tape surface.
• Avoid the following places to store the tape—in dusty
places, in direct sunlight or heat, in moist areas, on a TV or
speaker, or near a magnet.
To keep the best recording and playback sound quality
• Use a cotton swab moistened with alcohol to clean the
heads, capstans, and pinch rollers.
• Use a head demagnetizer (available at electronics and
audio shops) to demagnetize the heads (when the System
turned off).
To protect your recording
Cassettes have two small tabs on the back
to protect from unexpected erasure or rerecording.
To protect your recording,
tabs.
To re-record on a protected tape,
the holes with adhesive tape.
Cleaning the System
• Stains should be wiped off with a soft cloth. If the System
is heavily stained, wipe it with a cloth soaked in waterdiluted neutral detergent and wrung well, then wipe clean
with a dry cloth.
• Since the System may deteriorate in quality, become
damaged or get its paint peeled off, be careful about the
following:
– DO NOT wipe it with a hard cloth.
– DO NOT wipe it strong.
– DO NOT wipe it with thinner or benzine.
– DO NOT apply any volatile substance such as
insecticides to it.
– DO NOT allow any rubber or plastic to remain in contact
for a long time.
remove these
cover
Troubleshooting
If you are having a problem with your System, check this list
for a possible solution before calling for service.
General:
Adjustments or settings are suddenly canceled before
you finish.
]
There is a time limit. Repeat procedure again.
Operations are disabled.
]
The built-in microprocessor may malfunction due to
external electrical interference. Unplug the AC power
cord and then plug it back in.
Unable to operate the System from the remote control.
]
The path between the remote control and the remote
sensor on the System is blocked.
]
The batteries are exhausted.
No sound is heard.
]
Speaker connections are incorrect or loose.
]
Headphones are connected.
No picture appears on the screen.
]
The video cord connections are incorrect or loose.
No picture is displayed on the TV screen, the picture is
blurred, or the picture is divided into two parts.
]
The System is connected to a TV which does not support
progressive video input.
]
Incorrect color system is selected (see page 14).
The left and right edges of the picture are missing on the
screen.
]
Select “4:3 LB (MULTI)” for “MONITOR TYPE” (see
page 36).
Radio Operations:
Hard to listen to broadcasts because of noise.
]
Antennas connections are incorrect or loose.
]
The AM loop antenna is too close to the System.
]
The FM antenna is not properly extended and positioned.
Disc Operations:
The disc does not play.
]
You have inserted a disc whose Region Code is not “3.”
(“REGION ERR” appears on the display.)
]
The disc is placed upside down. Place the disc with the
label side up.
ID3 Tag on an MP3 disc cannot be shown.
]
There are two types of ID3 Tag—Version 1 and Version 2.
This System can only show ID3 Tag Version 1.
42
Page 47

MP3 groups and tracks are not played back as you
expect.
]
The playing order is determined when the disc was
recorded. It depends on the writing application.
MP3/WMA or JPEG files are not played back.
]
The inserted disc may include both type of tracks (MP3/
WMA files and JPEG files). In this case, you can only
play back the files selected by the “FILE TYPE” setting
(see page 36).
]
You have changed the “FILE TYPE” setting after you
inserted a disc. In this case, reload the disc.
The disc sound is discontinuous.
]
The disc is scratched or dirty.
The disc playback sounds strange.
]
Cancel Key Control (see page 32).
No subtitle appears on the display though you have
selected the initial subtitle language.
]
Some DVDs are programmed to always display no
subtitle initially. If this happens, press SUB TITLE after
starting play (see page 17).
Audio language is different from the one you have
selected as the initial audio language.
]
Some DVDs are programmed to always use the original
language initially. If this happens, press AUDIO after
starting play (see page 16).
The disc tray does not open or close.
]
The AC power cord is not plugged in.
]
Child Lock is in use. “LOCKED” appears in the display
window (see page 21).
]
The Program Play is in use. Cancel the Program Play
(see page 20).
Tape Operations:
The cassette holder cannot be opened.
]
Power supply from the AC power cord has been cut off
while the tape was running. Turn on the System.
Recording Operations:
Impossible to record.
]
Small tabs on the back of the cassette are removed.
Cover the holes with adhesive tape.
]
The Karaoke scoring function is in use. Cancel the
scoring function (see page 32).
Karaoke Operations:
Cannot activate the scoring function.
]
DVD Audio or DVD-VR is playing.
]
You cannot use the scoring function while recording, or
while the disc menu for DVD Video/SVCD/VCD is
shown on the TV screen.
Scoring result seems wrong (or “– –” appears).
]
The playback time with the scoring function is too short.
It is recommended to sing for more than one and a half
minutes. (If playback time is less than one minute, the
scoring is canceled.)
]
No input from the microphone or the input level (MIC
LEVEL) is too low.
]
You have sung in too low voice.
Timer Operations:
Daily Timer or Recording Timer does not work.
]
The System has been turned on when the on-time comes.
Timer starts working only when the System is turned off.
English
Language Code List
AA
Afar
AB
Abkhazian
AF
Afrikaans
AM
Ameharic
AR
Arabic
AS
Assamese
AY Aymara GD Scots Gaelic LA Latin QU Quechua TH Thai
AZ Azerbaijani GL Galician LN Lingala RM Rhaeto-Romance TI Tigrinya
BA Bashkir GN Guarani LO Laothian RN Kirundi TK Turkmen
BE Byelorussian GU Gujarati LT Lithuanian RO Rumanian TL Tagalog
BG Bulgarian HA Hausa LV Latvian, Lettish RU Russian TN Setswana
BH Bihari HI Hindi MG Malagasy RW Kinyarwanda TO Tonga
BI Bislama HR Croatian MI Maori SA Sanskrit TR Turkish
BN Bengali, Bangla HU Hungarian MK Macedonian SD Sindhi TS Tsonga
BO Tibetan HY Armenian ML Malayalam SG Sangho TT Tatar
BR Breton IA Interlingua MN Mongolian SH Serbo-Croatian TW Twi
CA Catalan IE Interlingue MO Moldavian SI Singhalese UK Ukrainian
CO Corsican IK Inupiak MR Marathi SK Slovak UR Urdu
CS Czech IN Indonesian MS Malay (MAY) SL Slovenian UZ Uzbek
CY Welsh IS Icelandic MT Maltese SM Samoan VI Vietnamese
DA Danish IW Hebrew MY Burmese SN Shona VO Volapuk
DZ Bhutani JI Yiddish NA Nauru SO Somali WO Wolof
EL Greek JW Javanese NE Nepali SQ Albanian XH Xhosa
EO Esperanto KA Georgian NL Dutch SR Serbian YO Yoruba
ET Estonian KK Kazakh NO Norwegian SS Siswati ZU Zulu
EU Basque KL Greenlandic OC Occitan ST Sesotho
FA
FI
FJ
FO
FY
GA
Persian
Finnish
Fiji
Faroese
Frisian
Irish
KM
KN
KO
KS
KU
KY
Cambodian
Kannada
Korean (KOR)
Kashmiri
Kurdish
Kirghiz
OM
OR
PA
PL
PS
PT
(Afan) Oromo
Oriya
Panjabi
Polish
Pashto, Pushto
Portuguese
SU
SV
SW
TA
TE
TG
Sundanese
Swedish
Swahili
Tamil
Telugu
Tajik
43
Page 48

English
Specifications
Amplifier section
Output Power:
MAIN SPEAKERS: 150 W per channel, min. RMS, driven into
Digital output:
OPTICAL DIGITAL OUTPUT:
Audio input sensitivity/Impedance
(Measured at 1 kHz, with tape recording signal 300 mV)
AUX: 300 mV/47 k
MIC 1/2: 3.0 mV/50 k
VIDEO OUT:
Color system: NTSC/PAL selectable
VIDEO (composite): 1 V(p-p)/75
S-VIDEO: Y (luminance) 1 V(p-p)/75
COMPONENT (Interlace/Progressive):
Speaker Terminals: 4
4 Ω at 1 kHz with no more than 10% total harmonic
distortion.
–21 dBm to –15 dBm (660 nm ±30 nm)
Ω
Ω
Ω
C (chrominance, burst) 0.286 V(p-p)/75
(Y) 1 V(p-p)/75
(PB/PR) 0.7 V(p-p)/75
Ω − 16 Ω
16
Ω − 32 Ω
(Main speakers)
(Surround speakers)
Ω
Ω
Ω
Ω
Tuner section
FM tuning range: 87.50 MHz – 108.00 MHz
AM (MW) tuning range: 531 kHz – 1 710 kHz (at 9 kHz)
530 kHz – 1 710 kHz (at 10 kHz)
Disc player section
Playable disc: DVD Video/DVD Audio/CD/VCD/SVCD
Dynamic range: 80 dB
Horizontal resolution: 500 lines
Wow and flutter: Immeasurable
CD-R/CD-RW (recorded in Audio CD/Video CD/
Super Video CD formats and MP3/WMA/JPEG
files)
DVD-R (recorded in DVD Video format)
DVD-RW (recorded in DVD Video format or DVDVR format)
DVD-RAM (recorded in DVD-VR format)
Cassette deck section
Frequency response
Normal (type I): 50 Hz – 14 000 Hz
Wow and flutter: 0.15% (WRMS)
General
Power requirement: AC 110 V / AC 127 V / AC 220 V / AC
Power consumption: 195 W (at operation)
Dimensions (W/H/D) (approx.): 185 mm x 460 mm x 361 mm
Mass (approx.): 10.9 kg
230 V – AC 240 V , (adjustable with
the voltage selector), 50 Hz / 60 Hz
20 W (on standby)
Supplied Accessories
See page 3.
Speakers
Main Speakers
Type: 3-Way 3-Speaker Bass Reflex
Speaker systems: Woofer: 18 cm cone x 1
Power handling capacity: 150 W
Impedance: 4
Frequency range: 37 Hz – 31 000 Hz
Sound pressure level: 85 dB/W•m
Dimensions (W/H/D) (approx.): 204 mm x 460 mm x 271 mm
Mass (approx.): 4.6 kg each
Surround Speakers
Speaker systems: 8 cm cone x 1
Power handling capacity: 40 W
Impedance: 16
Dimensions (W/H/D) (approx.): 105 mm x 230 mm x 125 mm
Mass (approx.): 0.7 kg each
Design and specifications are subject to change without notice.
• Manufactured under license from Dolby Laboratories.
“Dolby”, “Pro Logic”, “MLP Lossless”, and the double-D
symbol are trademarks of Dolby Laboratories.
• “DTS” and “DTS 2.0+DIGITAL OUT” are trademarks of
Digital Theater Systems, Inc.
• This product incorporates copyright protection technology
that is protected by U.S. patents and other intellectual property
rights. Use of this copyright protection technology must be
authorized by Macrovision, and is intended for home and
other limited viewing uses only unless otherwise authorized
by Macrovision. Reverse engineering or disassembly is
prohibited.
• “CONSUMERS SHOULD NOTE THAT NOT ALL HIGH
DEFINITION TELEVISION SETS ARE FULLY
COMPATIBLE WITH THIS PRODUCT AND MAY
CAUSE ARTIFACTS TO BE DISPLAYED IN THE
PICTURE. IN CASE OF 525 OR 625 PROGRESSIVE SCAN
PICTURE PROBLEMS, IT IS RECOMMENDED THAT
THE USER SWITCH THE CONNECTION TO THE
‘STANDARD DEFINITION’ OUTPUT. IF THERE ARE
QUESTIONS REGARDING OUR TV SET
COMPATIBILITY WITH THIS MODEL 525p AND 625p
DVD PLAYER, PLEASE CONTACT OUR CUSTOMER
SERVICE CENTER.”
(Magnetically-Shielded Type)
Mid: 5 cm cone x 1
Tweeter: 2 cm dome x 1
Ω
Ω
44
Page 49

OPTICAL DIGITAL OUTPUT Signals
English
DIGITAL AUDIO
OUTPUT
Playback disc STREAM/PCM DOLBY DIGITAL/PCM PCM ONLY
DVD Video
with 48 kHz, 16/20/24 bit Linear
PCM
with 96 kHz, Linear PCM 48 kHz, 16 bit Linear PCM
with Dolby Digital Dolby Digital bitstream 48 kHz, 16 bit Linear PCM
with DTS DTS bitstream 48 kHz, 16 bit Linear PCM
DVD Audio
DVD-RW/RAM in DVD-VR format
SVCD, VCD, CD
CD with DTS
MP3/WMA disc
*1 While playing some DVDs, digital signals may be emitted at 20 bits or 24 bits (at their original bit rate) through the OPTICAL DIGITAL
OUTPUT terminal if the discs are not copy-protected.
*2 There is no output for DVD Audio with content protection set.
2
*
with 48/96/192 kHz, 16/20/24 bit
Linear PCM
with 44.1/88.2/176.4 kHz, 16/20/
24 bit Linear PCM
with Dolby Digital Dolby Digital bitstream 48 kHz, 16 bit Linear PCM
with DTS DTS bitstream 48 kHz, 16 bit Linear PCM
with 48 kHz, 16/20/24 bit Linear
PCM
with Dolby Digital Dolby Digital bitstream 48 kHz, 16 bit Linear PCM
44.1 kHz, 16 bit Linear PCM*1/48 kHz, 16 bit Linear PCM*
DTS bitstream 44.1 kHz, 16 bit Linear PCM
32/44.1/48 kHz, 16 bit Linear PCM
Output Signals
48 kHz, 16 bit Linear PCM*
48 kHz, 16 bit Linear PCM
44.1 kHz, 16 bit Linear PCM
48 kHz, 16 bit Linear PCM*
1
1
1
45
Page 50

English
Remote control
Button Page Button Page
AUDIO
z
TV
x
77
77
¡¡¡¡ / 11
¢¢¢¢ / 44
88
88
5555 / ∞∞∞∞ / 3333 / 2222 /
ENTER
+ / –
10 keys
3D PHONIC
ACTIVE
BASS EX
ANGLE
AUDIO
AUDIO/TV
selector
AUDIO VOL
+ / –
AUX
CANCEL
CHANNEL +/–538
CLOCK/
TIMER
DIMMER
DISC 1–5
DVD LEVEL
DVD/CD 33
ECHO
FM MODE
FM/AM
GLANCE
BACK
GROUP/
TITLE
11
44
8
9 Q
7 .
P
E
F
T
D
h
y
r
m
,
v
l
k
H
2
o
33
4
s
P
b
p
e
7
38
9 – 11, 20
8, 10, 11, 18
9, 10
9, 18
10, 15, 17, 18,
23 – 28, 36, 38
13 – 15, 33, 34
9, 10, 19, 25, 38
14
12
17
16
7, 38
7, 12
7
20, 33, 35
15, 34, 35
15
9
14
7, 9
32
8
7, 8
17
9
KARAOKE
SCORING
KEY #
KEY
L / R
BALANCE
MIC MIX
MENU/PL
ON SCREEN
PAGE
PLAY MODE
REPEAT
RHYTHM AXg12
RESERVE
RETURN
REVERSE
MODE
SCAN MODE
SET
SET UP
SETTING
SLEEP
SOUND MODES13
SUB TITLE
TAPE-A 2222 33
TAPE-B 2222 33
TOP MENU/
PG
TV VOL + / –
TV
/VIDEO
V.MASKING
VFP
ZOOM
Main unit
Button Page Button Page
2
Display
77
77
11
¡¡¡¡ / 11
44
¢¢¢¢ / 44
88
88
ACTIVE
BASS EX. +/–
AUX
DEMO
Disc trays
DISC 1–5 0000 / 33
33
8
!
%
=
6
+
_
1
5
7
6
8 – 11, 20, 21
8, 10, 11, 18
9
9, 18
12
7
7
9
9, 21, 30
DISC REC
START
DUBBING
DVD/CD
DVD LEVEL
FM/AM
KARAOKE
SCORING
MIC 1 / MIC 2&31
MIC LEVEL
PHONES
PRESET +/–
Parts Index
Button Page Button Page
PUSH-OPEN 00
1
32
:
32
A
32
F
12
d
31, 33
W
10, 26
R
23 – 26
i
17
O
19, 20
;
21, 28
f
33
Y
10
I
11
U
14
j
8,
12,
13, 15, 33,
34, 35
w
36
G
12, 33
/
15
t
17
33
3
7, 11
33
n
7, 11
q
10, 26
6
38
c
38
a
32
U
14
u
18, 28
¡
30
£
30
0
7, 9
)
14
9
7, 8
@
32
*
31
7
7
=
9
REC START/
STOP
REVERSE
MODE
RHYTHM AX$12
00
# ^
™
¢
Remote control
1
2
3
4
5
6
7
8
9
p
q
w
e
r
t
y
u
i
o
;
a
s
d
f
g
h
j
k
l
/
Main unit
1
2
3
4
5
6
_
)
(
¡™£¢
7
11, 29
30
11, 29
+
SOUND MODE(13
TAPE-A
TAPE-B
TUNING
VOLUME +/–~7, 12, 31
4
3
%
z
c
b
m
.
Q
E
R
123
456
789
10 0 +10
T
U
O
A
D
G
8
9
0
=
~
!
@
#
$
%
^
&
*
7, 11, 30
7, 11, 29, 30
8
x
v
n
,
P
W
Y
I
:
S
F
H
Remote
sensor
46
Page 51
简介
使用前注意事项
安装
•
将本机安放在通风良好之处,以防内热积聚在机内。
切勿将本机安装在靠近热源,受到阳光直射,
灰尘多或有震动的地方。
•
将本机安放在平坦,干爽且温度不过于炎热或寒冷的地方—
5°C 和 35°C
介于
•
使本机与电视机之间保留足够的距离。
•
使扬声器远离电视机,以防对电视机造成干扰。
电源
•
在将本机自墙壁插座拔出时,请务必拔插头,而不要拔交流
电源线。
水蒸汽结露
在下列情况下,本机内部的镜头上可能会凝结水蒸汽:
打开房间内的取暖设备后
•
在潮湿的房间内
•
将本机直接从一寒冷处移动到温暖处。
•
如果出现结露,本机可能发生故障。遇此情况,可将本机启
动数小时,待结露蒸发掉后拔出交流电源线,然后再重新插
回。
内热
确保本机周围有良好的通风环境。通风不良会导致热度过高
•
而损坏本机。
本机的内部安装了一个冷却扇,用以防止机内热量积聚。
–
其他
•
如果发现有金属物体或液体落入机内,请在进行任何处置之
前首先拔掉交流电源线,并向经销商咨询解决办法。
•
如果长时间内不打算操作本机,请将交流电源线从墙壁插座
中拔出。
无论发生任何问题,请先拔掉交流电源线并向经销商咨询。
之间。
切勿用湿手握交流电源线。
切勿堵住通风口或通风孔。如果被报纸或布等
堵住,热量可能无法散出。
切勿拆卸本机,因为机内没有用户能够自行修
理的零件。
内容
...................................................................................... 3
连接
信息显示
日常操作—播放
日常操作—调整声音和其他项目
DVD/VCD
高级碟片操作
在屏幕上操作碟片
录音的操作
欣赏卡拉
定时器的操作
设置菜单操作
操作电视机
附加信息
部件索引
.............................................................................. 6
.................................................................... 7
取消屏幕演示
收听广播
播放碟片
播放磁带
调整音量
增强低音
调整输出平衡
选择声音模式
建立个人声音模式—用户模式
创建
3
预设
DVD
切换颜色制式和扫描模式
切换图像色调
改变显示屏亮度
设定时钟
自动关闭电源
选择音频曲目
选择字幕语言
选择观赏角度
快速观看播放
选择可浏览静止图像
播放赠送组
特殊的图像播放方法
................................................................... 7
........................................................................... 8
........................................................................... 9
......................................................................... 11
.......................................... 12
......................................................................... 12
......................................................................... 12
................................................................. 12
................................................................. 13
......................................... 13
维声场— 3 维立体声
自动声音增高水平
............................................. 14
......................................... 14
................................................ 14
................................................................. 14
.............................................................. 15
......................................................................... 15
................................................................. 15
的特殊操作
..................................................... 16
................................................................. 16
................................................................. 17
................................................................. 17
................................................................. 17
....................................................... 17
..................................................................... 18
....................................................... 18
..................................................................... 19
编排播放顺序—程序播放
按任意顺序播放—随机播放
重复地播放—重复播放
阻止碟片弹出—儿童锁
................................................ 19
............................................ 20
................................................... 21
................................................... 21
.............................................................. 22
关于屏幕条窗
使用屏幕条窗进行操作
在控制屏幕上进行操作
................................................................. 22
................................................... 23
................................................... 26
......................................................................... 29
OK ..................................................................... 31
跟随唱 (卡拉
消除原唱—原唱掩蔽
给您的卡拉
预定卡拉
OK) ....................................................... 31
....................................................... 32
OK
技巧打分
OK
歌曲—卡拉
............................................... 32
OK
程序播放
......................... 33
..................................................................... 34
..................................................................... 36
......................................................................... 38
............................................................................ 39
故障排除
规格
......................................................................... 42
................................................................................ 44
........................................................................... 46
中
文
1
Page 52
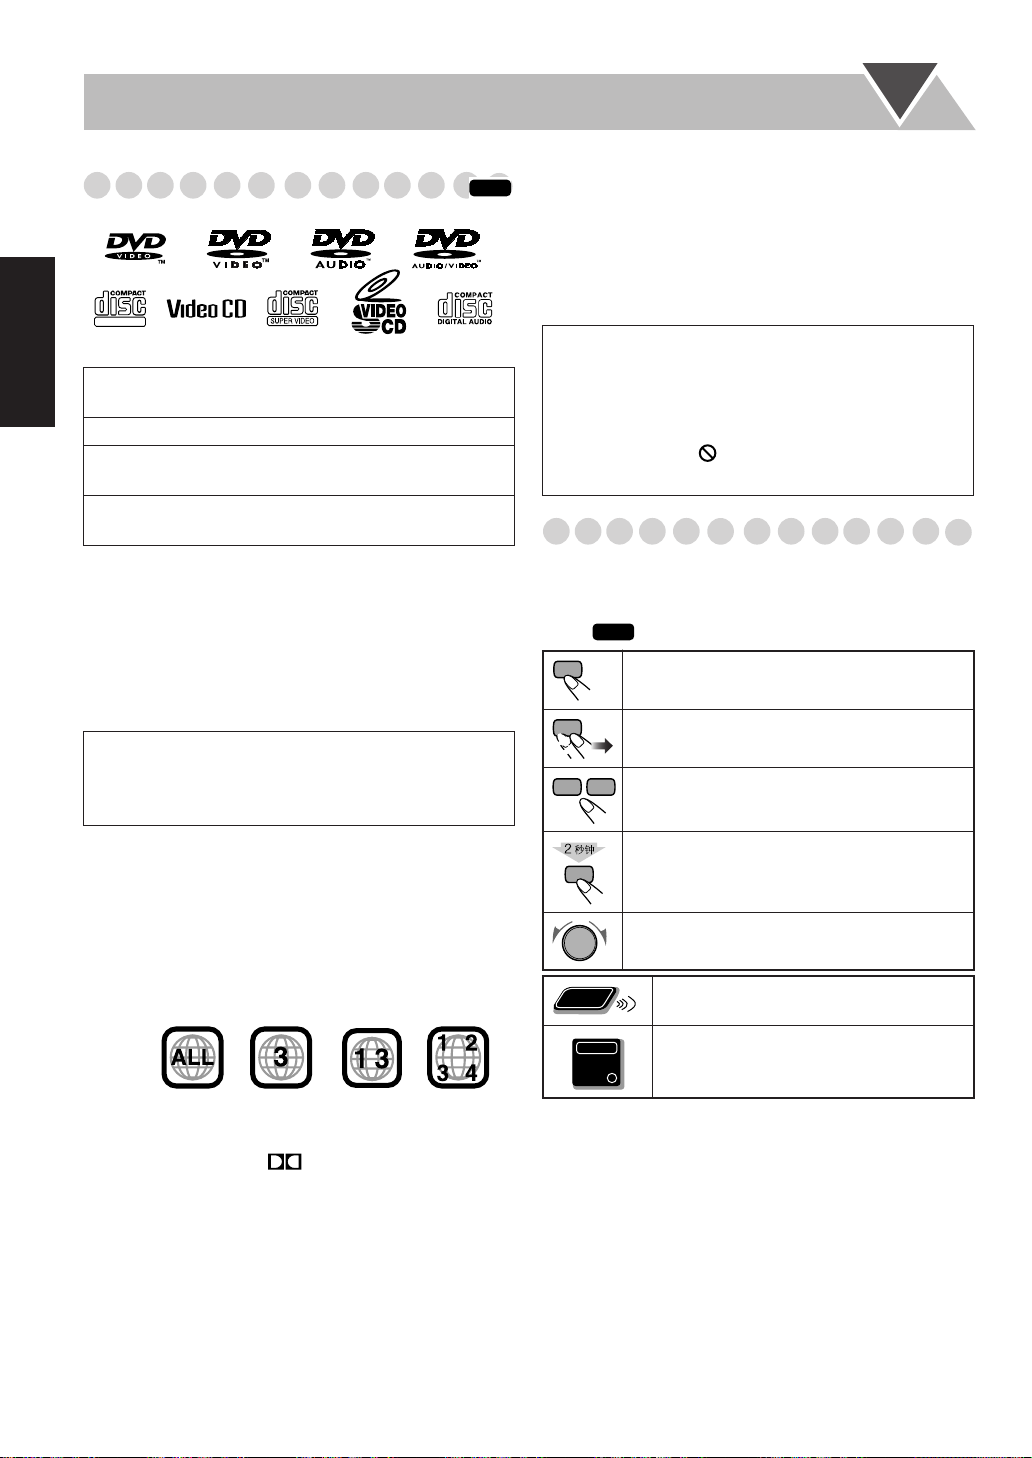
Main Unit
ONLY
中
文
可以播放的碟片类型
DIGITAL VIDEO
DVD
• CD-R/-RW
片及
• DVD-R
• DVD-RW
格式录制的碟片。
• DVD-RAM
片。
除上述碟片之外,本机还可以播放录制在文字
(图表
不能播放下列碟片:
•
DVD+R
等。
播放这些碟片会产生噪音并损坏扬声器。
本手册中在说明
•
“曲目”被互换使用。
双碟播放之注意事项:
“
DualDisc
音频”标准不兼容。因此,建议您不要在本产品上播放双
碟的非
DVD
标志是
格式/标识许可公司的商标。
:以音频
CD/
MP3/WMA/JPEG
:以
:
视频格式录制的碟片。
DVD
以
视频格式或视频记录 (
DVD
:以视频记录 (
)和特版
CD
,
DVD+RW, CD-I( CD-I
里的音频数据。
CD
MP3/WMA/JPEG
(双碟)”的非
碟面。
DVD
视频
CD/SVCD
文件。
DVD-VR
就绪),图片
的操作时,“文件”和
碟面与 “压缩碟片数码
DVD
格式录制的碟
DVD-VR
)格式录制的碟
CD, CD-G
INFO
CD
在播放多声道格式编码的
信号转换成
发出经下行混合后的声音。
想要从这些多频道格式编码的
•
本机后面板上
输出) 端子上连接一个适配型解码器或带有适配型内设解码
装置的功率放大器。
重要事项:在播放碟片之前,确保进行下列操作
打开电视机,在电视机上选择适当的输入模式,以便在
•
电视屏幕上观看图像或屏幕显示。
播放碟片时,您可以根据个人爱好来变更初始设定。参
•
阅第
36
)
在按下按键时如果
片不接受您试图进行的操作。
本手册的阅读方法
•
按键和控制旋钮的操作方法按下表所示进行说明。
•
一些相关性提示和注释统一归纳在后面的 “进一步掌握本机
的性能”和 “故障排除”章节里,而未在操作说明章节内给
INFO
出(
时,本机适当地将这些多声道
DVD
声道信号,并从主扬声器和距阵环绕声扬声器
2
欣賞強勁音響時, 须在
DVD
OPTICAL DIGITAL OUTPUT
页的 “设置菜单操作”。
标记在电视屏幕上出现, 表示碟
“”
图标表示该部分内容还有另外一些信息)。
指示您短促地按下按键。
指示您短促并反复地按下按键,直到所需的项
目被选取。
指示您按其中一个按键。
(光纤数码
...
关于颜色制式
本机与
NTSC 和 PAL
一种制式录制的碟片。
想要切换颜色制式时,参阅第
区域代码须知
本机只能播放区域代码中含有数字 “ 3”的
例:
制式均兼容,可以播放以两者当中任何
音频格式
本机可以播放下列数码音频格式。
• LPCM
DTS
(数码影院系统),
2
(线性
PCM
),
页。
14
DIGITAL
MLP
(莫瑞颠无损耗压缩)
视频。
DVD
(杜比数码),
指示您在指定的时间内按住按键不要松开。
箭头里的数字是指需要按住多长时间 (本例为
秒钟)。
2
指示您按指定方向旋转控制旋钮。
Remote
ONLY
指示您仅能使用遥控器进行此项操作。
指示您仅能使用主机进行此项操作。
Page 53
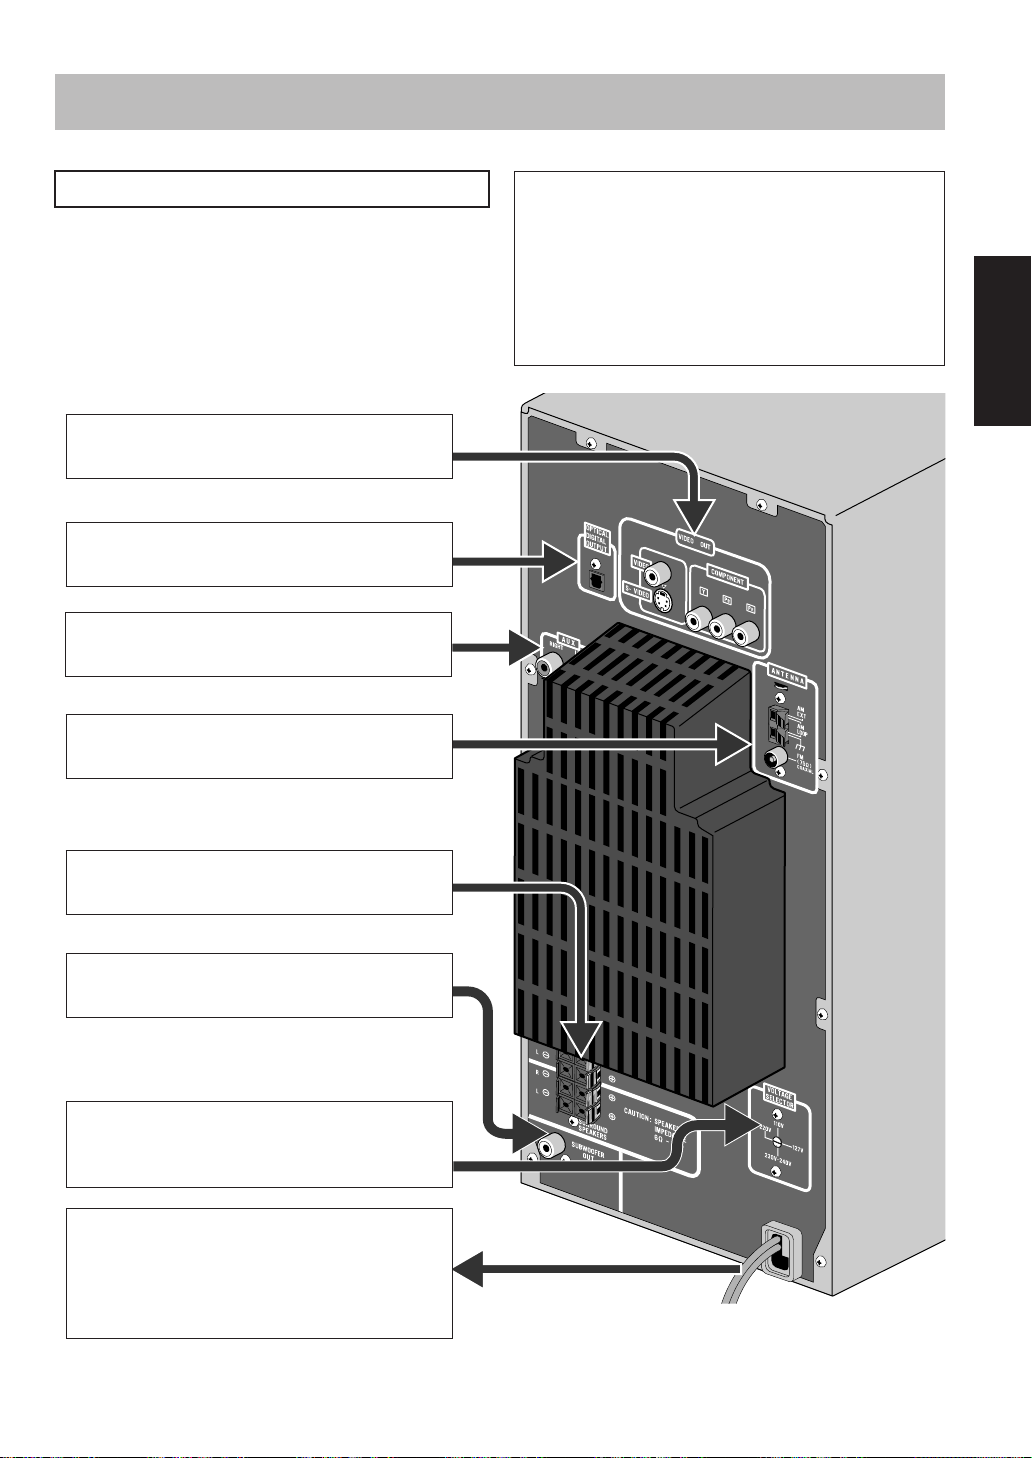
连接
切勿在所有其他连接完成之前连接交流电源线。
•将 VIDEO OUT
贝保护的碟片时,通过
可能会影响观赏效果。将
制式可能会影响观赏效果。
VCR
自电视机/显示器的视频输入
~
参阅第
Ÿ
自数码音频组件的数码输入,如:
参阅第
自外接组件的模拟音频输出 (
!
参阅第
自
AM/FM
⁄
参阅第
直接连接至电视机的视频输入。在播放拷
VCR 将 VIDEO OUT
连接至综合
CD
VCR
等)
4
4
4
4
页。
页。
页。
页。
VIDEO OUT
天线
连接至电视机
TV/
刻录机
附件
天线 ( x1)
• FM
环形天线 ( x1)
• AM
复合视频导线 ( x1)
•
遥控器 ( x1)
•
电池 ( x2)
•
交流电源插头适配器 ( x1)
•
如果缺失任何项目,请立即与您的经销商联系。
中
文
自主前置/距阵环绕声扬声器
@
参阅第
自加强型超重低音扬声器
¤
参阅第
电压选择器
#
插上电源之前,确认电压选择器指向的位置。
参阅第
‹
接至墙壁插座
只有在所有的连接工作完成之后才可以插上交流
电源线。
•
页。
页。
页。
5
5
5
如果交流电插头与墙壁插座不匹配,请使用附
带的交流电插头适配器。
3
Page 54
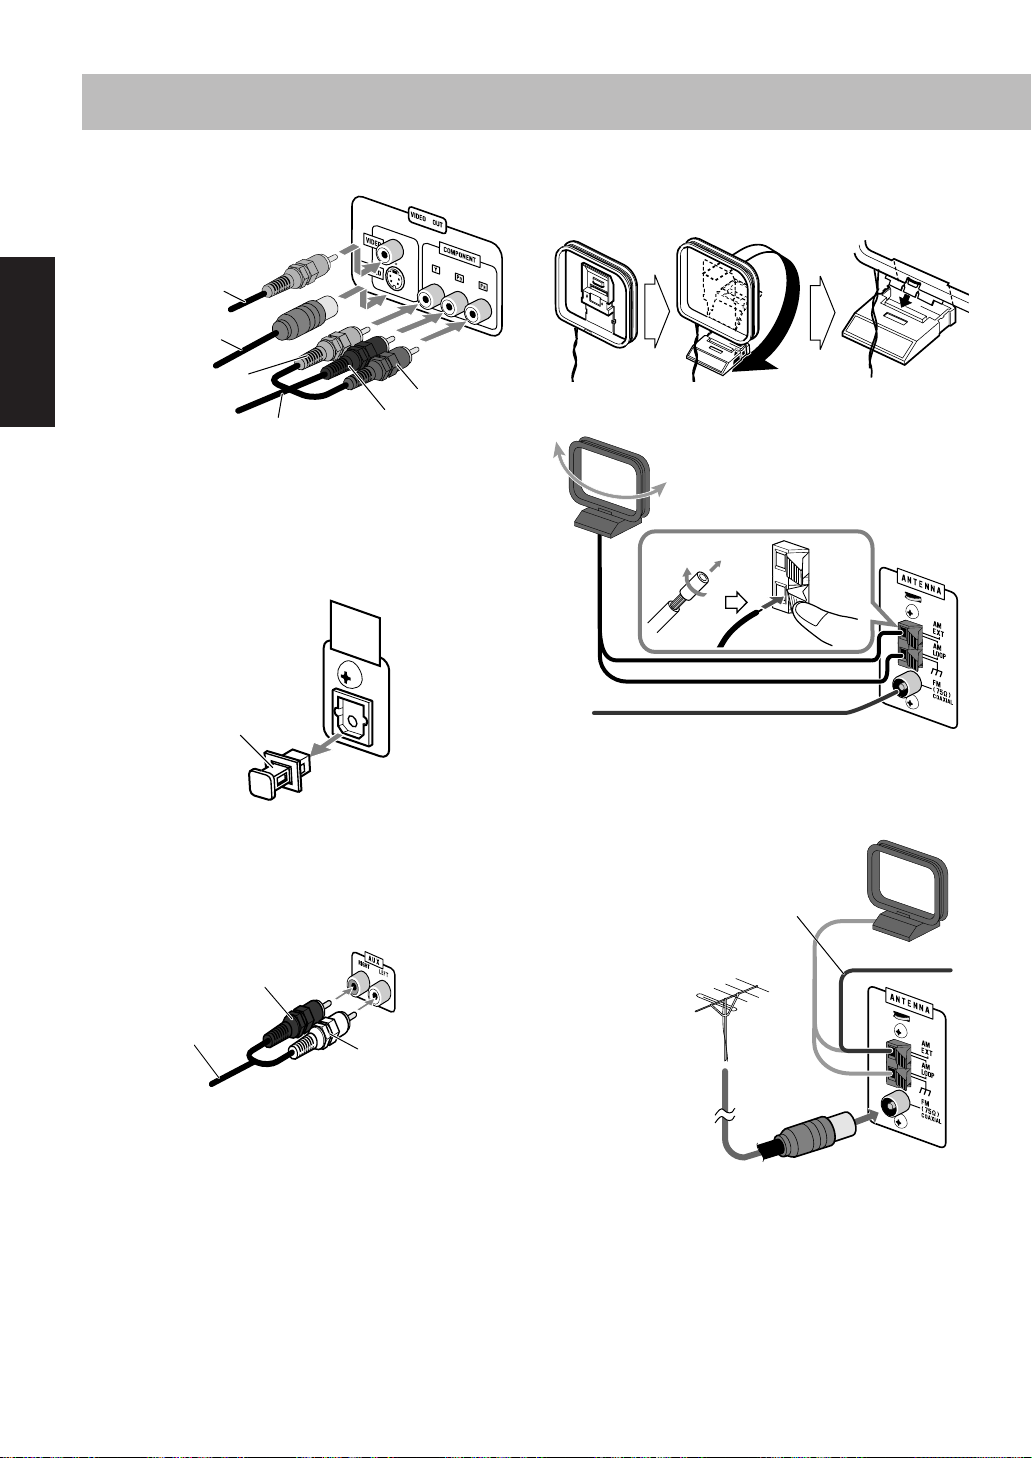
电视机/显示器
~
复合视频导线
(附带)
⁄
AM/FM
如何装配
AM
天线
环形天线
中
文
S
视频导线
(不附带)
•
想要选择逐行扫描模式 (参阅第
COMPONENT
•
VIDEO
连接
孔中任何一个您想使用的插孔。
Ÿ
数码音频组件
根据连接的数码音频设备,正确设定 “音频”菜单中的 “数
•
码音频输出”(参阅第
生很响的噪音,损坏扬声器。
绿
分量视频导线 ( 不附带 )
14
插孔。
S-VIDEO
插孔,
插孔或
保护盖
页)。如果设定不正确,可能会产
37
蓝
页),使用
COMPONENT
OPTICAL
DIGITAL
OUTPUT
红
如何连接
插
如何获得更好的
AM/FM
FM
天线 ( 附带 )
伸展天线以获得最佳接收效果。
天线
环形天线 ( 附带 )
AM
旋转天线直到获得最佳接收效果。
AM/FM
接收效果
AM
环形天线 ( 附带 )
保持在连接状态。
外接组件
!
立体声音频导线
(不附带)
4
红
白
•
•
塑料皮绝缘线 ( 不附带 )
水平方向伸展。
室外天线
FM
( 不附带 )
卸下附带的
DIN45325
确保天线的导体不要与任何其他端子,接通中的导线以及电
源线相碰触。还要使天线远离本机的金属部件,接通中的导
线以及交流电源线。否则会造成接收效果不良。
FM
天线,用带有同轴型连接器 (
75
Ω
)的
导线连接
FM
IEC 或
室外天线。
Page 55

主前置扬声器和距阵环绕声扬声器
@
在连接扬声器导线时,请对准扬声器端子的电极:红色/白
•
色与 ( +)相连接,黑色与 ( –)相连接。
12
如何取下主扬声器格子窗
插孔
插销
中
34
自右前置主扬声器
自左前置主扬声器
自右置距阵环绕声扬
声器
只能使用主机后面板扬声器端子所标示阻抗的扬声器。
•
前置主扬声器受磁场屏蔽以避免电视机的颜色失真。然而,
•
如果安装不当,可能会引起颜色失真。因此,安装扬声器时
请注意下列事项。
将电视机放置在电视机附近时,关闭电视机主电源开关或
–
在安装扬声器前拔去电源插头。
然后等至少
尽管您遵循了上述说明,有的电视机仍会受到影响。如果此
种情况发生,将扬声器移至远离电视机的地方。
分钟再打开电视机主电源开关。
30
切勿在每个端子上连接一只以上的扬声器。
•
切勿推或拉扬声器因为这样会损坏扬声器底
•
部的地脚。
自左置距阵环绕声扬声
器
加强型超重低音扬声器
¤
自加强型超重低音扬声器
( 不附带 )
#
如何调整电压选择器
电压标记
着手准备遥控器
扬声器格子窗
使用螺丝刀转动电压选择器,让电压
标记指向与本机供电电压相同的电压
值。(另请参阅封底页。)
切勿在设定电压选择器和完成所有的连接工
作之前接通电源。
使用遥控器时,尽量将遥控
器顶部对准遥感器。如果在
斜线位置进行操作,操作的
有效范围 (大约
会变短。
5 m
)可能
文
R6(SUM-3)/AA(15F)
按联邦,州际以及当地的规定适当地处理电池。
•
切勿为电池充电,使电池短路,分解电池或
加热电池或将其扔置于火中。
5
Page 56
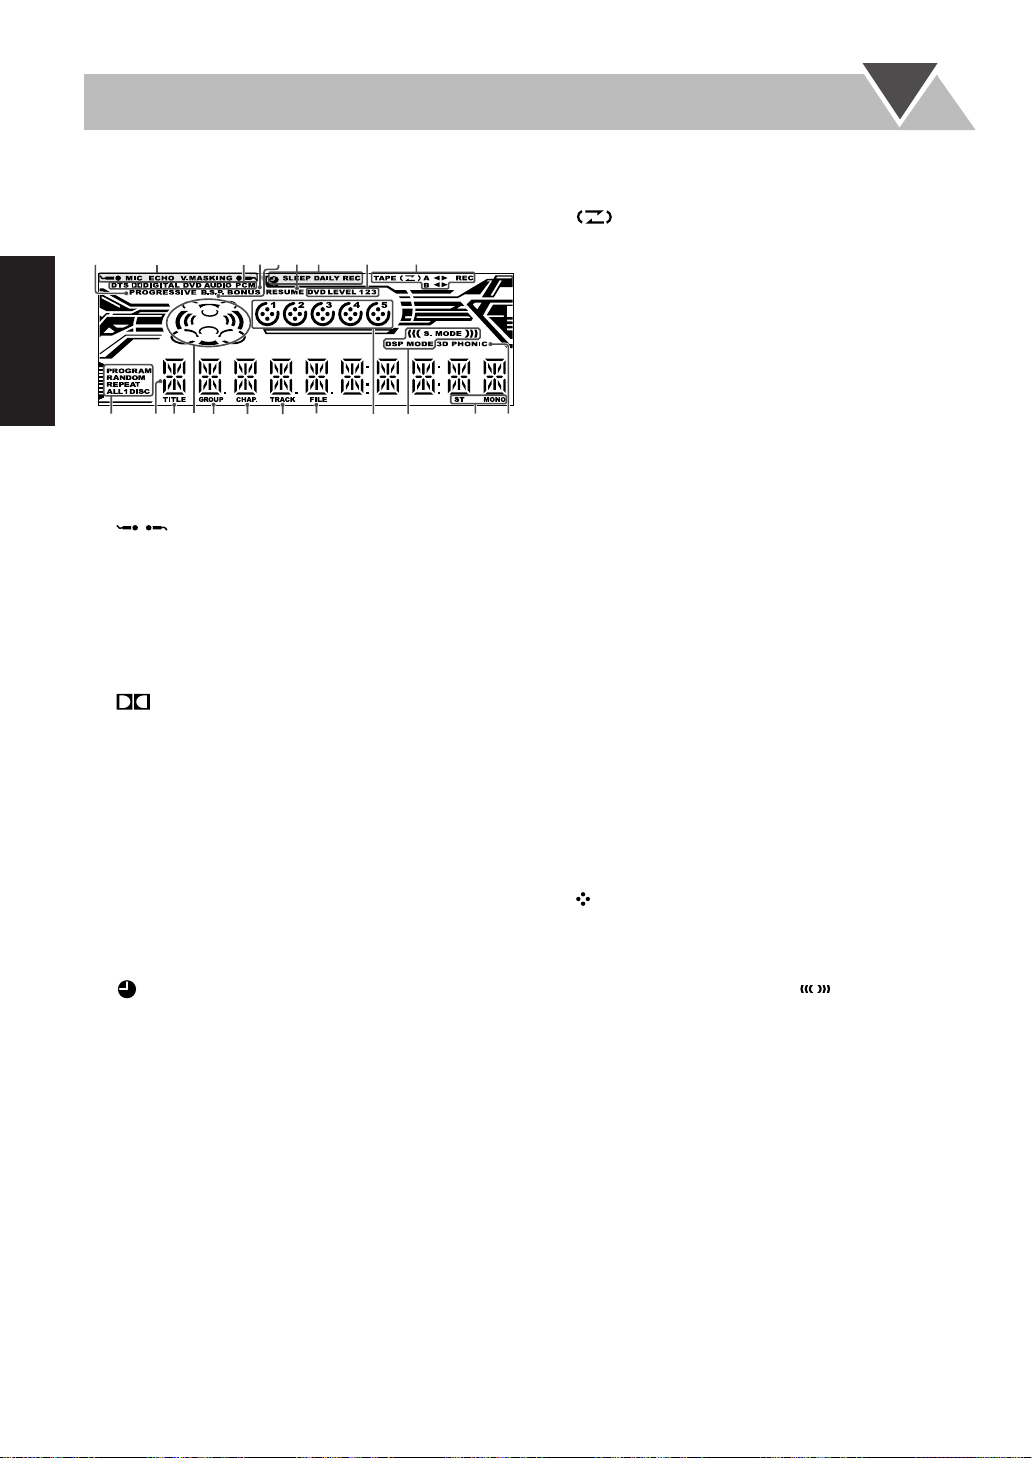
中
文
信息显示
磁带操作指示灯
在操作本机的过程中,显示屏上会出现许多指导性信息显示。
在操作本机之前,请首先弄清显示屏上的指示灯是在何时并
如何点亮。
13289
e
wpq
1 PROGRESSIVE
•
选择逐行扫描模式时点亮。
OK
2
卡拉
•
• MIC
• ECHO
操作模式指示灯 (参阅第
:麦克风混频模式启动时点亮;使用打分功能时
/
闪烁。
:麦克风混频模式启动时点亮;使用打分功能时闪
烁。
:回音功能启动时点亮。
• V.MASKING
3
播放源信号指示灯
• DTS
:播放源信号为
•
DIGITAL
• DVD
:检测出是
• DVD AUDIO
• PCM
:播放源信号为线性
4 BONUS
•
5 B.S.P.
•
6 RESUME
•
7
定时器指示灯
•
• SLEEP
• DAILY
• REC
指示灯
检测出是含有赠送组的
页)。
指示灯
可以播放
第
记忆播放功能启动时点亮 (参阅第
态时点亮。
设定状态时闪烁。
定状态时闪烁。
DVD
17
页)。
指示灯
:日常定时器或录音定时器处于待机,工作或设定状
:睡眠定时器启动时点亮。
:日常定时器处于待机时点亮;处于工作状态或
:录音定时器处于待机时点亮;处于工作状态或设
8 DVD LEVEL 1/2/3
•
该灯点亮指示
45
76
r
DVD
yu
t
指示灯
:原唱掩蔽模式启动时点亮。
DTS
时点亮。
:播放源信号为杜比数码时点亮。
DVD
视频时点亮。
:检测出是
DVD
PCM
DVD
音频上的幻灯式静止图像时点亮 (参阅
指示灯
视频递增水平。
i
31 至 33
音频时点亮。
时点亮。
音频时点亮 (参阅第
37
页)
页)。
;o
18
9
p
a
q
w TITLE
e
r GROUP
t CHAP.
y TRACK
u FILE
i
o
; FM
a 3D PHONIC
• TAPE
•
第
11
:磁带装载在
•A
:磁带装载在
•B
•
2
3
点亮时指示当前的走带方向。
–
在播放或录音时慢慢闪烁。
–
在倒带时快速闪烁。
–
• REC
碟片操作指示灯
• PROGRAM
• RANDOM
• REPEAT
• ALL DISC
• 1 DISC
:单曲/章节/步进重复模式启动时点亮。
•1
主屏幕
播放源为
•
音频信号指示灯
该灯点亮指示接收到音频声道信号。
•
该灯点亮指示组号。
•
该灯点亮指示章节号。
•
该灯点亮指示曲目号。
•
该灯点亮指示文件号。
•
碟片指示灯
• 1 – 5
:检测出碟片托盘中装有碟片时点亮;在播放的过程
•
中或暂停时旋转。
声音模式指示灯 (参阅第
• S.MODE
启动时点亮 (对应环绕声模式, 灯也点亮)。
• DSP MODE
接收状态指示灯
•ST
电台时点亮。
• MONO
维立体声模式启动时点亮 (参阅第
•3
: A 舱或
(转向模式):该灯点亮指示当前转向模式 (参阅
页)。
(走带方向):
:正在录音时点亮。
:重复播放模式启动时点亮。
:单碟重复模式启动时点亮。
指示灯
DVD
指示灯
指示灯
指示灯
指示灯
:该灯点亮指示当前碟片托盘。
:声音模式 (环绕声/
(立体声):在收到具有足够信号强度的
:在接收单声道
舱内装载磁带时均点亮。
B
舱时点亮。
A
舱时点亮。
B
:程序播放模式启动时点亮。
:随机播放模式启动时点亮。
:全曲重复模式启动时点亮。
视频时,该灯点亮指示标题号。
页)
13
/用户模式)之一
SEA
:环绕声模式之一启动时点亮。
立体声电台时点亮。
FM
指示灯
14
FM
页)。
立体声
6
Page 57
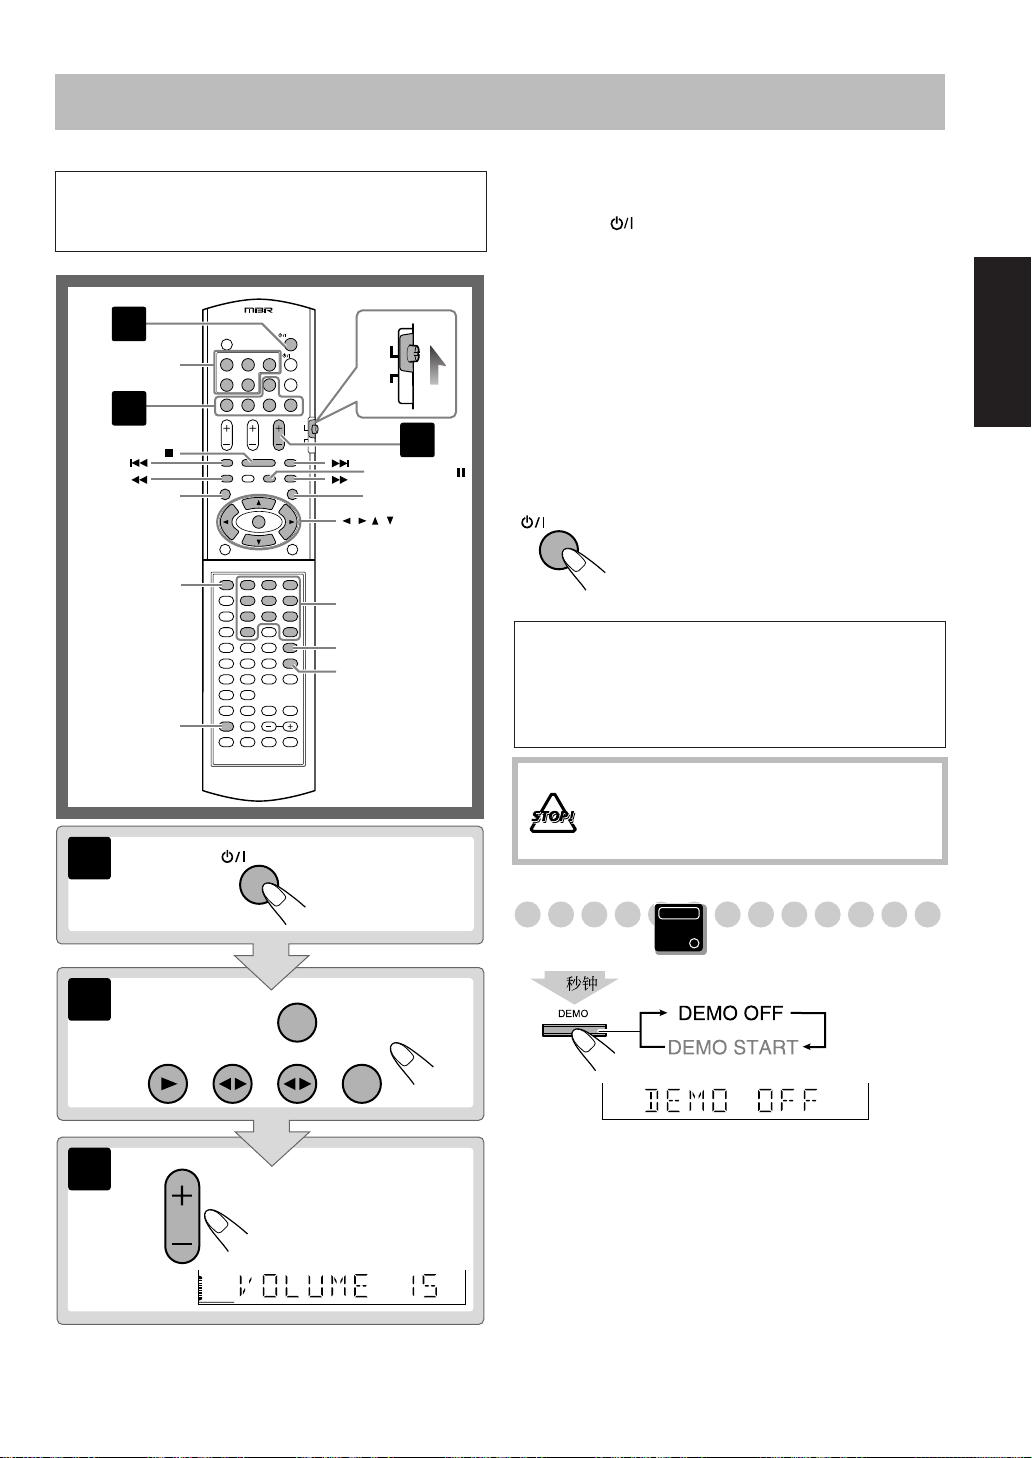
日常操作—播放
本手册主要讲解如何使用遥控器进行操作;但如果主机上存
在相同 (或相似)名称和符号的按键和控制旋钮,也可以
使用它们进行操作。
1
DISC 1 –
DISC 5
2
TOP MENU
GROUP/TITLE
SET
123
456
789
10 0 +10
AUDI O
TV
FM MODE /
MENU
////
ENTER
数字键
10
RETURN
REVERSE
MODE
3
启动电源。
¥
主机上的
•
选择播放源。
ø
如果选择的播放源已经准备就绪可以播放,播放会自动开
始。
•
调整音量。
π
按照后面的说明操作播放源。
[
STANDBY
不用按
AUDIO
放源选择键,本机便会自动启动。
如果按
AUX
灯熄灭。
键,只要在下一步操作中按某个播
键,开始播放的是外接组件上的播放源。
如何关闭本机 (使本机进入待机状态)
AUDIO
如何进行个人专听
可将一对头戴耳机连接到主机的
便不再发出声音。但在连接或戴上头戴耳机之前,请务必
将音量调低。
•
卸下头戴耳机时,扬声器便又开始启动。
主机上的
•
STANDBY
即使在待机状态下也总会有少许电量一直
在消耗。
灯点亮呈红色。
PHONES
插孔上。 扬声器
中
文
1
2
3
AUDIO VOL
AUDIO
AUX
切勿在将音量设定在极高水平时关闭本机
(使本机进入待机状态);否则,当您启动本
机或开始播放时,突然发出的高声可能损伤
您的听力,扬声器和/或头戴耳机。
取消屏幕演示
Main Unit
ONLY
2
想要开始屏幕演示时,选择
DEMO START
键。
7
Page 58

中
SET
SET
文
收听广播
如何选择
某些国家将
10 kHz
用
1
选择 “ AM”,然后关闭本机 (使本机进入待机状态)。
选择
AM
2
想要选择
调谐器的间隔距离
AM
AM
电台设定成
间隔。
调谐器间隔距离。
9 kHz
时:
9 kHz
间隔,而另一些国家则使
FM AM
Main Unit
ONLY
INFO
如果收到的
FM MODE
如何预设电台
您可以预设
想要在预设过程中取消操作,按
•
1
调收想要预设的电台。
如果选择
•
式。
开始预设。
2
电台听不清
FM
指示灯会在显示屏上点亮。 尽管
MONO
立体声效果丢失,但接受效果得到改善—
单声道接收模式。
想要恢复立体声效果时,
(
30 个 FM
预设电台,您可以为其储存单声道接收模
FM
MONO
Remote
ONLY
电台和
指示灯熄灭)。
Remote
ONLY
15 个 AM
CANCEL
再按一次该键
电台。
键。
时:
...
)
)
)
...
(按住该键然后按
想要选择
10 kHz
(按住该键然后按
如何选择波段 (
FM/AM
FM AM
FM/AM
如何调收电台
FM 或 AM
当选择
频率开始在显示屏上变换。
当收到某个具有足够强度信号的电台 (频率)后,频率搜索
便会停止。
当您反复地按下按键时,频率一步一步慢慢地变换。
•
时 ...
递增频率。
递减频率。
选择一个预设号码。
3
123
456
789
10 0 +10
例:
想要选择预设号码 5,按 5。
想要选择预设号码
按 5。
想要选择预设号码
然后按
•
储存该电台。
4
如何调收预设的电台
选择波段 (
1
FM/AM
FM 或 AM
FM AM
。
10
您也可以使用
)。
+/–
15
30
,按
,按
键。
,然后
+10
+10, +10
,
想要停止手动搜索电台时,按其中任意一个键。
8
Page 59

选择一个预设号码。
2
123
456
789
10 0 +10
例:
想要选择预设号码 5,按 5。
想要选择预设号码
后按 5。
想要选择预设号码
,然后按
+10
您也可以使用遥控器上的
•
4 /¢
键或主机上的
PRESET +/–
10
。
键。
15
30
,按
,按
播放碟片
在操作碟片之前,首先了解碟片是如何录制的。
• DVD
视频由 “标题”构成,标题内含有 “章节”,
/MP3/WMA
音频
JPEG
由 “组”构成,组内含有 “文件”, 而
VCD
只由 “曲目”构成。
•
JPEG
关于
由 “组”构成,组内含有 “曲目”,
27
播放,参阅第
页。
,然
+10
,
+10
INFO
DVD
CD/SVCD/
屏幕指南图标
在碟片播放的过程中,下列图标可能在电视屏幕上出现片
•
刻:
在含有多角度画面影像的播放开始处出现。
在含有多音频语言影像的播放开始处出现。
在含有多字幕语言影像的播放开始处出现。
下列图标还会在电视屏幕上出现,以指示当前的操作内
•
容。
,,,,,
想要关闭屏幕指南图标时,参阅第
•
页的 “屏幕指南”。
37
如何选择碟片
DISC 1 DISC 2
DISC 4 DISC 5
DISC 3
中文中
文
如何插入碟片
8 cm
•
在使用
想要关闭碟片托盘时,再按一次 0键。
•
如果对应同一碟片托盘按
播放。
想要开始播放时: 想要暂停播放时: 想要停止播放时:
DVD/CD
当前碟片开始播放。想要解除暂停时,按
DVD/SVCD/VCD/MP3
在播放
止点,当下次按
上次的停止点起开始进行—记忆播放。 ( 停止播放时
RESUME
在记忆播放功能启动状态下想要令播放完全停止时,
键。( 想要取消记忆播放时,参阅第
指示灯会点亮。)
Main Unit
ONLY
碟片时,将其放在碟片托盘的里圈上。
3
键,碟片托盘自动关闭并开始
FM MODE
DVD/CD 3
DVD/CD 3
键。
时:本机可以记忆播放的停
键再开始播放时,播放会接着
37
页的 “记忆播放”。)
按两次
如何选择标题/组
在播放碟片的过程中 ...
GROUP/TITLE
如何选择标章节/曲目
在播放碟片的过程中 ...
4
•
首次按
回当前章节/曲目的
开始处。
7
键可以返
开始播放。
Remote
ONLY
123
456
789
10 0 +10
123
或
456
789
10 0 +10
9
Page 60

如何搜索特定部位
123
456
789
10 0 +10
在播放
MP3/WMA
以外的碟片时
对应带有
7
...
在播放带有
会在显示屏上出现。
当碟片菜单在电视机上出现时,在菜单上选择一个项目。被
选项目便会开始播放。
功能的
PBC
功能的碟片时,“
PBC
SVCD/VCD
PBC
”字样而非播放时间
中
文
在
•
音。
想要返回到标准播放时,
如何直接选择项目
您可以直接选择标题/章节/曲目并开始播放。
对应
•
播放之后可以选择章节。
如何
您可以使用碟片菜单来操作碟片。
7
1
视频
DVD
DVD
/SVCD/VCD
按
DVD/CD 3
Remote
ONLY
视频,在开始播放之前可以选择标题,而在开始
例:
想要选择号码 5,按 5。
想要选择号码
。
5
想要选择号码
然后按
使用碟片菜单进行播放
对应
显示碟片菜单。
TOP MENU/PG MENU/PL
DVD
视频
/ DVD
或
音频
上进行搜索的过程中不发出声
键。
,按
15
+10
,按
30
+10, +10
。
10
Remote
ONLY
,然后按
,
123
456
789
10 0 +10
想要移到当前菜单的上一页
或下一页时:
例:
想要选择号码 5,按 5。
想要选择号码
。
5
想要选择号码
然后按
。
10
想要返回到原先的菜单时:
想要取消
碟片菜单不显示在电视屏幕上时,您也可以通过按
PBC
取消
想要重新启动
功能时
PBC
功能,开始播放。
PBC
功能时,
按
7
键,然后按
15
30
,按
+10
,按
+10, +10
RETURN
4
,然后按
,
10
数字键
键。
在碟片菜单上选择项目。
2
•
有些碟片还可以通过使用
项目。
10
ENTER
10
数字键输入数字的方法来选择
Page 61

播放磁带
如何插入磁带
您可以播放
•
建议不要使用
I
型磁带。
C-120
或更长的磁带。
推
如何切换走带方向
如何自动转向播放磁带
REVERSE
MODE
中
文
插入
关闭
想要开始播放时: 想要停止播放时:
TAPE-A TAPE-B
磁带转向,来回反复播放,直到您令播放停止。
磁带不会转向播放。当前的一面播完后便自动
停止。
磁带转向播放一次。
如何连续播放
当两个舱内都装有磁带时
REVERSE
MODE
您可以开始播放
舱和
A
TAPE-A TAPE-B
舱或
A
舱—接力播放
B
...
舱内的磁带。
B
想要倒带时:
11
Page 62

日常操作—调整声音和其他项目
中
文
遥控器
DVD LEVEL
ACTIVE
BASS EX.
RHYTHM AX
SET
CLOCK/TIMER
SLEEP
123
456
789
10 0 +10
AUDIO
TV
AUDIO VOL +/–
////
ENTER
VFP /
SCAN MODE
SOUND MODE
3D PHONIC
+/–
L/R BALANCE
SETTING
DIMMER
调整音量
音量水平可以在
– VOLUME 30
遥控器: 主机:
AUDIO VOL
32
以及
个阶段(
VOLUME MIN, VOLUME 1
VOLUME MAX
)之间进行调整。
增强低音
如何渐次调整低音水平—
您可以在水平 0(最低)至水平 2(最高)之间选择低音水
平。
遥控器: 主机:
ACTIVE
BASS EX
ACTIVE BASS EX.
主机
ACTIVE BASS
EX.
SOUND MODE
DVD LEVEL
12
VOLUME
RHYTHM AX
如何突出节奏感—
此功能可以突出强调高低音感。
RHYTHM AX
RHYTHM AX
ON
OFF
Remote
调整输出平衡
您可以调整扬声器的输出平衡。
输入平衡设定模式。
1
SETTING
ONLY
LR BALANCE
FANFARE
2
调整平衡。
LRBALANCE
R –6L –60
SET
Page 63

选择声音模式
您可以选择一种预设的声音模式。
SEA
模式
SOUND
MODE
ROCK
STADIUM
环绕声模式 *
SEA
(声音效果放大器)模式
ROCK
POP
CLASSIC
用户模式
USER1/2/3
多模式
MULTI
环绕声模式
DANCE
HALL
STADIUM
* SEA
效果加上环绕声效果便可以在您的房间内建立身临现
场的感觉。
想要取消声音模式,选择 “
增强低频和高频。适于原声音乐 (初始设
定)。
适于声乐。
适于古典音乐。
是指储存在记忆体中的个人模式。 参阅下
栏里的 “建立个人声音模式—用户模
式”。
环绕扬声器的声音输出与主扬声器的声音
输出相同。
*
增大回音和低音效果。
增加音色里的深度和明亮度。
增加音色里的清澄度和扩展度,如同身处
露天运动场。
POP CLASSIC
HALL
DANCE
OFF
”。
MULTI
OFF
Remote
ONLY
建立个人声音模式
INFO
—用户模式
您可以调整预设声音模式以建立符合您品位的个人声音模式。
变更后的设定可以储存成
式。
•
如果想在声音模式中加入环绕声成分,选择环绕声模式之一
进行调整。
当声音模式的名称在显示屏上显示时
1
SEA
进入
控制模式。
SET
USER1, USER2 和 USER3
...
模
2
SET
3
SEA
调整
1
2
LRBALANCE
4
选择一种用户模式。
LRBALANCE
BASS
调整
TREBLE
调整
•
您可以在
方案。
–5 至 +5
。
。
SET
的范围内调整高音和低音。
USER1 USER2 USER3
中文中
文
储存设定。
5
SET
•
声音模式切换成您已储存的模式。
13
Page 64

中
文
3
创建
在播放碟片的过程中
3D
3D
3D
预设
有时录制
低。因此您可以设定当前装载的
这样便不用在更换播放源时调整音量。
DVD LEVEL
维声场— 3 维立体声
...
3D PHONIC
3D PHONIC 3D PHONIC
动作
舞台
剧院
DVD
DVD
适于动作片和体育节目。
建立自然和温和的声音。使您在欣赏电影
时能够心情放松。
烘托出一种在大剧院内欣赏到的声音效
果。
自动声音增高水平
视频时所用的声音水平会比其他碟片和播放源
在电视屏幕上
DVD LEVEL1 DVD LEVEL2
3D PHONIC3D PHONIC
DVD
DVD LEVEL3
Remote
ONLY
INFO
视频的声音增高水平,
切换颜色制式和扫描模式
您可以选择与电视机的颜色制式 (
视频输出。
•
如果通过
以通过选择逐行扫描模式从内置
的画面。
•
只有当碟片播放停止时才能更改设定。
1
2
COMPONENT
输入颜色制式设定模式。
选择颜色制式和扫描模式。
LRBALANCE
NTSC / PAL NTSC 或 PAL
PAL
或
NTSC / PAL
PROG
3
储存设定。
SET
NTSC
NTSC 或 PAL
描
NTSC 或 PAL
插孔连接逐行扫描电视机,您可
DVD
NTSC
PAL PROG
NTSC
PAL
或
Remote
ONLY
播放器欣赏到高质量
INFO
)相匹配的
PAL
NTSC PROG
隔行扫描。适用于传统
电视机。
逐行扫描。适用于逐行扫
电视机。
随着数字增大,表示声音水平也在增高。
初始设定为 “
•
DVD LEVEL3
”。
14
Remote
切换图像色调
当观看在电视机上出现的图像时,您可以选择预设的图像色
调,或者对其进行调整并储存成个人喜爱的色调。
ONLY
如何选择预设的图像色调
1
播放时,显示
SCAN MODE
VFP
VFP
设定画面。
在电视屏幕上
0
0
0
0
0
0
Page 65
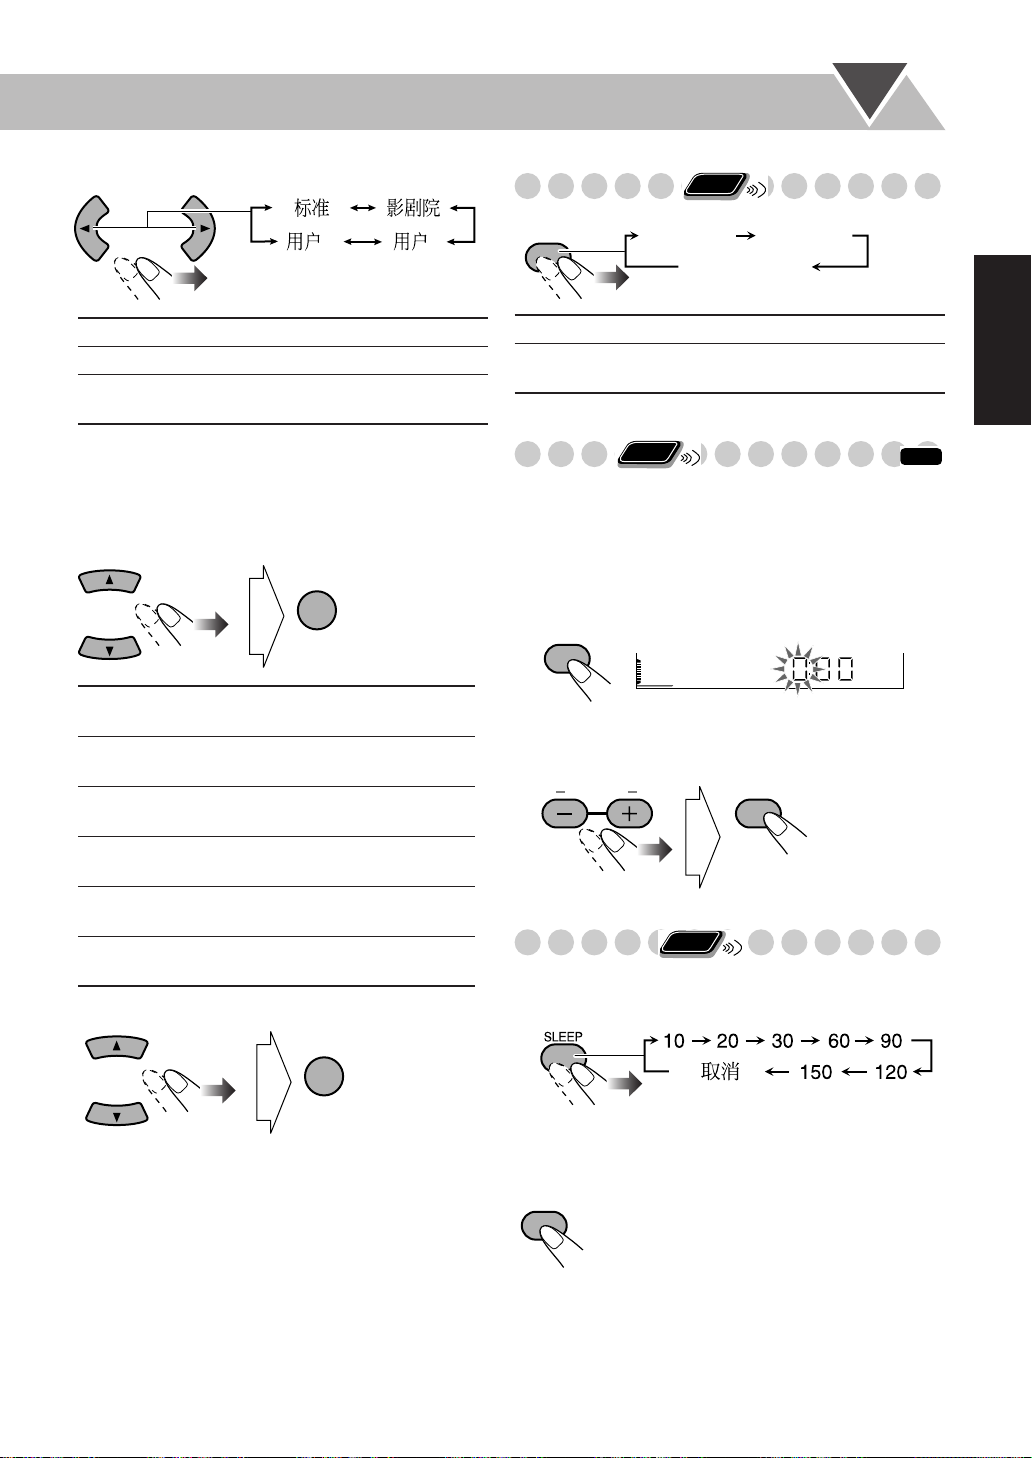
选择预设的图像色调。
2
改变显示屏亮度
Remote
ONLY
2 1
标准 标准情况下选此项。
影剧院 适于电影播放源。
用户 1/用户
2
您可以调整参数并储存设定内容
(参阅以下说明)。
如何调整图像色调
1
选择 “用户 1”或 “用户 2”。
•
操作上一页说明的步骤
2
选择想要调整的参数。
背景亮度 自然色过亮或过暗时调整此项。选
亮度 整体上看图像过亮或过暗时调整此
对比度
饱和度 图像发白或发黑时调整此项
色调 肌肤色不自然时调整此项
清晰度 图像模糊不清时调整此项
3
调整参数。
1 和 2
。
ENTER
定暗点和亮点的亮度 (
–8 至 +8
项(
远近位置不自然时调整此项
–7 至 +7
(
–7 至 +7
(
–7 至 +7
(
–8 至 +8
(
)。
)。
)。
)。
)。
–3 至 +3
)。
DIMMER
DIMMER 1 DIMMER 2
DIMMER OFF
(取消)
DIMMER 1
DIMMER 2
* RHYTHM AX
设定时钟
如果不设定内设的时钟,您无法使用任何一种定时器。
•
想要退出时钟设定模式时,根据需要按
键。
•
在操作的过程中想要修正误输入时,按
以退回到上一步骤。
1
启动时钟设定模式。
CLOCK/
TIMER
•
如果您以前已经调整过时钟,须反复按此键,直到时钟
时间开始闪烁。
2
调整小时,然后调整分钟。
LRBALANCE
此时内设的时钟开始计时。
自动关闭电源
使用睡眠定时器,您可以在音乐的伴奏下安然进入梦乡。
1
指定时间 (用分钟)。
显示屏和主机上的照明灯变暗 *。
显示屏变暗 (与
主机上的照明灯熄灭 *。
和
KARAOKE SCORING
Remote
ONLY
SET
Remote
ONLY
DIMMER 1
灯除外。
CLOCK/TIMER
CANCEL
相同)且
INFO
键。您可
中
文
重复步骤
4
想要清除
2 至 3
画面,再按一次
VFP
调整其他参数。
VFP
ENTER
键。
一直等到设定的时间消失。
2
如何确认关机之前的剩余时间
SLEEP
•
如果反复按此键,可以变更关机时间。
15
Page 66

中
文
DVD/VCD
遥控器
DVD/CD 3
GLANCE
BACK
AUDIO
TV
////
ENTER
的特殊操作
Remote
选择音频曲目
对应
视频:
DVD
要听的语言。
对应
音频:
DVD
要听的音频声道。
对应
DVD-VR/
选择想要播放的音频声道。
您也可以使用屏幕条窗来选择音频曲目 (参阅第
•
在播放
AUDIO
例:
DVD
视频的过程中
ONLY
在播放含有声音语言的章节时,可以选择想
在播放含有音频声道的曲目时,可以选择想
卡拉
OK SVCD/VCD
...
:
在播放曲目时,可以
页)。
23
INFO
AUDIO
SUB TITLE
ANGLE
ZOOM
PA GE
123
456
789
10 0 +10
10
数字键
在播放
DVD-VR, SVCD 或 VCD
AUDIO
ST1/ST2/ST
L1/L2/L
R1/R2/R
• SVCD
可以有
个声道去复录
4
SVCD
DVD-VR/VCD
想要听标准立体声 ( 2 声道)时选此项。
想要听左音频声道时选此项。
想要听右音频声道时选此项。
个音频声道。
4
声道的被录体 (
2
ST1 ST2
ST L R
卡拉
的过程中
L2
O
K SVCD
ST1/ST2
...
L1
R1R2
通常使用这
)。
16
Page 67

Remote
选择字幕语言
对应
视频:
DVD
ONLY
在播放含有多种语言字幕的章节时,您可以
选择想让其在电视屏幕上显示的字幕语言。
对应
DVD-VR
:
在播放过程中,您可以打开或关闭字幕语
言。
对应
:
SVCD
在播放过程中,尽管碟片上未录制字幕,您也
可以进行选择。
您也可以使用屏幕条窗来选择字幕语言 (参阅第
•
在播放
显示字幕选择窗。
1
SUB TITLE
DVD
视频过程中
...
23
页)。
Remote
选择观赏角度
仅对应
视频:在播放含有多制式观赏角度的章节时,您
DVD
ONLY
可以从不同的角度来观赏同一个画面。
您也可以使用屏幕条窗来选择观赏角度 (参阅第
•
在播放的过程中
ANGLE
例:
1/3
...
2/3
1
2
3/3
3
23
页)。
中
文
选择字幕语言。
2
例:
1/3 2/3
1/3
在播放
DVD-VR
SUB TITLE
ON
在播放
SVCD
SUB TITLE
的过程中
的过程中
2/3
OFF
...
3/3
JAPANESE
3/3
1/3
1
快速观看播放
DVD
仅对应
10
动
在播放的过程中
GLANCE BACK
视频
秒 (仅在同一标题内)—回顾。
Remote
ONLY
/DVD-VR
...
2/3
2
:您可以将当前播放位置朝前移
3/3
3
...
Remote
选择可浏览静止图像
仅对应
的曲目时,您可以选择 (翻页浏览)欲让其在电视屏幕上显
示的静止图像。
如果曲目上链接有幻灯式静止图像 (
•
在播放的过程中自动顺次显示。
您也可以使用屏幕条窗来选择页面 (参阅第
•
PAG E
音频: 在播放链接有幻灯式静止图像 (
DVD
每次按下该键时,静止图像会一个接一
个地变换 (如果可能的话)。
ONLY
B.S.P.
B.S.P.
),它们一般会
页)。
23
)
17
Page 68
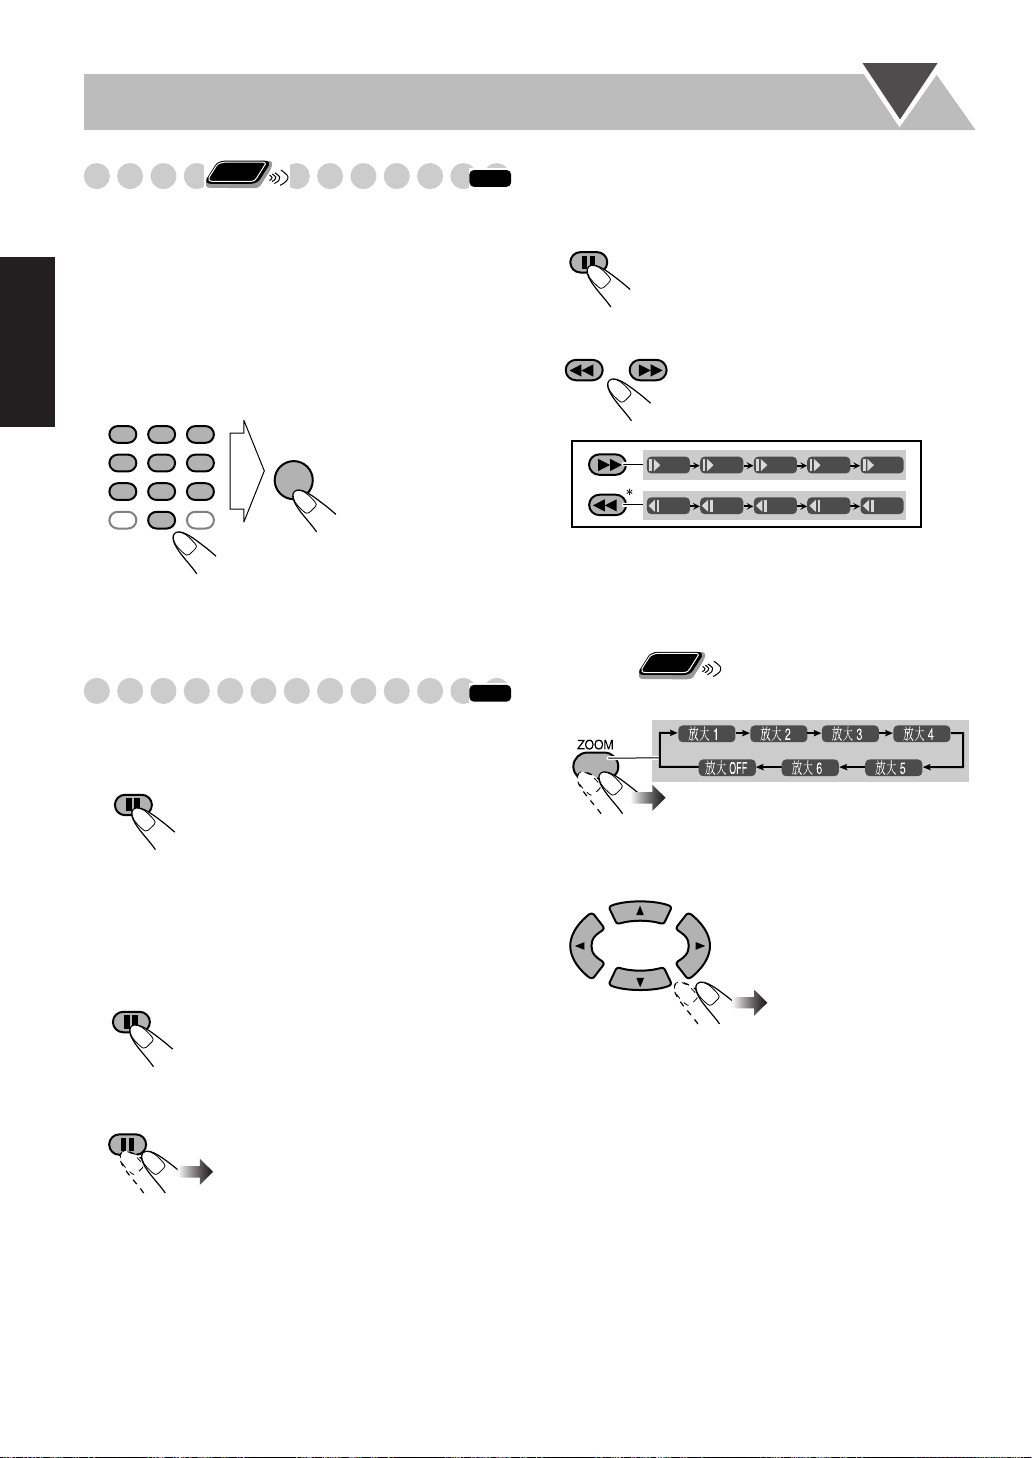
中
文
Remote
播放赠送组
仅对应
DVD
组”的特殊组,组的内容不对众公开。
想要播放赠送组时,必须为其输入指定的 “开组码”(一种
•
密码)。获得开组码的方法根据碟片而不同。
1
选择赠送组。
赠送组一般情况下录在最后 (例如当碟片上包括赠送组
•
在内共录有
关于如何选择组,参阅第 9 页的 “如何选择标题/组”。
•
输入开组码。
2
123
456
789
10 0 +10
ONLY
音频:某些
个组时,“组 4”便是赠送组)。
4
音频上含有一个被称为 “赠送
DVD
ENTER
INFO
慢动作播放
在播放中
1
FM MODE
选择慢动作速度。
2
...
静止图像播放开始。
1/32 1/16 1/8 1/4 1/2
1/32 1/16 1/8 1/4 1/2
3
根据电视屏幕上出现的交互性指示进行操作。
想要取消开组码输入模式时,按
7
键。
特殊的图像播放方法
静止图像播放
在播放中
想要恢复标准播放时,按
逐帧播放
1
2
...
FM MODE
静止图像播放开始。
在播放中
FM MODE
逐帧向前播放静止图像。
FM MODE
...
静止图像播放开始。
DVD/CD 3
键。
INFO
不适用于
*
想要恢复标准播放时,按
放大播放
1
2
想要恢复标准播放时,
字样在电视屏幕上出现。
DVD-VR/SVCD/VCD
DVD/CD 3
Remote
ONLY
在播放中
随着数字增大,表示放大倍率也在增大。
关于
•
移动放大部位。
...
之说明,参阅第
JPEG
反复按
。
28
ZOOM
页。
键。
键,直到 “放大
OFF
”
想要恢复标准播放时,按
18
DVD/CD 3
键。
Page 69
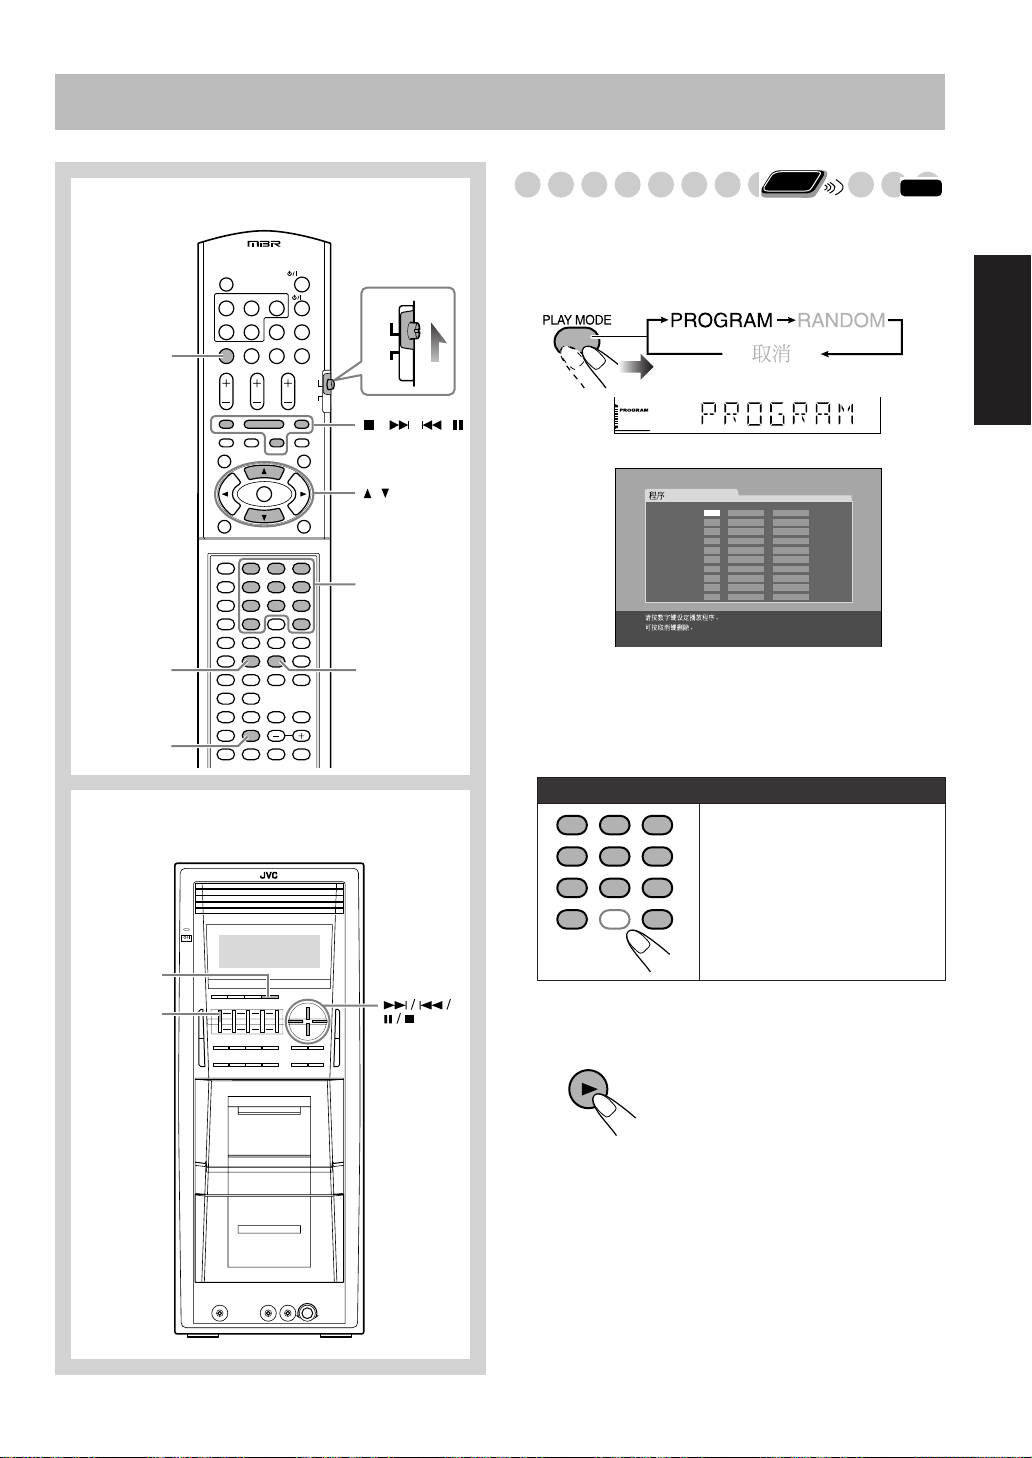
遥控器
高级碟片操作
编排播放顺序—程序播放
在开始播放之前,您可以编排曲目的播放顺序 (最多达
曲)。
1
在开始播放之前启动程序播放模式。
AUDI O
Remote
ONLY
INFO
99
中
DVD/CD 3
REPEAT
CANCEL
主机
TV
文
////
在显示屏上
No Group/TitleDisc Track/Chapter
1
2
3
4
5
123
456
789
10 0 +10
10
数字键
PLAY MODE
2
选择用于程序播放的章节或曲目。
选择碟片号码。
1
选择标题号或组号。
2
3
选择章节号或曲目号。
6
7
8
9
10
在电视屏幕上
想要输入号码时:
123
456
789
10 0 +10
例:
想要输入号码 5,按 5。
15
想要输入号码
,按
+10
按 5。
30
10
,按
。
+10
想要输入号码
+10
,然后按
,然后
,
DVD/CD
DISC 1 0
重复上述步骤
3
开始播放。
4
DVD/CD
,直到完成所需的程序。
2
开始按您编排的顺序进行播放。
19
Page 70

中
文
想要跳播曲目时: 想要暂停播放时:想要停止播放时
FM MODE
想要解除暂停
时,按
记忆播放对程序播放不起作用。
*
如何确认编排的内容
在播放前或播放后
DVD/CD 3
...
键。
Remote
ONLY
按与编排时相反的顺序
按编排顺序
*
:
按任意顺序播放—随机播放
您可以随机播放所置入碟片的内容。
•
DVD
某些
1
在开始播放之前,首先启动随机播放模式。
2
开始播放。
不能使用随机播放功能。
DVD/CD
当前碟片开始按随机顺序播放。
当前碟片的所有章节/曲目播放
后,下一张碟片开始播放。置入
的所有碟片都播放之后,随机播
放停止。
Remote
ONLY
如何修改程序
在播放前或播放后
想要删除最后一步编排的项
目时:
CANCEL
想要往程序里增加项目时:
重复第
19
...
页的步骤
。
2
如何退出程序播放模式
在播放前或播放后
...
想要删除整个程序时:
想要跳播曲目时: 想要暂停播放时:想要停止播放时:
FM MODE
想要跳到当前曲
目的开头处时,
4
按
键。
如何退出随机播放模式
在播放前或播放后
想要解除暂停时,
DVD/CD 3
按
键。
...
20
Page 71

Remote
重复地播放—重复播放
您可以重复地进行播放。
•
您也可以使用屏幕条窗来选择重复模式 (参阅第
•
显示屏上的指示灯按如下所示点亮以说明当前的重复模式。
•
DVD
对应
在播放中
REPEAT
•
对应
在播放中或播放前
REPEAT
...
DVD
视频:
REPEAT 1 REPEAT
取消
音频:
...
REPEAT 1 REPEAT
取消
ONLY
23
页)。
REPEAT ALL DISC
REPEAT ALL DISC
REPEAT 1
REPEAT
REPEAT 1
重复播放当前的章节/曲目。
重复播放当前的标题/组。
重复播放当前的碟片。
DISC *
REPEAT ALL
重复播放所有碟片。
DISC *
REPEAT ALL
以上模式对应
*
阻止碟片弹出—儿童锁
您可以锁住碟片托盘,以致任何人都不能拿出装在里面的碟
片。
•
仅当播放源为视盘机时才可以进行此项操作。
重复播放所有编排程序里的曲目。
视频可能无法正常工作。
DVD
Main Unit
ONLY
中
文
MP3/WMA
•
对应
在播放中或播放前
REPEAT
对应
CD/SVCD/VCD
•
在播放中或播放前 (不带
REPEAT
对应随机播放:
•
在播放中或播放前
REPEAT
对应程序播放:
•
在播放中或播放前
REPEAT
:
...
REPEAT 1 REPEAT
取消
:
REPEAT 1
取消
...
REPEAT 1
取消
...
REPEAT 1
PBC
REPEAT 1 DISC
REPEAT ALL DISC
功能的
/
SVCD
VCD) ...
REPEAT 1 DISC
REPEAT ALL DISC
REPEAT 1 DISC
REPEAT ALL DISC
REPEAT ALL
取消
处于待机状态时
( 按住该键然后按
想要解锁时,重复相同的操作。“
示屏上出现。
...
...
)
UNLOCKED
”
字样会在显
21
Page 72

在屏幕上操作碟片
中
文
遥控器
DVD/CD 3
PG
ZOOM
REPEAT
123
456
789
10 0 +10
AUDIO
TV
PL
////
ENTER
ON SCREEN
数字键
10
关于屏幕条窗
您可以通过屏幕条窗来确认碟片信息 (
片除外)以及使用某些功能。
MP3/WMA/JPEG
屏幕条窗
视频
DVD
12
DVD-VIDEO
TIME OFF CHAP. 1/31/31/1
Dolby D
3/2.1ch
DISC 1
TITLE 2
CHAP 3
TOTAL 1:01:58
4
DVD
音频
12
DVD-AUDIO
TIME
PPCM
3/2.1ch
OFF
DISC 2
TRACK
GROUP 14
1/31/3
TRACK 23
PAGE
TIME 0:15:58
4
DVD-VR
12
DVD-VR
TIME OFF CHAP. ST ON
Dolby D
2/0.0ch
DISC 1
PG 2
CHAP 3
TOTAL 0:01:58
4
SVCD
碟
3
3
3
22
12
TIME 0:04:58
TRACK 3
DISC
SVCD
TIME OFF ST1
3
-/ 4
3
4
VCD
12
TIME 0:04:58
VCD
TIME OFF ST
TRACK 3DISC 4
3
4
CD
12
TIME 0:04:58
TRACK 3
CD
TIME OFF
DISC 5
3
4
Page 73

1
碟片类型
2
播放信息
信息 含义
Dolby D/
PPCM
3/2.1 ch/
2.0/0 ch
DISC
1
TITLE
2
CHAP
3
GROUP 1
TRACK
PG 2
PL 2
TOTAL
1:25:58
3
播放状态
信息 含义
/
/
4
操作图标 (在下拉菜单上)
信息 含义
TIME
CHAP.
TRACK
1/3
1/3
1/3
PAGE 1/15
音频格式
声道数
当前的碟片
当前的标题
当前的章节
当前的组
14
当前的曲目
当前的标题
当前的播放清单
时间信息
播放
前进/倒退搜索
前进/倒退播放慢动作
暂停
停止
想要改变时间信息时选此项 ( 另请参阅
第 24页)。
想要重复播放时选此项 ( 另请参阅第
21
, 24和 25页)。
想要进行时间搜索时选此项 ( 另请参阅
25
第
页)。
想要进行章节搜索时选此项 ( 另请参阅
第 26页)。
想要进行曲目搜索时选此项 ( 另请参阅
第 26页)。
想要切换声音语言或声道时选此项 (另
请参阅第 16页)。
想要切换字幕语言时选此项 (另请参阅
第 17页)。
想要切换观赏角度时选此项 (另请参阅
第 17页)。
想要翻页时选此项 (另请参阅第
页)。
17
Remote
ONLY
使用屏幕条窗进行操作
屏幕条窗上的基本操作程序如下:
DVD
例:为
当选择碟片作为播放源时
1
显示带有下拉菜单的屏幕条窗。
视频选择字幕语言 (法语)时:
...
选择 (点亮)所需的项目。
2
ON
SCREEN
Dolby D
3/2.1ch
DVD-VIDEO
TIME OFF CHAP. 1/31/31/1
3
显示弹跳窗。
ENTER
在弹跳窗中选择所需的项目。
4
5
完成设定。
ENTER
想要清除屏幕条窗时
DISC 1
TITLE 21
弹跳窗消失。
CHAP 3
TITLE 2
CHAP 3
1/31/31/1
CHAP 3
TITLE 21
1/32/31/1
INFO
中
文
TOTAL 1:01:58
TOTAL 1:01:58
TOTAL 1:01:58
23
Page 74

中
ENTER
文
切换时间信息
您可以切换屏幕条窗和主机显示窗中的时间信息。
显示带有下拉菜单的屏幕条窗。
1
OFF
Dolby D
3/2.1ch
DVD-VIDEO
TIME
TIME OFF CHAP. 1/31/ 3 1/1
确保选择 (点亮)的是
2
切换时间信息。
3
ENTER
DISC 1
TITLE
TITLE 2
14
TIME
CHAP
1/3
。
CHAP 3
23
1/3 1/3
TOTAL 1:01:58
TOTAL
1:25:58
重复播放
另请参阅第
•
在播放碟片 (不带
1
中,显示带有下拉菜单的屏幕条窗。
• DVD
选择
2
显示弹跳窗。
3
页。
21
功能的
PBC
视频除外:可以在播放开始前选择重复播放。
。
SVCD/VCD
)的过程
TOTAL
T.REM
TIME *
REM *
*
DVD-VR
对应
想要清除屏幕条窗时
ON
SCREEN
碟片已经播放过的时间。
碟片上剩余的播放时间。
当前的章节/曲目已经播放过的时间。
当前的章节/曲目上剩余的播放时间。
不起作用。
4
选择所需的重复模式。
全曲
A-B
重复播放所有的碟片或所有编排曲目。
重复播放所需的部位 (参阅下一页)。
标题 重复播放当前的标题。
组 重复播放当前的组。
碟片 重复播放碟片 (
DVD
除外)。
章节 重复播放当前的章节。
*
轨迹
PG
PL
重复播放当前的曲目。
页。
28
DVD-
页。
重复播放当前的标题 (仅对应
VR
)。另请参阅第
重复播放当前的播放清单 (仅对应
DVD-VR
)。另请参阅第
28
断 取消重复播放模式。
*
在进行程序播放或随机播放的过程中,“步进”字样会出
现。
5
完成设定。
弹跳窗消失。
24
Page 75

A-B
H
C
重复
在播放的过程中,显示带有下拉菜单的屏幕条窗。
1
选择
2
显示弹跳窗。
3
选择 “
4
DVD-VIDEO
TIME
TIME OFF CHAP. 1/31/ 3 1/1
5
选择开始点 ( A)。
ENTER
•
选择开始点 ( A)后,可以使用
6
选择结束点 ( B)。
ENTER
想要取消
。
”。
A-B
Dolby D
3/2.1ch
OFF
A–B
A-B
重复,重复步骤
DISC 1
TITLE
14
1/3
DVD-VIDEO
TIME
TIME A- CHAP. 1/3
A-B
Dolby D
3/2.1ch
OFF
重复播放开始。被选的部分反复
CHAP
¡
23
1/3 1/3
TOTAL
键搜索结束点。
CHAP 3
TITLE 2
播放。
1 至 3
,并在步骤
“断”。
TOTAL 1:01:58
1:25:58
TITLE 2
DISC 1
TITLE
14
4
中选择
1/3
时间搜索
您可以用指定播放开始后经过多长时间的方法让播放直接移
到某一指定点。
在播放 (不带
1
示带有下拉菜单的屏幕条窗。
除外:可以在播放开始之前使用时间搜索功能。
• DVD
选择
2
显示弹跳窗。
3
OFF
Dolby D
3/2.1ch
DVD-VIDEO
TIME
TIME OFF CHAP. 1/31/ 3 1/1
4
输入时间。
您可以用小时/分钟/秒为单位来指定时间。
123
456
C
789
10 0 +10
•
要求必须输入小时数 (即使是 “ 0”小时),但不需要
输入末尾的零 (上述例子当中最后的两位数字)。
•
想要修正误输入时,按光标
5
完成设定。
ENTER
PBC
功能的
SVCD/VCD
)的过程中,显
。
DISC 1
TITLE
TIME _ : _ _ : _ _
TITLE 2
14
1/3
CHAP
TOTAL
23
1/3 1/3
TOTAL 1:01:58
CHAP 3
例:
想要移到 1(小时): 02(分):
00
(秒)处时,按 1, 0, 2,
0
,然后按 0。
想要移到
54
(分): 00(秒)处
时,按 0, 5, 4, 0,然后按 0。
2
删除最后输入的数字。
本机从指定的时间处起开始进行播放。
1:25:58
中
文
想要清除屏幕条窗时
ON
SCREEN
想要清除屏幕条窗时
ON
SCREEN
25
Page 76

中
123
456
789
10 0 +10
MENU/PL
文
章节/曲目搜索
您可以搜索想要播放的项目号码。
对应
对应
1
2
3
4
5
想要清除屏幕条窗时
DVD
DVD
视频
/DVD-VR
音频:曲目
:章节
在播放的过程中,显示带有下拉菜单的屏幕条窗。
CHAP.
选择
或
TRACK
。
显示弹跳窗。
DVD-VIDEO
TIME
TIME OFF CHAP. 1/31/ 3 1/1
Dolby D
3/2.1ch
TITLE 2
DISC 1
TITLE
CHAPTER _
CHAP
14
1/3
CHAP 3
23
1/3 1/3
TOTAL 1:01:58
TOTAL
输入所需的章节/曲目号码。
例:
想要选择章节/曲目 5,按 5。
想要选择章节/曲目
然后按 5。
想要选择章节/曲目
然后按 0。
•
想要修正误输入时,按
10
数字键,直到所需的号码在弹
跳窗中出现。
完成设定。
本机开始播放搜索到的章节或曲目。
ENTER
ON
SCREEN
15
30
1:25:58
,按 1,
,按 3,
Remote
在
控制屏幕上进行操作
DVD-VR/MP3/WMA/JPEG
对应
ONLY
:您可以通过控制屏搜索
INFO
并播放想要播放的项目。
以
DVD-VR
格式录制的
DVD-RW/RAM
的控制屏
想让原始程序 ( PG)或播放清单 ( PL)显示时,控制屏会
叠加到电视机屏幕上。
想要选择播放类型时
想要选择原始程序时: 想要选择播放清单时:
TOP MENU/PG
当选择原始程序时。
ORIGINAL PROGRAM
No Date Ch ime itle
1 25/04/04 4ch 19:00 JVC DVD World 2004
2 17/05/04 8ch 10:30
3 22/05/04 8ch 17:00 Music Festival
4 26/05/04 L-1 13:19 children 001
5 20/06/04 4ch 22:00
6 25/06/04 L-1 8:23 children 002
12 3 4 5
当选择播放清单时。
PLAY LIST
No Date Chap Length Title
1 25/05/04 001 1:03:16 My JVC World
2 17/06/04 005 1:35:25
3 20/06/04 003 0:10:23 Favorite music
4 25/06/04 001 0:07:19 children001-002
TT
6
26
1789
1
标题/播放清单号码
2
录制日期
3
录制源 (电视台,录制设备的输入端子等)
4
录制的开始时间
节目/播放清单的标题
5
6
点亮的项目条 (当前选取)
7
创建播放清单的日期
8
章节号码
9
播放时间
由于录音设备的不同,原始程序或播放清单的标题可能不显
*
*
5
6
示。
想要清除
DVD-VR
控制屏时,按
ENTER
键。
Page 77

MP3/WMA/JPEG
ENTER
置入
MP3, WMA 或 JPEG
机屏幕上。
例:当装载的是
1
Group : 2 / 3
Blue
Red
2
Green
3
4
Track Information
Title
Rain
Artist
5
Album
当前的组号/组总数
1
当前的组
2
组清单
3
当前的曲目
4
5
曲目信息 (
重复播放的设定
6
7
当前曲目已经播放过的时间
(仅对应
操作模式图标
8
当前的曲号/当前组里的曲目总数(装载的碟片上的曲目
9
总数)
点亮的项目条
0
曲目清单
-
•
如果一张碟片上录有两种类型的文件 (
JPEG
及
页)。
文件),请选择想要播放的文件类型(参阅第
碟片的控制屏
MP3
碟片时。
ID3
标签版本
MP3/WMA)
碟片时,控制屏自动出现在电视
Time : 00:00:14REPEAT TRACK
Track : 5 / 14 (Total 41)
Cloudy.mp3
Fair.mp3
Fog.mp3
Hail.mp3
Indian summer.mp3
Rain.mp3
Shower.mp3
Snow.mp3
Thunder.mp3
Typhoon.mp3
Wind.mp3
Winter sky.mp3
1.0
:仅对应
MP3/WMA
MP3/WMA
6
7
8
9
0
-
)
文件
36
如何在组清单和曲目清单之间移动亮 (绿色)条 (对应
MP3/WMA/JPEG
如何选择清单上的项目:
如何开始播放
对应
DVD-VR/MP3/WMA
ENTER
JPEG
对应
DVD/CD
):
将亮条移到曲目清单。
将亮条移到组清单。
将亮条移到所需的项目。
如果在播放
•
WMA
条,被选的曲目会自动开始播
放。
:
被选章节/曲目开始播放。
按
DVD/CD 3
•
始。
:
被选的曲目 (静止图像)开始播放,
直到您将其换掉。
开始幻灯式播放。
每个曲目 (静止图像)在屏幕上显示
数秒钟,然后一个接一个地往下播放。
DVD-VR/MP3/
碟片的过程中移动亮
键也可以让播放开
中
文
• JPEG
曲目的播放一经开始,控制屏便会消失。
•
想要取消幻灯式播放而播放当前的静止图像时,按
8
键。
27
Page 78

如何停止播放
如何放大静止图像 (对应
在播放暂停状态下
1
...
JPEG
)
中
文
想要重复播放
在播放的过程中或播放开始前
对应原始程序
REPEAT
对应播放清单
REPEAT
REPEAT 1*
REPEAT*
REPEAT 1
DVD-VR
REPEAT 1 REPEAT
( CHAP)
重复播放当前的章节。
重复播放当前的标题/播放清单。
重复播放当前碟片的所有标题。
的标题/播放清单时
取消
OFF)
(
REPEAT 1 REPEAT
( CHAP)
取消
OFF)
(
DISC*
REPEAT
重复播放所有置入的碟片。
ALL DISC
*
播放开始前不适用。
JPEG
如何为
在播放的过程中或播放开始前
REPEAT
重复进行幻灯式播放
REPEAT
( GROUP)
取消
( OFF)
...
REPEAT 1 DISC
( PG)
( DISC)
REPEAT ALL DISC
(
ALL)
( PL)
REPEAT ALL DISC
(
ALL)
...
REPEAT 1 DISC
( DISC)
REPEAT ALL DISC
( ALL)
随着数字增大,表示放大倍率也在增大。
移动放大部位。
2
想要取消放大时,反复按
样在电视屏幕上出现。
ZOOM
键,直到 “放大
OFF
”字
REPEAT
REPEAT 1
DISC
REPEAT ALL
DISC
•
关于重复播放
28
重复播放当前的组。
重复播放当前碟片中的所有文件。
重复播放所有置入的碟片。
MP3/WMA
之说明,参阅第
21 和 24
页。
Page 79

录音的操作
主机
TAPE-A /
TAPE-B
DISC 1–5 3
DISC REC
START
REC
START/STOP
FM/AM
DVD/CD
REVERSE
MODE
DUBBING
A
舱
B
舱
重要说明
未经版权所有者同意而擅自复录或播放版权产品可能会构
成非法行为。
用磁带录音
可以使用
•
关于如何播放磁带,参阅第
B
1
在
舱内插入一盒可以录音的盒式磁带。
按插入关闭
2
在显示屏上确认磁带的走带方向以及转向模式的设定状
态。
Main Unit
ONLY
I
型磁带进行录音。
转向模式指示灯
11
页。
走带方向指示灯
INFO
中
文
当前的播放源
如何变更走带方向
根据需要变更转向模式
想要录双面时选此项。
•
如果使用转向模式,请从正面 (3)
()
起开始录音。
只想录单面时选此项。
29
Page 80
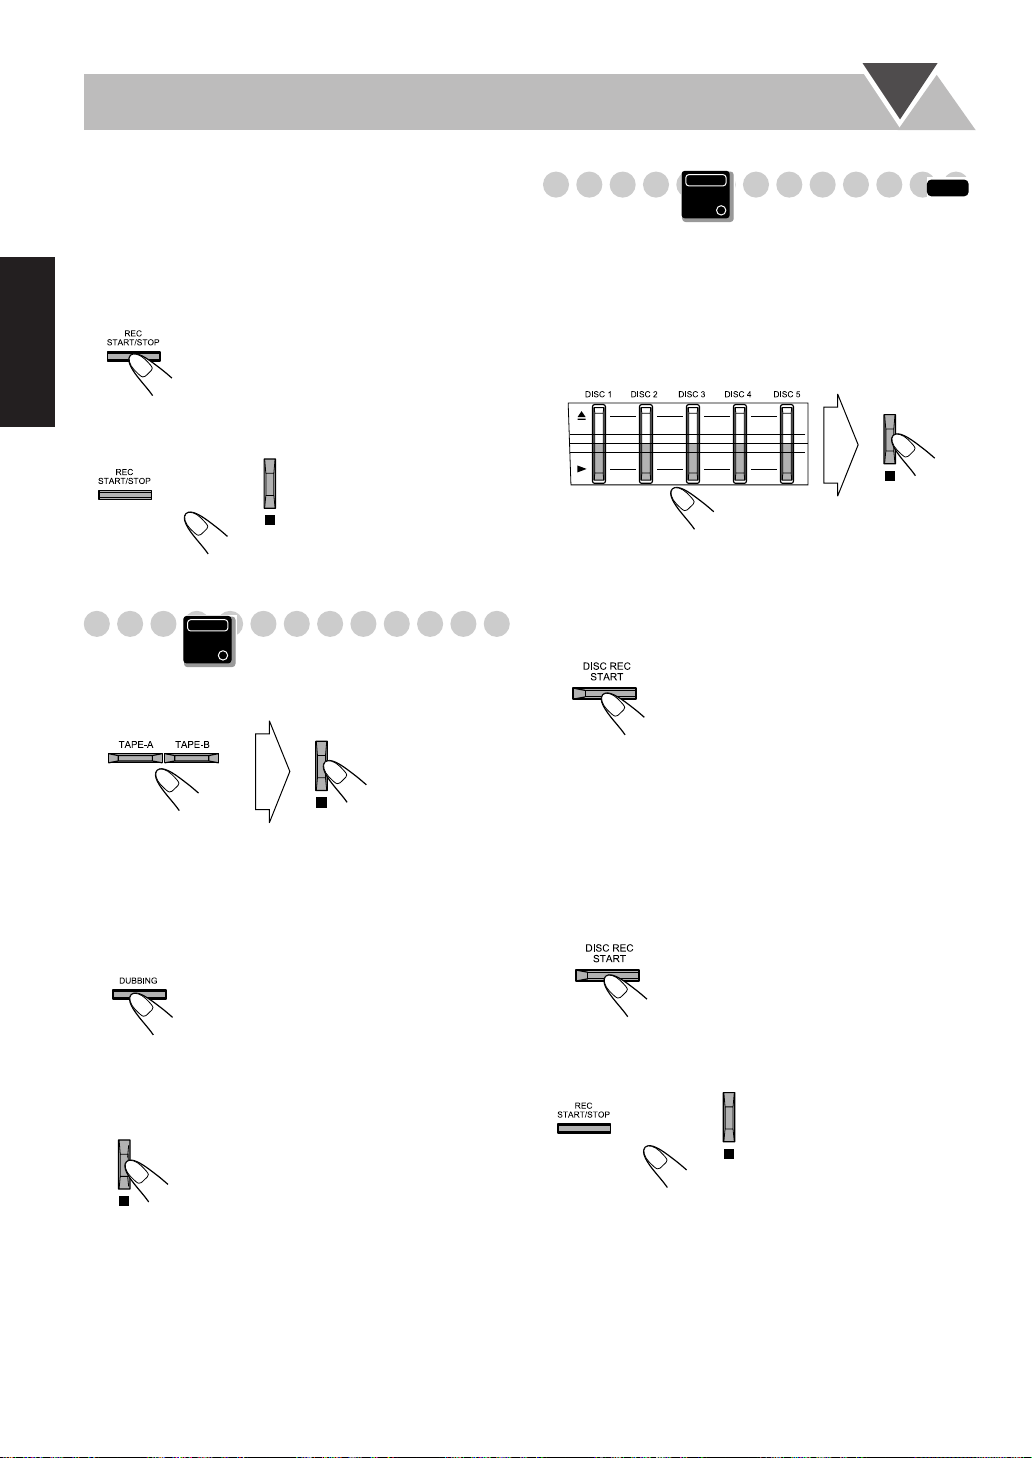
中
文
开始播放播放源— “ FM”,“ AM”,“
3
“
TAPE-A
在复录碟片时,还可以使用 “同步复录碟片”功能 (参
•
阅右栏)。
在从
•
栏)。
开始录音。
4
如何停止录音
复制磁带
1
将播放源切换成
”或 “
舱复录时,还可以使用 “复制”功能 (参阅下
A
或
Main Unit
ONLY
AUX
TAPE
”。
。
DVD/CD
”,
同步复录碟片
您可以令碟片播放和磁带录音同时开始并同时结束。
装载一张碟片并插入一盒可以录音的盒式磁带。
1
在显示屏上确认磁带的走带方向以及转向模式的设定状
2
态。
29
•
参阅第
3
选择想要复录的碟片号码。
复录碟片上所需的曲目:
您可以根据喜好编排曲目的录音顺序。
•
选择程序播放模式 (并编排程序;参阅第
要开始播放。
4
开始录音。
Main Unit
ONLY
页 “用磁带录音”里的步骤
碟片播放且从第一首曲目开始复录。
•
本机会在录到磁带上的各曲目之间自
4
动留出
秒钟的空白。
2
。
19
页),且不
INFO
A
2
在
舱内插入播放源用磁带,在
带。
在显示屏上确认磁带的走带方向以及转向模式的设定状
3
态。
29
参阅第
开始复制。
4
只要其中一个舱中的磁带结束播放或录音,两个卡式座便会
•
同时停止运转。
如何停止复制
页 “用磁带录音”里的步骤
B
舱内插入可以录音的磁
2
。
当碟片播放亦或录音结束时,视盘机和卡式座会同时停止运
•
转。
如何只复录您喜好的曲目—单曲复录
您可以在聆听碟片 (
带上的曲目。
当您想复录在磁带上的曲目正在播放时
如何在复录的过程中取消复录
或
视频除外)的过程中指定复录在磁
DVD
...
视盘机返回到曲目的开始处并将曲目
复录在磁带上。复录完毕后,视盘机
和卡式座自动停止。
30
Page 81

欣赏卡拉
OK
遥控器
KARAOKE
SCORING
播放源键
V.MASKING
ECHO
MIC MIX
SET
CANCEL
123
456
789
10 0 +10
AUDIO
TV
AUDIO VOL +/–
数字键
10
/
KEY
RESERVE
+ / –
SETTING
本章节描述的功能对应
重要事项
在连接或卸下麦克风时,请务必将
•
。
MIN
• MIC LEVEL
的两只麦克风均有效。
的调整结果对连接在
在不使用的时候切勿让麦克风一直保持连接
状态。
DVD
音频
/DVD-VR
MIC LEVEL
MIC 1
不起作用。
和
MIC 2
跟随唱 ( 卡拉 OK)
使用两只麦克风您便可以欣赏跟随唱 (卡拉 OK)。
•
REC START/STOP
按
1
MIC LEVEL
将
将麦克风 (不附带)连接到
2
启动麦克风混频模式。
3
MIC MIX
键,您可以复录跟随唱。
MIN
转到
。
MIC 1
和/或
MIC MIX
MIC OFF
MIC 2
设定在
插孔
插孔。
中
文
主机
播放源键
VOLUME +/–
KARAOKE
SCORING
MIC 1
MIC 2
MIC LEVEL
4
开始播放播放源— “ FM”,“ AM”,“
TAPE
“
•
对应卡拉
16
阅第
通过麦克风唱。
5
6
MIC LEVEL 和 VOLUME
调整
AUX
”或 “
OK SVCD/VCD
页的 “选择音频曲目”。
”。
:选择需要的音频声道。参
想要退出麦克风混频模式时,在步骤
MIC OFF
“
想要只使用麦克风时,
要开始播放。
”。
在步骤
4
中选择 “
3
。
中选择
DVD/CD
DVD/CD
”,
”,但不
31
Page 82

中
文
如何在您的声音里增添回音效果
麦克风混频模式启动时
ECHO
...
ECHO 1 ECHO 2 ECHO 3
ECHO 4ECHO 0
(取消)
•
随着数字增大,表示回音水平也在增高。
如何调整音调 (仅限于碟片播放)
在播放的过程中
KEY KEY
...
#
提高音调 (最高至
Remote
ONLY
给您的卡拉
本机可以将您的跟随唱与播放碟片上的原声相比,给您的卡
OK
拉
•
本功能仅适用于碟片播放。
•
建议按如下说明选择声轨 (参阅第
DVD
对应
SVCD/VCD
Remote
ONLY
+6
)。
对应
建议歌唱至少一分半钟,使打分功能正常进行。
•
1
选择 “
DVD/CD
OK
技巧打分
技巧打分。
视频:选择带原声的声轨。
:选择 “ ST”,“
DVD/CD
”作为播放源。
16
页):
ST1
”或 “
ST2
INFO
”。
如何取消音调控制
KEY KEY
#
降低音调 (最低至
–6
)。
–6 +60
KEYCON
JAPANESE
0
在显示屏上
关闭麦克风混频模式或选择其它曲目或碟片也会取消音调控
•
制。
Remote
消除原唱—原唱掩蔽
如果您想消除 (任何播放源,除音频
的)原唱,您可以使用原唱掩蔽模式。
V. MASKING
V.MASK1 V.MASK2
ONLY
在电视机屏幕上
DVD/DVD-VR
以外
OFF
V.MASK1
V.MASK2
取消立体声播放源上的原唱。
取消右音频声道。
INFO
2
启动打分功能。
KARAOKE
SCORING
第一首曲目开始播放,且麦克风混频模式自动启动 (保留
上一次对回音所作的调整)。
3
通过麦克风唱。
31
参阅第
•
如果需要,调整回音水平和音调 (参阅左栏)。
歌曲结束后,播放停止且得分栏出现在电视屏幕上,同时伴
有奏乐声。
例:
页的步骤
KARAOKE SCORE BOARD
KARAOKE SCORE BOARD
在电视屏幕上
1
,步骤
2
您的得分
SINGING
以及步骤
6
。
85 POINTS
Very good!!
93 POINTS1 ST
最近的前
3
2 ND
3 RD
名
85 POINTS
73 POINTS
想要通过麦克风唱,启动麦克风混频模式 (按照第
骤
想要退出原唱掩蔽模式时,
1 至 3
以及步骤
)。
6
选择 “
OFF
”。
32
31
页的步
想要在中途停止播放歌曲,按
打分功能不被取消,且如果播放时间大于一分钟,可以为您
的跟随唱打分。
想要取消打分功能时,按
上的显示屏画面消失。(麦克风混频模式仍保持启动状态。)
键。
7
KARAOKE SCORING
键。电视
Page 83

Remote
KARAOKE
SCORING
如何打开/关闭奏乐声
进入奏乐声设定模式。
1
SETTING
LR BALANCE
ONLY
SET
FANFARE
选择奏乐声设定。
2
LRBALANCE
ON
OFF
预定卡拉
—卡拉
您可以决定视盘机上标题或曲目的播放顺序。最多可以编排
个程序项目。
12
将播放源切换成 “
1
DVD/CD
OK
OK
歌曲
程序播放
DVD/CD
Remote
ONLY
”。
INFO
启动麦克风混频模式。
4
MIC MIX
MIC MIX
MIC OFF
5
开始播放。
想要开始卡拉
放时:
DVD/CD
以程序编排的顺序开始播放。
•
对应带有打分功能的卡拉
时,播放停止且得分栏出现。按两次
SCORING
如何确认编排的内容
RESERVE
OK
卡拉
•
预定画面出现。
在打分功能使用的过程中,不能显示卡拉
程序播
OK
键开始播放下一首曲目。
想要开始带有打分功能的
卡拉
OK
程序播放时:
OK
程序播放:每次歌曲结束
KARAOKE
OK
预定画面。
中
文
2
3
启动卡拉
•
选择想用于卡拉
依照下列顺序按数字键选择歌曲。
OK
程序播放模式。
RESERVE
在此模式下
1
2
3
123
456
789
10 0 +10
PROGRAM
选择碟片。
选择标题/组。
选择章节/曲目。
No
Disc Tr/Chap
1
2
3
4
5
在电视屏幕上
指示灯会闪烁。
OK
程序播放的歌曲。
例:
想要选择号码 5,按 5。
想要选择号码
然后按 5。
想要选择号码
+10
,然后按
Gr/Tt
15
30
10
,按
,按
。
+10
,
+10,
如何修改程序
OK
当卡拉
想要清除不想要的项目时:
想要清除整个程序时,重复这一步骤。
想要在程序里添加项目时:
重复操作步骤
预定画面在电视机上出现时
。
3
...
CANCEL
33
Page 84
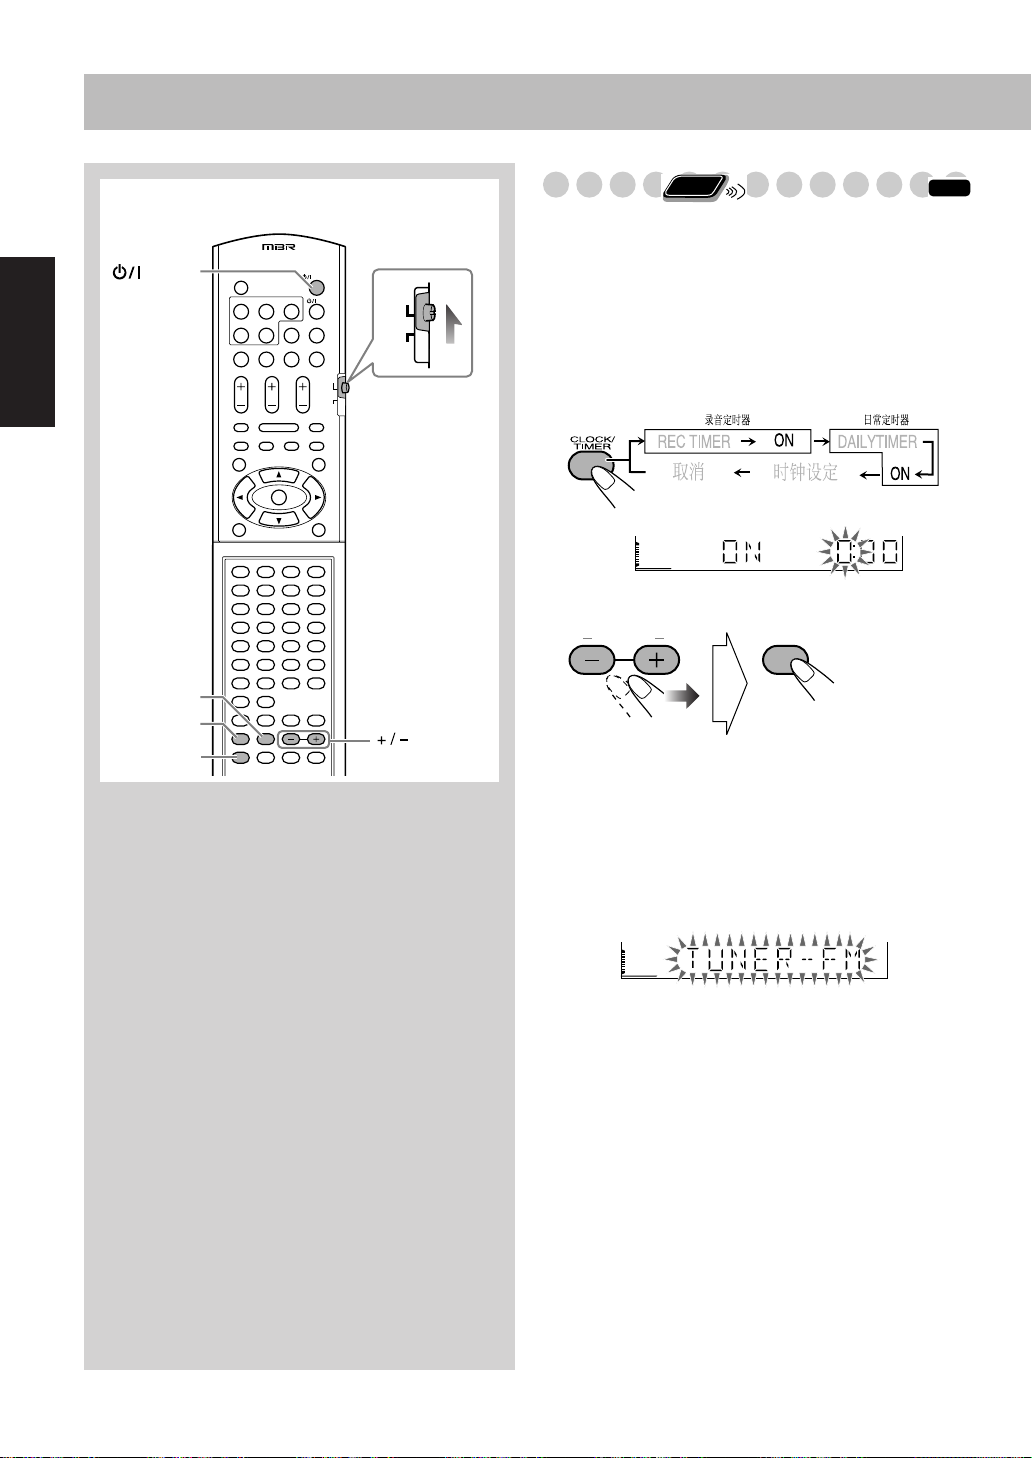
定时器的操作
中
文
遥控器
CANCEL
CLOCK/
AUDIO
SET
TIMER
123
456
789
10 0 +10
AUDIO
设定定时器
通过使用日常定时器,您可以被自己喜欢的歌声唤醒。而通
过使用录音定时器,您可以让收音机节目自动录到磁带上。
•
您不能同时启动日常定时器和录音定时器。(启动任意一个
定时器便关闭另一个定时器。)
•
在操作的过程中想要修正误输入时,按
TV
以退回到上一步骤。
1
选择一种定时器设定模式—
时器。
Remote
ONLY
CANCEL
ON
对应日常定时器或录音定
INFO
键。您可
2
根据所需进行定时器设定。
LRBALANCE
按下列顺序重复进行程序操作,直到完成设定:
设定定时器启动时间的小时值,然后分钟值。
1
设定定时器关闭时间的小时值,然后分钟值。
2
对应录音定时器:选择播放源— “
3
“
TUNER-AM
对应日常定时器:选择播放源— “
“
TUNER-AM
“
TAPE-B
”或 “
”。
”,“
AUX IN
SET
DISC
TUNER-FM
TUNER-FM
”,“
TAPE-A
”。
” 或
”,
”,
34
例:当选择 “
4
选择为 “
电台,或者选择碟片,组,然后对应 “
曲目号码。
选择音量水平。
5
•
TUNER-FM
您可以选择音量水平 (“
VOLUME 30
“
VOLUME --
“
用的音量。
TUNER-FM
”和 “
VOLUME 0” –
VOLUME --
”和 “
”,音量将被设定成主机关机当时所
”时。
TUNER-AM
DISC
”)。如果选择
”预设的
”选择
Page 85

如果是在本机启动状态下设定的定时器,须关闭本机 (使
3
本机进入待机状态)。
AUDIO
在完成设定后如何关闭定时器
在设定后您可以将定时器关闭。
因为日常定时器每天都在相同的时间启动,在某些特殊的时
•
候您可能需要将其取消。
日常定时器如何实际工作
日常定时器一经设定,定时器 ( )指示灯
示灯便会在显示屏上点亮。如果不去手动关闭定时器 (参
阅下栏),该日常定时器每天都会在相同的时间启动。
•
只有当本机关闭 (进入待机状态)时,日常定时器才开
始工作。
当启动时间到来时
本机自动启动,调收指定的电台或者开始播放指定的播放
源,并将音量设定成预设水平。
当关闭时间到来时
本机会停止播放并自动关机 (进入待机状态)。
•
定时器的设定内容会保存在记忆体中,直到您将其改变。
DAILY
指
录音定时器如何实际工作
录音定时器一经设定,定时器 ( )指示灯和
示灯便会在显示屏上点亮。录音定时器只工作一次。
•
只有当本机关闭 (进入待机状态)时,录音定时器才开
始工作。
当启动时间到来时
本机自动启动,调收指定的电台,将音量设定成预设水
平,并开始录音。
当关闭时间到来时
本机停止录音并自动关机 (进入待机状态)。
•
定时器的设定内容会保存在记忆体中,直到您将其改变。
REC
指
选择想要取消的定时器 (
1
DAILYTIMER
关闭所选的定时器。
2
CANCEL
定时器 ( )指示灯
•
想要重新启动定时器时,
键。
)。
REC TIMER 或
熄灭。
重复步骤
1
并在步骤
2
中按
SET
定时器优先权
如果睡眠定时器和录音定时器/日常定时器的设定重叠,定
时器按下述规则工作。
•
睡眠定时器 (参阅第
优先权。
录音定时器/日常定
时器
睡眠定时器
15
页)比录音定时器和日常定时器有
取消
6:00 6:30 7:00 7:30
中
文
本机关闭。
在此情况下,录音定时器/日常定时器不起作用。
•
复录/播放
取消
6:00 6:30 7:00 7:30
录音定时器/日常定
时器
睡眠定时器
本机关闭。
•
在此情况下,录音定时器/日常定时器被取消。(如果睡眠
定时器先于录音定时器设定的时间关闭本机,睡眠定时器关
闭本机时复录停止。)
35
Page 86

设置菜单操作
123
456
789
10 0 +10
中
文
遥控器
SET UP
语言菜单
菜单语言
声音语言
字幕语言
画面表示语言
初始设定
在播放过程中,菜单中某些项目不能改变。
SET UP
1
按
AUDIO
TV
按 2(或 3)键选择菜单。
2
按 5(或 ∞)键移动选择项目。
////
ENTER
项目 内容
DVD
您可以选择
您可以选择
您可以选择
您可以选择 “英语”,“中国语”或 “西班牙语”作为画面表示语言。
视频的初始菜单语言 (参阅第
DVD
视频的初始声音语言 (参阅第
DVD
视频的初始字幕语言 (参阅第
3
按
4
ENTER
按 5(或 ∞)键选择选项,然后按
5
想要清除预置显示屏
按
SET UP
键。
43
43
43
键。
键。
页)。
页)。
页)。
ENTER
INFO
键。
屏幕类型
图像来源
映像储存器
文件类型
36
图像菜单
16:9
项目
内容
DVD
播放对应宽银幕电视机录制的
16:9
16:9
/
4:3
4:3
•
通过选择 “多制式”模式,本机自动切换颜色制式以适合置入碟片的颜色制式。关于颜色制式的
设定,参阅第
通过选择碟片内容的图像来源种类,您可以获得最理想的图像品质。
自动:
电影:对应电影类碟片时选此项。
视频:对应视频类碟片时选此项。
您可以将映像储存功能设定为通或断。
通:当大约
断:想要取消映像储存器时选此项。
您可以选择播放的文件类型。
音频:想要播放
静止图像:想要播放
多制式 ( 宽银幕转换式):对应宽银幕 (
4:3
信箱屏幕/
度显示宽银幕图象且保持纵横比不变。
全景扫描/
充屏幕且图像的左右边缘被切掉。
多制式信箱屏幕 (信箱转换):对应传统 (
4:3
多制式全景扫描 (全景扫描转换):对应传统 (
14
页。
标准情况下选此项。本机会根据碟片信息识别当前碟片里的图像种类 (电影或视频)。
5
分钟未进行操作时,电视机上的屏幕显示会变暗。
MP3/WMA
JPEG
视频碟片时,您可以选择与您的电视机相符的屏幕类型。
文件时选此项。
文件时选此项。
16:9
)电视机。
4:3
)电视机。
4:3
)电视机。
以适合电视机屏幕宽
图象放大纵向填
Page 87
音频菜单
数码音频输出
下行混合
动态范围控制
其他菜单
记忆播放
屏幕指南
项目 内容
OPTICAL DIGITAL OUTPUT
使用本机后部的
PCM
:当连接只能解码线性
DOLBY DIGITAL/PCM
/PCM
光束
根据您的数码音频连接,适当地设定本项,播放
•
此项设定仅对应音频输出在 “数码音频输出”设定为 “
杜比环绕:当连接
立体声:当连接立体声接收机,
在中低音量水平聆听以杜比数码格式录制的
自动:您可以欣赏力度强劲的音响。
通:如果
为清晰。
项目 内容
您可以选择记忆播放功能。
通:如果碟片仍在碟片托盘中,本机从播放停止处继续播放。
断:记忆播放功能关闭。
利用此菜单您可以启动或关闭屏幕指南。
通:
启动屏幕指南。
断:关闭屏幕指南。
:当连接
环绕声解码器时选择此项。
DVD
视频的声音水平低于电视节目的声音水平,选择此项使声音在较低的音量水平下更
PCM
信号的音频设备时。
当连接杜比数码解码器或带有内置杜比数码解码器的功率放大器时。
:
DTS
解码器或带有内置
播放机,电视机等时选择此项。
MD
(光纤数码输出)
DTS
DVD
DVD
解码器时。
视频上的多声道音频环绕音响。
视频设定此项。
端子时正确设置此项。
PCM
”时有效。
中
文
37
Page 88
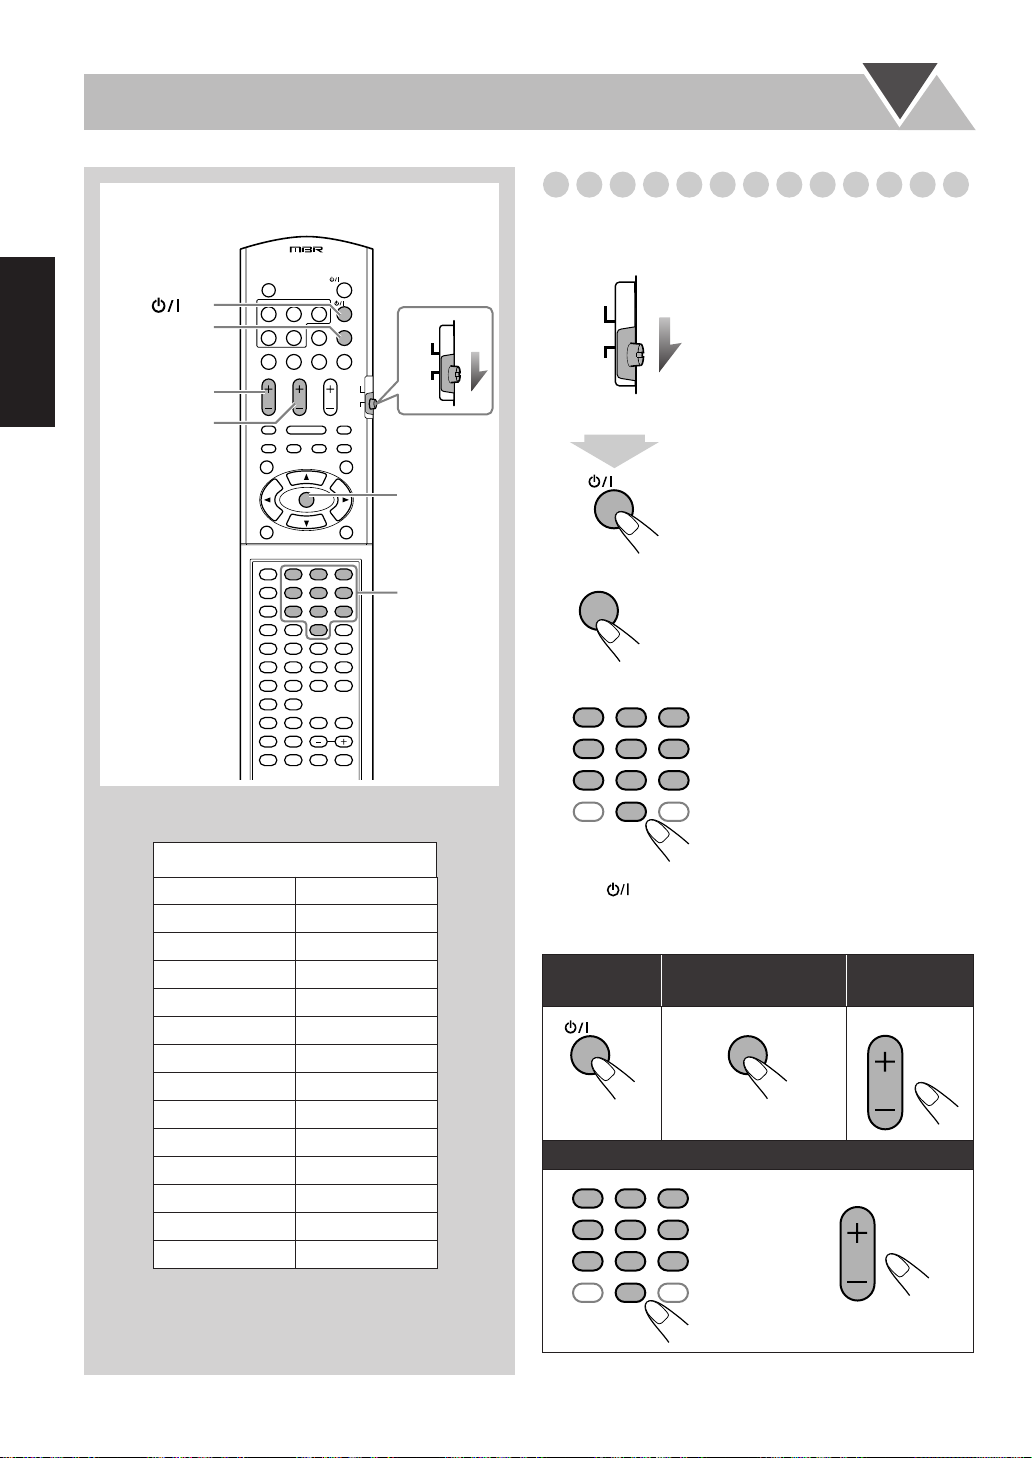
操作电视机
TV
中
文
遥控器
TV
TV/VIDEO
TV VOL +/–
CHANNEL +/–
123
456
789
10 0 +10
AUDIO
TV
ENTER
10
数字键
操作电视机
您可以使用本机的遥控器操作
AUDIO/TV
1
将
AUDIO
TV
2
按住此键不要松开,直到完成下面步骤的操作。
TV
选择器滑动至 “ TV”。
JVC
牌或其他厂家的电视机。
3
ENTER
输入
4
位数字的厂商代码。
2
123
456
789
10 0 +10
38
厂商代码
厂商 代码
JVC
01
Hitachi 10
Magnavox 02
Mitsubishi 03
Panasonic 04,11
Philips 15
RCA 05
Samsung 12
Sanyo 13, 14
Sharp 06
Sony 07
Toshiba 08
Zenith 09
松开
5
TV
键。
如何操作电视机
或
TV
想要调整电视机
音量时:
TV VOL
CHANNEL
想要启动或关
闭电视机时:
想要选择电视频道时:
123
456
789
10 0 +10
想要选择输入模式(
VIDEO
或
)时:
TV/VIDEO
Page 89

附加信息
进一步掌握本机的性能
1
(参阅第
简介
可以播放的碟片类型:
关于音频格式
•
线性
–
PCM
大多数演播室主盘所用的格式相同。
–
杜比数码
频格式,该格式可以通过多频道编码方法来建立虚拟环绕
声。
– DTS
种压缩式数码音频格式,该格式可以像杜比数码一样再生
多频道软件。但因为其压缩率较杜比数码低,因此可提供
更宽的动态范围和更好的分离效果。
如果您使用盒式
•
出。
:是由杜比实验室公司开发的一种压缩式数码音
(数码影院系统)
日常操作—播放
收听广播:
如果将一个新电台储存到一个已存有电台的号码里,原来储
•
存在那里的电台会被清除。
•
在拔下交流电 源线或者发生断电时,预设的电台将于数日内
被清除。发生此种情况时,请重新预设电台。
播放碟片:
某些
•
DVD , SVCD 或 VCD
本手册当中讲解的方法不一样,其原因来自程序编制方式和
碟片的结构,而不是本机有故障。
某些
•
DVD
时,“
LR ONLY
的是左前频道和右前频道的信号。
在播放以
•
音频压缩制式,可以完全可逆地重现
的
示窗中没有指示灯点亮。
关于
•
– MP3/WMA
–
–
–
–
MLP
音频时,信号被解码成线性
DVD
MP3/WMA
来自组 / 文件结构的复杂性。)
有些
MP3/WMA
文件的录制程序和录制状态。
在录制
MP3/WMA
作为碟片格式。
Level 2
本机可以播放增设码为
母均可)的
在录制每个
频率和
128 kbps
的比特率录制的文件。
2
至
页)
:是非压缩式数码音频格式,该格式与
:是由
数码影院系统
DVD-RAM
(参阅第
音频不接受下行混合处理。当您播放这样的碟片
”字样会在显示屏上出现,而且本机播放
(莫瑞颠无损耗压缩 ; 一种数据完全复原性
,置入碟片前将其从盒中取
7
11
至
页)
碟片的实际操作方法可能会与
PCM
信号,只是在显
PCM
播放
...
碟片需要比普通
文件不能播放并被跳过。原因来自这些
碟片时,请使用
更长的读出时间。(原因
CD
ISO 9660 Level 1 或
<.mp3> 或 <.wma>
MP3/WMA
MP3/WMA
文件。
文件时最好使用
的比特率。本机不能播放以低于
44.1 kHz
CD
公司开发的一
信号)格式录制
(大小写字
的抽样
64 kbps
日常操作—调整声音和其他项目
页)
建立个人声音模式—用户模式:
当拔下交流电源线或者发生断电时,用户模式的设定结果会
•
在数日之内被清除。发生此种情况时,请重新设定用户模
和
式。
3
创建
维声场— 3 维立体声:
在使用头戴耳机的过程中, 3 维立体声会被暂时取消。
•
维立体声的设定也用于
•3
(光纤数码输出)端子传出的光纤数码输出信号。
切换颜色制式和扫描模式:
当颜色制式设定在 “
•
碟片,碟片会以 “
NTSC
机不支持这种制式,屏幕可能上下快速地滚动。
当颜色制式设定在 “
•
碟片,虽然可以看到播出的图像,但会发生下述症状:
PAL
碟片菜单里的项目模糊不清,并且在点亮时显示的位置会
–
发生轻度改变。
图像的纵宽比可能与固有纵宽比不一样。
–
图像移动得不流畅。
–
在下列情况下不能切换成扫描模式:
•
如果您的电视机不支持逐行扫描视频输入。
–
当您未使用分量视频导线将电视机与本机连接到一起时。
–
当您以逐行扫描模式播放
•
定如何本机均会输出
设定时钟:
在设定时钟之前 “
•
时钟每个月可能会快出或慢出
•
时,请重新设定时钟。
DVD/VCD
选择音频曲目:
•
DVD
某些
播放赠送组:
•
您不能选择赠送组里的曲目进行程序播放。
视频在播放过程中无法为其切换音频语言。
NTSC
0:00
的特殊操作
(参阅第
OPTICAL DIGITAL OUTPUT
PAL( PROG
PAL 60
NTSC( PROG
NTSC
” 字样一直在显示屏上闪烁。
(参阅第
)”时如果您播放
”制式再生,但如果电视
)”时如果您播放
碟片时,无论彩色制式设
信号。
分钟。此种情况发生
1 到 2
16
18
至
页)
12
至
15
中
文
39
Page 90

中
文
特殊的图像播放方法:
在进行慢动作播放的过程中听不到声音。
•
对应
•
DVD-VR
在放大播放的过程中,图像可能看起来粗糙。
•
高级碟片操作
编排播放顺序—程序播放:
在编排程序项目的过程中
•
如果您试图编排的项目号码在碟片上不存在 (比如碟片上
–
只有
12
输入无效。
对于非当前碟片托盘中装载的
–
会提示要求输入组号码,但在播放的过程中这些输入会被
忽略。
您不能将程序播放模式和随机播放模式用于
•
碟片。
JPEG
保留编排程序的内容直到您清除它们。
•
当
•
PROGRAM
控器上的
在屏幕上操作碟片
使用屏幕条窗进行操作:
重复:
• A-B
某些
–
DVD
重复播放仅能在同一标题或同一曲目内进行。
– A-B
在控制屏幕上进行操作:
对应
DVD-VR
•
–
原始程序:本机可以以刻录顺序播放原版图像。
–
播放清单:本机可以播放由刻录设备编辑的播放清单。 只
有当碟片有播放清单时,控制屏才会出现。
记忆播放功能不适用。
–
有关
–
DVD-VR
的使用手册。
进行
•
JPEG
建议以
–
低于
640 x 480
花费较长的时间。)
本机可以播放基线
–
文件 * 或无损耗
基线
*
逐行扫描
无损耗
不能使用逐帧播放。
19
(参阅第
21
至
页)
...
首曲目,而您却选择曲目
),此种情况下您的
14
SVCD/VCD/CD
指示灯点亮时,不能切换播放的碟片。(遥
DISC 1 – 5
不能进行
文件播放时
640 x 480
JPEG
JPEG
键和主机上的
(参阅第
重复播放。
A-B
播放
...
格式及播放清单的详情,请参阅录音设备
...
的分辨率来录制文件。(如果文件是以
的分辨率录制而成,则该文件显示时便要
文件 *。不能播放逐行扫描
JPEG
文件 * 。
JPEG
格式: 用于数码相机,互连网等。
格式: 用于互连网。
JPEG
格式: 一种旧式文件格式,现在很
3
22
28
至
少使用。
键不起作用。)
,本机也
DVD-VR/
页)
JPEG
本机可以播放增设码为
•
(字母大小写均可—大写/小写)。
本机可能无法正确播放用静像数码相机以外的其他装置录制
•
的
在幻灯式播放的过程中,不能使用图像放大功能。
•
录音的操作
一般:
在录音的过程中无法切换播放源。
•
在盒式磁带的开头和结尾处存在一段不能录上音的先导带。
•
因此在录碟片或收音机节目时,先将先导带部分倒过去,这
样才能保证录音内容完整无缺。
如果未插入盒式磁带或插入的是防录磁带,“
•
样会在显示屏上出现。
如果选择环绕声模式 (
•
参阅第
整不影响复录水平。)
用磁带录音:
在使用转向模式进行录音时,首先从正面 (3)起开始录
•
音;否则仅录完磁带的单面 (反面)后录音便会停止。
同步复录碟片:
录音从第一首曲目开始即使您用
•
想要指定某一 (几)首复录的曲目,为其编排程序 (或使
用单曲复录)。
在录音的过程中,您不能使用碟片操作键 (除
•
和声音设定键 (除音量控制旋钮以外)。
碟片里的每项内容按其在碟片里所处的顺序或按您所编排的
•
程序播放顺序录制到磁带上。
您不能同时使用同步录音模式和重复播放模式 ( 重复播放模
•
式将被取消 )。
文件。
JPEG
页),您也可以复录其环绕声成分。(其它声音调
13
• DISC REC START
在播放暂停的过程中。
–
当随机播放功能启动时。
–
在程序播放正在播放或暂停的过程中。
–
在录音的过程中当磁带的正面 (3)走到尽头时,最后一
•
首歌曲将被重复录制到反面 (2)的开头处。
在录音的过程中当磁带的反面 (2)走到尽头时,不管整
•
张碟片是否已经全部录完,录音均会停止。
<.jpg> 或 <.jpeg> 的 JPEG
29
(参阅第
30
至
页)
DANCE, HALL, STADIUM
¢ /4
键不起作用:
文件
NO REC
键选择了曲目。
7
”字
键以外)
—
40
Page 91

31
OK
欣赏卡拉
消除原唱—原唱掩蔽:
原声掩蔽模式可用于通过
•
(光纤数码输出)端子输出的光纤数码信号。
在原声掩蔽模式下播放卡拉
•
或音量可能降低。
对于某些音乐,原声掩蔽模式无法达到恰当的效果。
•
给您的卡拉
打分功能启动前,您可以按
•
(
DVD
如果在打分过程中按
•
消 (但不会跳过曲目)。
如果启动打分功能时,播放停止且处于记忆播放功能状态,
•
播放将从停止处开始。
您也可以在播放的过程中启动打分功能。在此情况下,从启
•
动打分功能的该点开始打分。
在使用打分功能的过程中,您不能使用下列按键:
•
V.MASKING
作键 (
启动打分功能将取消重复播放。
•
您不能在程序播放,随机播放或录音的过程中使用打分功
•
能。
关闭本机时,排名 (前
•
歌曲数目少于 3,“
预定卡拉
如果您选择装载有
•
片号码被跳过。
如果当前碟片托盘装载了
•
用卡拉
当曲目开始播放时,该曲目号码将从卡拉
•
除 (保留编排程序的内容直到您清除它们)。
当
•
PROGRAM
控器上的
定时器的操作
设定定时器:
在设定定时器的过程中如果未指定预设的电台或曲号,当定
•
时器启动时便会播放当前选择的电台或者最初的一首曲目。
当拔下交流电源线或者发生断电时,定时器会被取消。此时
•
必须首先设定时钟,然后再重新设定定时器。
在录音定时器开始录音后如果录音未停止则不能变更播放
•
源。
如果将
•
(参阅第
OK
技巧打分:
视频和带
PBC
功能的
¢ /4
键,
MIC MIX
¢ /4 /7
键除外)。
0 POINT
歌曲—卡拉
OK
DVD
程序播放。
OK
指示灯闪烁时,不能切换播放的碟片 (遥
DISC 1 – 5
DVD
键和主机上的
(参阅第
视频设定成播放源,日常定时器无法正确工作。
33
至
页)
OPTICAL DIGITAL OUTPUT
碟片时,原声可能不被消除
OK
¢ /4
名)将被清除。(如果进行打分的
3
”字样会出现。)
程序播放:
OK
音频或
DVD
34
键来选择曲目
SVCD/VCD
键,播放停止且打分功能取
键,
DVD-VR
音频或
35
至
除外)。
RESERVE
的碟片托盘,碟
DVD-VR
OK
键不起作用。)
3
页)
键和碟片操
,不能使
预定画面中清
36
设置菜单操作
一般:
菜单的上下部分被切去,调整电视机的图象尺寸控制器。
•
语言菜单:
当为菜单语言,声音语言或字幕语言选择的语言未录制在碟
•
片上时,原有的语言用作初始语言。
图像菜单—屏幕类型:
对于某些
•
扫描”,屏幕尺寸却可能变成
制方法有关。
当您为纵宽比为
•
像会有轻微的改变,原因来自图像宽度的转换处理方式。
音频菜单—下行混合:
在播放
DTS
•
其他菜单—屏幕指南:
即使将本功能设定成 “断”,设置菜单和屏幕条窗也会显示
•
(并被录制)。
不管其如何设定,字幕语言和图像放大信息总会出现在显示
屏上。
(参阅第
视频
DVD
,尽管选择的是 “
的图像选择 “
4:3
多频道软件时本设定不生效。
37
至
页)
4:3
信箱屏幕。这与碟片的录
4:3
(多制式)”时,图
16:9
(多制式)全景
保养
想要获得本机的最佳性能,须保持碟片,磁带和机器的清洁。
保养碟片
从盒中取出碟片时,轻按中央孔拿住边缘将其取出。
•
切勿触摸碟片的光亮面或将其弄弯。
•
碟片用后须放回盒中以防弯曲。
•
在放回盒中时小心不要划伤碟片的表面。
•
避免将碟片暴露在阳光直射,温度异常和潮湿之处。
•
如何清洁碟片:
用软布从中心到边缘直线擦拭碟片。
中
文
41
Page 92

中
文
保养磁带
如果磁带盒中的带条松弛,可将铅笔插入到其中一个卷带筒
•
内,通过卷绕的方法将松弛的带条卷紧。
如果带条松弛,可能会拉长,扯断或卡在磁带盒里。
–
小心不要触摸磁带的表面。
•
避免将磁带存放在下列场所—有灰尘的地方,受阳光直射或
•
放热的地方,潮湿的地方,电视机或扬声器的上面,或者靠
近磁场的地方。
如何保持最佳录音状态和播放的声音质量
使用棉棒沾上酒精来清洁磁头,卷带轮和压带轮。
•
使用磁头去磁器 (可到电器或音响商店购买)来为磁头去
•
磁 (在本机关机状态下)。
如何保护录音内容
盒式磁带的背面有两个小的防抹防录片,用
来防止误抹或再录。
想要保护录音内容时,
想再用防录磁带录音时,
上。
除去这些小片。
用胶带将小孔盖
清洁本机
•
可用软布擦去脏点。如果本机脏污严重,可用布沾上以水稀
释后的中性洗涤剂彻底擦拭,然后用干布擦干净。
•
因为本机可能发生质量退化,引起破损或脱漆,因此要注意
下列事项:
–
切勿用硬布擦拭。
–
切勿用力擦拭。
–
切勿用稀释剂或苯擦拭。
–
切勿向其喷射挥发物如杀虫剂。
–
切勿让任何橡胶或塑料长时间与其接触。
故障排除
如果您的机器出现了问题,在请求维修之前,可以从下表自
行查找解决办法。
一般:
在操作完成之前调整或设定的内容突然被取消。
因为存在操作时限。请重新进行操作。
]
操作无法执行。
可能因为外界电波干扰导致内设的微处理器发生故障。可
]
拔下交流电源线然后再插回去。
无法使用遥控器来操作本机。
遥控器和遥感器之间的通路被障碍物挡住。
]
电池电量耗尽。
]
听不到声音。
扬声器接线错误或松脱。
]
连接了头戴耳机。
]
屏幕上不出图像。
视频接线错误或松脱。
]
电视屏幕上不出图像,图像不清晰或图像分成两部分。
本机所连接的电视机不支持逐行扫描视频输入。
]
]
选错了颜色制式 (参阅第
图像的左右边缘部分在屏幕上未显示出来。
]
将 “屏幕类型”选择成 “
阅
36
第
页)。
14
页)。
4:3
(多制式)信箱屏幕”(参
收音机的操作:
因噪音而导致节目听不清。
天线接线错误或松脱。
]
] AM
环形天线离本机太近。
] FM
天线没有正确伸展和定位。
碟片的操作:
碟片无法播放。
]
插入了一张区域代码不是 “ 3”的碟片。(“
ERR
”字样会在显示屏上出现)。
碟片被颠倒放置。放置碟片时让标签面朝上。
]
无法显示
] ID3
MP3
标签有两种类型—版本
ID3
标签当中的版本 1。
碟片上的
ID3
标签。
1
和版本 2。本机只能显示
REGION
42
Page 93

组和曲目无法按意愿播放。
MP3
]
播放顺序是在录制碟片时决定的。取决于写入时用的应用
程序。
无法播放
]
MP3/WMA 或 JPEG
插入的碟片里可能同时含有两种类型的曲目 (
WMA
文件和
文件)。发生此种情况时,通过进行
JPEG
文件。
MP3/
“文件类型”设定,可以只播放被选类型的文件 (参阅
第
页)。
36
]
您可能是在插入碟片之后才变更 “文件类型”的设定。在
此种情况下,可重新装载碟片。
碟片声音不连贯。
]
碟片有划痕或脏污。
碟片播出的声音很奇怪。
取消音调控制模式 (参阅第
]
32
页)。
尽管您已经选择了初始字幕语言,但显示屏上不出现字幕。
有些
]
示字幕时,须在开始播放之后按
第
17
声音语言与您选作初始声音语言者不一样。
有些
]
要使用原始语言时,须在开始播放之后按
(参阅第
的录制程序决定不总是事先显示字幕。想要显
DVD
SUB TITLE
页)。
的录制程序决定不总是事先使用原始语言。想
DVD
AUDIO
页)。
16
键(参阅
键
碟片托盘打不开或关不上。
]
交流电源线未插上。
儿童锁正在使用中。“
]
上 (参阅第
程序播放正在使用中。取消程序播放 (参阅第
]
21
LOCKED
页)。
”字样出现在显示屏窗口
页)。
20
磁带的操作:
磁带舱打不开。
]
在磁带播放过程中交流电源线的供电中断。启动本机。
录音的操作:
无法录音。
]
盒式磁带背面的小防抹防录片被除掉。用胶布将小孔盖
上。
卡拉
]
32
卡拉
打分功能正在使用中。取消打分功能 (参阅第
OK
页)。
OK
的操作:
无法启动打分功能。
] DVD
]
音频或
在复录的过程中或
DVD-VR
DVD
正在播放。
视频
/SVCD/VCD
的碟片菜单在
电视屏幕上显示时,无法使用打分功能。
打分结果好象出错 (或 “
带有打分功能的播放时间太短。建议唱歌的时间应大于一
]
”字样出现)。
– –
分半钟。(如果播放时间小于一分钟,打分取消。)
]
没有自麦克风的输入或输入水平 (
唱歌嗓音太低。
]
MIC LEVEL
)太低。
定时器的操作:
日常定时器或录音定时器不工作。
]
当启动时间到来时本机已处于启动状态。定时器只在本机
关机时才会开始工作。
中
文
语言代码一览表
AA
阿伐尔语
AB
阿布卡赞语
AF
南非公用语
AM
阿姆哈拉语
AR
阿拉伯语
AS
阿萨美斯语
AY
埃马拉语
AZ
阿塞拜疆语
BA
巴什克尔语
BE
白俄罗斯语
BG
保加利亚语
BH
比哈尔语
BI
科西嘉语
BN
孟加拉语
BO
藏语
BR
布列塔尼语
CA
加泰隆语
CO
科西嘉语
CS
捷克语
CY
威尔士语
DA
丹麦语
DZ
不丹语
EL
希腊语
EO
世界语
ET
爱沙尼亚语
EU
巴斯克语
FA
FI
FJ
FO
FY
GA
GD
GL
GN
GU
HA
HI
HR
HU
HY
IA
IE
IK
IN
IS
IW
JI
JW
KA
KK
KL
波斯语
芬兰语
斐济语
法劳塞语
弗利茜安语
爱尔兰语
苏格兰语
伽里茜安语
瓜拉尼语
古伽拉提语
豪萨语
印地语
克罗地亚语
匈牙利语
亚美尼亚语
英塔里古亚语
英塔里古厄语
英皮阿可语
印度尼西亚语
冰岛语
西伯来语
依地语
爪哇语
格鲁吉亚语
哈萨克语
格陵兰语
KM
KN
KO
KS
KU
KY
LA
LN
LO
LT
LV
MG
MI
MK
ML
MN
MO
MR
MS
MT
MY
NA
NE
NL
NO
OC
柬埔寨语
肯那达语
韩国语 (
KOR
克什米尔语
库尔德语
吉尔吉斯语
拉丁语
林嘎拉语
老挝语
立陶宛语
拉托维亚语
马尔加什语
毛利语
马其顿语
马拉雅拉姆语
蒙古语
摩尔达维亚语
马拉提语
马来语 (
MAY
马尔他语
缅甸语
瑙鲁语
尼泊尔语
荷兰语
挪威语
奥希昙语
OM
(阿梵)奥佬毛语
OR
)
)
奥里亚语
PA
潘伽比语
PL
波兰语
PS
普什图语
PT
葡萄牙语
QU
奇楚亚语
RM
利多罗曼语
RN
克伦蒂语
RO
罗马尼亚语
RU
俄语
RW
肯牙旺达语
SA
梵语
SD
信德语
SG
桑篙语
SH
塞尔维亚—克罗地亚语
SI
僧伽罗语
SK
斯洛伐克语
SL
斯洛文尼亚语
SM
萨摩亚语
SN
马绍纳语
SO
索马里语
SQ
阿尔巴尼亚语
SR
塞尔维亚语
SS
西斯瓦提语
ST
塞索托语
SU
SV
SW
TA
TE
TG
TH
TI
TK
TL
TN
TO
TR
TS
TT
TW
UK
UR
UZ
VI
VO
WO
XH
YO
ZU
苏丹语
瑞典语
斯瓦希里语
泰米尔语
泰卢固语
塔吉克语
泰语
梯嘎林亚语
土库曼语
他加禄语
塞茨瓦纳语
汤加语
土耳其语
从咖语
鞑靼语
图依语
乌克兰语
乌尔都语
乌兹别克语
越南语
沃拉普克语
乌尔夫语
考塞语
约鲁巴语
组鲁语
43
Page 94

规格
中
文
功率放大器部分
输出功率:
主扬声器: 每频道
数码输出:
OPTICAL DIGITAL OUTPUT
音频输入灵敏度/ 阻抗
(测量时频率为
:
AUX
MIC 1/2
VIDEO OUT
颜色制式:
VIDEO
S-VIDEO
1 kHz
:
:
(复合):
:
COMPONENT
扬声器端子:
,最小
150 W
,总谐波失真不超过
Ω
(光纤数码输出):
–21 dBm
,磁带录音信号为
300 mV/47 k Ω
3.0 mV/50 k Ω
NTSC/PAL
可选式
(亮度)
Y
(色度,脉冲)
C
(隔行扫描/逐行扫描):
(
Y
(
P
)
/
)
B
R
P
4 Ω − 16 Ω
16 Ω − 32 Ω
调谐器部分
调收范围:
FM
AM( MW
)
调收范围:
87.50 MHz – 108.00 MHz
531 kHz – 1 710 kHz
530 kHz – 1 710 kHz
视盘机部分
可播碟片:
动态范围:
水平分辨率:
晃动率: 不可测量
视频 /
DVD
CD-R/ CD-RW
格式录制的碟片及
DVD-R
DVD-RW
DVD-RAM
(以
(以
DVD
(以音频
DVD
DVD
(以
80 dB
500
音频 /
MP3/ WMA/ JPEG
DVD-VR
线
卡式座部分
频率响应
晃动率:
型):
标准 (
I
50 Hz – 14 000 Hz
0.15%( WRMS
RMS, 1 kHz
。
10%
至
–15 dBm( 660 nm ±30 nm
300 mV
时驱动于
)
1 V(p-p)/75 Ω
1 V(p-p)/75 Ω
0.286 V(p-p)/75 Ω
1 V(p-p)/75 Ω
0.7 V(p-p)/75 Ω
(主扬声器)
(环绕声扬声器)
(
在
9 kHz
(
在
10 kHz
CD/ VCD/ SVCD
CD
/ 视频
CD/
超级视频
文件)
视频格式录制 )
视频格式或
DVD-VR
格式录制 )
)
格式录制 )
附件
参阅第
页。
4
3
扬声器
主扬声器
)
类型:
3
扬声器系统: 低音喇叭:
运转时功率容量:
阻抗:
频率范围:
声压水平:
体积 (宽/高/深)(大约):
重量 (大约):每只
环绕声扬声器
扬声器系统:
运转时功率容量:
阻抗:
体积 (宽/高/深)(大约):
重量 ( 大约): 每只
设计和规格若有变更,恕不另行通知。
)
CD
经杜比实验室授权生产。“
•
)
Lossless
“
•
DTS
公司的商标。
•
您本产品的防止拷贝技术受美国专利和其他知识产权保护法的
保护。任何使用本技术的行为必须经过
Macrovision
经
目的。使用本机时不可进行违规操作或分解。
•
“消费者应注意并非所有高分辨率的电视机都完全同本产品兼
容,并且有可能在图像中引起伪影出现。如果
扫描图像出现问题,建议用户将连接切换至 ‘标准分辨率’输
出。如果存在有关我们的电视机同这一型号
视盘机的兼容性问题,请与我们的顾客服务中心联系。”
D
”和双
”和“
DTS 2.0+DIGITAL OUT
向
扬声器系统低音反射型
3
(磁场屏蔽型)
中音喇叭:
高音喇叭:
18 cm
5 cm
2 cm
圆锥形
圆锥形
球顶形
x 1
x 1
x 1
150 W
4 Ω
37 Hz – 31 000 Hz
85 dB/W•m
204 mm x 460 mm x 271 mm
4.6 kg
圆锥形
8 cm
x 1
40 W
16 Ω
105 mm x 230 mm x 125 mm
0.7 kg
”,“
Dolby
Dolby Laboratories
标志均为
特别批准时,不可用于家用或其他私用之外的
Pro Logic
Macrovision
”,“
MLP
商标。
”是数码影院系统有限
批准,未
525
625
或
逐行
525p
625p DVD
和
一般
电源要求:
功耗:
体积 (宽/高/深)(大约):
重量 (大约):
AC 110 V
– AC 240 V
调整 ),
44
/
AC 127 V
50 Hz
195 W
20 W
185 mm x 460 mm x 361 mm
/
AC 220 V
,( 可使用电压选择器进行
/
60 Hz
(操作时 )
(待机时 )
10.9 kg
/
AC 230 V
Page 95

OPTICAL DIGITAL OUTPUT
(光纤数码输出)信号
数码音频输出
/PCM DOLBY DIGITAL/PCM PCM
可播放的碟片
DVD
视频
48 kHz, 16/20/24 bit
以
PCM
以
96 kHz
以杜比数码信号编码 杜比数码比特流
以
DTS
DVD
音频
48/96/192 kHz, 16/20/24 bit
以
PCM
线性
44.1/88.2/176.4 kHz, 16/20/
以
24 bit
以杜比数码信号编码 杜比数码比特流
以
DTS
DVD-VR
以
信号编码
线性
,
信号编码
2
*
信号编码
PCM
线性
信号编码
格式录制的
PCM
信号编码
DVD-RW/
线性
信号编码
光束
DTS
DTS
比特流
比特流
RAM
48 kHz, 16/20/24 bit
以
PCM
以杜比数码信号编码 杜比数码比特流
SVCD
以
DTS
VCD
,
信号编码的
MP3/ WMA
*1
在播放某些
20 bit
*2
或
带有内容保护设定的
信号编码
CD
,
CD
碟片
DVD
24 bit
时,如果碟片为非防拷贝碟片,自
(以其固有位传输速率)的传输速率传递。
DVD
线性
音频没有输出。
44.1 kHz
,
DTS
比特流
OPTICAL DIGITAL OUTPUT
48 kHz
48 kHz
48 kHz
44.1 kHz
48 kHz
16 bit
线性
32/44.1/48 kHz
输出信号
16 bit
,
线性
,
线性
16 bit
48 kHz
16 bit
,
线性
16 bit
,
线性
48 kHz
16 bit
,
线性
1
PCM*
/48 kHz
44.1 kHz
16 bit
,
(光纤数码输出)端子输出的数码信号可能以
PCM*
PCM
,
PCM
PCM
,
PCM*
,
,
线性
1
16 bit
16 bit
1
16 bit
16 bit
PCM
48 kHz
线性
48 kHz
线性
48 kHz
线性
线性
,
PCM
,
PCM
,
PCM*
PCM
16 bit
16 bit
16 bit
1
线性
线性
线性
PCM
PCM
PCM
中
文
45
Page 96
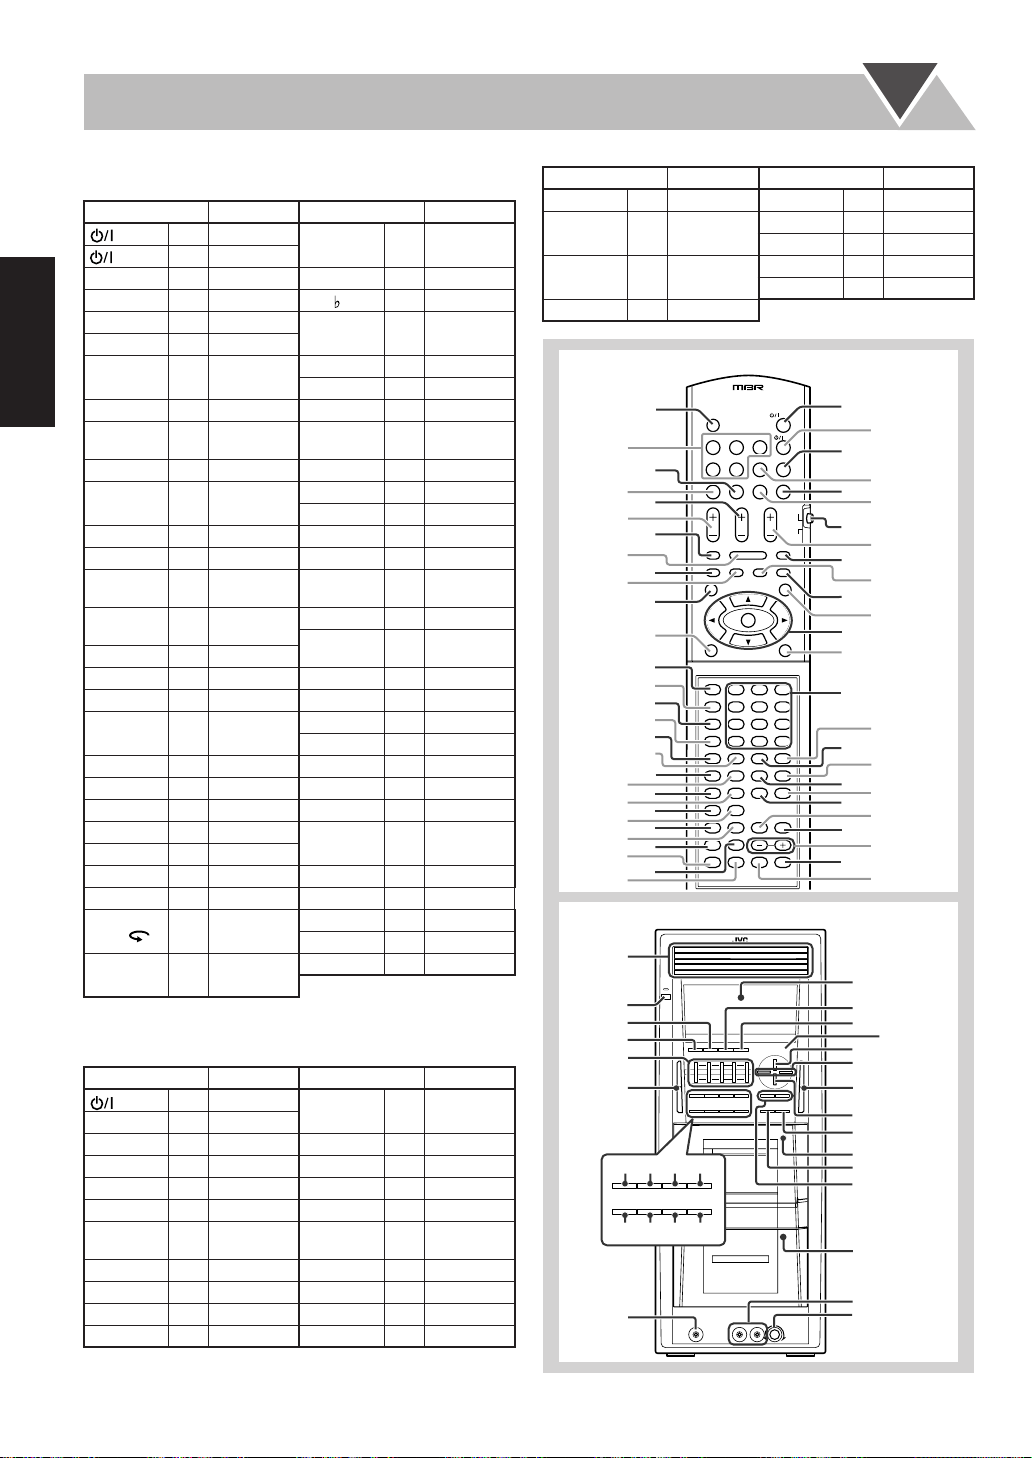
部件索引
中
文
遥控器
按键 页码 按键 页码
AUDIO
TV
77
77
¡¡
11
¡¡
/ 11
¢¢
44
¢¢
/ 44
88
88
55
∞∞
33
22
55
/ ∞∞
/ 33
/ 22
数字键
/
选
33
ENTER
+ / –
10
3D PHONIC
ACTIVE
BASS EX
ANGLE
AUDIO
AUDIO/TV
择器
AUDIO VOL
+ / –
AUX
CANCEL
CHANNEL +/–
CLOCK/
TIMER
DIMMER
DISC 1–5
DVD LEVEL
DVD/CD 33
ECHO
FM MODE
FM/AM
GLANCE
BACK
GROUP/
TITLE
z 7
x 38
8 9 – 11, 20
9
Q 8, 10, 11, 18
7
. 9, 10
P 9, 18
E 10, 15, 17, 18,
23 – 28, 36, 38
F 13 – 15, 33, 34
T 9, 10, 19, 25,
D 14
h 12
y 17
r 16
m 7, 38
, 7, 12
v 7
l 20, 33, 35
5 38
k 15, 34, 35
H 15
2 9
o 14
4 7, 9
s 32
P 8
b 7, 8
p 17
e 9
38
KARAOKE
SCORING
KEY #
KEY
L / R
BALANCE
MIC MIX
MENU/PL
ON SCREEN
PAGE
PLAY MODE
REPEAT
RHYTHM AX
RESERVE
RETURN
REVERSE
22
22
/VIDEO
33
33
33
33
MODE
SCAN MODE
SET
SET UP
SETTING
SLEEP
SOUND MODE
SUB TITLE
TAPE-A 22
TAPE-B 22
TOP MENU/
PG
TV VOL + / –
TV
V.MASKING
VFP
ZOOM
1 32
: 32
A 32
F 12
d 31, 33
W 10, 26
R 23 – 26
i 17
O 19, 20
; 21, 28
g 12
f 33
Y 10
I 11
U 14
j 8, 12, 13, 15,
33, 34, 35
w 36
G 12, 33
/ 15
S 13
t 17
3 7, 11
n 7, 11
q 10, 26
6 38
c 38
a 32
U 14
u 18, 28
主机
按键 页码 按键 页码2
显示屏
77
77
¡¡
11
¡¡
/ 11
¢¢
44
¢¢
/ 44
88
88
ACTIVE
BASS EX. +/–
AUX
DEMO
碟片托盘
00
/ 33
33
DISC 1–5 00
7
8 6
! 8 – 11, 20, 21
% 8, 10, 11, 18
= 9
- 9, 18
6 12
+ 7
_ 7
1 9
5 9, 21, 30
DISC REC
START
DUBBING
DVD/CD
DVD LEVEL
FM/AM
KARAOKE
SCORING
MIC 1 / MIC 2
MIC LEVEL
PHONES
PRESET +/–
¡ 30
£ 30
0 7, 9
) 14
9 7, 8
@ 32
& 31
* 31
7 7
= 9
按键 页码 按键 页码
PUSH-OPEN 00
REC START/
STOP
REVERSE
MODE
RHYTHM AX
00
#
^ 11, 29
™ 30
¢ 11, 29
$
12
SOUND MODE
TAPE-A
TAPE-B
TUNING
VOLUME +/–
( 13
4 7, 11, 30
3 7, 11, 29, 30
% 8
~
7, 12, 31
遥控器
1
z
x
2
3
4
5
6
7
8
9
p
q
w
e
r
t
y
u
123
456
789
10 0 +10
i
o
;
a
s
d
f
g
h
j
k
l
/
c
v
b
n
m
,
.
P
Q
W
E
R
T
Y
U
I
O
:
A
S
D
F
G
H
主机
1
8
2
3
4
5
6
9
0
=
~
遥感器
!
@
_
+
)
(
#
$
%
¡™£¢
^
&
7
*
46
Page 97

MEMO
Page 98

MEMO
Page 99

MEMO
Page 100

Mains (AC) Line Instruction (not applicable for Europe, U.S.A.,
Canada, and U.K.)
CAUTION for mains (AC) line
BEFORE PLUGGING IN, do check that your mains
(AC) line voltage corresponds with the position of
the voltage selector switch provided on the
outside of this equipment and, if different, reset
the voltage selector switch, to prevent from a
damage or risk of fire/electric shock.
DX-T5 COMPACT COMPONENT SYSTEM
EN, CS
© 2005 Victor Company of Japan, Limited
0205AIMMDWJEM
 Loading...