

Page 1

COLOUR TELEVISION
INSTRUCTIONS
Thank you for buying this JVC
colour television.
To make sure you understand how to
use your new TV, please read this
manual thoroughly before you begin.
AV-1406AE
AV-1406FE
AV-2106BE
AV-2106CE
AV-2106TE
AV-2106YE
AV-2106WE
AV-2108CE
AV-2108TE
AV-2108WE
Contents
Safety precautions 2
Preparation 3
1 Confirm which remote control you have
2 Inserting the batteries
3
Connecting the aerial and external devices
4 Connecting the power cord
5 SETUP TOUR
...................................
........................
..............................................
......
...
Basic operation 7
Remote control buttons and functions 8
PICTURE MODE button
COLOUR SYSTEM button
SOUND SYSTEM button
DISPLAY button
RETURN + button
CHANNEL SCAN button
MUTING button
OFF TIMER button
.................................
.............................
...............................
.............................................
..........................................
................................
.............................................
.........................................
Using the TV’s menus 10
Basic operation
ON TIMER
...........................................................
INPUT
...............................................................
VNR
AUTO SHUTOFF
CHILD LOCK
BLUE BACK
SETUP TOUR
LANGUAGE
AUTO CH PRESET
MANUAL CH PRESET
..............................................................
SKIP
Picture Adjustments
............................................
.....................................................
..........................................
.................................................
..................................................
...............................................
..................................................
.......................................
..................................
....................................
10
11
11
12
12
12
13
14
14
14
15
16
16
Using the buttons on the TV 17
Troubleshooting 19
Specifications 20
3
3
4
6
6
8
8
8
9
9
9
9
9
GGT0112-001A-H
0206-NIC-JMT
© 2006 Victor Company of Japan, Limited
Page 2
Safety precautions
WARNING
•To prevent fire or shock hazard, do not expose the TV to rain or moisture.
CAUTION
• Operate only from the power source indicated on the rear of the TV.
•Avoid damaging the power cord and mains plug. When you unplug the TV, pull it out by
the mains plug. Do not pull on the power cord.
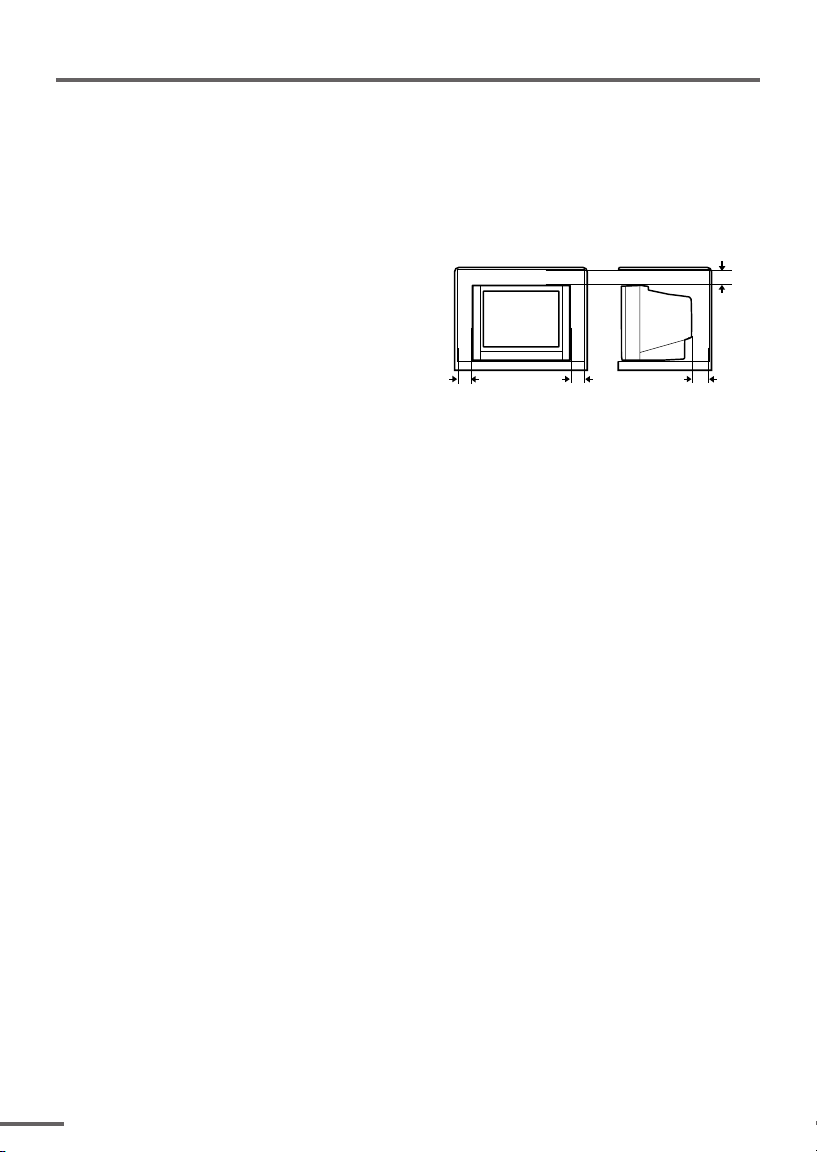
•Never block or cover the cabinet openings for
ventilation. Never install the TV where good
ventilation is unattainable. When installing
this TV, leave spaces for ventilation around
the TV more than the minimum distances
shown in the diagram.
• Do not allow objects or liquid into the
cabinet openings.
• In the event of a fault, unplug the TV and call a service technician. Do not attempt to
repair it by yourself or remove the rear cover.
• The surface of the TV screen is easily damaged. Be very careful with it when handling
the TV. Should the TV screen become soiled, wipe it with a soft dry cloth. Never rub it
forcefully. Never use any cleaner or detergent on it.
• This TV can be turned on/ off power by connecting/ disconnecting the AC Plug into AC
outlet. While this TV is being installed, enough space should be reserved for connecting/
disconnecting the AC Plug into AC outlet by hand.
10 cm 15 cm
10 cm
15 cm
2
Page 3
Preparation
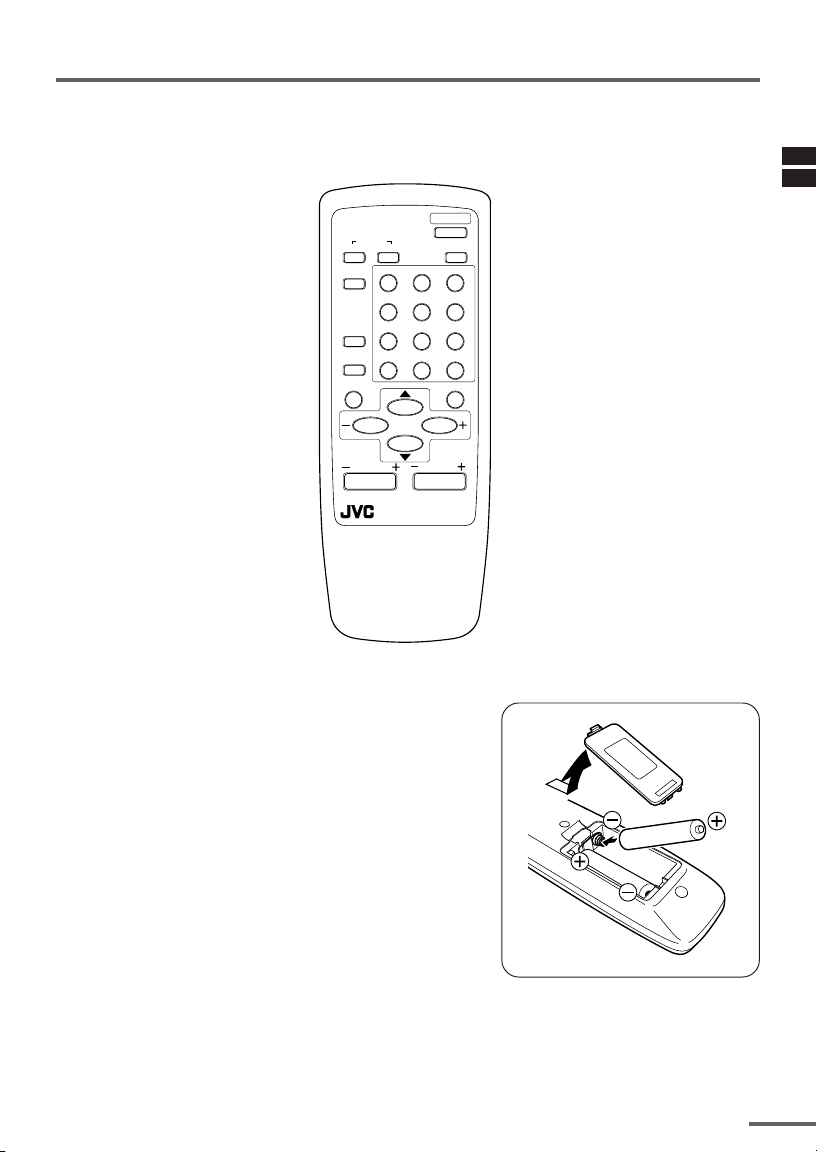
1 Confirm which remote control you have
RM-C360GY
POWER
COLOUR
TV/VIDEO
OFF
TIMER
CHANNEL
SCAN
DISPLAY
SYSTEM
SOUND
RETURN+
PICTURE
MODE
123
456
789
--
0-/
MUTING
MENU
CHANNEL
REMOTE CONRTOL UNIT
RM-C360GY
2 Inserting the batteries
Correctly insert two batteries, observing the , and
. polarities and inserting the . end first.
CAUTION:
Follow the cautions printed on the batteries.
Notes:
• Use AA/R6/UM-3 dry cell batteries.
• If the remote control does not work properly, fit new
batteries.
The supplied batteries are for testing, not regular use.
VOLUME
3
Page 4
Preparation
3 Connecting the aerial and external devices
•For further details, refer to the manuals provided with the devices you are connecting.
• Connecting cables are not supplied.
• The front and rear AUDIO/VIDEO input jacks are directly connected so that input to either jack
is output through both. You cannot provide input to both the front and rear jacks at the same
time. Disconnect one input, or use one of the jacks as an output jack only (for monitoring or
recording).
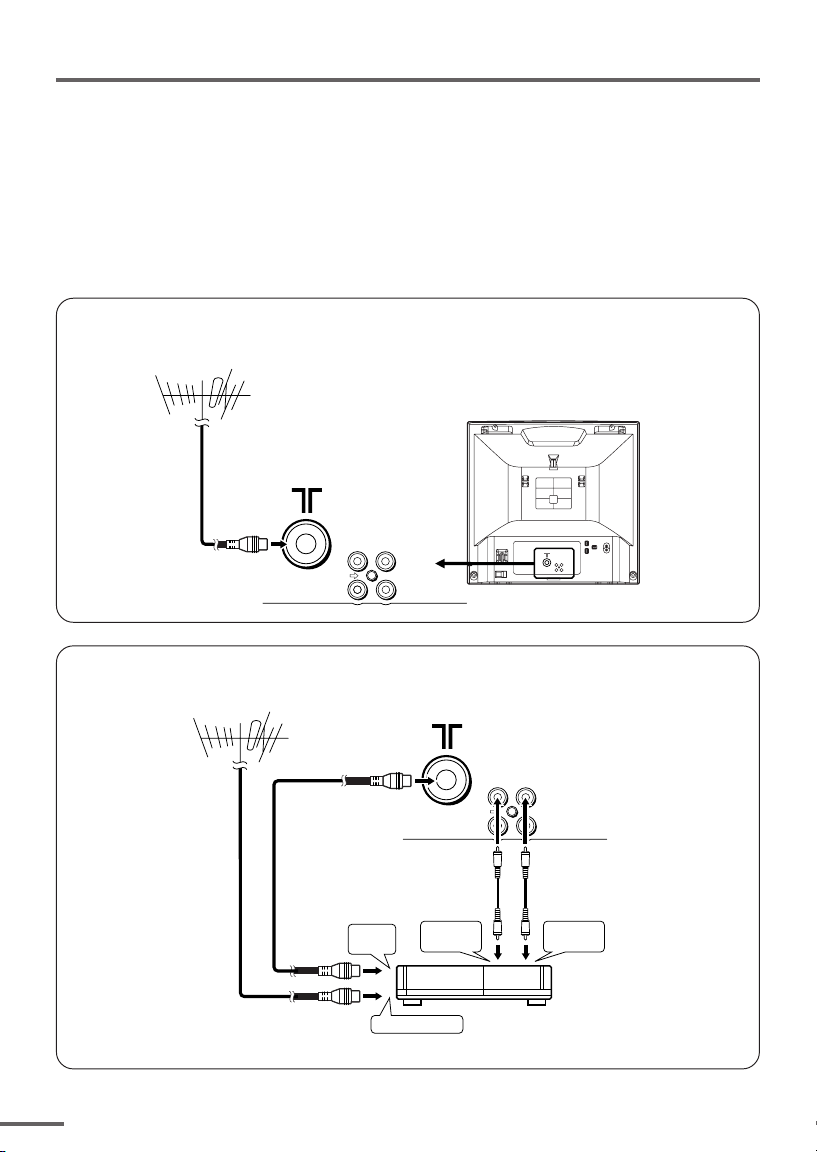
■ Connecting the aerial and VCR
Connecting the aerial
VHF/UHF outdoor aerial
VIDEO
AUDIO
IN
OUT
• Illustration of AV-2106TE.
Connecting the aerial and VCR
VHF/UHF outdoor aerial
4
1
2
To RF
output
To aerial input
To video
output
VIDEO
AUDIO
IN
OUT
3
To audio
output
VCR
• Illustration of AV-2106TE.
Page 5
Preparation
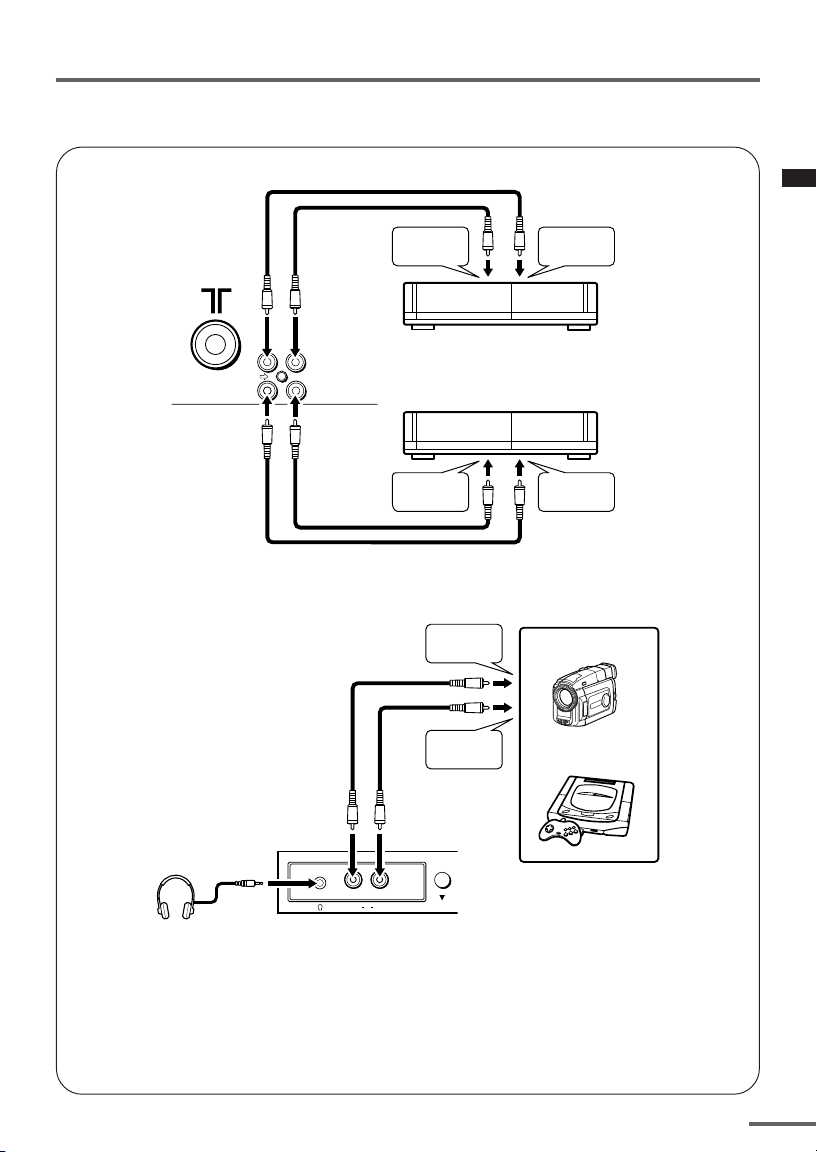
■ Connecting other external devices
VIDEO
AUDIO
• Illustration of AV-2106TE.
IN
OUT
To audio
output
VCR (for playing)
VCR (for recording)
To audio
input
To video
output
To audio
output
To video
output
To video
input
Camcorder
or
TV game
MENU
VIDEO AUDIOIN
Headphones
• Illustration of AV-2106TE.
• Use the headphones with a stereo mini jack (3.5 mm in diameter). When you connect the
headphones, the TV speakers go off.
5
Page 6
Preparation
4 Connecting the power cord
Connect the power cord to the AC outlet.
Operate only from the power source indicated on the rear of the TV.
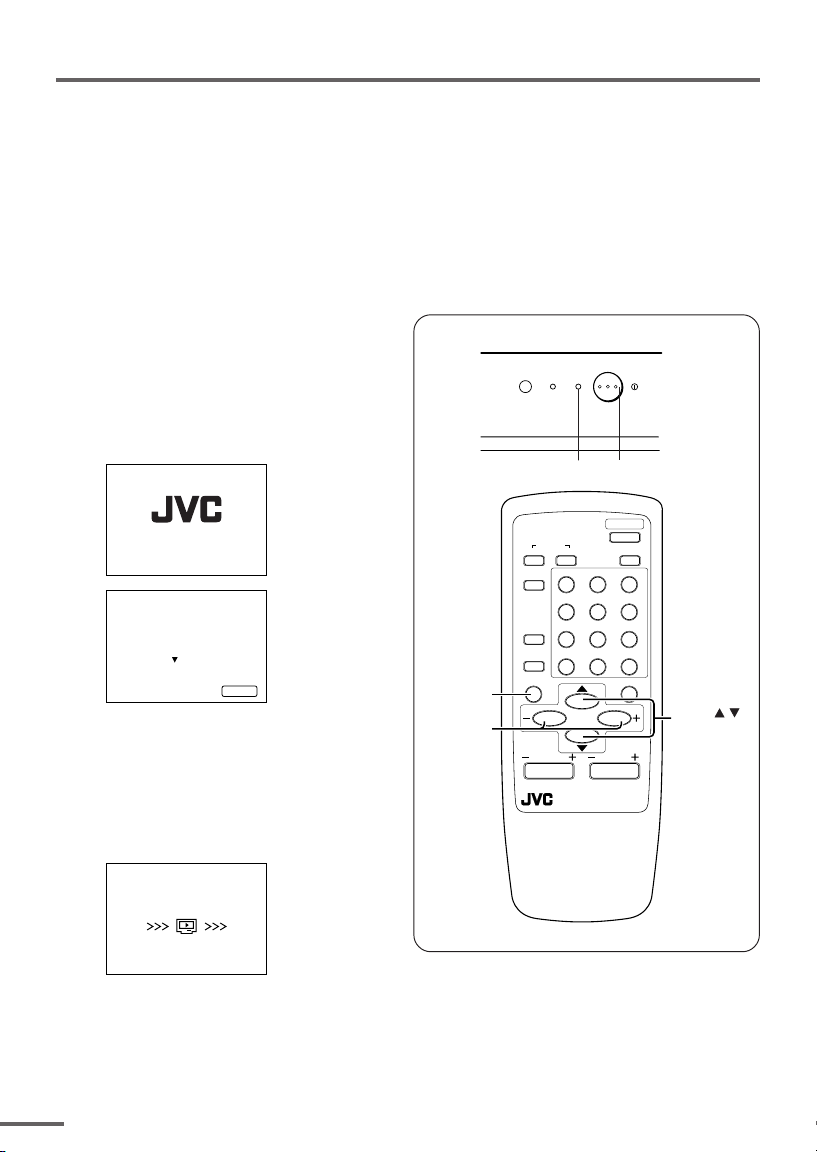
5 SETUP TOUR
When the TV is first turned on it enters the SETUP TOUR mode, and the JVC logo is
displayed. Follow the instructions on the on-screen display to perform the SETUP TOUR.
• In case of resetting that the reason for such as removal, you can set the SETUP TOUR
function on the “MENU 3” menu. For details, see page 14.
1 Press the Main power button
on the TV.
The POWER lamp or POWER/ON
TIMER lamp lights. After the JVC
logo has been displayed, the TV
automatically switches to the
language setting mode.
SETUP TOUR
SETUP TOUR
LANGUAGE
ENGLISH
EXIT BY
OPERATE BY -+
NEXT
DISPLAY
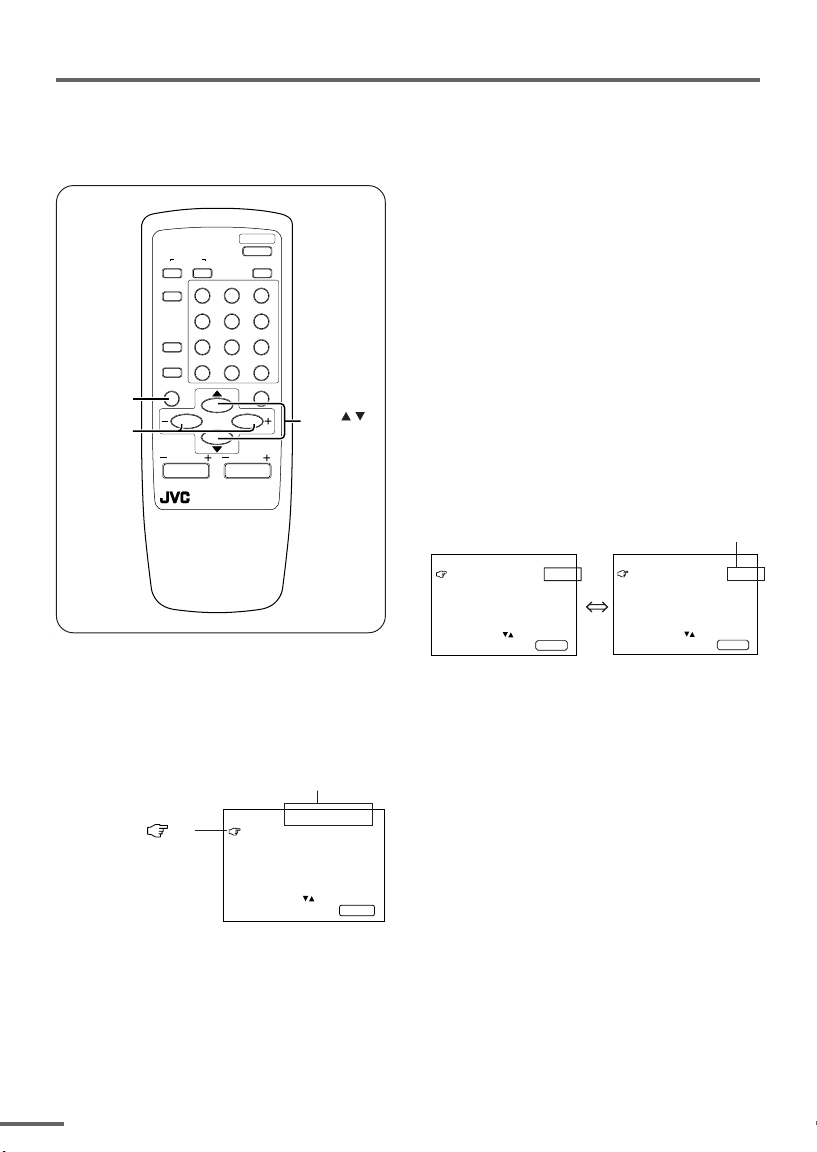
2 Press the MENU M buttons to
select the on-screen language.
3 Press the MENU y button.
The AUTO PROGRAMMING function
will start and the indicator blinks.
SETUP TOUR
• Illustration of AV-2106YE
ON TIMER POWER
POWER lamp Main power button
POWER
DISPLAY
button
MENU –/+
buttons
COLOUR
TV/VIDEO
OFF
TIMER
CHANNEL
SCAN
DISPLAY
CHANNEL
SYSTEM
SOUND
RETURN+
PICTURE
123
456
789
0-/
MUTING
MENU
VOLUME
REMOTE CONRTOL UNIT
RM-C360GY
MODE
--
MENU /
buttons
NOW PROGRAMMING
STOP BY -+
•To stop the AUTO PROGRAMMING function, press the MENU m buttons.
When you press stop, it will display “SETUP TOUR THANK YOU!”.
When all the TV channels that can be received on your TV have been preset, the
display goes out and the AUTO PROGRAMMING function operation is completed.
6
• If a TV channel you want to view is not set to the channel, set it with the MANUAL CH
PRESET function. For details, see page 15.
Page 7
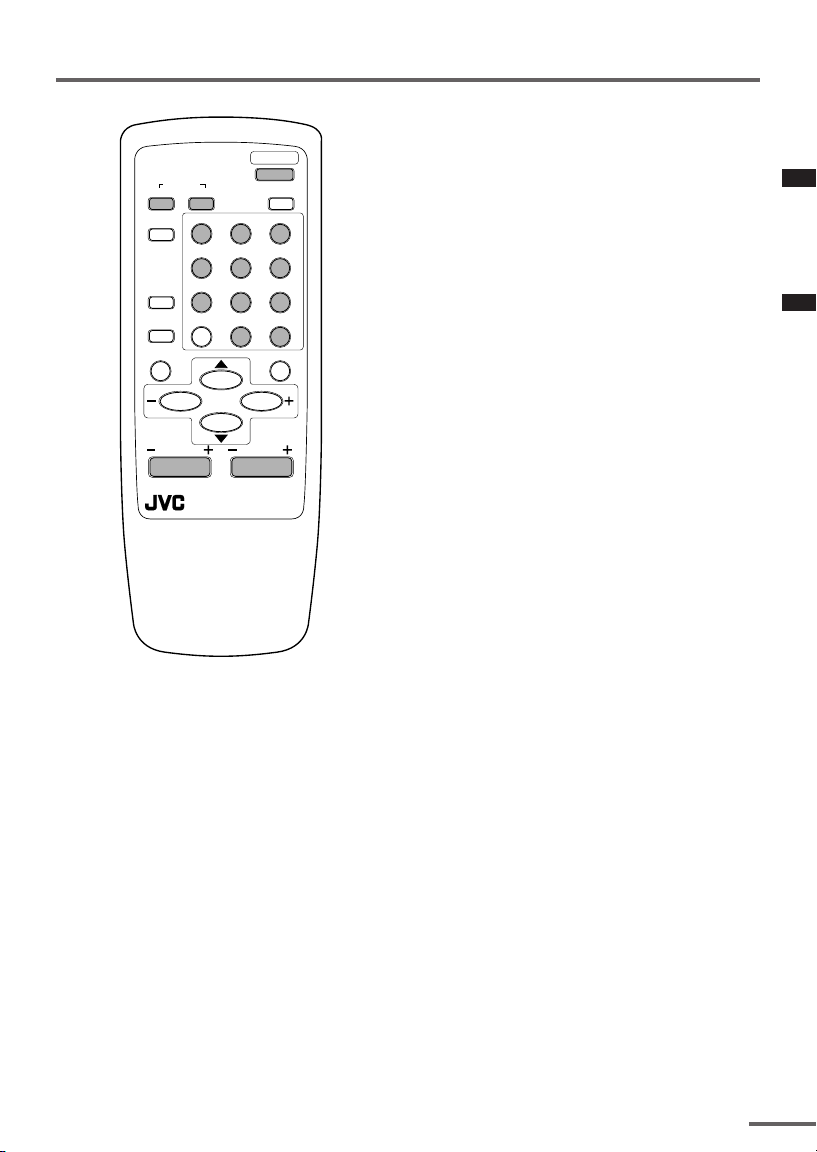
Basic operation
POWER
COLOUR
TV/VIDEO
OFF
TIMER
CHANNEL
SCAN
DISPLAY
CHANNEL
SYSTEM
SOUND
RETURN+
REMOTE CONTROL UNIT
RM-C360GY
PICTURE
MODE
123
456
789
--
0-/
MUTING
MENU
VOLUME
1 Press the POWER button to turn
your TV on.
• If your TV does not turn on, press the
Main power button on the TV then press
the POWER button again.
•You can also turn on your TV by pressing
any of the following buttons;
- the CHANNEL m button
- the Number buttons
- the TV/VIDEO button
2 Select a channel.
■ Press the CHANNEL m button.
• Up/down selection cannot be selected
for channels to which the SKIP has been
set to “YES”. See page 16.
■ Press the Number buttons to enter
the channel number.
• If you want to enter a two-digit number,
press the -/-- button to select the two
digit mode “--”, then enter the channel
number.
3 Press the VOLUME M button to
adjust the sound.
4To turn your TV off, press the
POWER button.
•We recommend that you press the Main
power button on the TV to turn the main
power off if you do not plan to use your
TV for a long time or if you wish to save
energy.
If the picture is not clear:
Press the COLOUR SYSTEM button to
select another colour system, see page 8.
If the sound is not clear:
Press the SOUND SYSTEM button to select
another sound system, see page 8.
Viewing Images from an External
Device:
Press the TV/VIDEO button to select the
VIDEO mode.
•You can also use the INPUT function to select
the VIDEO mode. For details, refer to page 11.
7
Page 8
Remote control buttons and functions
PICTURE MODE button
You can select one of three picture
adjustment settings as you like.
Press this button to select a mode.
BRIGHT:
Heightens contrast and sharpness.
STANDARD:
Standardizes picture adjustments.
SOFT:
Softens contrast and sharpness.
•Pressing this button returns all the picture
settings in the “MENU 4” to their default
settings.
COLOUR SYSTEM button
If the picture is not clear or no colour
appears, change the current colour system
to another colour system.
Press this button to select the colour
system.
In TV mode (channel 1 to 99 and AV):
AUTO PAL
SECAM
In VIDEO mode:
AUTO PAL
NTSC4.43
SECAM
NTSC3.58
AUTO:
Automatic colour system selection.
•For the colour systems in each country or
region, see the table“Broadcasting systems”
on page 20.
• If the picture is not normal in the AUTO
mode, change the AUTO mode to another
colour system.
SOUND SYSTEM button
If the sound is not clear even when the
picture appears normal, change the
current sound system to another sound
system.
Press this button to select the sound
system.
B/G I D/K
•For the sound systems in each country or
region, see the table “Broadcasting systems”
on page 20.
•You cannot select any sound system when in
a VIDEO mode.
8
Page 9

Remote control buttons and functions
DISPLAY button
You can continuously display the current
channel number or VIDEO mode on the
screen.
Press this button.
To turn the display off, press this button
again.
• When selecting a channel or VIDEO mode
with no input signal, indication of selected
channel or VIDEO mode becomes fixed on the
screen.
RETURN + button
You can set a channel you frequently view
to the Return Channel and you can view
that channel at any time with one-touch.
To set the channel to the Return
Channel:
1 Select the channel you want to set
to the Return Channel.
2 Press this button and hold until the
message “RETURN PLUS
PROGRAMMED!” appears.
• When you turn off the TV, the Return
Channel setting is cancelled.
To view the Return Channel:
Press this button.
•You can view two channels (current channel
and Return Channel) alternately by pressing
this button.
To cancel the Return Channel setting:
Press this button and hold until the
message“RETURN PLUS CANCELLED!”
appears.
If no channel is set to the Return
Channel:
You can view the channel selected right
before the current channel by pressing
this button.
CHANNEL SCAN button
You can quickly view all TV channels
programmes that you can view on your
TV, and search for the programme you
want to view.
1 Press this button to start scanning
TV channels.
The TV channel programmes are each
displayed for several seconds.
• The programmes of TV channels for which
the SKIP function is set to “YES” are not
displayed. (See page 16.)
2 When you find the programme you
want to view, press this button
again to stop scanning.
MUTING button
You can turn the sound off instantly.
Press this button.
To turn the sound on, press this button
again.
OFF TIMER button
You can set the TV to automatically turn
off after a set time.
Press this button to select the period of
time.
•You can set the period of time to a maximum
of 120 minutes in 10 minute increments.
•1 minute before the OFF TIMER function
turns off the TV, “GOOD NIGHT!” appears.
To display the remaining time, press this
button once.
To cancel the OFF TIMER function, press
this button to set the period of time to 0.
• The OFF TIMER function will not turn off the
TV’s main power.
9
Page 10
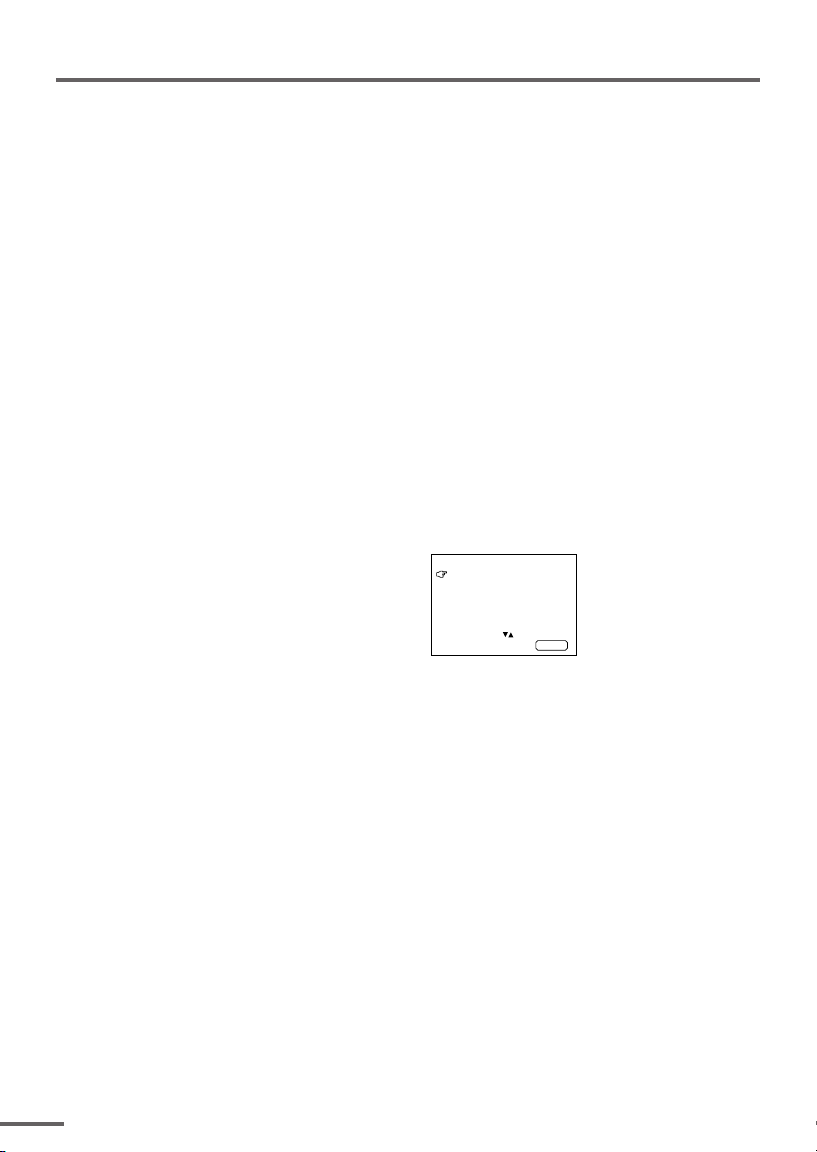
Using the TV’s menus
This TV has a number of functions you can operate using the menus. To use all your TV’s
2 Repeatedly press the MENU T
buttons to display a desired
menu.
• If you hold down the y button, the next
menu is displayed.
• If the selected function is on the first line,
pressing the r button displays the
preceding menu.
3 Repeatedly press the MENU T
buttons to select a desired
function.
4 Press the MENU M buttons to
change function settings.
Example:
MENU 2
AUTO SHUTOFF OFF
CHILD LOCK OFF
BLUE BACK ON
SELECT BY EXIT BY
OPERATE BY -+
• With some functions, the operation
method may differ.
DISPLAY
⇔
10
5 Press the DISPLAY button to turn
the display off.
•To operate a menu using the buttons on
the front panel of the TV, refer to
“Operating menus” on page 18.
Page 11
Using the TV’s menus
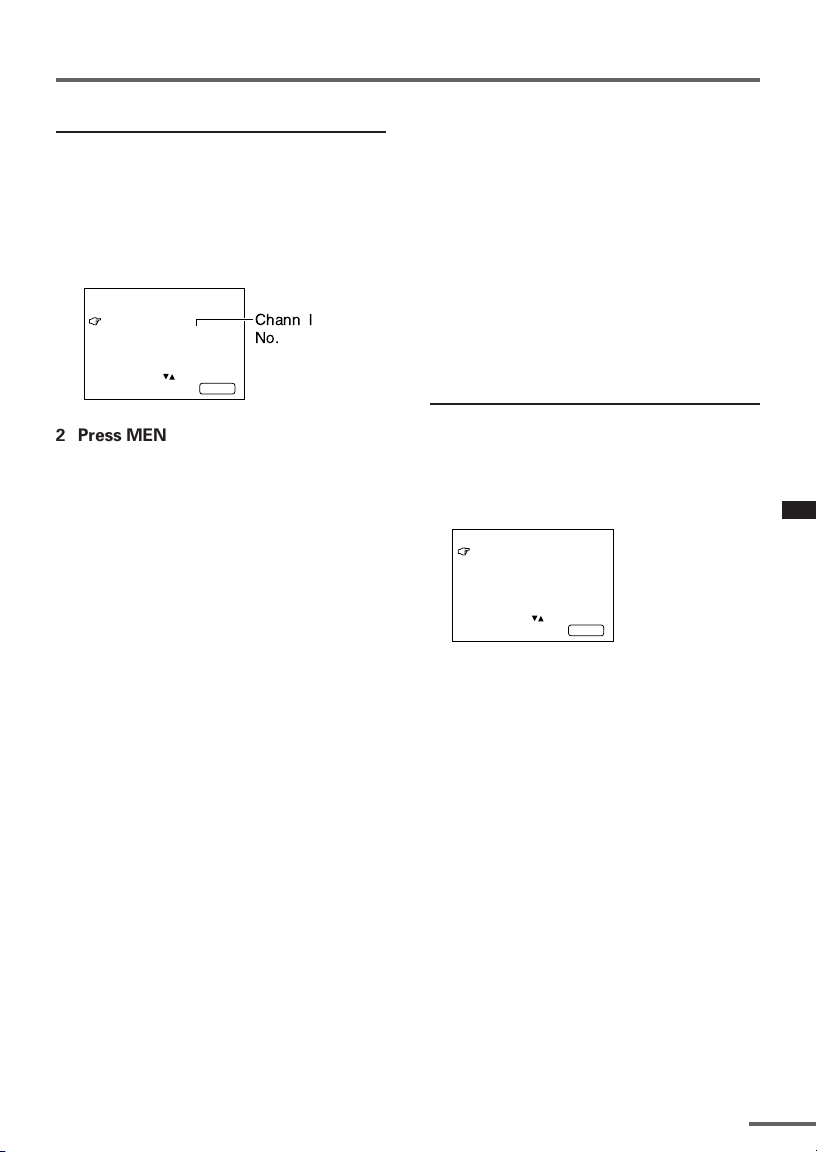
ON TIMER
Your TV will automatically turn on and
tune into the channel you set after the
period of time you set.
1 Press MENU T to display the
“MENU 1” menu, then select
“ON TIMER”.
MENU 1
INPUT TV
ON TIMER
PR 1 0:00
VNR OFF
OPERATE BY VOL-+
SELECT BY EXIT BY
PROGRAM BY -+
2 Press MENU M to select a channel
you want to view when the TV turns
on.
3 Press VOLUME M to select the
period of time after which you want
to turn on the TV.
The ON TIMER function starts.
• Each time you press the button, the period
of time changes in 15 minute intervals (up
to 12 hours).
To cancel the ON TIMER function,
press the VOLUME m button to set the
period of time to “0:00”.
4 Press DISPLAY to turn the display
off.
• If you turn off the TV’s main power by
pressing the Main power button, the ON
TIMER function is canceled.
• If you do not turn off the TV after starting
the ON TIMER function, the channel will
automatically switch to the channel set for
the ON TIMER function.
Channel
No.
DISPLAY
When the time set for the ON TIMER
function is reached:
The TV automatically turns on and the
channel set for the ON TIMER function is
displayed.
•For safety reasons the TV will automatically
turn off if no operations are made within
approximately two hours after the TV is
turned on with the ON TIMER function.
• The OFF TIMER function and AUTO
SHUTOFF function have priority over the ON
TIMER function.
INPUT
You can view images from VCRs or other
devices connected to your TV.
1 Press MENU T to display the
“MENU 1” menu, then select
“INPUT”.
MENU 1
INPUT TV
ON TIMER
PR 1 0:00
VNR OFF
SELECT BY EXIT BY
OPERATE BY -+
2 Press MENU M to select the VIDEO
mode.
While you press MENU –/+, it will
switch to TV mode and VIDEO mode
alternately.
DISPLAY
11
Page 12

Using the TV’s menus
VNR (Video Noise Reduction)
You can reduce the picture noise.
1 Press MENU T to display the
“MENU 1” menu, then select “VNR”.
MENU 1
INPUT TV
ON TIMER
PR 1 0:00
VNR ON
SELECT BY EXIT BY
OPERATE BY -+
DISPLAY
2 Press MENU M to select “ON”.
To cancel the VNR function, select
“OFF”.
AUTO SHUTOFF
You can set your TV to turn off if no
signals are received for about 15 minutes
or longer after the end of a broadcast.
1 Press MENU T to display the
“MENU 2” menu, then select “AUTO
SHUTOFF”.
MENU 2
AUTO SHUTOFF ON
CHILD LOCK ON
BLUE BACK ON
SELECT BY EXIT BY
OPERATE BY -+
DISPLAY
CHILD LOCK
You can disable the front control buttons
of the TV.
When this function is set to “ON”, the TV
can be operated using only the remote
control.
Use this function to prevent children from
operating the TV without parental consent.
1 Press MENU T to display the
“MENU 2” menu, then select “CHILD
LOCK”.
MENU 2
AUTO SHUTOFF ON
CHILD LOCK ON
BLUE BACK ON
SELECT BY EXIT BY
OPERATE BY -+
2 Press MENU M to select “ON”.
To cancel the CHILD LOCK function,
select “OFF”.
• The CHILD LOCK function is canceled when
you turn the power off.
DISPLAY
2 Press MENU M to select “ON”.
To cancel the AUTO SHUTOFF function,
select “OFF”.
• The AUTO SHUTOFF function does not
turn off the TV’s main power.
• The AUTO SHUTOFF will not work for a
VIDEO mode.
12
Page 13

Using the TV’s menus
BLUE BACK
You can mute the sound and change the
picture into a blue screen while no signals
are received by the TV, or when the
signals are unstable.
1 Press MENU T to display the
“MENU 2” menu, then select “BLUE
BACK”.
MENU 2
AUTO SHUTOFF ON
CHILD LOCK ON
BLUE BACK ON
SELECT BY EXIT BY
OPERATE BY -+
2 Press MENU M to select “ON”.
To cancel the BLUE BACK function,
select “OFF”.
•To view a broadcast even when the
reception signal is poor, set the BLUE
BACK function to “OFF”.
•Even when the BLUE BACK function is set
to “OFF”, the sound may not be audible.
DISPLAY
13
Page 14

Using the TV’s menus
SETUP TOUR
You can start the SETUP TOUR function.
1 Press MENU T to display the
“MENU 3” menu, then select
“SETUP TOUR”.
MENU 3
AUTO CH PRESET
MANUAL CH PRESET
SETUP TOUR
LANGUAGE ENGLISH
SELECT BY EXIT BY
OPERATE BY -+
DISPLAY
2 Press MENU M.
JVC logo is appear and the SETUP
TOUR function will start.
For details, see page 6.
LANGUAGE
You can select the language for the onscreen display.
1 Press MENU T to display the
“MENU 3” menu, then select
“LANGUAGE”.
MENU 3
AUTO CH PRESET
MANUAL CH PRESET
SETUP TOUR
LANGUAGE ENGLISH
SELECT BY EXIT BY
OPERATE BY -+
2 Press MENU M to select
language.
The on-screen display indications are
in the selected language.
DISPLAY
AUTO CH PRESET
You can automatically preset all TV
channels that can be received by your TV
to channels.
1 Press MENU T to display the
“MENU 3” menu, then select “AUTO
CH PRESET”.
MENU 3
AUTO CH PRESET
MANUAL CH PRESET
SETUP TOUR
LANGUAGE ENGLISH
SELECT BY EXIT BY
OPERATE BY -+
2 Press MENU M to start the AUTO
CH PRESET function.
“>>>ON SEARCH” is displayed on
the screen.
When all the TV channels that can be
received on your TV have been preset,
the display goes out and the AUTO CH
PRESET function operation is
completed.
To stop the AUTO CH PRESET:
Press the MENU m buttons.
• The AUTO CH PRESET function does not
preset a TV channel to the AV channel
(channel number 0).
• If the TV cannot preset the TV channel you
want to view, preset it manually. For details,
see “MANUAL CH PRESET” on page 15.
DISPLAY
14
Page 15

Using the TV’s menus
MANUAL CH PRESET
You can manually preset desired TV
channels to desired channels.
1 Press MENU T to display the
“MENU 3” menu, then select
“MANUAL CH PRESET”.
MENU 3
AUTO CH PRESET
MANUAL CH PRESET
SETUP TOUR
LANGUAGE ENGLISH
SELECT BY EXIT BY
OPERATE BY -+
2 Press MENU M.
The sub-menu is displayed.
MANUAL
FINE
SKIP NO
SOUND SYSTEM B/G
EXIT
SELECT BY PR 1 VL
PROGRAM BY -+ EXIT BY
SEARCH BY VOL-+
• The channel number is displayed as a PR
number. For example, channel 1 will be
displayed as PR 1. However, the AV
channel will be displayed as AV.
3 Press MENU M to select the
channel number.
4 Press VOLUME M to start
searching for the TV channel.
“>>>” or “<<<” is displayed on the
screen.
When the TV finds a TV channel, the
“>>>” or “<<<” display goes out,
and the TV channel is preset to the
currently selected channel number.
• If the TV channel you want to preset is not
displayed, repeat step 4 until the TV finds
the TV channel you want to preset.
•To stop the MANUAL CH PRESET function,
press any button other than the VOLUME
m button.
DISPLAY
DISPLAY
If the picture is not clear:
Fine-tune the TV channel.
1 Press MENU t to select “FINE”.
MANUAL
FINE
SKIP NO
SOUND SYSTEM B/G
EXIT
SELECT BY PR 3 VL
PROGRAM BY -+ EXIT BY
FINE BY VOL-+
DISPLAY
2 Hold VOLUME m down to fine-tune
the TV channel so that the best image
is displayed on screen.
“>” or “<” indicates that the TV is finetuning the TV channel.
If the sound is not clear:
1 Press MENU t to select “SOUND
SYSTEM”.
MANUAL
FINE
SKIP NO
SOUND SYSTEM B/G
EXIT
SELECT BY PR 3 VL
PROGRAM BY -+ EXIT BY
CHANGE BY VOL-+
DISPLAY
2 Press VOLUME m to select the
appropriate sound system.
•For the sound systems in each country
or region, refer to the table
“Broadcasting systems” on page 20.
5 Press MENU T to select
“MANUAL”.
6 Repeat steps 3 to 5 if you want to
preset another TV channel to a
channel.
15
Page 16

Using the TV’s menus
SKIP
You can set undesired channels to be
skipped. Channels set to be skipped
cannot be selected by the CHANNEL m
buttons nor the CHANNEL SCAN button.
• Channels to which TV channels have not
been preset are automatically set to be
skipped.
1 Press MENU T to display the
“MENU 3” menu, then select
“MANUAL CH PRESET”.
2 Press MENU M.
The sub-menu is displayed.
3 Press MENU T to select “SKIP”.
MANUAL
FINE
SKIP NO
SOUND SYSTEM B/G
EXIT
SELECT BY PR 3 VL
PROGRAM BY -+ EXIT BY
YES/NO BY VOL-+
4 Press MENU M to select the
channel you want to skip.
5 Press VOLUME M to select “YES”.
The channel is set to be skipped.
To cancel the SKIP function, select
“NO”.
DISPLAY
Picture Adjustments
You can adjust the picture as you like.
1 Press MENU T to display the
“MENU 4” menu.
MENU 4
TINT
COLOUR
BRIGHT
CONT.
SHARP
SELECT BY EXIT BY
OPERATE BY -+
2 Press MENU T to select an item
and press MENU M to adjust it.
TINT* - : Reddish + : Greenish
COLOUR - : Lighter + : Deeper
BRIGHT - : Darker + : Brighter
CONT. - : Lower + : Higher
SHARP - : Softer + : Sharper
* TINT (tint) is displayed only when
viewing images from NTSC3.58 or
NTSC4.43 colour systems.
DISPLAY
6 Repeat steps 4 and 5 if you want to
set another channel to skip.
16
Page 17

Using the buttons on the TV
The following illustrations are of only some models are shown for explanation purpose
only. Your TV may not be exactly the same as illustrated.
<AV-2106YE>
MENU CHANNEL VOLUME
2
1
EXIT
3
<AV-2106TE>
MENU CHANNEL VOLUME
2
1
<AV-2106WE>
MENU CHANNEL VOLUME
2
1
EXIT
3
EXIT
3
ON TIMER POWER
9 5 6 8
POWER /
ON TIMER
4
POWER/
ON TIMER
94 7 8
78
1 MENU button
• MENU
button
2 CHANNEL –/+ buttons
• MENU m buttons
3 VOLUME –/+ buttons
• EXIT from MENU buttons
4 Remote control sensor
5 ON TIMER lamp
The light is switched on while
ON TIMER function is
operating.
6 POWER lamp
When the Main power is on,
the light is red.
7 POWER/ON TIMER lamp
When the Main power is on,
the light is green.
When ON TIMER function is
on, it is red.
8 Main power button
9 Not application
<AV-2106BE>
MENU CHANNEL VOLUME
1
2
3
EXIT
POWER
ON
TIMER
4 7 8
17
Page 18

Using the buttons on the TV
Basic operation
• Check to make sure the CHILD LOCK
function is set to “OFF”. When the CHILD
LOCK function is set to “ON”, the TV cannot
be operated using the front control buttons.
For details, see “CHILD LOCK” on page 12.
1 Press CHANNEL M to turn the TV
on from standby mode.
2 Press CHANNEL M to select a
channel.
3 Press VOLUME M to adjust the
volume.
4To turn your TV off, press the Main
power button to turn off the TV’s
main power.
To change the TV mode to the VIDEO
mode:
• Select the VIDEO mode with the INPUT
function in “MENU 1”.
Operating menus
You can operate functions in menus using
the front control buttons on the TV.
1 Press MENU y to display a menu.
2 Press MENU y repeatedly to display
the menu you want to use.
3 Press MENU y to select the desired
function or item.
4 Press MENU M or VOLUME M to
carry out the desired operation.
For details, see the description for each
function.
5 Press VOLUME M to turn the menu
display off.
To turn the sub-menu display off:
1 Press MENU y to select “EXIT”.
MANUAL
FINE
SKIP NO
SOUND SYSTEM B/G
EXIT
SELECT BY PR 3 VL
PROGRAM BY -+ EXIT BY
EXIT BY VOL-+
DISPLAY
18
2 Press VOLUME m to turn the display
off.
Page 19

Troubleshooting
If there is no picture or the TV does not operate normally, make sure the problem isn’t due
to the reasons indicated below.
If the problem persists even after taking the measures indicated, please contact a service
technician.
Cannot turn the TV on
•Press the Main power button on the TV.
• Connect the power cord to the AC outlet.
The screen turns blue
• Is the BLUE BACK function on? (see page 13.)
Remote control inoperable
•Replace the batteries. (see page 3.)
Buttons on front of the TV do not work
•Switch the CHILD LOCK function off.
(see page 12.)
TV does not respond immediately
•Press the main power button on the TV to
turn off the main power. Press the main
power button again to turn on the TV. If the
TV returns to a normal state, operation is
normal.
The TV turns off suddenly
• Is the OFF TIMER function set to operate?
(see page 9.)
• Is the AUTO SHUTOFF function on?
(see page 12.)
•Have you not performed an operation for
about two hours after the TV was switched on
by the ON TIMER function? (see page 11.) If
you don’t perform an operation within about
two hours, the TV is automatically switched
off for safety.
Poor sound
•Press the SOUND SYSTEM button to select
another sound system. (see page 8.)
Poor picture
•Press the COLOUR SYSTEM button to select
another colour system. (see page 8.)
•Adjust the picture settings. (see page 16.)
• Set the Picture mode to STANDARD.
(see page 8.)
• If noise (snow) totally blocks out the picture,
check the following.
-Have the TV and aerial been connected
properly?
- Has the aerial cable been damaged?
- Is the aerial pointing in the right direction?
- Is the aerial itself faulty?
• If the TV or aerial suffer interference from
other equipment, stripes or noise may appear
in the picture. Move any equipment which
can cause interference away from the TV.
• If the TV or aerial suffer interference from
signals reflecting from mountains or
buildings, double-pictures (ghosting) will
occur. Change the aerial’s direction or replace
it with an aerial with better directionality.
• When a white and bright still image (such as
a white dress) is displayed on the screen, the
white part may look as if it is coloured. When
the image disappears from the screen, the
unnatural colours will also disappear.
The TV turns on suddenly
• Is the ON TIMER function set to operate?
(see page 11.)
The TV channel changes suddenly
• Is the ON TIMER function set to operate?
(see page 11.)
19
Page 20

Specifications
TV RF systems
B, G, I, D, K, K1
Colour systems
PAL, SECAM, NTSC 3.58/4.43 MHz (in VIDEO mode only)
Receiving channels
VHF low channel (VL), VHF high channel (VH), UHF channel (U)
Receives cable channels in mid band, super band and hyper band.
External input / output
INPUT: VIDEO input (RCA), AUDIO input (RCA)
OUTPUT: VIDEO output (RCA), AUDIO output (RCA)
Headphone jack: stereo mini jack (3.5 mm diameter)
Accessories
• Remote control unit: RM-C360GY
• AA / R6 / UM-3 dry cell battery × 2
Design and specifications subject to change without notice.
Broadcasting systems
Area Country or Region
Bahrain, Kuwait, Oman, Qatar,
United Arab Emirates, Yemen, etc. PAL B/G
Indonesia, Malaysia, Singapore, Thailand,
Asia,
Middle
East
Europe
India, etc.
China, Vietnam, etc. PAL D/K
Hong Kong, etc. PAL I
Islamic Republic of Iran, Lebanon, Saudi Arabia, etc. SECAM B/G
Russia, etc. SECAM D/K
Czech Republic, Poland, etc. PAL D/K
Germany, Holland, Belgium, etc. PAL B/G
UK, etc. PAL I
Oceania Australia, New Zealand, etc. PAL B/G
Republic of South Africa, etc. PAL I
Africa Nigeria, etc. PAL B/G
Egypt, Morocco, etc. SECAM B/G
System
Colour Sound
20
Page 21

COLOUR TELEVISION
INSTRUCTIONS
Thank you for buying this JVC
colour television.
To make sure you understand how to
use your new TV, please read this
manual thoroughly before you begin.
AV-14A16
AV-21B16
AV-21F16
AV-21T16
Contents
Safety precautions 2
Preparation 3
1 Confirm which remote control you have
2 Inserting the batteries
3
Connecting the aerial and external devices
4 Connecting the power cord
5 SETUP TOUR
...................................
........................
..............................................
......
...
Basic operation 7
Remote control buttons and functions 8
PICTURE MODE button
COLOUR SYSTEM button
SOUND SYSTEM button
DISPLAY button
RETURN + button
CHANNEL SCAN button
MUTING button
OFF TIMER button
.................................
.............................
...............................
.............................................
..........................................
................................
.............................................
.........................................
Using the TV’s menus 10
Basic operation
ON TIMER
...........................................................
INPUT
...............................................................
VNR
AUTO SHUTOFF
CHILD LOCK
BLUE BACK
SETUP TOUR
LANGUAGE
AUTO CH PRESET
MANUAL CH PRESET
..............................................................
SKIP
Picture Adjustments
............................................
.....................................................
..........................................
.................................................
..................................................
...............................................
..................................................
.......................................
..................................
....................................
10
11
11
12
12
12
12
13
13
13
14
15
15
Using the buttons on the TV 16
Troubleshooting 18
Specifications 19
3
3
4
6
6
8
8
8
9
9
9
9
9
GGT0106-001A-H
0206-NIC-JMT
© 2006 Victor Company of Japan, Limited
Page 22

Safety precautions
WARNING
•To prevent fire or shock hazard, do not expose the TV to rain or moisture.
CAUTION
• Operate only from the power source indicated on the rear of the TV.
•Avoid damaging the power cord and mains plug. When you unplug the TV, pull it out by
the mains plug. Do not pull on the power cord.
•Never block or cover the cabinet openings for
ventilation. Never install the TV where good
ventilation is unattainable. When installing
this TV, leave spaces for ventilation around
the TV more than the minimum distances
shown in the diagram.
• Do not allow objects or liquid into the
cabinet openings.
• In the event of a fault, unplug the TV and call a service technician. Do not attempt to
repair it by yourself or remove the rear cover.
• The surface of the TV screen is easily damaged. Be very careful with it when handling
the TV. Should the TV screen become soiled, wipe it with a soft dry cloth. Never rub it
forcefully. Never use any cleaner or detergent on it.
•This TV can be turned on/ off power by connecting/ disconnecting the AC Plug into AC
outlet. While this TV is being installed, enough space should be reserved for connecting/
disconnecting the AC Plug into AC outlet by hand.
10 cm 15 cm
10 cm
15 cm
2
Page 23

Preparation
1 Confirm which remote control you have
RM-C360GY
POWER
COLOUR
TV/VIDEO
OFF
TIMER
CHANNEL
SCAN
DISPLAY
SYSTEM
SOUND
RETURN+
PICTURE
MODE
123
456
789
--
0-/
MUTING
MENU
CHANNEL
REMOTE CONTROL UNIT
RM-C360GY
2 Inserting the batteries
Correctly insert two batteries, observing the , and
. polarities and inserting the . end first.
CAUTION:
Follow the cautions printed on the batteries.
Notes:
• Use AA/R6/UM-3 dry cell batteries.
• If the remote control does not work properly, fit new
batteries.
The supplied batteries are for testing, not regular use.
VOLUME
3
Page 24

Preparation
3 Connecting the aerial and external devices
•For further details, refer to the manuals provided with the devices you are connecting.
• Connecting cables are not supplied.
• The front and rear AUDIO/VIDEO input jacks are directly connected so that input to either jack
is output through both. You cannot provide input to both the front and rear jacks at the same
time. Disconnect one input, or use one of the jacks as an output jack only (for monitoring or
recording).
■ Connecting the aerial and VCR
Connecting the aerial
VHF/UHF outdoor aerial
VIDEO
AUDIO
IN
(VIDEO - 1)
OUT
• Illustration of AV-14A16.
Connecting the aerial and VCR
VHF/UHF outdoor aerial
4
1
2
To RF
output
To aerial input
To video
output
VIDEO
AUDIO
IN
(VIDEO - 1)
OUT
3
To audio
output
VCR
• Illustration of AV-14A16.
Page 25

Preparation
■ Connecting other external devices
VIDEO
AUDIO
• Illustration of AV-14A16.
Camcorder or TV game
IN
(VIDEO - 1)
OUT
To audio
output
VCR (for playing)
VCR (for recording)
To audio
input
To video
output
To video
output
To video
input
To audio
output
VIDEO AUDIO
IN
MENU CHANNEL
• Illustration of AV-14A16.
Headphones
• Use the headphones with a stereo mini jack (3.5 mm in diameter). When you connect the
headphones, the TV speakers go off.
5
Page 26

Preparation
4 Connecting the power cord
Connect the power cord to the AC outlet.
Operate only from the power source indicated on the rear of the TV.
5 SETUP TOUR
When the TV is first turned on it enters the SETUP TOUR mode, and the JVC logo is
displayed. Follow the instructions on the on-screen display to perform the SETUP TOUR.
• In case of resetting that the reason for such as removal, you can set the SETUP TOUR
function on the “MENU 3” menu. For details, see page 13.
1 Press the Main power button
on the TV.
The POWER lamp or POWER/ON
TIMER lamp lights. After the JVC
logo has been displayed, the TV
automatically switches to the
language setting mode.
SETUP TOUR
SETUP TOUR
LANGUAGE
ENGLISH
EXIT BY
OPERATE BY -+
NEXT
DISPLAY
2 Press the MENU M buttons to
select the on-screen language.
3 Press the MENU y button.
The AUTO PROGRAMMING function
will start and the indicator blinks.
SETUP TOUR
• Illustration of AV-21F16
DISPLAY
button
MENU –/+
buttons
E
ON TIMER POWER
POWER lamp Main power button
SYSTEM
SOUND
COLOUR
123
TV/VIDEO
456
OFF
789
TIMER
CHANNEL
RETURN+
SCAN
DISPLAY
MENU
CHANNEL
VOLUME
REMOTE CONTROL UNIT
RM-C360GY
POWER
PICTURE
MODE
0-/
MUTING
--
MENU /
buttons
NOW PROGRAMMING
STOP BY -+
•To stop the AUTO PROGRAMMING function, press the MENU m buttons.
When you press stop, it will display “SETUP TOUR THANK YOU!”.
When all the TV channels that can be received on your TV have been preset, the
display goes out and the AUTO PROGRAMMING function operation is completed.
6
• If a TV channel you want to view is not set to the channel, set it with the MANUAL CH
PRESET function. For details, see page 14.
Page 27

Basic operation
POWER
COLOUR
TV/VIDEO
OFF
TIMER
CHANNEL
SCAN
DISPLAY
CHANNEL
SYSTEM
SOUND
RETURN+
REMOTE CONTROL UNIT
RM-C360GY
PICTURE
MODE
123
456
789
--
0-/
MUTING
MENU
VOLUME
1 Press the POWER button to turn
your TV on.
• If your TV does not turn on, press the
Main power button on the TV then press
the POWER button again.
•You can also turn on your TV by pressing
any of the following buttons;
- the CHANNEL m button
- the Number buttons
- the TV/VIDEO button
2 Select a channel.
■ Press the CHANNEL m button.
• Up/down selection cannot be selected
for channels to which the SKIP has been
set to “YES”. See page 15.
■ Press the Number buttons to enter
the channel number.
• If you want to enter a two-digit number,
press the -/-- button to select the two
digit mode “--”, then enter the channel
number.
3 Press the VOLUME M button to
adjust the sound.
4To turn your TV off, press the
POWER button.
•We recommend that you press the Main
power button on the TV to turn the main
power off if you do not plan to use your
TV for a long time or if you wish to save
energy.
If the picture is not clear:
Press the COLOUR SYSTEM button to
select another colour system, see page 8.
If the sound is not clear:
Press the SOUND SYSTEM button to select
another sound system, see page 8.
Viewing Images from an External
Device:
Press the TV/VIDEO button to select the
VIDEO mode.
•You can also use the INPUT function to select
the VIDEO mode. For details, refer to page 11.
7
Page 28

Remote control buttons and functions
PICTURE MODE button
You can select one of three picture
adjustment settings as you like.
Press this button to select a mode.
BRIGHT:
Heightens contrast and sharpness.
STANDARD:
Standardizes picture adjustments.
SOFT:
Softens contrast and sharpness.
•Pressing this button returns all the picture
settings in the “MENU 4” to their default
settings.
COLOUR SYSTEM button
If the picture is not clear or no colour
appears, change the current colour system
to another colour system.
Press this button to select the colour
system.
In TV mode (channel 1 to 99 and AV):
AUTO PAL
SECAM
In VIDEO mode:
AUTO PAL
NTSC4.43
SECAM
NTSC3.58
AUTO:
Automatic colour system selection.
•For the colour systems in each country or
region, see the table“Broadcasting systems”
on page 19.
• If the picture is not normal in the AUTO
mode, change the AUTO mode to another
colour system.
SOUND SYSTEM button
If the sound is not clear even when the
picture appears normal, change the
current sound system to another sound
system.
Press this button to select the sound
system.
B/G I D/K
•For the sound systems in each country or
region, see the table “Broadcasting systems”
on page 19.
•You cannot select any sound system when in
a VIDEO mode.
8
Page 29

Remote control buttons and functions
DISPLAY button
You can continuously display the current
channel number or VIDEO mode on the
screen.
Press this button.
To turn the display off, press this button
again.
• When selecting a channel or VIDEO mode
with no input signal, indication of selected
channel or VIDEO mode becomes fixed on the
screen.
RETURN + button
You can set a channel you frequently view
to the Return Channel and you can view
that channel at any time with one-touch.
To set the channel to the Return
Channel:
1 Select the channel you want to set
to the Return Channel.
2 Press this button and hold until the
message “RETURN PLUS
PROGRAMMED!” appears.
• When you turn off the TV, the Return
Channel setting is cancelled.
To view the Return Channel:
Press this button.
•You can view two channels (current channel
and Return Channel) alternately by pressing
this button.
To cancel the Return Channel setting:
Press this button and hold until the
message“RETURN PLUS CANCELLED!”
appears.
If no channel is set to the Return
Channel:
You can view the channel selected right
before the current channel by pressing
this button.
CHANNEL SCAN button
You can quickly view all TV channels
programmes that you can view on your
TV, and search for the programme you
want to view.
1 Press this button to start scanning
TV channels.
The TV channel programmes are each
displayed for several seconds.
• The programmes of TV channels for which
the SKIP function is set to “YES” are not
displayed. (See page 15.)
2 When you find the programme you
want to view, press this button
again to stop scanning.
MUTING button
You can turn the sound off instantly.
Press this button.
To turn the sound on, press this button
again.
OFF TIMER button
You can set the TV to automatically turn
off after a set time.
Press this button to select the period of
time.
•You can set the period of time to a maximum
of 120 minutes in 10 minute increments.
•1 minute before the OFF TIMER function
turns off the TV, “GOOD NIGHT!” appears.
To display the remaining time, press this
button once.
To cancel the OFF TIMER function, press
this button to set the period of time to 0.
• The OFF TIMER function will not turn off the
TV’s main power.
9
Page 30
Using the TV’s menus
This TV has a number of functions you can operate using the menus. To use all your TV’s
functions fully, you need to understand how to use the menus.
2 Repeatedly press the MENU T
buttons to display a desired
POWER
SOUND
123
456
789
RETURN
+
0-/
MENU
VOLUME
REMOTE CONTROL UNIT
RM-C360GY
PICTURE
MODE
MUTING
--
MENU /
buttons
DISPLAY
button
MENU –/+
buttons
COLOUR
TV/VIDEO
OFF
TIMER
CHANNEL
SCAN
DISPLAY
CHANNEL
SYSTEM
■ Basic operation
1 Press the MENU T buttons.
One of the 4 menus is displayed.
MENU number
MENU 1
The icon on
the left indicates
the currently
selected function.
INPUT TV
ON TIMER
PR 1 0:00
VNR OFF
SELECT BY EXIT BY
OPERATE BY -+
DISPLAY
menu.
• If you hold down the y button, the next
menu is displayed.
• If the selected function is on the first line,
pressing the r button displays the
preceding menu.
3 Repeatedly press the MENU T
buttons to select a desired
function.
4 Press the MENU M buttons to
change function settings.
Example:
MENU 2
AUTO SHUTOFF OFF
CHILD LOCK OFF
BLUE BACK ON
SELECT BY EXIT BY
OPERATE BY -+
• With some functions, the operation
method may differ.
DISPLAY
Changes the AUTO
SHUTOFF setting.
MENU 2
AUTO SHUTOFF ON
CHILD LOCK OFF
BLUE BACK ON
SELECT BY EXIT BY
OPERATE BY -+
DISPLAY
5 Press the DISPLAY button to turn
the display off.
•To operate a menu using the buttons on
the front panel of the TV, refer to
“Operating menus” on page 17.
10
Page 31

Using the TV’s menus
ON TIMER
Your TV will automatically turn on and
tune into the channel you set after the
period of time you set.
1 Press MENU T to display the
“MENU 1” menu, then select
“ON TIMER”.
MENU 1
INPUT TV
ON TIMER
PR 1 0:00
VNR OFF
OPERATE BY VOL-+
SELECT BY EXIT BY
PROGRAM BY -+
2 Press MENU M to select a channel
you want to view when the TV turns
on.
3 Press VOLUME M to select the
period of time after which you want
to turn on the TV.
The ON TIMER function starts.
• Each time you press the button, the period
of time changes in 15 minute intervals (up
to 12 hours).
To cancel the ON TIMER function,
press the VOLUME m button to set the
period of time to “0:00”.
4 Press DISPLAY to turn the display
off.
• If you turn off the TV’s main power by
pressing the Main power button, the ON
TIMER function is canceled.
• If you do not turn off the TV after starting
the ON TIMER function, the channel will
automatically switch to the channel set for
the ON TIMER function.
Channel
No.
DISPLAY
When the time set for the ON TIMER
function is reached:
The TV automatically turns on and the
channel set for the ON TIMER function is
displayed.
•For safety reasons the TV will automatically
turn off if no operations are made within
approximately two hours after the TV is
turned on with the ON TIMER function.
• The OFF TIMER function and AUTO
SHUTOFF function have priority over the ON
TIMER function.
INPUT
You can view images from VCRs or other
devices connected to your TV.
1 Press MENU T to display the
“MENU 1” menu, then select
“INPUT”.
MENU 1
INPUT TV
ON TIMER
PR 1 0:00
VNR OFF
SELECT BY EXIT BY
OPERATE BY -+
2 Press MENU M to select the VIDEO
mode.
While you press MENU –/+, it will
switch to TV mode and VIDEO mode
alternately.
DISPLAY
11
Page 32

Using the TV’s menus
VNR (Video Noise Reduction)
You can reduce the picture noise.
1 Press MENU T to display the
“MENU 1” menu, then select “VNR”.
MENU 1
INPUT TV
ON TIMER
PR 1 0:00
VNR ON
SELECT BY EXIT BY
OPERATE BY -+
DISPLAY
2 Press MENU M to select “ON”.
To cancel the VNR function, select
“OFF”.
AUTO SHUTOFF
You can set your TV to turn off if no
signals are received for about 15 minutes
or longer after the end of a broadcast.
1 Press MENU T to display the
“MENU 2” menu, then select “AUTO
SHUTOFF”.
MENU 2
AUTO SHUTOFF ON
CHILD LOCK ON
BLUE BACK ON
SELECT BY EXIT BY
OPERATE BY -+
2 Press MENU M to select “ON”.
To cancel the AUTO SHUTOFF function,
select “OFF”.
• The AUTO SHUTOFF function does not
turn off the TV’s main power.
• The AUTO SHUTOFF will not work for a
VIDEO mode.
DISPLAY
CHILD LOCK
You can disable the front control buttons
of the TV.
When this function is set to “ON”, the TV
can be operated using only the remote
control.
Use this function to prevent children from
operating the TV without parental consent.
1 Press MENU T to display the
“MENU 2” menu, then select “CHILD
LOCK”.
MENU 2
AUTO SHUTOFF ON
CHILD LOCK ON
BLUE BACK ON
SELECT BY EXIT BY
OPERATE BY -+
DISPLAY
2 Press MENU M to select “ON”.
To cancel the CHILD LOCK function,
select “OFF”.
• The CHILD LOCK function is canceled when
you turn the power off.
BLUE BACK
You can mute the sound and change the
picture into a blue screen while no signals
are received by the TV, or when the
signals are unstable.
1 Press MENU T to display the
“MENU 2” menu, then select “BLUE
BACK”.
MENU 2
AUTO SHUTOFF ON
CHILD LOCK ON
BLUE BACK ON
SELECT BY EXIT BY
OPERATE BY -+
DISPLAY
12
2 Press MENU M to select “ON”.
To cancel the BLUE BACK function,
select “OFF”.
•To view a broadcast even when the
reception signal is poor, set the BLUE
BACK function to “OFF”.
•Even when the BLUE BACK function is set
to “OFF”, the sound may not be audible.
Page 33

Using the TV’s menus
SETUP TOUR
You can start the SETUP TOUR function.
1 Press MENU T to display the
“MENU 3” menu, then select
“SETUP TOUR”.
MENU 3
AUTO CH PRESET
MANUAL CH PRESET
SETUP TOUR
LANGUAGE ENGLISH
SELECT BY EXIT BY
OPERATE BY -+
DISPLAY
2 Press MENU M.
JVC logo is appear and the SETUP
TOUR function will start.
For details, see page 6.
LANGUAGE
You can select the language for the onscreen display.
1 Press MENU T to display the
“MENU 3” menu, then select
“LANGUAGE”.
MENU 3
AUTO CH PRESET
MANUAL CH PRESET
SETUP TOUR
LANGUAGE ENGLISH
SELECT BY EXIT BY
OPERATE BY -+
2 Press MENU M to select
language.
The on-screen display indications are
in the selected language.
DISPLAY
AUTO CH PRESET
You can automatically preset all TV
channels that can be received by your TV
to channels.
1 Press MENU T to display the
“MENU 3” menu, then select “AUTO
CH PRESET”.
MENU 3
AUTO CH PRESET
MANUAL CH PRESET
SETUP TOUR
LANGUAGE ENGLISH
SELECT BY EXIT BY
OPERATE BY -+
2 Press MENU M to start the AUTO
CH PRESET function.
“>>>ON SEARCH” is displayed on
the screen.
When all the TV channels that can be
received on your TV have been preset,
the display goes out and the AUTO CH
PRESET function operation is
completed.
To stop the AUTO CH PRESET:
Press the MENU m buttons.
• The AUTO CH PRESET function does not
preset a TV channel to the AV channel
(channel number 0).
• If the TV cannot preset the TV channel you
want to view, preset it manually. For details,
see “MANUAL CH PRESET” on page 14.
DISPLAY
13
Page 34

Using the TV’s menus
MANUAL CH PRESET
You can manually preset desired TV
channels to desired channels.
1 Press MENU T to display the
“MENU 3” menu, then select
“MANUAL CH PRESET”.
MENU 3
AUTO CH PRESET
MANUAL CH PRESET
SETUP TOUR
LANGUAGE ENGLISH
SELECT BY EXIT BY
OPERATE BY -+
2 Press MENU M.
The sub-menu is displayed.
MANUAL
FINE
SKIP NO
SOUND SYSTEM B/G
EXIT
SELECT BY PR 1 VL
PROGRAM BY -+ EXIT BY
SEARCH BY VOL-+
• The channel number is displayed as a PR
number. For example, channel 1 will be
displayed as PR 1. However, the AV
channel will be displayed as AV.
3 Press MENU M to select the
channel number.
4 Press VOLUME M to start
searching for the TV channel.
“>>>” or “<<<” is displayed on the
screen.
When the TV finds a TV channel, the
“>>>” or “<<<” display goes out,
and the TV channel is preset to the
currently selected channel number.
• If the TV channel you want to preset is not
displayed, repeat step 4 until the TV finds
the TV channel you want to preset.
•To stop the MANUAL CH PRESET function,
press any button other than the VOLUME
m button.
DISPLAY
DISPLAY
If the picture is not clear:
Fine-tune the TV channel.
1 Press MENU t to select “FINE”.
MANUAL
FINE
SKIP NO
SOUND SYSTEM B/G
EXIT
SELECT BY PR 3 VL
PROGRAM BY -+ EXIT BY
FINE BY VOL-+
DISPLAY
2 Hold VOLUME m down to fine-tune
the TV channel so that the best image
is displayed on screen.
“>” or “<” indicates that the TV is finetuning the TV channel.
If the sound is not clear:
1 Press MENU t to select “SOUND
SYSTEM”.
MANUAL
FINE
SKIP NO
SOUND SYSTEM B/G
EXIT
SELECT BY PR 3 VL
PROGRAM BY -+ EXIT BY
CHANGE BY VOL-+
DISPLAY
2 Press VOLUME m to select the
appropriate sound system.
•For the sound systems in each country
or region, refer to the table
“Broadcasting systems” on page 19.
5 Press MENU T to select
“MANUAL”.
6 Repeat steps 3 to 5 if you want to
preset another TV channel to a
channel.
14
Page 35

Using the TV’s menus
SKIP
You can set undesired channels to be
skipped. Channels set to be skipped
cannot be selected by the CHANNEL m
buttons nor the CHANNEL SCAN button.
• Channels to which TV channels have not
been preset are automatically set to be
skipped.
1 Press MENU T to display the
“MENU 3” menu, then select
“MANUAL CH PRESET”.
2 Press MENU M.
The sub-menu is displayed.
3 Press MENU T to select “SKIP”.
MANUAL
FINE
SKIP NO
SOUND SYSTEM B/G
EXIT
SELECT BY PR 3 VL
PROGRAM BY -+ EXIT BY
YES/NO BY VOL-+
4 Press MENU M to select the
channel you want to skip.
5 Press VOLUME M to select “YES”.
The channel is set to be skipped.
To cancel the SKIP function, select
“NO”.
DISPLAY
Picture Adjustments
You can adjust the picture as you like.
1 Press MENU T to display the
“MENU 4” menu.
MENU 4
TINT
COLOUR
BRIGHT
CONT.
SHARP
SELECT BY EXIT BY
OPERATE BY -+
2 Press MENU T to select an item
and press MENU M to adjust it.
TINT* - : Reddish + : Greenish
COLOUR - : Lighter + : Deeper
BRIGHT - : Darker + : Brighter
CONT. - : Lower + : Higher
SHARP - : Softer + : Sharper
* TINT (tint) is displayed only when
viewing images from NTSC3.58 or
NTSC4.43 colour systems.
DISPLAY
6 Repeat steps 4 and 5 if you want to
set another channel to skip.
15
Page 36

Using the buttons on the TV
<AV-14A16>
MENU CHANNEL VOLUME
1
2
<AV-21T16>
MENU CHANNEL VOLUME
EXIT
1
2
3
<AV-21F16>
EXIT
3
POWER /
ON TIMER
4 7 8
POWER /
ON TIMER
4
78
1 MENU button
• MENU
2 CHANNEL m buttons
• MENU m buttons
3 VOLUME m buttons
• EXIT from MENU buttons
4 Remote control sensor
5 ON TIMER lamp
The light is switched on
while ON TIMER function
is operating.
6 POWER lamp
When the Main power is
on, the light is red.
7 POWER/ON TIMER lamp
When the Main power is
on, the light is green.
When ON TIMER function
is on, it is red.
8 Main power button
button
16
MENU
CHANNEL
1
<AV-21B16>
2
VOLUME
EXIT
3
ON TIMER POWER
4 5 6 8
Page 37

Using the buttons on the TV
Basic operation
• Check to make sure the CHILD LOCK
function is set to “OFF”. When the CHILD
LOCK function is set to “ON”, the TV cannot
be operated using the front control buttons.
For details, see “CHILD LOCK” on page 12.
1 Press CHANNEL M to turn the TV
on from standby mode.
2 Press CHANNEL M to select a
channel.
3 Press VOLUME M to adjust the
volume.
4To turn your TV off, press the Main
power button to turn off the TV’s
main power.
To change the TV mode to the VIDEO
mode:
• Select the VIDEO mode with the INPUT
function in “MENU 1”.
Operating menus
You can operate functions in menus using
the front control buttons on the TV.
1 Press MENU y to display a menu.
2 Press MENU y repeatedly to display
the menu you want to use.
3 Press MENU y to select the desired
function or item.
4 Press MENU M or VOLUME M to
carry out the desired operation.
For details, see the description for each
function.
5 Press VOLUME M to turn the menu
display off.
To turn the sub-menu display off:
1 Press MENU y to select “EXIT”.
MANUAL
FINE
SKIP NO
SOUND SYSTEM B/G
EXIT
SELECT BY PR 3 VL
PROGRAM BY -+ EXIT BY
EXIT BY VOL-+
DISPLAY
2 Press VOLUME m to turn the display
off.
17
Page 38

Troubleshooting
If there is no picture or the TV does not operate normally, make sure the problem isn’t due
to the reasons indicated below.
If the problem persists even after taking the measures indicated, please contact a service
technician.
Cannot turn the TV on
•Press the Main power button on the TV.
• Connect the power cord to the AC outlet.
The screen turns blue
• Is the BLUE BACK function on? (see page 12.)
Remote control inoperable
•Replace the batteries. (see page 3.)
Buttons on front of the TV do not work
•Switch the CHILD LOCK function off.
(see page 12.)
TV does not respond immediately
•Press the main power button on the TV to
turn off the main power. Press the main
power button again to turn on the TV. If the
TV returns to a normal state, operation is
normal.
The TV turns off suddenly
• Is the OFF TIMER function set to operate?
(see page 9.)
• Is the AUTO SHUTOFF function on?
(see page 12.)
•Have you not performed an operation for
about two hours after the TV was switched on
by the ON TIMER function? (see page 11.) If
you don’t perform an operation within about
two hours, the TV is automatically switched
off for safety.
Poor sound
•Press the SOUND SYSTEM button to select
another sound system. (see page 8.)
Poor picture
•Press the COLOUR SYSTEM button to select
another colour system. (see page 8.)
•Adjust the picture settings. (see page 15.)
• Set the Picture mode to STANDARD.
(see page 8.)
• If noise (snow) totally blocks out the picture,
check the following.
-Have the TV and aerial been connected
properly?
- Has the aerial cable been damaged?
- Is the aerial pointing in the right direction?
- Is the aerial itself faulty?
• If the TV or aerial suffer interference from
other equipment, stripes or noise may appear
in the picture. Move any equipment which
can cause interference away from the TV.
• If the TV or aerial suffer interference from
signals reflecting from mountains or
buildings, double-pictures (ghosting) will
occur. Change the aerial’s direction or replace
it with an aerial with better directionality.
• When a white and bright still image (such as
a white dress) is displayed on the screen, the
white part may look as if it is coloured. When
the image disappears from the screen, the
unnatural colours will also disappear.
The TV turns on suddenly
• Is the ON TIMER function set to operate?
(see page 11.)
The TV channel changes suddenly
• Is the ON TIMER function set to operate?
(see page 11.)
18
Page 39

Specifications
TV RF systems
B, G, I, D, K, K1
Colour systems
PAL, SECAM, NTSC 3.58 MHz/NTSC 4.43 MHz (in VIDEO mode only)
Receiving channels
VHF low channel (VL), VHF high channel (VH), UHF channel (U)
Receives cable channels in mid band, super band and hyper band.
External input / output
INPUT: VIDEO input (RCA), AUDIO input (RCA)
OUTPUT: VIDEO output (RCA), AUDIO output (RCA)
Headphone jack: stereo mini jack (3.5 mm diameter)
Accessories
• Remote control unit: RM-C360GY
• AA / R6 / UM-3 dry cell battery × 2
Design and specifications subject to change without notice.
Broadcasting systems
Area Country or Region
Bahrain, Kuwait, Oman, Qatar,
United Arab Emirates, Yemen, etc. PAL B/G
Asia,
Middle
East
Europe
Indonesia, Malaysia, Singapore, Thailand,
India, etc.
China, Vietnam, etc. PAL D/K
Hong Kong, etc. PAL I
Islamic Republic of Iran, Lebanon, Saudi Arabia, etc. SECAM B/G
Philipins, Taiwan, Myanmar, etc. NTSC M
Russia, etc. SECAM D/K
Czech Republic, Poland, etc. PAL D/K
Germany, Holland, Belgium, etc. PAL B/G
UK, etc. PAL I
Oceania Australia, New Zealand, etc. PAL B/G
Republic of South Africa, etc. PAL I
Africa Nigeria, etc. PAL B/G
Egypt, Morocco, etc. SECAM B/G
System
Colour Sound
19
Page 40

 Loading...