

Jura Imressa S9 One Touch Manual For Use
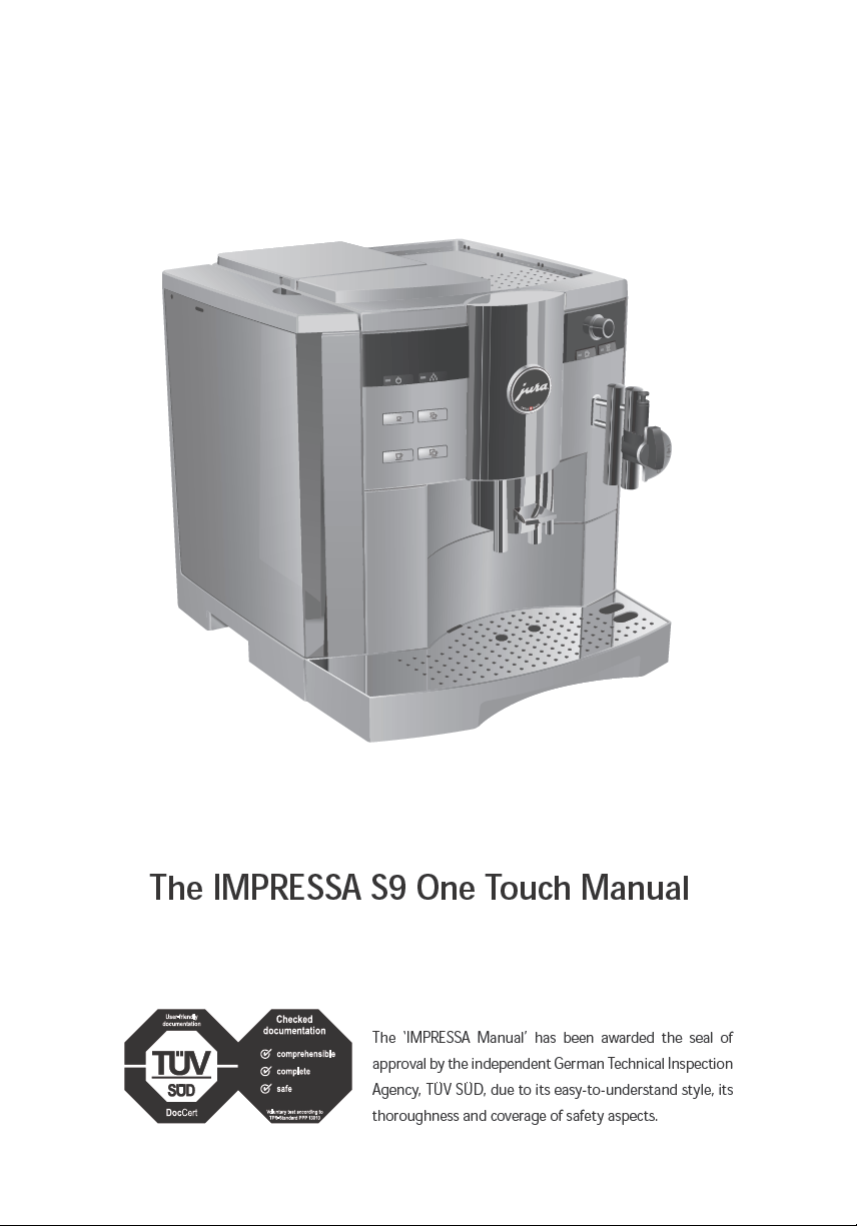

Table of contents
Your IMPRESSA S9 One Touch
IMPORTANT SAFEGUARDS 4
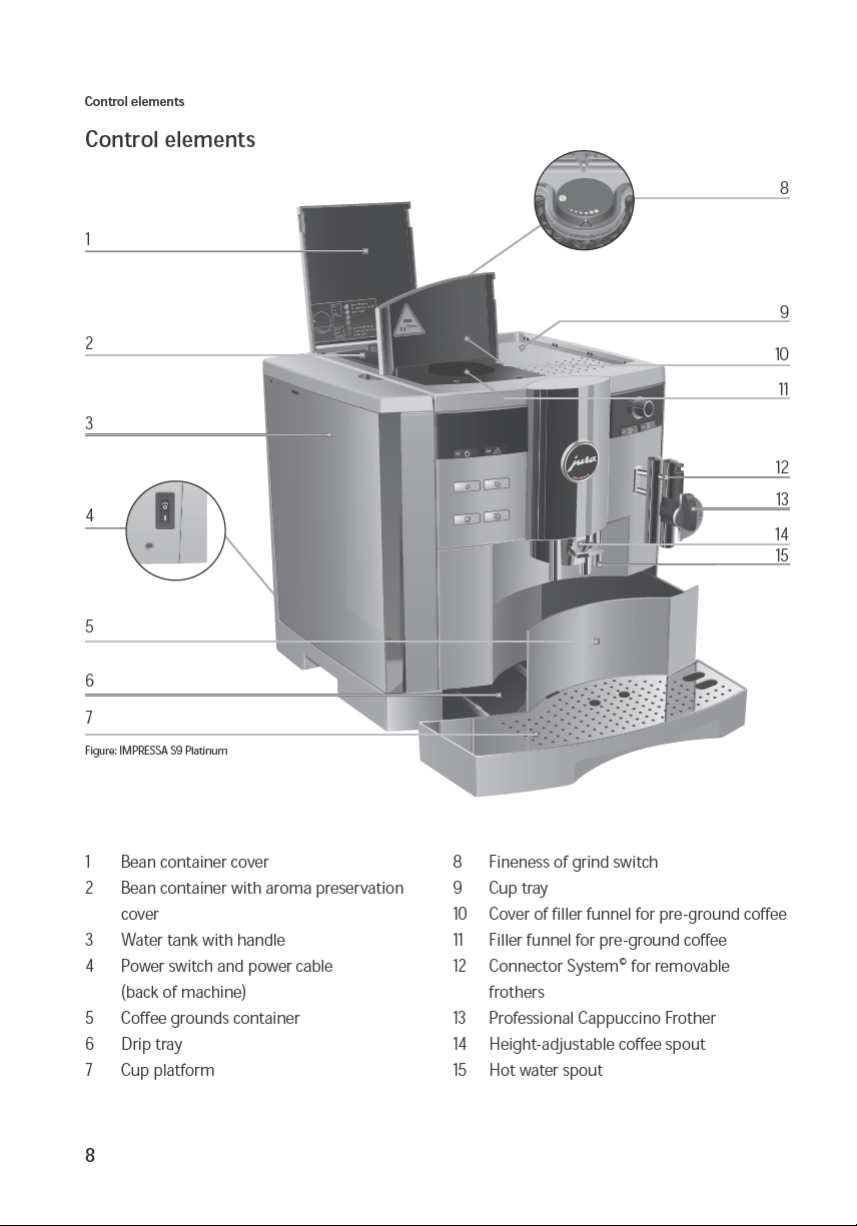
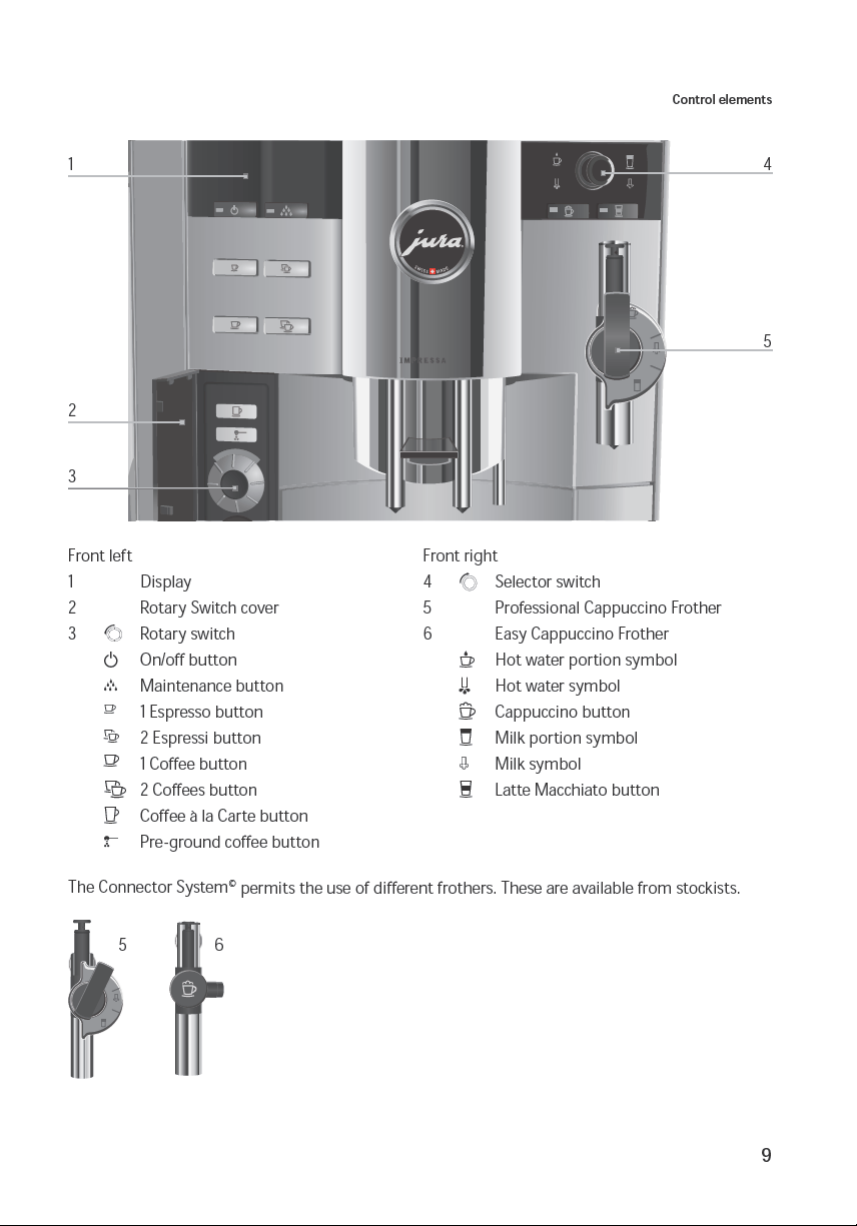
Control elements 8
Proper use 10
For your safety 10
The IMPRESSA S9 One Touch Manual 13
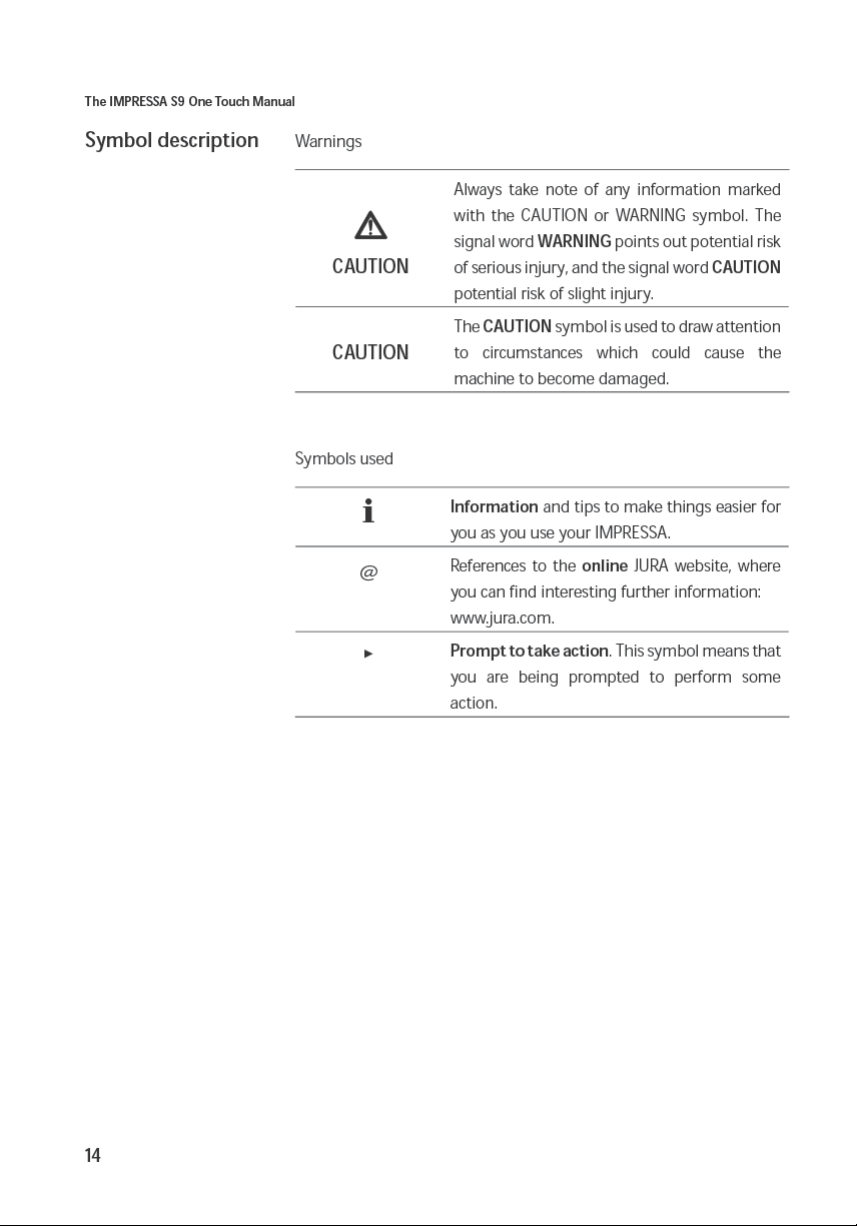
Symbol description ......................................................................................................................................14
1 IMPRESSA S9 One Touch 15
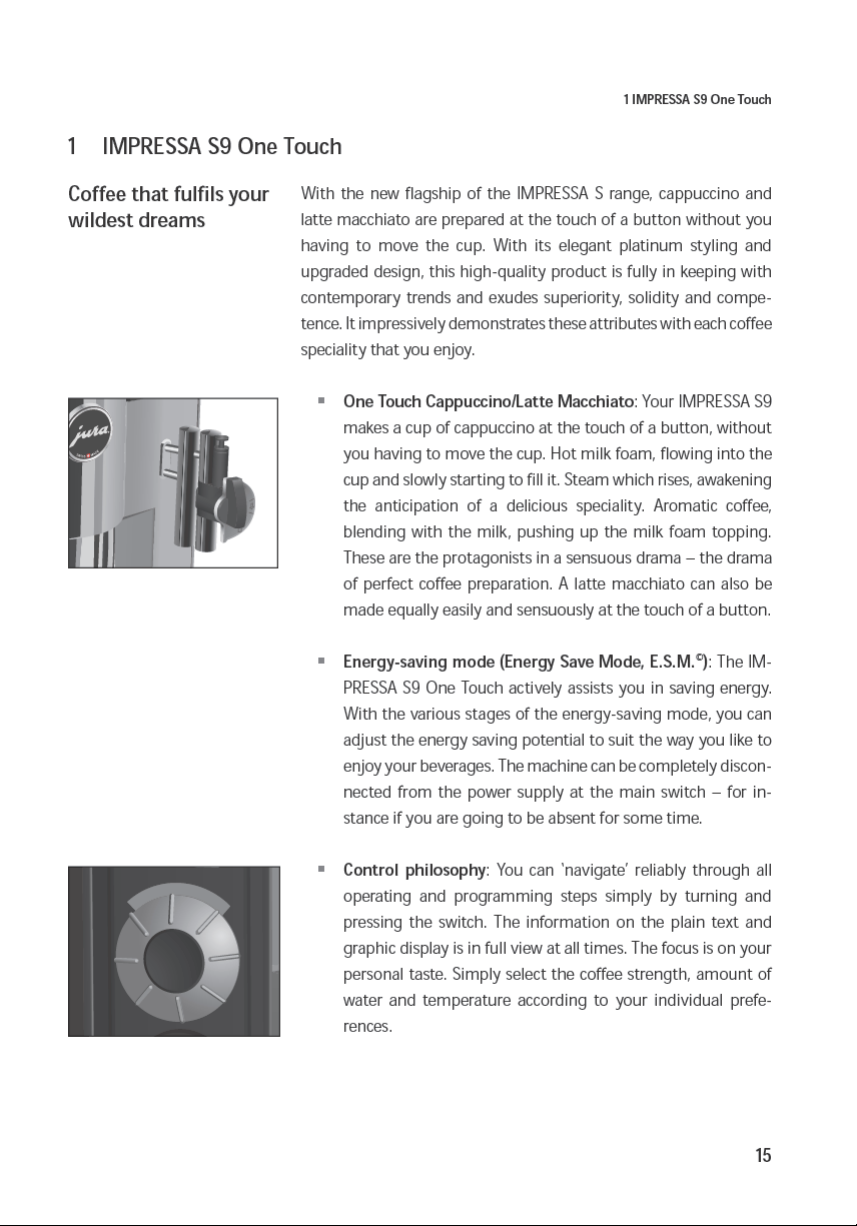
Connector System
JURA on the Internet ....................................................................................................................................16
Knowledge Builder .......................................................................................................................................16
2 Preparing and using for the first time 17
Setting up ......................................................................................................................................................17
Filling the water tank ...................................................................................................................................17
Bean container filling ...................................................................................................................................17
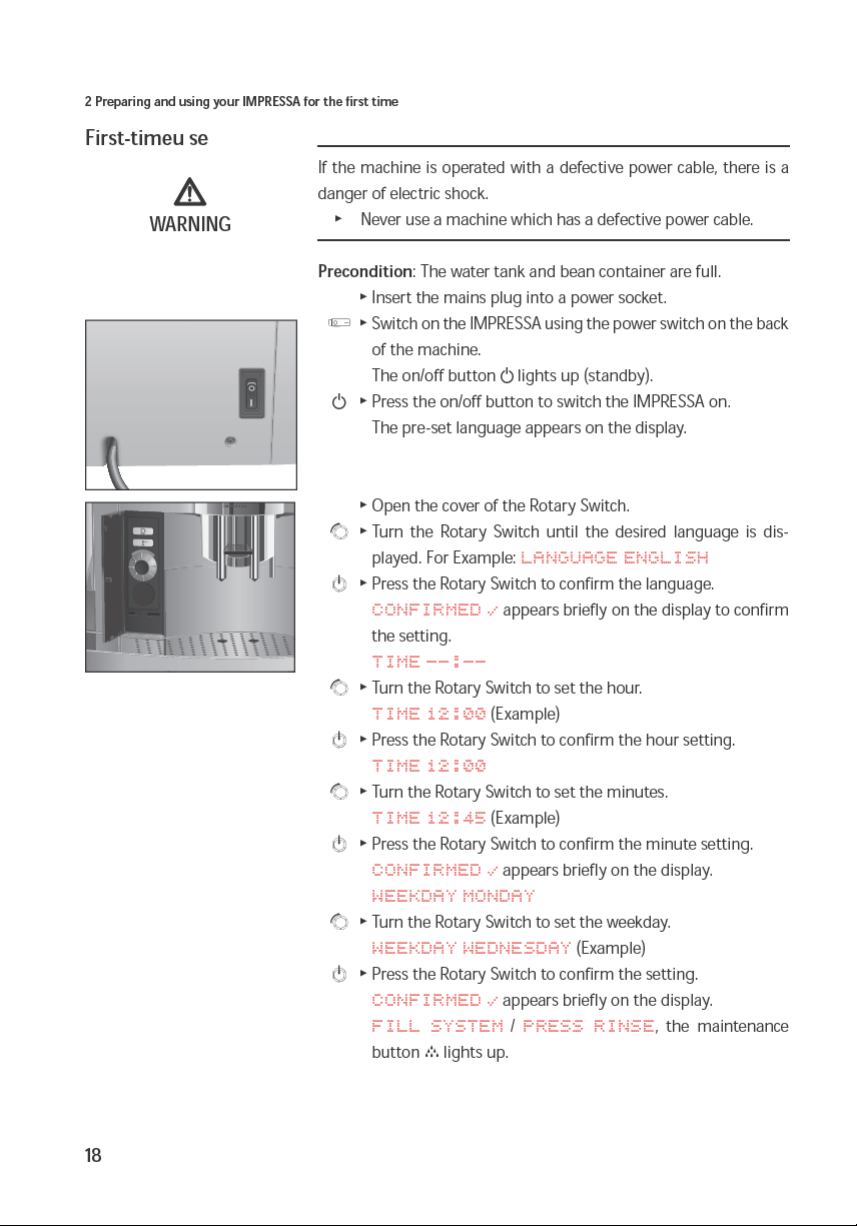
First-time use ................................................................................................................................................18
Using and activating filter ..........................................................................................................................19
Determining and adjusting the degree of water hardness ..................................................................21
Adjusting grinder ........................................................................................................................................22
Switching on ................................................................................................................................................23
Switching off (Standby) ..............................................................................................................................24
3 Familiarising yourself with the control options 25
Preparation at the touch of a button .......................................................................................................26
One-off settings before and during preparation ...................................................................................26
Entering a permanent setting for the amount of water for a cup size..............................................27
Permanent settings in programming mode ..........................................................................................28
Viewing information and maintenance status .......................................................................................31
4 Preparation at the touch of a button 32
Espresso ........................................................................................................................................................32
Coffee ............................................................................................................................................................33
Coffee à la Carte ..........................................................................................................................................33
Cappuccino...................................................................................................................................................34
Latte macchiato ...........................................................................................................................................35
Pre-ground coffee .......................................................................................................................................37
Hot milk and milk foam .............................................................................................................................37
Hot water .....................................................................................................................................................39
©
....................................................................................................................................16
2

Table of contents
5 Permanent settings in programming mode 41
Products .........................................................................................................................................................41
Energy-saving mode (Energy Save Mode, E.S.M.
©
) ..............................................................................44
Time and weekday ......................................................................................................................................45
Programmable switch-on and switch-off time ......................................................................................45
Automatic switch-off ..................................................................................................................................47
Rinses ............................................................................................................................................................48
Unit amount of water / time format ........................................................................................................48
Language ......................................................................................................................................................49
6 Maintenance 51
Maintenance tips ..........................................................................................................................................51
Rinsing the machine ....................................................................................................................................51
Changing the filter ......................................................................................................................................52
Cleaning the machine ................................................................................................................................54
Descaling the machine ...............................................................................................................................56
Rinsing the cappuccino frother ................................................................................................................58
Cleaning the cappuccino frother ..............................................................................................................60
Disassembling and rinsing the Professional Cappuccino Frother .......................................................61
Disassembling and rinsing the Easy Cappuccino Frother....................................................................62
Cleaning the bean container .....................................................................................................................62
Descaling the water tank ...........................................................................................................................63
7 Display messages 64
8 Troubleshooting 66
9 Transport and environmentally neutral disposal 68
Transport/Emptying the system ...............................................................................................................68
Disposal .........................................................................................................................................................68
10 Technical data 69
Index 70
JURA contact details / Legal information 72
3

Important Safeguards
IMPORTANT SAFEGUARDS
These safeguards apply for machines with UL safety test (see rating
plate and chapter 10, ‘Technical data’).
Follow the basic safety
precautions
When using electrical appliances, basic safety precautions should
always be followed, to reduce the risk of fire, electric shock, and/or
injury to persons, including the following:
Z Read all instructions.
Z Do not touch hot surfaces. Use handles or knobs.
Z To protect against fire, electric shock and injury to persons, do
not immerse cord, plugs, or body of machine in water or other
liquid.
Z Close supervision is necessary when any appliance is used by
or near children.
Z Unplug from outlet when not in use and before cleaning.
Allow to cool before putting or taking off parts, and before
cleaning the appliance.
Z Do not operate any appliance with a damaged cord or plug or
after the appliance malfunctions, or has been damaged in any
manner. Return appliance to the nearest authorized service
facility for examination, repair or adjustment.
Z The use of accessory attachement not recommended by the
appliance manufacturer may result in fire, electric shock, or
injury to persons.
Z Do not use outdoors.
Z Do not let the cord hang over the edge of a table or counter,
or touch hot surfaces.
Z Do not place on or near a hot gas or electric burner, or in a
heated oven.
Z Always attach plug to appliance first, then plug cord into the
wall outlet. To disconnect, turn any control to ‘OFF’ then
remove plug from wall outlet.
Z Do not use appliance for other than intented use.
Z Use extreme caution when dispensing hot steam.
Z For household use only.
SAVE THESE INSTRUCTIONS
4

Important Safeguards
Special cord set instructions
a. A short power supply cord is provided to reduce the risk
resulting from becoming entangled in or tripping over a long
cord.
Your IMPRESSA has a 3-pin grounded plug.
b. Longer extension cords are available and may be used if care
is exercised in their use.
c. If an extension cord is used,
1. the marked electrical rating of the extension cord should be
at least as great as the electrical rating of the appliance,
and
2. if the appliance is of the grounded type, the extension
courd should be a grounding type 3-wire cord, and
3. the longer cord shall be arranged so that it will not drape
over the counter top or tabletop where it can be pulled on
by children of tripped over.
Z As a safety feature, this plug will fit in a polarized outlet only
one way.
Z If the plug does not fit fully in the outlet, reverse the plug. If it
still does not fit, contact a qualified electrician.
Z Do not modify the plug in any way or attempt to defeat this
safety feature.
Warning
Caution
To reduc e the risk of fire or electric shock, do not remove any service
covers. No user serviceable parts inside. Repair should be done by
authorized personnel only.
This appliance is for household use. Any servicing other than cleaning and user maintenance should be performed by an authorized
service representative:
Z Do not immerse base in water or try to disassemble.
Z To reduce the risk of fire or electric shock, do not remove the
base. No user serviceable parts inside. Repair should be done
by authorized service personnel only.
Z Check voltage to be sure that the voltage indicated on the
name plate agreees with your voltage.
Z Never use warm or hot water to fill the water container! Use
cold water only.
5

Important Safeguards
Z Keep your hands and the cord away from hot parts of the
appliance during operation.
Z Never clean with scouring powders or hard implements.
NEVER DO
(or you will void your
warranty protection):
Z Never fill instant coffee, chocolate mix etc. into the grinder or
ground coffee funnel (grunder by-pass). It will damage the
functioning of the brewing chamber
Z Never fill sugar coated coffee beans into the bean hopper. In
case of doubt, call your dealer.
Z Never fill anything other than coffee beans into the bean con-
tainer (no chocolate, no rice, no nuts, no spices, nothing other
than roasted coffee beans).
Z Never do anything with the machine which is not described in
the User‘s Manual. In case of doubt, call your dealer.
6

Important Safeguards
7


Important information
Z Be careful to ensure that the appropriate nozzle is installed
and clean. The nozzle or parts of the nozzle might come off if
the parts are not assembled correctly or a blockage occurs.
A defective machine is not safe and could cause injury or fire. To
avoid damage and any associated risk of injury or fire:
Z Never allow the power cable to loo sely hang down. The po wer
cable can be tripped over or damaged.
Z Protect your IMPRESSA from environmental influences such
as rain, frost and direct sunlight.
Z Do not put the IMPRESSA, cable or connections in water.
Z Do not put the IMPRESSA or any individual parts in the dish-
washer.
Z Turn your IMPRESSA off at the power switch before starting
any cleaning operation. Always wipe your IMPRESSA with a
damp cloth rather than a wet one, and protect it from prolonged water splash.
Z Only connect the machine to a power supply in accordance
with the information on the rating plate. The rating plate is
located on the underside of your IMPRESSA. Further technical
data is given in Chapter 10 ‘Technical Data’.
Z Use only original JURA care products. Use of accessories that
are not explicitly recommended by JURA could damage the
IMPRESSA.
Z Do not use any coffee beans treated with additives or caramel-
ised coffee beans.
Z Always fill the water tank with cold, fresh mains water.
Z If you will be absent for an extended period, turn the machine
off and unplug.
Risk to children and persons with limited capabilities in operating
machines:
Z The machine is not designed to be operated by children and
persons with limited capabilities.
Z The machine may only be used by persons who are able to
operate the machine safely.
11

Important information
Safe handling of the CLARIS filter cartridges:
Z Filter cartridges should be kept out of the reach of children.
Z Store them dry in the sealed package.
Z Protect them from heat and direct sunlight.
Z Do NOT use damaged filter cartridges.
Z Do NOT open filter cartridges.
12

The IMPRESSA S9 One Touch Manual
You are holding the manual for your IMPRESSA S9 One Touch in
your hand. It will help you to familiarize y ourself with your IMPRESSA
safely and quickly and teach you the full range of facilities it offers.
Chapter 2, ‘Preparing and using your IMPRESSA for the first time’,
explains step-by-step how to set up and prepare the IMPRESSA.
Chapter 3, ‘Familiarising yourself with the control options’ is important for you to read as you are familiarising yourself with your
IMPRESSA. It invites you to actively explore all the different coffee
experiences that it offers.
All the other chapters are intended to help you when you have a
specific q uery.
If you use the IMPRESSA S9 One Touch Manual, you will become
a master at preparing exciting coffee specialities, you will be a
Barista!
The IMPRESSA S9 One Touch Manual
You can download the short operating instructions for y our machine
from the JURA website (www.jura.com).
13

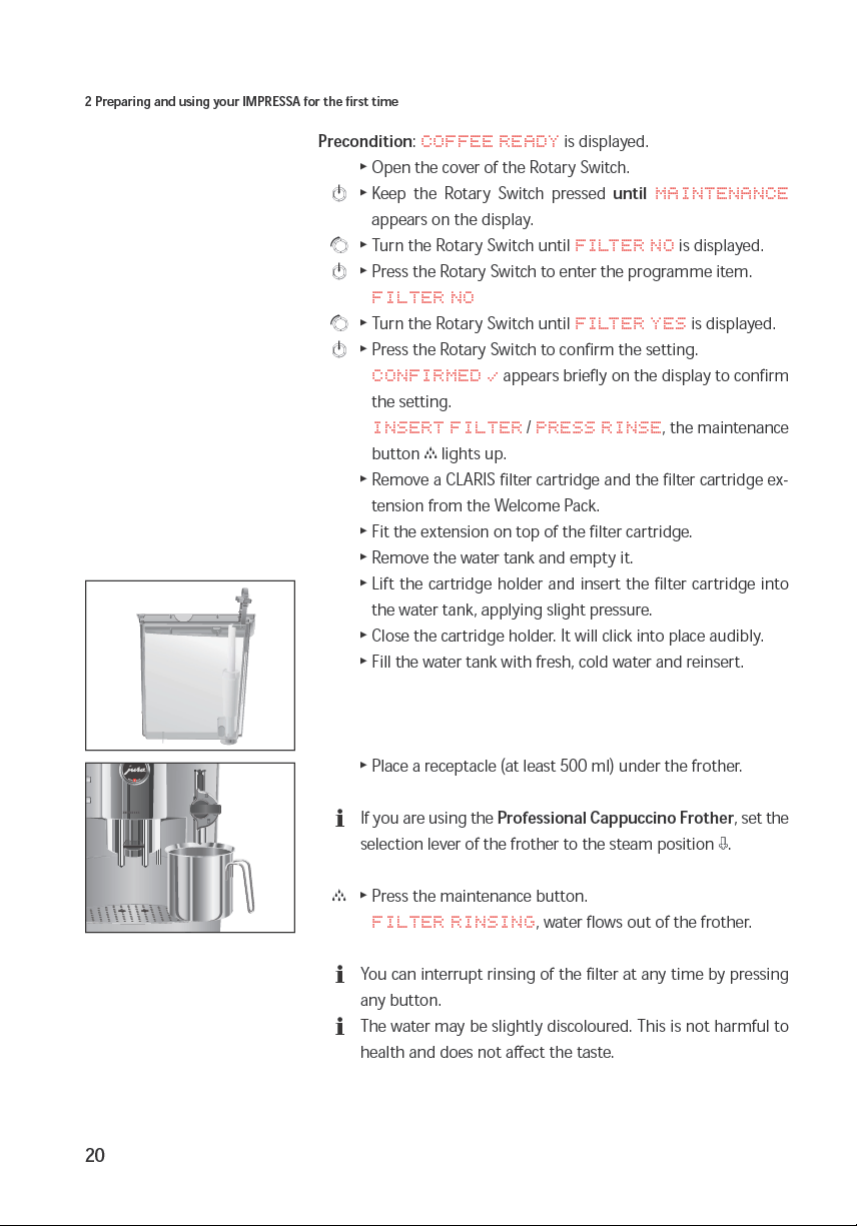
2 Preparing and using for the first time
This chapter provides you with the information y ou need to use your
IMPRESSA without any problems. You will prepare your IMPRESSA
step-by-step for your first coffee experience.
2 Preparing and using your IMPRESSA for the first time
Setting u p
Filling the water tank
CAUTION
Bean container filling
CAUTION
When setting up your IMPRESSA, please note the following:
Z Set the IMPRESSA down on a horizontal surface that is not
sensitive to water.
Z Choose a spot for your IMPRESSA which is protected against
overheating.
To enjoy perfect coffee we recommend changing the the water
every day.
Milk, mineral water or other liquids can damage the water tank or
the machine.
T Only fill the water tank with fresh, cold water.
T Remove the water tank and rinse it with cold water.
T Fill the water tank with fresh, cold water and reinsert.
The bean container has an aroma preservation cover . This will ensure
that your coffee beans retain their aroma for longer.
Coffee beans which have been treated with additives (e.g. sugar),
pre-ground or freeze-dried coffee will damage the grinder.
T Only use untreated coffee beans to refill the bean container.
T Open the cover of the bean container and remove the aroma
preservation cover.
T Remove any dirt or foreign objects inside the bean con-
tainer.
T Fill the bean container with coffee beans, then close the
aroma preservation cover and the bean container cover.
17
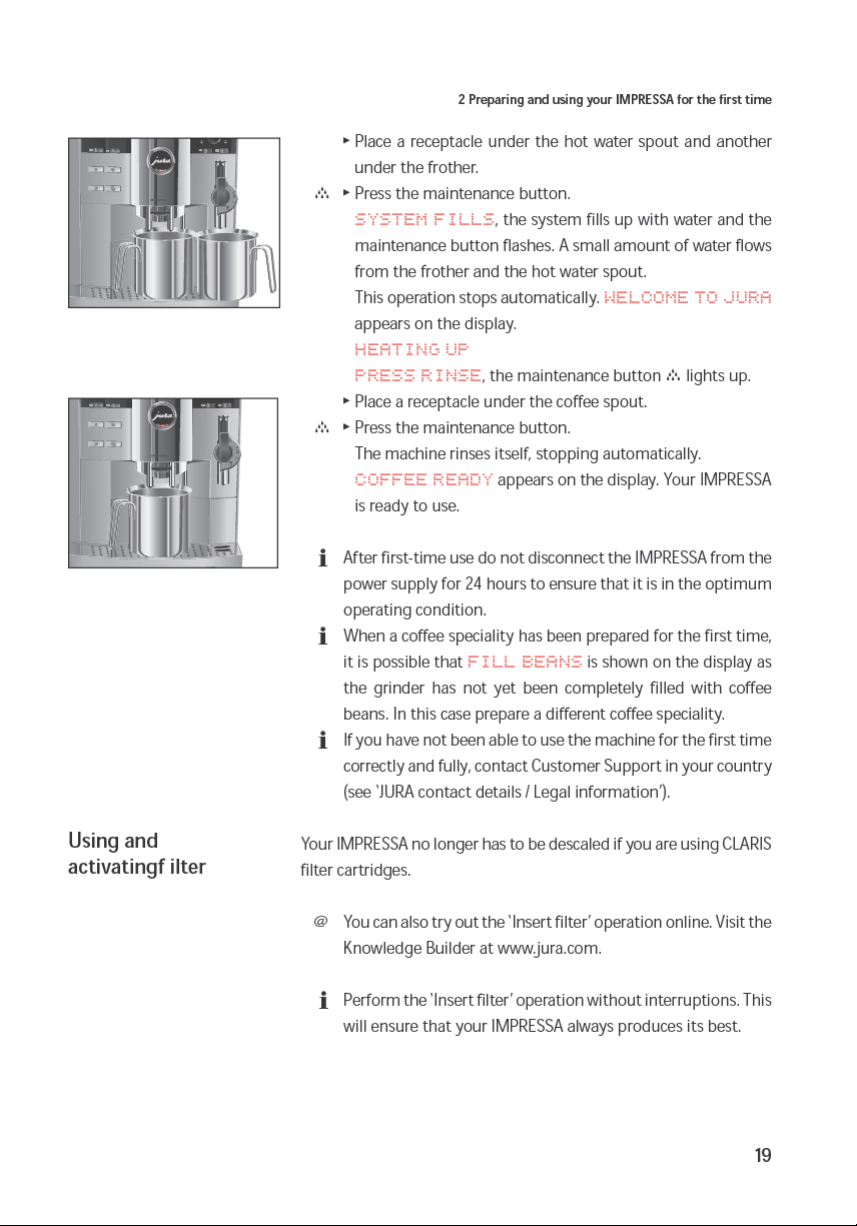

2 Preparing and using your IMPRESSA for the first time
Filter rinsing stops automatically after approx. 500 ml.
COFFEE READY appears on the display . The filter is now
activated.
Determining and
adjusting the degree
of water h ardness
The harder the water is, the more frequently the IMPRESSA needs to
be descaled. It is therefore important to adjust the water hardness.
The water hardness can be adjusted on a continuous scale between
1° dH and 30° dH. This can also be deactivated, which means that
the IMPRESSA will not let you know when it has to be descaled.
E However, if you are using the CLARIS filter cartridge and have
activated it, you will not be able to adjust the water
hardness.
You can find out what the w at er hardness is by using the Aquadur®
test strip supplied as standard.
T Hold the test strip briefly (for one second) under flowing
water. Shake off the water.
T Wait for about one minute.
T You will then be able to read the degree of water hardness
from the discolouration of the Aquadur® test strip and the
description on the packaging.
You can now adjust the water hardness.
Example: To change the water hardness from
proceed as follows:
Precondition:
k T Keep the Rotary Switch pressed until
g T Turn the rotary switch until
k T Press the Rotary Switch to enter the programme item.
COFFEE READY is displayed.
T Open the cover of the Rotary Switch.
appears.
displayed.
16°d H to 25°d H,
MAINTENANCE
HARDNESS 16°dH is
16°dH
g T Turn the Rotary Switch until 25°dH is displayed.
21

 Loading...