

Jura Impressa 601, Impressa Thermoblock TB-96, Impressa Evolution, Impressa Ultra, Impressa M30 Installing Manual
...
Services Unlimited, Inc./ Parts Guru
Installing thermoblock S-series
S 55-95, X-70-95, Scala,Ju3r0a0I/m50p0re,s6sa01T,hEervmoolubtloiockn,TUBl-t9r6a:, Cappuccinatore, M30,
4000/6000
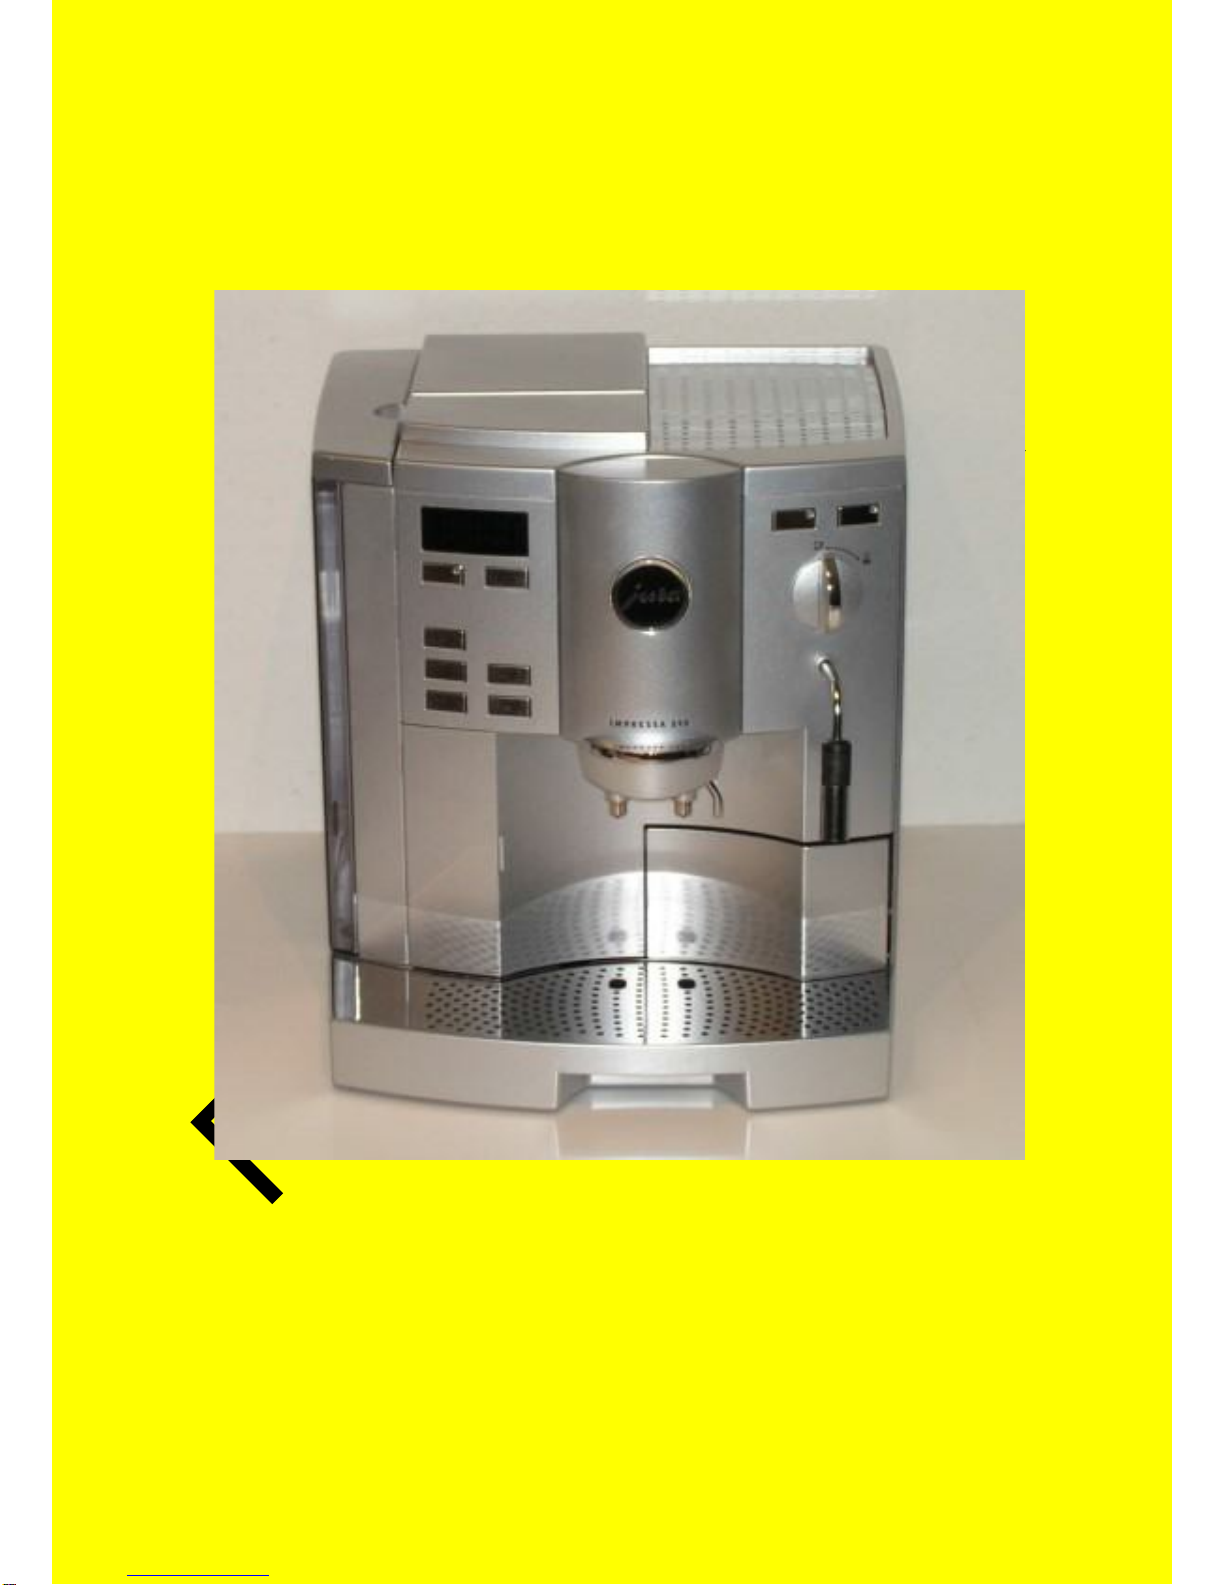
In this guide, the removal and installation of the Thermo Block 96 is described
in a Jura S9. Similar models with fewer features may have different wiring and
hose routing. It is advised the wiring and hose connections are clearly
marked/tagged and pictures taken to not lose the right connections and
positions.
For Jura parts, and fast repairs, Contact:
Serviices Unlimited, Inc./ Parts Guru
Lansdale, PA 19446
Phone: 215-361-7000 Fax: 215-361-7434
email: sales@partsguru.com 1 of 34

Services Unlimited, Inc./ Parts Guru
Repair of Jura machines is not simple or be taken lightly. Anyone using
this repair guide must be experienced in electrical repairs and be familiar
with automatic functions of the machine. Inexperienced persons accept
the risk of their work & errors causing damage to the machine &/or
personal injury.
Unplug the machine, before starting any work. Remove the water tank &
empty the beans container. Place the machine on a wooden or otherwise
insulated top sheet/cover. Operate only in well lighted place. When
separating two components or wires, mark the positions, tag the
separated parts/wires and make notes or take photographs after every
three or four steps. Services Unlimited, Inc./ Parts Guru, its staff or
affiliates do not accept responsibility for loss, damage or injury of any
king and value.
The machine and the instructions to repair are protected by
copy right laws. Information is not for publishing or
distribution in any medium with written permission from the
author.
email: sales@partsguru.com 2 of 34

Services Unlimited, Inc./ Parts Guru
Disassembling
.
Most illustration are easy to follow
Do not rely on written text
alone. Match the text with the picture. Understand the progress of
work with every step.
.
Next step: Remove the two Torx (T10) orPhilip screws, shown above
email: sales@partsguru.com 3 of 34
Services Unlimited, Inc./ Parts Guru
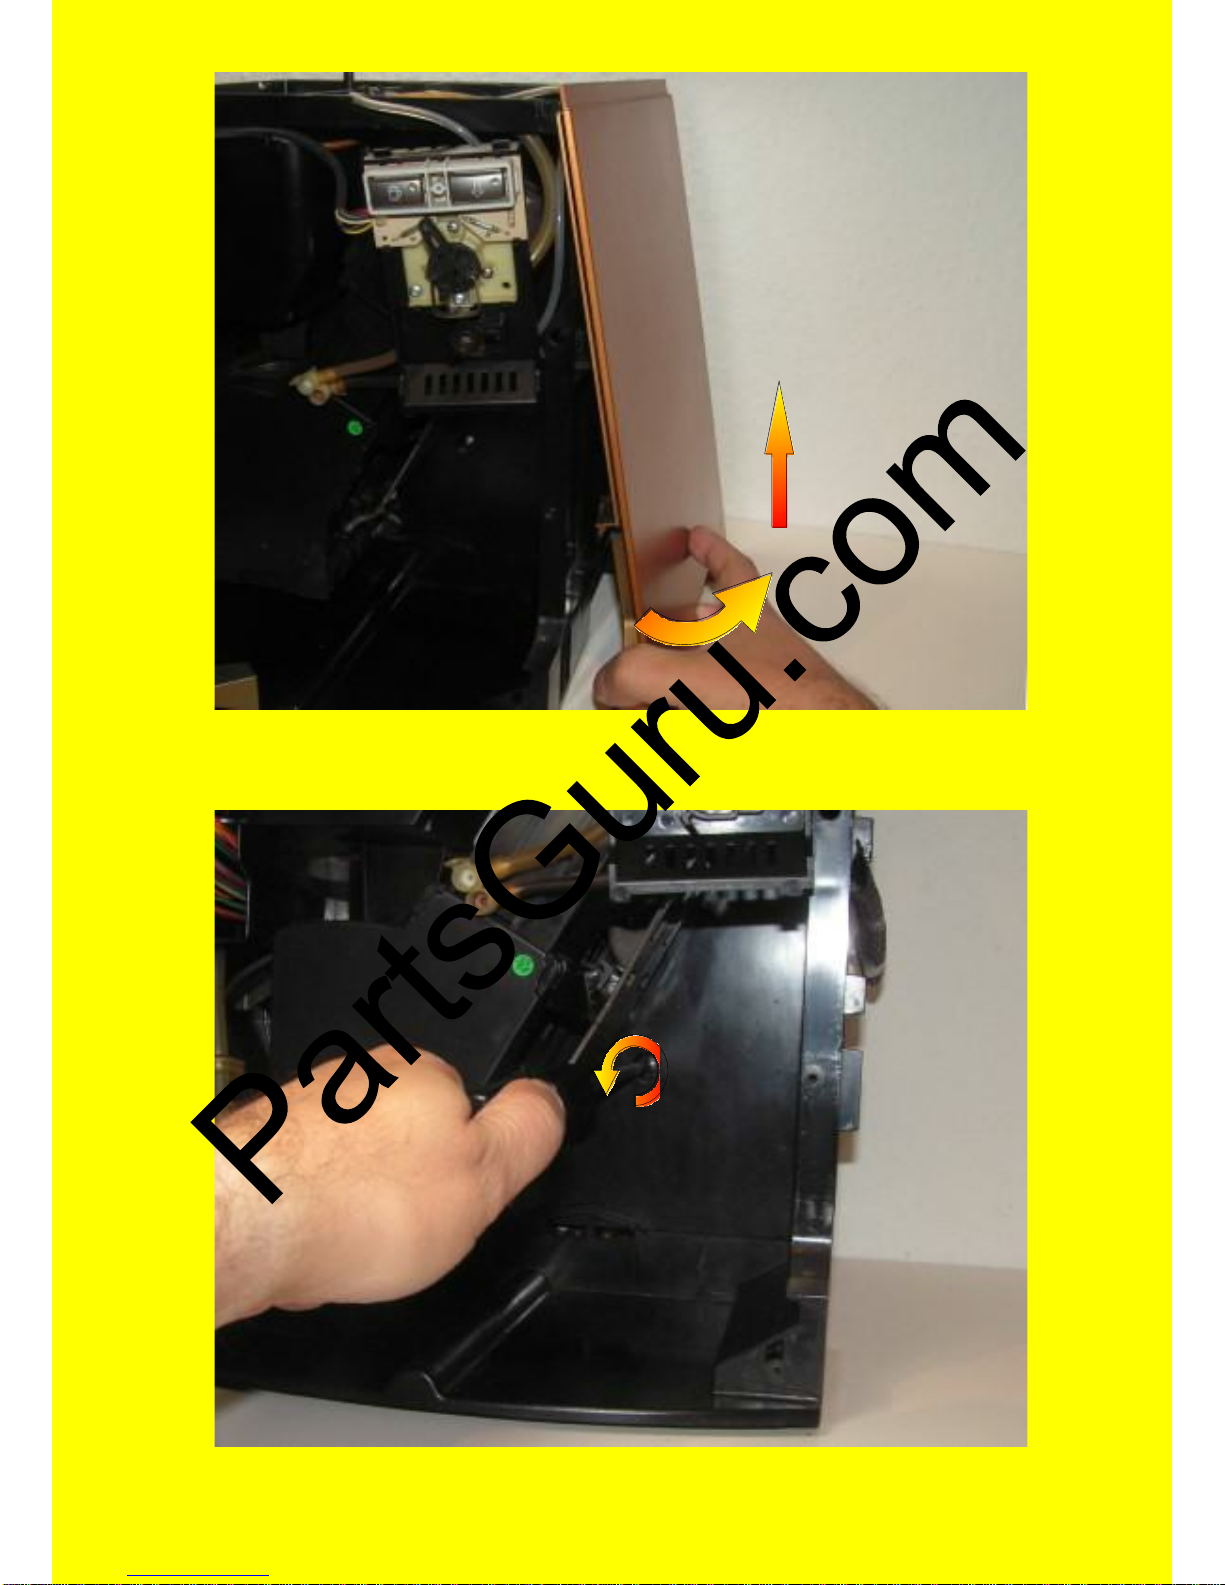
Pull the side panel slight away at the bottom and lift up to
unhook the top two tabs.
.
Next losen the screw to free the TB96 cage
email: sales@partsguru.com 4 of 34
Services Unlimited, Inc./ Parts Guru
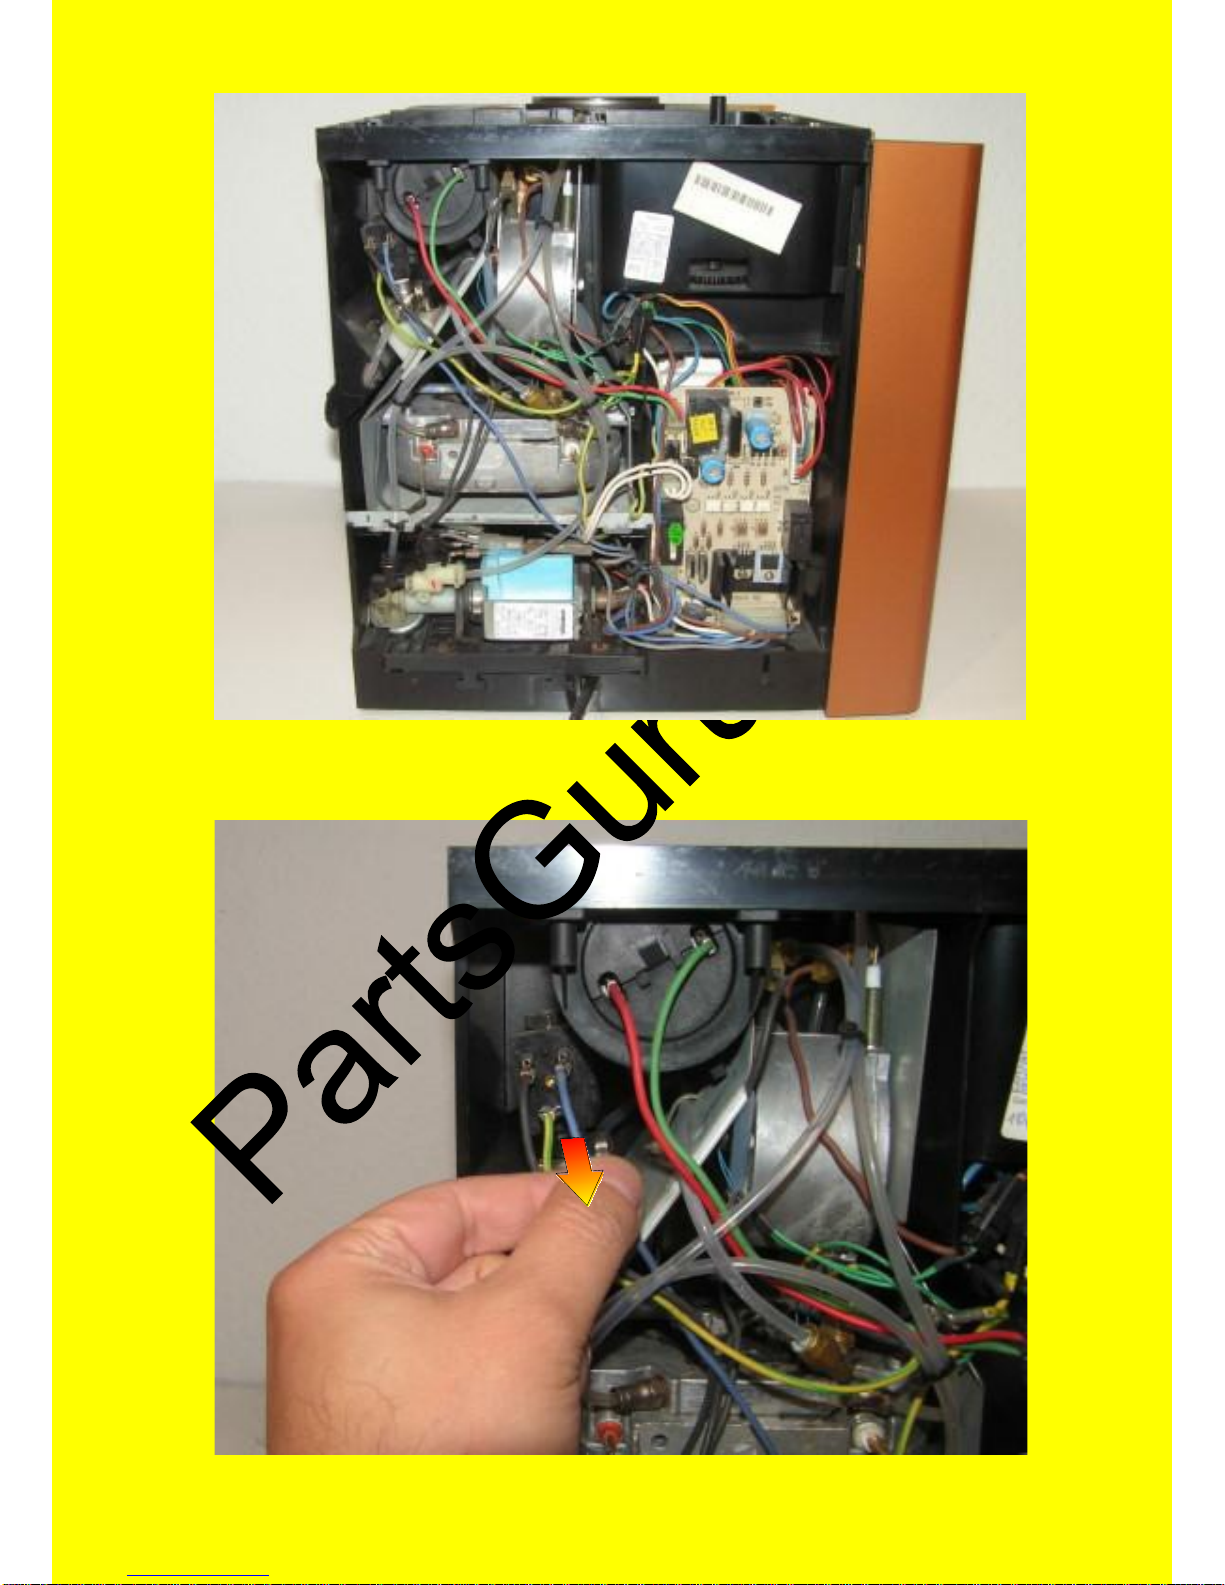
Take a good look at the position of parts, hoses and wiring. The pump,
diaphragm regulator, Power board, Thermo block, steam boiler above
Disconnect the blue wire from the solenoid valve coil.
email: sales@partsguru.com 5 of 34

Services Unlimited, Inc./ Parts Guru
.
Then remove the ground wire
...
and then disconnect the next wire as shown.
email: sales@partsguru.com 6 of 34
Services Unlimited, Inc./ Parts Guru
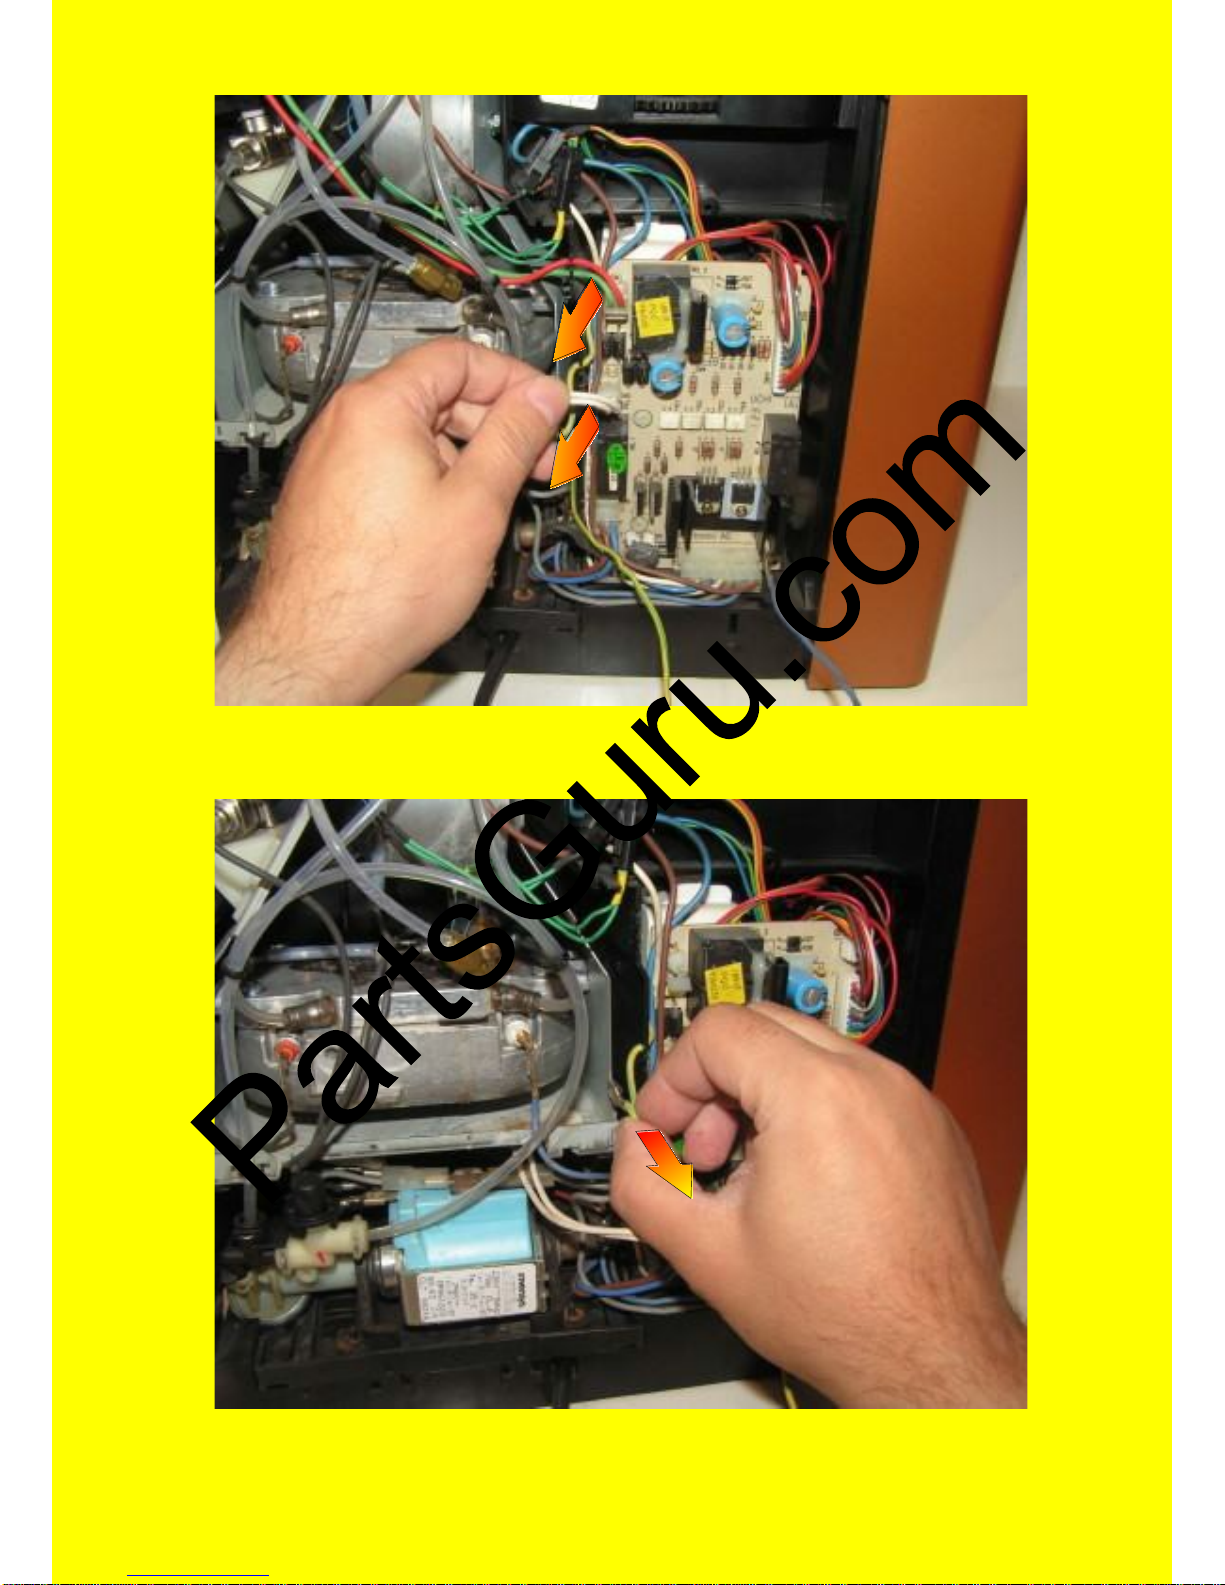
.
Next disconnect the double white, then green & orange wire as shown
Disconnect Green ground wires from TB metal housing as shown.
email: sales@partsguru.com 7 of 34
Services Unlimited, Inc./ Parts Guru
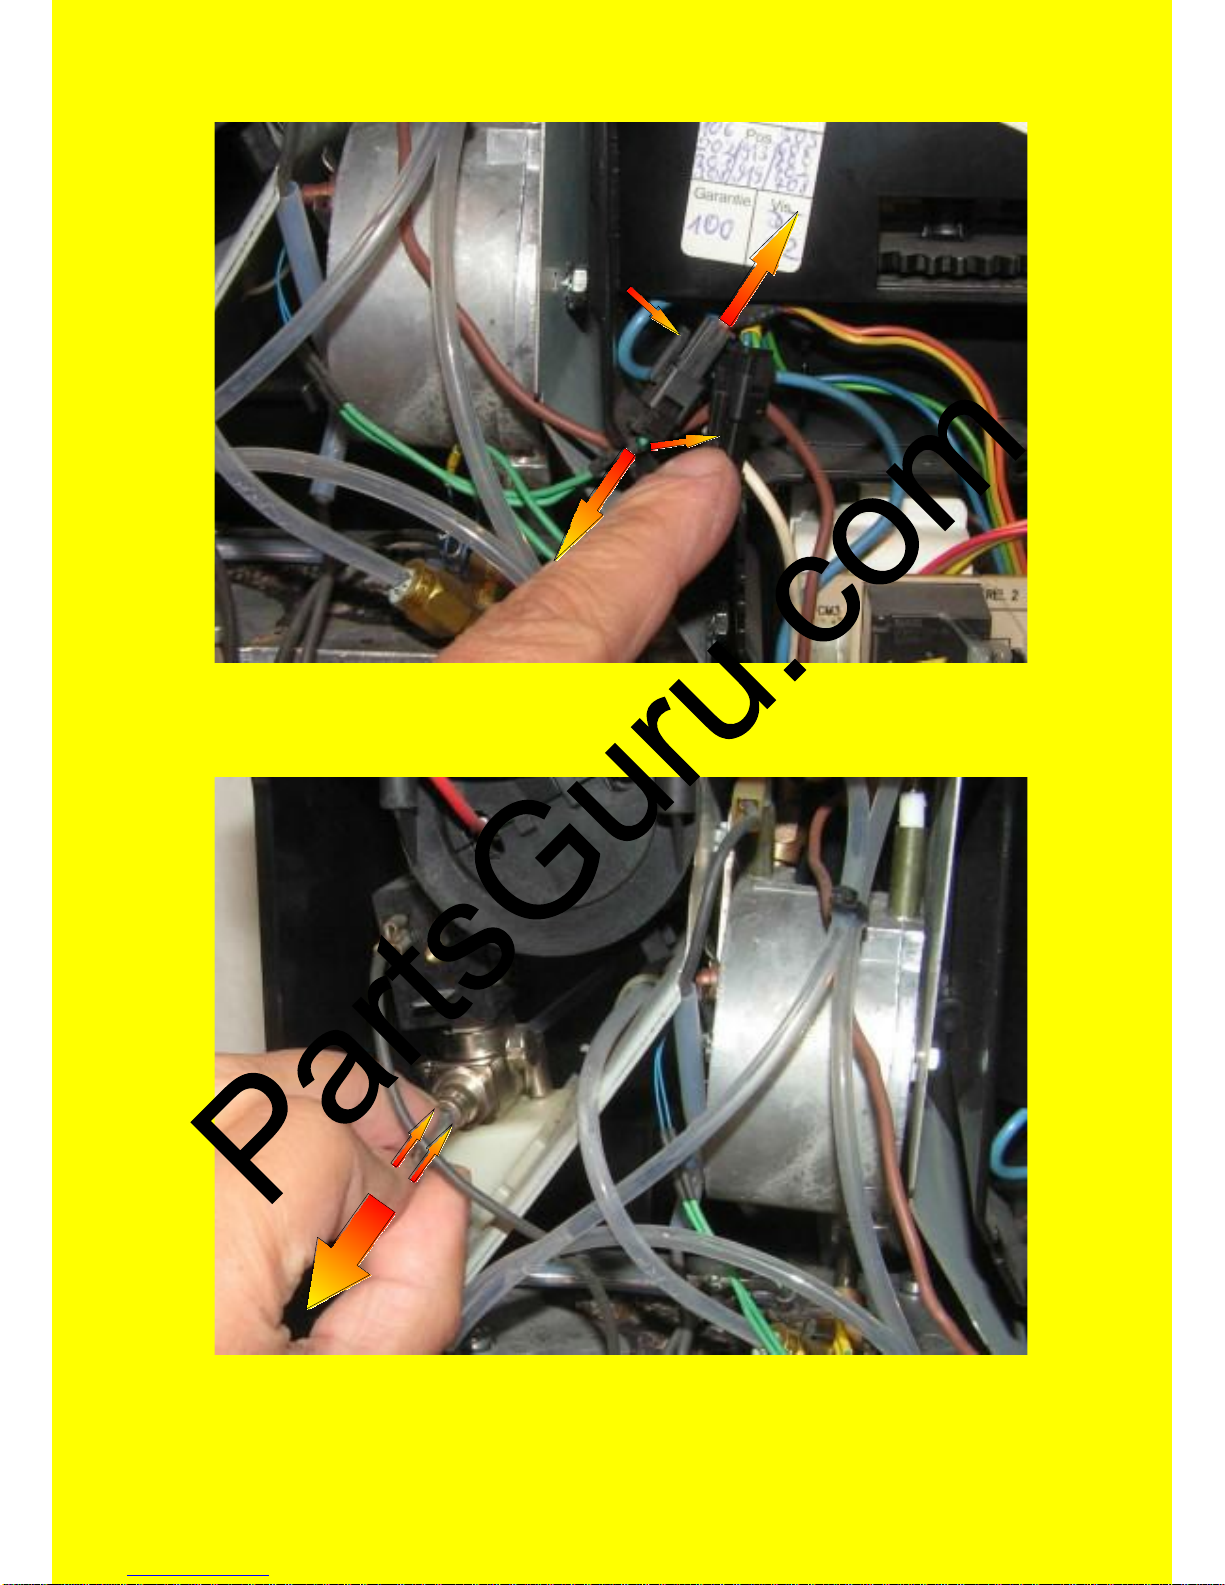
Press the catches and loosen the wires as shown with arrows.
Disconnect the hose from (legris) push connect fitting from the
solenoid inlet. Push the ring on the fitting as you pull the hose
free.
email: sales@partsguru.com 8 of 34
Services Unlimited, Inc./ Parts Guru
Remove the hairpin clip on the diaphragm regulator as shown
by the arrow and pull up the hose free.
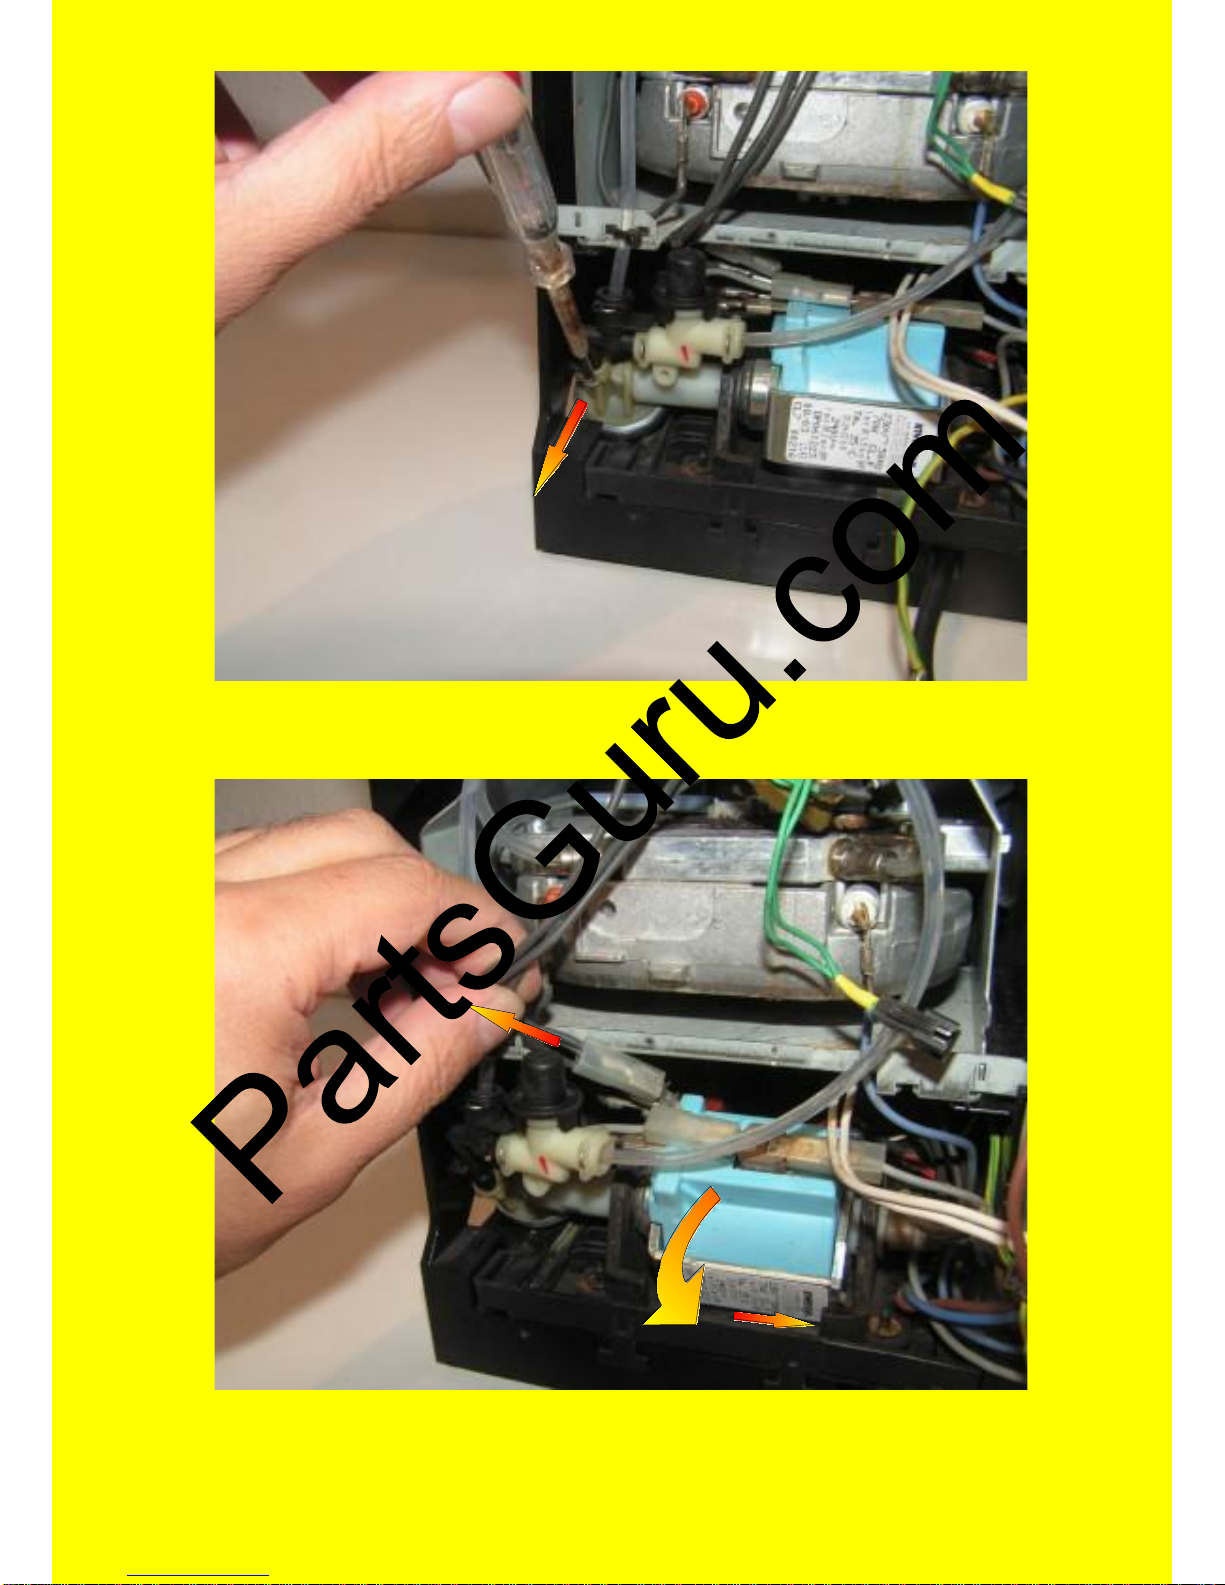
Push the pump to the right and turn it towards you to disconnect the
wire from the pump as shown by arrows.Disconnect the wire on the
pump.
Seite 9
email: sales@partsguru.com 9 of 34
Services Unlimited, Inc./ Parts Guru
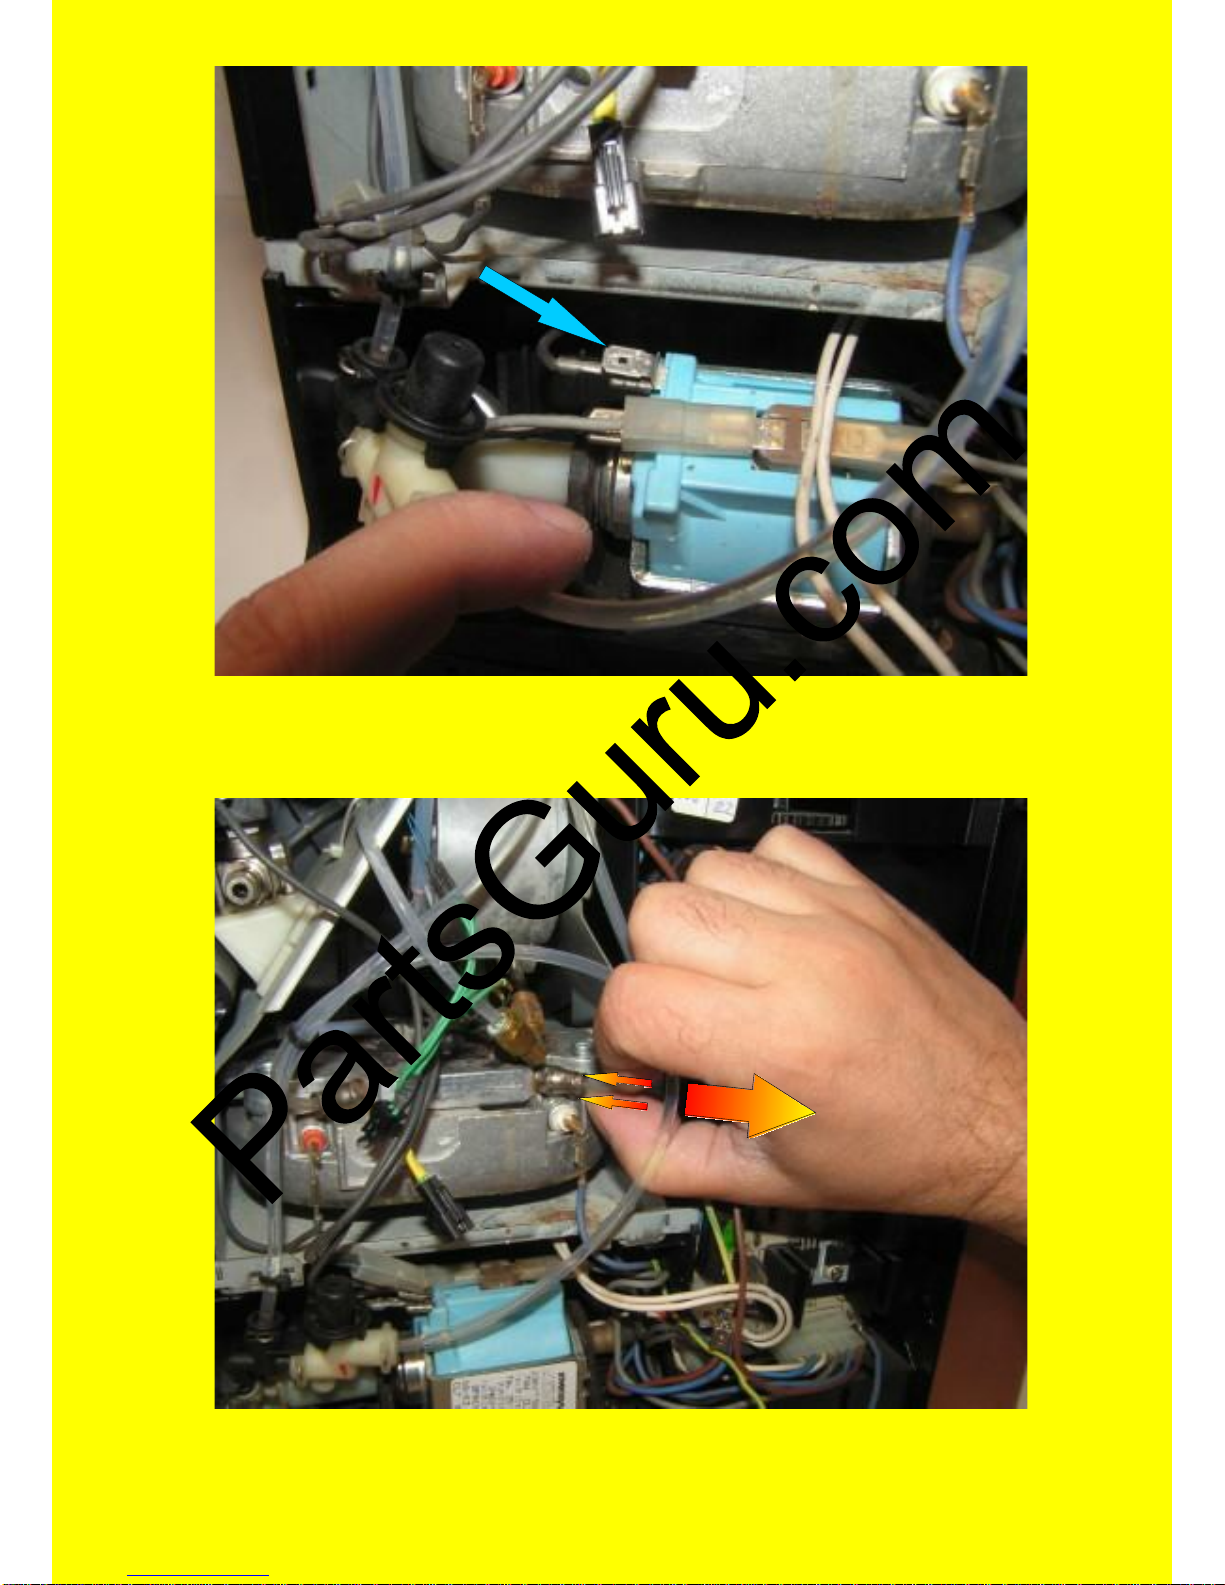
Remove the wire that connects to the TB c.asing (blue arrow) and
leave the other wires at their connections.
Disconnect the hose from the Ceramic valve connecting at the
(Legris) fitting on TB as shown. Push the ring on fitting as you pull
the hose.
email: sales@partsguru.com 10 of 34

Services Unlimited, Inc./ Parts Guru
.
Free the hose from the plastic tie
See arrow and the inset.
Back here push the sheet metal tab away. See also inset screen detail.
email: sales@partsguru.com 11 of 34
 Loading...