

SRX210 Services Gateway 3G ExpressCard
Quick Start
Use the instructions in this guide to help you install the SRX210 Services Gateway 3G
ExpressCard. For details, see
The SRX210 Services Gateway Hardware Guide at
http://www.juniper.net/techpubs/a057.html
The Junos OS documentation at
http://www.juniper.net/techpubs/software/junos-srx/index.html
Overview of 3G Connectivity on SRX Series Services Gateways
The SRX210 Services Gateway has a built-in 3G ExpressCard slot (wireless modem
card). You can use the 3G ExpressCard sold through Juniper Networks for wireless data
connectivity to 3G networks.
Support for the 3G ExpressCard extends the already rich set of WAN connectivity
options available on the SRX210 Services Gateway. The SRX210 Services Gateway
supports a wireless interface as a backup for primary interfaces such as Gigabit Ethernet
and Fast Ethernet. You can also use the 3G interface as the primary interface.
3G Connectivity on GSM and CDMA Expresscards
Juniper Networks supports 3G ExpressCards that you can insert into the ExpressCard
slot in the SRX210 Services Gateway. When the services gateway is equipped with a 3G
ExpressCard and used in a branch office, the device can provide dial-out services to PC
users and forward IP traffic to the service provider’s cellular network.
Juniper Networks supports the following 3G ExpressCards:
Sierra Wireless AirCard Global System for Mobile Communications (GSM)
High-Speed Downlink Packet Access (HSDPA) ExpressCard
Sierra Wireless AirCard GSM High-Speed Uplink Packet Access (HSUPA)
ExpressCard
Sierra Wireless AirCard Code-Division Multiple Access (CDMA) 1xEvolution-Data
Optimized (EV-DO) rev. A ExpressCard
GSM and CDMA are competing digital cellular phone technologies. CDMA is used by the
Verizon and Sprint service providers. There are several GSM technology users
worldwide.
NOTE: The SRX210 Services Gateway supports only certain Sierra Wireless Inc.
ExpressCards, which are supplied by Juniper Networks and orderable from the Juniper
Price List. For details on the models supported, see the SRX210 Services Gateway
Hardware Guide.
Installing the 3G ExpressCard in the SRX210 Services Gateway
ExpressCard Slot
Use the following instructions to install the 3G ExpressCard in the SRX210 Services
Gateway. See the following illustration for details on the location of the 3G ExpressCard
slot on the device’s back panel.
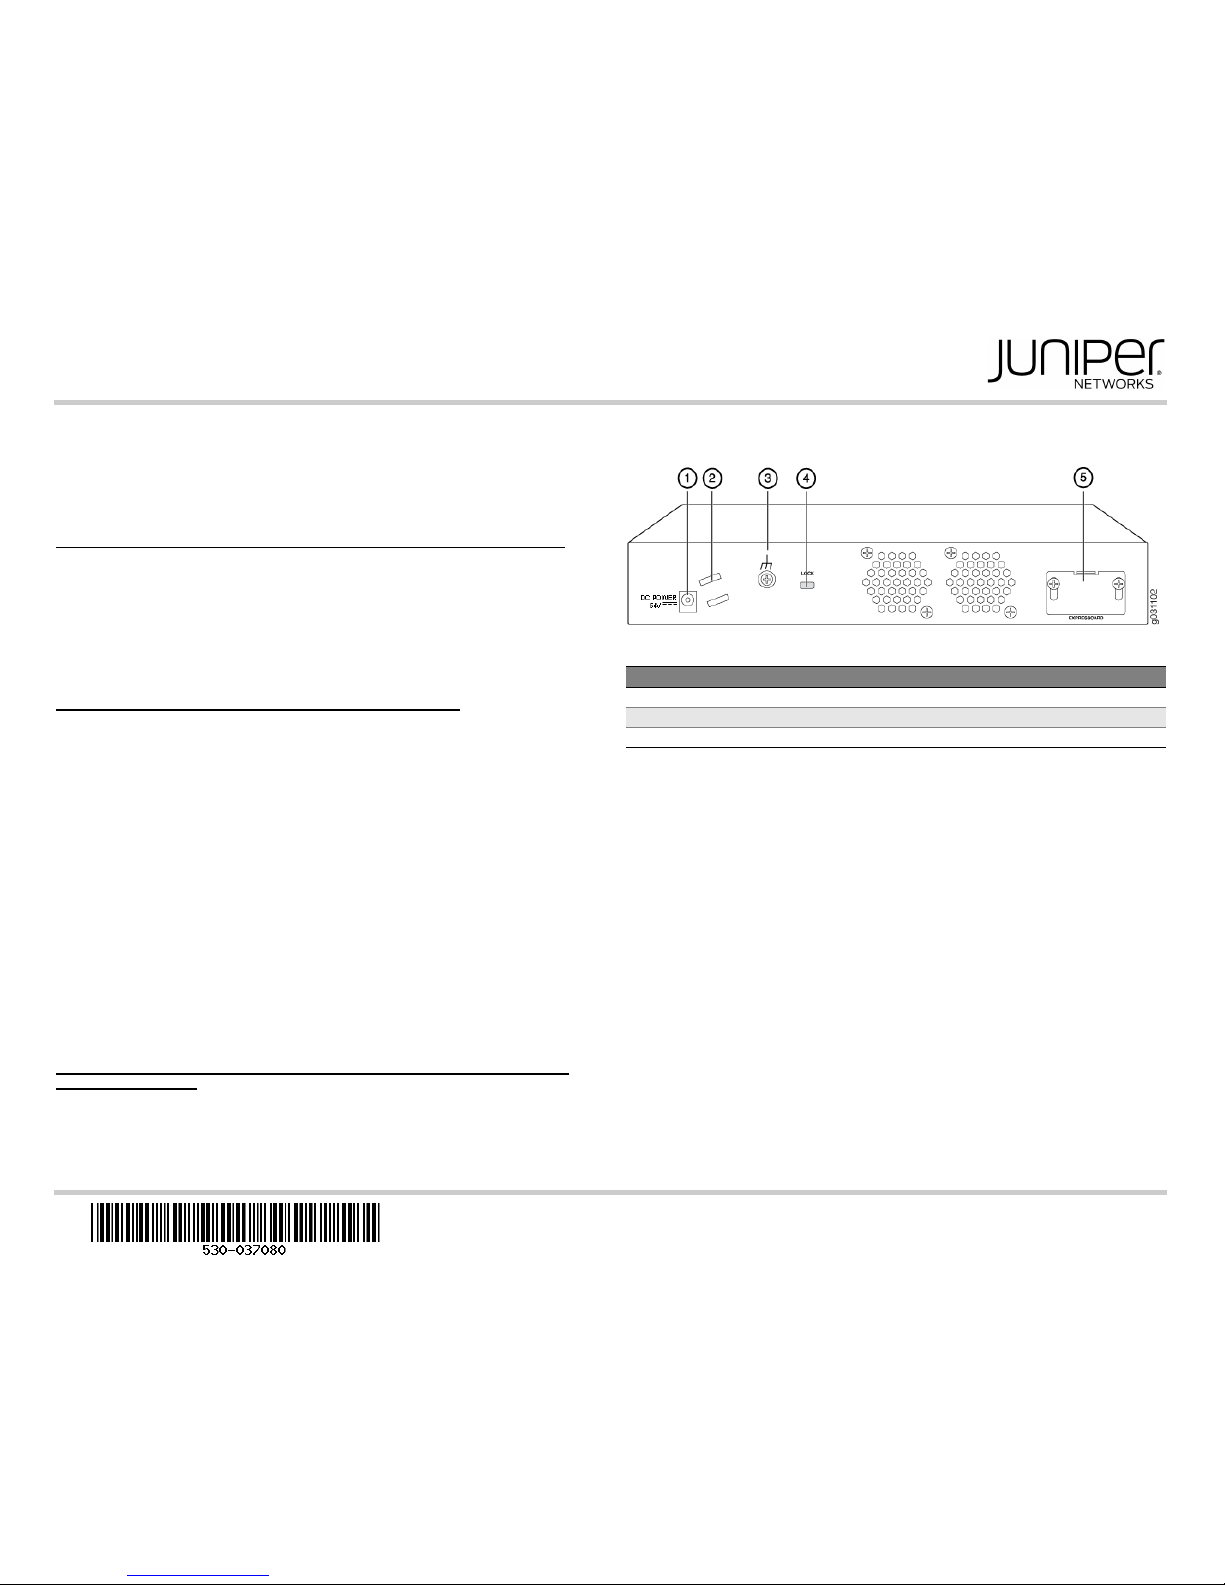
SRX210 Services Gateway Back Panel
Task 1: Before You Begin
Before you begin, do the following:
1. Install your SRX210 Services Gateway and establish basic connectivity. For more
information, see the SRX210 Services Gateway Hardware Guide.
2. Establish an account with a cellular network service provider. Contact your service
provider for more information on creating an account.
For CDMA/EV-DO 3G ExpressCards, use the Electronic Serial Number (ESN)
available on the card to create an account with a CDMA service provider (Verizon or
Sprint). To access the ESN on the 3G ExpressCard:
user@host > show modem wireless interface cl-0/0/8 firmware
For HSPA (GSM/UMTS) 3G ExpressCards, a SIM card should be obtained from the
service provider and inserted into the SIM slot of the 3G ExpressCard.
Task 2: Install the 3G ExpressCard
To install the 3G ExpressCard on the SRX210 Services Gateway:
1. Ensure that the device is powered off.
2. Insert the 3G ExpressCard into the ExpressCard slot. Align the 3G ExpressCard as
follows:
Ensure that the 3G ExpressCard is parallel with the surface on which the services
gateway is placed.
Ensure that the center of the 3G ExpressCard is aligned with the center of the
ExpressCard slot on the services gateway.
Callout Description Callout Description
1 Power supply point 4 Lock for security cable
2 Cable tie holder 5 ExpressCard slot
3 Grounding point
Page 2
The 3G ExpressCard is designed to fit tightly in the slot. You will encounter two
points of resistance while inserting the 3G ExpressCard into the slot. Use firm
pressure as you insert the card.
NOTE: The 3G ExpressCard is not hot-swappable.
As you attempt to insert the 3G ExpressCard into the ExpressCard slot, you will
immediately encounter the first point of resistance. After you align the 3G
ExpressCard, lift it slightly and use firm pressure to slide it into the slot.
When you have partially inserted the 3G ExpressCard, you will encounter the
second point of resistance. Use additional pressure to finish inserting the 3G
ExpressCard into the slot.
3. Power on the device. The ExpressCard LED on the front panel of the device
indicates the status of the 3G ExpressCard interface.
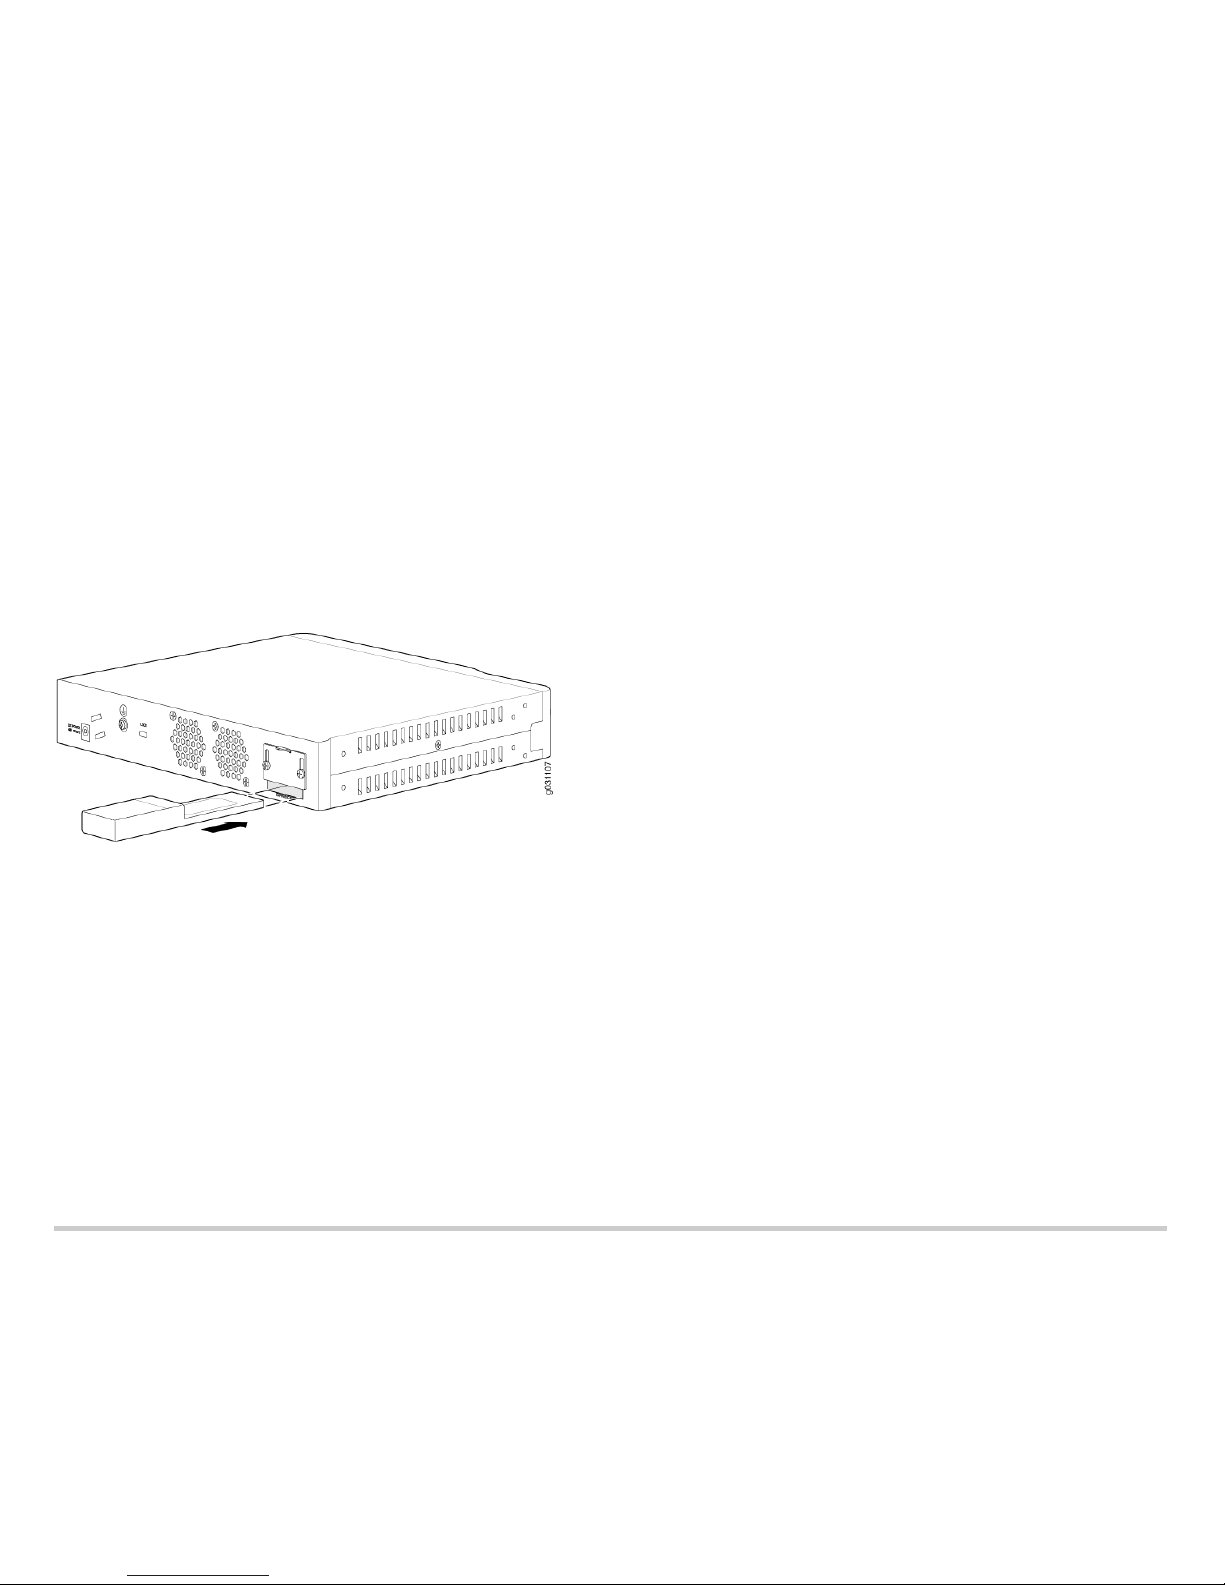
The illustration below depicts the insertion of the 3G ExpressCard into the SRX210
Services Gateway.
Task 3: Check the 3G ExpressCard Status
Use the following CLI commands to check the status of the 3G ExpressCard:
user@host> show modem wireless interface cl-0/0/8
user@host> show interfaces terse
Task 4: Configure the 3G ExpressCard
To configure the 3G ExpressCard:
1. Configure a dialer interface.
2. Configure the 3G ExpressCard interface.
3. Configure security zones and policies, as required, to allow traffic through the WAN
link.
4. The dialer interface (dl0.0) should be placed into the relevant security zone.
5. Configure one of the dialer trigger mechanisms.
Task 5: Activate the 3G ExpressCard Options: CDMA ExpressCard
You can activate CDMA ExpressCards using the Junos CLI or J-Web interface. You can
enable the CDMA ExpressCard to connect to the service provider’s cellular network.
T
O ACTIVATE THE CDMA EXPRESSCARD (CLI PROCEDURE)
1. Enter the command:
user@host> request modem wireless activate
2. Enter one of the following options:
user@host> request modem wireless activate iota cl-0/0/8
user@host> request modem wireless activate manual cl-0/0/8 msl msl mdn
mdn imsi imsi sid sid nid nid sip-user-id sip_id sip-password sip_password
user@host> request modem wireless activate otasp cl-0/0/8 dial-string
calling-number
TO ACTIVATE THE CDMA EXPRESSCARD (J-WEB PROCEDURE)
1. In the J-Web user interface, select Configure>Interfaces.
2. Click the cl-0/0/0 interface name. The 3G Interface Configuration page appears.
3. Select one of the following options:
IOTA—Internet-based over air provisioning.
Manual Activation—Requires manual entry of the required information.
OTASP—Over the air service provisioning.
4. Click Activate.
5. Enter the information required for card activation when prompted, if you have
selected Manual Activation or OTASP.
6. Click OK.
GSM ExpressCard
You can lock or unlock the SIM card inserted into the GSM ExpressCard from the Junos
CLI by using the following commands. If the SIM is locked, you need to unlock it before
you can make a call.
1. To lock the GSM SIM:
user@host> request modem wireless gsm sim-lock pin xxxx enable cl-0/0/8
NOTE: Once the SIM lock is enabled, you can view the status of the SIM card with the
CLI command show modem wireless interface cl-0/0/8. The output displays the PIN
security status as Modem PIN security status: Enabled.
When the SRX210 Services Gateway is rebooted, the SIM is locked and must be
unlocked with the given PIN.
2. To unlock the GSM SIM:
user@host> request modem wireless gsm sim-unlock cl-0/0/8 pin
3. To unlock the SIM automatically on reboot:
[Edit]
user@host# set interfaces cl-0/0/8 cellular-options gsm-options
sim-unlock-code
When you attempt to unlock the SIM, if you enter a wrong PIN three times in a row, the
SIM enters the PIN Unlock Key (PUK) state. You must obtain the PUK code from your
service provider to unblock it with the CLI.
4. To recover the SIM from the PUK state:
 Loading...