

Page 1
AGE 14+
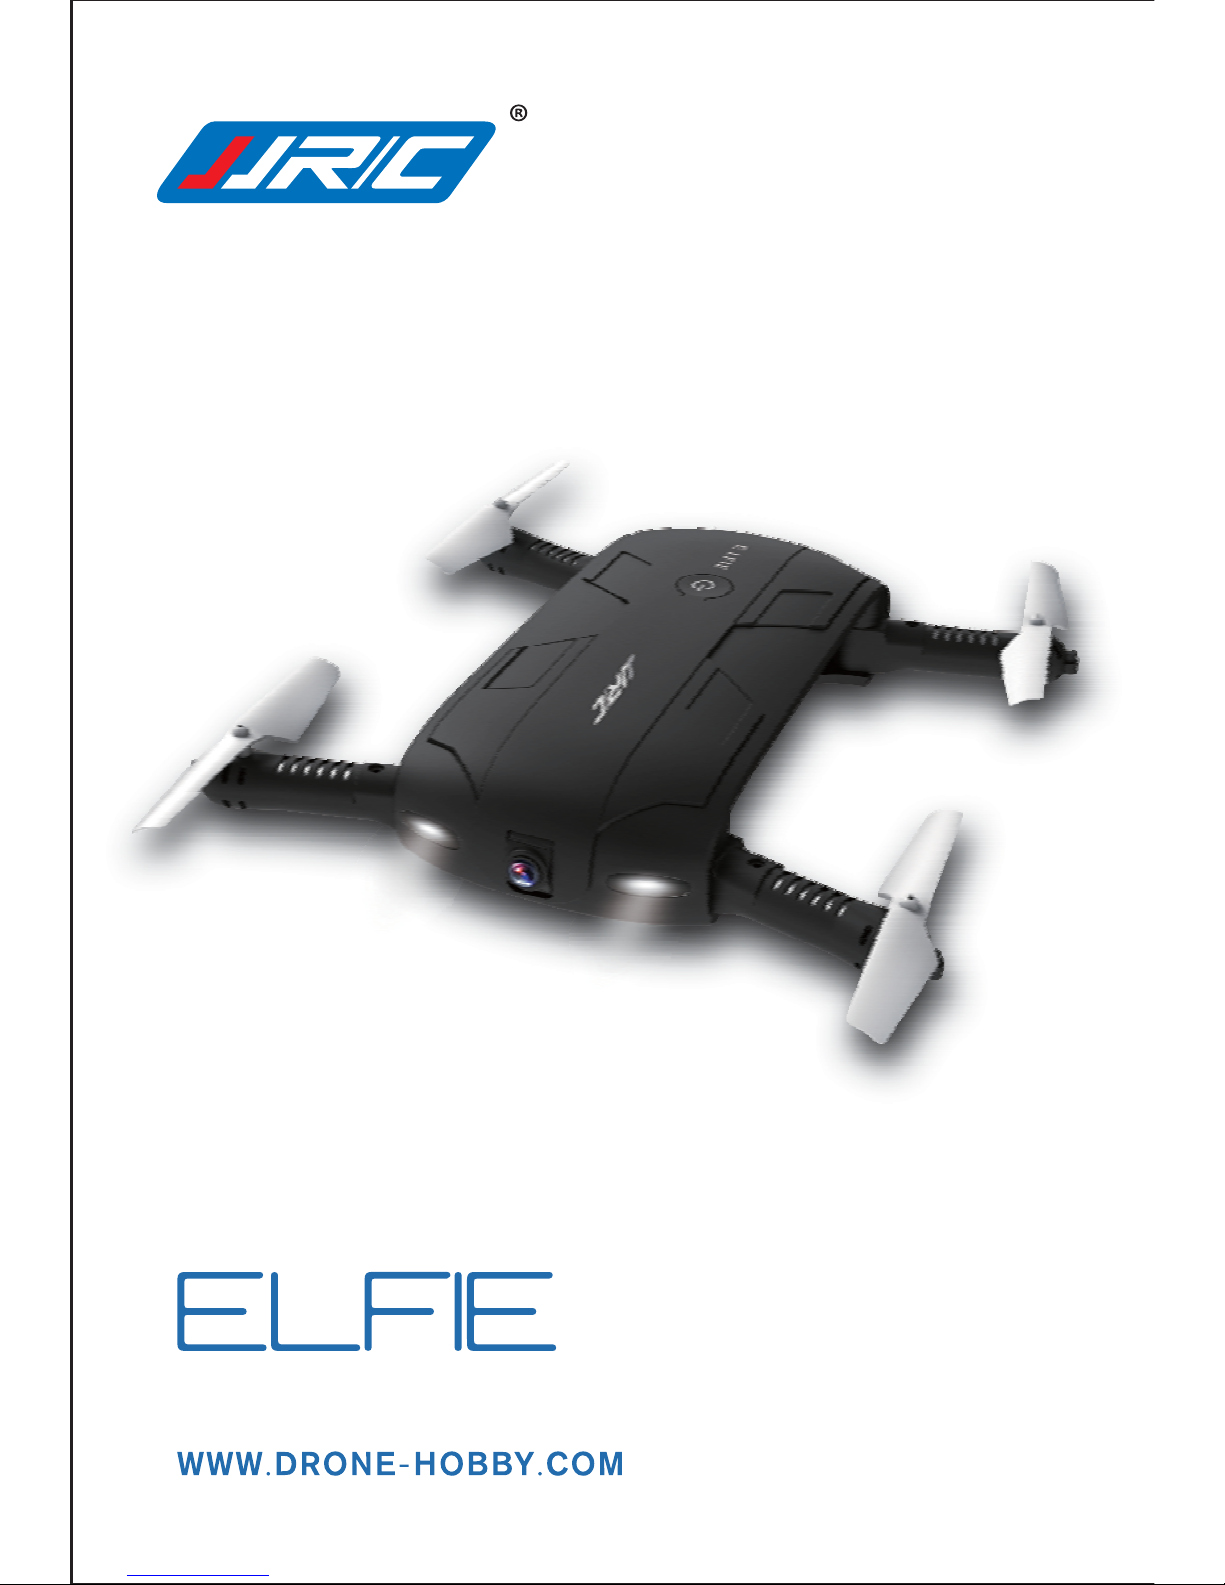
THE WORLD’ S SMALLEST FOLDABLE DRONE
Page 2

ATTENTIONS
1.The 4-axis quadcopter is suitable for indoor/outdoor flight, please
make sure the outdoor wind force is less than Beaufort force 4.
2.lt adopts 2.4G frequency band for long remote control distance;
allows multiple flights at the same time and in a same area without
any interface. Gamer can control it to fly forward/backward, left/right
sideward, turn left/right, to flip and roll.
3.The remote-controlled distance will be shortened when the battery
power of the quarocopter/transmitter is insufficient. The quadcopter
will be unable to take off or fly high when the power of quadcopter is
insufficient.
4.Please repair the quadcopter in time when it is damaged. Do not fly
the quadcopter when it is seriously damaged (rotor wing breakage),
or it might lead to injury.
5.Do not crash the quadcopter from high altitude or crash it seriously,
or it might shorten its lifetime.
6.Please read this manual carefully before operation and keep it
properly for future reference.
Page 3
CONTENTS
Page 4
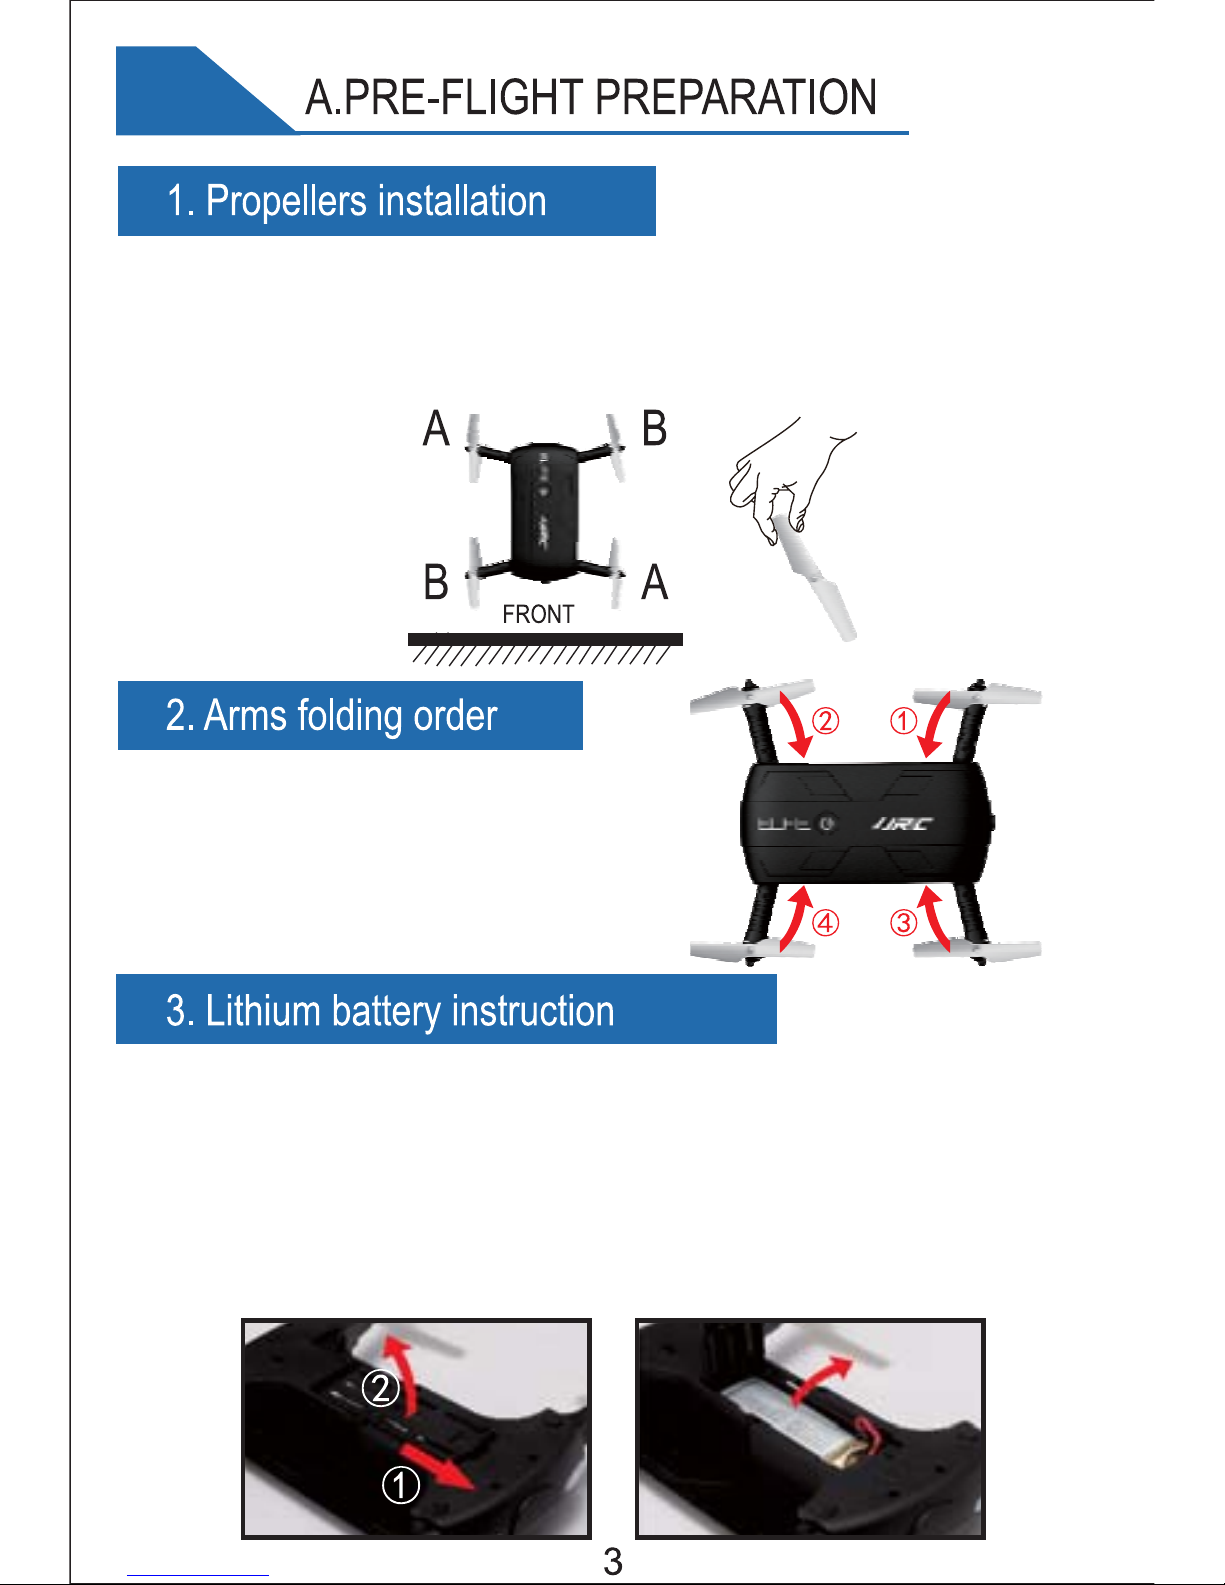
Installation of fan blades- the fan blades should be installed to the
designated place. The number of fan blade should be the same as the
number of air frame. A is corresponding with A, B is corresponding with B,
press down the fan blades with the motor shaft, Please do not deform it.
Arms folding order- fold the front arms
near the camera first, then the back
arms (opposite when unfold them)
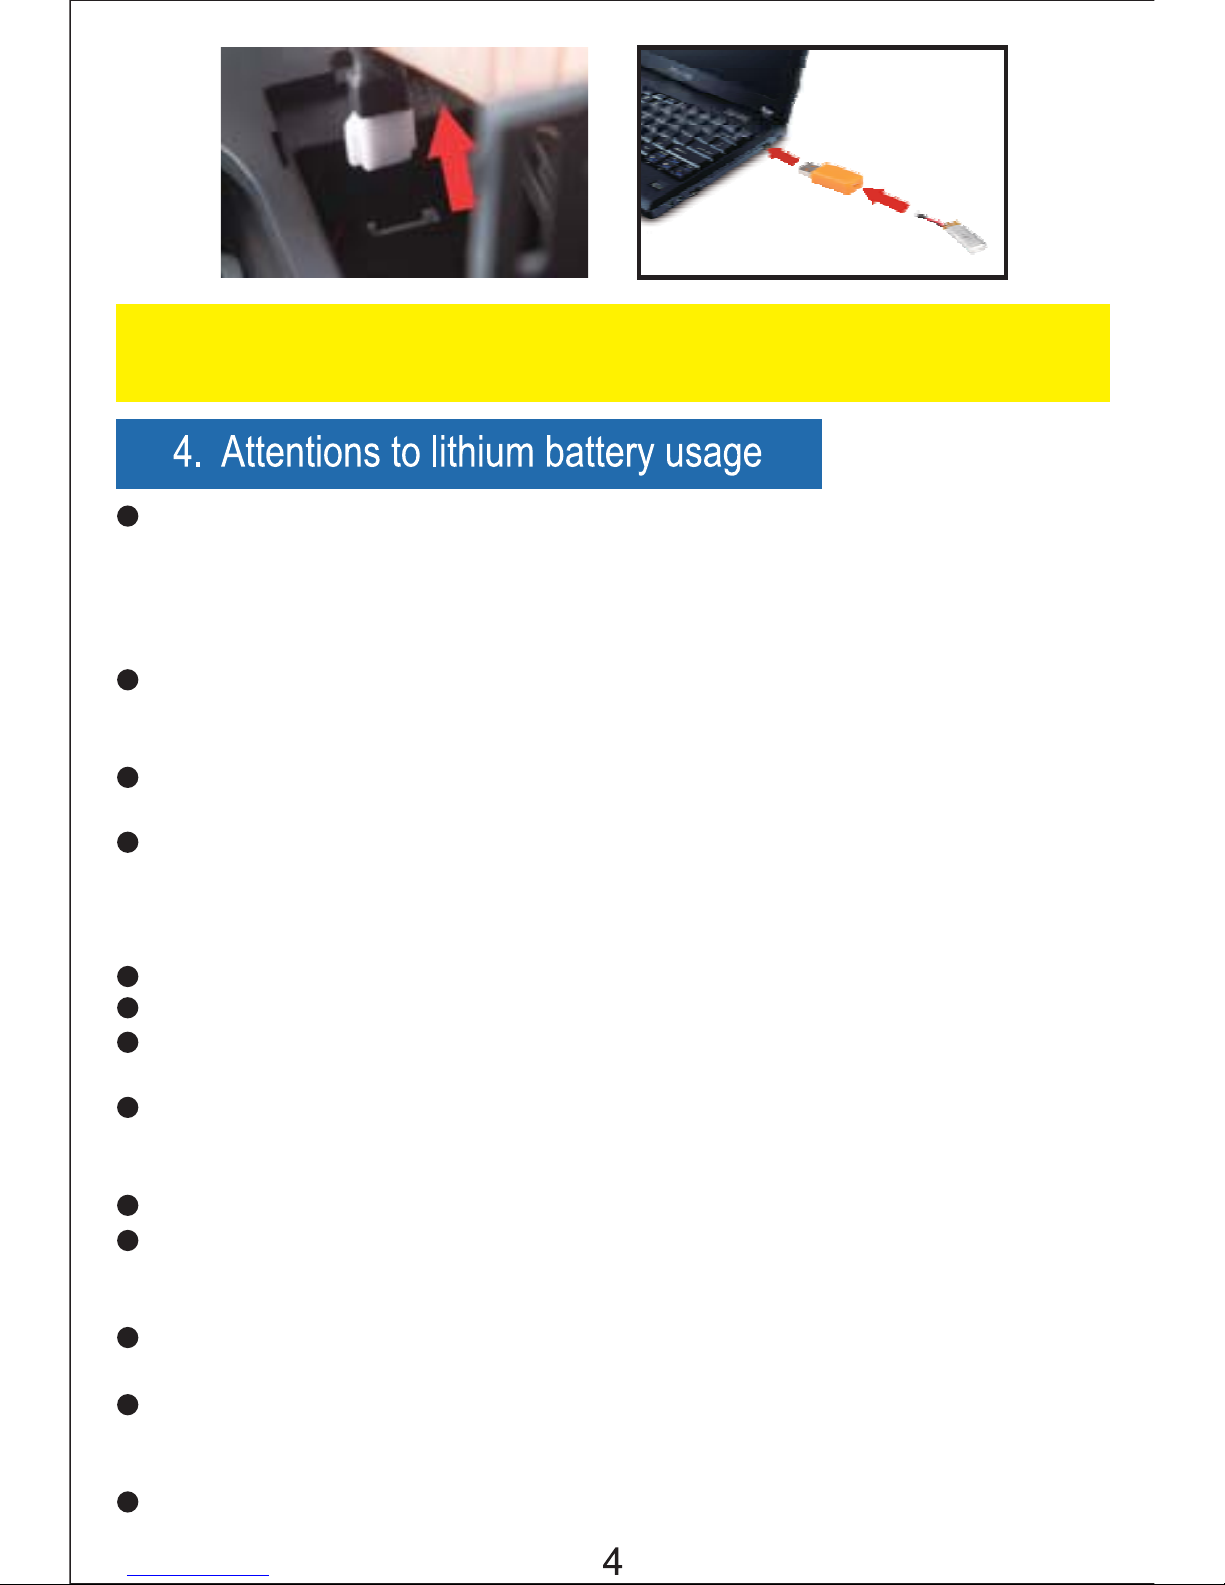
Take out the lithium battery from the battery holder and disconnect with
the power socket as shown in the figure, and connect the USB plug of
charger with the computer USB port, then connect the charging socket
of the charger with the lithium battery plug. When charging, the LED will
light up; when fully charged, the LED will light off. The charging time is
about 120 minutes.(For the sake of safety, be sure that the battery in
your sight when charging)
Page 5
There is a certain risk when using lithium battery.lt may cause fire,body
injury or property loss. Users must be aware of the risks of using this
product.Manufacturers,retailers and dealers do not bear any
responsibility once accidents occur,so please read the safety guidelines
and charging instructions carefully before operation.
If battery leakage occurs,please avoid contacting your eyes and skin
with electrolyte. Once it happens, please wash your eyes with clean
water and seek medical care immediately.
Please remove the plug immediately if you sense any peculiar smell,
noise or smog.
Please comply with the following requirements strictly, or it may cause
fire, electric shock or explosion.
Attention: when the quadcopter battery plugged in, please insert the
charger that has a small iron as inside.
Battery Charging
Please use the charger from original factory to ensure your safe usage.
Do not charge the dilatant or outworn battery.
Do not overcharge the battery.Please pull out the charger once the
battery is fully charged.
Do not charge the battery next to inflammables or on the surface of
electro-conductive objects.When charging please observe the battery
at all times.
Do not charge batteries which not cool down yet.
The charging temperature should be between 0°C to 40°C.
Recycle
Do not deal with the related equipment as daily rubbish. The damaged
/unusablebatteries should be put into the designated container.
This equipment is composed of electronic elements and batteries.
For electronics garbage, please dispose them according to the special
requirements.
Please familiarize yourself with the local garbage disposal method.
Page 6

1.Use your phone to scan the QR code, download and install the control
software: 'JJRC'. Android, Android(Google Play) and lOS are all
supported.
2.Turn on the drone and the lights will flash; turn on your mobile phone
to connect WIFI (JJRC-##### as shown in figure 2.),
Page 7

3.Open the APP, enter the main interface, as shown in figure 3.
Click "play" into the manipulation interface, as shown in figure 4.
Click " " to enter ordinary control interface, as shown in figure 5
Click " ", Altitude Hold key becomes yellow, and enter the Altitude
Hold interface, as shown in figure 6. Click " " for more Settings
interface, as shown in figure 7.
4.When the Video links successfully, you can see the images that WIFI
camera transmits through your mobile phone screen.
Page 8

13.Leftjoystick (throttle)
14.Right joystick (rudder)
15.Left rotation fine-tuning
16.Right rotation fine-tuning
17.Left side fly fine-tuning
18.Right side fly fine-tuning
19.Forward fine-tuning
20.Backward fine-tuning
21.More settings
22.Camera reverse
23.3D display
24.Headless mode
25.One-key calibration
1.Return
2.Photo
3.Video
4.Document (Album/video)
5.Speed contr01:30%/60%/100%
6.Altitude hold
7.Gravity induction
8.Show/Hide steering wheel
9.360° flips and rolls
10.One-key unlocking
11.One-key down
12.Emergency stop
Page 9

1. Accelerometer mode: Click into Accelerometer mode, put your right
hand thumb on the right joystick, and move the phone towards any
direction for remote control (Figure 1).
2. Selfie mode: In the Altitude hold mode, you can control the quadcopter
to turn the camera back to itself, then click the camera button on the
screen to take selfies(Figure 2),
Attention: sefie-taking must be practiced when you are skillful enough
to control the quadcopter.
3.One-key calibration: This function is only allowed on the ground.
Page 10

Page 11

Page 12

Page 13

Page 14

Page 15

Page 16

 Loading...