

Page 1
3
MotoDriver2
Page 2

MotoDriver2
Publi shed: 16.0 4.2019 Copyrigh t by Jo y-IT 2
1. Introducon
2. Device Overview
3. Using with an Arduino
3.1 Connecon
3.2 Example-Code
4. Using with a Raspberry Pi
4.1 Connecon
4.2 Example-Code
5. Addional Informaons
6. Support
TABLE OF CONTENTS
Page 3
MotoDriver2
Publi shed: 16.0 4.2019 Copyrigh t by Jo y-IT 3
Dear customer,
thank you very much for choosing our product. In the following we have listed what you have to consider
during the setup.
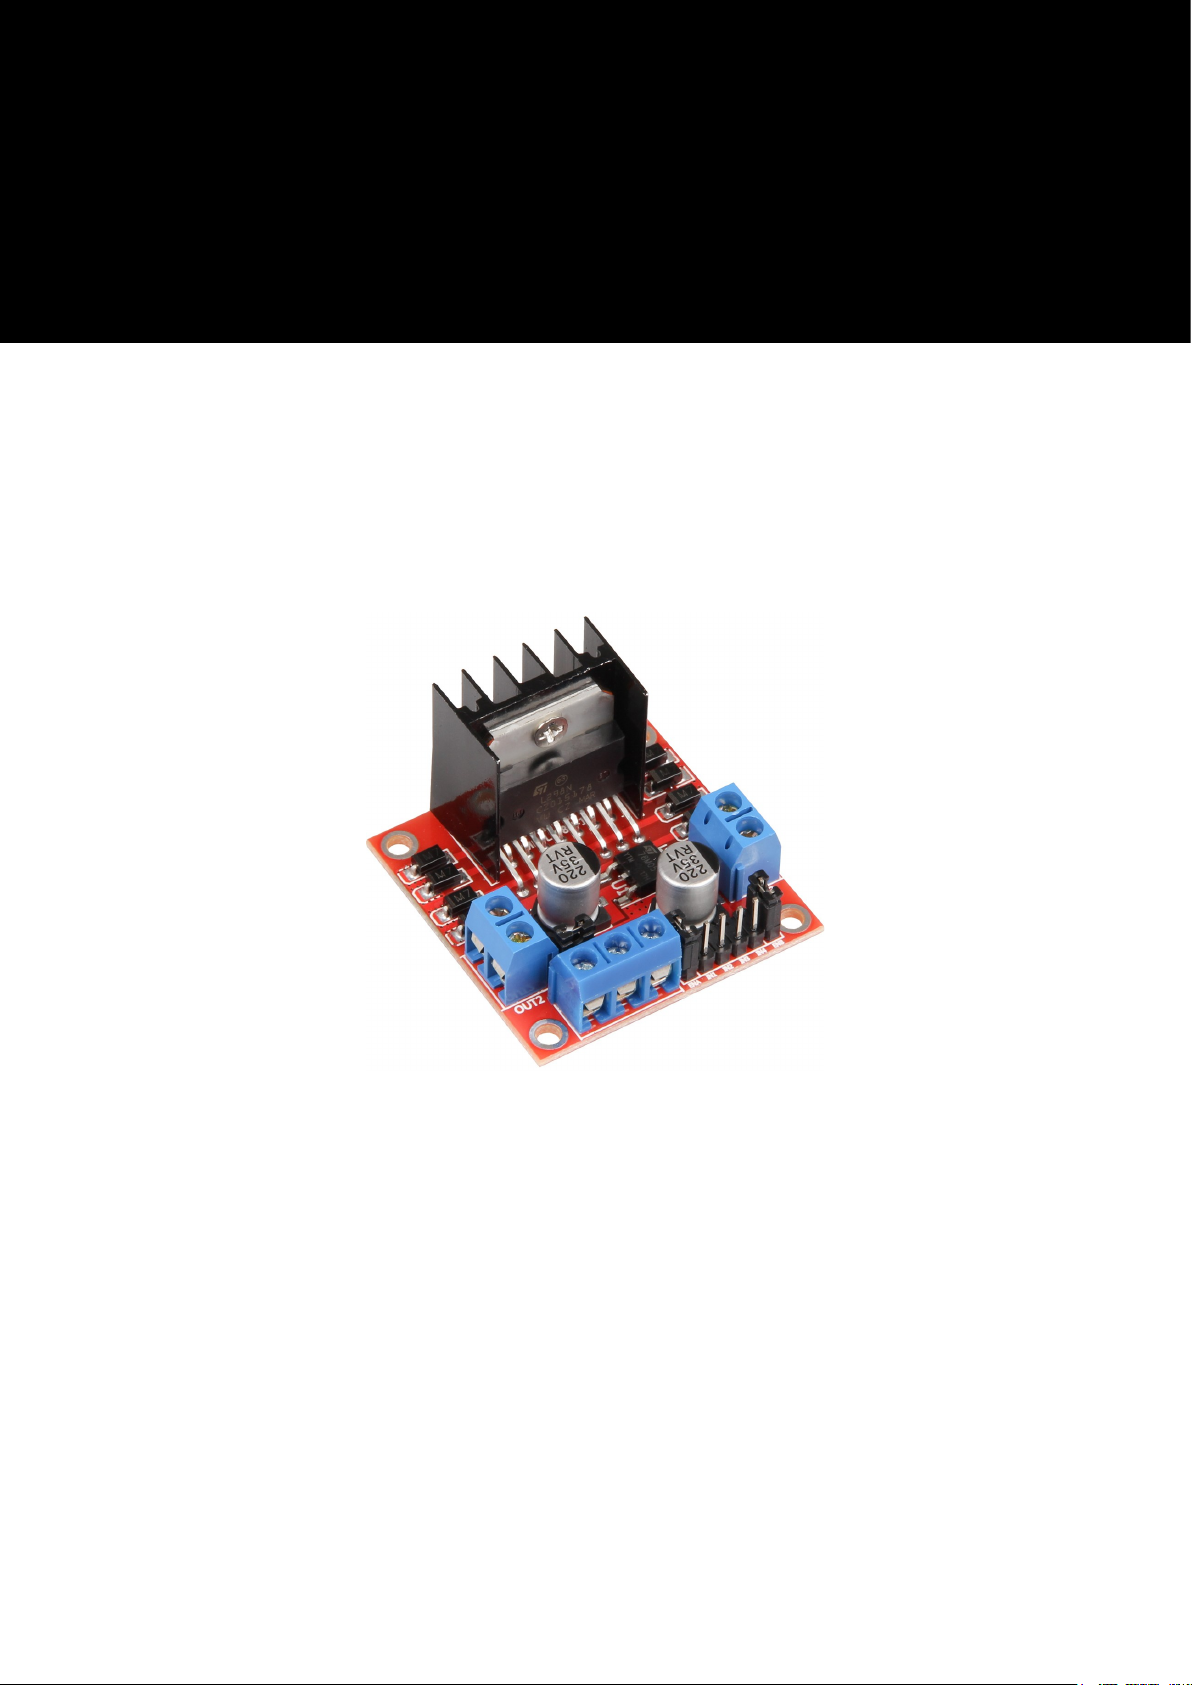
The MotoDriver2 is an expansion board that allows the control and use of up to two DC motors. The DC
motors can be controlled with a constant voltage between 5V and 35V.
1. INTRODUCTION
2. DEVICE OVERVIEW
Model SBC-MotoDriver2
Driver L298N
Logic Voltage 5V
Drive Voltage 5V - 35V
Drive Current 2A
Power Max. 25W
Dimensions 43 x 43 x 25 mm
Page 4

MotoDriver2
Publi shed: 16.0 4.2019 Copyrigh t by Jo y-IT 4
Noce:
Remove the jumper from slot 3 if the power supply is above 12V. This will acvate power to the Onboard
5V Regulator. The 5V output is ideal for powering an Arduino, for example. This is only acve if the jumper
is set to slot 3.
PIN Assignment
1 DC Motor 1 / Stepper Motor +
2 DC Motor 1 / Stepper Motor GND
3 12V Jumper
4 Power Supply +
5 Power Supply GND
6 5V Output (if Jumper 3 is set)
7 DC Motor 1 Jumper
8 Input 1
9 Input 2
10 Input 3
11 Input 4
12 DC Motor 2 Jumper
13 DC Motor 2 / Stepper Motor +
14 DC Motor 2 / Stepper Motor GND
Page 5

MotoDriver2
Publi shed: 16.0 4.2019 Copyrigh t by Jo y-IT 5
3.1 CONNECTION
The power supply for the MotoDriver2 (PIN 4) should be between 5V and 35V.
This depends on your conguraon and the used components.
3. USING WITH AN ARDUINO
MotoDriver 2 Arduino
Input 1 9
Input 2 8
Input 3 7
Input 4 6
Page 6

MotoDriver2
Publi shed: 16.0 4.2019 Copyrigh t by Jo y-IT 6
3.2 EXAMPLE-CODE
To use the DC motors on the module, connect the motors, the module and your Arduino as shown in the
previous picture. Transfer the following code example completely to your Arduino to test the
funconality.
//Motor 1
const int motorPin1 = 9;
const int motorPin2 = 8;
//Motor 2
const int motorPin3 = 7;
const int motorPin4 = 6;
int speed = 180;
void setup(){
//Set pins as outputs
pinMode(motorPin1, OUTPUT);
pinMode(motorPin2, OUTPUT);
pinMode(motorPin3, OUTPUT);
pinMode(motorPin4, OUTPUT);
//Motor Control A in both directions
analogWrite(motorPin1, speed);
delay(2000);
analogWrite(motorPin1, 0);
delay(200);
analogWrite(motorPin2, speed);
delay(2000);
analogWrite(motorPin2, 0);
//Motor Control B in both directions
analogWrite(motorPin3, speed);
delay(2000);
analogWrite(motorPin3, 0);
delay(200);
analogWrite(motorPin4, speed);
delay(2000);
analogWrite(motorPin4, 0);
}
void loop(){
}
Page 7

MotoDriver2
Publi shed: 16.0 4.2019 Copyrigh t by Jo y-IT 7
4.1 CONNECTION
The power supply for the MotoDriver2 (PIN 4) should be between 5V and 35V.
This depends on your conguraon and the used components.
4. USING WITH A RASPBERRY PI
MotoDriver 2 Arduino
Input 1 GPIO26
Input 2 GPIO20
Page 8

MotoDriver2
Publi shed: 16.0 4.2019 Copyrigh t by Jo y-IT 8
4.2 EXAMPLE-CODE
To use DC motors on the module, simply connect the motors, the module and your Raspberry Pi, as
shown in the previous picture. Transfer the following code example completely to your Raspberry Pi to
test the funconality.
import sys
import time
import RPi.GPIO as GPIO
mode=GPIO.getmode()
GPIO.cleanup()
Forward=26
Backward=20
GPIO.setmode(GPIO.BCM)
GPIO.setup(Forward, GPIO.OUT)
GPIO.setup(Backward, GPIO.OUT)
def forward(x):
GPIO.output(Forward, GPIO.HIGH)
print("Moving Forward")
time.sleep(x)
GPIO.output(Forward, GPIO.LOW)
def reverse(x):
GPIO.output(Backward, GPIO.HIGH)
print("Moving Backward")
time.sleep(x)
GPIO.output(Backward, GPIO.LOW)
while (1):
forward(5)
reverse(5)
GPIO.cleanup()
Page 9

MotoDriver2
Publi shed: 16.0 4.2019 Copyrigh t by Jo y-IT 9
Our informaon and take-back obligaons according to the Electrical and Electronic
Equipment Act (ElektroG)
Symbol on electrical and electronic equipment:
This crossed-out dustbin means that electrical and electronic equipment does not belong in the
household waste. You must return the waste to a collecon point.
Before handing over waste baeries and accumulators that are not enclosed by waste equipment must
be separated from it.
Return opons:
As an end user, you can return your old device (which essenally fulls the same funcon as the new
device purchased from us) free of charge for disposal when you purchase a new device.
Small appliances with no external dimensions greater than 25 cm can be disposed of in normal household
quanes independently of the purchase of a new appliance.
Possibility of return at our company locaon during opening hours:
Simac GmbH, Pascalstr. 8, D-47506 Neukirchen-Vluyn, Germany
Possibility of return in your area:
We will send you a parcel stamp with which you can return the device to us free of charge. Please contact
us by e-mail at Service@joy-it.net or by telephone.
Informaon on packaging:
If you do not have suitable packaging material or do not wish to use your own, please contact us and we
will send you suitable packaging.
5. ADDITIONAL INFORMATIONS
Page 10

MotoDriver2
Publi shed: 16.0 4.2019 Copyrigh t by Jo y-IT 10
We are also there for you aer the purchase. If you sll have quesons or problems, we are also available
by e-mail, telephone and cket support system.
E-Mail: service@joy-it.net
Ticket-System: hp://support.joy-it.net
Phone: +49 (0)2845 98469 – 66 (9:30 - 17:00 o‘clock)
For further informaon please visit our website:
www.joy-it.net
6. SUPPORT
 Loading...