


 Loading...
OPERATING MANUAL for |
JT-UK |
JT - CONTROL SYSTEMS |
1 of 28 |
JT14/... JT26... JT45/... JT70/... |
09.10/03/Sie |
E000 (installation set) |
|
|
|
as from S/N (control board): 1003061
JT
OPERATING MANUAL for |
JT-UK |
JT - CONTROL SYSTEMS |
2 of 28 |
JT14/... JT26... JT45/... JT70/... |
09.10/03/Sie |
E000 (installation set) |
|
|
|
1 ELECTRICAL SAFETY
THE ELECTRICAL INSTALLATION WORK
MUST ONLY BE CARRIED OUT BY AN
AUTHORIZED QUALIFIED CRAFTSMAN.
THE JT CONTROL SYSTEM CARRIES DANGEROUS CURRENT
WHEN IT HAS BEEN CONNECTED TO THE MAINS.
THE JT CONTROL SYSTEM MUST WHEN IN OPERATION BE
EARTHED VIA A GROUND CONDUCTOR WHICH IS
CONNECTED TO THE FRAME TERMINAL PE.
INTERFERENCE VOLTAGE MAY BE PRESENT ALSO IN A
SWITCHED OFF JT CONTROL SYSTEM.
CHECK BY MEASURING WITH A VOLTMETER AT THE MAINS
TERMINALS AND THE RELAY OUTPUT TERMINALS THAT THE
JT CONTROL SYSTEM IS DEENERGIZED BEFORE
COMMENCING WORK.
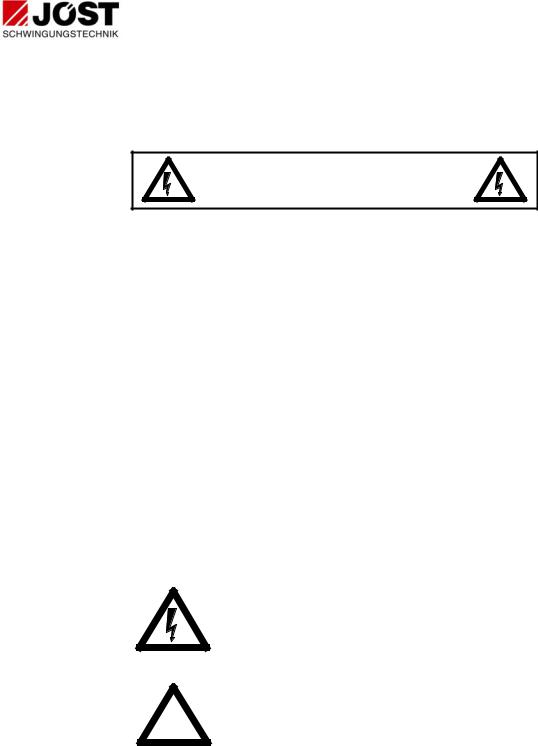
Warning symbols
For your own safety, please pay particular attention to the instructions marked with the following symbols:
Danger! High voltage
!General warning

OPERATING MANUAL for |
JT-UK |
JT - CONTROL SYSTEMS |
3 of 28 |
JT14/... JT26... JT45/... JT70/... |
09.10/03/Sie |
E000 (installation set) |
|
|
|
2 NOTES ON EMC LEGISLATION |
|
The CE mark applied refers to [German] legislation of |
|
09.11.92 governing electromagnetic compatibility (EMC). |
|
Installation of the JT control system must be carried out by |
|
staff trained in EMC. |
|
The JT control system complies with the following |
|
standards or equivalent documents. |
|
1. EN 50081-1 |
|
2. EN 50082-2 |
|
The JT control system may be used in
−the home, commercial and trade sectors and small business
−industry
providing that the following measures are observed: (as shown in the Appendix "Connection Diagram")
•The delivered manufacturer`s mains filter must be used.
•All control cables are screened and connected to the control equipment at one end.
•The connecting cable between the JT control system and the vibrator is screened and connected at both ends.
•The corresponding measures concerning the cabling in chapter 7.3 must be observed.

|
OPERATING MANUAL for |
JT-UK |
|||
|
JT - CONTROL SYSTEMS |
4 of 28 |
|||
|
JT14/... |
JT26... |
JT45/... |
JT70/... |
09.10/03/Sie |
|
E000 (installation set) |
|
|
||
3 |
CONTENTS |
|
|
|
|
|
1 ELECTRICAL SAFETY ............................................................................ |
|
|
|
2 |
|
2 NOTES ON EMC LEGISLATION ............................................................. |
|
|
3 |
|
|
3 CONTENTS .............................................................................................. |
|
|
|
4 |
|
4 PREFACE ................................................................................................. |
|
|
|
5 |
|
5 PURPOSE................................................................................................. |
|
|
|
6 |
|
6 OPERATING PRINCIPLE ........................................................................ |
|
|
6 |
|
|
7 INSTALLATION........................................................................................ |
|
|
|
7 |
|
7.1 CONSTRUCTION .................................................................................. |
|
|
|
7 |
|
7.2 NOTES ON INSTALLATION.................................................................. |
|
|
7 |
|
|
7.3 WIRING.................................................................................................. |
|
|
|
8 |
|
7.4 CONNECTIONS..................................................................................... |
|
|
|
9 |
|
7.5 SPECIAL CHARACTERISTICS............................................................. |
|
|
9 |
|
|
7.5.1 Regulator release................................................................................ |
|
|
|
9 |
|
7.5.2 Output-side switching.......................................................................... |
|
|
9 |
|
|
7.5.3 Actual value failure protection........................................................... |
|
|
10 |
|
|
7.5.4 Switching on the setpoint signal........................................................ |
|
10 |
||
|
7.5.5 Applications for coarse/fine feed setpoint ......................................... |
|
10 |
||
|
7.5.6 Manual/automatic applications.......................................................... |
|
|
10 |
|
|
7.5.7 Multiple drive applications................................................................. |
|
|
10 |
|
|
8 COMMISSIONING .................................................................................. |
|
|
|
11 |
|
8.1 CHECKS BEFORE SWITCHING ON THE MAINS VOLTAGE ........... |
11 |
|||
|
8.2 SWITCHING ON THE MAINS VOLTAGE ........................................... |
|
11 |
||
|
8.3 SETPOINT INTEGRATOR .................................................................. |
|
|
12 |
|
|
8.4 ACTUAL VALUE OUTPUT .................................................................. |
|
|
12 |
|
|
8.5 OUTPUT RELAY.................................................................................. |
|
|
|
13 |
|
9 SETTINGS / RECONFUGURATION...................................................... |
|
14 |
||
|
9.1 POSITION OF ADJ. ELEMENTS AND COMPONENTS....................... |
14 |
|||
|
9.2 EXPLANATION OF ADJUSTMENT ELEMENTS ................................ |
14 |
|||
|
9.3 MATCHING THE SETPOINT SOURCE .............................................. |
|
15 |
||
|
9.4 FIXING THE CONTROL MODE .......................................................... |
|
|
16 |
|
|
9.5 CHOOSING THE OUTPUT FREQUENCY.......................................... |
|
16 |
||
|
9.6 MATCHING THE MAINS VOLTAGE ................................................... |
|
17 |
||
|
9.7 CONTROL SYSTEM CALIBRATION................................................... |
|
17 |
||
|
9.8 PI-REGULATOR .................................................................................. |
|
|
|
17 |
|
9.9 STROKE SENSOR CONNECTION..................................................... |
|
18 |
||
|
10 MAINTENANCE.................................................................................... |
|
|
|
18 |
|
11 FAULT FINDING................................................................................... |
|
|
|
18 |
|
12 ADDITIONAL EQUIPMENT ................................................................. |
|
|
20 |
|
|
13 APPENDIX............................................................................................ |
|
|
|
21 |
|
13.1 TECHNICAL DATA ............................................................................ |
|
|
|
21 |
|
13.2 TYPE KEY.......................................................................................... |
|
|
|
23 |
|
13.3 SCOPE OF SUPPLY ......................................................................... |
|
|
|
24 |
|
13.4 FUSES ............................................................................................... |
|
|
|
24 |
|
13.5 DIMENSIONS .................................................................................... |
|
|
|
25 |
|
13.6 CONNECTION DIAGRAM ................................................................. |
|
|
27 |
|

OPERATING MANUAL for |
JT-UK |
JT - CONTROL SYSTEMS |
5 of 28 |
JT14/... JT26... JT45/... JT70/... |
09.10/03/Sie |
E000 (installation set) |
|
|
|
4PREFACE
The information contained in this manual refers exclusively to JT control systems.
It is essential that you read this manual before installation and commissioning.
The limits specified in the technical data must be observed when using the control system.
The guarantee for manufacturers' drives and equipment does not cover defects caused by misuse or incorrect use of these control systems.
The manual is divided into individual sections in accordance with the table of contents.
Section 1 "Electrical safety" and Section 2 " Notes on EMC legislation" must be read before working with the JT control system.
It is essential that the user familiarises himself with this manual before using the drive/equipment or before carrying out adjustment work specific to the operations.
Please contact the manufacturer directly if you have any questions about the JT control system.
The manufacturer reserves the right to make product changes without prior notice.

OPERATING MANUAL for |
JT-UK |
JT - CONTROL SYSTEMS |
6 of 28 |
JT14/... JT26... JT45/... JT70/... |
09.10/03/Sie |
E000 (installation set) |
|
|
|
5PURPOSE
The JT Control Systems are intended for the operation of vibrating systems with manufacturers` electromagnetic drives from an a.c. mains.
With the JT Control System the stroke (vibration amplitude) of such an installation can be adjusted from almost 0 to maximum.
In the control mode 'K' (= voltage regulation), fluctuations in the supply voltage of ±10% have nearly no effect on the stroke.
In the control mode 'Y' (= stroke regulation), fluctuations of ±10%, as well as a change in the mass conditions, e.g. through bunker pressure, have no effect on the stroke.
6OPERATING PRINCIPLE
With the potentiometer supplied or an external mAor voltage signal as the setpoint source, the stroke and therefore the feed rate of an electromagnetic vibratory system can be continuously adjusted within certain limits (minimum or maximum value resp.).
The setpoint signal is compared with the actual value signal. (The actual value signal is, with the control mode 'K', the output voltage of the control system to the drive and, with the control mode 'Y', the signal of the stroke sensor on the vibratory system). The differential signal (regulation deviation) is passed to a PI-action controller, which generates the setting signal for the phase control system. The setting signal determines the firing point of the thyristor-module.
The firing pulses are passed to the thyristor-module for galvanic separation via a firing transformer. Firing takes place only within the positive sinusoidal half-wave. The negative is suppressed by the thyristor. The phase control within the positive sinusoidal half-wave controls the electrical output of voltage and current, which is passed to the vibratory system.

OPERATING MANUAL for |
JT-UK |
JT - CONTROL SYSTEMS |
7 of 28 |
JT14/... JT26... JT45/... JT70/... |
09.10/03/Sie |
E000 (installation set) |
|
|
|
7 INSTALLATION
7.1CONSTRUCTION
The major components of the JT control system are as follows:
1 |
|
|
|
|
|
|
|
|
105 |
2 |
|
|
|
|
|
3 |
|
4 |
|
7 |
6 |
|
|
|
|
|
4 |
|
|
|
|
|
|
|
1 |
2 PE 3 |
4 |
PE 17182627 |
8 |
|
||||
9 |
|
|
|
9 |
1.Perspex cover
2.Control board
3.Connection plug X3 between control board and power section
4.Control terminals X2
5.Rating plate
6.Thyristor-module with RC snubber network
7.Mains connection/drive/earth terminal X1
8.Heatsink
9.Fixing holes
10.Assembling bolt for screening
7.2NOTES ON INSTALLATION
Cooling:
The JT control system is cooled by natural convection. In order to guarantee an adequate air flow, the equipment must be mounted upright and the minimum distances shown in the adjacent illustration observed. The cooling air must be as clean as possible and free of aggressive substances. Should the cooling air contain dust, the cooled
areas must be cleaned regularly.
a
|
|
|
JT 14 to JT26: |
|
|
|
|
||
|
|
|
a = 60 mm |
|
|
JT- |
JT45 to JT70: |
||
|
Control |
a = 80 mm |
||
|
|
|
||
|
System |
|
|
|
|
|
|
|
|
|
|
|
|
|
|
60 mm |
|
|
|
|
|
|
|
|

OPERATING MANUAL for |
JT-UK |
JT - CONTROL SYSTEMS |
8 of 28 |
JT14/... JT26... JT45/... JT70/... |
09.10/03/Sie |
E000 (installation set) |
|
|
|
Mounting:
Fixing dimensions, also for the mains filter, are to be found in the appendix.
The JT Control system is fixed on the assembly board with four screws inserted through slots.
Fit four fixing screws, hook on the control unit and tighten the four screws.
The control system should be placed in a shockand vibration-free position.
7.3WIRING
Mains and drive cable sizes:
Values are based on a cable length of 50 m between the control system and drive. The cable diameters must be increased appropriately for longer distances.
Allocation table: Control system / back-up fuse / cable / mains filter
JT-type |
2-pole |
Mains and drive |
matching |
|
back-up |
cable cross- |
mains filter |
|
fuse |
section 1) 2) [mm²] |
3) |
|
[A, retarded] 1) |
|
Type |
JT 14/... |
max.16 |
2.5 |
2x16 |
JT 26/... |
max. 35 |
6.0 |
2x35 |
JT 45/... |
max. 50 |
10.0 |
2x50 |
JT 70/... |
max. 80 |
25.0 |
2x80 |
1)adapted to IN of the drive.
2)The local regulations governing earthing and cables must be observed.
3)To be used within the scope of the EC directive 89/336/EEC concerning EMC.
As the connecting cable between electromagnetic drive and stationary terminal box we recommend the use of a flexible cable of the type H07RN-F resp. NSSHöU-J. For the use of screened cables we recommend the type ÖLFLEX 540 CP.
Additional measures within the scope of the EMC directive 89/336/EEC:
(also refer to connection diagram in the appendix)
Mains supply: For this case, the delivered mains filter must be switched into the mains supply line of the JT control system. The filter must be directly mounted on the left hand side next to the JT control system. Sufficient ground contact must be observed. The connection between the filter (wiring side named „LOAD“) and the JT control system must be as short as possible. For the filter types upto 2x35 the filter-own output wires must be used. As from the filter type 2x50 the connection must be made by single wires of max. 20 cm length.

|
OPERATING MANUAL for |
JT-UK |
||
|
JT - CONTROL SYSTEMS |
9 of 28 |
||
|
JT14/... JT26... JT45/... JT70/... |
09.10/03/Sie |
||
|
E000 (installation set) |
|
||
|
|
|
|
|
|
|
|
|
|
|
For the mains supply all filters are fitted with |
|
||
|
clamps on the „LINE“ side. The connection of the |
|
|
|
|
ground conductor is built as threaded bolt as from |
|
|
|
|
filter type 2x50. |
|
|
|
|
|
|
|
|
|
Drive connection:A screened cable between JT control system |
|
||
|
and drive must be used. The screen connection |
|
|
|
|
must be as short as possible and connected to |
|
|
|
|
ground on both ends. |
|
|
|
Control cable: |
|
|||
The control cable must be screened. We recommend a screened, |
|
|||
multicore flexible cable with a conductor cross-section of 0.5 or 0.75 |
|
|||
mm² for the control system connection. |
|
|||
N:B.: Earth the cable screen - as short as possible - at the JT control |
|
|||
|
system end. Use the assembling bolt (see 7.1 „Construction“, |
|
||
|
Pos.10). |
|
||
The control cables must be positioned at least 0.5 m from the drive |
|
|||
cable, to prevent interference. |
|
|||
7.4CONNECTIONS
Please refer to the connection diagram in the appendix or the connection sheet enclosed with the control system for the assignment of terminals for the mains, drive and control system cables.
N.B.: If the setpoint potentiometer is used, please ensure that the correct connection sequence is observed.
7.5SPECIAL CHARACTERISTICS
7.5.1 Regulator release
The control system is fitted with an input for the regulator release (control system terminals X2.14/15).
The regulator is blocked when the terminals are open. The drive will be idle.
The regulator is released when the terminals are shorted. The drive will vibrate.
When the drive is switched off by the regulator release, connection terminals X1.3/4 will not be disconnected from the mains.
If the operating process requires the drive to be switched on and off frequently, the "regulator release" must be used instead of switching at the mains. The control system therefore remains connected to the mains current.
7.5.2 Output-side switching
It is only permissible to switch the output if the control system is switched off (at the mains end or via the regulator release). Switches or contactors with appropriate maximum loads must be used for this.
Loading...