

Page 1
1
2
3
4
INSTALLATION INSTRUCTION
For JSK 37H Fifth Wheel Topplate
Replacement for Holland™ Models FW 8, FW 35, FW 2000 & FW 3500
FAILURE TO FOLLOW THESE INSTRUCTIONS
COULD CAUSE A HAZARDOUS CONDITION!
INSTALLING YOUR JSK37H TOPPLATE WILL RAISE
THE INSTALLED FIFTH WHEEL HEIGHT BY 3/4”.
CAUTION
WARNING
A. REMOVE OLD TOPPLATE:
1. Remove the excess grease from the topplate as required.
2. Remove the bracket pins and discard.
3. Using a suitable lifting device, lift the old topplate from the mounting
bracket and discard.
4. Inspect the bracket bushings. Remove and replace if distorted or damaged.
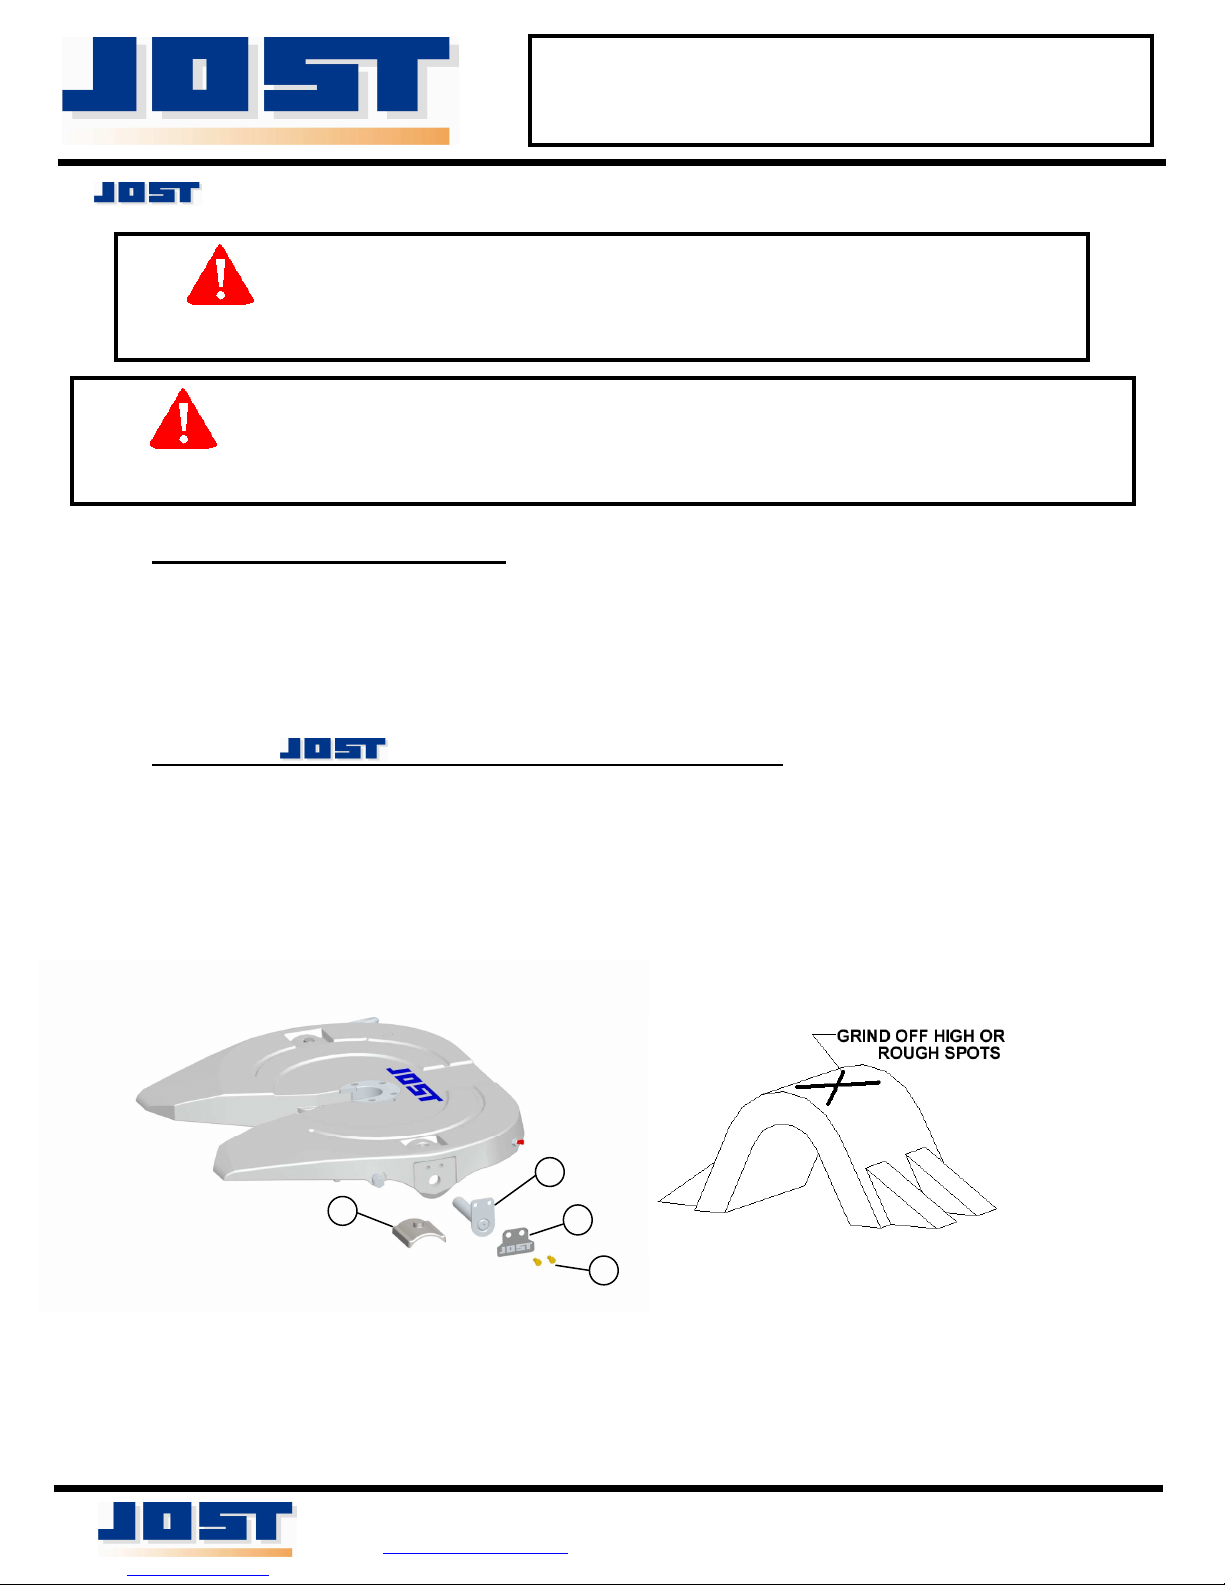
B. INSTALL MODEL JSK 37H TOPPLATE:
1. Remove the hex head cap screws (figure 1 item 1) and locking tabs (item 2).
2. Remove the bracket pins (item 3).
3. Inspect the top of the bracket cap and grind off any high or
rough spots (see figure 2).
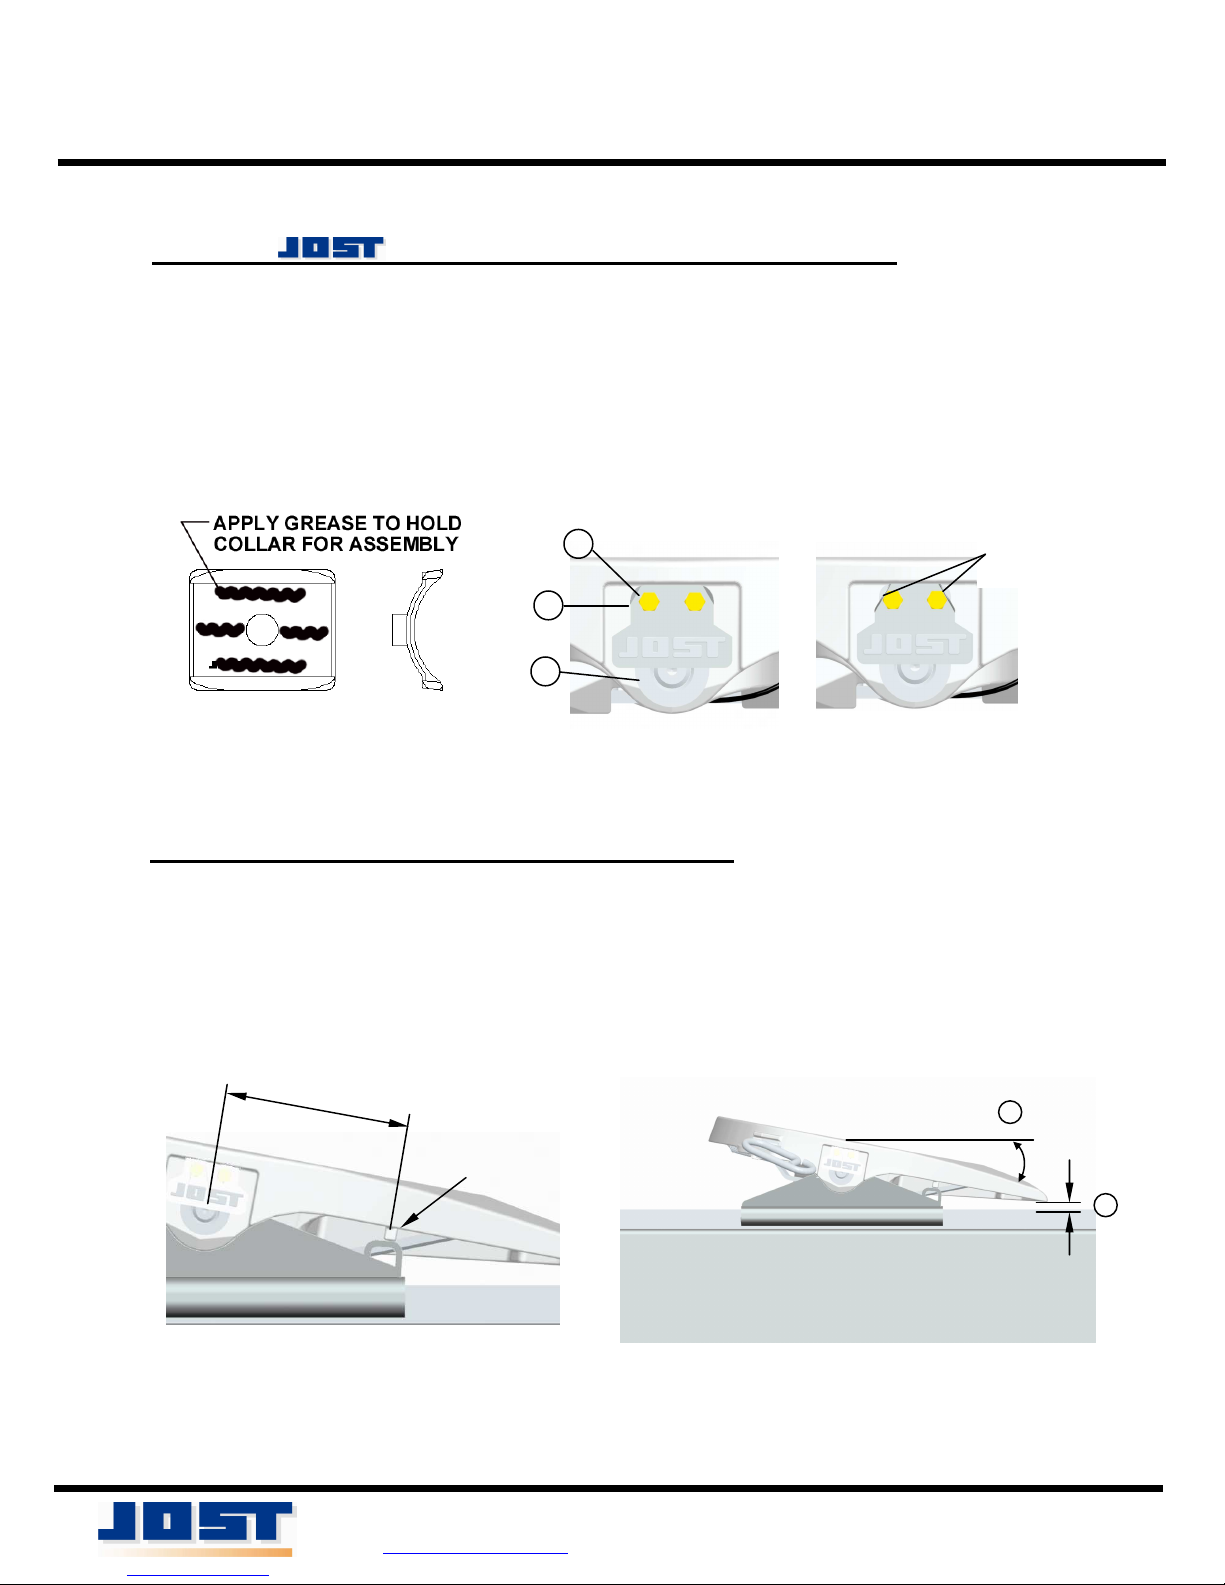
4. Apply grease to the top surface of the pivot bracket collars (item 4)
as shown in figure 3.
5. Install pivot collars (item 4) into the pivot pockets of the fifth wheel topplate.
FIGURE 1 FIGURE 2
The right to alter specifications is reserved.
1770 Hayes Street
Grand Haven, MI 49417
www.jostinternational.com
Ph. (616) 846-7700 (800) 253-5105
Fax (616) 846-0310
Page 1 of 3
LT SK37H-01 Rev.H
Page 2
FIGURE
6
CASTING LUG
GAP
C. INSTALL MODEL JSK 37H TOPPLATE (CONT.):
6. Using a suitable lifting device, lower the new Jost topplate onto the
mounting bracket.
7. Install the pivot pins (figure 4 item 3) aligning the flange with the
threaded holes in the topplate casting.
8. Align a locking tab (item 2) with each pivot pin and install the hex head
cap screws (item 1) thru the locking tabs, the pivot pin flange and into
the topplate casting ears.
9. Bend the locking tabs over each cap screw as shown in figure 4.
FIGURE 3 FIGURE 4
D. VERIFY MOUNTING BRACKET TILT STOPS:
stops. (see figure 5)
1. The topplate casting lugs must rest squarely on the mounting bracket tilt
2. The topplate tilt angle must be 20 degrees or less. (figure 6 item 1)
3. The tails of the topplate must not contact the frame rails or the slide bed.
(item 2)
4. Modify the mounting bracket tilt stops as needed.
8-3/4”
FIGURE 5
The right to alter specifications is reserved.
1770 Hayes Street
Grand Haven, MI 49417
www.jostinternational.com
1
2
3
Ph. (616) 846-7700 (800) 253-5105
Fax (616) 846-0310
BEND TABS
AFTER TIGHTENING
1
2
Page 2 of 3
LT SK37H-01 Rev.H
Page 3

E. INSPECTION AND LUBRICATION PRIOR TO USE:
1. Review the installation. Be certain that all steps were completed properly.
2. Check the fifth wheel locking mechanism using a lock tester. It must lock and
unlock as described in the Maintenance Procedures provided with your fifth
wheel. For additional copies of the Maintenance Procedures contact Jost.
CHECK THE LOCKING MECHANISM PRIOR TO USE. DO NOT
WARNING
3. Apply grease to the top of the fifth wheel (where it contacts the trailer plate).
USE ANY FIFTH WHEEL THAT FAILS TO OPERATE PROPERLY!
The right to alter specifications is reserved.
1770 Hayes Street
Grand Haven, MI 49417
www.jostinternational.com
Ph. (616) 846-7700 (800) 253-5105
Fax (616) 846-0310
Page 3 of 3
LT SK37H-01 Rev.H
 Loading...