

Page 1
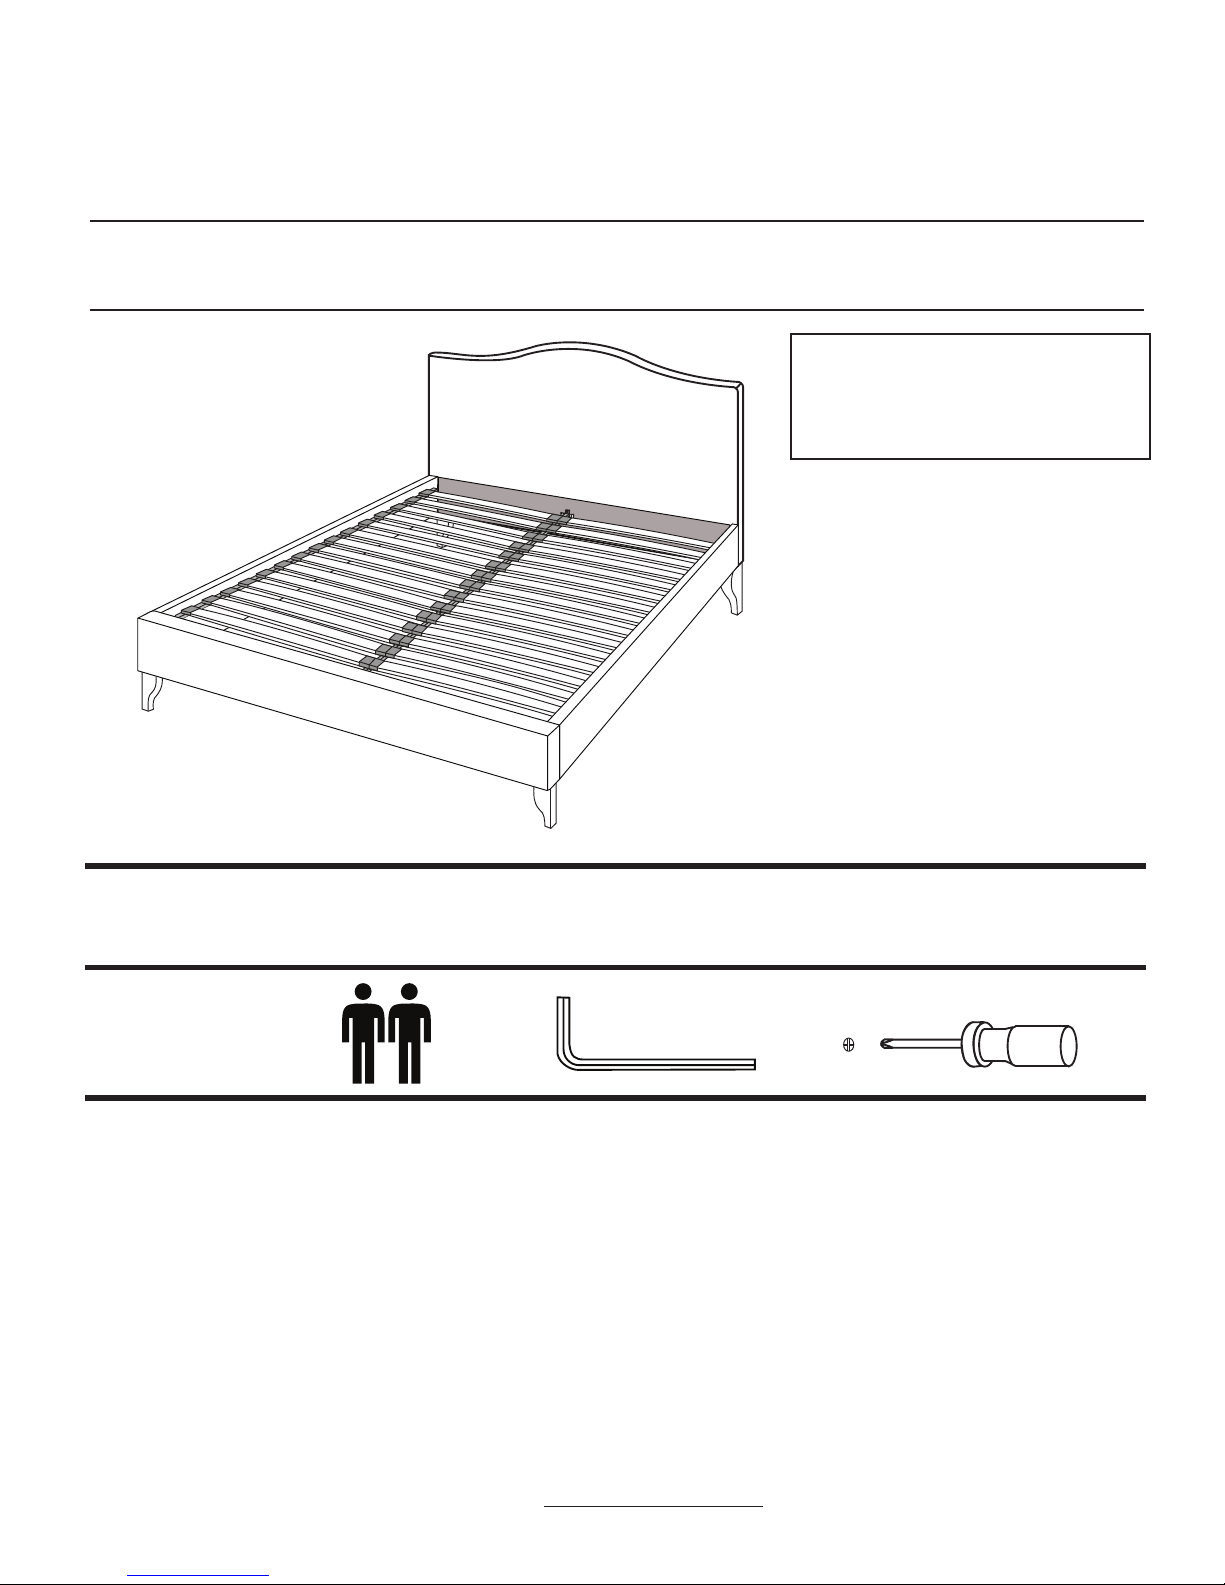
Charlotte Bed
PRE-ASSEMBLY PREPARATION
Please check the pack contents before attempting to assemble this product. A full checklist of components is
given in this leaflet. If any components are missing, please contact the John Lewis Helpline.
This product is HEAVY. It should be assembled as near as possible to the point of use. TAKE CARE WHEN
LIFTING to avoid personal injury and (or) damage to the product.
This product takes approximately 40 MINUTES to assemble with 2 PEOPLE.
The fittings pack contains SMALL ITEMS which should be KEPT AWAY FROM YOUNG CHILDREN.
Read this leaflet in full before commencing assembly.
If you require any additional information or have any issues with this product please call the
John Lewis Helpline on 01244 689949 or email mail@fwgroup-uk.com
Stock Code: 803/44605
Stock Code: 803/44606
Stock Code: 803/44607
Double
King
Super King
John Lewis
For product support or spare parts please call
the John Lewis Helpline;
T: 01244 689949
E: mail@fwgroup-uk.com
Please ensure instructions are read in full before attempting to assemble this product.
Necessary Tools
Thank you for purchasing this Charlotte Bed. Please read the instructions carefully before use to ensure
safe and satisfactory operation of this product.
Not included in hardware list
1/6
Page 2

Metal Plate x 4
7
A
B
C
D
E
F
G
H
I
M5 Allen Key x 1
M4 Allen Key x 1
Side Caps x 30
Centre Caps x 15
M6 x 25mm Bolt x 10
3.5 x 18mm Screw x 4
M8 Spring Washer x 4
Spanner M13 x 1
Nut M8 x 4
Fittings and parts checklist
1
2
3
4
5
6
Headboard x 1
Footboard x 1
Side Rails x 2
Slats x 30
Centre Rail x 1
Legs x 4
2/6
Page 3

1
3
3
2
Hook the pre-attached metal fixings on the Side Rails (3) over the pre-inserted bolts in the Headboard (1)
and Footboard (2) and hand-tighten to loosely secure parts together. Do not tighten with M5 Allen Key (B)
until you have inserted the Centre Rail in the next step.
Step by step assembly instructions
Step One
LOOSELY SECURE PARTS
TOGETHER IN ORDER FOR
CENTRE RAIL TO FIT IN
NEXT STEP
Step Two
BRACKET
SIDE RAIL
3
1
2
AND
Bracket
Side Rail
1
2
3
AND
M4
M6 x 25mm
Centre Rail
(5)
S
T
E
P
1
M4 (A)
M6 x 25mm (E)
S
T
E
P
2
E. A.
M5
Insert Centre Rail (5) into the brackets in the centre of the Headboard (1) and Footboard (2).
Push down fully and secure in place using M6 x 25mm bolt (E) and tighten with Allen Key M4 (A). You can
now tighten the bolts at the Side Rails from previous step (Step One) with Allen Key M5 (B) so all fastenings
are now tightened.
B.
1
S
T
E
P
3
Bracket
Side Rail
3
M5
3/6
4
AFTER INSERTING CENTRE RAIL,
TIGHTEN ALL FIXINGS FULLY
INCLUDING BOLTS AT SIDE RAILS
(FROM STEP ONE)
Page 4

Step Three
Step Four
E. F.H.I.
M8 x 4
Spanner
M13 x 1
STEP 2
For Footboard
M6 X 25mm x 8
Next attach the legs to the Headend (1) Footend (2) as shown in diagram using Bolt M6x25mm (E) and
Screw 3.5x18mm (F). Tighten the bolts with Allen Key M4 (A).
Attach Metal Plate (7) and Wooden Leg (6) together as shown in Step 1. Attach together Wooden Leg (6) and
Metal Plate (7) using Spring Washer (G) and M8 Nut (H) then tighten with Spanner M13 (I) and Screw 3.5x18mm (F).
M8 Nut (H)
Spanner M13 (I)
Spring
Washer (G)
6
7
STEP 1
Legs x 4
7.
Metal plate x 4
G.
Spring
Washer M8 x 4
2
3
7
3.5 x18mm (F)
M6 X 25mm (E)
M6 X 25mm (E)
A.
M4 Allen Key x 1 3.5 x 18mm x 4
M4(A)
x4
2
1
3
7
3.5 x18mm(F)
M6 X 25mm (E)
M6 X 25mm (E)
M4(A)
M4(A)
4/6
7
6
x2
F
o
r
H
e
a
d
b
o
a
r
d
M6 X 25mm (E)
6
6
6
3
7
3.5 x18mm (F)
6.
Page 5

Step Four
4
C
C
D
4
4
x30
D
4
4
x15
C
Side Caps (30pcs)
Centre Caps (15pcs)
Slats (30pcs)
4.
C.
D.
f
i
g
.
5
Step Five
This bed is now ready to use.
5/6
Insert two Slats (4) into both sides of a Centre Cap (C) and press down into the pre-inserted hole in the
Centre Rail (5). Insert a Side Cap (D) onto both of the other ends of the slats and press down into the
pre-inserted holes in the Side Rails (3). Repeat this process for all slats.
Page 6

Care and Maintenance
Safety Instructions
This Charlotte Bed should be cleaned using a soft damp cloth and dried immediately. Do not
use a very wet cloth or allow any liquid contact for a long period of time as this can permanently
damage the surface.
Do not use detergents and do not rub as this can cause permanent damage.
Always protect your bed from direct sunlight as this may accelerate the natural on-going discolouration
process.
Screws holding together the bed frame should be tightened regularly.
Please retain this information leaflet for future reference.
Never drag furniture when moving it. Always lift it.
Periodically check all fixings to ensure none have come loose and re-tighten where necessary.
Please take care when handling or moving the furniture as careless handling may cause damage or injury.
Furniture can be dangerous if incorrectly installed. Any assembly should be carried out by a competent adult.
No liability will be accepted for damage or injury caused by incorrectly installed or assembled furniture.
During assembly, children should be kept away from the product due to possible risk of injury.
Do not use this item if any components are missing or damaged.
It is recommended that care is taken when moving heavy objects to a new location to avoid
personal injury or damage to the furniture. Please be careful to retain all fittings when doing this.
This product complies with BS EN 1725:1998.
6/6
If you require any additional information or have any issues with this product please call
the John Lewis Helpline on 01244 689949 or email mail@fwgroup-uk.com
John Lewis Partnership 171 Victoria Street, London, SW1E 5NN.
www.johnlewis.com
 Loading...