

Page 1
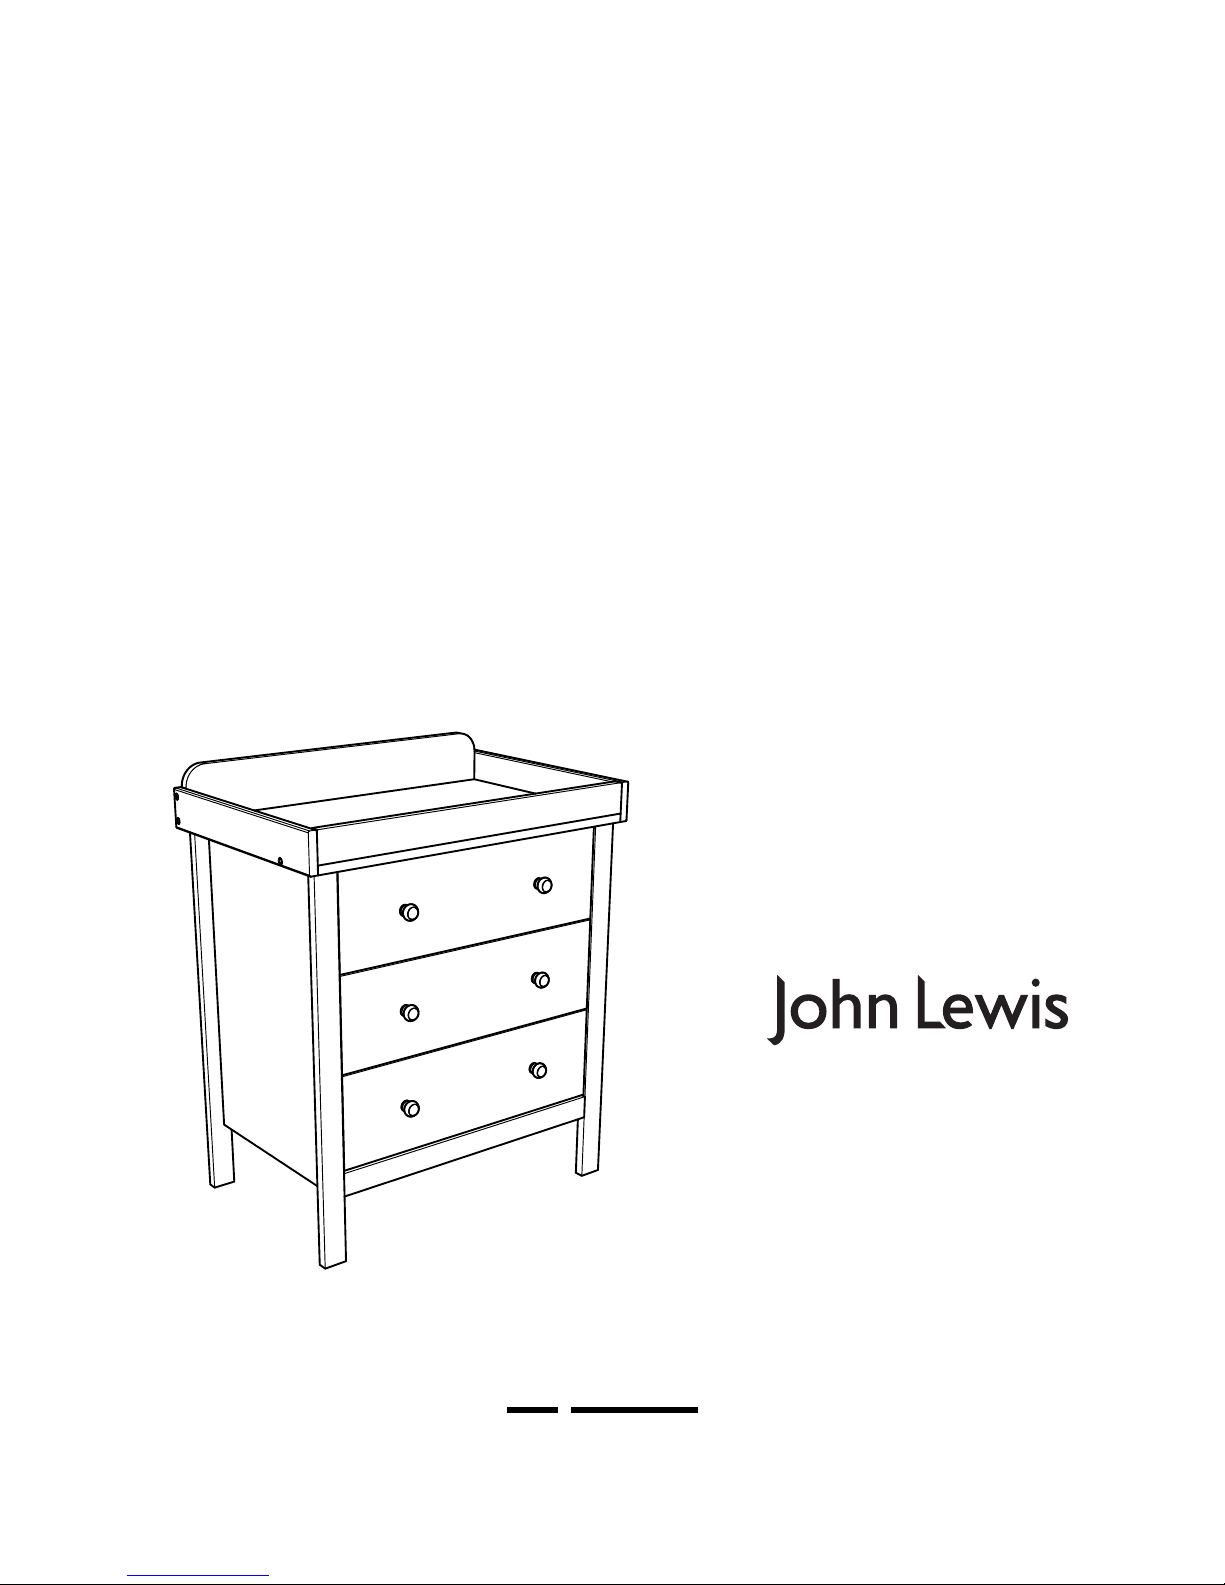
alex dresser
Instruction manual
Important
retain for future reference
please read carefully
Page 2
Important
Retain for future reference: Read carefully
Please read the instructions and warnings carefully before use to ensure safe and
satisfactory operation of this product.
Your child’s safety is your responsibility. If you have a query with this product or require
replacement parts, please contact your nearest John Lewis department store.
Lay out the parts on a soft level surface and compare to the part/fixing checklist on pages 2
and 3. Do not discard any packaging until you are sure that you have all the parts.
Keep children clear during assembly as pack contains small parts which may present a
choking hazard.
Recommended changing mat: 750 x 470 mm.
This product complies with BSEN 12221:2008 +A1:2013.
You will need the following tools to complete assembly:
Flat-headed screwdriver and Cross point screwdriver.
2
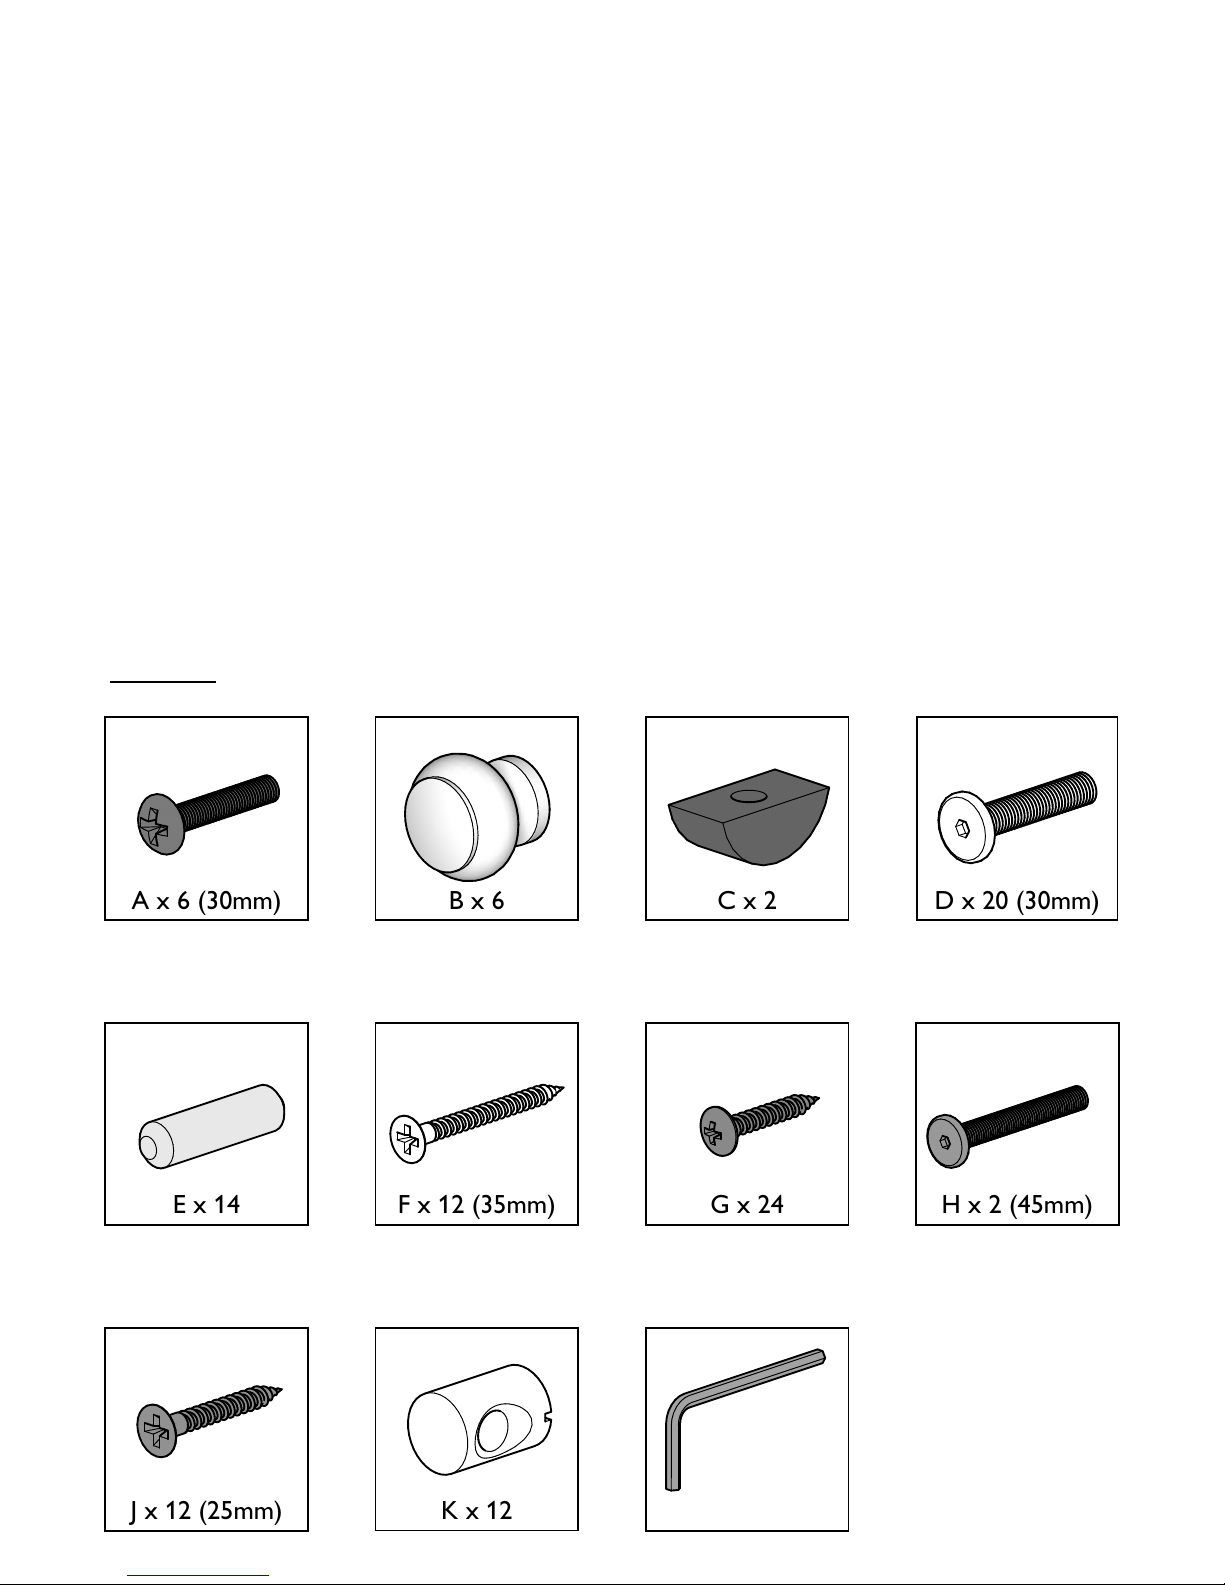
Hardware
A x 6 (30mm)
B x 6
C x 2
D x 20 (30mm)
E x 14
F x 12 (35mm)
H x 2 (45mm)
G x 24
K x 12
J x 12 (25mm)
Hexagon Key x 1
Page 3
3
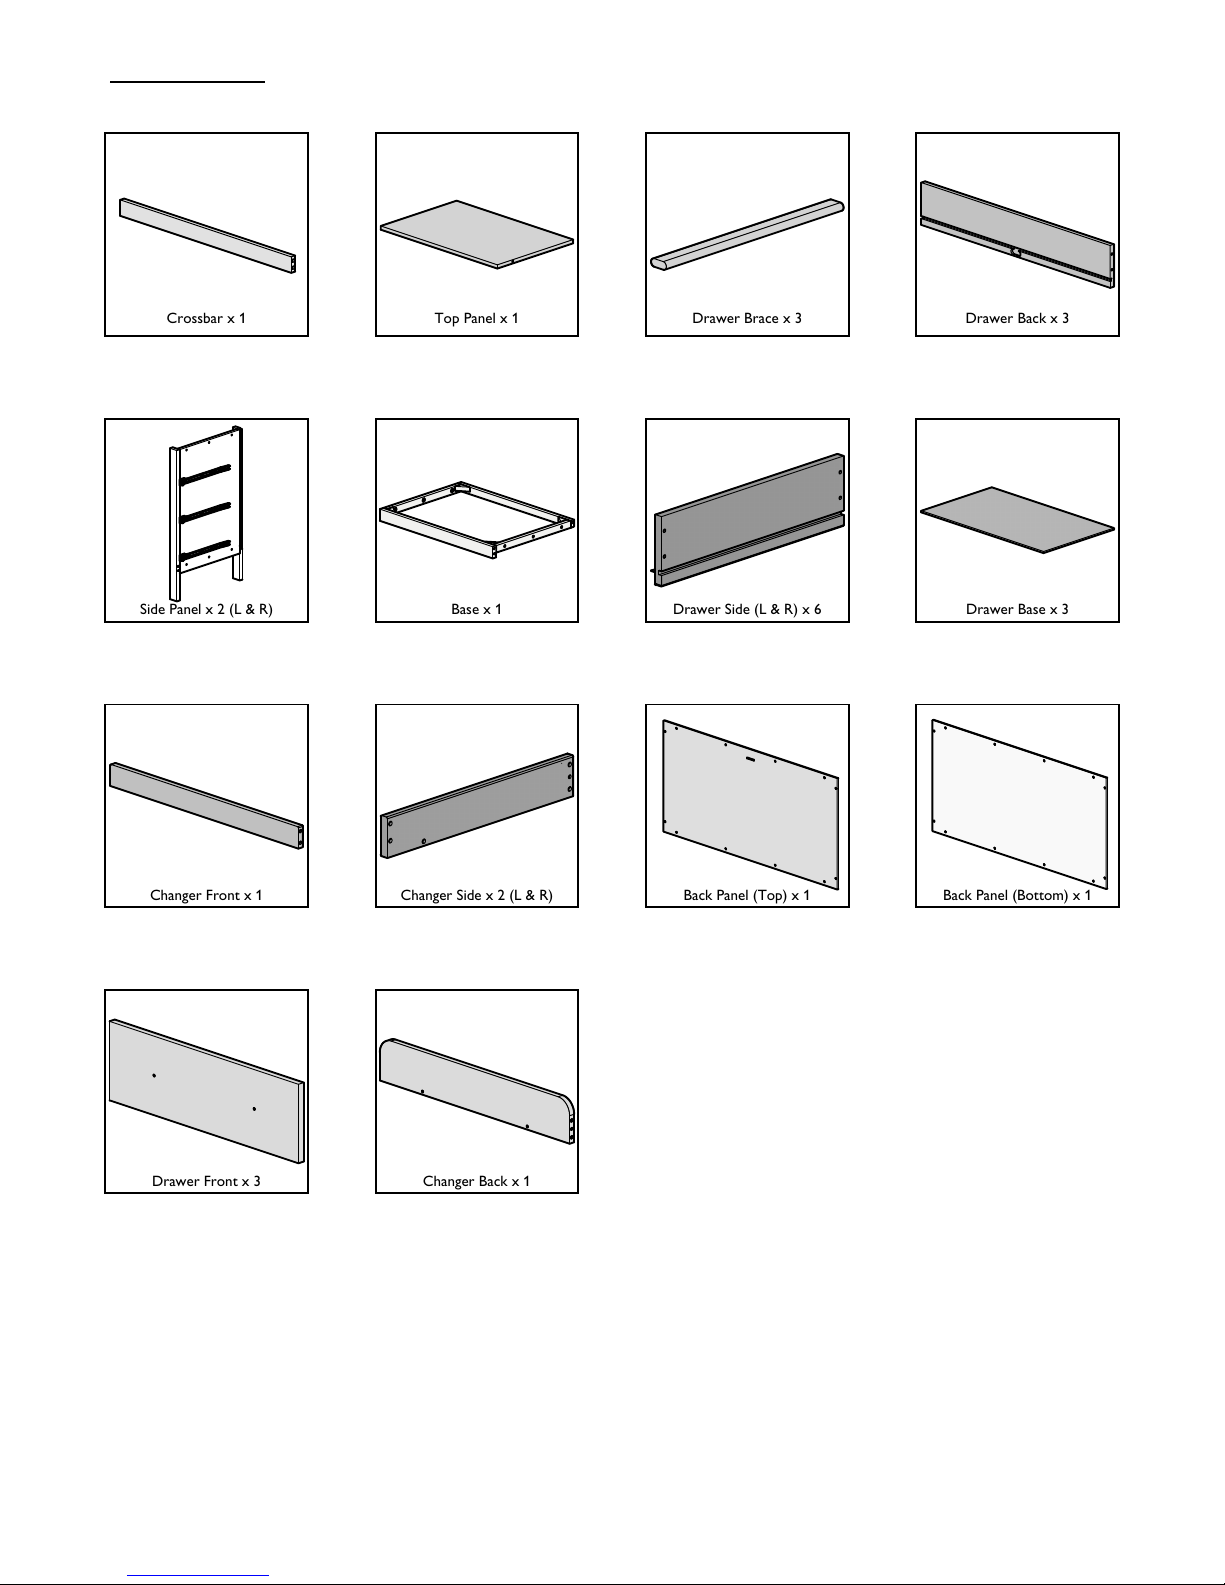
Wooden Parts
Crossbar x 1
Top Panel x 1
Drawer Brace x 3
Drawer Back x 3
Side Panel x 2 (L & R)
Drawer Side (L & R) x 6
Drawer Base x 3
Changer Front x 1
Changer Side x 2 (L & R)
Back Panel (Top) x 1
Back Panel (Bottom) x 1
Drawer Front x 3
Changer Back x 1
Base x 1
Page 4

4
NOTE: Take care to insert the dowels
into the correct holes as indicated.
Repeat for the opposite end of the
crossbar and base. (Total 8 dowels)
Assembly 1
Assembly 2
E x 4
Base
Crossbar
Top Panel
Crossbar
Base
D x 3
D x 3
H
C
Side Panel
Page 5

Assembly 3
Assembly 4
5
H
C
D x 6
Side Panel
Back Panel (Top)
Back Panel (Bottom)
G x 12
(each panel)
NOTE: Ensure that the slot in the Back Panel (Top) is toward
the upper edge when attached to the dresser frame.
When fitting the Back Panels, push into the corner so that the
side and top edges contact the rebate evenly all the way
around the frame of the dresser. This will ensure that the
dresser frame is square and that the drawers will align with
each other.
Page 6

6
NOTE: Repeat for remaining drawers
Assembly 6
Assembly 5
J x 2
(each side)
Drawer Side
Drawer Side
Drawer Front
Drawer Base
A x 2
B x 2
NOTE: Repeat for remaining drawers
Drawer Brace
Drawer Back
K x 4
F x 2
(each side)
Page 7

Assembly 8
7
Assembly 7
Changer Front
Changer Back
E x 3
(Each end)
Page 8

Assembly 10
8
Assembly 9
D x 3
D x 2
Changer Side
Changer Back
Changer Front
Changer Side
D x 3
Page 9

The dresser is supplied with a fixing kit which will secure it and help to guard against accidental tipping.
WARNING : Installation only to be carried out by a competent person.
Check the suitability of the wall before fitting.
1. Place dresser against the wall where it is to be fitted. Mark the wall 25mm (1”) down from the top surface
of the changer.
2. Using the 25mm screw, washer and the appropriate wall fixing attach the fabric strap to the marked
position.
3. Remove the top drawer and thread the free end of the strap through the slot in the back panel.
4. From the inside of the dresser, attach the fabric strap to the dresser frame using the 15mm screw and the
washer.
Refit the top drawer.
Before use, ensure that the strap is securely fixed to both the wall and the dresser.
1
2
3
4
The type of wall fixing you will require depends on the construction of the wall. See below for details.
If in doubt, seek professional advice.
Wood: If fixing to wood make
sure that it isn’t chipboard as
screws can easily pull away
the core structure.
Brick or masonry: Use
the wall plug, provided
you are sure that your
wall is sound.
Cavity wall: Special toggle
wall plugs needed.
Seek expert advice.
Washer x 2
Fabric strap
Plastic wall plug
(For brick or masonry wall use only)
Screw (25mm)Screw (15mm)
9
Assembly 11
1
Page 10

Care and maintenance
Your furniture may be cleaned by wiping with a damp cloth and drying with a soft clean
cloth.
Do not use abrasives, bleach, alcohol or ammonia-based household polishes.
Take care when handling or moving the furniture. Careless handling may cause damage.
Regularly check that all fixings are tightened and that there are no broken or damaged
parts.
Safety notes
Warning: Do not leave your child unattended.
Keep children clear during assembly as pack contains small parts which may present a
choking hazard.
All assembly fixings should always be tightened properly. Care should be taken that no
screws are loose because a child could trap parts of their body, or clothing (e.g. strings,
necklaces, ribbons, dummies, etc) which could pose a risk of strangulation.
The changing area is suitable for use up to 12 months old or 11kg in weight.
Be aware of the risks of open fires and other such sources of strong heat, such as electric
bar fires, gas fires, etc. in the near vicinity of the dresser.
Ensure that the wall strap is used to securely attach the dresser to the wall to prevent
tipping.
Do not use the changing unit if any of the parts are broken, torn or missing.
Any additional or replacement parts can only be obtained from the manufacturer or the
distributer.
This changing unit complies with BSEN 12221:2008 +A1:2013.
John Lewis Partnership
171 Victoria Street
London
SW1E 5NN
www.johnlewis.com
JLPAD
09/16
 Loading...