

Instructions
Safety Warnings
Mop Assembly
This is not a toy. Keep away from children.
Keep all body parts away from spin cycle while it is spinning.
Keep all body parts away from the mechanism behind the pedal at all time.
Use the Whizz Mop only for its intended use.
Read the instruction manual carefully and retain for future reference.
Do not use attachments not recommended by the manufacturer.
Never operate the Whizz Mop if it is not functioning properly.
Do not leave children unattended with the Whizz Mop.
Important information
Ensure the pole is fully upright when operating the spin cycle, and
that all microfibre threads are inside the spinning bowl.
DO NOT operate the spin cycle if any microfibre threads are out of
the spinning bowl.
Hold the mop handle gently during a spin cycle.
DO NOT put force or push down on the mop handle, as this can
cause damage to the spin mechanism.
Ensure the handle sections are tightly threaded together before
using the mop to avoid the handle sections detaching in use.
DO NOT put excessive force on the mop handle.
90°
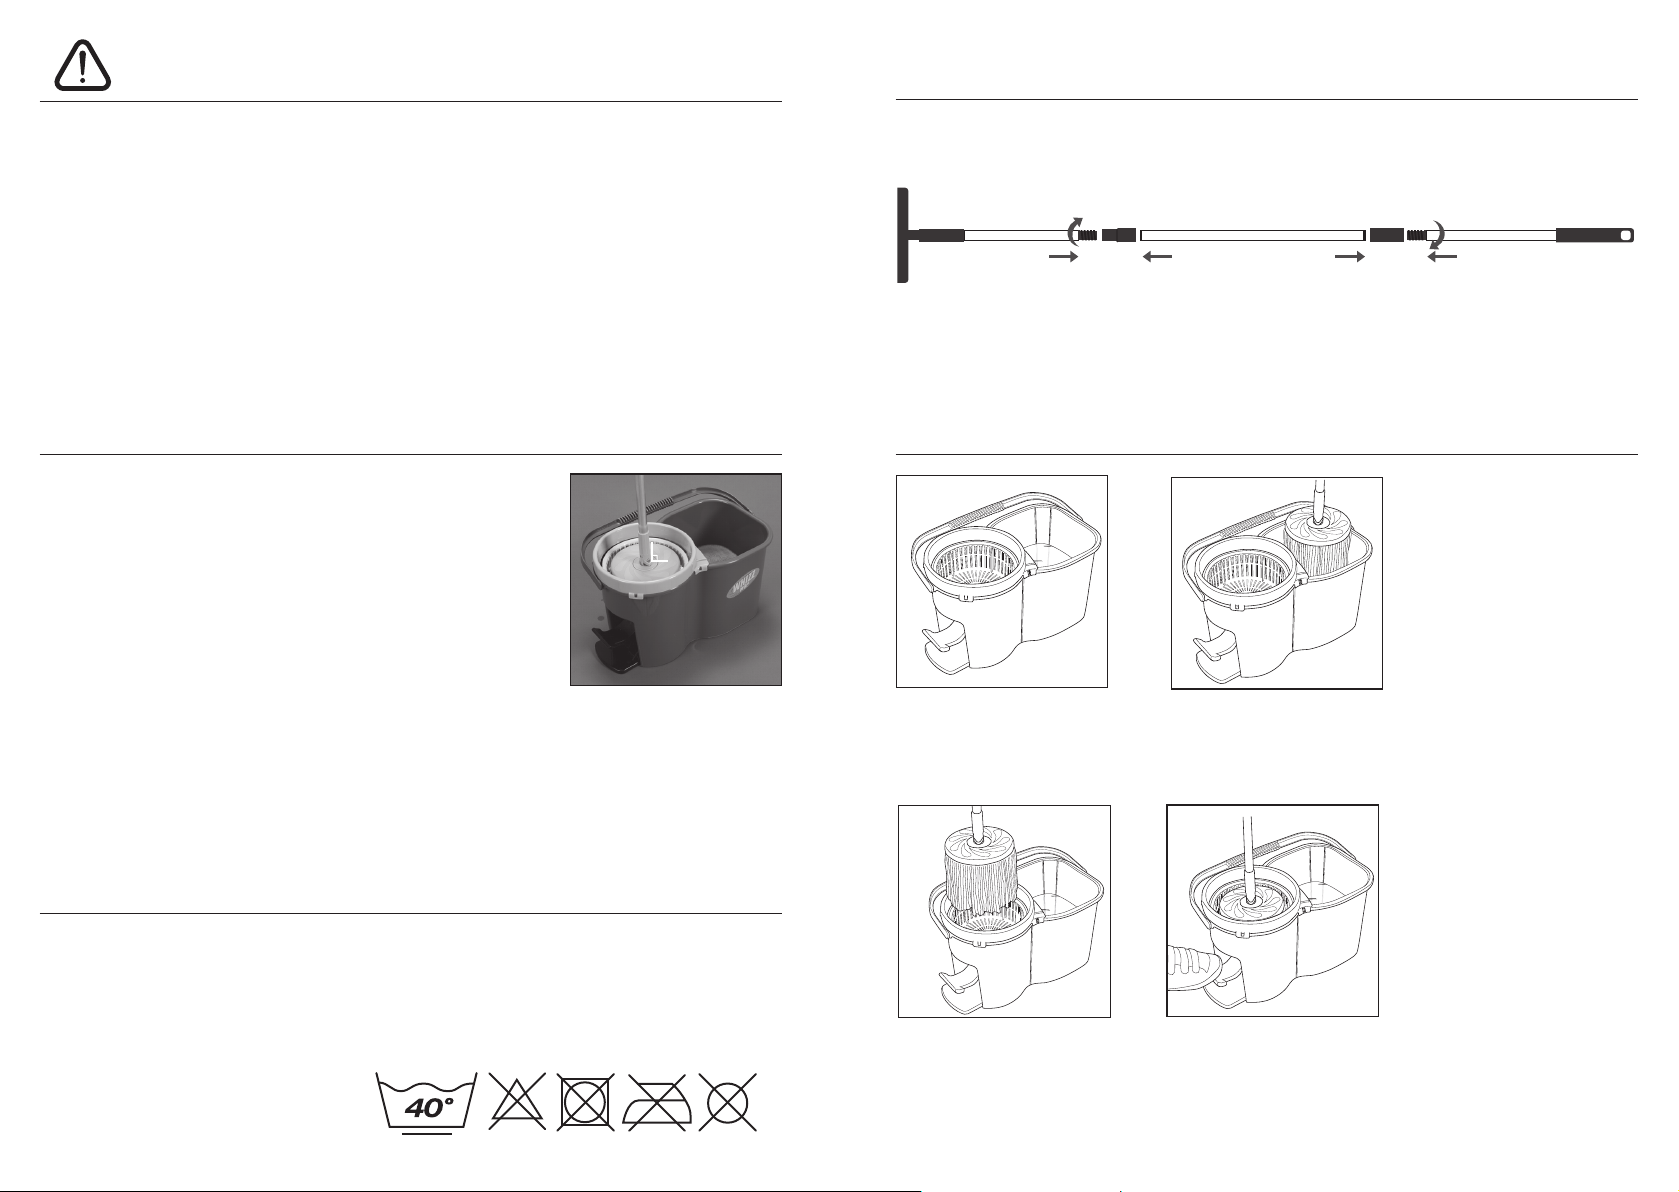
To assemble the mob, tightly screw together the three part handle as illustrated.
PLEASE NOTE: Pole will only tighten in reverse during assembly (as shown in above image).
This is to avoid the pole loosening when you wring the mop.
IMPORTANT: DO NOT place excessive pressure
on the handle when draining water from the mop
Rinsing and spinning
1. Fill bucket with warm water
and cleaning detergent,
noting the maximum fill level
indicated.
2. Place Whizz Mop into the water.
head. Allow the spinning system to do this.
Washing the mop head
The mop head is machine washable. It is recommended that you place the mop head inside a
pillow case or cloth cover to avoid damage to your washing machine or the mop head.
DO NOT wash with other items or garments
DO NOT use bleach, tumble dry, iron or dry clean.
Dry flat naturally.
Always detach mop head from the
pole before washing.
3. Place Whizz Mop in the spin
system, making sure all fibres
are inside the spinner.
4. Use the foot pedal to spin
out excess water and you’re
ready to go!

Changing the mop head
1. Step on the mop head
fibres, with your foot at the
edge of the green disc. Turn
the handle so the screw
joint is at a right angle to
your foot.
DO NOT place foot on the
plastic head when removing
the mop head.
2. Push handle away from you
to disconnect it from the
mop head.
3. Place handle over new mop
head and push down until
you hear a click.
Product code: V2334
©JohnMillsLtd/PS/09.10/TW/E
JML
Unit 1 Eastside, Port of Tyne,
South Shields, NE33 5SP
Freephone: 0800 781 7831
E-mail: info@JMLgroup.co.uk
Web: www.jmldirect.com
 Loading...